
Ree Drummond's Blog, page 86
November 11, 2010
Hilarity
 I Tweeted last night–because I was scooped by a Food Network commercial–that next Wednesday, I'll be appearing on Throwdown with Bobby Flay.
This means that I (P-Dub) will be throwing down (going head-to-head) with Bobby Flay (Iron Chef who can cook anything.)
Translation: Things (the Throwdown) may or may not (does) get a little ugly (help).
But it's all about the fun, food, and fellowship, right?
Riiiiight.
 There are so many things to say about the whole experience, and I'll reserve a lot of the behind-the-scenes details for after the episode–and of course, I can't tell you how it ends. But here's a little taste.
 * It's an hour-long Thanksgiving-themed show.
* We went head to head on an entire Thanksgiving meal.
* Help me, Rhonda.
* It happened on the ranch.
* It happened in the kitchen at The Lodge.
* I wore an empire waist top.
* Lord, give me strength.
* I've never worn an empire waist top in my life before that day.
* A large, bulky mic pack was placed in the blousy part of my empire waist top.
* Of all the things I've recounted and thought about since the Throwdown happened, the empire waist top has given me the most terrifying nightmares.
* If you watch the show, please don't look at my empire waist top.
* Bobby Flay was very cute.
* Bobby Flay was very nice.
* Bobby Flay's sidekicks, Stephanie and Miriam–they're on every episode of Throwdown–were wonderful and lovely.
* The other thing I'm having nightmares about is that at one point during the Throwdown, Bobby Flay offered to help me carry my huge, heavy pot of boiling potatoes to the sink and I rebuffed his advances, saying that I was a robust ranch woman and could handle it myself.
* Why did I say that?
* And why did I wear an empire waist blouse?
* Bobby Flay's waist is smaller than mine.
* But he hasn't had four children.
* Have four children, Bobby, then get back to me!
* I sure told him, didn't I?
Okay, that's just a little sprinkling.
 I can't wait to share more of the whole story, as the whole experience was such a hilarious blast and I had to keep it under wraps for so long. Bobby, his homegirls, and the production team were so kind.
I'll give you a little more background information next week, but for now I wanted to let you know when the show will air:
Throwdown – Bobby Flay vs. PW: Wednesday, November 17, 9 pm (8 pm Central)
 At the very least, you'll get to watch me be a complete dork. You'll also get to see Bobby Flay cook in the kitchen at The Lodge (as well as Hyacinth, Missy and me doing a bunch of prep work down at my house) and will come away with more Thanksgiving recipes for your arsenal!
(See: Bobby's version of cranberry sauce. It belongs in Heaven.)
 Most importantly, though, you'll get to see firsthand the perils of wearing an empire waist top when a bulky mic pack is involved.
Tortured in the Tallgrass,
Pioneer Woman
P.S. New Thanksgiving recipe coming next. Just had to throw this in.


November 9, 2010
Polvorones…and Piglet
A few months ago I was asked to be one of the judges in The Piglet, an annual bracketed cookbook competition held on Food52. The Piglet launches today with my "judgment" – a nice, long chronicling of my experiences with two different cookbooks in the competition.
You can read about the two cookbooks in detail in my Piglet post. I was brutal. Vicious. I spared no feelings and left a swath of destruction a hundred miles wide. Historians will write books about it. Generations will weep.
 Meantime, I'd like to share with you a recipe I've made three times since my judging period began.
(Judging is such a harsh word. Difficult for a middle child to utter.)
They're polvorones, a Mexican wedding-type cookie, and I love them. They come from Fany Gerson's My Sweet Mexico, one of the two cookbooks I was asked to judge. (The other was Good to the Grain by Kim Boyce.)
Spoiler alert: I loved both books.
You can get the full recipe for these cookies at the end of my post on The Piglet. The ingredients are as simple as they come: all you need is unsalted butter, flour, almond flour, superfine sugar, and vanilla.
Five ingredients!
Oh, wait. Powdered sugar.
Six ingredients!
I made them again last night, just as a wicket prairie fire was breaking out on a neighboring ranch.
Here's the step-by-step, just so you can see the process.
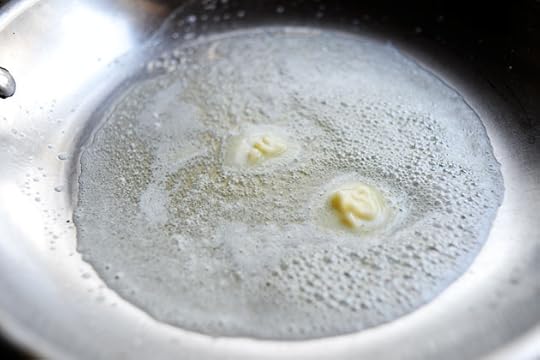
 The recipe begins with clarified butter. Melt 3 sticks (1 1/2 cups) unsalted butter in a saucepan or skillet, then remove it from the heat and let it sit for five minutes.
 Skim off the foam and discard. (If there's a practical use for this buttery foamy substance, I haven't found one. Though I fantasized about plopping a bunch of it on a toasted English muffin and scarfing it down.)
(I'm just being honest here.)
 Here it is with most of the foam skimmed off.
 After that stage, pour it into a bowl through a fine mesh strainer to filter out the milk solids.
 Now all you're left with is a bowl of beautiful, golden clarified butter, also known as Paradise. You'll want to measure out 1 cup of the stuff for the recipe.
 To the butter, add a cup of superfine (often called Baker's) sugar.
 Stir this mixture gently to combine, then refrigerate it for 30 minutes or so.
And if you think I didn't spend a good minute licking and savoring this spoon…you're sorely mistaken. Honestly, I could have quit with this bowl of buttery-sugary deliciousness and called it a day.
But I proceeded. It was the right thing to do.
 You want to refrigerate the substance for 30 minutes, or until it's totally solid.
 Then, and this is really nifty, you beat the mixture with an electric mixer for a minute or so until light and fluffy. Magically, it takes on a whipped cream consistency…but obviously has a lot more substance.
 To this, you add two cups of all-purpose flour…
 And a cup of almond flour, which is available in both supermarkets and specialty stores. (You can also make your own; it's simply ground up almonds!)
 Note that you can omit the almond flour and just use three cups of all-purpose flour instead. But I think the almond flour gives the cookies such a nice, mild nuttiness.
 Add 1/2 teaspoon of vanilla extract, then stir the mixture together gently.
 It'll be very, very crumbly, so knead it together in the bowl a little bit to bring it all together.
 Dump the dough onto a lightly floured surface, then use your hands to pat it together in a cohesive disc.
 Roll it out gently, using your hands in between rolls to keep the dough in a circular shape. Because the cookies have no leavening, how thick you roll the dough will determine how thick the cookies will be. The recipe calls for an inch thick, but I went slightly thinner. As a rule, I'd say the smaller in diameter the cookies, the thicker you can roll the dough.
 Cut circles with a glass or biscuit cutter. The first time I made the cookies, I used a smaller biscuit cutter. But between that time and now, my boys used it to build a makeshift Ironman suit and bent it into the shape of a ferret's kidney.
 Bake the cookies at 375 degrees for 12 minutes or so. You want them to be baked but just barely starting to turn golden.
 Immediately dust the tops of the cookies with plenty of powdered sugar. (If the cookies are smaller, you could gently toss them in a plastic bag of powdered sugar to give them more of an even coating.)
Polvorones, people! They're so yummy. Very crisp and decidedly non-gooey, but that's the nature of this cookie. I love them with coffee.
I love them with anything.
To get the recipe, to read about this cookbook and its opponent, and to see my final decision, here's my Piglet post:
The Piglet: PW's Decision
I had lots of fun.
New Thanksgiving side dish coming up next!
I just ate the last of my green bean casserole.
*Burp*
I may wind up having pizza for Thanksgiving dinner this year.
Love,
P-Dub

November 8, 2010
Green Bean Casserole
 Thanksgiving is just over two weeks away, and boy is my whisk tired. I've been cooking Thanksgiving dishes to share with you and in the process, I've even been storing up things like pie crusts and cornbread for my own spread. I've have had a blast making a complete mess of of my kitchen.
And I've considered selling the house when it's time to clean up.
And I've told my children to make friends with washing dishes, but fast. It's worked out nicely for me!
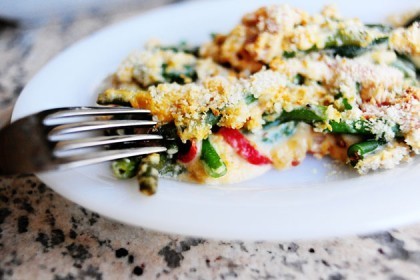
Today I'm sharing a from-scratch green bean casserole that's a cinch to make and a nice departure from the cream-of-mushroom standby we all know and love. The wonderful thing about it, besides the fact that it contains bacon, is that it begins with a plain white sauce, which can be adapted in any number of ways. Use a combination of different cheeses, add a little mustard, some mushrooms–whatever floats your boat. And while I opted for a topping of panko breadcrumbs, you can substitute the yummy french fried onions (or crushed potato chips; you heard me) if that's more to your liking.
Have fun with it! The green bean casserole world is your oyster.
Just don't add oysters. You'll need them for the dressing.
But that's another story for another time.
 Here's what you need. Green beans, butter, flour, milk, half-and-half, salt, pepper, cayenne, cheddar cheese, bacon, onion, garlic, and panko bread crumbs.
Sorry about the exposure in this photo, but I am an eternally imperfect person.
Like, totally.
 Grab a few green beans at a time, then lop off the tops and bottoms. If you like the green beans a little smaller, cut them in half or thirds. I left mine whole because I'm a rebel, a middle child, a malcontent, and a misanthrope.
 But only sometimes.
 And I know some people prefer to sit on the porch with a bowl in their laps, methodically snapping off the ends of their beans.
But I'm not one of those people.
When it comes to green beans, I take the easy road.
 I want the green beans to be slightly tender but still a little crisp, so we need to blanch them. Throw the beans into boiling water and let them cook for about three minutes, more if you want them a little more soft.
 Remove them from the boiling water with a slotted spoon, then plunge them into a bowl of icy cold water. This will stop the cooking process in its tracks.
Next, just drain the beans and set them aside. Reflect on the gorgeous color of green. Consider taking one of the green beans to Lowe's and having them match a can of paint so you can pain a nightstand or a mirror.
Remember that you really don't feel like painting anything right now.
Proceed with the green bean recipe.
 Dice up an onion and some garlic…
 Then slice some bacon into small pieces.
 Throw the bacon into a skillet over medium heat.
 Let it cook for a couple of minutes, then throw in the diced onions and garlic.
 Stir it around and cook until the bacon is cooked but not crisp, and the onions are nice and golden brown. Now turn off the heat and set this aside for a sec.
 Next, melt some butter in a separate skillet or saucepan.
 Sprinkle on some flour. We're just making a simple white sauce.
 Whisk it around immediately to get the flour evenly mixed into the butter.
 Let it cook over medium low heat for about two minutes, then pour in some milk…
 And a little half-and-half for richness.
 Add some salt, freshly ground black pepper, and cayenne. You can also add some paprika, mustard powder…any number of spices.
 Stir it all together, then add in the grated cheese.
 I used sharp cheddar, but you can use pepper jack, white cheddar, or any combination of cheeses.
 Stir in the cheese till it melts, then dump in the drained pimentos.
 Next up, stir in the bacon and onions.
 Stir it in, then check the seasonings. Add a little more salt or cayenne if it needs it, and if it's way too thick, splash in a little milk and whisk. And be sure to taste the seasonings; make sure there's plenty of punch!
 Pour the sauce over the blanched green beans…
 Gently stir/toss it all to coat.
 Then even out the surface and scrape any remaining sauce on top.
Yum. Oh, yes.
 Finally, sprinkle on some panko breadcrumbs.
NOTE: If it's important to you, you can substitute French's fried onions here! I just like the panko crumbs a little more, but either is perfectly acceptable.
Bake it at 350 degrees for about 30 minutes.
 Serve it up.
Faint.
Wake up.
Smile.
Thanksgiving is near!
Enjoy this, my friends. It's really, really yummy.
Recipe: Green Bean Casserole
Prep Time: 20 Minutes
|
Cook Time: 30 Minutes
|
Difficulty: Easy
|
Servings: 8
Print Recipe
3"x5" Cards
4"x6" Cards
Full Page
 [image error]
');
[image error]
');

Ingredients
2 pounds Fresh Green Beans, Ends Cut Off4 slices Bacon, Cut Into 1/4 Inch Pieces3 cloves Garlic, Minced½ whole Large Onion, Chopped4 Tablespoons Butter4 Tablespoons All-purpose Flour2-½ cups Whole Milk½ cups Half-and-half1-½ teaspoon Salt, More To Taste Freshly Ground Black Pepper, To Taste⅛ teaspoons Cayenne Pepper1 cup Grated Sharp Cheddar Cheese1 jar (4 Ounce) Sliced Pimentoes, Drained Extra Milk For Thinning If Necessary1 cup Panko Bread Crumbs Preparation Instructions
Cut green beans in half if you like pieces to be a little smaller.
Blanch the green beans: drop them into lightly salted boiling water and allow green beans to cook for about 3 to 4 minutes. Remove them from the boiling water with a slotted spoon and immediately plunge them into a bowl of ice cold water to stop the cooking process. Drain beans once they're cool and set aside.
Add bacon pieces to a skillet over medium heat. Cook bacon for two minutes, then add diced onion and garlic and continue cooking for 3 to 5 minutes, or until bacon is done (but not crisp) and onions are golden brown. Remove from heat and set aside.
In a separate skillet or saucepan, melt butter over medium heat. Sprinkle flour into the pan and whisk immediately to evenly mix it into the butter. Cook for a minute or two, then pour in milk and half and half. Continue cooking, whisking constantly, while sauce thickens, about 2 minutes. Add salt, pepper, and cayenne then add the grated cheddar. Stir while cheese melts. Turn off heat.
Add pimentos to pan, then add bacon/onion mixture. Stir to combine. Pour over green beans and stir gently to combine. Pour into a baking dish and top with panko crumbs.
Bake at 350 degrees for 30 minutes or until sauce is bubbly and panko crumbs are golden.

November 5, 2010
Holiday Baking Weekend WINNERS
 The bad news is, The Lodge only has room for four winners and their guests.
The good news is, I'm making plans for the next cooking weekend at the Lodge in January; watch for the details late this month.
The randomly selected winners of the holiday baking weekend on the ranch are…
#2358 Jennifer (mom of 4)
#31820 Molly
#16182 Jenna
#14213 Christy
Winners, contact prizes@thepioneerwoman.com for details about the trip!
(Note: If any winner is unable to attend, I will redraw from among the entries.)
Thank you, everyone, for entering. I'll be sure to document the baking demonstration(s) and will provide all the details you need to follow along from home!
I'll have the next weekend cooking giveaway around Thanksgiving.
Love,
P-Dub

November 4, 2010
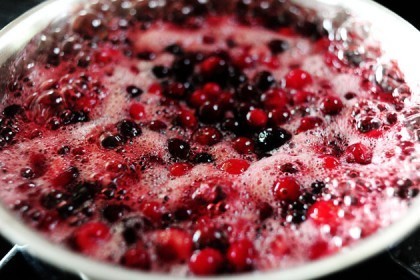
Cranberry-Pomegranate Sauce
 I love cranberry sauce. Love it, love it, love it.
I'm picky about it, though. I do not, for example, like cranberry relish–the coarse concoction mixed up in a blender or food processor. Too chunky. Too tart. Yuck.
I'm so judgmental.
I do, however, love a more jelly-like, sweet cranberry sauce. I'm making a very easy one for you today.
But first, let's have a quick run-down of the new Thanksgiving recipes I've posted here over the past few weeks. Things will really pick up next week, recipe-wise, so have your grocery list and a big fat pen nearby. (Or just follow the individual links to print out each recipe.)
 We've had Cornbread Dressing with Sausage and Apples.
 And the cornbread you need to make it.
 Here's my favorite turkey brine recipe.
 And my favorite sweet potato side dish.
 There's this scrumptious spaghetti squash…
 And the pie that'll make you cry. Just make sure you bake it until it's no longer jiggly.
It has a mind of its own.
For today, here's a quick and easy (as in, embarrassingly easy) throw-together cranberry sauce for your Thanksgiving turkey. What sets this yummy version apart is that it's made deliciously sweet with pomegranate juice, which gives it a nice little edge.
Let's make it baby. And I mean that in the most respectable way possible.
This will seriously be the easiest thing you make this Thanksgiving.
 Throw the cranberries into a medium saucepan.
 Grab a bottle of pomegranate juice.
 Pour it right over the cranberries.
Take a swig at the end if you want. It's good for you.
At least that's what pomegranate juice producers tell me.
And I'll give them the benefit of the doubt. I'm not a cynic!
 Next, pour in the sugar. I used 3/4 cup, which was just right for me in terms of sweetness. But if you like your cranberry sauce a little more tart and bitter, reduce it to 1/2 cup.
 (Or if you like things super sweet, raise it to a cup. )
 Stir the mixture then bring it to a boil over medium to medium-low heat. Not too hot!
Cook it for 15 to 20 minutes, stirring occasionally to avoid burning.
 Then pour it in a bowl and chill it until the turkey comes out of the oven! It'll be thick when you finish cooking it, but it'll thicken even more in the fridge.
(Psst. It's delicious on toasted English muffins, too.)
Enjoy!
Recipe: Cranberry-Pomegranate Sauce
Prep Time: 2 Minutes
|
Cook Time: 15 Minutes
|
Difficulty: Easy
|
Servings: 12
Print Recipe
3"x5" Cards
4"x6" Cards
Full Page
[image error]
');
Ingredients
1 bag (about 12 To 16 Oz) Fresh Cranberries16 ounces, fluid Pomegranate Juice¾ cups Sugar, More Or Less To Taste Preparation Instructions
Combine all ingredients in a medium saucepan and cook over medium-low heat for 20 minutes, stirring occasionally to prevent burning. Mixture will thicken as it cooks, and will thicken more as it cools.
Cool in a jar or bowl in the fridge. Serve with Thanksgiving turkey.

November 2, 2010
Holiday Baking Weekend Giveaway
 Today, because the holidays are approaching, because you've been so supportive through the last year of my cookbook adventures, because baked goods are my life, and because I love ya, I'm holding a giveaway for a weekend baking retreat at The Lodge, where four winners (and accompanying guests, if desired) will spend the weekend relaxing, looking at cows, sipping coffee, listening to zero traffic…and taking part in an interactive holiday baking fest.
And sleeping in.
And doing nothing. It's what we do best here!
Here's what's included:

* Two night stay—Friday and Saturday nights—at The PW/MM Lodge in Middle of Nowhere, Oklahoma, December 3 & 4. Each winner/friend combo will have their own room/bathroom at The Lodge, and great news! !here are curtains in the bedrooms. It's the kind of gal I am.
* Airfare (if applicable) will be paid up to $500.
* Activities: sleeping, drinking coffee, Friday night dinner (prepared by me), all-day baking demonstration (with guest experts) Saturday, feeding cattle and horses with Marlboro Man and the kids, sipping wine (if you're into that kind of thing). And more coffee. Amen.
* Great baking-related goodie bags will be given to all guests.
The purpose of the weekend is to relax, meet new friends, learn how to cook different kinds of holiday treats, and chow down.
That's it!
TO ENTER
To enter this weekend baking giveaway, just answer the following question in the Comments section of this post:
What holiday treats would you most like to learn how to make?
Are you interested in yeast-based treats like cinnamon rolls and raisin bread? Or would you like to learn the art of the perfect decorated Christmas cookie? Have you always wanted to make an edible fruitcake? Or would you like to learn how to put together the perfect plate of baked goods to give away as gifts?
Whatever your poison, just shout out the category of holiday baked good that interests you most and your automatically entered to win.
THE RULES
One entry per person, please.
No entries after 6:00 pm Pacific Time Wednesday.
Winners will be announced Friday morning!
(Note: Because of the specific timeframe/date, I don't expect there to be scads and scads of entries…so chances of winning are better than average.)
Good luck, my friends!

November 1, 2010
Pear Clafouti, Three Ways
 I decided to make pear clafouti yesterday for two reasons:
1. I had pears.
2. I love to say the word clafouti.
Clafouti…clafouti…clafouti…Ah. There's just something about that name.
If only I knew what exactly clafouti is.
Oh, wait. I just remembered. I think clafouti is a cakey, fruity French dessert. Fruit is arranged in the bottom of a baking dish and a flan-type batter–one made with a relatively small amount of flour–is poured over the top and baked. The fruit and the cake pouf up, then settle, and the whole thing is sprinkled with powdered sugar and all the blessings of this life. Last night I was feeling ambitious and decided to make–gulp–three different versions of the same dish.
I told you: I had lots of pears. But also, I wanted to settle once and for all whether the cobbler recipe I love and use all the time–the one on this site and in my cookbook–is similar in consistency, since I've always thought it looked more like clafouti than cobbler.
My sister Betsy is visiting right now and I dragged her along for the ride.
To summarize, here's what we wound up making:
Version #1: Traditional clafouti recipe made with whole milk
Version #2: Same recipe as Version #1, but with heavy cream substituted for milk
Version #3: My favorite cobbler recipe, made with pears instead of blackberries
 Here's what you need for Versions 1 and 2.
 Pears. Any kind. Firm is best.
 Fresh ginger.
 Flour. Not a lot. But some.
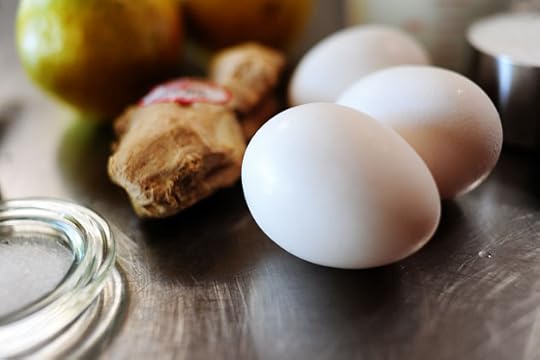 Eggs.
Eggs.
 Salt.
Salt.
 Sugar.
 Vanilla.
 And whole milk. In Version #2, I substituted 1 1/2 cups of the milk with heavy cream.
We'll see how they differ!
 Start by peeling the pears.
Alliteration Alert: I find peeling pears pleasing.
 Use an apple corer to easily cut the core out of each half.
 Add this to the compost bin for your organic garden…
Or, if you want to be a real Pioneer Woman, just toss it in the trash.
Amen.
 Slice the pears thinly.
Generously butter the bottom of a pie dish, then arrange the pear slices in a pinwheel (sorta) design in the bottom. (Or have your kid sister do it because she wants to help and you want to give her busy work but don't really want to hand too much responsibility over to her yet because her hands are too small and she's only nine.)
(Or at least she was nine the last time you checked.)
(Wait. She's not nine! She just turned thirty-six and she's given birth! And she has a mortgage!)
(I'm sitting here crying in my yoga pants.)
 Order your kid sister–the one who has the mortgage and the little hands–to continue pinwheeling the pear slices until the bottom of the pan is nicely covered.
 Slice the peel off of a chunk of ginger, then run it over a grater (Microplane or otherwise.)
 But if you haven't yet treated yourself to a Microplane…there's really nothing like it.
 Drop the ginger onto the pears, then sprinkle the top with sugar. (Alternatively, you can also toss the pears, ginger, and sugar all together…and if you're feeling naughty, feisty, and rambunctious, you can add a teeny splash of brandy. But only if you're into that sort of thing.)
(And I'm into that sort of thing.)
 Throw the flour and salt into a bowl.
 Throw the eggs into a bowl…
 Beat 'em with a fork…
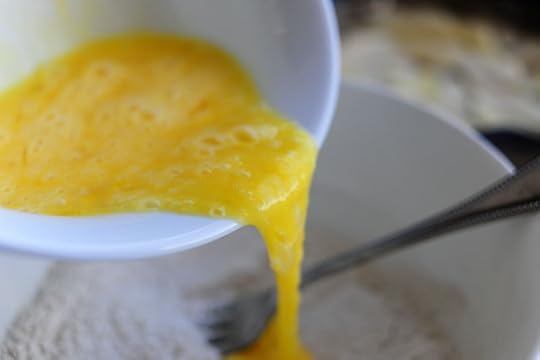 Then pour it into the bowl…
 Along with some sugar…
 Vanilla…
 And whole milk.
 Whisk it together until smooth.
 Pour the mixture over the pears…
 And there you go–Pear Clafouti. Enjoy, guys!
Just kidding. I just like to do that about once every quarter.
 Here it is after baking. Looks good…but let's look at the other versions now.
VERSION #2
 Version #2 is the same as Version #1, except I substituted 1 1/2 cups of the milk with heavy cream.
I like to take a walk on the wild side every now and then.
 Here it is right before coming out of the oven.
 Here it is a couple of minutes later, after it's chilled out a little.
Definitely a different look than the first one.
So let's keep going.
VERSION #3
 Version #3 is my Blackberry Cobbler recipe, with pears substituted for blackberries.
 And here it is in all its self rising flour glory.
If self rising flour is wrong, I don't want to be right.
THE MOMENT OF TRUTH
 Because we are dedicated and thorough self-described food journalists, Betsy and I felt we needed to sample each clafouti at least four times.
 Version #1.
 Decidedly more eggy and dense. Glossier on the surface, the thinnest of all three.
 Version #2.
 Much more cakey in appearance. A nice pouf and a nice crispy outer layer.
 Version #3.
 Pears are barely visible, very cakey in appearance, lovely golden brown and crisp surface.
 Time to decide!
 Version #1 was my second favorite, Betsy's third favorite. It is decidedly more eggy/flan-like in texture, which I'm relatively confident is the goal with clafouti. The flavor was nice; it just wasn't my fave.
 Version #2 was Betsy's top pick, my third. The cream definitely gave it more substance and cohesion, and Betsy preferred the richer flavor.
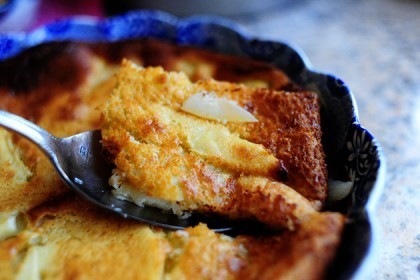
 I hate to say it. I know I belong out back with the hounds. But traditional adherence to regional French desserts aside, if I had to pick one of the three versions of "clafouti" to eat the rest of my life, it would be Version #3, which isn't technically clafouti at all, but it's close enough for me.
It's a little more cakey. It has a nice, crisp top layer. It remains very moist.
And yes. It's made with self-rising flour.
I can't help it. I have to be me.
Truth be told, each of the above recipes was totally yummy. I don't show this, but I added sugar and cinnamon to some heavy cream and whipped it up to serve alongside the clafouti…and it was divine.
Try this sometime, guys! And if your kid sister's visiting, whip up two different versions just for kicks.
Just make her do the dishes when you're all done.
Enjoy!
(Note: for the cobber-type recipe I used for Version #3, here it is: Cobbler Recipe on PW Cooks.)
Here's the printable for Versions 1 and 2:
Recipe: Pear Clafouti
Prep Time: 15 Minutes
|
Cook Time: 45 Minutes
|
Difficulty: Easy
|
Servings: 12
Print Recipe
3"x5" Cards
4"x6" Cards
Full Page
[image error]
');
Ingredients
2 whole Pears2 teaspoons Minced Or Grated Ginger2 Tablespoons Sugar2 teaspoons Brandy, Optional¾ cups All-purpose Flour½ teaspoons Salt½ cups Sugar3 whole Eggs, Beaten With A Fork2 cups Whole Milk (substitute Half With Cream If You Desire)1 teaspoon Vanilla Preparation Instructions
Preheat oven to 375 degrees.
Peel pears and slice in half. Core each half, then slice pears thinly. Arrange in a pinwheel design in a pie dish. Sprinkle 2 tablespoons of sugar and minced ginger over the top. Sprinkle brandy over the top if using.
Whisk together flour, salt, eggs, sugar, milk, and vanilla until smooth. Pour over the top of the pears.
Bake for 45 minutes or until poufy and no longer overly jiggly. Remove from oven and allow to cool for at least 10 minutes. Serve with freshly whipped cream flavored with sugar and cinnamon.
VERSION 2: Substitute 1 1/2 cups of heavy cream for 1 1/2 cups of milk.

October 29, 2010
Soul Sweet 'Taters (Step-by-Step!)
Well, shiver me timbers.
Long ago, I had shared the final photo and printable recipe for my all-time favorite sweet potato dish. It's called Soul Sweet 'Taters, and my mother and aunt used to make it every Thanksgiving during my childhood on the golf course. It's technically a side dish…but if the world was a logical place, it would fall under the category of desserts. It's sweet, crunchy, beautiful…but has that lovely sweet potato flavor that's deliciously unmistakable.
However, I just realized that I've never shared the step-by-step photos here.
I just found them in an old folder. Immediately, I knew I had a job to do.
(These photos were taken in 2007. It's like taking a trip down memory lane…)
 The Cast of Characters: Sweet potatoes, milk, eggs, vanilla, brown sugar, sugar, pecans, butter, flour, and salt.
 First up, throw the sweet potatoes into a 375 degree oven for about 45 minutes, or until fork tender.
You can also nuke 'em to save time. But I like to do things the hard way so I look busy and feel like I'm earning my keep. It's a middle child thing.
I realize that made absolutely no sense.
 Once they're done, split them down the middle, just as you would a baked potato.
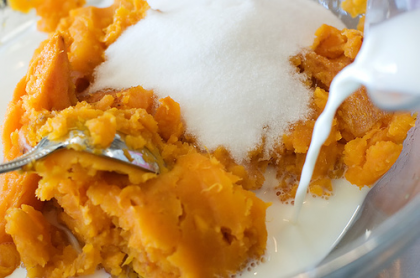
 Scrape the potatoes our of their skins and into a mixing bowl. Add the white sugar…
 The milk (whole milk, please)…
 Eggs and vanilla…
And salt.
Oh, this is so, so good.
 Next, grab a potato masher…
 And mash, mash, mash…until it's all combined. You can leave it a little lumpy if you prefer, or you can go more smooth, like this.
Either way: scrumptious.
Oh, I hear you out there! "Ew! I hate sweet potatoes! They're gross and orange and weird!"
To that I say the following, very profound, statement:
Don't hate. Appreciate.
Give it a shot! You'll never know till you try.
 Next, in a separate bowl, mix together softened butter, pecans, brown sugar, and flour. To add a little interest, you could also throw in some oats—about a half a cup or so.
 Use a pastry cutter to mix the ingredients together…
 Until it resembles crumbs.
Crumbs = Yum.
 Spread the sweet potatoes in a casserole dish…
 Then sprinkle the crumb mixture over the top.
 And you're good to go! Now just bake it in a 400 degree oven, until golden brown on top.
Note: You could make this the night before Thanksgiving! Just assemble and keep in the fridge. You could also prepare the elements ahead of time and keep the potatoes and crumb mixture separate until you're ready to bake. I've done both, and both work just fine.
 Mmmm. Like this.
 To serve, don't try to be neat and organized about it. Just stick a spoon on in…
 And get it on a plate as fast as you can.
 And then—this is important—do this. Bring to mouth. Ingest. Sigh. Faint.
Repeat as needed.
You'll love this, my friends. It's so, so wonderful.
More Thanksgiving recipes coming next week.
Love,
P-Dub
Here's the printable (sorry! Disappeared for a second.)
Recipe: Sweet Potatoes
Prep Time: 45 Minutes
|
Cook Time: 30 Minutes
|
Difficulty: Easy
|
Servings: 10
Print Recipe
3"x5" Cards
4"x6" Cards
Full Page
[image error]
');
Ingredients
4 whole Medium Sweet Potatoes1 cup Sugar1 cup Milk2 whole Eggs1 teaspoon Vanilla Extract1 teaspoon Salt1 cup Brown Sugar1 cup Pecans½ cups Flour¾ sticks Butter Preparation Instructions
Wash 4 medium sweet potatoes and bake them in a 375-degree oven until fork tender, about 30-35 minutes. When they are finished cooking slice them open and scrape out the flesh into a large bowl.
Add 1 cup of (regular grandulated) sugar, 1 cup of milk, 2 eggs, 1 teaspoon of vanilla extract and 1 teaspoon of salt. With a potato masher, mash them up just enough—you don't want to be perfectly smooth.
Now, in a separate bowl, add 1 cup brown sugar, 1 cup pecans, chopped (that means measure a cup of pecans, then chop them), ½ cup flour, and ¾ stick of butter. With a pastry cutter or fork, mash together until thoroughly combined.
Spread the sweet potato mixture into a regular baking dish and sprinkle the crumb mixture all over the top.
Bake in a 400-degree oven for 30 minutes, or until golden brown.

Soul Sweet 'Taters! (Step-by-Step Recipe)
Well, shiver me timbers.
Long ago, I had shared the final photo and printable recipe for my all-time favorite sweet potato dish. It's called Soul Sweet 'Taters, and my mother and aunt used to make it every Thanksgiving during my childhood on the golf course. It's technically a side dish…but if the world was a logical place, it would fall under the category of desserts. It's sweet, crunchy, beautiful…but has that lovely sweet potato flavor that's deliciously unmistakable.
However, I just realized that I've never shared the step-by-step photos here.
I just found them in an old folder. Immediately, I knew I had a job to do.
(These photos were taken in 2007. It's like taking a trip down memory lane…)
The Cast of Characters: Sweet potatoes, milk, eggs, vanilla, brown sugar, sugar, pecans, butter, flour, and salt.
First up, throw the sweet potatoes into a 375 degree oven for about 45 minutes, or until fork tender.
You can also nuke 'em to save time. But I like to do things the hard way so I look busy and feel like I'm earning my keep. It's a middle child thing.
I realize that made absolutely no sense.
Once they're done, split them down the middle, just as you would a baked potato.
Scrape the potatoes our of their skins and into a mixing bowl. Add the white sugar…
The milk (whole milk, please)…
Eggs and vanilla…
And salt.
Oh, this is so, so good.
Next, grab a potato masher…
And mash, mash, mash…until it's all combined. You can leave it a little lumpy if you prefer, or you can go more smooth, like this.
Either way: scrumptious.
Oh, I hear you out there! "Ew! I hate sweet potatoes! They're gross and orange and weird!"
To that I say the following, very profound, statement:
Don't hate. Appreciate.
Give it a shot! You'll never know till you try.
Next, in a separate bowl, mix together softened butter, pecans, brown sugar, and flour. To add a little interest, you could also throw in some oats—about a half a cup or so.
Use a pastry cutter to mix the ingredients together…
Until it resembles crumbs.
Crumbs = Yum.
Spread the sweet potatoes in a casserole dish…
Then sprinkle the crumb mixture over the top.
And you're good to go! Now just bake it in a 400 degree oven, until golden brown on top.
Note: You could make this the night before Thanksgiving! Just assemble and keep in the fridge. You could also prepare the elements ahead of time and keep the potatoes and crumb mixture separate until you're ready to bake. I've done both, and both work just fine.
Mmmm. Like this.
To serve, don't try to be neat and organized about it. Just stick a spoon on in…
And get it on a plate as fast as you can.
And then—this is important—do this. Bring to mouth. Ingest. Sigh. Faint.
Repeat as needed.
You'll love this, my friends. It's so, so wonderful.
More Thanksgiving recipes coming next week.
Love,
P-Dub
Here's the printable (sorry! Disappeared for a second.)
Recipe: Sweet Potatoes
Prep Time: 45 Minutes
|
Cook Time: 30 Minutes
|
Difficulty: Easy
|
Servings: 10
Print Recipe
3"x5" Cards
4"x6" Cards
Full Page
[image error]
');
Ingredients
4 whole Medium Sweet Potatoes1 cup Sugar1 cup Milk2 whole Eggs1 teaspoon Vanilla Extract1 teaspoon Salt1 cup Brown Sugar1 cup Pecans½ cups Flour¾ sticks Butter Preparation Instructions
Wash 4 medium sweet potatoes and bake them in a 375-degree oven until fork tender, about 30-35 minutes. When they are finished cooking slice them open and scrape out the flesh into a large bowl.
Add 1 cup of (regular grandulated) sugar, 1 cup of milk, 2 eggs, 1 teaspoon of vanilla extract and 1 teaspoon of salt. With a potato masher, mash them up just enough—you don't want to be perfectly smooth.
Now, in a separate bowl, add 1 cup brown sugar, 1 cup pecans, chopped (that means measure a cup of pecans, then chop them), ½ cup flour, and ¾ stick of butter. With a pastry cutter or fork, mash together until thoroughly combined.
Spread the sweet potato mixture into a regular baking dish and sprinkle the crumb mixture all over the top.
Bake in a 400-degree oven for 30 minutes, or until golden brown.
October 27, 2010
Spaghetti Squash with Maple Syrup and Shallots
In the next post, I'll continue the turkey brining discussion, and move on into roasting the sucker.
Meantime, here's a yummy Thanksgiving side dish!
Spaghetti squash is so weird.
So wonderfully, deliciously weird.
If you've never tried it before, you have to! The texture is out of this world.
 Grab one or two medium-sized spaghetti squash. Put 'em on a cookie sheet and stick 'em in a 375-degree oven. Bake for one hour if they're a little larger, forty-five minutes if they're small.
 This is an hour later. Things have been happening within.
 With a very sharp knife, carefully, gracefully, and gingerly whack them in half.
 With a spoon, scoop out the seeds and the slimy pulp surrounding the seeds.
 I don't care if this is edible. It just doesn't look right, does it?
Blech.
 Back to the squash, just grab a fork and begin picking. You'll see the magic happen! All of a sudden, this stuff that looks like solid squash breaks apart into beautiful, thin pieces of…spaghetti!
 Scrape the entire squash into a bowl, then discard the shells. (Or, if you're feeling fancy, you can save the shells and serve the squash in them. Martha would be pleased!)
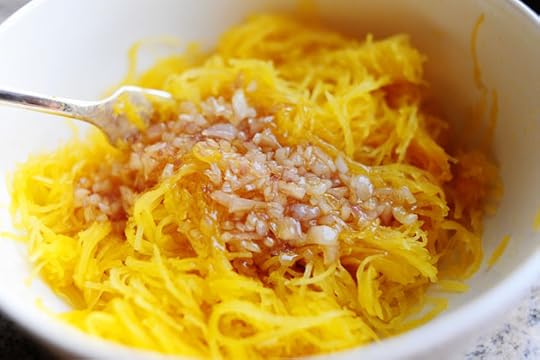
 Now, grab a couple of shallots.
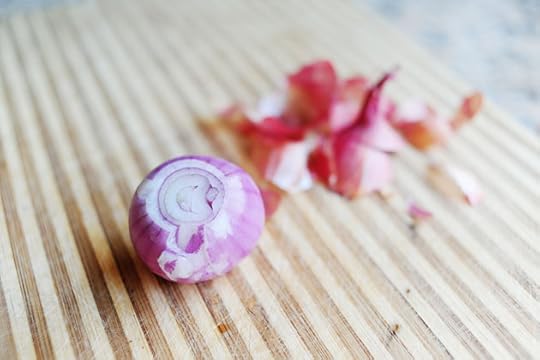 Peel them…
 Cut them in half and make vertical slices…
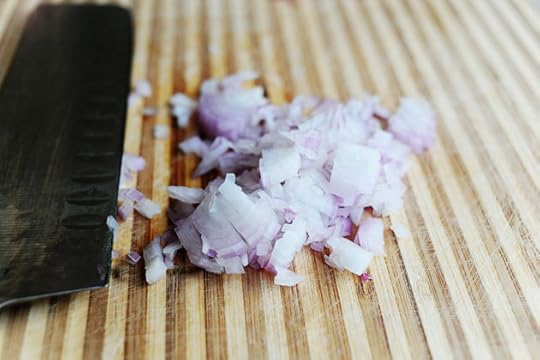 Then dice them up finely.
 Melt butter in a skillet…
 Then throw in the shallots. Stir them around and cook them for a minute or two, until they slightly soften and lose a little of their kick.
 Next, reduce the heat a bit and pour in some maple syrup. (If you're feeling naughty, you can also splash in a teeny bit of brandy or whisky. Don't tell anyone.)
 Sprinkle in a little salt to balance the sweetness, then let the whole mixture bubble for a minute or two.
Not too long. You're not making candy here.
 A minute or so later, just pour the contents of the skillet over the warm squash.
 Flavor!
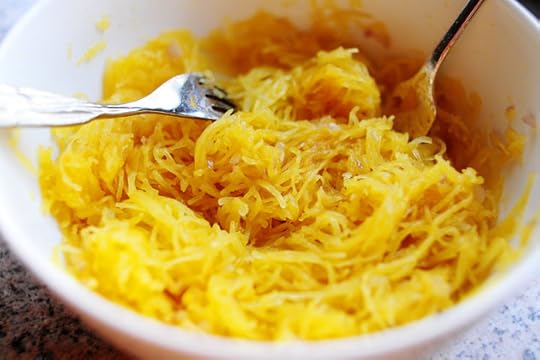 Mix it all together, then check the seasonings. Sprinkle in a little nutmeg. If you want to look into the bowl and think about how freaking weird this stuff looks, that would be perfectly normal, too.
 But then you need to taste it.
And then you'll understand.
Enjoy this! It's so, so yummy.
Recipe: Spaghetti Squash with Maple Syrup and Shallots
Prep Time: 10 Minutes
|
Cook Time: 1 Hour
|
Difficulty: Easy
|
Servings: 8

Print Recipe
3"x5" Cards
4"x6" Cards
Full Page
[image error]
');
Ingredients
2 whole Medium Spaghetti Squash3 Tablespoons Butter2 whole Shallots, Finely Minced¼ cups Maple Syrup Dash Of Salt Dash Of Nutmeg Preparation Instructions
Preheat oven to 375 degrees.
Pierce spaghetti squash a few times with a sharp knife. Place on a cookie sheet and bake for 1 hour.
Cut squash in half. Scoop out and discard seeds and slimy pulp. Scrap out the rest of the squash with a fork. Place in a bowl. Keep warm.
In a large skillet, melt butter. Cook shallots over medium heat for 2 minutes or until soft. Reduce heat and add maple syrup. Cook for a minute, then remove from heat. Stir in salt.
Pour mixture over squash. Sprinkle on nutmeg and mix together gently. Sever warm.

Ree Drummond's Blog

- Ree Drummond's profile
- 2032 followers

