
Ree Drummond's Blog, page 85
November 22, 2010
Parker House Rolls
Wanted to thank you for following along during Pie Week last week. Children, ranch, laundry, and life have kept me from finishing up the last of my pie posts, but I'll try to get them up sometime in the coming days.
Welcome to my world! Jump on in. The water's warm.
In the meantime, I wanted to share this dinner roll recipe, since dinner rolls are necessary to life on Thanksgiving day.
 For the record: I don't make beautiful, perfect bread. It's just not a knack I have. I'm much better at impersonating old Broadway stars. But these rolls aren't about looks. They're about flavor—buttery, sinful, Thanksgiving table flavor.
Parker House Rolls are a simple/scrumptious dinner roll with a score or split down the middle, which practically begs you to pull it apart and slap a pat of softened butter right inside. I've seen Parker House Rolls formed (and placed on the baking pan) in different ways. One way (which Joy the Baker demonstrates so very nicely) involves forming dough into balls, then making a deep crease or impression in the center.
The second way, which is the method my mom employed, involves cutting flat discs of dough, dipping the discs in butter, and folding them in half.
I have no idea which style reflects the original Parker House Roll from the historic Parker House Hotel in Boston. I've never even been to Boston.
And why is that? How can I be forty-one years old and never have visited such a major American city? I feel swindled.
I'll work that out later. For now…we have rolls to make!
 I'm using my basic dough recipe (the same one I use for my cinnamon rolls and no-knead dinner rolls) but instead of canola oil, this time I'm using butter.
Please don't be mad.
 Combine butter and sugar in a pot, then pour in whole milk.
 Turn on the burner and simmer the mixture until it's hot but not boiling, then turn off the heat.
 Let this cool until it's warm but not hot.
"Warm but not hot." Man, I sure have a way with words, don't I?
 When it's warm but not hot, sprinkle some active dry yeast over the surface…
 Followed by eight cups of flour.
 Stir this together, then cover the pot and put it in a warm, draft-free place for an hour.
 If you play your cards right, this is what it'll look like. Should be nice and light and bubbly.
 Next, throw a cup of flour on top of the dough…
 Then add a heaping teaspoon of baking powder…
 A scant teaspoon of baking soda…
 And a heaping tablespoon of salt.
 Then break out your elbow grease and stir this together until it's combined. It's a little physically taxing, but you'll make it!
 Divide the dough in half. It's easier to work with that way, and if you don't need more than about 24 rolls, you can save the rest of the dough for later.
(Or make some cinnamon rolls! You know you want to.)
 Now, throw half of the dough onto a floured surface and knead it for 8 to 10 minutes. Be sure to ask a local alien if you can borrow his hand, as you can plainly see was my approach.
 After kneading, form the dough in a large ball, cover it, and let it sit and rise for 30 to 45 minutes.
 After that, it'll be nice and smooth. Roll it out (gently; don't stretch too much) to about an inch-and-a-half thick…
 Melt some butter in a saucepan. Use a round cutter to cut circles of dough.
 Dunk each dough circle in the melted butter…
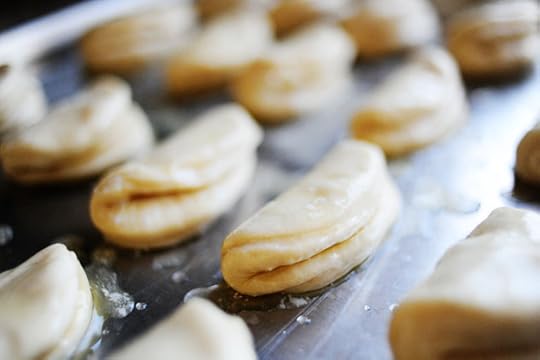
 Then fold the circle in half, gently pressing to encourage it to "seal."
 Now, here's another place where you can take a couple of different approaches. My mom laid the rolls on their sides, like this. But you can also use a baking dish with higher sides and stand the rolls upright so the seam is facing up. If you do this, you'll need to crowd the rolls a bit so that they'll support one another.
Either way works well!
 These remind me of:
a. Pac Man
b. Mussels
I see things in my food.
I see dead people.
 Doesn't it just seem like this should start talking? Wokka wokka wokka.
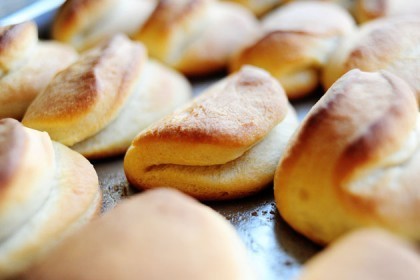
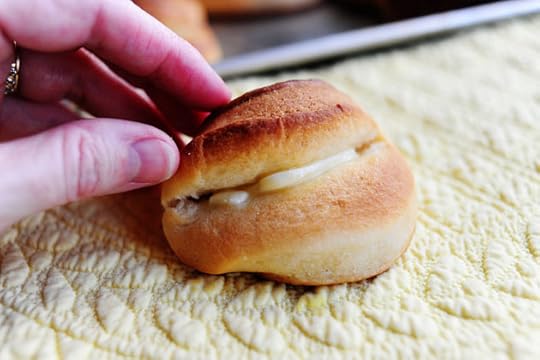
Oh, sorry. missed a couple of steps. Covered rolls and let them rise for 30 minutes. Baked 'em for 15 minutes. Amen. Note that if you lay them individually on a baking sheet, their shape can vary to well behaved (as seen above) to freakish and malformed. If you crowd them into a pan face up, you'll wind up with a pan of more uniform dinner rolls. Up to you!
 These little puppies just beg to be pulled open…
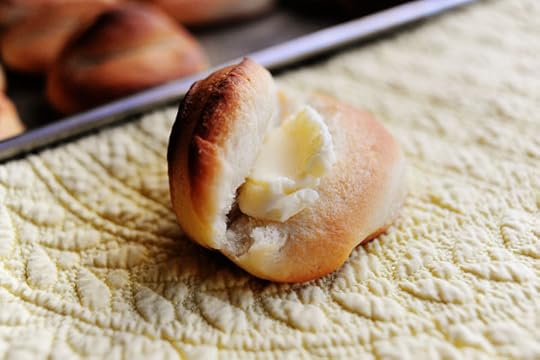 And buttered…
 And eaten.
And by the way, in case you were wondering: just before this photo was taken, the alien's cousin Rosalinda showed up, stole my wedding ring, and stuck her hand right in my shot!
Freaky pink alien hands. It's the lighting, I swear. No really, I…
Oh, never mind.
Enjoy these rolls, my friends! You can make the dough the night before Thanksgiving. Just store it covered in the fridge (be prepared to punch it down if it rises too much) and know that you'll need to allow more time for the rolls to rise (because the dough will be a little cold.) Or you could try flash freezing the rolls right after you form them and put them on the pan (unrisen); then you'd just thaw them out, allow them to rise, and bake. Lots of options!
Here's the handy dandy printable:
Recipe: Parker House Rolls
Prep Time: 3 Hours
|
Cook Time: 15 Minutes
|
Difficulty: Intermediate
|
Servings: 36
Print Recipe
3"x5" Cards
4"x6" Cards
Full Page
 [image error]
');
[image error]
');
Ingredients
4 cups Whole Milk2 sticks 1 Cup Butter1 cup Sugar4-½ teaspoons Active Dry Yeast8 cups All-purpose Flour1 teaspoon (heaping) Baking Powder1 teaspoon (scant) Baking Soda1 Tablespoon (heaping) Salt1 cup (additional) All-purpose Flour2 sticks Melted Butter (additional) Preparation Instructions
Combine 4 cups milk, 2 sticks butter, and sugar in a large pot. Bring to a simmer, and when the mixture is hot (but not boiling) turn off heat and allow to cool to warmer than lukewarm, about 30 to 45 minutes.
Sprinkle in the yeast and 8 cups of flour. Stir to combine, then cover and allow to rise for 1 hour.
After 1 hour, add baking powder, baking soda, salt, and 1 additional cup of flour. Stir to combine. Divide dough in half, then turn out onto floured surface. Knead dough for 8 to 10 minutes, then form into a ball and cover with a towel and allow to rise in a warm place. for 30 to 45 minutes. (Repeat with other half of dough, or store it for a later use.)
Preheat oven to 400 degrees. Melt 2 sticks of butter in a saucepan.
Roll out dough 1/2 inch thick. Cut circles with a 2 1/2 inch cutter. Dunk each circle in melted butter, then immediately fold in half and place on a cookie sheet, flat side down. Press lightly to encourage sealing. Repeat with the rest of the dough. Cover with a towel and allow rolls to rise 30 to 45 minutes.
Bake for 15 minutes. Remove and serve immediately!


November 21, 2010
Bobby's Pumpkin Bread Pudding
 Any of you who tuned in to watch my Throwdown against Bobby Flay this week likely saw the part when my precious daughter Petunia sold me down the river and told the camera that she preferred Bobby's dessert to mine.
I think her exact words were "Don't tell my mom, but I really think Bobby's recipe is the best."
Doh!
Turns out, though, homegirl knows her stuff. Bobby's dessert was "Pumpkin Bread Pudding with Spicy Caramel Apple Sauce and Vanilla Bean Creme Anglaise," and my eleven-year-old was so smitten with the recipe during filming, it's totally ruined her forever on the typical sweets eleven-year-olds might like.
"Honey, you want a piece of chocolate cake?"
"No, I'm waiting for more of that pumpkin bread pudding."
"Sweetie, you want a chocolate chip cookie?"
"No, I'll just have some of that pumpkin bread pudding of Bobby's."
"Sugar Lump, would you like this bag of Skittles?"
"I want Bobby and his wife to adopt me."
My point is, the dessert raised the bar for desserts as far as my sweet girl is concerned. Problem is, we haven't been able to make the recipe ourselves because we haven't been able to find it. But this week, in conjunction with the show, Food Network posted all the recipes. You can find them here:
Friday afternoon, my daughter made it all by herself.
She started by making the pumpkin bread. Very simple ingredients. A piece of cake. (Well, a loaf of bread.) Then she cubed the bread, put it on a big sheet pan, and toasted the bread for about forty-five minutes or so, just to dry it out a little bit. While the bread was drying, she made the pumpkin custard, which sounds complicated but really isn't at all.
I wandered into the kitchen from time to time to lick bowls and steal cubes of pumpkin bread out of the oven.
 Once the bread was slightly dried out, she made the bread pudding by throwing the cubes in a baking dish and pouring the pumpkin custard over the top, then baking it.
 Bobby spooned his onto plates. but my girl cut hers into squares.
I wonder what that says about their respective personalities? I'll ask Freud the next time I bump into him. I see him at The Wal Marts occasionally.
 While the bread pudding baked, Petunia made the vanilla bean creme anglaise, which is in the family of creme brulee or any sort of custard cream. She did really well with it; there were some slightly cooked curdles of eggs that wound up in the strainer, but the strained cream itself was just as it should be.
 By the way, I'm putting this on PW Home and Garden soon as a Holiday Gift Idea. It is a heavenly, perfect product. I absolutely love it, and will tell you more about it later.
 I should tell you that my girl opted not to make the caramel apple sauce. She didn't want to wait that long.
 And I really can't blame her. This was actually photographed the next day, and both the bread pudding (reheated) and the creme anglaise were just as delicious as they'd been the night before.
I will tell you that this recipe has many different elements, and many can be made ahead of time. Make the pumpkin bread now, for instance; it only gets better if it gets a little dry. Make the creme anglaise Tuesday, then cover it tightly and keep it in the fridge. I think you could easily make the custard the day before Thanksgiving and keep it cold, and the same would probably hold true for the caramel apple sauce. Then you'd just need to assemble, bake, heat, drizzle, and bring it all together in an explosion of perfect deliciousness on Thanksgiving day.
I can't recommend this Thanksgiving dessert enough.
 And neither can Petunia.
Here's the recipe.
Bobby Flay's Pumpkin Bread Pudding with Spicy Caramel Apple Sauce and Vanilla Bean Creme Anglaise
Try it this year! Your guests will die…in a very, very good way.
Love,
P-Dub

November 20, 2010
How to Control Saltiness After Brining
 Time's getting away from me! We spent all last week on pies, and it occurred to me this morning that I needed to run through what happens after brining the turkey. In years past, I've experienced a little trial-and-error with brining. While it unquestionably injects a lot of flavor in the turkey and helps it to retain a lot of juiciness and moisture, it also can result in saltier drippings, which can cause problems with both the stuffing (if you stuff your bird, which I don't generally do) and the gravy, since the gravy is made from turkey drippings.
 There are several things you can do to decrease the "over-salty" quality of your brined turkeys. The more of these tips you follow, the more you'll be able to control the saltiness that can result from brining.

1. Use a fresh (i.e. non-frozen) turkey.
The reason for this is that frozen turkeys are typically injected with a sodium solution to help them freeze well, and brining an already-injected turkey can result in an inedible bird. Fresh turkeys are typically not preserved this way. Be sure to check the package before you buy the turkey, too; some frozen turkeys are thawed out before they're sold, so they can give the impression of being "fresh." But if they say "Injected With Sodium Solution" (or anything resembling this), you won't want to brine them.
I will say that my friend Julie found frozen turkeys at Whole Foods that were injected with a sodium solution, but on a very small scale. We just decreased the amount of time we brined them (around 12 hours instead of 16-24) and they turned out great!
To make it easy, read labels and ask the meat department or butcher.

2. After brining, rinse the turkey thoroughly under cold water for a few minutes.
Take the brined turkey out of the brining bag or pot (or whatever vessel you set it in for brining), then discard the brine and set the turkey in a clean sink. Turn on the water and move the turkey underneath the water, allowing the water to run all the way into the cavity, and even using your hands to rub the surface of the turkey as it rinses.
3. After rinsing, fill the sink with cold water and soak the turkey for fifteen minutes.
This will "purge" the excess salt that has built up in the skin and surface meat and just decrease the intensity of the salt in the drippings.
4. While making gravy, use the lowest sodium chicken broth you can find.
Well-known chicken broth brands sell "low sodium" versions, but always check the label. The low-sodium broth at Whole Foods, for instance, is much, much lower in salt than the low-sodium broth in stores. Remember, you can always add salt to the gravy, but you can't take it out. You'll need all the help you can get when combating the salt in the drippings.
Also, you can always make your own chicken stock before Thanksgiving: just throw a chicken into a big pot, add chopped onions, celery, and carrots, a few herbs, but absolutely zero salt. That's the best way for you to ensure your stock/broth won't be salty.
5. Boil the giblets in water until they're cooked through, then keep the broth from the giblets and use it to thin the gravy as you cook it.
This will add a nice flavor and, again, zero salt.
 Try those steps this year!
Coming soon: roasting the sucker.
Thanksgiving is just around the corner!
In case you missed it, here's my homemade brine recipe:

November 19, 2010
Pies, Pies, Pies!
I have more pies of my own yet to share (I've only posted three of the five) but in the meantime, I've found some incredible pies on the world wide web as a result of Pie Week. (The following bakers shared their pies with the #PieWeek hashtag on Twitter. Feel free to keep sharing your own!)
Click on the yummy photos or links below to visit the individual sites.
Then please come do my laundry so I can finish my pie posts.
 Cranberry Cheesecake Pie by Created by Diane. Gorgeous.
 Chocolate Bourbon Pecan Pie from She Wears Many Hats. Beautiful.
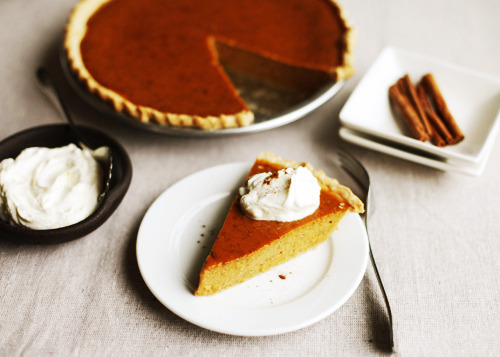 Homemade Pumpkin Pie from Savory Sweet Life. Perfection!
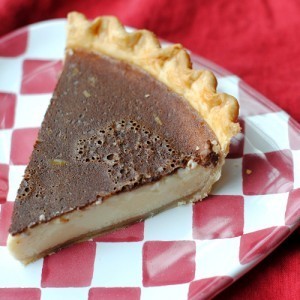 Bob and Andy Pie at Three Many Cooks. Mmmm. I want it for breakfast.
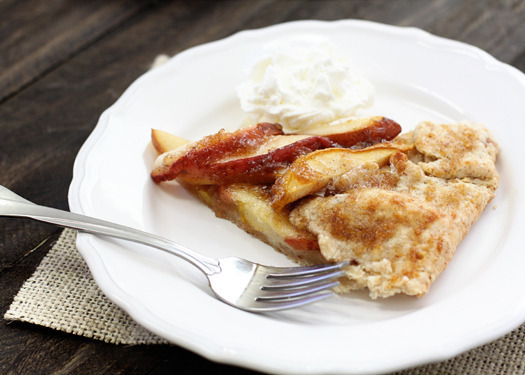
 Dulce de Leche Apple Pie by Recipe Girl. Oh my.
 S'more Pie from The Noshery. Goodness gracious.
 Cinnamon Pear Crostata with Almond Oat Crust by Good Life Eats. Gorgeous.
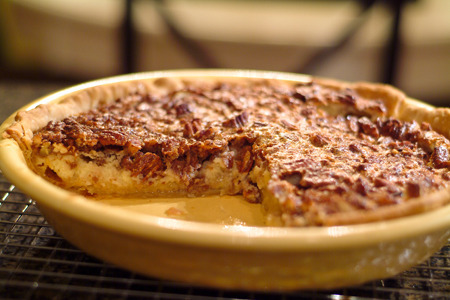 Pecan Cheesecake Pie by Never Enough Time.
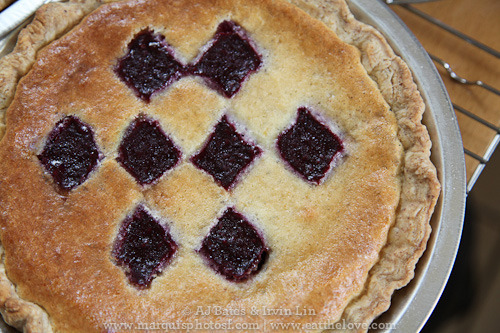 Blackberry Lemon Chess Pie by Eat the Love. Yummy and lovely!
 Key Lime Pie by Two Peas and Their Pod. I absolutely love key lime pie. This looks so good.
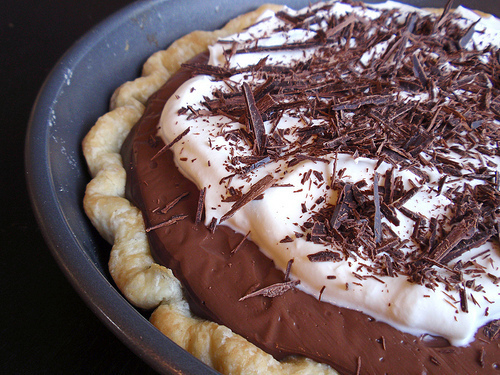 Chocolate Pudding Pie by Handle the Heart. This is right up Marlboro Man's alley. Yum!
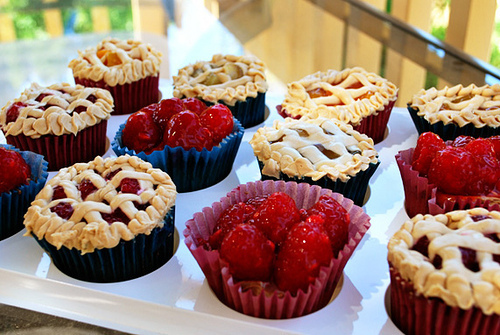 Holiday Pie Cupcakes by MommyTopics.com. How adorable!
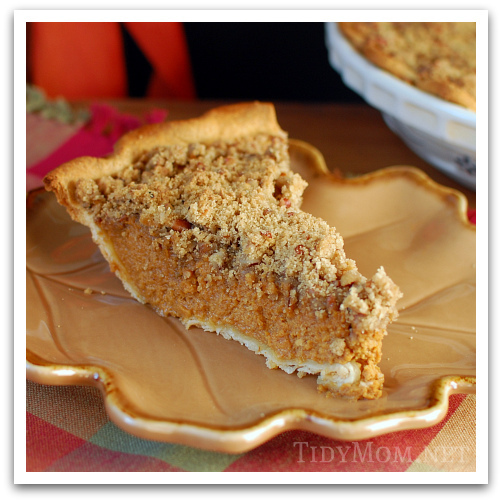 Apple Butter Pumpkin Pie by Tidy Mom, who, it just so happens, has been hosting a pie party of her own this wee. Lots of wonderful links here:
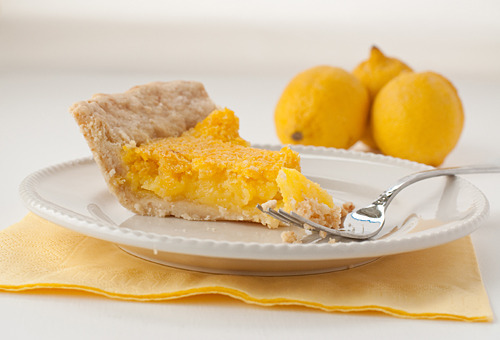 Lemon Chess Pie by Phoo-d. Absolutely gorgeous!
I'll stop there for now and go work on my own pies.
Will share more links over the weekend, then pull into the home stretch for Thanksgiving food. Thank you for sharing your pies during Pie Week, everyone!

November 17, 2010
Nantucket Cranberry Pie
 "There once was a pie from Nantucket…"
Never mind. Sorry.
It's Day Three of Pie Week! And what a beautiful, sugar-filled day it is.
*Burp*
I've been wanting to try this version of cranberry "pie" for awhile, because anytime I see a photo of one of these babies, I always think "that isn't pie. That's cake." And I love doing, trying, thinking, speaking, and eating things that make absolutely no sense.
You probably already knew this about me.
Many versions of Nantucket Cranberry Pie abound. I adapted a basic recipe from the late, great Laurie Colwin, a beloved writer, cookbook author, and contributor to Gourmet magazine. The results were out of this world. I loved it.
And I know you'll love it, too.
Just be prepared to be bombarded with the following comment from the people you serve it to:
"That's not pie! That's cake!"
To which I encourage you to retort:
"It's pie in Nantucket."
Who can argue with that?
 Here's what you need! Such a simple treat to make.
 Begin by greasing a cake pan (very, very generously) with softened butter.
 Get into the cracks and crevices!
 Next, grab a heaping two cups of fresh cranberries. Plump, juicy, gorgeous.
 Sprinkle them into the buttered pan…
 And arrange them into a single layer.
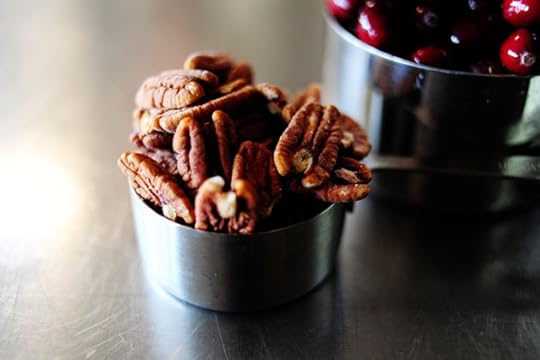 Next, measure some pecans…
 Then chop 'em up.
Incidentally, this usually isn't of monumental consequence, but note that there is a difference in recipes between
* 1/2 cup chopped pecans (this means you chop them, then measure them)
and
* 1/2 cup pecans, chopped (this means you measure them, then chop)
 Sprinkle the pecans over the top of the cranberries.
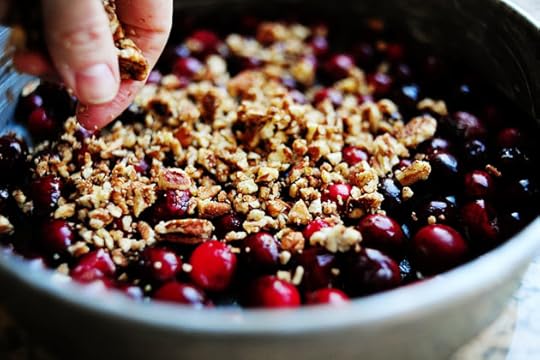 Pretty!
 Next, sprinkle sugar over the top.
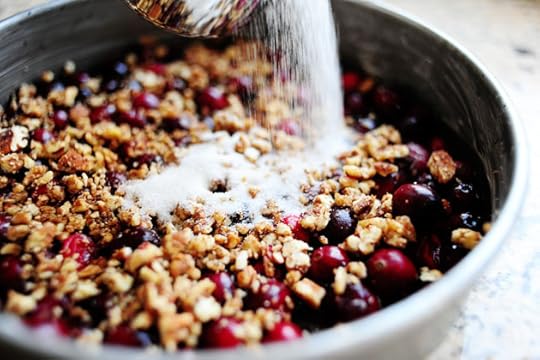 Now, listen. Cranberries are tart! They need sugar, man.
 Please don't run screaming from this website. If we were baking with succulent, sweet peaches or something, all this sugar would be in the fruit naturally and you wouldn't even know it.
So actually, this is more honest!
I just totally made that up.
Don't listen to me.
 Next up, add flour and sugar (yes. more sugar.) to a mixing bowl. Stir to combine.
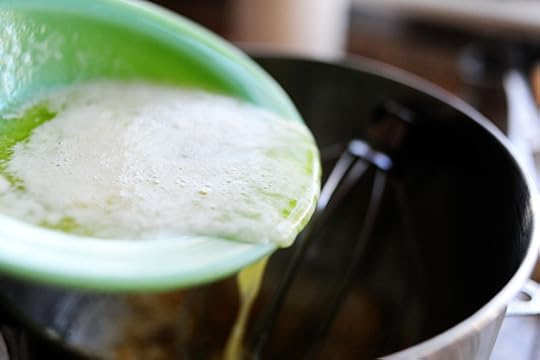 Add melted butter…
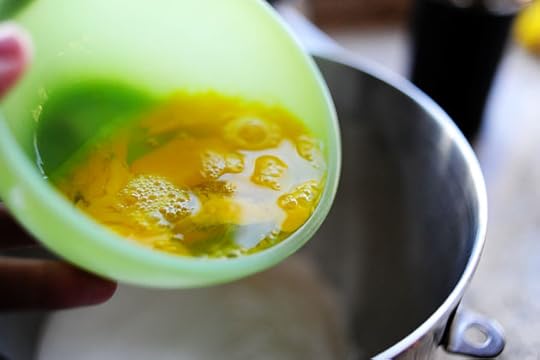 Beaten eggs…
 Almond extract…
And a dash of salt.
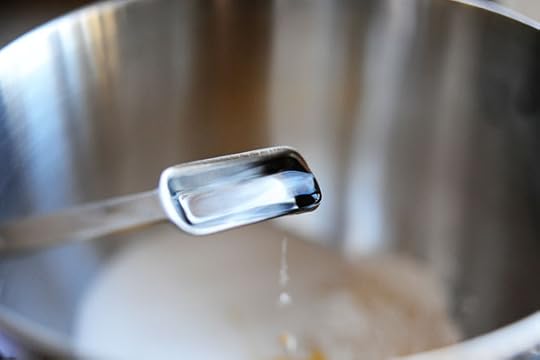
 Mix it together gently until it's all combined.
 It'll be pretty thick, so tip it forward…
 And let it pour out slowly in thick "ribbons."
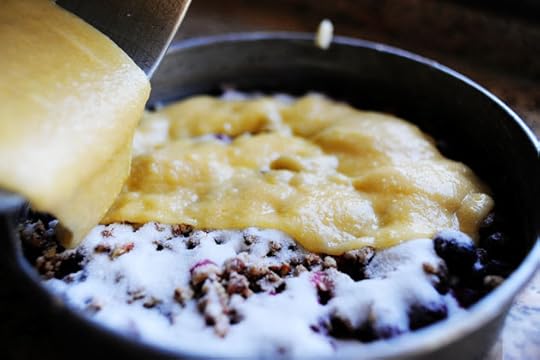
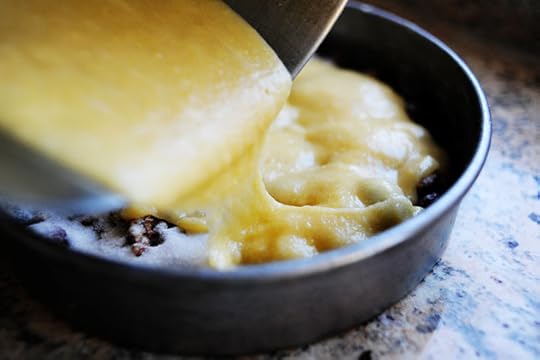
 Gently spread it to fill in any holes, if necessary, then bake for 45 to 50 minutes.
When you have about 5 to 10 minutes to go, Open the oven door, pull out the rack on which the pan sits, and sprinkle some sugar over the top. This'll give the surface a little texture and crunch.
 Done! And my kitchen smells so, so good.
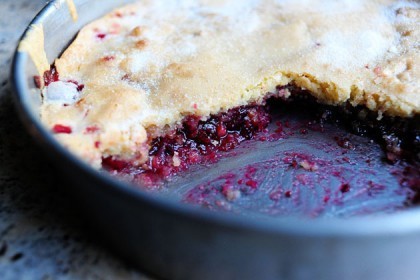
 Cut pieces with a very sharp knife. The top is nice and crisp.
 Oh. This looks and smells divine.
 And the taste. Oh, dear. The cranberries, while sweet, still retained enough tartness to set them apart from other, sweeter, fruits. I love that there were some large pieces of cranberries. Gave it great texture.
Pie Week! Three pies down, two to go.
This is the best week of my life.
(Remember to Tweet your favorite online pies, using the #PieWeek hashtag on Twitter so we can all see the deliciousness. I found a lot of treasures yesterday!)
Enjoy this cranberry "pie." It really was a treat.
Here's the printable.
Recipe: Nantucket Cranberry Pie
Prep Time: 10 Minutes
|
Cook Time: 45 Minutes
|
Difficulty: Easy
|
Servings: 10
Print Recipe
3"x5" Cards
4"x6" Cards
Full Page
[image error]
');
Ingredients
Butter, For Greasing2 cups (heaping) Cranberries¾ cups Pecans, Chopped (measure, Then Chop)⅔ cups Sugar1 cup Flour1 cup Sugar1 stick Unsalted Butter, melted2 whole Eggs, Lightly Beaten1 teaspoon Pure Almond Extract¼ teaspoons Salt1 Tablespoon Sugar For Sprinkling Preparation Instructions
*Adapted from a recipe by Laurie Colwin*
Preheat oven to 350 degrees.
Generously butter a cake pan or pie pan. Add cranberries to the bottom of the pan. Sprinkle on chopped pecans, then sprinkle on 2/3 cup sugar.
In a mixing bowl, combine flour, 1 cup sugar, melted butter, eggs, almond extract, and salt. Stir gently to combine.
Pour batter slowly over the top in large "ribbons" in order to evenly cover the surface. Spread gently if necessary.
Bake for 45 to 50 minutes. 5 minutes before removing from oven, sprinkle surface with 1 tablespoon sugar for a little extra crunch.
Cut into wedges and serve with ice cream or freshly whipped cream.

November 16, 2010
Pumpkin Cream Pie
 I'm getting ready to tell you something. It might change the way you feel about our relationship. If it does, I understand.
Here goes: I don't absolutely love pumpkin pie.
There. I said it. I feel cleansed.
Don't get me wrong. It isn't the pumpkin that trips me up. I love the flavor and texture of pumpkin. I love pumpkin breads, muffins, pancakes. I even love the flavor and texture of pumpkin puree. But there's something about pumpkin pie that makes me favor other pies on Thanksgiving day. I always, always reach for pecan first. Then, chocolate. After that, I'd choose apple or mincemeat before I'd go for the pumpkin. If I have a piece of pumpkin pie, it's because I feel sorry for it and want it to feel included. But even then, I cover the thing in whipped cream to give it a little oomph.
The pie I'm sharing today, on the other, hand, is a pumpkin pie I can really get behind. It's adapted from a recipe found in my mom's infamous recipe binder, and really does provide the best of both worlds: the scrumptious, seasonal flavor of pumpkin and the decadence of cream.
But not just any cream.
You'll find out more in a minute.
 This pie has a graham cracker crust, so we'll start there. Grind 'em up in a food processor (or, if you don't have a food processor, throw 'em into a large ziploc and smash 'em with a rolling pin.)
 Throw in powdered sugar. This is an unusual addition to a graham cracker crust–you'd normally see granulated or brown sugar. But trust me on this one.
 Mix the crumbs and sugar together, then add melted butter.
 Pulse until everything's mixed together and the crumbs are nice and moist.
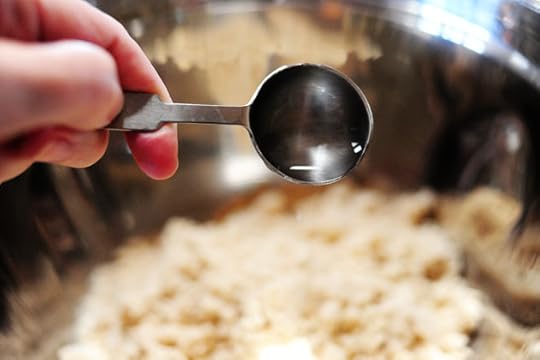
 Next step–and this is very, very important: remove one heaping spoonful of crumbs, then place it in your mouth. Eat. Smile. Feel no guilt.
Repeat as needed.
 Next, dump the crumbs into a standard pie pan.
They kinda resemble Grape Nuts, don't they?
 I like to use a one-cup measure to quickly flatten the crumbs into the bottom of the pie pan, then use my fingers to work the crumbs up the sides. Use gentle pressure. You want to secure the crumbs in there so they're nice and tight.
 Next up, throw the crust into a 300 degree oven for about 8 to 10 minutes. This'll set it and give it just a tiny bit of a toasted flavor. Then remove it, set it aside, and let it cool completely. Cover it with a dish towel if it'll be a few hours before you'll use it.
Now it's time to make the filling.
(Brace yourself.)
(You've been warned.)
 You need a box of vanilla cook and serve pudding!
Don't hate. Appreciate.
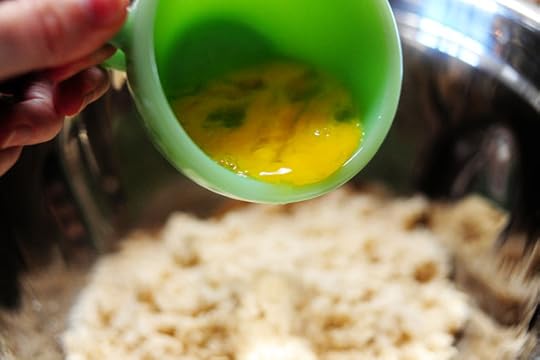
 Without fear or shame, dump the contents of the package into a saucepan.
 You know what I love about pudding mix? It sparkles with little fairy crystals, assuring you that using cook-and-serve pudding mix doesn't make you a bad person. Nothing sparkly can be bad.
 Now, here's the kicker: rather than mix in milk, you add a mixture of cream and half-and-half.
This is pie, people. It's no time to practice restraint.
 Whisk the mixture together, then add a pinch of cinnamon, nutmeg, and ground cloves. I tend do underdo the spice a little bit because I don't like it to be overpowered. But you can taste it and add spice to your taste.
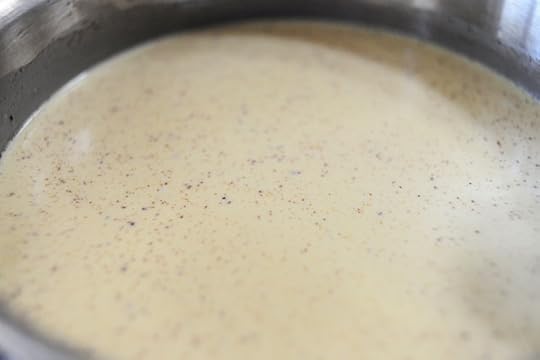 Yummy!
By the way, wouldn't this be divine with vanilla bean? Kind of like a cheater's version of creme brulee?
Hmmm. I'll have to think about that one.
 Bring the pudding to a boil over medium heat and cook it for a minute or two, just until it gets nice and thick.
 Grab the booze. This is totally optional. It just gives the pie a certain…je ne sais quoi.
But you can absolutely leave it out if you don't want to be naughty.
 Turn off the heat, then add in the whiskey. Stir it gently to combine.
 Next up, grab a heaping half a cup of pumpkin puree. This is from the can, but did you know you can make your own?
It's true. And here's how:
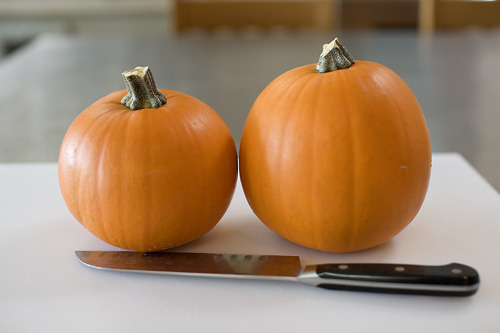 Take a walk on the wild side: Make Your Own Pumpkin Puree.
 Whether you use canned or fresh, dump the pumpkin right into the creamy mixture.
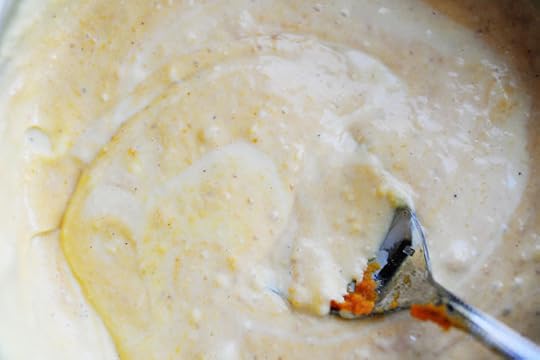 Stir it around to combine.
Don't worry about the lumps. It's a pudding thing, and an I-was-taking-photos-and-didn't-whisk-enough-while-it-was-cooking thing.
 Give it a taste and make sure the spices are where you want them, then cover the pot and let it cool for a little bit. After it cools slightly, throw the pot into the fridge to get it nice and cold.
 Later, when the filling is nice and chilled, add some brown sugar to some heavy cream.
 Whip the tar out of it until it's very, very fluffy and stiff.
 Combine this with the pumpkin/pudding/cream mixture…
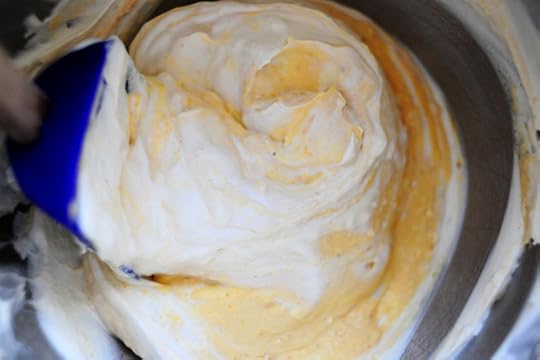 And fold it together gently.
 Try not to dunk your whole head in this mixture and lose your good sense. It's really, really delicious!
 Pour it right on into the cooled crust.
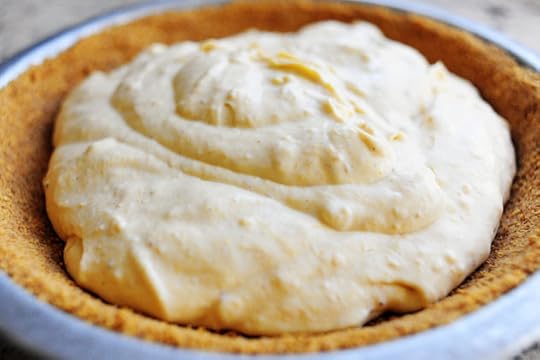 Goodness gracious.
 Spread it to even out the surface, then cover with plastic wrap and chill for at least a couple of hours. (I know, I know. There's a lot of chilling going on. But you want all the elements to marry and firm up a bit. Make it the night before Thanksgiving!)
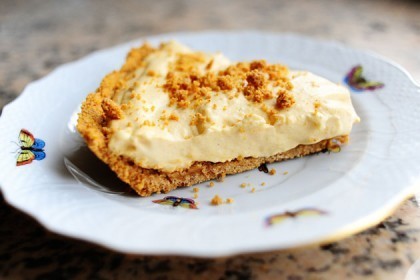
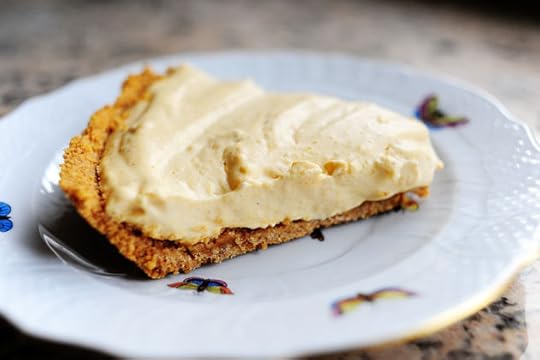 To serve, slice it up…
 And sprinkle on extra graham cracker crumbs. You can just use regular crumbled crackers (just do a quick ziploc crush trick) OR, save some of the butter and sugar-soaked crumbs from the day before, give em a little toast on a cookie sheet, and use those instead. Flavor, baby. And crunch!
 China Check: Herend Rothschild Bird. From Hungary, and from my blessed godmother Lela.
It's my life.
 So is this pie. Utterly divine! If you're not a huge fan of pumpkin pie, you have to try this one this year. I love how light and mild it is. Swoon.
Yay, Pie Week!
(Speaking of Pie Week, if you're on Twitter you can post links to your favorite online pie recipes (on your own site or other recipe sites.) Just post the link and use the #PieWeek hashtag. I'll be featuring some of the links throughout the week.)
Enjoy, my friends.
Here's the printable. (Double checked for accuracy.)
Recipe: Pumpkin Cream Pie
Prep Time: 2 Hours
|
Cook Time: 20 Minutes
|
Difficulty: Easy
|
Servings: 8
Print Recipe
3"x5" Cards
4"x6" Cards
Full Page
[image error]
');
Ingredients
FOR THE CRUST:1-½ package Graham Crackers (about 15 Cookie Sheets)½ cups Powdered Sugar1 stick Butter, Melted FOR THE FILLING:1 box (3 Oz. Box) Vanilla Pudding (Cook And Serve Variety)1 cup Half-and-half½ cups Heavy Cream Pinch Of Cinnamon Pinch Of Nutmeg Pinch Of Ground Cloves2 Tablespoons Whiskey (optional)½ cups (plus 3 Tablespoons) Pumpkin Puree½ cups (additional) Heavy Cream2 Tablespoons Brown Sugar Extra Graham Cracker Crumbs, For Garnish Preparation Instructions
Preheat oven to 300 degrees.
Grind graham crackers in a food processor (or, if you don't have a food processor, place them in a large ziploc and pound 'em with a rolling pin.) Add powdered sugar and melted butter and process until totally combined. Press into the bottom and sides of a pie pan until nice and firm. Bake for 8 to 10 minutes, or until warm and "set." Remove from oven and allow crust to cool completely.
In a medium saucepan, mix dry pudding mix with half-and-half and cream. Add spices. Bring to a boil over medium heat, stirring constantly, until mixture is bubbly and thick. Remove from heat and stir in whiskey, if using. Add pumpkin and stir to combine. Place lid on pot and set aside to cool. When cool enough, place pot in the fridge to cool completely.
When mixture is cool, remove from the fridge. In a mixing bowl, add 1/2 cup heavy cream and brown sugar. Beat until very light and fluffy. Fold in pumpkin cream mixture until combined. Pour into cooled crust.
Cover and refrigerate for a couple of hours or overnight. Serve with graham crackers crumbled on top.

November 15, 2010
Dreamy Apple Pie
 It's Pie Week here on PW Cooks, and I'll be posting a new pie recipe every day for the next five days. I'd better make friends with my Stairmaster, and fast.
It'll be difficult to reestablish the relationship. It's been years since I acknowledged its presence.
I'm starting Pie Week with this utterly decadent apple pie, made ultra rich and dreamy with the addition of cream and all sorts of sugary, naughty goodness. Try it for Thanksgiving this year, and be sure to serve it with a big dollop of hard sauce, which we made here yesterday.
Hard sauce on warm apple pie could cure the world's ills, let me tell you.
THE PIE CRUST
As any of you know who've hung around this godforsaken place (or used my cookbook) for any length of time, for years I've used a no-fail (and so flaky you can't believe it) pie crust that was shared with me by a woman named Sylvia. And I firmly believe that when Sylvia appears before her maker one day, he will place his hand on her head and say "Well done, my child. Well done." For Sylvia's pie crust recipe has made its mark on many a family's Thanksgiving table.
For the printable recipe for the pie crust, click here:
 I've gotten a little lazy through the years, especially when I have a bunch of other cooking going on, and often whip up the pie crust in the food processor. Here's the flour and shortening.
 I do about thirty very quick pulses. I don't want to just kill this stuff and process it to death; the quality of the crust would be affected. Just go until the mixture resembles coarse crumbs. Ideally, you'd do this with a pastry blender to avoid overdoing it.
 Next, you add a little ice water…
 And a little vinegar.
 And a beaten egg.
 Stir it together gently, just long enough for the mixture to come together.
 Next, split the dough in half, form each half into a rough ball, then place each ball into a separate ziploc bag. Slightly flatten each ball, seal the bags, then place 'em into the freezer until you need them. (If you're using the pie dough right away, you still need to freeze it for a good 20 to 30 minutes, so it'll be firm enough to roll out and work with. (And this also somehow improves the flaky nature of the crust.)
THE PIE
 When you're ready to make one of the best apple pies in the world, peel three good-sized Granny Smith apples. Try to keep the peel in one long spiral. Pretend if it breaks, you're a complete dork. If it doesn't break, you'll be voted homecoming queen.
 Sorry. Didn't mean to project my issues onto this lovely recipe.
I can't promise it won't happen again.
WHY DIDN'T YOU LOVE ME BACK, TEDDY? IS IT BECAUSE I WASN'T TAN LIKE YOU?
Sorry again. 1984.
It haunts me so.
 Core the apples.
 Slice the apples into about 16 slices per apple (a few more if you like the apples nice and thin, which I do) and throw them into a bowl.
 Okay, now we're going to mix up the creamy dream concoction for the apples. Mix together white and brown sugar in a bowl…
 Pour in heavy cream.
You heard me.
 Add vanilla…
 A teeny bit of cinnamon…
 And flour, to give it all a little cohesion.
 Mix it together and pour it over the apples. Stir the apples and set 'em aside.
Note: Do NOT lick the spoon after mixing the apples. One thing will lead to another and soon your head will be in the bowl of apples, there'll be one apple slice left, and you'll have cream and sugar all over your face.
And you won't have a pie.
Wouldn't that be embarrassing?
 Now it's time to roll out the pie dough. Flour the surface and the rolling pin.
 Then roll it out into a large circle.
I make it sound easy, but I'm not going to pretend that it's just slap-slap, roll-roll, perfect circle every time, particularly with this pie dough. It takes finessing, fiddling, and patience.
Here's how I roll it out:
Take the disc of dough out of the plastic bag.
Put it on the floured surface.
Sprinkle flour on top.
Roll a couple of times. A little dough will stick to the pin.
Flour again. Roll a couple of times. The dough will crack and freak out.
Push edges in with the palms of your hands, pushing them in to form a perfect circle.
Flour again. Roll a couple of times. Repeat the palm-of-hand thing to get the dough back into a perfect circle.
Consider picking up pie at your neighborhood bakery.
Remember that you live in the middle of the country.
Remember that there is no neighborhood bakery.
Keep flouring and rolling until it's one big circle.
Use a large offset spatula to run underneath the dough and loosen it from the surface.
Carefully transfer to a pie pan. Trim off the excess around the edges, leaving enough dough for you to do something with the edge.
Go take a nap. I'm exhausted.
 Are you impressed at my meticulous and perfectionist pie edge?
No?
Then you're smart.
Look, I have other nice qualities. Perfect pie crust edges are not among them.
 Pour in the apples.
 Then, back to the food processor, add butter, flour, brown sugar, pecans, and a dash of salt.
 Process it several times, until the mixture comes together in large clumps.
 Pour the crumb topping over the top of the pie, evenly distributing it on the surface.
 Then, what I like to do is make a little foil rim and fasten it around the edge of the pie crust (I do two halves and hook 'em together.) This will keep the edge from getting too brown too fast; we want the pie to bake long enough for the apples (and the sauce) to do its thing.
Bake it at 375 degrees for one hour, more if it needs it.
 About halfway through, I checked the pie and saw that the topping was already nice and golden. I didn't want it getting too brown…
 So I just placed a flat piece of foil over the top for the rest of the baking time.
 For the last ten or fifteen minutes of baking, I removed all of the foil so it would all be nice and golden.
Just bake until the pie is ultra bubbly. Remove from the oven and let it cool on the counter.
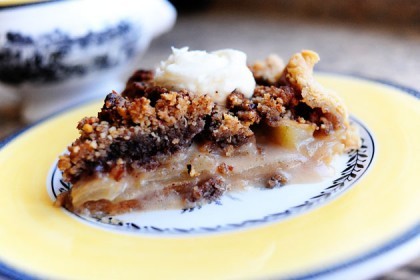
 To serve, grab the hard sauce we made yesterday.
Here's the recipe in case you missed it:
 Dish up a piece of warm pie. If you made it the night before, nuke it for ten to fifteen seconds or so.
 Plop some hard sauce on top.
 Utterly divine.
But wait.
Watch what happens.
 Hard sauce, I love you.
 Enjoy this, guys!
New pie recipe tomorrow.
Love,
P-Dub
Here's the handy printable.
Recipe: Dreamy Apple Pie
Prep Time: 20 Minutes
|
Cook Time: 1 Hour
|
Difficulty: Easy
|
Servings: 12
Print Recipe
3"x5" Cards
4"x6" Cards
Full Page
[image error]
');
Ingredients
1 whole Unbaked Pie Crust Filling3 whole Large Granny Smith Apples, Peeled, Cored, And Sliced Thin½ cups Brown Sugar½ cups Sugar1 Tablespoon All-purpose Flour2 teaspoons Vanilla Extract⅛ teaspoons Cinnamon Topping7 Tablespoons Butter¾ cups All-purpose Flour½ cups Brown Sugar¼ cups Pecans (more To Taste) Dash Of Salt Preparation Instructions
Preheat oven to 375 degrees.
Roll out pie dough and place it in a pie pan. Decorate the edges as desired.
Add apple slices to a large bowl. In a separate bowl, mix together 1/2 cup brown sugar, 1/2 cup sugar, 1 tablespoon flour, vanilla, and cinnamon. Pour over apples. Pour apples into pie shell.
In the bowl of a food processor (or you can mix by hand) combine butter, flour, sugar, pecans (chop if you're not using a food processor), and salt. Mix until everything comes together in clumps. Pour topping over apples.
Attach foil to the edges and lay a piece of flat foil loosely over the top of the pie. Place pie pan on top of a rimmed cookie sheet and bake for one hour. At the end, remove foil and allow to finish baking and browning. Can bake for up to 15 or 20 minutes more if necessary.
Remove from oven when pie is bubbly and golden brown.
Serve warm with hard sauce, whipped cream, or ice cream.

November 14, 2010
Hard Sauce
 I'm posting this recipe in preparation for the pie recipe I'll be posting Monday morning–a pie that must go on your Thanksgiving table.
Have you ever eaten hard sauce? If so, your eyes are closing in bliss and you're probably licking your lips right now. It's okay! Go ahead. I completely understand.
If you haven't eaten hard sauce…oh, my friend. Your life is about to change.
Hard sauce is a soft, spoonable topping meant to be plopped onto the top of warm (and the "warm" part is important) desserts like pies, pudding, cobblers, and crisps. It has a butter base, so when it hits the warm dessert, it takes its own sweet time melting and running down the sides of whatever the dessert happens to be. It's absolutely out of this world.
This decadent concoction is usually seen around the holidays for one important reason: it contains booze. Glorious, flavorful booze. I usually go with whiskey–makes me feel tough–but you can use brandy, rum, or whatever your poison is. I tend to push the envelope and add as much as I can without drastically altering the consistency of the hard sauce, because I want to actually taste the booze; and since the hard sauce is competing with the pie (or whatever dessert it's adorning), it takes a little bit of a strong hard sauce for the booze to stand out.
Here's how you make it. It's the easiest thing in the world.
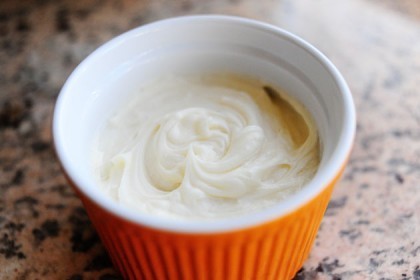
 Beat a stick of softened butter. Just barely softened; not room temperature and mushy.
 Add the powdered sugar and mix, scraping the sides of the bowl at least a couple of times during the process. You want it all to be totally mixed together evenly. I used the paddle attachment on my mixer and it seems to work the best.
 Finally, add the booze and mix until fluffy.
Spoon it into a dish and set it aside if you're going to use it that day, or refrigerate it until you need it! Covered in plastic wrap, hard sauce will keep in the fridge for days and probably weeks. Just be sure to set it out on the counter at least a couple of hours before you'll need it. You want it to be soft and spoonable. (Though if the dessert is warm enough, you can scoop the cold, solid stuff right on the top and it'll be fine.)
Serve over warm pies, warm puddings, warm cobblers, warm crisps. Warm, warm, warm. Warm is the key.
Here's the printable. See you Monday morning for the pie!
Recipe: Hard Sauce
Prep Time: 5 Minutes
|
Cook Time:
|
Difficulty: Easy
|
Servings: 8
Print Recipe
3"x5" Cards
4"x6" Cards
Full Page
[image error]
');
Ingredients
1 stick (1/2 Cup) Softened (not Room Temperature) Butter1-½ cup Powdered Sugar1 Tablespoon Whiskey1 teaspoon (additional) Whiskey Preparation Instructions
Beat butter in mixer with paddle attachment until fluffy. Add powdered sugar gradually until incorporated, scraping sides of the bowl twice during the process. Add whiskey and beat again, scraping the bowl to make sure everything gets mixed together.
Spoon into a bowl and serve, or keep in the fridge (it will last for days covered in plastic wrap) until you need it. NOTE: The hard sauce will harden in the fridge, so be sure to remove it at least a couple of hours before you want to serve. Hard sauce should be smooth and easily spooned onto desserts.
Serve on warm pie. Yum!

November 12, 2010
For Thanksgiving (Winners Announced!)
WINNERS: The winners of the Le Creuset French ovens are:
#28497 RobertRinFL: "Heading up to GA from FL to be with my lovely wife's family!"
#16393 Vickie: "I will be helping cook for my family , and cleaning up and cleaning up some more. Just being with loved ones makes it such a wonderful day…."
#7212 Marissa: "We really are going over the river and through the woods to my grandmother-in-law's house, then down the mountain to my parents' house two days later. Two dinners, the second of which I am determined to make many of your Thanksgiving dishes."
Congrats, winners! Contact prizes@thepioneerwoman.com to claim your new pots. Hope you'll have them in time for Thanksgiving!
Today…
Because it's Friday…
Because I have three Thanksgiving side dishes in the hopper and am still editing photos…
Because my kitchen is inexcusable…
And because I love ya…
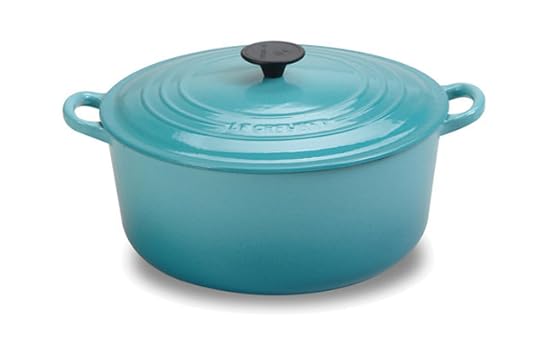
I'm giving away three (3) Le Creuset 7 1/2-Quart Round French Ovens, in this lovely "Caribbean" color.
I love this color.
TO ENTER
To enter the contest, just answer the following question in the Comments section of this post:
What are you doing on Thanksgiving Day?
Such an obvious question, I know! But let's have it: are you hosting everyone and Uncle Festus at your place? Are you traveling over the river and through the woods to Grandmother's house? Are you staying home and playing Atari?
Yes, I realize I just dated myself.
Just shout out your Thanksgiving Day plans and you're automatically entered to win the Le Creuset.
THE RULES
One entry per person, please. Strictly enforced with a wooden spoon, a whisk, and can opener. (Wait…what?)
*Note* Sometimes comments will not be visible immediately. Please give it a little time; it'll show up eventually!
No entries after midnight Friday
Winners will be chosen randomly and announced Saturday.
Good luck!
____________________________________
Contest sponsored by Pioneer Woman.

For Thanksgiving
Today…
Because it's Friday…
Because I have three Thanksgiving side dishes in the hopper and am still editing photos…
Because my kitchen is inexcusable…
And because I love ya…
I'm giving away three (3) Le Creuset 7 1/2-Quart Round French Ovens, in this lovely "Caribbean" color.
I love this color.
TO ENTER
To enter the contest, just answer the following question in the Comments section of this post:
What are you doing on Thanksgiving Day?
Such an obvious question, I know! But let's have it: are you hosting everyone and Uncle Festus at your place? Are you traveling over the river and through the woods to Grandmother's house? Are you staying home and playing Atari?
Yes, I realize I just dated myself.
Just shout out your Thanksgiving Day plans and you're automatically entered to win the Le Creuset.
THE RULES
One entry per person, please. Strictly enforced with a wooden spoon, a whisk, and can opener. (Wait…what?)
*Note* Sometimes comments will not be visible immediately. Please give it a little time; it'll show up eventually!
No entries after midnight Friday
Winners will be chosen randomly and announced Saturday.
Good luck!
____________________________________
Contest sponsored by Pioneer Woman.
Ree Drummond's Blog

- Ree Drummond's profile
- 2032 followers

