
Ree Drummond's Blog, page 88
October 6, 2010
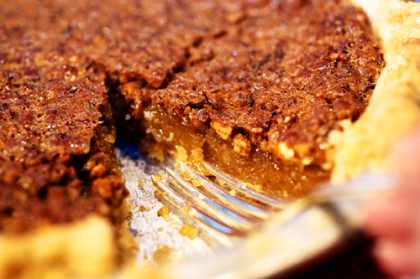
The Pie That'll Make You Cry
 …Is this recently perfected Pecan Pie, which, one bite in, changed my life for the better.
First: Pecan Pie. There is nothing like it on earth. If you've never tried it—either because it's not common in your area or you've written it off as some freaky-looking nutty concoction—you must, must, mustmustmustmust try it this year. Unless you're deathly allergic to tree nuts. And in that case, please don't try it. (I always have to throw that in for my poor little sister Betsy, whose head swells if she even looks in the direction of a pecan.)
I had to make several pecan pies recently and took the opportunity to tweak my ingredient amounts just slightly and experiment. The result was the most delectable, flavorful pecan pie on Earth.
Well, at least the tiny parcel of Earth on which my home sits. Marlboro Man, who has never been a pecan pie fan, took one bite and said "Never stop making this."
I love it when he says that.
One of the things I've always done with my pecan pies is finely chop the pecans. This could be considered a sacrilege to those who love the appearance of toasted pecan halves all over the top. But pecan halves bug me! When you cut into the pie, it's hard to get nice, even, neat pieces because the big, bulky pecan halves get pushed into the perfect filling. Not that neatness is a priority when trying to dive into a piece of pie, but I've found that chopping the pecans makes such a difference and results in a nice, crunchy pie with flavor that'll rock your world.
Here's the printable recipe:
Recipe: Pioneer Woman's Pecan Pie
Prep Time: 15 Minutes
|
Cook Time: 50 Minutes
|
Difficulty: Easy
|
Servings: 12
Print Recipe
3"x5" Cards
4"x6" Cards
Full Page
Ingredients
1 whole Unbaked Pie Crust (I Use "sylvia's Perfect Pie Crust" Recipe1 cup White Sugar3 Tablespoons Brown Sugar½ teaspoons Salt1 cup Corn Syrup¾ teaspoons Vanilla⅓ cups Melted Butter (salted)3 whole Eggs Beaten1 cup (heaping) Chopped Pecans Preparation Instructions
First, whip up your pie crust using "Sylvia's Perfect Pie Crust" found on Tasty Kitchen.
Next, mix sugar, brown sugar, salt, corn syrup, butter, eggs, and vanilla together in a bowl.
Pour chopped pecans in the bottom of the unbaked pie shell.
Pour syrup mixture over the top. Cover top and crust lightly/gently with foil. Bake pie at 350º for 30 minutes. Remove foil, then continue baking for 20 minutes, being careful not to burn the crust or pecans.
Allow to cool for several hours or overnight. Serve in thin slivers.


October 5, 2010
Three Cheese-Stuffed Shells with Meaty Tomato Sauce
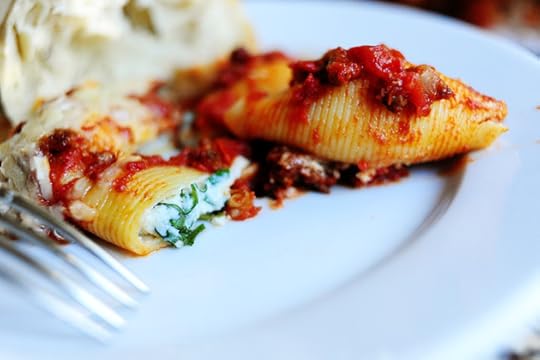 This is yummy.
This is simple.
This was dinner last night.
The kids loved it. Marlboro Man loved it. Amen.
Everyone loves stuffed pasta shells—even people who don't think they like stuffed pasta shells. It's just that they don't know they love them yet. But they will. Mark my words…they will!
Pasta shells will triumph!
Sorry.
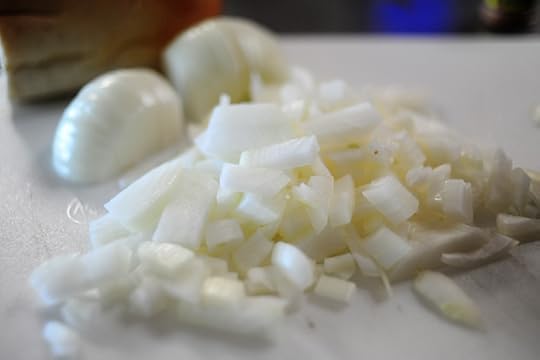
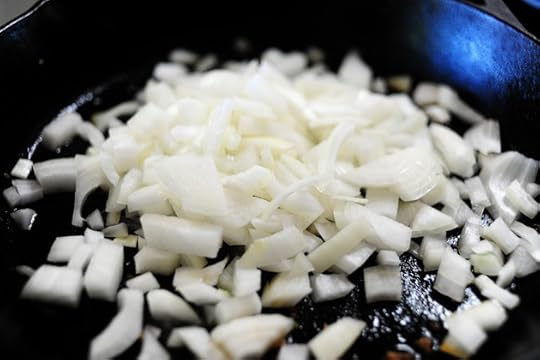
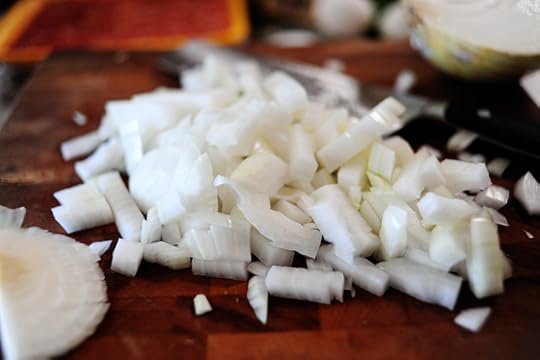 Dice up an onion.
 Some garlic, too.
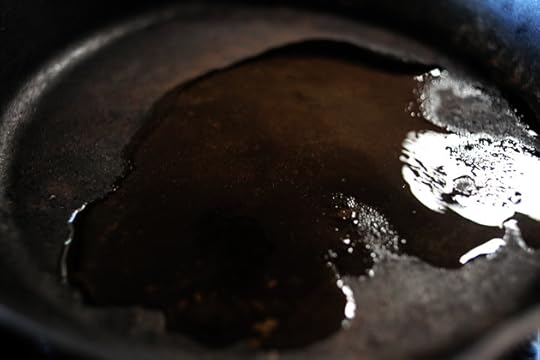 Then heat up some oil in a large skillet.
It's getting cold here, by the way!
Translation: I've never been happier in my life.
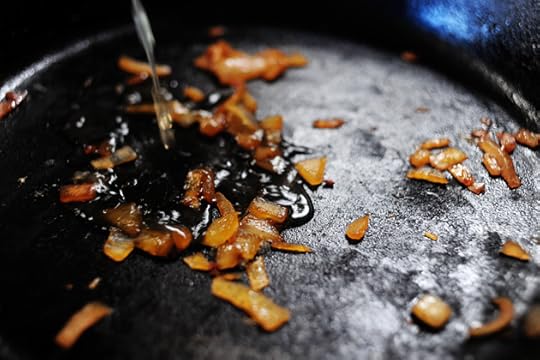
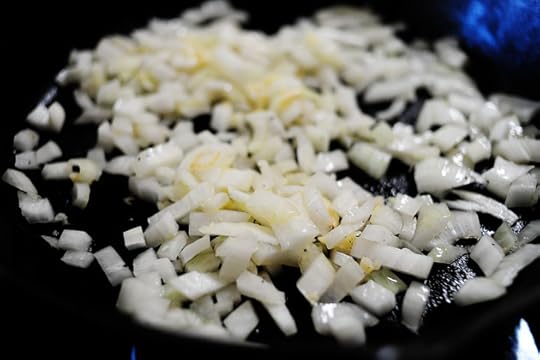 Throw in the onion and garlic…
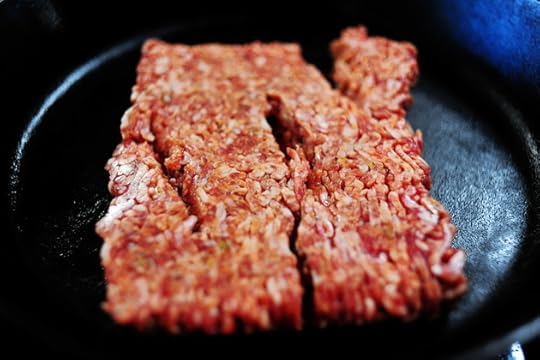
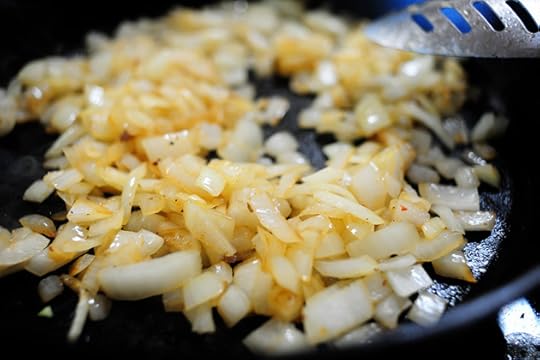
 Then throw in the Italian sausage.
You could use regular breakfast sausage.
Or hamburger.
Or a mixture of both.
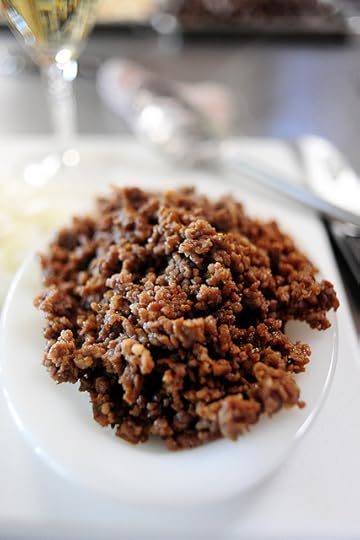
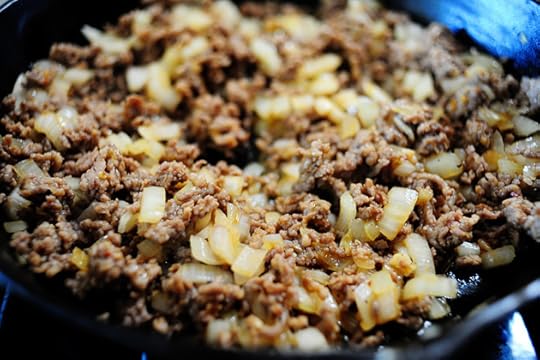 Stir it around and crumble it while it browns.
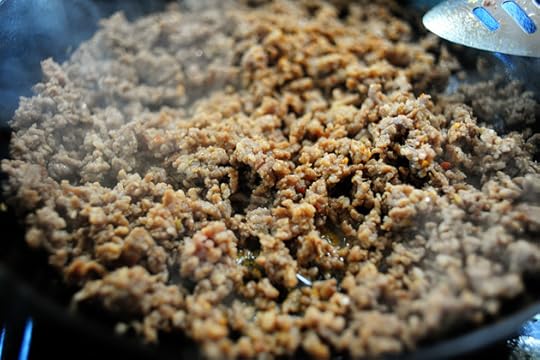
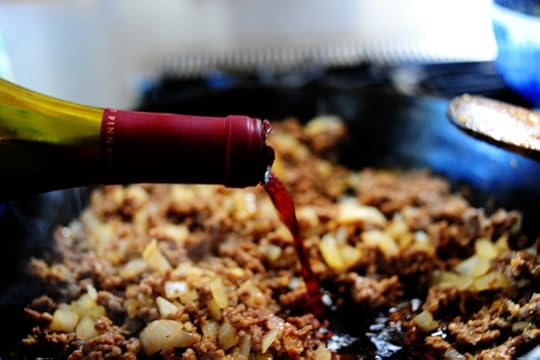 When it's nice and brown, pour in some red wine.
 Let the liquid bubble and cook for a couple of minutes…
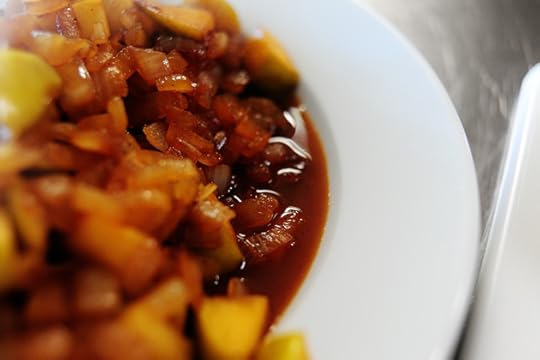
 Then pour in the crushed tomatoes.
(You can also just use plain tomato sauce.)
Stir it around, add salt, pepper, and sugar. Then cover the skillet and cook the sauce for 30 to 45 minutes, stirring occasionally.
 While the sauce is cooking, throw jumbo pasta shells in boiling water. Just cook 'em about half the time—you want them al dente to the max! When they're done, drain them and rinse them with cool water. Set them aside.
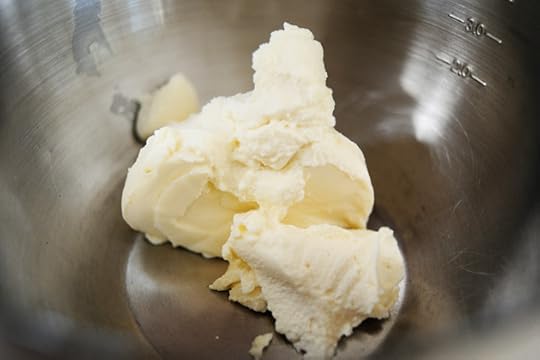 Throw the ricotta into a large bowl…
 Then throw in the egg.
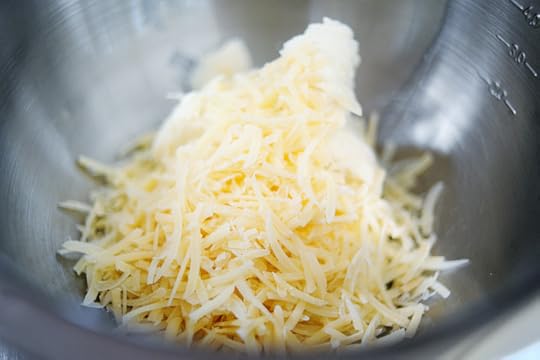 Throw in a bunch of freshly grated Parmesan.
 And some grated Romano.
 Stir it together…
 Add plenty of salt and pepper…
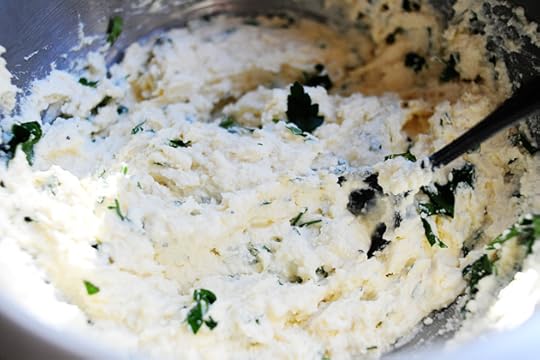 And throw in some herbs. I used basil and parsley…mostly basil.
I say 'throw' a lot.
Sorry. Trying to quit.
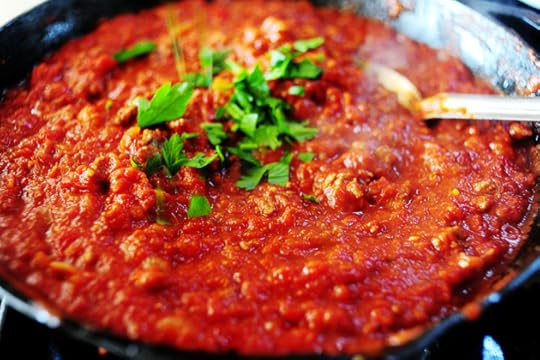 When the sauce has finished cooking, throw in a little parsley and basil and stir.
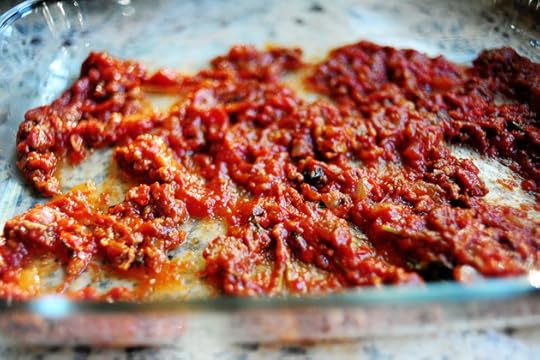 Spread a little sauce in the bottom of a baking dish.
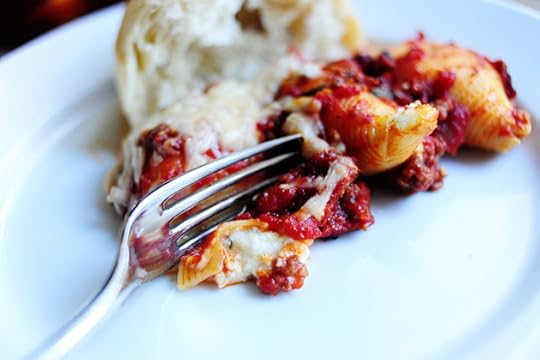
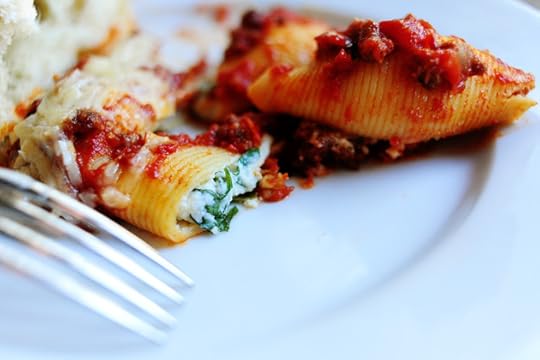
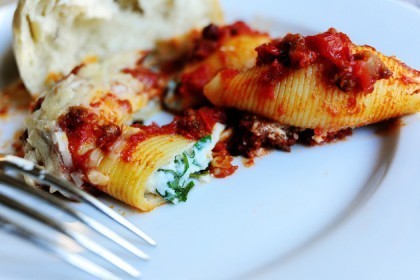
 Stuff the half-cooked pasta shells with the cheese mixture. Don't overstuff; you want the shells to be able to close, and besides: picky men and kids will want you to go easy on the cheese mixture.
I speak from experience here.
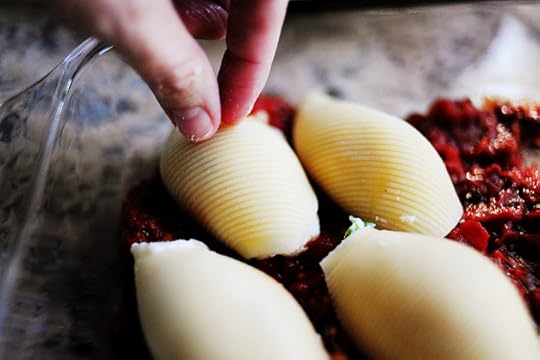 Then lay the stuffed shells face down onto the sauce.
 Yum. Already.
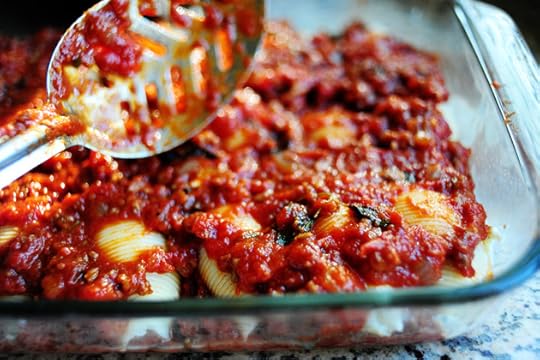 Spoon sauce over the top of the shells.
 Sprinkle the top with more Parmesan, OR—if you have it—thin slices of fresh mozzarella.
The latter is scrumptious.
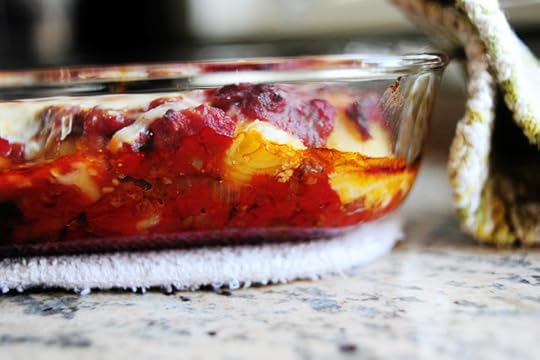 Bake it for 20 to 25 minutes until hot and bubbly.
 Serve it up with crusty bread…
 (Your kitchen smells delicious right now.)
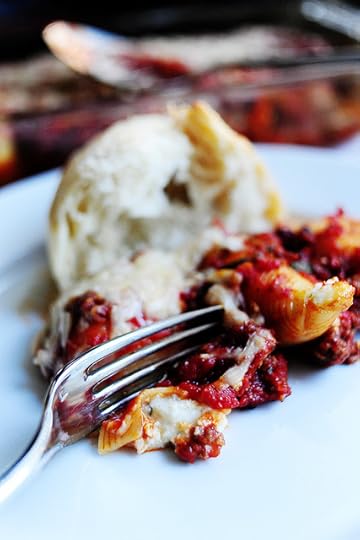
 The herbs in the cheese are divine. Go heavy on the basil, light on the parsley.
You'll love this! A pretty easy, throw-together meal. Takes a little while to cook, but the ingredients and assemble are totally uncomplicated.
Enjoy, my friends!
Here's the handy printable:
Recipe: Three Cheese-Stuffed Shells with Meaty Tomato Sauce
Prep Time: 15 Minutes
|
Cook Time: 1 Hour30 Minutes
|
Difficulty: Easy
|
Servings: 8
Print Recipe
3"x5" Cards
4"x6" Cards
Full Page
Ingredients
8 ounces, weight Jumbo Pasta Shells30 ounces, weight Whole Milk Ricotta Cheese8 ounces, weight Parmesan Cheese, Grated, Divided½ cups Grated Romano Cheese1 whole Egg12 leaves Basil, Chiffonade2 Tablespoons Minced Parsley Salt And Pepper, to taste2 Tablespoons Olive Oil½ whole Medium Onion, Chopped5 cloves Garlic, Minced½ pounds Italian Sausage½ cups Red Wine1 whole 28 Ounce Can Crushed Tomatoes1 whole 15-ounce Can Crushed Tomatoes2 Tablespoons Sugar½ teaspoons Salt2 Tablespoons Minced Parsley Preparation Instructions
Cook pasta shells for half the cooking time; make sure not to overcook. Drain and rinse in cool water. Set aside.
Heat olive oil in large skillet or dutch oven over medium-high heat. Add onions and garlic and saute for a minute or two. Add Italian sausage and brown, breaking it up into small pieces as it cooks. Pour in red wine and let it cook for a minute or two.
Pour in cans of crushed tomatoes and stir. Add sugar and salt. Bring to a boil, then reduce heat to low. Cover and cook 30 to 45 minutes, stirring occasionally. Check for seasonings; can add crushed red peppers if you like a little heat.
In a separate bowl, mix ricotta, half the Parmesan, Romano, egg, salt and pepper, basil, and 2 tablespoons parsley. Stir until combined.
To assemble, coat the bottom of a baking dish with sauce. Fill each half-cooked shell with the cheese mixture. Place face down on the sauce. Repeat with shells until cheese mixture is gone. Top shells with remaining sauce. Sprinkle on extra Parmesan.
Bake at 350 degrees for 25 minutes, or until hot and bubbly.
Serve with crusty French bread.

October 4, 2010
Cornbread Dressing with Sausage and Apples
 It's October 4, and you know what that means: It's time for Thanksgiving recipes!
Wait…huh?
Already?
So soon?
Let me explain. First of all, for those of you who might not know, Thanksgiving is celebrated in Canada in October. It'll be happening next week, in fact! Second, I want to start sharing Thanksgiving recipes now, so those of you who like to start planning early can entertain some new options. Third, I'm going to be sharing more Thanksgiving recipes than usual this year and need a head start.
Fourth…I like to eat. I see no reason why I shouldn't be able to eat turkey and dressing the entire month of October.
Let's start with this dressing recipe, made with a mix of breads and a bunch of other scrumptious ingredients. Stuff the bird with it if that's your poison, or bake it in a separate dish. Adjust the amount of liquid to suit your fancy, too. I tend to like my dressing a little drier than average; soggy, saturated dressing isn't my favorite thing. But no matter how you like it, you'll love this recipe.
I'm eating it right now as I type this. If I get a cornbread crumb on your screen, please forgive me.
Just flick it off.
 First thing you need to do is make a batch of cornbread. (Scroll down to the second post on this page or click on the link below for the cornbread recipe.) You can make this the night before—even a couple of nights before.
Skillet Cornbread Recipe
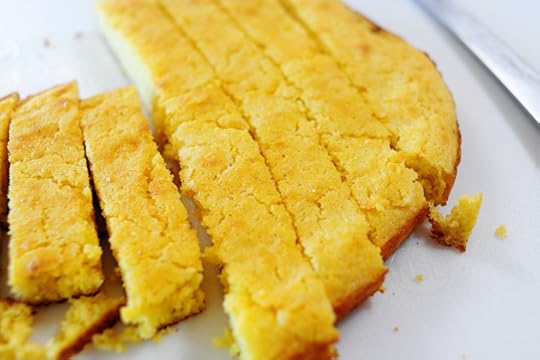 Cut the cornbread into strips, then into cubes.
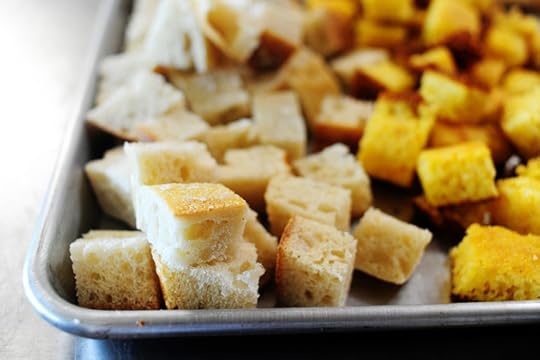
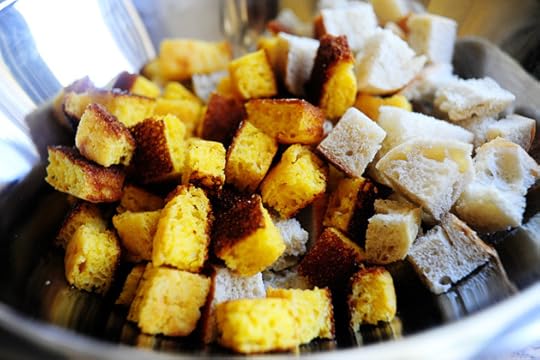
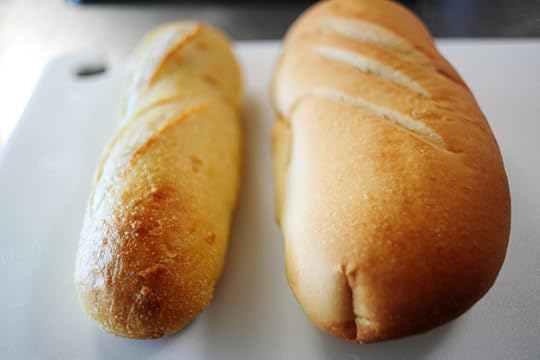 Grab a loaf of artisan or sourdough bread (you want it to be really crusty and tough) and a loaf of regular French bread. Cut them into cubes, too, and lay all of the cubed bread on a large cookie sheet (or two) and let it sit out several hours or overnight. The bread needs to dry a bit.
 Here's the sourdough…
 The cornbread…
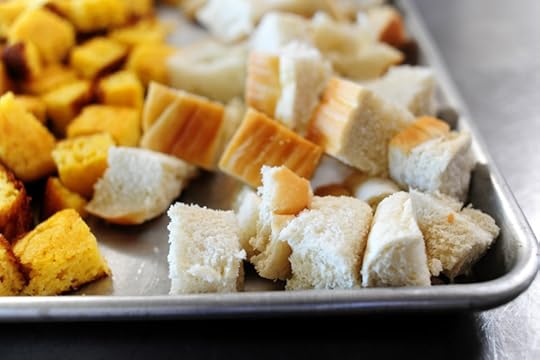 And the French, which, in this case, is essentially white bread.
When you're ready to make the dressing, preheat the oven to 500 degrees. Hot!
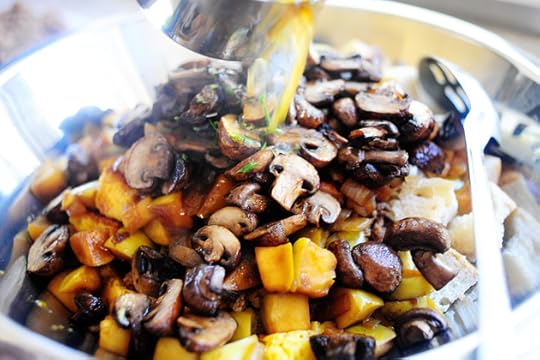
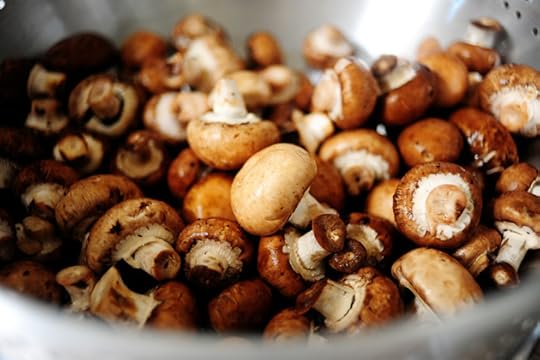 Grab 32 ounces of mushrooms. I was able to get some crimini mushrooms (sometimes called "Baby Bellas") but you can use regular white mushrooms if you want. Both are delicious!
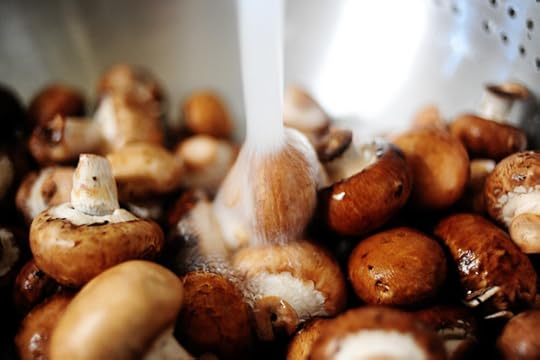 Rinse the mushrooms thoroughly under cool water…
 Then pat them dry with a paper towel.
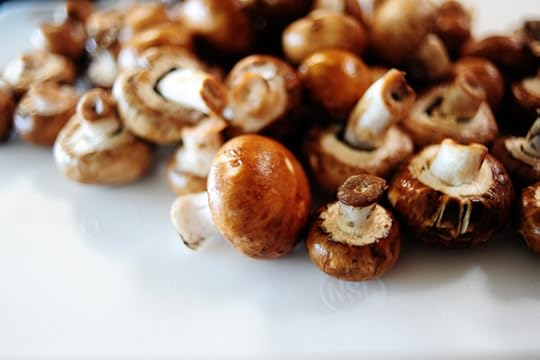
 Cut them in half and throw them into a big bowl…
 Then drizzle in a bunch of canola oil.
 Sprinkle in a little kosher salt, give 'em a good toss, then split the mushrooms between two sheet pans and roast them in the top half of the oven for about 20 to 25 minutes.
 Give them a stir/shake halfway through the roasting process.
 Then remove them from the oven when they're nice and deep in color. Just let them stay on the pan until you need them.
 Next up: Italian sausage! I love the stuff that's not in the casing.
 Throw it into a heavy skillet…
 Break it up with a spoon…
 And cook it over medium-high heat until it's nice and brown.
 Remove it from the skillet and keep it on a plate until later.
 Next, dice up some onions. Keep the chunks pretty big.
 Throw them into the same skillet you used to cook the sausage. Flavor, baby!
 Stir the onions and cook them until they get nice and golden, around five minutes or so.
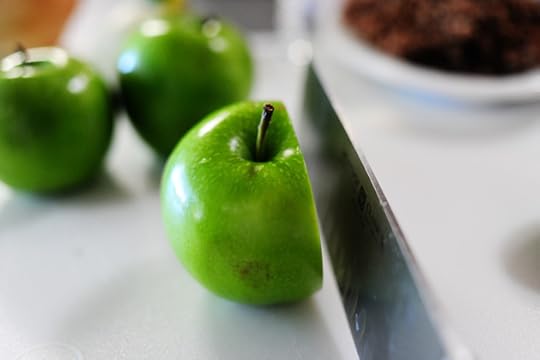 While the onions are cooking, dice up a few Granny Smith apples. I just slice the apples around the core into four pieces each.
 Lay them all on a cutting board cut side down…
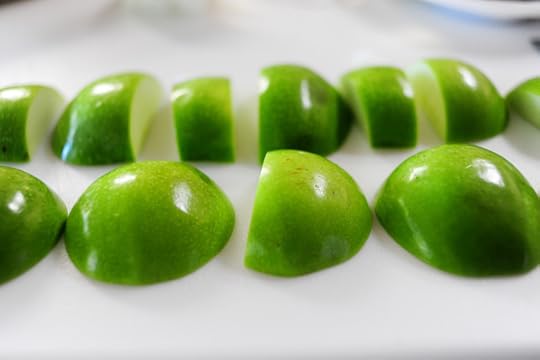
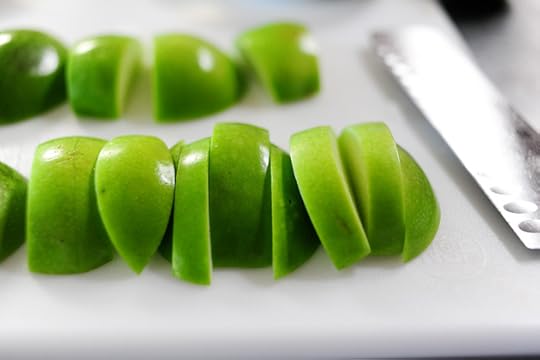 Cut them into slices, then turn them in the other direction to dice them.
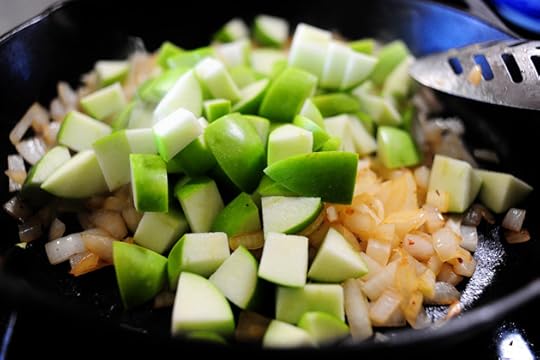 Crank the heat up to high, then throw them right into the skillet with the onions.
Take a moment. Inhale.
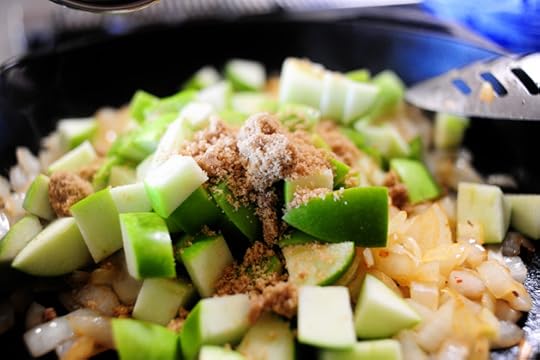 I want the onions to caramelize in a short amount of time, so I'm hastening the process with some brown sugar. It counteracts the tartness of the Granny Smiths, too.
 Flatten the apples and onions in the pan (so that as much surface area as possible is touching the bottom of the pan) and cook them on high heat for three to five minutes.
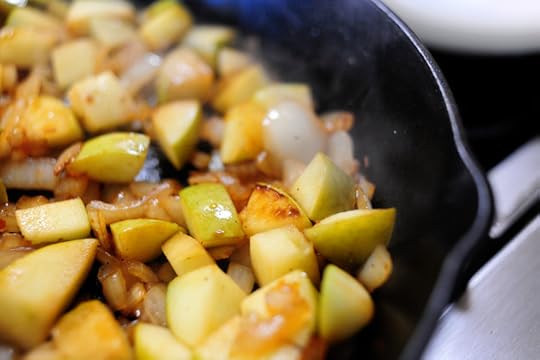 Hello, gorgeous apples. I love you and I want you in my life.
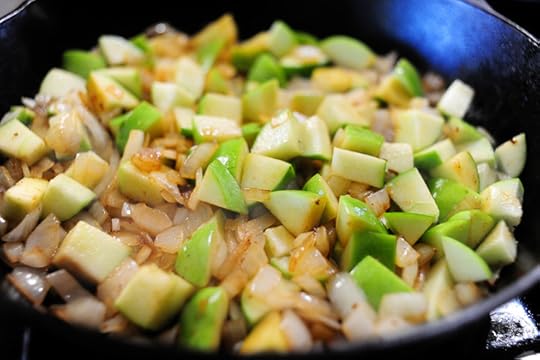
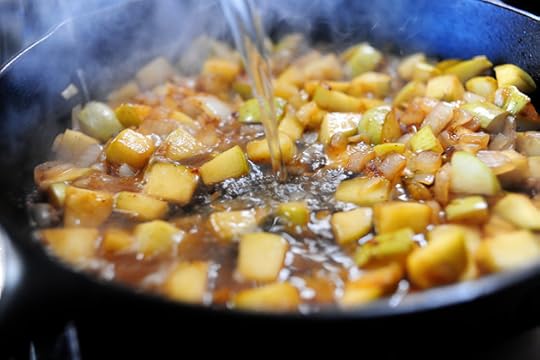 After they're nice and browned, turn down the heat and pour in a good cup of white wine. This'll deglaze the pan and help create a yummy sauce that'll add a lot of flavor to the dressing.
 Let it bubble and cook for a couple of minutes.
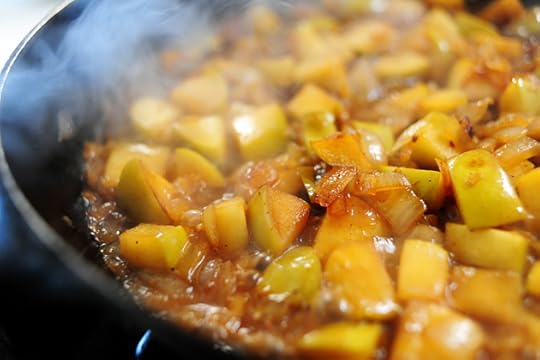 Poifect. Yum.
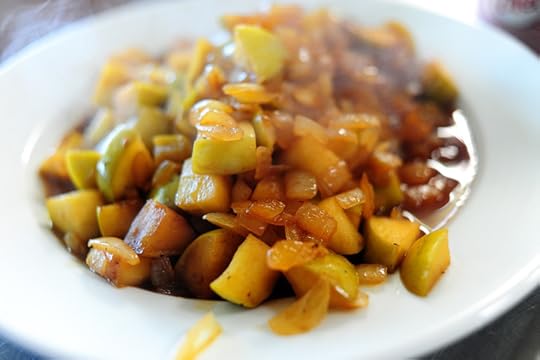 Pour the apples and onions onto a bowl and set it aside for a bit.
 And remember that liquid I told you about? Right there 'tis, my darling.
 Next, return the skillet to the stove and pour in the chicken broth.
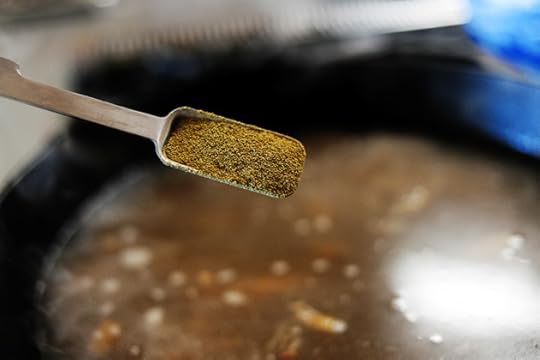 Add ground thyme…
 And some beautiful, wonderful turmeric.
I don't want to live in a world without turmeric, so if some kind of blight destroys the plant from which it's derived, just put me out of my misery.
 For turmeric is good. Turmeric is so, so good.
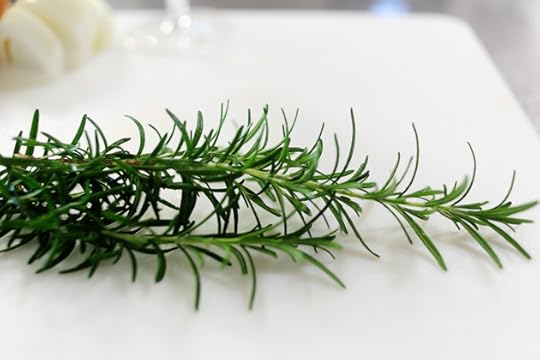 Next up: Rosemary, otherwise known as the only thing left in my herb garden.
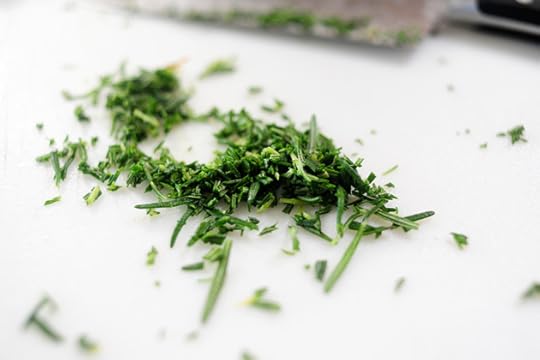 A little goes a long, long way, so go easy.
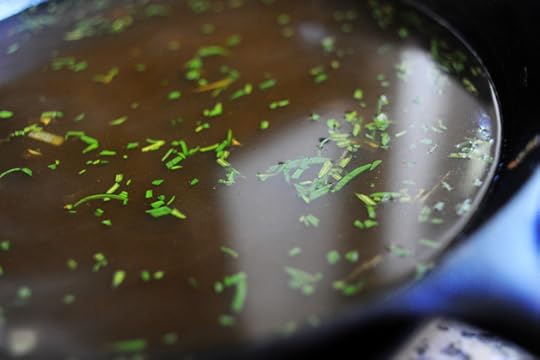 Add a little salt and pepper, stir it up, and set it aside.
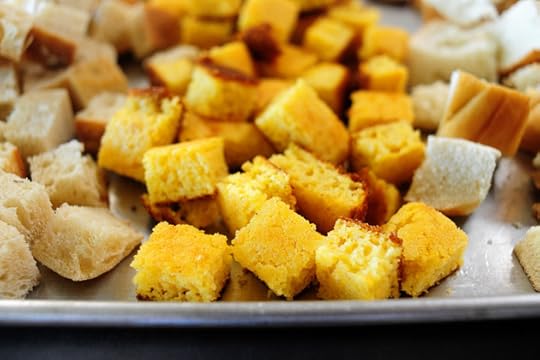
 Now it's time to assemble! Throw the bread cubes into a big bowl…
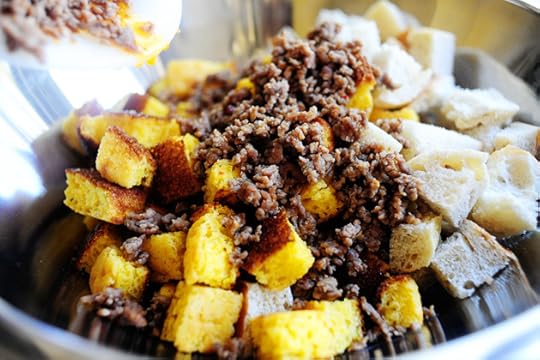 Followed by the sausage…
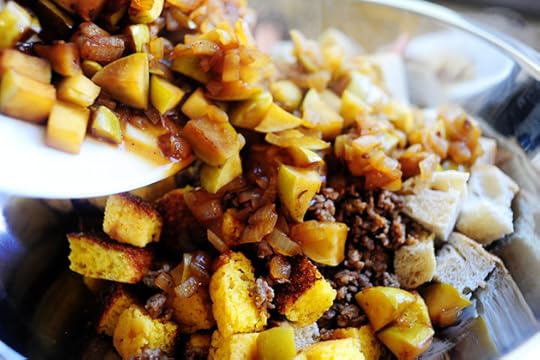 Apples and onions, along with the yummy juice…
 And shrooms.
 Next, drizzle in some of the broth mixture. You'll want to add in about half at first, tossing the dressing around to coat evenly, then add in more gradually until it reaches the moisture content you like.
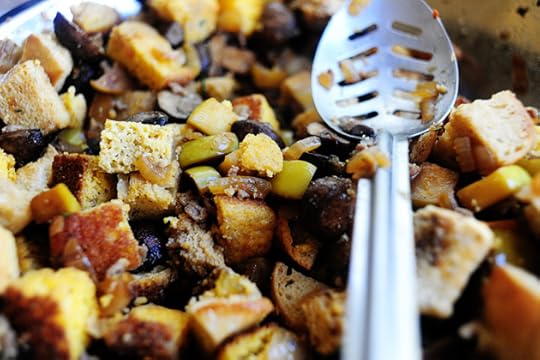 I wound up using about 3/4 of the broth mixture. You can use all of it or even more. Make it your own! And be sure to taste the dressing and add in a little salt and pepper.
 Finally, chop up some parsley and throw it in.
 I decided to bake mine in the iron skillet to avoid dirtying another dish…and because I love the look of things baked in iron skillets.
Iron skillets should be sainted. Seriously.
They're so wonderful.
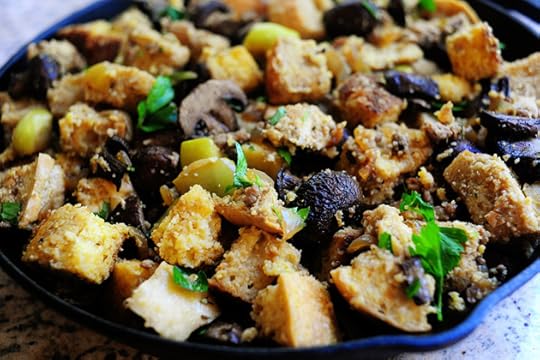
Just bake the dressing in a 375 degree oven for about 20 minutes or so, or until the top gets nice and golden.
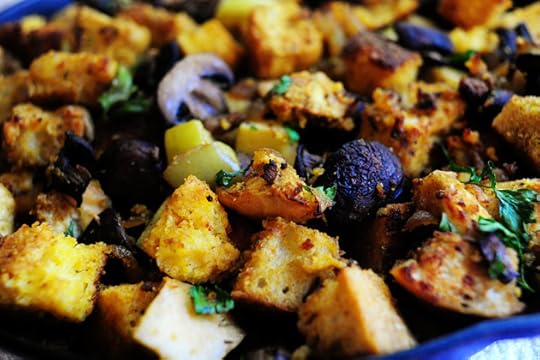
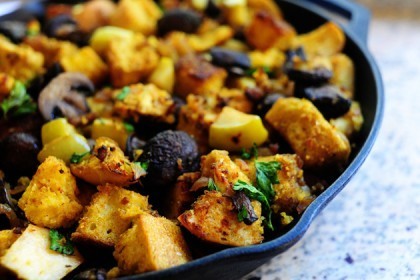
 And just look at the color! We have turmeric to thank for that.
Turmeric should be sainted, too.
You'll notice the bread cubes on top do tend to dry while baking and become a little on the crisp side. I love this, though, because the cubes underneath retain their moisture and you wind up having a nice mix of textures.
You can use this dressing/stuffing to stuff your bird, of course, if that's your preference. It's delicious baked in the turkey and winds up being much more moist than if you bake it in a separate pan. Just remember when you do stuff your bird, you need to check the temperature of the stuffing before removing the bird from the oven. It needs to reach an adequate temperature in order to be safe to eat, which can sometimes be tricky since you don't want the turkey to dry out, which is precisely why so many people prefer not to stuff their turkeys.
(But that's another story for another time.)
 Enjoy, guys! I'll share more stuffing/dressing recipes in the coming weeks.
Here's the handy printable:
Recipe: Cornbread Dressing with Sausage and Apples
Prep Time: 30 Minutes
|
Cook Time: 30 Minutes
|
Difficulty: Easy
|
Servings: 16
Print Recipe
3"x5" Cards
4"x6" Cards
Full Page
 [image error]
');
[image error]
');

Ingredients
32 ounces, weight White Button Or Crimini Mushrooms4 Tablespoons Canola Oil½ teaspoons Kosher Salt4 cups Cornbread, Cut Into 1-inch Cubes4 cups French Bread, Cut Into 1-inch Cubes4 cups Artisan/crusty Bread, Cut Into 1-inch Cubes½ pounds Italian Sausage2 cups Diced Onion5 whole Granny Smith Apples, Large Dice5 Tablespoons Brown Sugar1 cup White Wine½ teaspoons Kosher Salt32 ounces, fluid Low (very Low) Sodium Chicken Broth1 teaspoon Ground Thyme½ teaspoons Turmeric (more To Taste)2 teaspoons Rosemary, Leaves Minced½ teaspoons (additional) Kosher Salt Black Pepper To Taste Fresh Parsley, Minced Preparation Instructions
Allow diced bread to sit out on cookie sheets for several hours or overnight, until dried out.
Preheat oven to 500 degrees.
Wash mushrooms thoroughly and pat dry with paper towels. Toss in a bowl with canola oil and sprinkle with 1/2 teaspoon salt. Mushrooms will be very coated, but that's good! Divide mushrooms between two sheet pans and roast in the upper half of the oven for at least 20 minutes, stirring once halfway through roasting. Remove from oven when mushrooms are deep brown. Set aside.
In a large skillet, crumble and brown sausage over medium high heat. Remove sausage from skillet and set aside. Without cleaning the skillet, add in diced onions and brown for five minutes. Increase heat to high and add diced apples, brown sugar, and 1/2 teaspoon salt. Cook for 3 to 5 minutes, or until deep golden brown.
Decrease heat to medium and pour in wine (be careful if you're using an open flame). Stir and cook to reduce liquid by half, about two to three minutes. Pour apple/onion mixture into a bowl and set aside.
Return skillet to medium heat (again, without washing) and add thyme, turmeric, rosemary, 1/2 teaspoon salt, and pepper. Heat for a few minutes, then set aside.
Add bread to a large bowl, then add browned sausage, mushrooms, and apple/onion mixture (and juice that might have accumulated.) Next, add broth mixture gradually as you toss the ingredients, being prepared not to use all of the liquid according to your taste.
Check seasonings at the end and add in minced parsley. Pour into a large baking dish (I used an iron skillet) and bake at 375 for 20 to 25 minutes, or until golden brown on top. (Or you can stuff the turkey if you're into that kind of thing.
Delicious!

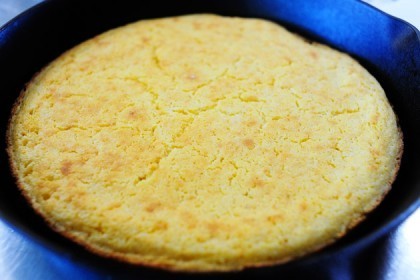
Skillet Cornbread
 This is my all-time favorite cornbread recipe, probably because it's the recipe I grew up eating. My mom had a couple of cast iron cornbread stick pans and would make individual servings that were so perfectly crisp and wonderful.
Mom? Where are those cornbread stick pans? Please bring them to my house and accidentally leave them here.
Here's the cornbread recipe:
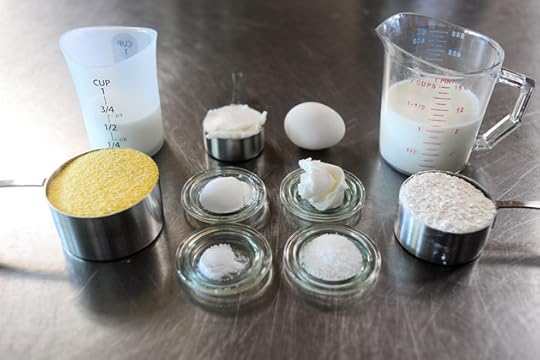 You need cornmeal, flour, shortening, salt, baking soda, baking powder, buttermilk, and milk.
If you don't have buttermilk, remember that you can add a splash of white vinegar to regular milk. Magic!
 Mix together the cornmeal, flour, salt…
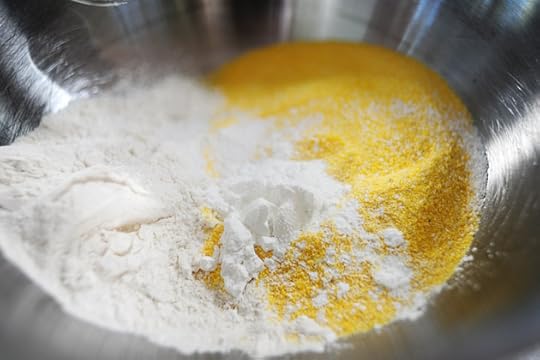 And baking powder.
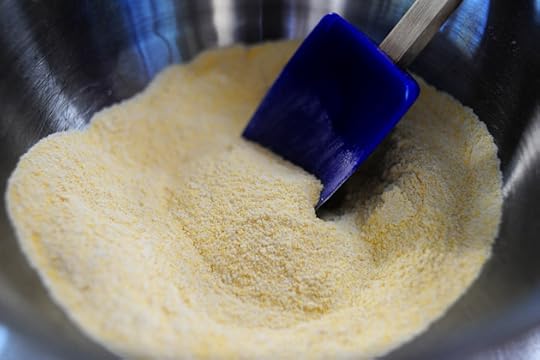 Stir it together to combine.
 Add the milk to the buttermilk…
 Then add the egg and stir with a fork to combine.
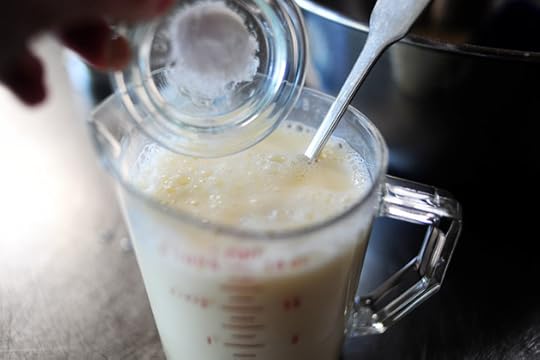 Stir in the baking soda.
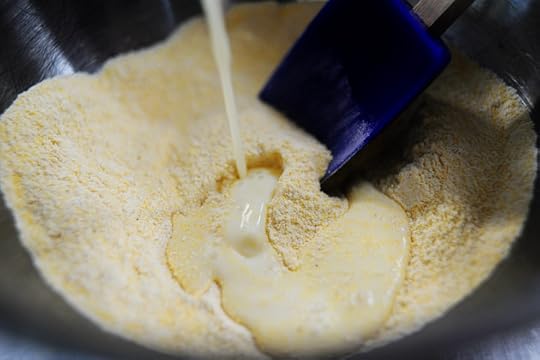 Pour in the liquid…
 And stir to combine all ingredients.
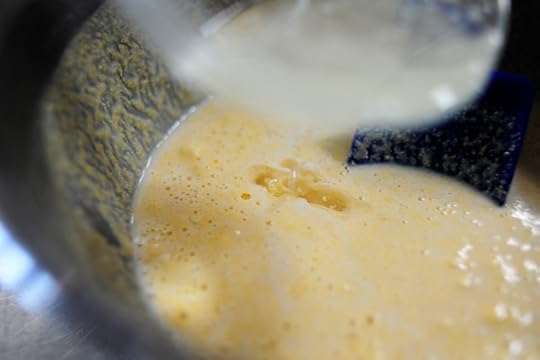 Melt the shortening in the microwave and drizzle it in, stirring gently to combine.
 Melt a little more shortening in the skillet…
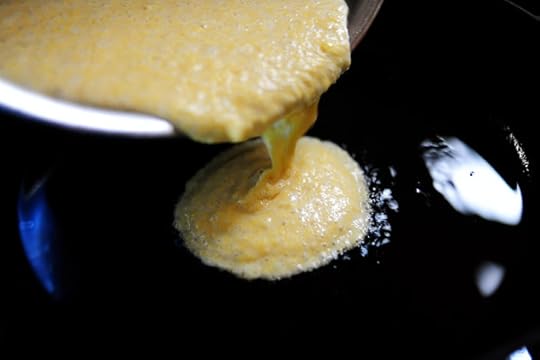 When the skillet is hot, pour in the batter. It'll sizzle in the hot shortening, which will ensure crispy edges and utter happiness.
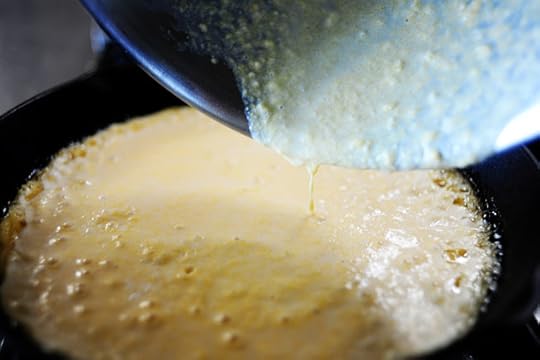
 Let it cook on the stovetop for one minute…
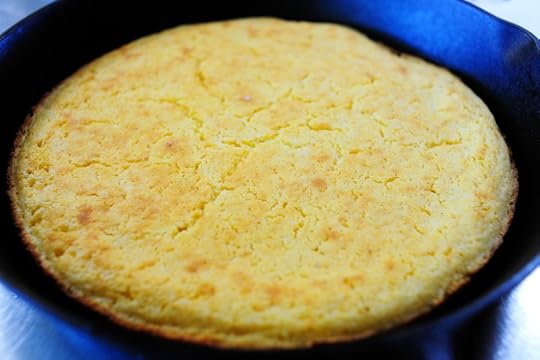
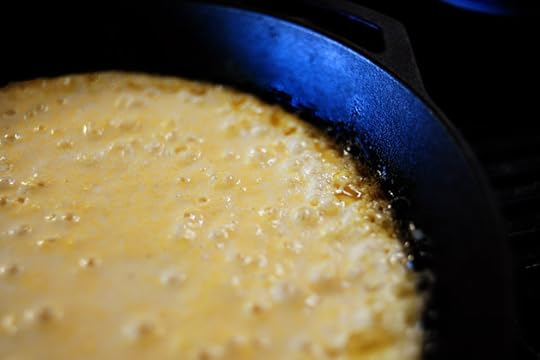
 Then bake it in the oven for 20 to 25 minutes, or until golden brown.
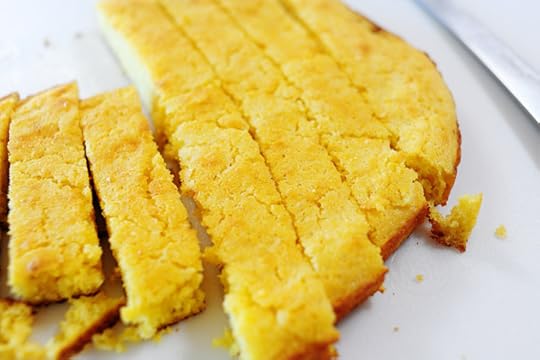 Cut it into wedges, squares, or sticks and serve with softened butter (or cube and use for stuffing/dressing.)
It's also delicious with jam.
Here's the handy printable:
Recipe: Skillet Cornbread
Prep Time: 5 Minutes
|
Cook Time: 20 Minutes
|
Difficulty: Easy
|
Servings: 12
Print Recipe
3"x5" Cards
4"x6" Cards
Full Page
Ingredients
1 cup Yellow Cornmeal½ cups All-purpose Flour1 teaspoon Salt1 Tablespoon Baking Powder1 cup Buttermilk½ cups Milk1 whole Egg½ teaspoons Baking Soda¼ cups Shortening2 Tablespoons Shortening Preparation Instructions
Preheat oven to 450 degrees.
Combine cornmeal, flour, salt, and baking powder in a bowl. Stir together.
Measure the buttermilk and milk in a measuring cup and add the egg. Stir together with a fork. Add the baking soda and stir.
Pour the milk mixture into the dry ingredients. Stir with a fork until combined.
In a small bowl, melt 1/4 shortening. Slowly add melted shortening to the batter, stirring until just combined. In an iron skillet, melt the remaining 2 tablespoons shortening over medium heat. Pour the batter into the hot skillet. Spread to even out the surface. (Batter should sizzle.)
Cook on stovetop for 1 minute, then bake for 20 to 25 minutes or until golden brown.
Edges should be crispy!

October 1, 2010
Notes on Cinnamon Rolls
There aren't many instances in which I claim that my version of a recipe is THE best one ever. I'm a home cook, after all, not a chef. I can find my way around the kitchen and make the best versions of things that I can. But claiming everything I make is the best version ever…well, that ain't my shtick.
I've only done it a couple of times. Maybe three. Lasagna. Sheet Cake. But even in those instances, I agree that what is "best" to some might not be best to others.
So I just go eat a Twinkie, revel in my mediocrity, and don't worry too much about it.
However.
If I had to pick one recipe of mine that I could incontrovertibly claim is the best there is, it would most definitely be cinnamon rolls.
I'd enter a cinnamon roll contest with these.
I'd take 'em to the state fair.
I'd go on Iron Chef with them, and I'd smear those turkeys into the ground!
(I would at this time like to violently take that back. I was just trying to make a point.)
Here's the original recipe, posted over three years ago: Cinnamon Rolls 101. They're simply to die for.
I have a point.
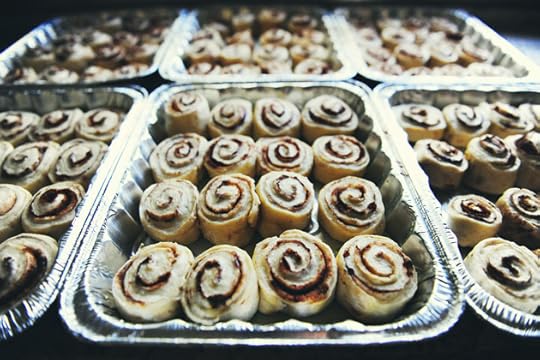
I've made these cinnamon rolls approximately 89,745 times in my life, give or take 89,000. I've made the straight cinnamon version, a caramel apple version, an orange marmalade version, a chocolate chip cookie dough version, and more versions that reside in the recesses of my brain. And since many of you have started making them every year around the holidays, I have a few tips/pieces of information to share.
NOTES ON CINNAMON ROLLS
1. Loose vs. Firm Dough
One of the most common questions I'm asked about the rolls is related to the looseness/stickiness of the dough. In fact, if you make the dough and go straight into making the rolls, the dough will be very loose and sticky, and the rolls will be less "perfect" in their shape and how well they hold together. (I make them like this all the time, obviously, and the shape of the rolls matters not when it comes to eating them.) Sprinkling on some flour—both under and on top of the dough—will help mitigate the extreme stickiness and make you a more contented person.
However, if you prefer the dough to be more firm, you need only chill it in the fridge. It really does cooperate so much better, and results in a neater, more held-together roll.
Examples:
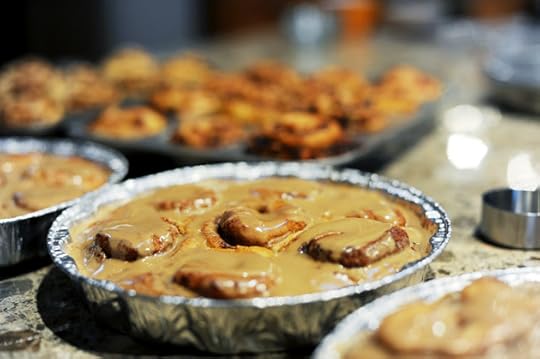
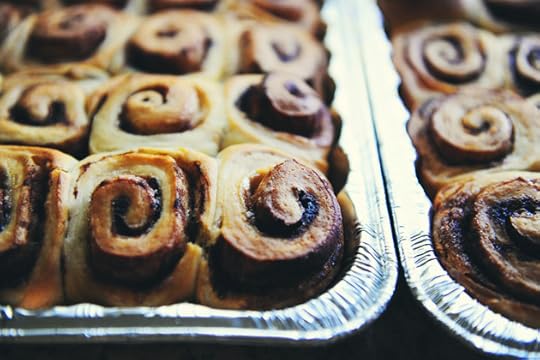
 These orange-marmalade rolls were made straight through from beginning to end (without refrigeration.) While they still tasted great and looked fine, they were much more loosey-goosey and messy to work with.
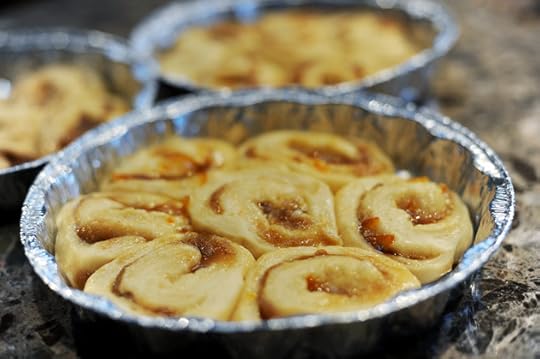
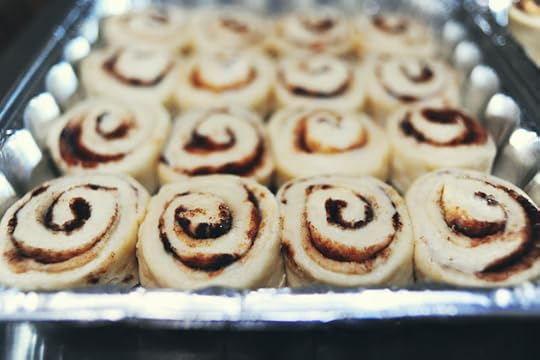
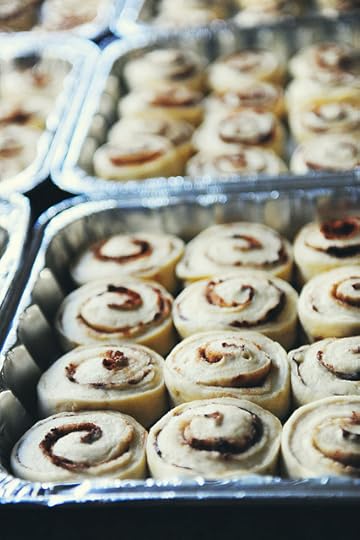
 These cinnamon rolls, however, were made using dough that had been refrigerated overnight. Rolling it out was a much neater proposition, and the rolls themselves were more consistent in size and neatness.
Keep in mind, though, that when you use cold, refrigerated dough….
 You'll need to allow the rolls to rise a little longer before you put them in the oven.
 This is how the neat ones baked up.
In summary, I would like to state for the record that I really don't have a preference all. More often than not, I make the rolls straight through without refrigerating the dough. If you're interested in a more aesthetically perfect, consistently-sized roll—if you're serving rolls at a shower or party, or catering an event—the refrigerated approach would probably be best.
Otherwise, it's just an unnecessary step.
2. Amount of Butter: MESS!
The amount of butter directly impacts the messy factor. My approach is to add butter until I think there's enough, then add more. If I roll up the long roll of dough and butter does not violently ooze out of it, I believe I have not used enough butter.
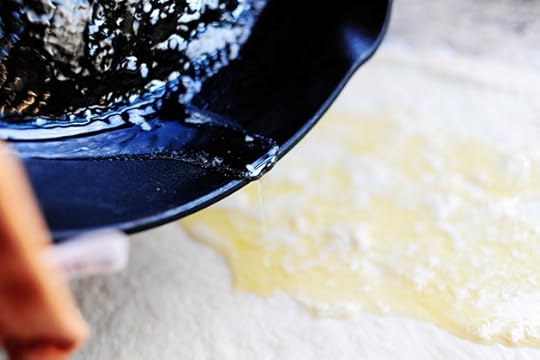
However, if you prefer a more moderate approach, pulling back on the amount of butter is fine. Just keep in mind that you'll want to pour on a little more icing to make sure the rolls are ultra, ultra moist.
In summary: do not fear the mess. Anytime this amount of melted butter and sugar are involved, there's gonna be plenty of cleanup on aisle seven.
If it makes you feel any better, I've had to clean it up 89,745 times. Give or take 89,000.
3. I don't like maple (or I don't like coffee). What are my options for the icing?
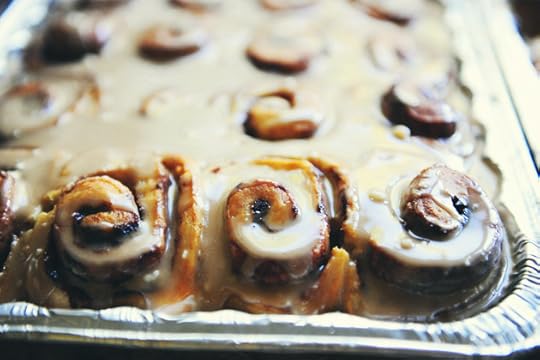
The pour-on maple icing for my cinnamon rolls is part of the wonderment of the whole thing: it's thin enough to run into the cracks and crevices of the warm rolls and turns the rolls into something incredibly special. And while the icing does contain both maple extract and brewed coffee, I promise you from the bottom of my heart that the icing does not have an overwhelming flavor of either. It really just winds up being a nice, mild icing that perfectly complements the rolls.
 However, if the thought of maple or coffee makes you want to hurl, you can certainly leave either out with no problem. In place of the maple extract, use a little bit of vanilla (not the same amount, as vanilla is stronger). With the coffee, you can simply leave it out altogether and just splash in a little more milk to make it thin and stirrable.
4. Freezing Rolls: When?
I'm often asked when in the process the cinnamon rolls can be frozen.
The answer is…anytime!
* You can freeze the rolls, unrisen, in the pan. Cover them tightly with both plastic wrap and aluminum foil. Then you'll just need to remove them, allow them to thaw and rise, and continue the baking and icing process.
* You can freeze the rolls, baked but unfrosted. Later, you can thaw them out, warm them for just a few minutes in the oven, and ice them while warm.
* OR you can freeze the rolls completely iced and finished. Just allow them to cool, then cover with plastic wrap and foil. This is how I normally freeze them and they turn out just fine.
5. Now, go make cinnamon rolls!
Make them for everyone in your life.
This is a love that must be shared.
New Thanksgiving recipe Monday morning!
Love,
Pioneer Woman

September 29, 2010
Monster Cookies
 As I lamented on Twitter yesterday afternoon, I was having trouble deciding whether to make a soup, a casserole, or a main dish salad for dinner. I kept going back and forth and I just couldn't make up my mind.
So I just made cookies instead.
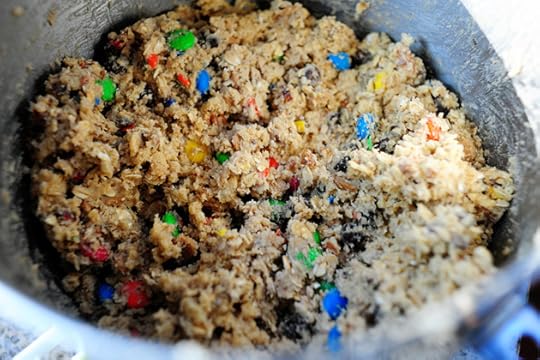
These are generally called Monster Cookies, but could also be called "Everything Cookies" since they have everything in them…but I already have a version of Everything Cookies on my site and Hyacinth would get mad at me.
Make these your own, bumping up quantities of whatever ingredients float your boat: M&M's, nuts, chocolate chips—just adjust as you feel led.
And eat 'em with a tall glass of cold milk. There's nothing better in the world.
Except maybe that soup I made afterward. But that's another recipe for another time.
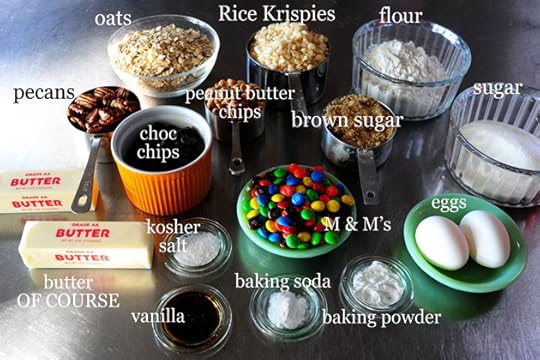 Here's what you need. Basic, yummy stuff!
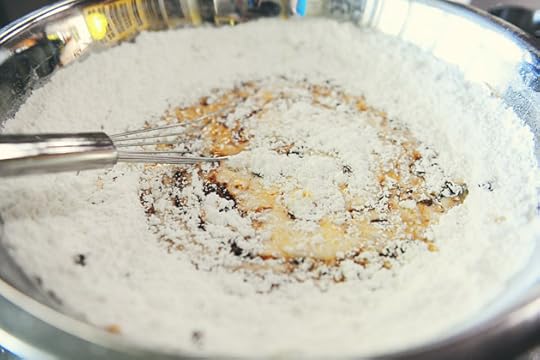
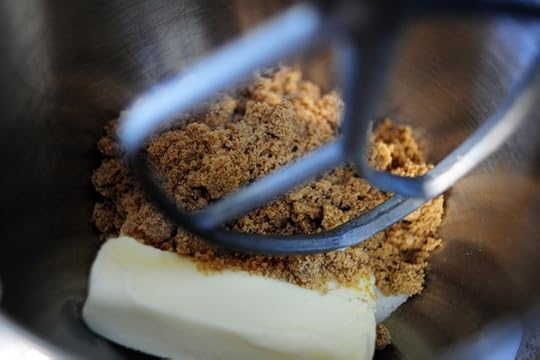 Throw the butter and both sugars into a mixer. Paddle attachment is best.
You can also do it by hand if you have the upper body strength, which I absolutely do not.
I wonder if that's due to the fact that I always use a mixer? Which came first? The mixer or the atrophy?
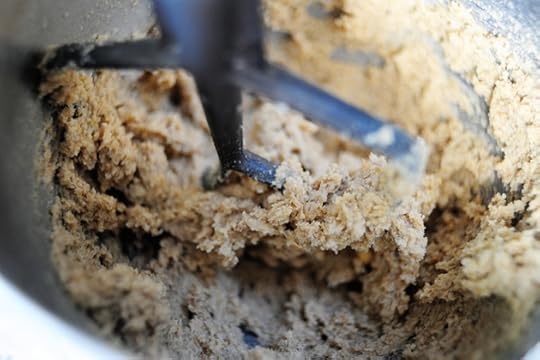 Mix it until it's nice and fluffy and combined.
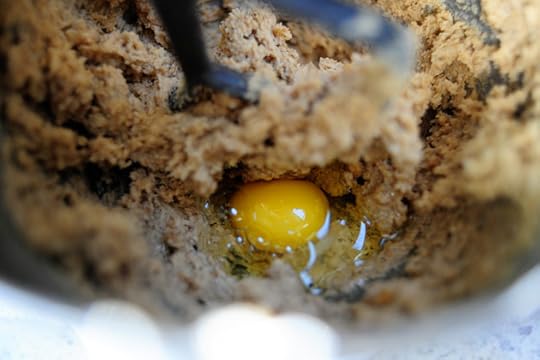 Crack in the eggs one at a time…
 Mixing well after each addition.
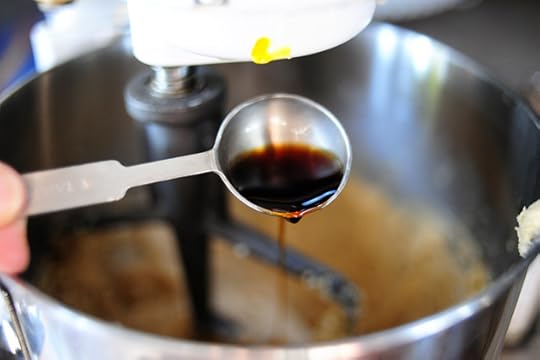 Add in vanilla and mix to combine.
I love vanilla.
It makes me happy.
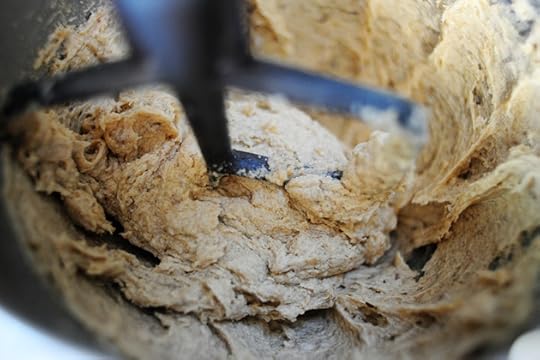
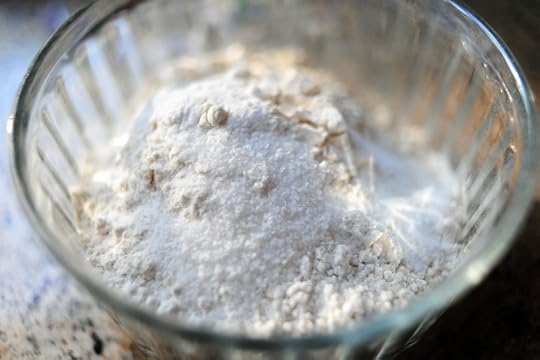 Now mix the flour, baking soda, baking powder, and kosher salt.
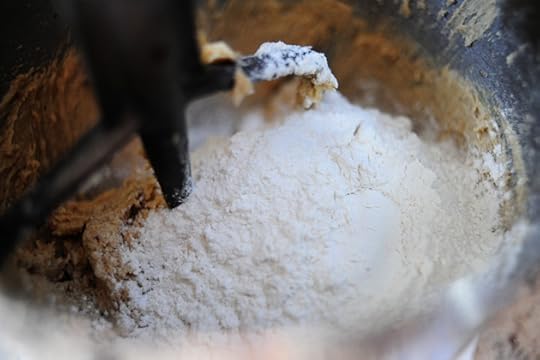 Dump it into the mixing bowl…
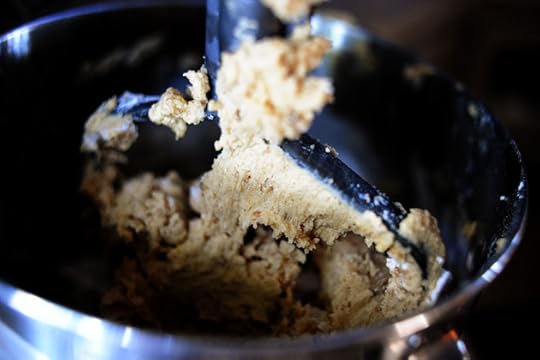 And mix it up till it's all combined. Scrape the sides of the bowl with a rubber spatula halfway through.
It's the right thing to do.
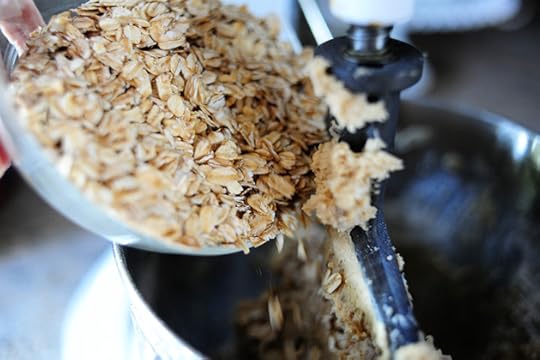 Next, dump in the oats…
 Chop up the pecans…
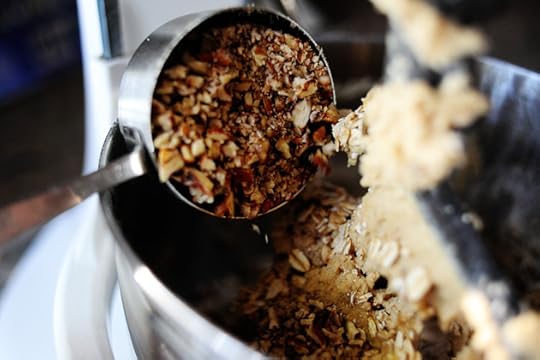 And dump them in, too.
 Mix it just a little bit until it's combined.
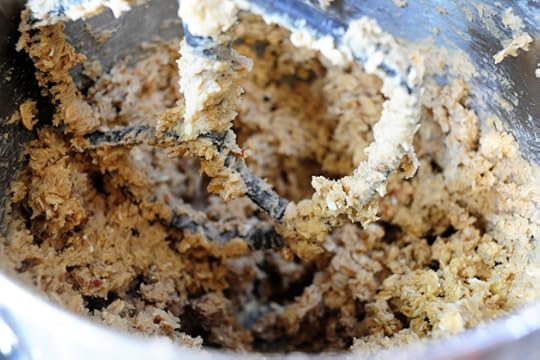
And now you can have some fun!
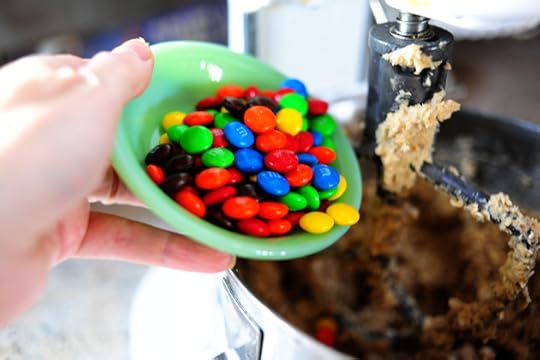 M&M's…
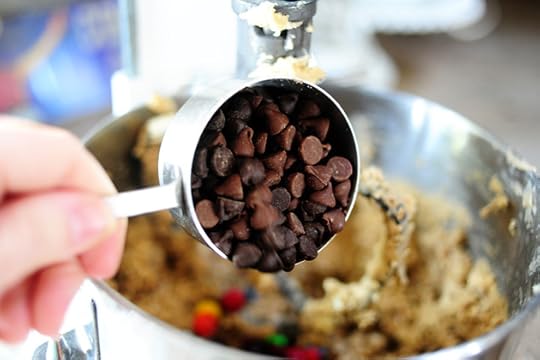 Chocolate chips. I did a mix of semi-sweet and milk chocolate, because sometimes semi-sweet gets a little strong for me and can dominate cookies and then everything's RUINED!
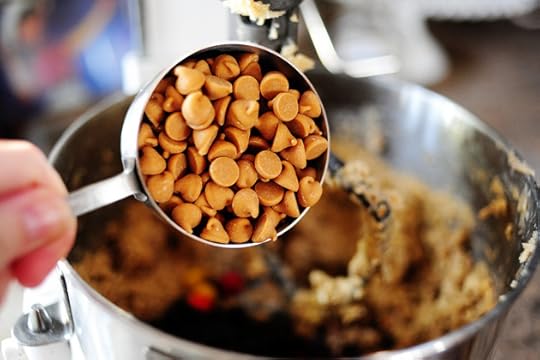 I also used peanut butter chips.
But you don't have to.
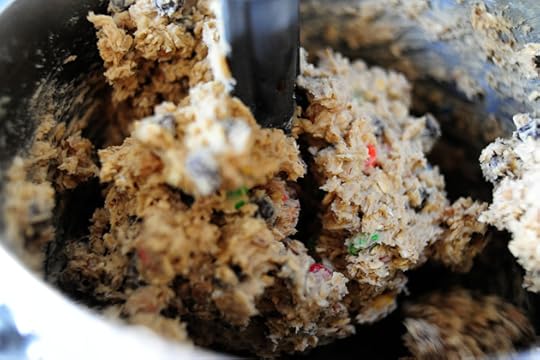 Now you can mix it again (very gently). Check out the quantities of everything, and dump in a little more of what you might want.
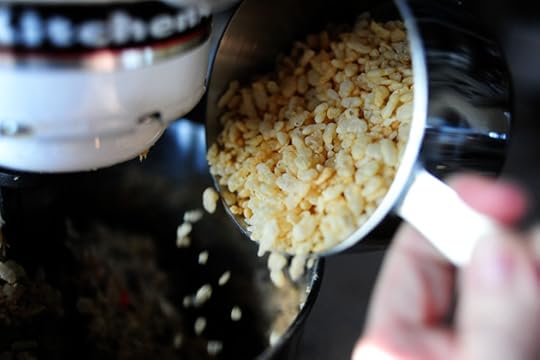 I like to add the Rice Krispies at the end so they won't get completely beaten up.
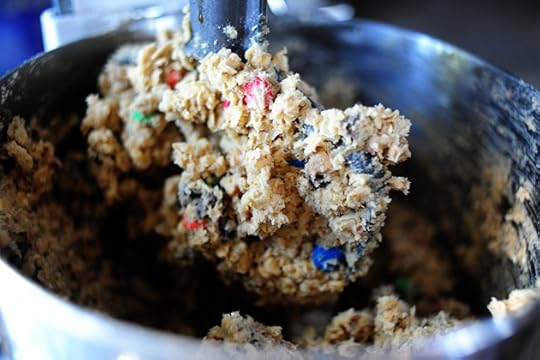 Then mix it around till combined. Done!
 And that's it, baby! Modify this dough however you'd like: chocolate chunks, bits of toffee, even bits of dried fruit.
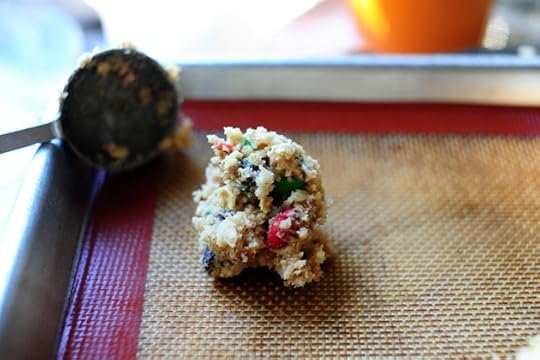 Use a cookie scoop or tablespoon to drop helpings of dough onto the cookie sheet.
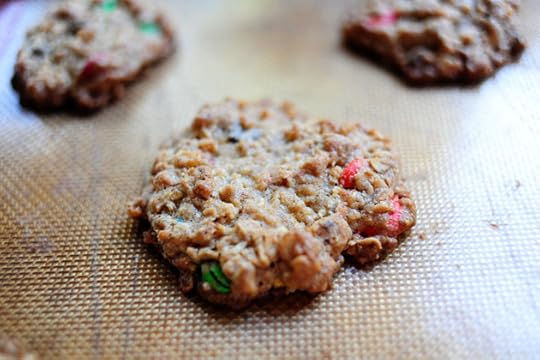 Then bake 'em till they're golden brown. I let these get a little darker than golden, because I'm weird.
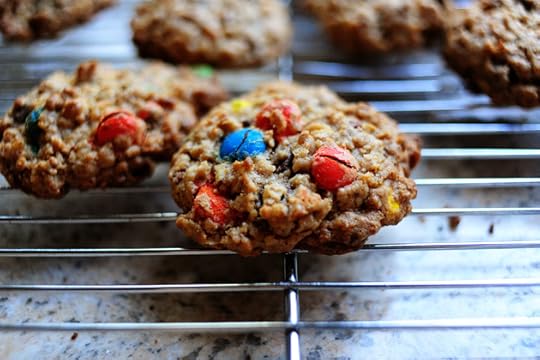 Let them cool on a wire rack.
And chow down, baby!
You'll love 'em.
They'll make you grin.
And jiggle. But we'll worry about that tomorrow.
Recipe: Monster Cookies
Prep Time: 15 Minutes
|
Cook Time: 12 Minutes
|
Difficulty: Easy
|
Servings: 36

Print Recipe
3"x5" Cards
4"x6" Cards
Full Page
 [image error]
');
[image error]
');
Ingredients
2 sticks (1/2 Pound) Butter (salted) Softened½ cups White Sugar1-½ cup Brown Sugar, Packed2 whole Large Eggs1 Tablespoon Vanilla Extract1-½ cup All-purpose Flour½ teaspoons Baking Soda1 teaspoon Baking Powder2 teaspoons Kosher Salt1-½ cup Oats (either Quick Or Regular)½ cups M & M's (more To Taste)½ cups Pecans, Chopped (more To Taste)¾ cups Chocolate Chips (milk Or Semi-sweet)½ cups Peanut Butter Chips2-¼ cups Rice Krispies Preparation Instructions
Preheat oven to 375 degrees.
Cream butter with sugars until fluffy. Add eggs one at a time, beating well after each addition. Add vanilla and beat.
Combine flour, baking soda, baking powder, and kosher salt. Add to mixing bowl and mix till combined. After that, add in remaining ingredients in whatever quantity you prefer. Add more nuts if you'd like, or more M & M's, more peanut butter chips or chocolate chips.
Add Rice Crispies at the very end, mixing until just combined. Do not overmix!
Use a cookie scoop to scoop balls of dough onto a cookie sheet. Bake until golden brown, then allow to cool on a rack.
Serve with glasses of cold milk.

September 28, 2010
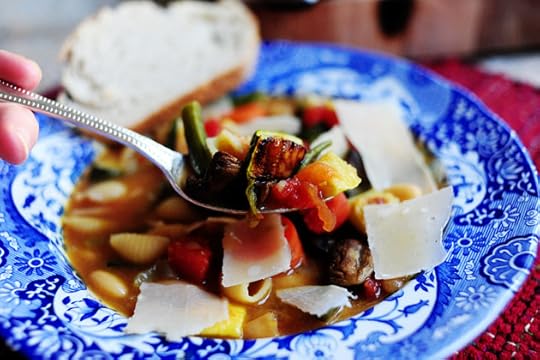
Roasted Vegetable Minestrone
 After a summer of unrelenting Oklahoma heat—I'm talking a month at least of 100-plus degree days—to say I walked around in a state of elation yesterday is an understatement. I'm not sure the temperature ever rose above 65 degrees, and I almost had to put on my fur parka because my body had grown so accustomed to Hades-like heat and humidity. And okay, I don't really have a fur parka, but still.
In honor of the sub-zero temperature of yesterday, I decided to make a scrumptious minestrone. To change things up, though, I roasted some of the veggies to give them a little bit of a deeper flavor. I loved the flavor of the soup, which was made even more delicious by some last-minute shavings of Parmesan cheese. And with a slice of warm crusty bread…I was in heaven.
(To my California friends: forgive me. I just learned of the temperatures you're enduring right now. Look away and come back when the heat wave passes!)
Here's the recipe. There are a lot of pieces, but it really was a cinch to throw together.
 The first thing we'll do is roast the veggies. Preheat the oven to 500 degrees. 500, because we want to get as much color on the veggies as we can without completely cooking them to smithereens. Grab a zucchini and top off the tops and bottoms. Then slice them in half lengthwise, then in half again.
 Slice them the other way to create a large cube/dice.
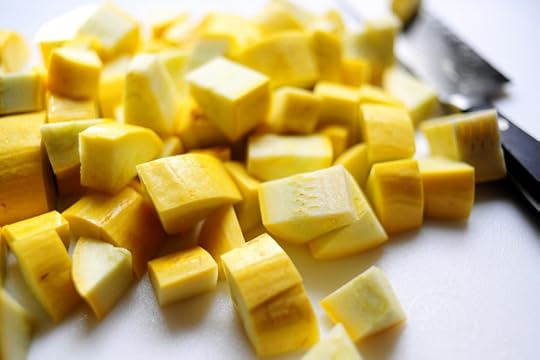 Do the same with yellow squash…
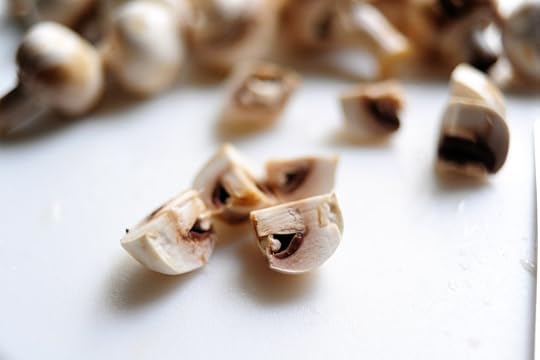 And mushrooms. Just pull off the stems first, then cut into halves or fourths, depending on how large they are.
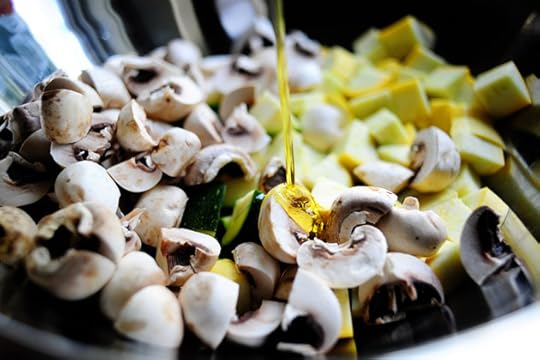 Throw the squash and mushrooms into a large bowl and drizzle with olive oil.
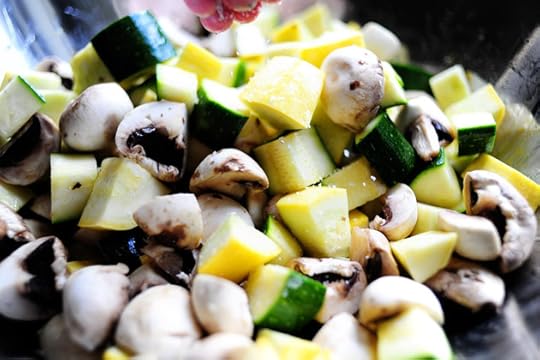 Sprinkle with salt, then toss with your hands to thoroughly coat.
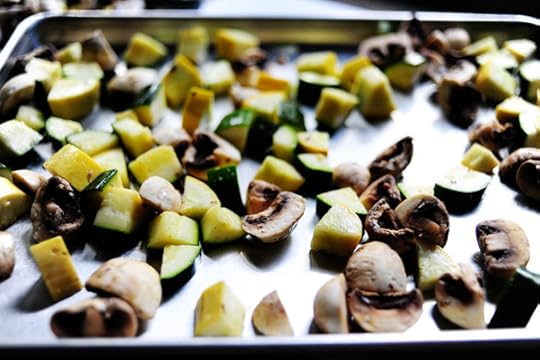 Throw them on a large baking sheet (I actually divided the veggies between two sheets so as not to crowd) and roast them for five to ten minutes, or until the veggies begin to show dark brown/black areas.
 Pull them out when they're done and set them aside.
 Next, slice up a couple of washed, but unpeeled, carrots. You have to leave on the peel in order to ensure absorption of the beta carotene and…
Actually, I just couldn't find my peeler.
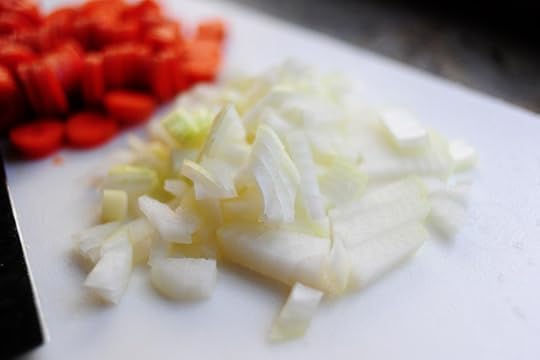 Dice up an onion…
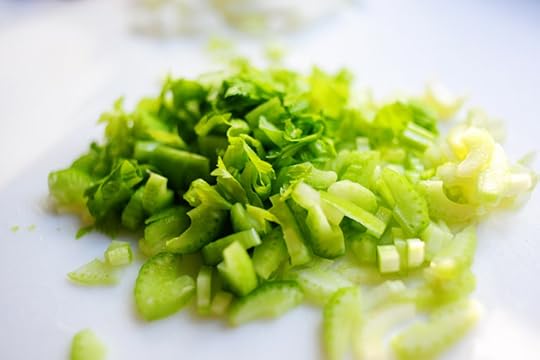 And slice up some celery. Try to include some leaves if you can—they add flavor, and I think they're lovely.
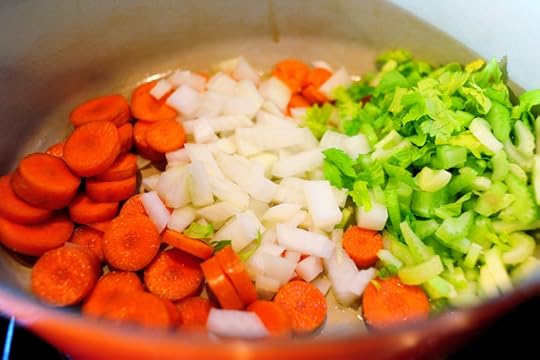 Heat some olive oil in a heavy pot, then throw in the carrots, onions, and celery. Stir around and cook for a few minutes over medium heat, or until the veggies begin to cook and show their color.
Is it considered mirepoix when the carrots aren't diced? I don't think it is. But it sort of is. But it kinda isn't.
But it doesn't really matter.
Everything is useless. A chasing after the wind.
(Name that bible verse.)
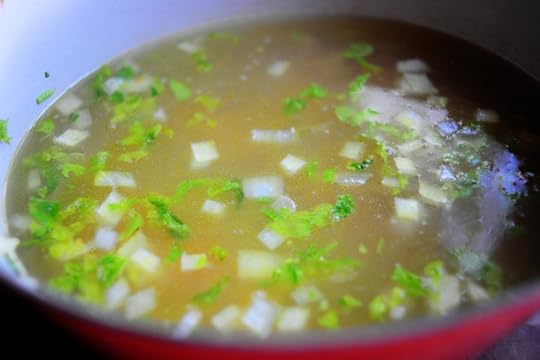 Pour in the chicken broth! Use the low sodium stuff, please. Stir and bring to a boil, then reduce heat to low.
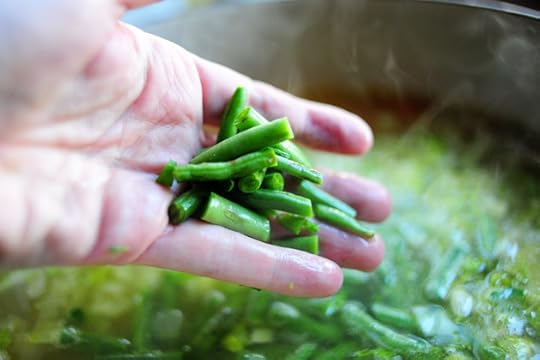
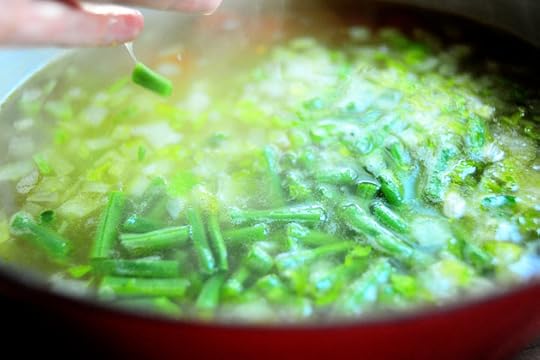
 Grab some fresh green beans.
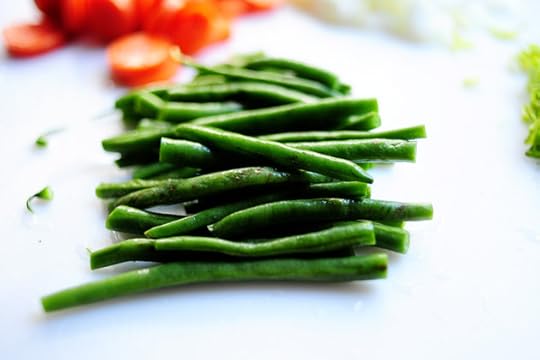 Lop off the tops and bottoms…
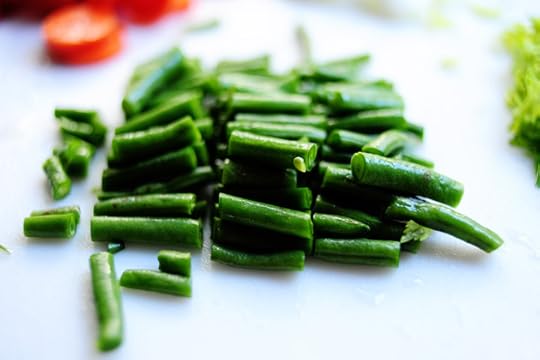 Then cut them into one-inch pieces.
You can absolutely use frozen cut green beans for this, and they'll wind up being totally delicious. But I had fresh ones in my fridge and needed to use them.
Amen.
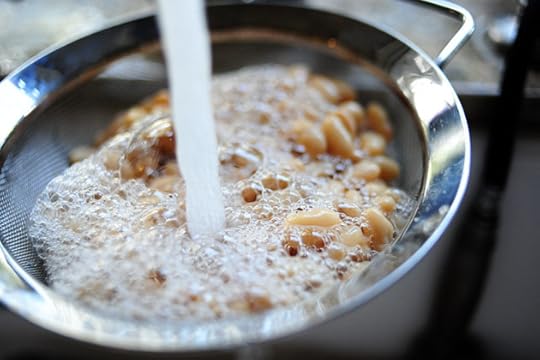 Next, crack open a couple of cans of cannellini beans, throw them into a strainer, and rinse 'em like mad.
Canned beans smell so bad when you first open the can. Yuck! And see all that foamy stuff? It's the stuff you want to rinse.
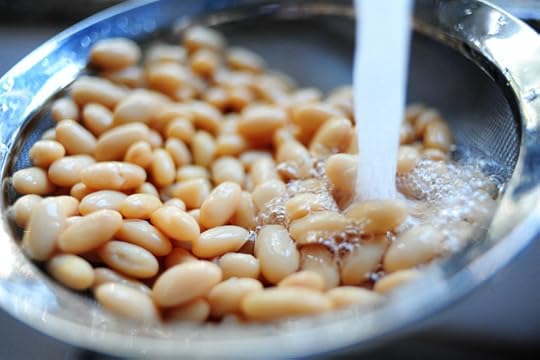 Ahhh. Much better. Rinsed!
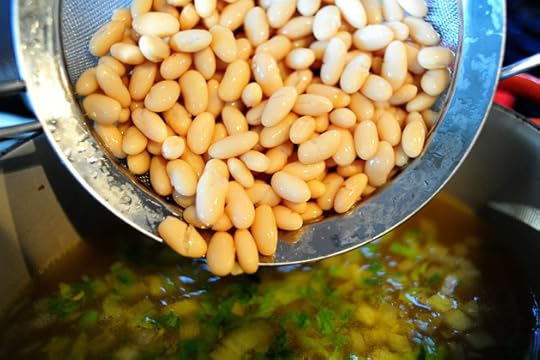 Now pour both beans into the soup: the cannellini…
 And the green beans.
And if you could recruit a local alien to come and demonstrate this step as I apparently did, that would be just great.
 Stir the soup and cook on low for ten minutes.
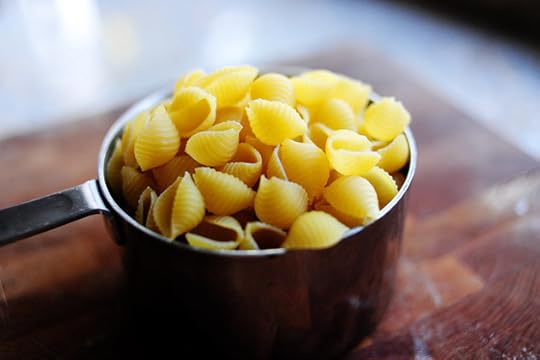 Next, measure about a cup and a half of dried pasta…
 And pour that on in. You can use a little less if pasta isn't a priority in your life.
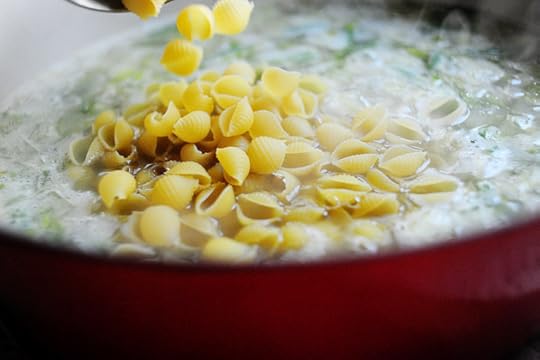 Stir it around, then simmer for about five minutes.
 Yum! Looking good…but we need more tomfoolery in here.
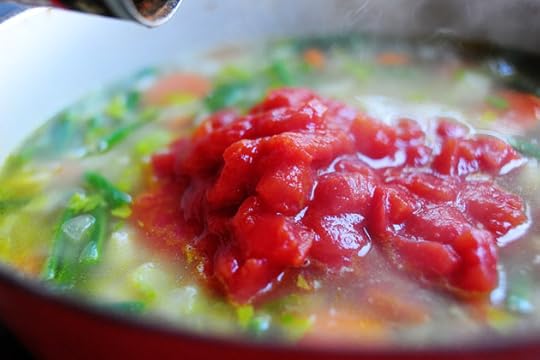 Dump in a can of diced tomatoes, juice and all!
This'll just give the broth a little depth. It won't result in a tomato-heavy broth at all. However, if you like things with more of a tomato base, you can add in a tablespoon or two of tomato paste. Delicious.
 Stir it around and allow it to cook for a few more minutes, until the pasta's almost done. Add in salt and pepper as needed (don't undersalt!) and my obsession—turmeric—to taste.
Go easy on the turmeric, though. Too much and you'll have bright yellow cannellini beans.
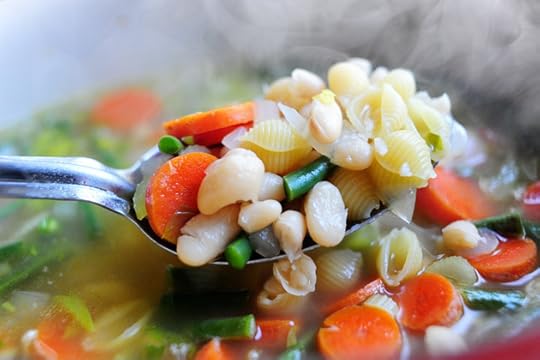
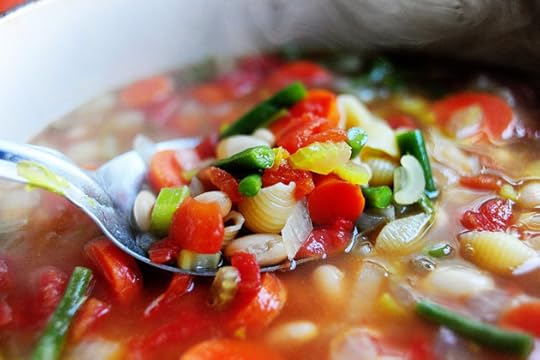
 When the pasta is al dente and the seasonings are right…
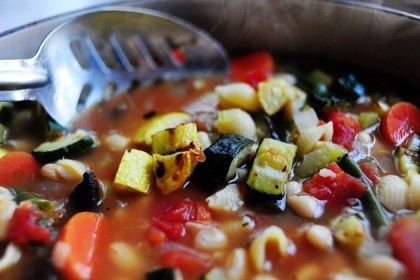
 Throw in the roasted veggies…
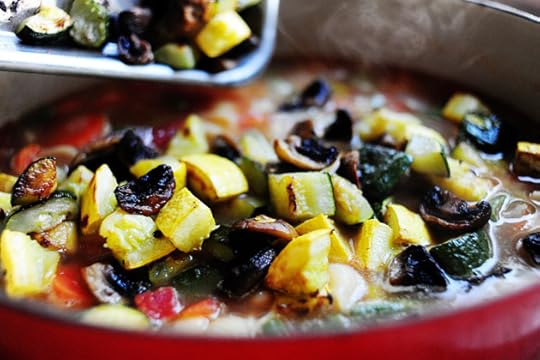 Mmmm. The perfect addition to an already delicious soup.
 These won't need any cooking at all, so just stir them around and let them heat with the soup for a minute or two. Done!
 To serve, do some quick shavings of Parmesan.
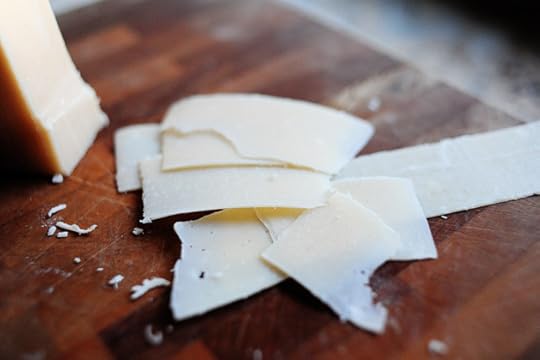 This is the good stuff, too. My local grocery store carries it now, and love 'em for it.
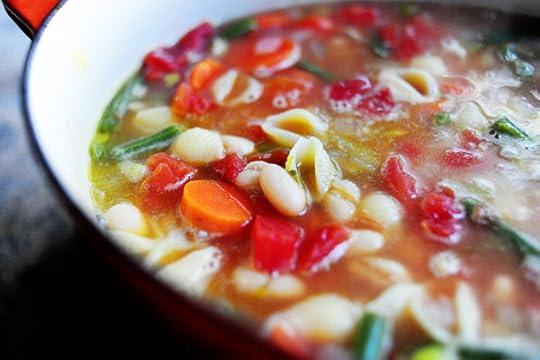
 Ladle the chunky, yummy soup into a large bowl.
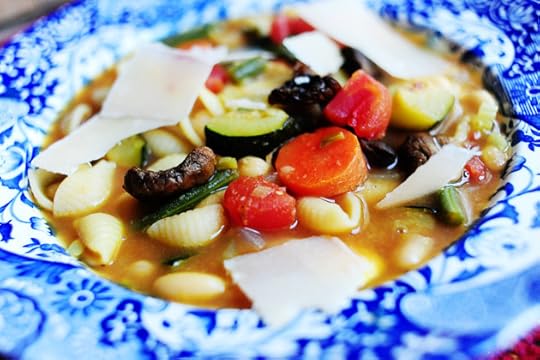 Throw a generous amount of Parmesan shavings. They'll begin to soften and melt…divine.
And by the way, if you're one of those people who saves the Parmesan rind, you can throw it into the soup while it cooks.
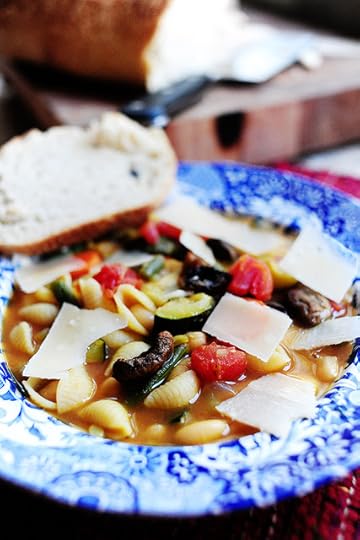 Crusty bread is a must.
You'll love this soup, my friends! You can make it spicy with the addition of red pepper flakes if that makes your skirt fly up, and you can substitute other veggies, too.
The perfect cool weather dinner.
Enjoy!
Recipe: Roasted Vegetable Minestrone
Prep Time: 10 Minutes
|
Cook Time: 30 Minutes
|
Difficulty: Easy
|
Servings: 8
Print Recipe
3"x5" Cards
4"x6" Cards
Full Page
[image error]
');
Ingredients
2 whole Zucchini, Halved, Cut Into Strips, Then Cubed2 whole Summer Squash, Halved, Cut Into Strips, Then Cubed8 ounces, weight White Mushrooms, Stems Removed And Quartered2 Tablespoons Olive Oil Kosher Salt To Taste2 Tablespoons (additional) Olive Oil2 whole Carrots, Washed And Sliced (not Peeled)1 whole Medium Onion, Diced3 stalks Celery, Sliced (leaves Included)8 cups Low Sodium Chicken Broth2 cans Cannelini Beans, Rinsed1 cup (heaping) Cut Green Beans, Fresh Or Frozen1-½ cup Medium Or Small Pasta Shells, Uncooked1 can (14.5) Diced Tomatoes With Juice Salt And Pepper, to taste¼ teaspoons Turmeric (optional) Parmesan Cheese, Shaved Preparation Instructions
Preheat oven to 500 degrees.
Toss cubed zucchini, squash, and mushrooms in a bowl with olive oil and a sprinkling of kosher salt. Arrange onto two sheet pans (to avoid crowding) and roast in the hot oven for 5 to 10 minutes, or until brown and black parts begin to show. Remove from oven and set aside.
In a heavy pot, heat olive oil over medium heat. Add carrots, onions, and celery and stir to cook for 3 minutes. Pour in broth and bring to a boil. Reduce heat to low and simmer for ten minutes.
Add cannelini beans and green beans. Cook on low for five minutes. Add pasta and cook for an additional five minutes. Add canned tomatoes, stir, and cook for an additional five minutes on low heat. Check for seasonings, adding salt, pepper, and turmeric.
Add roasted vegetables at the very end. Stir and allow to simmer and heat for a few minutes before serving. Be sure to check seasoning! Add more broth if necessary to increase liquid amount.
Serve with Parmesan shavings and crusty Italian bread.

September 27, 2010
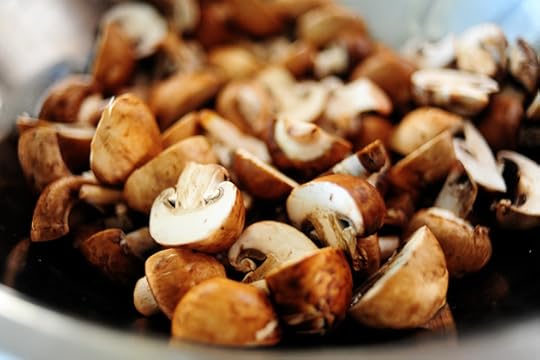
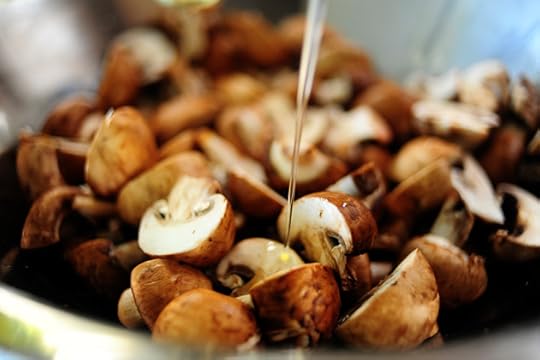
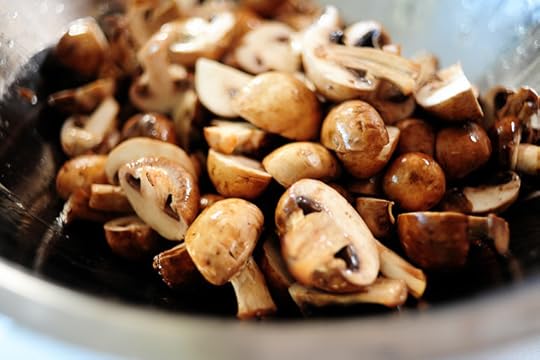
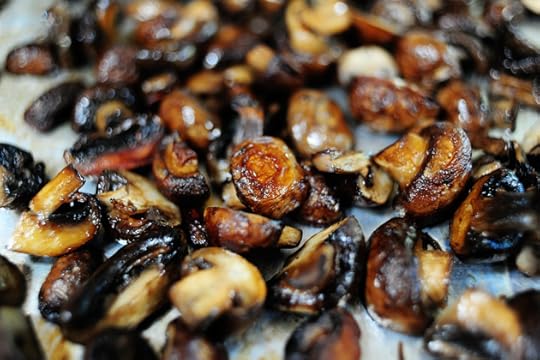
Burgundy Mushrooms
 When I'm asked which of the recipes in my repertoire I could not bear to live without, I usually respond with a list of around five or six dishes. A woman needs options, after all. While some items on my favorite-dishes-of-all-time list can change depending on the season, the placement of the moon, and my hormone level, one recipe that remains there—and will eternally—are these indescribably decadent burgundy mushrooms.
My mother-in-law introduced me to them years ago. We innocently walked...
September 24, 2010
My Favorite Sugar Cookies
I'm still putting together the precise recipes from my Thanksgiving cooking fest last week, so in the meantime, here's my very favorite sugar cookie recipe.
 While Marlboro Man would prefer sugar cookies made from tubes of storebought refrigerator dough (it's a comfort food for him), I prefer these light, melt-in-your-mouth babies. This recipe was given to me by the late Sally, a beloved member of our local Presbyterian church whose sugar cookies always made church potlucks and Cookie Sundays ...
September 22, 2010
Coming 'Round the Mountain
I've been cooking Thanksgiving recipes this week, most of which are delectable new incarnations of old favorites.
I'll be posting these well before Thanksgiving this year, just in case you like to do your planning early.
Haven't had a chance to edit photos and write recipes, so here's just a little glimpse.
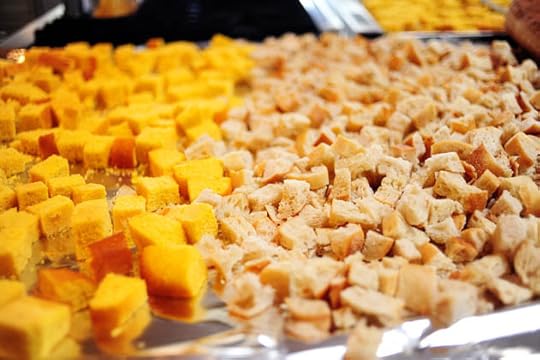 Bread drying.
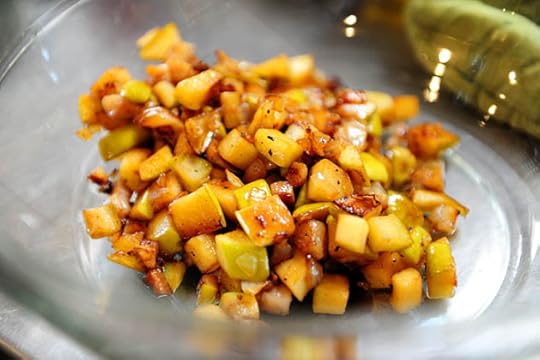 Caramelized apples cooling.
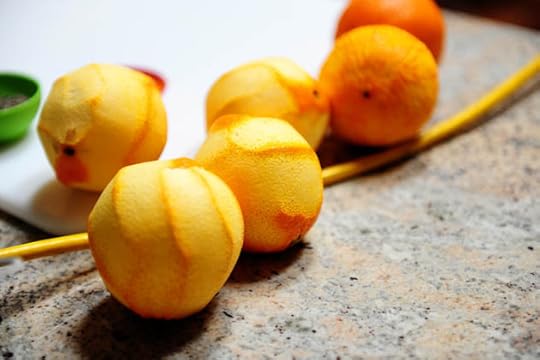 Oranges, naked and shivering in the cold.
Pardon my extension cord. When I planned my kitchen, I forgot to put an outlet where I seem to...
Ree Drummond's Blog

- Ree Drummond's profile
- 2036 followers

