
Ree Drummond's Blog, page 78
March 21, 2011
Grilled Chicken and Roasted Red Pepper Panini
 I love panini.
I love all varieties of panini.
I whipped this one up yesterday. It's nice and basic, and can be adapted by using storebough/rotisserie chicken if you'd like to omit the marinating/grilling process, and adding things like artichoke hearts and olives if you want the thing more loaded.
To me, panini are like pizza or quesadillas: the combinations and permutations are endless.
And delicious.
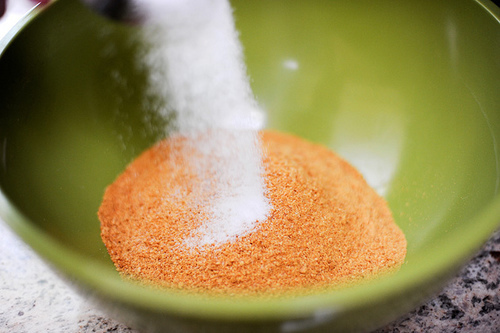
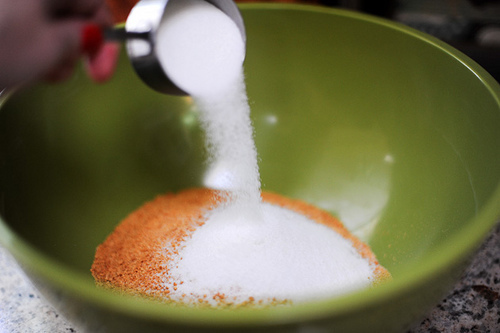
 We're going to begin by making a concoction. Grab some jarred sundried tomatoes.
 Throw them into a food processor or blender.
 Add a little olive oil, a little lemon juice…
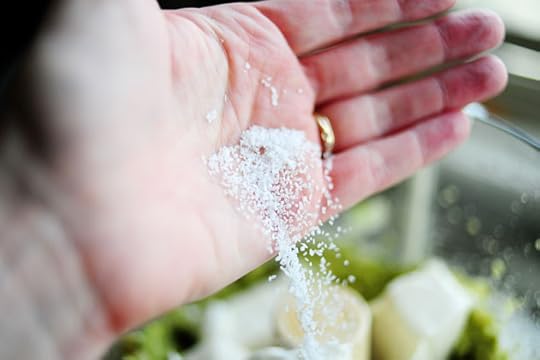
 And a little salt.
 Next, grab some prepared pesto. Either the tub in the refrigerated section, the jar…or you could make your own if you're one of the eight humans on earth who can find fresh basil right now.
 Where has all the basil gone? Long time passing…
 Add a good amount of pesto to the mix…
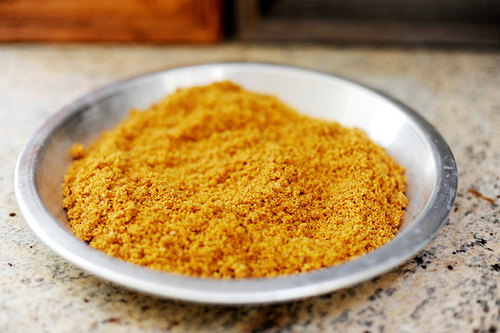
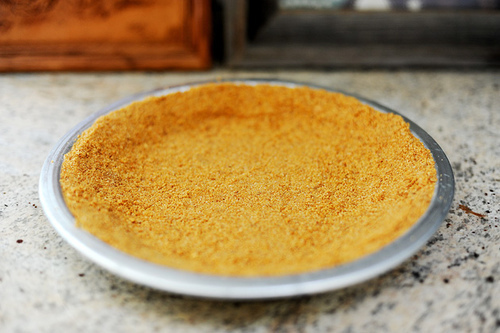
 Then pulse up the mixture until it's all combined.
 Next, throw half of the mixture into a ziploc bag with two chicken breasts.
 Seal the bag, smush it around, then refrigerate it for several hours or overnight so the chicken becomes lovely and flavorful and happy and emotionally fulfilled.
We all want that for our chicken breasts, don't we?
 After you stick the chicken in the fridge to marinate, throw a little mayonnaise into a small bowl.
 Add two or three tablespoons of the sundried tomato concoction…
 Then stir it around to combine. Cover the bowl with plastic wrap and refrigerate it until we make the panini. This'll be the panini spread. Amen.
 Next, we're going to roast a couple of red bell peppers. (Note: if you can find the roasted red peppers in jars, feel free to use them!) If you have a gas burner, turn it on medium-high and set the pepper right over the flame.
 Use tongs to move it around as it blackens. Basically, you want to char the heck out of the whole thing; try to make most of the red disappear! This should take about four to five minutes.
 The very second the pepper is blackened, throw it into a large ziploc bag and seal it while you do the second pepper. Then throw the second pepper in, too. Let the peppers sit in the sealed ziplocs for at least twenty minutes; they'll steam in there, which will cause the blackened skin to slip off more easily.
 When they're ready, use your fingers to pull off the skin. You can rinse them under cool water while you do this, but sometimes I think that rinses away some of the nice black flavor. So if you can, just wipe off the majority of the skin with a paper towel, leaving a few black bits for flavor.
I'm weird.
(Oh, and by the way: if you do not have a gas burner, you can char the peppers directly under the broiler in the oven. Just set them on a cookie sheet on the highest rack and turn them with tongs as they blacken. I use this method a lot! Just depends on my hormone level.)
(And if you love, love, love the flavor of roasted red peppers, try this pasta. You'll swoon.)
 After they're peeled, lop off the tops of the peppers, then pull out/scrape out the innards. And this is what you're left with. You can do this ahead of time, then refrigerate them till you need them, or you can do them right before you make the panini.
 When you're ready to make the panini, heat up the panini maker. Pull the chicken out of the fridge. Whack it a few times with a mallet or iron skillet, just to flatten them to uniform size. No need to make them paper thin; just even them out.
 Grill them (or saute them in a heavy skillet) over medium heat…
 Until done. Yum.
 Move them to a cutting board…
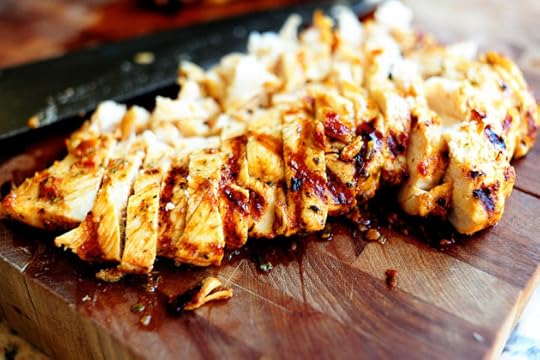 Then cut them into slices.
 Next, cut the roasted red peppers into slices.
 Grab some good, hearty sandwich bread (this is the wheat berry stuff) and spread rather generously with the spread we make earlier.
 Arrange slices of chicken on top…
 Followed by roasted red pepper strips.
 And finally, two slices of provolone cheese.
An panini without the cheese is like a kiss without a squeeze.
 Next, spread a second slice of bread with more of the yummy spread. And that's not my hand. An alien dropped by to appropriate my brain matter and I asked him to hold this piece of bread first.
I'm sure glad I don't have hands like that!
 Place that slice of bread face down…
 Then spread both sides with softened butter.
 Throw it on the panini grill…
 Then close the lid and let it do its dirty work.
Note: If you do not have a panini grill, you can certainly still make panini. Just grill the sandwich in a skillet (an iron skillet if you have one) and set a second (heavy) skillet on top of it, pressing to flatten slightly. You'll need to turn the sandwich halfway through to cook both sides.
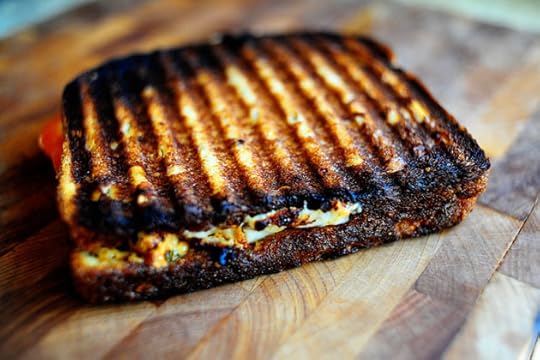 Here 'tis! Got a little brown, but I am not afraid.
 Yummy. How good does this look?
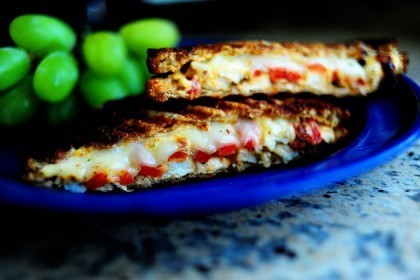
 Serve it with chips if you'd like, or just grapes if you're trying to make wiser choices about what you put in your mouth in anticipation of warmer weather, which does not permit you to cover up jiggle with large, oversized black turtlenecks.
Sorry to bring my own issues into this.
Enjoy this, guys.
Vive panini!
Here's the handy dandy printable:
Recipe: Grilled Chicken and Roasted Red Pepper Panini
Prep Time: 20 Minutes
|
Cook Time: 25 Minutes
|
Difficulty: Easy
|
Servings: 4
Print Recipe
3"x5" Cards
4"x6" Cards
Full Page
Ingredients
2 whole Boneless, Skinless Chicken Breasts8 whole Sundried Tomatoes, Packed In Oil3 Tablespoons Prepared Basil Pesto2 Tablespoons Extra Virgin Olive Oil1 Tablespoon Lemon Juice½ teaspoons Kosher Salt Freshly Ground Black Pepper¼ cups Mayonnaise2 whole Red Bell Peppers8 whole Slices Provolone Or Mozzarella Cheese8 slices Good Whole Grain Sandwich Bread4 Tablespoons Butter, Softened Preparation Instructions
CHICKEN
Slightly flatten chicken with a mallet (just until uniform thickness.)
In a blender or food processor, puree sundried tomatoes, pesto, olive oil, lemon juice, salt, and pepper. Add half the mixture to a ziploc bag with the chicken breasts. Smush around to coat the chicken, then refrigerate for several hours or overnight.
After marinating, heat heavy skillet or grill to medium. Grill or cook chicken until done. Slice chicken into strips.
SPREAD
In a small bowl, combine mayonnaise and 3 tablespoons of the sundried tomato mixture. Cover with plastic wrap and refrigerate until needed.
ROASTED RED PEPPERS
If you have a gas cooktop, blacken red peppers directly over the flame. (If you do not have a gas cooktop, blacken them directly under the oven broiler.) Completely blacken/char on all sides, then immediately seal in a ziploc bag. Allow peppers to sit, sealed, in the bag for at least 20 minutes. When cool enough to handle, remove from bag and use fingers to slip off the blackened skin. (Don't be afraid to leave some black bits!) Lop off the top, cut in half, then seed and slice into strips. Set aside.
TO ASSEMBLE
To make the panini, spread generous amounts of the sundried tomato/pesto spread on one side of all the pieces of bread. On four of the pieces, arrange 1/4 of the chicken slices, 1/4 of the pepper slices, and two pieces of provolone. To with the other four pieces of bread with the spread face down. Butter both sides of sandwich, then grill in panini maker or on a skillet over medium-low heat. (If you use a skillet, set a heavy pan or skillet on top of the sandwich as each side browns.)
Slice sandwiches in half and serve immediately with cold grapes. Delish!
Posted by Ree on March 20 2011


March 17, 2011
Sour Cream Noodle Bake
 Raise your hand if you love recipes with the word "Bake" in the title.
This is a classic old recipe shared with my mom by her friend Betty Daley. I always loved it growing up, but the first time I made it for my own household years ago, it was met with mixed reviews. The original recipe calls for quite a bit of sour cream, and since my nuclear family is a little sensitive to large amounts of the stuff, I've adapted it through the years to suit the picky palates of the people I live with.
Picky palates of the people. Thursday morning alliteration for you.
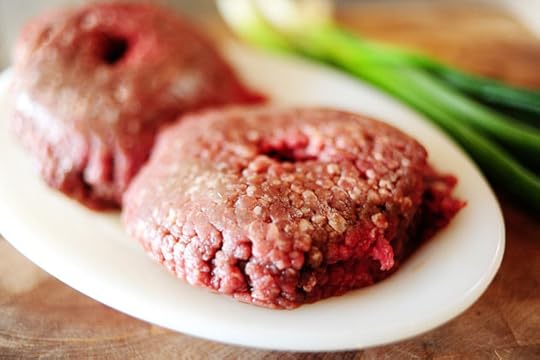 You'll need ground chuck.
Okay, fine. Any ground beef will do.
But ground chuck is best. Flavor to the max. Like, totally.
 You'll need tomato sauce. Just plain ol' pure and (relatively) holy tomato sauce.
 You'll need sour cream…
 Cottage cheese…
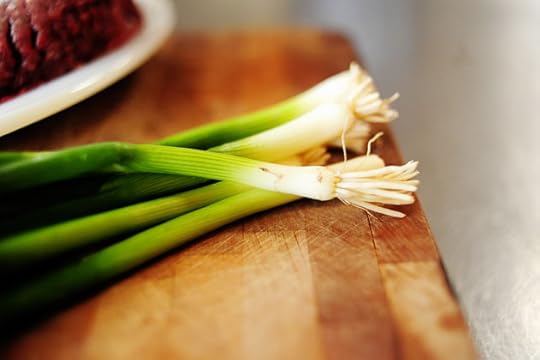 Green onions…
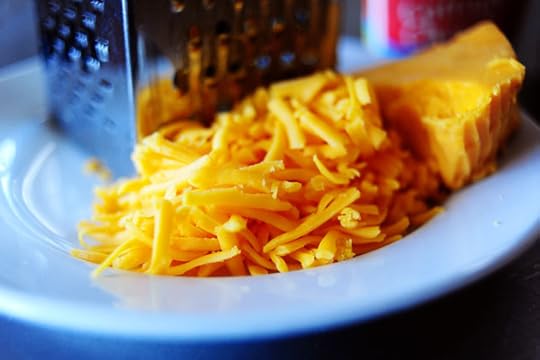 And grated sharp cheddar.
Please grate your own. Please?
 You'll also need egg noodles. It's hard to make Sour Cream Noodle Bake without the noodles!
Oh, and I like No Yolks. This is not a paid advertisement. No Yolks doesn't know me. I just like the firm, wonderful texture of No Yolks.
No Yolks No Yolks No Yolks.
Sorry.
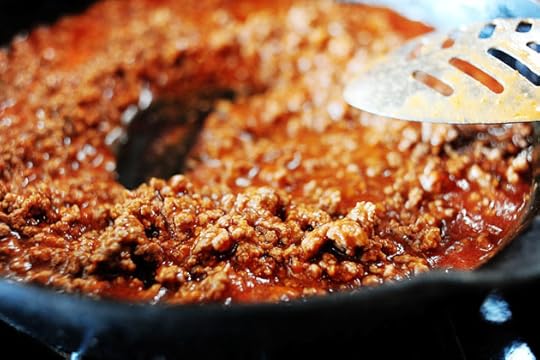
 Begin by browning the meat into a large skillet. Cook it till brown.
 Drain off the excess artery-clogging material…
 Then pour in the tomato sauce.
 Stir it together…
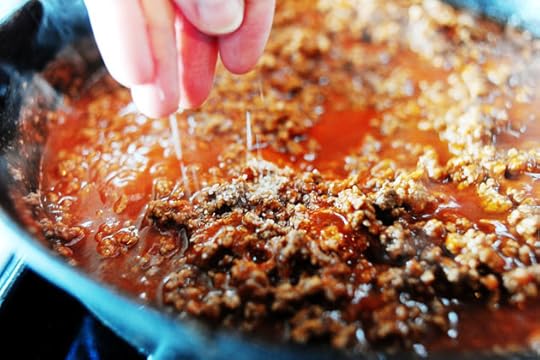 Then throw in some salt…
 And plenty of freshly ground black pepper.
And that's it for the seasoning, and what I actually love about this dish. But you can certainly add in some Italian seasoning or red pepper flakes to give it a little kick.
 Let the meat sauce simmer while you cook the egg noodles.
 Cook them until just al dente, then drain and set aside.
 In a separate bowl, add the sour cream…
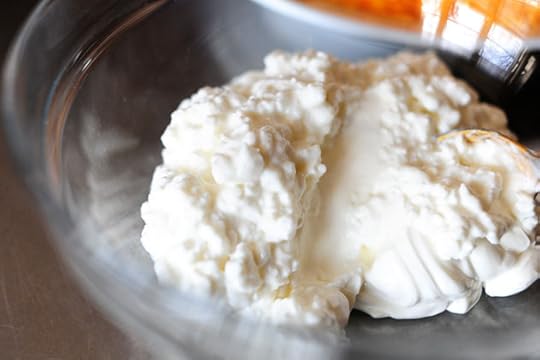 And the cottage cheese.
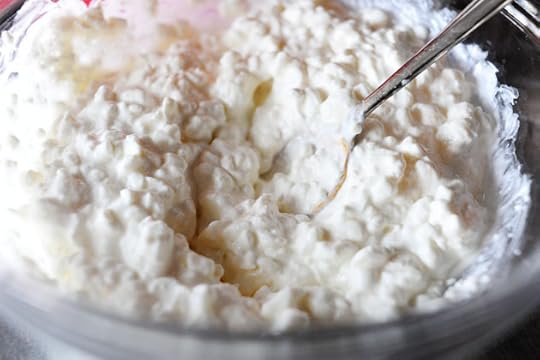 Mix this together…
 Then add in some freshly ground black pepper.
 Finally, slice up the green onions.
 Throw the sour cream/cottage cheese mixture…
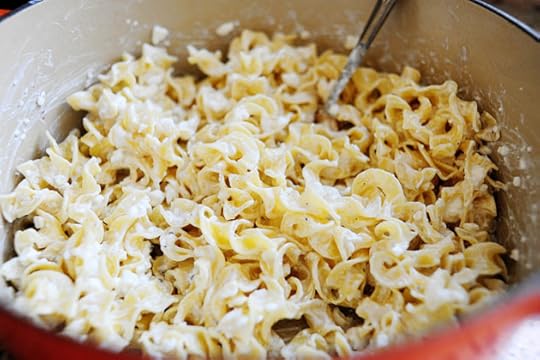 And stir it together.
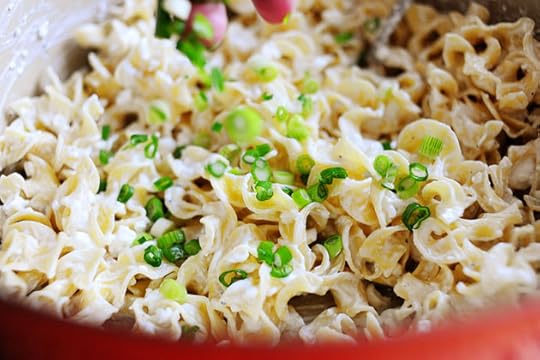 Throw in the green onions…
 And stir till combined. (Note: The green onions can quickly overpower, so go easy at first, adding as little as 1/4 a cup.) It is now that I will refrain from admitting that I snarfed down approximately four monstrous spoonfuls of the noodles at this point. Delicious on their own!
 To assemble, add half the noodle mixture to a baking dish.
Note: Some other versions of Sour Cream Noodle Bake call for stirring the noodle mixture and the meat mixture together in one big batch, but I prefer the layered approach. Either way is yummy, though—go forth and do what you'd like!
 Top the noodles with half the meat mixture…
 Then sprinkle on half the cheese.
 Repeat with the rest of the noodles, the rest of the meat…
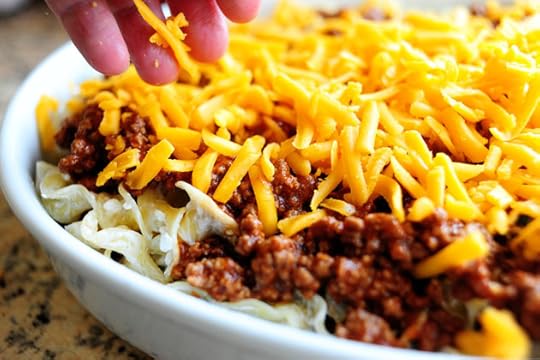 And the rest of the cheese.
Bake it in a 350 degree oven for about 20 minutes—just long enough for the cheese to melt.
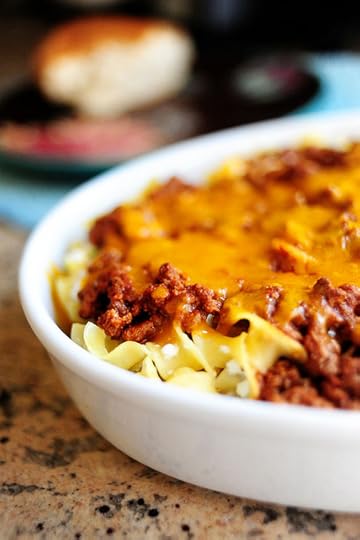 Oh, yum.
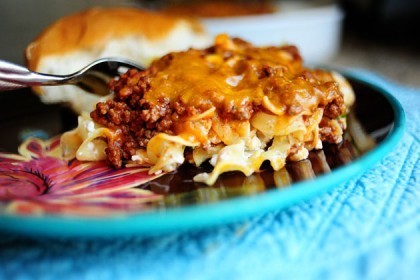
As you can see, I already have my hunk of bread ready.
 I always have my hunk of bread ready.
This really is yummy, guys, and can be made ahead of time and refrigerated, unbaked, until you're ready to pop it in the oven. Delicious, easy weeknight grub.
Enjoy!
Recipe: Sour Cream Noodle Bake
Prep Time: 10 Minutes
|
Cook Time: 20 Minutes
|
Difficulty: Easy
|
Servings: 8
Print Recipe
3"x5" Cards
4"x6" Cards
Full Page
Ingredients
1-¼ pound Ground Chuck1 can 15-ounces Tomato Sauce½ teaspoons Salt Freshly Ground Black Pepper8 ounces, weight Egg Noodles½ cups Sour Cream1-¼ cup Small Curd Cottage Cheese½ cups Sliced Green Onions (less To Taste)1 cup Grated Sharp Cheddar Cheese Preparation Instructions
Preheat oven to 350 degrees.
Brown ground chuck in a large skillet. Drain fat, then add tomato sauce. 1/2 teaspoon salt and plenty of freshly ground black pepper. Stir, then simmer while you prepare the other ingredients.
Cook egg noodles until al dente. Drain and set aside.
In a medium bowl, combine sour cream and cottage cheese. Add plenty of freshly ground black pepper. Add to noodles and stir. Add green onions and stir.
To assemble, add half of the noodles to a baking dish. Top with half the meat mixture, then sprinkle on half the grated cheddar. Repeat with noodles, meat, then a final layer of cheese. Bake for 20 minutes, or until all cheese is melted.
Serve with crusty French bread.

March 15, 2011
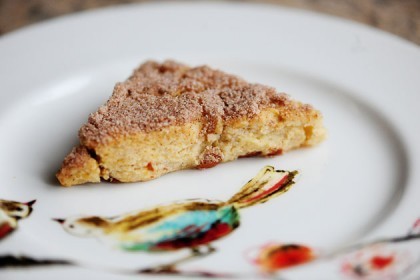
Sweet Cinnamon Scones
 I made these scones Sunday afternoon. Then I ate them.
I started to post the recipe yesterday morning, but when I saw the luscious Snickerdoodle Muffins on the Tasty Kitchen Blog, I decided to wait lest I burn you out forever on cinnamon and sugar-topped baked goods.
Today is a new day, of course, so here are the sweet cinnamon scones I made. Scrumptious.
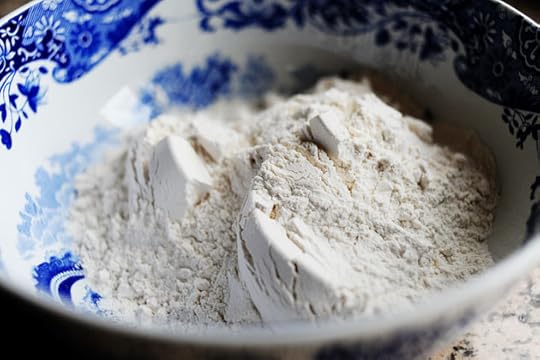 Start with a bowl of flour.
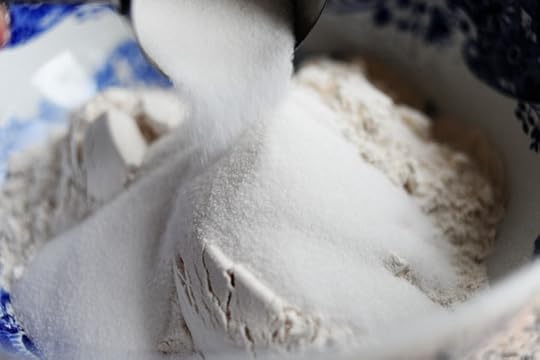 Add a little sugar.
I like my scones a little on the sweet side.
I'm sorry.
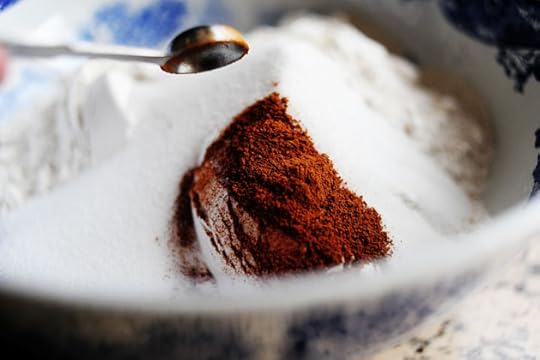 Add a little cinnamon…
 And a few teaspoons of baking powder.
 Stir it together with a whisk.
 Next, grab some unsalted butter (scones are one of the few instances in which I like to use unsalted butter) and cut it into pieces.
 Throw the butter into the flour mixture…
 …And use a pastry cutter to mix it into the flour.
 Keep going until the butter is thoroughly worked into the flour mixture. This takes a good couple of minutes, so be patient and use this time to contemplate the meaning of life.
Or your to-do list for the day. Whichever is more pressing.
 Add in some cinnamon chips—these are sold next to the chocolate chips.
They're yummy.
 Stir them into the flour/butter mixture so that they're evenly distributed.
 Next, measure up some heavy cream, and crack in an egg.
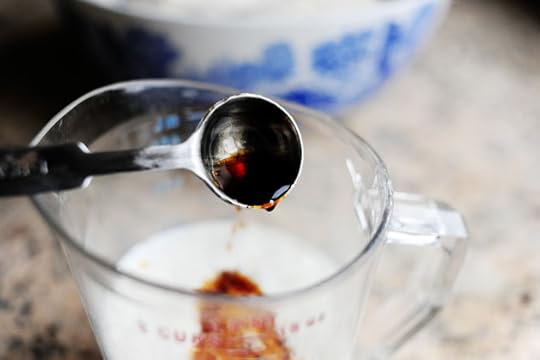 Add in some vanilla extract…
 And mix this together with a fork.
 Slowly pour in the cream/egg mixture…
 Stirring gently with a fork as you go. Don't overmix; stop just when the last of the liquid is stirred in.
 Turn the dough out onto a work surface. It'll fall apart, be crumbly, and look like a mess.
 Use your hands to push the dough together in a large circle…
 And use a rolling pin if you'd like to roll it to the desired size. Often, I won't even use a rolling pin, as I like more of a rough/rustic surface on top.
 Next, we'll sprinkle on the topping: mix together sugar and cinnamon.
 Add in a teaspoon or two of cream.
 Stir it together with a fork until it's combined and crumbly.
 Sprinkle it over the top of the dough.
 Use your freaky pink alien hand to spread it over the top of the scone dough, pressing lightly into the surface of the dough.
 Then use a knife to cut the scones.
 I usually just cut a plus sign…
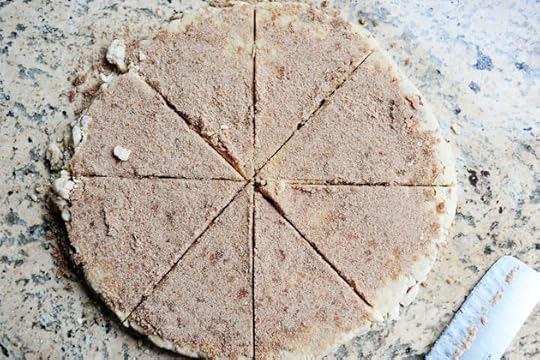 Then an "X".
 You can go a little farther and cut the wedges smaller if you'd like—depends on your preference.
 Carefully transfer the scones to a baking sheet lined with parchment or a baking mat, then bake at 350 degrees for 20 minutes or so.
 Serve with coffee. Dunk with pride.
 China Check: Lenox "Chirp."
 Note: You can also shape the dough in this shape, which results in more of a mini-scone. (Photo from Petite Vanilla Bean Scones.)
 Here's one of the small ones. I really do prefer the mini-approach to scones; they're not so large and bready, and you can eat three at a time and fool yourself into thinking you're eating more.
Or something like that.
Enjoy these, guys! Here's the printable.
Recipe: Sweet Cinnamon Scones
Prep Time: 20 Minutes
|
Cook Time: 25 Minutes
|
Difficulty: Easy
|
Servings: 8
Print Recipe
3"x5" Cards
4"x6" Cards
Full Page
Ingredients
3 cups All-purpose Flour⅓ cups Sugar½ teaspoons Ground Cinnamon5 Tablespoons Baking Powder2 sticks (1 Cup) Unsalted Butter¾ cups Heavy Cream1 whole Egg1 teaspoon Vanilla Extract1 cup Cinnamon Chips Topping½ cups Sugar1 teaspoon Ground Cinnamon1-½ teaspoon Heavy Cream Preparation Instructions
Preheat oven to 350 degrees.
In a large bowl, mix together flour, 1/3 cup sugar, 1/2 teaspoon ground cinnamon, and baking powder. Cut butter into pieces, then cut into dry ingredients with a pastry cutter until mixture resembles coarse crumbs. Stir in cinnamon chips.
Mix together cream, egg, and vanilla extract. Pour into flour/butter mixture, stirring gently with a fork to combine.
Turn onto work surface (mixture will be very crumbly and falling apart.) Gently press together on the sides as you flatten (or roll, with a rolling pin) the top. Form either into a large circle or a large rectangle. Mix together topping ingredients, stirring with a fork. Sprinkle over the top of the dough, lightly pressing.
Cut into wedges (from a circle) or triangles (from a rectangle.) Transfer to a cookie sheet and bake for 20 to 25 minutes. Allow to cool completely. Serve with coffee.

March 14, 2011
Happy Pi Day!
 Did you know today is Pi Day?
Not Pie Day. Pi Day. A day set aside by founder Larry Shaw to commemorate…well, Pi.
Not Pie. Pi.
Since the (approximate) numeric representation of Pi is 3.14, March 14 (3/14) is the perfect fit! Many Pi Day celebrants embrace Pi Day by eating Pie, so today I'm sharing what is probably my favorite pie here on The Pioneer Woman Cooks. (Well, besides the French Silk Pie, which is eternally my one true pie love.) I call it Key Lime Pie even though I used regular lime juice, and it's just so creamy and tangy and wonderful. But recently, a friend of mine sent me a box of key limes from his backyard in Florida and I used the juice in this pie. I died. I just died.
Whether you use regular limes or Key limes, you owe it to yourself to make this.
And Happy Pi Day, everyone!
Here's the recipe:
 Strict Key Lime Adherents: Please look away. I haven't got time for the pain.
Everyone else: Let's make Key Lime Pie! Using regular limes! Because that's all I have available in my small town! And I don't live in Florida! So I can't grow my own! Key limes!
I'm still calling it Key Lime Pie, though—no one can stop me. Not even you Strict Key Lime Adherents.
But I love ya anyway.
Before I proceed, I would like to state that I am currently obsessed with refrigerator pies: pies that require refrigeration (to facilitate setting) before serving. These pies often have a graham cracker or other cookie crust, which I think is at the basis of my current obsession. They're just making my skirt fly up right now. Can't explain why.
I chose Key Lime Pie for today's pie recipe because I love the movie "Heartburn". At the end of the movie, just after Meryl Streep's character, a food writer named Rachel, discovers that Jack Nicholson's character, a political columnist named Mark, has just spent their savings on a down payment for a new necklace for his mistress, a tall, leggy European named Thelma with whom he'd had an affair months earlier, Rachel bakes a Key Lime Pie with the sole intention of smashing it into Mark's face at a dinner party later that night.
And she does it.
And frumpy, disheveled housewives everywhere CHEERED!
And then we got really dang depressed.
But that's what pie is for: movie-induced depression.
By the way, are you aware the story of "Heartburn" is loosely based on the marriage between Norah Ephron and Carl Bernstein?
Anyway, that's why I decided to make Key Lime Pie.
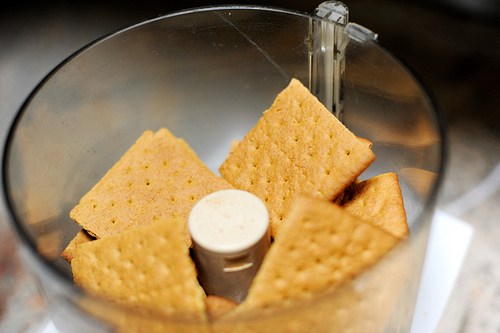 We've got to begin by making a good graham cracker crust. Put 18 graham crackers (that means the full rectangle) into a food processor.
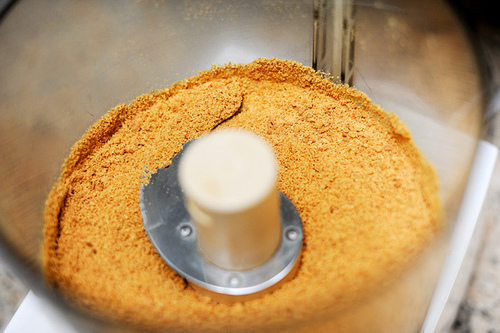 Pulse until totally crumbled. You could also put the crackers into large Ziploc bags, hand them to your sons, and say "Have at 'em, boys." It'll just take a minute or two.
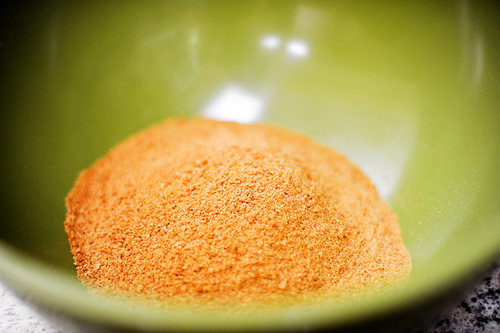 Pour the crumbs into a bowl.
 Then throw in a little sugar.
 Or a lot, if that floats your boat.
It usually floats mine nicely.
 Some butter. Regular, please. This concoction needs the salt.
 Melt it in the microwave.
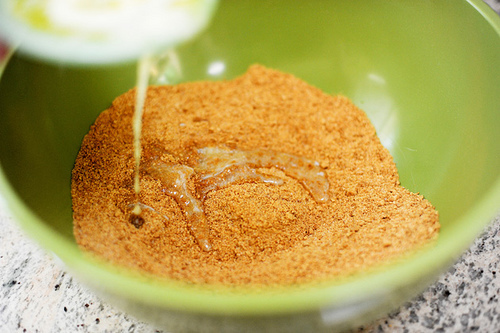 Then just drizzle the butter over the crumbs.
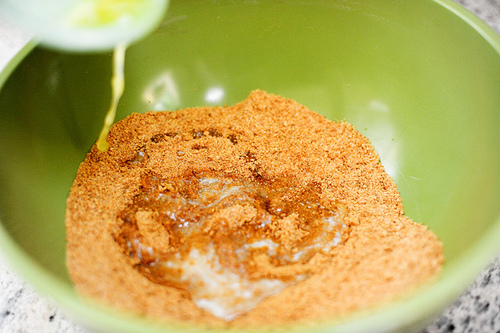
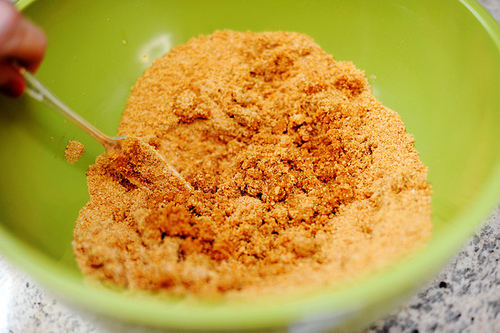 Stir the mixture with a fork.
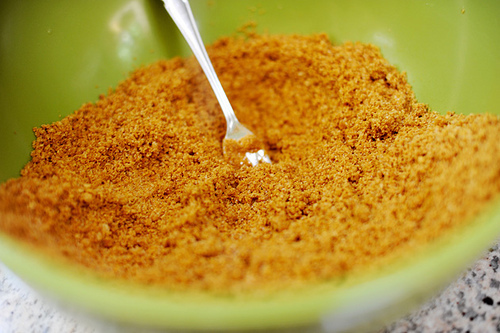 It should be moist, but still very crumbly.
 Pour the crumbs into a pie pan.
 Using your fingers, press the crumbs gently so that they form a crust on the bottom and sides of the pan. Again, don't expect the crumbs to stick together like glue; the crust should easily crumble if you mess with it too much.
Now just bake the crust in a 350-degree oven for about 5 minutes. This will toast it up a little bit and cause the crust to set.
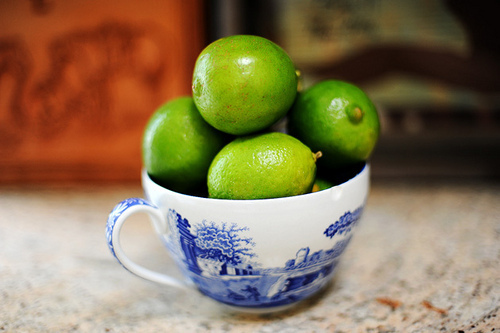 Grab some limes. If you have Key Limes, yahoo! If you don't, grab some of these regular peasants.
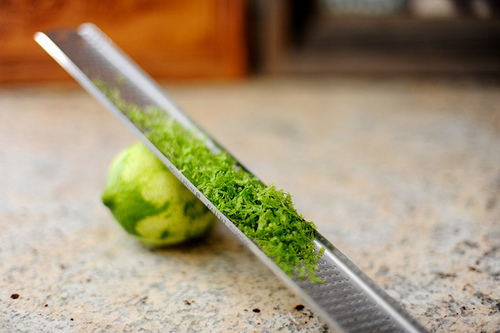 Now zest a couple of them. You'll need a heaping tablespoon of zest.
And if you don't have a microplane zester, please obtain one at your earliest convenience.
And when you do: run the zester over the lime—not the other way around.
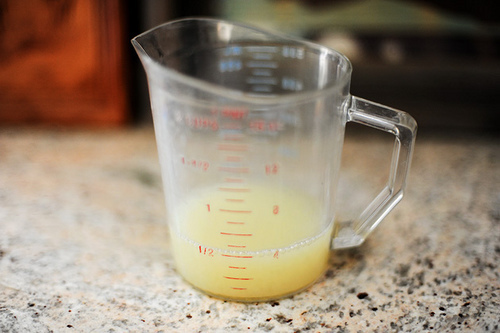 Now halve and squeeze the puppies until you have 1/2 cup of juice.
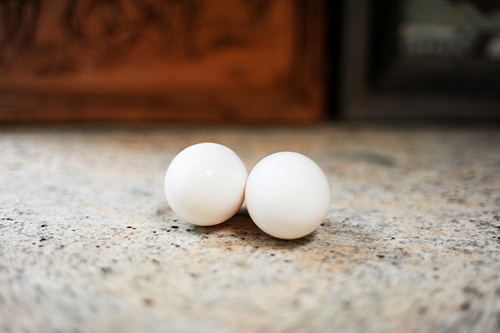 Now dig around your fridge until you find two eggs. Heave a sigh of relief. Then scribble "eggs" on your grocery list.
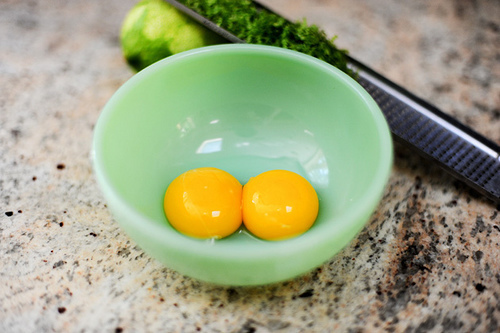 Separate the eggs. You just need the yolks for this one.
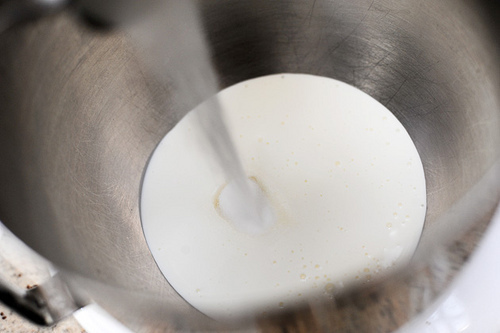
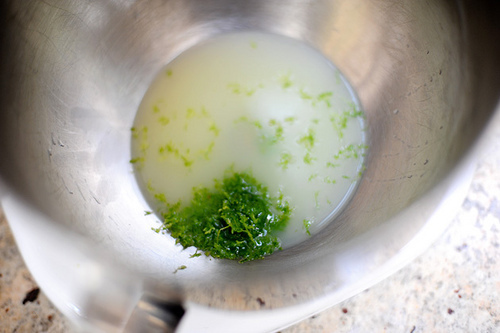 Now, throw the lime juice and the lime zest into the bowl of your electric mixer.
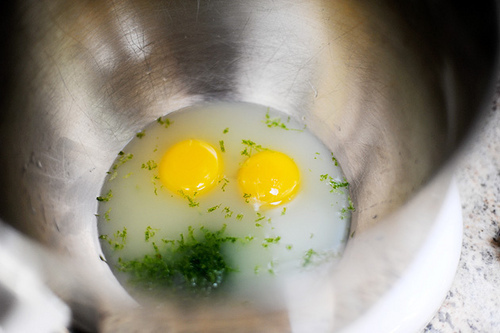 Then add the egg yolks and beat immediately on high for one minute.
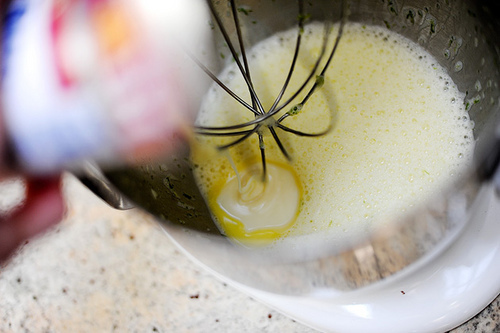 Turn off the mixer, then pour in 1 can of sweetened, condensed milk.
It's good stuff. I promise you that.
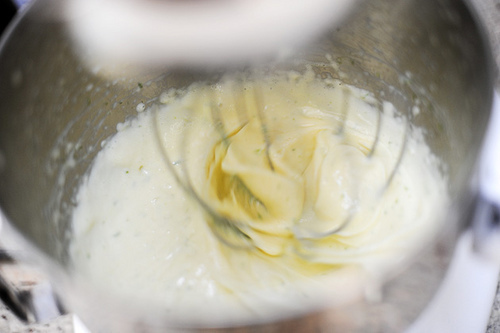 Mix it on high until thick and smooth.
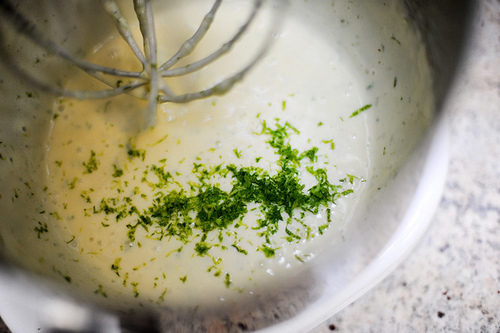 If the mixture looks like it needs more zest, add it right in!
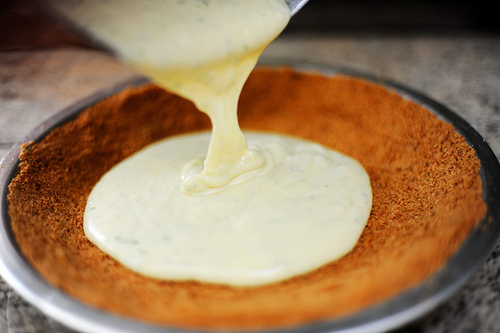
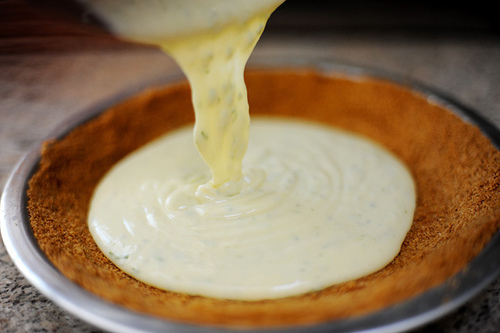
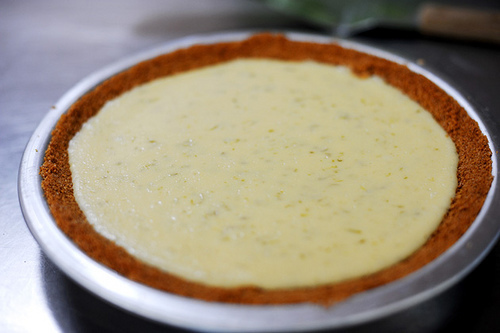
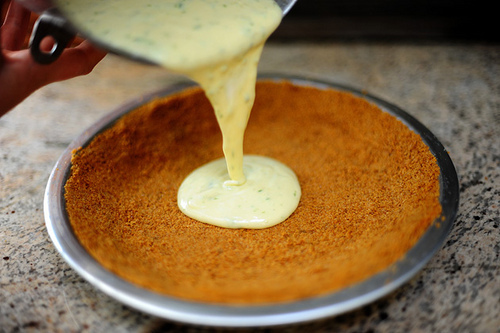 When it's all mixed, just pour it into the crust.
 Oh, honey.
 I love you so much.
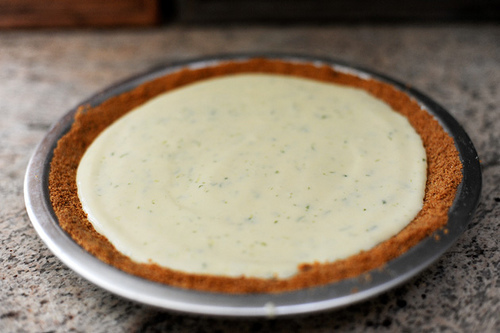
Now bake it in the oven for about fifteen minutes, or until no longer jiggly.
Then remove it from the oven, allow it to cool for a little while, then stick it into the fridge to chill for at least an hour. A couple of hours is better. You just want it to be nice and chilled and firm and perfect.
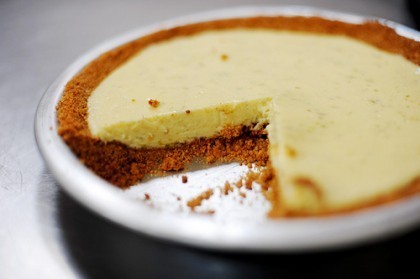
 Like this.
Oh, how I love Key Lime Pie Sorta.
Now, here's my stance on Key Lime Pie Sorta: it needs sweetened whipped cream. It could be that I'm overly sensitive to tart flavors and I need the whipped cream to balance it out. Or it could be that I just look for justification for putting more cream into my diet.
Either way, whipped cream makes it better.
And here's how you make it:
 Pour about a cup of cold, heavy cream into the (clean) bowl of the mixer. Then add in a healthy tablespoon or two of sugar. You can also add a little vanilla, but we don't really need it here.
 Then just beat it on high speed…
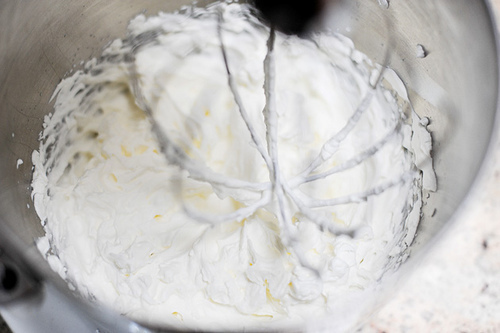 Until it's very stiff. Perfect!
 Now comes the fun part.

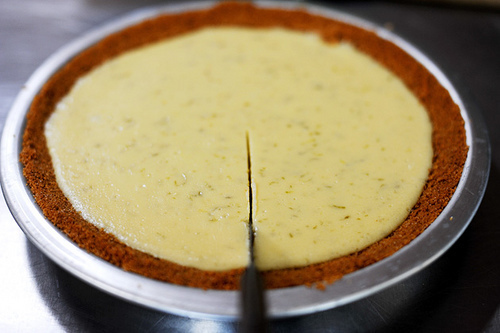
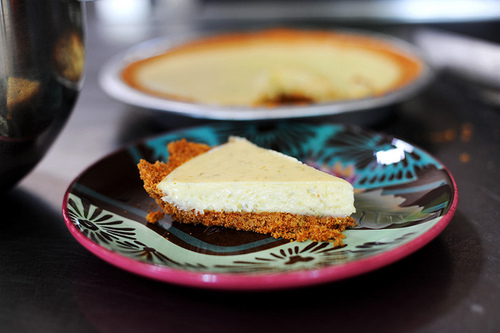 Mmmm. You can see that the crust is rather thick in relation to the filling. This is by design; as much as I love the creamy filling, I do find it pretty rich. With the ample crust and whipped cream on top, it turns out to be a really balanced piece of pie…and that lime flavor still really bursts through.
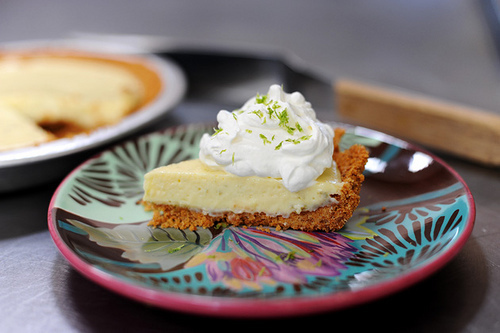 A little extra zest on top totally seals the deal.
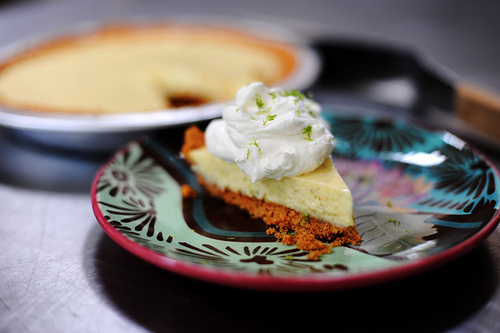 Oh, man. I'm so ready for the next five (okay, three) minutes to happen.
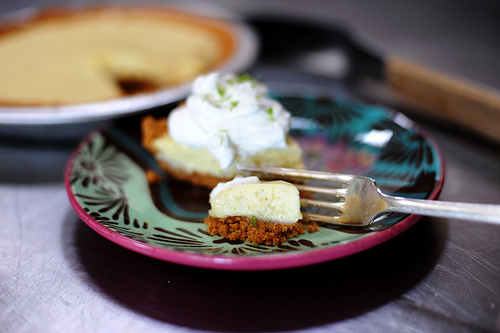 It's…it's…it's happening.
It happened.
And now it can happen to you!
Recipe: Key Lime Pie. Sorta.
Prep Time: 15 Minutes
|
Cook Time: 1 Hour
|
Difficulty: Easy
|
Servings: 36
Print Recipe
3"x5" Cards
4"x6" Cards
Full Page
Ingredients
Crust18 whole Graham Crackers (the 4-section Large Pieces)⅓ cups Sugar⅓ cups Butter, Melted _____ Filling1 Tablespoon (heaping) Lime Zest½ cups Lime Juice2 whole Egg Yolks1 can (14 Oz) Sweetened Condensed Milk Preparation Instructions
Preheat oven to 350 degrees
For the crust:
Crush crackers in a food processor or Ziploc bag. Pour them into a bowl and stir in sugar and melted butter. Press into a pie pan and bake for 5 minutes or until golden and set. Remove from oven and set aside to cool slightly.
For the filling:
Mix lime zest, lime juice, and egg yolks in a mixing bowl. Add in condensed milk and mix on high until smooth and thick. Pour mixture into crust and bake for 15 minutes.
Remove from oven, allow to cool, then refrigerate for at least 1 hour—more if possible.
Serve with sweetened whipped cream and more grated lime zest.

March 10, 2011
Two Crab Dips
I'm in Savannah, Georgia as I type this. Marlboro Man and the boys are with me. When I'm finished here (oh my, have we had an experience; more later) we're driving to Atlanta for the rest of the weekend (I'll be looking in on Bakerella while I'm there; please keep her in your prayers) then will be back home to the ranch on Sunday.
When we arrived in Savannah last night, the glorious smell hit me. Savannah smells like Hilton Head, where we used to go on vacations when I was a child. I don't know what the smell is, either; it's a marshy/swampy/salty/fishy smell, and I love it more than life itself. It reminds me of sand dollars and Topsiders and colorful beach towels…of childhood and rental bikes and madras. Nothing transports me to my youth more than that glorious, salty smell.
Crabbing is one of my strongest memories from vacations on Hilton Head. The very day we'd arrive on the island, we'd run to the market and buy crabbing nets. Then we'd tie chicken necks in the center and hurl the nets over the side of the dock…then wait. And when we pulled the nets from the water awhile later, there'd be three, four, sometimes six or seven crabs inside. Then I'd scream and run because I was too scared to invert the net and let the crabs fall into the big steel bucket. I didn't like the sound of their hard shells crashing against the galvanized steel. And I didn't want to get pinched. So my brother would invert the nets and let the crabs drop into the bucket, then he'd take credit for catching all the crabs. Then I'd call him a butt and tell on him.
My childhood memories are very, very strong.
I forget nothing.
Here are a couple of crab dips from my mom's recipe binder. I made them earlier this week for no reason at all other than I was craving crab dip. I now know, after arriving in Savannah last night, that my heart must have been yearning for this little section of the South.
Here are the two yummy recipes:
CRAB DIP #1
This is a baked crab dip made delicious with horseradish. Add as much as your sinuses can stand!
You can make this ahead of time and keep it in the fridge, unbaked, until you're ready to bake and serve. I love it.
 Start with a couple of packages of cream cheese…
 Whip them up to soften them a bit…
 Then grab some crabmeat in any form: canned, frozen, fresh, single, married, or looking.
Yes, I used canned crabmeat. I live in northeastern Oklahoma, and I am not ashamed.
 Drain the crabmeat (if it's the canned stuff) and dump it into the cream cheese.
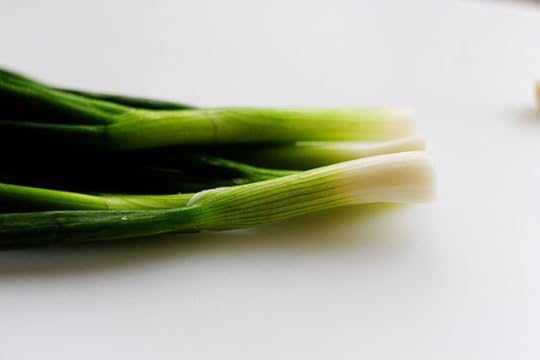 Then lop the tops off a few green onions.
 Slice them up, then throw them into the mixing bowl.
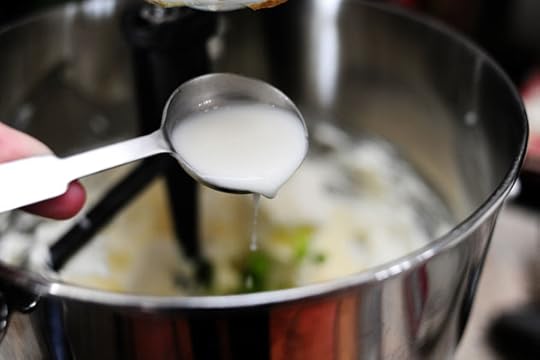 Then add a little milk…
 Horseradish…
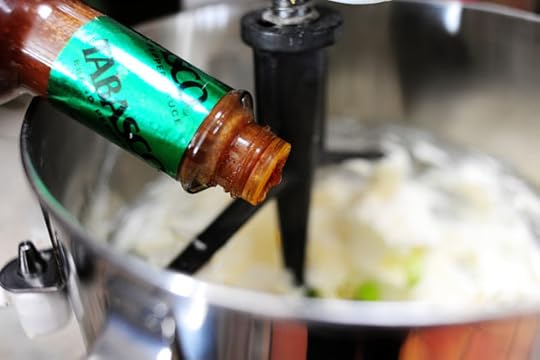 Tabasco…
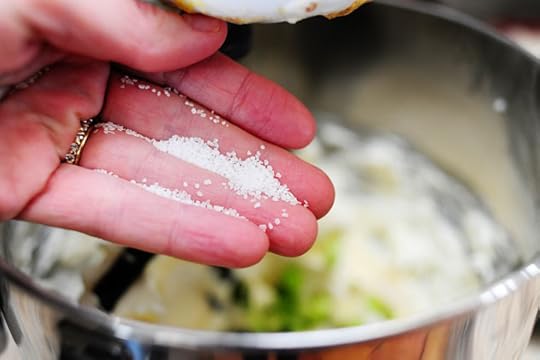 And salt.
 Mix it all together until it's all combined. Give it a taste on a chip or cracker and make sure the flavor/spiciness is what you want. I wound up adding more horseradish and Tabasco. I wanted to feel some heat!
 Throw the mixture into a baking dish…
 Spread out the surface with a spatula…
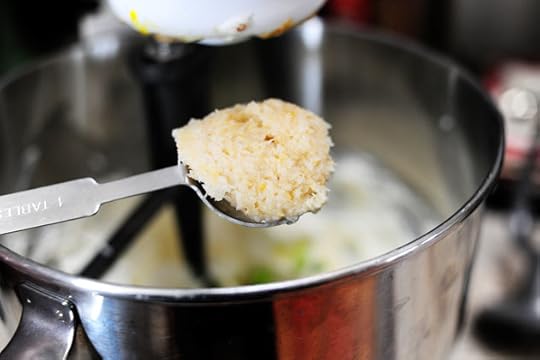
 Then sprinkle the top with slivered almonds.
 Throw this into the oven for 20 to 25 minutes…
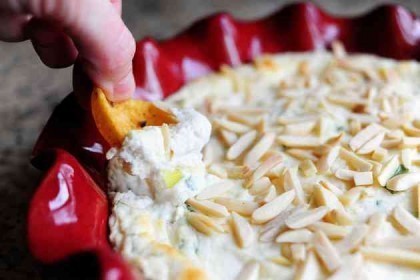
 Or until golden brown on top. As you can see, I couldn't wait before using my wrinkled, pink rat claw into the shot.
I like hot crab dip, man.
CRAB DIP #2
I especially love this cold crab dip, made with avocados as a base.
I remember spreading this on a turkey sandwich once. Sublime.
 Start with two bruised, pitiful looking avocados. But only if you want to be like me.
If you don't want to be like me, use nice, lovely avocados.
Pit them and scoop out the good stuff into a blender or food processor.
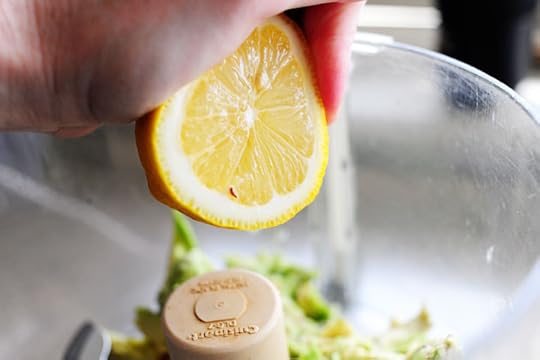 Squeeze in some lemon juice.
Then sniff the lemon.
I love sniffing lemon.
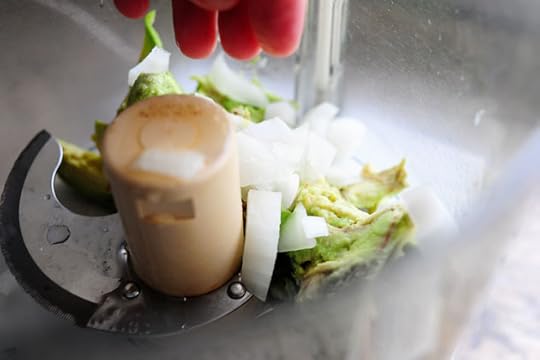 Throw in some diced onion…
 And a little Worcestershire.
 Pulse-pulse-pulse to break up the avocado a bit.
 Then throw in some cream cheese.
And speaking of cream cheese, the other day my daughter asked me what it was.
I couldn't answer her.
The end.
 Add some sour cream…
 Add some salt…
 Then dump in the (drained, if you're using the canned stuff) crabmeat.
 I went ahead and pulsed the crabmeat into the rest of the mixture, but if you're using good lump crabmeat, just stir it in to retain a lot of the texture.
Now, you can refrigerate it for a couple of hours before serving, of course. Just remember that avocado's involved, and after a few hours, the top of the tip will start to discolor.
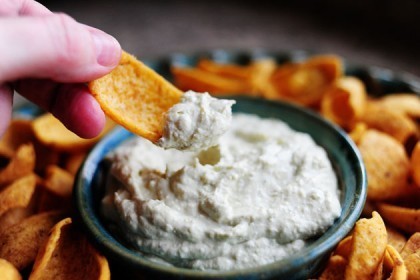
 Dish it on up…
 And surround it with corn chips or crackers.
 Scrumptious!
Enjoy these crab dips, guys! Tailor them to your liking, using fresh crabmeat and altering the spices to suit your tastebuds.
Here are the handy dandy printables:
Recipe: Hot Crab Dip
Prep Time: 10 Minutes
|
Cook Time: 25 Minutes
|
Difficulty: Easy
|
Servings: 12
Print Recipe
3"x5" Cards
4"x6" Cards
Full Page
Ingredients
2 packages 8 Ounce Cream Cheese2 Tablespoons Mayonnaise2 cans (7-ounce Each) Crabmeat (or Use Fresh Or Frozen)4 whole Green Onions, Sliced2 Tablespoons Whole Milk2 Tablespoons Horseradish (more To Taste)½ teaspoons Salt Freshly Ground Black Pepper5 dashes Tabasco (more Or Less To Taste)¼ cups Slivered Almonds Preparation Instructions
Place cream cheese and mayonnaise in a mixer fitted with a paddle attachment. Beat to combine. Add remaining ingredients except almonds and beat gently until just combined. Spoon into a heatproof baking dish. Sprinkle with slivered almonds, then bake at 375 degrees for 20 to 25 minutes or until golden and bubbly on top. Serve with corn chips or crackers.
Recipe: Avocado Crab Dip
Prep Time: 10 Minutes
|
Cook Time:
|
Difficulty: Easy
|
Servings: 12
Print Recipe
3"x5" Cards
4"x6" Cards
Full Page
Ingredients
2 whole Avocados, Seeded And Scooped1 Tablespoon Lemon Juice1 Tablespoon Chopped Onion1 teaspoon Worcestershire Sauce1 package 8 Ounce Cream Cheese¼ cups Sour Cream¼ teaspoons Salt2 cans (7-ounce) Cans Crabmeat, Drained (can Use Fresh Or Frozen, Of Course) Preparation Instructions
In a blender or food processor, combine avocado, lemon juice, onion, and Worcestershire. Pulse until combined. (Leave some texture to the avocados.)
Add cream cheese, sour cream, and salt. Pulse a couple of times. Stir in crab meat.
Chill dip until needed. Keep in mind that the avocado will discolor within a few hours, so make no more than a couple of hours before serving!

Mixer Weiners
 The winners are:
#3030 Amelia: "I would eat… a big bowl of hearty beef stew with a thick slice of homemade french bread (whipped up in the new kitchenaid, of course), slathered with real salted butter. A big glass of Dr. Pepper, followed with a small piece of chocolate cake with chocolate frosting and a glass of skim milk. Ah, bliss."
#18715 Keri Always: "Something with cheese. Being 7.5 weeks pregnant, nothing is very tempting right now. Blech."
#21729 Ro: "SUSHI. SUSHISUSHISUSHI. with tons of the really fatty white toro that I never get because I can't afford it."
Congrats, winners! Contact prizes@thepioneerwoman.com to claim your loot.

March 9, 2011
Today
Today…
Because my eyes are puffy…
Because my kitchen is messy…
Because my arms are jiggly…
And because I love ya…
 I'm giving away three (3) of these gorgeous candy apple red KitchenAid stand mixers.
I love this mixer.
It's red.
It's shiny.
It'll keep you out of trouble.
TO ENTER
To enter the giveaway, just answer the following questions in the Comments section of this post:
What would you choose to eat for your ideal dinner?
Would you have steak, mashed potatoes, and chocolate cake?
Sushi, wine, and green tea ice cream?
A big, fat Big Mac?
Just share your idea of a perfect dinner in the Comments section of this post and you're automatically entered to win a mixer.
THE RULES
One entry per person, please. Strictly enforced with a wire whisk.
No entries after noon Pacific Time Thursday.
Winners will be selected at random and announced Thursday night.
Note: Replies to comments are unable to be counted as entries. Please leave one comment (not a reply) as your entry.
Lots of Love,
P-Dub
____________________________
Giveaway sponsored by Pioneer Woman.

March 7, 2011
Short Ribs in Tomato Sauce
 I've said it before and I'll say it again: Short ribs are my life. They really, really are. I just can't think of another cut of meat that does quite what short ribs do to me. That soft, tender, moist meat that practically falls off the bone…there's absolutely nothing like it.
I have a simple braised short rib recipe on PW Cooks, and I'd eat it (served over goat cheese polenta) every day of the week if I could. But yesterday I decided to change things up and braise the short ribs in a tangy (and slightly spicy) tomato sauce. It was the only right thing to do.
Important note: it's really best to make this the day before you want to serve it (or earlier in the day) so that you can refrigerate it for several hours after cooking. This will allow you to remove the fat from the dish more easily. Then you just warm it back up and chow down. Piece of cake!
(Another note: for the purposes of this pictorial recipe, I did not refrigerate the dish overnight [I also didn't cook it for the entire four hours; I was chasing daylight!] Don't be like me.)
I have no more notes. So let's make this, baby!
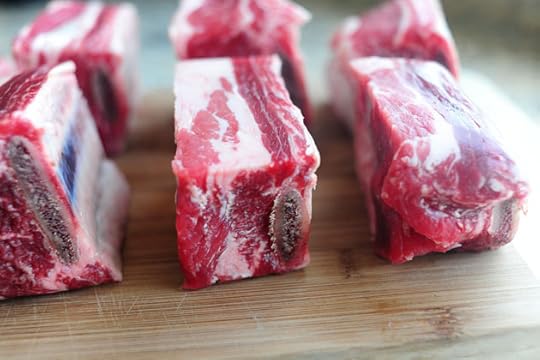 Short ribs. Yum.
 Sprinkle them with salt and pepper.
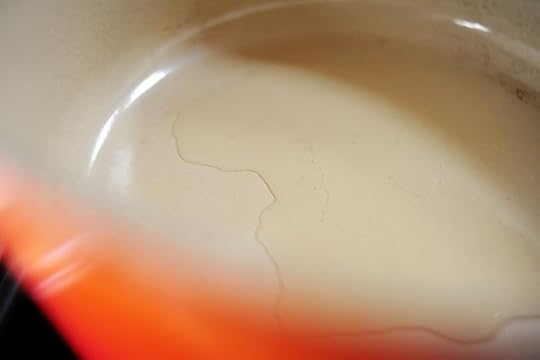 Then heat some canola oil in a large pot…
 And set the ribs in the pot to brown them.
 Get them as brown as you can in the least amount of time possible, about 1 1/2 to 2 minutes per side. You'll want the burner to be on high.
You'll also want not to lean down too close with your camera, unless you like the sensation of popping grease landing on your freckled forehead.
Ouch.
I'm going to call it a beauty mark.
Well, a beauty blister.
Never mind.
 Remove the browned ribs from the pot…
 Then (very carefully) pour off the excess oil into a heatproof container.
Seriously. Careful!
Hot grease is…well, hot.
 Throw in some chopped onions and garlic. Stir it around and cook it for a minute.
 Then crack open a big can of whole or diced tomatoes. Pour it over the onions and garlic.
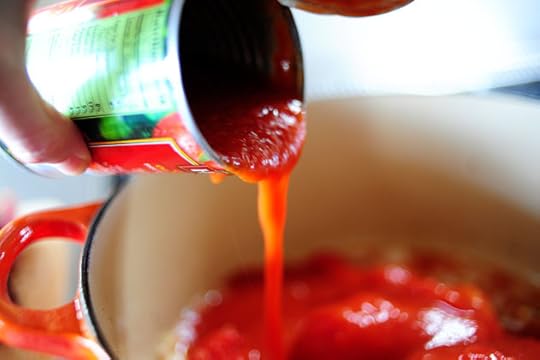 Then crack open a can of tomato sauce and pour it in, too.
Really, you can use any form of tomatoes here: crushed, diced, stewed, whole, sauce, etc.
Also (not shown because I'm a dork): pour in a little wine.
It'll make things extra nice.
*Hiccup*
 Next, add salt, pepper, sugar, ground thyme, and red pepper flakes for spice. Stir it all together…
 Then add the browned short ribs back into the pan.
Now, cover the pot and put it into a 275-degree oven for about four hours. This'll ensure that the short ribs are soft and tender and falling off the bone, and that the tomato sauce is deep and rich and flavorful and miraculous.
 Now, when you pull it out of the oven, you'll notice that there's a healthy (well, not healthy at all) layer of grease at the very top.
 You could spend a million years doing this…but why?
So what you need to do is cool the pot a bit, then place it into the fridge for several hours or overnight. When it's totally cold, the fat/grease will have risen to the top and hardened, which makes it a complete cinch to remove. Then you just set it on the stove or in the oven and warm it up.
 While you're warming it up, cook some pasta.
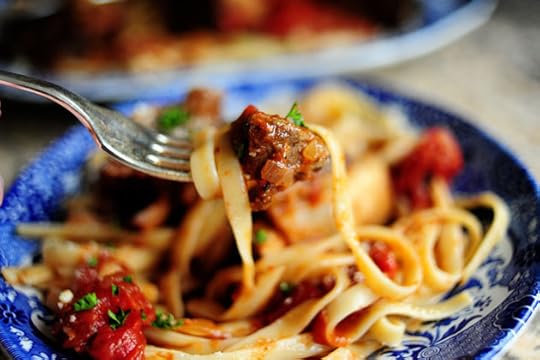
 Place the cooked pasta onto a large platter, then spoon the sauce over the top. (Remember, mine didn't cook the full four hours. Yours'll be much richer in color.)
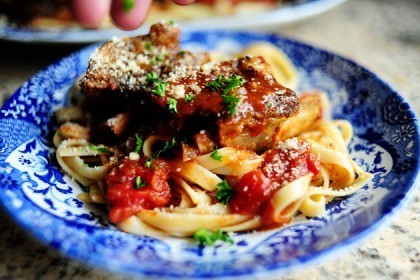
 Place the short ribs over the tomato sauce…
 Then smile. Inhale. Smile again.
 Serve up individual portions, and sprinkle Parmesan cheese on top.
 Then top it off with some fresh minced parsley.
Yes, this is the curly stuff.
It's all I have till my garden grows, man.
 Mmmm. Good. Very good.
 Make this very soon!
(Just remember to make it the night before you'll need it.)
Enjoy!
Recipe: Short Ribs in Tomato Sauce
Prep Time: 10 Minutes
|
Cook Time: 4 Hours
|
Difficulty: Easy
|
Servings: 6
Print Recipe
3"x5" Cards
4"x6" Cards
Full Page
Ingredients
8 whole Beef Short Ribs2 Tablespoons Olive Oil Salt And Pepper, to taste1 Tablespoon Sugar4 cloves Garlic, Crushed1 whole Medium Onion, Diced1 cup Red Or White Wine1 can (28 Ounce) Whole Tomatoes1 can (14 Ounce) Tomato Sauce1 teaspoon Salt¼ teaspoons Red Pepper Flakes¼ teaspoons Ground Thyme1 pound Fettuccine Grated Parmesan Cheese Minced Fresh Parsley Preparation Instructions
Preheat oven to 275 degrees.
Heat olive oil in a heavy pot over medium-high to high heat. Sprinkle short ribs with salt and pepper. Brown short ribs in oil, about 1 1/2 or 2 minutes per side. Remove to a plate.
Pour off excess oil (be careful!) Throw garlic and onions into pot. Stir to cook for a minute or two, then add tomatoes, tomato sauce, wine, salt, red pepper flakes, and thyme. Stir to combine.
With tongs, set short ribs back into the pot, submerging as much as possible in the sauce. Cover pot and place into the oven. Cook for 3 1/2 to 4 hours. Short ribs should be tender and falling off the bone.
*Remove ribs from pot. Allow to cook, then wrap tightly and refrigerate. Allow pot of sauce to cool a bit, then place pot into the fridge for several hours or overnight. Remove hardened fat/grease from the top. Discard fat. Return ribs to pot, then return pot either to stovetop or oven and warm it up.
Boil pasta according to package directions. Turn pasta onto a large platter, then top with tomato sauce and short ribs. Sprinkle plenty of Parmesan over the top, as well as some chopped parsley.
Takes awhile, but the end result is worth it! Short ribs are my life.

March 4, 2011
Grasshopper Pie
 I love desserts containing creme de menthe. I'm still not sure what my mom was thinking, but I used to eat creme de menthe parfaits (basically, layers of vanilla ice creme with creme de menthe drizzled between the layers) with great regularity beginning when I was six years old.
*Hiccup* I wonder if that's what's wrong with me?
*Hiccup*
Anyway, yesterday I was craving something minty, fresh, and cold. I was fresh out of vanilla ice cream, so I decided to whip up a Grasshopper Pie, circa…well, I can't exactly say from what era Grasshopper Pies originally hail. So I'm just gonna go out on a limb and assign it to the seventies. It's the decade responsible for most of my favorite foods.
 Thank you, Betty Daley, for the recipes you contributed to my mother's old recipe box, which eventually morphed into a large and bulky recipe binder, which my mother blessedly left at my house once upon a time, and which I accidentally shook upside down as I was later returning it to her in hopes some of the little jewels like these would fall out.
And they did. And I kept them. And I'm not sorry.
Hey, Mom: if you ever need a recipe for Grasshopper Pie, you'll know who to call!
Betty Daley, by the way, also happens to be responsible for Sour Cream Noodle Bake, which is so beefy and cheesy and delicious, I don't know how to describe it.
Well, I guess I did just describe it. It's beefy and cheesy and delicious.
Anyway, I'll make it for you sometime.
And I'll stop talking now.
Let's make the Grasshopper Pie, okay?
Okay.
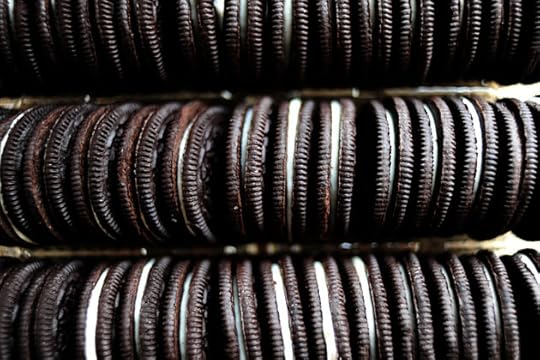 To begin, grab some Oreos.
Betty Daley's recipe says "Hydrox cookies," which I think is just adorable.
 Throw some cookies into the food processor (or a big Ziploc if you just want to crush 'em yourself.)
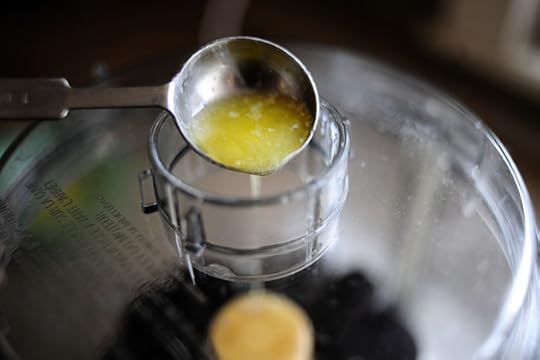 Add in some melted butter…
 Then process them until totally combined.
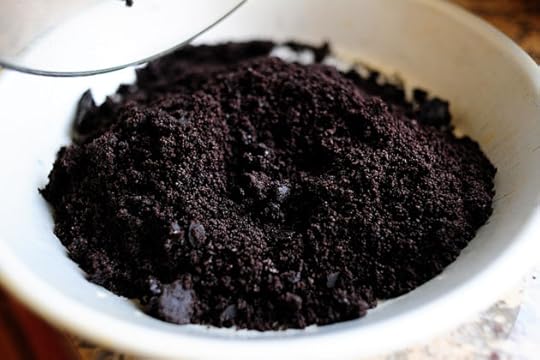 Pour 'em into a pie pan…
 And press them into the bottom of the pan and up the sides. Set the pie pan aside, and for the sake of all that is good and right in the world, do not grab a spoon and scoop a big chunk of the crust out of the pan, eat it, then attempt to patch up the hole.
Never works as well as you think.
 The recipe calls for 24 large marshmallows, but this time I decided just to use the fluff stuff.
I'll tell you something I don't know: How many marshmallows equals how much marshmallow creme.
So I used the whole dang jug.
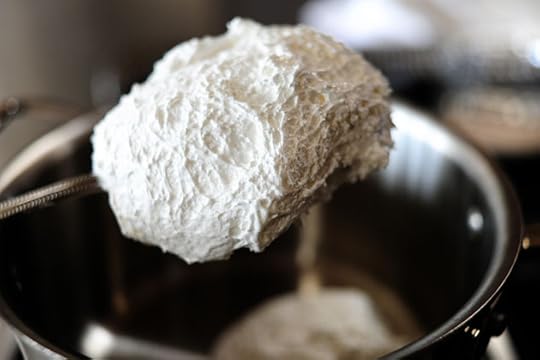 Throw it into a saucepan…
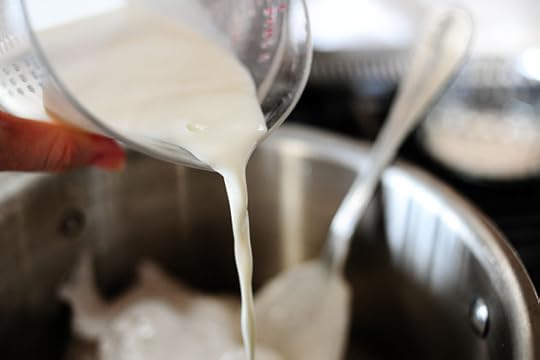 With some half-and-half.
 Cook the mixture over low heat, stirring constantly, until just melted. Then turn off the heat…
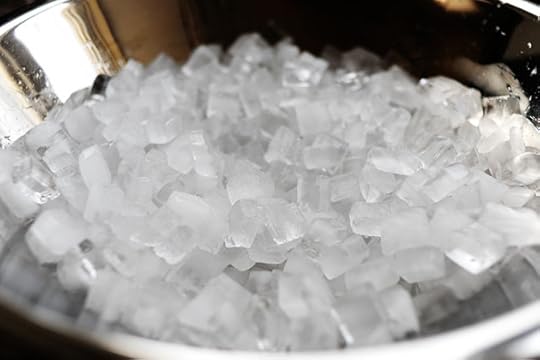 Fill up a bowl with ice…
 And set the saucepan right in the ice. Stir it around a little to hasten the cooling process.
 Next, grab these from your bedside table.
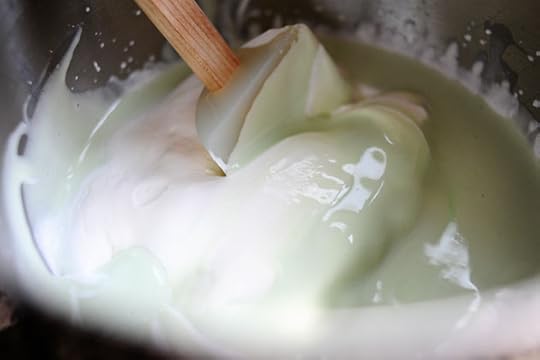
 Add two tablespoons of creme de cacao…
 And two (or three, if you like things more minty) tablespoons of creme de menthe. Stir to combine.
 Now, because my creme de menthe was not colored a shocking green like my mom's creme de menthe used to be, I decided to drop in a tiny bit of coloring.
 I only added a drop…
 Which turned out to be ultra subtle.
If you want to make more of a green statement (St. Patrick's Day, anyone?) just add a little more coloring.
Then let it sit and finish cooling while you whip up some fresh cream.
 Pour a cup of heavy cream into the bowl of an electric mixer…
 Then beat it on high until the cream is stiff.
 Make sure the marshmallow mixture is nice and cold, then pour it into the whipped cream…
 And fold it together gently.
 You can barely see the difference between the green and the white in the photos…but it really was a nice, light shade of mint.
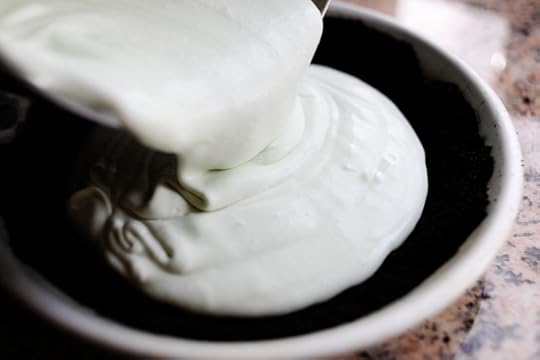
 Pour the filling into the crust…
 Done! Note that this filling really fills up a standard pie pan; you'll have a half cup or so left over, which you can just drink with a straw while you're waiting for the pie to freeze.
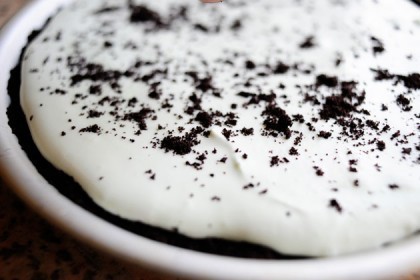
 Finally, sprinkle on some extra cookie crumbs. Makes the pie look purty.
 You'll want to freeze this for at least a couple of hours. Stick it right in the freezer, uncovered, until the surface really firms up. Then you can cover it with plastic wrap without disturbing the lovely surface, then stick it back in the freezer until it's totally set.
Remove it from the freezer about ten minute before you want to cut into it. The pie is nice and rich, so smaller slices are usually plenty. And if you want to go a little fancier, throw some chocolate curls (or just shaved chocolate) on top. The texture is lovely: smooth and firm and light.
Enjoy!
Recipe: Grasshopper Pie
Prep Time: 20 Minutes
|
Cook Time:
|
Difficulty: Easy
|
Servings: 12
Print Recipe
3"x5" Cards
4"x6" Cards
Full Page
Ingredients
16 whole Chocolate Sandwich Cookies2 Tablespoons Butter, Melted24 whole Large Marshmallows (or Container Of Marshmallow Fluff)⅔ cups Half-and-half2 Tablespoons Creme De Menthe Liqueur (more To Taste)2 Tablespoons Creme De Cacao Liqueur Drop Or Two Of Green Food Coloring1 cup Heavy Cream Extra Cookie Crumbs, For Sprinkling Preparation Instructions
Throw the cookies and melted butter into a food processor and pulverize (or, if you have some aggressions or energy to expend, you can crush them in a large Ziploc bag.) Pour into a pie pan and press into the bottom and up the sides of the pan. Set aside.
Heat marshmallows and half-and-half in a saucepan over low heat, stirring constantly. As soon as it's all melted and combined, place saucepan in a bowl of ice to cool down quickly. (Stirring occasionally will hasten this process.) Once cool, add creme de menthe and creme de cacao. Taste and add more creme de menthe if needed. Add one to two drops green food coloring (optional!)
In a mixing bowl, beat whipping cream until stiff. Pour cold marshmallow mixture into the whipped cream and fold together gently.
Pour filling into chocolate crust (note: you might have a good 1/2 cup filling left over, depending on the size of your pie pan!) Sprinkle extra chocolate crumbs over the top. Place pie in the freezer and freeze until very firm, at least two hours.
Remove from freezer ten minutes or so before you want to slice and serve.

March 3, 2011
Web Deliciousness
I have cooking photos still to edit, so I thought I'd share a handful of utter deliciousness I've seen on some of my favorite food sites lately.
I die.
I swoon.
I crave.
 Dulce de Leche Cupcakes from Joy the Baker. Bless you, Joy. Bless you.
 Feta Sun-Dried Tomato Turkey Burger Sliders by Picky Palate. I love sliders, and I'm craving these at 9:50 a.m.
 Cheesecake wih Guava Swirl from The Noshery. Oh, Meseidy. Yum.
 BBQ Chicken Salad by Two Peas and Their Pod. Oh my goodness. Loaded salads are my life.
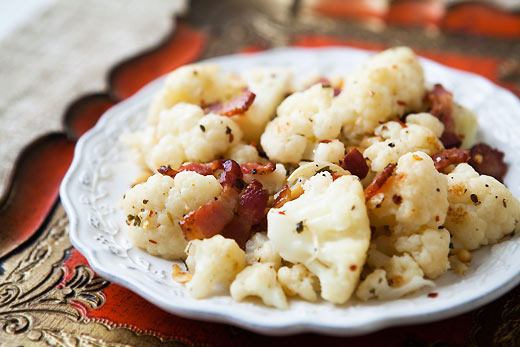 Cauliflower with Pine Nuts and Bacon. Oh my gracious. This looks divine.
 Chocolate Covered Cherry Oreo Cake by I Am Baker. It's gorgeous on the outside…even more so on the inside. Wow.
 Sautéed Bacon, Mushrooms, and Lentils by Leites Culinaria. And with that…I just died from bliss. Delicious!
I'll have my next recipe up as soon as I dig out from under my pile.
I estimate this will be in the year 2039.
See you then!
Love,
P-Dub

Ree Drummond's Blog

- Ree Drummond's profile
- 2032 followers

