
Ree Drummond's Blog, page 77
April 11, 2011
Vegetable Lasagna
 I woke up yesterday knowing I was going to make vegetable lasagna of some kind. It was meant to be, it was in the cards, it was predestined…it was fate. And I can't explain my hankering at all. I simply woke up, got out of bed, and followed the light.
I made vegetable lasagna in high school once. I can't remember the exact measurements, but instead of something like four tablespoons of parsley, I did something like four cups of parsley. So really, it was Parsley Lasagna, and it was a long time before I could eat parsley after that. It was also a long time before anyone could eat my cooking after that. It was also a long time before I could wear sandals after that, as I was deep in the throes of Ballet Toes during that period of my life, and my feet weren't suitable for public viewing.
Not that my toes had anything whatsoever to do with my vegetable lasagna mishap, but it's 6:00 in the morning as I type this and sometimes synapses fire that shouldn't.
Yesterday I tweeted that I couldn't decide between a tomato sauce and a Béchamel/white sauce for my vegetable lasagna, as both are common and delicious in an entirely different way. The responses were split down the middle, which gave me confidence that no matter what direction I headed, I couldn't go wrong. But then a few folks threw a wrench in my thinking and said, "Use both." Yum.
In the end, I was in the mood for tang and stuck with just tomato. But next time, I think I'll do the Béchamel on one layer/tomato on another layer approach.
See? I hardly finish one meal when I'm thinking about the next one. It's a little problem I have.
Here's what I made yesterday:
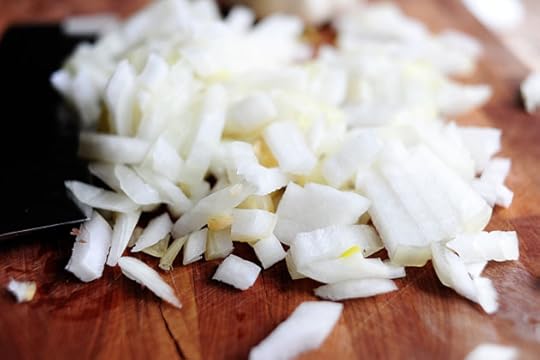 Start with a chopped onion.
 Then peel a few cloves of garlic…
 And mince them up nice and fine.
 Then you'll need diced red bell pepper: just cut it into matchsticks, then dice away.
 Mushrooms. Lots and lots of mushrooms. We're going to chop them up and they're going to shrink, so we need plenty.
 Slice them up, then chop them up…
 And keep going till they're all chopped.
I love chopping mushrooms. I think when I do it.
Kind of like when I mow the yard. I have the best ideas on the lawn mower.
 Next, grab some squash of some kind: I used yellow, but zucchini is good if you have it on hand.
 Cut the squash in half, then cut each half into fourths lengthwise.
 Cut the squash in the other direction to dice.
 You can switch up the vegetables however you'd like: use zucchini, different kinds of mushrooms, carrots…whatever makes you happy in life.
 Pour some olive oil into a (very large) skillet or Dutch oven over medium heat.
 Throw in the onions and garlic. Stir and cook for a minute or so…
 Then throw in the diced red bell pepper and cook for another minute.
 Toss in the diced squash and cook it for a minute.
Are you tired of me saying "minute" yet?
Just curious.
 Next, throw in the mushrooms and stir to combine. Let these cook for a couple of minutes, until they really start to shrink and cook.
 Then crack open a large can of whole tomatoes…
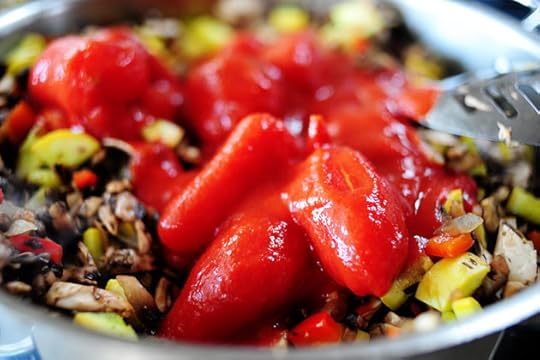 And throw them right on top.
 With very clean hands, grab the tomatoes and crush them one by one.
(Yes, my wedding band is missing a stone. It happened a long time ago, when I was welding pipe in our back yard.)
(I wasn't really welding pipe.)
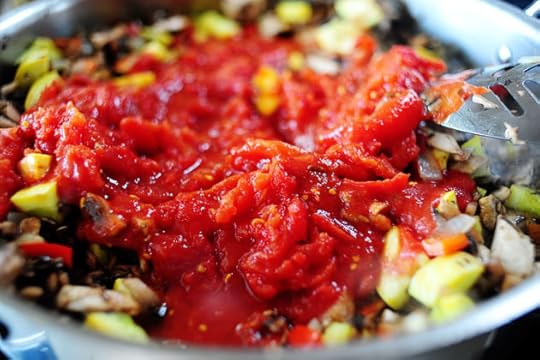
 Then stir them into the sauce and let it all start to cook.
 Pour in a little wine. It's the right thing to do.
 And, finally, add salt, pepper, and red pepper flakes. A little spice is nice.
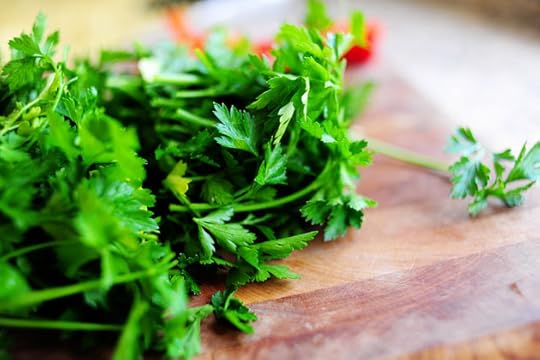 Chop up some fresh parsley…
 And add it into the sauce. This is more than four tablespoons, but a lot less than four cups.
And add some basil if you have it available.
I love you, basil. Why have you stayed away for so long?
 Stir it and let the sauce cook a little while longer. You want some of the liquid to cook off so the lasagna won't be overly soupy.
Also–important–taste the sauce, checking the seasonings and adding more salt if necessary.
 While the sauce is simmering, grab some ricotta.
 Throw in a couple of eggs…
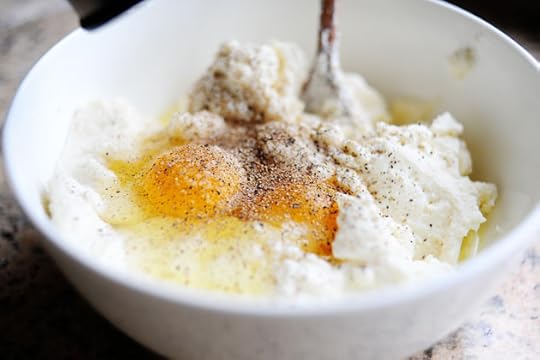 Salt and pepper…
 And Parmesan. Stir this all together and set it aside for a minute.
Also, if it wasn't already obvious, boil some lasagna noodles and have them ready.
 To assemble, spoon a little of the vegetable sauce into the bottom of a large baking pan.
 Lay four lasagna noodles in the bottom of the pan. As you can see, this is a mega baking dish that leaves a very sad, depressing gap on one end.
 Not that I let that thwart me.
 Next, violently plop 1/3 of the ricotta mixture onto the noodles.
 Spread it to evenly distribute it…
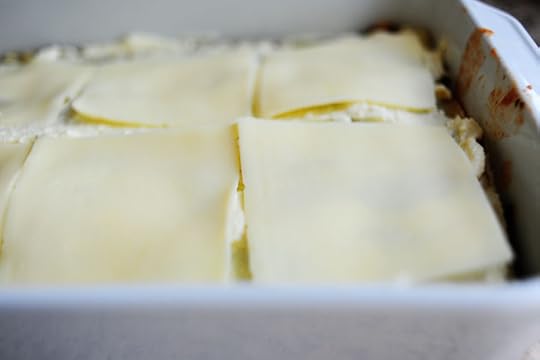
 Then lay mozzarella slices all over the top.
 Finally, spoon a little less than a third of the vegetables over the mozzarella.
 Then we'll repeat the whole thing! Noodles, ricotta…
 Mozzarella…
 Vegetables. Then repeat it a third and final time.
 End with a generous sprinkling of Parmesan, then cover with foil and bake at 350 for about 20 minutes. Remove the foil toward the end and bake for another 5 to 10 minutes, or until hot and bubbly.
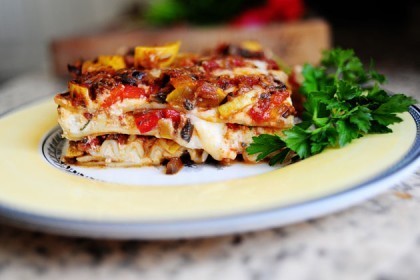
Remove from the oven and allow the pan to sit for ten minutes before serving.
Serve it up, and have a loaf of crusty French bread nearby. This is a really rich, cheesy delight, and as you can see, you can sub whatever veggies you'd like. I think yellow bell peppers would be delicious, and I'd definitely like to see some zucchini in there with the yellow squash. Eggplant would certainly be yummy, too, as would different varieties of mushrooms. Have fun with it. Make it your own.
Enjoy!
Recipe: Vegetable Lasagna
Prep Time: 20 Minutes
|
Cook Time: 45 Minutes
|
Difficulty: Easy
|
Servings: 12
Print Recipe
3"x5" Cards
4"x6" Cards
Full Page
Ingredients
10 ounces, weight Lasagna Noodles2 Tablespoons Olive Oil1 whole Medium Onion4 cloves Garlic1 whole Red Bell Pepper, Diced24 ounces, weight White Mushrooms, Chopped4 whole Squash (yellow Or Zucchini), Diced1 can (28 Ounce) Whole Tomatoes½ cups White Wine¼ cups Fresh Parsley, Chopped (more To Taste)½ teaspoons Kosher Salt (more To Taste) Freshly Ground Black Pepper 1/2 Teaspoon Red Pepper Flakes30 ounces, weight Ricotta Cheese2 whole Eggs½ cups Grated Parmesan¼ teaspoons Kosher Salt Freshly Ground Black Pepper1 pound Thinly Sliced Mozarella Cheese Extra Parmesan Cheese, For Sprinkling Preparation Instructions
Preheat oven to 350 degrees.
Cook noodles according to package directions. Drain and lay flat on a sheet of aluminum foil.
Heat olive oil in a large skillet over medium heat. Add onions and garlic and cook for a minute. Add diced red peppers and saute for another minute or so. Add squash and mushrooms and cook for a few minutes. Pour in wine, add salt, pepper, and red pepper flakes, and stir.
Pour in tomatoes. Use hands to squeeze/crush them. Stir to combine and let simmer for 20 minutes or so. Stir in chopped parsley.
In a separate bowl, combine ricotta, eggs, Parmesan cheese, salt, and pepper.
To assemble, spread a little of the vegetable/tomato sauce in a lasagna pan. Layer four cooked noodles in the pan, slightly overlapping them if necessary. Spread 1/3 of the ricotta mixture on the noodles. Top the ricotta mixture with mozzarella slices. Spoon a little less than 1/3 of the veggie/sauce mixture over the mozzarella.
Repeat the layering two more times, ending with a large helping of vegetable sauce and a sprinkling of Parmesan.
Bake at 350 degrees, covered in foil, for 20 minutes, then remove foil and continue baking for 5 to 10 minutes. Remove from oven and allow to stand for 10 minutes before cutting into squares and serving.
Serve with crusty French bread.
Posted by Ree on April 10 2011


April 8, 2011
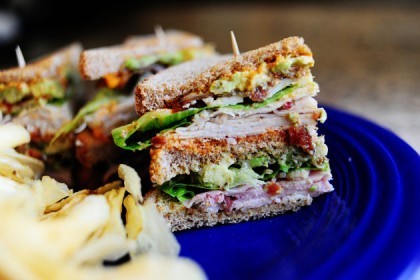
Killer Club Sandwich
[image error]Club sandwiches remind me of the seventies. I went through a phase in the seventies when I'd order club sandwiches any time my family and I went out to dinner at the club (club. get it?) and here's how it would go.
"I'll have a club sandwich, please, and a Shirley Temple."
Then I'd eat all the rolls in the roll basket and my dad would say, "How can you eat so much bread?"
I wouldn't answer him.
Ten or fifteen minutes later, my club sandwich would arrive. I would pick apart all the layers, eat the ham, then push the plate away and say, "Whew! I'm full!"
Then I'd eat all the crackers in the cracker basket and my mom and dad would shake their heads and wonder what would one day become of me.
Because I love to reminisce, I made myself a club sandwich the other night. Here's how you can make one, too!
 Start with some good sandwich bread. White is fine, wheat is fine, pumpkin is…probably not fine.
 Toast them lightly in the toaster, then set them aside. They need to cool completely before you start piling on all the cool ingredients.
 Next—my favorite part—fry up some bacon.
Frying bacon gives me hope.
When I fry bacon, I feel at peace.
Bacon's natural, bacon's good. Not everybody does it, but everybody should.
I'll stop now.
 Remove them from the skillet when they're no longer chewy but not overly crisp, and let them drain on a paper towel-lined plate.
 Now it's time to mix up a couple of spreads. This is plain mayonnaise (NOT demonic Miracle Whip, but you're welcome to use that if you like pain and suffering) and prepared basil pesto.
Jarred or packaged pesto has been my saving grace throughout the winter, as I have been able to find zero basil anywhere. I done heard there was a blight.
When it gets warm enough, I'll be planting so much basil, I'll embarrass myself.
 Mix the mayo and pesto together until combined, tweaking it with more pesto if needed. Refrigerate this until you need it.
 I had this in my pantry. If you can't find sundried tomato pesto, though, all you need to do is chop up or puree a few jarred sundried tomatoes…
 Throw it into a bowl with mayonnaise…
 And stir it to combine. Refrigerate this till you need it.
Of course, you can just use plain mayonnaise and/or Dijon mustard. But I like taking more of a flavored spread approach; knocks an average club sandwich out of the park!
 So here's how you construct one sandwich: start with three slices of toasted bread.
 Spread one side of one piece with the pesto mayonnaise.
 Place some shaved ham on top. I would prefer for this ham to be much more roughly/thinly shaved so that it would go on the sandwich in clumps instead of slices, but I have issues so don't listen to me.
 Lay some lettuce (this is Romaine) on top of the ham.
 Next step: spread another piece of bread with pesto mayo.
 Halve an avocado, remove the pit, and cut half of the avocado into slices.
California friends: please don't judge my avocado. I live in Pawhuska, Oklahoma and it's April. I don't have the luxury of putting on my bikini, walking outside with my bronze, shimmering skin, and plucking a perfectly ripe avocado off the tree in my perfectly manicured front yard as my shiny blond hair blows lightly in the ocean breeze.
Not that I resent you for being able to do that.
 Lay avocado slices on the pesto mayo…
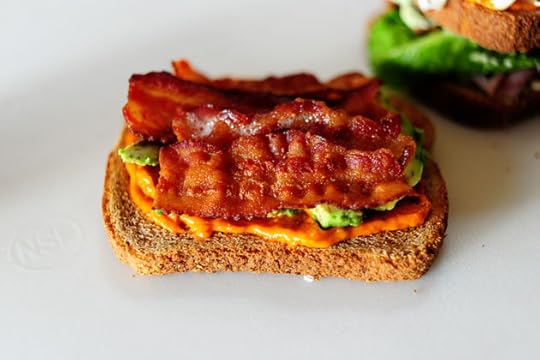
 Then lay bacon slices on top of the avocado.
 Carefully invert the avocado/bacon piece onto the ham/lettuce piece.
 Next, spread the top of the sandwich with the sundried tomato spread. Also, spread the remaining piece of bread with the sundried tomato spread.
 Top this with shaved turkey, and (not pictured because I'm an airhead) lettuce.
 And top the other piece of bread with the other half of the avocado…
 The bacon…
 And a piece of cheese. This is Baby Swiss.
 Next, take a deep breath, center yourself, and invert the avocado/bacon/cheese piece onto the turkey/lettuce.
 Give it a little smoosh to anchor it all together…
 Then use a very sharp knife to cut the sandwich into four triangles.
 Like this! And you'll notice that I stuck a toothpick into each triangle. I could have used those fancy long picks with the frilly color on the ends…but I don't exactly stock those in bulk around here.
The idea is just to get the layers of ingredients to hold together somehow.
[image error]Wow. What a delicious mouthful! And of course, the world is your oyster in terms of the ingredients you can layer on: good slices of tomatoes, thinly sliced cucumber, baby spinach…use your imagination and create your own Killer Club.
Enjoy this, guys!
Recipe: Killer Club Sandwich
Prep Time: 10 Minutes
|
Cook Time: 15 Minutes
|
Difficulty: Easy
|
Servings: 4
Print Recipe
3"x5" Cards
4"x6" Cards
Full Page
Ingredients
12 slices Sandwich Bread4 Tablespoons Mayonnaise1 Tablespoon Prepared Basil Pesto1 Tablespoon Prepared Sundried Tomato Pesto (or Just A Couple Of Pureed Sundried Tomatoes)8 slices Bacon, Cut In Half½ pounds Shaved Ham½ pounds Shaved Turkey4 whole Avocados, Peeled And Sliced4 slices Cheese (swiss, Mozzarella, Etc.) Romaine Or Green Leaf Lettuce Preparation Instructions
Toast bread in toaster until light golden brown. Set aside.
Fry bacon until just barely crisp, then drain on a paper towel. Set aside.
Mix together 2 tablespoons mayonnaise with prepared basil pesto; in a separate bowl, mix additional 2 tablespoons mayonnaise with sundried tomato pesto.
To Make One Sandwich:
Spread two pieces of bread with basil pesto. On one piece of bread, lay ham on top of pesto mayo, then top with cheese and lettuce. On other piece of bread, lay the slices of 1/2 avocado on top of the pesto mayo. Top avocado with bacon. Lift the second slice of bread (the one with avocado and bacon) and place it, ingredient side down, on top of the first piece of bread.
For the second layer: On the top of the top piece of bread, spread the sundried tomato mayonnaise. Spread one side of the third piece of bread with sundried tomato mayonnaise. Place ham, cheese, and lettuce on top. Place other half of the avocado slices on the other piece of bread. Top with bacon slices. Place this piece of bread, ingredient side down, on top of the first piece of bread.
Use a sharp knife to cut the sandwich in half (on the diagonal) then again in fourths.
Serve with chips!
Posted by Ree on April 7 2011

April 7, 2011
Cuisinart Winners
 Here are the winners of the Cuisinart food processors:
#32169 Kim: "August."
#192 Molly: "May."
#27758 Brian: "July. My wife would love this."
#12192 Ashlan: "MAY!"
Winners, contact prizes@thepioneerwoman.com to claim your food processors.
Statistician Don came through for us on this one, sending a chart of all of our birth months below. Here's what he said:
"There's a chart attached with the full details, but the winner is April! Or maybe I should say that the winner is July (sociologically speaking!) May has virtually the same number of births as April so maybe all those hot summer nights aren't due just to global warming."
Until next time!
Don

Thank you, Statistician Don!

April 6, 2011
I Heart Cuisinart
 I love this "old fashioned" (read: Eighties) style of Cuisinart, because it reminds me of my mother and Bon Appetit and graham cracker crusts and my childhood. It reminds me of my mom's dinner parties and chopped pecans and my sister's neck getting itchy if she accidentally ingested so much as a smidgen of them.
Sorry, Betsy.
Because I'm a nostalgia freakazoid, I'm giving away four (4) of these 11-cup Cuisinart food processors today.
TO ENTER
To enter this giveaway, just answer the following question in the Comments section of this post:
"In what month were you born?"
In our church, on the first Sunday of every month, our minister invites everyone who's going to be having a birthday that month to stand up so we can all sing Happy Birthday, God Bless You to them. Kind of like they do at restaurants, but without the brownie sundae and sparkler. And I always chuckle at the fact that from August through December, nine months following the long, hard winters in northern Oklahoma (when there's nothing to do but stay indoors…ahem), plenty of people stand up for their Happy Birthday song. On the flip side, hardly anyone in our church has birthdays in March, April, or May—nine months following the hot, grueling summer, when the work in the world of agriculture is unrelenting.
Gosh, that was some kind of sociological observation, wasn't it?
So now I'm asking you to shout out what month you were born! (If you'd rather not be the subject of my wicked experiment, I understand. Just say hi or howdy or hello, and you're good to go.)
Sociological data aside, I think it'll be neat to see the distribution of birth months. (Statistician Don? Are you there?)
THE RULES
One entry per person, please.
No entries after noon Pacific Time Thursday.
Winners will be announced Thursday night.
Sponsored by Pioneer Woman. Cuisinart has never heard of me. I could disappear tomorrow and Cuisinart would never know the difference. Over and out.

April 5, 2011
Web Deliciousness: Beautiful Cakes
Beginning today, every Tuesday on The Pioneer Woman Cooks, I'll be sharing links to beautiful recipes on the web.
There is much deliciousness in the world.
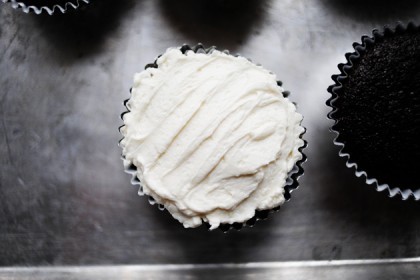
Today I have cakes on the brain. And I'm not picky: layer cakes, cupcakes, upside down cakes, pound cakes…all are welcome. I'm an equal opportunity cake lover.
Here are some beautiful cakes I've found. Click on either the photos or recipe titles to be taken to the recipes.
 Easter Egg Cake by Picky Palate. Lovely, and customizable for any color combo you'd like.
 Rose Cake Tutorial by I Am Baker. I am in deep, deep love with this cake, and Amanda makes the decorating look so easy. Beautiful.
 Gluten Free Cupcake Bites by Elana's Pantry. I love everything Elana cooks or bakes. The end.
 Chocolate Chip Cookie Dough Cupcakes made by TidyMom. (Original recipe by Annie's Eats.) Can you say decadent? I would like five right now, with a glass of whole milk.
Yes, I'm hungry. Why do you ask?
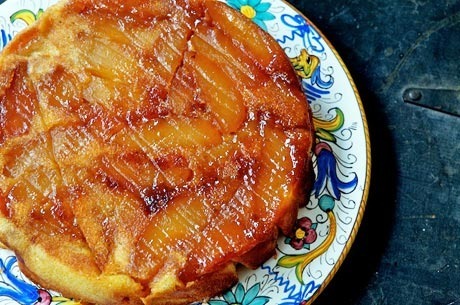 Apple Upside Down Cake by Simply Recipes. I love upside down cakes, and this one looks just beautiful. I'll take it warm, with freshly whipped cream and a drizzle of caramel sauce, please. Thank you.
 Vanilla Bean Cupcakes with Chocolate Buttercream by Joy the Baker. Check out the secret ingredient in Joy's buttercream. I love it.
 Fourteen Layer Cake by Bakerella. (We love you, Angie!)
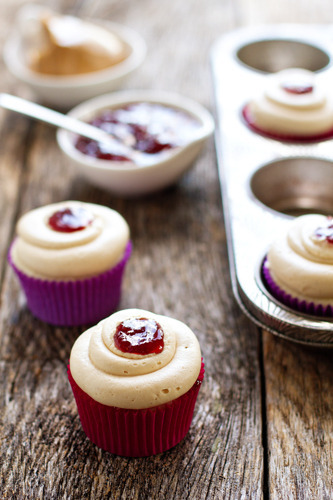 Peanut Butter and Jelly Cupcakes by My Baking Addiction. If you haven't checked out this blog…please go now. Incredible.
 Portuguese Orange-Olive Oil Cake from Leite's Culinaria. Here's what I'd do with this cake:
Make French toast
Top with berries and whipped cream
Make finger sandwiches with different flavors of jam
Eat it plain out of the pan
Thank you very much
 Rhubarb Upside Down Cake by Cooking for Seven. I have a minor obsession with rhubarb these days, and this upside down cake looks divine.
 Chocolate Raspberry Cake by Our Life in the Kitchen. This looks naughty and wonderful. I want it now.
Happy Tuesday, everyone!
Love,
Pioneer Woman

April 4, 2011
Red Velvet Sheet Cake
 I'm a sheet cake type of girl. I love the simplicity…the ease…the I-don't-have-to-make-layer-cakes-if-I-don't-want-to-dangit beauty of a sheet cake. With a sheet cake, it's all about the cake, and very little about stacking and icing and crumb layers and balancing and cursing because you just don't have it in you to create the beautiful layer cakes you see out in the world. (See: I Am Baker. Girl's got talent.)
This is the red velvet cake recipe from my cookbook; I adapted it ever so slightly when I made it yesterday afternoon. And this time, instead of using the standard cream cheese frosting recipe that I was always indoctrinated to believe was a requirement for red velvet cake, I used the quickly-becoming-my-favorite frosting recipe from Tasty Kitchen: That's the Best Frosting I've Ever Had, by Tasty Kitchen member MissyDew.
Guys, this frosting. It's indescribable, and such a fantastic alternative to cream cheese frosting, which, while delicious, can sometimes be a little rich. And from what I'm told, this "Best…" frosting is actually the original frosting for red velvet cake, before cream cheese frosting burst onto the scene and inserted itself into the mix.
And after trying my first bite last night, it was instantly clear that these two things were M.F.E.O.
(If you know what that stands for, you watch way too many movies. Like me.)
Let's make the cake!
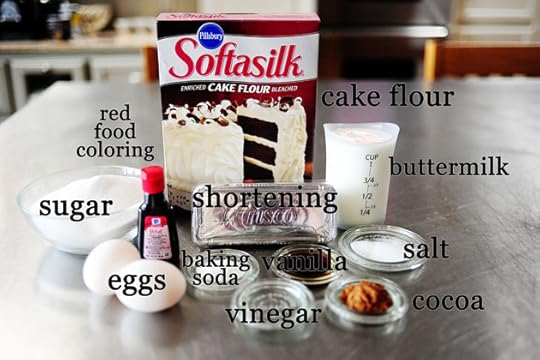 Here's what you need.
 Begin by throwing cake flour and salt in a sifter
(Thanks to Bridget, who very kindly sent me a sifter after discovering during her visit here that I just use big, unwieldy fine mesh strainers to sift my dry ingredients.)
 Sift them together…
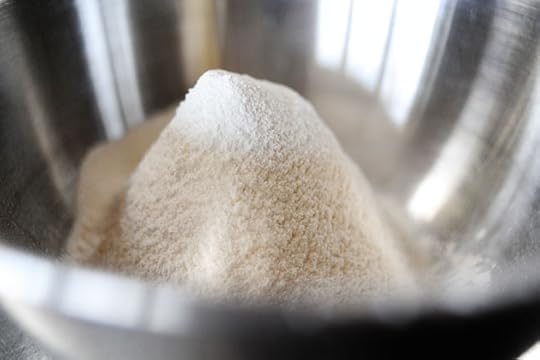 And set them aside.
 In a separate bowl, combine buttermilk…
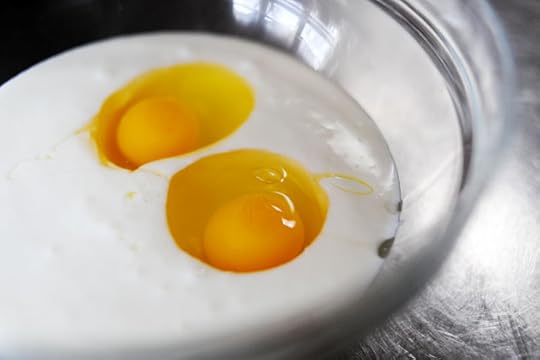 Two eggs…
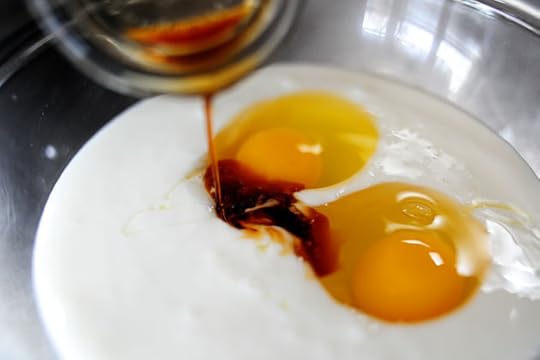 Vanilla, and baking soda.
 Whisk it together, then add a little vinegar. Set this aside, too.
 Finally, in a separate small bowl, add 1 1/2 ounces of red food coloring. This is one-and-a-half bottles (the small size) of red food coloring. Shocking. But that's how red velvet cake gets its color.
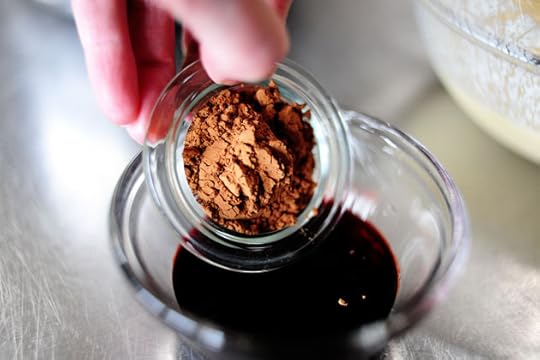 Add in cocoa powder…
 And stir it together to make a paste. Set this aside for a minute.
 To make the cake, beat shortening and butter together until it's light and fluffy.
 Scoop out a little of the sifted flour mixture…
 And dump it into the mixer, mixing until just combined.
 Next, add in a little of the buttermilk/egg mixture, mixing until just combined. Continue alternating the flour and buttermilk mixture, mixing well at the end. Be sure to scrape the sides of the bowl as needed.
I haven't entered into the realm of scraping blades yet. Do they work?
Bueller? Bueller?
 Yum. And this makes a nice whitish cake if you'd like to omit the red step.
But I'm not going to omit the red step. For I am making red velvet cake. And I will not be thwarted!
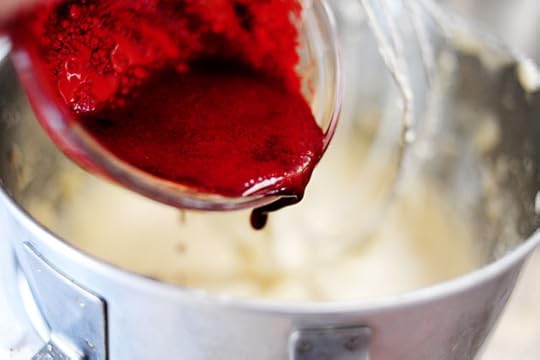 Pour in the red mixture…
 And beat until combined. You'll need to scrape the sides of the bowl a couple of times to make sure all the white batter is incorporated.
 Now, thoroughly spray a sheet pan with nonstick cooking spray. Get in the corners and crevices and hidden places. Spray, spray, spray.
 Then pour the batter into the pan.
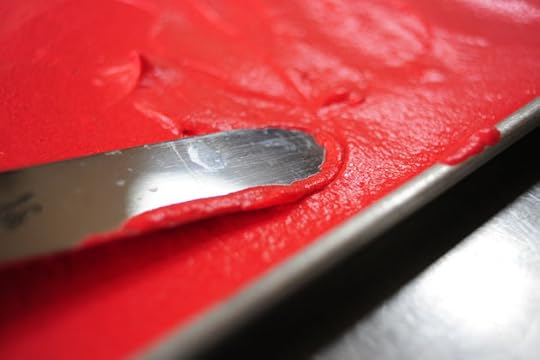 Then use a large spatula to spread the batter evenly.
 Then, this is a VERY important step. Take the spatula…
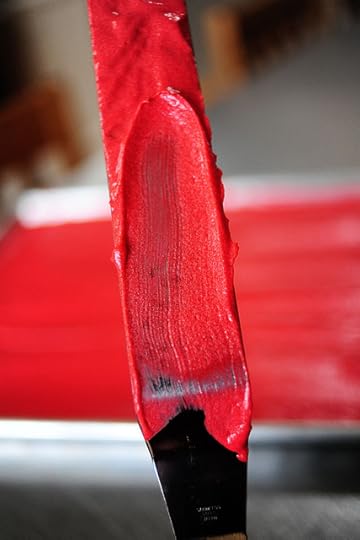 And do this.
Yeesh. That makes my tongue look a little large and scary, doesn't it?
Pretend you didn't see that.
And it's not my tongue. It's…it's Charlie's.
 Bake the cake for 20 minutes, then remove it from the oven and let it cool in the pan for another 20 minutes or so.
 Place a large cutting board on top of the cake pan, then invert it to allow the cake to drop out of the pan. Allow the cake to totally cool, sticking it in the fridge or freezer to hasten the cooling if you're in a hurry.
 Make the frosting, and let me tell you something about the frosting after having made it several times: if, after making it, you feel like it "flopped", you simply need to beat the heck out of it some more. In fact, I believe "beat the heck out of it" is a specific phrase included in the official instructions, and it really is true. There've been times I've make the icing and it's appeared grainy or weird; but if I just beat the heck out of it some more, it redeems itself.
 Plop the icing on the totally cooled (and slightly cool is best) cake, then spread it thinly with a knife.
Another frosting note: I got by with one recipe of the frosting, but it resulted in a pretty thin icing layer all around. I liked this, but if you prefer a thicker application of frosting, you might double the frosting recipe. You might not quite need it all, but you can just eat the extra for dinner.
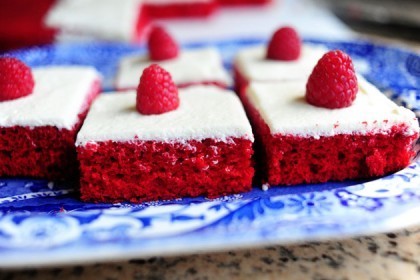
 I like to make a little grid with raspberries (or whatever little trinket suits you.)
 Then you can just cut the cake into squares with a sharp knife. It's best to rinse/wipe dry the knife after each cut to avoid dragging red crumbs into the icing like I did.
 And this is why I like to turn sheet cakes out onto a surface before frosting them. Much easier to cut and serve!
 Yum. This really is a lovely cake.
 And you can do this to make it more…uh…"healthy."
Forget I ever said that.
 Whip this up sometime this spring. It's bright and colorful and beautiful, but it's also light, fluffy, and exceedingly delicious.
Enjoy!
Here are the two printables, one for the cake and one for MissyDew's frosting:
Recipe: Red Velvet Sheet Cake
Prep Time: 20 Minutes
|
Cook Time: 20 Minutes
|
Difficulty: Easy
|
Servings: 24
Print Recipe
3"x5" Cards
4"x6" Cards
Full Page
Ingredients
1 cup Shortening1-¾ cup Sugar2-½ cups Cake Flour1-¼ teaspoon Salt2 whole Eggs1 cup Buttermilk1 teaspoon Vanilla Extract1 teaspoon Baking Soda1-½ teaspoon Vinegar1-½ ounce, fluid Red Food Coloring1-½ teaspoon Cocoa Powder Preparation Instructions
Preheat oven to 350 degrees. Thoroughly spray a large (18 x 12) sheet cake pan (or you can use a slightly smaller jelly roll pan) with nonstick baking spray. Be sure to get in all the corners of the pan.
Sift together cake flour and salt. Set aside.
In a separate bowl, stir together buttermilk, eggs, vanilla, and baking soda. Add vinegar and stir. Set aside.
In a separate small bowl, mix together cocoa and red food coloring. Set aside.
Cream together shortening and sugar until fluffy. Alternate adding the flour mixture and the buttermilk/egg mixture until all combined. Pour the red mixture in and beat until combined.
Pour batter into prepared sheet cake pan. Use a large offset spatula or knife to even out the surface. Bake for 20 minutes. Remove pan from oven and allow cake to cool in the pan for 20 minutes. Place a large cutting board on top of the cake pan, then invert the cake, allowing it to turn out onto the cutting board. Allow cake to cool completely before icing.
(Ice with Tasty Kitchen recipe "That's the Best Frosting I've Ever Had". It's perfect with this cake.)
Posted by Ree on April 4 2011
Recipe: That's the Best Frosting I've Ever Had
Prep Time: 15 Minutes
|
Cook Time: 10 Minutes
|
Difficulty: Easy
|
Servings: 12
Print Recipe
3"x5" Cards
4"x6" Cards
Full Page
Ingredients
5 Tablespoons Flour1 cup Milk1 teaspoon Vanilla1 cup Butter1 cup Granulated Sugar (not Powdered Sugar!) Preparation Instructions
Bake your favorite chocolate cake and let it cool.
In a small saucepan, whisk flour into milk and heat, stirring constantly, until it thickens. You want it to be very thick, thicker than cake mix, more like a brownie mix is. Remove from heat and let it cool to room temperature. (If I'm in a hurry, I place the saucepan over ice in the sink for about 10 minutes or so until the mixture cools.) It must be completely cool before you use it in the next step. Stir in vanilla.
While the mixture is cooling, cream the butter and sugar together until light and fluffy. You don't want any sugar graininess left. Then add the completely cooled milk/flour/vanilla mixture and beat the living daylights out of it. If it looks separated, you haven't beaten it enough! Beat it until it all combines and resembles whipped cream.
Grab a spoon and taste this wonderful goodness. If there is any left after your taste test, spread it on a cooled chocolate cake.
Cut yourself a piece and put it on a pretty plate. Grab a fork and prepare to experience the most divine pairing you can imagine. This frosting on chocolate cake is to die for. Sure, the recipe sounds strange — it has flour in it — but it's sublime. Try it, you'll see. You'll love it so much you won't go back.
Posted by MissyDew on August 12 2009

March 31, 2011
My Brother's Chicken Tacos
 Before I share this recipe with you, let me warn you: it's a royal mess. But as is the case with many messy dishes (cinnamon rolls, anyone?), it's also darn delicious.
These are my brother's chicken tacos. He made them for dinner at our house last night. And truth be told, they're actually probably Heidi's chicken tacos (hi, Heidi!) but since my brother has made them with great regularity over the past twenty years of his life, I can't help but associate them with him. This is a departure from the normal buy-your-taco-shells-like-normal-people-do method of making tacos, but it's a fun thing to do with friends on a Friday night.
In this recipe, the tacos are assembled, then fried in oil. This is where the "mess" part comes in; between the assembling and the frying and the garnishing, you need to light a candle and have a moment of silence for your kitchen. But if you can get past that part of it, these tacos really are fun to make. Try not to fear the aftermath.
 Begin with boneless, skinless chicken breasts.
 Cut them down the center lengthwise, then cut each half into bit-size slices.
 These are not my hands. I just needed to clarify that.
 Heat a couple of tablespoons of canola oil in a skillet over medium-high heat.
 Throw in the chicken, spreading it out in the pan.
 Crack open a couple of cans of diced green chilies…
 And dump it into the pan with the chicken.
 Season the chicken with things like cumin, chili powder, and salt…or you can just use taco seasoning. Spice it up with some cayenne if you can handle the heat.
 Cook the chicken, stirring occasionally, until it's totally done. Then turn off the heat and set the chicken aside while you get the other taco ingredients ready.
 You'll need finely grated cheese. This is the pregrated stuff—it's a cheddar/jack mix—and it actually works just fine in this recipe.
 You'll also need some diced Roma tomatoes…
 And some thinly sliced lettuce. This is Romaine—I just lopped off the top and sliced away.
 You'll also need sour cream, hot sauce, and small corn tortillas.
TO FRY THE TACOS
To fry the tacos, heat a couple of inches of canola oil in a large skillet over medium-high heat.
*Use caution when frying with oil, please.*
*Thank you.*
 Grab a spoonful of the chicken/chili mixture.
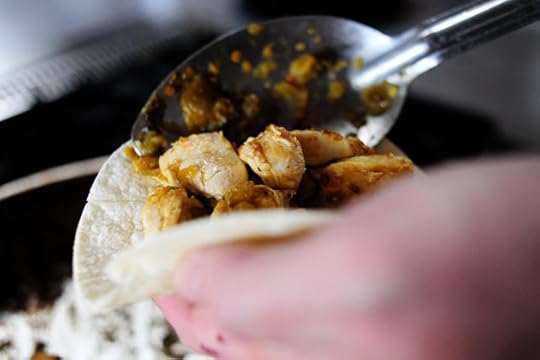 And scoop it into a tortilla.
 Fold up the tortilla, then clasp the taco shut with a pair of metal tongs.
 Use the tongs to set the taco into the oil, then use the tongs to hold the top half down to "form" the taco.
 After a few seconds, it will stay put and you can assemble and fry a couple more tacos.
 Don't be like my brother. He uses his fingers to hold the tortillas closed as he places the tacos in the pan.
 Then he uses a fork to hold it closed and flip the tacos as they cook.
The fork is okay. The fingers? Not so much.
 Flip the tacos when they're light golden brown.
 Then cook the other side.
 When they're done, lift each taco out of the oil, holding it sideways and shaking lightly to get the excess oil to drip out.
 Have a stack of at least 5 to 6 paper towels nearby, and place each taco on top of the stack.
 Fold the corners and sides of the paper towels tightly around the taco…
 Then gently shake the taco three or four times to get out the excess oil. You'll want the paper towels to be snug around the taco so the chicken won't fall out!
A note about the oil/frying: I'm always surprised how UNgreasy these tacos are. If you remove them from the oil sideways and let the excess drip out, and if you do the little shaking trick, they don't have a greasy/oily quality at all.
 Place the tacos on a plate after shaking, then carefully pry open the tops of the tacos and stuff in some cheese. (You can use tongs, a fork, or your fingers; the tacos will be a little hot.) Then let them sit for several minutes before serving. The cheese will quickly melt inside the hot tacos, and they'll be good to go when you serve them.
NOTE: It's ideal if you can keep going with the frying process and have a friend standing nearby who can take care of the cheese-stuffing step. That keeps the tacos moving through the assembly line more quickly.
 When it's time to serve, there is a PRECISE order of garnishing—this is according to my brother, who is unyielding and unwavering in his adherence to proper taco garnishing rules. Start with a smear (using a knife) of sour cream.
 Then add several dashes of your favorite hot sauce.
 Picante sauce is okay, but my brother says the liquid nature of bottled hot sauces is best because it drips down into the chicken and makes for more of a scrumptious snarfing experience. And what he says goes.
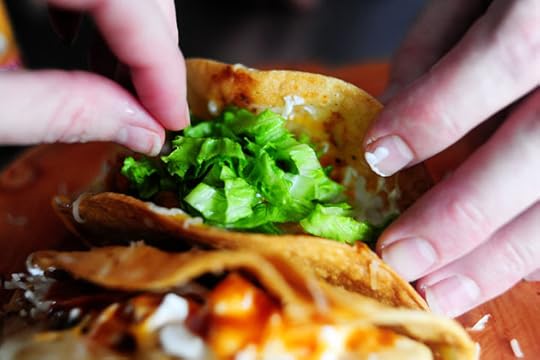 Next comes plenty of lettuce…
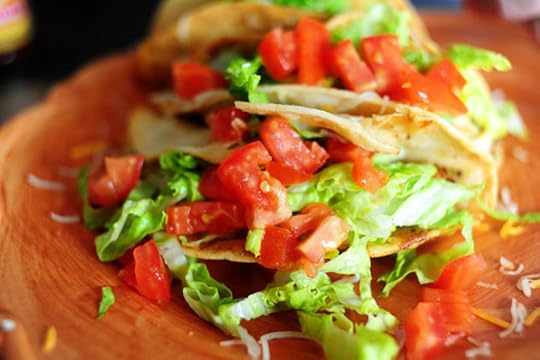 And tomatoes…
 And that is a plate of chicken tacos.
 Again, it's ideal if you can make this with friends or family members and turn it into an assembly line. Just keep a close watch on the oil/frying process, making sure anyone who helps you has their wits about them—then you can have others help garnish the tacos and keep serving them.
Fun to make! Crispy, crunchy, and oh, so good. And you can change up the meat you use, of course. Shrimp is my personal favorite.
Enjoy!
Recipe: My Brother's Chicken Tacos
Prep Time: 10 Minutes
|
Cook Time: 30 Minutes
|
Difficulty: Intermediate
|
Servings: 8

Print Recipe
3"x5" Cards
4"x6" Cards
Full Page
Ingredients
16 whole Corn Tortillas (small Size)4 whole Boneless, Skinless Chicken Breasts, Cut Into Pieces Salt, Cumin, Chili Powder To Taste (or Use Taco Seasoning)2 Tablespoons Canola Oil2 cans (4 Ounce) Diced Green Chilies1-½ cup Finely Grated Cheese (cheddar Or Cheddar/jack Mix) Sour Cream Hot Sauce (Chulula Or Other Brand)2 cups Thinly Sliced Romaine Lettuce (or Any Lettuce)4 whole Roma Tomatoes, Diced Canola Oil, For Frying Tacos Preparation Instructions
*Be careful frying with hot oil!*
Season diced chicken liberally. Heat 2 tablespoons oil in large skillet over medium-high heat. Add the chicken and cook for a couple of minutes. Dump in the diced green chilies. Stir and cook until chicken is totally done inside. Turn off heat and set aside.
Have all other ingredients—grated cheese, sliced lettuce, diced tomato, sour cream, and hot sauce—ready.
Also have a plate ready, as well as a stack of five or six paper towels to hold in your hand.
TO FRY
To fry the tacos, heat a couple of inches of canola oil in a heavy skillet over medium-high. Place some chicken in the middle of a tortilla, then fold tortilla in half. Clamp the tortilla shut with a pair of heat-proof metal tongs, then carefully lay the taco—one side down—in the oil. As you lay it in the oil, use the tongs to hold the top side down for a few seconds to form it in place. Once it stays put, repeat with two other tacos. Turn tacos after 30 to 45 seconds, or when each side gets light golden brown (not too brown.)
One at a time, remove tacos from the pan with tongs, holding sideways as you remove them to allow oil to drip out of the sides. Place the taco in the stack of paper towels. Fold the sides and corners around the taco to tightly hold it, then give it three or four shakes to remove excess oil. Remove it from the paper towels and place on a plate. Repeat with other tacos in the pan.
As you continue frying the other tacos, have someone carefully place some grated cheese inside the tops of the tacos (gently pry them open just enough to place the cheese in). Then just let them sit until ready to serve—the cheese will melt as it sits in the warm taco.
To serve, garnish in this order: a smear of sour cream, dashes of hot sauce, shredded lettuce, diced tomato. You'll need to slightly open up the tops of the tacos to get all the garnishes in there.
Tacos will be hot for a minute or two after frying, so don't rush into eating! They'll stay nice and warm for a little while after frying.
Posted by Ree on March 31 2011

March 30, 2011
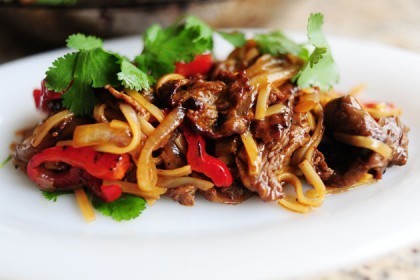
Beef with Peppers
 I could eat beef stir fry every day of the week. I had a major hankering for it last night, and decided to throw together a variation of my Beef with Snow Peas, which will knock your ever-loving socks off if you ever get around to making it. For this incarnation, I decided to use red bell peppers and otherwise spice things up a bit; use whatever peppers you have on hand, at whatever spiciness level you can handle. And add hot chili paste or chili oil for an extra layer of heat. Ouch and wow and yum.
Also, rather than serve it over rice this time, I used rice noodles. Rocked my world, right here on the Oklahoma cattle ranch where I live.
I wiped a tear from the corner of my eye.
Not sure how much of that was attributable to the spiciness of the dish.
Either way, it was delicious. Here's how I made it:
 Start with some soy sauce. Low sodium is good; keeps the dish from getting too salty.
 Mix in sherry, brown sugar, cornstarch, minced garlic, and fresh ginger (not shown because I didn't have any, but you'll definitely want to include it because it's a miracle) and…and this weird stuff. It's red chili paste. You could also just use a few dashes of red chili oil.
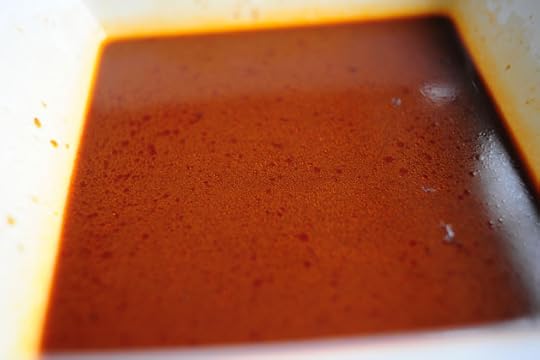 Stir it all together.
 Add the very thinly sliced flank steak to the mixture.
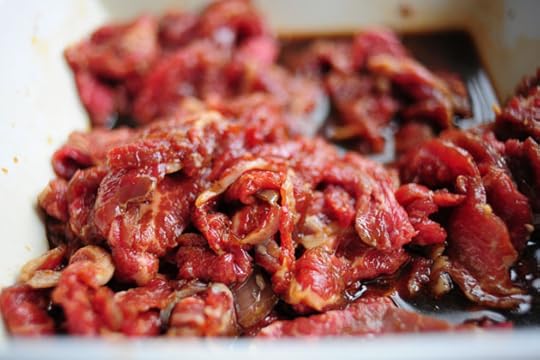 Toss it around.
I will now take this opportunity to state for the record that very thinly sliced flank steak is my absolute top choice when it comes to stir fry. It's the best. It's incredibly flavorful, yes, but it also remains tender after cooking.
Just make sure you start with a very sharp knife so you can get the meat slices really thin.
 Next, slice up an onion. Not too thin; you want the slices to remain a little firm and crisp.
 Grab a couple of bell peppers. Lop off the tops, pull out the innards, the cut the peppers into rings. You can use all red, red and green, or a combo of red, green, and yellow. Also, if you're feeling spicy, mince up some fresh jalapenos or chili peppers. Heat is good!
 (You'll also need some rice noodles. Boil some water and have it ready toward the end.)
 Begin by heating canola oil over medium-high to high heat.
 Throw in the sliced onions and cook them for just a minute. You'll want to get 'em as brown as possible in as short an amount of time as possible. Remove them to a separate plate.
 Return the skillet to the burner and allow it to get nice and hot.
 Throw in the red bell pepper, and cook it the same way: quickly, over high heat.
 Remove the peppers to a plate.
 Return the skillet to the stovetop, add a little more oil to the pan, then add about a third of the marinated meat mixture, also known as MMM or M-cubed. Spread the pieces out, then don't touch them for thirty seconds or so.
 Turn them over to the other side and cook them for twenty to thirty more seconds…
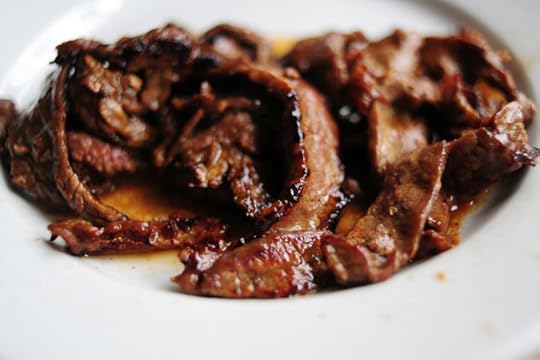 Then remove them to a plate.
 Repeat with the rest of the meat.
 Turn the heat to low, then add all the meat back into the skillet.
 Then dump in the onions and peppers…
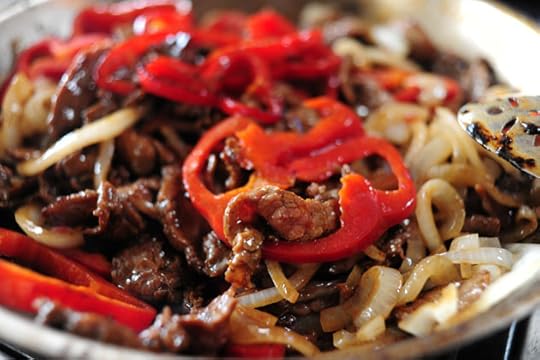 And stir to combine.
 Pour in the rest of the liquid from the bowl…
 Then stir and allow to simmer for a few minutes.
 Cook the rice noodles according to package directions: I boiled some water, then turned off the heat and threw the noodles into the hot water and allowed them to sit for eight minutes.
 I started by adding only about half the noodles I cooked; I wanted to see how much the meat and sauce would take.
 Stir it around and see how the sauce looks, then add more noodles if you think it's necessary.
 Throw on some cilantro leaves at the end.
And…yum. Flavorful, spicy, magical. Sprinkle on some red pepper flakes at the end to top off the spicy factor. Eat with chopsticks if you have 'em.
And most importantly: have seconds.
Enjoy!
Recipe: Beef with Peppers
Prep Time: 15 Minutes
|
Cook Time: 15 Minutes
|
Difficulty: Easy
|
Servings: 8
Print Recipe
3"x5" Cards
4"x6" Cards
Full Page
Ingredients
1-½ pound Flank Steak, Sliced Very Thin Against The Grain½ cups Low Sodium Soy Sauce3 Tablespoons Sherry2 Tablespoons Packed Brown Sugar2 Tablespoons Cornstarch1 Tablespoon Minced Fresh Ginger2 cloves Garlic, Minced1 teaspoon Red Chile Paste (or A Few Dashes Red Chile Oil)2 Tablespoons Canola Oil1 whole Medium Yellow Onion Sliced2 whole Red Bell Peppers, Cored And Sliced Into Rings1 Tablespoon Diced Fresh Jalapeno (or 1 Teaspoon Dice Hot Pepper) Red Pepper Flakes, For Sprinkling Cilantro Leaves Preparation Instructions
Mix together soy sauce, sherry, brown sugar, cornstarch, ginger, garlic, and chili paste (or chili oil.) Place sliced beef in the mixture and toss to coat. Set aside.
Heat 1 tablespoon oil in a large skillet over medium-high to high heat. When it is very hot, throw in the onions and cook for less than a minute. Remove to a separate plate. Return skillet to flame, allow to reheat, and add bell peppers (and hot pepper/jalapeno if using.) Cook for a minute, tossing, until peppers have brown/black bits but are still firm. Remove to a plate.
Return skillet to heat and allow to get hot. Add the remaining tablespoon of oil to the skillet. Add 1/3 of the meat mixture, evenly distributing over the surface of the skillet. Allow to sit for 20 to 30 seconds, then turn with tongs. Cook for another 30 seconds, then remove to a separate plate. Repeat with remaining meat until all brown.
Reduce heat to low. Add all meat, onions, and peppers to the skillet and toss to combine. Pour in remaining sauce (the sauce the meat marinated in) and stir. Allow to simmer on low for a few minutes. Sauce will slowly thicken. Turn off heat.
Turn off boiling water, then throw in noodles. Stir, then allow noodles to sit in hot water for 8 minutes or so (check package directions to be sure.) Drain, then add 1/2 the noodles to stir fry. Toss together, then add more noodles to taste. Add very hot water if needed to thin.
Top with cilantro leaves. Serve immediately.
Posted by Ree on March 30 2011

March 28, 2011
Pasta Salad with Tomatoes, Zucchini, and Feta
 Yesterday, after a weekend of brisket, chocolate cake, and innumerable other naughty delights, suddenly all I wanted was a cold, healthy salad. I eventually came to my senses and decided to include pasta in the mix, and threw in tomatoes, zucchini, and—the best part—lots of feta cheese.
It tasted so darn good.
There's nothing simpler than this salad; the only thing I dressed it with was olive oil and lemon juice (and salt, pepper, and parsley), proving once again that some of the most pared-down foods are some of the most delicious.
Make this after your hectic, calorie-filled weekend! We'll get back to the naughty stuff later this week.
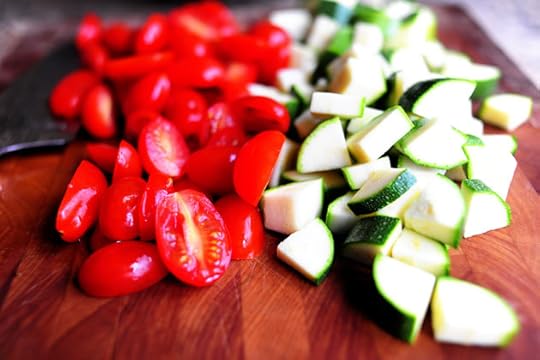
 Begin with a couple of zucchini. And I know it's not zucchini season, but if I wait until my garden is overrun with zucchini before I start to post recipes that use zucchini, everyone else in the world will also be posting zucchini recipes and then it won't be spayshul.
Not really. I just happen to see these groovy hothouse zucchini at the store, and I needed an excuse to use them.
 Lop off the tops and bottoms of the zucchini, then cut them in half.
 Cut each piece in half lengthwise…
 Then rotate it 90 degrees and cut it again.
 At this point, you'll have sticks. You could bread 'em and fry 'em if you wanted it! In fact…
*Slapping my own hand till I cry* Ree! Stop that! You must remember the jiggle.
 Then turn the sticks to the side and dice 'em up.
 Next, halve some grape tomatoes.
 I love grape tomatoes.
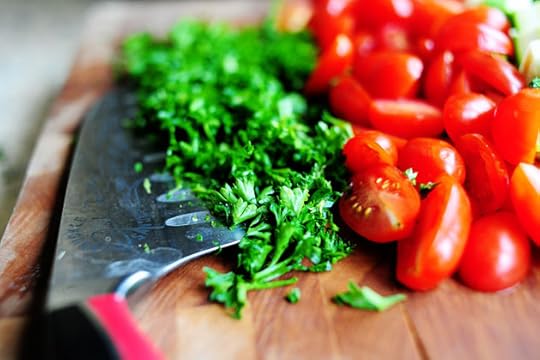 Mince up some parsley…
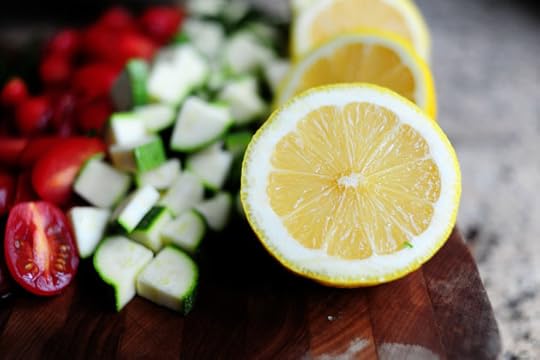 And halve a lemon.
 Cook and drain some pasta, then rinse it under cold water to cool it down.
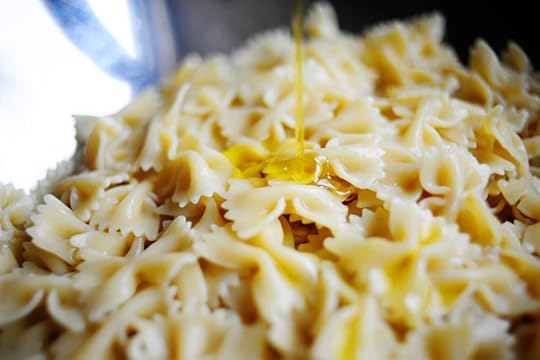 Drizzle on some olive oil…
 Then use your unfortunate, pale pink alien claw to squeeze in some lemon juice.
 Next comes salt…
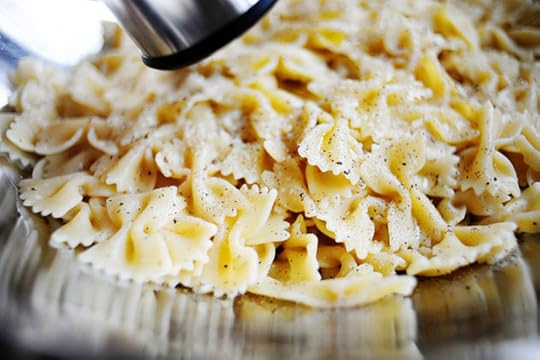 And pepper.
 Toss the pasta to coat, then throw in the tomatoes, zucchini, and parsley.
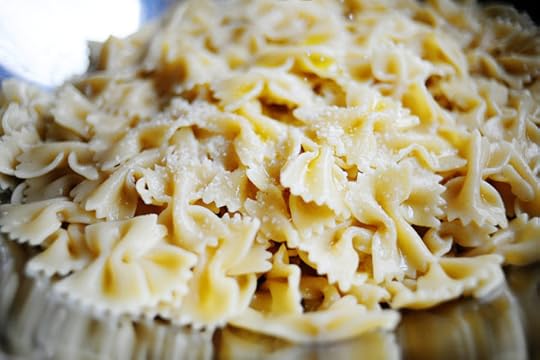
 Finally, add in some feta. Really pile it in, too—it adds yummy salty tanginess.
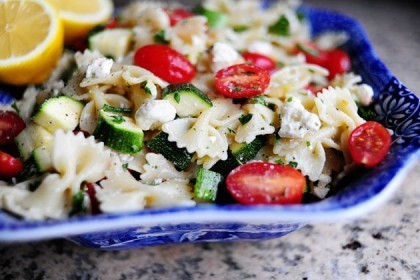
 Toss it all together, then give it a taste and add more of what it needs: squeeze in a little more lemon, drizzle on a little more olive oil, add more feta, etc.
 Divine. Now, if you have the time, cover this with plastic wrap and refrigerate it for at least a couple of hours.
Good things will happen.
Stick a couple of lemon halves on the side. They're purdy, and you can squeeze some more juice in for some moisture if needed.
 Oh! And lookie here: if you want a little more protein with the salad, throw on some cold grilled beef, chicken, or shrimp (or serve them on the side.) Delicious!
Here's the printable recipe:
Recipe: Pasta Salad with Tomatoes, Zucchini, and Feta
Prep Time: 10 Minutes
|
Cook Time: 10 Minutes
|
Difficulty: Easy
|
Servings: 12
Print Recipe
3"x5" Cards
4"x6" Cards
Full Page
Ingredients
12 ounces, weight Farfalle (bowtie) Pasta2 Tablespoons Extra Virgin Olive Oil1 whole Lemons (more To Taste) Salt Freshly Ground Black Pepper2 whole Zucchini, Cut Into Small Wedges Or Diced10 ounces, weight Grape Tomatoes, Halved Lengthwise⅓ cups Minced Fresh Parsley6 ounces, weight Crumbled Feta Cheese Preparation Instructions
Cook pasta until done. Drain and rinse in cold water until completely cool. Add olive oil and lemon juice, then add salt and pepper to taste (do not undersalt). Toss to combine. Add zucchini, tomatoes, parsley, and feta, and toss to combine. Add more of what you think it needs; I like to go heavy on the feta! Squeeze in a little more lemon juice/drizzle more olive oil if it needs more moisture.
Cover in plastic wrap for at least a couple of hours. Pasta is best when chilled for a few hours before serving.
*Note: Add grilled shrimp, grilled chicken, or grilled flank steak if you need a little protein.
Posted by Ree on March 27 2011

March 23, 2011
Spicy Dr. Pepper Shredded Pork
 It came to me in a vision, this bizarre decision to cook a pork butt in Dr Pepper.
Then again, so did my decision to get a Basset Hound.
First of all: pork butt. It isn't a pork butt at all, but a pork shoulder. Second, it's just a wonderful cut of meat. It cooks up moist and tender and results in so much meat, you can either feed a crowd or stretch the meat into at least two or three different meals for your fam damily. Third, I loved Johnny Johnson in fifth grade and he didn't love me back. And finally, this fun and sweet/spicy concoction of Dr Pepper and chipotle peppers really did turn out to be a lovely combination.
If you haven't ever tried it, cook up a pork shoulder sometime soon. You'll be amazed at how much you can do with the stuff.
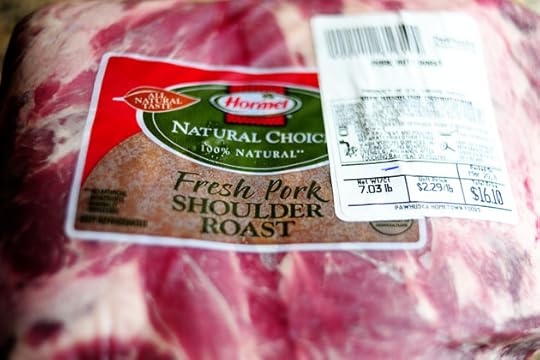 Here's the pork shoulder.
 But as you can see, my local butcher calls it pork butt.
Huh huh. I said "pork butt."
I'm mature.
Go ahead and unwrap it and I don't care what they say—give it a rinse if you're so inclined. I can't not rinse pork. I can't. I can't not.
I expect the USDA to egg my house tonight.
 Grab a big, fat onion. Cut it in half from root to tip.
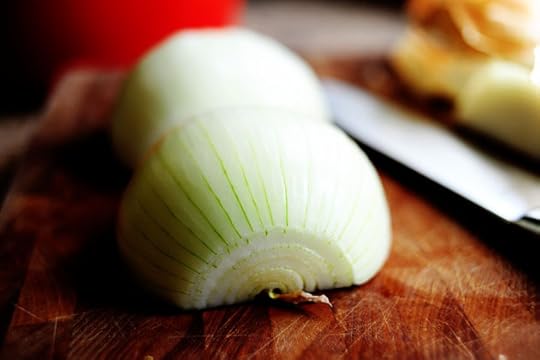 Peel off the outer layer…
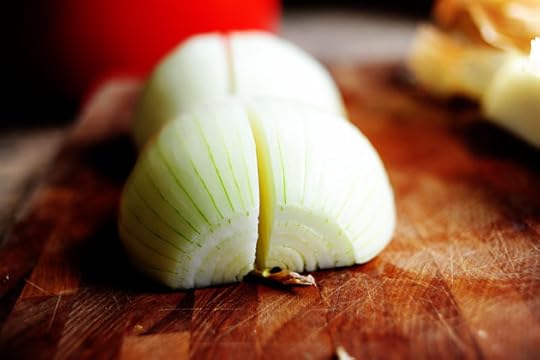 Then cut each half…in half.
 Separate the onion wedges and lay them in the bottom of a big pot.
 Generously salt and pepper the pork, then lay it on top of the onions, fat side up.
 Crack open a can of chipotle peppers in adobo sauce, then dump 'em right in.
 These are spuh-ICY, so if you're a little on the wimpy side in terms of spice, you can do half a can.
Chipotle peppers: smoky, spicy, flavorful. Such a distinctive flavor. Clears sinuses. Heals relationships.
 Next, things get really weird.
 Crack open two cans of Dr Pepper and pour 'em right into the pot.
I also threw in a couple of tablespoons of brown sugar, but you can leave that out if you'd like.
 Weird! But I'm feeling strangely optimistic.
At this point, you'll want to cover the pot with the lid and put it in a 300 degree oven for at least six hours. This is definitely a "low-and-slow" cut of meat that benefits from cooking for a long period of time over low heat. Our goal is for the meat to absolutely fall apart into a great big mess of wonderfulness.
Three or four times during the cooking process, take the lid off the pot and carefully flip the pork shoulder over to the other side, ending with the fat side up and allowing it to go at least an hour after that.
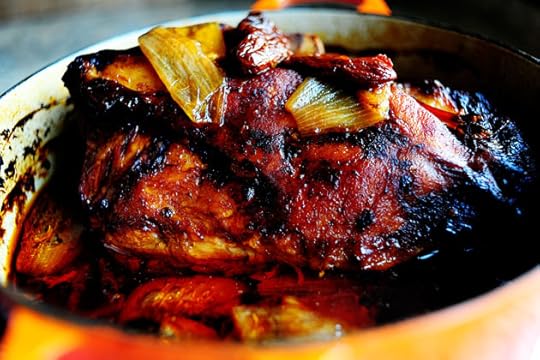 Oh, dear me. That looks good.
Now, after six hours, you should fork-test the meat. The meat should easily be pulled apart with a fork; if you meet with any resistance, just put the lid back on and return the pot to the oven for another hour. As is the case with pot roast, brisket, or any slow-cooked meat:
If the meat's still tough, you ain't cooked it long enough.
I just made that up. I'll be selling t-shirts soon.
 Remove the pork from the pan and set it on a work surface. I know this looks crazy and possibly a little frightening, but all of that color is going to result in such flavorful meat.
 You'll want to strain off as much of the gloopy fat from the top of the cooking liquid as possible. (And of course, you can refrigerate the meat and liquid separately, then remove the hardened fat from the liquid once it's cold. But that will require your making this a day in advance, and I'm not always that on top of things.)
(Actually, I'm rarely that on top of things.)
(Okay, never.)
 Here's a peek at the fall-apart nature of the meat.
 So what you want to do is work with a couple of forks and gradually remove and shred all the meat.
 Keep going and going and going until all the meat is shredded.
 A pork shoulder results in a lot of meat!
Note that you can chop it up with a sharp knife if you want the meat pieces to be smaller. But I'm gonna leave it as is.
I'm lazy.
 Now, whether you do it now or the next day after the remove-the-hardened-fat process, return all the shredded meat to the cooking liquid.
Keep it warm until you're ready to serve. Mmmm. This looks so delicious.
You can do absolutely anything with this meat: sandwiches on Texas toast, nachos, even pizza.
 But I'm going to go the warm flour tortilla route. And when you put the meat on the tortilla, be sure to include the cooking juice; it'll bring some spice and flavor to the mix.
 Shredded lettuce, diced tomato…
(I'm counting the days until I can plant tomatoes this year. I'm dying.)
 A few sprigs of cilantro…
 And some grated pepper jack cheese, just to drive the whole spicy point home.
 A good spoonful of salsa's good, too.
 Fold. Bring to mouth. Insert. Snarf.
Utter deliciousness. This was a late dinner last night, and I'm so excited to have the leftover pork for the rest of the week.
Enjoy this, guys!
Here's the printable:
Recipe: Spicy Dr. Pepper Shredded Pork
Prep Time: 5 Minutes
|
Cook Time: 6 Hours
|
Difficulty: Easy
|
Servings: 18
[image error]
Print Recipe
3"x5" Cards
4"x6" Cards
Full Page
Ingredients
1 whole Large Onion1 whole Pork Shoulder ("pork Butt") - 5 To 7 Pounds Salt And Freshly Ground Black Pepper1 can (11 Ounce) Chipotle Peppers In Adobo Sauce2 cans Dr. Pepper2 Tablespoons Brown Sugar Preparation Instructions
Preheat oven to 300 degrees.
Peel the onion and cut it into wedges. Lay them in the bottom of a large dutch oven.
Generously salt and pepper the pork roast, then set it on top of the onions in the pan.
Pour the can of chipotle peppers over the pork (include the sauce.) Pour in both cans of Dr Pepper. Add brown sugar to the juice and stir in.
Place lid tightly on pot, then set pot in the oven. Cook for at least six hours, turning roast two or three times during the cooking process. Check meat after six hours; it should be absolutely falling apart (use two forks to test.) If it's not falling apart, return to the oven for another hour.
Remove meat from pot and place on a cutting board or other work surface. Use two forks to shred meat, discarding large pieces of fat. Strain as much of the fat off the top of the cooking liquid as you can and discard it. Return the shredded meat to the cooking liquid, and keep warm until ready to serve. (You can also refrigerate the meat and liquid separately, then remove hardened fat once it's cold. Then heat up the liquid on the stovetop and return the meat to the liquid to warm up.
Serve on warm flour tortillas. Top with shredded lettuce, diced tomatoes, grated cheese, avocado slices, salsa, and whatever else you'd like.
Posted by Ree on March 22 2011

Ree Drummond's Blog

- Ree Drummond's profile
- 2032 followers


![[image error]](http://static.thepioneerwoman.com/cooking/files/2011/04/club3.jpg)