
Ree Drummond's Blog, page 73
June 20, 2011
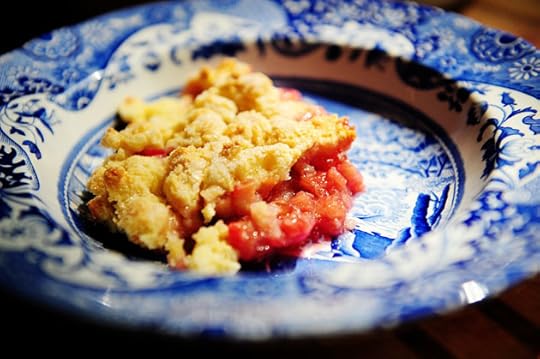
Rhubarb Cobbler
 Oh, do I love rhubarb. It's so tart and strange and beautiful. So weird. So misunderstood.
Rhubarb reminds me of my grandmother. Not because she's tart or strange or weird or misunderstood. She is beautiful, yes. But she's not those other things. And anyway, none of those things are why rhubarb reminds me of my grandmother. Rhubarb reminds me of my grandmother because the little restaurant in the little town where she lived–the Ideal Cafe, to be exact–served rhubarb pie all day, all the time.
I'm some of those other things, by the way. I'm strange. I'm weird. And I'm misunderstood. I say good morning and Marlboro Man says "What'd you say?" Then I repeat good morning and Marlboro Man says "Eh?"
I'll shut up now.
Wait–no I won't. I have to talk about cobbler. I've pontificated about it ad nauseum, how there are different interpretations of cobbler and how I'm certain the cobbler I like (a clafouti-like cake made with self-rising flour) is the only one true cobbler. But today I'm breaking from that deeply-held belief and sharing a rhubarb cobbler made with my second favorite cobbler topping. It turned out to be the perfect pairing: juicy, sweet-but-still-tart rubarb baked underneath a sweet biscuity topping.
I loved it. And I know you will, too.
 The Cast of Characters: rhubarb, sugar, salt, lemon juice, almond extract (not pictured, because I'm a dork), flour, baking powder, butter, milk, egg, and lard (or shortening.)
Lard if you're a lunatic and want the cobbler to taste delicious.
Shortening if you're sensible, though how sensible can shortening be?
What I'm trying to say is: either lard or shortening is just fine. And don't let anyone tell you otherwise.
Especially redheaded women in northeastern Oklahoma.
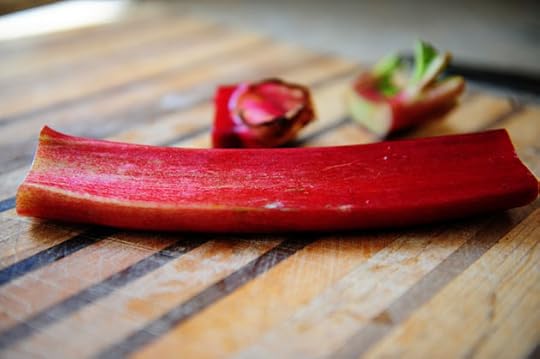
 This is rhubarb! It's weird and celery-like in appearance, but is an entirely different animal. It's incredibly tart, needs beaucoups sugar, and bakes into a wondrous substance in pies, crisps, coffee cakes, etc.
 Lop off the top and bottom…
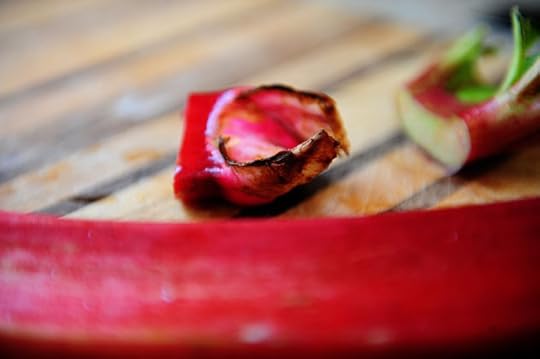 Ew.
Ew.
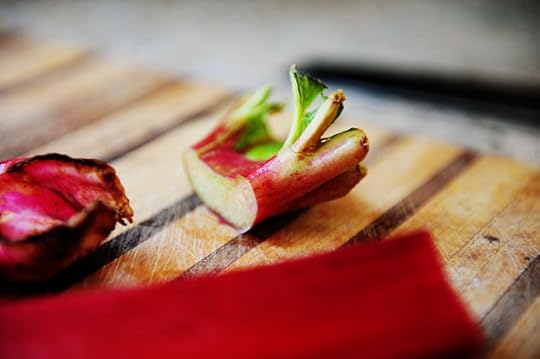 Grody.
 Yum!
Yum!
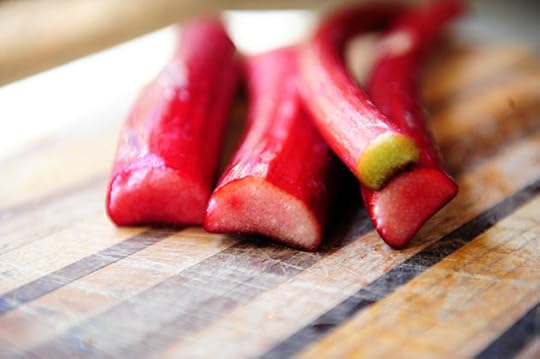
 To chop it up, slice it into strips…
 Then cut it in the other direction to chop it up.
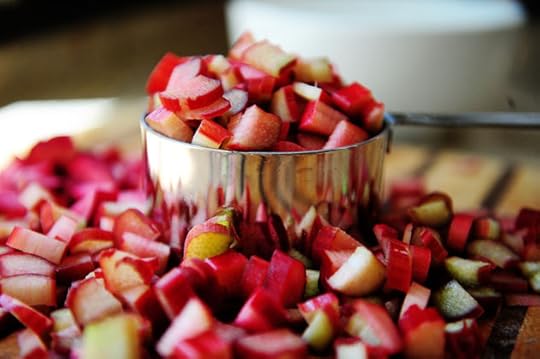 You need four cups. Ish.
 Throw it into a bowl with the beaucoups sugar.
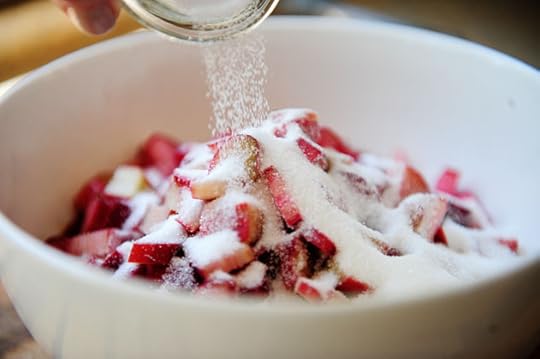 And some salt…
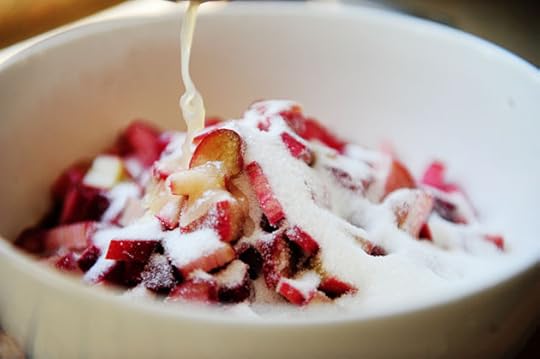 And some lemon juice…
 And if you have it and you feel like it, a little of this.
But it's seriously fine without it.
But it's also really good with it.
But don't wig out if you don't have it.
But be sure to add it if you have some.
I'm sorry you have to deal with me.
 Stir it all together, and guess what? Don't eat it. Too tart. (My eyes are squinting and my mouth is squirting just thinking about it.)
 Set aside the rhubarb for a bit. Then, in a separate bowl, add flour…
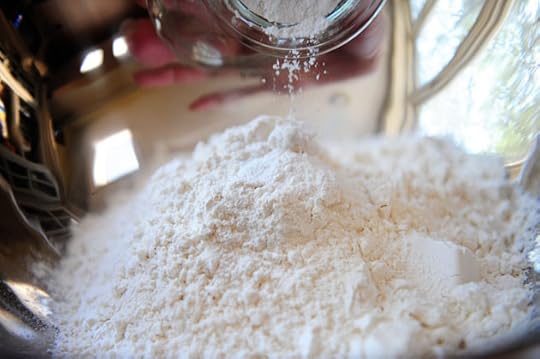 Baking powder…
 A couple of tablespoons of sugar, and a pinch of salt.
 Stir it together, then add lard…
 And butter.
 Use a pastry cutter to work it all together.
 Then crack an egg into some whole milk and beat it all together.
You know you want my hands. Don't act like you don't.
 Pour it into the flour mixture…
 Evenly distributing it as you go.
 Stir it all together with a fork until it's just combined.
 Butter a baking dish. It's the right thing to do.
 Pour in the chopped rhubarb, making sure to get every last drop of the juice.
 Take little pinches of the dough and lay them over the top of the fruit.
 Okay, fine. I think this is real cobbler.
 Just before baking it, sprinkle a couple of spoonfuls of sugar over the top.
Why? Because we live in a free society, that's why.
 Oh, and because it'll result in a sweet, crispy, crunch little crust.
Free society. Crispy little crust. Who needs more reasons than these?
 In restless dreams I walked alone
Narrow streets of cobblestone.
Paul and Art, come back to us. You were the best there ever was.
Download Recommendation: April Come She Will. Trust me. It's short, though, so you might feel ripped off.
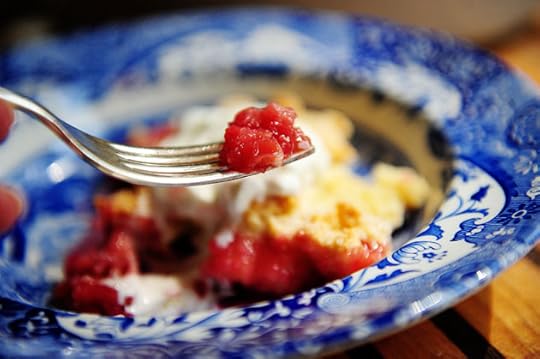
 You can serve this immediately (hot) or you can serve it after a little while (warm) or you can serve it tomorrow (room temperature unless you nuke it).
 But when you serve it…
 Plop on some freshly whipped cream.
Ice cream would work, too.
 Mmmm…rhubarb. It's so beautiful, so different. So jewel toned.
 And so good.
Enjoy this! Here's a link to the printable:
Rhubarb Cobbler – Printable Recipe
(Note: New weekend cooking/baking giveaway here tomorrow. It's a yummy one!)


June 17, 2011
Spicy Pasta Salad with Smoked Gouda, Tomatoes, and Basil
 I found some smoked Gouda at my lovely little local grocery store yesterday, and I knew immediately what I was going to make. It's a pasta salad based loosely on one I tried from Whole Foods a couple of weeks ago, one brought to the Lodge by recent guests. I can't remember all the ingredients; I just remember that smoked Gouda played a role. I have tons of basil in my garden (which means I'm finally, at long last, happy) so I went a little crazy in that department.
I whipped up this salad yesterday afternoon. Then I died from happiness, went to bed ten, and slept like a rock till 6:30 this morning.
It's one powerful pasta salad.
 You need pasta. Mostaccioli's good.
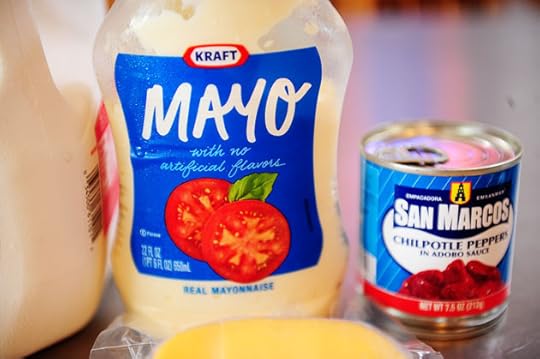 Mayo.
Mayo.
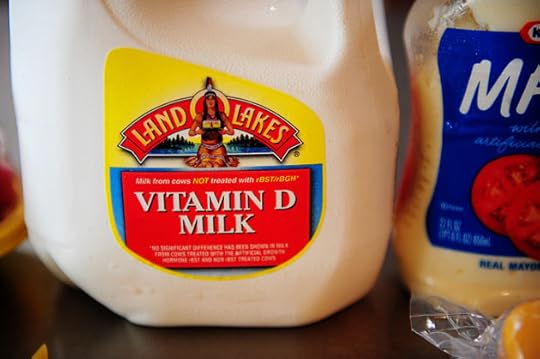 Milk.
Milk.
You also need white vinegar. But I didn't realize this until after I started making the recipes. It was one of those…afterthoughts.
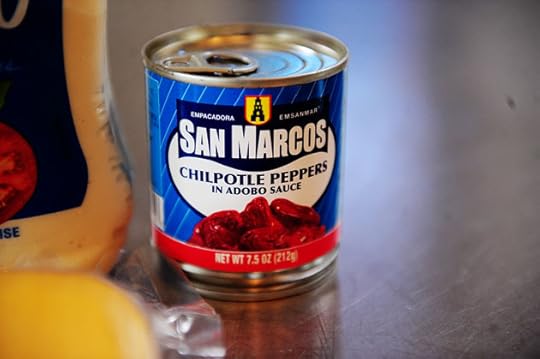 Chipotle peppers.
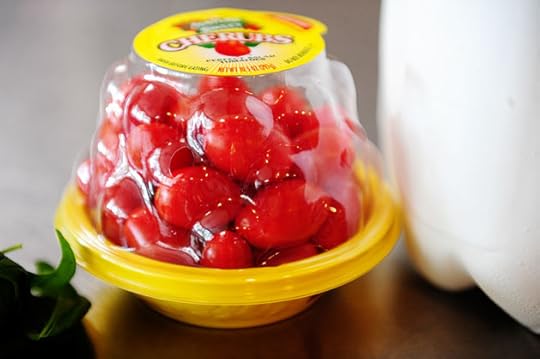 Grape tomatoes.
I love grape tomatoes.
 You also need basil, glorious basil.
And some smoked gouda cheese.
I got it in my little grocery store, and you can too!
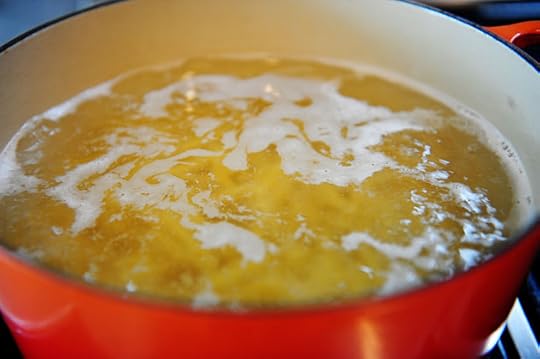 Start by cooking the pasta.
 Drain it, rinse it thoroughly in cold water until it's no longer hot, then place it in a bowl.
 Now make the dressing: start with mayo…
 A little milk to give it a thin consistency..
 And some adobo sauce from a can of chipotle peppers. (Then just transfer the remaining peppers to a small glass bowl and keep 'em in the fridge. Chipotles can be added to so many things [in small quantities; it's spicy!] to give a smoky, wonderful flavor.)
 Add it to the bowl.
Also add 2 to 4 tablespoons of plain white vinegar. Adds a little tang and depth.
 Add salt and pepper and stir together to combine. Taste it and add a little more of the chipotle sauce if you can handle the heat.
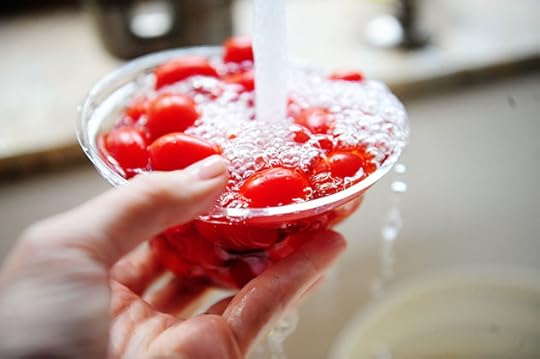 Next, rinse the tomatoes.
 And cut them in half lengthwise.
 Slice up the smoked gouda into matchsticks…
 Then cut them into neat cubes. Each cube should be exactly–and I mean exactly–the same size. If you wind up with cubes of different sizes, even slightly so, discard them all and start over.
Just kidding.
 Add the tomatoes and cheese to the pasta.
 Then drizzle in the dressing. Stir this all together to combine.
 Then stack up all the basil leaves…
 Roll them into a tight roll…
 And cut into thin slices. Chiffonade!
 Throw it into the mixing bowl (I transferred it to a larger bowl to mix, as my blue bowl was too full to stir)…
 And stir gently to mix. Be sure it has plenty of basil; don't be afraid to slice up and add some more. It needs to be a basil explosion!
 Transfer it (if you used a different bowl to mix) to the serving bowl and refrigerate it for at least a couple of hours.
 Then, when you're ready to serve, garnish with a pretty sprig of basil.
Or a sprig of pretty basil, whichever your preference.
 This is divine. Utterly, incredibly divine. Light and creamy, a nice smokiness from both the chipotle and the Gouda, and wonderful freshness from the tomato and basil. I absolutely loved it.
Perfect for summer!
Here's the link to the printable. We should be back to the old format of printable recipes here within the next week! Sorry for the inconvenience, guys:
Spicy Pasta Salad with Smoked Gouda, Tomatoes and Basil

June 15, 2011
Tomato Bread Salad
I'd like to introduce Georgia Pellegrini–she's a chef, author, fellow foodblogger, and regular Tasty Kitchen contributor. Georgia got wind of the fact that I've been, uh, maybe a teeny bit busy over the past fourteen days, and offered to write a guest post here on PW Cooks. I jumped at the offer, and when I took one look at Georgia's beautiful photos and delicious recipe, it was official I wanted to live with her forever. Wait…huh? Okay, maybe just be friends with her forever. Either way, thank you so much, Georgia, for dropping by…and for sharing your talents here.
I want this salad. Now.
I got overly ambitious with my garden this year. I wanted fresh produce so badly after such a long harsh winter that before I knew it, I had planted about 20 varieties of vegetables and fruits. Needless to say it's a battle between me and the woodchucks now. They are winning, but I shall persevere!
If you're lucky enough to come across great tomatoes this summer, particularly colorful heirloom varieties, I highly recommend this salad. The secret is in the sauce.
 Here are some of the things you'll need: baguette, red onion, arugula, cherry tomatoes, medium tomatoes, large tomatoes, basil, cilantro, parsley, garlic, olive oil, white wine vinegar, salt and pepper.
 It begins with something I call tomato water. It's a magical elixir really.
Cut the large tomatoes into quarters to get them ready for the blender. They will spin more easily this way.
 Then slice the red onion. Half will go into the tomato water, and half will go into the salad.
 Cut the root out and cast it away.
 Then slice the onion as thinly as you can. Set half aside and add the other half to the tomato chunks destined for the blender.
 Then gather the basil, cilantro, and parsley along with the white wine vinegar and salt. Use the large, less attractive basil leaves here and save the small tender dainty ones for later.
 Drop it all into the blender in a nice vegetable parfait.
 While it blends, place a piece of cheesecloth over a fine mesh strainer. If you don't have cheesecloth handy, you could also use a coffee filter or paper towel here.
 Pour in the pureed mixture…
 And let it drip into the bowl. It will be a nice pink color, and quite clear.
 You can squeeze out extra juice by pressing on it with a spatula…
 And then you can lift up the cheesecloth and give it an extra squeeze to get the last drops of juice.
 At the end you'll just have the dry fibrous bits, which you can toss.
 Once you've set the pink liquid aside, you make your croutons! If you have a favorite packaged crouton you like at the store then you can skip this step. But I just love making croutons out of bread I have on hand. It makes me feel so thrifty.
 To make the croutons, slice some garlic in half.
 Drizzle the baguette with olive oil…
 And rub the garlic on all sides of the bread to give it some flava.
 Then cut it into 1-inch squares.
 Toss them in a baking dish, and sprinkle 'em with a dash of salt.
 And a dash of peppa. And pop 'em in the oven.
 Now you gather the salad ingredients: slice your smaller tomatoes into halves or quarters or triangles or circles or rectangles, depending on your mood.
 Ladle a few large spoonfuls of tomato water into a salad bowl, then add the arugula, the smaller basil leaves, tomatoes, and red onion and a bit more salt and pepper.
 Remove the croutons from the oven and let them cool for a few minutes so they dry out…
 Add the croutons to each dish right before serving and drizzle the whole thing with some olive oil.
 You can serve this salad in individual bowls or you can make one great big platter of it and serve it family style.
Give this a try sometime! It's perfect for these summer months when the tomatoes and basil are intoxicatingly delicious.
Tomato Bread Salad
Prep time: 15 min | Cook time: 20 min | Difficulty: Easy | Serves: 4
Ingredients
2 large tomatoes
½ red onion
2 cloves garlic
1 cup basil, picked
½ cup cilantro, picked
½ cup parsley, picked
2 tablespoons white wine vinegar
½ teaspoon sea salt
1 baguette
2 cloves garlic
2 tablespoons olive oil
½ teaspoon sea salt
½ teaspoon black pepper
3 heirloom tomatoes, (the more colorful the better!)
1 cup cherry heirloom tomatoes
1 cup arugula
½ cup small basil leaves
Preparation Instructions
For the tomato water, cut the large tomatoes into quarters and add to a blender. Slice the red onion thinly and set half of the slices aside and add the other half to the blender. Add the 1 cup basil, cilantro, and parsley to the blender along with the vinegar and ½ teaspoon of salt and puree the mixture for several minutes.
Place a piece of cheesecloth over a fine mesh strainer and set it over a bowl. Pour the mixture into a mesh strainer and press it through until all of the liquid is extracted. Set the bowl of tomato water aside.
Preheat the oven to 325 degrees F. Cut the baguette lengthwise and drizzle all sides with olive oil. Then rub the baguette on all sides with garlic. Cut the baguette into cubes and place it into a baking dish. Add a sprinkle of salt and pepper and toss. Bake for 20 minutes then remove from the oven to let cool.
Slice the heirloom and cherry tomatoes into bite sized pieces. In shallow bowls, combine ½ cup of tomato water with tomatoes, arugula and ½ cup small basil leaves. Drizzle with olive oil and add a few croutons just before serving. Enjoy!

June 13, 2011
Perfect Iced Coffee
 Iced coffee is my life. When I wake up, often around the time party animals on the west coast are just heading home, I start each day not with a cup of freshly brewed hot java, but with a tall, blessed glass of creamy iced coffee in a glass. I've been an iced coffee freakazoid for years and years. To say I couldn't live without it is an understatement. It gives me the tools I need to cope.
Iced coffee is a complicated thing, and there are many different approaches. One would think that one could merely pour brewed coffee into a glass full of ice and call it a day…but I find that method extremely flawed. First, no matter how packed with ice the glass is, once the hot coffee hits, some of the ice is bound to melt. This has two disastrous results:
1. The overall strength of the coffee flavor is diluted.
2. The iced coffee isn't as cold as it could (or should) be. The finished glass of iced coffee should be frigid, not sorta cold with half-melted ice cubes floating around.
Given the previous set of facts, one would assume that the logical solution would be to brew hot coffee, then transfer the brew to the fridge, allow it to cool, and use it to make iced coffee from there. It's an okay solution, one I subscribed to for quite awhile…until I picked up an issue of Imbibe Magazine three summers ago. It contained a huge spread on the subject of iced coffee, and suggested the following cold-brew method for creating a sort of iced coffee concentrate. I tried it immediately, have made it this way ever since, and can tell you that there is no better (or simpler) method for having the most delicious iced coffee at your fingertips.
There are reasons this method results in a smoother, richer, more delicious concentrate than simply brewing strong coffee and refrigerating it. I would take the time to explain them to you if I knew what they were. But since I don't, I'm just going to show you instead.
(Note: I've totally adapted/tweaked coffee/water amounts to suit my own tastes. Experiment to find your own perfect ratio.)
 I start with a big ol' container. I love these food storage containers, by the way. I got these at restaurant supply, but Sam's Club had them last time I was there.
You can use a big bowl, a large pitcher…even a really clean bucket will work if you're going for a huge quantity. (Or you can halve the original quantity and use a pitcher.)
 Rip open a pound of ground coffee. Any kind will do; the stronger and richer the better.
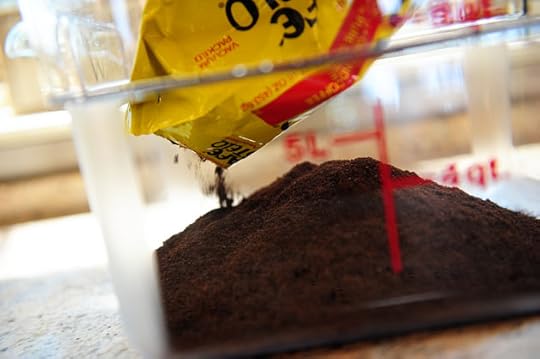 Pour in the coffee.
 Mount Bliss. Who invented coffee, anyway? They should be awarded the keys to the city.
Or, at the very least, my heart.
 Pour in 8 quarts (2 gallons) cold water.
 Give it a stir to make sure all the grounds make contact with the water…
 Then cover the container and go live your life as the coffee steeps for at least eight hours. (And you can go much longer if you'd like.)
 When the time has passed, grab a separate container and place a fine mesh strainer over the top.
 Place a couple of layers of cheesecloth inside the strainer…
 And slowly pour the steeped coffee through the strainer.
 It'll take awhile for all the liquid to pass through. (Doesn't this look like one of the acid pools at Yellowstone?)
My friend Julie is there right now.
Hi, Julie!
Oh. Guess she didn't hear me.
 Use a spoon to gently press/force the last of the liquid through. And note: I've tried the straining method without the cheesecloth, and stray grounds did make it through the mesh strainer. Definitely try to use cheesecloth (or even paper towels) to filter out the finer pieces.
 And there we have it. The dregs (left)…and the gold (right.)
 You can store the liquid in the same container, or you can transfer it to a pitcher or other dispenser. Though it's difficult to wait, I refrigerate this gorgeous concoction before consuming it. It's meant to be cold!
Note: this amount of coffee concentrate lasts me a good three weeks to a month if kept tightly covered in the fridge.
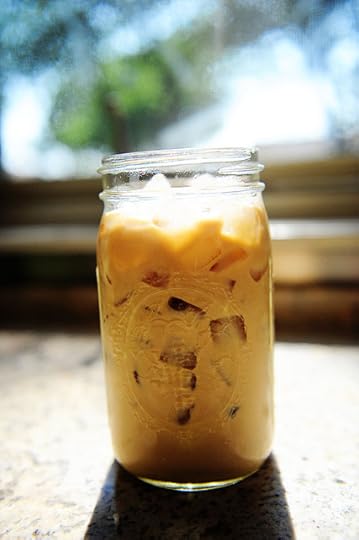
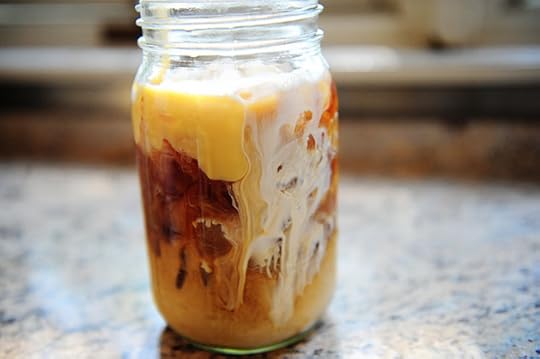
 Now, when you're ready to make yourself an iced coffee, you can do two things. Start by filling a glass with ice.
 Reach into the fridge and dispense enough of the coffee liquid to fill the glass half full (or maybe a little more).
 Splash in skim, 2%, or whole milk…or, if you're a naughty, naughty bad girl like me: half-and-half.
 Make that naughty, naughty, naughty, bad, bad girl.
 Add enough sugar to achieve the level of sweetness you like, or you can drizzle in vanilla or hazelnut syrup if you have those kinds of things lying around.
 Stir it all up…
 Stick in a straw…
 And go fer it. Look at that miracle. The ice is all there. The flavor's all there.
I'm all there.
VARIATION: VIETNAMESE ICED COFFEE
And now for something entirely different. Same…but different.
This is a variation on classic Vietnamese Iced Coffee (also recommended by Imbibe), which actually does begin with a hot brew…but I'm using the cold stuff.
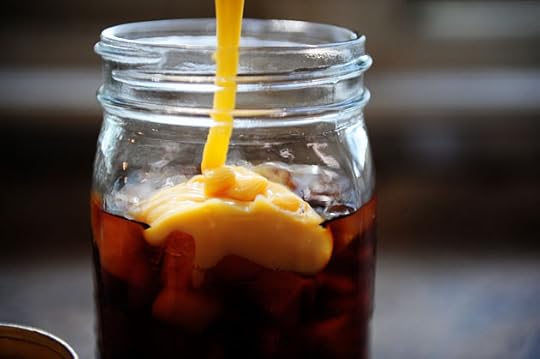
 Fill the glass with ice and coffee concentrate as we did before, then crack open a can of sweetened condensed milk.
A glorious substance. One you should get to know better if you don't already.
 Drizzle in at least 2 tablespoons for a big glass (I wound up adding three.)
 Come…to…MAMA.
 On top of this, add a small splash of milk or half-and-half.
(I recommend the latter, of course.)
 Glorious.
 Stir, take a small sip, and add a little more sweetened condensed milk if needed.
I've tried all combinations of milk, half-and-half, sugar, artificial sweeteners, flavored syrups, and sweetened condensed milk, and I will tell you that there is no more winning combo than the half-and-half/sweetened condensed milk mixture. It is out-of-this-world creamy and wonderful, and is worth at least a spot in your weekend rotation if you're not willing to go there daily.
Either way, try this cold-brewed method of iced coffee sometime soon. The flavor, convenience (and cost savings) can not be underestimated.
Love,
Pioneer Woman
Here's a link to the printable recipe:
Printable Recipe: Perfect Iced Coffee

June 10, 2011
A Triumph
This isn't as much a recipe as it is an idea.
But it was so incredibly, wonderfully, over-the-top delicious (and easy) I feel that it's my duty as your weird friend to share.
Next week I'll be back in the saddle with some new recipe posts.
For now, please try this at the earliest possible convenience:
 I made Macaroni and Cheese for my baby's birthday.
Butter + Flour = Roux
Roux + Milk = White Sauce
White Sauce + Cheese = Cheese Sauce
Cheese Sauce + Macaroni = I jiggle
Anyway, I could have left it at that, but I like to adorn and add and decorate my food with as many things as possible. Honestly, give me a burger menu and I pretty much combine every burger offered in order to stack high as many toppings as possible. It's a real problem.
Unfortunately, though, I knew the kids wouldn't want a bunch of stuff in their macaroni and cheese.
No kid wants a bunch of stuff in their macaroni and cheese. It is written.
So I had a macaroni and cheese bar instead, setting out toppings so everyone could decorate their mac and cheese however they wanted.
 I could have gone berserk and had eighteen dishes of different options, but instead I focused on these three. Speaking of focus, my light was bad and I had to open up my aperture really wide so you can only see the topping in the front. Sorry, man. My bad. But here's what they were:
Front: Caramelized onions. Halve onions from root to tip, then slice thinly. Cook in a couple tablespoons of butter over medium-low heat for 15-20 minutes or until really, really golden brown.
Back Left: Crumbled Gorgonzola cheese. Violently rip open the package. Use a fork to roughly crumble.
Back Right: Big, chewy chunks of crumbled peppered bacon.
I don't have a photo of my plate, which was piled as high as the heavens with the warm, gooey mac and cheese and embarrassing quantities of the three toppings. It was so delicious. I've mixed different things with macaroni and cheese before, of course, but there's something about the sweetness of the golden brown caramelized onions, the tangy sharpness of the Gorgonzola, and the smokiness of the peppered bacon that complemented the macaroni and cheese so perfectly.
Try this combo sometime soon!

June 8, 2011
Hot (Winners Announced)
Here are the winners of the beautiful orange Le Creuset:
#2848 Grace: Hubby has been laid off and looking for work for 8 months, so no. I am taking random days off throughout the summer so we can spend days with the kids having picnics at the beach, spending days in local parks, etc.
#13434 Tricia:
No I'm not!! My husband and son are hiking Philmont Scout Ranch, but my daughter and I will be swimming in the pool!
#40170 Elizabeth: No vacations…just summer school and a new job!
Congratulations, winners! Contact prizes@thepioneerwoman.com to claim your loot.
Today…
Because it's Wednesday…
Because it's hot, windy, and hot…
Because it's 7:30 a.m. and sweat is already trickling down my back…
 I'm giving away this 7 1/4 Quart Round French Oven in this orange-hot "Flame" color.
I love this color.
Love it very much.
I don't love this weather.
I sweat. I sweat much.
TO ENTER
To enter the contest, just answer the following question in the Comments section of this post:
Are you taking a vacation this summer?
Are you going to Disneyland? Your grandmother's house in Duluth? The Alps in Switzerland? The Florida Keys? Or are you, like us, staying put all summer? Just shout out your vacation plans (or non-plans!) and you're automatically entered to win the Le Creuset.
THE RULES
One entry per person, please. Strictly enforced with a wooden spoon, a whisk, and can opener. (Wait…what?)
No entries after noon Thursday.
Winners will be chosen randomly and announced Thursday evening.
Good luck!
____________________________________
Contest sponsored by Pioneer Woman, with cooperation from CHEFS Catalog.

Hot
Today…
Because it's Wednesday…
Because it's hot, windy, and hot…
Because it's 7:30 a.m. and sweat is already trickling down my back…
I'm giving away this 7 1/4 Quart Round French Oven in this orange-hot "Flame" color.
I love this color.
Love it very much.
I don't love this weather.
I sweat. I sweat much.
TO ENTER
To enter the contest, just answer the following question in the Comments section of this post:
Are you taking a vacation this summer?
Are you going to Disneyland? Your grandmother's house in Duluth? The Alps in Switzerland? The Florida Keys? Or are you, like us, staying put all summer? Just shout out your vacation plans (or non-plans!) and you're automatically entered to win the Le Creuset.
THE RULES
One entry per person, please. Strictly enforced with a wooden spoon, a whisk, and can opener. (Wait…what?)
No entries after noon Thursday.
Winners will be chosen randomly and announced Thursday evening.
Good luck!
____________________________________
Contest sponsored by Pioneer Woman, with cooperation from CHEFS Catalog.
June 6, 2011
Pasta with Pesto Cream Sauce
 I finally have basil in my garden. Basil I can use. This is a huge development.
I had no basil during the winter. None. Growing anything outdoors in northeastern Oklahoma from October through March is not possible, and I wasn't organized enough to start indoor plants for my kitchen windowsill. And then there was the blight–whatever basil blight made buying basil anywhere within a hundred miles of the ranch remotely possible.
Do you know how difficult it is for me to live without basil for extended periods of time? It's torture. This summer I'm making and freezing pesto in ice cube trays until I have no fight left in me. As God is my witness, I'll never go without basil again.
Here's what I made myself for dinner last night. It made me so darn happy, I cried.
I'm still crying, actually.
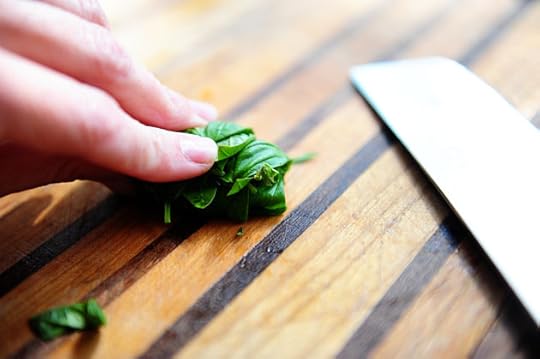
 Basil! Basil! Who wants some basil?
Too bad. I've gone so long without it, I'm afraid I part with any. But you can find it at your local farmer's market or grocery store.
Egg McMuffin. Corner of Broadway and Belmont.
Name that movie.
 Throw the basil into a food processor or blender.
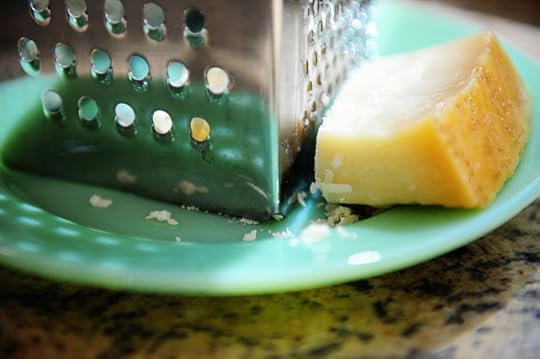 Grate up some Parmesan…
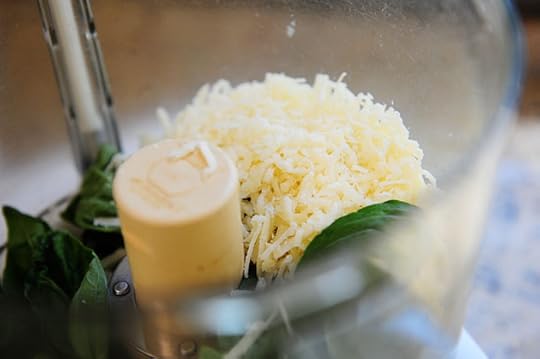 And throw it in, too.
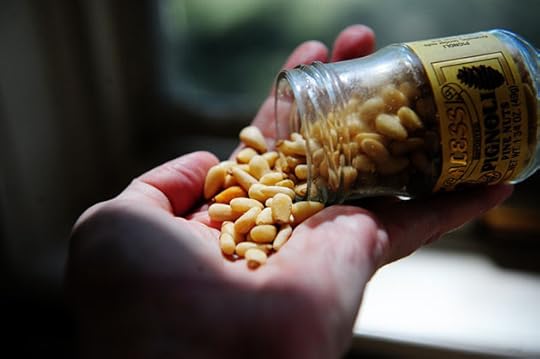 Then grab some pine nuts…
 And throw some in. You can toast them in a skillet first, if you're motivated, have the the time, and can't eat pesto unless the pine nuts are toasted.
I fall into none of those three categories.
 Now grab some garlic. Ain't as good without it.
 Peel the garlic and throw it in with the other beauties.
 And finally, sprinkle in some salt and pepper.
 Throw on the lid, turn on the machine, and drizzle in some olive oil as it mixes.
 Stop when it's all combined. Pull off the lid. Stick your nose anywhere in the general vicinity. Inhale. Reflect that nothing exists on earth that smells better after a long, dreary, lifeless, gray, drab winter than the smell of fresh basil. Then take another whiff and die from bliss.
 Boil some pasta. I love this shape, but fusilli would also be wonderful.
 In a small saucepan, heat up some heavy cream…
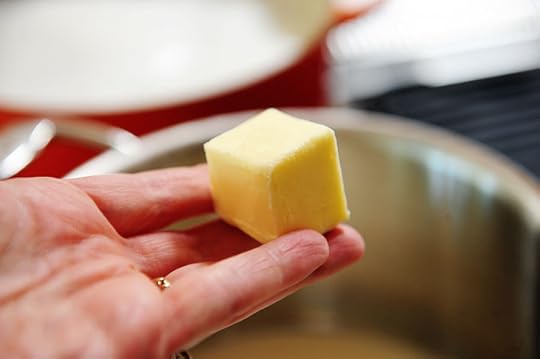 And throw in some butter.
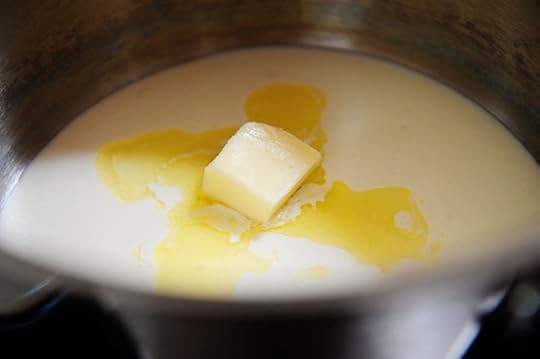 When the butter is melted…
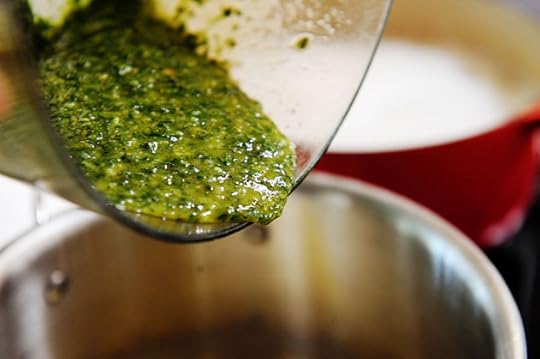 Throw in the pesto.
 Oh, is this a beautiful sight. Cream. Butter. Pesto.
And the world is, again, a glorious place.
 Stir it together, then go write a sonnet.
 Finally, throw a little Parmesan into the sauce. Stir it together.
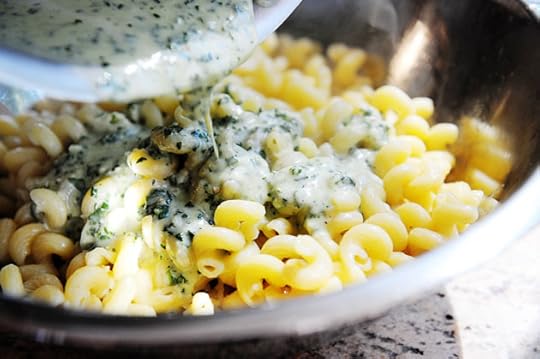
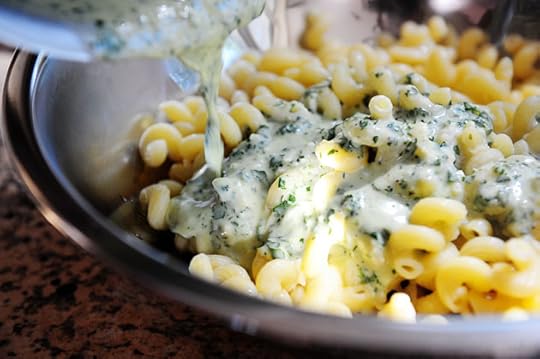
 Drain the pasta, then throw it into a serving bowl.
 Pour the pesto cream over the top.
 Garsh.
 Garsh garsh garsh.
 Finally, chop up a couple of tomatoes.
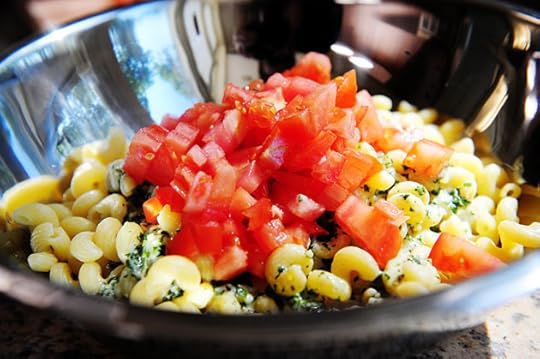 Throw 'em right in…
 And toss it all together. The tomatoes will be warmed by the hot pasta noodles and the cream sauce, and they'll keep their shape because they're not getting cooked to death.
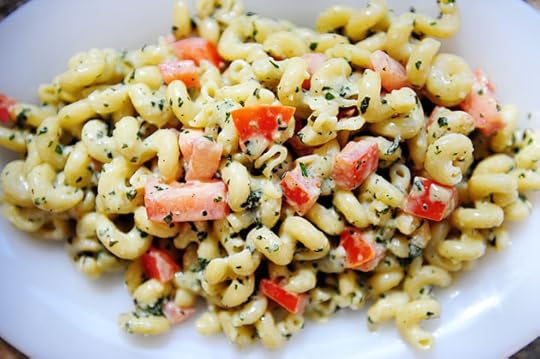 Goodness. Sonnet time again.
Shall I compare thee to a summer's day? Thou art more fragrant and more filled with carbs.
 Please, my friends: get thy hands on some basil and make this soon.
 It'll float your boat in a major way.
Here's the printable recipe:
Printable Recipe: Pasta with Pesto Cream Sauce

June 2, 2011
Tuna Melts
 When I was a teenager, my mom and I went over to a nice lady's house for reasons I can't remember. Maybe she wanted to visit with us. Maybe she was doing our colors. Maybe she was showing us some photographs or a newly decorated bedroom in her house, or maybe she had some Tupperware on display. I can't remember. I've had babies since then.
One thing I do remember is that she served us lovely little tuna melts on English muffins. And they were so, so, so, so good. I think I asked for seconds, and then thirds. And then my mom pinched my leg under the table and discretely mouthed the word "No."
I made some of the little tuna melts myself a few days ago. I wanted to remember.
I needed to remember.
 Dice up a red onion really finely.
Not finally. Finely.
 Do the same with some red bell pepper…
 And a jalapeno. I add jalapenos to weird things. It's a problem I have.
 You'll also need some sweet gerkins.
 Grab a few…
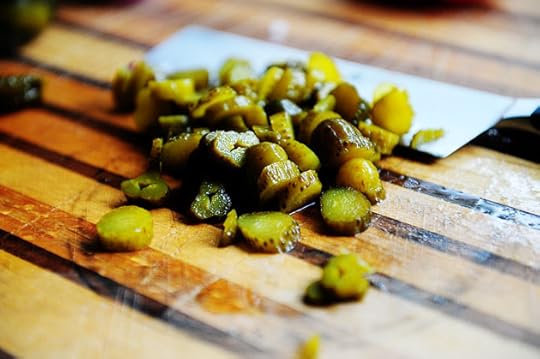 And slice 'em up.
 Finally, chop up some hard boiled eggs.
 Grab some tuna–whatever kind makes your skirt fly up.
 Throw it into a bowl…
 And add all the other delights.
 Plop some mayonnaise on top.
 Add some plenty of salt and pepper…
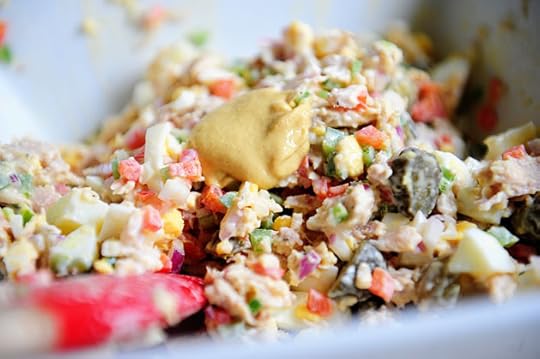 And how about a little Dijon?
I also splash in some juice from the pickle jar.
Yum. Flavor. Good.
 Line up some English muffins on a cookie sheet and preheat the oven to 375.
 With a scoop or spoon, plop some salad on each of the muffin halves.
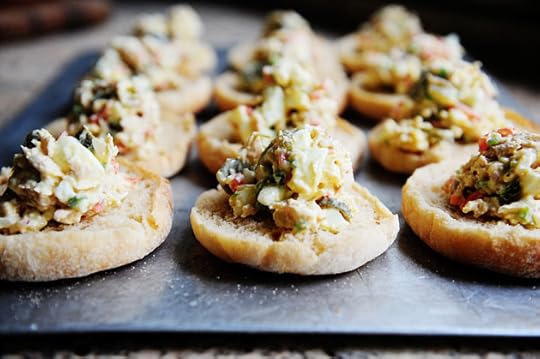
 Flatten/spread out the mixture, then pop the pan into the oven for about 8 minutes, just to start warming up the tuna salad.
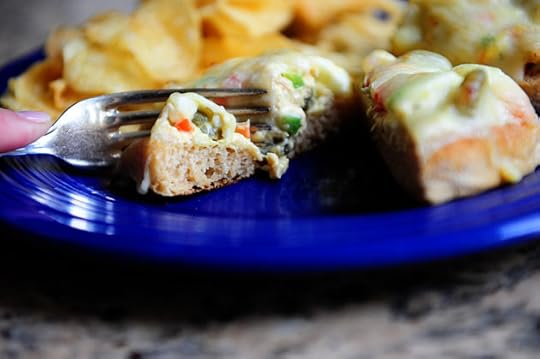
 Pull the pan out of the oven and crank up the broiler.
 And lay a slice of cheese on the top of each muffin.
Broil 'em until the cheese is melted and bubbly, then serve 'em up with some chips or fruit.
 Mmm. That right there is what it's all about.
 Here's the printable recipe:
Tuna Melts – Printable Recipe
Enjoy!

May 31, 2011
Make This Today
 There's the Marlboro Man Sandwich. Pure, unadulterated, and unafraid.
Try not to be blown away by my 2007 food photography. Thank you for your cooperation.
 There's also the MM Sandwich, PW Style–my version of Marlboro Man's beloved sandwich, which needs no improvement according to my beloved, but which is even more delicious with the addition of peppers, mushrooms, and sherry. According to me.
That made no sense.
 And then there's this. My friends, I want you to try this sometime soon. As in, today. It's Marlboro Man's original favorite sandwich. No sherry. No mushrooms. No peppers. But it's topped it with pieces of fresh mozzarella, thick slices of juicy, ripe tomato, and peppery, scrumptious arugula.
Goodness gracious, is all I have to say.
 Marlboro Man's Sandwich: Right. Meat, onions, and bread.
My Sandwich: Left. Warm, cold, peppery, fresh, cheesy, rich, and delightful.
Which would you rather have?
 (I'll give you a hint: it's this one.)
It was a dream. The mozzarella begins to melt against the warm meat/onion mixture, but still holds together since the slices are thick. The juicy tomatoes add a cool freshness, and the arugula on top just sends it over the top.
Splendidly, fantastically delicious. Try it this week!
Here's a link to the printable for this girl-friendly version so you don't have to dig through the old post. Enjoy this, guys!
MM Sandwich, Adorned

Ree Drummond's Blog

- Ree Drummond's profile
- 2032 followers

