
Ree Drummond's Blog, page 72
July 12, 2011
What Country Would You Visit?
Today…
Because it's hot outside…
Because I'm cooking just so I can have an excuse to stay inside…
And because I love ya…
 I'm giving away two (2) of these All-Clad stainless steel cookware sets.
It's sturdy.
It's shiny.
It'll take you where you want to go. Well, in a cooking sense, anyway.
TO ENTER
To enter the giveaway, just answer the following questions in the Comments section of this post:
If you could travel to any foreign country just to eat the food, which country would it be?
If food were the only deciding factor, which country would you visit? Morocco? Italy? France? India? Just shout out the country whose cuisine you'd most like to devour and you're automatically entered to win the cookware.
THE RULES
One entry per person, please. Strictly enforced with a metal spatula.
No entries after midnight Tuesday.
Winners will be selected at random and announced Wednesday.
Note: Replies to comments are unable to be counted as entries. Please leave one comment (not a reply) as your entry.
Lots of Love,
PW
____________________________
*Not a paid advertisement. All-Clad doesn't know me. I could disappear tomorrow and All-Clad would not bat an eyelash. I just like their pans. Amen.*
Giveaway sponsored by Pioneer Woman, with cooperation from CHEFS Catalog.


July 11, 2011
Vanilla Ice Cream with Basil-Peach Topping
 It's hot. All I want is ice cream. The end.
Okay, I'm back and I have a question: have you ever had fruit jelly or preserves spiked with fresh herbs? I have, and I lived to tell about it. To be specific, I once tried an apple-rosemary jam. It was beautiful and woodsy and strange and I cried tears of joy. I also once tried peach preserves with a little basil added. It was…sublime. Toasted english muffin. Lots of unsalted butter. Basil-peach preserves. And the girl was so, so happy. It was herbaceous and divine.
We're not making apple-rosemary jam today, and we're not making basil-peach preserves. It's too hot for me to bear the thought of a hot water bath boiling on my stovetop. I'll wait till the temperature drops below four thousand degrees before I even consider it. So instead, we're making this easy little topping for ice cream. Your kitchen doesn't need to get too hot, and the ice cream will keep you cool. The perfect solution!
Warning: this topping is strange. You're going to see me pour a weird green syrup over a bowl of chopped peaches. But the flavor…it's just out of this world. All the goodness of peaches, all the bright freshness of basil.
Try it! It's bizarre…and wonderful.
 Grab a couple of peaches. Make a slice all around the pit, then twist to separate the peach in half. Use a spoon to remove the (often stubborn) pit.
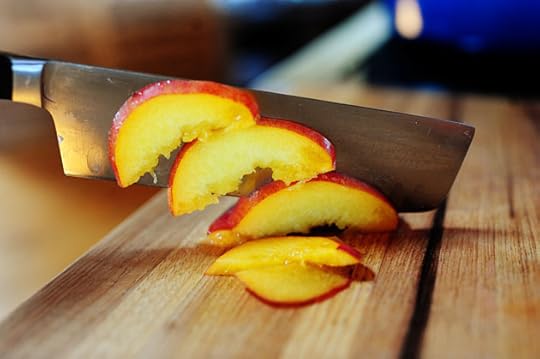 Cut each peach into slices…
 Then cut in the other direction to chop.
 Combine 2 cups of water with 2 cups of sugar. Stir together just to combine, then bring to a boil over medium-high heat. Cook it for 3 to 5 minutes, just until it thickens but before it begins to change color.
 Set it aside for a couple of minutes.
 Pour the slightly-cooled syrup into a blender. The syrup won't be thick-thick-thick…just a nice, light syrup.
 Then throw in the basil leaves.
WARNING: I have a ton of basil and will be using it in every recipe I make over the next month. Bear with me.
 Now, I intended to just press the "Pulse" button, and to press it for approximately 1/10000000 of a second so that the resulting mixture would be a clear syrup with chunks of basil leaves.
 But I pressed the Liquefy button instead.
Live and learn.
But you know what? It was fine!
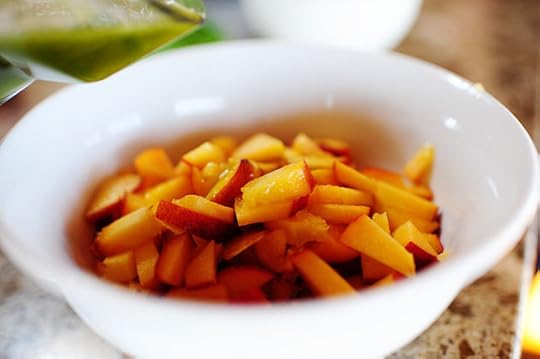 Put the peaches in a bowl…
 And pour the warm green syrup over the top. You can see the little flecks of basil landing on the peaches. Pretty!
 Now, you can set this aside for awhile and let the flavors meld a bit, or you can cover it and refrigerate it for a few hours.
 But of course, I couldn't wait that long.
 Peach-basil topping. Vanilla ice cream. Good.
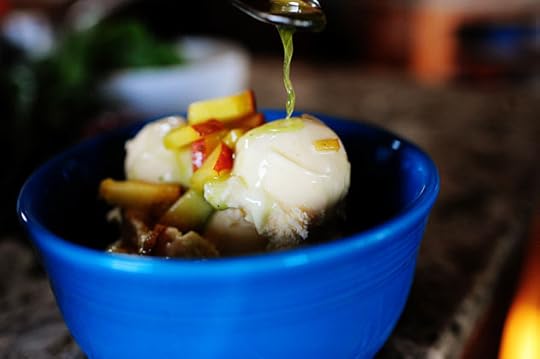 Very, very good.
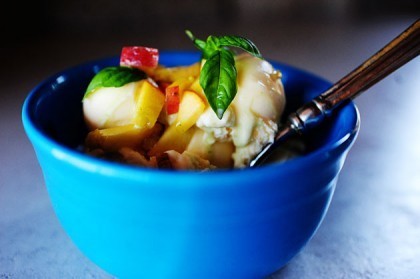
 And you know what? While the syrup is definitely green, it sort of loses its craziness once it hits the ice cream. When it settles in the bottom of the bowl, it's very, very subtle.
It may be green. It may be weird. It may be excessively herbaceous. But it's oh, so good. Give it a try while the weather's hot!
You'll absolutely love it.
Recipe: Vanilla Ice Cream with Peach-Basil Topping
Prep Time: 1Minute
|
Cook Time: 5 Minutes
|
Difficulty: Easy
|
Servings: 12
Print Recipe
3"x5" Cards
4"x6" Cards
Full Page
Ingredients
2 whole Peaches, Pitted And Chopped2 cups Sugar2 cups Water18 whole Basil Leaves, WashedVanilla Or Strawberry Ice Cream Preparation Instructions
Place chopped peaches in a bowl. Set aside.
In a saucepan, combine sugar and water. Stir to combine. Turn on heat to medium-high and boil for 3 to 5 minutes, until syrup is thicker but not yet starting to turn color. Remove from heat and allow to cool for a couple of minutes.
Pour warm syrup in a blender. Throw in basil leaves. Pulse once quickly for larger chunks of basil; blend for a few seconds for more of a green syrup. (It may look a little funky, but man, does it taste good.)
Pour basil syrup over chopped peaches. Allow to sit a few minutes, then spoon mixture over vanilla or strawberry ice cream.
(Can refrigerate sauce and use later.)
Posted by Ree on July 11 2011

July 6, 2011
Missy's Marinated Tomatoes
 My sister-in-law Missy brings these marinated tomatoes to our Fourth of July bash every year, and as far as I'm concerned, they're essential to my emotional well-being. Amidst all the grilled steaks, warm corn casserole, and potatoes, the cool, fresh flavor of the tomatoes always, always hits the spot.
What also hits the spot is that Missy, for reasons unknown to me, insists on transferring her tomatoes to a food storage container and leaving them with me at the end of the night. Maybe she knows how much I love them. Maybe she doesn't want to clutter her fridge. Maybe her tomatoes are some kind of ministry…I don't know. But I will tell you that as good as these tomatoes are at the Fourth of July get-together, they're even better the next day.
And the day after that? Also known as today? This is what I did:
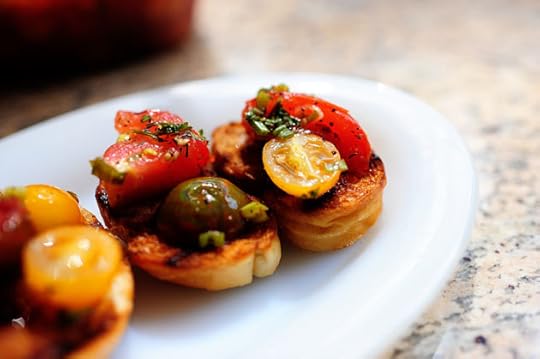 Made bruschetta.
I sliced a baguette, brushed the slices with olive oil, then grilled them on a grill pan. Then I rubbed a peeled garlic glove over the surface of the bread and topped with the tomatoes, using a spoon to allow for some extra juice to drop onto the bread.
 Divine, and you can leave it as is or top it with goat cheese if you're feeling extra naughty.
Here's the recipe!
Recipe: Missy's Marinated Tomatoes
Prep Time: 4 Hours
|
Cook Time:
|
Difficulty: Easy
|
Servings: 18

Print Recipe
3"x5" Cards
4"x6" Cards
Full Page
Ingredients
1 cup Canola Oil1/4 cup Balsamic Vinegar4 Tablespoons Sugar1 teaspoon SaltFreshly Ground Black Pepper3 whole Green Onions, Sliced1/4 cup Chopped Parsley18 whole Basil Leaves (chiffonade)1/4 teaspoon Ground Thyme2 cloves Garlic, Minced Finely2 pounds Tomatoes, Cut Into Quarters (if Big) Or Halves (if Small)1 whole Baguette, Sliced1 clove Garlic, Peeled Preparation Instructions
Combine all ingredients except tomatoes in a large glass bowl. Whisk to combine, then add tomatoes. (You can up the quantity of tomatoes if need be.) Use regular red tomatoes, or a mixture of red, yellow, heirloom, etc. Use different sizes of tomatoes, too--pretty!
Allow to marinate for at least 3 to 4 hours, several hours if possible. Tomatoes will give off liquid as they marinate.
Use leftover tomatoes to make bruschetta: slice baguette and brush slices with olive oil. Grill on a skillet or grill pan until golden. Rub slices with garlic cloves. Top with tomatoes, allowing juice to drip on the bread.
Posted by Ree on July 6 2011

July 4, 2011
Last Minute Fourth Recipes
 This pasta salad is to die for, and takes about 20 minutes to make:
Spicy Pasta Salad with Smoked Gouda, Tomatoes, and Basil
 Best salsa ever. Hands down. Amen.
Restaurant Style Salsa
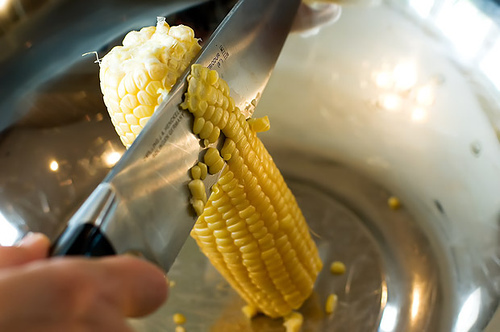 My favorite thing to do with fresh corn. Divine. Pardon the circa 2007 photos.
 My husband's grandmother brings this side dish to our house every year. It rocks my world.
Edna Mae's Escalloped Cabbage
 And this luscious dessert–tart, sweet, warm, and delicious. And so, so easy.
Raspberry Crisp
 Finally, here are the winning recipes from the recent grilling recipe contest. The recipes are delicious, and the videos are lots of fun.
Winning Grilling Recipes
Have a happy and delicious Fourth of July, everyone!

July 1, 2011
French Toast with Berry Butter
 I cooked at the Lodge yesterday, and this was the final dish. It was the final dish because after it was done, I scarfed down so much of it that I had to go home and take a fourteen-hour nap. I went way too far.
I love going too far.
The dish was French toast–slightly different from your average French toast; you'll see why in a minute–topped with two kinds of berry butter. I have so many blackberries (storebought, not in my garden) right now that I'm desperate to use them up, and this compound butter was a start. I was going to go one step further and make blackberry syrup for the French toast, but then I would have had to wait longer to eat it, and that was an unacceptable proposition.
Make this for a special Fourth of July breakfast this weekend! It's pretty, special…and pretty special.
THE BUTTER
 Okay, I'm excessive and made a pound of each kind of berry butter. But my printable recipe below cuts this in half.
Don't be like me.
 Whip the butter on high until fluffy–if it's really, really soft (and it's better if it's really, really soft) this obviously will only take a few seconds.
 Switch to the paddle attachment, because I'm afraid the whisk will beat up the berries too much, and I just want to create more things for me to have to wash.
Not really on that last part.
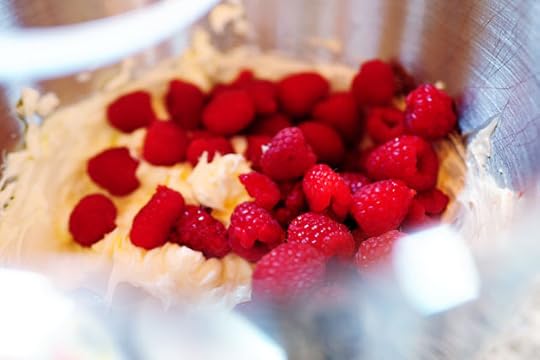 Dump in the raspberries…
 Then turn the mixer on low for just a few seconds. Watch it the whole time–you'll want to stop mixing as soon as the berries start to break up.
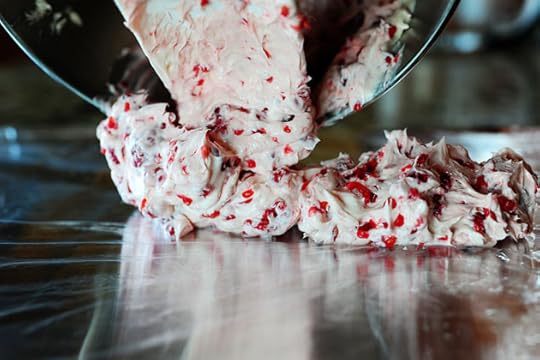
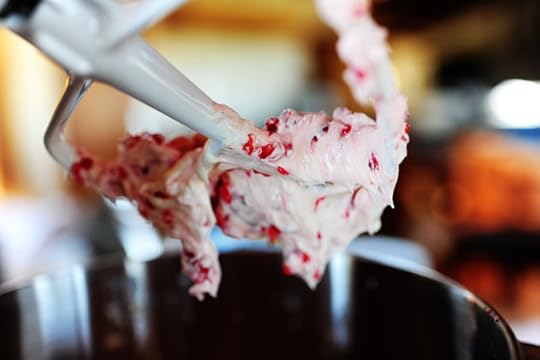 Look at how gorgeous this is.
Note that you could add a little sifted powdered sugar to each of the butters if you think it needs a little sweetness. But I kind of like keeping things pure and holy…and besides, the maple syrup will bring plenty of sweetness to the table.
 Next, lay a long sheet of plastic wrap on top of a long sheet of aluminum foil. Spoon the butter mixture in a line down the center of the plastic.
 Now, this is a little hard to explain: use the foil to sort of push the plastic wrap around the butter, gradually forming the butter into a cylindrical shape.
 Then, after the plastic is wrapped neatly around the cylinder of butter, wrap the foil around the cylinder. Twist the ends like a piece of wrapped candy.
 Now, this is the neato part: Twist each end of the cylinder in opposite directions, applying a bit of pressure in order to make the cylinder a little taut. This will make for a nice, solid, cohesive log of butter. Stick this in the freezer for a good thirty minutes to hurry along the setting process, then move it to the fridge until you need it.
 Wash the bowl and beaters, then repeat this process with blackberries.
 Remember: just barely mix it. I think this took about five seconds.
Maybe six. But definitely not seven. If you mix it for seven seconds, the whole thing will be completely ruined!
Not really.
 Lay it on the plastic wrap/foil…
 Then roll it up and torque it!
 Freeze it, then refrigerate it till you need it. It needs to be solid as a rock.
Well, as a cylinder of butter.
THE FRENCH TOAST
 Here's what you need for the French toast.
 Have you ever made French toast with egg yolks only?
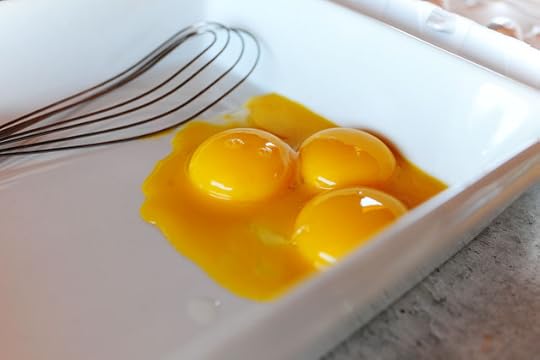 Then you haven't lived.
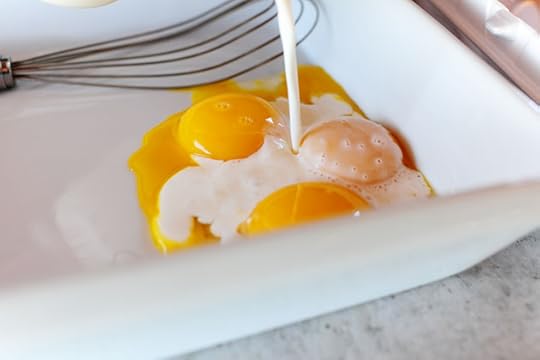 Add half-and-half.
 Also add sugar, vanilla, and lemon zest. All the good things in life.
 Cut some slices of bread. This is sourdough.
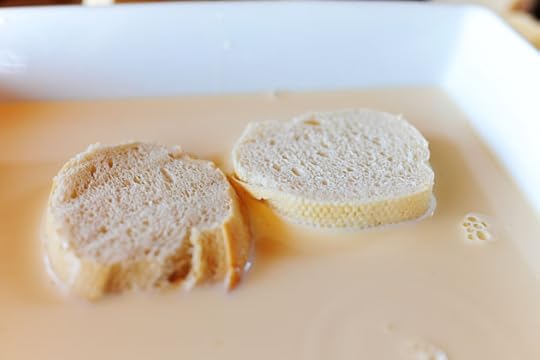 Dip 'em in the egg mixture.
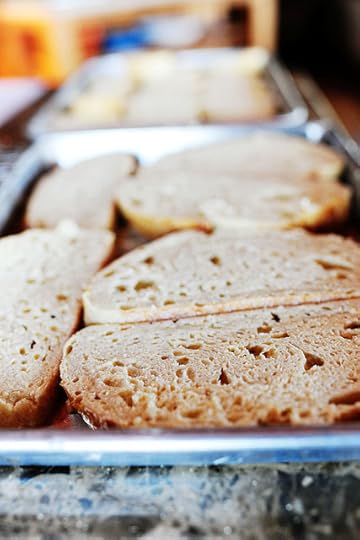
 I also used this French loaf. I like to have options.
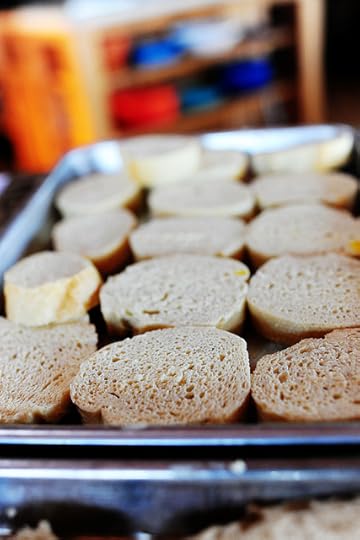 Set 'em on a pan.
 Then fry 'em in a skillet (or on a griddle) over medium heat.
Add some butter to the pan first.
Because, you know, there isn't already going to be enough butter in this dish.
 Cook the slices till golden brown.
 Then put 'em on a platter when they're done.
You can see the difference here between French toast that's made with whole eggs and just egg yolks: Without the whites, you don't have that burned/crusty quality that can happen on regular French toast, and you also wind up with a nice yellow color. Also, the sometimes-overwhelming egg flavor isn't present. It just makes for a nice mild French toast.
Almost like a custard French toast.
Like a bread pudding French toast.
To me, it's all in the same category.
 I usually pop this into a preheated (300 or so) oven for a few minutes, just to warm things up.
 Here's the butter! It's gorgeous.
 Look at the chunks of berries. Mmmmm.
 I'm sure glad I didn't mix this for seven seconds. I'd be crying right now.
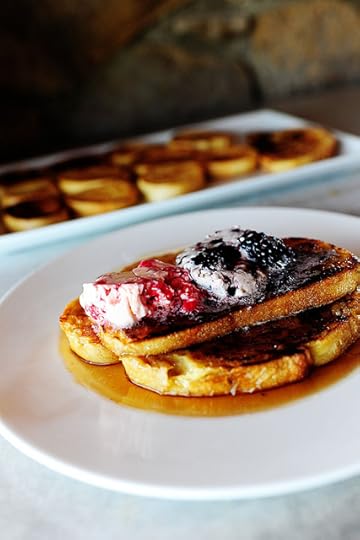
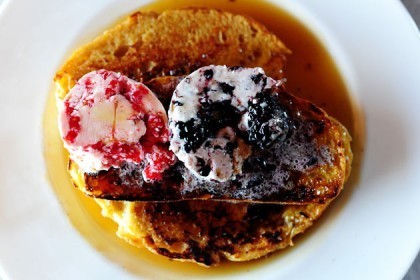
 Plop a slice of each kind of butter on top.
 Then do this. Be sure to make a royal mess on the side of the plate like I did. It'll make me feel better about myself.
 I love food. I love food, because food involves this.
 This is a real treat, guys. The butters begin to melt, leaving the chunks of berries behind. And the world, once again, is a beautiful, kind, safe place.
 Enjoy this!
And have a happy, safe, wonderful Fourth of July, friends.
Love,
P-Dub
Recipe: French Toast with Berry Butter
Prep Time: 2 Hours
|
Cook Time: 20 Minutes
|
Difficulty: Easy
|
Servings: 8
Print Recipe
3"x5" Cards
4"x6" Cards
Full Page
Ingredients
1 pound Unsalted Butter, Softened1/2 cup Raspberries1/2 cup Blackberries1 loaf Crusty Bread: Baguette, French Loaf, Etc.4 whole Egg Yolks2 cups Half-and-half1 Tablespoon Sugar2 teaspoons VanillaZest Of One LemonMaple Syrup For ServingSifted Powder Sugar, For Serving (optional) Preparation Instructions
Make the berry butters: in separate batches, whip 2 sticks of butter at a time on high using the whisk attachment. Switch to paddle attachment. Add either raspberries or blackberries. Turn mixer on low for only about five seconds, just long enough for the berries to begin to mix in/break up, but not so long that it turns into a mess. Clean mixer bowl and attachments and repeat with other kind of berry.
With each batch, turn mixture out onto a long sheet of plastic wrap set over a long sheet of foil. Use the wrap/foil to roll the butter into a cylinder: first seal the plastic wrap around the cylinder, then secure the foil around it. Twist the ends, gradually applying more pressure as you twist in order to make the cylinder taut.
Once it's a nice, neat cylinder of foil, place into the freezer for 30 minutes in order to quickly solidify it, then transfer it to the fridge until you're ready to use it. Butter should be nice and firm.
NOTE: You can add a little sifted powdered sugar to the butter to make more of a sweet spread for bread and muffins! For French toast, though, the maple syrup makes things sweet enough.
To make the french toast, cut bread into slices 1/2 inch thick. In a dish, mix together egg yolks, half-and-half, sugar, lemon zest and vanilla. Whisk to combine. Dip bread slices in mixture, coating both sides, then remove from dish and set aside. Repeat until all bread is coated.
Heat iron skillet or griddle over medium heat. Sizzle butter in the pan when hot. Cook French toast on both sides until golden brown, being careful not to burn.
Remove berry butters from fridge. Unwrap one end and cut slices. Lay one slice each onto each serving of French toast. Sprinkle with powdered sugar if desired, then drizzle with warm maple syrup.
Posted by Ree on July 1 2011

June 29, 2011
Caprese Salad
 I love Caprese Salad so much it actually hurts. I love it as a main dish salad, I love it as a side dish with beef, I love it as an appetizer before a meal, I love it as a mid-afternoon snack. Caprese is truly a magical and perfect combination of flavors, textures, and freshness: ripe tomatoes, fresh mozzarella cheese, basil, and some kind of drizzle of either olive oil or balsamic…or both.
For this Caprese, I used a simple balsamic reduction, which results in a pretty presentation and gorgeous flavor.
Serve a platter of Caprese Salad on the Fourth! I usually do, and it's always a welcome treat amidst all the burgers and hot dogs and ribs and celebration and fun.
And it's…well, it's Caprese.
 Start with the balsamic reduction. It's a cinch–just don't walk outside to water your garden while it's reducing or you'll wind up having to do it all over again.
I speak from experience here, people.
 Precise measurements aren't important; you can do a whole bottle or just a small amount, but if I'm going to go to the trouble, I often just do a whole bottle.
Which means when I go outside and water my garden and forget about it, I waste a whole bottle and have to start over.
Don't be like me.
 Pour it into a small saucepan and bring it to a gentle boil over medium to medium-low heat.
 Watermelons and Child Paintings: A Still Life.
 Let the balsamic reduce for a good ten to twenty minutes, depending on how much you're reducing.
 It'll slowly start to thicken. Remove it from the heat when it's a nice, thick (but still pourable) glaze.
 Again, I burned my first batch and had to do it again. This is my second batch, which I stuck in the fridge to cool since I was chasing daylight and was so hungry for Caprese I couldn't see straight. Since it's cool, it looks a little thick…but it wound up being the perfect consistency.
 You need mozzarella, tomatoes, lots of basil, olive oil, salt and pepper, and the balsamic reduction.
And you'll need the sheer will to get Caprese in your mouth as soon as humanly possible.
 Cut the tomatoes into slightly thick slices.
 Do the same with the mozzarella.
 Basil, basil, basil. I'll have you know that I have approximately fourteen thousand basil plants in my garden. For the first time in a long time, I feel there's something to hope for each day.
 Alternate tomato and mozzarella slices on a platter you bought at Sam's Club one summer in a fit of rage.
Have you ever bought a platter at Sam's Club in a fit of rage?
I wouldn't recommend it.
 Pretty, but it's not good enough.
 Tuck basil leaves in between each slice.
 I'm starting to get excited now.
But we're still not done.
 Drizzle the whole thing with olive oil…
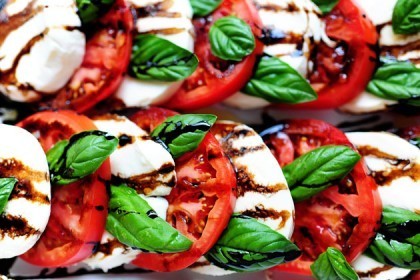
 And, finally, a beautiful drizzle of the balsamic reduction.
 There's nothing like that beautiful dark-colored gloss. It's such a contrast to the red, green, and white.
 Because the basil leaves are all drizzled with stuff, I throw on a few pure and holy ones at the end just for kicks. Also, sprinkle on kosher salt and freshly ground black pepper. Divine.
 Total loveliness. Now, you'll notice that on the moist/wet mozzarella, the balsamic reduction starts to seep and run (a watercolor effect)–but on the basil leaves and platter, it remains more of a semi-solid glaze. So if you're artistic (and I'm not) you can create designs on the sides of your platter to really up the presentation factor.
 But last night, presentation wasn't foremost on my mind. This was.
 Oh, and guess what? Balsamic reduction is delicious on beef.
Over and out.
Amen.
Printable recipes are back! I've missed them.
Here 'tis:
Recipe: Caprese Salad
Prep Time: 5 Minutes
|
Cook Time: 20 Minutes
|
Difficulty: Easy
|
Servings: 8
Print Recipe
3"x5" Cards
4"x6" Cards
Full Page
Ingredients
2 cups Balsamic Vinegar3 whole Ripe Tomatoes, Sliced Thick12 ounces, weight Mozzarella Cheese, Sliced ThickFresh Basil LeavesOlive Oil, For DrizzlingKosher Salt And Freshly Ground Black Pepper Preparation Instructions
In a small saucepan, bring balsamic vinegar to a boil over medium-low heat. Cook for 10 to 20 minutes, or until balsamic has reduced to a thicker glaze. Remove from heat and transfer to a bowl or cruet. Allow to cool.
When you're ready to serve, arrange tomato and mozzarella slices on a platter. Arrange basil leaves between the slices. Drizzle olive oil over the top of the salad, getting a little bit on each slice. Do the same with the balsamic reduction, making designs if you want. Store extra balsamic reduction in fridge for a later use.
End with a sprinkling of kosher salt and black pepper. Serve as a lunch, with crusty bread. Or serve alongside a beef main course for dinner.
Posted by Ree on June 28 2011
Caprese Salad

June 27, 2011
Pollo Asado
 There was an insanely authentic and delicious Mexican food dive in the general vicinity of my college campus. It was basically a hut with a drive-through–I'm not even sure it had a seating area inside–and it was the perfect fare for my fellow dormmates and me: high on fat and flavor, incredibly cheap, open all night. The two or three people who worked there were friendly and upbeat and made the most incredible quesadillas I've ever eaten–ones I've never been able to duplicate to this day. What was that mysterious cheese? I think it was all a dream. They also sold carne asada and pollo asado tacos and burritos. I didn't eat them because I was a vegetarian in college for reasons I still don't understand. But I still don't understand acid wash, either. Or neon scrunchies. Or Sun-In.
Pollo Asado is marinated Mexican (or Cuban, depending on your perspective) grilled chicken, seasoned in any number of ways. I took a basic/citrus approach, but you can add cumin or other spices to give it whatever kick you like. But the magic, to me, is not the chicken itself, but what you do with it after it's cooked: serve the pieces whole, with warm tortillas and pico de gallo…and whatever other scrumptious sides you can manage.
It's how grilled chicken should always be served.
 Here's what you need for the marinade.
 Measure 1/2 cup olive oil, then grab a couple of oranges and whack 'em in half.
 Squeeze enough oranges to make half a cup of juice.
 And if you don't have enough oranges, which I did not…
 Just supplement with some storebought stuff.
 Lemons are best, but I had no lemons. I had no lemons because I have a mental block about buying lemons when I go to the grocery store. I've needed lemons for approximately fourteen years now, and I can't seem to remember to buy them.
 When this bottled stuff runs out, I'm gonna be in a world of hurt.
 You'll also need a couple of limes.
 And a disturbing, freaky pink alien hand to do the hard work.
 As you squeeze the fruit, throw it into the bowl or bag that you plan to use to marinate the chicken.
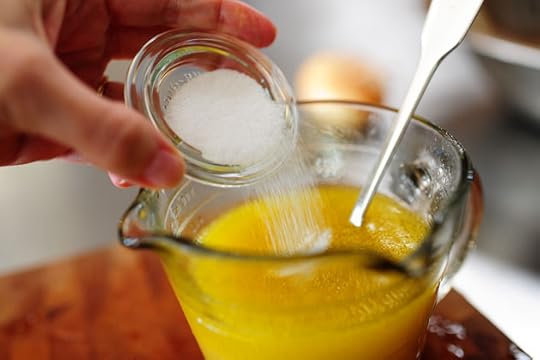 Next add salt…
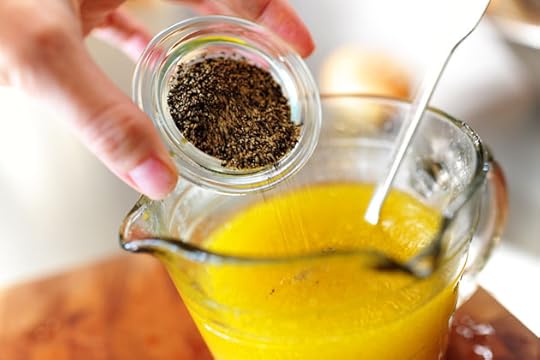 And pepper.
 Then grab three or four cloves of garlic…
 And use your aggressions and frustrations to violently smash them.
 Throw them into the marinade…
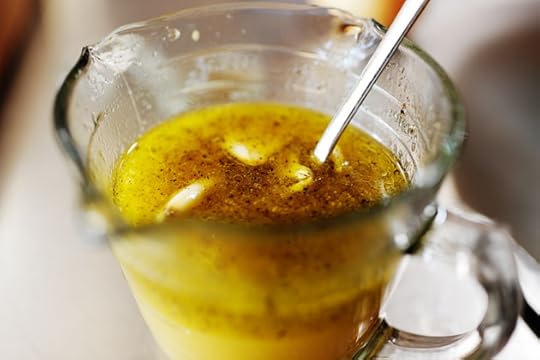 Then whisk it all together.
 Throw a bunch of chicken legs into the bowl (or bag) with the squeezed fruit, and add a couple of peeled, quartered onions.
 Pour the marinade all over the chicken, then toss, cover with plastic wrap, and refrigerate for at least a couple of hours. Mo' is better, though.
And glass bowls are better. But I have to be me.
 While the chicken's marinating, make some pico de gallo: you'll need chopped tomatoes…
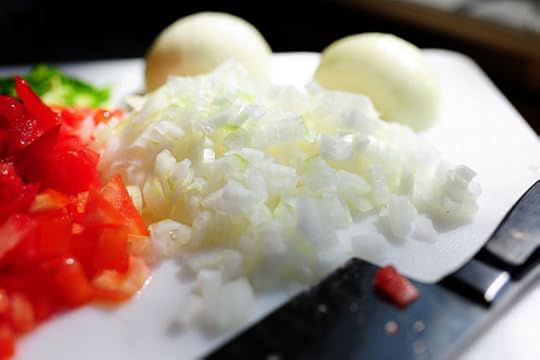 Onions…
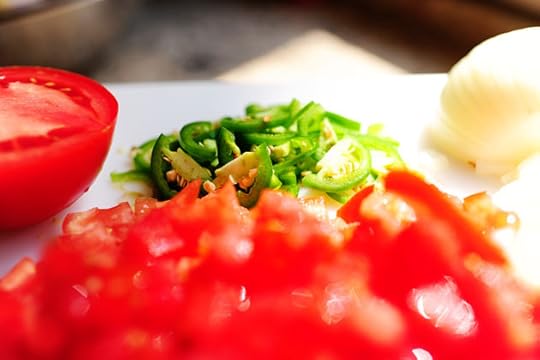 Jalapenos…
And lots and lots of cilantro, not shown because I'm an airhead.
 When you're ready to cook the chicken (and really, be sure to let it marinate and marinate and marinate first) arrange it on a broiler pan. Preheat the broiler and arrange the rack toward the bottom of the oven, and broil the chicken for 20 to 25 minutes, turning and marinating the chicken once during the cooking process.
 While the chicken is cooking, warm some corn tortillas in a separate oven (or wait until the chicken's done)…
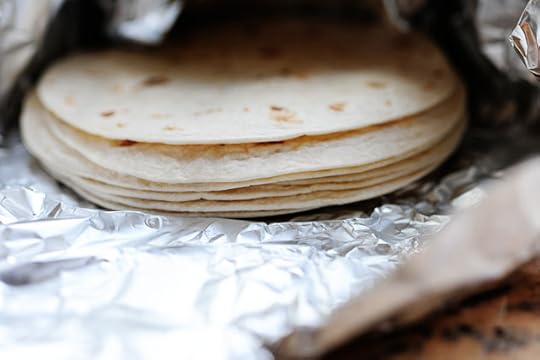 And/or some flour tortillas.
 Grab some beans if you have some. These are simple canned pinto beans, which I drained, seasoned, and warmed slowly on the stovetop for about thirty minutes.
But there's nothing like homemade beans. Recipe below.
 You'll also need the pico de gallo…
And whatever other sides you can round up: guacamole, sour cream, grated cheese, salsa verde, etc.
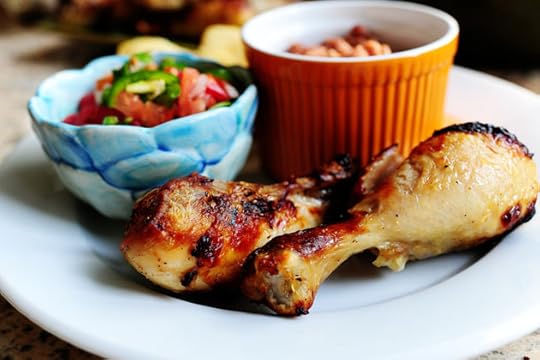
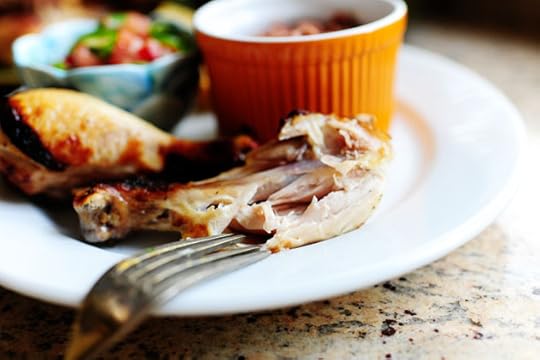
 The chicken's ready! The idea is to broil the heck out of it so that the skin is blackened and grilled, while the inside is still juicy and moist.
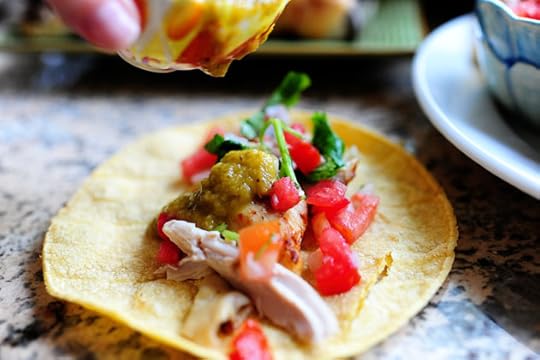
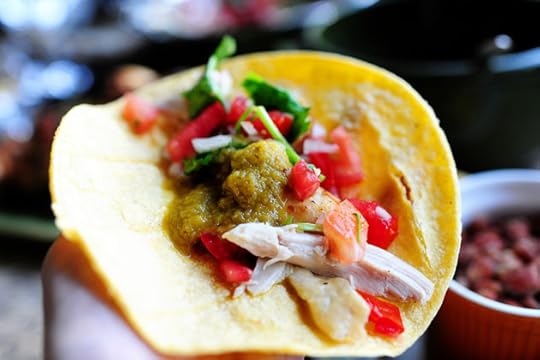
 Throw all the chicken on a plate and serve it with all the fixins.
 I'm a corn tortilla girl myself. I can't resist the grainy texture.
 And the chicken? It's good.
 This is my idea of a spread, baby. Yum.
 And here's what you do.
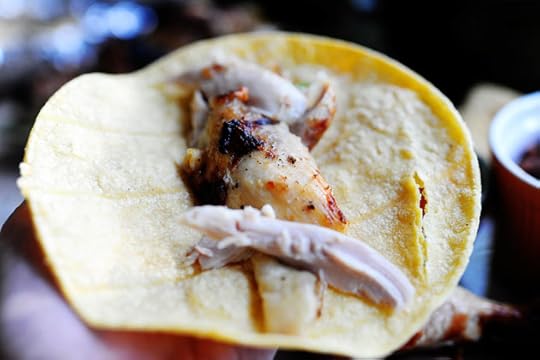 Lots of chicken…
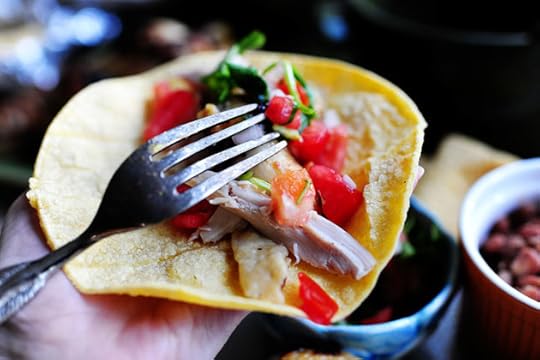 Lots of pico…
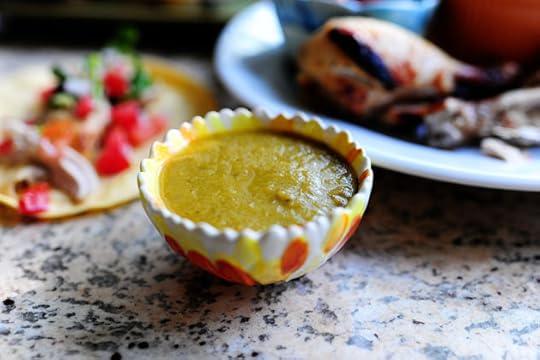 And I L-O-V-E salsa verde.
 By the way, these are little measuring cups from Anthropologie. But I cheat and use them for little salsa dishes.
I'm a rebel that way.
 Mmmm.
Mmmm.
 Get thee in my mouth. Pronto.
You'll love this simple meal. Easy to adapt and make it your own.
Enjoy, guys!
Here are the printables. (Crossing my fingers the old printable format will be up and running this week–thanks for being patient.)
Pollo Asado – Printable Recipe
Pico de Gallo – Printable Recipe
Beans – Printable Recipe

June 22, 2011
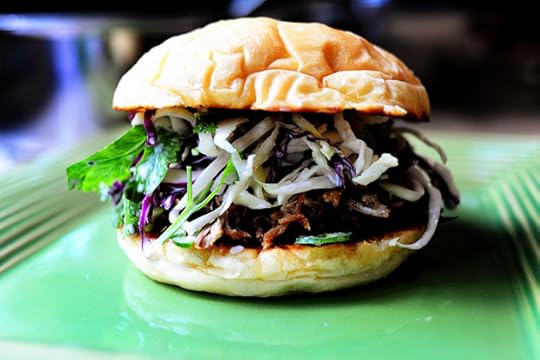
Pork Sandwiches with Cilantro-Jalapeno Slaw
 Today's recipe is more about the slaw than the pork.
 I used my Dr Pepper Shredded Pork for this sandwich, which I posted here in March. If you haven't made it yet, please do so. Thank you.
Note: the above pork recipe holds the distinction of being one of the most wondrous-smelling recipes during the cooking process.
My house yesterday was a fragrant paradise.
 You don't have to use pork, though. You can use any shredded meat, like this Braised Beef Brisket.
You can also just pick up some barbecue brisket or pork at a deli or other local joint.
You need shredded meat. That's all.
The beauty here…is the slaw!
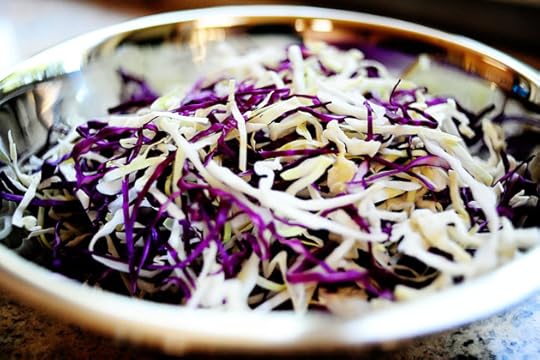
 Whack a head of cabbage in half.
 Cut one half of the head in half, then turn each of the two quarters (I'm so awesome at math) on their side.
 Use a sharp knife to slice very thinly.
 If you run into a little core, just pull out the pieces and discard them. I don't like coring cabbage. I find it boring.
Coring is boring.
I tend to say that about anything at which I'm not very adept.
If I'm bad at something, it's so totally boring.
 Do the same with purple cabbage.
 Why is purple cabbage so gorgeous? Why aren't more people talking about this?
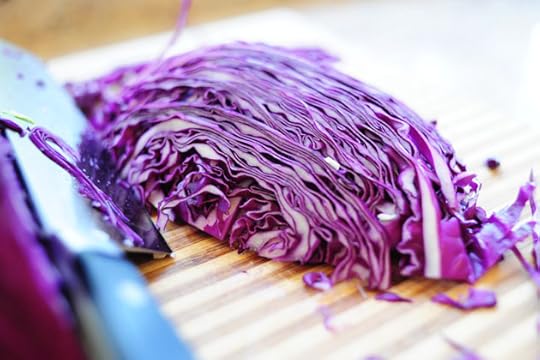 Slice it thin…
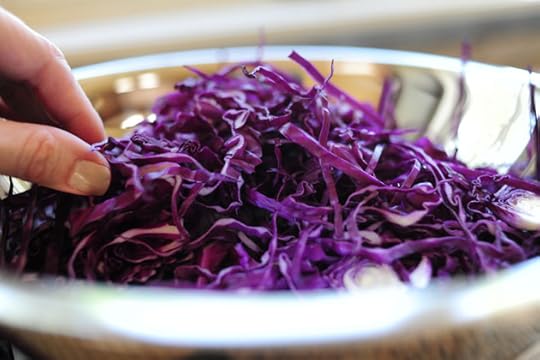 And add it to the bowl, too.
 You also need a jalapeno. Slice it in half…
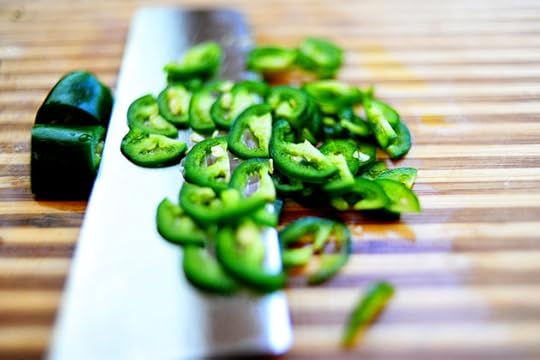 Then slice the halves thinly.
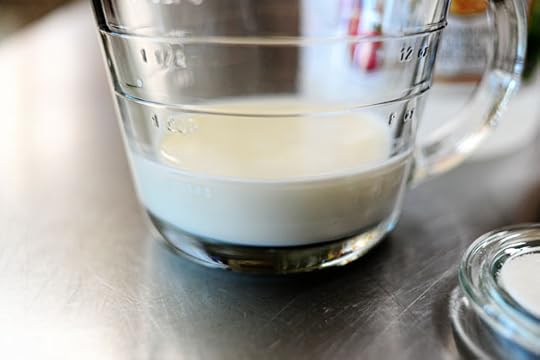 Measure 1/2 cup whole milk…
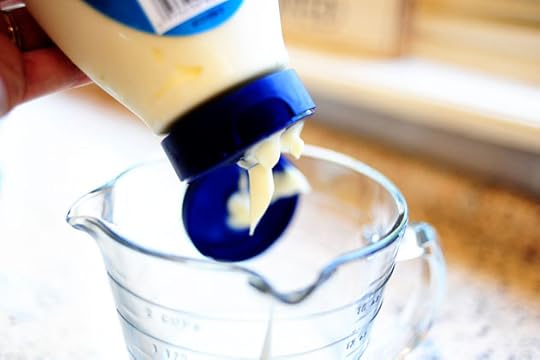 And add 1/2 cup mayonnaise.
Not Miracle Whip.
Miracle Whip is mean.
 Add a leetle white vinegar…but not too much!
Vinegary slaw ruins my day.
 Add a little sugar, a pinch of salt…
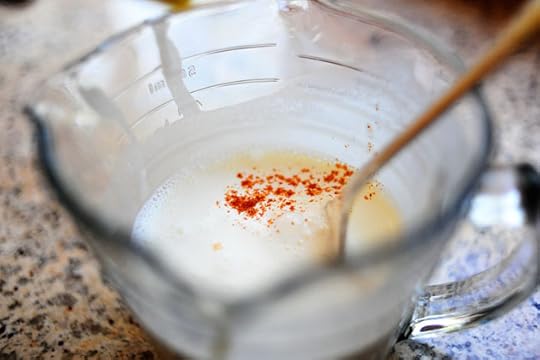 And a dash of cayenne.
I love heat.
 Mix the cabbage all together…
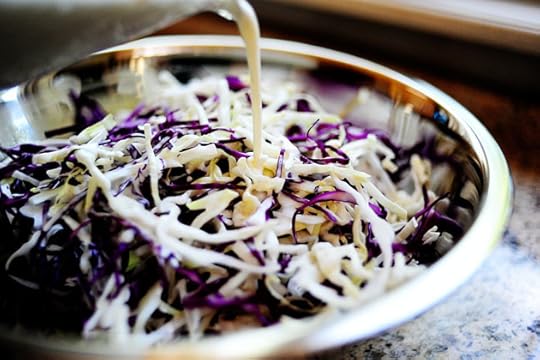 Then pour in the dressing.
 Throw in the jalapenos, then toss it all together.
Cover it with plastic wrap and refrigerate it for at least a couple of hours.
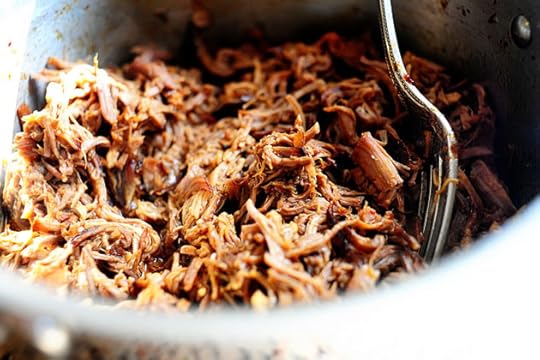 The pork. It's ready.
 Grab a bunch of cilantro and give it a rough chop. Or just leave the leaves whole.
Looks prettier that way.
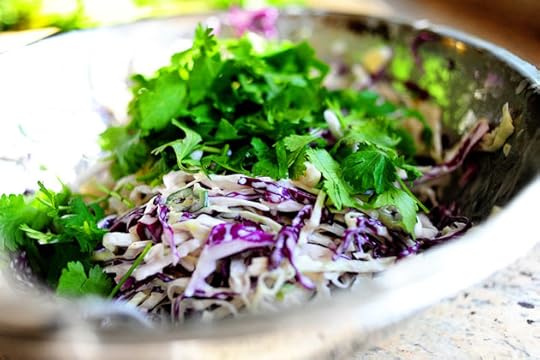 Throw it into the slaw…
 And mix it all together with your very clean hands.
 Be sure to add plenty of cilantro!
 Butter a bunch of Kaiser Rolls.
 And brown them on a griddle or skillet.
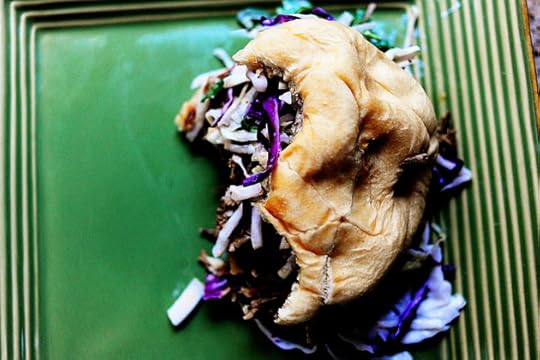
 Throw some meat on the bottom half. Drizzle on a spoonful of liquid. I'll tell you why in a minute.
 Then top the meat with a bunch of slaw.
 Add about twice as much slaw as meat.
 Top it with the other half of the bun.
 Now, here's where you can see a hint of the magic. See the meat drippings? See the creamy dressing from the slaw. Those are coming together inside the sandwich right now, creating a medley of flavor, sin, and calories in the bottom half of the bun.
 And that's my kinda sandwich.
 Enjoy this, guys!
I sure did.
Note: You can use this meat-and-slaw combination in soft tacos, crunchy tacos, tostadas, even nachos!
Here's the link to the printable. I included the Dr Pepper Pork recipe for convenience:
Pulled Pork Sandwiches with Cilantro-Jalapeno Slaw
You'll slurp it up. You may even lick your fingers.
Love,
Pioneer Woman

June 21, 2011
Macaron/Food Photography Ranch Weekend (Winners Posted!)
The winners of the MACARON WEEKEND are:
#865 Ruth L. "I LOVE macarons!!! I LOVE Helene. I've been reading her blog for a few years now. Her photography is stunning."
#14242 Theresa: "I have never had a macaron but they look and sound really yummy. I have been really good the last six months and have lost 25lbs. so I think a reward of a "few" macarons is in order."
#11598 Darcy: "I have never tried a macaron~do we have them in Idaho ? I am REALLY interested in the Violet and Pistachiao macarons~they look divine."
Congratulations, girls! Looking forward to meeting you. Contact prizes@thepioneerwoman.com to claim your loot!
___________________
Thanks to everyone for entering–I'll be sure to chronicle the class and share it with you!
This is Helene from Tartelette.
 Helene is a French expatriate living in Charleston, South Carolina. She's also a food blogger, food photographer, and author.
Helene is unbelievably talented. I've been a fan for a long, long time.
You have to peruse Helene's site to see why. Her food styling and photography of all the beautiful treats she prepares are pure art; her sweets jump off the screen.
 Gorgeous.
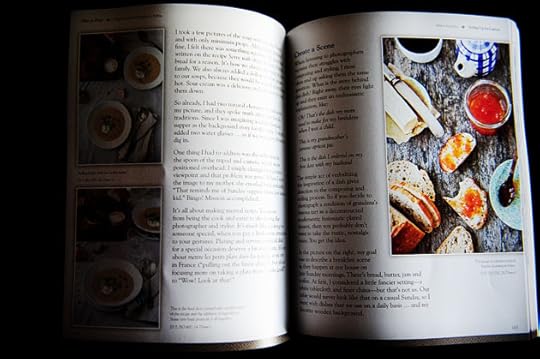
THE BOOK
Helene recently wrote and released a book. For food photographers, or photographers in general, it's a complete treasure.
 Plate to Pixel is a photographer's dream. It centers around food photography, but the lessons in the book can be applied to photography in general; within the first ten minutes after I first opened the book, I'd already learned something new about my camera equipment.
Here's a peek at some of the content:
 She covers equipment, both for food styling and photography.
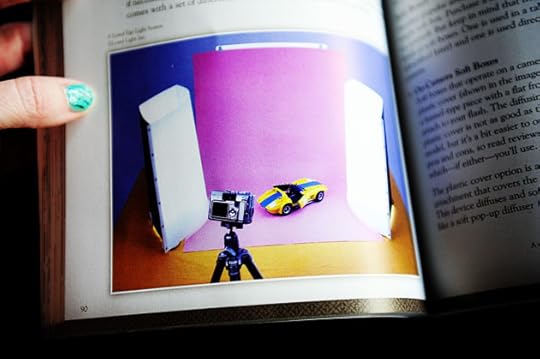 And lighting.
 And compares unfavorable light…
 With light that brings out the natural beauty of food.
 This is a hands-on, read-it-then-do-it photography manual.
It's fabulous.
MACARONS
Helene, among other things, is known for her macarons:
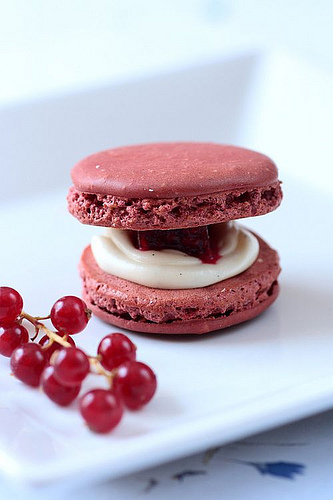 Her Red Berry Macarons.
 Her Creme Brulee Pistachio Macarons.
 And her Violet Macarons with Violet and Vanilla Bean Buttercream. Goodness gracious.
Raise your hand if you've never had a macaron.
*If you just raised your hand, I want to scoop you up in my arms and console you.*
Macarons are…
Macarons are…
(Forgive me, but they render me speechless.)
Macarons are light, crisp, slightly chewy, heavenly, blessed, wondrous angel-kissed sandwich cookies whose flavor combinations–of both cookie and filling–are endless. Macarons are a mystery, a delight, a triumph. A trip to Paradise and back. Macarons are big these days, and every time I take a bite of one, I close my eyes, moan, and completely understand the hype. They're just divine.
THE GIVEAWAY!
 Next month, Helene is gifting the ranch with her presence for a combination Macaron and Food Photography Weekend. There, three winners (each with a guest of their choice) will learn the ropes of both making macarons and photographing them in all their delicious beauty.
And we all might ride a horse or two.
THE DETAILS
When: July 23-24
Where: The Lodge, Our Ranch in Oklahoma
Why: Because Helene is coming! And because I love ya.
Prizes: There are three prize packages. Each includes:
* Airfare (if necessary) for winner and one guest
* Two-night stay at the Lodge
* Macaron and Food Photography class taught by the beautiful Helene Dujardin
* Gift bag with macaron-making goodies and Helene's book Plate to Pixel
* A fun, yippy-skippy weekend
Note: No need to be a photographer or have photography experience in order to attend the weekend. Both the macaron and photography instruction will be helpful to all skill levels.
TO ENTER
To enter the giveaway for the Macaron/Food Photography weekend, just answer the following question in the Comments section of this post:
Have you ever had a macaron? And if you have, how much [on a scale of 1 to 10] do you love them?
Do you eat macarons every day of your life? Have you only ever had one? Or have you never had the joy of sinking your teeth into one of the delights? Just list your macaron experience and you're automatically entered to win.
THE RULES
One entry per person, please.
No entries after noon Wednesday.
Winners will be selected and announced Thursday morning.
*Note: winners must be free to travel to the ranch July 23-25, 2011*
Good luck—macarons, here we come!

Macaron/Food Photography Ranch Weekend
This is Helene from Tartelette.
Helene is a French expatriate living in Charleston, South Carolina. She's also a food blogger, food photographer, and author.
Helene is unbelievably talented. I've been a fan for a long, long time.
You have to peruse Helene's site to see why. Her food styling and photography of all the beautiful treats she prepares are pure art; her sweets jump off the screen.
Gorgeous.
THE BOOK
Helene recently wrote and released a book. For food photographers, or photographers in general, it's a complete treasure.
Plate to Pixel is a photographer's dream. It centers around food photography, but the lessons in the book can be applied to photography in general; within the first ten minutes after I first opened the book, I'd already learned something new about my camera equipment.
Here's a peek at some of the content:
She covers equipment, both for food styling and photography.
And lighting.
And compares unfavorable light…
With light that brings out the natural beauty of food.
This is a hands-on, read-it-then-do-it photography manual.
It's fabulous.
MACARONS
Helene, among other things, is known for her macarons:
Her Red Berry Macarons.
Her Creme Brulee Pistachio Macarons.
And her Violet Macarons with Violet and Vanilla Bean Buttercream. Goodness gracious.
Raise your hand if you've never had a macaron.
*If you just raised your hand, I want to scoop you up in my arms and console you.*
Macarons are…
Macarons are…
(Forgive me, but they render me speechless.)
Macarons are light, crisp, slightly chewy, heavenly, blessed, wondrous angel-kissed sandwich cookies whose flavor combinations–of both cookie and filling–are endless. Macarons are a mystery, a delight, a triumph. A trip to Paradise and back. Macarons are big these days, and every time I take a bite of one, I close my eyes, moan, and completely understand the hype. They're just divine.
THE GIVEAWAY!
Next month, Helene is gifting the ranch with her presence for a combination Macaron and Food Photography Weekend. There, three winners (each with a guest of their choice) will learn the ropes of both making macarons and photographing them in all their delicious beauty.
And we all might ride a horse or two.
THE DETAILS
When: July 23-24
Where: The Lodge, Our Ranch in Oklahoma
Why: Because Helene is coming! And because I love ya.
Prizes: There are three prize packages. Each includes:
* Airfare (if necessary) for winner and one guest
* Two-night stay at the Lodge
* Macaron and Food Photography class taught by the beautiful Helene Dujardin
* Gift bag with macaron-making goodies and Helene's book Plate to Pixel
* A fun, yippy-skippy weekend
Note: No need to be a photographer or have photography experience in order to attend the weekend. Both the macaron and photography instruction will be helpful to all skill levels.
TO ENTER
To enter the giveaway for the Macaron/Food Photography weekend, just answer the following question in the Comments section of this post:
Have you ever had a macaron? And if you have, how much [on a scale of 1 to 10] do you love them?
Do you eat macarons every day of your life? Have you only ever had one? Or have you never had the joy of sinking your teeth into one of the delights? Just list your macaron experience and you're automatically entered to win.
THE RULES
One entry per person, please.
No entries after noon Wednesday.
Winners will be selected and announced Thursday morning.
*Note: winners must be free to travel to the ranch July 23-25, 2011*
Good luck—macarons, here we come!
Ree Drummond's Blog

- Ree Drummond's profile
- 2032 followers

