
Ree Drummond's Blog, page 68
September 24, 2011
Perfect Pot Roast
 Note: Today, since I'm making pot roast on my Food Network show, I'm bringing this, one of my very early cooking posts on The Pioneer Woman Cooks, up to the front. Pot roast is one of my absolute favorite meals, and once you figure out the secret to making a good roast, there's no going back!
Original post: January 2008
I want you to embrace the pot roast, my friends!
I had to kiss a lot of frogs before I found my prince, Marlboro Man. And I had to make a lot of really bad pot roasts to finally figure the whole dadgum thing out…and figure it out I did, thank the Lord above. And the verdict? Pot roast, when made according to a few fundamental rules, can be a totally delicious addition to your repertoire. There are lots of different, equally delicious ways to make pot roast. Today's version is the first of many I'll be profiling here.
The meat you use is important. My favorite roast is the chuck roast; it has wonderful marbling throughout the meat, and when given an ample amount of time to cook, chuck roast winds up being tender and melt-in-your-mouth delicious. To understand the importance of adequate cooking time, you must understand that these tougher pieces of meat have lots of tough connective tissue that will only soften when cooked at a lower temperature for a long period of time. You can't rush a pot roast; you'll be disappointed with the result if you try. But if you reach deep down into your soul and find your patience—at least, the patience that was given to you by your Maker to relate to beef-related circumstances in your life—you won't be disappointed.
Let's just jump right in and embrace the pot roast together, okay?
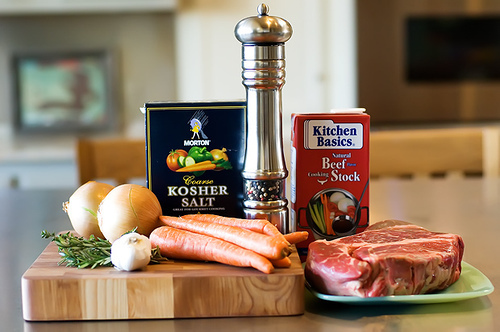
The Cast of Characters: Chuck Roast, onions, carrots, salt, pepper, beef stock, fresh thyme, fresh rosemary (if you have it; if not, dried is fine). Optional ingredients: red wine, garlic, button mushrooms.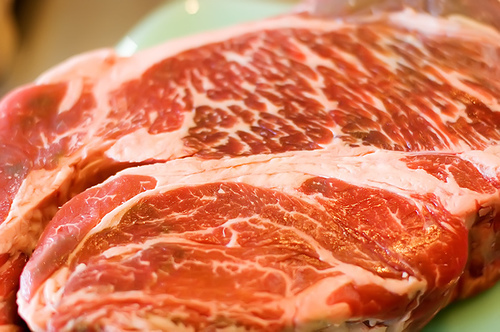
Behold the chuck roast, my friends. See what I mean about the beautiful striations of fat throughout the meat? Mmmmm…it's a really good thing. Just remember: Marbling equals tenderness AND flavor.
I love to use the word "striation" at least once a week. It throws people off and makes them wonder why they don't know what that word means, and it makes me feel smart. Even though I really don't know what it means either.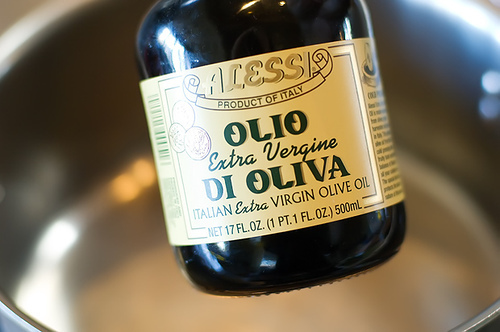
Okay, first: grab your olive oil. It really doesn't have to be extra virgin, and if you're feeling particularly naughty, you can add a couple of pats of butter. But my bottom feels big right now, so I'm giving up butter for thirteen hours.
I'm sure it will help.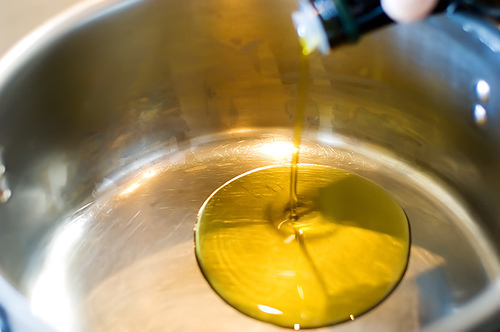
First, heat a large pot/dutch oven over medium high heat. Then add 2 to 3 tablespoons olive oil. (Or combo of butter and oil, unless your bottom feels big, then abstain for thirteen hours like me.)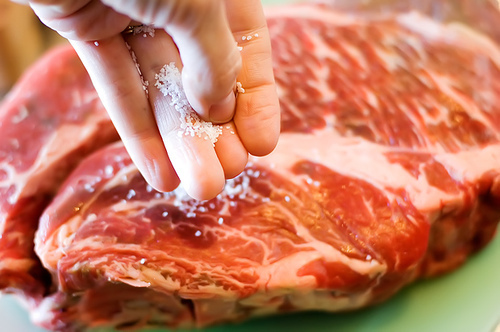
Now generously salt your chuck roast. (Mine was 2.5 pounds, which is a bit small for me. 4 to 5 pounds is much better.) I like to use kosher salt because it's flat and flaky and adheres to the meat better than regular salt. But plain salt is fine, too.
But whatever salt you use, don't hold back—salt away, baby.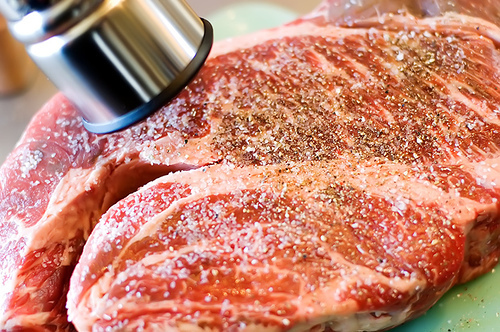
Now add a bunch of black pepper. I finally bought myself a new peppermill after my boys commandeered and destroyed my wooden one. And I think it's made of titanium or something, which means it's punk proof.
Unless they find Marlboro Man's blow torch, which is always a possibility.
In any event, pepper the meat generously. You're seasoning a lot of meat here.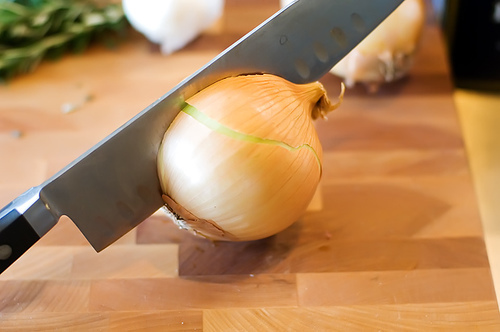
Now take a couple of onions…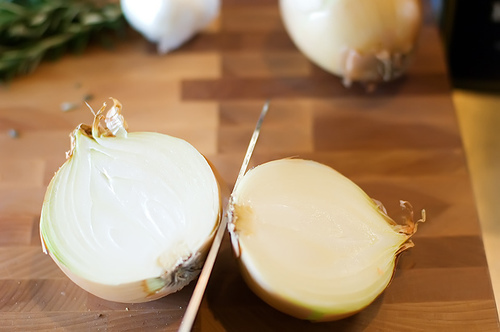
And cut them in half from root to tip.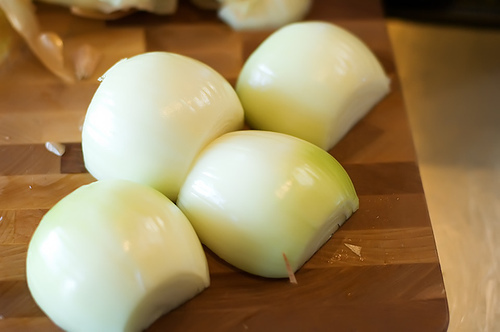
Then cut off the tops, cut off the bottoms, and peel off the outer layer. If you're an onion addict/freak, feel free to use more.
When the oil in the pot is very hot but not quite smoking (and heck, if it smokes, it's no big deal)…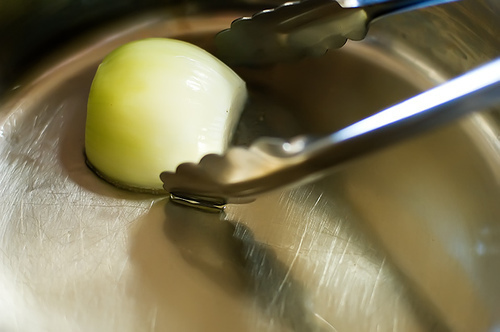
Add in the onions.
And brown them on one side, about a minute. (The oil should really sizzle, like Marlboro Man.)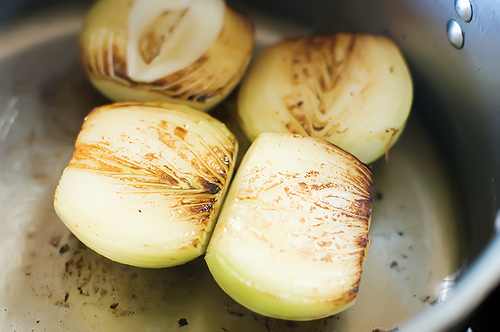
Now flip 'em over and do the same to the other side…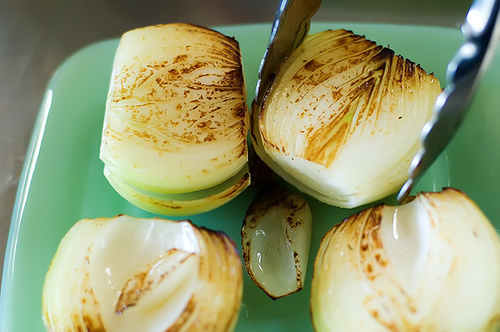
Then remove the onions to a plate.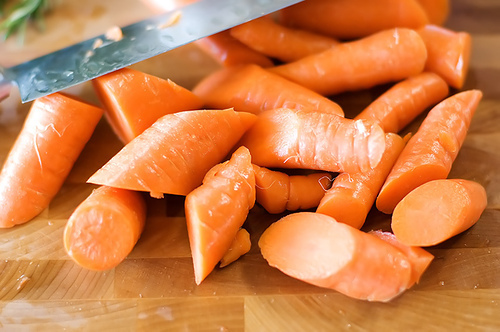
Now thoroughly wash (but do not peel) 6 to 8 carrots, then cut them roughly into 2-inch slices. I like not peeling them because it maintains a rustic quality, and I'm, like, soooo rustic. As you well know.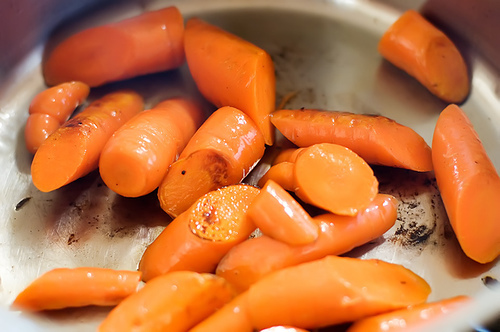
Throw them into the same (very hot) pan and toss them around until slightly brown, about a minute or so. Remember, the point here is to get a nice color started on the outside of the vegetables—not to cook them.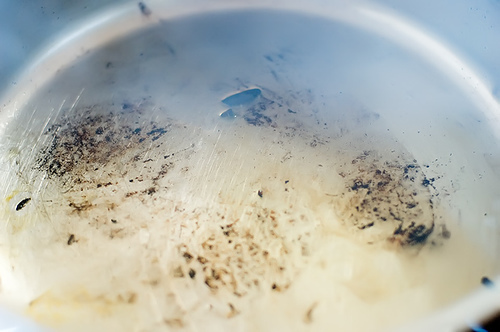
Now remove the carrots to a plate, and get the pot really hot again. If necessary, add in another tablespoon of oil. See all that nice brown stuff? That stuff is good. That stuff is real, real, good.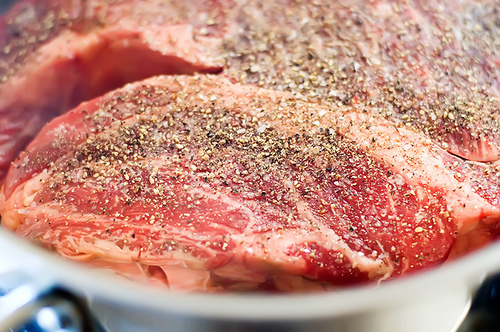
We're going to put the meat right on top of that stuff. Make sure it's adequately seasoned, then set it into the hot pan and sear it on one side, about a minute.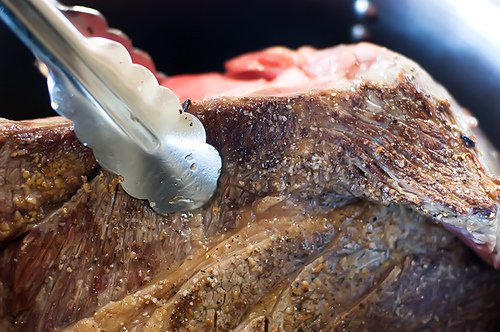
When that side is nice and brown (the browner the better), flip it over to the other side.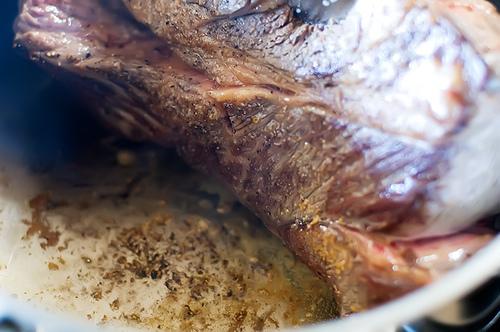
I like to even hold it up and sear the sides, too. When you've browned it all over the place, remove to roast to a plate. Oh, and see that brown stuff in the pan? That's good. That's real, real good.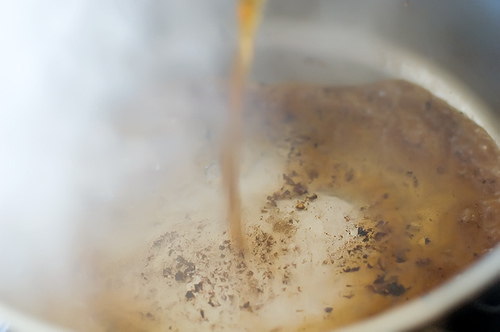
Now, with the burner on high, we're going to deglaze the pan. In layman's terms, we're going to incorporate the use of a liquid to precipitously loosen the diminutive bits of culinary goodness from the bottom of the alloy pan. In real people's terms, we're gonna scrape the heck out of the pan and git all that gooooood stuuuuuuff off the bottom. Amen. Usually, I like to start with a splash of red wine, then fill in with beef broth. But if you're averse to wine, OR if you live in a state, ahem, that prohibits liquor stores from being open for business on Sundays, ahem, cough cough, and you don't have any red wine in the house, cough cough…you can just use beef broth like I did here and it'll taste just fine. Delicious, even!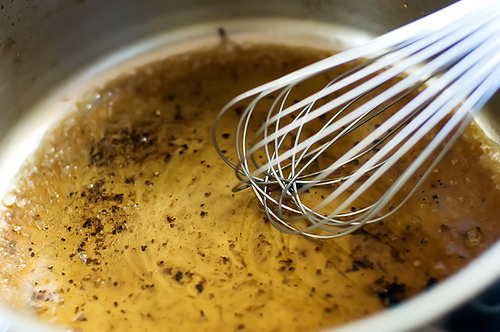
After you add about 1 cup or so of liquid, stop and use your whisk to stir and scrape the bottom of the pan.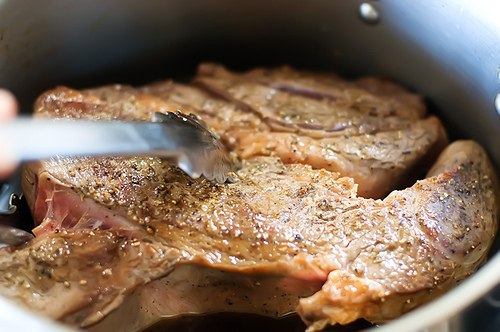
Now add the browned meat to the pan and add in enough liquid to cover the meat halfway. I'd say 2 to 3 cups of liquid is fine.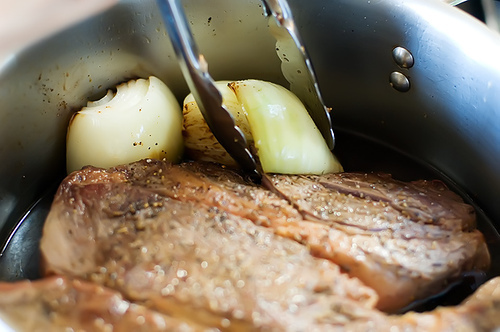
Now add the onions back in…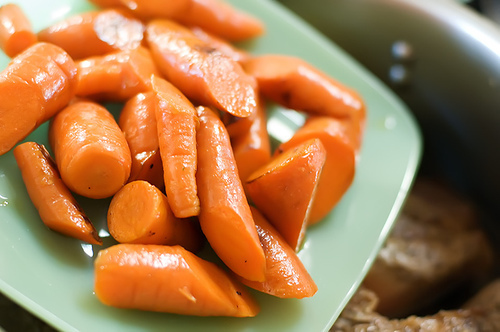
And do the same with the carrots.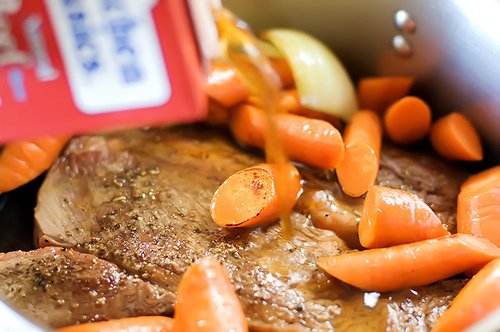
Hey! It's starting to look like pot roast, isn't it? What a coincidence! Here, I'm splashing a little more broth into the pan because I'm a middle child and I think everything needs a little tweaking, even if it doesn't.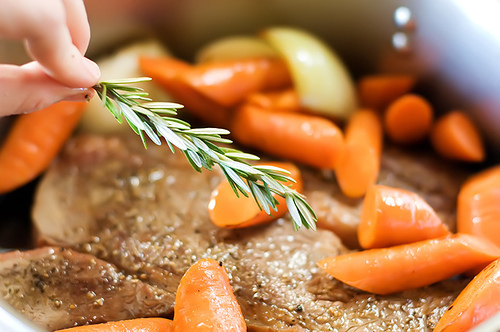
Now I don't mean to be a traitor or anything, but I have really found through the years that fresh herbs—specifically, rosemary and thyme—can transform a regular roast into something extraordinary. This is a spring of rosemary, and I like to add about 3 or 4 sprigs. Just leave it all intact and throw it in. (And rosemary is a very easy plant to grow in a container. Try it! It's such an aromatic, versatile little herb.)
But if you only have dried rosemary in your spice cabinet, who cares? Use it!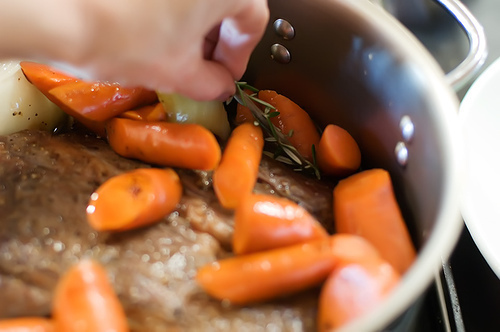
Oh. And when you do add in the fresh sprigs, be sure to submerge them in the liquid so they'll really be able to work their magic.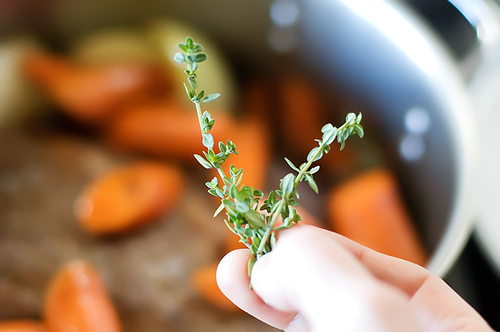
This is a sprig of fresh thyme, which I love and adore. Soon I'll be posting a recipe for my fresh thyme bread, which rocks my existence, but for now just throw some into the roast. I use about 3 sprigs.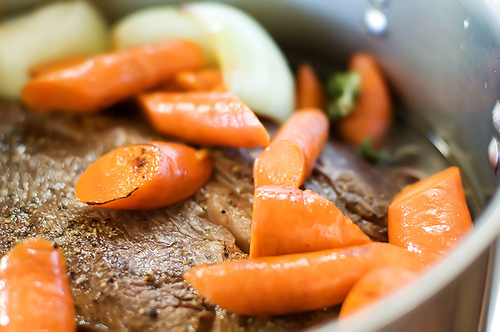
Mmmmm. Now we're talkin'. Time to put it in the oven. Put the lid on, then roast in a 275-degree oven for 3 hours, for a 3 pound roast. For a 4 to 5 pound roast, plan on 4 hours. And don't peek and fiddle and frig with it, either. Just find a hobby that will occupy your thoughts and actions for the time it takes for your roast to cook. Needlepointing, scrapbooking, birdwatching, and spelunking are just a few of the many options available.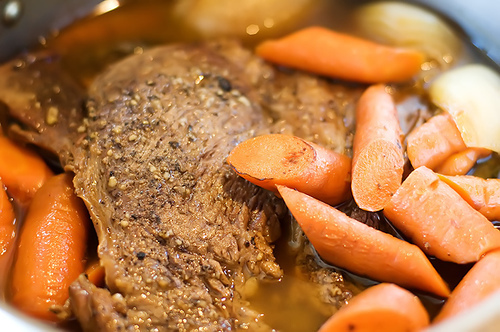
And here's what it will look like.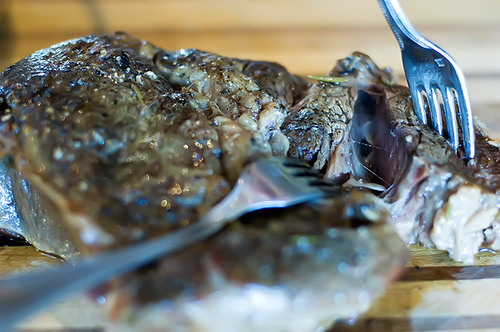
Now remove the meat to a cutting board and test it with a fork. See how easily it splits apart? You can literally see the melted connective tissue between the meat. When it easily "falls apart," it's definitely ready.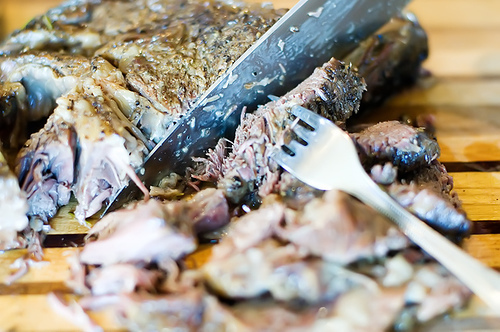
To serve, you can either slice it with a knife…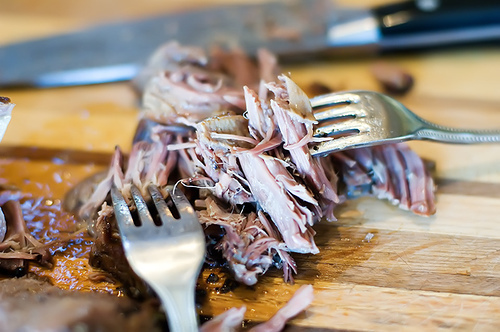
Or you can just shred all the meat with two forks. It's matter of preference. If you cooked the roast correctly, it won't matter much how you slice it—the meat will all fall apart anyway.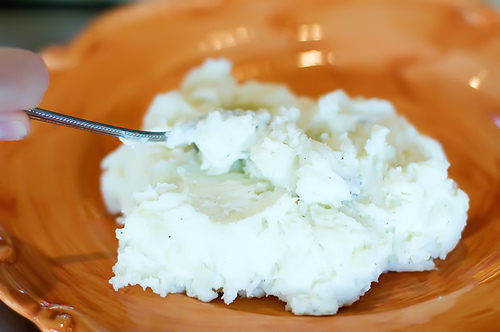
Now's a good time to have my mashed potatoes handy. Which reminds me, I never addressed The Potato Issue at the beginning of this post. I do NOT like to put potatoes into the pot with the meat. While it's a handy, convenient way to cook the spuds, I think the potatoes turn out kind of mealy and dumb. Instead, I think mashed potatoes really make a pot roast special, though that's just my silly little opinion. Don't listen to me. Heck, you can used baked potatoes, twice baked potatoes…even cooked egg noodles! (Wait a minute. That sounds pretty good…)
Whatever you use, just place the meat on top/to the side of it.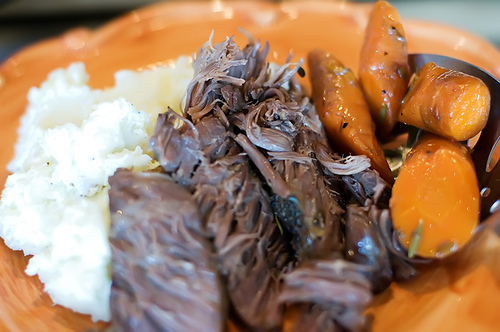
Then spoon some vegetables onto the plate. Mmm…I just love cooked carrots, especially when they're infused with the flavor of roast.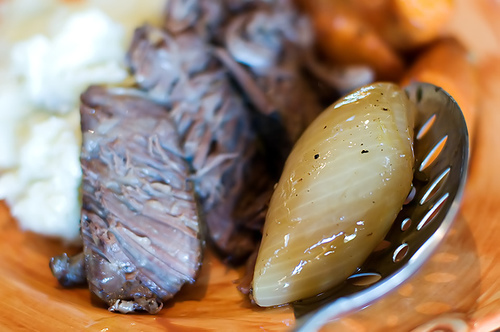
And mmmm…you've gotta love these onions.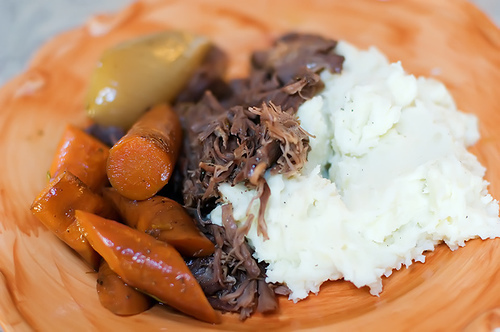
But don't stop there!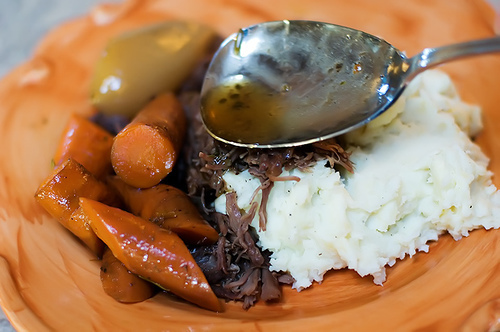
Because you'd never want to miss out on all that flavor, be sure to spoon some of the pan juice over the meat…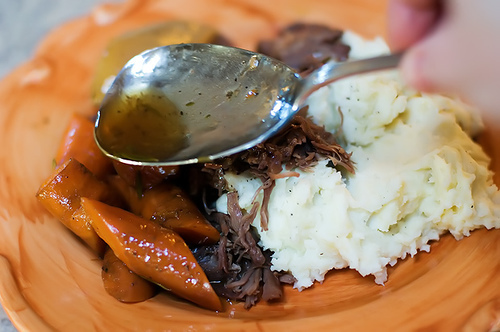
And the carrots…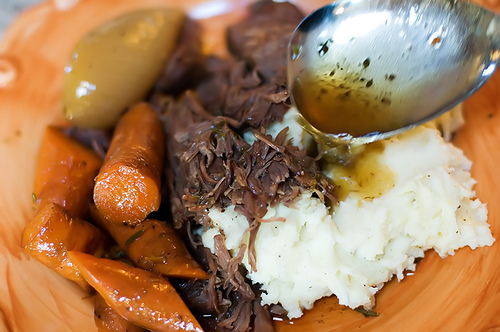
And the potatoes. And because you're very nice and considerate of others, be sure to serve some extra juice at the table so everyone can drown their roast at will.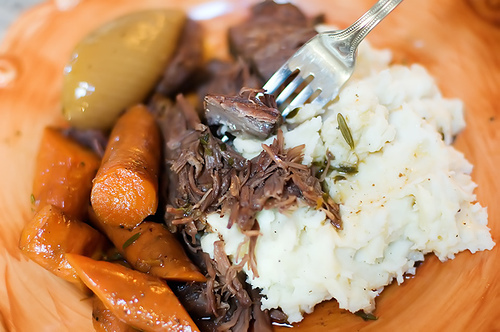
What I love about roast is, you can eat everything at once.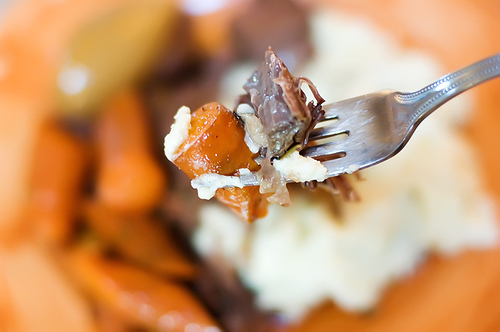
Don't be afraid to get a forkful!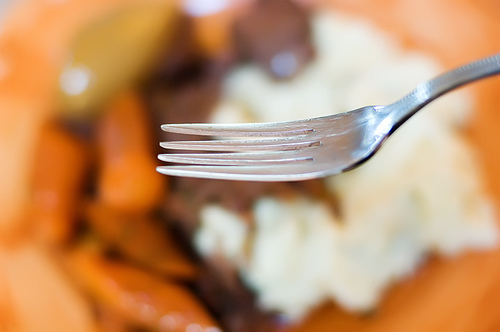
I'm sorry. I couldn't help myself. And mmmm…*burp*…it was SO delicious. I really tasted the rosemary, and the meat was so tender it really did melt in my mouth.
In the future, I'll continue to offer up different variations of pot roast, as there really are many delicious ways to approach it. But try this one this week. Serve it to your family, or your girlfriend, or your grandma or your uncle or your pal or yourself. Then pat yourself on the back, because you've embraced one of the most basic dishes there is.
You've embraced THE POT ROAST!
Yahoo yippity.
Recipe: Pot Roast
Prep Time: 20 Minutes
|
Cook Time: 4 Hours
|
Difficulty: Easy
|
Servings: 10

Print Recipe
3"x5" Cards
4"x6" Cards
Full Page
Ingredients
1 whole (4 To 5 Pounds) Chuck Roast2 Tablespoons Olive Oil2 whole Onions6 whole Carrots (Up To 8 Carrots) Salt To Taste Pepper To Taste1 cup Red Wine (optional, You Can Use Beef Broth Instead)2 cups To 3 Cups Beef Stock3 sprigs Fresh Thyme, or more to taste3 sprigs Fresh Rosemary, or more to taste Preparation Instructions
First and foremost, choose a nicely marbled piece of meat. This will enhance the flavor of your pot roast like nothing else. Generously salt and pepper your chuck roast.
Heat a large pot or Dutch oven over medium-high heat. Then add 2 to 3 tablespoons of olive oil (or you can do a butter/olive oil split).
Cut two onions in half and cut 6 to 8 carrots into 2-inch slices (you can peel them, but you don't have to). When the oil in the pot is very hot (but not smoking), add in the halved onions, browning them on one side and then the other. Remove the onions to a plate.
Throw the carrots into the same very hot pan and toss them around a bit until slightly browned, about a minute or so.
If needed, add a bit more olive oil to the very hot pan. Place the meat in the pan and sear it for about a minute on all sides until it is nice and brown all over. Remove the roast to a plate.
With the burner still on high, use either red wine or beef broth (about 1 cup) to deglaze the pan, scraping the bottom with a whisk to get all of that wonderful flavor up.
When the bottom of the pan is sufficiently deglazed, place the roast back into the pan and add enough beef stock to cover the meat halfway (about 2 to 3 cups). Add in the onion and the carrots, as well as 3 or 4 sprigs of fresh rosemary and about 3 sprigs of fresh thyme.
Put the lid on, then roast in a 275F oven for 3 hours (for a 3-pound roast). For a 4 to 5-pound roast, plan on 4 hours.
Posted by Ree on August 1 2009


September 22, 2011
Short Ribs with Wine and Cream
 I think I've established that I'm obsessed with short ribs. The first time I ever tasted one, I fainted from the sheer, slow-cooked bliss of it all. Short ribs, contrary to what many might assume, are not in the same category of the ribs people smoke and rub in barbecue sauce. They're actually nothing like those ribs. The only way I can describe short ribs is that they're a little like pot roast on a stick–only the best, most succulent and amazing pot roast you've ever tasted in your life.
I have a braised short rib recipe here on my site, and one with a more tomato-based sauce. This one is under the winey/creamy/so-darn-good sauce umbrella, and it may be my favorite one.
Since the cream sauce was so rich and decadent, I decided not to go the route of risotto or mashed potatoes or polenta or pasta. Instead, I just stuck them on top of some roasted Oklahoma mushrooms and called it a day, patting myself on the back for making such a healthy choice.
Ahem.
 These are short ribs. I'm already excited.
 Sprinkle both sides with salt and pepper…
 Then brown them in a heavy pot over very high heat.
 This'll just take a couple of minutes–we're just searing them at this point.
 When they're seared, remove the ribs from the pot for a minute and pour in the red wine…
 And beef broth. Stir it around and scrape the bottom of the pot to loosen up all the magical bits of heaven.
 Return the short ribs to the pot, then (oops. forgot to do this earlier) throw in the rosemary. Give it all a little stir with a big spoon, then put on the lid, reduce the heat to low, and simmer it for about 2 1/2 to 3 hours. The ribs are like pot roast or brisket or any slow-cooked meat: they have to be cooked low and slow in order for the connective tissues to dissolve and for everything to become tender and evil, where evil means irresistibly delicious.
 Sometime during the slow-cooking process, throw a bunch of mushrooms onto a baking sheet. I usually just do creminis or white buttons, but these are an assortment of crazy, freaky mushrooms…and they're all grown here in Oklahoma!
I'll post more about this at another time. I am as obsessed with mushrooms as I am with short ribs.
Anyway, roast the mushrooms as you always would: drizzle them with olive oil, sprinkle on some salt and pepper, and throw them in a 400 degree oven for about 20 minutes.
 You want 'em to be nice and golden brown, so just go as long as you need to. I want to marry these mushrooms, I love them so much.
I think we'd be very happy together.
 Next, take the hunks of burning love out of the pot and set them on a plate for a minute. They should be so tender, they'll look like they'd fall apart if you looked at 'em funny.
"I see you made gooseberry tarts, too. I wonder if they're as light as mine. Mine like to'd have blown away if you blew on 'em."
If you can name that movie, you have my admiration forever.
 Now, back to the pot. Add in some capers, which I forget about 95% of the time, but when I remember to remember them, I'm so glad I did.
Capers are weird. And wonderful.
And weird.
 Next, because it will give everything a nice tang, throw in some mustard: Dijon, grainy…anything but the neon yellow stuff will do.
 Then drizzle in some heavy cream. It all suddenly makes perfect sense.
 Now just bring this to a gentle boil and let it thicken up for a couple of minutes.
 And…I'm dead. This looks (and tastes) (and smells) so ding dang wonderful. Winey and beefy and rosemary-y.
 When you're ready to serve it up, pile some mushrooms on the plate…
 Then try to make a mountain out of a couple of short ribs and drizzle on extra cream sauce. Holy…help.
Oh, and I'm sure glad I decided not to serve this with anything fattening, like goat cheese polenta or four-cheese pasta. I'm all about healthy choices, as you can see.
Not.
 At the end, you can sprinkle on some more minced rosemary…or you can just set a sprig on there to be extra fancy.
 But the fancy really doesn't matter. All that really matters is that when you taste of forkful of these short ribs…your life will change forever. Especially if you've never had a short rib before.
It's one of my favorite things in the entire world.
Here's the handy printable:
Recipe: Short Ribs with Wine and Cream
Prep Time: 10 Minutes
|
Cook Time: 3 Hours
|
Difficulty: Easy
|
Servings: 6
Print Recipe
3"x5" Cards
4"x6" Cards
Full Page
Ingredients
12 whole Shortribs Salt And Pepper, to taste3 Tablespoons Olive Oil1 cup Red Wine32 ounces, fluid Beef Broth Or Beef Stock2 Tablespoons Minced Fresh Rosemary2 Tablespoons Grainy Mustard1 cup Heavy Cream2 Tablespoons Capers (more If You Want!)16 ounces, weight Assorted Mushrooms: Cremini, Oyster, Baby Bellas, Etc. Olive Oil, For Drizzling Rosemary Sprig, To Be Fancy Preparation Instructions
Heat olive oil in a heavy pot over high heat. Sprinkle short ribs on both sides with salt and pepper. Quickly sear both sides of the short ribs, using tongs to flip them halfway through. (Just sear about 1 1/2 minutes per side.) Remove the shortribs to a plate.
Pour wine and beef broth into the pot. Add rosemary. Stir to combine, scraping the bottom of the pot to deglaze. Return the shortribs to the pot, reduce heat to low, then cover the pot and simmer it for 2 1/2 to 3 hours. (You can also put the pot into a 300 degree oven if you'd prefer not to simmer on the stovetop.)
After they have cooked, carefully remove the shortribs from the pot again. Stir in mustard, cream, and capers, then raise the heat and allow it to bubble up and gently boil for a good couple of minutes, or until it has thickened a bit. Taste and add more salt and pepper if needed. Return the shortribs to the sauce, put on the lid, and turn off the heat.
To roast the mushrooms, preheat oven to 400 degrees. Arrange the mushrooms in a single layer on a baking sheet. Drizzle with olive oil and sprinkle with salt and pepper, then roast the mushrooms until they're golden brown, about 15 to 20 minutes.
Serve the shortribs on top of the mushrooms, then drizzle with extra cream sauce. Add a little rosemary sprig if you want to be fancy.
This is absolutely divine.
Posted by Ree on September 22 2011

September 19, 2011
Ravioli, Three Ways
 I love all kinds of pasta, but there's something about good ravioli that really makes my heart go pitter-pat. I love the flat area of pasta around the filling itself, and I love it when the fork finally cuts into whatever the filling happens to be.
I love it in the morning and I love it in the night.
And I loved it last week.
I'd recommend loving it tonight if you can swing by the store!
 First, let's concentrate on the filling: throw some ricotta into a bowl with some grated Parmesan.
ruh-CAWT-uh
ree-COAT-uh
ree-CAWT-uh
reecoatacawtacoatacawta
It is my fervent wish to be able to pronounce 'ricotta' correctly sometime before I croak.
 Crack in an egg and sprinkle in some salt and pepper.
 Stir it all together and set it aside for a minute.
 Next, heat a skillet over medium-high heat and drizzle in some olive oil. Throw in some arugula. You can also use spinach, but I happened to have a buncha arugula on hand.
Just grab somethin' green, man.
 Stir it around and cook it just along enough to wilt–only about 30 to 45 seconds.
 Then throw it into a bowl and let it cool down a bit.
 Once it's cool, give it a rough chop…
 Then stir it into a separate bowl with half the ricotta mixture.
And now. For a little something on the side: Homemade marinara sauce. I generally don't use a recipe, so here are some approximations:
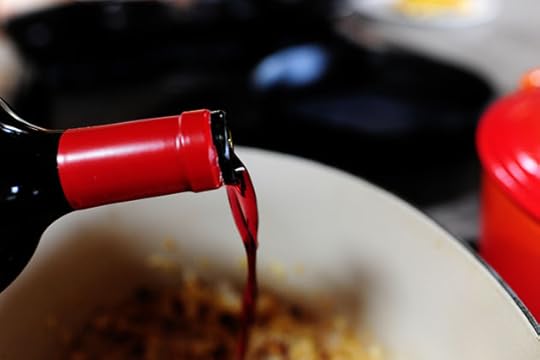 1/2 cup to 1 cup wine. This is optional.
 Pour it into a pot of diced onions and garlic. About 1 large onion and 3 cloves of garlic.
 1 large can of whole tomatoes. (These are fire roasted fancy ones, but I usually just use the normal ones.)
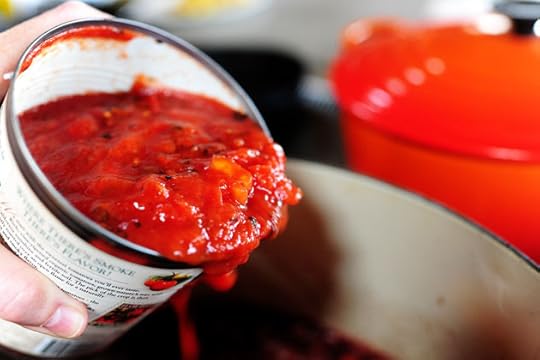 1 large can of crushed tomatoes…
 And salt, pepper, and a good amount (1/4 cup-ish, maybe a little less) sugar.
 Bubble, bubble, toil and trouble. Cook, cook, cook. Then just add herbs as you see fit: parsley, basil, etc.
Man, do I love marinara sauce.
But today…today is about zee ravioli!
 To make the highly gourmet, 100% homemade ravioli…
Grab some wonton wrappers! Ha.
But seriously, here's how I feel about it: truly homemade ravioli is to die for. There's absolutely nothing like it. If you have the time and the tools and the inclination, please make the pasta dough from scratch, then please roll it out and fill it and cut it, and then please invite me over so I can have some, too.
But if you want to whip up the next best thing, wonton wrappers really are a remarkably good subtitute–especially if you want to experiment with different toppings and make a variety. You can sink all your effort and creativity into the filling instead of the dough.
I'll be quiet now.
 Spoon a very small amount of filling–probably 3/4 to 1 teaspoon–onto the center of the wonton wrapper.
 Brush a little egg wash (1 egg beaten with a little water) around the edges of the wrapper.
 Then lay a second wrapper on top, but here's how you do it: lay it on top, then gently press the top wrapper all around the edges of the filling first, making sure to get out all the air bubbles. Then work your fingers out to the edges, lining up the corners and pressing it to seal. (Don't seal the edges first; lots of air will be trapped in there.) This one actually looks like it has a little air stuck inside…but the world (and my kitchen) is an imperfect place.
 Repeat with the other filling and the rest of the wonton wrappers.
 If you have a sweet girl with a bun on top of her head to help you…even better!
School debris in the background. The Lodge is a one-room schoolhouse this year.
 As you (or your girl) assemble the ravioli, place them on a tray until you need them.
 And now. Who can guess what kind of ravioli this is?
Whether you can guess it or not, I promise you it will rock your ever-loving world.
Then it will knock your ever-loving socks off.
Then it will make you faint.
Here. Let's just go ahead and cook these first.
 Drop the ravioli three or four at a time into boiling water. Let them cook for about three minutes…
(Note: the egg yolk variety only cooked for about 90 seconds or so, as I was afraid of the yolk setting.)
 Then remove them with a slotted spoon and place them on a plate. For these special little numbers, olive oil (I had a hand spasm and drizzled on more than I intended), salt, and pepper were all I needed.
 You've probably figured out what kind of ravioli this one was. Yes–egg yolk, my friends. Have you seen it? Have you had it? It's offered in some restaurants here and there, and it will change your life, turn you upside down, and make you wonder how you ever lived without it. It's very bizarre and very wonderful at the same time.
1. Crack an egg
2. Cup the yolk in your hand and let the white drip through your fingers.
3. Carefully place the yolk onto the center of a wonton wrapper and repeat the other steps for assembling.
So incredibly delicious. But then again, I have an unnatural love for egg yolks.
 Here's the cheese variety. Yum.
 Zee marinara was goot! And look how pretty that "pasta" sheet looks.
 Mmmm. Divine.
 For the arugula version, I went back to the olive oil, salt, and pepper approach, which is so darn wonderful. Simple. Delicious. If you don't want to mess with a sauce, it's a quick and easy way to dress up your ravioli.
Make wonton ravioli sometime this week! The possibilities for filling are endless: sauteed mushrooms, crabmeat, even pulled pork or shredded brisket. The world is your oyster!
Here's the handy dandy printable:

September 16, 2011
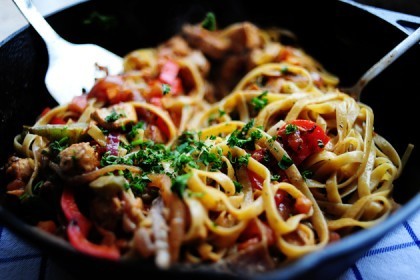
Cajun Chicken Pasta
 Note: Since this recipe is featured on the Food Network episode this morning, I'm bringing it to the front for easy reference. This really is one of my favorite recipes here on The Pioneer Woman Cooks, and I regularly hear from people who've made it with great success. Crowd-pleaser!
This is an exceedingly yummy, decadent pasta dish with chicken, vegetables, and lots and lots of scrumptious carbs. It's a cinch to throw together, and if you don't have prepared Cajun spice in your cabinet, you can just throw a few spices together to make your own combination. Different Cajun spice mixtures use different combinations of ingredients, but if you stick to basics like cayenne pepper (important!), paprika, white pepper (plenty, to help the spice factor), and garlic or onion powder, you're doing just fine. And you can add Cajun extras to this dish—things like Andouille sausage, crawfish, or shrimp. Play with it…have fun!
Just remember: part of the deliciousness of this pasta dish is the spicy kick. So don't wimp out on me, baby.
Here's how you make it.
 The Cast of Characters: boneless, skinless chicken breast, olive oil, butter, Cajun spice (make your own or buy the prepared stuff; whichever you prefer), salt, pepper, red onion, green bell pepper, red bell pepper, garlic, fresh parsley, low sodium chicken broth, white wine, and heavy cream.
Oh. And pasta would come in handy. Fettuccine is best for this one.
 Start by slicing the veggies: Lop the top and bottom off of the red pepper…
 Then slice the pepper down the middle.
 Rip out the innards…
 Then make slices—not too thick, not too thin.
 Do the same with the green bell pepper…
 Then slice the red onion in half from root to tip.
 Lop off the top and peel off the outer skin…
 Then slice up half of the onion.

 Cut three or four Roma tomatoes in half lengthwise.
 Make three or four slices…
 Then slice in the other direction to create a dice.
 Now peel three or four cloves of garlic…
 And mince them up nice and fine.
 Finally, cut the chicken breast into cubes.
 Sprinkle the chicken with Cajun spice.
 Be generous! Don't skimp! Go for it! Lay it on thick, brother!
Get my drift?
 Now, heat a heavy skillet over high heat. This is my new pan, and I think we're going to be very happy together.
It's pre-seasoned cast iron. With a lid, ladies and gentlemen.
Could life be any more exciting than this?
The sad thing is, I'm not exaggerating when I say that.
I'm excited by cookware: that's the gospel truth.
 Begin by adding a little olive oil and butter to the skillet.
 When it's very hot, add half the chicken in a single layer. Don't stir it right off the bat; let it get really hot/black on one side.
 Cook it for about a minute, then flip it over to the other side and cook for another 30 seconds or so. You want to get the chicken as brown as possible in as little time as possible.
 Remove the chicken to a plate.
 Repeat with the other half of the chicken…
 And remove it to the plate when it's brown.
 Leave the pan on high heat, then add in a little more olive oil and butter.
 Throw in the onions, peppers, and garlic.
 Then sprinkle on some more Cajun spice.
Note: be aware of whether or not your Cajun spice contains salt. If it does not, you'll need to lightly salt both the chicken and the veggies. If it does contain salt, be careful not to overdo it; stop a little short, then just add more cayenne to make sure you get enough spice without oversalting.
 Over very high heat, cook the vegetables for a minute at the most. Like the chicken, you want to get them as brown as possible in the shortest amount of time possible.
 Throw in the chopped tomatoes…
 Then stir it around and cook it for 30 seconds.
 Add the vegetables to the plate with the chicken.
 Now, set the pan back over high heat.
 Then pour in the wine…
 And the chicken broth.

 Stir the liquid around with a spoon or whisk, scraping the bottom of the pan to get all the bits off the bottom.
 Cook it on high for a few minutes, allowing the liquid to reduce by about half. It should get slightly thicker, and will be nice and deep brown in color.
Yum.
 Reduce the heat, then pour in the heavy cream.
 Whisk it around to combine, then cook the cream sauce over medium heat for a few minutes until it thickens.
Just look at that deep golden color! Be sure to taste the sauce at this point; add a little cayenne and whisk it around to give it a little more kick.
 Once the sauce has thickened a bit, go ahead and add the chicken and vegetables.
 And be sure to add all the delectable juices from both the chicken and the vegetables.
This is like liquid gold, my friends. Don't waste a drop of it.
 Allow the sauce to bubble up and continue cooking…
 Stir the chicken and veggies around in the sauce, then add freshly ground black pepper. Don't skimp on the pepper!
 When the sauce is done, drain the pasta, which should be nice and al dente.

 Dump the pasta right into the pan with the sauce.
 Then toss the whole delicious mess together.
 Make sure to get all the pasta coated. The sauce will slowly thicken over the next couple of minutes.
 Sneak a bite, because you're a pasta addict and can't control yourself.
 Then sneak another bite, this time with peppers and chicken.
Then get a hold of yourself and sprinkle on a bunch of chopped fresh parsley.
 Then take another bite.
 Then, when your twelve-year-old daughter does the same thing, shriek, "Quit! It's not dinnertime yet!"
Then sit there and relish all the beautiful double standards in parenting.
Enjoy!
Recipe: Cajun Chicken Pasta
Prep Time: 10 Minutes
|
Cook Time: 15 Minutes
|
Difficulty: Easy
|
Servings: 6
Print Recipe
3"x5" Cards
4"x6" Cards
Full Page
Ingredients
3 whole Boneless, Skinless Chicken Breasts, Cut Into Cubes3 teaspoons Cajun Spice Mix, More To Taste1 pound Fettuccine2 Tablespoons Olive Oil2 Tablespoons Butter1 whole Green Bell Pepper, Seeded And Sliced1 whole Red Bell Pepper, Seeded And Sliced1/2 whole Large Red Onion, Sliced3 cloves Garlic, Minced4 whole Roma Tomatoes, Diced2 cups Low Sodium Chicken Broth1/2 cup White Wine1 cup Heavy Cream Cayenne Pepper To Taste Freshly Ground Black Pepper, To Taste Salt To Taste Chopped Fresh Parsley, To Taste Preparation Instructions
Cook pasta according to package directions. Drain when pasta is still al dente; do not overcook!
Sprinkle 1 1/2 teaspoons Cajun spice over chicken pieces. Toss around to coat. Heat 1 tablespoon oil and 1 tablespoon butter in a heavy skillet over high heat. Add half the chicken in a single layer; do not stir. Allow chicken to brown on one side, about 1 minute. Flip to the other side and cook an additional minute. Remove with a slotted spoon and place on a clean plate.
Repeat with remaining chicken. Remove chicken, leaving pan on high heat.
Add remaining olive oil and butter. When heated, add peppers, onions, and garlic. Sprinkle on remaining Cajun spice, and add salt if needed. Cook over very high heat for 1 minute, stirring gently and trying to get the vegetables as dark/black as possible. Add tomatoes and cook for an additional 30 seconds. Remove all vegetables from the pan.
With the pan over high heat, pour in the wine and chicken broth. Cook on high for 3 to 5 minutes, scraping the bottom of the pan to deglaze. Reduce heat to medium-low and pour in cream, stirring/whisking constantly. Cook sauce over medium-low heat for a few minutes, until cream starts to thicken the mixture. Taste and add freshly ground black pepper, cayenne pepper, and/or salt to taste. Sauce should be spicy!
Finally, add chicken and vegetables to sauce, making sure to include all the juices that have drained onto the plate. Stir and cook for 1 to 2 minutes, until mixture is bubbly and hot. Add drained fettuccine and toss to combine.
Top with chopped fresh parsley and chow down!
Posted by Ree on January 31 2010

September 15, 2011
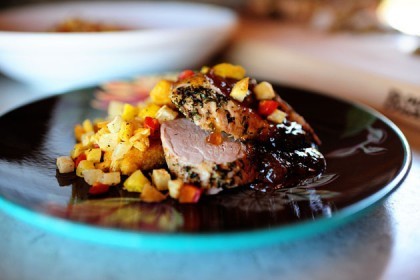
Herb Roasted Pork Tenderloin with Preserves
 This was yummy. And easy. And pretty! And it took basically no time to make.
Before I share the recipe, I'll just say it: I'm not wild about pork tenderloin. It's good, of course. It's fine. But in my experience, it usually needs…something. Lots of something. Seasoning. Marinade. Sauce. Glaze. The flavor of pork tenderloin itself is rather neutral, so it begs for lots of adornments.
Enter: this recipe, which is hardly a recipe at all. Just a quick little throw-together dish that looks like you spent way more time on it than you did.
(This was/is a possible cookbook recipe, so the recipe is lighter on step-by-step photos than usual.)
(I just heard you thank me.)
 Salt and pepper two pork tenderloins. They need flavor, so be somewhat liberal.
 Look at how lovely this is. Herbs de Provence with lovely little bits of lavender.
It's like a lovely trip to France. Well, except for the whole being-in-France part.
Details, details.
 Sprinkle the herbs over the pork, rolling it around to get as much on the outside as you can.
Place it on a roasting rack and into the oven and roast the pork in a preheated 425 degree oven for 12 to 15 minutes, then remove it from the oven and let it rest for ten minutes or so.
 While the pork is resting, throw some preserves (these are fig, but you can do peach, plum…anything!) and a tiny splash of vinegar into a small pan or skillet. Add some water (the same amount as the preserves) and stir it around to heat it up. Remove it from the heat and set it aside aside.
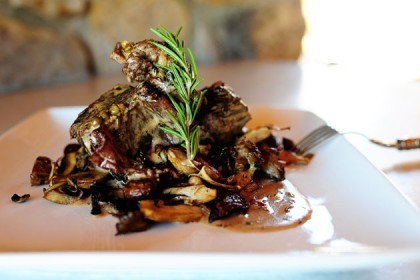
 Slice the pork into pieces. The herbs look so pretty!
Then arrange it on a plate with whatever side dish you'd like: mashed potatoes, potatoes au gratin, grits, or the roasted vegetables I posted yesterday. (Psst: I also have another thing underneath the pork that I'll share soon. See if you can guess what it is.)
 This was really, really yummy. The herbs de Provence were just wonderful, and the preserves added a really nice (and much-needed) sweetness. A very uncomplicated, anyone-can-make-it plateful of wonderfulness, with lots of room for improvising and substituting.
And it took, like, twenty minutes.
Score. A direct hit.
(Name that movie.)
Here's the handy printable!
Recipe: Herb Roated Pork Tenderloin with Preserves
Prep Time: 5 Minutes
|
Cook Time: 15 Minutes
|
Difficulty: Easy
|
Servings: 12
Print Recipe
3"x5" Cards
4"x6" Cards
Full Page
Ingredients
2 whole Pork Tenderloins Salt And Pepper, to taste8 Tablespoons Herbs De Provence (more If Needed1 cup Preserves (fig, Peach, Plum)1 cup Water1 Tablespoon Vinegar Preparation Instructions
Preheat oven to 425. Season pork tenderloins liberally with salt and pepper, then with Herbs de Provence, pressing to get the herbs to adhere to the pork.
Place the pork on a rack or in a large skillet and roast in the oven for 12 to 15 minutes. Remove from the oven and let it rest for 10 minutes.
While the pork is resting, combine preserves, water, and vinegar in a small pan and bring to a simmer.
Slice pork into thick pieces, then spoon the sauce/glaze over the slices. Serve with mashed potatoes, grits...anything you'd like!
Posted by Ree on September 15 2011

September 14, 2011
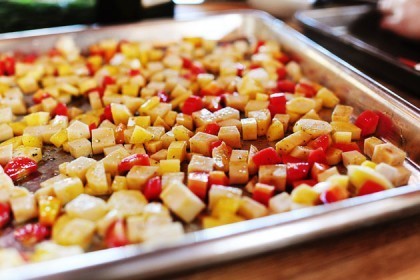
Roasted Root Vegetable "Candy"
 I'm a lover of root vegetables and will take them however I can get them. This is a simple way to enjoy an assortment of root veggies in tiny bites (rather than pureed or in big chunks) and can be eaten as a snack or as a pretty side dish.
I called them "candy" not because I added any sugar but because they take on this lovely natural sweetness after they're roasted. Try it and see what I mean.
Root vegetables for president!
Vive la root vegetables!
Root vegetables are natural
Root vegetables are good
Not everybody does it
But everybody should…
I'll stop now.
 Grab a bunch of root vegetables, whatever you can find. Celery root (the frightening monster pictured above), carrots, parsnips, sweet potatoes, rutabagas, turnips, etc.
 Pull up a stool and peel the suckers.
 I used celery root, parsnips…and these glorious multi-colored carrots, which are so pretty, I almost can't handle it.
 Look at that beautimous, beautimous piece of art.
 So basically, you just want to dice or slice everything into approximately the same size.

 Throw them onto a pan and drizzle with olive oil.
 Sprinkle on a little salt…
 A little pepper…
Then toss them with your hands and arrange them in a single layer.
 Roast them in a 375 degree oven for 30 to 40 minutes, or until they start to turn golden brown. Then remove them from the oven and let them come to room temperature.
 Serve them in a bowl as a snack (you can drain them a little on a paper towel if you'd like to remove some excess oil) or as a scrumptious and colorful side dish (as I'll show you in tomorrow's recipe.)
Try these, guys! A perfectly simple treat. You'll love them.
Recipe: Roasted Root Vegetable Candy
Prep Time: 15 Minutes
|
Cook Time: 40 Minutes
|
Difficulty: Easy
|
Servings: 8
Print Recipe
3"x5" Cards
4"x6" Cards
Full Page
Ingredients
1 whole Celery Root, Peeled And Diced3 whole Parsnips, Peeled And Diced6 whole Carrots (varied Colors If You Can Find Them), Peeled And Diced Other Root Vegetables, Peeled And Diced Olive Oil, For Drizzling Salt And Pepper, to taste Preparation Instructions
Preheat oven to 400 degrees.
Throw diced vegetables on a large baking sheet and drizzle with olive oil, then sprinkle with salt and pepper. Use hands to toss, then arrange in a flat layer on the pan.
Roast for 30 to 40 minutes, or until vegetables are golden brown. Allow to cool to room temperature and eat as a snack, or serve them as a side dish with pork chops, roasted chicken, etc.
Posted by Ree on September 14 2011

September 12, 2011
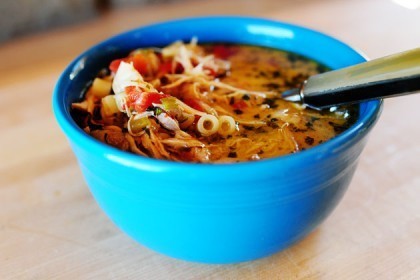
Italian Chicken Soup
 WARNING: I'm afraid I'm going to be obsessed with soup this fall. I apologize in advance. Something about the recent lifting of the two-thousand degree weather has made me really excited about finally being able to eat hot food made in pots.
I made three soups last week, unsure of which one(s) I'd use for my cookbook and which one(s) I'd post here. Yesterday, I closed my eyes and picked one…and was so happy this was the one I landed on, as it's the one I most wanted to share. It's very loosely based on a classic soup from a chain Italian restaurant, but departs from it in several key ways…not the least of which is the addition of heavy cream, which adds richness to the soup without turning it into…well, a creamy soup. It really is the best of both worlds.
This is a delightful and delicious soup, but be aware that it's kind of pot-heavy (meaning I'm going to drive you crazy saying "get another pot…get another pot"). It's also one of those recipes that has a lot of "set-aside" steps along the way (meaning I'm going to drive you crazy saying "do this…then set aside.") You'll see what I mean.
Finally, to address an issue raised here a couple of weeks ago: I'm going to watch The Princess Bride for the first time ever this week.
Amen.
 Throw the chicken into a pot and cover it with a bunch of chicken broth or stock. Bring it to a boil, then simmer it with the lid on for 30 minutes. After that, turn off the heat and let it sit in the pot for an additional thirty minutes.
 After that, take the chicken out of the pot and shred all the meat. Get ridda the bones, but keep the broth that the chicken cooked in. Set this all aside. (This will not be the first time I say "set aside" in this post. Sorry.)
 Meantime, cook the pasta. If you can find it, get this kind. I love it. It's like macaroni without the curl, and half the size.
That made no sense.
Anyway, just cook the stuff ahead of time. Then rinse it with cold water and toss it with a little olive oil. I like this better than throwing the pasta in to cook with the soup, because I have deeply rooted issues and imagine that all the starchy stuff would fall into the soup, which it would, which is just fine for normal people who don't have issues, but for me I just think of all the starch floating around in the soup.
Don't be like me.
 Another "set aside" item: mince up a bunch of oregano. Heat a little skillet over medium-high heat, then drizzle in some olive oil. Throw the oregano into the olive oil, then turn off the heat, stirring the oregano constantly for a good minute or so. Your kitchen will smell like oregano, and this concoction is going to make the soup so darn good, you'll cry.
You can also use dried oregano flakes! Heating it up in the olive oil really awakens the flavor. If you're using the dried stuff, though, use half the quantity since dried herbs are quite a bit stronger.
 Next, dice up some onion and green bell pepper (I think red would be nice; I just didn't have any)…
 Some celery…
 And some jalapeno for heat. You can leave this out if your family can't HANDLE the spice, but after it's all said and done, it really turns out to be nice and mild, with a little bit of spice.
I love jalapenos.
 Set Aside Item #254: Chop up a can of whole tomatoes. Then set. Them aside.
Set aside, set aside, set aside-side-side
Set aside, set aside, set aside-side-side
Set aside, set aside, set aside-side-side
Set ASIDE
Set aside-side-side
I feel better now. I hope you do, too.
 Throw all the veggies into a pot (sorry about all the different pots. you can plan ahead and reuse the same pot if you have the time) with a little olive oil, and saute them over medium-high heat.
 Sprinkle in some salt and pepper…
 Then cook 'em for about ten minutes, or until they're tender and golden brown.
 Next, pour in the chicken broth…
 Then stir in the chicken…

 The tomatoes…
 The cooked pasta…
 The heavy cream…
 And all the oregano and olive oil from the little skillet. Look at that gorgeous oil. When you serve the soup, a little bit will rise to the surface of the soup and you'll want to dip a big hunk of bread in it.
I speak from experience here.
 Then throw in salt and pepper and simmer it just a few minutes to heat it all up.
 Dish it up, then sprinkle on plenty of Parmesan cheese. Big, fat shavings are the best…but all I had was this pregrated stuff. And it was just fine.
 Goodness gracious.
Great bowls of flavor.
(Get it?)
 Yum, yum. Hooray for cooler weather! And hooray for soups that make your soul sing.
Enjoy!
Off to see what the Princess Bride passion is all about,
Pioneer Woman
Recipe: Italian Chicken Soup
Prep Time: 20 Minutes
|
Cook Time: 1 Hour30 Minutes
|
Difficulty: Easy
|
Servings: 8
Print Recipe
3"x5" Cards
4"x6" Cards
Full Page
Ingredients
1 box Ditalini Pasta (very Short Macaroni-type Pasta Noodles)1 Tablespoon Olive Oil1 whole Cut Up Fryer Chicken8 cups Low Sodium Chicken Broth1 whole Medium Onion, Diced2 whole Green Bell Peppers, Diced2 stalks Celery, Diced2 whole Fresh Jalapenos, Diced1 Tablespoon Olive Oil1 can (28-ounce) Can Whole Tomatoes2 cups Heavy Cream1/3 cup Extra Virgin Olive Oil4 Tablespoons Minced Fresh OreganoSalt And Freshly Ground Pepper, To TasteParmesan Cheese Shavings, For Serving Preparation Instructions
Cook pasta in a pot according to package directions, being sure not to overcook it. Drain and rinse in cold water to cool. Toss in 1 tablespoon olive oil and set aside.
Place chicken in a large pot or dutch oven and cover in chicken stock. Bring to a boil, then simmer chicken, covered, for 30 minutes. Turn off heat and leave covered for 30 minutes. Remove chicken from pot and shred meat. Discard bones and set meat aside.
Dice canned tomatoes and return them to their juice. Set aside.
Heat a small skillet over medium high heat. Add olive oil and oregano and turn off heat, stirring over the next minute to keep oregano from burning. Set this aside.
Either pour off chicken broth into a separate container or use a new pot to saute onion, green pepper, celery, and jalapenos in 1 tablespoon olive oil over medium heat until tender and golden brown, about 10 minutes. Add chicken broth, shredded chicken, and tomatoes with their juice. Bring to a boil, then reduce to a simmer. Add cooked pasta, cream, and all the oregano and olive oil from the small skillet. Stir to combine. Turn off heat.
Serve with lots of Parmesan sprinkled on the top--the more the better! Crusty Italian bread is good, too.
Posted by Ree on September 11 2011

September 9, 2011
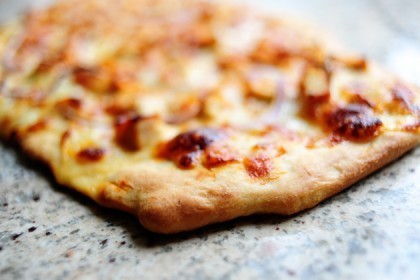
Fig-Prosciutto Pizza with Arugula
Note: Because this pizza is featured on my cooking show Saturday morning, I'm bumping this up to the front for easy reference for those of you who'd like to print the recipe. If you watch the show, please notice the difference in fig spreads. On this recipe I made last year, I used a hearty fig spread that has a seedy texture. On the show, I couldn't find that product in my neck of the woods, so wound up using a true fig preserve, which was a little more jelly-like. Either one is delicious–just be aware there are different varieties!
 Original Post: December 2010. I made a whole bunch of pizza dough last week, and after churning out my Leek and Potato pizza (and subsequently scarfing it down unabashedly), I stuck the rest of the dough in a plastic bag in the fridge and walked away for a few days.
This week, because I'm busy getting ready for Christmas, I decided I'm making pizza whenever I get struck with the urge. The only rule I'm imposing on myself is that I can't make the same pizza twice. I started with this scrumptious fig-and-prosciutto pizza on Sunday, some five days after making the original batch of dough. And when I took my first bite, I realized once again how delicious this pizza dough is when it's "aged" in the fridge for several days. I don't know what happens to the dough over time, but it takes on some kind of magical chewy/flavorful quality that's absolutely noticeable. One of my New Year's Resolutions in 2011—aside from never running out of gas and staying on top of my laundry pile and exercising every day and learning how to sing and play guitar—is keeping a steady batch of several-day-old pizza dough in the fridge.
I'm convinced it will make me a happier, more well-rounded individual.
Well-rounded, because I like a lot of cheese on my pizza.
But that's another story for another time.
 Here's what you need for the pizza crust.
This is simple stuff here, my darlings!
 To make the crust, sprinkle yeast over warm water and let it stand for a few minutes.
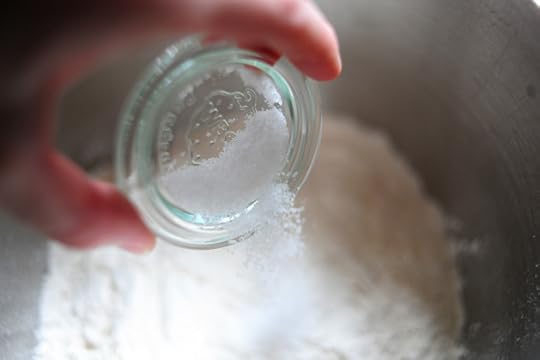 Next, add the salt to the flour.
 And stir it around in the mixer for a few seconds.
 Next, with the mixer on low, drizzle in the olive oil.
 Stir it together till the olive oil is worked into the flour.
 Next, pour in the warm water/yeast mixture.
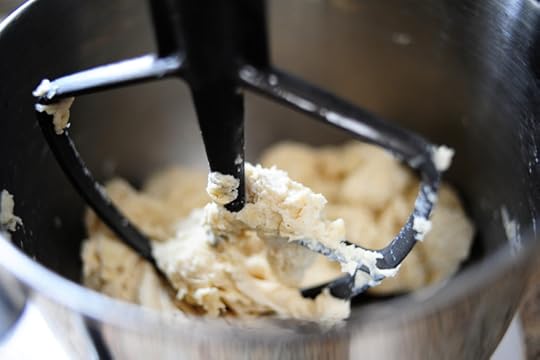 Mix it together until the dough all comes together in a sticky mass.
 Then just cover the bowl with plastic wrap and set it aside for 1 to 2 hours. Or, to really step up the flavor and texture, just park it in the fridge for a few days, sealed in a plastic bag.
 Yum. Aged to perfection.
 I want this pizza to be as thin as possible, so I just used a third of the dough recipe (I usually use half the recipe for one pizza.) Just roll it out as thin as you can.
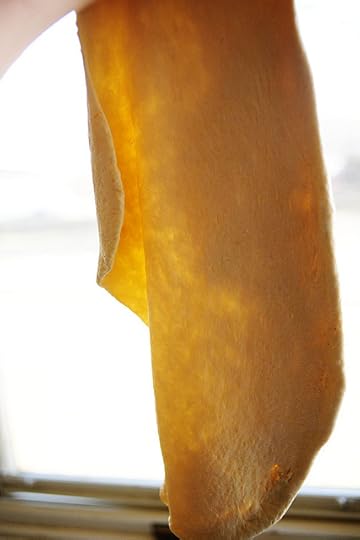 Or, if you're talented in this arena (and I'm not), shape it and stretch it with your hands.
 Place the dough on a large baking sheet. Drizzle it very lightly with olive oil, and sprinkle very lightly with salt.
 Grab some fig spread, which is pretty much like fig jam.
 I found this at the little grocery store in our small town! They've started carrying some gourmet cheese and specialty items, which means I'm probably the happiest woman in the world at this point.
 Scoop out a couple of large spoonfuls of the spread…
 Spread a nice layer of fig spread all over the crust.
Note: You could also just use regular pizza sauce here; just go a little easy on it so it doesn't overpower the toppings.
Sprinkle on some kosher salt to offset the sweetness a bit!
 Next, use your hands with the chipped and grody fingernails to lay slices of fresh mozzarella over the top.
 This mozzarella was pre-sliced and was a bit thicker than I would have sliced myself; the thinner the mozzarella slices, the better.
Now just stick the pizza in a very, very hot oven—on the lowest rack—for about 10 to 12 minutes.
While the pizza is cooking, get all the other ingredients ready–you'll want to throw it all on as soon as it comes out of the oven!
 You'll need some thinly sliced prosciutto. Separate the slices so they'll be all ready to go.
 And you'll need some delicious, peppery arugula.
Raise your hand if arugula makes you want to sing songs of praise.
*Raising hand*
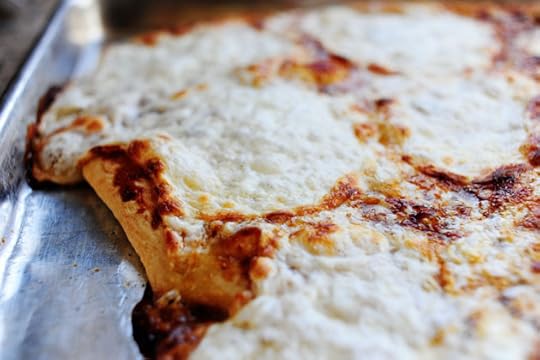 Pull the pizza out of the oven with the crust is golden and the cheese is bubbly. The fig spread will caramelize in areas and have some nice golden brown areas. Yum.
 Immediately lay/drape slices of prosciutto over the top of the hot pizza.
 Back when I shared this recipe for Caramelized Onion and Prosciutto Pizza, I got a great tip from a gal who said "Next time, wait till the pizza's done before you lay the prosciutto on top."
And she was right. The prosciutto is allowed to get nice and warm from the hot pizza, but it stays soft and delicious.
 Here you can see how yummy the fig spread is. Sweet, but a nice, distinctive flavor.
If I were a kitten, I'd be purring.
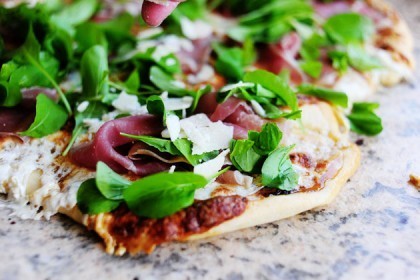
 Next, sprinkle the arugula all over the top.
 I just tear off the leaves (rather than chop it) and throw 'em right on. I actually didn't have much arugula, but I would have really piled it on if I'd had more. You can't use too much!
 Sprinkle on plenty of shaved Parmesan…
 Then cut it up…
 And serve it immediately. You'll love it! Crispy crust, the sweetness of fig, the deliciousness of fresh mozzarella, the saltiness of prosciutto, the peppery crispness of arugula.
Goodbye. I'm going to have it for breakfast.
Enjoy!
Recipe: Fig-Prosciutto Pizza with Arugula
Prep Time: 1 Hour30 Minutes
|
Cook Time: 12 Minutes
|
Difficulty: Easy
|
Servings: 12
Print Recipe
3"x5" Cards
4"x6" Cards
Full Page
Ingredients
Pizza Crust1 teaspoon Active Dry Yeast4 cups All-purpose Flour1 teaspoon Kosher Salt1/3 cup Olive OilFOR THE PIZZA:2 Tablespoons Olive Oil4 Tablespoons Fig Spread Or JamKosher Salt To Taste12 ounces, weight Fresh Mozzarella, Sliced Thin6 ounces, weight Thinly Sliced Prosciutto*1 bunch Washed And Rinsed ArugulaFreshly Ground Pepper, to taste1/2 cup Shaved Parmesan Preparation Instructions
NOTE: PIZZA INGREDIENTS IN THIS RECIPE ARE FOR 1/3 OF THE PIZZA DOUGH RECIPE. USE LEFTOVER DOUGH TO MAKE OTHER KINDS OF PIZZA!
Sprinkle yeast over 1 1/2 cups warm (not lukewarm) water.
In a mixer, combine flour and salt. With the mixer running on low speed (with paddle attachment), drizzle in olive oil until combined with flour. Next, pour in yeast/water mixture and mix until just combined.
Coat a separate mixing bowl with a light drizzle of olive oil, and form the dough into a ball. Toss to coat dough in olive oil, then cover the bowl tightly with plastic wrap and allow to rise for at least an hour. Use right away or store in the fridge until you need it. ***It's best to make the dough at least 24 hours in advance, and 3 or 4 days is even better.
Preheat oven to 500 degrees.
Roll out 1/3 of the pizza dough as thinly as possible. Place on a large baking sheet.
Drizzle lightly with olive oil and sprinkle lightly with kosher salt. Spread fig spread (or jam) all over the surface of the dough. Sprinkle lightly with salt.
Lay sliced of mozzarella all over the surface. Sprinkle lightly with salt and freshly ground pepper. Bake for 12 to 15 minutes, or until crust is golden and cheese is bubbly.
Remove from oven and immediately lay prosciutto over hot pizza. Just before serving, sprinkle on arugula and Parmesan shavings.
Cut into wedges or squares and serve immediately!
Posted by Ree on December 21 2010

September 7, 2011
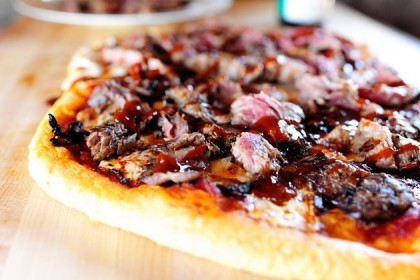
Steakhouse Pizza
 Earlier this summer, I made a bunch of different pizzas for my new cookbook. In the spirit of impatience, I'm sharing one of them with you today.
Hello, I'm Pioneer Woman. And I can't sit on recipes and not share them here.
Hi, Pioneer Woman.
I love this pizza. I cooked up some balsamic red onions and added a little more balsamic to the pizza sauce for a little more depth of flavor. Then I topped the pizza with thin slices of medium rare steak after I pulled the baked pizza out of the oven. The hot pizza warmed the steak without ruining the beautiful medium-rare redness, and angels sang in the heavens. At the end, I drizzled the whole thing with some good steak sauce…and, well, it was too good for words.
Here's the step-by-step. Note that since this is a cookbook recipe, I have fewer photos than usual. I can hear you thanking me now.
(You think I can't hear you, but I can.)
 Slice up a couple of red onions and saute them with a little butter and balsamic vinegar until they're nice and deep and caramelized. I thought these would hold their own against the juicy steak and sauce.
I thought right.
 Grab a steak. I used skirt steak, but flank steak or even a ribeye will do.
 Season it well with salt and pepper…
 And grill it until it's medium rare. Don't overcook the sucker! Overcooked steak is a sacrilege.
Amen.
 Remove the steak from the grill and keep it warm on a plate while you get everything else ready.
 Roll out the pizza dough as thin as it will go. Curse violently when it won't stop boinging back because of its elasticity, but only in your head.
I'll just say it: I've made pizza for years, and pizza dough never ceases to have a mind of its own.
 Next, I used some good jarred marinara sauce, then drizzled in a little balsamic and Worcestershire to give it some richness. Smelled so, so good!
 Pour the pizza sauce on the dough, and spread it evenly with a spoon to coat.
 Evenly distribute the balsamic red onions all over the sauce…
 Then lay slices of mozzarella all over the red onions. Stick the pizza in a 475 degree oven (on the bottom rack) and bake it until the cheese is bubbly and the crust is golden brown, about 12 to 15 minutes.
 When the pizza's about to come out of the oven, slice up the steak really thinly…
 And as soon as you pull out the pizza, lay the steak slices all over the top.
Hot Pizza + Warm Steak = TrueLuv4Evr
 Grab a little steak sauce. This stuff is très yum.
 Drizzle the steak sauce all over the surface of the warm meat/hot pizza. Use a squirt bottle if you have it; if you don't, a spoon will do just fine.
 I swoon. I faint. I die.
 At the end, sprinkle on plenty of Parmesan shavings. You can also sprinkle on a couple of sliced green onions if you need a little color.
This is a pizza fit for a king. Enjoy, guys!
And I promise never to post any more of my new cookbook recipes ever, ever again.
Ahem.
Love,
Pioneer Woman
Here are the printables, both for the crust and the pizza itself:
Recipe: One Basic Pizza Crust
Prep Time: 1 Hour
|
Cook Time:
|
Difficulty: Easy
|
Servings: 12
Print Recipe
3"x5" Cards
4"x6" Cards
Full Page
Ingredients
1/2 teaspoon Active Dry Yeast3/4 cups Warm Water2 cups All-purpose Flour3/4 teaspoons Kosher Salt3 Tablespoons Olive Oil Preparation Instructions
Sprinkle yeast over 3/4 cups warm (not lukewarm) water. Let stand for a few minutes.
In a mixer, combine flour and salt. With the mixer running on low speed (with paddle attachment), drizzle in olive oil until combined with flour. Next, pour in yeast/water mixture and mix until just combined, and the dough comes together in a sticky mass.
Coat a separate mixing bowl with a light drizzle of olive oil, and form the dough into a ball. Toss to coat dough in olive oil, then cover the bowl tightly with plastic wrap and set it aside for 1 to 2 hours, or store in the fridge until you need it.
Note: it's best to make the dough at least 24 hours in advance.
Posted by Ree on September 7 2011
Recipe: Steakhouse Pizza
Prep Time: 1 Hour30 Minutes
|
Cook Time: 25 Minutes
|
Difficulty: Easy
|
Servings: 12
Print Recipe
3"x5" Cards
4"x6" Cards
Full Page
Ingredients
1 whole Recipe Pizza Crust1 whole Skirt Steak Or Flank SteakSalt And Pepper, to taste2 whole Red Onions, Sliced Thin3 Tablespoons Butter4 Tablespoons Balsamic Vinegar1/2 teaspoon Worcestershire Sauce2 cups Marinara Sauce12 ounces, weight Fresh Mozzarella Cheese, Sliced ThinShaved Parmesan Cheese1/2 cup Good Steak Sauce (more If Desired) Preparation Instructions
Preheat oven to 475 degrees. Arrange rack in the bottom half of the oven.
Saute red onions in butter and 2 tablespoons balsamic vinegar over medium-low heat until dark and caramelized, about 10-12 minutes. Remove from heat and set aside.
Combine marinara sauce with 2 tablespoons balsamic and Worcestershire sauce. Set aside.
Grill steak over high heat until medium rare. Remove from grill and set aside.
Roll out pizza dough until very thin. Top with marinara mixture and spread to coat dough. Lay caramelized red onions all over the sauce, then top onions with slices of mozzarella cheese. Bake pizza for 12-15 minutes, or until crust is golden and cheese is bubbly (but watch to make sure it doesn't burn.)
While pizza is baking, slice steak into very thin slices.
Remove pizza from the oven, then drape slices of steak all over the surface. Drizzle the top of the pizza with steak sauce (use squirt bottle if you have one) and top the whole thing with Parmesan shavings.
Cut into squares and serve immediately.
Posted by Ree on September 7 2011

September 3, 2011
Lemon Blueberry Pancakes
Note from PW: Because this recipe is featured on today's episode of my cooking show, I wanted to bring this to the forefront so the recipe would be readily available. On the show, I used a whole milk-lemon juice mixture. But if I had to choose, I'd definitely stick with the evaporated milk-lemon juice mixture as this recipe calls for. The pancakes are light, fluffy, and perfect.
Here's my basic pancake recipe if you like things plain: Perfect Pancakes
 Original Post May 2011: So here's what I did. One day I made Grilled Chicken Salad with Feta, Fresh Corn, and Blueberries. A few days later I made Knock You Naked Brownies.
That same day, I realized I had leftover blueberries from the salad, and extra evaporated milk from the brownies.
So I decided to make pancakes so I could use up both ingredients. And because I wanted pancakes. I threw in lemon for two reasons: one, the juice, when combined with the evaporated milk, results in a little bit of a buttermilk effect. Two, I love lemon with blueberries. Three, my name is not Myrtle.
Here's how I made them:
 Measure the evaporated milk…
 And squeeze in the juice of one whole lemon. If the lemon isn't a very juicy one, squeeze in the juice of two lemons.
 Stir this together and let it sit for a few minutes to thicken.
 In a separate bowl, combine cake flour…
 Salt. Best added with freaky pink alien claws.
Pancakes taste better that way.
 Baking powder…
(Don't be thrown off by the teaspoon here. I used 1 tablespoon + 1 teaspoon, but in the printable recipe below wound up just saying "1 heaping tablespoon.")
 Plenty of sugar! You need to offset the tartness of the lemon.
 Back to the evaporated milk/lemon juice mixture: crack in an egg…
 Add vanilla extract…
 Then zest the lemon…
 And throw it in.
 Add the wet mixture to the dry ingredients…
 Stirring it gently with a fork as you pour it in.


 Then throw in a bunch o' blueberries. I don't believe in spooning the batter into the skillet, then adding the blueberries to each individual pancake. It goes against my belief system.
And I'm lazy.
 And stir until just combined. Splash in a little more evaporated milk if it's overly thick. It needs to be slightly pourable; not just ploppable.
 Then melt some butter…
 And stir it into the batter. I should have added the butter before the blueberries, but I plum forgot.
Don't be like me.
 Heat a heavy griddle or skillet over medium-low heat and add butter to the pan. Drop batter into the pan with a 1/4 cup measure.
 Then cook 'em on both sides until golden brown.
 Stack 'em up to your heart's content, top with a big pat of softened butter, and drizzle on the warm syrup.
And then, this is important: repeat after me.
 I…
I…
 Love…
Love…
 Pancakes…
 So…
So…
Much.
Enjoy these over the weekend! Make 'em for your mama. Or, if you are one of those mama creatures…put in this order for Sunday morning.
Have a happy, happy weekend, everyone.
Lots of Love,
P-Dub
Recipe: Lemon Blueberry Pancakes
Prep Time: 10 Minutes
|
Cook Time: 10 Minutes
|
Difficulty: Easy
|
Servings: 4
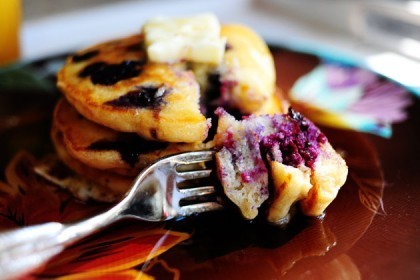
Print Recipe
3"x5" Cards
4"x6" Cards
Full Page
Ingredients
1-1/2 cup Cake Flour1 Tablespoon (additional) Cake Flour1/4 teaspoon Salt1 Tablespoon (heaping) Baking Powder3 Tablespoons Sugar1-1/2 cup Evaporated Milk (more If Needed)1 whole Lemon (more If Needed)1 whole Large Egg1-1/2 teaspoon Vanilla2 Tablespoons Butter, MeltedZest From 1 Lemon1 cup Heaping BlueberriesExtra ButterMaple Or Pancake Syrup Preparation Instructions
Heat heavy skillet or grill over medium low heat.
In a medium bowl, mix flour, salt, baking powder, and sugar. Set aside.
In a separate bowl, mix evaporated milk, juice of 1 lemon (more if lemon isn't very juicy), and lemon zest. Allow to sit for five minutes, then add egg, vanilla, and melted butter. Mix to combine.
Pour wet mixture into dry ingredients. Stir gently to combine. Splash in more evaporated milk if mixture is overly thick. Stir in blueberries. Again, check to make sure mixture isn't overly thick.
Melt butter in heated skillet. Drop batter by 1/4 cup measures and fry pancakes on both sides until golden.
Serve with softened butter and warm syrup.
Posted by Ree on May 6 2011

Ree Drummond's Blog

- Ree Drummond's profile
- 2032 followers

