
Adam D. Roberts's Blog, page 10
September 10, 2020
Don’t Ask Me About My Coleslaw

Earlier this summer, in Sun Valley, Idaho, I burned two racks of ribs. I’d made a dry rub with lots of brown sugar and cayenne pepper, sprinkled it all over the ribs, wrapped them in aluminum foil, and placed them in the oven for low-and-slow cooking. This, however, was an unfamiliar oven in an unfamiliar kitchen (we were staying with our friends Harry and Cris) and when the ribs came out, hours later, they bore a closer resemblance to King Tutankhamun than anything you’d actually want to eat.
Thankfully, there was coleslaw. Not just any coleslaw: my coleslaw. What can I say? I’m something of a coleslaw whisperer. It’s something that I ate often, growing up. My mom would buy cartons of coleslaw from the deli, along with macaroni salad (remember macaroni salad?) and she’d keep them both in the refrigerator next to a pitcher of Crystal Light lemonade.
My coleslaw is significantly better than the stuff you get at a deli and, yet, I can’t give you a recipe for it. It changes every time I make it.
On the night of the burnt ribs, I made it with a homemade mayonnaise which I whisked up because I forgot to buy mayonnaise at the store. I doctored the mayonnaise with lemon juice and cayenne pepper and it won great huzzahs from Harry and Cris, who were so enjoying the coleslaw, they ate all of their burnt ribs without complaint.
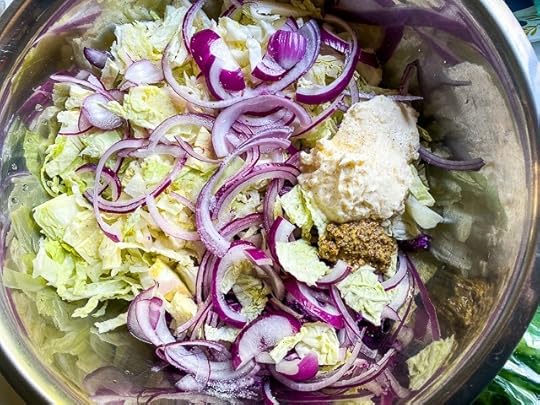
Coleslaw, for me, is about intuition, about feeling things out. You see what you have on hand. One thing you must have on hand is cabbage. Though I’m sure you could make a very daring experimental coleslaw with thinly sliced turnips and kohlrabi, let’s be real here: if it doesn’t have cabbage, it’s not coleslaw.

Ideally, it’s a mixture of purple and green cabbage. You want to slice them both thinly and add them to a bowl. After that, it’s up to you. Shredded carrots are nice, but not necessary. Some kind of onion always works; sometimes red onion, sometimes scallions. Don’t put garlic in there: garlic doesn’t belong in coleslaw. Radishes are good for crunch and color. Celery, maybe. But, come to think of it, celery is a terrible idea. Don’t put celery in your coleslaw.
The point is, once you have your raw vegetables sliced thinly, you have to dress them and that’s where my wizardry really kicks into high gear. You put a big spoonful of mayonnaise in there; store-bought is fine, though, as mentioned, I once made the mayonnaise myself and it blew my friends’ minds. (They even went back for more later in the night when there was leftover coleslaw in the fridge.)
After the mayo, you want a big dollop of mustard: whole grain works, spicy Dijon works. Lots of salt, lots of pepper.
If I give you any advice — and I’d really rather not, but here we are — you want a BIG glug of vinegar. Lately, I’ve been using white balsamic and that’s really launched my coleslaw into a new state of consciousness. But any white vinegar will work: white wine vinegar, rice wine vinegar. Just don’t use distilled white vinegar — it’ll be too harsh — so ignore that part about any white vinegar working.
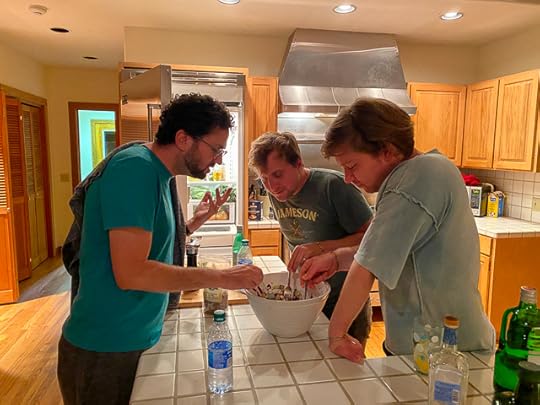
You want the salt and vinegar to work their magic and bring your coleslaw to life. Some people add sugar. If you do add sugar, please don’t tell anyone about it. I certainly won’t tell you if I add sugar. You’ll just have to guess. But once you add the vinegar and salt and mayo and mustard, you want to mush everything together with your hands. Really work that dressing in there and then start tasting. Your eyes should bug out a bit and you should make an audible “whoah” like Joey Lawrence on Blossom. It should be that peppy.
Then you can add herbs. If you have cilantro, add cilantro. If you have parsley, add parsley. Any delicate herbs — tarragon, chives, fennel fronds — will work here. (Fennel fronds work especially well if you have fennel in your coleslaw. I approve of fennel in your coleslaw; you could even add fennel seeds to that version.) Just don’t add woodsy herbs: no rosemary. No thyme. Coleslaw doesn’t want that.
Refrigerate your coleslaw and when it’s time to serve, taste again. The vinegar and salt will have mellowed a bit, so best to add another splash and another sprinkle, to stir and to taste. You could add hot sauce too. You could add olive oil, which I sometimes do. In fact, I think I always add olive oil.
This is all hard to talk about. Coleslaw is very personal; reading my coleslaw is like reading my journal. I’d really rather you didn’t.
In fact, I think we should stop here. I didn’t want to talk about my coleslaw, and you made me. I’m not angry, but I’m not not angry.
Going forward, I just ask that you respect my need for privacy.
Don’t ask me about my coleslaw.
The post Don’t Ask Me About My Coleslaw appeared first on The Amateur Gourmet.


September 9, 2020
One-Pan Cod and Potatoes with Olive Gremolata

Every family has its own way with potatoes. Growing up, my mom would buy frozen potato latkes, heat them up in the toaster, and serve them with Mott’s apple sauce (you can hear all about it on my mom’s episode of Lunch Therapy). Most families, I’d venture, are mashed potato families. Some do it from a box, others from scratch.
Here at Chez Amateur Gourmet, we’re a roasted potato family. Specficially: pee-wee potatoes roasted with garlic, olive oil, salt, pepper, and sometimes with spices thrown in (smoked paprika, cumin seeds, crushed coriander seeds).
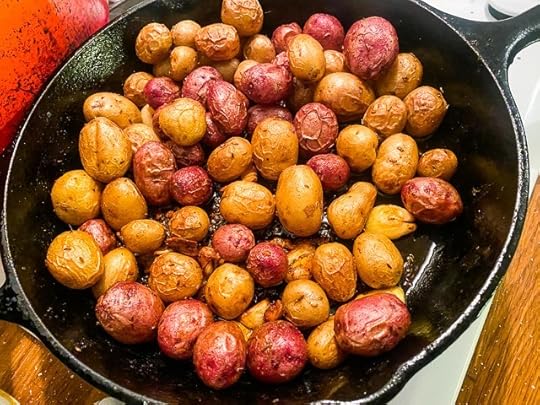
Here’s why I love doing potatoes this way: you can dump them straight from the little pee-wee potato package into your cast iron skillet. Then you smash a few cloves of garlic, throw those in, glug in the olive oil, sprinkle in lots of salt, and pop into a 425 oven. You leave it and forget about it and the potatoes start to wrinkle and crisp, the garlic gets caramelized, and 45 minutes later you have a potato side that’s perfect for breakfast, lunch, or dinner.
But a breakthrough came last week when I read this Mark Bittman recipe for potatoes and cod. He has you slice potatoes thinly (1/8th of an inch!), cook with butter, and then lay cod on top before broiling. That all sounded very fussy; why slice potatoes when you can roast pee-wees? But I loved the idea of laying cod on top of the cooked potatoes and broiling.

It really was as simple as roasting my potatoes the normal way, putting the fish on top, drizzling with olive oil, sprinkling with salt and pepper, and popping under the broiler until the cod reached an internal temperature of 145.

While all of that was happening, I made a quick olive gremolata with pitted Cerignola olives, lemon zest, capers, parsley, lemon juice, and olive oil.

Dinner was as simple as lifting the cod on to plates, scooping the potatoes on to the side, and placing the gremolata on top of the fish. With a crisp white wine, it was a perfect weeknight dinner and easier to make than frozen potato latkes with apple sauce.

One-Pan Cod and Potatoes with Olive Gremolata
An easy weeknight dinner involving some fish, potatoes, and olives.
Ingredients3 cups pee-wee potatoes5 – 6 cloves garlic, smashed and skinned1/4 cup olive oil, plus more for the fish and gremolataKosher salt and freshly ground black pepper1 Tbs smoked paprika1 tsp crushed cumin seeds1 cup green olives (preferably Cerignola), pitted1 lemon, zested and juiced1 Tbs capers1/2 cup chopped parsley2 filets cod Other fish would probably work here. You're just broiling it on top of potatoes.
InstructionsHeat the oven to 425. Place the potatoes and garlic in a cast iron skillet and toss with the olive oil, a big pinch of salt (about a tablespoon), freshly ground black pepper, and the spices. Place in the oven and roast, stirring occasionally, until the potatoes are wrinkled, the garlic is golden, and a knife pierces a potato easily. (Sometimes this takes longer, like an hour or so.)While the potatoes roast, make the gremolata. Stir together the olives, the lemon zest, juice, capers, and parsley. Stir in olive oil (about 1/4 cup.) Taste and adjust with more lemon juice.To finish, lay the cod filets on top of the potatoes. Drizzle with a little more olive oil, sprinkle with salt and pepper, and place under the broiler and cook until the internal temperature reaches 145.To serve, spoon lift the cod on to plates, spoon the potatoes on the side, and top the fish with the gremolata. Eat right away.
Related Posts:
One-Pan Salmon with Sugar Snap Peas and a Cherry Tomato Sauce (Amateur Gourmet)
Lots of Seafood Cooked in a Big Pot with White Wine, Tomatoes, and Chiles de Arbol (Amateur Gourmet)
Roasted Cod and Potatoes (Mark Bittman, New York Times)
Madhur Jaffrey’s Baked Cod in Yogurt Sauce (The Wednesday Chef)
Tourte de Brandade, or Salt Cod Tart (Orangette)
The post One-Pan Cod and Potatoes with Olive Gremolata appeared first on The Amateur Gourmet.

September 7, 2020
Double Vanilla Bean Ice Cream

Here’s some free life advice: if you ever see two vanilla beans on sale for $8, buy them.
That’s literally what happened to me last week at Cookbook in Echo Park. They’re selling vanilla beans in little packets of two for eight bucks. Here’s the thing: if you’ve never worked with a vanilla bean before, you should treat yourself, at least once, to the experience… especially if you like vanilla. A fresh vanilla bean is intensely fragrant in the most natural way — the total opposite of a vanilla-scented candle — and scraping the little black seeds out with a sharp knife is the closest many of us will ever get to buying caviar.

As far as I’m concerned, there’s no better way to use a vanilla bean than to make vanilla bean ice cream. The simple ingredients — whole milk, cream, egg yolks, sugar — really allow the vanilla bean to shine. And though there are many complex and wonderful ice creams out there for you to make (David Lebovitz’s Malted Milk Ice Cream, with Whoppers in it, from The Perfect Scoop may be my favorite), vanilla bean is an ideal starter ice cream. It really shows you what homemade ice cream can taste like vs. store bought.

For this version, I used a recipe from a new favorite ice cream book (#2, after David’s): La Grotta Ices. The book is by Kitty Travers, who sells ice cream in a converted green grocers in South London. I saw it, once again, at Cookbook right near the vanilla beans. The cover called out to me.

The book is full of surprising and delightful ice cream and sorbet combinations: pink gooseberry and hazelnut crunch, prune and Earl Grey, rhubarb and Angelica. All of that sounds quite exquisite, but I thought the best one to give the book a test drive was the French vanilla. Only, as mentioned, I used two vanilla beans instead of one.
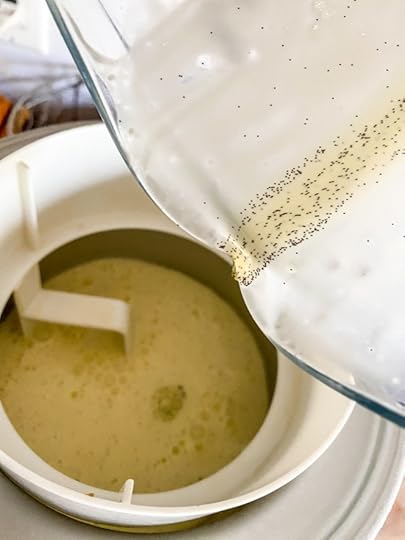
I even went a step further and used my vanilla sugar — sugar that sits in a jar with discarded vanilla beans — to really hit another vanilla note. I suppose you could call this triple vanilla bean ice cream, but let’s not get carried away with ourselves. Whatever you call it, it comes out looking gorgeous with the little black specks (don’t you love little black specks in your vanilla ice cream?) and tasting truly sublime.

Just to be extra gourmet, I served mine with some fancy olive oil and Saba — a cooked grape must — which I’ve had laying around ever since I bought a bottle at Monsieur Marcel at The Grove, B.C. (before Covid). But you could top it any way you like; a salted caramel sauce might be nice. Or just eat it by itself. You put two vanilla beans in it, for crying out loud! But you won’t regret that choice, especially if it’s your first time. Your first time with a vanilla bean is always special.

Double Vanilla Bean Ice Cream
A splurgy but worth-it vanilla ice cream using a recipe from Kitty Travers' La Grotta Ices.
Ingredients2 vanilla pods The original recipe calls for one, but I called this "double vanilla bean ice cream" so it's up to you.1 1/2 cups whole milk1 cup heavy creamPinch sea salt3 large egg yolks1 cup sugar
InstructionsStart by splitting the vanilla pods down the middle with a small, sharp knife. Scrape out the seeds and place them, and the pods, in a pot with the milk, cream, and sea salt. Turn the heat to medium, and whisk to get the seeds broken up as it heats. Meanwhile, whisk the egg yolks and sugar together in a separate bowl.When the liquid is hot and steaming (but not boiling), quickly whisk a little into the egg yolks to temper them. Then add the rest of the liquid, whisking constantly, until it's combined.Return it to the pot and cook over a medium/low heat until it reaches 180 degrees, stirring all the time with a rubber spatula to prevent it from curdling. As soon as it reaches the proper temp, pour into another container (a soup container works great), cover, and refrigerate overnight. (As Kitty Travers says: "This recipe really does benefit from being aged in the fridge overnight before churning. The texture will thicken and have better 'mouthfeel' and you get a warm long-lasting flavour from the vanilla pod." Two pods, in our case.The next day (sorry!), strain the custard through a fine-mesh sieve into a clean container, pressing down to extract everything from the vanilla pods. Use a hand blender to blend the cold custard for a minute to emulsify. (If you don't have one, you can skip this step.)Pour the custard into an ice cream machine and churn according to the machine's instructions until frozen and the texture of whipped cream, about 20 – 25 minutes. Transfer to a lidded container and freeze until ready to serve.
Related Posts:
Darkest Chocolate Sorbet (Amateur Gourmet)
Butterscotch Pecan Ice Cream (Amateur Gourmet)
The Best Chocolate Sauce Recipe (David Lebovitz)
Coffee Stracciatella (Bon Appetit)
The post Double Vanilla Bean Ice Cream appeared first on The Amateur Gourmet.

September 3, 2020
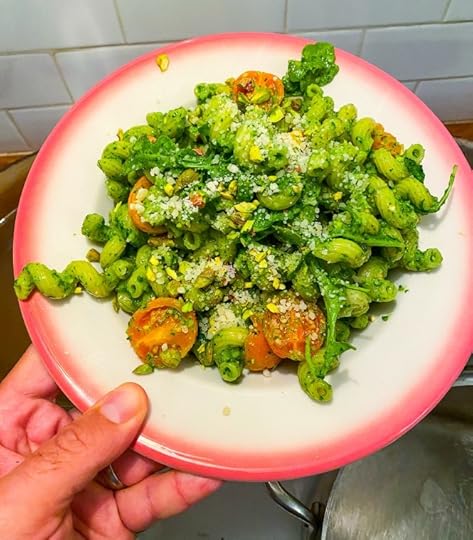
Cavatappi with Pistachio Arugula Pesto and Sun Gold Tomatoes
One of the cruelest things food writers have asked innocent home cooks to do is to make pesto in a mortar and pestle. Yes, I know, Italian grandmothers do this instead of pilates; yes, I know, it yields a texture that’s so silky you want to rub it all over your body and wear it as a dress. I get that. But for most people, the idea of making pesto in a mortar and pestle just makes them not want to make pesto. And that’s a shame! Because pesto is one of the most terrific things you can make at home, especially if you make in the summer.
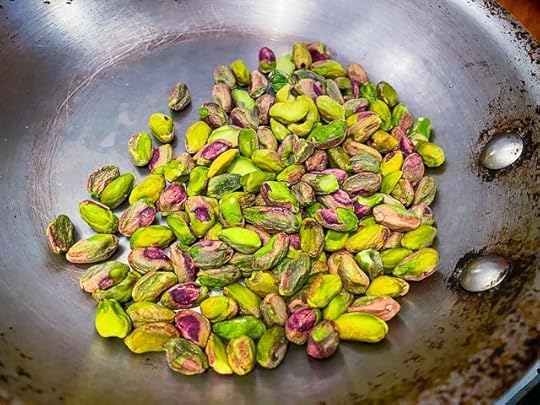
The formula is so simple, you can just memorize it right here (and I know that pan is dirty, I’ve scrubbed it with Barkeeper’s Friend; leave me alone!). Are you ready? Toast nuts: preferably pine nuts, almonds, walnuts, or — if you’re feeling fancy — pistachios. Set them aside to cool.
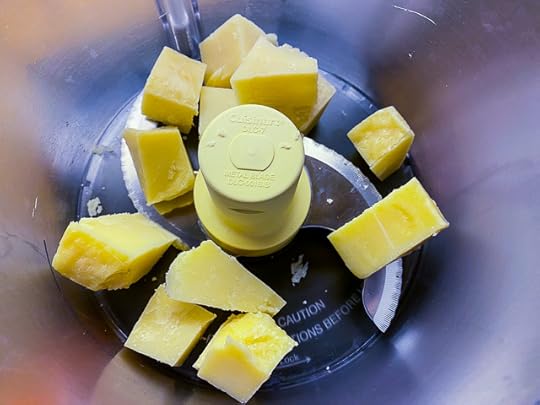
Take a hunk of good Parmesan cheese (don’t buy the pre-ground stuff), cut it into cubes, and throw that into the food processor. Pulse until it’s finely ground, then dump into a bowl.

Now, in that very same food processor, place the cooled toasted nuts, a few cloves of garlic (let’s say four?), and a pinch of salt. Pulse until coarsely ground. Then add big handfuls of either basil (which is the most traditional) or, my personal favorite, arugula. I love arugula because it’s a little bitter, a little spicy, and you don’t have to pick it off the stem like you do with basil. I just buy a big bag of it and dump it in.
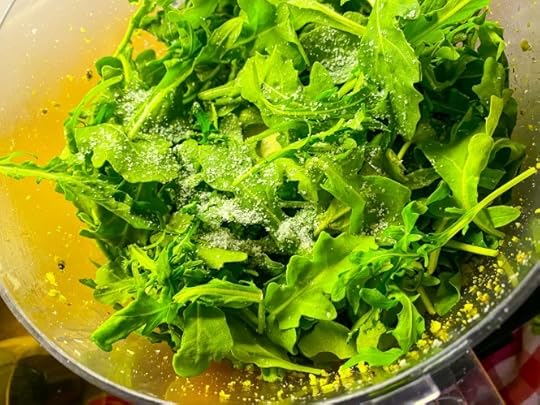
Pulse that until it’s coarsely chopped up, then start drizzling olive oil in. You drizzle it in (through the tube) until it looks like pesto; at least 1/2 a cup, probably more.

The final step? Stir in lots of that Parmesan you ground up at the beginning.

In the past, I would add lemon juice here to make it zingy; but recently, this exchange happened on Twitter.

I tasted and it had a deep, umami flavor that lemon juice might spoil, so I listened to Carla Lalli Music and stuck with pesto instead of salsa verde.
Then to turn this into dinner, I boiled cavatappi in salted water just until al dente, then lifted into a bowl. I spooned a bunch of pesto into the big bowl, which had a little pasta cooking water in it, which helped the pesto stick.

Then came the fun part: the doctoring up! I had some sun gold tomatoes that were just sitting on my counter. So I sliced those in half and threw those in, along with some stray arugula.
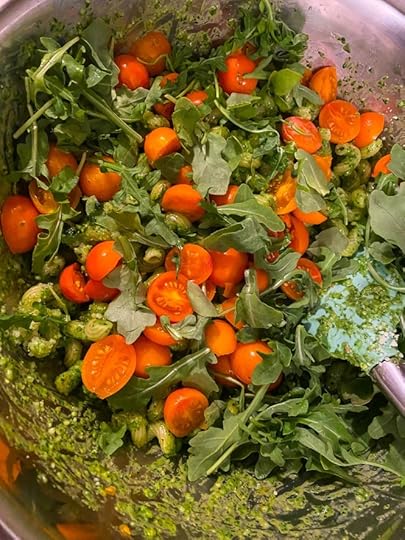
I stirred that all in, along with more Parmesan, and at the very end I chopped up some leftover toasted pistachios and sprinkled them on top.

Now that’s a summer dinner if there ever was one! And you didn’t have grind it all together in a mortar and pestle; you just pressed “pulse” a few times and there it was. Just don’t do what I did and leave the dishes ’til the next day; the pesto really sticks on. I’m going to have to really put some elbow grease into doing the dishes; almost as much as work as making this in a… nah, never mind.

Cavatappi with Pistachio Arugula Pesto and Sun Gold Tomatoes
A bright green pesto made with green pistachios and spicy arugula mixed with cavatappi and sun gold tomatoes.
Ingredients1/2 cup shelled green pistachiosKosher salt1 wedge Parmesan cheese, rind removed, cut into chunks (about 1/2 pound)4 cloves garlic, smashed, skin removed3 – 4 cups arugula1/2 – 3/4 cup extra-virgin olive oil1 pound dried cavatappi You could also use any other small pasta shape. Spaghetti would work too.1 pint sun gold tomatoes, rinsed and halved
InstructionsToast the pistachios in a small skillet with a pinch of salt until fragrant and slightly toasted-looking. Don't scorch. Set aside.Bring a large pot of water to a boil and season well with salt (it should taste like good broth, but not the ocean).In bowl of a food processor, grind the Parmesan until finely ground. Set aside.Now add most of the cooled toasted pistachios (save a tablespoon to chop and put on top of the finished dish). Add the garlic and pulse together with the pistachios and a pinch of salt until coarsely ground.Add all of the arugula, another pinch of salt, and turn the machine on. As it grinds the arugula, slowly pour the olive oil in through the tube. You may need to stop and scrape down the sides. Keep going until the pesto looks emulsified but still roughly textured. Stir in a big handful of the Parmesan and taste. Adjust for salt and more Parmesan. (You could add lemon juice here, just don't tell Carla Lalli Music.)Drop your cavatappi in the big pot of boiling water and cook just until cooked through; taste to know. You want it al dente.Using a spider tool, lift the pasta into a large metal bowl. (You want some of that pasta water to help the pesto stick.) Add big spoonfuls of the pesto and stir all around until everything looks coasted and glossy. I think it's better to use more than less here, but that's just me.Add a handful of Parmesan, the tomatoes, some extra arugula that you forgot to add to the food processor, and continue stirring all around. Keep tasting and adjusting.To serve: lift the the pasta into bowls and top with more Parmesan and some of the chopped pistachios I told you to conserve earlier.
Related Posts:
Instant Pesto (Amateur Gourmet; a very similar post to this one, but not as pretty and no recipe)
Toss Your Beans in Pesto (Amateur Gourmet; a healthier way to use up your pesto)
Samin Nosrat’s Basil Pesto (New York Times; this is the mortar and pestle version… I will try it someday!)
How To Make Pesto Like an Italian Grandmother (101Cookbooks)
The post Cavatappi with Pistachio Arugula Pesto and Sun Gold Tomatoes appeared first on The Amateur Gourmet.

September 1, 2020
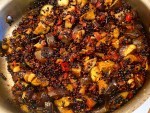
Spicy Black Lentils with Charred Eggplant and Urfa Chili

Cinderella has to pick lentils out of the fireplace in order to go to the ball (at least in Into The Woods) and for a long time I thought to myself, “At least she doesn’t have to eat them!”
There are so many foods that people associate with “health food,” they’re anything but enticing. Lentils definitely have a prominent place on that list. (The guiltiest offender? “Nutritional yeast.” Can you think of a food with a more awful name? I can’t.) And yet, just like The Best Broccoli of Your Life changed the way we think about broccoli, Ottolenghi has a recipe for lentils that’ll shift them into the category: “Something I really want to eat!”
The trick, here, is to develop deep, dark flavor that matches the deep, darkness of the lentils themselves.

A few things: Ottolenghi’s original recipe calls for Puy (green) lentils. He also calls for cherry tomatoes that get charred along with the eggplant. I took liberties here based on what I had around. If you’re feeling unsafe, I get that; head over to Ottolenghi’s recipe, and make that.

I also changed up his technique, starting with the eggplant first, so that I could get a really good sear on it without having to worry about burning garlic or tomatoes bursting and putting too much liquid in the pan to really get anything brown.
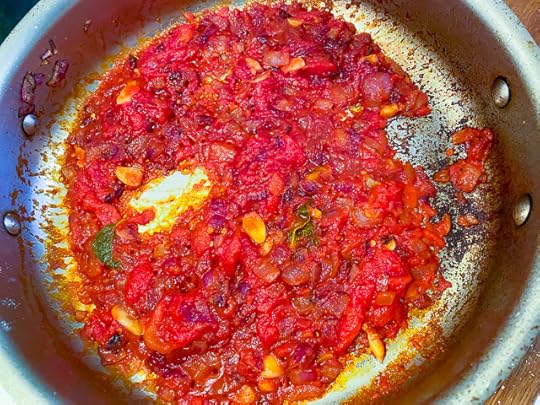
To emulate the charred tomato effect, I drained a can of tomatoes, and squeezed a few solid tomatoes directly into the pan and let them cook until they got deep, dark brown. The bottom of the pan had great brown bits that got worked up with the white wine.
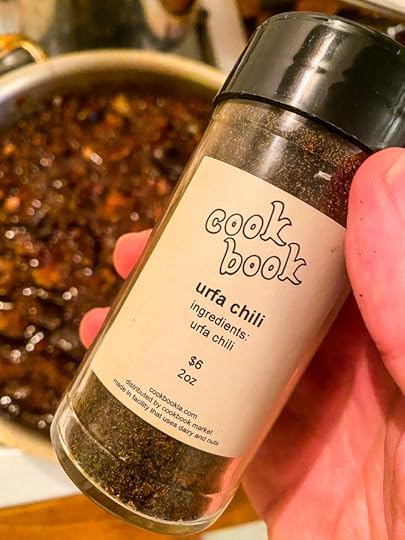
If there’s one ingredient that you absolutely must procure before making this dish, it’s Urfa Chili. Frankly, my Urfa Chili was sitting in my spice cabinet, neglected, for way too long. Here, it finally has its moment to shine: the deep, profound heat you get from Urfa Chili comes alive with the lentils.
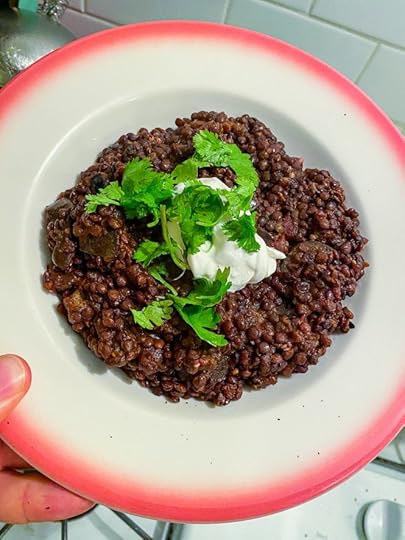
Make this for dinner, and “lentils for dinner” will sound like less of a punishment and more of a reward. Just don’t put Nutritional Yeast on it. Nobody deserves that.
Spicy Black Lentils with Charred Eggplant and Urfa Chili
A hearty, spicy, healthy dinner featuring lentils and Urfa Chili, based on an Ottolenghi recipe.
Servings 4 people
IngredientsOlive oil4 Japanese eggplant, stemmed and cut into cubes You could also use one large globe eggplant and do the same.Salt1 red onion, finely chopped 4 cloves garlic, sliced thin1 can San Marzano tomatoes, drained, liquid discarded, tomatoes crushed by hand1/2 cup dry white wine2 cups water or vegetable stock I used water, it was fine1 1/2 cups black lentils, rinsed and picked over1 Tbs Urfa chili, plus more to tasteFreshly ground black pepperSour cream, Greek yogurt, or crème fraîche for servingCilantro, for garnish
InstructionsStart by heating a splash of olive oil in a wide, metal skillet. When hot, add one layer of eggplant: don't crowd the pan (you may need to work in batches). Sear on all sides, then season with salt, and set aside. Do again until you've seared all the eggplant (you may need to add more oil as you go).Add more oil to the pan (a few Tbs), and add the red onion. Season with salt and fry until golden brown. Add the garlic and cook just until it starts to color. Add the solid tomato pieces, stir all around with salt, and cook until starting to caramelize. The bottom of the pan should be brown, but not black.Add the wine to deglaze the bottom of the pan, working everything up with a wooden spoon. Add the eggplant back in, then the water or stock, and finally the lentils, plus a big pinch of salt. Stir all around as the liquid comes to a boil. Lower heat to a simmer, and cook until the lentils are completely tender, about 30 – 40 minutes. You may need to add more water or stock if the lentils get too thick.Towards the end of its cooking time, start seasoning with the Urfa chili and black pepper. Keep adding sprinklings of both until you really taste it. Don't be timid! This is what makes the lentils special.Scoop into bowls and top with the sour cream and cilantro. Eat right away.
Related Posts:
Curried Lentil Soup (Amateur Gourmet)
Lentil Soup with Sausage, Chard, and Garlic (Smitten Kitchen, featuring Gina DePalma’s recipe from my cookbook!)
Lentils with Grilled Aubergines (The Guardian, another Ottolenghi lentils and eggplant recipe)
Lentils Diavolo (Ali Slagle, The New York Times)
The post Spicy Black Lentils with Charred Eggplant and Urfa Chili appeared first on The Amateur Gourmet.

August 31, 2020
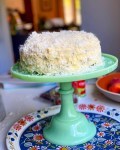
The Fluffiest Coconut Cake with Cream Cheese Frosting

My friend Ryan O’Connell is a superstar in every sense. Not only does he have his own show on Netflix, he was featured this weekend in a New York Times article about artists as activists. (Coincidentally, the article was written by Mark Harris, a Lunch Therapy alumni, just like Ryan.)
Suffice it to say, I feel very lucky to call Ryan a friend. And knowing that his birthday was coming up, and that he’s part of our quarantine bubble (a very small group of friends that we still see), I asked if he had a menu in mind for his birthday dinner. He didn’t hesitate: “Oooh, can we have Martha’s Mac and Cheese?” (The best of all time, in case you didn’t know that.) “Oh, and maybe a salad with peaches? Peaches are season, right?” (They are.) “And can we do a coconut cake for dessert?” “You got it,” I replied.

I like how Ryan knows what he wants. And it’s fun to make a dinner for someone who’s so looking forward to the food you’re making.
Strategy-wise, I made the cakes the night before, wrapped them in plastic, and refrigerated them overnight. (It’s easier to ice a cooled cake.) The next morning, I put together the mac and cheese — with almost two pounds of cheese — and refrigerated it. Then, in the afternoon, I set about icing the cake.

I’ve learned a thing or two about icing a cake over the years. Firstly, as mentioned, I always let the cakes cool for as long as possible before icing them. The refrigerator is a good idea. In my naive, early days I tried icing still warm cakes and you can guess how well that went.

The other major discovery is how important it is to line your cake stand with torn pieces of parchment as you ice. Why? Because when you do the outside layer — which is the hardest part — you can yank away the falling mounds of glop and have a clean-looking cake stand and a perfectly iced cake at the end.

See how messy that looks? But once that parchment was yanked away, the cake looked almost professional. Well, if not almost professional, like it was made by an expert home cook.

That’s the thing about a cake like this: you do want it to look a little shaggy, so everyone can see the love you put into it. And the coconut, which was easy to sprinkle on to the top, but harder to get on the sides — I basically flung it and let the coconut go everywhere — hides most of your icing mistakes.
As you can see, the birthday boy was very happy indeed.

My only other tips are to make sure that your butter and eggs are at room temperature before you make the cake — it’ll make for a fluffier cake — and same when you’re making the cream cheese icing; it’ll whip up more cleanly.
Happy birthday, Ryan! Excited to hear next year’s menu.
The Fluffiest Coconut Cake with Cream Cheese Frosting
A perfect homemade coconut cake based on Ina Garten's recipe.
Servings 12 people
IngredientsFor the cake:3 sticks unsalted butter, at room temperature, plus more for the pans 3/4 pound, if you don't measure by sticks.2 cups sugar5 extra-large eggs, at room temperature1 1/2 tsps pure vanilla extract1 1/2 tsps pure almond extract3 cups all-purpose flour, plus more for dusting the pans1 tsp baking powder1/2 tsp baking soda1/2 tsp kosher salt1 cup whole milk4 ounces sweetened shredded coconutFor the frosting:1 pound cream cheese, at room temperature2 sticks unsalted butter, at room temp 1/2 pound, again if you don't measure by sticks.3/4 tsp pure vanilla extract1/4 tsp pure almond extract1 pound confectioners' sugar, sifted6 ounces sweetened, shredded coconut
InstructionsPreheat the oven to 350. Spray two 9-inch round cake pans with non-stick spray (or butter them, if you have softened butter); line with parchment (use this trick), and spray the parchment, and dust with flour. Knock out any excess dust.In the bowl of an electric mixer fitted with the paddle, cream the butter and sugar on medium-high for 3 to 5 minutes, until light and fluffy. Crack the eggs into a bowl and with the mixer on medium, add the eggs one at a time, scraping down as necessary. Add the vanilla and almond extracts and mix well.In a separate bowl, sift the flour, baking powder, baking soda, and salt. With the mixer on low, alternately add the dry ingredients and the milk to the batter in three parts, beginning and ending with the dry. Mix just until combined. Fold in the 4 ounces of coconut with a rubber spatula. Pour the batter into the two prepared pans, smooth the tops, and bake 45 to 55 minutes, until a cake tester comes out clean. (I use a piece of spaghetti.) Cool in the pans for 30 minutes, then turn out on to a baking rack to finish cooling. (It's not a bad idea to do this the night before.)To make the frosting, combine the cream cheese, butter, vanilla, and almond extract in the bowl of an electric mixer with the paddle attachment on medium speed. (Be sure everything's at room temperature first!) Add the confectioner's sugar and mix until smooth. Ina says: "Don't whip!"To assemble, place one layer on a cake stand, top-side down (I sliced a little off the top to make it sit flat). Spread with frosting, about a cup. Place the second layer on top, top-side up, and frost the top and sides. Sprinkle with the coconut and press more coconut on to the sides. Serve at room temp.
Related Posts:
Yellow Cake with Chocolate Frosting (Amateur Gourmet)
Hummingbird Cake (Amateur Gourmet)
Plush Coconut Cake (Smitten Kitchen)
Chocolate Coconut “Candy Bar” Cake (David Lebovitz)
Banana Coconut Layer Cake (Melissa Clark)
The post The Fluffiest Coconut Cake with Cream Cheese Frosting appeared first on The Amateur Gourmet.

August 28, 2020
My Love Affair with White Balsamic

This summer, I’ve been having an affair. No, not in the bedroom, in the kitchen. I’m passionately in love with a vinegar; not just any vinegar, but white balsamic vinegar.
It all started when I was ordering groceries to pick up from McCalls Meat & Fish (yes, I know I mention them a lot). Their online store has an oils and vinegars section, so I checked out their offerings and saw that they had white balsamic. I’d never used white balsamic before, but I was intrigued, so I bought it. And that’s when everything changed. I started feeling feelings I’d never felt about a vinegar before.
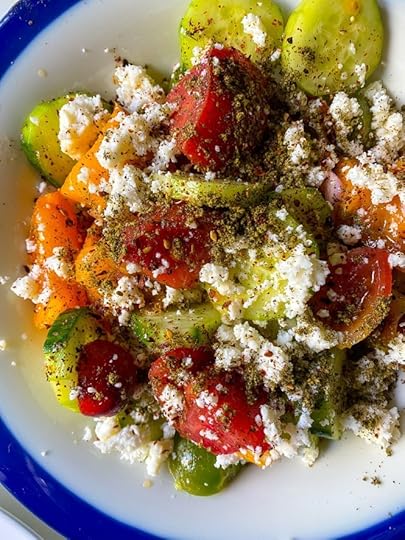
The tomatoes in my tomato salad were like the Von Trapp children and the white balsamic was Fraulein Maria, bringing joy and music where there hadn’t been joy and music in a long time. (The one above has cucumbers, Feta, olive oil, the white balsamic, salt, pepper, and za’atar sprinkled on top.)
What makes it so good? White balsamic has a roundness to it; it’s not as sharp and syrupy as regular balsamic. It has a sweet and sour vibe that brings any salad to life. My favorite way to use it is in a Caesar-ish dressing.

In a large bowl, I whisk together a teaspoon or so of anchovy paste, a tablespoon of Dijon mustard, a splash of the white balsamic, and then enough olive oil (added slowly while whisking) to emulsify. To that I add shredded radicchio, arugula, a sliced cucumber, cherry tomatoes, and a bunch of grated Parmesan.

It’s not a Caesar salad by any means; it’s better.
My fling with white balsamic isn’t exclusive to salads. I use it in sautéed vegetables, like corn; I’ve drizzled it on to soups. I could even imagine mixing it with berries and sugar to make that classic Italian dessert that normally uses the red stuff.
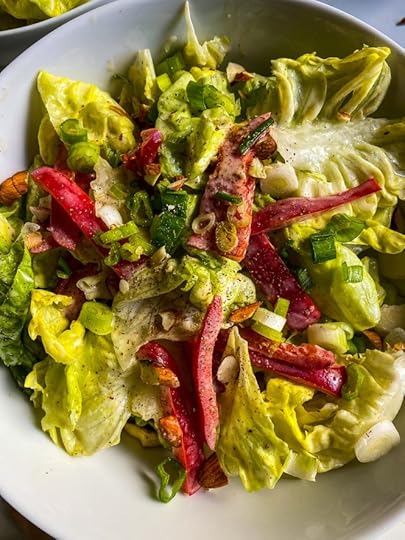
But salads are where white balsamic and I are happiest. Here’s one we did together with a creamy dressing involving a tablespoon each of mayo and sour cream, a splash of buttermilk, and then a splash of the white balsamic, and enough olive oil to bring it all together. (The lettuce is Boston lettuce, with red pepper, scallions, and toasted, chopped almonds.)
So if your summer was a dull one, it’s not too late. Get yourself a bottle of white balsamic and go to town. Your husband never needs to know.
Related Posts:
Dorie Greenspan’s Mustard Bottle Vinaigrette (Amateur Gourmet)
What Is White Balsamic Vinegar and Why Do Chefs Love It? (Bon Appetit)
What’s The Deal With: White Balsamic Vinegar? (The Kitchn)
The post My Love Affair with White Balsamic appeared first on The Amateur Gourmet.

August 26, 2020
One-Pan Salmon with Sugar Snap Peas and a Cherry Tomato Sauce

When we think about one-pan cooking, we usually think about a dish where all of the components cook together in one pan at the same time. But there’s another kind of one-pan cooking! (Sorry for the exclamation mark, I was excited.) It’s the kind where you cook multiple components in the same pan one after the other and then assemble everything together on the plate at the end.
That’s what I did here when I made salmon for dinner the other night. You may be thinking: “Make the components one after the other? Don’t they get cold?” And I’d say to you: “Not really, they’ll stay warm. Stop worrying so much.”

Obviously, the advantage to making a dinner like this is that you only have one pan to clean at the end. This is my Scan Pan from Sur La Table (this is not a sponsored post, I swear) which I really love because it’s non-stick but it doesn’t have dangerous chemicals in it (The Wall Street Journal gave it the Blue Ribbon for nonstick pans).

I happened to have some sugar snap peas and cherry tomatoes that I picked up at McCalls Meat and Fish when I went to get salmon there the other day (you order everything online in advance) and I figured this was the best way to marry all of the ingredients into one harmonious dinner.

As you can see above, I cooked the cherry tomatoes with some garlic and olive oil and then finished with capers. The sugar snaps got the same olive oil and garlic treatment. I wiped out the pan each time, setting each component aside, and finished by searing the salmon in hot grapeseed oil (any neutral oil works well here).
I’ve learned the hard way that if it’s a thick filet, you want to finish it in the oven so it cooks all the way through. But these filets were thin, so I started them skin-side down until they got a nice crust, then finished in the pan on the other side.

It’s a summery, healthy-ish dinner that you can have on the table in twenty minutes. And there’s only one pan to clean! Not apologizing for that exclamation mark. I earned it.

One-Pan Salmon with Sugar Snap Peas and a Cherry Tomato Sauce
Servings 2 people
IngredientsOlive oil6 cloves garlic, sliced thinRed chili flakes2 cups cherry tomatoes, halved Try to use multicolored heirloom cherry tomatoes if you can find them.Salt 1 – 2 tsp capers1 pound sugar snap peas, strings removed This recipe would work equally well with asparagus, broccoli (though you may need to blanch it first), and string beans.1 lemonGrapeseed oil2 filets salmon, skin-onFreshly ground pepper
InstructionsHeat the olive oil in a medium-sized nonstick skillet and add half of the garlic. When the garlic starts to color, add a pinch of red chili flakes, then all of the cherry tomatoes plus a big pinch of salt. Cook on medium heat until the tomatoes begin to burst and the liquid begins to thicken. Towards the end, stir in the capers and taste to adjust for salt. Spoon the tomato sauce into a bowl.Wipe out the pan with a paper towel and heat another splash of olive oil, enough to coat the bottom of the pan. When very hot, add all of the sugar snap peas and a big pinch of salt. Toss all around and then let the sugar snaps sit in the hot oil until they start to color. Continue tossing and charring until they're all a bit shriveled, hot, and brown in spots. Taste for salt and squeeze a wedge of the lemon on top. Set aside.Wipe out the skillet one more time, and heat a splash of the grapeseed oil in the same skillet. Pat your salmon filets very dry with paper towels and season generously with lots of salt and pepper. Carefully lay the salmon, skin-side down, into the hot oil. Cook on medium-high heat until the skin is crispy and bronzed (about 2 to 3 minutes), then flip with a fish spatula. If your filets are thin, they should finish cooking in the pan. If they're very thick, you may need to finish in a 400 degree oven. Either way, cook until a thermometer inserted into the center reads 125 for medium. Remove the salmon to a plate and top with the cherry tomato sauce. Serve the sugarsnaps on the side with a lemon wedge.
Related Posts:
The Miracle of Mustard-Brown-Sugar Salmon (Amateur Gourmet)
Slow-Roasted Salmon with Cucumber Yogurt and Quick-Preserved Lemons (Amateur Gourmet)
Seared Salmon with Roasted Broccoli (Amateur Gourmet)
Sheet Pan Salmon and Broccoli with Miso Butter (Simply Recipes)
Sheet-Pan Salmon and Broccoli with Sesame and Ginger (New York Times)
The post One-Pan Salmon with Sugar Snap Peas and a Cherry Tomato Sauce appeared first on The Amateur Gourmet.

August 24, 2020
The Ultimate Road Trip from Los Angeles to Bellingham, Washington

At first, I talked myself out of it. We were going stir-crazy in our very hot apartment here in L.A. and Craig said we should drive up the California coast, up the Oregon coast, and finally to visit his family in Bellingham, Washington, where they share a cabin in the summers with friends on Eliza Island, at the tip of the San Juans. It sounded ideal, but also a little scary in Covid-times: where would we stay along the way? Where would we eat? Would it be safe? I came down on the “no” side and Craig was disappointed.
Then he decided to fly. He started looking at tickets. Fly! Wasn’t that more dangerous? What germs would he encounter on the plane? Would he be bringing them to his parents? Back to me? I recalculated the risk of driving: we would have to stay in hotels or AirBnBs, but face-to-face interactions could still be minimized. Food-wise we could stick to outside or drive-throughs. Plus: wouldn’t it be great to get out of this fiery cauldron? I re-approached the idea while walking Winston and shifted my stance. “Let’s just do it!” I said and, before we knew it, we were on our way.

Craig had long fantasized about driving up the California coast, zooming along the cliffs James Bond-style. I had long fantasized about going up the California coast and eating at all the delicious places along the way, including The Big Sur Bakery, whose cookbook I have somewhere in my collection. As it was, the zig-zagging car ride made me pretty nauseous, and stopping at the bakery didn’t fit in our schedule, so we just zoomed on up to Carmel for our first night.

We stayed at The Carmel Lodge, right in the middle of town, which had a nice-enough room and a pretty unbeatable location. Surprisingly, there were crowds of people on the streets, which was a little unnerving. We made our way to the beach and let Winston run around a bit, which he loved. For dinner, I’d made reservations at Il Tegamino because it was outside, it allowed dogs, and it was on one of Eater’s lists.

Like many people, I’ve had reservations about dining out during Covid, not for just for our safety, but for the safety of the people who are working at these restaurants. On the road, though, it felt justifiable, especially since we weren’t likely to be in Carmel again anytime soon. This seafood pasta hit the spot, and was a perfect thing to eat near the beach. And we were sure to wear a mask anytime we were interacting with the staff.

We designed the trip so that every day’s drive was between six and eight hours — we had gone to visit friends in Sun Valley, Idaho, earlier this summer, and the thirteen hour car drive was pretty extreme — and breaking it up this way allowed us to visit lots of places we’d always been meaning to visit. It was also kinder to Winston, who was a trooper in the back seat.

Our next stop was Ashland, Oregon, where Craig gone in the past for the Shakespeare Festival, something he’d been raving to me about for years. Sadly, there was no Shakespeare Festival this summer, but Ashland was still charming to visit for its own sake (and maybe the lack of a Shakespeare Festival allowed us to concentrate on its other charms).

We stayed at the Ashland Springs Hotel, an iconic, historic hotel, smack in the middle of town: you can’t miss it, it’s a big yellow building, the tallest for miles. The hotel was really great: you could enter through the back, so you didn’t have to ride the elevator, and the room was very clean and dog-friendly.

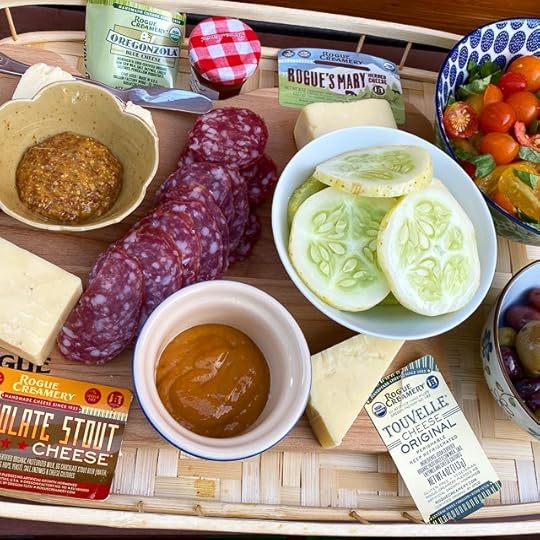
Craig’s old friends Todd and Jessica live in Ashland — Todd works for the Shakespeare Festival — and they had us to their backyard, where we got to hang out with their kids, admire their peach tree (they gave us peaches to take with us), and enjoy this cheese plate, featuring cheeses from Rogue Creamery, which took top prize recently in the World Cheese Awards. Also: Todd and Jessica grew these cucumbers and tomatoes.
The next day, it was time to do the final haul to Bellingham. In the car, we mostly listened to music (God bless you, Sirius Broadway, which Craig tolerated for bits at a time), the occasional podcast (loving Desert Island Discs), and every so often we’d ask each other a profound or perverted question. Finally, we arrived and we met up with Craig’s sister Kristin and crew at a new Bellingham pizza place called Storia Cucina.

This may have been one of my favorite meals of the trip: never have I been happier to sip a cold Negroni and to bite into a perfectly crusty slice of pizza.

The next morning, we set sail for Eliza Island. There was some confusion finding the ferry (it’s not an actual ferry, it’s a guy named Bob who shuttles people into the San Juan Islands) but once we were on it, the air never smelled sweeter and never had I felt so proud to have finally reached my destination.

And, at last, there we were on Eliza Island with Craig’s family: 1200 miles away from L.A.

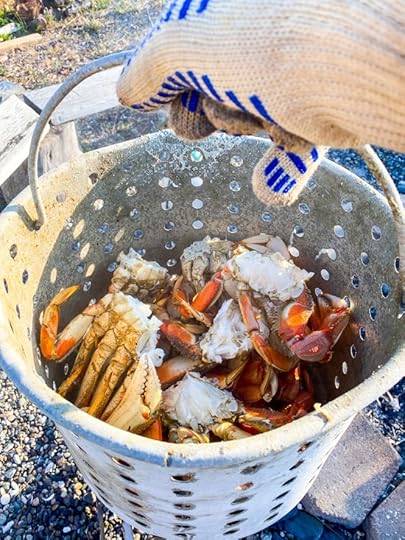
We spent a week there doing all of the things you do on an island in the Pacific Northwest. We caught Dungeness crab and ate it with rosé on the beach.


We kayaked around the island and saw seals on Seal Rock.

Steve, Craig’s dad, made the world’s best crab cakes; Julee, Craig’s mom, made that incredible blackberry peach crisp using peaches from Todd and Jessica’s backyard and blackberries that we picked ourselves. We watched Kristin cuddle with Winston while the sun set over Lummi Island (home of The Willows Inn).

And just like that, a week flew by and it was time to ferry back to Bellingham. Craig and I had dinner that night at Temple Bar, which was excellent, and ice cream at Mallard’s which was even more excellent. (I went with Coconut Chocolate Chunk with Almonds + Blackberry, which we ate in the car.)


Now I’m one of those people who has a hard time, at the end of a vacation, to truly enjoy those final moments instead of preparing myself for the big return to normal life. This trip didn’t really allow for that, though, because Craig was intent on showing me the Oregon coast instead of trying to zoom back home in two days. So our next stop? Cannon Beach, Oregon.

It took us a while to get there — we hit traffic going into Astoria and didn’t have time to see the Goonies house (which, apparently, is difficult to see anyway) — but finally we made it to our hotel, the splurgiest hotel of our trip, The Ocean Lodge (pictured above), which we absolutely loved. If we had endless money and endless time, I’d stay here for a whole week; as it was, we had one night, so we scurried down to the beach.

As suspicious as I was of Craig’s claims about how beautiful the Oregon Coast was, it was hard to deny it once I was there. This may be one of the Top Three beaches of my life (cue the Beaches soundtrack!) and Haystack Rock, which you see here, is absolutely stunning. Winston loved it too: he ran around like crazy and even found a few chicken legs to gnaw on.
That night, we tried to have dinner at Public Coast Brewing Company (per this Eater article), but it was a madhouse. So we just wandered into town and found a great restaurant, that seemed more local and authentic anyway, called Driftwood where I ate an amazing Oyster Po’Boy with oysters from Williams Bay washed down with a citrusy IPA from Astoria.

Winston enjoyed all the scraps that fell to the floor under the table.

The next morning, we grabbed coffee and a Kouign Aman from the lovely bakery/coffee shop, Sea Level.


Then we hit the road for our final stop of this big journey: Redding, California.
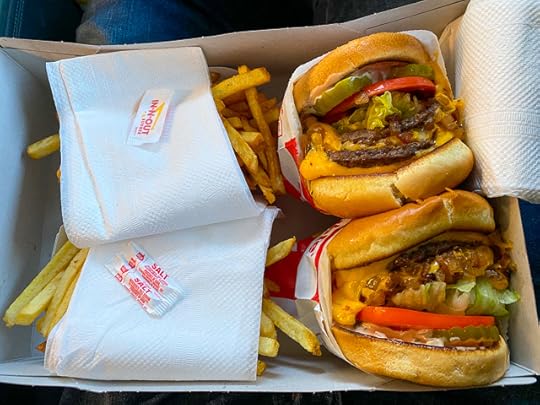
We didn’t know what to expect in Redding, but it was a perfect place to stop. We had a luxurious dinner at In-N-Out Burger, almost as satisfying as that pizza in Bellingham (maybe it helped that I’d been snacking on pretzels and M&Ms all day and was so hungry). Double double animal style, naturally, and extra-well fries for me.
We checked into our hotel, the Sheraton Redding at the Sundial Bridge, which is actually a Marriott Bonvoy? I was expecting a fine-enough hotel, but I actually loved it here: the room was so cozy with top-notch A/C and the best thing, of all? Outlets in the nightstands. It was so easy to plug in our phones.
We took Winston out for an evening stroll along the Sundial Bridge, by Santiago Calatrava, which cost $23.5 million and is pretty stunning. As was this sunset.

The next morning, we grabbed some Starbucks from the lobby, and completed the long haul home.
So, was it worth it? Absolutely! All of those fears that I had about hotel rooms and being on the road, in general, were for naught. Sure, we exposed ourselves to more risk than we would have just staying home, but sometimes the reward outweighs the risk. And that was definitely the case here.
If any good thing came out of this pandemic, it was an awareness of how easy it is to get into your car and have an adventure. Post-pandemic, I plan to make it a regular habit.
Related Posts:
Surfacing on Eliza Island (Amateur Gourmet)
My Dungeness Crab Adventure (Amateur Gourmet)
Get Away to Kennebunkport (Amateur Gourmet)
Our Tour De France (David Lebovitz)
Healthy Eating While Traveling (101 Cookbooks)
The post The Ultimate Road Trip from Los Angeles to Bellingham, Washington appeared first on The Amateur Gourmet.

August 20, 2020
Harissa Honey Chicken with Blistered String Beans

Grilling in the summer is difficult when you don’t have a grill. We had a communal one in our fourplex’s backyard, but I haven’t seen it in a while. Maybe I just don’t want to see it. I don’t really love our backyard, though I love our apartment in general; the backyard’s just not a place I want to spend much time. That’s my big realization about grilling: grilling is only fun if you like the environment in which you’re grilling.
So until we have a house with a pool surrounded by citrus trees and male models, I’m staying inside and using my broiler. It’s funny to me how many people don’t know about their broilers. When I interviewed the amazing Kate Berlant on Instagram Live, she said she didn’t even know if her oven had one. People! Your broiler can be your best friend in the kitchen. Let me tell you why.

A broiler replicates the grill in the sense that you’re cooking directly under (as opposed to over) a flame. You ever hear the expression “flame-broiled”? That’s what your broiler’s capable of. It can give your food that char that everyone craves so much in summer. Your oven can’t get your chicken skin crispy and golden by itself, but your broiler can. It can also work magic on ribs, meatballs (I use my broiler instead of frying them in a pan, these days), even desserts.

I got the idea for a honey harissa chicken from the Sababa cookbook, which has a very different recipe that doesn’t involve the broiler. But I liked the idea of mixing harissa and honey together, so I used harissa in a tube that I had in my fridge and combined it with a generous amount of honey, plus some lime juice for acid.

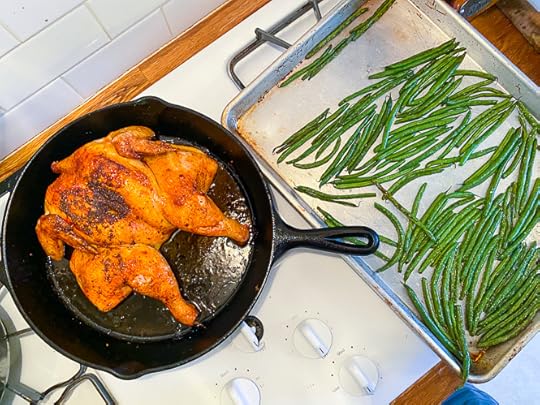
I painted it on to a chicken that I had spatchcocked and cooked in a cast-iron skillet at 425, just until the internal temperature reached 160 (about 30 minutes). While the chicken roasted, I tossed a bunch of beautiful string beans with olive oil, salt, and pepper and inserted them into the oven until they were charred and soft all over (about 20 minutes). Then I broiled that chicken until it looked like something you’d see in a commercial.
It’s a simple, summery dinner that makes you feel like you’re outside, even if you’re not outside. And in this heat, who wants to be outside? Well: I suppose people who have pools, citrus trees, and male models. Until that happens, make this.

Harissa Honey Chicken with Blistered String Beans
An easy summer dinner with lots of big flavors.
Servings 2 people, with leftovers
Ingredients1 3 – 4 pound chicken, preferably organicSalt and pepperGrapeseed oil (or other neutral oil)2 big handfuls haricots verts (aka: large string beans), stemmedOlive oil2 Tbs harissa Store bought is fine, but feel free to make your own!1/2 cup honey1 lime, juiced
InstructionsPreheat the oven to 425.Cut the backbone out of your chicken using kitchen shears (this is called spatchcocking). Discard the bone or save it for stock (you can freeze it); and flatten the chicken breast with the palm of your hand. Pat the chicken dry with paper towels and season generously with lots of salt and pepper.Heat a large cast iron skillet on the stove until very hot. Add a splash of grapeseed oil (a few tablespoons) and lay the chicken in breast-side down, being sure to unfold the chicken so as much surface area touches the bottom of the pan as possible. Using a lid, press down on the chicken to really help it brown. Do this for a few minutes, then check the chicken. If it's golden brown in spots, use tongs to turn the chicken over and place in the oven. Cook for at least 30 minutes, or until a thermometer reads 160 (it'll keep cooking when you broil it).Meanwhile, toss your string beans with enough olive oil to coat the beans (I use about 1/4 cup), lots of salt, and pepper. Place on a cookie sheet, spread out, and cook in that same oven until the beans are caramelized in spots, about 20 minutes, shaking the pan every so often. When the chicken's cooked through, remove it from the oven and mix together the harissa, honey, and lime juice. Paint on to the chicken, being sure to get it everywhere, using up the whole mixture. Place the chicken under the broiler, a few inches away, and turn onto high. Broil the chicken for several minutes, monitoring the whole time, until the chicken is charred in spots and the honey starts to caramelize. Remove from the oven, put the chicken on a cutting board, and let it rest for ten minutes before cutting it up. Serve with the string beans.
Related Posts:
The Ultimate Weeknight Chicken and Broccoli Dinner (Amateur Gourmet)
One-Pan Harissa Chicken (David Lebovitz)
Harissa Chicken with Leeks, Potatoes, and Yogurt (Food52)
Harissa Chicken Thighs with Shallots (Colu Henry, New York Times)
The post Harissa Honey Chicken with Blistered String Beans appeared first on The Amateur Gourmet.

Adam D. Roberts's Blog

- Adam D. Roberts's profile
- 3 followers

