
Adam D. Roberts's Blog, page 2
November 11, 2025
Golden Hof

A few weeks ago Deb Perelman, aka Smitten Kitchen, reached out to me and asked if I had any interest in seeing a staged reading of Moonstruck starring Patti Lupone. That’s like asking me, “Would you like to spend several hours in actual heaven?” I immediately said “yes” and then we got to the important stuff: where would have dinner first? After careful research (doing a Google search) I remembered Golden Hof, a new Korean restaurant in Rockefeller Center from the team behind Golden Diner.
 Welcome to the Hof
The vibes at Golden Hof are warm and inviting; the space is huge: what seems like just a bar in front actually hides a massive dining room. There was a sports game projected on to the wall which is the direct antithesis of seeing Patti LuPone in Moonstruck, but that only revved me up further.
Deb and I decided to start with the “Toasted Rice Martinez,” a cocktail made with “scorched rice-infused Ford’s gin, Cocchi Torino, and Madeira.”

I was expecting something more like a Negroni; this was more like a sweeter-martini with subtle toasted rice flavor. I liked it.
It wasn’t clear, out of the gate, how good the food at Golden Hof would be. But holy moly, was it good. We positively devoured this Ssamjang Caesar Salad with baby gem, sesame, parmesan, and ssamjang caesar dessing.

Deb said they definitely soaked the lettuce in ice water, which is what made it so crisp; as for the dressing, we detected miso and sesame oil. That combo with the Parmesan? Pure brilliance.
And then the Korean fried chicken wings with gochujang sauce? Flawless.

If all food tasted like this, we’d never stop eating. The only downside is I felt like I had to take a shower after eating one: I had glaze all over my face. Deb had the good grace to tell me where to put my napkin.
But Wait, There’s More….The corn cheese with lime onions, pickled jalapeños, melted mozzarella was the best use of corn in a non-summer month I’ve yet experienced.

This stuff is like Korean queso that you can just eat with a spoon: no tortillas necessary.
As for the main event — the Jipo fried rice featuring gochujang-honey glazed file fish tossed in garlic fried rice — it was way less intense than you’d guess it would be; instead, it was more clean-tasting and subdued, but in a great, refreshing way.
 I Saved the Best for Last
This was plenty of food for two people and we didn’t need to have dessert — we had Patti Lupone to get to — but then we saw The Pancake.
As anyone who knows about Golden Diner knows, they’re most famous for their pancakes. The NYT just did a big article about them. So the fact that you can get them for dessert at Golden Hof? It’s a miracle in and of itself.

I’ve never wanted to fight someone over a pancake, but last night my fork was doing battle with Deb’s to get the next piece. This was insanely good: swimming in a pool of honey maple syrup and topped with honey butter, it was the salt that took it over the top. I never once thought about serving pancakes for dessert but after this experience, I may reconsider.
We walked off our food as we trekked to The Music Box theater and then we had a blast as the cast — including Rose Byrne (as Cher), Bobby Cannavale (as Nicholas Cage), Steve van Zandt, Steve Buscemi (basically the cast of The Sopranos) — performed John Patrick Shanley’s masterful script.

A fantastic meal and a fantastic show. When the moon hit my eye afterwards, it wasn’t a pizza pie that I saw: it was a pancake. Thanks for inviting me, Deb!
Golden Hof / 16 W 48th St, New York, NY 10036 / (212) 592-0752
The post Golden Hof appeared first on Amateur Gourmet.


Rigatoni with Sausage and Butternut Squash
Over my twenty years of doing The Amateur Gourmet, I’ve been approached by fans a handful of times. Usually the exchange is quick and pleasant: I feel a thrill for being recognized and hopefully they feel a thrill for meeting their favorite nerdy, gay, old-school food blogger. However the exchange goes, I’m always on the same side of it; until a few months ago when the roles reversed and I fan-girled out over meeting my favorite food influencer, Hailee Catalano.
All Hail HaileeOn her videos, Hailee is the loveliest, most calming presence. Would she be the same way in real life? She absolutely was. I was at a loss for words. She made me feel completely at ease and then we ran into each other again at The Great Community Bake Sale and she was once again a doll (her cakes made my cookies look like trolls under a bridge) and I think we’re best friends now?

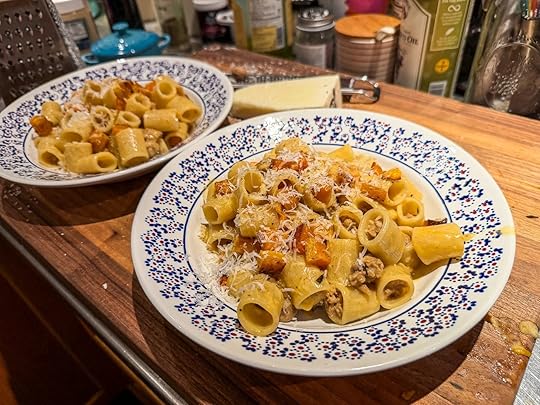
Naturally, when her book came out a few months ago, I had to buy it. And I’ve been thumbing through it ever since, marveling at the pictures and the recipes, and deciding what I wanted to make first. The answer came on Friday night when I decided to make her Pasta all Norcini with Roasted Squash. As Hailee writes: “This creamy pasta originates from the Umbria region of Italy and usually uses a sausage seasoned with nutmeg. This flavor profile feels very cozy and autumnal to me, so I love adding a bit of roasted squash to really drive home that vibe.” Hailee, I’m in.
 I’m Nuts for Nutmeg
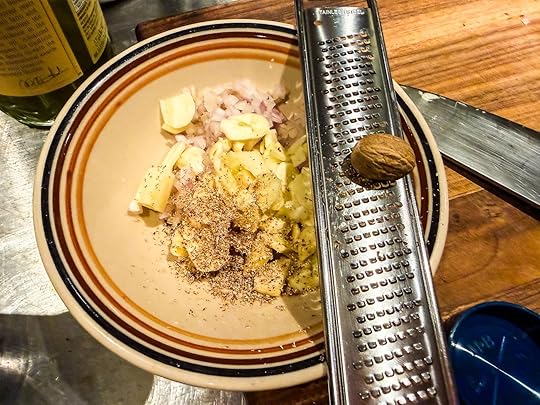
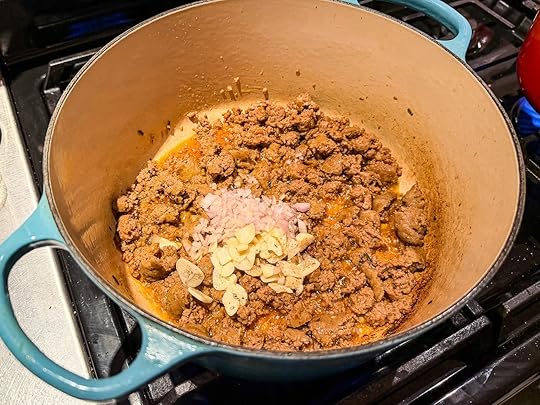
Freshly grated nutmeg is one of my favorite spices of all-time (I’m still in mourning for The Barefoot Contessa who insists on using the pre-ground stuff). It’s great in a baked good, but even more delightful in a meaty ragu. This one starts with sausage that you brown really well before adding shallots, garlic, and the aforementioned nutmeg.
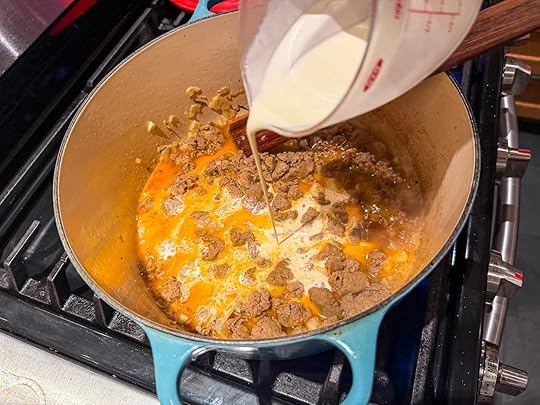
From there, you add white wine (I used an Italian one) and, gird your loins: heavy cream.
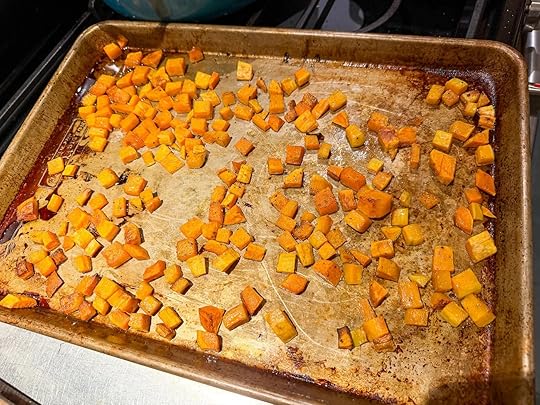
Once that cooks down, you could stop, add the pasta, and call it dinner. But Hailee has you go one step further and add squash: a diced butternut squash that you roast at 425 until golden brown.
To bring this baby together, you boil rigatoni in well-salted water and finish it in the pan with the cream sauce, adding Pecorino and pasta water, to make it extra creamy. Then you add the squash.
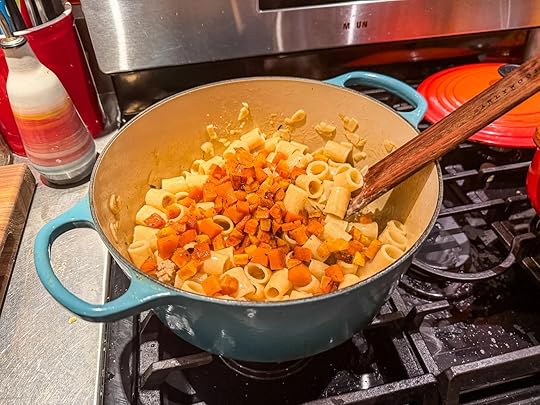
You carefully stir that in, ladle into pasta bowls, and sprinkle with more nutmeg and cheese.
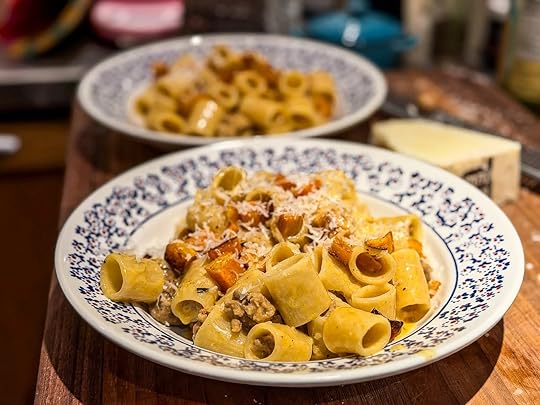
This dinner was a huge hit. Craig, who doesn’t always love a pasta for dinner, was ooh-ing and ahh-ing over it. He said, “You’re such a good cook.” I said, “It’s not me. It’s Hailee Catalano. She’s my everything!” He looked at me, confused, and went back to eating. But my best friend Hailee and I know a thing or two about making a good pasta: we’re totes going to gab about it the next time we hang.
 PrintRigatoni with Sausage and Butternut SquashA cozy combo of sausage, garlic, wine, cream, and butternut squash from Hailee Catalano's cookbook.Course Main CourseCuisine ItalianKeyword cream, pasta, sausage, squashPrep Time 30 minutes minutesCook Time 30 minutes minutesServings 4 peopleCost 30Ingredients1 small butternut squash about 24 ounces, peeled and cut into 1/2-inch cubesOlive oil for drizzlingKosher salt and freshly cracked black pepper to taste1 pound hot Italian sausage casings removed (I used sweet Italian and it worked great too)3 garlic cloves thinly sliced2 large shallots minced1/4 teaspoon freshly grated nutmeg plus more for topping3/4 cup dry white wine preferably Italian1 cup heavy cream1 pound dry mezze rigatoni1/2 cup freshly grated pecorino Romano plus more for servingInstructionsPreheat the oven to 425. On a cookie sheet, toss the squash with a liberal pour of olive oil (about 1/4 cup), salt and pepper, and spread out. Roast, tossing halfway through, until tender and caramelized but not mushy; 30 to 35 minutes (mine was done closer to 20, probably because I cut the squash a little smaller).Bring a large pot of water to a boil over high heat.Heat another large pot over medium-high heat. coat the bottom of the pan with a thin layer of olive oil. Add the sausage, and cook, breaking up the meat into bite-size chunks, until browned, 6 to 8 minutes. (The sausage won’t be fully cooked.)Reduce the heat to medium and add the garlic, shallots, and nutmeg. Cook, stirring occasionally, until the shallots are translucent and the garlic is soft, 3 to 4 minutes.Deglaze the pan with the wine, and scrape up any brown bits from the bottom of the pan. Cook until the wine is reduced by half, 1 to 2 minutes.Add the cream, bring to a simmer, and reduce the heat to very low to keep the sauce warm while the pasta cooks, about 10 minutes.Generously salt the boiling water and drop in the rigatoni. Cook according to the package directions until al dente. Lift the pasta with a spider tool into the pot with the sausage.Add a splash of pasta water and pecorino Romano to the pot, and toss to combine. Cook, adding splashes of pasta water as needed, until the sauce coats the pasta nicely, 1 or 2 minutes. (I cooked it down until all the liquid was absorbed, but that’s just me.)Turn off the heat, and gently stir in the squash. Season with salt and pepper. Serve, topped with more pecorino Romano and a small grating of fresh nutmeg.
The post Rigatoni with Sausage and Butternut Squash appeared first on Amateur Gourmet.
November 10, 2025
Raoul’s

There’s forced cool and there’s real cool. Raoul’s in SoHo, which has been around for fifty years, is the real deal. I grabbed a five PM reservation yesterday before seeing a show at The SoHo Playhouse, not really knowing much about what to expect except that Raoul’s always shows up on lists of SoHo’s best restaurants.

Walking into Raoul’s feels like entering a party you’re not sure you’re really invited to. We pushed through the throng and the hostess sat us in the front (I had a feeling the cooler people sat in the back, but that’s fine) and she said she needed the table back by seven, which reaffirmed my sense that we were welcome but not that welcome.
No matter! We soaked up the space with its quirky art on the walls, its steep spiral staircase, its vibrant bar packed two people deep.
They Have Food Here TooTo start, we shared the crab beignets which were really crab fritters padded with fresh corn:

These were undeniably good: hot, salty, filled with a nice textural mix of stuff, if not quite enough crab.
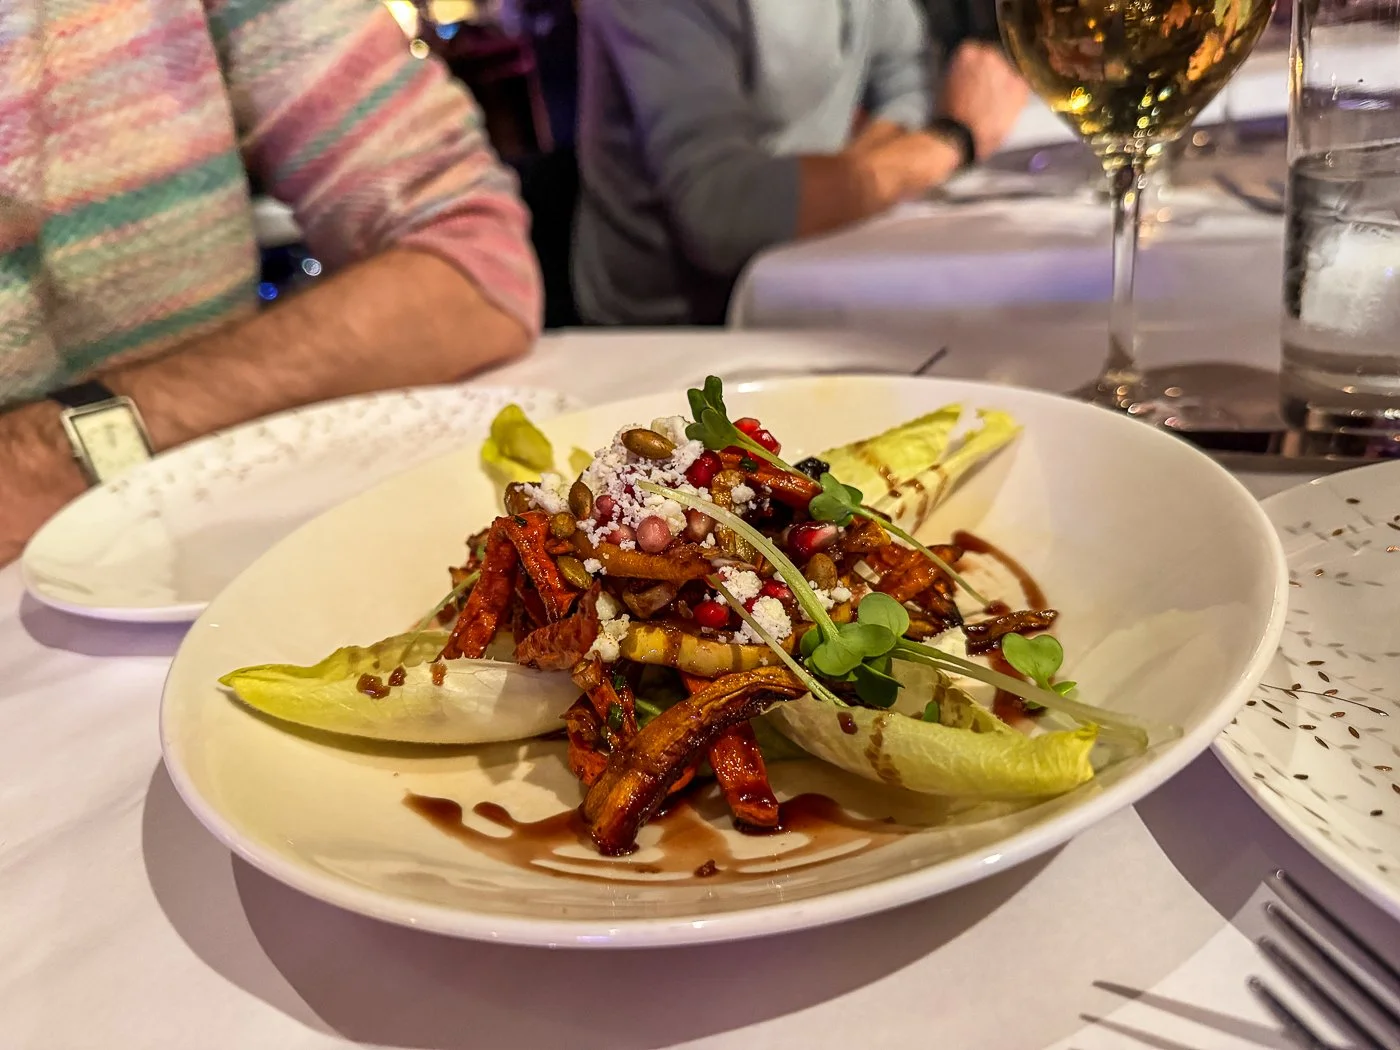
The roasted rainbow carrot salad also had a nice mix of textures. The balance of toothsome carrots, soft squash, creamy cheese, and crunchy endive made for a perfect mix.
 On to the Entrees
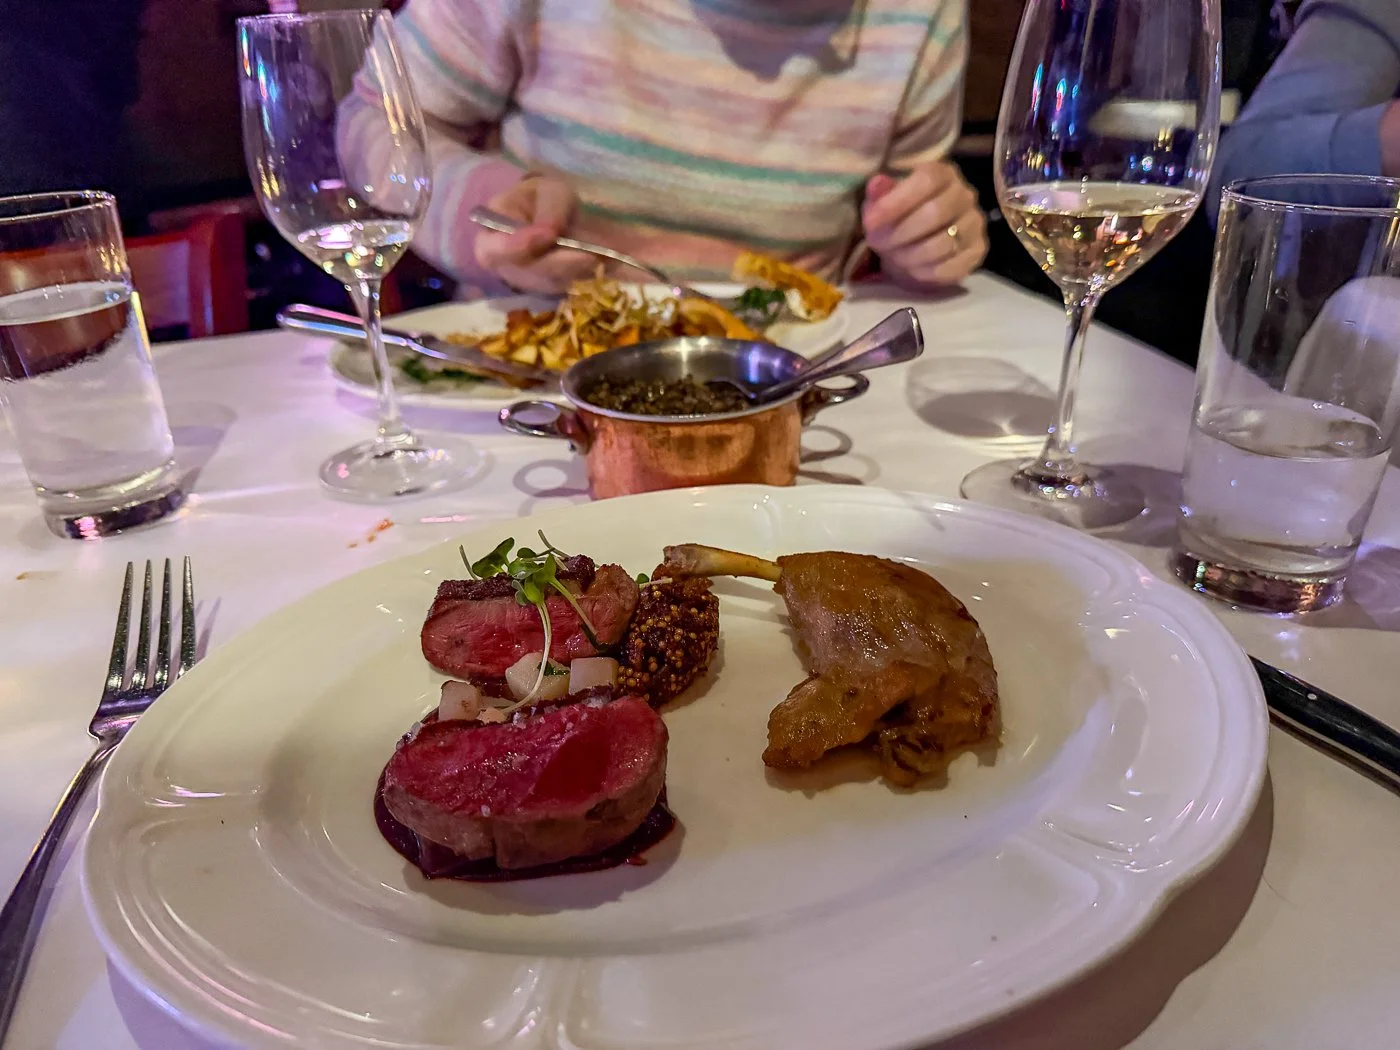
I wasn’t sure if it was a gamble to order the duck — that’s a bit of an uptown thing to order at a place that felt so downtown — but it was pretty flawless, especially with roasted pears and a house-made grainy mustard, plus lentils in their own little copper pot.
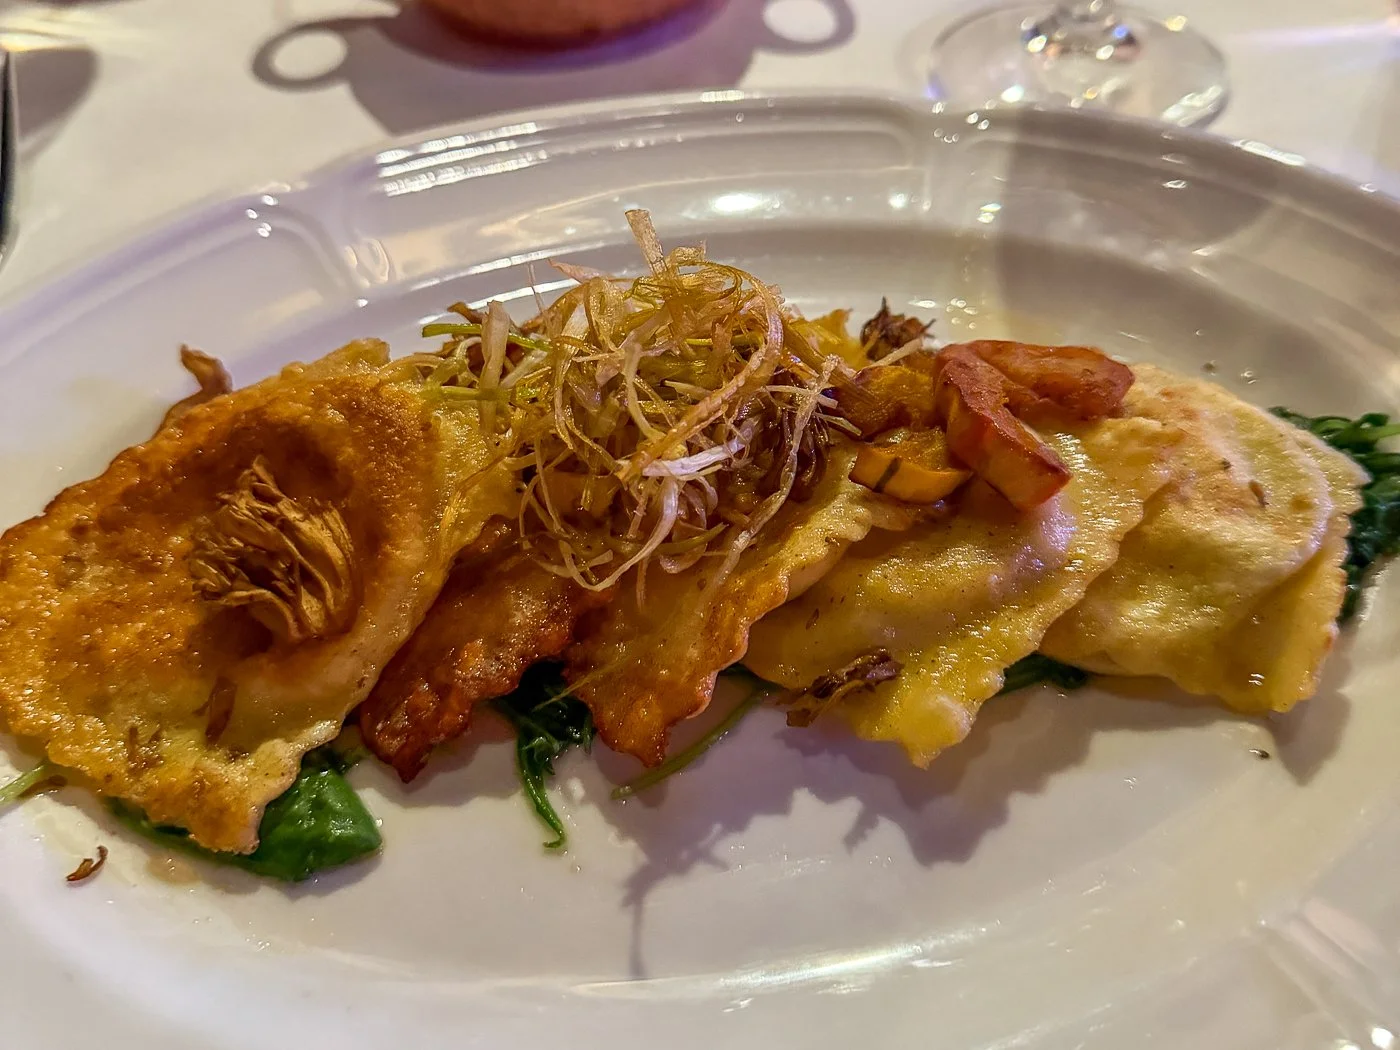
Craig had the roast goat cheese ravioli, which tasted like a crispy blintz (complimentary).
We elected not to have dessert — not because it didn’t look good, just because we had our show to get to (and our table to give back) — but we left feeling full and happy. We crashed the coolest party in town and nobody was the wiser.
Raoul’s / 180 Prince St, New York, NY 10012 / (212) 966-3518
The post Raoul’s appeared first on Amateur Gourmet.
May 18, 2023
Sassy Strawberry Sorbet
When strawberries are season (like they are now), you have a few options. Option one: eat them raw. Option two: eat them raw dipped in homemade whipped cream. Option three: Strawberry Shortcake. All of these are totally reasonable options — especially option three (which I plan to make this weekend for a friend’s birthday) — only, are they the most strawberry-forward options? Well, the raw strawberries, yes. You don’t get more strawberry-forward than a raw strawberry. Or do you? What if you blend them and perk them up with sugar, lemon juice, and a few other secret ingredients and then give them a spin in an ice cream maker? You’ll wind up with something even better than a raw strawberry. You’ll wind up with my sassy strawberry sorbet.
Start with the Sweetest Strawberries
Strawberries can be deceptive. Just because they’re red, just because they’re at the farmer’s market, doesn’t mean that they’re actually good. Your best bet is to bite into one (ask permission, if you must) and see if the strawberry sings. If it’s giving strawberry aria, you’re ready to sorbet! If not, then maybe the time isn’t right yet. In that case, make chocolate sorbet and let’s come back to this later.
Blend ‘Em Up
Don’t show David Lebovitz this picture: I’m going to get yelled at for cutting the strawberries the wrong way! You’re actually supposed to hull them. I even have the right knife for it. But some of us have children to raise (okay, I don’t) and dogs to walk (I do), so forgive me my slicing method. The point is: they go into the food processor and you blend them. It’s really not that hard.
And then you add sugar and lemon juice and blend again.
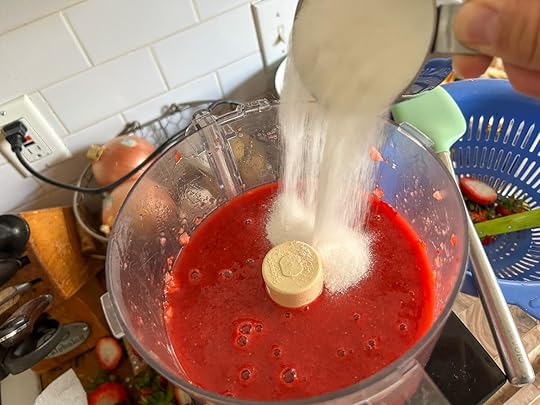
How much sugar? For two quarts of strawberries, you want one cup. Truthfully, I didn’t really measure here: I just hulled (sliced) three pints of strawberries, blended them, and added a cup of sugar and the lemon juice and tasted. It tasted good! That’s how I knew I was on to something.
Pssst… A Few Secret Ingredients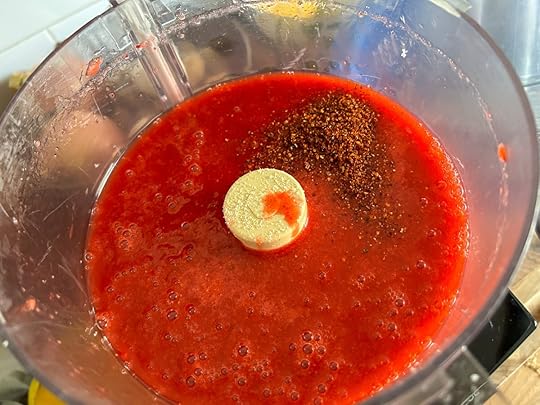
When I tasted my strawberries and sugar and lemon I liked it, but I was a little bored. So first, I did what Ina Garten might do and I added a splash of Framboise. She’s always adding Framboise to things. Framboise is a raspberry liqueur, so isn’t exactly a strawberry flavor, but it’s a berry flavor and a little alcohol in sorbet is a good thing. It keeps things soft.
Then, on a whim, I decided to add some Kashmiri chili powder and some Aleppo pepper. I liked the idea of a warming heat that takes my customer (or dinner party guest) by surprise. I added a little at first, and tasted, and then I added a little more. Basically I just stood there adding chili and tasting strawberry liquid until I was happy.
Netflix and Churn
After straining the sorbet base (make sure to press with a rubber spatula to get all the liquid through), I chilled it in the fridge for two hours and then churned. When it finished churning — see lead photo — it was pure joy to taste a little off my tasting spoon and to see how the chilies and lemon juice and Framboise all helped the strawberries pop. This sorbet was alive, baby!

When I served this at dinner that night, my friend Ryan went nuts for it. “You should sell this!” he said. “For real… people would go crazy for it.” He loved it so much that he took the rest of it home (with my permission).
So give my Sassy Strawberry Sorbet a try. As an alternative to the Kashmiri chili powder, you could add a red chili to the food processor along with the strawberries. If you do that, let me know! We’re all open to new experiences here at Sassy Strawberry Sorbet headquarters.
 PrintSassy Strawberry SorbetMy spicy spin on a traditional springtime strawberry sorbet.Course DessertCuisine AmericanKeyword chilies, frozen, lemon, sorbet, strawberriesPrep Time 2 hours hours 20 minutes minutesCook Time 30 minutes minutesServings 1 quartIngredients2 quarts strawberries, washed and hulled1 cup sugarJuice of one lemon1/2 teaspoon kosher salt1 tablespoon Framboise1 teaspoon Kashmiri chili powder, plus more to taste1 teaspoon Aleppo pepper, plus more to tasteInstructionsPlace your hulled strawberries in the bowl of a food processor and process until the whole thing is liquid and smooth. Add the sugar, half the lemon juice, and salt and blend again. Taste and add more lemon juice if it needs it.Now for the fun: add the Framboise, the Kashmiri chili powder, and Aleppo pepper. Blend and taste. Adjust for heat — if you like it sassier, go for it.Strain the mixture (I like to do it into a large measuring glass), cover, and chill for at least two hours. Then churn in your ice cream maker according to your ice cream maker instructions (at least 20 minutes; you'll know it's done when the whole thing looks like sorbet). Scoop into a quart container and freeze for a few more hours, before serving.
The post Sassy Strawberry Sorbet appeared first on The Amateur Gourmet.
May 8, 2023
Best Sticky Buns Ever
Hyperbole on a food blog? Well I never! Look: I’ve eaten many a sticky bun in my day (that sounded dirty) and the best sticky buns I’ve ever experienced were the ones that I ate in my kitchen just two days ago when I made the Sticky Sticky Buns from Joanne Chang’s essential Flour cookbook. But, to quote Reading Rainbow, don’t take my word for it. When Joanne Chang went on Beat Bobby Flay in Battle Sticky Bun, these buns went home with the trophy. They’re as much a Boston landmark as Faneuil Hall — I ate one when I visited Craig last summer. But nothing can compete with eating them warm out of your own oven. They really are the best sticky buns ever.
You Oughta Dough
There’s one hiccup to this recipe: you have to make another recipe to make it.
No, don’t click away! That other recipe — Joanne Chang’s recipe for Brioche dough — is such a pleasure to make and, if you have a KitchenAid mixer, a total piece of cake…err, brioche. If you do what I did and divide the dough in half, you can leave this experience with a loaf of professional-grade brioche (for French Toast, for grilled cheese, for croutons) PLUS a batch of the best sticky buns you’ll ever eat.

As you can see, the first step for making sticky buns is to roll out the brioche into a rectangle 16 X 12 inches wide. You might notice that my rectangle wasn’t a perfect rectangle and that was a mistake because when you roll it up, the curved in parts short-shrift that person’s sticky bun experience. You want each sticky bun to have as many layers as you can manage.
Dust It, Roll It, Slice It

If you watch a lot of The Great British Baking Show, as I do, you’ll have seen those bakers roll up a jelly roll for Paul Hollywood to ridicule. This one, though, was a pleasure to roll up. After dusting with sugar, cinnamon, and toasted chopped pecans (don’t skip toasting them! It draws out the flavor), you roll from the far end towards yourself. Because the brioche is so well developed (see brioche recipe), it’s firm and pliant and easier to deal with than a sleeping bag.
Once rolled, you slice off the ends and then slice into eight equal-sized pieces.

Isn’t that pretty? Even Paul Hollywood would shake my hand. Now let’s make goo.
For Gooey Sticky Buns, You Need Goo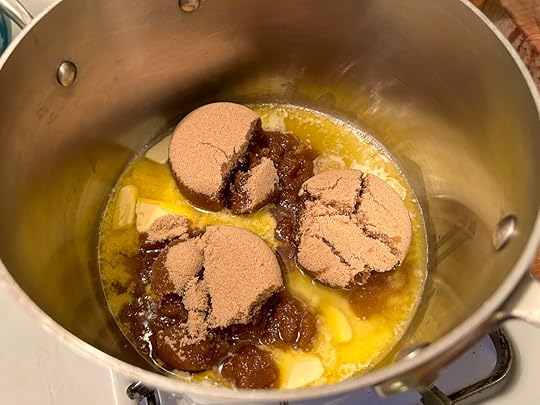
I live in a goo-oriented household. As in, if I make pasta with tomato sauce or a salad with lots of bits and I bring Craig his portion, he’ll almost always say: “Needs more goo.” Then he’ll go spoon on more tomatoes, more bits, etc. That’s why I love that Joanne Chang just comes right out and calls this stuff what it is: the goo.

You make the goo with brown sugar, butter, honey, heavy cream, water, and salt, you pour it into a 9X13 baking dish, you dust it with the rest of the pecans, and then top with your sliced up buns. I made these the night before and refrigerated so I could just bring to room temperature the next morning before baking.
Rise Up and Get Baked
That’s what the sticky buns looked like the next morning when I took them out of the refrigerator and let them rise for two hours. They’re supposed to touch, but because I cut off too much of the ends when it was a log, they weren’t equally sized.
Turns out, that didn’t matter because once I baked them for 35 minutes in a 350 oven, they baked up beautiful and golden.

If you could scratch and sniff the screen, you’d want to do that right now. These made the apartment smell so good.
Sticky Buns Ready to Go
You have to let these cool for 25 minutes and then you flip them out and spoon on all of the extra goo. Sometimes a picture just speaks for itself, so I’ll let you gaze upon these sticky buns and see if you agree that they’re the best ever. And once you’ve realized that they’re the pillowiest, stickiest, most complex and satisfying sticky buns you’re likely to encounter, you can make the recipe!
Related: Brioche for Beginners
 PrintBest Sticky Buns EverThe undisputed best sticky buns ever from Joanne Chang's Flour cookbook.Course BreadCuisine AmericanKeyword baking, breakfast, sticky bunsPrep Time 2 hours 30 minutesCook Time 35 minutesServings 8 bunsIngredientsFor the goo:3/4 cup unsalted butter (1 1/2 sticks of butter)1 1/2 cups light brown sugar1/3 cup honey1/3 cup heavy cream1/3 cup water1/4 teaspoon kosher saltFor the buns:1/2 batch Basic Brioche dough The recipe is in my post "Brioche for Beginners," linked above1/4 cup packed light brown sugar1/4 cup granulated sugar1/2 teaspoon cinnamon1 cup pecan halves, toasted and choppedInstructionsStart by making the goo. In a sauce pan, melt the butter over medium heat. Whisk in the brown sugar and cook until it dissolves. Off the heat, whisk in the honey, cream, water, and salt. Let cool for 30 minutes.On a floured work surface, roll out the dough into a rectangle about 16 by 12 inches and 1/4-inch thick. Position the rectangle so a short side is facing you.In a small bowl, stir together the brown sugar, granulated sugar, cinnamon, and half of the pecans. Sprinkle it over the entire surface of the dough. Starting from the short side farthest from you, roll up the rectangle like a jelly roll. Roll it tightly so you have a nice round spiral. Slice off 1/4 inch from both ends to even things out.Using a bench scraper or a chef's knife, cut the roll into 8 equal pieces. (I did this by cutting it in half, cutting each half in half, and then once again.) Pour the goo into a 9X13-inch baking dish, covering the bottom evenly. Sprinkle the remaining pecans over the surface. Place the buns, cut-side down and evenly spaced, in the baking dish. Cover with plastic wrap and place in a warm spot to proof for two hours, or until the dough is puffy and the buns are touching.Heat the oven to 350 degrees. Bake the buns for 35. to 45 minutes or until they're golden brown. Remove from the oven and let cool on a wire rack for 20 to 30 minutes. Using a spatula, carefully flip them out on to a serving platter one at a time. Spoon any extra goo on top. They're best right away or within 4 hours of baking.
The post Best Sticky Buns Ever appeared first on The Amateur Gourmet.
May 7, 2023
Brioche for Beginners
I’m currently listening to Julia Child’s memoir, My Life in France, on Audible. I’m embarrassed it to say that it took me this long; I suppose I thought I already knew the story because I’ve watched both Julie & Julia (multiple times) and Julia (which I really loved; I interviewed the showrunner, Daniel Goldfarb, on my podcast). But there’s something undeniable about hearing Julia tell her story in her own words. The wonderment that she felt upon arriving in France and experiencing not just the famous sole meunière but the cheeses and the sauces and the breads totally reignited my own Francophilia. And that’s why I found myself, on a Saturday afternoon, whipping up brioche from scratch like a real boulanger.
Give Your Mixer a Workout
The recipe that I used — Joanne Chang’s from her Flour cookbook — is a masterclass in specificity. At one point she says the dough should feel like “cold, clammy Play-Doh” and at another point she says it should feel like “a water balloon.” It made the brioche-making process a total cinch. The other thing that made it a cinch? My KitchenAid Mixer.
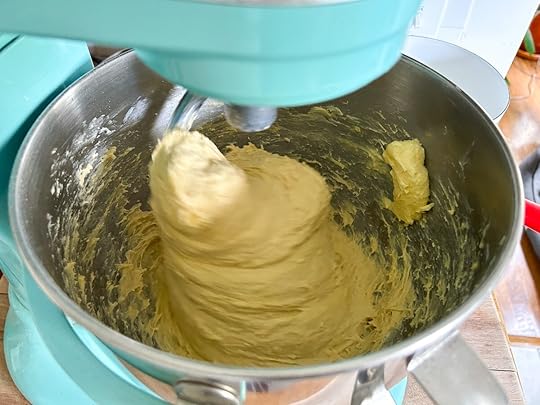
That’s the thing. If you have a KitchenAid mixer? There’s nothing to this recipe. In the bowl of the mixer, you stir together all-purpose flour, bread flour, active dry yeast, a little sugar, kosher salt, cold water, and five eggs. You let the machine work that with a dough hook for a while and then you start slowly adding 2 3/4 sticks of room temperature butter. As each little piece goes in you let the machine take its time incorporating it and then you crank up the machine and then you crank it up even more and my poor machine was so hot at the end, I felt bad for it! It was like Short Circuit, the food version.
Give Your Dough a Rest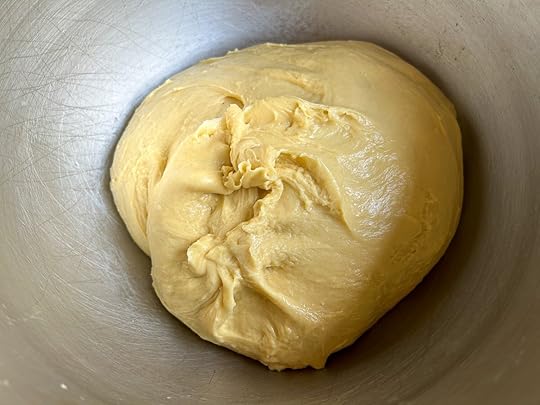
That’s what finished brioche dough looks like before you let it rise for six hours (to overnight) in the refrigerator. I went to dinner then a musical (I’m gay, what can I say) and when I came home, this is what I found waiting for me.

Look at that bulbous blob! I could just imagine Julia trilling: “Oh goody!”
As I Lay Me Down to Sleep, I Pray the Lord My Dough to Keep
Right before bed, I got to work. Because after you shape it, the dough takes another 4 to 5 hours at room temperature, I wanted a head start. So I followed the instructions to divide the dough in half (the other half went to the best sticky buns I’ve ever made; that’s my next post!), pat the dough into a square, then fold it like an envelope. I placed it crease-side down in a greased loaf pan, covered with plastic, and refrigerated overnight.
Getting a Rise Out of You
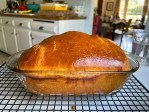
Then, this morning I took it out of the fridge and let it come to room temperature for a few hours while I went to the farmer’s market, worked the Sunday Times crossword puzzle (Ship of Theseus), and by the time the dough reached the top of the pan, I brushed it with egg and baked it in a 350 oven for 35 minutes. And look at this beauty.
My Big Bad Beautiful Brioche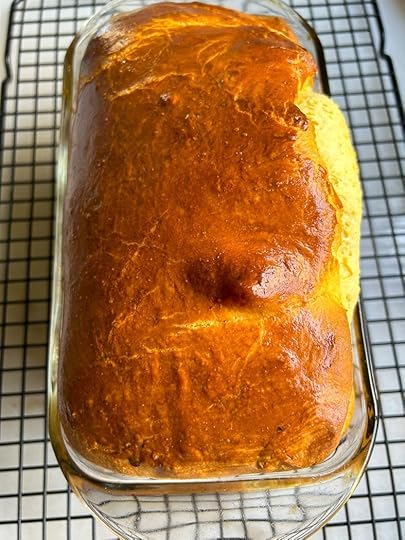
I’m so proud of my first brioche and I have such big plans for it! Grilled cheese one day (with Gruyere and caramelized onions and mustard), French Toast the next, and maybe just a slice as a treat.

Turns out making your own brioche isn’t just easy, it’s a total joy. I can’t wait to do it again. Bon Appetit!
 PrintBrioche for BeginnersA foolproof recipe for brioche from Joanne Chang's Flour cookbook.Course BreadCuisine FrenchKeyword bread-making,, brioche, French, Joanne ChangPrep Time 13 hoursCook Time 35 minutesIngredients2 1/4 cups unbleached all-purpose flour (315 grams) I used a scale to measure the ingredients… much more accurate! 2 1/4 cups bread flour (340 grams)1 1/2 packages active dry yeast1/3 cup plus 1 tablespoon sugar (82 grams)1 tablespoon kosher salt1/2 cup cold water (120 grams)6 large eggs1 cup plus 6 tablespoons unsalted butter at room temperature, cut into 10 to 12 pieces (310 grams) That's 2 + 3/4 sticksInstructionsPlace your dough hook in your stand mixer (you're really going to need a stand mixer for this) and combine the all-purpose flour, bread flour, yeast, sugar, salt, water, and 5 of the eggs. Beat on low speed for 3 to 4 minutes, or until all of the ingredients have come together. Every so often stop and scrape down the sides of the bowl. Once the dough has come together, beat on low speed for another 3 to 4 minutes. The dough will be stiff and seem quite dry. On low speed, add the butter one piece at a time, taking your time to let the butter disappear after each addition. Continue until you've used up all the butter and then keep mixing on low speed for about 10 minutes, scraping the bowl as necessary. Your goal: get all of the butter incorporated into that dough, even if you have to use your hands.Once the butter's completely incorporated, turn up the speed to medium and beat for another 15 minutes, or until the dough becomes sticky, soft, and somewhat shiny. It will take some time to come together. (It may look shaggy at first, but will turn smooth and silky eventually.) After that, turn the speed up to medium-high and beat for 1 minute. The dough should make slapping sounds against the side of the bowl. If it seems wet and loose, add a few tablespoons of flour and mix until it comes together. It's ready when you can gather it all together and pick it up in one piece.Place in a large bowl or plastic container and cover it with plastic wrap, pressing the wrap directly on top of the dough. Let the dough proof in the refrigerator for at least 6 hours or overnight. Remove the dough from the fridge and divide it in half. If you want to use half to make sticky buns, pop that half back in the bowl and refrigerate until you're ready. Otherwise, line two 9-by-5-inch loaf pans with parchment or just spray them with cooking spray (that's what I did). Press the dough into a 9-inch square (it'll feel like "cold, clammy Play-Doh"). Facing the square, fold down the top one-third toward you, and then fold up the bottom one-third, as if folding a letter. Press to join these layers. Turn the folded dough over and place it, seam-side down, in one of the prepared pans. Repeat with the second piece of dough, if you're doing two.Cover lightly with plastic and place in a warm spot to proof for 4 to 5 hours, or until the loaves have nearly doubled in size. They should have risen to the rim of the pan and be rounded on top. Position a rack in the center of the oven and heat to 350 degrees F.In a small bowl, whisk the remaining egg until blended. Gently brush the tops of the loaves with the beaten egg.Bake for 35 to 45 minutes, or until the tops and sides of the loaves are completely golden brown. Let cool in the pans on wire racks for 30 minutes, then turn the loaves out of the pans and continue to cool on the racks. The bread can be stored tightly wrapped in plastic wrap at room temperature for up to 3 days or in the freezer for up to one month.
 The post Brioche for Beginners appeared first on The Amateur Gourmet.
May 3, 2023
Seared Scallops on Sugar Snap Cacio e Pepe
There are certain culinary rules that people memorize like they’re gospel, even though they’re not really rules and those who adhere to them are doing it more out of fear than logic. Case in point: cheese and fish. “In Italy, you never put cheese on fish!” No less an authority than Lidia Bastianich has disproven this on her show where she explains traditions regarding fish and cheese have more to do with geography than gastronomy. (Don’t believe me? Here’s her recipe for a seafood gratin.) Generally, I never put cheese on fish because fish is so delicate. But every so often, if there’s seafood involved with a pasta, I may sprinkle on a little Parmesan. And thus this recipe for seared scallops with sugar snap cacio e pepe was born.
It’s Not Really a Cacio e Pepe

Since I’m already in trouble with the cheese and fish thing, I won’t fall on another sword: this isn’t a textbook cacio e pepe.
For that, I highly recommend this Mark Ladner recipe where you toast the peppercorns in a dry skillet, add pasta cooking water, then thicken it with butter before adding the pasta and then the cheese.
Here, I had some gorgeous sugar snap peas and after stringing them and cutting them in half on the diagonal, I sautéed them in olive oil with lots of garlic, then stopped the cooking with pasta water. To finish, I added a knob of butter, a bunch of black pepper, and a handful of grated Parmesan (off the heat). Just by itself, it was sublime. But I knew a way to make it even better.
Seared Scallops for Serious Scallop Searers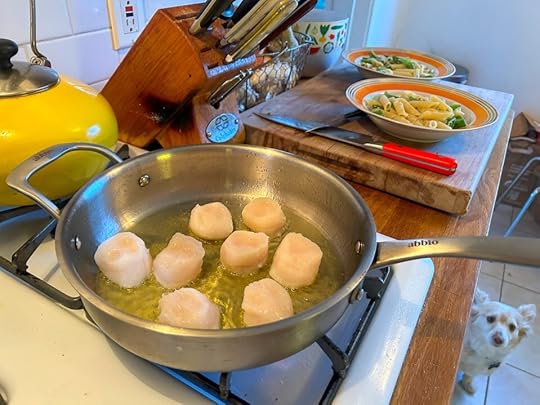
There’s only one way to sear a scallop and that’s this: don’t move it.
DON’T. MOVE. IT.
I’m not joking. Buy dry-packed scallops (they shouldn’t be sitting in liquid), pat them with paper towels, and season with salt and pepper. Then in a skillet wide enough to hold them all in a single layer, heat a layer of olive oil until very hot. Then carefully add your scallops and walk away. Go do a dish or two. Text your mother back. When you’ve walked away for at least a minute, come back and grab a spoon. If you can flip a scallop over with a spoon without having to tug, you’ve done a good job.
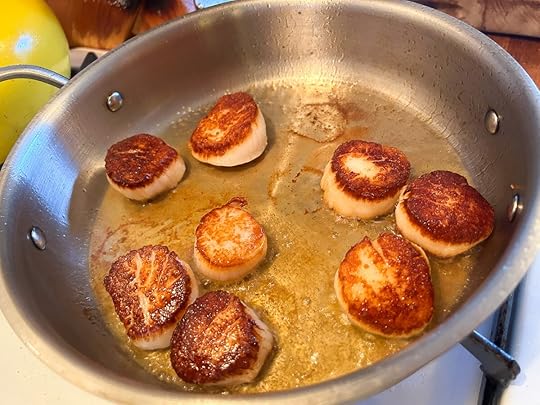
I mean, can you imagine more perfectly seared scallops than these? I can’t! On the other side, just cook until opaque (another 15 seconds or so). And that’s that.
Plate it Up, Heather
To serve, it’s as simple as this. Spoon the pasta into bowls, top the bowls with the scallops, and squeeze some lemon juice on top. Grind some pepper and, if you must, dust with more Parmesan. Did I do that? No I didn’t. You have to draw the line somewhere.
 PrintSeared Scallops on Sugar Snap Cacio e PepeA springy pasta dish with seafood that breaks a few rules along the way.Course Main CourseCuisine ItalianKeyword pasta, scallopsPrep Time 30 minutesCook Time 26 minutesServings 2 peopleIngredientsKosher salt1/2 pound penne or spaghetti or any other pasta you like1/2 cup extra-virgin olive oil, divided4 cloves garlic, thinly slicedRed chili flakes1/2 pound sugar snap peas, strings removed, sliced in half on the diagonal2 tablespoons butter, salted or unsalted, doesn't matterFreshly ground black pepper1/2 cup freshly grated Parmesan cheese8 dry-packed scallops, patted dryFreshly squeezed lemon juiceInstructionsBring a large pot of water to a boil and season with salt. It should taste like good soup, but not so salty that it tastes like the ocean. About a few tablespoons, depending on how much water.Drop your pasta into the water and at the same time, pour 1/4 cup of olive oil into a skillet. Add the garlic and toast on medium heat just until the garlic starts to take on a little color. Add a pinch of red chili flakes, then all of the sugar snaps. Toss all around until thoroughly coated and starting to soften a little. Then add a ladleful of pasta cooking water and allow to simmer and reduce as the pasta continues to cook. Lower the heat if too much evaporates. When the pasta is cooked to your liking (see package instructions), lift it with a spider tool into the pan with the sugar snap peas and toss all around. Add the butter and black pepper and continue tossing until thoroughly coated. Off the heat, add the Parmesan cheese and stir aggressively until well incorporated. Taste for seasoning and set aside.In a large skillet (cast iron, metal, even non-stick will work), heat the remaining 1/4 cup of olive oil until very hot. Meanwhile season the scallops with salt and pepper and then add them, flat side down, in one layer. They should sizzle immediately upon hitting the skillet. Don't move them — leave them alone! — until you can see they're golden brown on the bottom. Using a spoon see if you can detach the scallop without having to tug. If it flips over by itself, it's ready. Flip all the scallops that way and cook on the other side just until the scallop is no longer translucent, about 15 seconds.Spoon the pasta into bowls and top with the scallops. Squeeze lemon juice on top and add more pepper, if you like. Serve right away.
The post Seared Scallops on Sugar Snap Cacio e Pepe appeared first on The Amateur Gourmet.
May 2, 2023
Chicken and Rapini Stir-Fry
Some people collect matchbooks from restaurants, others dinner napkins. Me? I collect cookbooks from the restaurants I’ve been to. On my shelf, you’ll find a Spanish language version of the El Bulli cookbook we collected on our trip there. There are cookbooks from Prune, St. John, Mozza, Lucques, and so many others, too many to list here. One that I bought last summer was the Myers + Chang At Home Cookbook which I bought after our terrific dinner at Myers + Chang in Boston. Not only is a restaurant cookbook a great reminder of your dinner there, it’s full of recipes that’ll conjure up that meal through similar flavors, textures, smells. Like this chicken and rapini stir-fry.
She Used an Itsy-Bitsy Teeny-Weeny Head of Bitter Green Rapini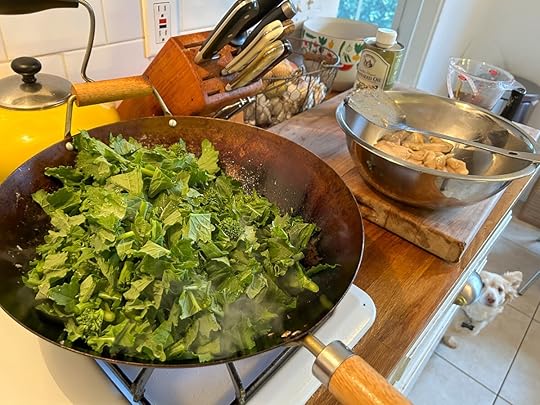
What I loved about our meal at Myers & Chang was the everything was familiar yet different at the same time. Like the scallion pancakes. I couldn’t get them out of my mind, they were so good, but they didn’t taste like any scallion pancakes I’d had before. Then I found a video of Chef Joanne Chang making them and the secret was… they’re made from pizza dough. Isn’t that wild? Everything was like that. The carrot cake was so good, I don’t even have words.
But we’re here to talk about the recipe that I just made from the Myers + Chang cookbook. Chicken and rapini stir-fry. What’s rapini? It’s like broccoli but a lot more bitter; like your hippie uncle who spent a year in Afghanistan handing out flours and came back angry and broken. Wow, that was dark.

Instead of your typical beef and broccoli or chicken and broccoli stir-fry, Myers + Chang utilize rapini’s bitterness to create more balance in the dish. Plus there’s Napa cabbage in there too for a little extra crunch and sweetness.
The Chicken Part of the Chicken and Rapini Stir-Fry
Now the original recipe asks you to do something cheffy. It asks you to “velvet” the chicken by coating it in Chinese wine, corn starch, and egg white and then deep-frying it in two cups of oil.
That seemed like a lot for a Monday night, so I coated the chicken breast pieces in Mirin (that was all I had) and corn starch, left out the egg white, and instead of deep-frying, I just sautéed the chicken in a wok the way I normally would. And somehow, it still worked. The marinade made the chicken breast super tender. And I took it out just when it turned opaque. Nothing worse than a dry chicken breast.
Let’s Talk Stir-Fry Sauce
I have some excellent condiments in my fridge (so many, the middle shelf broke and needs to be replaced). The Momofuku Soy Sauce I couldn’t resist when I was ordering things from Good Eggs. And the oyster sauce that was recommended by Ruth Reichl in her newsletter.
The only annoying thing here is you have to mix it together and then cook it before you add it to the wok, dirtying another pot. Do you really need to do that? Between you and me, maybe not. But the resulting sauce is glossy and unctuous (world’s worst food word) and gives you all of that glazed, umami you want in a stir-fry.

As it cooks down, it coats everything but enough still remains to pour over your rice.
Let’s Doctor Our Bowl, Doctor
I served this over brown rice which I cooked in my rice cooker (it took forever; literally ninety minutes!). I topped it with cilantro and Momofuku Chili Crunch, also on Good Eggs (no they’re not sponsoring this post). Be careful with that stuff; I ate it while we watched The Real Housewives of New Jersey and my mouth was so on fire, I almost toppled over a table.
But this was such a good dinner and a great justification for buying restaurant cookbooks as souvenirs. Now who wants to make me the carrot cake?
 PrintChicken and Rapini Stir-FryA robust and satisfying stir-fry of chicken and rapini from the Myers + Chang cookbook.Course Main CourseCuisine ChineseKeyword chicken breast, rapini, stir-fryPrep Time 30 minutesCook Time 4 minutesServings 4IngredientsFor the Chicken Stir-Fry Sauce:1 tablespoon cornstarch1/4 cup oyster sauce1/4 cup low-sodium soy sauce1/4 cup basic chicken stock I used water and it was fineFor the chicken and rapini stir-fry:1 tablespoon cornstarch1 tablespoon Shaoxing cooking wine or dry sherry or dry white wine1 pound boneless, skinless chicken breast, cut thinly into 2 X 1/4-inch strips1/4 cup vegetable oil1 pound rapini, trimmed and cut into 2-inch pieces The bottom of the rapini is really tough so I just discard it, though some people shave it down2 cups thinly sliced Napa cabbage1 teaspoon freshly ground black pepper1 teaspoon red pepper flakes1 teaspoon chili oil1 cup fresh cilantro leavesCooked brown rice or white rice InstructionsFor the Chicken Stir-Fry Sauce:In a small bowl, whisk together the cornstarch and 4 tablespoons cold water with a fork until smooth. Set aside.In a medium saucepan, bring the oysters sauce, soy sauce, and stock to a boil over medium-high heat. Whisk in the cornstarch slurry until the sauce thickens and becomes shiny, 3 to 4 minutes. Set the sauce aside.For the stir-fry:In a medium bowl, stir together the corn starch and the Shaoxing wine. Add the chicken strips and use your hands to coat the chicken thoroughly in the mixture. Marinate for at least 30 minutes. Heat a wok over high heat until very hot. Swirl in the 2 tablespoons of the oil, coating the sides of the wok, and then add your chicken (leave any residual liquid behind). Stir-fry the chicken until it goes from pink to white and immediately remove the chicken to a plate. It'll cook again later.Swirl in another 2 tablespoons of vegetable oil and carefully add the rapini (if it's at all wet, it'll crackle and spurt). Stir for 1 minute to coat with the oil. Add 1/2 cup water to the wok and cover. Cook for about 5 minutes until the rapini is wilted and no longer raw and bitter tasting.Add the napa cabbage and season with the black pepper, red pepper flakes, and chili oil. Stir a few times and return the chicken to the wok. Stir for 2 minutes.Add the Chicken Stir-Fry Sauce and toss until the chicken and rapini are nicely covered in sauce and the chicken is cooked through, 3 to 4 minutes more. Add cilantro and toss one last time. Divide the stir-fry among four bowls and serve with rice.
The post Chicken and Rapini Stir-Fry appeared first on The Amateur Gourmet.
April 30, 2023
Reverse-Seared Ribeyes
Remember that scene in Mary Poppins where they all go up the chimney and come out all sooty? That’s what my dinner guests usually look like when I cook steak. The whole kitchen fills up with black clouds as I sear the meat in a large cast-iron skillet, flipping and continuing to cook while frantically taking the temperature to make sure I stop in time to hit medium-rare. Sometimes I get it right on the first go; other times, I serve the steak and somebody politely says: “Ummm, sorry, but is it supposed to be blue inside?” That all changed this past Saturday when I cooked my usual steakhouse dinner for our friends Marcos and John, only this time the kitchen wasn’t full of smoke and the steaks came out absolutely perfect. The secret? Reverse-seared ribeyes.
The Easiest Steak Cookery You Will Ever Do
Do you see the image above? That’s the extent of what you have to do to reverse sear. There’s no stock pot where you mimic a sous vide, no vacuum sealer that you have to pack the meat into. You just line a sheet pan with foil (you don’t even need to do that, it just makes clean up easier), place a rack on top, and then place two ribeyes on top. They should be at least an inch thick — these were about 1.4″. Season all over with salt and pepper (be generous… that’s a lot of meat to season). Then wait for them to come to room temperature, about 30 minutes.
Preheat the oven to 250 and then insert your sheet tray and cook for 20 to 25 minutes until a thermometer reads 115 (that’s for medium rare, which is what you want) when inserted into the thickest parts of the steak. That’s it. To reiterate: put meat on a rack, season the meat, put it in a 250 oven, cook 25 minutes until it’s 115 in the thickest parts. Now you just have to sear it.
Searing the Reverse-Sear Ribeyes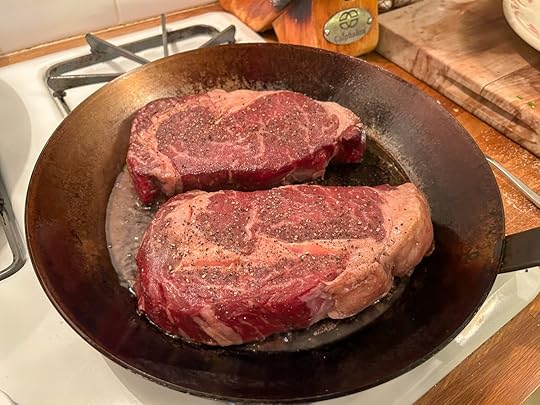
For this step, get out your largest cast iron skillet or carbon steel skillet (that’s what I have here) and heat on high heat until super hot. Add a splash of vegetable oil and then lay in your ribeyes directly from the oven. They should immediately sizzle.
Your goal here is just to get color on the outside. The steaks are basically cooked; you just want to cook on one side until golden, flip, and then keep cooking until you get to an internal temperature of 130 for medium-rare (140 for medium). Once that happens, you immediately remove the steak and slice into it, against the grain. No need to rest it!

Look at that color. Can you even? Ribeye doesn’t get much better than that!
Serving Up Your Ribeyes
I like to make a green salsa verde / chimichurri kind of thing by chopping a bunch of parsley, two cloves of garlic, and some pickled red chilies until very very finely minced. Then I stir that together with lemon zest, lemon juice, and enough olive oil to make a thick paste.
To serve up the steaks, I lifted some slices on to each plate and then topped each portion with the green sauce.
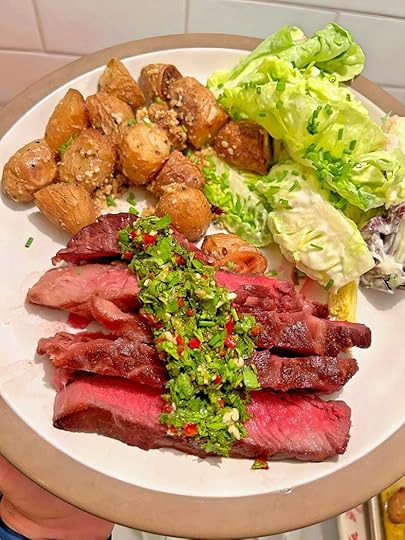
As for the other stuff: that’s a little gem salad with homemade Roquefort dressing and roasted fingerling potatoes with Parmesan. Our dinner guests were very happy indeed!

Now that I’ve reverse-seared ribeyes, I’m never looking back. No more clouds of smoke, no more questionable doneness. Chim-chiminee indeed.
 PrintReverse-Seared RibeyesA technique for getting perfectly cooked ribeye steaks every time.Prep Time 5 minutesCook Time 35 minutesServings 4 peopleIngredientsFor the ribeyes:2 large ribeyes, around 1 pound each, at least 1" thickKosher saltFreshly ground black pepperFor the green herb sauce:1 bunch Italian flat-leaf parsley2 cloves garlic, peeled and sliced2 pickled red chilies or one fresh red chili 1 lemon1/2 cup extra-virgin olive oilTo finish the steaks:Vegetable oilInstructionsPreheat the oven to 250. Place a wire rack on top of a foil-lined cookie sheet. Place the ribeyes on top, pat dry with paper towels, then season generously with kosher salt and pepper (rain it down like a chef!). Let sit for 20 to 30 minutes to come to room temperature.Insert the sheet pan into the oven and cook for 20 to 25 minutes until a thermometer inserted into the thickest part reads 115 for medium-rare (for medium, shoot for 125).While the steaks are cooking, make your green sauce. Roughly scrape the leaves off the parsley stems (it's okay if a few stems get in there). Lay them on a cutting board and place the garlic and chilies on top. Using your sharpest knife chop chop chop and keep chopping — it'll take a few minutes — until everything is finely minced. Add the mixture to a bowl and zest the lemon over it, add the lemon juice, add a pinch of salt, and then stir in the olive oil until it's pasty but not so thick it won't spill off a spoon. Set aside.When the ribeyes reach the right temperature, heat a large cast iron skillet or carbon steel skillet on high heat until you can't hold your hand near it without it getting too hot, then add a splash of vegetable oil. Lay in your ribeyes straight from the oven and let them sear on the first side without moving them for 30 seconds to a minute. When they detach easily and are golden brown, flip them over and finish on the second side until a thermometer reads 130 for medium-rare and/or 140 for medium.Immediately slice the ribeyes against the grain, place on to a platter, and spoon the sauce on top. Serve right away.
The post Reverse-Seared Ribeyes appeared first on The Amateur Gourmet.
April 26, 2023
Spicy Merguez with Spinach and Borlotti Beans
Every so often you encounter a recipe that grabs you by the throat and won’t let go. That was the case when I was thumbing through an old book in my collection: Daniel Boulud’s Braise, which he co-wrote with Melissa Clark back in 2013. This is one of those books that’ve survived many a cookbook cut because (a) braising is my favorite cooking technique (so much reward for such little effort); and (b) the recipes in it are fascinating. Like this recipe for Spicy Merguez with Spinach and Beans. It’s not that shocking to imagine lamb sausage, spinach, and beans together; but the technique is what left me shooketh.
I’m Strong to the Finich, ‘Cause I Eats Me Spinach
This recipe calls for four pounds of spinach. To put that into perspective, that image you see above? That’s two pounds of spinach. The idea of buying eight giant plastic containers of spinach was too much, even for me, so I decided to halve the greenery.

As anyone who’s worked in the Spinach Department before knows, even two pounds of spinach cooks down to almost nothing. What’s odd about this recipe, and what made me sit up and pay attention, is that you just cook the spinach by itself in olive oil. And then, once it’s wilted and released all its liquid and starting to brown, you add the aromatics.
Bring on the Flavah!
As you can see, Daniel Boulud has many tools in his arsenal to spice up your spinach. For starters: harissa. Then a ton of garlic, onions, cilantro, mint (I couldn’t find the mint I bought and by the time I did, it was too late), and Four-Spice powder which I mimicked using small spoonfuls of ground ginger, grated nutmeg, a pinch of cloves, and lots of black pepper.

Again: that all goes in once the spinach is wilted. The recipe doesn’t say to, but I seasoned things as I went because I’m almost positive that’s what a four-star chef like Daniel Boulud does too. (Though maybe he doesn’t have you season because of the theory that salt inhibits the cookery of beans? But that’s been disproven.)
Beans, Beans, The Special Beans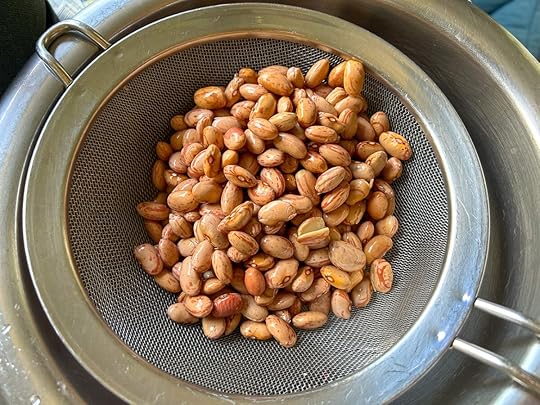
As dedicated readers may recall, I recently ordered Borlotti Beans from Italy as part of a package that I bought from Gustiamo (it led to this article about pistachios for Food52). This recipe calls for dried cannellini beans or dried black eyed peas, but knowing that the cook time was in the same ballpark, I soaked the borlottis (which are also known as cranberry beans) overnight and then added them to the mix, along with four cups of water and a good pinch of salt.
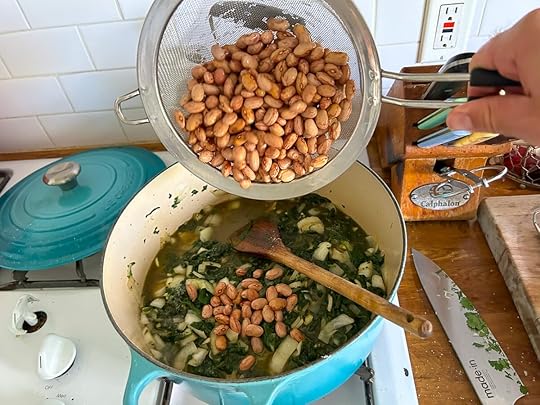
I think it’s important to use soaked dried beans here because canned beans will disintegrate with all of the cooking this is about to do. This goes into the oven, lid on, for two hours.
Bring on the Meat, Or Don’t
Two hours later you have something pretty extraordinary. All of those aromatics that you added after the spinach, instead of sautéing them first, infuse into the liquid which infuses into the spinach and the beans, creating a harmonious whole that’s greater than the sum of its parts. I checked things about halfway through the cooking and saw a lot of liquid in there, so for the remainder I braised with the lid a bit off so things would thicken up a bit.
At this point, you could serve this as a vegetarian side dish or even a main with some rice and cheese. For the carnivores, though, things are about to get meaty. Bring on the merguez!

As you can see, the process here is pretty simple. You sear the merguez (spicy lamb sausage) in a skillet and when it’s brown all over, you lay it on top of the spinach (which you stir a little lemon juice into first), before putting the lid back on and returning it to the oven for thirty more minutes.
A One-Pot Dinner — Except for That Skillet You Seared the Sausages In — But Otherwise It’s a One-Pot Dinner
What I love about this dish is that it transcends seasons. Yes, we eat a lot of lamb in the spring; true, spinach is also something that emerges as it gets warmer out. But because these ingredients are available year-round, you can honestly make this on a cold winter’s night or a rainy summer’s eve, it doesn’t matter.
And believe me when I tell you: it’s so good. The spinach pops with vibrant flavors, the beans are succulent from their two hour braise, and the lamb marries beautifully with the harissa and lemon. See? Thumbing through old cookbooks is a perfectly good use of your time. Now tell that to my husband who wants me to get rid of half of them before we move!
 PrintSpicy Merguez with Spinach and Borlotti BeansA thrilling recipe from Daniel Boulud's cookbook Braise: A Journey Through International Cuisine.Course Main CourseCuisine FrenchKeyword garlic, harissa, lemon, merguez, spinachPrep Time 30 minutesCook Time 3 hoursServings 4 peopleIngredients1/4 cup extra-virgin olive oil, plus 1 tablespoon2 pounds baby spinach, washed and dried The original recipe calls for four pounds of regular spinach, stems removed, but two pounds of baby spinach worked great.Kosher salt2 medium onions, peeled and cut into small cubes6 garlic cloves, peeled and finely chopped2 tablespoons chopped fresh mint leaves2 tablespoons chopped fresh cilantro1 tablespoon harissa I used a harissa paste from a tube.1 teaspoon freshly ground black pepper1/2 teaspoon four-spice powder I just added small amounts of ground cloves, ground ginger, and freshly grated nutmeg to supplement.1/2 pound dried borlotti beans, cannellini beans, or black-eyed peas, soaked overnight in cold water and drained2 pounds merguez sausage1/4 cup freshly squeezed lemon juiceInstructionsCenter a rack in the oven and preheat the oven to 300 degrees F.Heat 1/4 cup of the olive oil in a wide Dutch oven over high heat. Add the spinach, little by little (seasoning with salt every so often), and cook, stirring continuously, until all the spinach has wilted and browned slightly and all the liquid has evaporated, 20 to 30 minutes. Add the onions, garlic, mint, cilantro, harissa, black pepper, and Four-Spice Powder and cook, with a pinch of salt, stirring, for 5 minutes.Pour in 4 cups water and add the beans or black-eyed peas. Add another big pinch of salt, stir, bring to a simmer, and cover. Braise in the oven for 2 hours or until the beans are nearly tender.When the spinach is done and tasting good, heat the remaining 1 tablespoon olive oil in a medium skillet over medium heat. Sear the merguez on all sides until golden brown. Stir the lemon juice into the beans and spinach and place the seared merguez on top. Cover and continue to braise until the beans are tender and the sausage is cooked through, about 30 minutes more. Season with salt to taste.NotesAs I mentioned in the post, I found the spinach and beans were a bit too liquidy after an hour of braising, so I took the lid half off in order for some of the liquid to evaporate. Keep your eye on it as it goes. You don’t want soup here, but you also don’t want a solid mass of spinach and beans.
The post Spicy Merguez with Spinach and Borlotti Beans appeared first on The Amateur Gourmet.
Adam D. Roberts's Blog

- Adam D. Roberts's profile
- 3 followers

