
Conor Jordan's Blog, page 6
January 19, 2021
Mathematical Functions in Excel

Mathematical functions allow you to perform a variety of calculations in Excel including RoundDown, RoundUp and Sumif. These functions make calculating data contained within a worksheet easier and more efficient.
RoundDown
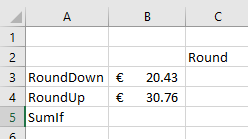
1. Create the following table:
2. Select cell C3
3. On the Formulas tab in the Function Library group, select Math & Trig
4. Select RoundDown

5. For the Number text box, select B3
6. For the Num_digits text box, type in 0
7. Click OK
The number has been rounded down to the nearest Euro
RoundUp
1. Select cell C3
2. On the Formulas tab in the Function Library group, select Math & Trig
3. Select RoundUp
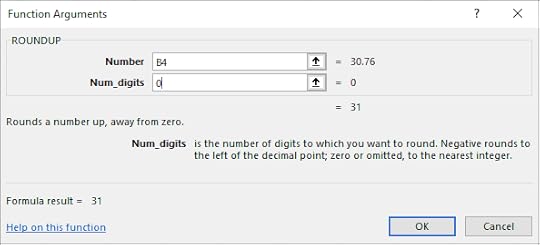
4. In the Number text box, select B4
5. In the Num_digits text box, type in 0
6. Click OK
The number was rounded up to the nearest Euro
SumIf
1. Select cell B5
2. On the Formulas tab in the Function Library group, select Math & Trig
3. Select SumIf
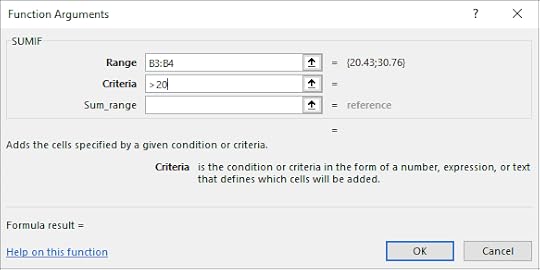
4. Select B3 and B4 for the Range
5. Type in >20 for the Criteria text box
6. Click OK
7. The selected cells were only calculated if they were above 20 Euro
8. Save the workbook as “Maths”
For further information about Advanced Excel click the link below:


January 11, 2021
Background Audio using PowerPoint

Audio files can be played in the background while a presentation is being given. This is a useful feature that allows speakers to have audio play while they are giving a presentation.
1. Open a slideshow
2. Insert an audio file
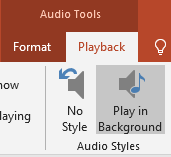
3. On the Audio Tools – Playback tab in the Audio Styles group, select Play in Background
4. Preview the slideshow, the audio will play in the background
5. In the Editing group click on Trim Audio
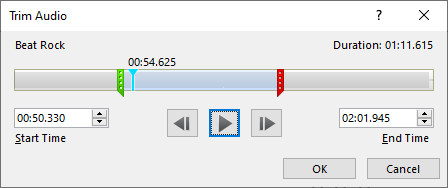
6. Click and drag the Green and Red lines to change the Start and End time of the recording
7. This can be adjusted to suit the length of the presentation
8. Click OK
9. Save the slideshow
For more Advanced PowerPoint tips check out the link below:
Text Functions in Excel

Text functions allows users to extract pieces of text from selected cells, neaten the appearance of text in cells and bring together text from separate cells. The function Left extracts the left part of text within a cell depending on the number of characters the user specifies. The Right function extracts text in the left part of a cell depending on input. The Mid function extracts a set number of characters from the middle of a cell.
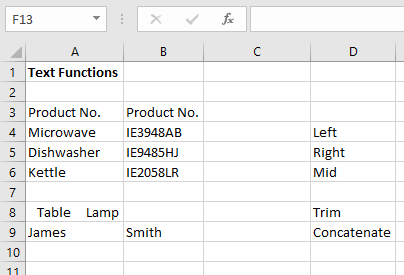
1. Enter the following table:
2. Select cell C4
3. On the Formulas tab in the Function Library group, select Text
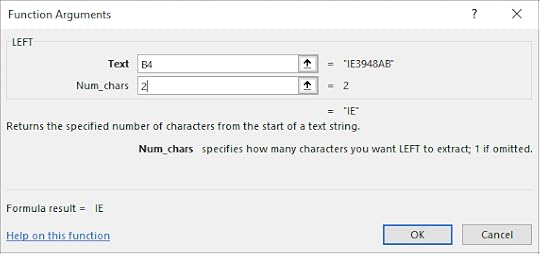
4. Select Left
5. Select B4 for the Text textbox
6. For Num_chars type in 2
7. Click OK
8. This returns the first 2 letters of the Product Number
9. Select cell C5
10. On the Formulas tab in the Function Library group, select Text
11. Select Right
12. In the Text textbox select cell B5
13. For Num_chars type in 2
14. Click OK
15. This displays the last 2 letters of the Product Number
16. Select cell C6
17. On the Formulas tab in the Function Library group, select Text
18. Select Mid
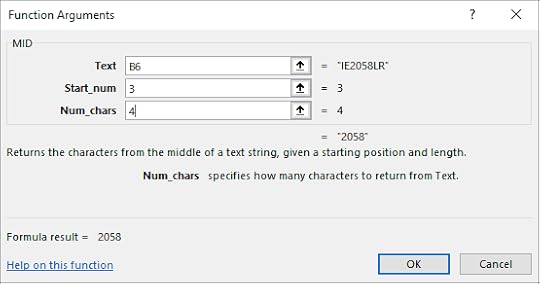
19. Select cell B6 for the Text textbox
20. Type in 3 for the Start_num
21. Type in 4 for the Num_chars
22. Click OK
23. This has displayed the 4 numbers in the middle that started at the 3rd number
TrimThe Trim function can remove the spaces between text within a cell. This makes the appearance of text in a cell much clearer and is useful for neatening a range of cells in a worksheet.
1. Select cell C8
2. On the Formulas tab in the Function Library group, select Text
3. Select Trim
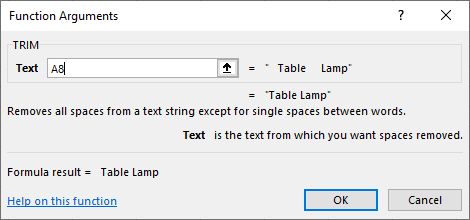
4. In the Trim text box, select cell A8
5. Click OK
6. This removes unnecessary spaces between words
ConcatenateThis function takes a number of separate cells containing text and joins them together in another cell. This can be useful if a user has a list of contact details and wants the first name and surname of each contact to appear in a single cell.
1. Select cell C9
2. On the Formulas tab in the Function Library group, select Text
3. Select Concatenate
4. In the Text1 textbox, select A9
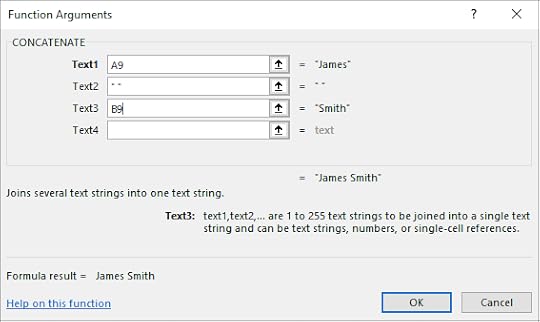
5. In the Text2 textbox, type in “ “
6. In the Text3 textbox, select B9
7. Click OK
For more Advanced Excel tips check out the Advanced Excel book at the following link:
Many to Many Relationships in Access

A many-to-many relationship is used when a record in the first table can have many matching records in the second table or when the second table can have many matching records in the first table. For example, in an e-commerce website, a customer may have one order with a number of different products and a single product may have many orders. A many-to-many relationship cannot exist on its own. A related junction table must be created with one-to-many links to the two main tables. It has to contain two fields with the foreign keys from both tables.
1. Open a database with at least three tables of data
2. An intermediate table must be included to form a Many-to-Many relationship between two tables
3. A primary key for the first table must be created with two fields
4. Open the first table in Design View
5. Click and drag to the left of two fields
6. Apply a Primary Key to both fields
7. Save the table and close it
8. Open the Relationships window
9. Add the first table
10. Create a Many-to-Many relationship between the first table and the third table using one field. A One-to-Many relationship between the first table and the second table has been created. There has been a Many-to-Many relationship created between the first and third tables as a result of the two One-to-Many relationships.
For more information about Advanced Access click the link below:
Table of Figures in Microsoft Word

A table of figures is a list of the pictures or diagrams that is placed after the table of contents. Users can format it according to their own preferences. This can be formatted to suit the style of the document and can make referencing figures in a document easier.
1. Open a new document
2. Insert four photographs into a document
3. Insert a caption for each of the photographs
4. Insert a page break before the first photograph
5. On the References tab in the Captions group, click on Insert Table of Figures
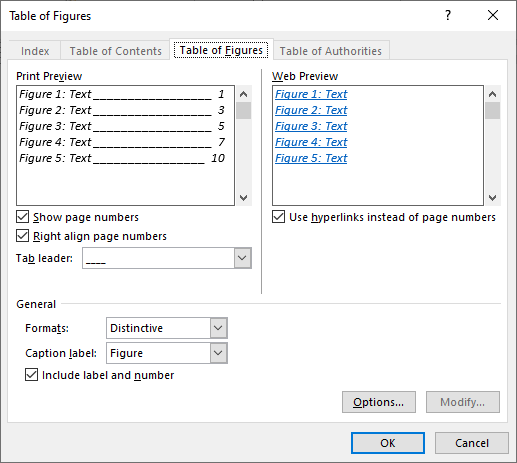
6. Change the Tab Leader to dots
7. Change the Formats to Distinctive
8. Click OK
9. A table of figures will be inserted into the document
10. Save the document
For more information about Advanced Word features click the link below:
Screen Recording in PowerPoint

Screen recording can record any activity that takes place on the screen of your computer. This is a useful feature if you want to show how an action is performed step by step. The screen recording can then be displayed in a slideshow. It can be used to give examples of how tasks can be carried out.
1. With a slideshow open, display the slide you want to record the screen from
2. On the Insert tab in the Media group, select Screen Recording
3. Click and drag to select an area to record the screen
4. Click on the Record button
5. Type out the following list:
· Screen recording is a useful feature in PowerPoint
· It can be used to show how actions are performed
· This is an example of screen recording
6. Move the mouse pointer to the top of the screen
7. Click Stop
8. On the slide, press the Play button to playback the recording
9. The recording will play back in full
10. Save the slideshow

January 7, 2021
Lookup Fields in Access

This is a field that contains all of the values that can be entered. This can help to reduce typing mistakes as users can select an entry from a predefined list. Settings can be applied to allow only entries from the list to be entered. Users can either type information into a field or lookup values from another table.
1. Open a database containing a table
2. Open the table in Design View
3. Choose a field name that requires a list of names to be added to it
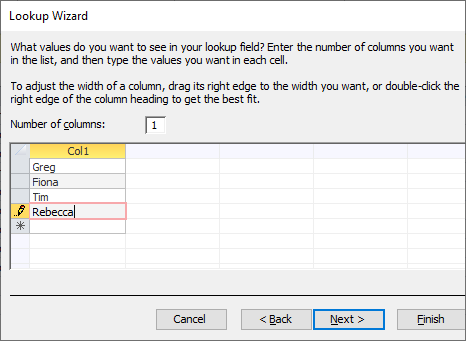
4. For Data Type choose Lookup Wizard
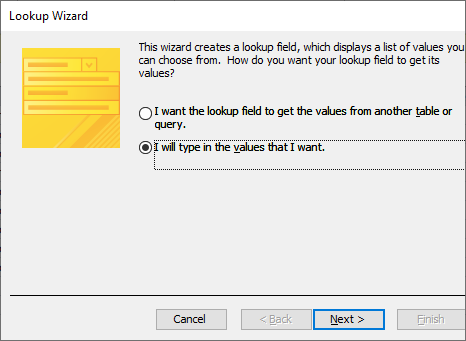
5. Choose I will type in the values that I want and click Next
6. Set the Number of Columns as 1 and type in the following entries. Use the Tab key to move on to the next entry.
7. Click Next. Choose an appropriate label
8. Click Finish to create the Lookup Field
9. Change the view to Datasheet view
10. Notice how you can now include names into a field by using a drop-down menu containing the entries you selected
Changing Entries in a Lookup Field
1. Return to Design View and select the Lookup tab for the selected field name
2. Replace Tim with Mathew in the Row Source property
3. Save the changes to the table and return to Datasheet View
4. Change the Seller records from Tim to Mathew
5. Save the table and close the database
For more information about Advanced Access click the link below:
January 6, 2021
Outline Numbering in Microsoft Word

Outline numbering can be used to create formatted lists. For every new list level, a specific formatting can be applied e.g. numbers for the first list level and lowercase letters for the next.
1. Start a new document
2. On the Home tab in the Paragraph group, click on Multilevel List
3. Choose Define New Multilevel List
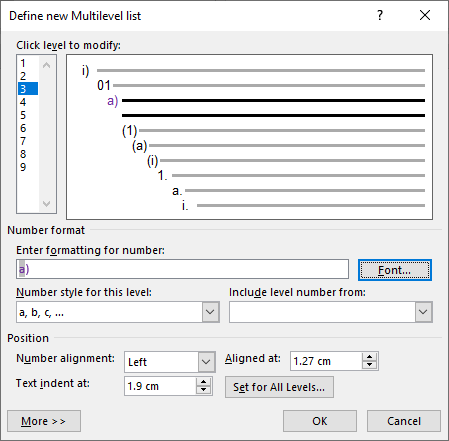
4. On the Number Style For This Level drop-down box, choose the i, ii, iii format
5. Under Click Level To Modify, select 2
6. Choose the 01, 02, 03 format
7. Under Click Level To Modify, select 3
8. Choose the a, b, c format
9. Click on the Font button
10. Choose a purple text colour
11. Click OK
12. Click OK again
13. Use the Tab key to move to the Second and Third List Level
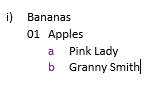
14. Create the following list:
15. Save the document as “Shopping List”
For more information about Advanced Word features visit www.digidiscover.com/books
January 5, 2021
Creating a Macro in Word
A macro is an automatic function that carries out a task or several tasks. This is useful when a task needs to be repeated many times and can save time on repetitive tasks. When a macro is set up, the user can simply click on a button and the set of instructions is carried out instantly.
1. Open a new document
2. On the Developer tab in the Code group, click on Record Macro
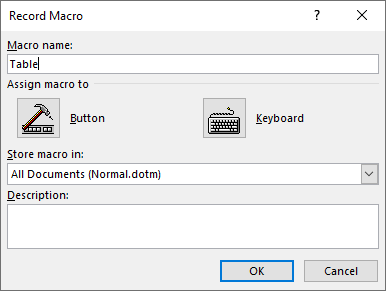
3. Name the Macro as “Table” and click OK
4. On the Insert tab in the Tables group, create a table with 4 columns and 3 rows
5. Format the table as Grid Table 4 – Accent 6
6. On the Table Tools Layout tab in the Data group, select Repeat Header Rows
7. On the Developer tab in the Code group, select Stop Recording
8. Save the document as “Macro”
Run a MacroRunning a macro is when a user makes the macro perform its specified task. Users can make many different macros for tasks that are often repeated.
1. Open the “Macro” document
2. On the Developer tab in the Code group select Macros
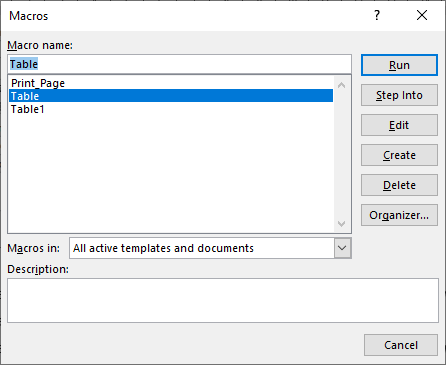
3. Select Table and click on Run
4. This will run the macro and create the formatted table
5. Save the document
Creating a Custom ButtonUsers can change the macro’s button appearance to suit the type of macro. This can then be placed in the ribbon where the user has easy access to it.
1. Open the “Macro” document
2. Right-click on an empty space on the ribbon
3. Choose Customize the Ribbon
4. In the Choose Commands From drop-down box choose Macros
5. Click on the New Group button to create a new group
6. Click on the Rename button
7. Change the name of the group to Macro
8. Click OK
9. Select the Macro and click on the Add button
10. Click on the Rename button
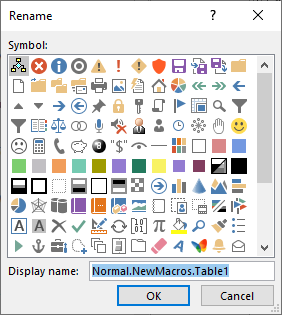
11. Choose a Smiley Face for the icon and change the Display Name to Table
12. Click OK
13. Click OK again
14. The Macro is now added to the Ribbon
15. Save the document
For more information related to Advanced Word click the button:
December 4, 2020
Count Functions in Excel
Statistical functions perform calculations based on certain criteria. Countif is used to count a range of selected cells that meet a specified criteria. Countblank counts the number of blank cells in a range of cells. Rank.Eq displays the rank of a selected cell within a range of cells. These are useful functions to perform calculations on data contained within a worksheet.
Countif
Open a workbook with a list of values Select the cell you want to place your answer into On the Formulas tab in the Function Library, select More Functions then Statistical Select CountIf Select the Range of cells within the list of values Enter the Criteria as the number you want to set as the criteria of each cell that will be counted Click OK This will Count the cells with the value you specified with the criteriaCountblank
Select the cell you want to place an answer in On the Formulas tab in the Function Library, select More Functions then Statistical Select CountBlank Select the cell Range within the list of values Click OK This Counts the Blank cells in the Range of cellsFor more information about Advanced Excel, view the eBook below:
Conor Jordan's Blog


