
Emily Henderson's Blog, page 94
April 11, 2023
This Bedroom Trend Is Going To Make All Our Lives Much Easier

I personally love a trend that requires no shopping, no styling, and quite frankly very little thinking. If you are designing a room, you know that it comes with making a thousand decisions and even the smallest ones can feel like they’ll make or break a room. While designing my living and dining room, there were a lot of decisions that felt almost painful to make but the most debilitating aspect was choosing and hanging art. Art can be expensive, it’s very personal, and it makes a statement immediately (whether good or bad). So when I started seeing bedrooms with no wall art, I was immediately intrigued and sort of relieved. If no art looks cool in the bedroom why should I agonize over finding the perfect piece for my own?? The more I thought about it, the more I realized opting for no wall art is the perfect trend for the bedroom. Bedrooms, famously where we sleep, are ideally calm and serene to promote restful sleep. So what better place to experiment with quiet minimalism? Even I, a self-proclaimed maximalist, feel very excited and hopeful about this trend so I thought I’d take you along with me as I explore its benefits. Let’s begin.

 design by studio doran | photos by peter dolkas
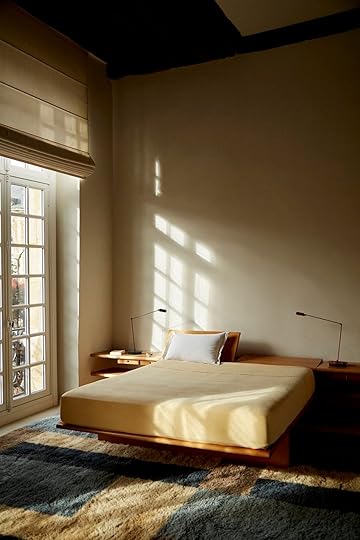
This bedroom by Studio Doran has everything I want and when I saw it I was immediately sold on this trend. I love the dark grey-green wall color (Treron by Farrow & Ball), the antique drawers, and the simple “Monastery Chic” bedding. Once I took in all of the aspects of the room, I quickly realized I wasn’t bothered by the lack of wall art at all. If anything, I prefer it! The four-poster bed adds some height that draws your eye up and having no other break in the walls makes you feel enveloped by the wall color which creates a calming effect. It feels minimal but collected and not at all boring. Adding two matching table lamps creates a symmetry that is easy for the eye to understand, and the added task light is a cool touch that adds personality and function. Although this room is notably darker than most, it feels inviting and lived in. I want to replicate this room immediately! It’s so good.
 colin king for beni rugs collection, a study on balance | home of andré saraiva | photo by billal baruk taright
This bedroom, shot for Colin King’s fourth collection with Beni Rugs, reminds me how effortlessly cool a minimally styled bedroom can be. Even with incredibly high ceilings and a lot of wall space, the no wall art trend feels intentional and calming. To fill such a large wall space, you would need a massive piece of art or a huge gallery wall, so I think the choice to leave it blank makes a statement and allows the other elements in the room to be noticed. The bed alone adds a cool structured, post-modern look and the rug brings in just the right amount of pattern and color. Also, the texture of the wall finish (likely lime wash) could be a major component in why this works so well. It creates depth and movement so the walls don’t appear boring or unfinished. I’ve stared at this room a thousand times and I never tire of it, which I think goes to show how powerful the no art trend can be.
 design by colombe studio | photo by kasia gatkowska
Refraining from hanging art is a great way to let architectural details shine. In this bedroom by Colombe Studio, the blank walls are soothing and allow the subtleties of the wall paneling and molding to take center stage. And who knows, if this room was layered with wall art maybe you wouldn’t notice the awesome fluted windows on the door (but I doubt that :)). If you were worried this trend would be boring, this bedroom is proof that minimal maximalism can be achieved without art and in such a fun way. The blue floral bed is a really exciting statement piece that brings in color and pattern and of course, the bedding adds to that effect. The incredible burl wood side table also brings in a warm, sculptural element that is impossible to ignore.
 design by jake arnold for crate & barrel
 Perhaps one of the reasons why I am so attracted to this trend is because it sort of emulates a relaxed European je ne sais quoi. A room with no wall art is unapologetic in its simplicity. It says, “I don’t need art! I am content with the way I am”. However, I can’t deny that beautiful crown molding certainly helps give off an effortlessly cool vibe, as shown in the bedroom above. The molding and beautifully curved bed have a lot to offer, so the lack of art feels intentional and sophisticated.
 design by jake arnold for crate & barrel
 Even here I am not missing wall art! Am I losing it, folks?? I just love how it accentuates the molding and allows for minimal (but impactful) styling moments. That table lamp is so special.
 design by kate marker interiors | photo by stoffer photography
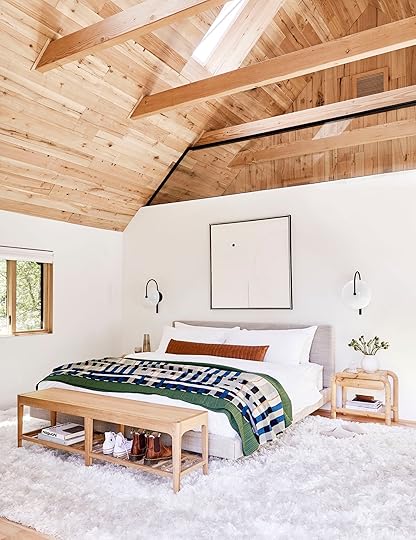
If we are talking about calm, warm, and inviting bedrooms that promote rest, this one is a prime example. The style and vibe instantly come across as lived-in and welcoming which I think is ideal for a bedroom. I love how Kate Marker flanked two sconces above the headboard, creating symmetry that is easy for the eye to take in. The exposed wood beams draw your eye up so you can appreciate the high ceilings and gorgeous brass chandelier that ties in the brass details throughout the room. If there was art over the bed it would certainly be fine, but I really appreciate the choice to keep the walls bare. It accentuates a quiet minimal vibe and on a practical note, is super budget friendly (which is another main reason why I love this trend).
 design by ask og eng
Again, exposed wood beams draw the eye up in this room by Ask Og Eng, and a long hanging pendant light takes up space so there is something interesting for your eye to take in. I love that they went asymmetrical with the lighting in this case, because it creates visual interest in an otherwise minimal room. What I love most about this room is that the high ceilings create a dramatic look that is emphasized with no wall art. If there was hanging art, it would break up the wall and could make the room feel less open and spacious.
I hope this helped anyone who is struggling with art in their bedroom right now. Maybe the answer is no art at all?? If so, I support you and I am right there with you. 🙂 Let me know what you think about this trend down below. xx
Opener Image Credit: Photo courtesy of Colin King for Beni Rugs | Home of André Saraiva | Photo by Billal Baruk Taright
The post This Bedroom Trend Is Going To Make All Our Lives Much Easier appeared first on Emily Henderson.


April 10, 2023
Hot Off The Press: 9 Design News Alerts You’ll Want To Know About This April

Too many good design things have been happening lately for there not to be a fresh design news post! Collabs, collections, and of course a beautiful design book have been hitting the internet so we thought a little bit of a deeper look (and celebration). I probably say this everything time but it’s all so good! But I guess when you love design, this kind of stuff just never gets old. We are going to start off with a VERY exciting collection by a designer that will be remembered in the design history books…
Lulu And Georgia X Eny Lee Parker Collection
 via lulu and georgia
You’ve seen Eny Parker Lee’s work before because she is responsible for creating this modern classic light that took over the internet. While her personal works may be a little out of a lot of our price ranges, she has already collaborated with Mitzi, giving us beautiful, more affordable options. Now she has this incredible new collection with Lulu and Georgia (who also sells her Mitzi lights:)). It’s not easy to create neutral pieces that feel fresh and different but if anyone can it’s Eny. There is a sampling of her collection.


Solana Chaise Sectional Sofa | Laria Pitcher | Elle Sideboard
I love this modular sofa but I really love the tie detail on the pillows! It’s simple but feels interesting. Then who doesn’t love a cool pitcher? This one is pretty and would also make an awesome vase. And lastly, how beautiful is that sideboard?? I love the doors, the miro knob, and those special legs. This piece could work with so many different styles.


June Ottoman | Leven Marble Tray | May Dining Chair
Ottomans have so many uses but most of them are round or square. Nothing wrong with that but it’s nice to have another option (and one that feels very “Eny Lee Parker”). Ok, a chic little raised tray?? I am in. Then finally I will leave you with this wildly cool chair. You just aren’t going to see unique pieces like this in many other people’s homes. So if it’s in your budget and you love it, GO FOR IT. In my opinion, these are collector’s items.
Target X Hilton Carter Collection via target
Our favorite plant expert is back with another great collection! Hilton is equal parts plant genius and design expert. His taste is impeccable and his designs are modern with depth. Also if you don’t follow him you are missing out on wildly entertaining and helpful plant tip videos!


Metal Wire Plant Stand Terracotta | 5″ Wide Footed Rectangular Terracotta Outdoor Planter Box | 9″ Wide Footed Stoneware Outdoor Planter Pot
If you’ve been following Em on Instagram then you may have noticed her love for plant stands. This one is super fun with its metal wiring but is then contrasted with the natural terracotta top. A perfect match. The planter box in the middle is probably my personal favorite piece! Those wonderful shapes and the cutout on the bottom make such a unique box for your plants. Lastly, this simple yet very cool black planter would look great in anyone’s home.


10″ Wide Self-Watering Square Concrete Outdoor Planter Pot | Outdoor Planter Pot with Metal Stand | 16″ Artificial Polka Dot Plant
A self-watering planter that looks cool?! There might be hope for me to keep a plant alive, y’all. Then the planter/stand combo in the middle is another beautiful blend of contrasting materials that are neutral but not boring to look at. Then if you are going to get a faux plant get a cool one like this one!
Heidi Caillier’s New Book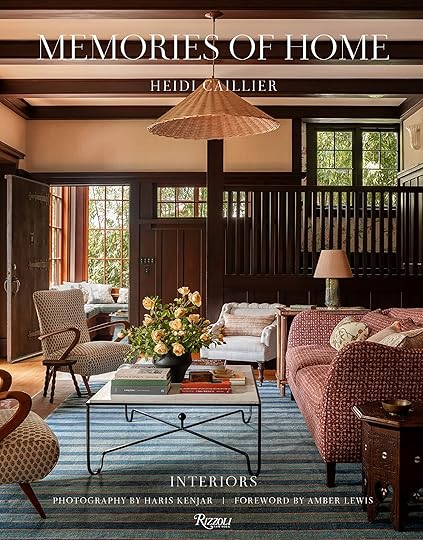
Talk about design news! EHD-Favorite Heidi Caillier is coming out with her book, Memories of Home and it’s all about mixing patterns, colors, and textures. She truly is a master of her craft (including mixing materials) so we are all VERY excited to get her book. Go preorder now because it’s crucial for a book’s success! Congrats Heidi<3
RUGS USA X Arvin Olano via rugs usa
Last month, in this post, I told you that Arvin’s journey designing his dream home was a must-follow. His house is a mid-century modern dreamboat! What I didn’t yet mention was his rug line with Rugs USA because it really deserves a call out all on its own.

 via rugs USA
It’s full of neutrals, textures, and has a ton of great patterns that will look great with so many different styled homes. And look how beautiful they look in the photos above (FYI that’s his home:))!
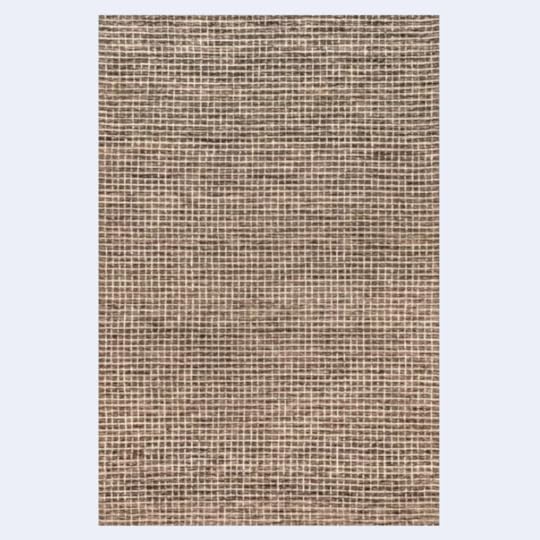
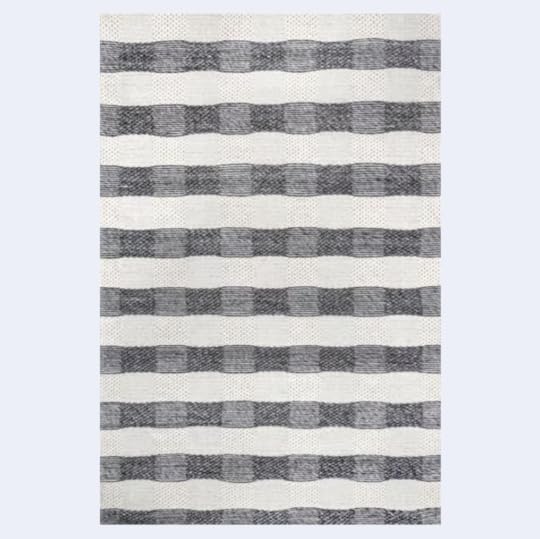

Brown Melrose Checked Area Rug | Gray Sophie Striped Wool Area Rug | Ivory Parker Check Textured Area Rug
Em is a big fan of a subtle pattern for its kid and pet-friendly capabilities so the first rug on the left is perfect for that! The next two rugs in this lineup are two different takes on organic stripes which is such a great stripe variation.
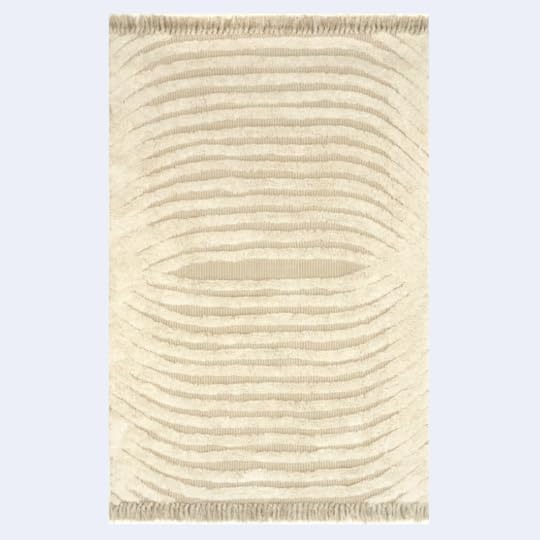

Ivory Riley Textured Shag Area Rug | Beige Ginger Cotton-Blend Area Rug | Beige Chandy Textured Wool Area Rug
These three beauties have more of a Moroccan style with a modern feel. I really love the two-pile look on the far left but all three are great. Go check out the whole collection (including the great prices:))
H&M Home Artist CollabsI really love that companies are investing more into actual artists and H&M is currently doing that with these two artists: Lulama Wolf and Amber Vittoria. Two female artists bring two wonderful but two very different color palettes to some H&M home decor.
Lulama Wolf via h&m
Let’s start with Lulama. She works mostly with neutral tones and abstract figures. Texture was clearly an important part of this collection which I think really makes it special. Let’s take a little look…

Tufted Wool Rug | Hand-Painted Stoneware Serving Dish
This rug may be on the smaller side but would add a perfect small accent to any small area. Then this dish is SO good. I love that color blue and the design is stunning. Special without being overly ornate.
Amber Vittoria via h&m
Moving onto Amber, I’m sure it’s quite clear what initially makes these collections different from each other… BOLD COLOR. These decor pieces are full of childish whimsy but in a way that adults will want them in their homes too:)


Tufted Wool Rug | Poster Natural White/Abstract
For the color lovers out there this collab is perfect. Or if you just want to have a color moment then choosing one is also a great option.
CB2 Spring Collection
 via cb2
Spring collection time is the best time and per usual CB2 is bringing the very cool, very modern (and vintage-inspired) pieces to us. I also think their spring sale is happening right now. This new drop is filled with things from every category so let’s get into six of my favorites…


Terrain 4-Piece L-Shaped Bronze Brown Velvet Sectional Sofa | Sabia Ivory Ceramic Table Lamp with Black Shade | Masha Rattan and Teak Outdoor Lounge Chair with White Sunbrella Cushions
If you know me, you know I love that sofa color a lot. But what I also love are those wood legs. SO cool and chic. I love my single-cushion sofa but with all these incredible modular sofa options on the market, I am convinced. The next two pieces are more on the organic side. That lamp base is very pretty and made a bit more modern with that black lampshade. Oh and that outdoor chair is STUNNING. For the right style of home, I say bring that chair inside.


Plier Square High-Gloss Walnut Wood Coffee Table | Flounce Black Teak Decorative Bowl | Monte Ivory Upholstered Dining Chair
The colors and materials of this table really remind me of my vintage coffee table so I am a big fan. Normally I’m not a high gloss lover but it really works with this piece. It also comes in a side table size. As for that bowl, what a centerpiece! It’s would add a ton of organic dimension to a room. Then that dining chair is such a cutie. That curved backrest is such a special detail. The website says it’s waterproof, performance fabric but I would still consider your lifestyle before purchasing these.
Nest Studio Collection X Katie Gong Collab
 photos by brett walker
The artist, Katie Gong, who created the wood squiggle that was in my last living room has now branched out to hardware. I could gush forever because I love her work so much but here is a little blurb that Katie wrote, “I’ve been working with @neststudiohardware and @atelier_davis since 2018 on these. All four shapes were created by making waxed molds of my work in order to cast these gorgeous pieces. Full collection available in three finishes via @neststudiohardware. Please check these out as they are truly special and will look so amazing in any home project.”
These handles are a work of art so let’s check out all four pieces:


These are four great size and style options (that come in three different finishes). All you need is a simple cabinet or drawer front because these pieces will steal the show!
Backdrop’s Fourth Wallcovering Collection


Turini | Ephemera | The Cloisters
Another great collection from Backdrop. They are really nailing the modern wallpaper game. Take a look at the site to see all the different color options and the one I didn’t include:)
Crate & Barrel X Leanne Ford Collection via crate & barrel
Leanne’s easy breezy vibe is going outside this year with her outdoor collection! It’s simple, natural, and well-designed (obviously!) Let’s see more…
 via crate & barrel
I really love her melamine dinnerware! Everything is so pretty that I would consider using them indoors too. Those slightly imperfect shapes are really good.


Jeannie Teak Outdoor Chaise Lounge | Pebble White Indoor/Outdoor Concrete Side Table | Pansy 23″x23″ Stripe Outdoor Pillow
See what I mean by it being simple, natural, and well-designed?? None of these pieces are screaming, “pay attention to me” but instead create that beautiful feeling of being relaxed while outside. Such a well-curated collection!
Workstead’s New Collection – Pendolo via workstead
Another EHD favorite, Workstead. All of their lights are incredible with their beauty and quality off the charts. So when I saw they had a new collection I clearly needed to tell you about it.


Pendolo Pendant III | Pendolo Pendant Small | Pendolo Flush Mount Small
This entire collection is filled with warm, light-filtering light through linen-wrapped cones. They play a lot with scale and balance which I loved. Give me all of the oversized lights. While not all of the fixtures are oversized, they all have linen and metal finish options so you can create your perfect Pendolo light.
Well, that’s it for this fine Monday and if you have any other news drop it in the comments!
Love you, mean it.
Opening Image Credit: via Lulu and Georgia
The post Hot Off The Press: 9 Design News Alerts You’ll Want To Know About This April appeared first on Emily Henderson.
Hot Off The Presses: 9 Design News Alerts You’ll Want To Know About This April
Too many good design things have been happening lately for there not to be a fresh design news post! Collabs, collections, and of course a beautiful design book have been hitting the internet so we thought a little bit of a deeper look (and celebration). I probably say this everything time but it’s all so good! But I guess when you love design, this kind of stuff just never gets old. We are going to start off with a VERY exciting collection by a designer that will be remembered in the design history books…
Lulu And Georgia X Eny Lee Parker Collectionvia lulu and georgiaYou’ve seen Eny Parker Lee’s work before because she is responsible for creating this modern classic light that took over the internet. While her personal works may be a little out of a lot of our price ranges, she has already collaborated with Mitzi, giving us beautiful, more affordable options. Now she has this incredible new collection with Lulu and Georgia (who also sells her Mitzi lights:)). It’s not easy to create neutral pieces that feel fresh and different but if anyone can it’s Eny. There is a sampling of her collection.
Solana Chaise Sectional Sofa | Laria Pitcher | Elle Sideboard
I love this modular sofa but I really love the tie detail on the pillows! It’s simple but feels interesting. Then who doesn’t love a cool pitcher? This one is pretty and would also make an awesome vase. And lastly, how beautiful is that sideboard?? I love the doors, the miro knob, and those special legs. This piece could work with so many different styles.
June Ottoman | Leven Marble Tray | May Dining Chair
Ottomans have so many uses but most of them are round or square. Nothing wrong with that but it’s nice to have another option (and one that feels very “Eny Lee Parker”). Ok, a chic little raised tray?? I am in. Then finally I will leave you with this wildly cool chair. You just aren’t going to see unique pieces like this in many other people’s homes. So if it’s in your budget and you love it, GO FOR IT. In my opinion, these are collector’s items.
Target X Hilton Carter Collectionvia targetOur favorite plant expert is back with another great collection! Hilton is equal parts plant genius and design expert. His taste is impeccable and his designs are modern with depth. Also if you don’t follow him you are missing out on wildly entertaining and helpful plant tip videos!
Metal Wire Plant Stand Terracotta | 5″ Wide Footed Rectangular Terracotta Outdoor Planter Box | 9″ Wide Footed Stoneware Outdoor Planter Pot
If you’ve been following Em on Instagram then you may have noticed her love for plant stands. This one is super fun with its metal wiring but is then contrasted with the natural terracotta top. A perfect match. The planter box in the middle is probably my personal favorite piece! Those wonderful shapes and the cutout on the bottom make such a unique box for your plants. Lastly, this simple yet very cool black planter would look great in anyone’s home.
10″ Wide Self-Watering Square Concrete Outdoor Planter Pot | Outdoor Planter Pot with Metal Stand | 16″ Artificial Polka Dot Plant
A self-watering planter that looks cool?! There might be hope for me to keep a plant alive, y’all. Then the planter/stand combo in the middle is another beautiful blend of contrasting materials that are neutral but not boring to look at. Then if you are going to get a faux plant get a cool one like this one!
Heidi Caillier’s New BookTalk about design news! EHD-Favorite Heidi Caillier is coming out with her book, Memories of Home and it’s all about mixing patterns, colors, and textures. She truly is a master of her craft (including mixing materials) so we are all VERY excited to get her book. Go preorder now because it’s crucial for a book’s success! Congrats Heidi<3
RUGS USA X Arvin Olanovia rugs usaLast month, in this post, I told you that Arvin’s journey designing his dream home was a must-follow. His house is a mid-century modern dreamboat! What I didn’t yet mention was his rug line with Rugs USA because it really deserves a call out all on its own.
via rugs USAIt’s full of neutrals, textures, and has a ton of great patterns that will look great with so many different styled homes. And look how beautiful they look in the photos above (FYI that’s his home:))!
Brown Melrose Checked Area Rug | Gray Sophie Striped Wool Area Rug | Ivory Parker Check Textured Area Rug
Em is a big fan of a subtle pattern for its kid and pet-friendly capabilities so the first rug on the left is perfect for that! The next two rugs in this lineup are two different takes on organic stripes which is such a great stripe variation.
Ivory Riley Textured Shag Area Rug | Beige Ginger Cotton-Blend Area Rug | Beige Chandy Textured Wool Area Rug
These three beauties have more of a Moroccan style with a modern feel. I really love the two-pile look on the far left but all three are great. Go check out the whole collection (including the great prices:))
H&M Home Artist CollabsI really love that companies are investing more into actual artists and H&M is currently doing that with these two artists: Lulama Wolf and Amber Vittoria. Two female artists bring two wonderful but two very different color palettes to some H&M home decor.
Lulama Wolfvia h&mLet’s start with Lulama. She works mostly with neutral tones and abstract figures. Texture was clearly an important part of this collection which I think really makes it special. Let’s take a little look…
Tufted Wool Rug | Hand-Painted Stoneware Serving Dish
This rug may be on the smaller side but would add a perfect small accent to any small area. Then this dish is SO good. I love that color blue and the design is stunning. Special without being overly ornate.
Amber Vittoriavia h&mMoving onto Amber, I’m sure it’s quite clear what initially makes these collections different from each other… BOLD COLOR. These decor pieces are full of childish whimsy but in a way that adults will want them in their homes too:)
Tufted Wool Rug | Poster Natural White/Abstract
For the color lovers out there this collab is perfect. Or if you just want to have a color moment then choosing one is also a great option.
CB2 Spring Collectionvia cb2Spring collection time is the best time and per usual CB2 is bringing the very cool, very modern (and vintage-inspired) pieces to us. I also think their spring sale is happening right now. This new drop is filled with things from every category so let’s get into six of my favorites…
Terrain 4-Piece L-Shaped Bronze Brown Velvet Sectional Sofa | Sabia Ivory Ceramic Table Lamp with Black Shade | Masha Rattan and Teak Outdoor Lounge Chair with White Sunbrella Cushions
If you know me, you know I love that sofa color a lot. But what I also love are those wood legs. SO cool and chic. I love my single-cushion sofa but with all these incredible modular sofa options on the market, I am convinced. The next two pieces are more on the organic side. That lamp base is very pretty and made a bit more modern with that black lampshade. Oh and that outdoor chair is STUNNING. For the right style of home, I say bring that chair inside.
Plier Square High-Gloss Walnut Wood Coffee Table | Flounce Black Teak Decorative Bowl | Monte Ivory Upholstered Dining Chair
The colors and materials of this table really remind me of my vintage coffee table so I am a big fan. Normally I’m not a high gloss lover but it really works with this piece. It also comes in a side table size. As for that bowl, what a centerpiece! It’s would add a ton of organic dimension to a room. Then that dining chair is such a cutie. That curved backrest is such a special detail. The website says it’s waterproof, performance fabric but I would still consider your lifestyle before purchasing these.
Nest Studio Collection X Katie Gong Collabphotos by brett walkerThe artist, Katie Gong, who created the wood squiggle that was in my last living room has now branched out to hardware. I could gush forever because I love her work so much but here is a little blurb that Katie wrote, “I’ve been working with @neststudiohardware and @atelier_davis since 2018 on these. All four shapes were created by making waxed molds of my work in order to cast these gorgeous pieces. Full collection available in three finishes via @neststudiohardware Please check these out as they are truly special and will look so amazing in any home project.”
These handles are a work of art so let’s check out all four pieces:
These are four great size and style options (that come in three different finishes). All you need is a simple cabinet or drawer front because these pieces will steal the show!
Backdrop’s Fourth Wallcovering CollectionTurini | Ephemera | The Cloisters
Another great collection from Backdrop. They are really nailing the modern wallpaper game. Take a look at the site to see all the different color options and the one I didn’t include:)
Crate & Barrel X Leanne Ford Collectionvia crate & barrelLeanne’s easy breezy vibe is going outside this year with her outdoor collection! It’s simple, natural, and well-designed (obviously!) Let’s see more…
via crate & barrelI really love her melamine dinnerware! Everything is so pretty that I would consider using them indoors too. Those slightly imperfect shapes are really good.
Jeannie Teak Outdoor Chaise Lounge | Pebble White Indoor/Outdoor Concrete Side Table | Pansy 23″x23″ Stripe Outdoor Pillow
See what I mean by it being simple, natural, and well-designed?? None of these pieces are screaming, “pay attention to me” but instead create that beautiful feeling of being relaxed while outside. Such a well-curated collection!
Workstead’s New Collection – Pendolovia worksteadAnother EHD favorite, Workstead. All of their lights are incredible with their beauty and quality off the charts. So when I saw they had a new collection I clearly needed to tell you about it.
Pendolo Pendant III | Pendolo Pendant Small | Pendolo Flush Mount Small
This entire collection is filled with warm, light-filtering light through linen-wrapped cones. They play a lot with scale and balance which I loved. Give me all of the oversized lights. While not all of the fixtures are oversized, they all have linen and metal finish options so you can create your perfect Pendolo light.
Well, that’s it for this fine Monday and if you have any other news drop it in the comments!
Love you, mean it.
Opening Image Credit: via Lulu and Georgia
The post Hot Off The Presses: 9 Design News Alerts You’ll Want To Know About This April appeared first on Emily Henderson.
April 9, 2023
The Link Up: Em’s AWESOME New Chair, Ryann’s Way To Help Her Pup’s Anxiety, And The Rocks Glass We All Love Holding

Happy Easter and a slightly belated Passover to those who celebrate! We are also happy to report that the Henderson’s had an incredible vacation (which Emily plans to write all about) and have come back safe and sound. Now, it’s time to hit the ground running with lots of exciting shoots and new design content. So whether you’re having a fancy meal, a ham sandwich bar, or a peaceful meal for one today, we hope it’s wonderful. Until mealtime, let’s get to these links.
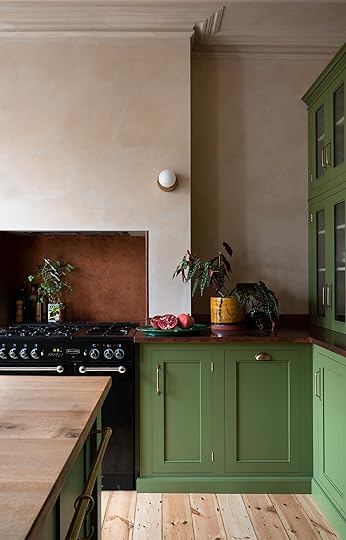

 via deVOL kitchens
This week’s home tour is this incredible and perfectly colorful kitchen. Is there a better kitchen to look at for this Easter Sunday?? We didn’t think so:) The mix of classic cabinets, modern lights, and textured walls is heavenly to look at. We would all happily cook Easter brunch (or any meal) in this kitchen…duh:)
From Emily: This past week, I received a chair I bought from Soho Home and I LOVE IT! It’s so comfortable, incredibly soft, and is the most beautiful tone of blue. Yes, I am adding more blue to the living room:) It also adds the perfect amount of “edge” I was looking for to balance out the antiques. AH, I’m so happy I love it and feel so good about it. To see it in action I recorded some intastories and a reel.
It’s finally here! Max Humphrey’s book Lodge: An Indoorsy Tour of America’s National Parks is available to order. We know firsthand how much work goes into writing and producing a book, let alone a great one like Max’s. We are so happy for Max and can’t wait to get our copies!
From Albie: We’ve been slowly working on our outdoor spaces since the fall with a goal of it being an extension of our indoor hygge. While there’s quite a bit of work to do that hasn’t stopped us from making other upgrades we can use in the meantime. One such addition has been our smoker. When we bought #thehyggeranch, the previous owners left us one of their grills — the Weber Summit Gas Grill — and we absolutely love it! My husband, however, has always wanted a smoker… and the Recteq has not disappointed! We’ve made a few different meals using the smoker & the meats come out so deliciously flavorful & juicy! I’m no culinary expert so I don’t have the words to accurately describe how good everything is however I can now say I understand how there’s a difference between a grill & a smoker. Summers are about to be lit!
From Ryann: I have tried many dog-calming products over the years but these are the only ones I have actually seen make a difference. I give my pup one once a day right before bed or when we are having guests over and he is noticeably calmer and less anxious. They are a serious game changer for dogs with anxiety!
From Jess: My sweet sweet cousin gave me this BEAUTIFUL oil cruet and I love how special it looks and the color it adds (amber) to my kitchen counter. It’s such a perfect gift! If you don’t know how passionate we are about pretty kitchen essentials this post may help:)
From Mallory: We did a team lunch this week and it was the 4th time I’ve sat down at a restaurant, ordered a drink, and this glass appeared. The first time we saw it, my boyfriend was like I LOVE THIS GLASS SO MUCH WE NEED IT, and because I have a gift where I can find pretty much anything on the internet, I located it (at first for $80 per glass) then found the same glass on Wayfair for $34 for 4. So yes, I purchased them immediately. The reason why they’re so good is that they have this little cute sun area that feels SO good to hold and put your thumb on. It’s kinda like thumb support for a glass if that makes sense, but it’s a fun one to hold. I’ve spotted it in the wild so many times now that I can confirm it’s a crowd favorite, so if you need new cocktail glasses hit these up.
From Caitlin: I’ve spent the last two weeks traveling (first back home to hang out with my mom Brenda, and then I dragged my boyfriend Dennis up to Lake Placid for the World Synchronized Skating Championships – SO FUN; this was my favorite performance!!!) and while I’ve had a GREAT time with the people I love, I cannot wait to get back to LA so I can sleep in my own bed! You may recall that I have a litany of back problems – broke it in late 2020 and it’s been on the fritz ever since – and I’m not joking when I say that it’s genuinely hard to spend time away from this mattress now. It’s a total Goldilocks situation: not too soft, not too hard, just perfectly supportive. I’ve never slept better (I have the Apple Watch data to prove it; Dennis agrees that he sleeps like a rock on this mattress!) and it’s SIGNIFICANTLY eased my recurring back pain symptoms. I switched in January and I’ve felt a MAJOR difference in my body since (especially now that I’ve been away for a few weeks – I’m starting to have some back pain flare-ups that I believe are correlated to sleeping on mattresses that aren’t the right fit for my support needs). Emphatically recommend this one if you also struggle with chronic pain!!!
Also From Caitlin: I want to share a cause that’s near and dear to my heart – the team at Bandcamp is working to unionize! (You can read a bit more about the cause in this Rolling Stone write-up). I had a past life in the music industry – including living through a similarly disorienting acquisition (fun fact: I was an OG hire at Beats Music, which became the backend for today’s Apple Music!) – so seeing these folks band together for the betterment and benefit of everyone on the team (as well as all the artists who make a living on their platform!) is really inspiring. Please check out their site and give them a follow on IG. Go team 🙂
GOOD Sales:
Been eyeing any lighting or ceiling fans at Rejuvenation?? Well, they are offering free shipping this weekend! I’m sure it’s no surprise, but these pendants, this sconce, and this chandelier are some of Em’s favorites (since they are in her house:)).
J. Crew is really cutting us a sweet deal with 40% off almost everything, plus 50% off sale items through Monday 4/10 with code: SPRING. We love this rash guard (summer is coming!), this button-up (LOVE the cuffs), and this pretty spring dress.
Pottery Barn is having a great sale – up to 40% off furniture, lighting, outdoor & more this week! We love these linen curtains, placemats, and these frames.
H&M is giving up to 50% off! We are very into this shacket, this knit dress, and oddly these resistance bands.
Enjoy the rest of your Sunday and see y’all tomorrow. xx
Opening Image Credit: via deVOL kitchens
The post The Link Up: Em’s AWESOME New Chair, Ryann’s Way To Help Her Pup’s Anxiety, And The Rocks Glass We All Love Holding appeared first on Emily Henderson.
April 8, 2023
Leggings Review: In Search Of The Perfect Leggings That Won’t Slip Down

I fear that I may be asking too much of the humble legging. I want them to be comfortable enough that I can wear them all day, and I desperately want them to not slip down while I am exercising. You know when you are in downward dog and notice your leggings have gone from high-wasited to low rise? It’s a maddening phenomenon so I decided to do research to see if the perfect leggings I have in my head actually exist. Over the past few months I have tried countless leggings, kissed many frogs, and have now procured a solid collection of leggings I love and wear often. So since I have several pairs that are regularly in rotation, I figured I would review them in case anyone out there is looking for solid everyday leggings that won’t slip down. Full transparency: I am a size 12/14 which I think informs how I reviewed them (AKA I am curvy so I want leggings that are high-waisted and hug my curves). Shall we begin?
Vuori Clean Elevation Legging
Price: $98
Size Range: XXS-XXL
Size worn/True to Size? L/Yes
Comfort score: 9.5
Will they slip down during a workout? Yes.
Verdict: When I first put these on my body I never wanted to take them off. I was really rooting for these but due to the fabric being so lightweight and stretchy, they will easily slip down. I wore them on a walk recently and literally had to pull them up every few steps which really bummed me out. I still wear them often though, because the fabric is so buttery and comfortable. They are really cozy lifestyle leggings but I think I am going to try their Evolve legging next to see if they hold their integrity longer.

Alo 7/8 High Waist Airbrush Leggings
Price: $98
Size Range: XXS-L
Size worn/True to size? L/Yes
Comfort score: 8
Will they slip down during a workout? It depends.
Verdict: These are GREAT. They are extremely high-waisted and they have a nice, thick material that feels good and keeps you feeling tucked in and supported. Immediately after a wash, they are perfect and will stay up. After a day of wearing them though, they will lose their integrity and if I wear them multiple times, I do find myself pulling them up a lot. That said, I find myself wanting to wear these for workouts more than most of my other leggings because of the thick, supportive fabric and high waist. I have to knock points for them not being very size-inclusive, though.

Alo Ribbed High Waist 7/8 Blissful Leggings
Price: $98
Size Range: XXS-L
Comfort score: 8.5
Size worn/True to size? L/Yes
Will they slip down during a workout? No (but there’s a catch).
Verdict: I LOVE these. They are more of a lounging legging because they are made from ribbed cotton material but the elastic waistband makes it so they don’t slip down at all. However, since the fabric is not a performance material, these are not really made to work out in and I think if you sweat in them, sweat marks might show. These are amazing for walks and light yoga and I find myself wishing I had more pairs all the time! (But again, really bummed Alo doesn’t offer more inclusive sizing – I wear a size L and thankfully they have a lot of stretch).

Lululemon Fast and Free High-Rise Tight 25″
Price: $128
Size Range: 0-20
Size worn/True to size? 12/14 / Sort of
Comfort score: 6
Will they slip down during a workout? It depends.
Verdict: When I was expressing my legging woes to the team, Mal suggested I try these. They are her favorite and I can see why they are so popular. However, I am really really not a fan of thin “tech” fabric because I find it uncomfortable and less supportive. Also, I don’t think these are high-waisted enough for curvy body types like myself (I tried sizes 12-16 and none fit me correctly). I spent about an hour in the dressing room trying on different sizes and squatting/walking around to see if they would slip down and for me, they would. I didn’t end up buying them because they truthfully did not feel good on me. I talked to other people who have these though and they don’t feel like they slip down at all (it’s possible I am in between sizes OR these are not the best for curves).

Lululemon Align™ High-Rise Pant 28″
Price: $98
Size Range: 0-20
Comfort score: 6
Size worn/True to size? 12/14 / Sort of
Will they slip down during a workout? It depends.
Verdict: I feel very similar about these as the ‘Fast and Free’ leggings above. I think they could be more high-waisted and they did slip down on me (and gave me an unfortunate camel toe). I personally prefer a thicker more supportive fabric but again, I think the slipping down conundrum is due to having curves. Full disclosure: I bought these online and ended up returning them.

Nike Women’s Gentle-Support High-Waisted 7/8 Leggings
Price: $100
Size Range: XXS-XXL
Size worn/True to size? L/Yes
Comfort score: 7.5
Will they slip down during a workout? Yes.
Verdict: I have had these for years and love how high-waisted they are. The fabric is a thin performance material that is soft and comfortable, but because of the thin material, the top will often roll down during a workout. I love how comfortable they are though and will wear them on walks with no issues.

TnaBUTTER™ Atmosphere Super Hi-Rise Legging
Price: $68
Size Range: XXS-XXL
Comfort score: 8.5
Size worn/True to size? L/Yes
Will they slip down during a workout? It depends.
Verdict: I really love these. They are great quality for the price and so comfortable that you sometimes forget you are wearing pants at all. The fabric is thin but so soft and the thick waistband makes you feel very supported. They are also extremely high-waisted which I love. When I got them I was impressed with how well they stayed up, but after a while they started to slip down more and more (a common thing that happens with most leggings). Overall these are great for light workouts but I love them for everyday wear.

TnaLIFE™ Cheeky Hi-Rise Legging
Price: $68
Size Range: XXS-XXL
Comfort score: 8.5
Size worn/True to size? L/Yes
Will they slip down during a workout? It depends.
Verdict: Similar to the pair above, these are great when you first put them on after a wash. They are extremely high-waisted which I love so there is room for them to slip down a bit without it being annoying.

Gymshark Flex High Waisted Leggings
Price: $50
Size Range: XS-XXL
Comfort score: 6
Size worn/True to size? L/Yes
Will they slip down during a vigorous workout? No.
Verdict: As the name suggests, these are built for the gym. These are going to stay put for an entire workout, full stop. They have a thick waistband that compresses your waist and makes you feel super supported. They are not my favorite because I don’t love the look of them (I have them in grey but would prefer them in black) but as far as not slipping down, these are a clear winner.
That’s all from me! I hope this helped anyone who needed it and PLEASE drop your legging recommendations down below. Thanks for stopping by and happy Saturday! xx
Opening Image Credits: Photo by Kaitlin Green | From: My Winter Workout Gear – What I’m Wearing And Loving Both Indoors And Out When It’s Chilly (And Even Free zing)
The post Leggings Review: In Search Of The Perfect Leggings That Won’t Slip Down appeared first on Emily Henderson.
April 7, 2023
My Journey To FINALLY Choose A Wall Color For Our Living Room (And How I Feel Now That It’s Painted)

As you know this room is my problem child – so much potential and I can really love the great qualities about it, but I’ve been stumped with how to handle it. It’s coming along now (as you can see at the end) but it took a lot of indecision to get to the point where I felt 65% sure that I wanted to paint the drywall – a percentage I wish were higher, but I just went ahead and did it. But before that, I had Misty photoshop some options for the walls to see if that could help my decision process and it did. I didn’t like any of the ideas that I had, so there’s that! Here we go:

Swivel Chairs (from opening photo) | Rug | Sectional | Leather Sofa | Sconces | Chandelier | Black Side Table
This is where the room was when we sent it to Misty (now realizing she should have done it off the first photo when the walls were bare – sorry Misty!). You can see the room coming along, but the walls felt unfinished and the wood jams and sashes bothered me but I had NO CLEAR SOLUTION.
The three biggest challenges:
The Paneling and Trimwork. The paneling was painted a very cool white in semi-gloss and repainting it requires a 3-day paint job where the room has to be emptied and sprayed because the paneling can’t be rolled (well it can, but it will look better if its sprayed evenly). I kinda backed myself into this corner on accident, with way less flexibility. This is doable but expensive and extremely disruptive. And then change it to what? Even if I could snap my fingers I didn’t know what the right color would be. The Drywall is so broken up. As you can see there are so many doorways, windows, etc., so painting the drywall something darker would make the room so choppy and busy. So we needed lighter… Fine, but choosing the right light tone I find to be much harder than dark because it’s harder to get a sense of the tone from a sample. And boy did I try out a billion samples. The paint color shouldn’t compete with and should enhance the kitchen tile.So we tried some options:
Neutral Wallpaper
I love the Sandberg Rafael white wallpaper so much – just a few tones of white (one that matches our cooler white). But when Misty photoshopped it in here (granted renderings are hard) it was certainly not a hell yes. But then I thought that maybe it’s the wood of the windows that pops too much for me and throws everything off balance (this is still a current running theory).
Neutral Wallpaper With White Painted Windows
Now painting these white oak windows is NOT IDEAL and would take me being 95% sure it’s the right decision. But seeing it photoshopped the same as the trim color is something I do really like. Brian and other people don’t agree so I’m not doing it anytime soon, but to me, it makes the room way less busy so that you can focus on the real moments – the ceiling, the fireplace, and the big wood doors (that we wouldn’t paint). But y’all, once painted you can NOT go back. In this one Misty also made the mantel wood – which I like but don’t love (not sure why).
Light Blue Wallpaper And Trim
This was meant to be a fabric wallpaper/texture and have the trim match it completely. We tried to make this work really hard – using the Ashley Stark fabric wallcoverings. Again, just a texture (it looks like a pattern up there). Ultimately we worried that the tones of the fabric which you can see here (stone and pebble) might have been a little gray for this room.
Neutral Walls
This was a neutral I thought I liked (to add warmth) but uh, no.
Bold(er) Pink
We have a lot of blue and green (and more green coming) so I thought maybe a pink on the walls would be nice to see. Nope!
Pale Pink
Still nope! Perfect for Easter!
Pale Pink And Trim
But here it is with the windows painted out the same pink (which I still prefer than the wood when you look at the overall room).
What We Painted – Where We Are This Week
So when we were gone for Spring Break we had the drywall painted Mantra SW 9631 by Sherwin–Williams. It was a last-minute decision but I felt 85% good about the sample and since the drywall was just a few hundred dollars, took one day, and didn’t require spraying (so we didn’t have to unload the room) I said, “let’s just do it”. I came back and was so pleasantly surprised. It’s a happy extremely pale light tone of blue, with some green in it. We were worried about going too gray as to look sad in Portland but it’s such a pretty color. Am I 100% sure that it works? Nope! But I’m moving forward with the other elements that are happening. We have bought this sofa, and am planning on cafe curtains on the deep sills, big curtains on the big doors (maybe), and still considering upgrading the mantel to something warmer (or even still painting the brick). So I would say I’m 70% happy with this color and have no idea how it could be better. I still kinda want to paint the wood of the windows, but last week I played with a piece of sheer white fabric as a cafe curtain and think that might help a lot. I’m going to try everything I can before we paint those windows, FYI. I think my biggest challenge is that the room looks more formal than I want it to be because of all my choices. The paneling in semi-gloss is kinda formal. The lights are very traditional and could be considered formal. And all the trimwork – molding and paneling give off this higher-end vibe, which is not a bad thing but it also reads more formal. But I’m embracing it and really feel hopeful that through furniture and decor, I can make it feel happy, beautiful, and more casual. But all in all, we love this pale color and I can’t wait to show you other angles of it (just need to shoot the dining nook before I can show you :))
More to come soon, but what do you think?
Resources:
Wood flooring: Oregon White Oak by Zena Flooring
Windows and Doors: White oak, Aspen Casement by Sierra Pacific Windows
Stairwell Color: Smoky Blue by Sherwin-Williams
Wall Color: Extra White by Sherwin-Williams
*Photos by Kaitlin Green
The post My Journey To FINALLY Choose A Wall Color For Our Living Room (And How I Feel Now That It’s Painted) appeared first on Emily Henderson.
The Journey I Went On To FINALLY Pick A Wall Color For Our Living Room (And How I Feel Now That It’s Done)
As you know this room is my problem child – so much potential and I can really love the great qualities about it, but I’ve been stumped with how to handle it. It’s coming along now (as you can see at the end) but it took a lot of indecision to get to the point where I felt 65% sure that I wanted to paint the drywall – a percentage I wish were higher, but I just went ahead and did it. But before that, I had Misty photoshop some options for the walls to see if that could help my decision process and it did. I didn’t like any of the ideas that I had, so there’s that! Here we go:
Swivel Chairs (from opening photo) | Rug | Sectional | Leather Sofa | Sconces | Chandelier | Black Side Table
This is where the room was when we sent it to Misty (now realizing she should have done it off the first photo when the walls were bare – sorry Misty!). You can see the room coming along, but the walls felt unfinished and the wood jams and sashes bothered me but I had NO CLEAR SOLUTION.
The three biggest challenges:
The Paneling and Trimwork. The paneling was painted a very cool white in semi-gloss and repainting it requires a 3-day paint job where the room has to be emptied and sprayed because the paneling can’t be rolled (well it can, but it will look better if its sprayed evenly). I kinda backed myself into this corner on accident, with way less flexibility. This is doable but expensive and extremely disruptive. And then change it to what? Even if I could snap my fingers I didn’t know what the right color would be. The Drywall is so broken up. As you can see there are so many doorways, windows, etc., so painting the drywall something darker would make the room so choppy and busy. So we needed lighter… Fine, but choosing the right light tone I find to be much harder than dark because it’s harder to get a sense of the tone from a sample. And boy did I try out a billion samples. The paint color shouldn’t compete with and should enhance the kitchen tile.So we tried some options:
Neutral WallpaperI love the Sandberg Rafael white wallpaper so much – just a few tones of white (one that matches our cooler white). But when Misty photoshopped it in here (granted renderings are hard) it was certainly not a hell yes. But then I thought that maybe it’s the wood of the windows that pops too much for me and throws everything off balance (this is still a current running theory).
Neutral Wallpaper With White Painted WindowsNow painting these white oak windows is NOT IDEAL and would take me being 95% sure it’s the right decision. But seeing it photoshopped the same as the trim color is something I do really like. Brian and other people don’t agree so I’m not doing it anytime soon, but to me, it makes the room way less busy so that you can focus on the real moments – the ceiling, the fireplace, and the big wood doors (that we wouldn’t paint). But y’all, once painted you can NOT go back. In this one Misty also made the mantel wood – which I like but don’t love (not sure why).
Light Blue Wallpaper And TrimThis was meant to be a fabric wallpaper/texture and have the trim match it completely. We tried to make this work really hard – using the Ashley Stark fabric wallcoverings. Again, just a texture (it looks like a pattern up there). Ultimately we worried that the tones of the fabric which you can see here (stone and pebble) might have been a little gray for this room.
Neutral WallsThis was a neutral I thought I liked (to add warmth) but uh, no.
Bold(er) PinkWe have a lot of blue and green (and more green coming) so I thought maybe a pink on the walls would be nice to see. Nope!
Pale PinkStill nope! Perfect for Easter!
Pale Pink And TrimBut here it is with the windows painted out the same pink (which I still prefer than the wood when you look at the overall room).
What We Painted – Where We Are This WeekSo when we were gone for Spring Break we had the drywall painted Mantra SW 9631 by Sherwin–Williams. It was a last-minute decision but I felt 85% good about the sample and since the drywall was just a few hundred dollars, took one day, and didn’t require spraying (so we didn’t have to unload the room) I said, “let’s just do it”. I came back and was so pleasantly surprised. It’s a happy extremely pale light tone of blue, with some green in it. We were worried about going too gray as to look sad in Portland but it’s such a pretty color. Am I 100% sure that it works? Nope! But I’m moving forward with the other elements that are happening. We have bought this sofa, and am planning on cafe curtains on the deep sills, big curtains on the big doors (maybe), and still considering upgrading the mantel to something warmer (or even still painting the brick). So I would say I’m 70% happy with this color and have no idea how it could be better. I still kinda want to paint the wood of the windows, but last week I played with a piece of sheer white fabric as a cafe curtain and think that might help a lot. I’m going to try everything I can before we paint those windows, FYI. I think my biggest challenge is that the room looks more formal than I want it to be because of all my choices. The paneling in semi-gloss is kinda formal. The lights are very traditional and could be considered formal. And all the trimwork – molding and paneling give off this higher-end vibe, which is not a bad thing but it also reads more formal. But I’m embracing it and really feel hopeful that through furniture and decor, I can make it feel happy, beautiful, and more casual. But all in all, we love this pale color and I can’t wait to show you other angles of it (just need to shoot the dining nook before I can show you :))
More to come soon, but what do you think?
Resources:
Wood flooring: Oregon White Oak by Zena Flooring
Windows and Doors: White oak, Aspen Casement by Sierra Pacific Windows
Stairwell Color: Smoky Blue by Sherwin-Williams
Wall Color: Extra White by Sherwin-Williams
*Photos by Kaitlin Green
The post The Journey I Went On To FINALLY Pick A Wall Color For Our Living Room (And How I Feel Now That It’s Done) appeared first on Emily Henderson.
April 6, 2023
How To Layout A Bedroom For Optimal Rest: 5 EHD-Tested Layouts + Help Jess Choose Hers

As I’m wrapping up my living room design (it’s happening people!), my sights are heavily set on my bedroom. And as someone who has only designed one bedroom fully in her adult life, I am pretty pumped but also really want to get it right. Can you see me shrinking by the pressure I’m adding onto my shoulders?? Just kidding…sort of. So to kick things off, I need to solidify my layout. Doing that will help me come up with my desired furniture list and general size needs making everything easy to source..right? Now first I’m going to walk you through my bedroom and my personal layout options (or at least the one’s I like the most). Then after that, we are going to dive into our five “no-fail” layouts to help you figure out a bedroom layout if you are currently struggling. This way we can all help each other:) Sound fun? Cool.
So here is my bedroom before I moved in…


Above to the left is my “headboard wall” and just one of two walls my bed could be on. Then to our right is the other love of my life (my turret being #1) – my French window wall. These French doors lead out to my skinny balcony and bring in the prettiest, softest light.

When my cousin was staying with me she called it a princess room and to be honest I kinda feel like a princess when I’m in there (and that’s without it being designed!). Oh and don’t worry those blinds are long gone. I have temporary white curtains that are perfectly light filtering. I also have my little vintage chair from my last living room reveal in the corner. Remember that chair when I talk about the layout options:)


Now, this is the wall opposite my “headboard wall”. Since it has those two doors (one to my bathroom and the other to my closet) there’s not much you can do furniture-wise but a tall slim dresser in between the doors which I am highly considering.

I figured I’d give you a little furniture context and yes, I have been sleeping like this for 2.5 years. This is also a full-sized bed so I CAN’T wait to upgrade to a queen. Many have tried to tell me I’ll regret not getting a king but first I think it would take up too much space and not leave enough room for my nightstands (especially since on the window side I need to take the door’s ability to open into the room into account). Then on a sentimental note, my parents never had more than a queen because they never wanted to be that far from each other. I know that doesn’t work for every couple for a ton of different reasons but since it’s still just me and I like that idea, I’m sticking with a queen.

Here is the room without any furniture so you can see what the scope is. It’s almost a square with lots of doors and window doors.

To be honest, this is what I’m leaning towards. I haven’t had a dresser in years (at least seven) so I’m not desperate for one but having a slim tall one in between the closet and bathroom doors does sound handy (and could be very pretty:)). So aside from my little chair on the right, it’s simple, not crowded, and in my mind, peaceful. However…
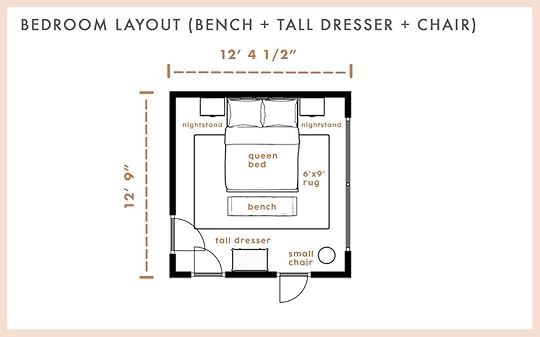

…I do like the idea of a bench or two little ottomans at the end of my bed. The little chair is really just for decor at this point and isn’t something you want to sit on for any length of time. So having something at the end of the bed not only gives me a place to sit on that’s not my bed but also is another opportunity to have a pretty design moment. Beauty is “function” to me for my overall peace of mind. As silly as that sounds I’m not kidding.
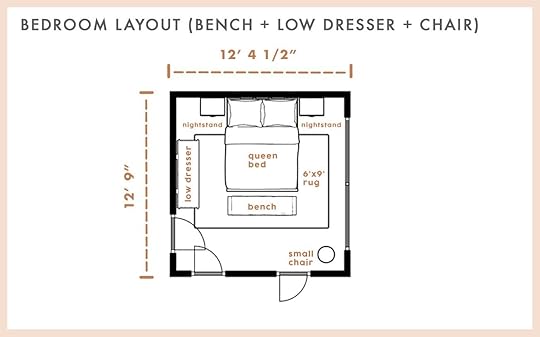
The only other option I’d really consider is to get a low and long dresser for the wall opposite the window wall. While I’m sure it wouldn’t look bad, the small tall dresser looks like it’s more visually balanced with the other pieces that I also want. I originally made an option with both dressers but I really don’t need two dressers and it would simply be too much furniture for just me. Maybe if someday I’m sharing this apartment that may need to change but until then it’s one.
So what do y’all think? Do you agree with what I’m feeling? Bench or no bench? Let me know!
 design by jess bunge | styled by emily bowser | photo by sara ligorria-tramp | from: the feel-good modern romantic bedroom makeover jess did for her dear friend (all thanks to the company store)
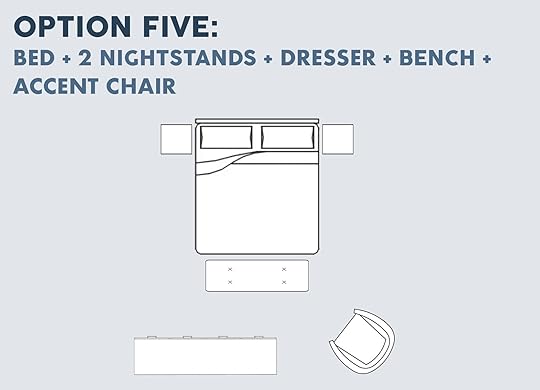
Now that we’ve talked about me, let’s talk about you, shall we? Do you have a bedroom layout you are possibly overthinking?? Look, some rooms are HARD, with wild layout quirks so I don’t want to discount that. However, other times all it takes is someone showing you five great options with examples (of course) to help you make a decision so you can actually enjoy your room. The key to all of these is the “sq ft: furniture ratio”. You don’t want your room to feel empty but you also don’t want so much furniture that your mind can’t relax. If you are nervous about this, just start small and slowly add if need be. With that said here’s the first and grandest option (aka for a big bedroom):

This one was modeled after the Griffith Park bedroom. A layout like this one definitely requires more space but can easily be modified if you like the idea but can’t fit all nine pieces. For instance, you could take away one chair or the bench or both. You still get the vibe, the room is still balanced, and you keep all that great dresser storage. We really love the idea of mixing up dresser heights (one tall with one short and long), especially if they live on different walls. It will give your room more visual interest!
 photo by tessa neustadt | from: the griffith park master bedroom reveal
 photos by tessa neustadt | from: the griffith park master bedroom reveal
See the resemblance and how pretty it is all together??
Now onto the next and on the opposite end – one of the simplest (but equally as pretty):
As you will soon see, this is the layout Emily went for in their small primary bedroom in LA. It’s elegant, symmetrical (which we love when it comes to bedrooms), and perfect for a small space. Five pieces for a beautiful bedroom you can happily enjoy. Let’s see it in action below…
 photo by veronica crawford | from: our bedroom update (also how i feel about having a tv in the bedroom)
Since there aren’t many pieces of furniture, you can play more with pattern and texture! Just remember to vary the pattern scales.
 photo by veronica crawford | from: our bedroom update (also how i feel about having a tv in the bedroom)
Emily also added a little accent chair next to their dresser for an added special moment. So if you have a small chair you love see if it works next to your dresser.
Option Two (Without The Bench)
 design by emily bowser | photos by sara ligorria-tramp | from: moto reveal: emily bowser’s bedroom “after” is unrecognizable from the “before”
But what if your room doesn’t have room for an end-of-the-bed bench? No worries! Either get it out of there or if you’re like Bowser, you can stick it along a wall!

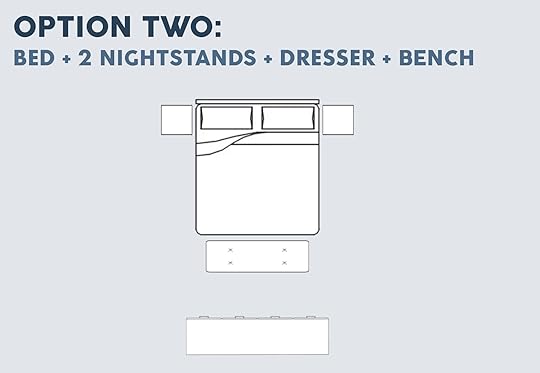
Next up is great for anyone but extra great for couples. Two dressers so no one is touching the other person’s stuff and it’s symmetrical?? What a dream! The size of the dressers can even vary from each other if that’s something you’d like. Check out how Em did it in their Glendale primary bedroom:
 photo by tessa neustadt | from: our master bedroom – finally
Ok, we’ll start with this shot because it’s perfect. I’ve always loved this room. Oh, and can you tell we reallllly love end-of-bed benches?? Use whenever possible:)
 photo by tessa neustadt | from: our master bedroom – finally
Now we’re talking. Em used two different dressers in size and style but since the materials were similar (white and brass) they totally worked together! Technically she didn’t have a choice but to get two different sizes because of windows and wall space but that just goes to show how you can modify for your unique space:)

Maybe you have a dresser and a bench but something’s still missing! You might just need a reading chair (space permitted). While there are a couple of options when it comes to accent chair placement, don’t be afraid to put it next to your nightstand (especially if you have a long, narrow room).

 photos by sara ligorria-tramp | from: a romantic glam bedroom makeover with opalhouse by target
See how cute it is in this bedroom we designed a while back? Bonus points if it’s next to a window.
Last but not least we have the dresser/chair on the same wall combo. It’s simple and easy. Again you don’t need a bench if you don’t have the space. However, if you do and you have kids coming in and out of your room, or you and your partner like to talk facing each other, then a chair across from your bed is going to be really nice! Or maybe you have a window on that side and you want your chair next to it like Julie did below.


 design by julie rose | photos by sara ligorria-tramp | from: makeover takeover: julie’s huge (and diy packed) bedroom upgrade
She skipped the bench since there wasn’t enough space but it all looks great! Also if you can get your hands on a real vintage Siesta Lounge Chair it’s one of the most comfortable chairs I’ve sat in.
So that’s it! Remember that you should always adjust for your space’s needs but these are great starting places. Have fun:) Oh and let me know if you have any thoughts on my layout but be nice, k?
Love you, mean it, and here’s a big graphic with all the options I just talked about:)

Opening Image Credit: Design by Malcolm Simmons | Photo by Keyanna Bowen | From: Malcolm’s Bedroom Reveal Is Here… How He Found Healing Through Design + The Incredible DIYs That Transformed The Space
The post How To Layout A Bedroom For Optimal Rest: 5 EHD-Tested Layouts + Help Jess Choose Hers appeared first on Emily Henderson.
April 5, 2023
Where Do You Really Need Canned Or Recessed Lighting? What Lights We Used, Didn’t Use, Or Wish We Had This Winter

Ah, the recessed light debate – the source of many impassioned internal arguments that I’ve had in EVERY SINGLE ROOM I’ve ever designed. Designers don’t like generic builder grade anything, so there is a level of snobbery about these basic fixtures, inherent in talking about them. But often without them, especially in certain rooms during certain times of the year there is frustration when you simply can’t see anything. So after our first dark PNW winter where there is no natural light between 4 pm and 8 am, where we eat breakfast before the sun comes up and start dinner after sundown, I feel like I have some perspective to share. So here is where I actually used my recessed lights (and where I regret putting them because I didn’t use them at all this year).
But first…the purpose of recessed light:
Not every type of lighting has the same purpose – it’s not always just to “brighten” or to “see better”. No. The purpose of a recessed light, the reason you would put them in your room is one of these things (or both):
To make a room bright enough to execute a specific task – i.e. cooking, cleaning, crafting, putting on makeup, and getting dressed. To keep the lighting fixtures minimal – likely in a more contemporary home where you want your eye to go to other more architecturally interesting things, not a ceiling fixture (this time).And before I get too far into it, you should know that when I talk about recessed lighting I’m referring to the more sleek/modern 3″ or 4” round with the squared-off casing in white or black (if wood or dark ceiling). It’s what we have throughout our first floor and I think they are lovely to look at in every way.
So let’s go room by room with my current opinions based solely on my 43 years of my own personal experience. Everyone is different – but here is my perspective.
The KitchenYay or Nay? Personal preference! (But, I’m currently a yes)
 photo by kaitlin green | from: farmhouse kitchen reveal
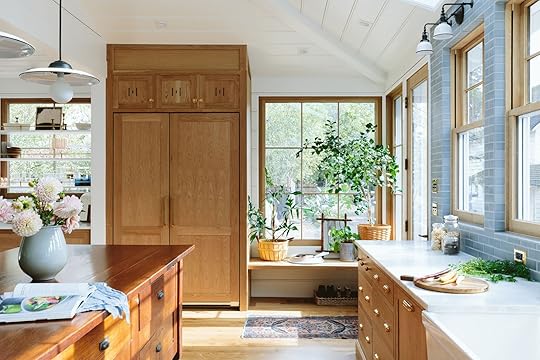 photo by kaitlin green | from: farmhouse kitchen reveal
This is unpopular with designers but y’all I use my recess lights in our kitchen a lot – both for cooking and cleaning. I lean more practical this way, probably because I cook a lot. Or maybe I’m just used to it, but in the last 4 kitchens I’ve either had track or recessed lighting in addition to pretty fixtures. I used track lights both times when we had exposed wood ceilings where the track could be installed and hidden along a vintage beam, and recessed lights for a more typical drywall ceiling.
 photo by sara ligorria-tramp | from: mountain house kitchen reveal
Last winter at the farm, I still used the sconces and pendants for morning light in the kitchen because it was too early for that level of overhead. But if I’m following a recipe in a cookbook for dinner, I really want to be able to see well. I find that while the sconces and pendants provide a lot of lovely light, it’s not task lighting and it’s not direct (they are more ambient) and just not enough. I’d also like to point out the obvious that kitchens have to be cleaned nightly after dinner, whereas bathrooms can be cleaned during the day on the weekend, thus you need better lighting to clean at night. So, I’m a yes to recessed lighting in the kitchen just to light up your cooking spaces.
The MudroomYay or Nay? Depends! (We didn’t this time).
 photo by kaitlin green | from: our mudroom reveal: a dog + storage-focused space that is possibly my favorite room in our house
Now, this is considered a very utilitarian room which usually people recommend a lot of overhead task lighting (and I do, too). We have high ceilings in here so we put in these four pendants which provide more than enough and I’ve never wished for more lighting in here. So we skipped them, but if you don’t have a lot of overhead light options (like pendants or multiple semi-flush lights) then go for the recessed. I don’t love the look of 4-6 semi-flush lights (a trend we’ve been seeing a lot lately) but I do like spotlights and love multiple pendants as we did.
The Living RoomYay or Nay? SKIP, unless it’s also the kids’ playroom
 photo by kaitlin green | from: moving through some regret – the first look at the farmhouse living room plus what i’m loving so far 🙂
This is our fourth living room documented here on the blog and never have we had recessed lights in any of them nor wished we had. So I feel confident in saying that generally, I don’t think you need them if you can put in ample overhead fixtures and sconces (and table/floor lamps). Since we have an exposed ceiling in the farm living room we couldn’t really put in recessed lighting in here, so it wasn’t really a debate. The purpose of this room is usually to hang/converse and this is always better with recessed lights off, and ambient lights on. However, if your main living room is also where you gather around your coffee table to play games and do crafts then you’ll probably want them. We used them all the time in the mountain house family room – the lamp light wouldn’t do in the winter (and that room didn’t have a ton of afternoon natural light).
 photo by sara ligorria-tramp | from: mountain house reveal: how we designed our super kid-friendly family roomBedrooms
Yay or nay? Depends! (we mixed it up and my opinions are based on a few factors)
First off, this really depends on the era of the house. For vintage houses try to avoid recessed lighting and do ample overhead semi-flush, flush, and/or sconces.
It’s my current opinion that you need either a multi-bulb semi-flush or chandelier if you have the height OR recessed lights but not both. If you have a more contemporary house, I think throw them in – they won’t look weird as it’s more period appropriate.
 photo by sara ligorria-tramp | from: mountain house reveal (yes, another one!): the coziest upstairs guest “bunk” bedroom
We had them in the mountain house (1970s) bedrooms (not the master) and as long as they are dimmable they go unnoticed when not in use. We purposely wanted to keep the room clean and minimal and liked the look of no light fixtures.
 photo by kaitlin green
 photo by kaitlin green
Our farmhouse bedroom ceiling was very asymmetrical so we didn’t put in an overhead light (I might still swag a big Japanese lantern for decorative reasons because we have the height). Any other type of light fixture would have to come from a really awkward place in the middle of a beam in order to be centered which I don’t love, so we just nixed it and put in recessed lights instead. That’s all to say that I have a current theory: If you get dressed in your bedroom you need decent overhead light – either a multi-bulb fixture or recessed lights. But if you don’t need to get dressed/look in the mirror in your bedroom or if you have a separate dressing closet then you don’t need a ton of bright lighting in the bedroom. We rarely turn on our overhead lights in the bedroom so I could have nixed them (but I don’t regret having them too much).
 from: master bedroom update + another ask the audience
 photo by sara ligorria-tramp | from: reveal: our boy/girl, 2-twin bed shared kids room…with a heavy dose of mama drama
In our LA house bedroom and our kids’ rooms (a vintage 100-year-old style home) we did not put them in and I’m happy we didn’t – HOWEVER, for all three of the farmhouse bedrooms we needed more overhead light during the winter. I actually am currently switching out our kids’ semi-flush lights because the single 40-watt bulb is just not enough (and we could upgrade the wattage, but the fixtures are clear glass so seeing that white LED bulb doesn’t sound awesome). We are instead putting in multi-light semi-flushes that look cool. But I am glad we didn’t put in recessed as the vintage windows and doors just look better without the contemporary recessed lights in there.
Where I didn’t put them in but wish I had….
 photos by sara ligorria-tramp | from: mountain house reveal: our calm scandinavian master bedroom
We didn’t put any overhead light in the mountain house primary bedroom because I didn’t want to disrupt the gorgeous wood ceilings. We attempted to address overhead lighting by putting LED strip lights on TOP of the collar ties (the horizontal beams) which unfortunately flicker in a very annoying way (because some LED + dimmers often don’t work well yet). Now, not having any overhead light was fine in the bedroom most of the time except when I wanted to try on outfits in the winter at night (which was rare as that wasn’t our lifestyle to go out). We actually have black track lighting originally intended for the closet sitting in the garage, but never installed (a very me thing to do/not do). Now what I should have done is put 4-6 small black recessed lights in the bedroom (I really like the look of black recessed lights).
BathroomsYay or nay? Personal preference (skip if you can but heavily depends on sconces)
 photo by sara ligorria-tramp | from: mountain house reveal: our soft yet secretly sultry downstairs guest bed + bath
 photo by kaitlin green | from: the farmhouse kid’s bathroom – bringing you up to speed on the (at the time) painful process
We didn’t put them in the kid’s bathroom and haven’t missed them for a second. We did put them in our bathroom and have only turned them on a couple of times. But we have them in all the mountain house bathrooms and used them a lot! The difference is that at the mountain house, all of our sconces were more decorative and gave off fairly low or directional (downward) lighting and we skipped all ceiling fixtures on purpose, to not bring your eye there. The era of the house was more post-modern and that worked so well stylistically. Whereas at the farmhouse, a more vintage style home, we chose sconces with really great light (clear or opal glass) with similar ceiling fixtures and so no, we did NOT need any of the recessed lights we put in (except in the shower).
I wish I hadn’t put the recessed lights in the vanity area of our bathroom – it disrupts the pretty tile in a bad way. Had I known that the sconces would provide such nice even makeup-applying bright light, I would never have put in these overhead fixtures. My bad.
Water Closet/Powder RoomYay or nay? Personal preference
You definitely don’t NEED recessed lighting in your powder room or water closet, so this is a personal preference. We didn’t put one in our powder room (just a little cute semi-flush and a sconce) and it’s GREAT. We did, however, put one in our water closet in our bathroom and I rarely use it, opting for the dimmable sconce over the toilet instead. So no, I don’t think you need it but doesn’t hurt and isn’t offensive (but if you have a vintage-style home maybe skip).
ShowerYay or nay? YES

 left: photo by tessa neustadt, from: our classic modern master bathroom reveal
| right: photo by sara ligorria-tramp, from: portland reveal: creating the dreamiest of master bathrooms
 photos by sara ligorria-tramp | from: the final mountain house reveal (for now): all the details of my master bathroom
Listen, even if you don’t turn the recessed light on in the shower you want one for cleaning otherwise it’s really hard to see in the corners.
Walk-In ClosetYay or nay? ALWAYS
 photo by kaitlin green | from: primary closet reveal! our functional and beautiful scandinavian farmhouse dream closet
Sure, you can go heavy on the sconces in here or put in a semi/flush, but really you just need good recessed overhead lighting (and I prefer this over the single fixture). I put away clothes so often at night, so it’s not just for getting ready.
PantryYay or nay? ALWAYS

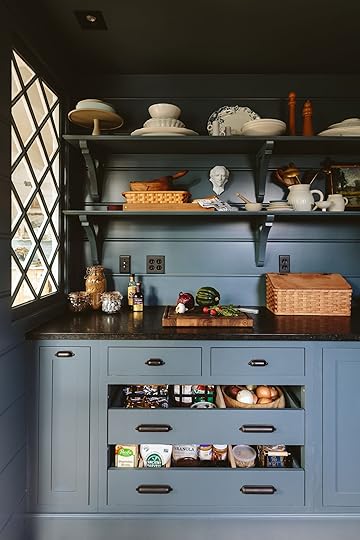 photos by kaitlin green | from: our farmhouse pantry reveal – moody, practical and extremely well-used
You need to be able to tell the difference between split peas and green lentils, quinoa, and brown rice. We put a really cute light fixture in our pantry, but for sure knew that we’d more often use the black recessed lights. I’m sure a multi-bulb or really bright semi-flush or flush could work, but I just think that recessed works better in here.
So like everything there are some things that are advisable and tend to be called a “rule” but so much of it is a personal preference, so I’d love to invite any/all of you to leave any anecdotal experience in the comments.
Opening Image Credits: Photo by Sara Ligorria-Tramp | From: Mountain House Reveal: Our Calm Scandinavian Master Bedroom
The post Where Do You Really Need Canned Or Recessed Lighting? What Lights We Used, Didn’t Use, Or Wish We Had This Winter appeared first on Emily Henderson.
April 4, 2023
Emily Bowser’s Kitchen REVEAL! Plus The 8 Ways She Really Maximized Her Galley Kitchen Storage

Hello hello! Better late than never? Where has the time gone?? I CANNOT believe we are already wrapping up March. HOW? I was really really hoping 2023 was going to bring a breath of fresh air and some rest for the Bowser household but it has proven to be a challenging and busy year so far. It’s not all bad, we have done some traveling and work has been more consistent than it has been in the past year and a half. However, I bring sad and shocking news for anyone who follows all my cat sagas: A couple days after we got back from Sundance at the end of January, we found out our 7-year-old cat Puck had a large cancerous tumor in his intestine. He got on steroids and gave us another 4 weeks before we made the tough choice to help him transition to the next life. Our house feels more empty than we could have imagined and we all miss him very, very much. He was a challenging and adventurous cat who loved to play fetch, bring me dead (and sometimes alive) mice, fight neighborhood raccoons, had a crush on any woman who came to the house, and in the end, despite his tendency to be more of an independent spirit, made it clear how much he loved and trusted us in the last few weeks of his life. It is wild how much these little creatures affect our lives and I’m hoping our cat luck will take a turn for the positive because I’m not sure how much more heartache I can take. In good news, Puck spending his last days cuddling with us really taught Gremmy a thing or two. I think Gremmy and Daffy were aware something was wrong and they stayed close. During this time Gremmy would come up on the bed and lay close by, which is not something he would do before. This past week Gremmy has been getting on my lap and if you’re one of the few Gremmy super fans you know this is huge.

Now you may understand why I‘m a little slow in getting these reveals out. The good news is we have shot so much now I just have to write!
I wanted to start with the kitchen because honestly it was supposed to be finished in September! As always, I’m living proof that these things take time. So much time and money and time is money etc etc. You can read the intro to this post here. Cliff notes: It is the last room in the house to be “finished” because it’s been fine after the initial reno that made it safe (there was mold) and liveable. When initially renovating we were WAY out of money so I didn’t get to do what I wanted, I just kept it simple white subway tiles, white shaker cabinets, and black hex floors which felt like they would remain timeless because historically those are pretty timeless finishes but, you know, now it feels very 2015. I wanted to make it feel more “me” while gaining some storage but without doing any major reno, for waste and money reasons.
Enter my friend Rebecca (a designer, design producer, and entrepreneur) and her company Design By Numbers. We knew each other from working on HGTV’s Build Me Up (RIP) with host Orlando Soria (you may know him 🙂 ). We would all Marco Polo during the pandemic and be annoyed by the fact that my upper cabinets didn’t go to the ceiling (it was often my background and I would force them to look at them while I talked/screamed about the state of our country). It took a while to actually get to it, but I finally 3D scanned the space (more on this is in the process post) and she had a new cabinet box made to replace the one that didn’t go to the ceiling. Now I have more storage space, a working vent, and much prettier cabinets. I had the lower boxes painted and just replaced the doors and drawer fronts. Shall we get to the reveal??


And now with more interest and depth…

To say that photographing this galley kitchen was a challenge is an understatement. Poor Sara. This is the most pulled-back we could get without it getting too fish-eye-ish
As you can see through, the uppers on the left now reach the ceiling AND incorporate the fridge making it feel more integrated. The cabinet style is called “baby shaker” and the color is “Putty”. It’s a greenish, greyish taupe and adds the perfect amount of warmth without being overwhelming in this small space. The simple and modern pulls and knobs are by Rejuvenation. I wanted hits of black to make the floor feel more incorporated into the design, I didn’t want it to feel like I designed this kitchen over 7 years. It was all totally thought through and on purpose 🙂 I had the recessed light over the sink changed so that I could have this beautiful ceramic light by Rejuvenation. It’s both practical in that it gives off much nicer light than the recessed light (had a dimmer put on that switch as well) and obviously makes a much bigger statement than having nothing at all there.
One more time…


And now…

Over the Door Towel Bar | Ceramic Light | Pulls | Knobs

Soap Dispenser and Sponge Holder | Faucet
I love the way the doors are designed, they trick you into thinking they are frameless. These are good photos to talk about ADHD and design:). It’s funny, some would think that it would be easier to have less visual noise when you have ADHD. I think to some these photos may seem busy, but it all just makes sense to me. I use my kitchen a lot. We both work from home and one or both of us cook almost every meal every day in this tiny space. If things are visible in an organized way it helps me know not only where things are at all times and keep hoarding to a minimum, but it also feels like one less step when I go to cook. It’s hard to explain to people who don’t have the same hang-ups while trying to do basic tasks but maybe my fellow ADHD-ers will understand. I’m actually not a naturally organized or tidy person but I learned early that fewer choices and easy accessibility make my life easier. Liking my kitchen this way makes me think Julia Child may have had ADHD too :). It’s also important that everything that is out is also used often enough that it doesn’t get that weird oily dust from existing in a kitchen. Everything out I use almost daily, with the slight exception of the cutting boards although those are easier stored this way because with my job I often have to grab 5-10 of them as props often.
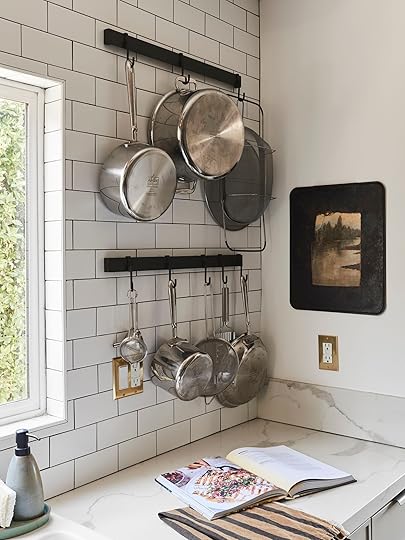
Pot Rack Bar | Hooks | Pots and Pans
Rejuvenation’s Emery Pot Rack Bar and hooks hold all my everyday pots and pans and a few other commonly used tools. My shelving brackets on the other side of my sink are from IronAbode. They have so many amazing shelf bracket options and are very affordable. They offer the actual wood shelves as well but because of the cost of shipping it just made sense for me to drive over to our friends Ross Alan Reclaimed in the valley and have a few shelves made there. I also got the wood for the top of my DIY lower cabinet from them, which you can read about in the process post if you haven’t already. The counter under that open shelving is where I end up doing 99% of food prep because the space to the right of the sink (above) is generally where clean dishes are “drying” aka probably sitting there until I use them again :).
Why yes that’s an oil painting that is for some reason painted on a very old and used cookie pan. You can’t really know that without seeing it up close but I wanted the internet to know because it makes me so happy that it’s on theme. Fun fact, I found it at a flea market in Seattle. On the same trip, I found the string of vintage buoys that hang above my bed.
I switched out my faucet for an unlacquered brass one from an Italian-based company Francone Bespoke Taps. I bought it to research for a job. Unlacquered brass in America isn’t cheap and at the time I purchased this one it was only $363, which was more affordable than it is now, but I would still say it is a quality faucet and I’ve enjoyed it. I’m sure they realized they weren’t charging enough/could charge more because it is very nice.
I want to mention my paper towel/ towel holder. I love it because it keeps me from just reaching for a paper towel without thinking. Because of pet messes and cleaning out my iron skillets, I like to have them on hand but not too on hand, you know? Another product I want to shout out is my soap dispenser and sponge holder. I want to be a solid soap person but I’m sorry, I’m a Dawn girl until I die. It just works so much better and I use it in so many homemade cleaners so I’m going to buy the huge Costco tubs of them a couple of times a year and decant them into this dispenser.

Shell Bowl | Magnetic Knife Rack | Knives | Magnetic Light | Shelving Brackets | Gold Dishware | Mixing Bowls | Green Plates (similar)
In keeping with the “put everything on the wall” theme, this magnetic knife rack holds my favorite slicing and dicing knives by Shun. I own more knives than that but they must have been dirty? If you look carefully, above the knife rack and attached to the bottom shelf there is a wooden work light. I’m calling this out for anyone like me that prefers to have their house seem like modern electricity doesn’t exist. Both Andrew and I are very sensitive to harsh light and have dimmers on essentially every light in the house but when making dinner, candlelight-level lightning isn’t really safe when using a sharp knife. After Andrew cut off half his thumb while chopping veggies last year I researched and found this simple (and cuter than it needs to be) magnetic light that recharges with a USB cord. I don’t use the rotatable piece, it comes with a flat magnet sticker as well that I screwed into the bottom of the shelf so it wouldn’t fall off, as those stickers seem to do eventually. This way we can keep most of the lights chill but have a work light where prep is happening.
I’ve owned the Gold Oak Kaloh dishes from West Elm for years. They’re just simple and good. So good in fact that I actually own twice as many as are seen here for large parties/when I inevitably break one. The mixing and serving bowls on the top shelf are from that line as well. The pretty ceramic cups were a gift and the green dishes and black mugs are vintage Hearth and Hand 🙂 The onion and garlic bowl is a Jayson Home concrete shell. Is it food safe? Who knows. Tell me how I’m going to get cancer in the comments.
Peep my amazing hedge out the kitchen window. Would it even be a blog post from me if I didn’t somehow bring up the only thing in my life that has ever just worked the way it was supposed to, my glorious 20-foot tall hedge?? I used to need a curtain here because my window looked directly into my neighbors but now I can look out to a sea of green. Some people have children, other people have hedges. Truly my pride and joy.

Switch Plate | Tea Kettle | Salt and Pepper Grinders | Pitcher (similar)
I decided to embrace the fact that my kitchen was renovated in this decade so therefore I feel like I have 1 million plugs and switches in a tiny space. Instead of hiding them, I gave them some bling with Rejuvenation’s switch plates. Then the tea kettle is by Fellow and those are vintage Nissen Denmark salt and pepper grinders, you can find them pretty easily on Etsy. I’m fraid the pitcher is old from Target and unavail at the moment.
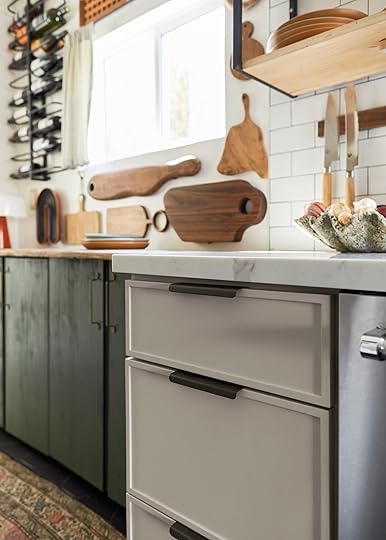

GREMMY!!
Welcome to the area where Gremmy essentially lives because this is where he gets fed and thinks if he sits there food will magically appear. Also ever since I put this Jean Palmer Home vintage rug here all the cats have loved hanging out with me when I’m in the kitchen.

Wine Rack | Rug (vintage) | Lamp (unavailable) | IKEA Unit | Cabinet Pulls | Wood Countertop
This is my perfect-size IKEA hack cabinet with Ross Alan Reclaimed top that you’ve seen in the process post. It houses all my cookbooks and our pantry things. I bought a wine rack for this area because we buy natural biodynamic wine in bulk for, you know, savings…and drinkings, so it’s not unusual for us to have too many wine bottles at any given time. I moved this old West Elm lamp from my living room into here because it’s perfect for giving off ambient light and being easy to clean. They no longer sell it but the link is there if you want to try to find it used online. I’m not going to link all my cutting boards because that would be wild. A lot of them are vintage, but if you have a question about any of them, ask away below!

Did I say I was going to do my laundry room? Let’s pretend I didn’t 🙂 INSTEAD let’s talk about the whole original inspo for doing anything with this space. I talked about this in the intro but this weird shape at the end of the kitchen has been tricky. There’s about 12” of wall on each side of the doorway to the laundry room and the IKEA hack was great for the right side, but because you needed space to walk past the edge of the counter you see on the right here, I needed something slim and tall on the left. Enter the Hart Modular Walnut Shelving Unit from Rejuvenation. I was also so happy to have some more open shelving to keep some of my pretty things I use when we have company and also a drink station for our everyday coffee and/or matcha…addiction. It’s visually helpful that the shelving unit is floating, it *feels* lighter and I hung it so that it would be even with the counter across from it.
 peep sweet daffy in the laundry room window!
Rail System | Matcha Maker | Coffee Grinder
I loved the Brookeside Rail System, also from Rejuvenation, in Sara’s kitchen reveal and it very practically holds bar/coffee/tea accouterments so I don’t have to dig through drawers for tiny things. The bottom cabinet holds our fancy dishware. Head over to IG to see an up close and personal tour of this very hard-to-capture in photos corner :). The Cuzen matcha maker and Fellow coffee grinder (I bought mine refurbished) are everyday appliances so they stay on the counter, luckily they are as pretty as they are practical.

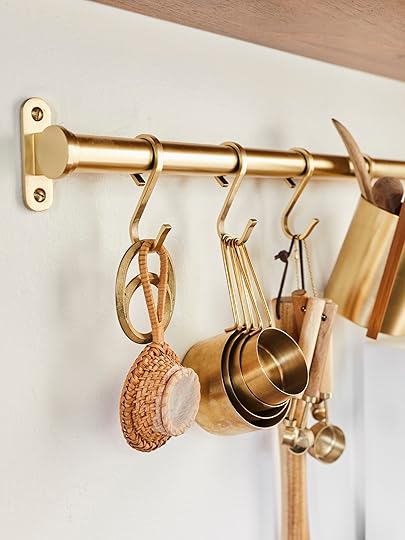

French Press | Glass Canisters
Look how pretty that walnut is! You can see here that the shelves are entirely adjustable.
If you are a French press person, I highly recommend this very inexpensive ($20!), extra large (34 oz!), double-walled (so it stays hot!), stainless steel (unbreakable!) french press. Save your money for a good grinder. I was shocked at how much that is a game changer. No need for expensive coffee makers in my opinion. Unless they are very fancy, and in that case, yeah probably buy those if you have the $$. Here’s a link for the simple canisters, but please don’t make me link everything on the rail system 🙂 if you have a question about something specific, ask away below!
If you are curious about the Cuzen matcha maker, it stores, grinds, and whisks whole matcha leaves. Apparently, this is the best way to consume matcha. They have a whole section of their website where they break it down. All I can say is it is convenient and delicious. I’ve taken to midday matcha with homemade cashew milk and have cut down our coffee consumption considerably.


Let’s turn around and look from the laundry room through to the new and improved dining nook. When you don’t have a lot of square footage, you have to go vertical. In the couple of inches between the IKEA cabinet and my kitchen cabinets I have a slim step ladder to reach my upper cabinets (now that they go all the way to the ceiling) and the top of the open shelving as well.

Let’s get into the dining space! As you may have seen, I revealed this space back in 2019. It’s a teeny tiny space, 7’5”x7’7”, that connects the living room to the kitchen. We needed to be able to fit a table but you also have to be able to walk past the chairs without tripping. Here’s a pic from that reveal:

Putting in an L-shaped bench helped a lot with being able to make the most of the space we had but here are the issues we still had: 1. The vintage table that I loved was just a bit too big. It was 48” wide and we had to cram it just a little too much into the corner to make it so that we could walk by. 2. I made a mistake and didn’t consider the fact that the vintage table had a lip, about 4 inches all the way around it, so in reality I should have lowered the bench a few inches to compensate for that. It wasn’t impossible to put your legs under the table or anything, but you couldn’t cross your legs for example, it was just a little too smooshed. 3. My vintage chairs also stuck out a little too much, as you can see the back has a sort of handle that would get caught on your hip as you walked by if you weren’t careful. Don’t worry. They live in my office now. I love those damn chairs. 4. The loose pillows were driving me crazy. They were always thrown around and messy looking 5. The banquette was getting scuffed to hell by our feet.
I looked and looked for a table that would be smaller but not *too* much smaller, I still needed it to be a proper dining table that could easily seat at least 4 people (this is also sometimes a workspace) so I couldn’t have it be a bistro table, for example. When working in small spaces I find that it’s hard because you need every inch but one inch too much is too much, you know??
I found this beautiful, high-quality white oak table by Sunday Furniture. It was perfect because it was 42”, so still big enough, but a 6” difference in a space that’s only 7’ is a lot! They had lovely, comfortable, durable chairs (with easy-to-clean seat pads!) as well so I reached out and the rest is history. Wanna see??
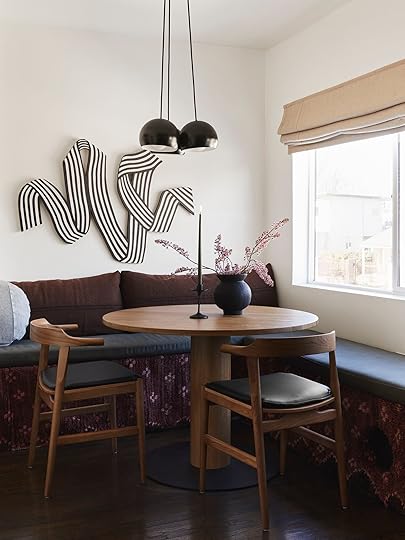
Table | Chairs | Runner | Ribbon Art | Chandelier | Roman Shade
What a mood change huh?? I bought a cheap-ish runner off of Etsy. It was $300 and the perfect width where I could split it down the center and make 2 pieces out of it to attach to the sides of the banquette. Don’t worry, it was not vintage. I’ve attached it with Velcro under the cushions and along the side so I can take it off to clean it. Cushions are the same as before, custom, made of green canvas that has held up well. The new pillows along the back are two body pillow inserts with custom cases I had made from vintage wool army blankets. They stay in place much better and offer more support. As you can see, no need to change the window treatments from Barn & Willow, the amazing ribbon art of Angela Chrusciaki, or the understated but perfect Schoolhouse chandelier. The Round pillow is vintage West Elm, sorry!

As you can see, there’s a little more space for the chair to be pushed out, but still able to get around. The chairs can also push in a lot more than seen here if necessary. The cushion on the chair is a must for me. We love hosting dinners and there is nothing I hate more than being uncomfortable or being concerned that our guests are uncomfortable. So far no issues with the cats tearing up the cushions accidentally or on purpose. They are also completely removable and easy to wipe down. The table is super sturdy. It’s solid white oak with a steel base so it’s not going anywhere, not even if Daffy tries her hardest 🙂

The tulip style also gives us the most legroom, especially if we are squeezing in a bunch of people for game night. It also gives us the flexibility to be able to push the chairs around easily.
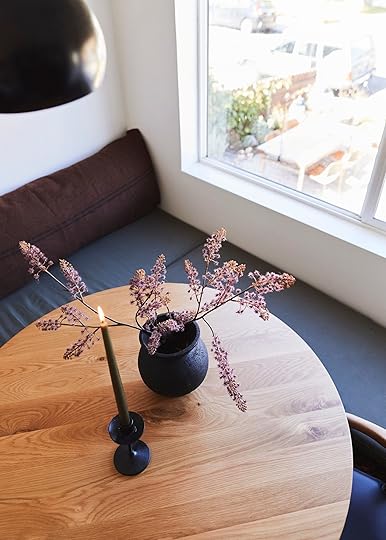
Vase | Branches (unavailable) | Candlesticks | Candlestick Holders (similar)
This vase is my favorite from CB2. It’s currently on sale and you should buy it, you won’t regret it. I’m sorry to report that the very good faux branches are from Target last year and I don’t think they carry them anymore, same for the candlestick holder. As always though, I will implore you not to waste your money on candlesticks that drip. I usually buy Yummi brand – they don’t drip and they come in a lot of sizes.

Don’t worry! The cat “hide-y hole”, as we call it, still exists. It now even has a camera so we can spy on them with motion-activated lights 🙂

Table Lamp | Vase | Black Tray |
This is where we did the lamp switcheroo, I’m using the Avena Table Lamp from Crate & Barrel here now. The tray on the vintage entry table is by Ferm and the pretty vase is from Jayson Home. The whole vibe change by bringing more depth over here kind of blows my mind. Of course, now I’m thinking of how the living room needs a little facelift in light of all this…someone stop me. Seriously. Next up…HOT TUB! See you all soon!

RIP Puck 🙁
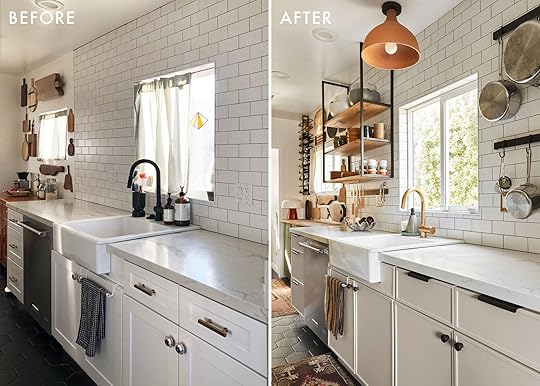


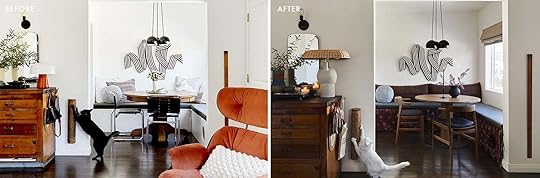
*Design and Styled by Emily Bowser
**Photos by Sara Ligorria-Tramp
The post Emily Bowser’s Kitchen REVEAL! Plus The 8 Ways She Really Maximized Her Galley Kitchen Storage appeared first on Emily Henderson.
Emily Henderson's Blog

- Emily Henderson's profile
- 10 followers

