
Emily Henderson's Blog, page 85
July 3, 2023
An Updated List of the Best July 4th Sales – Design-Editor Approved Decor, Furniture, Fashion, Beauty, and More


OH MY GOSH. Welcome to EHD’s annual Fourth of July sales guide! I have some great news for my fellow fiscally responsible friends: OUR PATIENCE HAS PAID OFF. This year, the July 4th sales are incredible. I mean: there’s 70% off furniture at McGee & Co.! There’s an extra 40% off sale pieces at Anthropologie! There’s 60% off clothing at Alex Mill! (And that’s barely scratching the surface – there are so many more good deals below!)
This weekend, Team EHD and I will be updating this post with our design editor-approved favorite deals in furniture, decor, fashion, beauty, and more. And, as always, feel free to drop your own small business’ sale details in the comments! We’d love to support you. Onwards, to the deals…
Furniture & Decor design by orlando soria | photo by sara ligorria-tramp | from: dreams do come true! the londo lodge is now a vacation rentalAllModern
 Sale: Up to 60% off furniture, decor, and more; an extra 20% off select items with code GET20; free shipping on furniture orders over $35.
Best Deals: Neutral Swivel Chairs | $368 Scandi Solid Wood Bed | Anthro-Style Cabinet
Sale: Up to 40% off furniture, decor, gifts, and more; plus an extra 40% off sale items (excluding furniture).
Best Deals:
Note: This sale ROCKS. I grabbed this charming little planter for $11.97, down from $28 – almost 59% off! If you’ve ever eyed Anthro’s decor but felt a little priced out (hi, same, me too!), this is the PERFECT time to grab a splurge-worthy piece at a budget-friendly price.
Sale: 20% off site-wide; $1,000 off orders over $3,999; $1,500 off orders over $4,999; $2,000 off orders over $5,999.
Best Deals: Quick-Ship Storage Sectional | Chic, Slightly-Curved Sofa | Classic Queen-Sized Sleeper Sofa
Sale: Up to 40% off select furniture, decor, and lighting.
Best Deals: Bowser’s Outdoor Sectional | Cool Terrazzo Planter | Sara’s Outdoor Coffee Table
Sale: 20-40% off site-wide.
Best Deals: Brass Picture Rail System | Sweet Organization Essentials | Traditional Decor Touches
Note: To see some Ballard furniture in action, check out Em’s newly-revealed patio.
Sale: 20% off site-wide.
Best Deals: Emily’s Favorite Comforter | Hardcore Bedding Bundles | Ultralight Towels
 photo by sara ligorria-tramp | via the new bed in a bagCB2
Sale: Up to 50% off furniture, outdoor, decor and more; up to 70% off sale items.
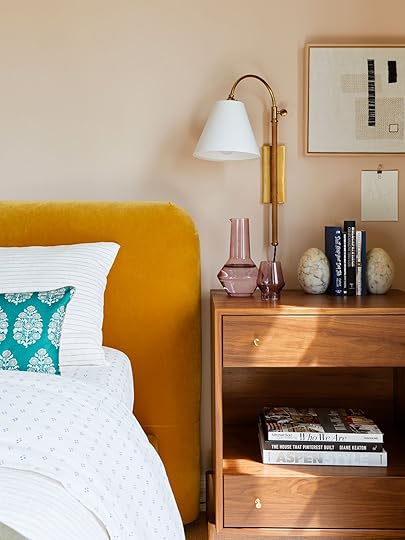
Best Deals: Emily’s New Bedroom Nightstands | On-Trend Chrome and Grasscloth Credenza | Set of 3 Quiet-Meets-Graphic Bud Vases
Note: Always sneaking spoilers into these posts!
Sale: Up to 35% off select items.
Best Deals: Handcrafted Rattan Ottomans | Luxe Leather Pillows | Mixed-Pile Accent Rug
Sale: 25% off Elfa-designed storage spaces; 20% off Avera- and Preston-designed spaces.
Best Deals: Family-Friendly Elfa Systems | Elevated Avera Systems | Premium Preston Spaces
Note: Read Sara’s comprehensive review of her Elfa shelving system here!
Sale: Up to 60% off select outdoor, decor, furniture, and kitchen, plus up to 30% off best-selling furniture.
Best Deals: Showstopping Burl Desk | Leanne Ford Vase | Spherical Indoor/Outdoor Planters
Sale: Up to 70% off sale items.
Best Deals: The Tupperware I Have & Love | The Entire Five Two Collection | Deeply-Discounted Dansk Casserole Dishes
 photo by kaitlin green | via our back patio reveal! (+ how everything’s held up to 6 months of portland weather)Frontgate
Sale: Up to 70% off select items, plus an extra 30% off clearance.
Best Deals: Beach & Pool Essentials | Classic, High-End Doormats | Em’s Patio Umbrella
Note: This is the best sale we’ve seen all year from Frontgate. Highly recommend for any outdoor needs!
Sale: Up to 70% off select items.
Best Deals: Statement Decor from $2.99 (!!!) | $4.99 Linen & Velvet Pillow Covers | Bold Outdoor Accessories
Sale: 20% off site-wide with code JULYFOURTH.
Best Deals: The Best Counter Stool Selection on the Internet | Whimsical Pendant Lamp | California Cool Coffee Table
Sale: 25% off site-wide, plus up to 70% off markdowns with code HEATWAVE.
Best Deals: Iconic Vice Canisters | Ready-to-Ship Furniture | Deeply-Discounted Markdowns
Sale: Up to 60% off select items, plus an extra 20% off wide code TAKE20.
Best Deals: Beds & Headboards | Timeless Nightstands | Glam Outdoor Umbrellas and Fire Pits
Sale: 20% off site-wide.
Best Deals: Irregular Checkerboard Rug | Sweet Fluted Sconce | The Ginny Macdonald Collection
 design by arlyn hernandez | photo by sara ligorria-tramp | from: arlyn’s bedroom reveal is a lesson in the beauty of “unfinished” designLumens
Sale: Up to 50% off select lighting, fans, furniture, decor, and more.
Best Deals: Aesthetically Appealing Ceiling Fans | Outdoor Lighting Essentials | Bath & Vanity Lighting
Sale: Up to 70% off select furniture, dining, outdoor, and more.
Best Deals: Em’s Dining Nook Table Dupe ($2400 Off!) | On-Trend Cane Dining Chairs ($500 Off!) | Woven Wicker Side Table ($300 Off!)
Note: A lot of people tout “up to 70%” off, but this sale MEANS BUSINESS. So many INCREDIBLE pieces at 70% off – this is literally the best-discounted inventory I’ve seen in the years that I’ve been pulling these roundups together!
Sale: An extra 20% off sale with code SALEONSALE, plus free shipping site-wide.
Best Deals: Classic Blue Table Runner | Graphic Cool-Toned Rug | Sweet Peach Apron
Sale: 15% off site-wide with code FIREWORKS23.
Best Deals: Personalized Stationery | All Things Wedding | Fine Art Prints
Note: Don’t forget that you can work with a free art advisor! I’m still thrilled with the gallery wall that the Minted team designed for me.
Sale: 30% off site-wide; 35% off orders over $4,000; free white glove delivery with all orders over $2,500.
Best Deals: My Tried-and-True Swivel Chairs | Beautiful Green and Brass Storage Console | Grasscloth Nightstands
Sale: 15% off site-wide with code JULYFOURTH2023.
Best Deals: Durable Outdoor Dining Set | Modern Teak Outdoor Sectional | Protective Furniture Covers
Note: Remember Jess’ communal patio? Her Neighbor pieces are still holding up beautifully.
 design by jess bunge | photo by sara ligorria-tramp | from: jess’ communal patio revealOverstock
Sale: Up to 70% off furniture, decor, and more; plus an extra 20% off select items.
Best Deals: $199 Serena & Lily Hanging Chair Dupe | Classic-with-a-Twist Media Credenza | Stylish AND Functional Shower Stool
Sale: Up to 50% off furniture, outdoor, lighting, and more.
Best Deals: Elevated Outdoor Lanterns | Scandi Folk Art Handcrafted Quilt | Deep Seat Slipcovered Sofa
Sale: Up to 60% off lighting, hardware, furniture and more, plus free shipping with code FREESHIP.
Best Deals: Sale Lighting Styles | Sale Furniture Styles | Sale Hardware Styles
Note: The furniture on sale is REALLY high quality – like, modern heirloom-level stuff. (That’s not even marketing speak – solid woods, beautiful finishing, all that jazz. Highly recommend perusing the selection if your budget allows.)
Sale: 20% off site-wide with code JULY20.
Best Deals: Charming Blue Indoor/Outdoor Rug | Flatweave Rug with Tasseled Edges | Modern Trellis Textured Rug
Sale: Up to 70% off select items, plus an extra 10% off sale items with code EXTRA10.
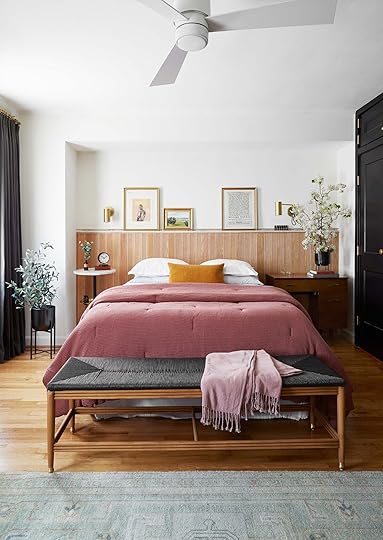
Best Deals: A Cheery Yellow Bed | Em’s Favorite Coverlet | Our Go-To Plug-In Sconces
Sale: Up to 50% off outdoor, kitchen, lighting, furniture, and more.
Best Deals: Half-Priced Potting Bench | Ticking Stripe Studio McGee Bench | Bright, Happy Jungalow Rug ($200 for a 7’x10′!)
 design by malcolm simmons | photo by keyanna bowen | via malcolm’s bedroom reveal is hereTerrain
Sale: An extra 30% off sale furniture, planters, decor and more with code SUMMERISHERE.
Best Deals: Pretty Garden Essentials | Galvanized Trough Planter | Geometric and Modern Chiminea
Sale: Up to $700 off on select mattresses and bed frames, plus additional savings on furniture, bedding, and more.
Best Deals: Mattresses | Body Pillow (Or a Lumbar, for King Beds!) | Linen Duvet Cover
Note: Check out Em’s recent mattress review here! (I also have the Mint Hybrid and wrote about it here.)
Sale: An extra 50% off sale items.
Best Deals: $2.47 (!!!) Brass Hanging Wall Mirror | Em’s Upstairs Storage Cabinet | The $29.98 Nightstands I Just Bought
Note: Yes, writing these sale posts IS great for my wallet. Have been eyeing those nightstands since they were $119 – yawped at this new price!
Sale: Up to 70% off outdoor, decor, furniture, and more.
Best Deals: A Stylistic-Chameleon Cocktail Ottoman | 4-Light Kitchen Pendant That Only Looks Expensive | Outdoor Rug with Palm Beach Vibes
Sale: Up to 60% off select items.
Best Deals: Easily-Styled Sofa with Refined Plinth Base | Affordable Indoor/Outdoor Planters with Stands | Cheery Striped Pillow Cover
Sale: 20% off site-wide for in-store pickup orders.
Best Deals: Em’s Rattan Daybed | Outdoor Planters | Justina Blakeney Pillows & Rugs
 photo by kaitlin green | via i went to the mall in search of cute comfortable summer clothesAbercrombie & Fitch
Sale: 20% off site-wide, plus an extra 15% off select styles.
Best Deals: Dresses (For Work AND Play) | Dreamy, Summer-Weight Wide-Leg Pants | My Favorite Curve Love Bottoms
Sale: 25% off site-wide with code USA25.
Best Deals: Wear-Forever Denim Jacket | Refined and Durable Leather Backpack | Hammered Stacking Rings
Sale: Up to 60% off select styles.
Best Deals: Sweaters & Sweatshirts | Shirts & Tops | Dresses & Skirts
Note: This is the first Alex Mill sale I’ve ever seen (other sites are calling it “a fever dream” and “totally unreal,” if that adds any context). I literally NEVER thought I’d see the day. It’s MAJORLY stocked, too – so many sizes, colors, and an endless scroll of inventory.
Sale: Up to 40% off sale styles.
Best Deals: Our Best-Selling Wide-Leg Pants (For Under $50!) | The Sweetest $47 Summer Dress | A Breezy (And Breathable) $35 Top
Sale: Up to 60% off select styles.
Best Deals: Charming Green Lace Midi Skirt | Elegant Elastic Waist Pants (Who Knew?!) | The Bow-Back Jumpsuit I Just Grabbed
Sale: Up to 60% off swim and summer styles.
Best Deals: $64 Olive Leather Sandals | Uber-Cute Cabana Striped Shorts | Vintage-Inspired Tank with Great Draping
 photo by kaitlin green | via the little things that make me feel good and pulled togetherGap
Sale: 30% off site-wide; 50% off select shorts, tees, and swim; up to 75% off markdowns.
Best Deals: Pink Barbie Puff-Sleeve Jean Jacket | The Sweetest Back-to-School Girls’ Clothes | $34 Linen-Blend Mini Dress
Sale: An extra 20% off sale styles with code SUMMER20.
Best Deals: Em’s Paint-Splattered Overalls ($324 Off!) | Loose, Easy-Fit Jeans ($234 Off!) | The Cutest $42 Waterproof Eddie Bauer Boots
Sale: Up to 70% off sale styles.
Best Deals: A GREAT $3.99 T-Shirt (I’m Wearing One!) | Graphic Crewneck Sweatshirt That Looks 10x The Price | $13.99 Twill Cargo Pants
Sale: An extra 60% off sale styles with code FOURTH.
Best Deals: Summery Blue & White Striped Pants | The Pink-and-White Version of My Go-To Summer Wedding Guest Dress | Half-Priced Liberty of London Dress
Sale: 40-70% off site-wide, plus an extra 20% off orders over $100 and 25% off orders over $125 with code CELEBRATE.
Best Deals: The Cutest Lobster-Print Dress | The Iconic J. Crew City Skirt (For Way Less Than I Used to Pay!) | ALL The Women’s Shorts
Sale: Up to 60% off site-wide with code HOTDEAL.
Best Deals: Em’s Half-Price Favorite Shorts | Em’s 100% Linen Dolman Top | Em’s Oversized Striped Button-Up
Note: I am easily #emfluenced (we all are, I think) and grabbed that oversized-button up for myself (in Pink). LOVE IT. Makes a great beach coverup, too!
 photo by kaitlin green | via em’s warm weather wardrobe reviewNisolo
Sale: Up to 50% off select styles with code SALE25.
Best Deals: My Most-Complimented “Work” Shoes | Woven Slide Sandals | Open-Toed Clog Sandal
Sale: Up to 60% off site-wide with code SALE30.
Best Deals: The Perfect Wrap | The Tie Oasis | The Bow-Shoulder Ruched Sidestroke
Come back over the next few days for updates – I’ll be here, bringing the deals. Have a great Friday. xx
Opening Image Credits: Design by Emily Henderson and ARCIFORM | Photos by Kaitlin Green | From: Our Custom Farmhouse Dining Nook Reveal (And What Makes It So Incredibly Durable…And Pretty:))
The post An Updated List of the Best July 4th Sales – Design-Editor Approved Decor, Furniture, Fashion, Beauty, and More appeared first on Emily Henderson.


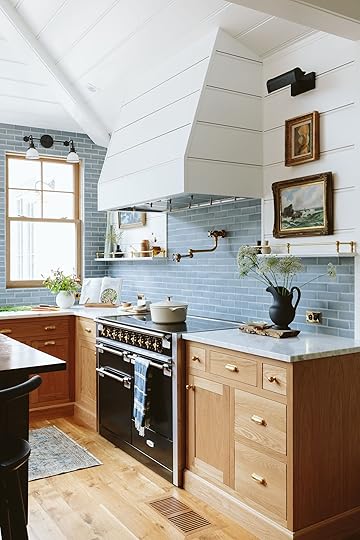
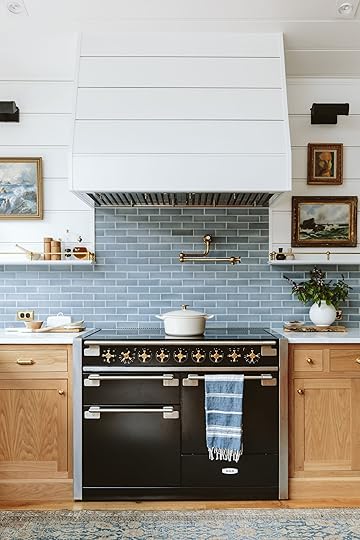
15 Questions About The Farmhouse Kitchen I Get Asked All Of The Time…Answered

I love a “renovation reflection” – the time after the renovation when you find that you love things even more than you thought, realize some things are way less important, as well as your basic regrets and missed marks. So today I’m answering a bunch of questions about the kitchen that I keep getting – mostly reader and Instagram comments from the reveal which was super fun for me to just answer off the cuff.
Love the oak cabinets and the marble worktop! I’m dying for a practicality update on the marble as I need to make a decision on whether or not to go with marble worktops soon – did you seal it and what with? What caused the marks you say it’s already got? Did you feel terrified sitting on it in case it scratched or does it feel robust enough for that? Have you dropped red wine/turmeric/lemon on it yet and what happens when you do? Please please could you write about that?
I 100% understand your hesitation. Real stone is prettier because it has a unique organic pattern, but it’s not for everyone (I’m currently at the mountain house and still LOVE the white matte Cambria – quartz – we chose here). How old is your house? I personally think that real marble is particularly essential in older homes (totally fine if you use quartz, too) but if you are hesitant (which it sounds like you are) and you have a post-modern *style* home (anytime after 1950s) then I’d go with a quartz or porcelain. Most designers I know (and I agree) that a lot of the veining on quartz can be incredibly fake looking. It’s just my opinion but I’m not alone. In our kitchen, with the real honed marble, we have a decent amount of etching and marks now – mostly red wine, lemon, marinara, and the ultimate culprit of the unassuming… turmeric. ALL of them fade in time, they might not totally go away but they fade. You really have to make sure your expectations are set before you do this – we KNEW this would be the case and opted in because we wanted the real stone and we are 100% glad we did. Not one day or stain goes by where I wish we didn’t have this beautiful marble on our countertops. Also, there is confirmation bias in the mix, too 🙂 It adds so much authenticity to an older home, which is why I really want you to ask yourself if you NEED it in your house. For my brother’s river house home project, we are doing different quartz in different rooms (all Caesarstone) and none with the faux veining. But it’s new construction and very contemporary so we are beholden to NO style challenges – we can do whatever we want. I hope that helps!!
What is the countertop seam situation with your countertops? There’s a lot of conflicting advice out there!
Our seam is behind the faucet and we have a farmhouse apron sink so that’s the only place you see it. It doesn’t bother me at all, but I don’t hone in on details like that. When everything else is so pretty I find that your eye really ignores little things like that. I didn’t think that we would need a seam – our slab was long, but I trust our fabricators that they did what was right. The corner (by the range) doesn’t have a seam – they made it an L-shaped slab. I love that, but at the same time, they used the only part of the slab that I didn’t love (it had lots of brown in the veining which looks dirty). So I was surprised when I saw it featured so prominently (there was a huge conversation about them avoiding using that area). It doesn’t bother me too much anymore, and I’m glad there is no seam. With real stone (like real wood) you just get what you get and have to work with the organic imperfections. It’s a good trade-off for us. Oh real quick, the biggest culprit has been the “not quite fully dried” pot lid, turned over on the counter to dry without a towel (so dumb). It wasn’t dirty anymore but the lid lip can rust a bit. I’ve now left these rinsed but not dried TWICE and in the morning was a HUGE round ring, in a darker yellow color. I freaked out (both times) and they have since faded but you can totally still see them.
The cabinets look very pretty and natural. Can you share the finish they used on the cabinets? Wax or oil, etc?
Unquie Kitchen & Baths used an all-natural Linseed oil. They clean up like a dream, aren’t shiny, and didn’t add any orange.
And if anyone wants to work with them you can get a little discount (10% off) with my code: EH2022
What’s the hardest thing to keep clean/is it hard to maintain?
Truly nothing comes to mind immediately as hard to clean/maintain YET. We PAINSTAKINGLY chose everything to be easy to clean (while still choosing stone, real wood, etc). There are a few original cracks in the top of the island that we could have filled but chose not to and those get crumbs which when I’m cleaning drives me nuts. The unlacquered brass faucet and pot filler takes a specific wax that I have only used once (so we aren’t really cleaning it) but oh that patina – so pretty. The walls underneath the shoe bench thing have gotten pretty scuffed up because we just throw our shoes in there, but I think once it drives me nuts enough I’ll use a magic eraser. The induction top is SO wonderful to clean, the island surface has held up almost miraculously (besides the crumb cracks). So I guess just the stone countertops making sure that we don’t leave the usual suspects there. But we are only nine months in, so I think this will be a great question in a year or four. Wait, as far as clutter – that corner bench area is full of backpacks, shoes, coats, garbage, things being charged, etc. It’s a mess, but it’s a contained mess. I tidy it daily and it’s fine.
How often do you have to take care of your unlacquered brass faucets and how long does it take?
Ha. I have been using just water and a micro rag, but I just cleaned it with the wax for the first time and I think it’s just once a month.
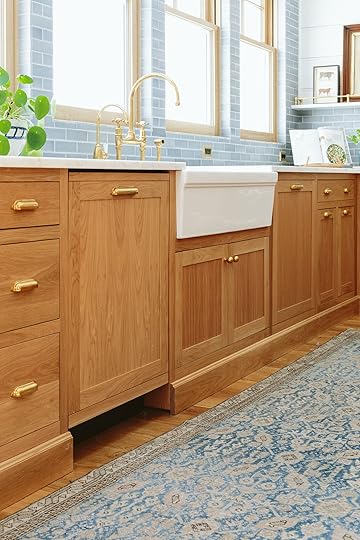
I am curious that you chose not to have a toe kick for the cabinets. Any reason?
So much of this is a personal preference, but in our LA house, the little furniture-style legs got so scuffed up (but they were painted so you could see the scuff so it might have been fine here since it’s stained wood which is so much more forgiving). I think it was more to make it simple and streamlined, easier to clean, etc. But a good thing to remember which I always forget about is that you can’t put this trim under any appliances – dishwasher, fridge, and drawer fridges – and you notice it missing more in the photo below.
So I guess the answer is it was a design choice that we made at the time, but I like both. Many people have said it’s more ergonomic to be able to tuck your feet underneath the space under the counter (the toe kick) while cooking or cleaning, but it has not bothered us AT ALL. HOWEVER, by choosing this design we had to put the heat vent on the floor in the kitchen, which we didn’t realize until we moved in and Brian and I were like, “Well that’s unfortunate”‘” because crumbs/food go down there so easily.
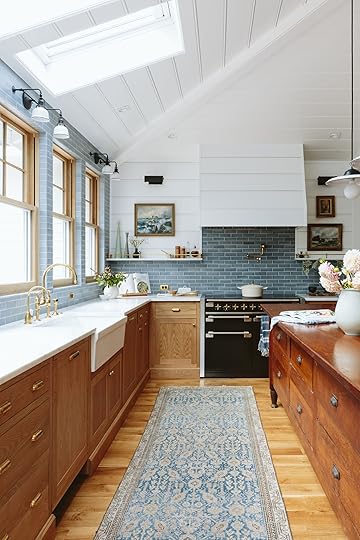
How do you keep the kitchen runner in place??
I think because it’s so long it makes it heavy and thus doesn’t move that much? We sweep/mop on Sundays and have to roll it up but I know there are great solutions out there if yours slides around. Ours is from District Loom by the way and I LOVE it.
I’m curious as to why the outlet on the bar is placed so high.
I had to go back and look to see what you are talking about! I think these things are just standard and if you don’t catch the exact placement that’s where they’ll go. It doesn’t bother me, though (probably because they are pretty outlets covers). Maybe they wanted it to be lined up with the lightswitches and they had to be that high for a reason? The point is I trust ARCIFORM enough to know that it was likely a reason, but I’m not sure what (and again, it doesn’t bother me or didn’t until you pointed it out haha).
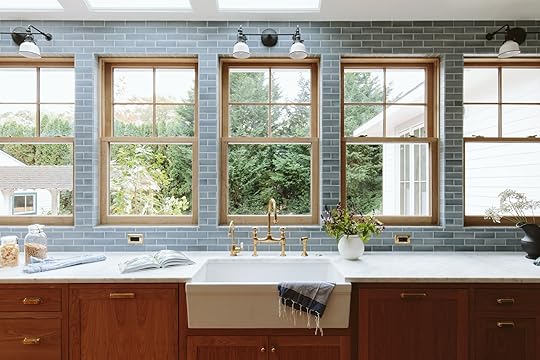
Where is your backsplash tile from and what color is it?
It’s a handmade tile from Pratt + Larson, made in Portland custom color P-146 (which matches my favorite Levis). It’s 100% gorgeous and I’m grateful every single day that it’s mine.
How’s it going with your stove? Still love the convection?
LOVE LOVE LOVE. The big handle on the right just popped off so I need to put it back on (I can rig it for now), but as far as cooking goes we LOVE it. So easy to clean, so fast to boil, so we are very very happy.
What is the height of your pot filler?
The spout sits 17.5″ above the stovetop but is attached to the wall roughly 6″ above that, 23.25″ from the stovetop. It’s also not centered on purpose but it could have been.
This there a name for the design style of your kitchen?
Maybe “Modern Scandinavian Farmhouse”? It feels very very very me/us, and I wouldn’t describe us as “Modern Farmhouse”. Whatever it is we love it so much. At one point we were throwing around the word “Shaker,” but I don’t think I really executed it as much as I had originally intended.

How has the vintage island been holding up and how has it been using the old drawers?
I have no idea what the refinisher from ARCIFORM (Renee) used on it to match the wood tone and have it hold up so well but it’s incredible. We abuse the heck out of it and nary a water glass ring. (He mentioned he used an older oil finish that is no longer for sale). The drawers still stick but I promise I’m not lying when I say this that it doesn’t annoy me AT ALL. We still plan on waxing them this summer because so many of you suggested that and if it were more smooth that would be nice.
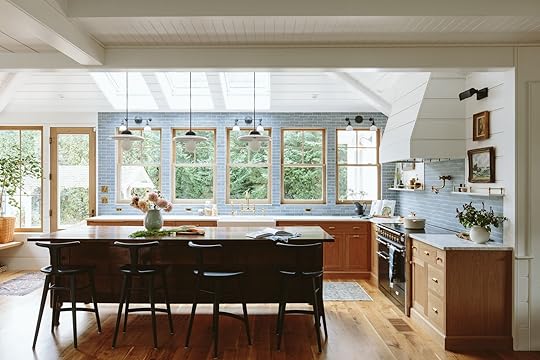
Do you still love you put in so many windows?
Ok here’s what I will say – when it’s sunny out YES – we love every single window and the house just sings. But when it’s rainy for days and days and days and dark at 4:30 pm and outside you are just seeing dark glass or gloom, then I find myself gravitating into the rooms with less windows. Since the backyard has been done (and we can see green) it’s been SO MUCH better, but the months of looking out at mud were challenging and I wish I had window treatments. I don’t really have any regrets, but I think we could have nixed the window that faces east (the one next to the fridge) and put hooks there or coat/purse storage. I doubt we would have missed that window at all. We could always add a cool rod or hooks across that window but haven’t felt motivated to do it yet.
Is there anything you would have done differently now that you’ve lived with it for a while?
I just wish I had chosen a slightly warmer white paint color for the walls. When it’s sunny out this color is so pretty and bright, but when it’s not I wish it was warmer (still a white, but a lower LRV – a technical spectrum I learned from commenters – thank you :)). This is totally on me. Somedays I fantasize about changing it, but it’s a real thing (probably 3-4 days of painting and $3k at least – and that’s just for the kitchen). If it weren’t open to the living room with a shared wall color/paneling it would be an easier change. But we’d likely need to do both and it’s just so disruptive and expensive to change. But if I could snap my fingers it would be a white with a less cool undertone.
Before we go, a big question that I get over and over is how much this kitchen cost, and y’all, I don’t know but a lot. It was all wrapped into a huge renovation. It’s impossible to calculate one room, but it can be assumed that this was a high-end remodel and probably $200K at least. I’m not saying that to brag (and I don’t love putting it out there TBH) but if your kitchen remodel is feeling really expensive to you just know that you aren’t alone and renovations cost so much more now than they did six years ago.
Ok, y’all – let me know any other questions you have. Also, we might do this for the mudroom so PLEASE ask any questions and I’ll answer. If you haven’t seen the mudroom reveal go check it out and then ask some questions 🙂 We’ll comb both posts for comments/questions. xx
Kitchen Resources:
Cabinetry: Unique Kitchens & Baths
Countertops: Bedrosians Tile & Stone
White Oak Windows and Doors: Sierra Pacific Windows
Skylights: Velux
Tile: Pratt + Larson
Appliances (sans Fridge and Freezer): Build with Ferguson
Fridge and Freezer: BlueStar
Flooring: Zena Forest Products(Oregon grown and milled)
Lighting, Switches, Outlets, and Sink: Rejuvenation
Wall Color: Sherwin Williams, “Extra White” .
Faucets: deVOL Kitchens
Vintage Island: Aurora Mills
Counter Stools: Fernweh Woodworking
Rug – District Loom
Brass Gallery Rods: Pepe and Carols
*Design by Emily Henderson and ARCIFORM
*Photos by Kaitlin Green
The post 15 Questions About The Farmhouse Kitchen I Get Asked All Of The Time…Answered appeared first on Emily Henderson.
July 2, 2023
The Link Up: Em’s Great New Summer Clothing Staples, Mal’s $12 Head Massaging Hairbrush, And Our Dupe Of A Popular/Expensive Soap

Happy Sunday, everyone. We had to mention the new farmhouse driveway at least one more time this week. Look at it! It’s so exciting and who knew talking about concrete and asphalt could be so interesting? But don’t worry we have an inside reveal for you soon:) Ok, let’s link up!
This week’s house tour takes us to Barcelona and drops us into the airiest most “I only wear beautiful caftans but still live in a busy city” home we’ve seen in a minute. The tall ceilings, the white brick columns, and the mix of vintage and new are all perfect. Go enjoy!
From Emily: I did a little Madewell partnership on stories the other day and yet again there were a few pieces I honestly fell in love with. Number one being a summer (well year-round) denim blazer. Y’all, it’s so good and I really have been searching for one. It has structure and a little stretch with I think is key. I even bought one that was a lot more expensive but returned it after trying on this one. Then you, of course, know your girl loves a boxy summer striped blouse. This one is super lightweight, linen, and really breathable. Lastly, I have pretty much been living in these demin mid-length shorts. I love that they’re a little longer but still look cool with the raw-edge hem.
 courtesy of netflix
Mickel Welch is bringing us all a great new design show called, Hack My Home on Netflix! We love his style and his personality so we are so so excited to watch. Set your alarms for July 7th because we definitely are:) But we figured who better to talk about the show than Mikel:
 courtesy of netflix
“I am thrilled to introduce you to “Hack My Home,” an exhilarating home renovation series set to premiere exclusively on Netflix on Friday, July 7. With a total of 8 captivating episodes, this show will take you on a journey of awe-inspiring transformations and aspirational design. What makes “Hack My Home” truly special is the incredible dynamic we have with our Dream Team. Together, we are a force to be reckoned with, ready to tackle the spatial challenges faced by deserving families. These families share a common desire: they need more space but want to avoid the hassle of moving or the expense of major home upgrades. As the Design expert, I take pride in finding functional, yet aesthetical decor solutions. Alongside me, we have Brooks Atwood, the mastermind behind groundbreaking innovations, Ati Williams, the construction expert, and Jessica Banks, the engineering genius. Together, we pool our skills and expertise to transform overcrowded spaces into functional and breathtaking havens. What sets “Hack My Home” apart from other design shows is our commitment to innovation. We go beyond tearing down walls just for the sake of an open concept living room. Instead, we focus on providing families with real-life, practical storage solutions that enhance their everyday lives. You never know where your next design solution will come from – it could be hidden in the ceiling or concealed behind a speakeasy-style doorway. “Hack My Home” is not just about creating visually stunning spaces; it’s about unlocking the true potential of every square inch. Get ready to be inspired as we embark on a remarkable adventure, transforming homes and lives one episode at a time.”
From Arlyn: If there is one person whose scent instincts I trust, it’s Jess. So when she popped over for a working lunch the other day and, after washing her hands before digging into her Sweeetgreen, she came out singing the praises of my hand soap, I knew I had to share it on a Link Up for the EHD world. Method’s Vetiver + Amber (which I picked up at Target) is a very good dupe for Le Labo’s Santal 33. It’s rich, musky, and leathery yet a little sweet. It smells like a fancy soap you find in a boutique restaurant bathroom, but it cost me about $7.
From Caitlin: This week, I cried reading this article – it’s an update on a few of the migrants who were flown to Martha’s Vineyard last summer and who now call it home. The quote that got me was from a 25-year-old Venezuelan woman, who had this to say: “I did not even know where Martha’s Vineyard was. And now I feel welcomed by everybody here. I’m working, making friends and this is home for me now,” Ms. Cauro said with a wide smile. “This is home now. I don’t want to leave.” CUE THE WATERWORKS. Felt like a pretty appropriate long read for this weekend, don’t you think? I’m so happy to see these incredibly brave folks building their lives in America – it’s really moving. We are lucky that so many talented, hardworking, family-oriented people risk everything to join us here:)
From Mallory: It’s honestly mind-boggling to me that hairbrushes are designed to be completely straight across when your head is naturally round…and if you haven’t thought about it you will after using this hairbrush. It’s curved so it fits the natural shape of your head and it feels like you’re massaging your scalp while you’re brushing your hair. I had a hairstylist use this on my head like 10 years ago and I immediately was like, “GIRL, WHAT’S GOING ON WITH THIS HEAVENLY FEELING ON MY SCALP.” She pointed to the brush and explained to me that everyone loves it so I bought one right there on the spot. Been using it ever since and I will never go back. Best $12 you will ever spend!!
From Jess: Last weekend I went on a truly magical bachelorette weekend so getting this “party favor” was the cherry on top of the relaxing poolside ice cream sunday. It’s the cutest little belt bag that is perfect for summer and going to events. I say “events” because baseball games, concerts venues, etc that all now seem to have a small bag size requirement. Even my pretty small Grande Fanny bag from Clare V is too big which is SO ANNOYING. Anyway, I got the neon green color which you know I love if you remember this belt bag from last summer but is also too big for a lot of venues. But it also comes in these neutrals too. I know this wasn’t a cheap gift to give all of us but I so appreciate gifts from bachelorette parties that you will actually use.
Ok, that’s it from us today. If you are in need of some home decor then head to our 4th of July sale roundup (you know Caitlin only finds the best) and if not enjoy what is hopefully an extra long weekend. See you tomorrow. xx
Opening Image Credits: Photo by Kaitlin Green | From: Our New Driveway – A Gravel/Concrete/Asphalt/Regrind Debate
The post The Link Up: Em’s Great New Summer Clothing Staples, Mal’s $12 Head Massaging Hairbrush, And Our Dupe Of A Popular/Expensive Soap appeared first on Emily Henderson.
July 1, 2023
The Case For The Romance Novel And How Its Enhanced My Life (+ 30 Of My Favorites)

Ladies, get ready to bookmark this post. This is more of a life/marriage rec/hack than it is a “book review”. These are romance novels, the ones typically relegated to “bored housewife” status, the likes of Hallmark movies and I have zero shame (nay, pride even) when discussing my love of these. And jokes on them, because these books have not only highly enhanced my/our life and marriage but are now sweeping the bestsellers lists. SWEEPING. And I’m here for the good versions of all of them. Some are bodice-ripping, many involve Dukes, some rom-comy, often erotic or steamy, always extremely enjoyable, easy to read, with a no-fail happy ending. Also, Mom/Dad (and my brothers), you can go ahead and click out of this post right now!
It’s full circle really. I grew up glued to romance novels, starting with V.C. Andrews graduating quickly to Sidney Sheldon and Danielle Steel. Years later, I got my degree in comparative literature and history and opted for Margaret Atwood and Paul Auster and the likes for decades. And yet here we are, reading historical romance novels called “Some Like It Scot” and telling the world about it, shamelessly.
Wait, Why Are Romance Novels So Great?They are extremely comforting, which is natural anti-anxiety. Think rom-coms like The Proposal or How To Lose a Guy in 10 Days. The formula requires a happy ending – so no need to worry AT ALL (like you do with some thrillers). You know the tropes and you know it will all work out therefore you can rely on them to put you in a good mood during stress. The good ones I’m recommending have a fresh (ish) take on the tropes while sticking within the formula. BTW you know what else is formulaic? All superhero stories, all action movies, or Patterson thrillers. So once again I think it’s hilarious that the male-run publishing industry thinks that these should be somehow relegated to just fluff because they mostly talk about relationships and feelings – there is so much skill and art in good story-telling, regardless of the genre. They help you sleep. These are highly enjoyable, but they aren’t as gripping or anxiety-inducing as many page-turning thrillers (which I also love) so I find that every night I SO look forward to snuggling into bed, but they don’t keep me up with a “But who dunnit??” rumination. They can take the place of a good TV show/social media and wine for me at night. I reach for both of those things after work, desperate to turn my brain off into “sleep mode.” But those things for me can be unhealthy if not moderated. So instead I opt for a novel after the kids are down (or before when it’s not my turn) because I’m so excited to get back to my book (will they or won’t they??). It’s dramatically reduced my TV/social media and wine consumption. They will put you in the mood and I can almost guarantee (from experience) that they’ll reignite your sex life. This is specifically useful for those of us in long-term monogamous relationships. You know what I’m talking about. All of these below recs are full of great chemistry, a lot of tension/buildup/almost kissing, and yes many have steamy descriptive scenes that will provoke a partner nudge that will likely not be rejected. Brian has totally endorsed this post, BTW. He’s a big fan of this hobby of mine. Romance Novels Are Having A HUGE MomentYou don’t need to be embarrassed or feel shame if you read these – you are NOT alone. Women fiction writers and literal romance novelists are absolutely killing it right now on all the bestsellers lists and I feel such glee for all of them. DOMINATING. The publishing industry, like most, was/is run by men who I’m sure discounted the power of this female-oriented type of reading enjoyment, prioritizing the James Pattersons and Dean Koontz of the world (both of which I also love), but LOOK. AT. US.
My #1 Tip…
Also, you might want a Kindle. Some of these titles/covers can be embarrassing to buy from a store, open in the mail, or hold on the sofa/beach. I love my Kindle, but if you read in the bath/pool/lake then get the waterproof one (I wish I had the new one). The best part is that you can read at night without the need for a lamp, or waking your partner and you can immediately download the next book as soon as you wrap the last one. I was super anti-Kindle until lockdown where we couldn’t go to stores or get deliveries. I still buy hard copies of psychology/business books, but for all my fiction where I don’t think I’m going to reference it again, I’m full-Kindle now.
Contemporary Rom-Com StyleThink Dirty Dancing or How to Lose a Guy in 10 Days. These might be coming of age, first love, friends to lovers, enemy to lovers, roommates to lovers, fake boyfriends, workplace romance – all my favorite tropes are here – set in the last 5-15 years. Here are my absolute favorites:

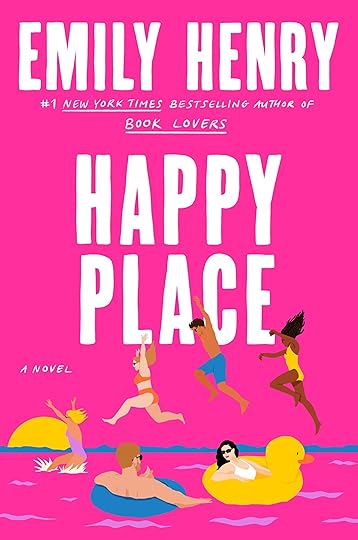
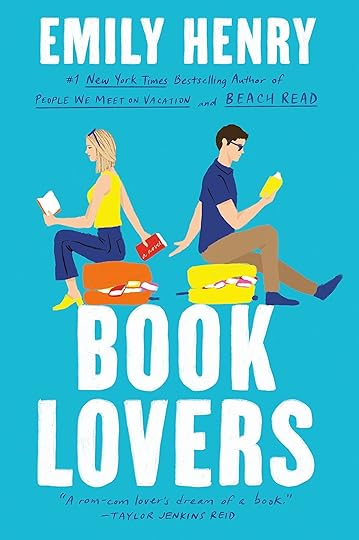
Beach Read (Kindle + Local) | Happy Place (Kindle + Local) | People We Meet on Vacation (Kindle + Local) | Book Lovers (Kindle + Local)
Emily Henry: Let EmHen be your gateway romance novel drug – witty, smart dialogue, and a fresh yet relatable romantic perspective (Emhens unite). I loved her books in this order: Beach Read, Happy Place, People We Meet on Vacation, and Book Lovers. Also if you are anti-Kindle, these books don’t have bodice-ripping Fabio on the front and you can easily read them in public. With EmHen you’ll get nostalgia, romance, so much build-up, and a few steamy scenes (but not crazy graphic).
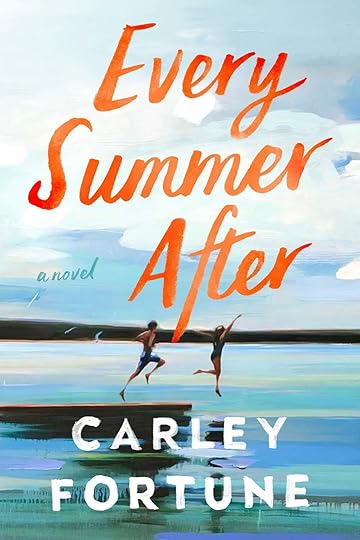
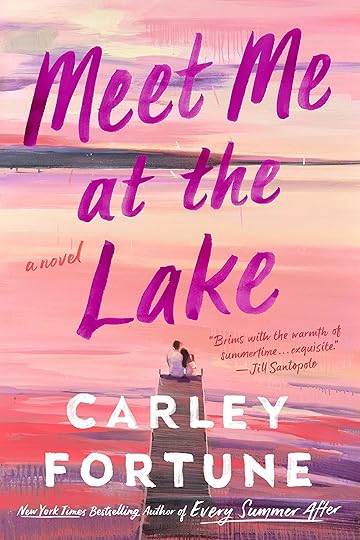
Every Summer After (Kindle + Local) | Meet Me At The Lake (Kindle + Local)
Carley Fortune: The PERFECT summer read/s. Carley sweeps you away with her first love nostalgia vibe that draws me in instantly and creates a really beautiful world you want to be in. She is a former publishing editor that took a stab at writing her own and then BOOM bestsellers list (I love stories like that). She only has two books but I loved them both SO MUCH. Brian actually read Every Summer After because the fiction book he is writing is set in a lake town with dual timelines. He admitted that he liked it. They are so good (and I’m not alone, all over the bestsellers list – her second is Meet Me At The Lake).
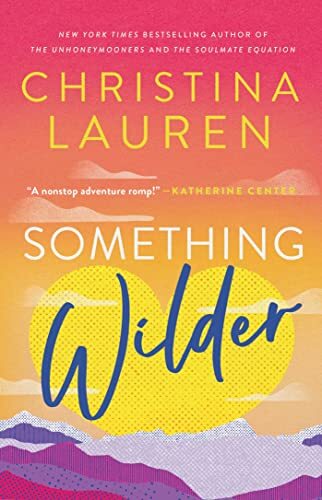
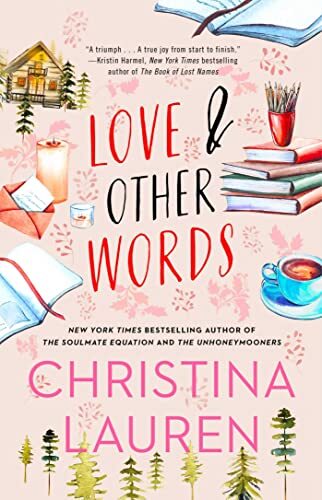
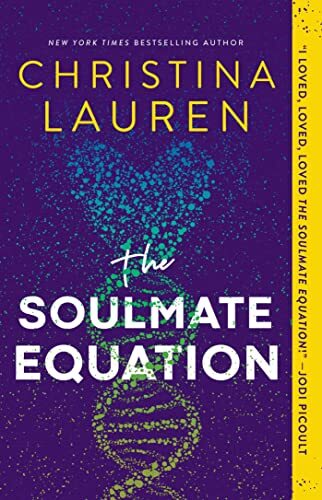
Something Wilder (Kindle + Local) | Love and Other Words (Kindle + Local) | The Soulmate Equation (Kindle + Local) | The Unhoneymooners (Kindle + Local)
Christina Lauren: Two friends (Christina and Lauren) who pound out (NPI) and write so many fun romance novels, seemingly so fast. I always enjoy them as extremely quick, easy reads. I think I’ve read 15 or so of their books now and counting. I loved Something Wilder, Love and Other Words, The Soulmate Equation, and The Unhoneymooners. You can’t not enjoy these books and you might finish one easily in two days (aka excellent vacation reads).
Colleen Hoover: It seems crazy not to immediately call her out because I’ve read four of her books and they are GREAT. I LOVE her own personal story and think that the themes in her novels are important to explore. However, they are dark and often make me feel unsettled (themes of domestic abuse, addiction, death) so they aren’t my go-to if I need a mood boost (but great for a plane trip – you won’t put it down and more gripping than others).
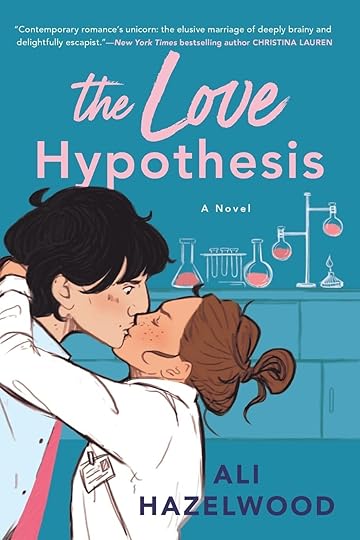
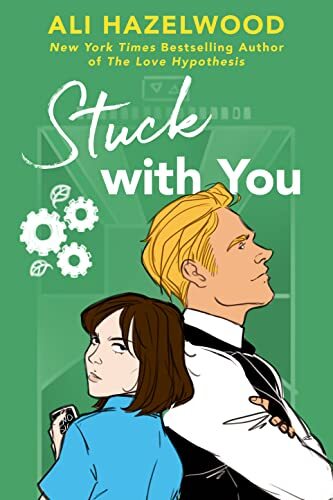

The Love Hypothesis (Kindle + Local) | Stuck With You (Kindle) | Love On The Brain (Kindle + Local) | Below Zero (Kindle)
Ali Hazelwood: Ali seemingly created a whole sub-genre called STEMenist fiction (women working and finding romance in the science fields). I’ve really liked these: The Love Hypothesis, Stuck With You, Love on the Brain, and Below Zero.
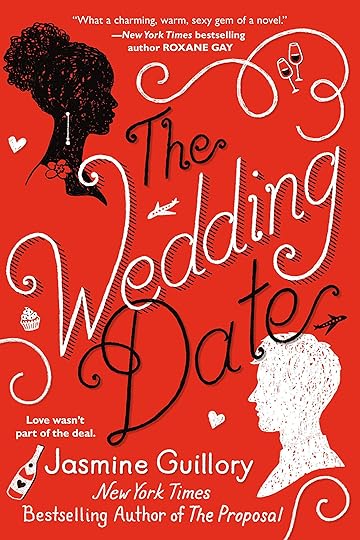
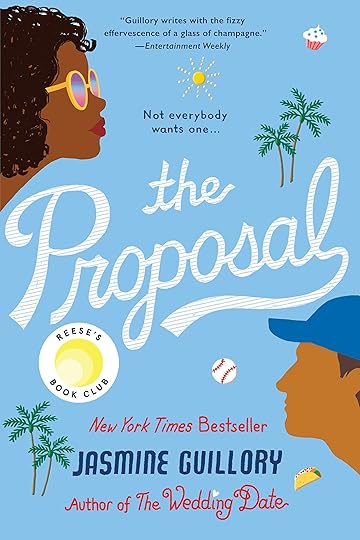
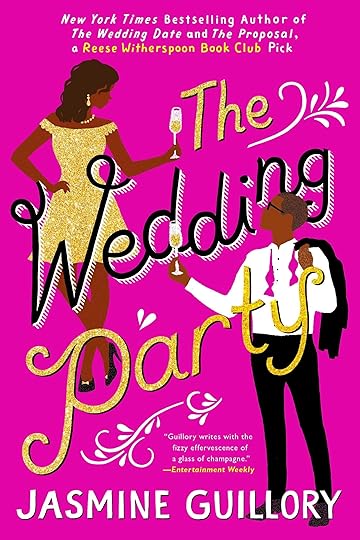
The Wedding Date (Kindle + Local) | The Proposal (Kindle + Local) | The Wedding Party (Kindle + Local)
Jasmine Guillory: Wedding Date Series (I think there are five, I loved the first three) – Entertaining from page one, so much “almost kissing” and steamy in such a good way. Also, I appreciated the inside perspective of what it might be like to be a black woman dating a white guy. I highly enjoyed them all.
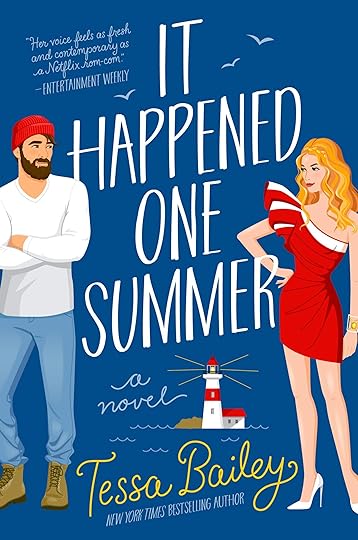

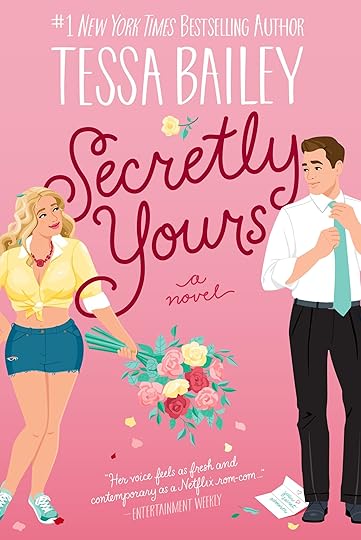
Fix Her Up (Kindle + Local) | It Happened One Summer (Kindle + Local) | Hook Line and Sinker (Kindle + Local) | Secretly Yours (Kindle + Local)
Tessa Bailey: These are swift, fun, and steamy with brawny dudes if that’s your thing (it is mine). These lean more Hallmark movie-ish and I couldn’t put them down. Fix Her Up, It Happened One Summer, Hook, Line, and Sinker (lots of “the rich city girl meets the brawny small-town fisherman” – a trope I highly enjoy). I just downloaded Secretly Yours and I’m excited to start.
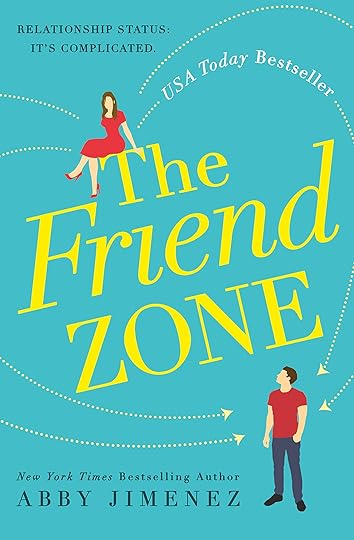

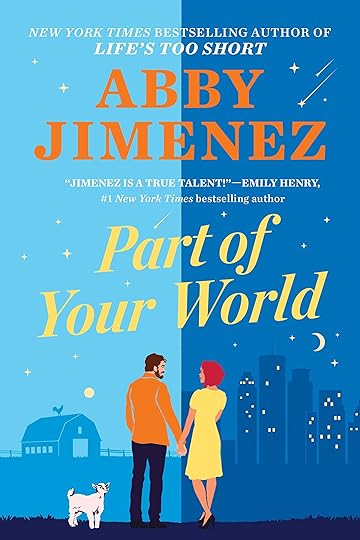
The Friend Zone (Kindle + Local) | The Happy Ever After Playlist (Kindle + Local) | Part of Your World (Kindle + Local)
Abby Jimenez: Former food network star (**Could this be my future, too?**). These are sweet, so fun, and feel like people/friends you know. The Friend Zone, The Happy Ever After Playlist, and Part Of Your World. I think I’ve read a few more and will continue to pick them up (not super steamy but lots of buildup). I just started Part Of Your World and am enjoying it a lot (but fairly tame so far).
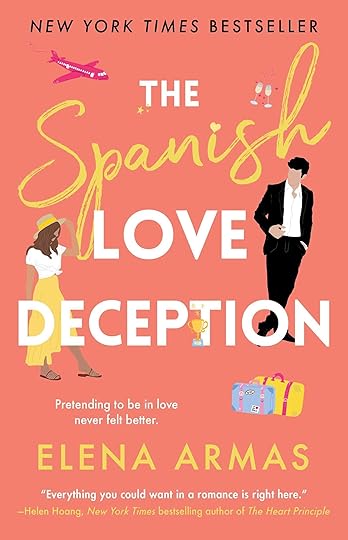
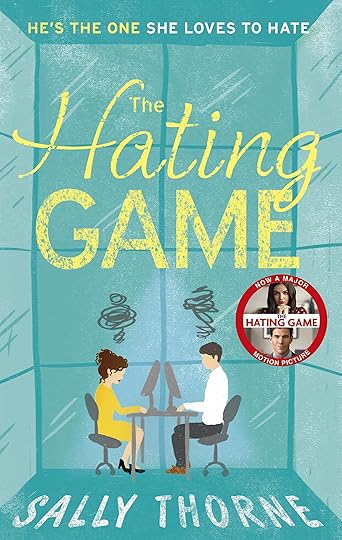
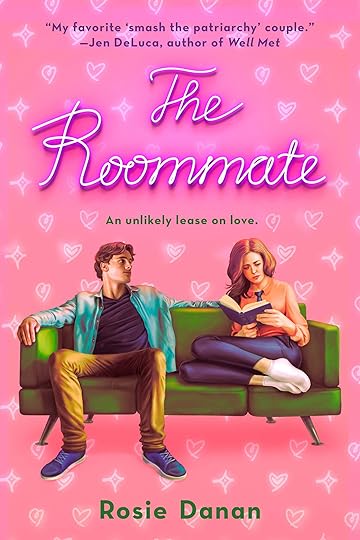
The Spanish Love Deception (Kindle + Local) | Dating Dr. Dil (Kindle + Local) | The Hating Game (Kindle + Local) | The Roommate (Kindle + Local) | Seven Days in June (Kindle + Local) | The Bodyguard (Kindle + Local) | That Summer (Kindle + Local) | Big Summer (Kindle + Local) | Shipped (Kindle + Local) | Things We Never Got Over (Kindle + Local)
Others I loved: The Spanish Love Deception, Dating Dr. Dil, The Hating Game (LOVED), and The Roommate (LOVED, so steamy). Tia Williams’ Seven Days in June – So good, excited about her next book. The Bodyguard by Katherine Center, That Summer and Big Summer (both by Jennifer Weiner), Shipped, and Lucy Score’s books (I liked Things We Never Got Over, the first one in the series but couldn’t get through the second one).
You might wonder where is Sally Rooney, Taylor Jenkins Reid, Jojo Moyes, and Emma Straub. I’ve read almost all of them and love them, but I feel like the whole world recommends them and they don’t fall into the “romance genre” as much so they aren’t the focus of this list. But also Curtis Sittenfeld’s romantic comedy (huge fan here) was wonderfully written but missed a few romance marks for me (aka very little steam).
Historical RomanceY’all. Get ready to be transported into a time where women couldn’t own property, dukes had to be tamed (such rakes!), and corsets came undone fast (warning – you may accidentally start calling your partner “my lord,” true story). I love living in this fantasy world and they are far more entertaining and fresh than they were in my youth (and more graphic in a fun way). I personally don’t love the long drawn out series (I loved Bridgerton the TV series, but not the books as much) and I kissed many, many a toad to wittle down this list. I learned a lot about the women’s suffrage movement, what it was like to not own property even as a woman of The Ton, and even a few new moves:) Yes, some of these can be problematic and hyper-cliche re: cisgender roles which is why I love the more recently written ones that take a more feminist bent.
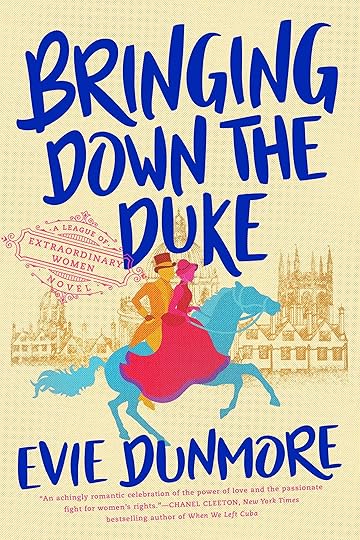
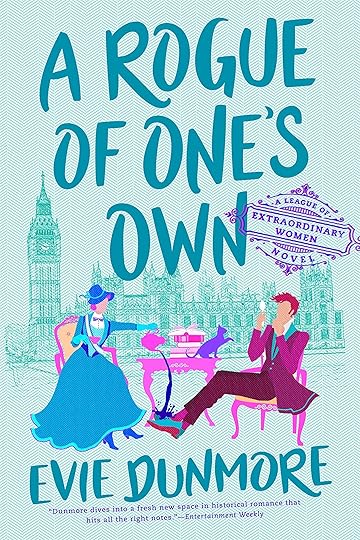
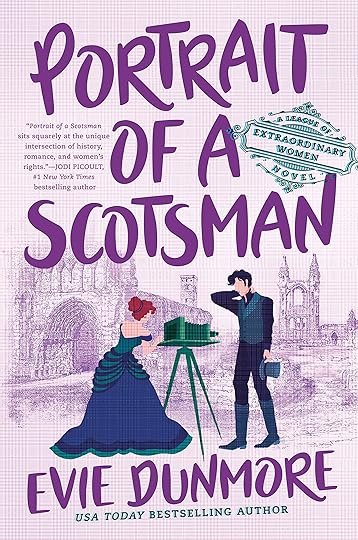
Bringing Down The Duke (Kindle + Local) | A Rogue of One’s Own (Kindle + Local) | Portrait of a Scotsman (Kindle + Local)
Hands down my favorite – Evie Dunmore: SO GOOOD and if you are new to this genre start with this series. Her writing is so quick, smart, and totally feminist ( + very steamy). I can’t recommend this series more: Bringing Down The Duke, A Rogue of One’s Own, and Portrait of a Scotsman. I don’t think I’ve ever preordered a book before until this lady…
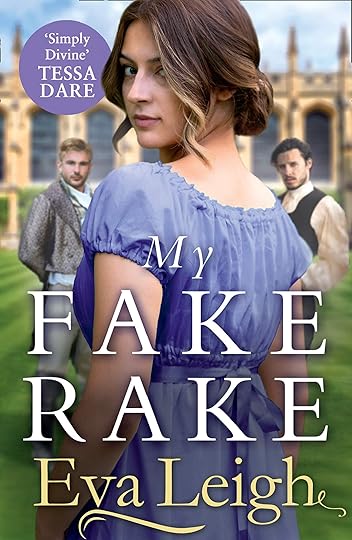
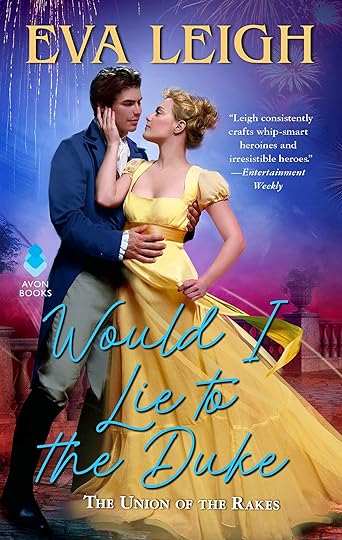
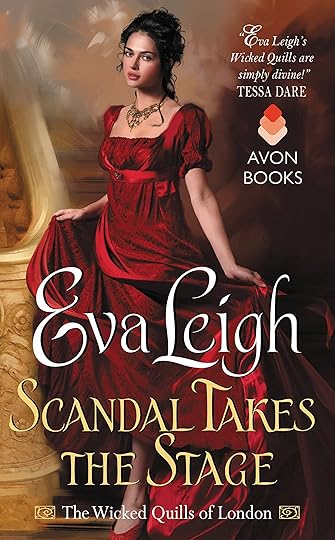
My Fake Rake (Kindle + Local) | Would I Lie To The Duke (Kindle + Local) | Waiting For A Scot Like You (Kindle + Local) | An Education in Pleasure (Kindle) | Forever Your Earl (Kindle + Local) | Scandal Takes The Stage (Kindle + Local) | From Duke Til Dawn (Kindle + Local)
Eva Leigh: This is where I started and I really liked these: My Fake Rake, Would I Lie To The Duke, and Waiting for a Scot Like You – ALL GREAT/fun/fast and hard to put down. Really good, steamy stuff. If you want to go straight to some mood-enhancing stuff, download An Education in Pleasure and try not to get turned on. I also read and liked: Forever Your Earl, Scandal Takes The Stage, and From Duke Til Dawn.
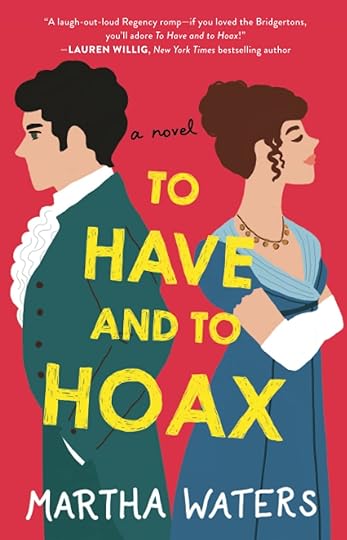
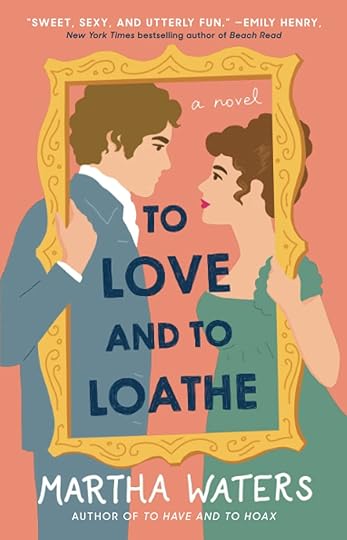
To Have And To Hoax (Kindle + Local) | To Love And To Loathe (Kindle + Local)
Martha Waters: To Have and to Hoax and To Love and to Loathe. Both of these were fun and rompy, but could be frustrating at times (so many set pieces that felt silly) but I still really liked them.
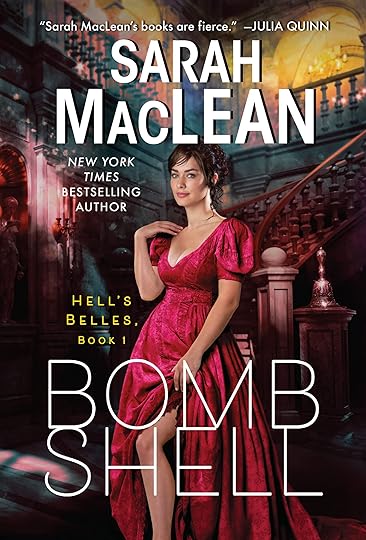
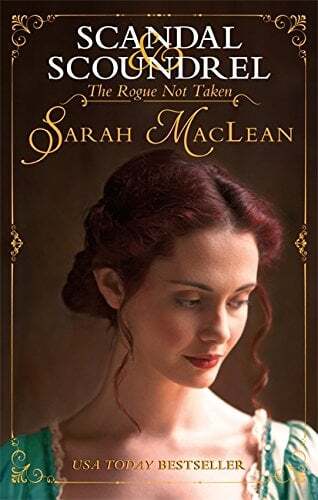
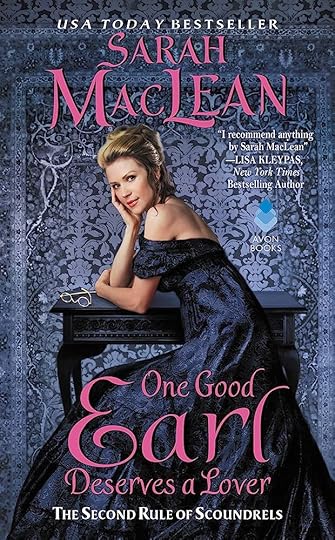
Bombshell (Kindle + Local) | The Rogue Not Taken (Kindle + Local) | One Good Earl Deserves Another (Kindle + Local)
Sarah MacLean: This lady can really write tension and love scenes: Bombshell (LOVED THIS SO MUCH), The Rogue Not Taken, and One Good Earl Deserves Another are all my favorites.

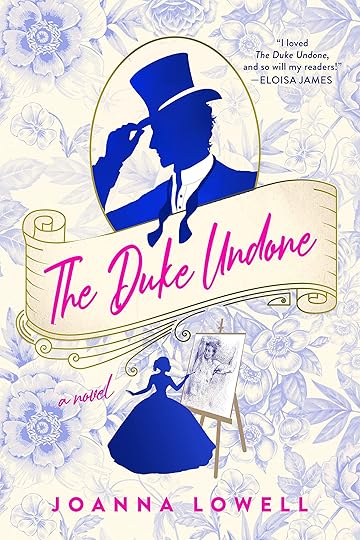
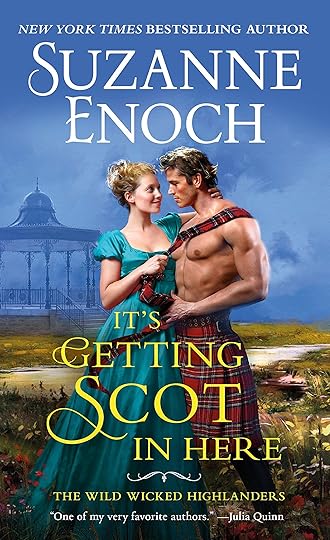
Who’s That Earl (Kindle + Local) | The Duke Undone (Kindle + Local) | It’s Getting Scot In Here (Kindle + Local) | Mr. Malcolm’s List (Kindle + Local) | A Lady’s Guide To Mischief and Mayhem (Kindle)
One-offs that I also loved: Who’s That Earl, The Duke Undone, It’s Getting Scot in Here, Mr. Malcolm’s List, and A Lady’s Guide To Mischief and Mayhem.
If you like the more drawn-out ones then yes, of course, Bridgerton or Outlander are good but I like the short fun fast ones that are less epic romances and more juicy.
For Those Ready To Dabble In EroticaNow to the fun stuff – which are honestly at times can be problematic (think 50 Shades of Grey dynamic) so read the description to make sure you are up for it (I’ve started a few that were a bit too hardcore for me). It’s hard to say that I loved any of these, but did I enjoy them and couldn’t put them down? Yes. So there’s that.

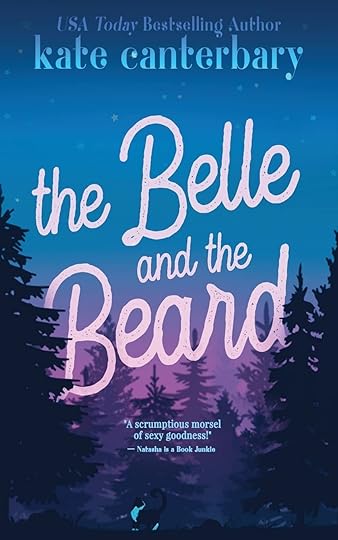

Bared to You (Kindle + Local) | The Belle And The Beard (Kindle + Local) | The Rivals (Kindle + Local) | Off The Clock (Kindle + Local)
LGBTQAI+ Focused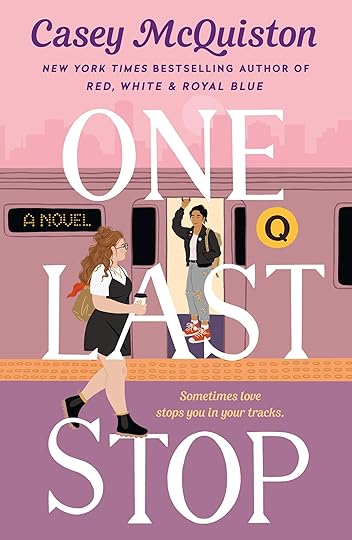
One Last Stop (Kindle + Local) | Boyfriend Material (Kindle + Local) | Red White And Royal Blue (Kindle + Local) | Love And Other Disasters (Kindle + Local)
Y’all, I have such compassion for my LGBTQAI+ friends that sit through so many hetero-romantic comedies, but lately, there seems to be way more non-hetero rom-com books being published. Here are some that are meant to be really good that I have downloaded but not read yet: One Last Stop, Boyfriend Material, Red, White, & Royal Blue, and Love and Other Disasters.
What Else????I have a huge summer reading list (not all romances, I’m starting The Guest after I finish my current novel) but I’d love any romance novels that I’m missing (which is likely A LOT). That’s the good news! It seems endless in a good way. Like just when I think I’ve read them all I’ll find a new writer who I love and dive in. I’ve read The Court of Thorns and Roses (the first one) and I’d be open to others dabbling in the fantasy genre if they are recommended. Let’s dish in the comments about others you love.
The post The Case For The Romance Novel And How Its Enhanced My Life (+ 30 Of My Favorites) appeared first on Emily Henderson.
June 30, 2023
The Best July 4th Deals – Design-Editor Approved Decor from $2.99, 70% Off Heirloom Furniture, and More

OH MY GOSH. Welcome to EHD’s annual Fourth of July sales guide! I have some great news for my fellow fiscally responsible friends: OUR PATIENCE HAS PAID OFF. This year, the July 4th sales are incredible. I mean: there’s 70% off furniture at McGee & Co.! There’s an extra 40% off sale pieces at Anthropologie! There’s 60% off clothing at Alex Mill! (And that’s barely scratching the surface – there are so many more good deals below!)
This weekend, Team EHD and I will be updating this post with our design editor-approved favorite deals in furniture, decor, fashion, beauty, and more. And, as always, feel free to drop your own small business’ sale details in the comments! We’d love to support you. Onwards, to the deals…
Furniture & Decordesign by orlando soria | photo by sara ligorria-tramp | from: dreams do come true! the londo lodge is now a vacation rentalAllModern Sale: Up to 60% off furniture, decor, and more; an extra 20% off select items with code GET20; free shipping on furniture orders over $35.
Best Deals: Neutral Swivel Chairs | $368 Scandi Solid Wood Bed | Anthro-Style Cabinet
Sale: Up to 40% off furniture, decor, gifts, and more; plus an extra 40% off sale items (excluding furniture).
Best Deals:
Note: This sale ROCKS. I grabbed this charming little planter for $11.97, down from $28 – almost 59% off! If you’ve ever eyed Anthro’s decor but felt a little priced out (hi, same, me too!), this is the PERFECT time to grab a splurge-worthy piece at a budget-friendly price.
Sale: 20% off site-wide; $1,000 off orders over $3,999; $1,500 off orders over $4,999; $2,000 off orders over $5,999.
Best Deals: Quick-Ship Storage Sectional | Chic, Slightly-Curved Sofa | Classic Queen-Sized Sleeper Sofa
Sale: Up to 40% off select furniture, decor, and lighting.
Best Deals: Bowser’s Outdoor Sectional | Cool Terrazzo Planter | Sara’s Outdoor Coffee Table
Sale: 20-40% off site-wide.
Best Deals: Brass Picture Rail System | Sweet Organization Essentials | Traditional Decor Touches
Note: To see some Ballard furniture in action, check out Em’s newly-revealed patio.
Sale: 20% off site-wide.
Best Deals: Emily’s Favorite Comforter | Hardcore Bedding Bundles | Ultralight Towels
photo by sara ligorria-tramp | via the new bed in a bagCB2Sale: Up to 50% off furniture, outdoor, decor and more; up to 70% off sale items.
Best Deals: Emily’s New Bedroom Nightstands | On-Trend Chrome and Grasscloth Credenza | Set of 3 Quiet-Meets-Graphic Bud Vases
Note: Always sneaking spoilers into these posts!
Sale: Up to 35% off select items.
Best Deals: Handcrafted Rattan Ottomans | Luxe Leather Pillows | Mixed-Pile Accent Rug
Sale: 25% off Elfa-designed storage spaces; 20% off Avera- and Preston-designed spaces.
Best Deals: Family-Friendly Elfa Systems | Elevated Avera Systems | Premium Preston Spaces
Note: Read Sara’s comprehensive review of her Elfa shelving system here!
Sale: Up to 60% off select outdoor, decor, furniture, and kitchen, plus up to 30% off best-selling furniture.
Best Deals: Showstopping Burl Desk | Leanne Ford Vase | Spherical Indoor/Outdoor Planters
Sale: Up to 70% off sale items.
Best Deals: The Tupperware I Have & Love | The Entire Five Two Collection | Deeply-Discounted Dansk Casserole Dishes
photo by kaitlin green | via our back patio reveal! (+ how everything’s held up to 6 months of portland weather)FrontgateSale: Up to 70% off select items, plus an extra 30% off clearance.
Best Deals: Beach & Pool Essentials | Classic, High-End Doormats | Em’s Patio Umbrella
Note: This is the best sale we’ve seen all year from Frontgate. Highly recommend for any outdoor needs!
Sale: Up to 70% off select items.
Best Deals: Statement Decor from $2.99 (!!!) | $4.99 Linen & Velvet Pillow Covers | Bold Outdoor Accessories
Sale: 20% off site-wide with code JULYFOURTH.
Best Deals: The Best Counter Stool Selection on the Internet | Whimsical Pendant Lamp | California Cool Coffee Table
Sale: 25% off site-wide, plus up to 70% off markdowns with code HEATWAVE.
Best Deals: Iconic Vice Canisters | Ready-to-Ship Furniture | Deeply-Discounted Markdowns
Sale: Up to 60% off select items, plus an extra 20% off wide code TAKE20.
Best Deals: Beds & Headboards | Timeless Nightstands | Glam Outdoor Umbrellas and Fire Pits
Sale: 20% off site-wide.
Best Deals: Irregular Checkerboard Rug | Sweet Fluted Sconce | The Ginny Macdonald Collection
design by arlyn hernandez | photo by sara ligorria-tramp | from: arlyn’s bedroom reveal is a lesson in the beauty of “unfinished” designLumensSale: Up to 50% off select lighting, fans, furniture, decor, and more.
Best Deals: Aesthetically Appealing Ceiling Fans | Outdoor Lighting Essentials | Bath & Vanity Lighting
Sale: Up to 70% off select furniture, dining, outdoor, and more.
Best Deals: Em’s Dining Nook Table Dupe ($2400 Off!) | On-Trend Cane Dining Chairs ($500 Off!) | Woven Wicker Side Table ($300 Off!)
Note: A lot of people tout “up to 70%” off, but this sale MEANS BUSINESS. So many INCREDIBLE pieces at 70% off – this is literally the best-discounted inventory I’ve seen in the years that I’ve been pulling these roundups together!
Sale: An extra 20% off sale with code SALEONSALE, plus free shipping site-wide.
Best Deals: Classic Blue Table Runner | Graphic Cool-Toned Rug | Sweet Peach Apron
Sale: 15% off site-wide with code FIREWORKS23.
Best Deals: Personalized Stationery | All Things Wedding | Fine Art Prints
Note: Don’t forget that you can work with a free art advisor! I’m still thrilled with the gallery wall that the Minted team designed for me.
Sale: 30% off site-wide; 35% off orders over $4,000; free white glove delivery with all orders over $2,500.
Best Deals: My Tried-and-True Swivel Chairs | Beautiful Green and Brass Storage Console | Grasscloth Nightstands
Sale: 15% off site-wide with code JULYFOURTH2023.
Best Deals: Durable Outdoor Dining Set | Modern Teak Outdoor Sectional | Protective Furniture Covers
Note: Remember Jess’ communal patio? Her Neighbor pieces are still holding up beautifully.
design by jess bunge | photo by sara ligorria-tramp | from: jess’ communal patio revealOverstockSale: Up to 70% off furniture, decor, and more; plus an extra 20% off select items.
Best Deals: $199 Serena & Lily Hanging Chair Dupe | Classic-with-a-Twist Media Credenza | Stylish AND Functional Shower Stool
Sale: Up to 50% off furniture, outdoor, lighting, and more.
Best Deals: Elevated Outdoor Lanterns | Scandi Folk Art Handcrafted Quilt | Deep Seat Slipcovered Sofa
Sale: Up to 60% off lighting, hardware, furniture and more, plus free shipping with code FREESHIP.
Best Deals: Sale Lighting Styles | Sale Furniture Styles | Sale Hardware Styles
Note: The furniture on sale is REALLY high quality – like, modern heirloom-level stuff. (That’s not even marketing speak – solid woods, beautiful finishing, all that jazz. Highly recommend perusing the selection if your budget allows.)
Sale: Up to 70% off select items, plus an extra 10% off sale items with code EXTRA10.
Best Deals: A Cheery Yellow Bed | Em’s Favorite Coverlet | Our Go-To Plug-In Sconces
Sale: Up to 50% off outdoor, kitchen, lighting, furniture, and more.
Best Deals: Half-Priced Potting Bench | Ticking Stripe Studio McGee Bench | Bright, Happy Jungalow Rug ($200 for a 7’x10′!)
Sale: An extra 30% off sale furniture, planters, decor and more with code SUMMERISHERE.
Best Deals: Pretty Garden Essentials | Galvanized Trough Planter | Geometric and Modern Chiminea
design by malcolm simmons | photo by keyanna bowen | via malcolm’s bedroom reveal is hereTuft & NeedleSale: Up to $700 off on select mattresses and bed frames, plus additional savings on furniture, bedding, and more.
Best Deals: Mattresses | Body Pillow (Or a Lumbar, for King Beds!) | Linen Duvet Cover
Note: Check out Em’s recent mattress review here! (I also have the Mint Hybrid and wrote about it here.)
Sale: An extra 50% off sale items.
Best Deals: $2.47 (!!!) Brass Hanging Wall Mirror | Em’s Upstairs Storage Cabinet | The $29.98 Nightstands I Just Bought
Note: Yes, writing these sale posts IS great for my wallet. Have been eyeing those nightstands since they were $119 – yawped at this new price!
Sale: Up to 70% off outdoor, decor, furniture, and more.
Best Deals: A Stylistic-Chameleon Cocktail Ottoman | 4-Light Kitchen Pendant That Only Looks Expensive | Outdoor Rug with Palm Beach Vibes
Sale: Up to 60% off select items.
Best Deals: Easily-Styled Sofa with Refined Plinth Base | Affordable Indoor/Outdoor Planters with Stands | Cheery Striped Pillow Cover
Sale: 20% off site-wide for in-store pickup orders.
Best Deals: Em’s Rattan Daybed | Outdoor Planters | Justina Blakeney Pillows & Rugs
photo by kaitlin green | via i went to the mall in search of cute comfortable summer clothesAbercrombie & FitchSale: 20% off site-wide, plus an extra 15% off select styles.
Best Deals: Dresses (For Work AND Play) | Dreamy, Summer-Weight Wide-Leg Pants | My Favorite Curve Love Bottoms
Sale: 25% off site-wide with code USA25.
Best Deals: Wear-Forever Denim Jacket | Refined and Durable Leather Backpack | Hammered Stacking Rings
Sale: Up to 60% off select styles.
Best Deals: Sweaters & Sweatshirts | Shirts & Tops | Dresses & Skirts
Note: This is the first Alex Mill sale I’ve ever seen (other sites are calling it “a fever dream” and “totally unreal,” if that adds any context). I literally NEVER thought I’d see the day. It’s MAJORLY stocked, too – so many sizes, colors, and an endless scroll of inventory.
Sale: Up to 40% off sale styles.
Best Deals: Our Best-Selling Wide-Leg Pants (For Under $50!) | The Sweetest $47 Summer Dress | A Breezy (And Breathable) $35 Top
Sale: Up to 60% off select styles.
Best Deals: Charming Green Lace Midi Skirt | Elegant Elastic Waist Pants (Who Knew?!) | The Bow-Back Jumpsuit I Just Grabbed
Sale: Up to 60% off swim and summer styles.
Best Deals: $64 Olive Leather Sandals | Uber-Cute Cabana Striped Shorts | Vintage-Inspired Tank with Great Draping
photo by kaitlin green | via the little things that make me feel good and pulled togetherGapSale: 30% off site-wide; 50% off select shorts, tees, and swim; up to 75% off markdowns.
Best Deals: Pink Barbie Puff-Sleeve Jean Jacket | The Sweetest Back-to-School Girls’ Clothes | $34 Linen-Blend Mini Dress
Sale: An extra 20% off sale styles with code SUMMER20.
Best Deals: Em’s Paint-Splattered Overalls ($324 Off!) | Loose, Easy-Fit Jeans ($234 Off!) | The Cutest $42 Waterproof Eddie Bauer Boots
Sale: Up to 70% off sale styles.
Best Deals: A GREAT $3.99 T-Shirt (I’m Wearing One!) | Graphic Crewneck Sweatshirt That Looks 10x The Price | $13.99 Twill Cargo Pants
Sale: An extra 60% off sale styles with code FOURTH.
Best Deals: Summery Blue & White Striped Pants | The Pink-and-White Version of My Go-To Summer Wedding Guest Dress | Half-Priced Liberty of London Dress
Sale: 40-70% off site-wide, plus an extra 20% off orders over $100 and 25% off orders over $125 with code CELEBRATE.
Best Deals: The Cutest Lobster-Print Dress | The Iconic J. Crew City Skirt (For Way Less Than I Used to Pay!) | ALL The Women’s Shorts
Sale: Up to 60% off site-wide with code HOTDEAL.
Best Deals: Em’s Half-Price Favorite Shorts | Em’s 100% Linen Dolman Top | Em’s Oversized Striped Button-Up
Note: I am easily #emfluenced (we all are, I think) and grabbed that oversized-button up for myself (in Pink). LOVE IT. Makes a great beach coverup, too!
photo by kaitlin green | via em’s warm weather wardrobe reviewNisoloSale: Up to 50% off select styles with code SALE25.
Best Deals: My Most-Complimented “Work” Shoes | Woven Slide Sandals | Open-Toed Clog Sandal
Sale: Up to 60% off site-wide with code SALE30.
Best Deals: The Perfect Wrap | The Tie Oasis | The Bow-Shoulder Ruched Sidestroke
Come back over the next few days for updates – I’ll be here, bringing the deals. Have a great Friday. xx
Opening Image Credits: Design by Emily Henderson and ARCIFORM | Photos by Kaitlin Green | From: Our Custom Farmhouse Dining Nook Reveal (And What Makes It So Incredibly Durable…And Pretty:))
The post The Best July 4th Deals – Design-Editor Approved Decor from $2.99, 70% Off Heirloom Furniture, and More appeared first on Emily Henderson.
June 29, 2023
6 Years Later, The “California Casual” Trend Gets A MASSIVE Update – Time to Deep Dive

It’s been six years since we did our deep dive into the OG “Effortless California Casual” style trend. In 2017, it was truly all the rage! It was impossible to not want to dive into that cool, neutral-toned bohemian world. Every photo looked like there was probably a little bit of sand on the ground because the beach was literally or hypothetically a mere few steps away. Guaranteed was also a piece of driftwood carefully placed on a coffee table or shelf. But now the sea breeze has somewhat settled on that version and its chic, more refined friend has entered the chat…and they are dominating.
Now this isn’t to say the old style is “out” because it’s still undeniably beautiful…but it’s been very fun seeing it evolve as every style does. So what’s changed?? Well, the same elements of neutral tones, lots of wood, and hits of black still ring true. But now, we’re seeing less boho and more classic. Replace driftwood with refined woods and cloud-like seating with structured sofas. Mainly, there’s overall visual warmth that wasn’t as apparent with those bright white walls of yore. Ok, this is starting to sound like I’m trying to write an Irish poem so I’ll stop because baby, we’re talking about west coast/Mediterranean-inspired style. Let’s start with a pretty crucial and standout element…
Limewash Walls design by rob diaz | photo by la light photo
You can’t throw a rock these days without hitting a house donned with at least some limewash paint. And I get why. IT’S BEAUTIFUL! I’m even considering it for a small room in my apartment. But not just any color works with this style, it’s gotta be a light neutral. The goal is to have walls that look “natural” and to give an effortless movement to the space.

 left: design by charlene miranda, photo by christian torres | right: design by rob diaz, photo by la light photo
Imagine if these wall were covered in normal, flat paint. They would still be pretty but they would feel um “less organic”?? They also add a velvety softness that is so soothing to look at. No wonder the world can’t get enough of the stuff. But in terms of this style/trend, I think it’s a significant difference. In 2017, it was all about BRIGHT WHITE walls but in 2023, the soft tans and beiges are king.
You may feel like this style leans a bit Japandi and you’re not wrong. I think it’s heavily influenced. But to me, it’s a bit more layered and cozier. But if you love Japandi, I have a feeling you are going to love this style. It’s just a hunch:)
Refined Wood design by 1000xbetter | photo by michael p.h. clifford
When I was looking at those old 2017 photos, naturally imperfect, yet very cool, wood was the look. But I also noticed that wood in general was used more as an accent as opposed to now where tends to be the statement. The color white was so crucial to the style that even cabinets were painted white over staying natural. But today, beautifully refined wood, whether it be cabinetry, shelving, wall treatments, or furniture are A HUGE component of getting this style right.

 left: photo courtesy of house of leon | right: design by noa santos
There tends to not be a tone of detailing in the wood. Cabinet fronts are almost exclusively flat and smooth. Gotta keep it simple but visually bold (like those ridiculously beautiful columns in that bathroom above)!
Slated And Fluted Wood Details
 design by rob diaz | photos by la light photo
Ok ok, refined doesn’t mean boring. Wood slat paneling (and fluting, which I’ll get into in a minute) is all over this style. I mean, look how impactful yet calming it is. Of course, you have to make sure you use a matte finish and light/medium warmth is always to good bet. I truly can’t get over how much I love that entry nook (?) in the photo on the left. The wood tone, the width of the panels, and those micro knobs (I’ll get to those later) are all perfect. Rob Diaz knows this style in and out.

 left: design by a 1000xbetter, photo by michael p.h. clifford | right: design by stewart-schafer, photo by sarah elliot
Wood slat paneling’s fancy cousin, fluting, is also a heavy hitter in this style. A 1000x Better decide to double down on this detail in both the wall and the vanity making for an undoubtedly sick bathroom. Of course, all of those neutral tones, natural elements, and perfectly placed Aesop soap bottle really make this a “Refined California Casual” space when it could have easily gone hyper-modern with slightly different materials. Also, I’m kidding about the soap…but your bathroom may not be complete without it;)
Now, for that stunning hallway shot designed by Stewart-Schafer, the fluted built-in mixed with those reclaimed beams, and perfect wood-framed doorways make me want to rethink my whole home. I do want to point out that this beautiful home isn’t really a “Refined California Casual” style home. They played with color and pattern and is much more European-inspired overall. I just couldn’t help myself and had to use this photo:)
Travertine design by rob diaz | photo by la light photo
Ah yes, the cool girl stone! Oh, you didn’t know that the “cool girl” aesthetic included a travertine coffee table?? Well, now you do. But I promise if you don’t identify as a “cool girl,” (I definitely don’t ha) I promise this stone is still for you. It’s warm, looks like it came straight from the earth’s core, and costs about half of what marble costs. Win/win if you ask me.
 design by 1000xbetter | photo by michael p.h. clifford
You don’t just have to use travertine in slabs for permanent elements. Look at the tiles above and the beautiful texture they add to the space. A small but special moment that is organic and natural.
 photo courtesy of house of leon
But maybe you are more into the coffee table version of incorporating travertine. We can all be cool girls:) Well, this beautiful coffee table from House of Leon is a beautiful option. It’s not inexpensive but given how special it is and that raw edge, it’s a forever piece (maybe just when the kids get a bit older so bumping into it is less hospital-inducing:))
Marble With A Lot of Movement design by charlene miranda | photo by christian torres
Now just because marble is more expensive than travertine doesn’t mean it isn’t as important to this style if it’s within your budget. That white statement marble is another element that takes this new version of California Casual away from the more boho look. It definitely makes it feel more “refined/elevated”.
 design by sarah sherman samuel | photo by nicole franzen
This bathroom by Sarah Sherman Samuel is nothing if not a showstopper. That elegant marble, the natural matte vanity, terra cotta tiles, stop it!
 design by rob diaz | photo by la light photo
I really love how the marble in this bathroom is still a statement but a slightly quieter one. This bathroom also has those gorgeous limewash walls, simple, flat front cabinetry as well as micro knobs and aged metals:) Wanna guess what we’re going to talk about next???
Structured Seating photo courtesy of house of leon
Did you guess furniture? Thought so:)
The new style of furniture is still light and textured but less “cool but falling apart” neutral vintage pieces or cloud-like seating. They are now chunky and structured which I honestly prefer. I’ve only heard complaints that the cloud sofas never hold their shape and can easily look messy.
 design by charlene miranda | photo by christian torres
See what I mean?! There’s just more structure and dare I say, refinement:)
 design by 1000xbetter | photo by michael p.h. clifford
This doesn’t exclude them from having some fun personality. While that Insta-famous sofa’s comfort is controversial, I love that Crate and Barrel media cabinet! Vintage-inspired and designed with Athena Calderone whose Amagansett home is another perfect example of this style.
Also notice the depth in dark, warmer neutrals that make me fall for this style over its former version. Do you agree??
Decor Details design by rob diaz | photo by la light photo
OOOk now let’s talk micro knobs. If you look back at these photos you’ll notice them in a handful because nothing says “refined” than tiny small ball knobs, amirite? They let the wood of the cabinet fronts be the star while adding the perfect amount of visual interest. I adore them. A small detail that makes a big impact.
 design by rob diaz | photo by la light photo
Another decor element you may have noticed is the use of aged brass and/or bronze fixtures, both plumbing and lighting. Using those materials adds instant soul and for the lights, there are extra points if you use vintage French Mid-century modern pieces:)
 design by 1000xbetter | photo by michael p.h. clifford
And this last one definitely leans more Japani but those simple, yet perfect wood inside frames make for the prettiest “permanent” detail. It adds dimension and warmth and is really something to consider if you want to try to achieve this style at home:)
So that’s it from me! There are some other clear heavyweight designers for the style like Amber Lewis (duh) and Jake Arnold who have really helped to make this style wildly popular. I am a huge fan even if I like a little more color in my own home. Why? Because this “rebrand” of California Casual is undeniably beautiful and nearly washes a sense of peace as you look at an example of it. While this style may change again in another six years, much like the original it will still stay timeless. No question. Thoughts???
Love you, mean it.
Opening Image Credits: Design by 1000xBetter | Photo by Michael P.H. Clifford
The post 6 Years Later, The “California Casual” Trend Gets A MASSIVE Update – Time to Deep Dive appeared first on Emily Henderson.
June 28, 2023
Our New Driveway – A Gravel/Concrete/Asphalt/Regrind Debate

Ready to nerd out over driveways?? Believe me, I didn’t want to either six months ago, but I learned SO MUCH and y’all are asking. I obviously want to remind you all that I am NOT a driveway expert and this is just based on my first-time experience doing it with the advice from the contractors that we consulted in Portland (i.e. there might be other options or very different pricing elsewhere). This is not a story that I ever wanted to tell because I never wanted to redo the driveway in the first place, but now that it’s behind us I feel very grateful that we were able to do it as it’s just so much better. We have the world’s longest driveway so this wasn’t a fun affordable “weekend project”. No, No, NO. You’ll see…
 our first trip with the kids
When we first visited the property, IN 2019, we LOVED the long driveway, using words like “magical” and “enchanted”. It instantly transported you into the country (we live in the suburbs) and you rocked back and forth a bit on the broken pieces while in your car. It’s lined with trees that bend over and meet in the middle but most importantly it had this grass patch in the middle giving it an old two-track vibe. Branches would slap your windshield on the way down the road and you had to pay attention to where the road was to not accidentally get stuck in a ditch. These were all things I loved about it and reminded me of where I grew up (rural Oregon), but quite literally no one agreed with us (besides Cali, our landscape designer who got our vibe). Brian wanted it wider but loved the vibe.
 photo by suraya barbee
Sure, maybe the concrete around the rest of the house was “very, totally, irreparably broken,” but it didn’t really bother me. They had patched some of the super broken areas with gravel and when it was dry most people wouldn’t notice (edit: literally every man with a wide truck would comment on it, but none of my girlfriends even noticed and I didn’t give a crap). I have so many other fish to fry, knowing that this home renovation/restoration was going to bleed us dry already. We agreed early on that we’d focus our budget on the house, namely the rooms that were to be heavily documented on the blog for my job, with projects that were tied to partnerships. There are some parts of the construction we can write off, and can actually build future business. I’m not a “driveway influencer” so when we were prioritizing construction costs we really, really didn’t want to have to redo the driveway. It was fine!!! (ish)


Aesthetically I didn’t want to touch it at all because I loved the two-track country vibe. But over the course of the construction with so many big trucks and machinery coming in and out daily + two years of heavy rain, it became more and more busted to the point of not being able to drive down it at all without fearing that you’ll pop your tire. The charm was pretty ruined and not just because it was cracked and in back shape, but because it was so narrow and surrounded by mud. No one could really turn around and every time anyone tried they would get stuck in the mud. It was starting to become very clear that we would have to redo the driveway and she is LONG. So let’s talk through the exact challenges/situation:
It’s a long driveway to just get to the property, then a roundabout with a grove of fruit trees in the middle, and a massive utility space that could park like 10 cars. She BIG. It seems to be a mix of mostly broken concrete with some poured asphalt mixed in and lots of patches of gravel. Everything needed to be widened so 2023 cars could navigate without getting stuck in the mud. It was that narrow. I liked the narrowness and found it charming, but explaining that to guys that are stuck in the mud was feeling increasingly silly/annoying. And then there was MUD. Just so much mud that I think permanently scarred us. We HAD to fix this problem and before next winter. What Are The Driveway Options
We didn’t really have a dedicated contractor on this part of the job – ARCIFORM would weigh in as would our landscape contractor who had done many driveways, but it was on Brian and I do to all the research and to book the work. So again, this might not all be accurate for your situation but it’s what we were told, based on our research.
ConcreteEveryone seems to love concrete and I agree that new concrete looks better than new asphalt. I don’t know THAT much about this except that concrete seems to be very expensive – and shot up in the last couple of years. Based on our square footage needed it would be $75-100k. It requires a complete demo, grading, gravel base, steel rods, pouring, curing, pouring, curing, and no traffic for weeks afterward. It is what everyone thought we should do with this older home. But y’all, not to take down the concrete world right now, but all the concrete pours I see are always super cracked. Can it really hold up to the rain and heavy cars? Between the price, the length of time (3 weeks), and our doubt that it would really last long term this was a very easy NO. We thought about just doing it around the house, but then we are booking two different contractors and where would it start/stop, etc. It would be clunky and disjointed.
Chip SealMany of you reached out to mention chip seal and I had never heard of it. Thank you! So we finally got a chip seal contractor to come quote (which held up the whole process for weeks since he was really busy and there are only a couple of guys in town but we seriously thought it would be worth it). He gave it a solid “no way” because our driveway was on a hill. He said with the rain in the PNW that he would be back in 3 years to redo it. And that’s literally coming from a chip seal contractor. It’s basically glued gravel over a base coat of gravel (I’m sure there is more to it than that, but that’s how he explained it to me). We loved the look of it online but we didn’t experience it anywhere in person but that was a moot point – when the salesperson is saying “no way, this is a bad product for you,” you don’t keep exploring or push back.
Permeable PaversAt the last minute, ARCIFORM suggested these pavers which honestly I think is a GREAT idea. We did preliminary research which showed that it was going to be very, very expensive but could be very pretty if thoughtfully designed. Think small stone or brick pavers that have space for grass growing in between – creating a pattern. When we brought it up to our landscape contractor he talked us through the process and y’all it sounded even more expensive than all the other options. I will say that it is a great option for the planet as it allows plants/grass to grow through and rainwater to drain directly through it, but we simply couldn’t afford it (and didn’t have time to research partnership opportunities). Now if we ever have a small driveway (literally where you can only park two cars) I would love to explore this, but for our scale of driveway, it just didn’t feel like a viable option that we could afford.
GravelWe love gravel, y’all. We love the sound of the tires when they drive over, the crunch under our feet as we walk, and the look that feels so casual for this old property. I’m not saying it’s right for everywhere (it’s not), but the vibe was what we wanted. But we had added gravel in the winter of 2022 in a bunch of places in order for trucks to navigate the property without getting stuck in the mud and it all just turned into a mud pit – all of it (granted we didn’t have it properly prepped or done). Also for gravel, we were going to have to demo out all the concrete, grade everything, line and prep and then put a gravel base, compact it, and then add a final top coat. All fine and good but it would take weeks, cost $60K+, and then we were still very, very, very worried that it would wash away in a few winters anyway!! We also just worried that it would collect mud and again, we had felt held hostage by mud for a year. We weren’t going to redo our driveway and have that be a risk. Our asphalt contractor said it for sure would wash away (but obviously he is selling a different product). Which brings me to…
AsphaltY’all. This was where Brian and I felt like we were going nuts because everyone seemed so bummed when we said we were highly considering asphalt. There was a “please don’t do this to this beautiful property” look and while I kinda agreed, we were like, “so are YOU going bankroll our concrete cost?” We got three quotes, all around $38k which after concrete and gravel seemed like our best option. We really liked one of the companies – their knowledge, customer service, and response time were excellent, so we set it up. Some of the pros of asphalt are that since it’s liquid tar mixed with rock (I think) it can be poured over cracked concrete and even old gravel – so less demo and prep time (and time is money). There is some prep work, but far less. It also meant that the kids could rollerblade on the driveway and bike easier than they could in gravel – which at the time seemed like a great perk. But it’s black and definitely says, “new construction”. I guess it stinks for a while and can bring black marks on shoes into the house. But it takes only a few days, cost literally 1/2 of concrete (if not even less) and the guy, John, said they could do it literally any time – like the next week.
We were so unbelievably over the mud surrounding our house, at times during the rain feeling like we had to quarantine inside because it would be that bad just walking to the car. I wore Bogs almost exclusively and had to provide rain/mud boots for guests should they want to visit. I ruined countless pairs of shoes – all fine and good, but it informs our decision making which is why I’m bringing it up. So we probably weren’t in the headspace to make this decision because we were reacting to the mud and couldn’t be objective. But we talked about it for months, really trying to see it from a $30k foot view, and asked ourselves if this is what we’d want in 10 years for this property. Were we just doing the cheapest option that we would regret??
After so much debate we decided that asphalt was good enough for us. The house is so pretty that you won’t really even notice. You’ll see the pretty windows, the plants, the pretty architecture – only certain old-house purists would think we took the cheap way out. And we started seeing asphalt everywhere and it looked fine to us!! We know that it always grays out over time, is easy/cheap/fast to redo in 15 years (just one layer and one day’s work, no demo) and ultimately it’s just not where we could spend the money. It was a decision based strictly on time and money and we were quickly running out of both, honestly.
Regrind (A.K.A. Recycled Asphalt)So our asphalt company was prepping, about to start when we lamented that we really wanted the look/feel/sound of gravel. He suggested quickly, “What about recycled concrete” – a product he also did. I was busy in meetings so Brian tried to relay the information as best he could which was essentially this: regrind is recycled asphalt that is broken up into gravel bits but since it still has the tar in it so it can compact to be harder and with less movement than gravel. He said that the prep would be more (an additional $10k) because they would have to demo out more of the larger broken concrete chunks but the product (regrind) is cheaper than asphalt by around $8k. They still compact it so it’s much harder than gravel, but it’s a bit loose on top and not this new asphalt look/feel. It’s a $2k difference, but when you are talking about $38k-$40k then you really just decide what you think you’ll want more long term, not trying to save $2k.

 What Did We Decide????
 We made the decision – REGRIND IT IS, with a huge thanks to a few of you who DM’d me and gave me confidence that it was the right thing to do. They began demo’ing out some of the concrete and widening the driveway with prep work when they…
 The Hiccup – Too Much Rainwater, Bad Drainage
It had rained heavily the weekend before, which I think was in between the prep work. As they were prepping the long driveway and widening it, the water from our hillside property was flooding the gravel and it was impossible to move the trucks around or to compact it. Cool. So I pulled up my “bad news script” and asked, “ok, what are our options and how much will they cost?”
Option #1: Wait til it dries out, extending the construction by a couple of weeks (depending on weather). But they all advised that without proper drainage it wouldn’t matter WHAT surface we had decided on – this driveway was going to get flooded and would be compromised again within a few years. This is because we had deeply disturbed the hillside by grading it for construction trucks and “disturbed soil” doesn’t retain/drain water like “established soil”. This was proving to be true everywhere there was disturbed soil. He also said that this is why the driveway seemed so patched in the first place – that there was attempt after attempt to fix this problem for decades, but without proper drainage, we would be in that same boat (haha) in a few years. Essentially if we don’t deal with this now we might be drowning in mud again soon.
Option #2: Put in a long perforated tube that would essentially line the entire length of the driveway on the hillside side and act as a French drain, taking the water away before it hits the driveway. This would extend the job by two days and cost $13k. This was obviously the recommendation, but it wasn’t $13 dollars, $130 dollars, or $1300. It was $13k gone just like that. Did we technically have it? Yes, in our savings from the sale of our LA house, which we are grateful for. But oof.
I begged him to get it under $10k and if so I’d just do it, rip the bandaid off in hopes of never having to deal with it again. He agreed and they finished it. They walked the property with us and showed us how much water there was. It’s just insidious and unless we dealt with it now we’d have a bigger problem later.
We had ZERO experience with this and didn’t have time to take a driving cruise around Portland and try to find some regrind. I put it on social and had enough of you say that you thought it was a good idea. So with the information we had at the time we went for regrind.
Our First Reaction the finished product!
When I came home after it was done I have to admit I was like, “ok. sure?” Since it’s looser it isn’t this super clean concrete or asphalt smooth look. There are areas that are super compact and solid and other areas that we wondered if it was too loose. But as we’ve settled in (it’s been about two months) Brian and I both agree that we actually LOVE it. It is that perfect combination between gravel and asphalt. It feels casual and farm-like, but truly seems to be more compacted and has more longevity than gravel with the hillside + rain combination. I obviously can’t say anything about that for years, so please know this isn’t a review (yet).

 So What Does Regrind Look/Feel/Sound Like?
It’s super dark, but not black like asphalt. It looks like dark small gravel rocks glued/compacted together with a layer of semi-loose to loose gravel on top (but very angular, so not that loose and settles in easily to the lower layer). It is about 6″ in total depth (it seems like it anyway). I walk on it in my bare feet but I have working troll feet that can handle much more than others – so I suppose that most people would say it’s like walking on gravel and not advisable with bare feet. But when I’m walking the dogs or driving up the driveway has that grave crunch that I love!


I just checked in with Brian about it – because two months ago we were both like “well, we hope we made the right decision”. And now, he said the same thing – that he has come to love it, too. We are so happy. The whole thing ended up being in the low $40k range (paid over time in payments which always helps) and it’s behind us. But again, I want to stress that the product itself isn’t that expensive, we just have an exceptionally long driveway so if you have a shorter one, all of these quotes would be far less.


If you guys have more insight/experience leave it in the comments. I truly hope that we made the right decision but only time will tell. We love the look and feel like it doesn’t compromise the overall vibe of the house, while hopefully giving us the long-term function, durability, and “NO MUD” that we so desired.
Thank you for listening to my driveway ted talk. I truly hope to not have to ever do this again 😉
*After Install Photos by Kaitlin Green
The post Our New Driveway – A Gravel/Concrete/Asphalt/Regrind Debate appeared first on Emily Henderson.
June 27, 2023
Arlyn Interviewed A Gen Z Design TikTok Star – Here Are 5 VERY Unexpected Takeaways

I’m just going to say it: Young people intimidate me. Gen Z, in particular, makes me feel beyond uncool (she says, wearing her Kirkland Signature leggings). So when Jess proposed I talk to a Gen Z design content creator for a story, I was trying to sound excited but was, understandably, a bit daunted.
Two years shy of the big four-oh, I didn’t even know what I would ask someone in their 20s, but I’m a trained journalist, damnit, and it was time to polish off those J-school interview skills I went into student loan debt to acquire. “Take a look through his videos, and let me know if it’s something you think you want to tackle,” Jess suggested, maybe hearing the slight hesitation in my voice I was poorly trying to hide.

 left: marco, the gen z creative added this painted wood door frame to add some character to his kitchen entrance | right: then seen here with his amazing hair and his diyed stained glass transom
The creator in question is Marco Zamora, a 26-year-old here in Los Angeles who shares his love of design as well as his uber-chic rental DIYs on TikTok and Instagram. Upon first scroll, I recognized a project of his that Jess had shown me a while back—a retrofitted wood doorway frame with a handpainted stained glass transom. I recall thinking it was so charming and elevated but didn’t make the effort to go into my own phone and follow the brains and the brawn behind it. Then there is the modern kitchen that he took from perfectly nice (especially by rental kitchen standards in LA) to inviting and sweet in order to better match the 1920s Parisian aesthetic of his building. The video I was most taken with, however, was one in which he talked about “sad beige” decor and how he broke up with it in his own home by layering in his Mexican heritage instead of going the route of trendy decor that Pinterest and Instagram condition us all into thinking is “good” design.
Maybe this wouldn’t be so formidable. Maybe, in fact, it would be enlightening. Talking to the younger generation of design lovers; figuring out what makes them tick(tok), what they’re into, and where they think this is all headed. Besides, how was I ever going to figure out what he puts in that glorious head of floppy, shiny, voluminous hair?!?
Post-phone call, I immediately texted Jess: “Marco is a DOLL!”
Before our call, if I had to put into words what I thought Gen Z “design” was, I’m not sure I could summarize it with words. I’d be better off sharing a movie reel of what my mind envisioned: flashes of squiggle mirrors, plastic vines taped to walls, string lights, Oreo-cookie side tables (look them up), bright colors, and just a constant whiplash of flipping through trends that end in “-core”. Honestly, not too dissimilar to my own bedroom circa 1997. I know my assessment isn’t fair, especially for someone who spends very little time following anyone under the age of 30 in the design world, and (gasp) doesn’t even have TikTok downloaded on their phone. But it wouldn’t be the first time one generation looks down their nose at the one that follows, whether they are mean-spirited about it or it’s just par for the course.

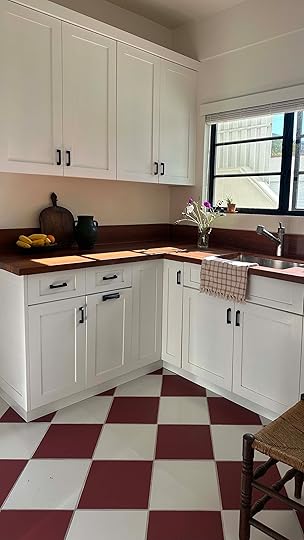 left: his kitchen “before” affordable diy transformation | right: marco’s warm and inviting reimagined kitchen
What was I scared of? My conversation with Marco instilled so much hope in me about Gen Z and beyond and inspired me in ways I wasn’t expecting, from why they do what they do to the care and the thought they put into their spaces. They seem leaps and bounds more mature than how I approached interiors when I was their age. I truly found myself pleasantly surprised as I sat and listened to Marco discuss his perspective on responsible design, on trends, and on access to inspiration.
So, what exactly did Marco share with me that made me flip my youth angst on its head? Let’s explore the most surprising takeaways…
[BUT WAIT: Marco and I spoke for nearly an hour about many things, including how he got to where he is. I edited down the conversation for the sake of brevity and readability but I don’t want to skip out on his impressive resume. Quick intro: Marco, 26, lives in LA. Wanted to be an architect his whole life, got into UC Berkeley but then switched directions after getting a full-ride scholarship to a school in Long Beach because he was his high school’s valedictorian; Long Beach didn’t have an architecture school so he studied civil engineering; graduated and got a coveted internship at Disney; moved on to work at Amazon; still didn’t feel like he was doing what he loved so after sharing his home on TikTok and people being drawn to his projects and aesthetic, he went full-time content creator. Phew! That was a lot, but *now* we’re ready get to it.]
Takeaway #1: Gen Z Puts Environmental Impact & Financial Responsibility First When DecoratingI’m leading the charge with the one learning that, honestly, was the most surprising to me, in the best way possible. Maybe it’s because my generation grew up recycling, sure, but the whole “reuse” part of the equation definitely wasn’t the star. I recall many times buying second-hand and most of my friends and peers just called it “used” and “old.” There was a subsect of vintage lovers I can recall, but it certainly wasn’t the norm. I can almost guarantee the majority of my generation wasn’t thinking of “environmental impact” as we filled our car trunks with flat-pack boxes from IKEA. I do not write this with pride; sadly, the opposite.
Also, keep in mind that I’m the same generation that would get lured into signing up for multiple credit cards on my college campus with the (incredibly predatory) trade of a cheap, size XXL T-shirt that said “College” on it (or the one time I got a new credit card just to get a free $7 Jimmy Johns sub…true story, and thank goodness this is now illegal). All that to say that financial literacy and responsibility were something you had to work hard to seek out. It wasn’t the standard to just know you were better off not opening up numerous lines of credit with no job.
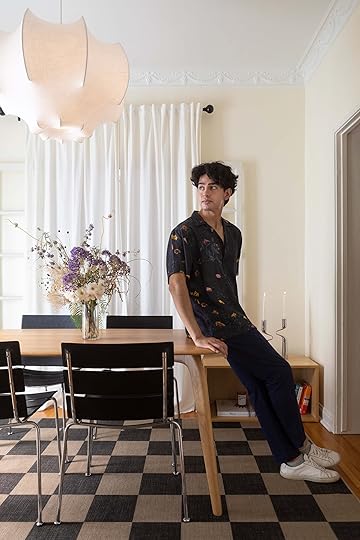
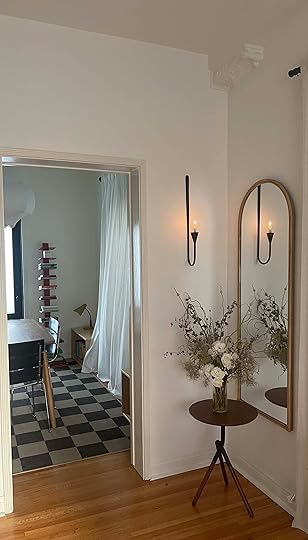 left: marco in his dining room, which, like most other spaces in his home, he’s constantly tweaking and experimenting | right: a cute little vignette he’s playing around with
“I think my generation really just isn’t into ‘new’ things,” says Marco. “We’re more about thrifting and finding unique things with character. I think that’s a natural shift in the design world in general, though. I think within the last five years, there’s just so much overproduction of trendy items. Take white furniture, for instance. White couches, white chairs, white beds, so much bouclé, but I think that’s actually the opposite of where I see myself and people my age leaning towards now. We’re trying to understand what we’re buying, and what environmental impact it will have. If all your stuff is brand new, especially if all of it is one trend or one style, how much waste is going to be created when you decide to flip styles?”
“I have a white couch, but I thrifted it, and even when I bought that white couch, I had to think ‘Okay, if this gets dirty or scuffed beyond repair and I can’t resell it, what does that mean? Waste.’ I feel like that about a lot of home decor in general. There’s so much mass production, and you can look at something and just know that about it. You can tell there’s not much history in it. Just…generic. There’s a lot of beauty in thrifting and finding something that’s unique and has a story. I think that’s something my generation prides itself in and looks for.”

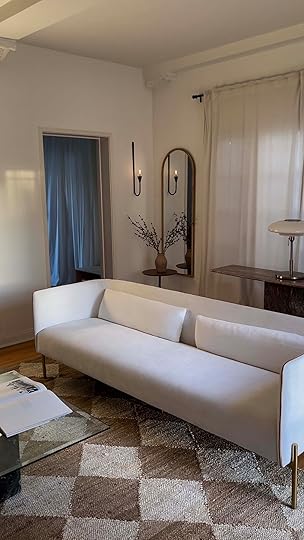 left: playing around and swapping out a rug in the dining room | right: marco’s thrifted white sofa
So does that mean Gen Z (or Marco) doesn’t ever buy anything new or shop at stores like IKEA and Target to grab a vase or tray? Not necessarily.
“Obviously, in a home, you’re going to need to buy some new things. But it’s about the mix and the balance. For me, I’m in an interesting place where I want to be able to provide recommendations that people can actually go and get. A lot of the time, if I find a very unique coffee table or stool, maybe it’s not something everyone can purchase or find. What I do try to do is find specific products at bigger box stores that are higher quality or have a more timeless design. I do like to meet in the middle. Nothing super trendy and ideally, well made. I try to collect good pieces that will hopefully have multiple lives and multiple homes. If for some reason something didn’t fit, I would find it a new home with someone else. But I think I like my pieces enough that they would work anywhere I go.”
Takeaway #2: They Actually Don’t Care How Their Homes Look On Social MediaLook, I know that this header is kind of contradictory to the idea that someone would share their home on the internet for a living, but when I asked Marco about the “why” behind what he does in his home, it felt like the thought of making his home beautiful *only* for the internet had never even crossed his mind. I don’t have to expand much on the truth that we all lived over the past 10-12 years: how to make your spaces “Instagram-worthy” or “Pinterest-worthy” consumed a tremendous percentage of both the number of articles circulating the web and what feels like the DNA make up of the Millenial age set. We were the first generation to really put our lives and our living rooms on a 24-hour feed to be consumed by everyone. But by now, those in Gen Z and younger don’t seem to have the same need to “fit in” and fake perfection that was so prevalent 10 years ago.
“I think at the end of the day, it’s a little bit of both. I think that’s true for all generations, really. You want a beautiful home for yourself but also you want other people to enjoy it with you. I wouldn’t necessarily say that it needs to be beautiful to show off on social media, per se, but inspiring others is always nice. My goal with the content I create is to make elevated design accessible to everyone. It’s not about being gimmicky or showing off, at all.”
Takeaway #3: Trends Don’t Matter. Experimentation Does.Could have fooled me. Truly. Again, back to my original thoughts of Gen Z…I would have put money on the fact that they are ruled by trends, but in fact, that’s not the case. They’re the trend-setters, and if they are buying into a trend, it’s to get to the next, better, version of themselves. Deep.


 marco aimed to respect the parisian aesthetic of his apartment building by leaning into that style for the pieces he’s collecting. the fireplace (right) is a retrofit feature he created with a salvaged stone mantel and detailing
“There is a lot of negative energy around the word trend, but there are some positives, too, specifically experimenting and learning. When I first started decorating my own homes, I was very much about neutrals. My Pinterest boards were all very Wabi-Sabi, natural, and of course, that’s been on trend for a while now. My style has since evolved and will continue to evolve. That will only happen by experimenting. The key, however, is to dabble responsibly. Buy things that are vintage or used already that fit this new ‘trend’ you might be interested in trying. Trends tend to repeat, so you’ll probably find something that is already in rotation. Be smart about it financially. It’s really what a lot of us think about first. Secondly, being mindful of the environmental impact. As long as you have those two things in hand, trends are fine! It’s the wastefulness that’s a problem. Am I buying a $3,000 white couch or bed that I’m not going to love a year from now?”
Takeaway #4: They’re Not Afraid to Be Uniquely Them…Even If No One Else Is Doing What They AreIt’s no secret that Gen Z kind of goes their own way. That’s just the nature of every generation that comes after us, though, right? They learn from the ones before them and repave the path to better suit themselves. In terms of design, it certainly didn’t hurt that there is seemingly unending access to inspiration and resources now that just weren’t available before.
When I was in my early 20s, Pinterest and Instagram weren’t a thing. The only options for second-hand or vintage were local shops, Craigslist and eBay. If your city didn’t have good options, off to HomeGoods or Z Gallery or West Elm you went. As far as inspiration, if I wanted design ideas, I could either buy a magazine, scroll through some Tumblrs, or see what a blogger I followed was up to. But even then, you didn’t quite know what to do with what you saw. So…we mirrored the photos we could find in our homes. We wanted to recreate the Emily Henderson look, for instance, or buy everything Nate Berkus designed for Target to feel like he styled our spaces. I’m not saying no one had an original room, of course we did, but the spirit behind it feels different.
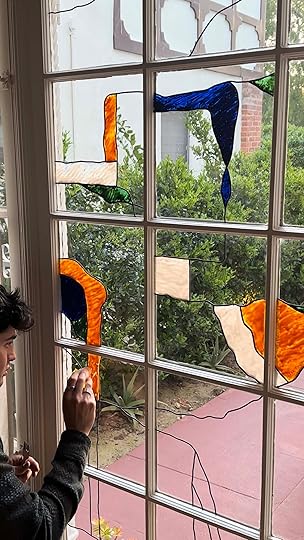

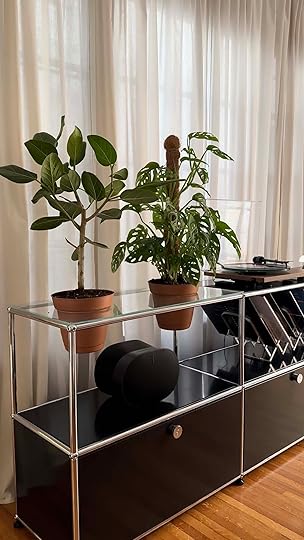 left: marco hand-painted a stained glass detailing on the french doors of his living room | middle: a mexican blanket he brought back from a trip to mexico city | right: he got creative with a vintage cabinet by swapping out the top shelf with a piece of glass that he then had two circles cut out of to hold plants
“Over the last few years, as I lived in apartments with roommates, I would just go to Target and HomeGoods to buy little decor pieces since I didn’t have free reign of the whole space, and honestly, it just didn’t really do anything for me. It always felt a little generic. It took me some time to learn to incorporate my Latin background into my designs because it’s important for me to make things my own. The internet is a beautiful place and it has helped me to learn so much. You get to see so much inspiration and different ideas all within your phone and it opens you up. You’re able to put it together in a way that’s very specific to you. Plus, we have so many resources now with resale markets like Facebook Marketplace, Kaiyo , and numerous online auctions that allow us to pull from across the country and the world. There’s a lot more to experiment with in unique ways. It lets you get so creative. Add your own twist and make it yours.”
“Recently, I took a trip to Mexico City and it changed my perspective on design. I visited Casa Luis Barragán which is one of architect Luis Barragán’s most famous projects. He had such a good understanding of how to incorporate color and Mexican culture in an elevated way. Being surrounded by my heritage and just seeing how beautifully it was all executed really motivated me to want to bring that into my home. I bought a lot of special mementos that remind me of Mexico and my culture.”
Takeaway #5: They Don’t Think Millennials Are a Bunch of Lame LosersSide parts vs. middle parts; skinny jeans vs. straight leg. Everywhere you look, there’s some annoying comparison of how everything us “old” people are doing is passé and all those younger, cooler people are not-so-secretly laughing at us. But…from the sounds of Marco’s answer when I asked him about this, Gen Z is far more accepting and welcoming than I originally gave them credit for.
“Design comes in waves. We also come in waves. So much is just dependent on what your inspiration and influencers were and where they came from. I don’t think that there’s anything ‘wrong’ with the older generation of content creators. That’s Emily’s style and this is my style. That’s important to understand in the design world. Sometimes, people think there’s a right and a wrong, but there really isn’t. Everyone is doing their own thing, and at the end of the day, that’s why it’s so great to experiment. You may love a very neutral space and there’s nothing wrong with that. But where we’re at right now, and why I think I’m trying to push the message of adding color and character and personality, is because we’ve been in this neutral design space over the last 10 years. Neutrals have been pushed so heavily as the “safe” option. When in reality, that isn’t the case.”
Final Thoughts
again, the hair in top form
Maybe Marco is a special unicorn in his generation, but the way he discussed not just himself but Gen Z when prompted felt like that’s not the case. He spoke about design and decorating with such ease and confidence that I hardly ever saw when I was his age (and I worked in a high-design magazine at the time, too). Personally, I think so much of it boils down to access and education. As much as we all can look down on social media and blame it for the pitfalls of society, what it has given us all—and particularly young folk—is visibility into all the options that exist to either tweak and make their own or completely reinvent the wheel.
Oh, and as for the hair. Yes, I did ask him about it because HELLO, but sadly, there was no resolute elixir that would turn us all into floppy hair gods. “It’s good genes! Honestly, my products are constantly in rotation. I don’t have much loyalty to specific products, but right now, I’m using the brand Kevin Murphy.” You win some, you lose some (she says, as she Googles Kevin Murphy…).
*all images courtesy Marco Zamora
The post Arlyn Interviewed A Gen Z Design TikTok Star – Here Are 5 VERY Unexpected Takeaways appeared first on Emily Henderson.
June 26, 2023
Scared To Choose Art? We Showed Our Photographer How To Do It With Pretty And Affordable Options

If you have been following along for a while, you know we love writing about choosing and hanging art. Or maybe “love” isn’t the right word. Maybe we just recognize how debilitatingly hard it can be to find art, purchase said art, and then hang that art in an aesthetically pleasing way, so we’ve made it our duty to find and share solutions. This is why we have so many posts in our archives such as: How To Hang Art Correctly, DESIGN MISTAKE: Different Walls, Same Art Configurations, How To Actually Make A Gallery Wall, 7 Unexpected Places I Like To Hang Art, The 7 Things You Need to Know Before You Try to Hang That Gallery Wall, and the list goes on. So when Emily was shooting EHD photographer Kaitlin’s basement reveal, and saw that the rest of Kaitlin’s home was beautifully designed except for one thing – art – she realized this is a common trajectory. MANY people find that choosing art is the hardest part of designing a home or even one room. I remember agonizing over my gallery wall for a solid year before it was completed (and I believe I only found the strength to complete it because I had a hard deadline). Even my years at EHD didn’t fully prepare me for the pain of choosing and hanging art. But sometimes what we all need is to get out of our heads a little bit and have fun with it. So today, using Kaitlin’s real home and blank walls, I am showing you how art can transform a space using the ancient art of Photoshop. In doing so, my hope is to prove that finding good, affordable, tasteful art is less painful than you think. Shall we begin?
THE CANVAS – KAITLIN’S HOME WITH NO ART
Welcome to Kaitlin’s home (and huge thanks to Kaitlin for inviting us in). It is so cute and clearly well-styled and designed (as you can see she has great taste). But without art, the walls are a bit sad and there is definitely a sense of something missing. Kaitlin has shared that she struggles with choosing art because it feels so daunting and permanent. She is not alone. We often get inside our heads about what the art we choose says about us. We can get trapped into believing this narrative that the art on our walls must represent who we are. Folks, I am here to tell you it doesn’t have to be that deep. Art certainly can represent your style, personality, and even your values, but it doesn’t have to. You can hang art because you like it! It’s as simple as that.

A common misconception is that adults who are serious about art should feel pressure to buy from a gallery or try to procure originals. If you have the opportunity and means to do so that is wonderful, but it’s not the only way to adorn your walls with quality art. As you will see later in this post, big box stores like Target, West Elm, CB2, Crate & Barrel, and so on have really great art options that can completely transform your walls. Then there are amazing second-hand and vintage options on Etsy and Chairish and of course, you can score incredible pieces on Craigslist, Facebook Marketplace, and flea markets. Good art does not have to break the bank, my friends.


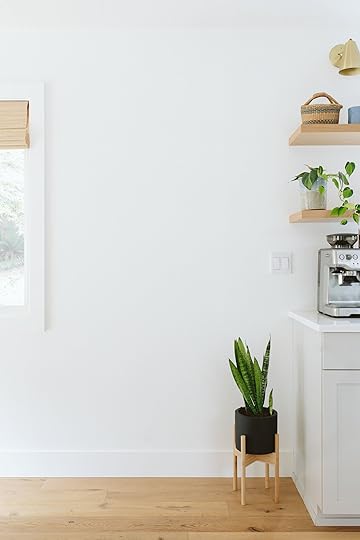
Now if you wondering if there is a formula to follow when arranging art in a room the answer is YES! Famously, rooms have at least four walls. So, to make a room feel collected and dynamic you should mix up the variations of art on your walls. For example, you don’t necessarily want to have one large vertical piece of art on every wall. That might make your room look like a museum. Instead, you can choose one of the following for each wall:
One small, large, or medium piece (depending on wall size)Gallery wallGridDiptych or TriptychMirrorStacked piecesSomething sculpturalFor you visual learners out there, this graphic is extremely helpful:

Now that you are familiar with the space and parameters, allow me to present some of our favorite art picks and how they can be arranged in a room. Here we go.
EXAMPLE#1: Minimal And Neutral Art
Layered Paper Dimensional Wall Art Set of 2 (left) | “Mountain High I” Framed Wall Art Print (over the mantel) | Wrinkle Decorative Bowl
To start us off, I pulled together a minimal and neutral art plan that accentuates the calming, relaxed vibe of the space and plays off the light wood tones throughout. The jumping-off point for this style began with the awesome Layered Paper Dimensional Art Diptych. It is perfectly minimal and interesting and has an artisanal look, plus they were big enough to fill the large empty space on the wall. You can buy one individually but as a pair, it creates a cohesiveness that is so pleasing to the eye. To complement the softness of the diptych, I chose this “Mountain High I” Print with a light wood frame. I love how the black strokes bounce off the black accents coming from the fireplace and the bookcase. Finally, to add movement and texture I included this wrinkle decorative bowl that brightens the mantel and provides a sculptural element.
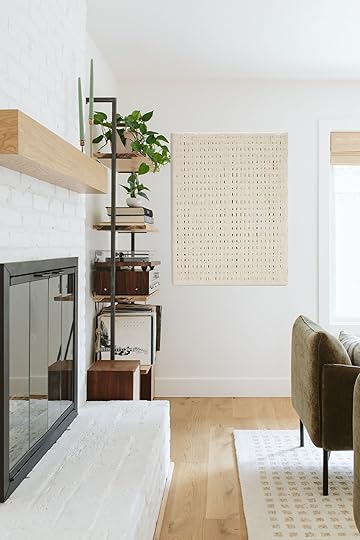
Following our formula above, this wall needed something other than a diptych or triptych, so the room would feel dynamic and nuanced. A medium or large-scale piece felt like the right fit here, and I really love this one from the Leanne Ford x Crate And Barrel collection. It’s woven with cotton fibers to create texture and some movement.
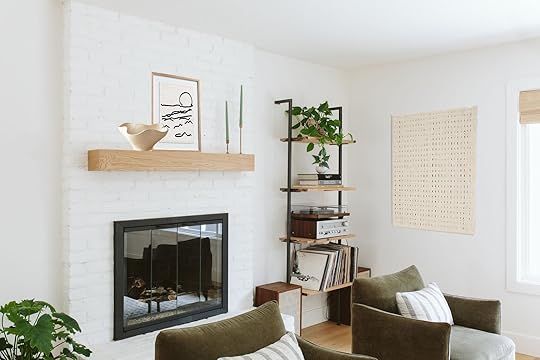
“Mountain High I” Framed Wall Art Print | Wrinkle Decorative Bowl | Natural Daisy Chain’ Wall Art
As you can see, the pieces on this side of the room are close together so it was important to find art that speaks to each other but are not too similar in size, subject, or shape.

On the opposite wall, next to the incredible slatted wood room divider, there was a blank space above this plant stand that honestly could have been left alone, but a mirror felt like a great way to draw your eye up. Hanging mirrors is one of our favorite “tricks” when finding the perfect art piece feels impossible. A mirror will make the room feel bigger and help bounce light around the room (which is especially important for rooms with a scarcity of natural light).


Arched Wood Throw Blanket Ladder | White Rice Paper Geo Framed Wall Art 4 Piece
Due to the open-concept floor plan in Kaitlin’s home, the dining area is visible from the living room so it only made sense to continue this art challenge on these two walls. To create more height and a sculptural element on the wall to the left, this ladder was the perfect solution. The arch creates a faux architectural element and the wood tone is really pretty. On the same wall on the other side of the window, this grid of 4 pieces breaks up the wall nicely and gives off a pulled-together, collected vibe.
EXAMPLE #2: Abstract And Bold Art
Finding Balance No. 1 Wall Art (left) | Metal Ring Sculpture (small) | Metal Ring Sculpture (large) | Nature You and Me Print
Switching gears a bit, I wanted to see how moody and abstract art would transform the space. Immediately, the darker cooler palette makes the room feel bold and a little mysterious. I started with the black and white print to the left and loved how it grounded the space. To balance out the darkness, this piece over the mantel created some warmth but still felt cohesive. Then the small and large ring sculptures provided movement while still sticking to the abstract and bold theme.

Shapes 1 Print (top) Shapes 2 Print (bottom)
Oh, I love these prints. Stacking two framed pieces is a great hack if you are having trouble finding a large piece to fill up a blank wall. They don’t even have to be a set (as you will see in another example below) and sometimes you can find two smaller pieces for a more affordable price than one large piece.
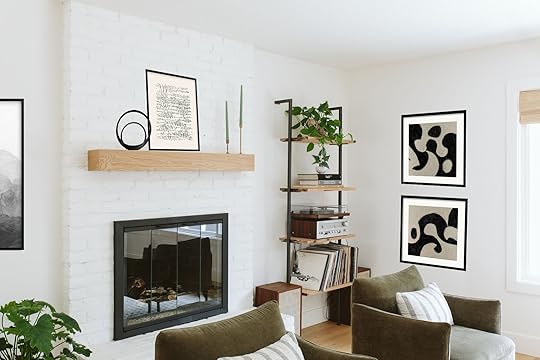
Metal Ring Sculpture (small) | Metal Ring Sculpture (large) | Nature You and Me Print | Shapes 1 Print (top) Shapes 2 Print (bottom)

Gerald Large Round Black Wall Mirror
Again, a round mirror on this narrow wall feels like the perfect decor moment. The roundness juxtaposes the hard lines of the room divider and creates a nice contrast.
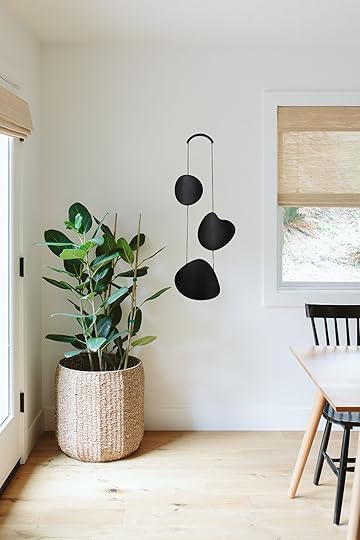
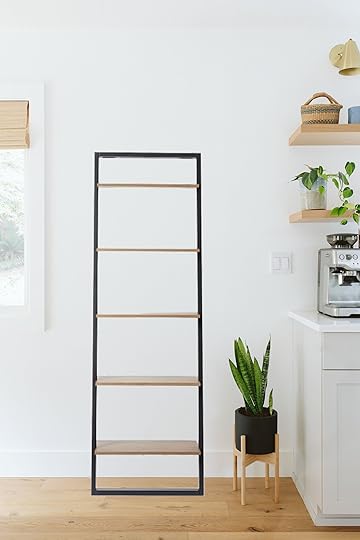
Circle & Line Rill Wall Hanging | Ladder Leaning Bookshelf
The narrow space between the plant and window was a little tricky to fill until I found this abstract wall hanging. It provided some much-needed movement and a 3-dimensional element to the room.
Not art per se, but a ladder shelf like so does provide a sculptural element and since it is close to the kitchen, it could act as a practical storage solution for pretty bowls, vases, and other serveware.
EXAMPLE #3: Vintage Inspired And Eclectic Art
Shepherd’s Meadow Print | Emma Mirror
Kaitlin’s home is truly a joy to play around with styles and I was really excited to see if I could make vintage-inspired artwork here. I started with this Shepherd’s Meadow Print from Lulu & Georgia to complement the green accent chairs and brass finishes. I immediately LOVED how it looked on her wall and thought an ornate mirror above the mantel would help drive the vintage style home.

Sticking with the muted green theme, this print really stuck out to me. It is from Minted, one of our favorite places to source affordable art, and comes in several sizes and frame options. I chose the brass frame to emulate a vintage vibe and I just love how it looks here. It brings in a contemporary element that helps tie in the more modern furniture and architecture.
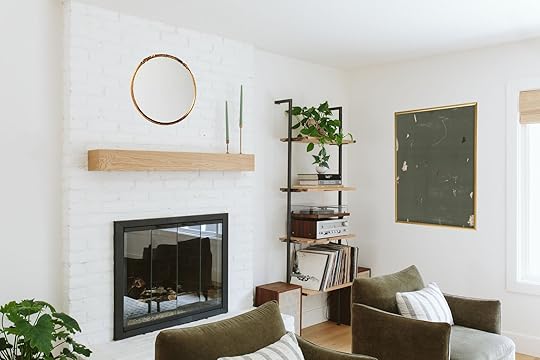
Emma Mirror | Play Wall Art Print

Instead of including a mirror here, I wanted to play with the idea of hanging a small vintage-inspired framed piece. A larger scale piece would also work here, but opting for a small one is sort of breaking the “rules” which can create a really interesting look. In fact, we are big fans of the “too small” rule-breaking trick because when done right, it looks intentionally eclectic and cool.


Coastal Beach Seascape (top left) | Sailing Boat Painting (top right) | Seascape Painting (middle right) | Framed Oil Painting Print on Canvas (bottom right) | Full-Length Floor Mirror
This seascape gallery wall, inspired by Emily’s family room, brought so much color and life to the walls. If Kaitlin wanted, she could remove the plant on the left to create a larger gallery wall, but I kind of love the asymmetrical gallery wall look.
Finally, I love how this standing floor mirror provided height and an arch shape to the room.
EXAMPLE #4: Lively And Colorful Art
Mauve Abstract Framed Canvas | Krysia Oval Metal Wall Mirror | Ariel Vase | Toppu Bowl
To conclude this art journey, a more colorful palette seemed like an appropriate way to emphasize the idea that art can be playful and fun. I love the scale and shape of the abstract print on the left and since the colors are muted and soft, it works nicely with the rest of the colors in the room. The mirror adds another unexpected and playful shape while the two small vessels provide a lovely 3-dimensional component.
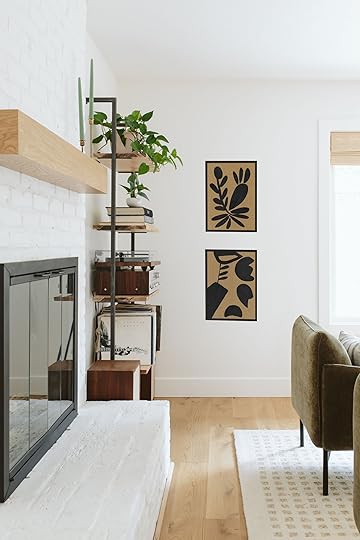
Contrasting Shapes 1 | Contrasting Shapes 2
Again, stacking two pieces is a great alternative if you are having trouble finding one large piece. These abstract framed prints are quality pieces that bring a youthfulness to the room.
HOT TIP: Try painting your own abstract art and getting them professionally framed for an affordable art solution.
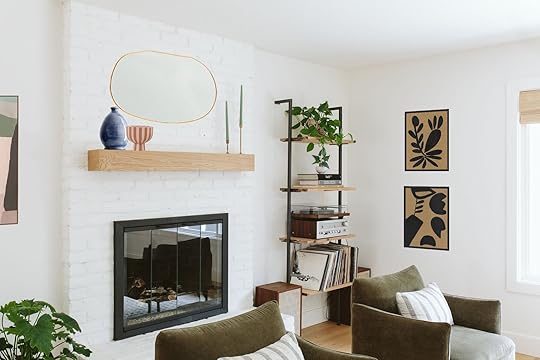
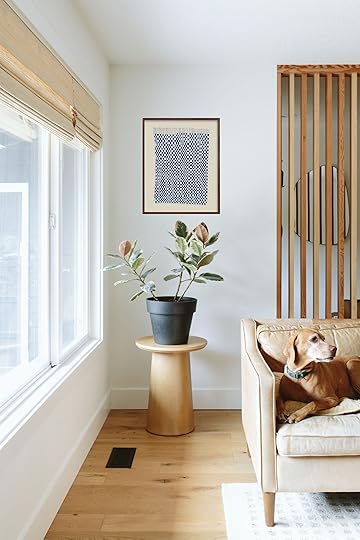
This checkerboard print adds more pattern to the room and a happy pop of color. I love how it speaks to the checkered rug and makes the rug pattern pop even more.


Crane Stencil 2 Wall Art | 2pk Neutral Checkers Framed Under Glass | Tea Towel
Stacking two pieces of different sizes and subjects is a great way to mix up the wall art formula. The above piece could have been left alone, but adding a smaller framed piece underneath is a cool trick that feels unexpected and fresh.
The final art piece on the right side of the wall is a tea towel framed with a white matte. The matting creates a more dialed-in look that appears more expensive. This is one of my favorite affordable art hacks – framing something you love that feels meaningful to you. You can frame a letter, a poem, a ticket, matches from your favorite restaurant, or whatever speaks to you. The possibilities are endless!
Alright my friends, that is all from me. I hope this post helped anyone who has ever felt stress or fear around choosing or hanging art. Let this be your sign to have more fun with it and just enjoy the ART of designing a space 🙂 Until next time. xx
*Photos by Kaitlin Green
The post Scared To Choose Art? We Showed Our Photographer How To Do It With Pretty And Affordable Options appeared first on Emily Henderson.
Too Afraid To Choose Art? Our Photographer Kaitlin Was Too So We Showed How With Pretty And Affordable Options
If you have been following along for a while, you know we love writing about choosing and hanging art. Or maybe “love” isn’t the right word. Maybe we just recognize how debilitatingly hard it can be to find art, purchase said art, and then hang that art in an aesthetically pleasing way, so we’ve made it our duty to find and share solutions. This is why we have so many posts in our archives such as: How To Hang Art Correctly, DESIGN MISTAKE: Different Walls, Same Art Configurations, How To Actually Make A Gallery Wall, 7 Unexpected Places I Like To Hang Art, The 7 Things You Need to Know Before You Try to Hang That Gallery Wall, and the list goes on. So when Emily was shooting EHD photographer Kaitlin’s basement reveal, and saw that the rest of Kaitlin’s home was beautifully designed except for one thing – art – she realized this is a common trajectory. MANY people find that choosing art is the hardest part of designing a home or even one room. I remember agonizing over my gallery wall for a solid year before it was completed (and I believe I only found the strength to complete it because I had a hard deadline). Even my years at EHD didn’t fully prepare me for the pain of choosing and hanging art. But sometimes what we all need is to get out of our heads a little bit and have fun with it. So today, using Kaitlin’s real home and blank walls, I am showing you how art can transform a space using the ancient art of Photoshop. In doing so, my hope is to prove that finding good, affordable, tasteful art is less painful than you think. Shall we begin?
THE CANVAS – KAITLIN’S HOME WITH NO ARTWelcome to Kaitlin’s home (and huge thanks to Kaitlin for inviting us in). It is so cute and clearly well-styled and designed (as you can see she has great taste). But without art, the walls are a bit sad and there is definitely a sense of something missing. Kaitlin has shared that she struggles with choosing art because it feels so daunting and permanent. She is not alone. We often get inside our heads about what the art we choose says about us. We can get trapped into believing this narrative that the art on our walls must represent who we are. Folks, I am here to tell you it doesn’t have to be that deep. Art certainly can represent your style, personality, and even your values, but it doesn’t have to. You can hang art because you like it! It’s as simple as that.
A common misconception is that adults who are serious about art should feel pressure to buy from a gallery or try to procure originals. If you have the opportunity and means to do so that is wonderful, but it’s not the only way to adorn your walls with quality art. As you will see later in this post, big box stores like Target, West Elm, CB2, Crate & Barrel, and so on have really great art options that can completely transform your walls. Then there are amazing second-hand and vintage options on Etsy and Chairish and of course, you can score incredible pieces on Craigslist, Facebook Marketplace, and flea markets. Good art does not have to break the bank, my friends.
Now if you wondering if there is a formula to follow when arranging art in a room the answer is YES! Famously, rooms have at least four walls. So, to make a room feel collected and dynamic you should mix up the variations of art on your walls. For example, you don’t necessarily want to have one large vertical piece of art on every wall. That might make your room look like a museum. Instead, you can choose one of the following for each wall:
One small, large, or medium piece (depending on wall size)Gallery wallGridDiptych or TriptychMirrorStacked piecesSomething sculpturalFor you visual learners out there, this graphic is extremely helpful:
Now that you are familiar with the space and parameters, allow me to present some of our favorite art picks and how they can be arranged in a room. Here we go.
EXAMPLE#1: Minimal And Neutral ArtLayered Paper Dimensional Wall Art Set of 2 (left) | “Mountain High I” Framed Wall Art Print (over the mantel) | Wrinkle Decorative Bowl
To start us off, I pulled together a minimal and neutral art plan that accentuates the calming, relaxed vibe of the space and plays off the light wood tones throughout. The jumping-off point for this style began with the awesome Layered Paper Dimensional Art Diptych. It is perfectly minimal and interesting and has an artisanal look, plus they were big enough to fill the large empty space on the wall. You can buy one individually but as a pair, it creates a cohesiveness that is so pleasing to the eye. To complement the softness of the diptych, I chose this “Mountain High I” Print with a light wood frame. I love how the black strokes bounce off the black accents coming from the fireplace and the bookcase. Finally, to add movement and texture I included this wrinkle decorative bowl that brightens the mantel and provides a sculptural element.
Following our formula above, this wall needed something other than a diptych or triptych, so the room would feel dynamic and nuanced. A medium or large-scale piece felt like the right fit here, and I really love this one from the Leanne Ford x Crate And Barrel collection. It’s woven with cotton fibers to create texture and some movement.
“Mountain High I” Framed Wall Art Print | Wrinkle Decorative Bowl | Natural Daisy Chain’ Wall Art
As you can see, the pieces on this side of the room are close together so it was important to find art that speaks to each other but are not too similar in size, subject, or shape.
On the opposite wall, next to the incredible slatted wood room divider, there was a blank space above this plant stand that honestly could have been left alone, but a mirror felt like a great way to draw your eye up. Hanging mirrors is one of our favorite “tricks” when finding the perfect art piece feels impossible. A mirror will make the room feel bigger and help bounce light around the room (which is especially important for rooms with a scarcity of natural light).
Arched Wood Throw Blanket Ladder | White Rice Paper Geo Framed Wall Art 4 Piece
Due to the open-concept floor plan in Kaitlin’s home, the dining area is visible from the living room so it only made sense to continue this art challenge on these two walls. To create more height and a sculptural element on the wall to the left, this ladder was the perfect solution. The arch creates a faux architectural element and the wood tone is really pretty. On the same wall on the other side of the window, this grid of 4 pieces breaks up the wall nicely and gives off a pulled-together, collected vibe.
EXAMPLE #2: Abstract And Bold ArtFinding Balance No. 1 Wall Art (left) | Metal Ring Sculpture (small) | Metal Ring Sculpture (large) | Nature You and Me Print
Switching gears a bit, I wanted to see how moody and abstract art would transform the space. Immediately, the darker cooler palette makes the room feel bold and a little mysterious. I started with the black and white print to the left and loved how it grounded the space. To balance out the darkness, this piece over the mantel created some warmth but still felt cohesive. Then the small and large ring sculptures provided movement while still sticking to the abstract and bold theme.
Shapes 1 Print (top) Shapes 2 Print (bottom)
Oh, I love these prints. Stacking two framed pieces is a great hack if you are having trouble finding a large piece to fill up a blank wall. They don’t even have to be a set (as you will see in another example below) and sometimes you can find two smaller pieces for a more affordable price than one large piece.
Metal Ring Sculpture (small) | Metal Ring Sculpture (large) | Nature You and Me Print | Shapes 1 Print (top) Shapes 2 Print (bottom)
Gerald Large Round Black Wall Mirror
Again, a round mirror on this narrow wall feels like the perfect decor moment. The roundness juxtaposes the hard lines of the room divider and creates a nice contrast.
Circle & Line Rill Wall Hanging | Ladder Leaning Bookshelf
The narrow space between the plant and window was a little tricky to fill until I found this abstract wall hanging. It provided some much-needed movement and a 3-dimensional element to the room.
Not art per se, but a ladder shelf like so does provide a sculptural element and since it is close to the kitchen, it could act as a practical storage solution for pretty bowls, vases, and other serveware.
EXAMPLE #3: Vintage Inspired And Eclectic ArtShepherd’s Meadow Print | Emma Mirror
Kaitlin’s home is truly a joy to play around with styles and I was really excited to see if I could make vintage-inspired artwork here. I started with this Shepherd’s Meadow Print from Lulu & Georgia to complement the green accent chairs and brass finishes. I immediately LOVED how it looked on her wall and thought an ornate mirror above the mantel would help drive the vintage style home.
Sticking with the muted green theme, this print really stuck out to me. It is from Minted, one of our favorite places to source affordable art, and comes in several sizes and frame options. I chose the brass frame to emulate a vintage vibe and I just love how it looks here. It brings in a contemporary element that helps tie in the more modern furniture and architecture.
Emma Mirror | Play Wall Art Print
Instead of including a mirror here, I wanted to play with the idea of hanging a small vintage-inspired framed piece. A larger scale piece would also work here, but opting for a small one is sort of breaking the “rules” which can create a really interesting look. In fact, we are big fans of the “too small” rule-breaking trick because when done right, it looks intentionally eclectic and cool.
Coastal Beach Seascape (top left) | Sailing Boat Painting (top right) | Seascape Painting (middle right) | Framed Oil Painting Print on Canvas (bottom right) | Full-Length Floor Mirror
This seascape gallery wall, inspired by Emily’s family room, brought so much color and life to the walls. If Kaitlin wanted, she could remove the plant on the left to create a larger gallery wall, but I kind of love the asymmetrical gallery wall look.
Finally, I love how this standing floor mirror provided height and an arch shape to the room.
EXAMPLE #4: Lively And Colorful ArtMauve Abstract Framed Canvas | Krysia Oval Metal Wall Mirror | Ariel Vase | Toppu Bowl
To conclude this art journey, a more colorful palette seemed like an appropriate way to emphasize the idea that art can be playful and fun. I love the scale and shape of the abstract print on the left and since the colors are muted and soft, it works nicely with the rest of the colors in the room. The mirror adds another unexpected and playful shape while the two small vessels provide a lovely 3-dimensional component.
Contrasting Shapes 1 | Contrasting Shapes 2
Again, stacking two pieces is a great alternative if you are having trouble finding one large piece. These abstract framed prints are quality pieces that bring a youthfulness to the room.
HOT TIP: Try painting your own abstract art and getting them professionally framed for an affordable art solution.
This checkerboard print adds more pattern to the room and a happy pop of color. I love how it speaks to the checkered rug and makes the rug pattern pop even more.
Crane Stencil 2 Wall Art | 2pk Neutral Checkers Framed Under Glass | Tea Towel
Stacking two pieces of different sizes and subjects is a great way to mix up the wall art formula. The above piece could have been left alone, but adding a smaller framed piece underneath is a cool trick that feels unexpected and fresh.
The final art piece on the right side of the wall is a tea towel framed with a white matte. The matting creates a more dialed-in look that appears more expensive. This is one of my favorite affordable art hacks – framing something you love that feels meaningful to you. You can frame a letter, a poem, a ticket, matches from your favorite restaurant, or whatever speaks to you. The possibilities are endless!
Alright my friends, that is all from me. I hope this post helped anyone who has ever felt stress or fear around choosing or hanging art. Let this be your sign to have more fun with it and just enjoy the ART of designing a space 🙂 Until next time. xx
*Photos by Kaitlin Green
The post Too Afraid To Choose Art? Our Photographer Kaitlin Was Too So We Showed How With Pretty And Affordable Options appeared first on Emily Henderson.
Emily Henderson's Blog

- Emily Henderson's profile
- 10 followers

