
Nik Sharma's Blog, page 7
August 6, 2021
july catch up
July was a busy month here. We kicked off the initial stages of our home remodel and you can see how my kitchen looks before the big gut (that’s about to happen in a few weeks). It’s going to be an interesting experience, I’ve made a makeshift kitchen space for work to test recipes but part of me wants to hold off and cook in the new kitchen. I am very excited and thank goodness for countertop ovens and portable stoves!
Here’s are my latest recipes published in July.
View this post on InstagramA post shared by Nik Sharma (@abrowntable)
At the Guardian Feast, we celebrated fruits and I’ve got two recipes for you : A Roasted Grape Salad with walnuts and a cool lime sorbet that’s infused with Makrut lime leaves that’s sure to keep you refreshed at all times during this hot summer.
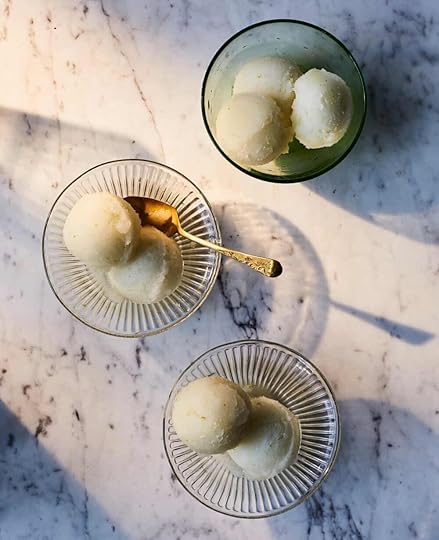
Photograph: Lizzie Mayson/The Guardian. Food styling: Liberty Fennell. Prop styling: Louie Waller. Food assistant: Jess Tofts.
For Food52 I looked into the biology of eggplants and how to prepare them for cooking and we even attempted an eggplant “bacon” recipe.

PHOTO BY ROCKY LUTEN. PROP STYLIST: MOLLY FITZSIMONS. FOOD STYLIST: ERICKA MARTINS.
For Serious Eats, we take a step-by-step approach to making a creamy, cheese loaded gnudi that I think can best be described as pillowy. Serve it with a saffron mushroom broth or just pop them directly in your mouth.
Until next time, stay safe!
xx
Nik


July 28, 2021
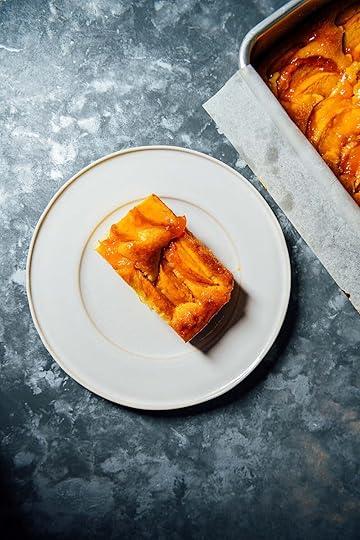
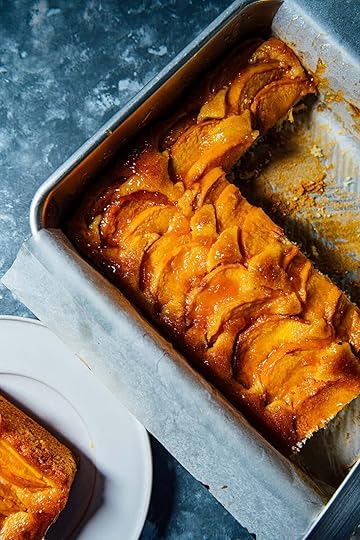
peach, cardamom, and saffron cake

This is a busy summer, I’ve embarked on the process of remodeling the house. Of course, the idea to do this, started with my kitchen! When we moved into this home a year ago I fell in love with the kitchen and the garden. But as time progressed, I realized working in this kitchen became a challenge. The layout wasn’t practical, the larger appliances need to be updated, and I needed a place where I could use my kitchen for work but also entertain. Over the next couple of months, you can follow my progress (the ups and downs) of gutting, and remodeling a kitchen over at Instagram.
In some exciting book related news, The Flavor Equation is now nominated for two award categories at the IACP book awards this year - General Cooking and Photography and Styling.
This week, I’ve got a peach cake for you. Summer’s juiciest bright peaches are layered on top of a fragrant cake batter made with saffron and green cardamom. The cake is then painted with a rich layer of peach jam to give it a shiny glaze, boost that peach flavor, and lock in the moisture in those fresh peaches.
Cooking Tips:
Yellow nectarines are the perfect substitute for peaches in this cake, you still need to poach them to get rid of the skin.
When poaching the peaches, if you want to use less water, use a smaller saucepan that can hold a single peach, and poach each peach one at a time. I do this because poaching takes a few seconds and this is less wasteful.
Instead of adding the saffron and cardamom to the dry ingredients, I add them to the butter. The color pigment in saffron and the aromatic molecules in the two spices are fat soluble. The fat grabs on to these flavor molecules quickly and the cake batter turns uniformly golden.
The cake pan I use is from Nordic Ware, it’s a pretty solid performer and I love it. Just don’t stick it in the dishwasher, it will ruin the coating (it’s still useable but it will look hideous).
You can use any type of peach jam or preserve, go with one with a simple flavor or cardamom to match the cake or else it might take away from the spices in this cake. I use the Bon Maman brand.
peach, cardamom, and saffron cake
Makes one 9 by 13 inch/23cm by 33cm rectangular cake
Grease a 9 by 13 inch/23cm by 33cm rectangular pan with a
little unsalted butter
and line with parchment paper. Leave a 2 inch/5cm overhang of parchment paper on the longer sides of the pan, this will help lift the cake out of the pan.
Preheat the oven to 350F/180C.
Rinse
3 large/each about 250g ripe but firm yellow peaches (or nectarines),
under running tap water.
Fill a medium saucepan with enough water to completely submerge the peaches and bring it to a boil over high heat. Carefully drop the peaches in and poach them for 20 to 30 seconds, remove the peaches with a slotted spoon, place them on a cutting board, and let them sit until cool enough to handle. Once cooled, peel and discard the skin, it should come off easily, and you won’t need to use a peeler. Remove and discard the stone, cut the peach into 1/4 inch/6mm thick wedges.
In a large bowl, dry whisk
2 cups/280g all-purpose flour
2 tsp baking powder
1/4 tsp baking soda
1/4 tsp fine sea salt
Place
3/4 cup/165g unsalted butter, at room temperature, cubed
1 cup/200g sugar
20 strands of saffron
1/2 tsp ground green cardamom
in the bowl of a stand mixer. Using the paddle attachment, beat over medium speed until it turns pale white and fluffy, 3 to 4 minutes.
Scrape the sides and bottoms of the bowl down.
Add
4 large eggs, at room temperature
one egg at a time, beating until combined, over medium speed, about 30 seconds, scraping the sides and the bottom of the bowl down after each addition.
Add the whisked dry ingredients to the creamed ingredients in the bowl, mix over low speed, and beat until until there are more streaks of flour visible, 1 to 1 1/2 minutes.
Transfer the batter to the prepared pan and level with an offset spatula. Layer the sliced peaches on top of the cake. Bake the cake in the preheated oven for 55 to 60 minutes, until the top is golden brown and a knife or skewer when inserted through the center comes out clean. Remove the pan from the oven, let the cake cool in the pan for 5 minutes.
While the cake cools, prepare the glaze. Mix
1/2 cup/about 150g peach jam or preserves
2 Tbsp/30ml boiling water
brush this glaze over the surface of the warm cake.
The cake can be served warm or at room temperature. This cake will stay good for up to 3 to 4 days if stored in the refrigerator in an airtight container.
July 19, 2021
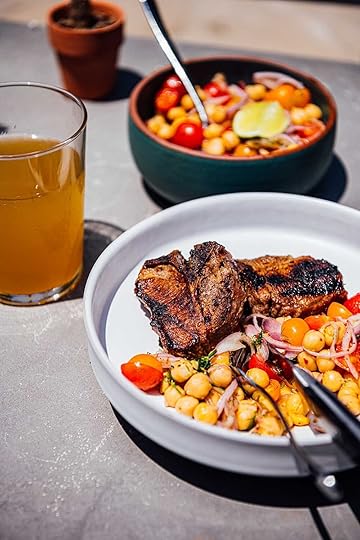
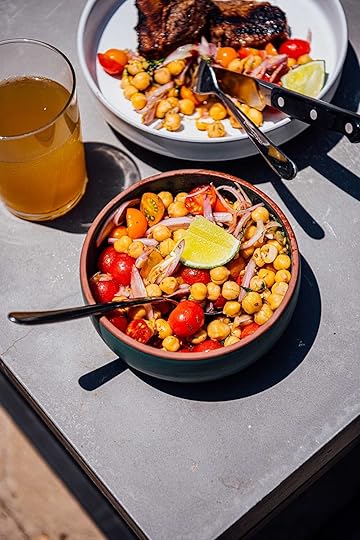
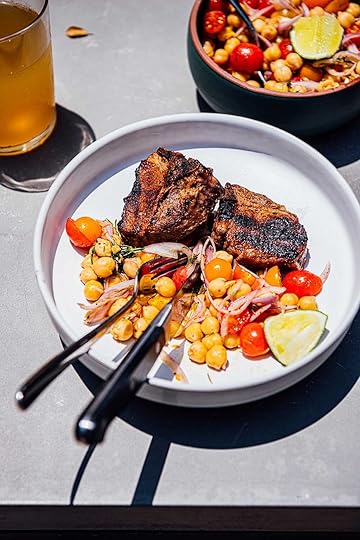
lamb chops, chickpeas, and tomatoes
Disclaimer: This post was sponsored by the American Lamb Board . All opinions expressed are solely my own.
Of course, I’m grilling a lot this summer. I don’t think either of you expect any different. Grilling is satisfying and the simplest recipes can transform into something remarkable, if grilling is introduced. Think of a fire-roasted eggplant, sweet corn, and even bell peppers thrown onto the grates of a hot fiery grill, they develop gorgeous flavors and even distinct smoky profiles. Meat is no exception to this experience and lamb with its juicy fat is the perfect candidate for grilling.
The lamb chops are marinated in a citrusy blend of lime and orange before they go on to the grill. The warm juicy lamb chops are then served alongside a cool salad made with fresh summery tomatoes and chickpeas with dill. Now, if you like dill as much as I do, I recommend doubling the quantity I recommend using in the recipe.
Before I forget, there’s some exciting news this week: the American Lamb Board is organizing a special contes. Explore the American Lamb Board's contest in partnership with Outdoorsy for a chance to win a $2,000 travel credit! Simply share a photo or video of an outdoor adventure and be entered to win some incredible prizes. Plus, they'll send you freebies just for entering! To find out more about the contest and how to enter visit The American Lamb Board.
Lamb Chops with Tomatoes and Chickpeas
Makes 4 servings
For the lamb chops
8 American lamb loin chops (about 2 lbs [910 g] total weight)
2 Tbsp/30ml extra-virgin olive oil plus a little extra to brush the pan
1/4 cup/60ml fresh lemon juice
2 Tbsp/30ml fresh orange juice
2 garlic cloves, peeled and grated
2 tsp ground black pepper
1 tsp orange zest
1 tsp fine sea salt
For the roasted tomatoes and chickpeas
One 14 oz/400g can chickpeas, drained
1/2 pint/170g cherry or grape tomatoes, cut in half
1 medium/55g shallot, minced
2 Tbsp fresh flat-leaf parsley or dill chopped
2 Tbsp/30ml fresh lemon juice
2 Tbsp/30ml extra-virgin olive oil
1/2 tsp ground black pepper
1/2 tsp ground sumac
1/2 tsp red pepper flakes
Fine sea salt
Pat the lamb chops dry with clean paper towels and place the lamb in a ziptop bag or in a glass or ceramic baking dish that can accommodate the ribs snugly in a single layer.
In a small bowl mix the olive oil, lemon juice, orange juice, garlic, pepper, orange zest, and salt. Drizzle the mixture over the lamb, seal the bag, and shake the bag a couple of times to coat yjr lamb well. Leave the lamb in the refrigerator for 30 minutes to 4 hours to marinate.
When ready to cook, heat the grill on high. Cook the lamb chops on the grill, on each side for 4 to 5 minutes, till the meat develops a few grill marks. The USDA recommends a minimum internal temperature of 145 degrees F, followed by a 3 minute rest. Remove the chops from the pan and place them in a serving dish and cover with foil.
While the lamb cooks prepare the salad.
Add the chickpeas, tomatoes, shallot, and parsley to a large bowl. Whisk the lemon juice, olive oil, black pepper, sumac, and red pepper flakes and drizzle over the vegetables in the bowl. . Season with salt. Let sit for at least 15 minutes before serving.
Serve the warm lamb chops with the chickpea salad.
May 26, 2021
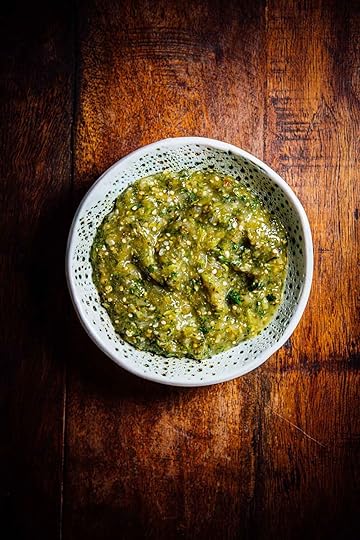
salsa verde
It’s warming up in LA which means I’ve got the grill going at least 3 to 4 times a week. There’s a degree of inexplicable satisfaction that comes with charring food on the hot grates of a grill and I suspect you will see a lot more grilling recipes in the upcoming weeks. You might notice a few changes in this week’s recipe writing style. Let me know what you think. I’m using the style of writing seen in “The Joy of Cooking” books that I feel makes recipes much easier to read and also the way in which ingredients are listed. I’d love to hear your thoughts on what you think makes for an easier recipe writing style.
Now for this week’s recipe. There are several variations of this popular and verdant salsa from Mexico, I love the subtle smoky flavor that comes from grilling the vegetables before they come together in the blender. I serve it over my eggs for breakfast, alongside vegetables and meats, and of course as a dip with a good amount of tortilla chips.
View this post on InstagramA post shared by Nik Sharma (@abrowntable)
Salsa Verde
Makes about 2.5 cups
Clean the grates of a grill, brush the grill with a little extra-virgin olive oil. Set the heat to medium-high. Dehusk and rinse 1 lb [455g] tomatillos, pat them dry with a clean kitchen towel and place them in a large bowl. Add 4 cloves of garlic with their paper on, 2 small white or yellow onions, 2 jalapeños or 1 serrano, drizzle 2 Tbsp of extra-virgin olive oil, and toss to coat well. If you prefer to skip the bowl, just brush the vegetables with the oil. Grill the vegetables on the hot grill for about 8 minutes, till they all develop char marks and the tomatillos turn a light dull green and are just about ready to burst. You might need to pull the chiles and the garlic off the grill, as they tend to cook quicker than the rest. Let the vegetables sit till they’re cool enough to handle. Peel off and discard the skins and stalks from the onions, garlic, and chillies. Place all the roasted vegetables in the bowl of a food processor. Add 1/2 cup [6g] packed fresh cilantro leaves and stems along with 1/4 cup [60ml] of fresh lime juice. Pulse for a few seconds till it turns slightly chunky. Taste and season with salt. Depending on how sour the salsa tastes, I sometimes add a pinch of sugar. Store the salsa verde in the refrigerator in an air-tight container for up to 4 days.
Cook’s Notes:
You can make this hotter by adding a hotter fresh green chile.
If you don’t own a grill, you can use your oven. Broil the vegetables in baking sheet, till the vegetables start to char, about 10 minutes. Another option is to char the vegetables in a dry cast-iron skillet over medium heat.
April 28, 2021
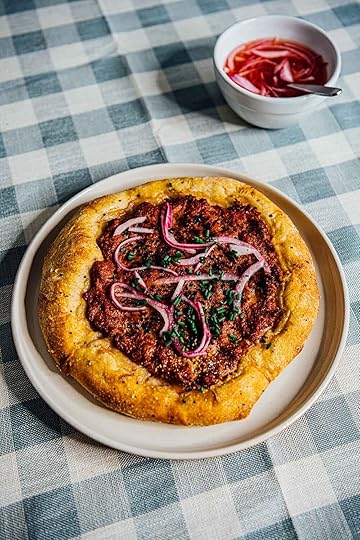
lamb pizza with pickled onions

Disclaimer: This post was sponsored by the American Lamb Board . All opinions expressed are solely my own.
There are many different types of lamb topped pizzas and among my favorites are the ones made in the Middle East called lahmacun (pronounced "lahma'joun"). My recipe is based on the Turkish lahmacun but I’m using pizza dough and my seasonings are slightly different. However, there is one ingredient that makes the lamb really stand out in this dish and I’m keeping it in this recipe, and that’s Turkish pepper paste. Turkish pepper paste is a concentrated mix of red peppers, quite similar in appearance to tomato paste, a wonderful condiment to keep in your refrigerator at all times. There are two types, a sweet pepper paste and a hot pepper paste, you can use either but I prefer to use a bit of both. If you can’t find the hot pepper paste, add a tiny amount of cayenne to spruce up the heat a little.
Using good quality ingredients is the key to any recipe's success. I use American lamb in my cooking because I trust the farms from which the meat is raised. Not only do they take care of the animals on the farm but the farmers do their best to support the local community. The use of ground lamb in this pizza is advantageous because it cooks quickly as the pizza cooks and also remains juicy.
While I haven’t added any cheese here, feel free to sprinkle a bit of soft creamy feta or sheep cheese just before you serve.
Here are my kitchen notes;
There are two types of Turkish pepper paste - hot and sweet. I usually use a mix of both. 1 Tbsp of each mixed together gives a nice rounded taste.
You can purchase Turkish pepper paste online as well as find them in Middle Eastern stores. The two I use at home are - Sweet Pepper Paste and Hot Pepper Paste.
When making the onion pickle, do not let the onions sit in the vinegar for too long, after 10 minutes they risk turning too soft.
Lamb pizza with pickled onions
Makes 4 servings
For the lamb pizza
22 oz [624g] pizza dough store bought or homemade, at room temperature
A little all-purpose flour to roll out the dough
1 lb [455g] ground American lamb
One [60g] shallot, minced
4 cloves of garlic, peeled and grated
3 Tbsp tomato paste
2 Tbsp Turkish pepper paste (see my kitchen notes)
1 green chilli such as Serrano, chopped
2 Tbsp chopped fresh cilantro or flat-leaf parsley
1 tsp ground coriander
1 tsp ground cumin
1 tsp ground black pepper
1 tsp fine sea salt
½ tsp ground cayenne
2 Tbsp cornmeal or semolina
2 Tbsp Extra virgin olive oil
2 tsp nigella seeds
For the pickled onions
1 small red onion or shallot, thinly sliced into half crescents
1 Tbsp sugar
½ tsp fine sea salt
½ cup [120ml] vinegar
Place a baking stone or baking steel in the oven and preheat the oven to 500F[260C].
In a large bowl, mix the lamb with the shallot, garlic, tomato paste, pepper paste, chilli, cilantro, coriander, cumin, black pepper, salt, and cayenne till evenly combined.
Divide the pizza dough in half, work with one piece at a time. Roll one piece of dough out, dusting with minimal flour till you get an 8 inch [20cm] circle. Sprinkle 1 Tbsp of the cornmeal over a pizza paddle or the underside of a baking sheet. Place the rolled out pizza dough on top. Top the pizza with half of the crumbled lamb mixture and brush the sides with 1 Tbsp of the olive oil. Sprinkle 1 tsp of nigella seeds on top of the pizza and slide the dough directly over the pizza stone. Cook the pizza for about 10 minutes, till the sides begin to puff up and the lamb is cooked, about 10 minutes. *(USDA recommends a minimum internal temperature of 160 degrees F for ground lamb)
While the pizza cooks, make the pickled onions. In a small bowl or jar, add the onions, sugar, and salt. Pour the vinegar and press the onions to submerge completely. Let sit for a maximum of 10 minutes before using.
When the pizza is ready, top the pizza, drain the vinegar and top with the pickled onions. Repeat to prepare the second pizza.
*Note:
While the USDA recommends cooking ground meat to a minimum temperature of 160 [71C]. This is ideal for recipes like burgers or kebabs where there is considerable thickness. In the case of this pizza, the topping is too thin to accurately measure a temperature, which is why we rarely see pizzas with ground lamb toppings list a temperature and here’s my explanation for this.
1. The ground lamb is in a thin layer and to measure it with a thermometer is not at all practical and virtually impossible. The thermometer probe needs to be covered to a certain height before it can read accurately (Thermoworks, I think it is 1/8th of an inch while other brands need at least 1/2 inch).
2. Another thing to keep in mind, a temperature of 160F [71C] in such a thin layer of ground lamb will be achieved very quickly in a hot oven at 500F [260C], this would leave the pizza dough uncooked.
The best strategy is to let the lamb continue to cook even after it reaches 160F [71C] till the dough is completely cooked. The lamb contains enough liquid to stay moist till the dough is completely cooked.
An alternative option (that I’ve tried) is to cook the lamb separately in a saucepan and then top it on the pizza and cook it again but it dries out and the texture is too rubbery, I don’t recommend this.
April 27, 2021
fig leaf syrup

I’ve always wanted to use fig leaves in my cooking and considering that I’ve always made it a point to grow my favorite fruit no matter where we’ve moved, it is odd that I’ve skirted this topic. One reason might be and I admit I do this, I tend to treat the produce I grow a little preciously and consequently, I wait till the very last minute to eat them. I like to see fruit sit on my trees for as long as possible.
The fig tree is spectacular, it’s large rounded forked leaves with its juicy little bags of fruits. Some of you who follow me on Instagram and are following the progress of the new garden landscaping already know that I own three varieties - a Black Mission Fig, a Black Jack , and a Tiger/Panache fig tree. Fig trees are easy to propagate, you take a cutting from a branch in fall or winter when the tree goes dormant and stick it into soil. By Spring you will see new leaf buds emerge.
When fig leaves are cooked, they turn edible but they also release a wonderful aroma. This week, I encourage you to grab a handful of fresh fig leaves and dry them out in your oven. Your kitchen will smell of the most delicious toasty coconut aroma, it’s absolutely amazing how this transformation happens. You can steep fig leaves in hot sugar syrup to make a flavored syrup to be used in drinks or even in sweets. Fig leaves are often steeped in hot milk to make fig leaf ice cream, in fact I first learned about fig leaves in cooking via Berkley’s Chez Panisse restaurant.
This week’s recipe is from my friend Mark Diacono’s new book, Herb A Cook’s Companion (Quadrille). This is an excellent book for those of you that want to learn more about herbs but also for those of you that like to garden. Mark’s filled this book with helpful notes and ideas and it’s a joyful book that’s brought much needed enthusiasm to my gardening and cooking. Use this fig leaf syrup to make make drinks or even add it to lemonade, gingerade, limeade. You can incorporate it into panna cotta and other desserts. The options are endless.
Note: When picking fig leaves avoid coming into contact with the plant’s sap. Fig sap contains a substance called ficin which is irritates the skin (I know from personal experience because I went to the dermatologist to get treated after I accidentally let it get on the back of my neck while trimming a fig tree). I’ve been told that the sap levels of ficin are lowest before sunrise and at sunset, so you could collect the leaves then or simply just use gloves and be careful. Heating the leaves destroys the ficin so it is not an issue during cooking.
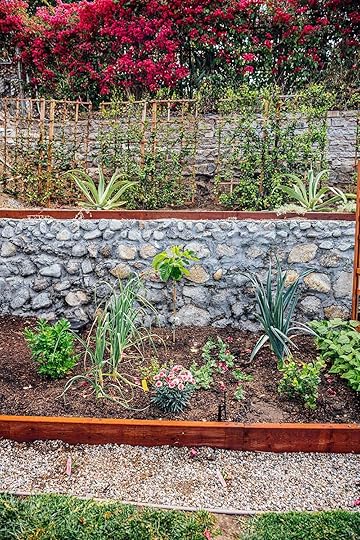
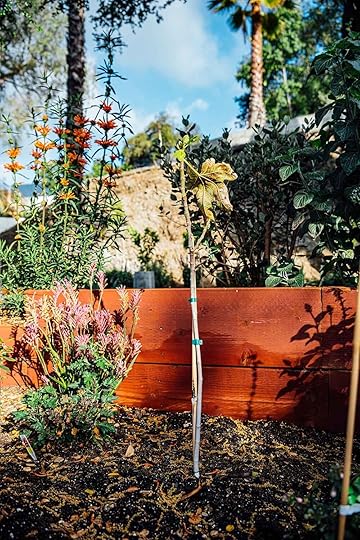
Fig Leaf Syrup
adapted from “Herb A Cook’s Companion” - by Mark Diacono (Quadrille)
makes around 3 cups/720ml
Take 3 fresh fig leaves and dry them at 250F/130C till they turn crisp but not brown, about 15 minutes.
Prepare a simple syrup by bringing 1 lb 2 oz /500g sugar in 2 cups/480ml water to a boil, till the sugar is dissolved completely.
Add the dried fig leaves and steep overnight in the refrigerator covered. You could also use a shorter steeping time for a milder flavor.
Store in a sterilized airtight bottle in the refrigerator for up to 2 weeks.
April 12, 2021
boston cream pie

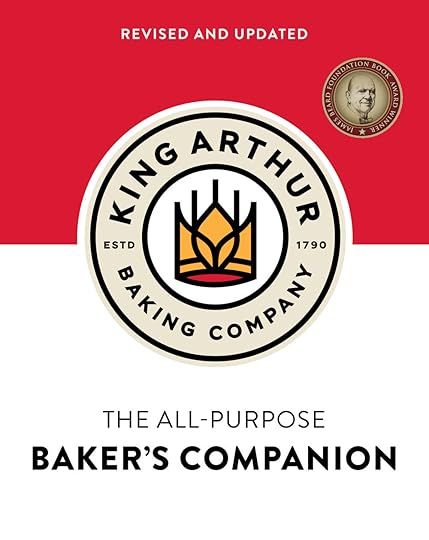
A few days ago I received a copy of the new revised and updated edition of the classic, King Arthur Baking Company’s The All Purpose Baking Companion. A lot of you are already familiar with the earlier edition of the book and this revised version is updated with lots of new information on baking ingredients and recipes. The first recipe that caught my eye, was the classic Boston Cream Pie. Its generous layer of pastry cream with a hint of chocolate makes it such a delicious and comforting dessert. It’s also my birthday month and I’m trying to stick to a goal of making one celebratory cake per week.
Today, I’m sharing the recipe for King Arthur Baking Company’s Boston Cream pie from the book. A Boston cream pie is a two-layer cake filled with a thick layer of pastry cream. The top of the cake is then glazed with chocolate. As per King Arthur Baking Company, the original Boston Cream Pie, created at Boston’s Parker House hotel in the nineteenth century, featured sponge cake layered with cream and iced with chocolate fondant. Their version (the recipe here) used a layer of chocolate ganache that’s more in line with modern version we see everywhere.
Is the Boston Cream Pie a pie or is it a cake? That’s probably the most controversial thing about this sweet but I think we can all agree that it is delicious. Now go ahead and make it!
A few kitchen tips;
I ended up cutting back on the amount of salt listed in the original recipe below from the book.
When layering the pastry cream and to keep it stable and from squishing out of the cake after layering do this;
Make sure the pastry cream and caked are chilled. Make the pastry cream and the cakes the night before and stick them in the refrigerator. Wrap them up with clingfilm to prevent the formation of a skin on the custard and drying of the cakes.
Use a pastry tip with a large bore size and pastry bag to layer the pastry cream. You can then even it out using an offset spatula.
Though not necessary, you could assemble the cake in a springform pan. Line the sides of the pan with a layer of lightly greased cellulose acetate film. It will give you a cleaner edge when you peel it off. Don’t forget to refrigerate the cake after assembly for at least 2 hours.
I’ve found the best way to cut this cake without having things squish out (some of it will), is to use a clean serrated knife that's dipped in running hot water and holding one side of the cake carefully to make sure it does not glide off. You will get a nice clean cut and things will stay in place.
The type of chocolate - I used a semi bittersweet 66% cacao chocolate. I find bitter and darker chocolate varieties taste better here against the sweet cake and the pastry cream.
An important note - the weights listed here are the King Arthur Baking Company’s weights. I followed their weight conversions as listed in the recipe. Some of you who are familiar with my work, might note that I use a different amount for 1 cup of flour (140g) for my recipes. Stick to the weights listed in this recipe. Depending on how you lift flour out of the container, you can get varying weights of flour, this is what leads to this discrepancy and different outlets list different weights especially when it comes to flour . This recipe is standardized by King Arthur Baking Company to their weight system, so use that!
Excerpted from The King Arthur Baking Company’s All-Purpose Baker’s Companion: Revised and
Updated. Copyright © 2021, 2003 by The King Arthur Baking Company, Inc. Reproduced by
permission of The Countryman Press, a Division of W.W. Norton & Company. All rights reserved.
Boston Cream Pie
One 2-layer 9 inch [23cm] cake
For the Cake
2 cups (397g) sugar
4 large eggs
1/3 cup (67g) vegetable oil
2 cups (240g) unbleached all-purpose flour
1¼ teaspoons salt * (see Notes below)
2 teaspoons baking powder
4 tablespoons (½ stick, 57g) butter, at cool room temperature (65°F to 68°F/18°C to 20°C)
1 cup (227g) whole milk
2 teaspoons vanilla extract
For the Filling
2½ cups (567g) whole milk
½ cup (99g) sugar
¼ teaspoon salt
1/3 cup (39g) cornstarch
3 large egg yolks
1 large egg
2 teaspoons vanilla extract
For the Glaze/Chocolate Ganache
1/3 cup (57g) chopped dark chocolate or chocolate chips
¼ cup (57g) heavy cream
½ teaspoon vanilla extract
To make the cake:
Preheat the oven to 325°F [160°C]. Lightly grease two 9̋ round pans.
Beat the sugar and eggs together until they’re light and fluffy, about 2 minutes at medium-high
speed using an electric or stand mixer. Slowly beat in the vegetable oil.
Add the flour, salt, and baking powder to the egg mixture in the bowl, beating just enough to
combine. Scrape the bottom and sides of the bowl, then beat again, to fully incorporate any
sticky bits.
In a saucepan set over medium heat, bring the butter and milk just to a boil. Add the vanilla.
Remove the pan from the heat and stir the mixture until the butter is completely melted.
Slowly add the hot milk mixture to the cake batter, mixing until everything is well combined.
Scrape the bowl and mix briefly, just until smooth. The batter will be very thin.
Divide the batter evenly among the prepared pans.
Bake the cakes for 30 to 35 minutes, until a cake tester or toothpick inserted into the center
comes out clean, and the top feels set when lightly touched. Remove the cakes from the oven,
cool them in the pans for 10 minutes, then turn them out onto a rack to cool completely.
To make the filling: In a medium saucepan, stir together 2 cups (454g) of the milk, the sugar,
and the salt. Bring to a simmer over medium heat, stirring to dissolve the sugar.
Meanwhile, whisk the cornstarch, egg yolks, and whole egg with the remaining ½ cup (113g)
milk.
Whisk some of the hot milk mixture into the egg yolks / cornstarch mixture to temper the yolks.
(This keeps them from turning to scrambled eggs when you add them to the simmering milk.)
Pour the egg / milk mixture back into the remaining simmering milk in the pan, pouring it
through a strainer to capture any bits of egg.
Bring the mixture to a low boil over medium heat (this may happen very quickly), stirring
constantly with a whisk, and cook for 2 minutes; the mixture will thicken significantly.
Remove the filling from the heat and stir in the vanilla.
Transfer the filling to a heatproof bowl, and top it with a piece of buttered plastic wrap (make
sure it touches the top of the filling so it doesn’t develop a skin). Refrigerate until cool.
When the cakes and pastry cream are completely cool, spread the filling in an even layer over
one layer, then stack the second layer on top. Set aside.
To make the glaze:
Melt the chocolate and cream together, stirring until smooth and lump-free.
Add the vanilla and stir well. Let the glaze sit for about 10 minutes to cool a bit and thicken just
a touch. Pour the glaze over the filled cake. Serve immediately, or cool to room temperature,
and refrigerate until ready to serve.
Note:
*I used 1/2 tsp of kosher salt instead of the amount listed in the recipe.
April 5, 2021
ham and chickpea soup
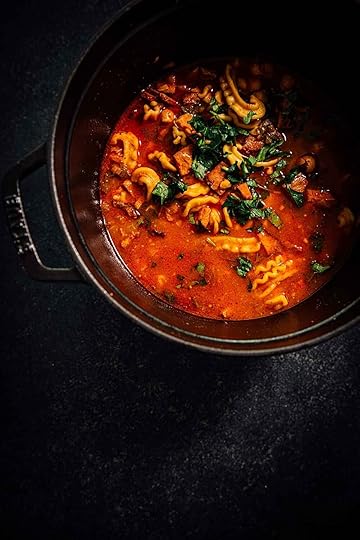
For those of you that celebrate Nowruz, Holi, the Passover, or Easter, I hope you had a wonderful celebration. This Easter, I took a break from cooking and let M do all the cooking. We feasted on a delicious smoked ham, collard greens, and potatoes. Just like Thanksgiving, the leftovers will continue to provide second and third meals over the next couple of weeks and I don’t mind that one bit. We cut the ham up and froze some of it while the other bit goes into this soup that gets a major portion of its flavor from garlic, tomatoes, and paprika. Serve it with warm garlic bread because the liquid deserves to be sopped up!
For the pasta, I used my friend Dan Pashman of the Sporkful podcast’s new pasta called cascatelli. Over the past 3 years, Dan’s been working to create a shape that resembles waterfalls (hence the name) and its unique shape helps grab sauces and liquids. Dan talks about the pasta on his show and it is been fun to see it come to life. Learn more about it here.
A few kitchen notes;
The butter needs to brown but stop crackling. If you add oil to it early, the water that’s separated from the fat will start to fly out all over the place.
You can sub rotisserie chicken in place of ham.
Cooking time is dependent on the shape and size of your pasta.
Add water to make the soup volume back up after its done cooking. Again, this will vary depending on the pasta you use.
I’ve not listed a weight for celery greens, it’s a rough 1/4 cup measure. It does not need to be a precise weight here.

ham and chickpea soup
makes 4 servings
2 Tbsp unsalted butter
1 Tbsp extra-virgin olive oil
1 medium [about 260g] onion, minced
6 garlic cloves, peeled and grated
4 Tbsp [55g] tomato paste
2 tsp smoked sweet paprika
1 tsp ground cumin
1/4 tsp ground cayenne
2 cups [320g] leftover ham, chopped
one 15 oz [425g] can chickpeas, drained
1 cup cascatelli pasta*
4 cups [960ml] water**
1/4 cup loosely packed fresh celery greens
fine sea salt
2 Tbsp chopped flat-leaf parsley or cilantro for garnish
Melt the butter in a medium saucepan or Dutch oven over medium heat. Cook till the butter turns brown and it stops cracking, about 4 minutes. Add the oil. Add the onions and sauté till they turn translucent, about 3 to 4 minutes. Lower the heat to medium-low, add the garlic, tomato paste, paprika, cumin, and cayenne and cook for 30 seconds till fragrant. Stir in the celery greens ham, chickpeas, pasta, and water. Add 1/2 tsp of salt, increase the heat to high and bring the water to a boil, reduce the heat to a simmer, and cook covered till the pasta is tender, about 15 minutes (this will vary depending on the type and size of the pasta you use - I used cascatelli which took 15 minutes). Remove from the heat, taste and season with salt if needed. If after cooking, the liquid volume drops, add more water as needed. Serve the soup warm and garnish with the parsley.
Notes:
*pasta - Pasta cooking time varies. The smaller the shape, the shorter the cooking time. If you decide to use a pasta other than cascatelli, like penne etc., adjust your cooking time.
**water - the soup volume will reduce after cooking (it also depends on how long you end up cooking due to the pasta size). I added 2 cups [480ml] of water after the cascatelli pasta was cooked to bring back the volume up.
March 24, 2021
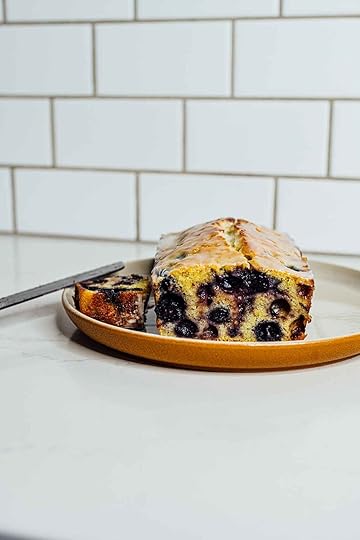
blueberry lime poundcake
This week, I’ve got some exciting news to share. The Flavor Equation just got long listed for the prestigious Art of Eating award for 2021 , it is such an honor to be included among all these wonderful authors and their books. I’m also going to begin working on two new cookbooks with Chronicle Books over the next couple of years and I will reach out here and on Instagram with questions, so do keep an eye out. I really appreciated all your help with the survey on colors and shapes for The Flavor Equation that eventually became an illustration in the book, it also helps me understand what you’re looking for in a cookbook. This year there will be at least 8 different language translations and editions of The Flavor Equation and I will keep updating this page as soon as more details available. The Dutch and Indian editions are the first ones up!
I’ve also got some recipe updates for you - sesame encrusted tofu served over a bed of sautéed spinach with a coconut milk lime dressing and chicken with miso garlic butter at the New York Times. At Serious Eats - roasted root vegetables with sweet lime dressing and aloo parathas.
Now for something sweet this week. Blueberry pound cakes are a classic and I’m giving it an update with plenty of lime. I know, I know, kefir makes an appearance yet again!
Some tips when making this cake:
Ideally always zest citrus directly into things, in this case the butter and the sugar. If you zest a lime or lemon and let the zest sit out, it will dry out fast as those delicious smelling essential oils evaporate very quickly.
By infusing the hot melted butter with the lime zest, the essential oils from the lime dissolve in the fat (oils are not water-soluble and as such would stay on the surface of water and evaporate easily, this method avoids that), and you get a much stronger flavor of lime in the cake.
I’m all about using frozen fruit if it is easier. However, avoid adding frozen blueberries directly to the cake batter as they will release a lot of liquid as they cook and the cake will be very damp (it almost feels like it’s weeping, if that makes sense). If you have to use frozen blueberries, thaw them and then discard all the liquid that is released. You can also take it a step further and leave them on a clean kitchen paper towel to absorb the liquid. Then add the fruit to the flour mix to coat.
A substitute for kefir is buttermilk or plain unsweetened yogurt but do not use Greek yogurt here. The latter has too much protein and very little liquid to work with the ingredient ratios used here. In America, if you can find Lifeway kefir, use that. It’s the best one I’ve come across.
This is my favorite loaf cake pan that I’ve used for years. I do hand wash it but I do that for all my cake pans, I don’t trust the dishwasher enough with them and my knives.
blueberry lime poundcake
makes one 8.5 inch by 4.5 inch loaf [21.5 cm by 11 cm] (you can also use a 9 inch [23cm] loaf pan)
2 1/2 oz [70g] unsalted butter, cubed plus extra to grease the loaf pan
2 tsp lime zest
1 cup plus 3 Tbsp [170g] all-purpose flour
1 1/4 tsp baking powder
1/8 tsp fine sea salt
1 1/2 cups [210g] blueberries
3 large eggs at room temperature
1 cup [200g] sugar
1/2 cup [120ml] unsweetened plain kefir
For the glaze
3/4 cup [90g] confectioner’s sugar
2 Tbsp plain unsweetened kefir
2 tsp fresh lime juice
2 tsp fresh lime zest
Preheat the oven to 325F [165C]. Grease and line a 8.5 inch by 4.5 inch [21.5 cm by 11 cm] loaf pan with a little butter and parchment paper.
Melt the 2 1/2 oz [70g] butter in a small saucepan over medium heat. Add the zest to the butter, stir, remove from heat, and cover for 10 minutes.
In a medium bowl, dry whisk the flour, baking powder, and salt. Reserve and transfer 2 Tbsp of this dry mixture to a separate medium bowl, add the blueberries and toss to coat well.
In the bowl of a stand mixer, whisk the eggs and sugar over medium speed till light and foamy, about 3 minutes. Scrape the sides of the bowl down and whisk in the melted butter with the lime over medium speed for 1 minute till incorporated. Stop the mixer and scrape the sides of the bowl down, whisk in the kefir over medium speed. Stop the mixer and scrape the sides of the bowl down and add the dry flour mix, mix over low speed till there are no more visible flecks of flour, about 3 minutes. Stop the mixer, scrape the sides of the bowl down and fold in the blueberries with a spatula. Transfer the batter to the prepared cake pan and bake in the preheated oven for 45 minutes. Do not open the oven during this time. After 45 minutes, rotate the cake pan halfway through and continue to bake till the top turns golden brown and a knife or skewer when inserted through the center comes out clean, about 15 minutes. Remove the pan from the oven and let the cake rest in the pan for 5 minutes.
While the cake rests , prepare the glaze. Mix the confectioner’s sugar with kefir, lime juice, and zest in a small bowl till smooth and there are no flecks of the dry powdered sugar, using a spoon or spatula. Pour this mixture over the hot cake in the pan and let it rest for another 30 minutes in the pan before removing it. This cake will be good for unto 3 days if stored in an airtight container.
March 16, 2021
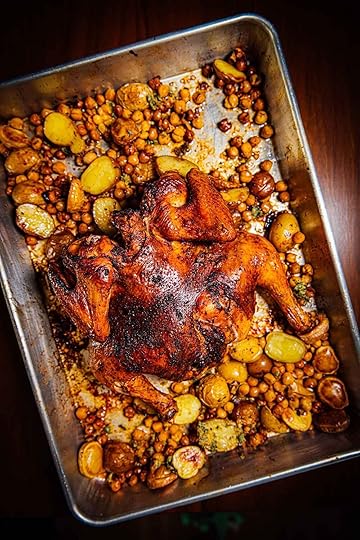
butterflied chicken with baharat and roasted chickpeas and potatoes with lemon and oregano

I’m going to come out and say it, I butterflied this chicken the opposite way. It isn’t exactly the end of the world and that’s the reason why I decided to share the photo and the recipe, too often we’re our own worst critics. The chicken turned out perfect with two difference - the breasts were on opposite sides of the bird and the spine was still attached (typically the spine is cut out from the bird during butterflying). My instructions in the recipe are for cutting the bird the “right way” so your chicken will flip the opposite way once butterflied.
Butterflying or Spatchcocking a chicken is one of my favorite ways to cook a whole bird. The bird cooks much more efficiently, the skin turns crispy all over since the bird is butterflied or laid flat, skin side up, and it also looks fancy on the dinner table.
Baharat is a spice blend used in parts of North African and the Middle East and carries a delicious warm aroma, add a pinch of chillies to complement that heat. I use it when I’m grilling and roasting vegetables, seafood, or meats and even add it to stews. It’s a great spice blend to keep on hand in the pantry. Toss in a souring agent like a lemon or lime and the dish will take on a whole new dimension.
Some notes:
You can use a knife to butterfly the chicken, you run the risk of slicing all the way through the bird. It’s best to use a pair of kitchen shears.
Season the bird on the skin and underneath, this helps flavor the chicken throughout.
If you don’t have a wire rack or a roasting pan with a rack (used for turkey), skewer the bird a few times and then place it on the roasting pan. It will achieve the same thing, the rendered fat will drip on the pan while the hot air will circulate under the bird.
I like to keep most of the chickpeas and potatoes under or around the bird. If your pan is too wide, you run the risk of the vegetables at the ends of the pan getting too crisp, centering them closer to the bird avoids this and they get the flavor from the chicken too.
As always rice is the best accompaniment to this dish.
butterflied chicken with baharat and lemon oregano chickpeas and potatoes
makes 4 servings
3 1/2 to 4 lb [1.6 to 1.8kg] roasting chicken
1 Tbsp baharat spice mix
fine sea salt
1/2 tsp ground chipotle
1/2 tsp ground cayenne
1 Tbsp extra-virgin olive oil
1 lb [455g] new potatoes, cut in half lengthwise
One 15 oz [425g] can chickpeas, drained
For the lemon oregano dressing
1/4 cup [60ml] fresh lemon juice
zest of one lemon
2 Tbsp fresh Greek or Mexican Oregano, chopped
1 tsp ground black pepper
1 tsp fine sea salt
Preheat the oven to 475F[240C].
Place the chicken on a cutting board, breast side down and and using a pair of sharp kitchen shears or a knife cut along the backbone. Open up the chicken, flip it over, and press it firmly down to flatten. At this point you can cut out the spine or leave it. With your fingers separate the skin from the flesh of the bird to create a pocket.
In a small bowl mix the baharat, 1 1/2 tsp salt, chipotle, cayenne, and olive oil. Brush this mixture over the chicken skin as well as inside the pocket between the skin and the flesh.
Take a roasting pan or baking pan with deep rimmed sides and add the potatoes and chickpeas. Season with a little salt. Place the Keep the vegetables in the center of the tray. If using a baking pan or a roasting pan without a wire rack, skewer the chicken with 4 skewers to hold it securely over the pan with vegetables underneath. This will allow the drippings from the bird to fall over the vegetables as they cook in the oven. Add the water to the pan and let the chicken cook for at least 45 minutes till the internal temperature of the chicken reaches 165F[74C]. Baste the chicken with the drippings from the pan every 15 minutes and rotate the tray after 30 minutes of roasting. Once the chicken is done, remove the tray from the oven and loosely tent with foil for at least 10 minutes before serving.
While the chicken roasts in the oven, prepare the dressing. In a small bowl, mix the lemon juice, zest, oregano, black pepper, and season with salt. To serve, transfer the chicken to a serving tray (remove the skewers if using). Transfer the potatoes and the chickpeas and drizzle the dressing over the vegetables. Serve immediately.


