
Nik Sharma's Blog, page 4
October 8, 2022
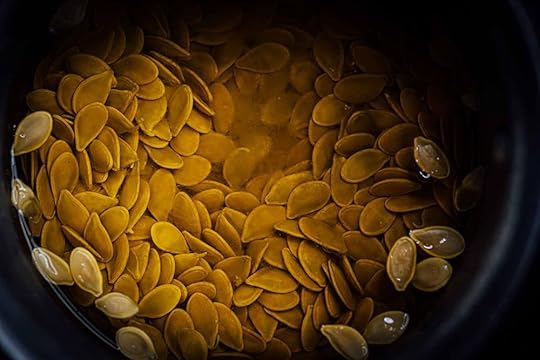
Spiced Roasted Pumpkin Seeds
One of the most important things to come out of a pumpkin besides the bright orange sweet flesh is also those little oval gems like seeds strung by threads in the center of the hollow space. Pumpkin seeds/pepitas occupy an important position in my freezer, I use them as a topping over salads, soups, stews, and any dish where I think a bit of crunchiness is going to make me and everyone who eats it happily. Sometimes, I’ll add pumpkin seeds to thicken soups and make sauces, seed butters, and chutneys, when blended the seeds take on a lovely creamy texture (just remember to steep the seeds in boiling water to help soften them before blending).
Now there's one thing I can't settle for you and that's how you like to eat pumpkin seeds. You might be a hull lover or you might prefer to eat the seeds without the hull, what matters is that you get your dose of crunchiness.
One note, pepitas are a type of pumpkin seed that comes from a specific variety of pumpkin called the Styrian or oil seed pumpkin. The pumpkin seeds I used here aren’t technically pepitas. Pepitas are green in color and lack an outer hull.
How to roast pumpkin seeds
Brine, brine, brine! Brine your raw pumpkin seeds in their hulls before you roast them in the oven. The type of brine we’re using here might seem a bit different from the typical way we brine meats – there’s heat involved, and the brining time is very short. Boiling the seeds in salted water helps poke holes into the hull of the seed. This helps the salt get inside and the seeds taste better. I've also noticed that it makes the hull come off easily. How does salt make this happen? Salt helps to change the chemistry of the outer seed hull by changing the structural components like lignin and pectin making it penetrable.

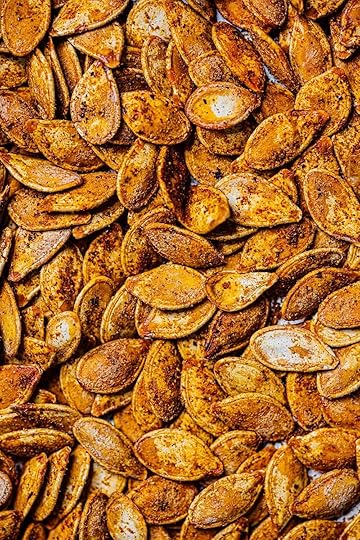
Spiced Roasted Pumpkin Seeds
The Cook’s Tips:
It is much easier to remove the stringy materials from the pumpkin seeds if the seeds are kept in a large bowl filled with water. The strings will slide off much easier and won’t be sticky, and they’ll stay apart.
Rinse the seeds with running tap water to ensure all the pumpkin flesh bits are gone.
The cooking time in the oven will vary depending on the size of the seeds, with smaller-sized seeds cooking much faster than larger ones.
This method will work for almost any type of pumpkin or melon seeds.
The sumac is added after roasting because the higher temperatures will make it taste bitter.
Spiced Roasted Pumpkin Seeds
Makes 1 cup/70 g
2 cups/480 ml water
fine sea salt
1 cup/70 g raw un-hulled pumpkin seeds, cleaned (See The Cook’s Notes)
1 Tbsp extra-virgin olive oil
1 tsp ground smoked sweet paprika
1 tsp ground coriander
1 tsp ground sumac
Preheat the oven to 375F/190C.
Add the water and 1 Tbsp salt to a small saucepan and bring to a boil over medium-high heat. Add the pumpkin seeds to the boiling water and boil for 10 minutes. Drain the seeds through a fine-mesh sieve held over the kitchen sink. Transfer the seeds to a rimmed baking sheet.
Drizzle the oil and sprinkle the paprika, coriander, and salt over the pumpkin seeds. Toss to coat well and bake in the preheated oven until the seeds turn golden brown and crisp, 25 to 30 minutes, rotating the sheet halfway through during cooking. Watch the seeds carefully after the first 8 minutes, smaller seeds will cook faster and will need to be removed. Some of the seeds might pop during roasting, this happens if they have a lot of moisture trapped inside. Remove the baking sheet, sprinkle the sumac, toss, and let the seeds cool to room temperature. Transfer to an airtight container and store for up to 1 month in the refrigerator or in the freezer for 3 months.


October 7, 2022
Black Garlic and Miso Green Beans
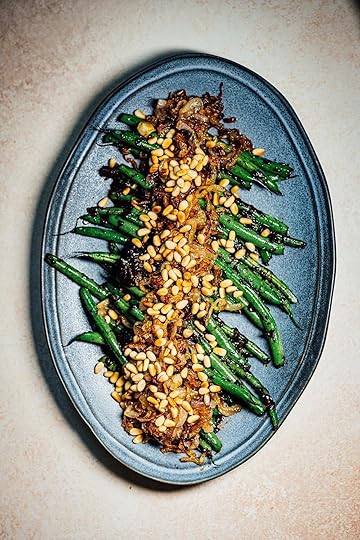
Black Garlic and Miso Green Beans
Sweet and savory, these green beans get a wondrous layer of caramel and sweetness from the fermented black garlic while the miso adds a depth of umami.
Tip: I recommend making this the day of. You can make it several hours ahead of time, it reheats well in the microwave. However, don't cook and keep it warm in the oven or a warming drawer, as the green color of the beans will turn dull with sustained heat.
The Cook's Notes
Both shallots (the caramelization of onions, leeks, and shallots is notoriously difficult to estimate) and green beans have unpredictable cooking times that depend on the vegetable and the heat source, among other things. The easiest way to know when they're ready is to check them as they cook.
Black garlic is a fermented form of garlic, and you can find it in grocery and specialty spice stores as well as online. It's sweet to taste with lovely caramel notes and lacks the pungency of garlic.
I prefer using white or yellow miso as they are less salty than the red variety.
Be careful while salting as miso is salty, to begin with.
Makes 4 to 6 servings as a side
3 Tbsp/45 ml extra-virgin olive oil or grapeseed oil
4 shallots (total weight about 240g), thinly sliced into rings
Fine sea salt
2 Tbsp raw unsalted pine nuts, sunflower, or pumpkin seeds
1 ½ lb/680 g green beans, trimmed
2 whole black garlic pods, smashed into a paste
2 Tbsp white or yellow miso
¼ cup Tbsp/60 ml water
2 Tbsp red wine vinegar
Heat 2 Tbsp of the oil in a 12 in/30.5cm stainless-steel skillet over medium heat. Add the shallots with ¼ tsp fine sea salt, and sauté until the shallots turn golden brown and crisp, the time will vary depending on the color (it took me 13 minutes). If at any point the pan gets too hot and the shallots start to burn, reduce the heat to low, add 1 to 2 Tbsp of cold water and continue to cook. Transfer the shallots to a small plate or bowl. Taste one or two shallots to see if they're salted enough or else season them with a little salt.
Don’t wipe the skillet, add the pine nuts, and cook over medium heat, until they turn golden brown, 1 to 2 minutes. Transfer to a small plate or bowl.
Add the remaining 1 Tbsp oil to the skillet and heat over medium-high. Add the green beans with ¼ tsp fine sea salt, and cook until the beans turn bright green, tender but crisp, 5 to 8 minutes (the cooking time can vary just like the shallots). Add the black garlic and miso, followed by the water, and vinegar, and fold the beans to coat them in the mixture. Cook until most of the liquid evaporates, 2 to 3 minutes. Taste and season with fine sea salt if needed.
Transfer the green beans to a serving plate. Garnish with crispy shallots and pine nuts. Serve warm.
Maple Pumpkin Seed Granola

Of all the snacks I love keeping in stock at home, granola probably ranks high in the top tier. For me, it’s all about granola's crunch and seasonal variations. In this fall-themed version, bright green pepitas and cranberries take center stage with warm cinnamon and ginger. In addition to the oats, I’ve added chia seeds and quinoa to give this an extra pack of crunchiness.
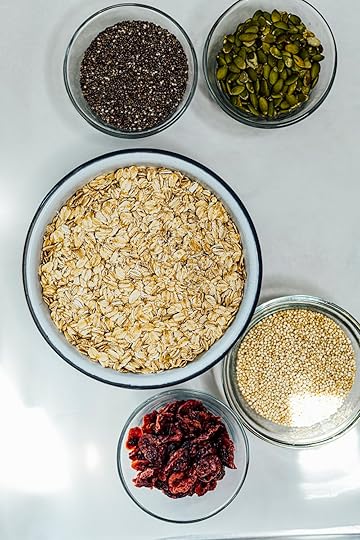
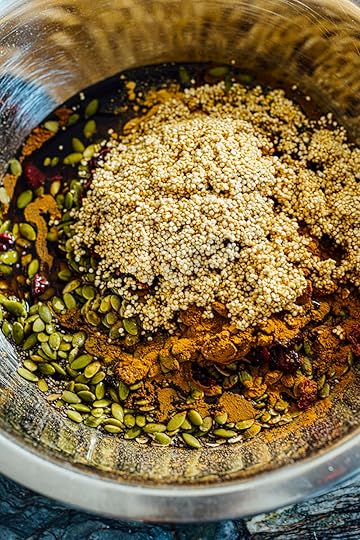
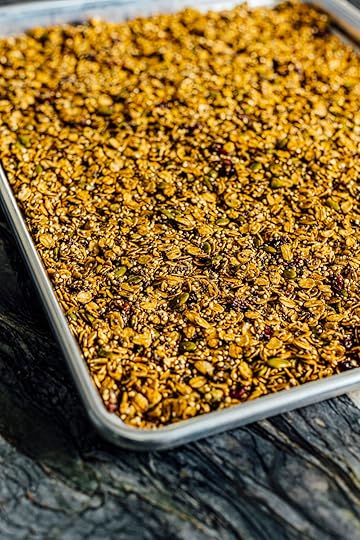

Maple Pumpkin Seed Granola
Be warned, the fragrance emanating from the oven as this granola cooks will make your kitchen smell like fall. This is how I love my granola, which is mildly sweet, scented with spices, and filled with various textures from grains like chia seeds, quinoa, and chewy dried cranberries. I eat this as a snack straight from a jar, or I will top it over creamy yogurt and drizzle a little maple syrup or honey for a sweet treat.
The Cook’s Notes
Wash the quinoa in a fine mesh sieve over running cold water to get rid of the bitter saponin coating. Drain the water and then toss it directly with the rest of the ingredients; it will toast and dry out in the oven as it cooks.
To make the granola clump into clusters, lightly whisk the white from 1 large egg and fold it into the oat mixture. Once baked, break the granola into clusters.
Add ¼ cup/50 g brown sugar to make the granola sweeter.

Makes about 5 cups/630 g
2 ½ cups/250 g instant rolled oats
1 cup/140 g raw unsalted pepitas
½ cup/70 g sweetened dried cranberries
½ cup/90 g chia seeds
½ cup/90 g quinoa, rinsed thoroughly and drained
2 tsp ground cinnamon
2 tsp ground ginger
½ tsp fine sea salt
2 Tbsp extra-virgin olive oil
1/3 cup/80 ml maple syrup
In a large mixing bowl toss together all the ingredients, fold to coat well, cover, and let sit for 15 minutes.
Preheat the oven to 300F/150 C.
Spread the oat mixture out onto a rimmed baking sheet lined with parchment paper. Bake in the preheated oven until the granola turns golden brown, 35 to 40 minutes, rotating the sheet halfway through during cooking. Remove from the oven, cool completely, transfer to an airtight container, and store for up to 1 month at room temperature.
October 6, 2022
Caramelized Date and Fig Oatmeal Cookies
Figs are a treasure, a source of delight. A ripe fig is like a piñata full of good surprises, bust it open and it will reveal a celebration of sweet juicy jamminess. This year, I planted five different varieties of fig trees in my backyard and while they haven’t produced a lot of fruit this year, I’m hoping I start to see better returns next year. Ironically, growing up in India, I don’t remember eating any fresh figs, they were always dried. You know, the ones stacked and tied together tightly with a piece of thin rope called “string figs”. I must admit, those dried figs weren’t my favorite. However, once I tried my first fresh fig (after I moved to Washington D.C.), I immediately fell in love. Fast forward to several years later and living in a new city (Los Angeles), I’ve now got five different varieties of fig trees growing in my backyard and maybe I won’t stop at five, if space permits, I guess I could squeeze in another fig tree.
This week’s recipe involves fresh figs and dried dates that come together in a spiced oatmeal cookie, the perfect way to start off fall baking. The cookie is equal parts chewy and crispy with the presence of chunks of fresh figs and dates and the oats. I’ve also built in a deep layer of caramel flavor in the cookie that really helps bring out the aroma of the ingredients.
One of the ways to build and intensify caramelization in recipes is by adding a tiny amount of baking soda. Baking soda (sodium bicarbonate) is alkaline and it raises the pH (fewer hydrogen ions). The new higher pH now helps the sugars present in the fruit, the butter, and the sugar to enter and quickly proceed through the caramelization reaction (the reaction that produces bittersweet flavors and caramel color in foods like baked cakes and flans) as the mixture heats in the saucepan. You’ll see the mixture quickly foam and then transition from a light toffee brown color into a darker shade of caramel in just a few minutes. Just don't go too dark or black, you won't like the taste of that.
I’ve kept the spices in the cookie straightforward, a hint of black pepper, a little cinnamon, and a splash of vanilla to play well with the fruit and caramel. Bake them and be prepared to get engulfed by all those lovely fragrances emanating from your oven.
Before we jump into the recipe, since this is fig season, I want to share a few more recipes that I think you’ll enjoy,
Fig Leaf Syrup – Before it gets too cool and the fig trees drop their leaves, grab a few fresh leaves, and prepare this delicious fig leaf syrup. Now here’s the interesting part, it won’t taste anything like figs but instead it will remind you of a very fragrant syrup made from toasted coconuts. Mix it with chilled water or soda and you’ll have yourself a refreshing drink. I also use the syrup over fresh fruit for a light dessert or to flavor other sweet recipes.
This Upside-Down Fig Cake is one of the most popular recipes that I created for my column at the San Francisco Chronicle. The cake carries a distinct caramel aroma combined with ghee and cardamom.
For a more tropical take, try my Almond Fig Cake that’s served topped with a Tangy tamarind Frosting from The New York Times.
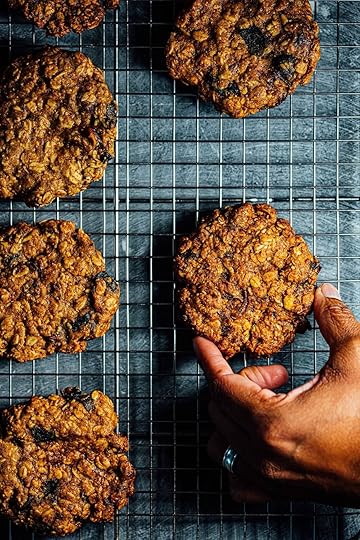
Caramelized Date and Fig Oatmeal Cookies

Caramelized dates and figs come together in these crispy and chewy spiced oatmeal cookies. Eat them warm or cool but be warned, one cookie is never enough!
The Cook’s Notes
Stay away from instant oatmeal when making cookies, old-fashioned/rolled oats are the only ones you need.
Use ripe figs but not overly ripe ones that are way too mushy.
Be careful when caramelizing the fruit, too much and the whole thing can turn extremely bitter.
You can shape these cookies smaller and double the final count.
These cookies don’t spread by themselves, and you won’t be able to treat them like drop cookies, shape them with wet hands and flatten them out into patties before baking.
The resting time for the cookie dough is critical to achieving part crispy and chewy textures in the baked cookie.
Makes 12 cookies
2 cups/200 g old-fashioned/rolled oats
1 cup/140 g all-purpose flour
½ cup/100 g sugar
12 to 13/200 g pitted, dried dates, chopped
3 ½ oz/100 g fresh figs, chopped
½ cup/110 g unsalted butter, cubed
½ tsp baking soda
1 large egg, cold and lightly whisked
1 tsp vanilla extract
½ tsp finely ground black pepper
½ tsp ground cinnamon
Preheat the oven to 350F/180C.
Line two baking sheets with parchment paper.
In a large mixing bowl, dry whisk the oats, flour, and ¼ cup/50g of the sugar.
Place the dates, figs, butter, and ¼ cup/50g of the remaining sugar in a small saucepan. Cook over medium heat until the butter melts, stirring with a silicone spatula, 2 to 3 minutes. Reduce the heat to low and stir in ½ tsp baking soda, the mixture will immediately foam and turn light brown. Continue to stir, until the mixture reaches 180F/82C and turns a dark caramel toffeelike color, 2 to 3 minutes. At this point, resist the urge to taste this, I know it smells amazing, and speaking from experience, you can/will easily singe your tongue. Remove from the heat and let cool to 140F/60C (anything over this temperature and the egg runs the risk of coagulating).
Stir in the egg, vanilla, black pepper, and cinnamon into caramelized fruit mixture.
Make a well in the center of the oat mixture and pour in the fruit mixture. Fold with the spatula until there are no more visible flecks of dry oats or flour. Cover the bowl with a lid and let sit for 15 to 30 minutes but not longer.
Divide the rested dough by weight into 12 equal parts (approximately 2 ½ to 3 Tbsp). Shape each into a 3 in/7.5 cm wide and ¼ inch/6mm thick patty. The dough will be quite sticky and lightly pre-wetting your hands in a little bit of water will help act as a non-stick shield during shaping. (If you want a smaller cookie, halve the quantity and the width.) Lay the shaped patties out onto the lined baking sheets (six cookie patties per sheet) and cook them in the preheated oven for 12 to 15 minutes, turning them halfway through during baking, until they turn golden brown and crisp on the edges. Remove the baked cookies from the oven and transfer them to a wire rack to cool. The cookies can be eaten warm or at room temperature. Store the cooled cookies in an airtight container at room temperature for up to 4 days.
October 5, 2022
Butter Chicken
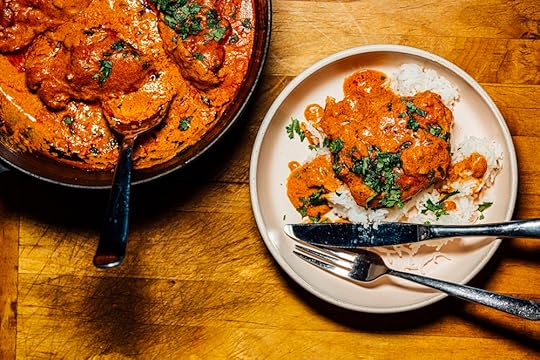
It didn’t matter where I lived, India or America, butter chicken aka Murgh Makhani, was the dish we always ordered at a restaurant or got as takeout. Over the years, I’ve received many requests for this dish and finally got a recipe that I know you will love. I’m very proud of how good this turned out (since it took so many tries and plenty of tinkering). The sauce is smooth and velvety and glides over the roasted succulent chicken pieces with a joyful speed. Don’t take my word for it; watch it slide over a bowl of hot rice, and you’ll see what I mean.
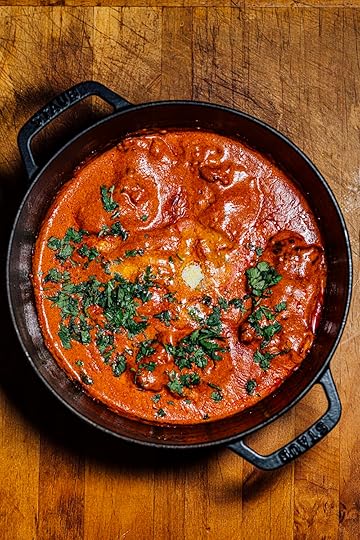

Butter Chicken/Murgh Makhani
Butter chicken is one of the most famous dishes associated with Indian restaurants, and if you have a craving, this is the recipe for you. Butter chicken uses tandoori chicken cooked in a tandoor (a type of Indian oven) that gives the chicken and, subsequently, a wonderful smoky flavor. To replicate the smokiness, I roast the chicken in the oven and then broil it quickly. Serve this fragrant chicken dish with its decadent fiery red velvety sauce with kachumber salad, rice, or flatbread like naan.
The Cook’s Notes
I prefer bone-in over boneless chicken; the flavor is always better.
To save time, prep the chicken with the marinade a day ahead of time. For long-term planning, marinate the chicken for 30 minutes, then freeze for two weeks. When ready to use, thaw overnight in the refrigerator.
Fret not if you’re out of Kashmiri chilli powder at home; for every 1 tsp of Kashmiri chilli powder, use ¾ tsp ground smoked sweet paprika and ¼ tsp ground cayenne.
If you want the butter chicken hotter, add cayenne.
Makes 4 to 6 servings
2.25 lb/1 kg chicken thighs, skinless, bone-in or
2 lb/910 g chicken thighs, skinless and boneless, cut into 1 in/2.5 cm cubes
For the Marinade
½ cup/120 g plain unsweetened Greek yogurt
2 Tbsp fresh lemon or lime juice
1 Tbsp grated garlic
1 Tbsp grated ginger
1 Tbsp garam masala homemade or store-bought
1 tsp ground Kashmiri chilli powder
½ tsp ground turmeric
½ tsp fine sea salt
For the Butter Chicken Sauce
½ stick/55 g unsalted butter
1 Tbsp vegetable oil
1 Tbsp Kashmiri chilli powder
2 tsp ground toasted cumin
1 Tbsp grated garlic
1 Tbsp grated ginger
1 tsp garam masala homemade or store-bought
1 green chilli such as jalapeno, serrano, or Bird’s eye
¾ cup/180 g tomato paste
1 cup/240 ml heavy cream
1 Tbsp fresh lemon or lime juice
Fine sea salt
2 Tbsp chopped cilantro, tender stems and leaves
1 Tbsp salted butter for garnish (optional)
If using bone-in chicken thighs, make 2 to 3 deep gashes in the chicken; skip this if you use the boneless pieces.
Place all the ingredients for the marinade in a medium bowl or ziptop bag and combine until smooth. Fold in the chicken and make sure the chicken is completely coated with the marinade. Leave in the refrigerator covered for 1 hour, preferably overnight.
When ready to cook, preheat the oven to 400F/200C.
Lay the marinated chicken pieces out on a baking dish or roasting pan. Roast the chicken in the oven until the internal temperature reaches 164F/74C, 30 to 45 minutes (boneless chicken takes about 20 minutes), rotating the dish halfway through during cooking. Transfer the baking dish to the upper rack of the oven, and then broil over high for 2 to 4 minutes, until the chicken starts to char in a few spots. Remove the baking dish from the oven.
At the 20-minute mark of cooking the chicken, start the sauce. Melt the butter in a medium Dutch oven or saucepan over low heat. Once the butter begins to foam, stir in the oil. Add the Kashmiri chilli powder, toasted cumin, garlic, ginger, garam masala, and green chilli. Stir until fragrant, 30 to 45 seconds. Then add the tomato paste and cook until the paste begins to turn light brown, 5 to 6 minutes. Pour in the heavy cream and add the chicken and any liquids left behind in the baking dish. Fold to coat well. Stir in the lemon juice, taste, and season with salt. Bring to a boil over medium-high; the fat should separate from the sauce. Remove from the heat. Garnish with cilantro and salted butter if using. Serve hot or warm with rice or naan. Leftovers will stay good for up to 3 days if stored in an airtight container in the refrigerator.
October 4, 2022
Spaghetti Squash Chorizo Bake

Chorizo is a staple in Goan cuisine, and if I can find an excuse to use it, I most certainly will. While the Goan chorizo (aka choriz or chouriço) I grew up eating is a bit hotter, tangier, and spicier than the ones I’ve found here in America, they still hit all the right spots when I get that feeling of nostalgia. The flavors are similar.
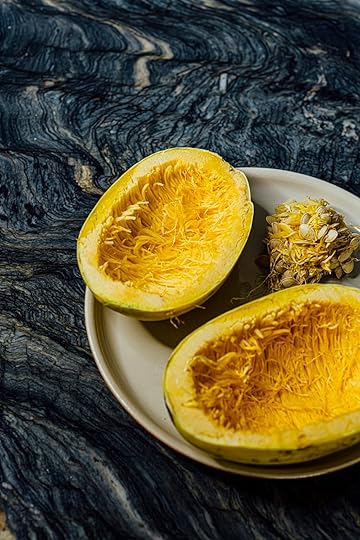
This recipe is straightforward yet packed with lots of flavors. The squash is first cleaned out and then stuffed with a filling of chorizo cooked with onions, bell peppers, and tomatoes. Once baked, the squash falls apart into threads. You can see evidence of the squash threads appearing on the edges of the squash after it bakes in the oven. I melt a bit of cheddar on top and garnish with fresh cilantro or parsley for the final finish. This is so easy to put together and so good!

This is an easy dish to put together and can be easily doubled or tripled.
If you don’t consume pork or want to veganize this recipe, swap out the chorizo and cheddar for a plant-based version. Since pork-based chorizo already contains fat, there’s no need to add oil to cook. Instead, I use the fat released from the sausage meat as it renders. In the case of plant-based chorizo, the fat content is typically lower, so I add a little oil to sauté the sausage and vegetables.


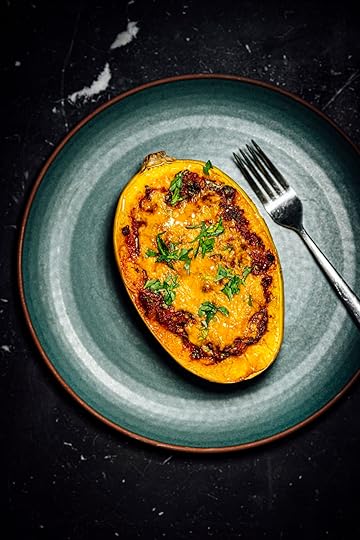
Spaghetti Squash Chorizo Bake
There’s something magical in the way spaghetti squash’s flesh cooks and transforms into thin threads. This squash bake takes full advantage of that quality. The squash is filled with a spicy and tangy chorizo mixture and topped with cheddar. It’s an easy and satisfying meal to prepare and one that doesn’t need any accompaniments or sides, making it a favorite at home.
The Cook’s Notes
To make it easier to halve the squash, microwave as shown in the video. Remember to use 1-minute intervals at a time.
To make this vegan, use vegan chorizo (like this sausage from Field Roast) and cheddar. If you use vegan chorizo, add 1 Tbsp of olive oil to the skillet before sautéing.
Makes 2 servings
One 1 ½ lb/680 g spaghetti squash, cut in half lengthwise, seeds discarded
2 tsp extra-virgin olive oil
5 ½ oz/155 g chorizo, broken into small bite-sized pieces
1 cup/250 g yellow or white onion, diced
1 cup/175 g green bell pepper, diced
1 cup/240 ml tomato purée
Fine sea salt
1 Tbsp chopped cilantro or flat-leaf parsley
2 Tbsp shredded cheddar
Preheat the oven to 425F/220 C.
Place the halved squash on a baking sheet or roasting pan. Brush each top with 1 tsp of olive oil.
Heat a medium skillet or saucepan over medium-high heat. Add the chorizo and cook until it starts to brown and the fat renders, 3 to 4 minutes. Add the onions and sauté until translucent, 4 to 5 minutes. Add and sauté the green bell pepper until it just starts to brown, 2 to 3 minutes. Stir in the puréed tomatoes, bring to a boil and remove from the heat. Add ½ Tbsp chopped cilantro or parsley. Taste and season with salt if needed.
Using a large spoon, divide the chorizo mixture between the two squash halves by filling their centers. Bake the squash in the preheated oven for 30 to 45 minutes, until the tops and edges are golden brown, and the squash flesh splits into threads on the edges. The squash flesh should be tender enough to be pierced easily by a fork or knife. Remove from the oven, top each half with 1 Tbsp of cheddar and return to the oven. Turn the broiler on high and broil until the cheese begins to bubble and melt, about 1 minute. Remove from the heat. Garnish each with 1 tsp of cilantro or parsley. Serve hot or warm. Leftovers can be stored in the refrigerator in an airtight container for up to 3 days.
October 3, 2022
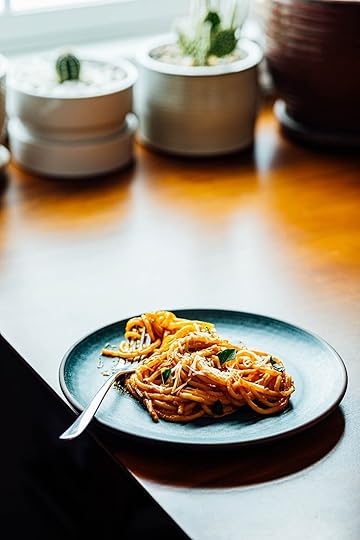
Roasted Tomato Miso Sauce and Spaghetti

“How do I make tomato sauce taste more savory?” – This might just be one of the most popular questions I get from readers, I think chocolate cakes are a close second.
The most common way to build savoriness in tomato sauce is to grab a tube of anchovy paste, give it a good squeeze, and get some that grayish paste into a saucepan containing hot olive oil. You can also add a few anchovy slivers from a tin of packed anchovies (preferably the ones stored in olive oil, use some of that olive oil for extra flavor) and cook the fish, till they fall apart completely. The bones are so tiny and fragile, they melt away and become inconspicuous.
You can also soak dried mushrooms like porcini or shiitake in hot water and add that liquid to the sauce.
But what if you don’t eat fish, simply don’t own a tube of anchovy paste, or can’t find any anchovies where you live? My solution is to go for the tub of miso (I prefer the yellow (soybeans are fermented with barley) or white (the soybeans are fermented with rice) miso pastes) sitting in the refrigerator. Just like anchovies, miso is a concentrated form of umami goodness but instead of fish, it is produced by fermenting soybeans. Just like anchovies, miso is an instantaneous way to add savoriness to food because it dissolves immediately. Since miso already contains salt, you probably won’t need to add any extra salt to the tomato sauce and an extra advantage, is it will help thicken up the sauce quickly.
This week, I’m going to show you how I make my tomato sauce at home, in its simplest avatar and we will build on that savory taste with miso. Of course, you can make this sauce even more elaborate by sautéing onions, celery, etc., that bit I leave up to you.
I’m probably a bit of an anomaly when it comes to how I like my pasta. I like a smaller amount of pasta in my bowl, but the pasta must be coated with extra sauce and I’m generous with the amount of cheese and basil that goes on top.
Roasted Tomato Miso Sauce and Spaghetti
This is the simplest of tomato sauces to use with pasta, one that I make often. If you make this sauce in summer during the peak season of tomatoes, then you shouldn't need to add sugar because ripe tomatoes in season are always so sweet! If you do or you don't own anchovies on hand or you do or don't eat seafood, you must try this roasted tomato sauce. Instead of anchovies that help amplify the umami of the sauce, miso builds the savoriness of the sauce, adds salt, and also helps thicken the sauce.
My sauce-to-pasta ratio might seem a bit quirky, I tend to fall into the group of people that like it with extra sauce. If you like more pasta, use a whole box (1lb/455g), this recipe makes enough sauce for a thinner coat.
The Cook’s Notes
I find yellow or white miso works best here in comparison to red miso since they are less saltier.
Be gentle when roasting tomatoes, they don’t need to be too dark because that might make the sauce taste bitter.
Summer tomatoes, especially the grape and cherry kinds, are a great option because they’re concentrated in flavor (also extremely easy to grow). As tomatoes ripen, their acids turn into sugar, and I find the sauce naturally sweet on its own and perfectly balanced in taste.
(This recipe first appeared in Bulletin)
Makes 2 servings
1 ½ lb/680 g cherry or grape tomatoes
¼ cup/60 ml extra-virgin olive oil
2 cloves of garlic, grated
1 tsp red pepper flakes such Aleppo, Maras, or Urfa
2 Tbsp yellow or white miso paste
fine sea salt
½ lb/230 g dried spaghetti, no 12
12 fresh basil leaves, torn
2 Tbsp lightly packed shredded or grated Parmesan
Start with the sauce. Preheat the oven to 400F/200C.
Swirl to coat the tomatoes with 2 Tbsp of the olive oil on a baking sheet or a 9 in by 13 in /20cm by 23cm roasting pan. Roast the tomatoes in the preheated oven till they start to burst and turn a light golden brown, rotating the pan halfway through during cooking, 25 to 30 minutes. This is where the tomatoes will lose their water content and become concentrated in flavor. Remove the sheet from the oven and transfer the tomatoes and all the drippings from the pan to a blender. Pulse on high speed for a few seconds till it turns into a smooth purée.
Heat the remaining 2 Tbsp of the olive oil in a medium saucepan over medium heat. Add the garlic and red pepper flakes to the hot oil, swirl, and cook till fragrant and the oil turns red, 30 to 45 seconds. You must always watch any type of dried chillies in hot oil, they tend to burn fast and will make everything turn unpleasantly bitter, so be careful. If it does end up burning, clean the saucepan and start again.
Stir in the miso paste with a wooden spoon but a spatula will work just fine, if it doesn't bend and flip the paste in your face or go on the wall (it's happened to me).
Fold in the pureed tomatoes and stir to combine evenly. You might need to whisk it slightly to disperse the miso to ensure there are no lumps present.
Bring the sauce to a boil and reduce the heat to a simmer. Taste and season with salt if needed. You can thin the sauce out as needed with a little bit of the pasta/spaghetti cooking water. If the sauce is too thick, I usually add ¼ cup/60ml of the leftover pasta cooking water at a time. Remove from heat.
Cook the spaghetti while the tomatoes roast in the oven.
Prepare the spaghetti while the tomatoes roast in the oven. You don't need to use my method and can absolutely use the one listed on the box of pasta you purchased or the method you've been using forever (cooked pasta textures are very personal).
To cook the spaghetti, bring a large pot of water to a rolling boil (3 cups/720 ml of water and 1 tsp salt for every ½ lb /230g of pasta). Add the spaghetti and cook for about 12 minutes, till tender. Remove the pasta with a pair of kitchen tongs or sieve and transfer them to a large bowl. Save the pasta cooking water just in case you need to thin out the tomato sauce.
Add the roasted tomato sauce and fold. Serve the pasta warm, divide between 2 bowls. Garnish each bowl of pasta with 1 Tbsp of parmesan and a little basil (yeah, I add a little more than this, I am very generous with cheese and herbs).
October 2, 2022
Crispy Cauliflower with Gochujang
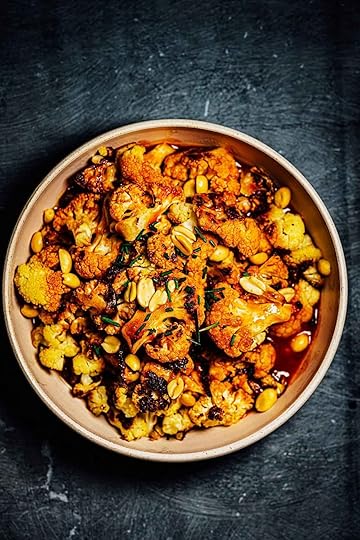
Crispy Cauliflower with Gochujang
This week, I've got crispy cauliflower on the menu. It's hot, it's sour, and carries a hint of sweetness. It's a minimal effort dish and the bulk of the flavor in this cauliflower comes from roasting and the sauce made with the Korean red chilli paste, gochujang. I keep a jar in the condiment shelf (it's probably the most stuffed shelf in my fridge) of my refrigerator.
Gochujang (gochu refers to Korean red pepper) is a staple in Korean cuisine with a very brilliant bright red color that is prepared by fermenting a mixture of barley malt, glutinous/sweet rice, soybeans, chillies, and salt.
One of the things I love about food and cooking is all the related nerdy facts and snippets of information. Here's something new, I learned about gochujang. There's a special hotness scale also that measures the Gochujang Hotness Unit (GHU) devoted to gochujang and the scale ranges from 0 to 100. Anything below a 30 GHU is mild, between 30 to 45 GHU is slightly hot, 45 to 75 is medium hot, 75 to 100 very hot, and anything above a 100 is extremely hot. For those of you familiar with the Scoville Heat Units (SHU) used for chillies, this is similar.
Let's get cooking but first read this (even if you don't read the entire newsletter, read this before embarking on the recipe)
The Cook's Tips
Get a microplane zester if you don't already own one. I keep two on hand all the time to grate garlic, ginger, nutmeg, etc.
There are lots of good brands of gochujang available, the one I keep at home is the Mother-in-Law's brand but if you are already in love with another one, go with that.
You can make very good crispy cauliflower in the oven keeping a few points in mind. The goal is to avoid overcrowding, so the larger the baking sheet or roasting pan, the better. This will allow the hot air from the oven to circulate and do a better job crisping up those florets. Keep your florets, bite-size, if they're too big or tiny, they will cook unevenly. Personally, the tinier burnt bits don't bother me as much as the large ones that aren't crisped enough.
Crispy Cauliflower with Gochujang
(This recipe first appeared in This Is A Cook-Letter)
Sweet, spicy, sour, and savory this roasted cauliflower dish gets its punch from the fermented chilli paste, gochujang, a mainstay in Korean cuisine. If you can't eat peanuts, cashews are a good substitute and if you can't eat nuts, try toasted pumpkin or sunflower seeds. The sauce can be made at least two days in advance and stored in an airtight container. Don't forget to warm up the sauce before you pour it over the cauliflower. Plain rice is a good accompaniment.
Makes 4 servings
2 lb/910g cauliflower, broken into bite-sized florets
2 Tbsp extra-virgin olive oil
fine sea salt
1/2 cup/120ml water
2 Tbsp gochujang
2 Tbsp apple cider vinegar
1 Tbsp grated fresh ginger
1 tsp light soy sauce
½ tsp packed light brown sugar
2 Tbsp roasted salted peanuts
1 Tbsp chopped chives
Preheat the oven to 425F/220C.
Place the cauliflower florets on a baking sheet, drizzle with olive oil, and season with salt. Fold and toss to coat well and when I mean toss, be gentle, the worst part is losing cauliflower to the kitchen floor.
Place the baking sheet in the oven and roast the cauliflower till the florets turn golden brown and crispy, 20 to 30 minutes, stirring halfway through during roasting to evenly cook them. Remove the cauliflower from the oven and transfer to a serving bowl.
You're going to have some time while the cauliflower roasts, you could either watch an episode of Hacks or you could make the sauce (you should make the sauce).
Place the water, gochujang, vinegar, ginger, soy sauce, and sugar in a small saucepan. Whisk till smooth, bring to a boil over medium heat, and remove from the stove. Taste and season with salt if needed (you probably won't need to).
Pour the hot sauce over the roasted cauliflower.
Top the roasted cauliflower with the peanuts and chives. Serve warm.
October 1, 2022
A Guide to Dals and a Recipe for Pumpkin Baby Kale Dal
Today, we’re making a beloved South Asian staple, dal.
Dal is dalicious which is one reason why they're so popular. The fact that a dried pantry staple easily transforms and creates something comforting and is also coincidentally is also high in protein content makes it very attractive to cooks.
Is a Dal a Soup or Stew?
This is where words become tricky and I feel a little uncomfortable describing dal as a soup or a stew simply because they are all different types of foods that might appear similar on the surface but are in fact, quite disparate. Let me explain why; for one dal always involve lentils, beans, or some type of pea while a soup or stew doesn’t need to and two, a dal doesn’t need to have any liquid in it, there are several sookhi dal/dry dal dishes to choose from where the lentils or beans have all their water removed. So IMO, dal are their own separate entity and the concept of “dal soup” always sounds confusing.
A dal without lentils, peas, or beans is not a dal. There are lots of choices to choose from in the Fabaceae family - red lentils, yellow lentils, black and green lentils, urad dal (aka urad beans), kidney beans, dried peas, etc. Sometimes a dal contains a combination of lentils or beans for example in some variations of dal makhani, kidney beans are added to the urad beans.
Vegetables
Dals are very welcoming, they like additions. To make it hearty, add fresh leafy greens like spinach, kale, or arugula, and chunky vegetables like pumpkins, squash, potatoes, carrots, beans, peas, tomatoes, and even eggplant. On a lazy day or when I’m in a hurry, I’ll stir in a bag of frozen mixed vegetables. Sometimes, I like to sauté or roast the vegetables to build on flavor before adding them to the dal. I didn’t do that here because I prefer the taste and texture of boiled pumpkin in this dal.
Meat
I once tried a beautiful shrimp-based dal at a friend’s home in India served with warm rice and a sour mango pickle. I prefer seafood, beef, and lamb in dal over poultry. There are some special dishes like dal gosht from Bengal which is made by cooking lentils with pieces of mutton/lamb that remain one of my favorite comfort foods since childhood.
The Flavor Boosters
Salt
Salt helps the vegetables turn tender by working on their tough structural fibers and it adds saltiness. There’s one extra special type of salt that I will use sometimes and that is kala namak or black salt (this salt is used for its sulfurous aroma). Use it as a finishing salt, after the dal is cooked and stir it in.
The Alliums and Hing/Asafoetida
You can fry or sauté onions, shallots, leeks, and garlic. You can cook them until tender and translucent and then boil with the lentils or cook them separately until they turn golden-brown and crisp and use them as a garnish. Sometimes alliums can also be incorporated into the tadka, like the garlic in this recipe.
Hing or asafoetida is a plant resin that smells quite intense in raw form but when added to hot oil, it immediately transforms and releases an aroma that will remind you of alliums. In fact, in India, people who don’t consume alliums use asafoetida to recreate that smell. A word of caution, make sure to read the label of the jar, asafoetida is mixed with wheat flour or rice flour and gluten-sensitive people should use the latter. You can use asafoetida in a recipe that uses garlic and onions, it intensifies the aroma of the dish remarkably well.
Ginger
You can use ginger or you can leave it out. Stir in grated ginger or fry thin matchsticks of ginger in oil till lightly golden brown and crisp for a dal topping. Sometimes the combination of onions-ginger-garlic is referred to as the trinity of Indian cooking because they're commonly used together but there is no such rule etched in stone, add it if you feel it benefits the overall taste of the dish.
Curry Leaves
Curry leaves are extremely popular in the warmer Southern states of India where they grow with ease. Unfortunately, there is no substitute for curry leaves (lemon leaves are not a substitute). Use the leaves fresh or dry and they must be fried crisp in hot oil. However with dried curry leaves, I find their flavor to be a bit weaker than the fresh ones, so I double the quantity called for in the recipe (I know this goes against everything you’re taught about fresh and dried herbs where we tell you to reduce the quantity of dried herbs by half because they’re so potent, curry leaves behave a bit different).
Spices, Spice Blends
Use whole seeds or crushed or ground forms of spices like cumin, nigella, caraway, carom, etc. in your tadkas (See Below and read my detailed Guide to Tadka). I've used garam masala in today's recipe but there are other blends and combinations of spices to choose from like panch phoran (5 spice mix). Turmeric is used in some dal recipes to help intensify the color and add flavor and in this pumpkin dal it adds flavor and color.
Chillies
Fresh chillies like Bird’s eye, serranos, and jalapenos are my favorites but dried whole chillies like Kashmiri chillies can be added to the tadka or cooked with the dal directly. Ground Kashmiri chilli powder can also be used and if you don’t have any on hand, mix ¾ tsp ground smoked sweet paprika with ¼ tsp ground cayenne to replicate that smoky flavor with a mild level of heat.
Acid
Lemons, limes, tamarind, tomatoes, and even some sour fruits like unripe raw mangoes can be used to build sourness. Vinegar is less common but that’s not to say it’s not used, toddy vinegar obtained by the fermentation of the sap collected from coconut palm trees. Toddy vinegar is not that easy to find outside Goa in India, so I use malt vinegar that does a very good job of approximating that taste.
Sweeteners
Natural sweeteners like jaggery are sometimes used in certain regional variations of dal. Jaggery is an unrefined sugar made by concentrating the juice collected from sugarcane or coconuts giving a more complex sweetness to the dal.
Herbs
I skipped the herbs in today’s recipe since I already had a big helping of baby kale and green chillies. However, cilantro, dill, mint, and chives all make fantastic garnishes.
Tadka:
From a scholastic point of view, tadka is a flavor infusing technique using hot fat as the solvent but it’s more than that. Tadka is like the thoughtfully composed soundtrack that makes a movie or tv show a star, in this particular case, woven through careful composition of scents, colors, textures, tastes, and even sounds to make that dal stand out.
I highly recommend reading this guide to the science of tadka I wrote for Serious Eats . It explains in great detail, all you need to know and understand about this wonderful flavor-infusing technique. It will tell you all about the oils to use, spices, and more
The Texture:
Dal can be thick and creamy to thin and watery. It just depends on the recipe and the preference. The lentils and beans can be cooked till they're just tender or until they're falling apart, the softer they are, the thicker the consistency (this is because of the starch present in the seeds that helps thicken the liquid).
(A version of this article and recipe first appeared on Bulletin)
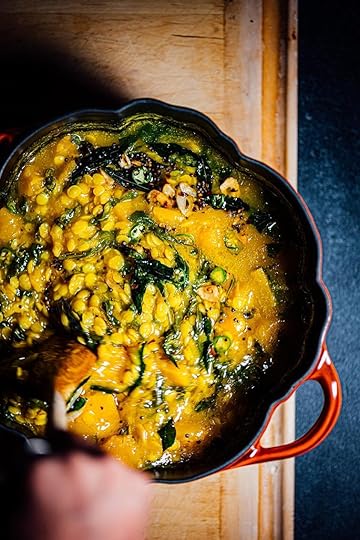
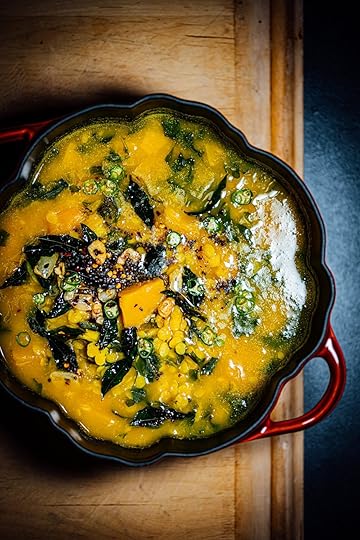
Pumpkin and Baby Kale Dal
This fall-inspired dal is hearty and filled with satisfying flavors and textures from the nuggets of chunky pumpkin and tender soft leaves of baby kale with split pigeon peas that are cooked until they fall apart. The Indian technique of tadka is applied to create the final fragrant finish. Don’t miss out on the curry leaves, you can find them at Indian grocery stores, online, and if you’re lucky grow your own plant at home!
The Cook's Notes
Butternut squash is a great substitute for pumpkins.
Serving suggestions - rice or flatbread is a must but a thick spoonful of plain unsweetened yogurt and a pickle or salad is always lovely.
Makes 4 to 6 servings
5 cups/1.2 L water
One small/2lb/910g pumpkin, cored, peeled, and cut into ½ inch/12mm pieces
1 cup/180g split pigeon peas, rinsed and drained
1 tsp garam masala
½ tsp ground turmeric
fine sea salt
3 oz/85g fresh baby kale leaves
2 Tbsp fresh lemon or lime juice
2 Tbsp neutral oil with a high smoke point such as grapeseed or ghee
1 tsp black or brown mustard seeds
2 garlic cloves, thinly sliced
10 to 12 fresh curry leaves
A tiny pinch of asafoetida/hing (optional)
1 tsp red pepper flakes such as Aleppo, Maras, or Urfa
1 green chilli such as Bird's Eye, jalapeno, or serrano thinly sliced (optional)
In a large saucepan or Dutch oven, add the water, pumpkin, split pigeon peas, garam masala, turmeric, and ½ tsp salt. Bring to a boil over high heat, then reduce heat to low and cook until the pumpkin and lentils are tender. The pumpkin will turn tender at about 8 to 10 minutes while the split pigeon peas will turn tender at about 20 to 25 minutes. Fold in the kale and cook until the leaves are completely wilted, 4 to 5 minutes. Remove from the heat, stir in the lemon juice, and taste and season with salt.
Prepare the tadka. Heat the oil in a small saucepan over medium heat. Drop a mustard seed into the oil, if it is hot the seed will sizzle and jump (this is an easy way to test how hot the oil is). Once the oil is hot, add the mustard seeds, the seeds will sizzle and dance, be careful. Get a lid ready and carefully add the garlic and curry leaves, cover with the lid, the moisture trapped inside the garlic and leaves will cause the oil to spurt. Swirl the ingredients in the saucepan, and fry until fragrant and the leaves turn crisp and translucent about 1 minute. Add the asafoetida and red pepper flakes, and swirl the contents of the saucepan until aromatic, 30 to 45 seconds. Remove from the heat and pour the hot oil with the spices over the lentils. Garnish with the green chilli and serve hot or warm with rice or flatbread like roti or naan.
Mixed Greens and Herb Salad with Lime Dressing
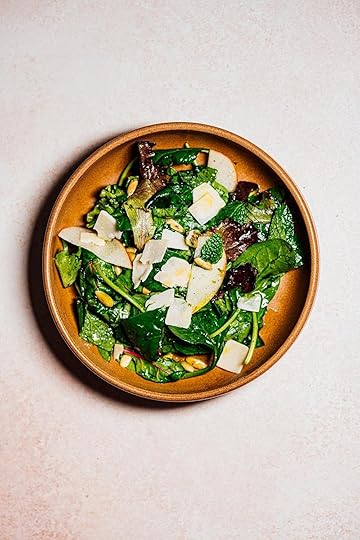
Mixed Greens and Herb Salad with Lime Dressing
I’ve wondered about the necessity of a salad at Thanksgiving. With so many sides, most of which are vegetarian or vegetable-heavy, do we really have space to eat a salad I've come to realize that salad is important and very helpful if light? I eat my salad before I jump into the main dinner, it helps me pace myself during the big meal. Feel free to play with the herbs, use all of them, or just a few of them.
Tip: You can make the dressing a maximum of 2 hours ahead of time. Just toss it all together right when you're ready to serve.
The Cook’s Notes
To toast pumpkin seeds, toast the seeds in a dry skillet over medium heat until they start to turn golden brown, remove and immediately transfer to a plate and let them cool. Don’t leave them in the hot skillet as they can burn.
A salad spinner is great at getting rid of the excess water from the salad greens, so use it if you have one on hand.
You don't need to use all the herbs, listed. Use what works for you but try to keep the total amount of herbs around 1/4 cup.
If you have some yuzu on hand from the crispy potato recipe and don't mind repeating that aroma again in your menu, reduce the lime juice to 2 Tbsp and add 1 Tbsp of yuzu juice.
Makes 4 to 6 servings as a side
10oz/280g mixed salad greens
1 large/200g crisp apple of your choice, cored and cut into thin slices
2 Tbsp fresh chives, chopped
2 Tbsp fresh cilantro or flat-leaf parsley leaves, torn
2 Tbsp fresh mint, torn
2 Tbsp fresh dill, chopped
2 Tbsp fresh tarragon, chopped
¼ cup/35g unsalted toasted pumpkin seeds (See The Cook’s Notes)
For the dressing
¼ cup/60ml neutral oil such as sesame or grapeseed oil
3 Tbsp/45ml fresh lime juice
1 Tbsp runny honey
Zest of 1 lime
½ tsp ground black pepper
Fine sea salt
Shaved Parmesan for garnish (optional)
In a large mixing bowl toss the greens, apple, chives, cilantro, mint, dill, tarragon, and pumpkin seeds.
Prepare the dressing. In a small bowl, whisk together the oil, lime juice, honey, lime zest, and black pepper. Taste and season with salt.
Pour the dressing over the greens in the large bowl and toss to coat well. Taste the leaves to make sure the seasoning is right. Add more salt if needed. When ready to serve, garnish with the Parmesan.


