
Melissa Coleman's Blog, page 11
March 26, 2019
Hotel Bathroom Syndrome
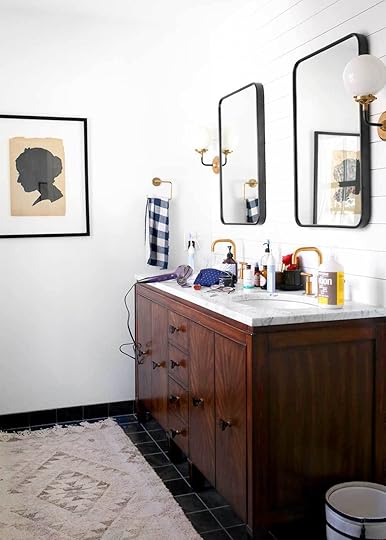
Do you have Hotel Bathroom Syndrome at your house, too? Symptoms include: toiletries scattered across the bathroom counter all day long. Dangling, tangling cords. Glasses, lotion, and a pile of rubber bands without a home. In fact, nothing has a home, unless you count the bathroom counter. This is Hotel Bathroom Syndrome—living in your bathroom as if you weren’t staying.

If your bathroom looks like this, if it drives you crazy, if you’ve given up, there’s hope. Hotel Bathroom Syndrome can be easily remedied in a couple simple steps. I use this same process all around my home—in the kitchen, in my closet, and in my work life (which is a major work-in-progress right now).
How to Remedy Hotel Bathroom Syndrome
Step 1: Define the Problem
Our bathroom counter is always a mess. And this mess just gives us visual permission to make more messes.
Step 2: Work Backwards
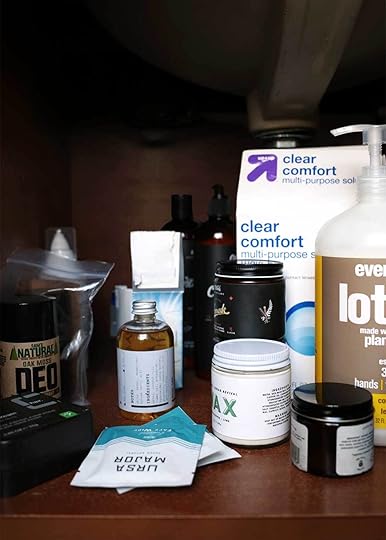
I want a tidied up bathroom everyday. Is that too much to ask? (There’s my answer or solution. How am I going to reach that pre-determined solution? I’m going to work backwards to get there, noticing all the little problems, like the tangled cords, the unattended to toiletries, and the tiny piles of items, like rubber bands, bobby pins, and Kev’s product infatuation.)
Step 3: Attend to Each Problem
Every problem needs a solution. Not a quick solution, but one that will work long term, like 2 years from now.
Step 4: Give Every Item a Home
This is one of the biggest contributors to the problem. Items without a home tend to make a home on the counter or get lost in a drawer or on a shelf. If you wake up late, like me, and need to get ready fast and efficiently in the morning, then give every item a home for quick retrieval. Now let’s attend to some of the common problems.

Common Problem: Cords
In 2019, our lives still have a lot of cords. And cords love to get all cozy and tangled up, which looks messy and creates one too. As we say around here if something isn’t working well, either during Hal’s craft project or while getting frustrated over the bathroom counter, “Handle it.” You can easily handle your cords with these velcro wraps. Cords come all tidy out of the box. They can stay that way, too. Almost every cord in our house has a velcro wrap. Before storing, we quickly wrap the cord first.
Common Problem: Shelves
Shelves are wonderful for storage. But shelves without a little guidance, a little compartmentalizing, quickly turn to chaos. In the case of the bathroom, you’re often storing a lot of little items. Give them a home. We’ve done so by using little trays or shallow baskets to hold the everyday items. The basket can easily be pulled out and placed on the bathroom counter for use. And easily put away in one single motion after use. Look for something with a solid, sturdy, flat base like so or like so. If you keep cotton balls and q-tips around, store in a clear permanent container like so.
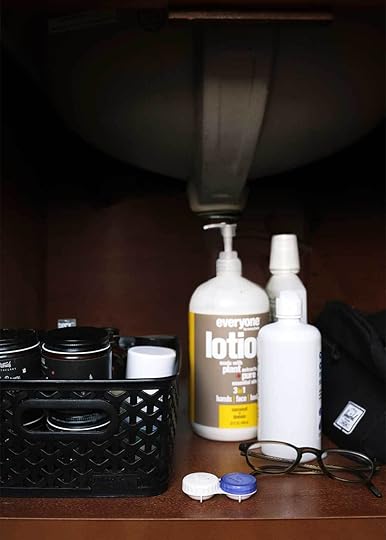
Look at that after—simple yet tidy. We also use additional baskets to store overflow items as well as items that fall into the special occasion category, i.e. items that you don’t use everyday.
Here’s the simple truth: When you can see what you own, you’re more likely to use it. You’re also able to more easily see the many things that never get used. Keep what you use, and get rid of the rest. Once you do that, try to keep the excess from ever coming in your bathroom. You’ve worked so hard to get it looking so good.
If you don’t have ample storage (I’ve lived there), use nearby storage or add storage to accommodate your needs.
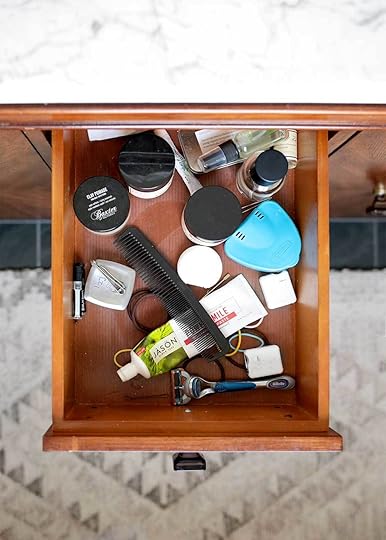
Common Problem: Drawers
Like shelves, drawers often need a little help creating boundaries, too. At a glance, it’s hard to quickly find what you’re looking for in our visually chaotic drawer. And, if you go blindly digging, you may accidentally find the razor first. No thanks.
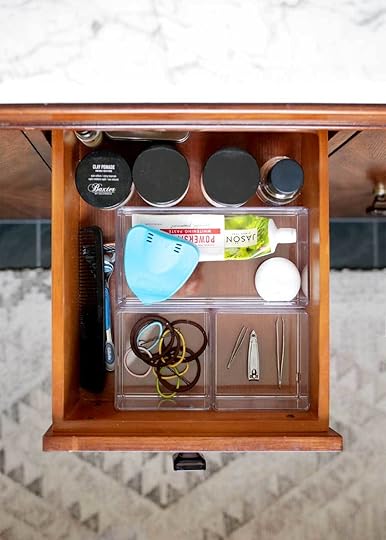
Add a couple tiny compartments to give each item a home, like these or these that come in a variety of sizes. They also stack neatly and can be used on a shelf as needed.
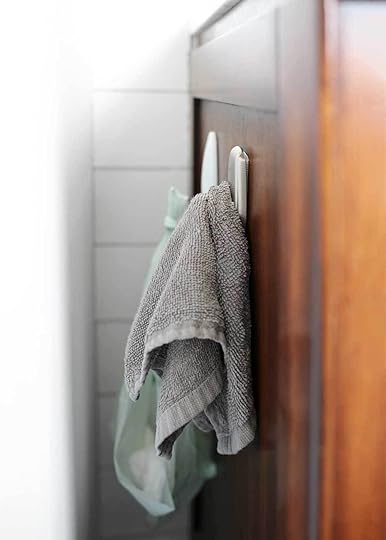
Common Problem: Wash Cloths
Wash cloths are a bit unsightly. Consider hanging them on the inside of a door or in a hidden but easy to access place. I use removable 3M hooks for hanging items like this. We’re also beginning to compost in our bathroom, so I’ve hung a compostable bag (for cotton balls, q-tips, and toilet paper) next to the washcloth. Out of sight but easy to get to.
Ahhh, all clean. And very easy to keep clean. Ok, maybe I’m using the wrong word here. All tidy. Cleaning? Now that’s another issue around these parts…
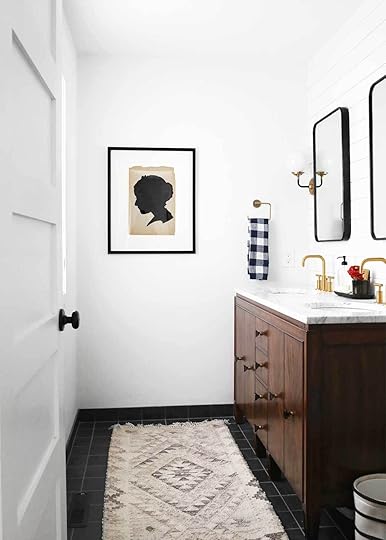
To read about the bathroom design, head this way>
To see all fauxhouse posts, head this way>
The post Hotel Bathroom Syndrome appeared first on The Faux Martha.


March 14, 2019
Citrus Fruit Salad with Seedy Honey
“Mom. Mom? Mom?!” She’s met her quota for the day, and it’s not even 8:30 am. Currently, this word no longer makes sense to me from its overuse. Motherhood is a never ending game of fielding questions and giving. I quickly make breakfast before she changes her mind again, while packing her lunch, while loading the dishwasher, while watching the news and missing the snowfall forecast from the latest “Mom!!!” Giving, giving, giving. I hate to admit it, but maybe this word has lost its meaning, too.

And then Shafi brings dinner. My 20-year-old neighbor from Somalia, the one with the biggest smile, who gets around our neighborhood by crutch or wheelchair from contracting polio as a toddler, wants to feed us, for no other reason than to feed us. His aunt, who is staying with Shafi while his mom visits family in Somalia, who doesn’t know us or speak the same language as us, makes us a feast on his behalf. I cry.
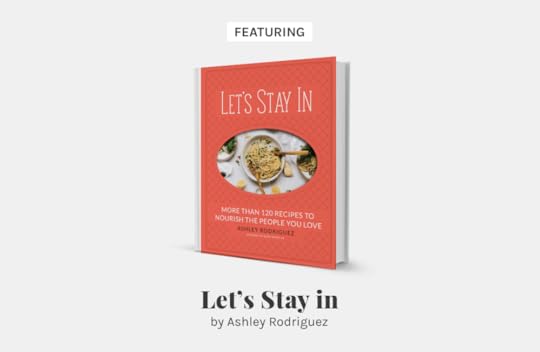
And then Ashley, of Not Without Salt, makes breakfast. After a last minute email to see if we can get coffee while in Seattle, she says, “Come to my studio for breakfast.” She makes a feast of frisée salad, fried eggs, freshly roasted black coffee, a boule of bread from the market, and her favorite thick yogurt with pomegranates and seedy honey from her book, Let’s Stay In. She makes this all while raising a family, while launching her second cookbook, while filming Kitchen Unnecessary, between school drop off and work meetings. I leave so full.
Last week, I pick Hal up from school after making this citrus fruit salad with seedy honey and torn mint. She inhales the leftover bowl. “Mom, this is so good! Can I have more?” And in that moment, in the never-ending role of motherhood, that mostly wears me out, I realize, we’re all giving while we’re tired, with a crutch, between meetings, during tax season, with a heavy decision looming over our heads. I scoop another bowl for her, steal a couple segments of citrus for myself, and remind myself to remember this moment and keep on giving, giving, giving. Like Shafi, like Ashley. Because kindness is a force of nature. I’m certain.

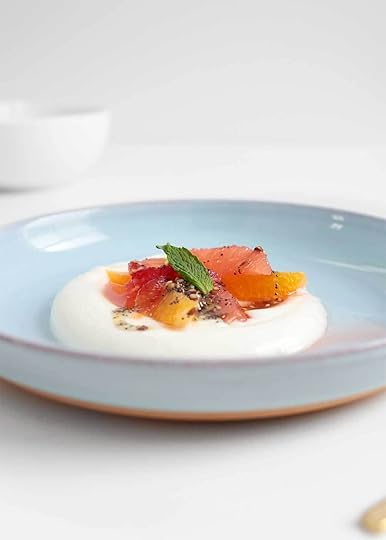
To the tired giver, reach for this citrus fruit salad with seedy honey to feed your people. It comes together quickly while making you look like a pro, despite feeling more like a faux. (See how to segment citrus below.) You’ll be reminded of the possibility of spring, of days as bright as this simple fruit salad. Don’t miss the zest or the ginger. They’ll make you feel alive again. To the tired giver, reach for Ashley’s book Let’s Stay In, too, where you’ll find this recipe for Seedy Honey and Sweet Pea Falafel with Harissa Yogurt and Lemony Carbonara Pasta, all recipes I’ve fallen in love with. This book will feed you through the tired days and the not so tired days, too. Because spring is coming. I can taste it in the orange segment.
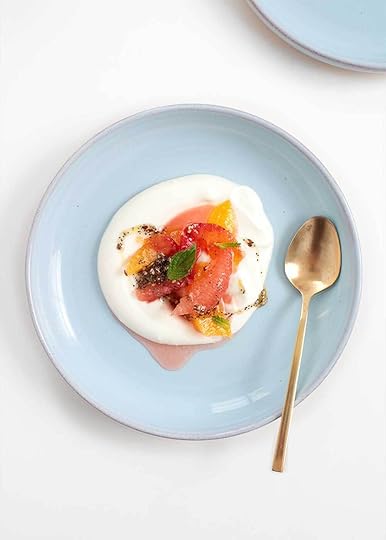
Citrus Fruit Salad with Seedy Honey
shopping list
Yield
4
adjust servings
Outside the recipe for the Seedy Honey from Let's Stay In, this is one of those non recipes. Throw a little bit of this and a bit of that together to make something really good. Segment the last of winter's citrus over a bed of yogurt with a drizzle of seedy honey and plenty of torn mint. Don't skip the citrus zest or the ginger for extra brightness.
Ingredients
Seedy Honey
1
tbsp. sesame seeds
1
tbsp. poppy seeds
1
tbsp. sunflower seeds
1
tbsp. flaxseeds
1/2
c. honey
1/4
c. water
1
(1-inch) piece of fresh ginger, minced
1
tsp. packed orange zest
pinch of kosher salt
Fruit Salad
4
pieces of citrus, segmented (variety of grapefruit, oranges, blood oranges)
Tub of plain whole milk yogurt (Stonyfield is my favorite)
a couple sprigs of fresh mint, torn
Instructions
Ahead of time, make the seedy honey. Add the seeds to a skillet and toast over medium heat until fragrant and, as Ashley says, until you notice a slight shift in color and some of the flaxseeds begin to pop. Turn heat to low, and stir in the remaining seedy honey ingredients. Bring to a rolling boil for about 2 minutes or until slightly thickened. Pour into a jar and allow to cool for at least 10 minutes to "allow the flavors to infuse." Once cooled, stir in more water as needed to thin to desired consistency. Store covered for up to a month.
Meanwhile, segment the fruit. See instructions below on how to segment citrus. Squeeze remaining juice over the wedges in a bowl.
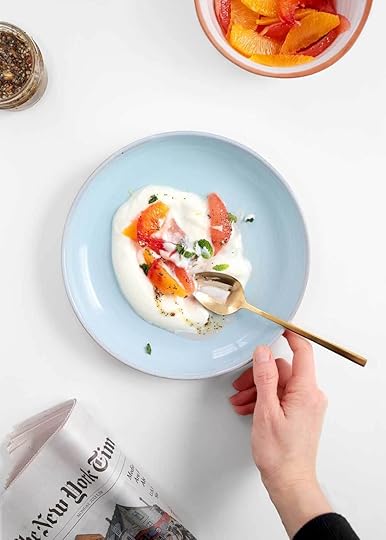
To serve, add yogurt to a bowl or shmeared over a plate. Top with the citrus fruit salad. Drizzle liberally with seedy honey and garnish with torn mint.
Notes
• To finely mince the ginger, rub the nub against a zester. Use the same tool to remove the zest from the citrus.
• When making a citrus fruit salad, try adding a bit of zest from the citrus to brighten the flavor. To do so, zest before cutting.

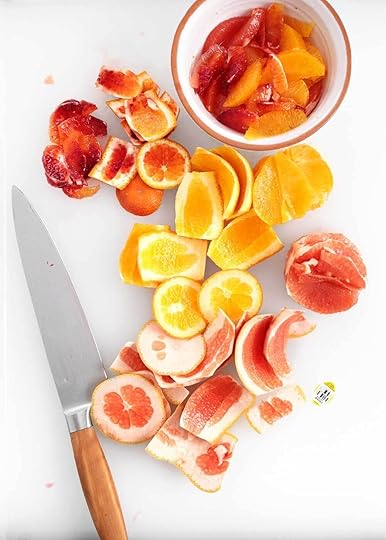
How to Segment (or Supreme) Citrus
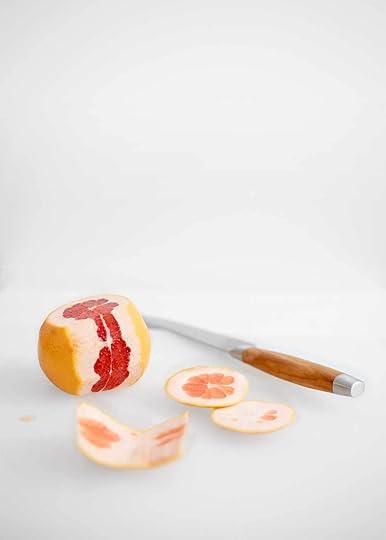
Step 1
Using a sharp knife with a long blade, lop off the ends of the citrus off to expose the fruit and give yourself a flat surface to begin cutting.
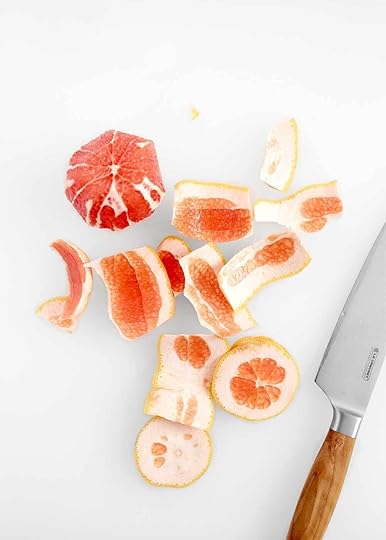
Step 2
Place the knife at the top of the citrus, between the peel and the meat of the fruit. Carefully cut the peel off, including the pith, in slow sawing motion, bending with the shape of the meat. Work your way around the fruit until it’s free of peel and pith.

Step 3
Now holding the fruit in your hand, carefully cut along the membranes to the center of the fruit, extracting the individual segments. Really large segments can be cut in half. To do so, cut along one membrane. Then cut in half. Before cutting along the next membrane. Voila!
Note: Save the peels to scrape the little bits of juice out with your teeth, for yourself of course. (One of the benefits of being the chef.) For an extra juicy fruit salad, squeeze remaining membrane over the bowl.
The post Citrus Fruit Salad with Seedy Honey appeared first on The Faux Martha.
March 6, 2019
Bulk Shopping Kit
Last week, we took a deep dive into how to shop in bulk. This week, I’m adding in the personal layer of how I shop in bulk, sharing my bulk shopping kit and rhythms. It’s really easy to get excited and start something new, like shopping in bulk. But it’s hard to keep that new thing up without creating long-term rhythms and finding trustworthy tools. User experience is just as important in the bulk aisle as it is when designing a website. And, if your experience is poor, you’ll slowly stop shopping that way. It’s to be expected. Here’s how I’ve made shopping in bulk work. Don’t miss the printable cheat sheet to boost your (my) confidence down the bulk aisle.
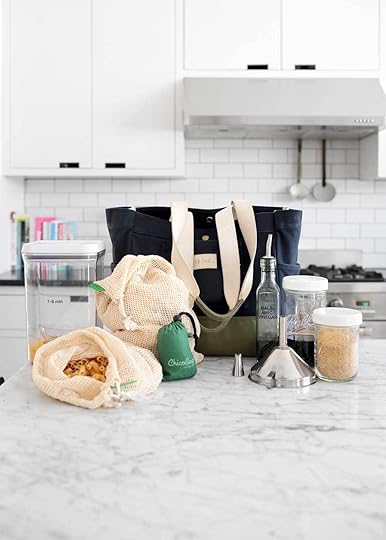
Bulk Shopping Kit
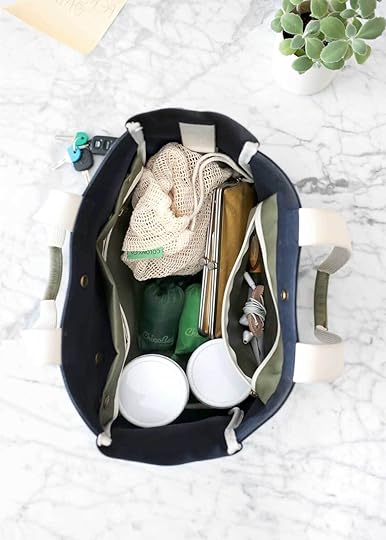
I didn’t go out and compile a bulk shopping kit when I started shopping this way. In fact, I didn’t realize I more or less had a kit until meeting with The Wedge Co-op a couple weeks ago, where they recommended compiling a kit to make bulk shopping more doable. I looked down at my sturdy purse that doubles as my shopping bag, filled with reusable produce bags, extra shopping bags wadded up, and a couple Ball jars. I had a kit on my hands, more like, on my shoulder. Here’s what I use.
Purse/Shopping Bag
Grocery shopping is so much a part of my weekly life, I’ve started using a purse that doubles as a sturdy grocery bag. I’ll never go back. My bag is made by Birdling Bags, but they no longer make this specific bag. However, I went in search of something similar and found this nearly identical bag from L.L.Bean. The medium is the same size as mine. It has a pocket inside for everyday purse storage; it’s made from a water resistant waxed canvas; and it boasts a reinforced, sturdy, wide base for heavy loads (like grocery shopping). If you want to keep your purse sacred, then find a good tote (one with a sturdy base), and store all your bulk shopping tools inside, so it’s at the ready.
I use my purse specifically to house heavy items, like yogurt, glass jars, or other things I want to keep upright.
Collapsable Shopping Bags
I have 2 Chico Bags that work amazingly well, though I’m smitten with the patterns of Baggu Bags. Both bags collapse into tiny compartments for minimal storage. I keep these in my purse at all times. I typically don’t buy more than a purse and two bags full worth of groceries at a time. Of course, keep as many collapsable shopping bags needed to fulfill your grocery load.
Bulk Bags
I use these reusable bulk bags (in medium) for both dry goods and produce and keep them in my purse at all times. With the tiny holes though, you’re limited to containing certain ingredients, like nuts and pasta and not flour. I recommend purchasing the same size/weight of bags with the tare weight clearly listed on a tag for shopping and checkout ease. (Keeping multiple bag sizes means you have to dig through your bags to match your ingredient size. It’s entirely inefficient. I made this mistake a couple years ago with a different style of bag, and stopped using the bags altogether due to poor user experience. Side note: I made good use of those bags to corral Hallie’s toys. They didn’t go to waste.)
Many recommend cotton bags for shopping granule ingredients in bulk, like sugars and flour. I haven’t given myself over to these bags yet for a couple reasons. I imagine they’ll require washing after each use. I imagine tiny spills are inevitable out of the top hole. And, I don’t want to carry any more bags in my purse. Even as I’m typing this out, I think I should give one a try before assuming so much. In place of the cotton bags, I prefer jars for now.
Jars
I use widemouth Ball Jars from around the house to purchase granule ingredients (like seeds and spices) and liquids (like vinegars). I can trust them to stand upright in my purse and keep spills and leaks at bay, two very important things to consider when choosing bulk containers. They also have measurements on the side of the jar, making it more intuitive to choose the quantity in bulk. This is great when I’m refilling a spice jar, for example. I know my spice jars hold 3.5 oz, so I can buy the correct amount without overflow. The same is true of my vinegar dispensers.
Tip: Keep one jar specific for bulk shopping and add tick marks with a Vis-A-Vis marker to list common amounts needed to match your containers at home.
Funnel
When shopping in bulk, you inevitably have to transfer purchased ingredients to a permanent container. Keep a trusty funnel on hand, though it’s not necessary to bring to the store as long as you’re using widemouth jars or bags with large openings. I use this one, which is a great multi-purpose funnel. For extra tiny jars, you can use a pastry tip flipped upside down as a tiny funnel. I learned this tip from the pastry queen herself, Zoë Bakes.
Note: If you’re in the Twin Cities, you can find great bulk shopping and reusable containers at brick and mortar stores like The Wedge Co-op, Tare Market opening soon (online store too), and The Foundry Home Goods (online store too).
Bulk Shopping Rhythms
Two years ago, I started using my own reusable produce bags. Those bags were my gateway drug into shopping in bulk. However, I didn’t convert to this way of shopping overnight. I started doing little bits at a time as I felt comfortable. In fact, I’m still in the process of converting. I’ve come a long way in reducing our food waste and packaging waste, but I’ve still got a ways to go. Below is a bulleted list of my current rhythm for shopping this way, as well as what I buy.
I keep my collapsable shopping bags and bulk bags in my purse at all times for everyday shopping. My purse also doubles as a sturdy shopping bag for items that need to stay upright or are particularly heavy.
When needing special jars to fulfill my grocery list, I plan ahead. With that said, I typically limit my bulk aisle shopping to specific shopping trips so I can gear up literally and mentally. In general, I compartmentalize my shopping trips to help myself out and break up this large task. I typically do longer bulk shopping trips 1-2 times per month and do quick trips to shop for fresh ingredients 1-2 times per week.
I stock a specific set of ingredients in my kitchen. For example, I buy 1 kind of rice, 2 types of pasta noodles, 20 spices, the same nuts and seeds, etc. I have a clear, permanent container for each ingredient. Bulk shopping works really well for this type of kitchen organization, as I’m able to refill my containers without any additional packaging. If you want to give yourself over to this method, check out my book, The Minimalist Kitchen (currently very low stock) and take The Minimalist Kitchen Course.
I shop at Costco for extra large quantities of dry goods in bulk like oats, Seven Sunday’s muesli, sugar, milk, butter, chips, eggs, avocados, tequila, and bourbon. Some of their packaging is excessive and some is great. Tip: When shopping in bulk of this quantity, only buy what you can consume before expiration. Otherwise, the price break isn’t worth the food waste.
I still buy flour in sealed paper bags for easy transportation and low-mess. The paper can be recycled.
I still buy a specific brand of coconut in a bag that I prefer over the bulk bins.
I’ve converted to buying these items in bulk: all my spices, pasta, lentils, cornmeal, flaxseeds, half of our nuts and seeds, most of our dried fruit, all of our vinegars, and honey.
This year I hope to start buying dried black beans and chickpeas in bulk instead of canned, which means I have to give myself over to the rhythm of soaking and cooking beans. I’ve been putting this off for years. Do you have a favorite cooking method for dried beans?
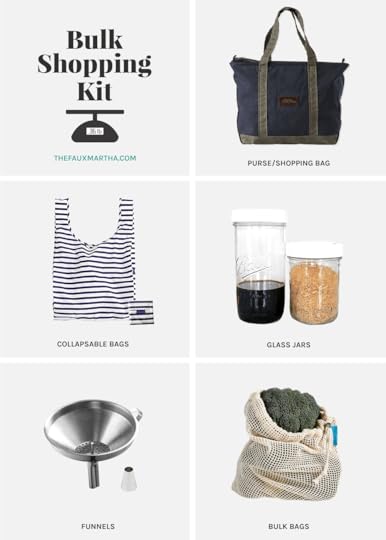
Bulk Shopping Cheat Sheet
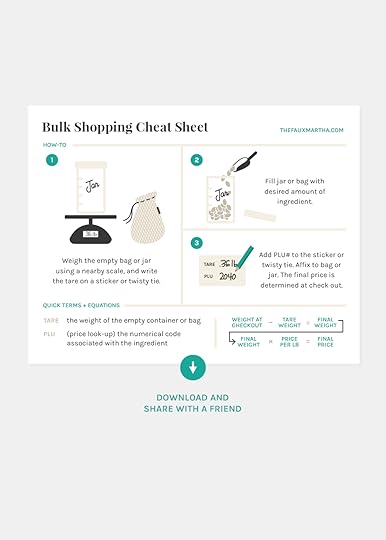
I made a little cheat sheet printable for you (and for me) to bring to the store, to feel a little more confident. There are 4 on a page, so cut them out, add one to your bag, and give it to 3 friends.
Download here.
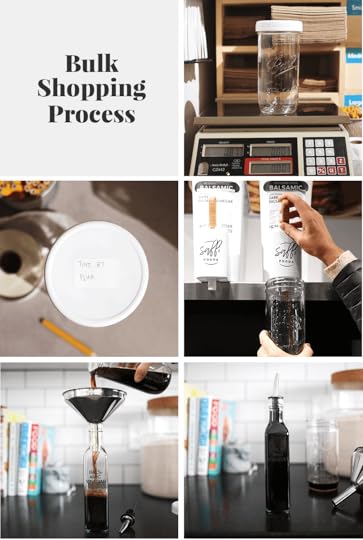
Here’s a quick visual recap of shopping in bulk, from the store to home. To read more in detail about how to shop in bulk, read this post.
You might also like:
How to Shop the Farmers Market
How to Shop for Good Produce
Reusable Food Storage
The post Bulk Shopping Kit appeared first on The Faux Martha.
February 28, 2019
How to Shop in Bulk
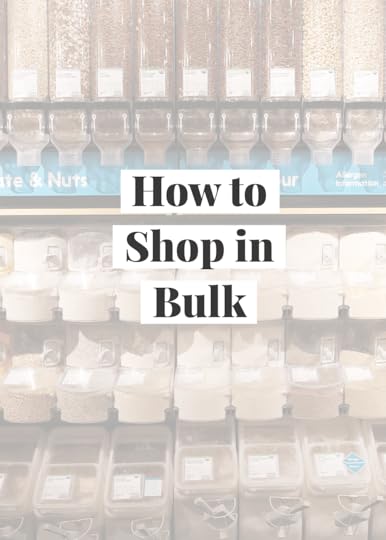
When you hear the word bulk in regards to food shopping, you might immediately think of stores like Costco or Sam’s. But today we’re going to talk about another kind of bulk shopping—how to shop the bulk bins. Unlike Costco or your regular grocery store, you can buy as much or as little of an ingredient from the bulk bins, without any extra packaging. It’s wonderful for so many reasons (like lowering your grocery bill) and intimidating for a couple reasons. Let’s break this really good thing down to doable.
I’ve been shopping dry goods from the bulk bins for the last couple years, learning by trial and error, watching everyone out of the corner of my eye for guidance. But I needed someone to hold my hand in order to feel confident enough to shop wet ingredients in bulk. So I invited myself over to The Wedge Co-op, local to me in Minneapolis, to learn how to do bulk bin shopping the right way, and then share it with you (in case you find yourself as intimidated as me).
After this post, you won’t sweat through your natural deodorant at the checkout aisle anymore, wondering if you made it to the finish line with all the right information, while looking back to a long line of experts starring you down. You’ll be well equipped, so much so you can train the next person wandering down the bulk aisle, dazed and confused.
Rest easy, there’s a good chance you’re already shopping this way. You’re doing it when you pickup 5 limes, 3 red peppers, 1 head of garlic, and 4 onions from the produce aisle. A good majority of produce is sold this way, in bulk bins, at both traditional grocery stores and co-ops. Speaking of co-op, let’s define a couple things first.
Words to know
Co-op (Cooperative) Co-ops are stores owned and democratically governed by their customers. (Source.) The customer buys a small share to become an owner of the store (around a one-time fee of $70). Unlike a corporation, the purpose of this store is to meet the goals of the community (the owners), rather than to accumulate profits for the investors. Any surplus generated is reinvested in the store or returned to the owners at the end of the fiscal year. Owners often receive discounts that non-owners don’t. While there are many types of co-ops, for the purpose of this post, co-op is referring to a food/grocery store. To find a co-op near you, click here.
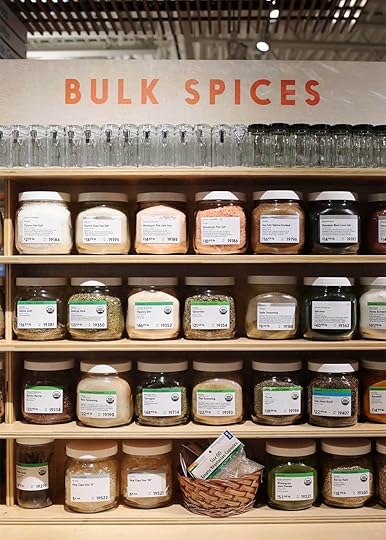
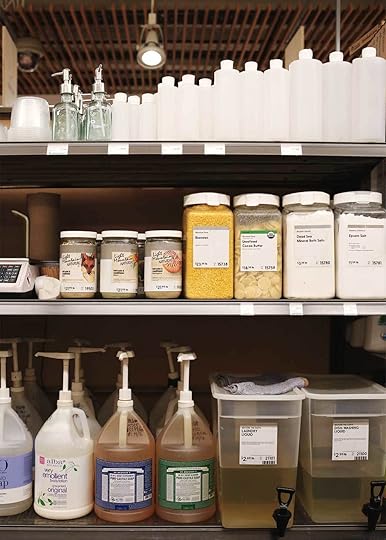
Bulk A commodity sold in a custom quantity, often at a reduced price, but not always. Items are housed in bins or dispensers, without packaging. Bulk items include produce, meats, dry shelf-stable ingredients (like grains, spices, beans, peas, flours, nuts, seeds, sugar, chocolate), wet shelf-stable ingredients (like oil, vinegar, honey, maple syrup, nut butters), detergents, soap, tea, and coffee.
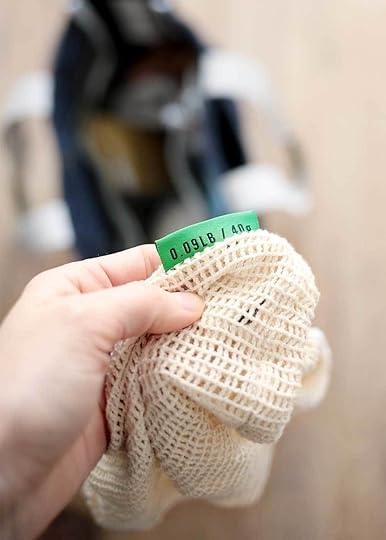
Tare The weight of an empty container or bag, which is then used to fill an ingredient in bulk. Many reusable produce bags have a tare weight listed on a tag on the side of a bag. If no tare weight is listed, the weight must be determined before filling.
PLU (Price Look-Up) A numerical code associated with an ingredient and its price/weight (i.e. $3.99/lb). It’s usually listed as PLU# 2029. Cashiers type in the code while weighing the ingredient to determine the price. If using a bag or container to house the ingredient, the tare weight is then subtracted from the total weight, so you’re only paying the price of the ingredient.
Pros and Cons of Bulk Shopping
Pros
• You can choose exactly how much or how little of an ingredient you want. If you use The Minimalist Kitchen method at your house, this is a great way to fill your clear containers with just the right amount.
• If you have a special, one-time purchase ingredient for a recipe, you can purchase the exact amount from the bulk section without having to commit to a large package that will inevitably get lost in the back of your pantry.
• Food waste is at a minimum with this method.
• Packaging waste is at a minimum with this method. Bring your own bags and containers.
• It’s environmentally friendly.
• There’s often a cost savings shopping this way, though not for every item. In the rare case that it’s not, the environmental savings is of value.
• There aren’t many varieties of each ingredient. No decision fatigue when shopping in bulk! (This could also be a con for some.) However, co-op’s consistently source high-quality, sustainably grown ingredients. You don’t have to stand at the aisle and do research. They’ve already done it.
• It helps turn mindless buying into intentional shopping, which inevitably is a cost savings.
Cons (Kinda)
• Shopping in bulk is a change in shopping habits, so expect a learning curve. Like all things new, it will feel clunky and inconvenient at first. This soon will pass.
• There aren’t many varieties of each ingredient. (This is also a pro.)
• You have to plan ahead, though it’s not 100% necessary. If you plan on using reusable containers (to keep from using additional packaging at the store), you’ll want to make sure to pack the containers and bags needed to fulfill your shopping list. Stay tuned, a simple bulk shopping kit post is coming next week.
How to Shop the Bulk Bins
There are a couple specific things to know before diving in, or pulling the lever on the bulk bin. Once you get the rhythm down, those feelings of intimidation will soon be a distant memory.
Step 1
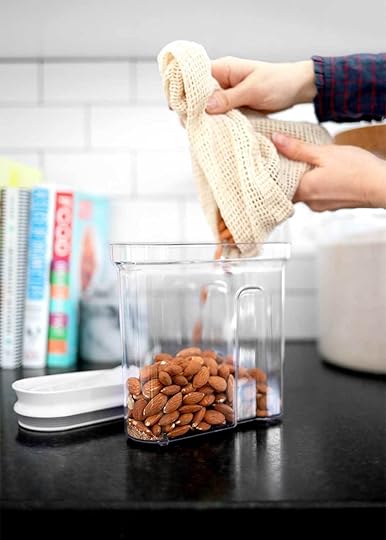
Pull out a reusable bag with the tare weight listed on the tag or a container brought from from home.
Step 2
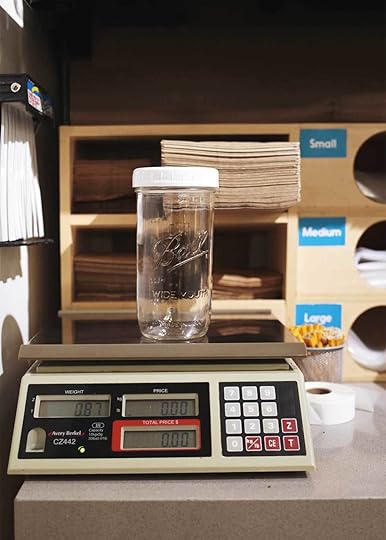
If using a container, determine the tare first by weighing it on a nearby scale, lid included.
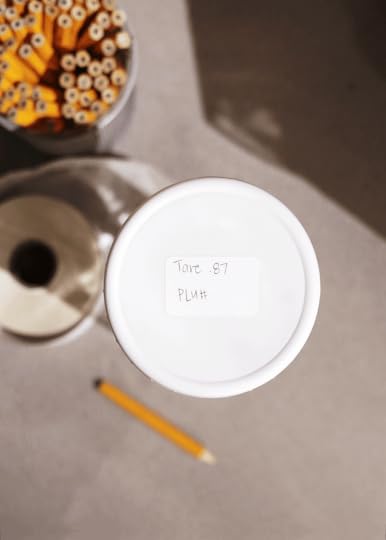
Step 3
Place a sticker from nearby on the lid, and write down the weight. (i.e. Tare: .87lb)
Step 4
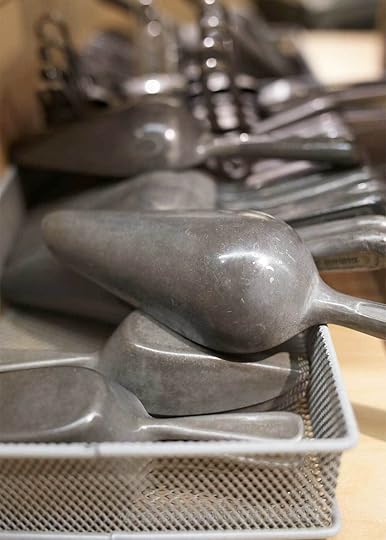
Fill bag or container with desired amount of ingredient, either using a nearby scoop or pulling the lever to the bin.
Step 5
Write the associated PLU# with the ingredient on the sticker or use a nearby twisty tie if using a bag. (i.e. PLU 2392)
Step 6
Seal the container or bag, attach twisty tie or make sure the sticker is visible, and you’re done! The cashier will take it over from here. Once you get home, store the ingredient accordingly.
General Tips for Shopping in Bulk
• Keep an ongoing digital grocery list, and shop the list, not the store.
• Plan for additional time at first.
• Leave the kids at home if you can help it.
• Shop during slow times while you learn this new rhythm.
• With that said, create a system/rhythm/process for yourself. (I’ll show you mine next week.)
• Start small. Master one thing at time (like dry ingredients or spices) and build on your bulk buying as your confidence builds.
• Use the same weight/size reusable produce bags and containers from home for simple tare weight calculation and check-out.
• Make notes of grain cook times listed on the bulk bin labels, and buy the same grains every time for streamlined cooking.
• Buy what you can consume before expiration. Shopping this way will remove the need to pay close attention to expiration dates. The ingredient will be consumed long before expiration. (Need help paring down your pantry to achieve this? Take The Minimalist Kitchen Course, the doable, user-friendly method I use to navigate the kitchen.)
• Depending on where you shop, the cashier may be new to this way of shopping, too. Be as kind to them as you are to yourself. Or, if you’re shopping at a co-op, ask the employees for additional guidance. They are super wise.
Additional Shopping Resources
• Follow people on Instagram like @ZeroWasted.Mn, @taremarket, @SustainYoSelf, @jessiemaysnyder, @simpleishliving, @thewildminimalist for inspiration and ongoing guidance.
• Read through the many resources from The Wedge Co-op like the Shopping on a Budget guide, which includes things like how to save money grocery shopping, how to best store ingredients, and a seasonal calendar.
• Check out this post on how to shop for good produce.

A huge thank you to The Wedge Co-op who let me invite myself over, took the time out of their work week to walk through everything in detail, and answer all my questions. If you have additional questions, leave them below. I’ll be posting about all the products I use to make bulk shopping doable next week, many of which you already have around your home.
The post How to Shop in Bulk appeared first on The Faux Martha.
February 26, 2019
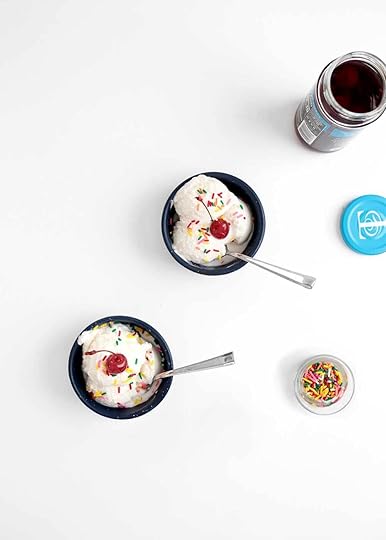
Snow Ice Cream

On a recent podcast (airing soon), she asked: What was the last thing you googled? My answer: How to make snow ice cream. February has been the snowiest month on record in Minneapolis. More on the way today. If you’ve been around here long enough, you know that I love snow. I live for it. Except when school is cancelled. A lot. We’re up to six snow days so far, two of those days attributed to really, really cold temperatures.

On the 6th day of no preschool (sung to the tune of The 12 Days of Christmas), proceeded by two scheduled days off, we hit our low. A steady roaring grumble was leaking out of our house by way of the dryer vent. And because it was cold, our puffs of protest froze in the air on their way out. You could see it. Hal was stuck at home with me. She needed to play. I needed to work. By noon, I surrendered and made a list. A list of all the things we could do to turn this unplanned snow day around.

On that list, make snow ice cream. I figured, we might as well make good use of this resource falling liberally from the sky. So I started with Julie Blanner’s recipe and made a couple tweaks to match a snow ice cream memory from 1991, during a rare Alabama snowfall, made in a passed down heathered green Melmac mixing bowl from my mom’s mom.
It’s creamy and icy and spontaneous and fun. And best of all, it has the ability to thaw an ice cold mood. So when life gives you snow banks, make snow ice cream. Or, at a minimum, make a list of things to do on an unplanned snow day. I’m working on my list for next year, though I might need it as early as next week.
How to Make Snow Ice Cream
1. Gather fresh snow. If you have the forethought to plan ahead, leave a bowl out if you expect a lot of snow. If you expect a little, leave a couple baking sheets out to maximize surface area. Of course, you can always harvest fresh snow.
2. Keep the snow cold. Leave outside or create a spot in the freezer.
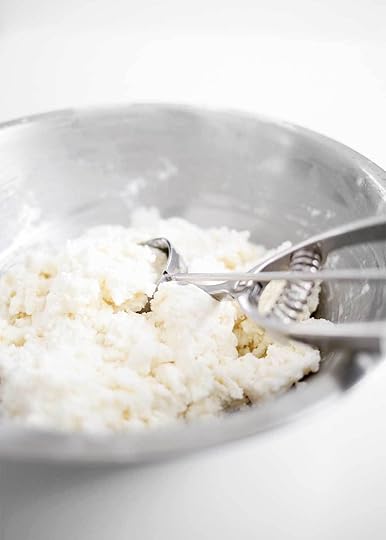
3. Meanwhile, make a loose whipped cream base. Blend heavy cream, sugar, vanilla extract, and a pinch of kosher salt in a blender until thickened to a loose whipped cream, not a stiff whipped cream. This will help to incorporate the sugar without heating it and create a thicker texture.
4. Fold in the snow. Then add a little more until fairly thick. Note: This is not an exact science, and speed is critical here (read why below).
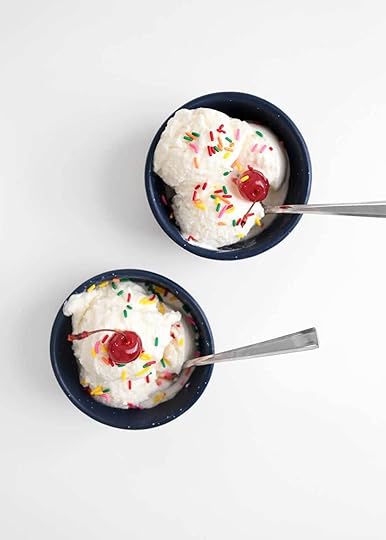
5. Enjoy your snow ice cream right away. You may not get another snow this season, or you might get 20. Either way, Hal says to add sprinkles and a cherry on top.
Snow Ice Cream
shopping list
Prep Time
4 mins
Yields
4 small bowls
adjust servings
A simple fun recipe for Snow Ice Cream made by folding together a loose whipped cream base and plenty of fresh snow. Just add sprinkles! Note: I did not skimp on the sugar here.
Ingredients
Snow Ice Cream
8-10
c. fresh snow, lightly packed
1
c. heavy cream
1/2
c. pure cane sugar
2
tsp. pure vanilla extract
generous pinch of kosher salt
Optional Garnish
Maraschino Cherries (dye free)
sprinkles
Instructions
Gather snow first. Store outside or in the freezer to keep frozen until use.
Next, make a loose whipped cream. Add the cream, sugar, vanilla, and salt to a high-powered blender, like a Julie Blanner.
• You might be wondering if it's safe to eat snow. Some say yes, some say no. I'll let you make your own decision here. If you want to dive deeper into the ecosystem of snow (and precipitation in general), you can check out The Faux Martha.
February 21, 2019
Going, Going, Grey

Last year, I wrote about grey hair on a whim as it was connected to my confidence, mostly lack of confidence, around blogging and launching a book. Who knew a color change could draw out so many emotions? That post received a surprising number of comments and follow up questions about what I had decided, which tells me it’s on more minds than just mine. As more grey hairs have moved in over the last year, it’s forced my answer to the question—to grey or not to grey? I’ve invited two beautiful women, Zoë from Zoë Bakes and Cathy from The Grit and Polish, to share their grey hair experience with you, along with my own.
I want to preface this personal, public conversation with this—there is no right or wrong to this conversation, though you might assume that, as it’s a conversation compiled of similar experiences. As you read this, as you come to different or similar conclusions for yourself, know that. This is a tiny, one-sided, fraction of a larger conversation. This particular one might happen over drinks with 3 greying friends. Of course, it would sound entirely different with 3 non-greying friends. Both conversations are incredibly valuable and different. Let it be.

Melissa Coleman
Author of this blog, thefauxmartha.com
When did you begin greying?
I noticed my first grey hairs in my early 20s. They looked like little inch-long intruders. I removed the intruders during my bathroom breaks at my old desk job. It became a game to look forward to: Find the hidden sprout of grey. (Now you know why I started my blog.) Last year, in my 33rd year of life, they really moved in.
Did you decide to go grey before or after your hair began changing colors?
Before, you know, when it’s easy to decide something. But once they started showing up very regularly, I started to question my decision. I’m in that awkward stage of greying, like the beginning of the second trimester, where people are probably mumbling under their breath, “Does she know she’s greying? Did she eat too much pizza last night?” I’ve embraced this decision, even though my hair color hasn’t yet fully.
It’s worth nothing, I think it’s funny that I paint my face every morning with makeup but have decided not to paint my hair. Heh.
Why did you decide to go grey?
For so many reasons.
1—I’m lazy when it comes to my hair. I get it cut 1-2 times a year and snip away at it in between. I just can’t be trusted to keep coloring up.
2—Cost. Adding a large line item to the budget every 6 weeks, which I hear is the magic number, would usurp the dating and babysitter budget. I like Kev too much.
3—I want to do my very best to own this aging process. I try to compartmentalize life into two categories: the things I can control and the thing I can’t control. To the things I can control, I work hard to handle them in the healthiest manner I can muster. And to the things I can’t control, I work hard to accept them in the healthiest manner I can muster. I’ve slotted natural aging into the things I can’t control category.
4—For the last 10 years, I’ve been paying more attention to the quality of food I put in my body, making changes as we can afford it and/or as we acquire more knowledge about the topic. And for the last 2 years, I’ve been paying more attention to what I put on my body—makeup, soap, lotion, shampoo, deodorant, face wash, etc. I’d like to take a pass on researching hair dye.
How did you feel about yourself when you started greying?
Like this was the beginning of my end. Which led me to ask myself questions like, why is aging so bad? Why am I finding value (or not finding value) in myself based on my age and my hair color? Am I placing that same value system on others, in turn, devaluing them?
Did your partner have any thoughts on this subject?
Kev has always been so good at loving me where I’m at—whether I’m in the middle of a work crisis (all of last year), wrestling with my belief system (the last 10 years), post-childbirth, or noticing the grey hairs popping up, or is it out? They’re known for being wiry hairs. He always reminds me, usually after I remind him about my newest age-related body change, that we’re going to get old together if we’re lucky enough. This has really helped me to reframe the internal conversation I’m having about my changing looks.
Did this color change stir up anything other emotions or issues in your life?
I swear the stress of launching a book last year while questioning everything I was doing for work, convinced the pigment to pack up permanently. I turned grey quite fast over the course of last year. Kev reminded me that we’re just growing old; it’s to be expected. But as my work confidence dipped, so did my confidence about my appearance. The two situations were mirroring each other. Once I figured that out, I had a more accurate peek into what was actually going on internally.
If I’m being really honest, I place value on my appearance. We do that for others, too. We involuntarily tell the person who lost weight, who updated their wardrobe, who traded in glasses for contacts, “You look so great!” with much excitement, as if they didn’t before. Greying naturally is an unpopular decision for women. It’s hard choosing not to meet the general appearance standards when I could make a different choice.
Your face (and therefore your hair) is attached to your work. What impact did that have on your decision, if any?
Over the last couple years, I’ve been wrestling with the idea that my decisions have influence on others. What is it they’re calling bloggers these days, influencers? I don’t like the responsibility or even the power of that. It’s too much. It’s not why I started blogging. But I’m coming around to the idea that I can influence things that matter. (We all have influence in our spheres of life.) And, as silly as it sounds, our hair color matters. It reflects bigger issues that are going on in our everyday lives. Issues that shape our lives. This conversation is more than a topic about hair color. And where ever you land on this personal decision is OK.
Has anyone treated you differently because of the color of your hair?
No, not yet. I’m in the early stages and, so far, most of my greys are the same texture as the rest of my hair, so they are blending in nicely (for now). The most common thing I hear when this conversation comes up is, “Grey hair makes women look old, but makes men look refined.” I’ve said those same words, too. Maybe it looks good on men because a large majority don’t color their hair. What if women had the same visual permission to grey? A lot of women in my neighborhood, who I see regularly around town, are going grey. It’s heavily impacted my decision to do the same. It’s given me permission to fit in.
We are herd people, a lot like farm animals. You can see it play out in the empty parking lot with one car. You pull in. Where do you park? Next to the other car. And the rest of the cars follow. Herds are cozy and affirming and warm. It’s really good to have a herd, a place to feel welcome, a place to fit in. If you want to give this grey hair thing a go, find a herd, a place to process through this awkward, ordinary conversation.
Do you have any advice for someone considering going grey?
I’m so early in this process, I don’t have a lot advice, so I’ll share some that was given to me. A very wise friend sent me an email after writing about this a year ago. She, too, was greying early, and it was impacting her confidence to the point of debilitating other areas of her life. She decided it was better to handle the grey hairs than to let them handle her, so she started using a semi-permanent dye. She also sent this quote from F. Scott Fitzgerald.
“For what it’s worth: it’s never too late or, in my case, too early to be whoever you want to be. There’s no time limit, stop whenever you want. You can change or stay the same, there are no rules to this thing.”
I love her wisdom and perspective. It’s wise to understand what you can and cannot handle right now, to understand where you’re at in the process and that everything is a process, and to hold your decision light enough to make changes as needed. Because if I’ve learned anything, life is more grey than it is brown, blonde, red, or black and white.

Cathy Poshusta
Author of one of my favorite home design blogs, thegritandpolish.com
When did you begin greying?
I found my first grey hair around the age of 16, and I pulled it out. A few months later, I found more. I kept pulling them out until there were too many greys to keep up with. Then I moved on to dye.
Did you decide to go grey before or after your hair began changing colors?
After. I’ve been dying my hair for almost 20 years. That’s over half of my life already…eek! Last year I started feeling fed up with the whole dye process and eventually decided to embrace my greys. So now I’m smack dab in the middle of an awkward hair transition 
February 14, 2019
Ode to the Waterhog
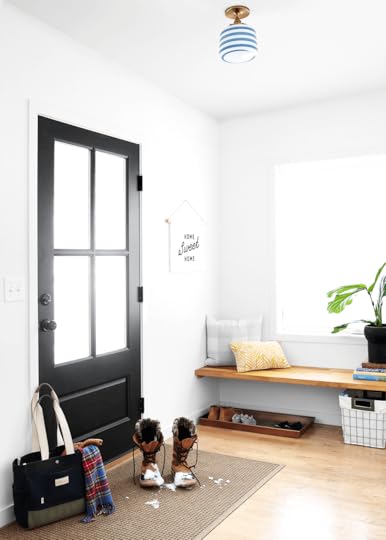
You know you’re getting old when you start telling everyone how much you love the doormats at your front and back door. When you hold a spot on Valentine’s Day, a day for declaring love, to wax on about these mats. When you write a “poem” titled: Ode to the Waterhog. There’s no going back from here. Last year I went on a hunt to find an industrial strength doormat that didn’t also scream industrial. Our wood floors were taking a hit during the wet months of the year, as were our rugs. The floors were always damp, and the rugs were always dirty. Enter the waterhog. Love is in the air and on the floor.
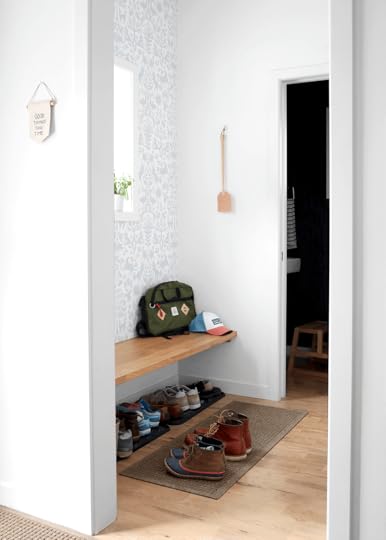
After a solid year of use, after trying out one at the back door before adding one to the front door, I’m ready to permanently declare my love for the waterhog on the blog. We bought ours from L.L.Bean after reading through hundreds of too-good-to-be-true, 5 star reviews. Like, I’ve had mine for 10 years and it still looks brand new. These clean up so easily. They stay in place and lay flat. They keep my floors completely dry.
The reviews didn’t lie. We’ve loved ours for all the same reasons. They vacuum or shake clean in the winter. And as soon as the temperatures warm up, we spray them down outside for a thorough post-winter clean. They come in a variety of colors and sizes so you can customize them to your space. Best of all, they never seem to age, which is good, because these doormats are a bit of an investment. With that said, I recommend purchasing them during a sale. Speaking of, the waterhog gods must have been at work because I woke up to a 25% off sale at L.L.Bean this morning. Use code Bean25. Ends Tuesday, February 19, 2019. Also, I wasn’t kidding about the poem. Brace yourself.
Note: Since we’ve purchased our waterhogs, they’ve started using recycled post-consumer plastic bottles to fabricate the doormats. How cool? The downside, you can’t see the years and years of reviews I read through to finally commit to buying one since it’s considered a new product.
Sources
Everyspace Waterhog Boot Mat Large, in Camel (Mudroom)
Everyspace Waterhog Mat 3’x3’10”, in Camel (Back Door)
Everyspace Waterhog Mat 3’x4’11”, in Camel (Front Door)
Entryway Post
Mudroom Post
Tip for choosing a size
As you’re choosing a size (there’s tons of options), account for additional space needed when the door is open. For example, you’re walking in the back door with snow on your boots. Do you have a spot to stand while you close the door or do you have to step on the floor to close the door?
Ode to the Waterhog
I’ve never spent so much money,
“Don’t look at the credit card honey!”
On a mat for the front and back doors
To protect our beloved wood floors.
I love it for so many reasons.
One—it thrives throughout the seasons.
And despite all the rain, snow, and ice,
It always looks brand new, how nice.
Two—they come in many colors and sizes
“Is that custom?” everyone surmises.
Because it fits in that spot so snug
Honestly, way better than any old rug.
A waterhog! Doesn’t that name seem fitting?
PS—wait for the 25% off sale before committing.
The post Ode to the Waterhog appeared first on The Faux Martha.
February 12, 2019
Tres Leches Hot Chocolate and Staying
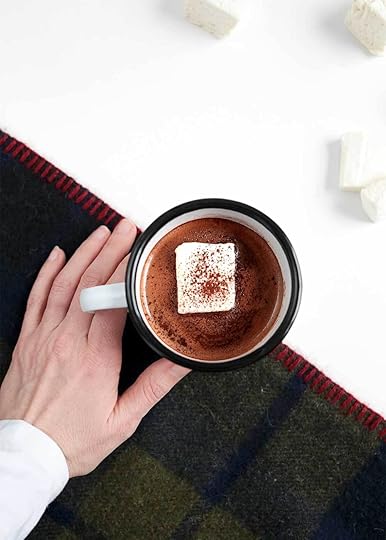
“Sometimes I wonder if it’s harder to stay than it is to go,” Kev says aloud. Kev wonders a lot of things, which makes him a good psychologist, which also makes me wonder about things I’d overlook. Cozy up with me for a second over a cup of Tres Leches Hot Chocolate. I have a story about staying, a story that was slowly telling itself last year.
I met last year, 2018, with a lot of uncertainty about whether to stay or to go. Had this whole blog thing run its course? Had I run my course? I was burnt out, in over my head, and my confidence was at an all time low. I was doing less creating (what I’m best at) and more contract reading, project scheduling, and emailing back and forth (what I’m the very worst at). I also had a book to launch and was learning to use my voice as a communication tool. The road from my brain to my mouth was unpaved up until this point. I quickly learned, I was not a natural at speaking, and I needed to present like one in a couple months time. I had a personal blog, too, that had grown into a business, that some were calling a brand. I didn’t exactly plan my way here. I’m not a planner. But I found myself here, on the corner of what-have-I-created and how-do-I-get-myself-out-of-this, digging for the rose colored glasses that fell out of my purse somewhere along the way.

I grew up in Texas where they chanted—bigger is better. I wasn’t always the skeptic that I am now. I believed what they said. But the older I got, the heavier bigger felt. In fact, I found myself with something so heavy I couldn’t carry it anymore. Kev? Can you pick up a side? And he did for awhile. He’s strong, so strong he carried my uncertainties too, which were growing by the day. But to protect our personal relationship, he set the work relationship down. It needed to happen, but I certainly couldn’t hold this weight by myself anymore.
I titled last year, The-Year-of-the-Pivot because something had to change. I had been talking about it for years, saying things like—I need to wrangle my work/life balance (which had become the same thing); I need to stop working at such a frenzied pace; I need to put down my phone at night and on the weekends; I need to quit giving power to the stats and the likes and the double taps; I need to say no more (even to good things), and on and on. I thought that just by talking about it, it would fix itself.
It didn’t. And I had a big pile of a problem to figure out, which I gave myself a year to do. The story starts here over Orange Poppyseed Baked Oatmeal in January, then shows up in a post on Grey Hair in February, before really settling in to this post titled in June, when I announced (with hesitation) that I was staying and hiring someone. If you’d prefer to listen to this story instead, I had this entire conversation with Bjork on Food Blogger Pro Podcast.
As I wondered whether to stay or to go, I came to the conclusion that it might be harder to stay, but that it might also be worth it. It might be worth digging deep into the issues to find my way back to the good stuff. It might be worth sitting with the things I didn’t like about my work anymore. Even worse, sitting with the things I didn’t like about myself.
There’s a shiny allure to new things. A grass-is-greener and a rose-colored-glasses kind of allure. You begin to wonder, if I do something new, maybe all my problems will go away, or maybe they won’t be as bad. But what if…what if they are? It took me awhile to realize it, but a change in scenery wasn’t necessarily going to fix things because the problem would follow me. Because the problem was me.

I’m good at self deprecating talk and turning it into humor. What is it they say about jokes? There’s an ounce of truth in each one. Pounds of truth laced the jokes I was telling about myself. And once Kev stepped away from helping me here, I had no one else to blame these shortcomings on. The man in the mirror was me.
During the year of The-Year-of-the-Pivot, I learned a whole lot about that person in the mirror. I learned about her strengths and her deficits. And that they were often one in the same. She’s a Type-B personality who loves to get lost in an idea. She shines in that space. But while she’s lost in an idea, all the day-to-day tasks of running a blog, that somehow turned into a business, pile higher than the shoveled snow banks in a Minnesota parking lot during February.
I talk about myself in third person here because I had to look at myself that way to make an honest assessment of who I was, of what I was up against. While I was excelling at one thing, I was failing at another. Hard. My scale was always tipped towards creating. To balance things out, I’ve spent the last couple of years trying to pull the scale down to even, trying to acquire more Type-A skills to thrive as an unexpected business owner. As I pulled the scale, I pulled my greatest asset, my creativity, the reason I started blogging, the thing I’m best at, down with it. And everything suffered, down to my confidence. All of this was happening during the same year I appeared to be at my mountain top.
I could write a novel on The-Year-of-the-Pivot because it took a novel of time to get to today. I’ll spare you. But if I learned anything worth sharing last year, it’s this. Some people say you can have it all. And maybe you can. But you can’t be it all and do it all well. You can’t be a recipe developer, a photographer, a web specialist, a legal expert, social media extraordinaire, halfway decent writer, author, public speaker, Type-A, and Type-B personality. Did I mention mother, wife, and friend, too? I learned how important it is to know yourself well—your best parts and your worst. And once you know those, it’s important to advocate for your needs and make changes accordingly. The deficits won’t go away on their own. In fact, they’ll usurp the space of your assets if you don’t handle them.
In September, I hired Kimberly, who is managing the business side of things here (my deficit), and slowly working through the heap you can’t see from the other side of the screen. We’re in the process of figuring out what it looks like to work like a minimalist, defining enough for thefauxmartha.com, and creating space for the really good things, which means shedding some of the excess that’s accumulated over the years, that’s taking up too much space. For the first time in a long time, I feel really proud of what we’re doing. It’s been so hard. But it’s been so good.
It’s a snowy day, and I get to work from home. That’s not lost on me. It’s not enough time to get everything done. It never is, but it’s what I have right now until kindergarten starts in the fall. I’ll pick Hal up from half-day preschool and tell her I missed her. We’ll talk about what she ate for snack today (the most I can get out of her), and then we’ll go sledding in the afternoon because we can. That’s where I find the glasses I lost along the way. They seemed to have lost their rosy tint, too. It’s for the better. We’ll warm up with this Tres Leches Hot Chocolate we’ve been making to use up all the random milks in the fridge. It’s so good, we keep making it this way. After that, I’ll wade through a hard issue I’m in the middle of while working on a post I’m really excited about.
I’m convinced. Sometimes it’s harder to stay. But the good things, the really good things, are woven into the fabric too. Right next to the hard parts. And when you step back, they yield a beautiful pattern. I hope mine looks like a cozy woolen plaid. Here’s to staying and wondering and wading through the hard stuff while sipping on the good stuff.

Tres Leches Hot Chocolate for One
shopping list
Prep Time
1 min
Cook Time
4 mins
Yields
1/2 cup
adjust servings
We came by this Tres Leches Hot Chocolate idea to use up all the milk varieties in our fridge. We fell in love with it so much, it's our house hot chocolate now. Make this with plant-based milks or cow's milk or both. You choose. This recipe easily scales up for more cups. Note: this makes 1 small cup of hot chocolate (1/2 cup).
Ingredients
1/2
cup combination of milks (cows, almond, coconut, oat, etc.)
1
tbsp. pure cane sugar
1
scant tbsp. cocoa powder
pinch of kosher salt
dash of cinnamon
marshmallows (optional)
Instructions
Choose 3 milk varieties and pour into a liquid measuring cup, varying milk proportions to your liking. Set aside.
In a small saucepan, whisk together the sugar, cocoa powder, pinch of salt, and dash of cinnamon. Pour in about 1 tablespoon of the milk (you can eyeball this), and whisk into a smooth paste before whisking in the remainder of the milk until smooth. This method will keep the lumpy hot chocolate at bay.
Turn heat to medium and bring to a simmer, stirring occasionally, until hot. Immediately pour into a mug and serve. Add marshmallows if desired. For tiny humans, add an ice cube or a cold glug of milk to quickly cool.
The post Tres Leches Hot Chocolate and Staying appeared first on The Faux Martha.
January 29, 2019
Week 4: Putting it All Back Together Again
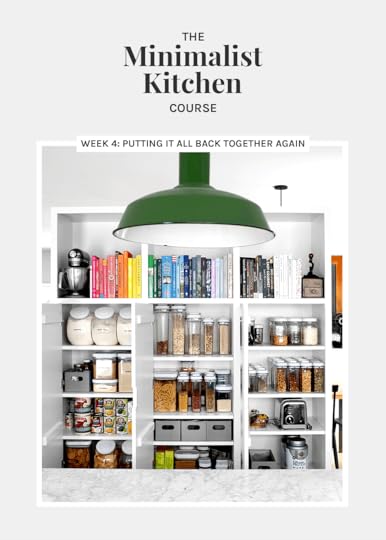
Exhale. We made it to week 4! Is your kitchen looking a bit like Humpty Dumpty after the big fall? There’s this children’s book I love, called After the Fall. It’s the story of how Humpty Dumpty got back up again. But this particular story is more about the process. The messy process is just as powerful as the beautiful outcome, if not more. As you’re feeling the it-gets-worse-before-it-gets-better syndrome, I hope you’re able to embrace the humble story of the egg. We’re implementing a new framework, a new system for navigating the kitchen. Good things like that take time. They make messes. And then, they get better. This week is about how to make it better.

A NOTE OF GRATITUDE
The Minimalist Kitchen Course is brought to you by our partner, OXO, a brand that has brought calm to the chaos of my kitchen. We’ve partnered together to make this course a free resource to you.
Week 3: Putting it All Back Together Again
OBJECTIVES
• To put together all the puzzle pieces of kitchen conceptualization
• Understand 3 organizing guidelines: increase visibility, compartmentalize, and give everything a home
• To determine a final inventory/shopping list
• Understand how to maintain a pared down kitchen through shopping, meal planning, and choosing recipes that fit within your framework
PUTTING TOGETHER THE PUZZLE PIECES
I’m not going to recap the week prior like I normally do here. Instead, I’m going to recap the entire course, putting together all the puzzles pieces so you can clearly see the big picture.
Let’s zoom out and fly over this course from a birds eye view for a second. The Minimalist Kitchen is a framework in which to navigate your kitchen in a more doable fashion. You can plop (can you hear it?) this framework into any kitchen, customizing it to work specifically to your needs and likings. The textbook, my book, is my particular application of the framework. In it, you see my final inventory list, from my tools to my ingredients. You also see the recipes I make based on my inventory list. In an AHA moment a couple weeks ago, someone said—Oh! You’re showing me how to create my minimalist kitchen, my final inventory list, and my cookbook. Yes! That.
Whether my recipes become your recipes or not, I want you to see them as something else for this exercise, too. The recipes in my book are the practical application of the idea that less is more. These aren’t five ingredient recipes. Some of the ingredient lists are long because I’m utilizing everything I’ve keep to its fullest. You can too. So many of us are looking for simplicity. And we’re asking our recipes to provide this simplicity. But maybe we’re looking to the recipe when we should be looking to the kitchen.
I like to think about The Minimalist Kitchen framework like I think about the cooking method mise en place, which means everything in its place. Before beginning to cook a recipe, you get everything in its place with this method, chopped and at the ready, for seamless cooking. The Minimalist Kitchen Framework is mise en place for the kitchen. Your kitchen is prepped and ready to cook 7 days a week.
You might be wondering why we’re complicating this course by talking about recipes instead of only focusing on organization. This framework is comprehensive because it has to be. The kitchen is an ecosystem. The recipes you make impact what ends up inside your cabinets, drawers, pantry, and refrigerator. It impacts the way you shop, too. If you don’t attend to every system, like we’re doing, you may find yourself right back to where you started, to a chaotic, hard-to-cook-in kitchen. I learned that the hard way.
We’re flying out of the kitchen for a second and over a big park. A park with a sandbox. Can you see it? Let’s go back to the analogy of the sandbox in the book on page 14. The sandbox is square. It has clear boundaries and parameters, unlike the big park in which it exists. While the park offers limitless space, the sandbox does not. Your kitchen is the sandbox, not the park. It has boundaries (a capacity). And understanding those boundaries is necessary in order to create a user-friendly, low-waste, dinner-producing kitchen. I’d even go so far as to say these boundaries will bring back the joy in your kitchen, giving you healthy parameters to create within.
Here’s the thing about boundaries. They keep us from driving off the road and crashing. They allow us to stay alive to do the things we love most. Boundaries, like ecosystems, acknowledge that there is a natural order to things. Everything comes with a specific set of rules. Like your broccoli, for example, it has a short life span. It does best when kept refrigerated after being cut from the earth. It also has a specific set of nutrients to feed your body what it needs. These aren’t the kind of rules that strip joy away, these are the kind of rules that define the natural order of things. And when you can understand how things naturally work, then you can build or design really good solutions to handle their naturally occurring problems and needs, rather than fighting against them. To do so in your kitchen, you define an objective, you begin to understand the natural order, and then you work backwards to solve the problem. This all must be sounding familiar.
The Minimalist Kitchen framework is a really big puzzle. Now let’s fill in some of the final pieces.
Putting it All Back Together Again
After performing the task of paring down last week, you’ve shed a huge layer. Everything left in your kitchen right now is from the keep category. Meanwhile, the undecided items have been removed for 3 months in order to free up space and help make the final decision very clear. A pared down kitchen, however, can still look visually chaotic when left alone. Mess begets mess, giving visual permission to create more mess. So let’s put it all back together again using 3 simple requirements: increase visibility, compartmentalize, and give everything a home. For additional guidance in setting up your pantry, reference pages 26-27.
Note: This method takes a financial investment. Do it as you are able, attacking one area at a time.
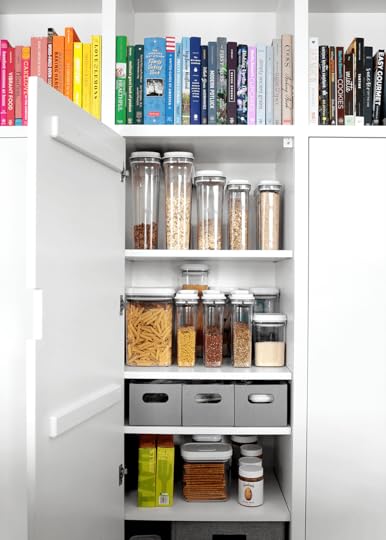
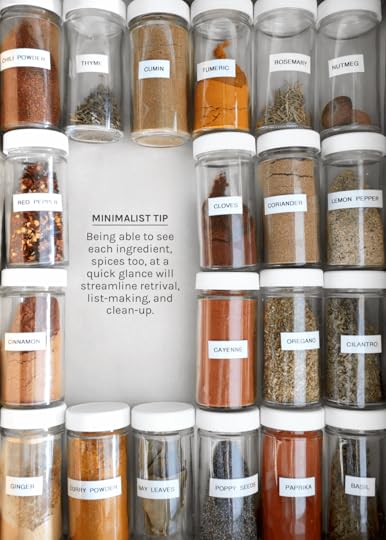
INCREASE VISIBILITY
The first item of business is to increase visibility. If you had to give a percentage, how much of your kitchen was completely hidden from your visibility before? Maybe you have deep shelves where things go to hide. Or items still in their original packaging from the store that make it impossible to gauge how much is left. When you’re unable to see items in your kitchen, you’re also unable to receive visual reminders to use the item as you naturally navigate the space. Overtime, as you accumulate more things to keep track of mentally, that item in the back of your cabinet, that you promised yourself you’d remember, quickly becomes forgotten. It’s to be expected.
When I finally came to terms that I couldn’t trust my brain to keep inventory of everything in my kitchen, I gave up trying and built a visual inventory system. This type of system is good for everyone in the home. How many times have you said, “They never put things back in the right place!!” A mental inventory is only good for one person, but a visual system is good for everyone. Whether you’re opening your fridge, pantry, drawers, or cabinets, you should be able to see everything without digging. It should all be in plain sight.
But what about…
Deep shelves. Deep shelves are the worst shelves. I have a general rule for myself—only store two rows deep. Any deeper and things get forgotten. If you have plenty of storage in your kitchen, then don’t use the full depth of the cabinet (or the fridge for that matter). However, if you’re tight on storage, then I recommend pursuing a couple solutions. Consider the back half of depth as unusable space, and add additional nearby storage (see Week 1). Not all storage space is good storage space. Or, add two bins to the shelf, one to hold items in the front and one for the back. The bins will allow you to easily retrieve the items in the back without having to completely rearrange the shelf every time.
Corner shelves, cabinets, and lazy susans. Corner shelves, that awkward deep storage space, tend to be a good place to store small appliances or another similar grouping of items. Organize the space to least used in the back to most used in the front. Like deep shelves, you can also compartmentalize using bins for easy retrieval if storing smaller items.
High cabinets. Again, not all storage is good storage. Consider storing items used less frequently (2-4 times per month up higher). In fact, that’s the hierarchy I’ve given my upper cabinets. The higher you go, the more infrequent the use. Again, if you don’t have enough user-friendly storage for your everyday items, then consider adding more or reducing the amount of things you keep stocked.

COMPARTMENTALIZE
In the same way that we’ve navigated this process, breaking down a really large idea into smaller, doable chunks, compartmentalize, compartmentalize, compartmentalize. Large spaces without dividers is a recipe for chaos. Break them up, add dividers, compartmentalize. Take your utensil drawer, for example. If you threw all your forks, spoons, and knives into one drawer, it would be entirely inefficient to find what you’re looking for while also trying to put dinner on the table. The same is true of all other drawers and cabinets in your kitchen. Compartmentalize everywhere you can. Though it may seem counterintuitive, compartmentalizing actually maximizes the storage capabilities of a space.
To create an intuitive kitchen, group similar items. If you need extra guidance here, think about the way the kitchen section of your favorite home goods store is organized and follow suit.
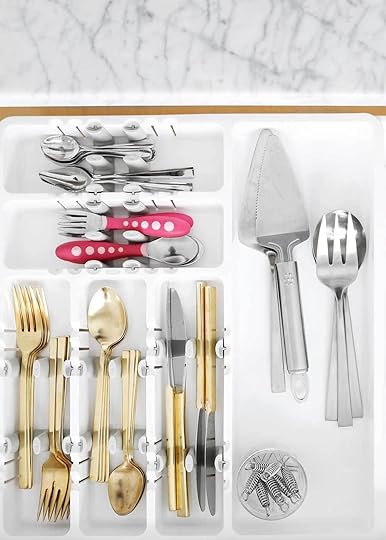
Hello tidy! OXO has an expandable utensil organizer that adjusts to your drawer width and your fork length.
Not all dividers are linear. Don’t forget the circular turntable as a way to divide and conquer a space, and easily get to the things in the back. I like this one from OXO that comes in 2 sizes. I’ve heard from several people that they use this turntable in their fridge. This is a great solution for deep fridges.
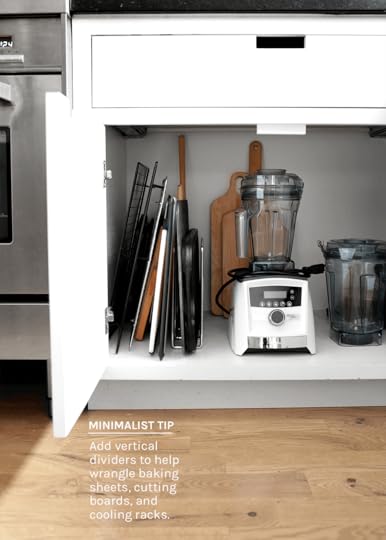
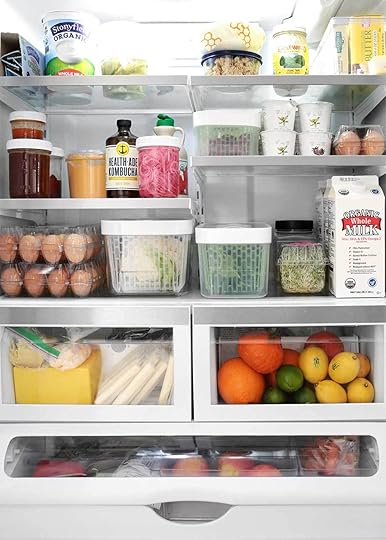
Install vertical dividers for things like cutting boards and baking sheets, and don’t forget about your fridge too. In the fridge, we use OXO GreenSavers to both extend the life of our produce and help compartmentalize the space. To read more about tackling the fridge, head this way.
GIVE EVERYTHING A HOME
This concept is the most reliable for both creating and keeping a minimalist kitchen (and home for that matter). Give everything a home. Think about what happens to all the unaccounted things around your kitchen. They end up accumulating in piles and stacks, which unintentionally give us visual permission to keep cluttering. Think: mail, counter produce, bread, wine, etc. When things have a home, you can easily clean up and retrieve the item when needed. And when something new enters, you either need to give it a home or get it out of your home.
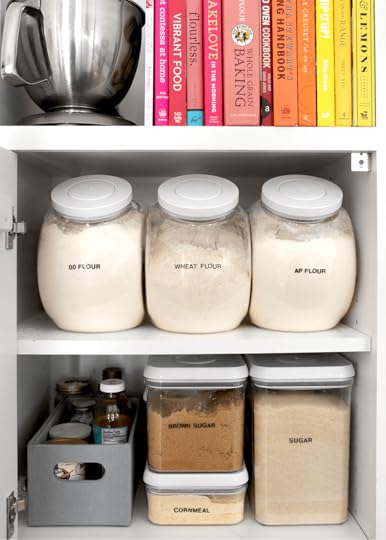
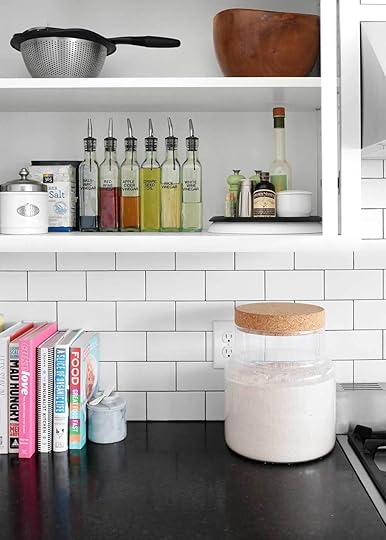
The same is true of your pantry. How many things have a permanent home right now in your pantry? So permanent you could find your flour, let’s say, with your eyes closed. So permanent if a guest used the ingredient, it would make it back home without a problem. We’re going to borrow from the concept of increase visibility and add it to this one—give everything a permanent home in a clear container. This is also the concept of compartmentalizing at play.
After trying many different food storage containers, I’m partial to OXO POP Containers for their variety of sizes that fit together like a puzzle, their lightweight structure, and their easy-to-open top. Here’s a couple other things to consider when choosing containers. Can you quickly open the top with one hand in the middle of meal prep? Are they sturdy or do they tip easily? Are they airtight? Will they store an entire bag a of chips? Are they light enough to pick up and carry across the kitchen (think flour or sugar container)? Does your hand fit inside? Would you trust your 5-year-old with it? If it has a lid, will it stay open when you pour? OXO containers check all those boxes for me.
But what about…
Expiration dates. Great question. Using this framework, I never think about expiration dates for my shelf stable ingredients. Cross that off your mental list. It’s one of the many by-products of this method. Because we keep a pared down amount of ingredients, we consume everything well before expiration. It sounds simple, but we eat what we buy. This also means we have very little food waste. It’s so rare that I ever throw away food—fresh or shelf stable. Lower grocery bill, less waste, not having to think about expiration dates. Are you sold yet?
Costco-sized bags. OXO sells a variety of sizes to fit a variety of needs. I can fit a whole bag of Pita chips from Costco in their 5.0 qt. POP container, which also keeps them from ever going stale. If you need an even larger container, try the 5.5 qt. Match your container size to the size of package you typically buy. And base the size of package you buy by what you can consume before expiration.
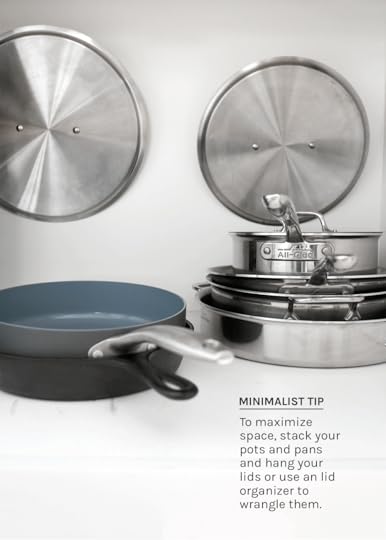
As you give everything a home, think about the miscellaneous things that pile up and spill over, too. Like the lids to your pots and pans. I’ve hung mine up using 3M hooks. You can also use a freestanding lid rack if you have the space.
Making Rules
Whether you realize it or not, we’ve been making rules and creating boundaries all throughout this post. Work within the capacity of your kitchen. Give everything a home. Buy what you can consume before expiration. Increase visibility. As mentioned above, these rules are not meant to strip away joy. They are intended to preserve joy. To make good rules, first acknowledge how that particular thing naturally works, then build a solution around it. For example, we know that when we can’t see what’s in our pantry, we tend to overbuy at the store. The solution: increase visibility by storing food in clear containers.
Another big problem in our house is cereal—a bunch of half eaten boxes that eventually go stale and take up lots of real estate. We came up with this rule: one cereal box at a time. The cereal goes directly in the designated OXO cereal container after we get home from the store. We also stock oats and a couple flavors of muesli, so we have limited space for additional cereal. A couple months ago, I noticed extra boxes of cereal popping up. I didn’t pay much attention to it at first. When the problem didn’t correct itself, I brought it up to my husband, the cereal lover. Here were our options for moving forward. We could begin only stocking one variety of muesli and reallocate that container for the cereal. Or, he could create a new storage space to meet this need. This is the ecosystem thing at play. When you introduce something new to the system, it impacts everything else. As you make rules and break rules, consider the impact to the ecosystem. What new issue is going to pop up if you break this rule to buy that thing?
Pull out your Week 1 worksheet and begin attending to each of the identified problems in the same way. You may need to create rules with your housemates to find a good compromise. Either way, it’s necessary to communicate the rules at some point. As you communicate, give those rules context. What is a rule? It’s a parameter intended to preserve the joy. If you have specific seemingly unsolvable conundrums, leave them in the comments. I love to problem solve!
Maintaining your Minimalist Kitchen
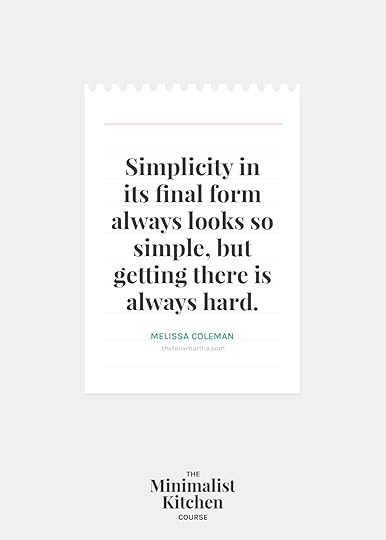
What you’re about to end up with is a kitchen that looks simple and well organized, as if it had always been that way (the sign of good design). I want you to remember the arduous process you took to get there. Because simplicity in its final form always looks so simple, but getting there is always hard. It’s much easier to add than it is to take away. Remember this process so that you don’t find yourself heading backwards. You’ve done the hard work. Let’s preserve it. There’s a couple more things to know moving forward.
FINAL INVENTORY LIST
With your pared down kitchen, you now have an updated inventory list. Create a clean list based off your initial list.
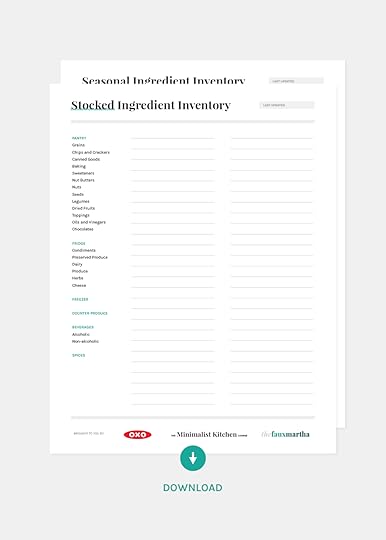
Download the Final Inventory Worksheet here.
You’ll notice this one is a bit different from the initial list, as it’s broken out into 2 main categories—your stocked ingredient list and your seasonal ingredient list. The stocked ingredients are anything shelf stable (from your pantry to your fridge). Fridge stable items include things like ketchup, soy sauce, and mayo. You know, the things that last a good while in your fridge. You can also include things like eggs and milk that have a shorter lifespan but are ingredients you always keep stocked. Your seasonal ingredient list is anything that has a very short life span. You know, the fresh stuff. See page 32-33 for an ingredient list reference.
With this list, you can add so much variety as long as it can be consumed before expiration. A critique of this framework is the lack of variety. It’s an accurate critique in regards to shelf stable items. Stocking a wide variety of shelf stable items causes an overflow and waste issue. However, seasonal, weekly produce, which lasts about 1-2 weeks, doesn’t cause either of those problems. So, try to sooth your need for variety through fresh produce, herbs, cheese, and animal proteins.
While we’re talking about variety, let’s talk a little more about it. Why do you crave variety? When do you crave variety? How can you achieve it in a way that doesn’t create a storage problem? Can you reallocate space to account for this need, if needed?
SHOP THE LIST
Good news! Your inventory list doubles as a grocery list. It’s the list of items you’ve decided to keep stocked to fulfill the daily needs and recipes of your kitchen. By making this decision, you’ve indirectly made the decision not to buy other things.
Your inventory list will also make your grocery shopping a whole lot easier. Shop your list, not the store, buying only the amount you can consume before expiration. Am I sounding like a broken record? The store is so good at convincing you that you might need something. Now that you’ve pared down your kitchen, you know exactly what you need. A natural by-product of this method is a lower grocery bill and reduced decision fatigue. Reference page 29 for additional guidance on shopping.
Remember this: maintaining a minimalist pantry starts at the store.
And this: a coupon or a sale is only a good deal if the item is on your list.
Now for a little levity. Did you ever see that Geico commercial with the basketball player Dikembe Mutombo? Where he swats away a balled up piece of paper (and many other things) and says, “Not in my house!” I told Kev to imagine me standing at the backdoor swatting the things we don’t need from the store. He got a good laugh and now hears Dikembe in his head rather than my nagging voice when he’s at Target contemplating the common question—to buy or not to buy.
MAKE A COOKBOOK
Maybe you go old school with a binder and recipe cards or printed recipes. Or maybe you save a bank of recipes digitally. Either way, try keeping a set of recipes that you often make, a cookbook. As you look to add new recipes to your book, look for ones that will make good use of the food you keep stocked. Meanwhile, tweak other recipes to match your ingredient list.
When you cook the same handful of recipes, you become an efficient cook. You’re able to get into a nice rhythm. Dinner flows out of the kitchen more easily, as if you’d practiced it before. Because you have! That’s just hard to achieve when you’re always cooking something new. If you love to try new recipes, plan to do that on the weekend or on a night when you have a little extra time and mental bandwidth. Set yourself up to succeed. Reference “Follow your Gut” on page 36 and the Dinner Composition post for more guidance.
TRY MEAL PLANNING
We eat well when we meal plan and not so well when we don’t. I highly recommend giving yourself over to this task. Read more about meal planning on page 36 under “Meal Planning” and “Helpful Tips for Meal Planning” and check out the Minimal Menu Boards post for the home.
GIVE YOURSELF TIME
At the start of all of this, I said—though I’m teaching this course in the space of 4 weeks, I’m not intending to communicate that it will take that long. We’ve gone about this process over the course of years in our kitchen, as time permits, budget permits, and as certain things break. It doesn’t have to all be perfect right now. And it never has to look like Pinterest to be in good working order. If your kitchen is working well for you, that’s a good indicator of success. Attend to individual systems are you’re able. I imagine when you find success there, you’ll want to implement it elsewhere.
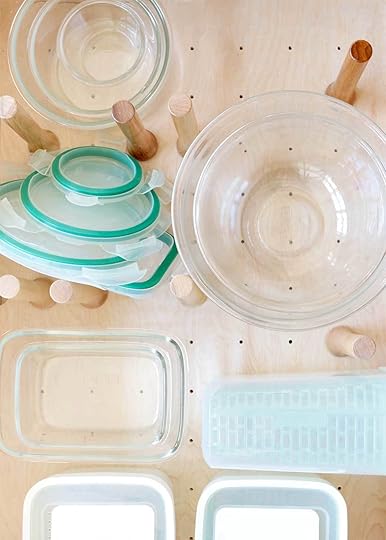
Here’s how this has played out practically at our house. Last year, our 15-year-old food storage containers from my college days finally bit the dust. Most of our glass containers were chipped and unsafe. The lids weren’t airtight and cleaning leaks in the fridge was becoming common. We replaced them with the OXO Smart Seal Glass Containers, which have been so wonderful. I dropped one on the ground the other day, and it’s still in tact. Praise be. I donated the remaining few containers from our previous system to create enough space for this system. While I don’t keep a variety of different types of food storage (or save every jar that comes into the house), I do keep Ball jars for sauces and other food storage.
I guess this is the part where I say goodbye for now to the course. You have wings to fly. Wings are made for flapping, and they’ll get even stronger as you use them. But don’t go too far. I’ll be adding a monthly Minimalist Kitchen post to the blog. Please continue to ask questions in the comments or join The Minimalist Kitchen Facebook community, a group of people in pursuit of a similar thing. One final huge thank you to OXO who made this course a free resource for you. As if making products that make the kitchen run more smoothly wasn’t already enough. Thank you, OXO. PS—if you’re on the hunt for a discount code, you can sign-up for their newsletter at the bottom of their site.
Cheers to the simple things,
Melissa
SOURCES
OXO POP Containers | OXO Cereal Containers | OXO Turntable | OXO GreenSavers | OXO Utensil Organizer | OXO Good Grips Smart Seal Glass Storage | Cutting Board/Pan Divider | Bamboo Dividers from Ikea and Target | Glass Spice Jars | The Minimalist Kitchen Tools List on Amazon | 1/4-inch vinyl letter decals
Homework
READ
 The Minimalist Kitchen, reread Chapter 1 as needed. There’s more specific information on building the pantry in the book than we covered in this course. To learn more about how to think about recipes, read the recipe headnotes and tips scattered throughout the book (even if you don’t intend to make the recipe).
REBUILD
Rebuild your kitchen, giving yourself time to do so. Continue paring down as you notice things. Set a calendar date for 3-months from now to attend to the undecided box. While you’re at at, take a walk through the kitchen. Now that things have settled, does anything need tweaking?
LIVE DISCUSSION
Join me on Thursday, January 31 from 8:30-9:00 pm CST for a Facebook Live in The Minimalist Kitchen community group. I’ll recap the content from this week and answer any questions that came up for you, so bring your questions about Week 4.
STAY UP-TO- DATE
To receive ongoing posts about The Minimalist Kitchen, be sure to sign-up to receive The Minimalist Kitchen Course emails.
If you’d like to share your kitchen progress along the way, use these hashtags: #theminimalistkitchen and #OXObetter.
Course Outline
WEEK 1: JANUARY 8
Audit the Space // Watch the Q&A on Facebook or YouTube
WEEK 2: JANUARY 15
Take Inventory // Watch the Q&A on Facebook or YouTube
WEEK 3: JANUARY 22
A Gentle Paring Down // Watch the Q&A on Facebook or YouTube
WEEK 4: JANUARY 29
Putting it All Back Together Again
The post Week 4: Putting it All Back Together Again appeared first on The Faux Martha.
January 22, 2019
Week 3: A Gentle Paring Down
After spending the first two weeks of the course auditing, taking notes, and conceptualizing your kitchen, we’re finally moving into the action stage. Say it with me now. A-C-T [clap, clap, clap] I-O-N [clap, clap, clap]. Action, people, action! We’re paring down your kitchen this week.
A NOTE OF GRATITUDE
The Minimalist Kitchen Course is brought to you by our partner, OXO, a brand that has brought calm to the chaos of my kitchen. We’ve partnered together to make this course a free resource to you.
Week 3: A Gentle Paring Down
OBJECTIVES
• Understand the maximum capacity of your space
• Introduce different methods of paring down
• Introduce the Gentle Paring Down method
• Understand everyday spaces vs. special occasion spaces
• Understand the problem of perfectly good
Before diving in, let’s take a look back. Last week we took inventory of all your kitchen items—from the spices to the stack of pots and pans. We looked at the recipes you often make, noticing the overlap in ingredients and tools. Noticing, noticing, noticing. And we made note of your specialty/hobby, something worth preserving.
We’re going to focus specifically on paring down this week. I like to compartmentalize action items in the same way I like to compartmentalize my pantry. When you try to do too much at once, important things get lost or go unnoticed. Just like your pantry. With that said, we’re saving the rebuilding of the kitchen for next week and focusing on shedding a large layer this week.
Let’s head back again to Week 1 and 2 for a second. In fact, we’re going to use all the information collected from the last two weeks to begin paring down. But first, let’s revisit the idea of space (or ecosystem as we called it last week). Every space has a maximum capacity. In city buildings, capacities are plainly listed outside of each room. It’s only wise to fit 59 people in that particular room, for example. You could fit more. You could easily fit less. But 59 humans is the maximum recommended. This idea of capacity also extends to our minds. When I overextend myself, I make a thousand mental mistakes and can’t keep track of my phone or keys, the most basic things to keep track of. In the same way, a glass jar can only hold so much food. Everything has a capacity.
Your kitchen has a capacity, too. And by this point, you hopefully have a better idea of the maximum capacity of your particular space, having added additional storage space nearby if needed. Imagine a maximum capacity sign hanging on one of your kitchen walls as a reminder. I want you to also imagine drawing a square on a piece of paper. That square is your kitchen; it’s your sandbox; it’s the rudimentary line defining the framework of your minimalist kitchen. First rule, you must stay within the capacity your space allows. The square isn’t changing in size.
Now to begin the journey of getting you at or below capacity.
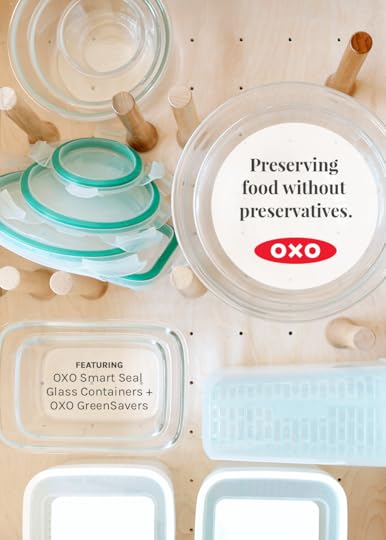
Gentle Paring Down
There are many ways to go about paring down. We’ll talk through three—the ruthless way, the Marie Kondo way, and the gentle way.
RUTHLESS
The ruthless way of paring down is, as it sounds, ruthless. Throw it all out. That’s how I feel after Christmas. This method produces quick, fast results. While there’s some benefit to that, I often make more regrettable mistakes this way, rebuying necessities, which is a bit wasteful, and missing some of the wisdom that reveals itself in the process.
MARIE KONDO
And then there’s the Marie Kondo way. Does it spark joy? This is a great problem solving tool for traditional closets and storage spaces. However, it doesn’t work as well in the space of the kitchen, a different breed of closet. Some necessities won’t spark an ounce of joy, but they’re necessities, so you have to keep them. While the majority of the kitchen has the potential to spark fireworks of joy. Food is an emotional thing. It sparks so much joy for me. Breakfast, lunch, and dinner are my favorite times of the day. The produce aisle, too, at the grocery store sparks joy for me. However, I don’t have the space to store it all or consume it all before expiration.
THE GENTLE APPROACH
For that reason, I’d like to recommend that you try the gentle, intuitive approach. It’s slow and thoughtful, much like the rest of this process. You’ve acquired facts about your kitchen over the last two weeks with the site audit and inventory. We’re going to use that factual information to help make an emotion decision easier, more intuitive. (Intuitive is still an emotional response. Hello, we’re humans. But it tends to be a more informed emotion, not a fleeting emotion.)
We’re going to add joy back into the kitchen, but in order to do that, we’re going to have to press pause on a couple strong emotions during the paring down process. Because, in many ways, joy got us into the problem of too much in the kitchen. Don’t get me wrong, joy in the kitchen is not a bad thing. It’s quite the opposite. However, it’s important to understand how it impacts your ecosystem, your kitchen, and how to best wrangle it.
Remember the ground rules for the course that I mentioned during Week 1? You’re going to want to lean on those this week. Go back and read them. Notice your emotions in this process. Advocate for your needs and the needs of your family members. Keep the poetry. I’m sending you out now to wade through the grey spaces of this process.
How do you decide what to keep and what to get rid of?
First things first, you’re the boss of this tiny restaurant, your kitchen. Take the wheel. I’m moving into the backseat, backseat driving louder than my husband. As I guide you through this process, I want you to really listen to your gut and start trusting it, too. What works for one person, won’t work for every person. Remember, you have a set of recipes you often make, a menu. You have a specialty, a hobby or two. Your final inventory list will and should look different from mine. Feel free to use my list as guidance when needed, to hear what I chose to keep and why.
Pull out that Inventory worksheet from Week 2. Hopefully you’ve had the chance to begin mentally categorizing items as as either keep, discard, undecided, or special occasion. As you pare down, I recommend setting aside a good chunk of uninterrupted time to do this first run within the same headspace. I also want you to go back and read your objective from the Week 1 worksheet before you begin paring down. You’re going to need that reminder this week, maybe a couple times throughout the week, as you begin to dismantle things. Remember why you decided to start the process.
Here’s a couple questions to keep in mind as you consider what to keep: Do I have enough space to store this item? If not, do I have the space to add additional storage? Is this item serving a similar purpose to another item? Can I consume this ingredient before expiration?
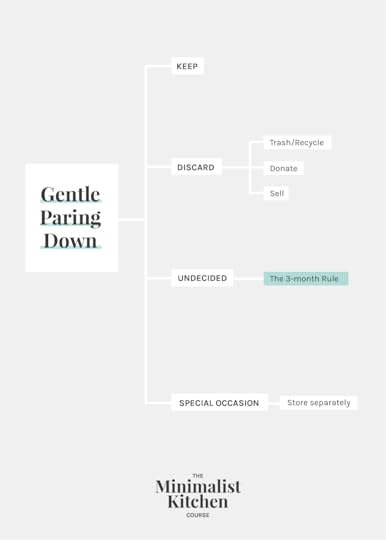
If it’s marked keep, just keep that item exactly where it is on the shelf. We’ll come back to it later.
If it’s marked discard, then create 3 piles: trash, donate, or sell (optional). Trash is anything expired or broken. Take the time to recycle when possible. Donate is anything that would be of value to someone else but not valuable enough to spend the time selling, unless you’re a killer garage sale organizer. Think spatulas or unopened, shelf-stable food items. And sell is any item that is in good condition or might be worth your time to sell. Think small appliances. Note: your time is of value. If selling takes up too much time or mental space, then donate.
If it’s marked undecided, then gently pare this item down. Find a storage box for this task. Place all of the undecided items in the box (shelf stable food too), and then remove the box from the kitchen. Store in the basement or in a faraway closet (as opposed to nearby), keeping it out of sight and out of mind, which is probably no different than where it was stored in the back of your pantry. Put a donate date on the calendar for 3 months from now. Rescue an item from the box only if needed. Donate or sell the rest after 3 months. This is the 3-month rule.
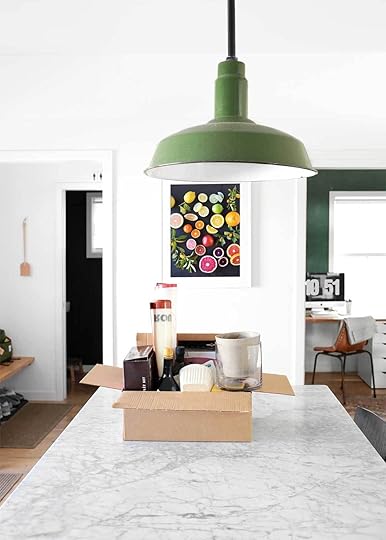
Making a lot of decisions at once, like we’re doing, can be overwhelming. Decision fatigue. It’s a real thing. I deal with this all the time. It’s one of the many reasons I lean on minimalism in my everyday life. In this particular case, change your 30 second decision-making deadline to 3 months. A good decision now will still be a good decision 3 months from now, or it won’t. In that case, you’ll be able to rescue the item if needed. As you rescue items, remember your capacity sign. Will it fit? Do you have space for it? If not, are you willing to get rid of something else to create space for it?
This simple task will help to remove some of the emotional attachments we naturally have to our belongings. I’ve only rescued 2 items from the bin using this method. The items were just as forgotten as they were in my kitchen.
Here’s what might also happen. You add that never-used small appliance from 2 Christmases ago to the box. You pare down your kitchen and have more mental and visual space. So much reclaimed space that you have the capacity to sit down and learn that small appliance. Great! Rescue it. Give it a try. If you fall in love with it, keep it. If not, you have your donate answer.
If it’s marked special occasion, then store it somewhere besides your everyday spaces. (Examples include: roasting pans, cookie cutters, turkey tools, special serving dishes, etc.) Consider storing it with holiday items, or in a designated “special occasion” container at the top of a closet shelf, or in one of those hard to reach cabinet spaces above the fridge.
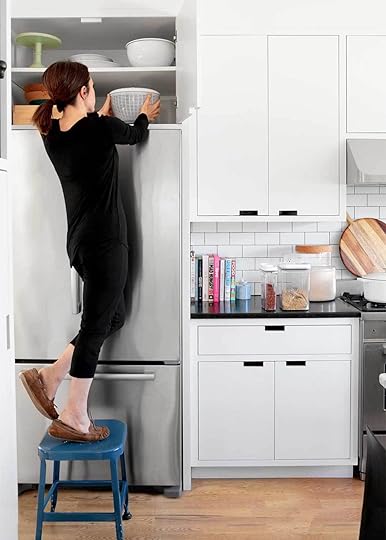
Speaking of special occasion, there are two types of storage spaces—everyday and special occasion. Everyday spaces are where you store items used every day to a couple times a week. Ideally, these everyday spaces are easy to reach and highly user-friendly. Special occasion spaces are where you store special occasion items, items used only a couple times a year. The special occasion often creeps into the everyday spaces. Preserve the everyday. Guard it with your life.
Other things to Consider
VARIABLES TO KEEP IN MIND
Read “Variables to Keep in Mind” when paring down on page 17-18 in regards to quality, quantity, holidays and hosting, the junk drawer phenomenon, and recipes.
THE PROBLEM OF PERFECTLY GOOD
“Perfectly good” creates a lot of storage issues in the kitchen, and the home in general. We often think, if an item is perfectly good, then I shouldn’t get rid of it. But a perfectly good item that’s not being used is no good at all. It’s just taking up precious space.
This problem often arises from overbuying and gifts. In the case of a gift, here’s my perspective. A gift is usually someone saying, I care a whole lot about you. Take that sentiment, and keep it forever. What a gift it is to be loved. However, you’re not obligated to keep the physical item if you know you won’t actually use it or don’t have the space for it. That’s easier said than done. Try it out. See what you think.
And then there’s the problem of overbuying. We’ve all been there. We all make mistakes. That’s the poetry popping up again. You can course correct, though. And you can do it through the process of noticing. Notice when and why you overbuy. Read more about this on page 15 under “How to Become a Minimalist.”
The 3-month Rule is wonderful in helping to navigate the perfectly goods and the mint-conditions.
THE PROBLEM OF LESS
When you keep less around, the things you keep get used a lot, daily in fact. Wear and tear is common. For that reason, I try to buy the highest quality/most durable items that I can afford. The good news is, when you’re buying less, you’re able to free up budget to invest in the higher-quality item.
CONSIDERING EVERYONE IN YOUR HOME
As you go about this process, you might find it really easy to get rid of everyone else’s excess, and really hard to get rid of your own. I know because I’ve been there. Pay attention to that. How do you preserve the poetry for your 7 year old, for your partner, for your roommate? Some of these answers will come by trial and error and others will come with time.
Practically, here’s how I go about it. I bring Kev, my husband, into the process. Sometimes it goes smoothly, and sometimes it doesn’t. Food is emotional. Along with the objective defined in Week 1, our goal is to stay within capacity while keeping the foods we eat most often, love, and can consume before expiration. I have to remind both him and myself of this goal to stay on the same page. On the other hand, I don’t bring my 5-year-old into the process of paring down. I’m not sure that’s she’s ready for this particular task, however, I do advocate for her needs and likings in this process.
DISHWASHER TEST
Reread the 3rd paragraph down on page 17, paying close attention to the dishwasher test. Notice what’s always in the dishwasher. And the items that are often leftover in the drawers and cabinets. Do you have too many of one item and not enough of another?
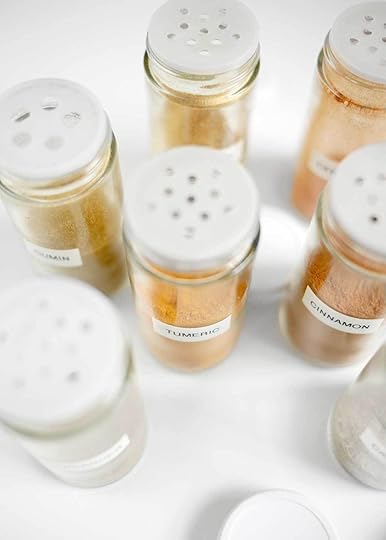
SPICES
Spices are one of the most tangible things to talk about in paring down process because there’s often so much overlap in your spice cabinet. You probably keep an assortment of individual spices and spice blends. And, more often than not, you could probably create some of those same blends with the individual spices you have.
You can approach paring down your spices one of two ways—lean on spice blends or lean on individual spices to create your own blends as needed. Common spice blends include Italian seasoning, Pumpkin Pie spice, Curry powder, Poultry seasoning, etc. Look at the ingredients on the packaging to notice the overlap. I’ve gone the route of leaning on individual spices and stocking a couple of my favorite, most used blends, like Curry Powder. Do what feels most comfortable.
While you’re at it, take a stance on onion and garlic. Do you prefer to use fresh or powdered? There’s no right or wrong answer. I use the fresh ingredient, so I’ve opted not to keep the powdered variety around. If you really love using both, then keep both within the confines of your space capacity. For more guidance, read page 30. Also read through the Aloo Gobi recipe to see this idea in action.
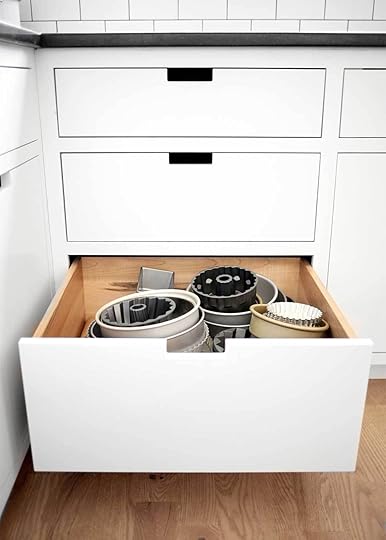
SPECIALTY
Now is a good time to look at the tools from your hobbies. Are you still into the same hobbies you were 5 years ago? Do you have items that you didn’t end up using? Do you find yourself with too many hobbies/specialties to actually maintain? Use the confines of your space and your time to pursue the hobby to make paring down decisions.
MAKE A NEW SET OF RULES
Remember all those problem areas from Week 1? As you pare down this week, start thinking about creating a new set of rules to address each of those problem areas, especially the recurring problems like the cereal boxes, chips, and crackers. Do you keep too many of one thing? Can you consume everything you’ve kept by its expiration date? We’ll talk about this in more detail next week.
ONIONS HAVE LAYERS
“Onions have layers. Ogres have layers, too.” I’d like to add to Shrek’s wisdom here by saying, kitchens also have layers. Once you clean out the front of the drawer, you’ll notice the back. Your kitchen will naturally shed layers overtime. You’ll do this process for the first time. Shed a heavy layer. And in 4 months from now, with a little space and time to notice things, you’ll see the back of the drawer and shed another layer. Time, like minimalism, working backwards, and list-making, is another really trustworthy problem-solving tool to keep in your toolbox.
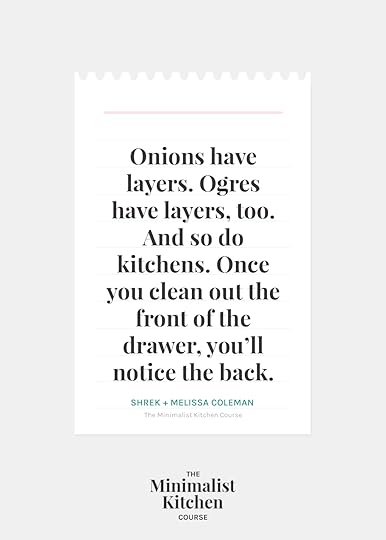
This process of shedding layers is like reading Harry Potter for the second or third time. You realize all the things you missed the first time. So rest in this—you can’t get it all right the first time. You have a capacity, too. This isn’t a quick game of right or wrong. As I mention in the book, I look at minimalism as a practice. And a practice need practicing. Ya know? It would be foolish to expect perfection at any point along the process. Let it be.
Homework
READ
The Minimalist Kitchen, pages 26-29 on “How to Build a Minimalist Pantry” and 35-37 on “The Recipes”. PARE DOWN
Go forth and pare down! We’ll put it all back together again next week.
LIVE DISCUSSION
Join me on Thursday, January 24 from 8:30-9:00 pm CST for a Facebook Live in The Minimalist Kitchen community group. I’ll recap the content from this week and answer any questions that came up for you, so bring your questions about Week 3.
STAY UP-TO- DATE
For a guided process through this course, be sure to sign-up to receive The Minimalist Kitchen Course emails. I’ll send out early bird worksheet downloads, Facebook Live reminders, and any additional course information straight to your inbox.
If you’d like to share your progress along the way, use these hashtags: #theminimalistkitchen and #OXObetter.
Course Outline
WEEK 1: JANUARY 8
Audit the Space // Watch the Q&A on Facebook or YouTube
WEEK 2: JANUARY 15
Take Inventory // Watch the Q&A on Facebook or YouTube
WEEK 3: JANUARY 22
A Gentle Paring Down
WEEK 4: JANUARY 29
Putting it all Back Together Again
The post Week 3: A Gentle Paring Down appeared first on The Faux Martha.
Melissa Coleman's Blog

- Melissa Coleman's profile
- 4 followers

