
Melissa Coleman's Blog, page 17
January 30, 2018
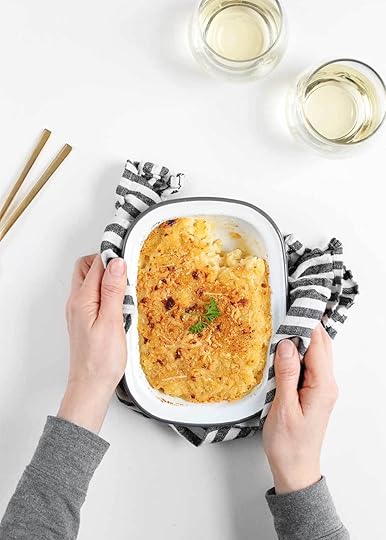
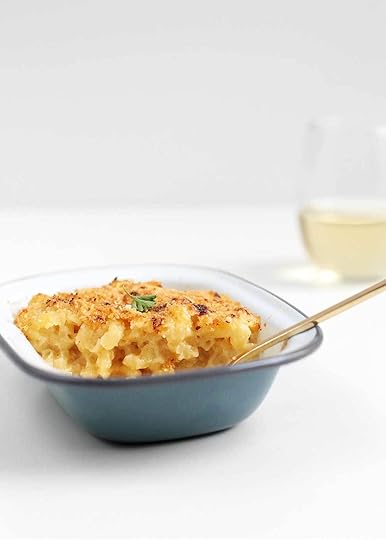
White Wine Mac and Cheese
“By all means, break the rules, and break them beautifully, deliberately, and well.” I first read this on a horribly uncomfortable futon for a college Typography class. It’s highlighted in the textbook I still keep—Elements of Typographic Style by Robert Bringhurst. One of my favorite things about life is that a book about typography can inform this White Wine Mac and Cheese recipe 12 years later. Everything informs everything. That kind of magic is real.


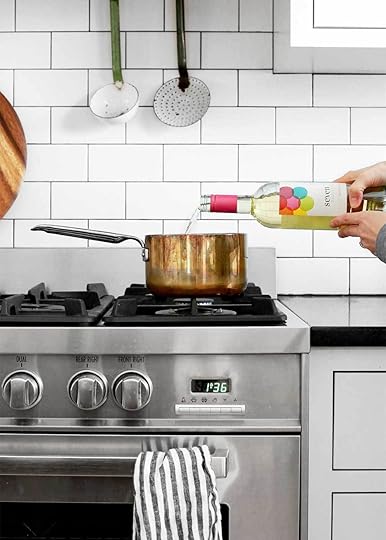
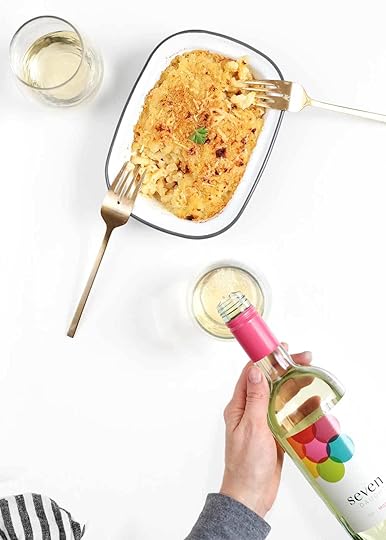
This post was created in an ongoing partnership with Seven Daughters Wine. Their Moscato is my absolute favorite white wine to cook with (even though it’s meant for sipping). Find Seven Daughters online, on Instagram, and on Facebook. Use code FAUX7D for 20% off your Seven Daughters purchase from uncorked.com.
I’ve written about it before. You’re not supposed to cook with Moscato. It’s always omitted from the lists of white-wines-to-cook-with. I’ve tried to follow the rules, using dry white wines. I’ve also thrown out entire batches of white wine sauces, like this white wine gravy, that end up too citrusy and tangy.
For the love of better white wine sauces, I had to break the rules. Seven Daughters Moscato is my cooking white wine of choice. (I’d tell you that even if I didn’t work with them.) Moscato is sweet, sweeter than a Riesling. This particular Moscato isn’t tangy or dry, which is why I love cooking with it. It produces a beautiful, round flavor that’s so hard to pinpoint and so pleasing to eat.
Though it’s not uncommon to shy away from sweetness when composing a savory meal, my favorite combination is a harmony of spicy, sweet, and salty notes. In some cases, a bit of sweetness is necessary in cooking, especially to cut the acidity of a tomato sauce or the bitterness of a tahini sauce. And in other cases, it’s just an accessory, a very good accessory, like this White Wine Mac and Cheese, paired with a sweet gruyere, offset by a sharp white cheddar and kick of cayenne at the end.
If you’re going to break the rules, I just hope it tastes like this.
White Wine Mac and Cheese for Two
.
shopping list
Prep Time
15 mins
Yield
2
adjust servings
This White Wine Mac and Cheese begins with a touch of sweetness from the wine and gruyere and ends with a kick of cayenne. Don't skip the toasted bread crumb topping if you can help it.
Ingredients
1
c. dry elbow noodles
2
tbsp. unsalted butter
2
tsbp. all-purpose unbleached flour
1/2
c. whole milk
1/4
c. Seven Daughters Moscato
1 1/2
tsp. dijon mustard
1/2
tsp. kosher salt
1/8
tsp. cayenne pepper
1/2
c. grated gruyere
1/2
c. grated sharp white cheese
Topping
1 1/2
tbsp. panko
1/2
tbsp. grated parmesan
drizzle of olive oil
Instructions
In a small saucepan filled 2/3s full of water, bring water to a boil. Salt water liberally and add noddles. Cook according to package instructions until al dente. Drain. Meanwhile, measure and prepare the remaining ingredients. Turn the oven to broil.
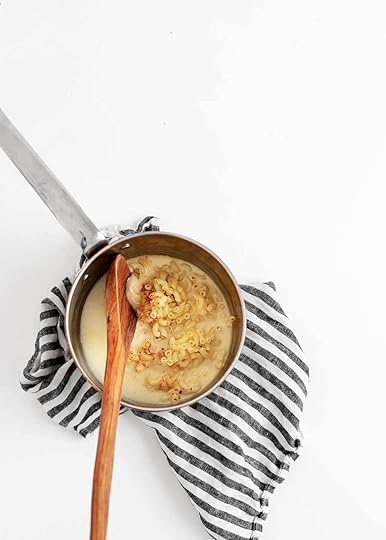
In the same saucepan melt butter over medium heat. Once melted, whisk in flour until smooth, and cook for 30 seconds to toast off the raw flour flavor. Slowly pour in milk, whisking to evenly combine. Add in the white wine, dijon, salt, and cayenne. Stir continually until sauce thickens, about 3 minutes.
Whisk in cheese until smooth. Heat for an additional minute. Stir in pasta noodles. (It's perfectly fine to serve as is, but the topping is just so delicious, don't skip it if you can help it.)
Pour the macaroni in a small enamel baking dish or 2 individual ramekins. Top with the panko and parmesan, then drizzle with olive oil. Place under the broiler until the topping is golden, keeping close watch. Serve immediately. Cheers!
TO FIND SEVEN DAUGHTERS NEAR YOU
Head this way. If you’re in Minneapolis, you can find it at Surdyk’s or at the Hennepin Whole Food’s in the North Loop. [edit] [edit]
The post White Wine Mac and Cheese appeared first on The Fauxmartha.


January 26, 2018
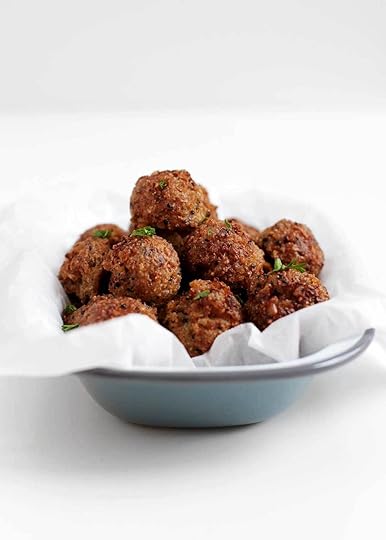
Vegetarian Swedish Meatballs
I’ve always been a little flighty. Kev is the analytical one of the two of us, the one who thinks through everything in great detail. I’m windy, work with whatever’s right in front of me, and make lots of flubs that only hindsite can teach me. Call me candid.
A couple weeks ago, I had all the ingredients to make these Vegetarian Swedish Meatballs again, so I did. I brought them to a party of people who were mostly of Swedish descent. As I walked in to Sarah’s house and saw her blonde hair and blue eyes, it hit me. Swedish Meatballs are in her DNA, and I just brought my adulterated version. Oh, Melissa.
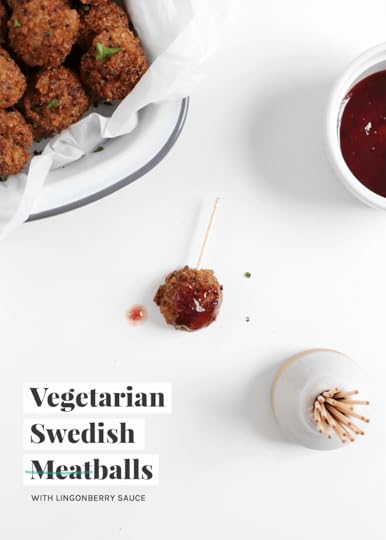
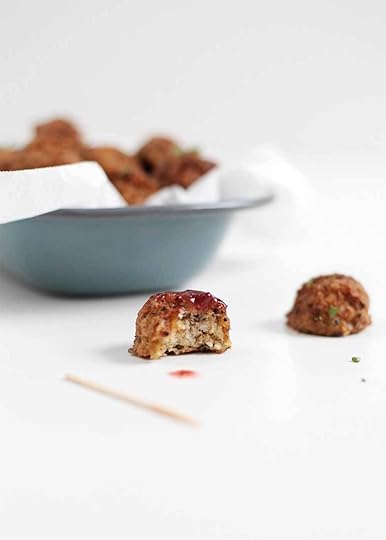
Thankfully, they disappeared, just like they did at the Nordic Winter Party I hosted in December. (More details on that party soon.) In fact, they stole the show at the Nordic party. These poppable cauliflower-laden bites dipped in a lingonberry sauce are wicked good and naturally gluten-free. (And they also look scary close to their meat counterpart.)
In true non-traditional form, I recommend serving these as an appetizer or as a side on a candle-lit table. (Just trust me.) Skip the traditional gravy and make a tart lingonberry dipping sauce.
About the prep time: In an effort to minimize prep time before serving, make these in advance and par-bake. The recipe will guide you. They can then sit in the fridge or freezer until ready for serving. Fry until golden and serve immediately.

Like so.
If you’re in to football, these are fit for the big game this weekend, hosted just down the street from us. They’re also fit for a winter gathering. Stay tuned for that post next week.
Vegetarian Swedish Meatballs
.
shopping list
Yields
about 30 balls
adjust servings
These poppable cauliflower-laden bites dipped in a lingonberry sauce are wicked good and naturally gluten-free. Note: this recipe is broken up into two sections—make ahead and just before serving. You can make this recipe in one breadth, but I find it more manageable in two. Recipe adapted from Pinch of Yum.
Ingredients
1 1/2
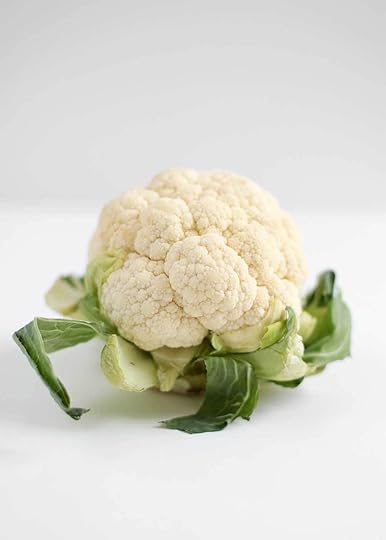
c. chopped cauliflower
1
packet (1 1/2 c.) Seeds of Change Garlic Brown Rice and Quinoa*
1/2
c. oat flour**
1
large egg
1
tsp. kosher salt
1/2
tsp. lemon pepper
1
tsp. worcestershire
For frying
neutral high-heat oil
Lingonberry Sauce
3
tbsp. ligonberry jam
2
tbsp. water
Instructions
Make ahead. Preheat oven to 400°F and line a baking sheet with parchment paper or a Silpat. Set aside. Place the prepared cauliflower in a saucepan fitted with a steamer basket. Fill the saucepan with at least 1-inch of water, but not touching the cauliflower. Turn to medium-high heat. Cover and cook for 5 minutes.
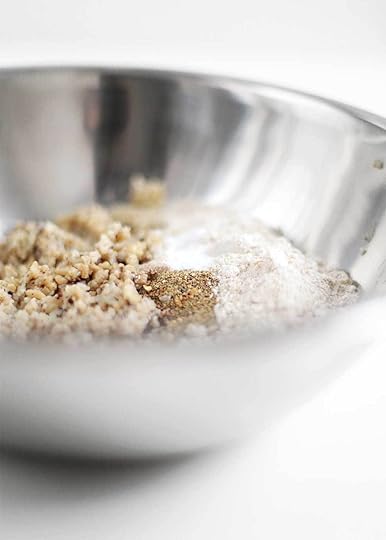
Add cauliflower to a high powered blender or food processor. Add rice mixture and pulse until roughly chopped.
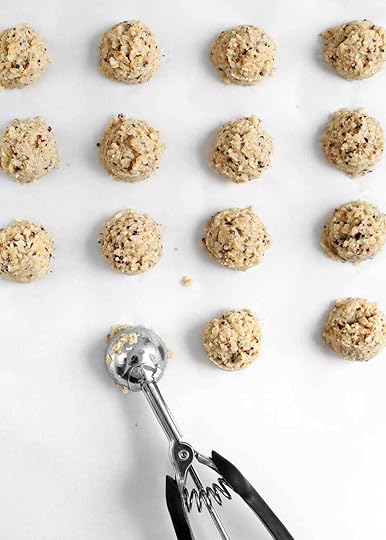
Add the blended contents to a large bowl with all the remaining ingredients. Stir until evenly combined. (Tip: use the teaspoon to measure the dry ingredients first before measuring the wet ingredient to save on cleaning mid recipe.) Using a 2 teaspoon-sized spring-release scoop (.3-ounce scoop/#60 scoop), scoop the balls, being sure to tightly pack. Place on prepared baking sheet. Bake for 12 minutes. Once cooled, store for later. If using within 2 days, store covered in the fridge. Otherwise, place balls in a freezer-safe bag and freeze for up to 2 months. Before using, thaw in the fridge overnight or on the counter for 1 hour.
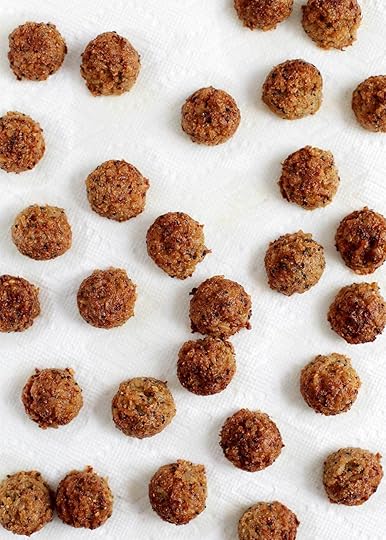
Just before serving. Add about 1-inch of oil to a dutch oven. Heat over medium to medium-low heat until hot. You'll know it's ready when you flick a bit of water onto the surface and it bubbles. (Tip: don't rush the frying process over a higher heat and risk burning the oil, the food, and the pan.) Carefully add balls to pan, being sure not to crowd. Once golden (about 3 minutes), flip and cook the other side until golden. Remove onto a plate lined with paper towels. Note, cooking times will vary based on the heat of your burner and pan. Cook for color, not time.
Make the sauce. Add sauce ingredients to a small sauce pan over medium heat. Stir occasionally until evenly combined, about 4 minutes. Jams vary in thickness. Add more water if needed to thin or more jam if needed to thicken.
Serve hot ( and with toothpicks if you don't like oily hands).
Notes
*These packets are just so convenient for this recipe. You can also make it with leftover rice and quinoa, I've done that too. Just add a little fresh garlic to the recipe.
**I make my own oat flour in the high powered blender. You can buy it too. I prefer the flavor of it over regular flour in this recipe. If making your own, blend at the start of the recipe so you don't have to clean your container mid-recipe.
The post Vegetarian Swedish Meatballs appeared first on The Fauxmartha.
January 23, 2018
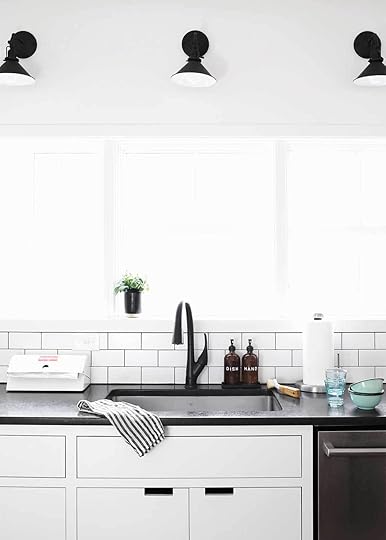
The Beauty and The Mess
Nine years ago, almost to the day, I started this blog. At first, it was a hey-mom-and-dad blog. Kev and I were freshly married and had just moved from Dallas to Chicago. A blog seemed like an efficient way to let our families know what we were up to. By the second or third post, I was typing out recipes, mostly the baked variety, with a side of crafting and knitting.


This post is sponsored by Delta® Faucet. Their new ShieldSpray
 Technology cuts through stubborn messes with a concentrated stream and reduces splatter with an innovative water shield, so you can power off the mess without making a bigger one. See what Delta can do.

A couple Christmas’s after starting, my dad gave me his old DSLR. (An aside: I used that very same camera up until last year, when my friend Lindsay convinced me it was time to upgrade.) Kev was supposed to be my fancy camera guy until we realized he has very unsteady hands. The camera stabilizing technology was no good back then (and there was no room for a tripod in our tiny condo). So I had to fire him. Many years later (like two years ago), I hired him back. Actually, he hired himself in a new position. But that’s a story for another day.
Nine years ago, I fell in love with blogging over a point-and-shoot camera, over yellow-toned, artificially-lit images, over making everyone else’s recipes, and posting whenever inspiration hit. I fell out of love with magazines. They were so pretty but too unrealistic. Blogs were real. I was craving real.
But like anything that grows older and matures (especially wine), it gets better with age. Until we find ourselves right back where we started—to the magazines. Beautiful and well done things aren’t bad. It’s good to get better. But is beautiful real?
Inadvertently, we often communicate just as much by what we don’t say. When you only see my highlight reel, the beautiful things, you begin to wonder if my house is ever messy. If my relationships are complicated. If I eat frozen pizza. If I lose my cool with Hal or Kev. If I deal with self-doubt. If I clean my own toilets. If I have fine lines and grey hair. If my pie crusts ever shrink. The answer is of course.

I have messes too (the literal and figurative kind), even when I don’t mention them. So, I’m pulling back the fancy camera that now sits on a tripod to show the beauty and the mess.

The Faucet
In October, I got the chance to visit the Food52 headquarters to see the newest Delta Faucet technology. I’m a sloooow adopter when it comes to new technologies in the kitchen. So I was a little nervous to try something new.
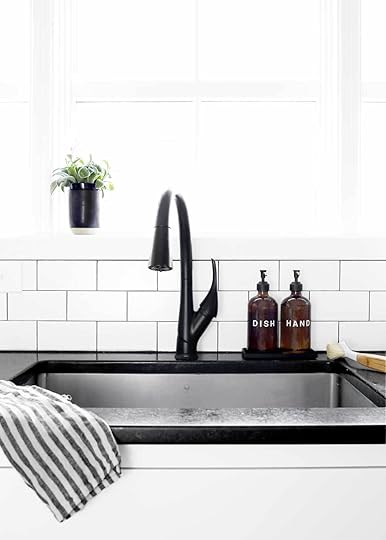
Like an iPhone without a home button, change takes some getting used to. But I’m beginning to love this matte black beauty. The Touch20® on and off technology is so amazing, especially while making pizza dough with flour all over my hands. Forearm bumps and cheeks work to turn the faucet on and off too. The ShieldSpray Technology took the most getting used to, but once you learn how to use it properly (up close and not pulled back, whoops!), it’s magic. See the video for proof.
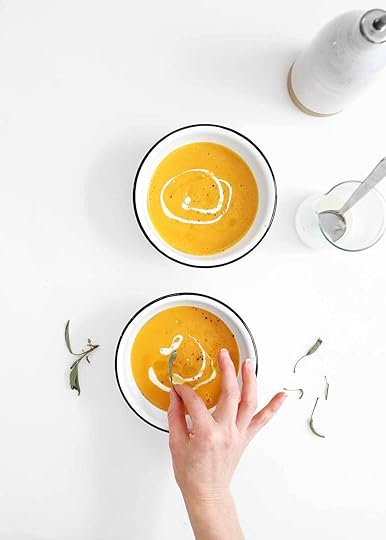
Get the recipes:
Butternut Squash Soup
Blender Hummus
Mambo Taxi
POST SOURCES Matte Black Esque Delta Faucet | Soap Bottle DIY | Soap Bottles | Linen Striped Towel | Dish Brush | Olive Oil Bottle | Foil Dispenser (vintage) | White Enamel Bowls | | Flower Vase (former candle) | Grandview Sconce
This is a sponsored conversation written by me on behalf of Delta Faucet. The opinions and text are all mine.
The post The Beauty and The Mess appeared first on The Fauxmartha.
January 19, 2018
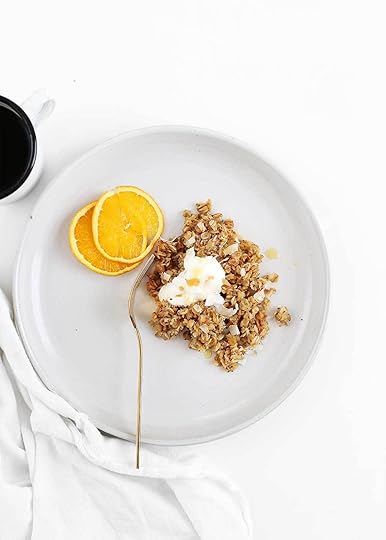
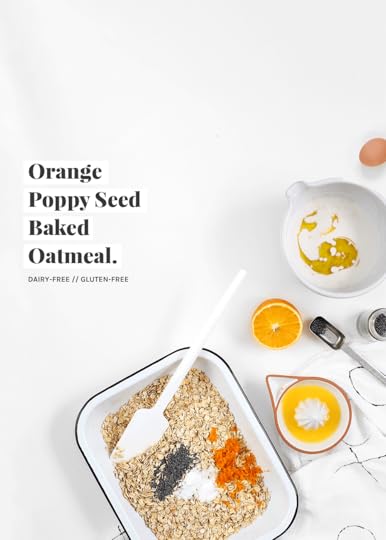
Orange Poppy Seed Baked Oatmeal
Mom, why are they singing the same words again? Hal, that’s called a refrain or a chorus. It’s a pattern people use to write songs. The repetition helps to communicate the meaning. (This is an excerpt from a December conversation we had on the way to preschool one snowy morning while listening to the radio.) Red white, red white, red white. It’s a candy cane pattern, Mom! (She’s learning about patterns at school right now.)
It’s playing, again. The beat is fast and frenetic. I could run a marathon at a sprinters pace with the cadence of this song. Ironically, I’m not sure I’d ever make it to the finish line at this pace. The chorus repeats itself again. It’s my voice. It’s Hallie’s voice. It’s a conversation with a friend. Slow down, Melissa.
This is the refrain of my life.
I pare down my closet, my kitchen gadget drawer, the amount of presents under the Christmas tree, and the varieties of rice we keep. I talk about minimalism a lot. I wrote a book about it. It’s a practice I like to practice. It’s easy to practice minimalism in my material life, well, most of the time. I’m still hanging on to that copper stock pot that’s basically the same size as my dutch oven. I don’t really need both.
And then there’s my work life. A couple years ago, this space became my full time job. I stopped designing websites and devoted all my working hours here. This space is complicated for a lot of reasons. It’s a space that’s deeply personal and feeds my need to create. But it also feeds my family, funds 10 rounds of lemon meringue pie recipe testing, and pays off that expensive Minnesota winter gas bill. It’s a space that’s tangled up in my everyday. In so many ways, my work is my life. The work part never ends. Not even on holidays, when the site crashes the day before Thanksgiving. Just keep sprinting.
This is also the refrain of my life.
There’s a beautiful copper stock pot sitting on the shelf of my work life too. I’m struggling to get rid of it, even though I don’t need it. How do you work like a minimalist (and not a maximalist)? How do you define enough for your work life? How do you then stop at enough? How do you conquer your email and to-do list without letting it conquer you? These are the questions I’ve been asking myself lately.
I’m calling this the year the year of the pivot. Because something has to change. It might be as small as learning how to gracefully say no to a very good thing in order to protect my most sacred things. Or maybe it will be a larger shift. I’m not sure. For the sake of my relationships and my mental health. For the sake of putting down my phone. For the sake of quieting that frenetic refrain playing yet again.
Sprint, slow down; sprint, slow down; sprint, slow down. The repetition of the refrain helps to communicate meaning. (I guess I’m learning about patterns too.)
I took two full weeks off between Christmas and the New Year. We went to Texas to see our friends and family. I invited myself over to my friend’s house and threw together a baked oatmeal from the random bits of my parent’s kitchen. She’s had to delete a couple things out of her diet while nursing, so I made a naturally dairy- and gluten-free Orange Poppy Seed Baked Oatmeal. There’s no telling how my experiments will turn out. This one was good, so good I made it again when we got home, and then one more time for you.
Orange Poppy Seed Baked Oatmeal
.
shopping list
Prep Time
10 mins
Cook Time
13 mins
Yield
4
adjust servings
The Orange Poppyseed Baked Oatmeal is a bright a bright spot on a winter morning. It's sweetened with maple syrup and orange juice and speckled with poppy seeds. This recipe is naturally dairy- and gluten-free.
Ingredients
Dry
2
c. old fashioned oats
1
tbsp. poppy seeds
1
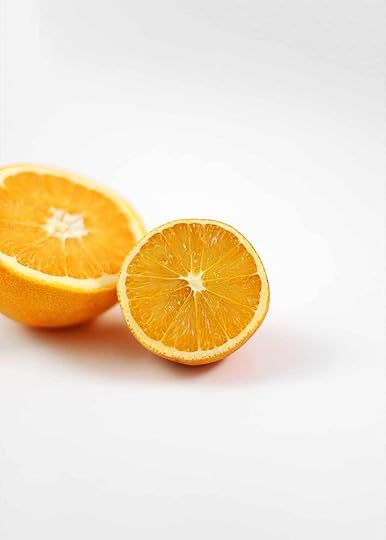
tbsp. orange zest
1
tsp. aluminum-free baking powder
1/2
tsp. kosher salt
Wet
1
c. coconut milk
1/3
c. maple syrup
1/3
c. fresh squeezed orange juice
2
tbsp. olive oil
1
large egg
Topping
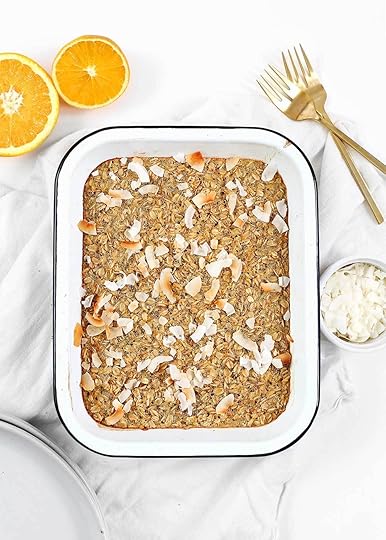
about 1/4 c. unsweetened coconut
Instructions
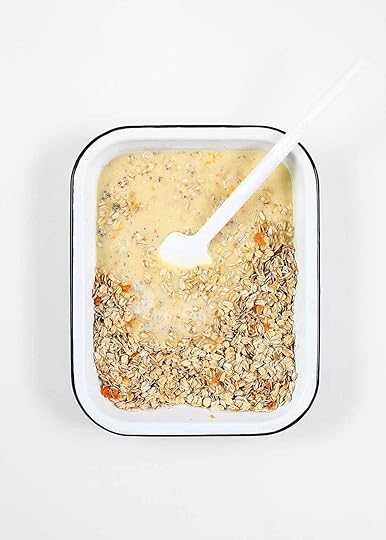
Prepare the dry ingredients. Preheat the oven to 375°F. In an 11.5" x 9" enamel pan (or similar), add all the dry ingredients and stir to evenly combine. Set aside.
Prepare wet ingredients. In a medium bowl, whisk together all the wet ingredients until evenly combined.
Pour the wet ingredients into the dry ingredients and stir until evenly combined. Smooth the top and wipe the sides of the pan with a spatula or a paper towel to keep the pan clean. Bake for 10-11 minutes. Sprinkle the coconut on top and bake for an additional 3 minutes to toast the coconut and finish baking the oatmeal. It's done when the edges are lightly golden and the top is firm to the touch. Serve and top with plain whole milk yogurt if that's your thing. (It's our thing.)
The post Orange Poppy Seed Baked Oatmeal appeared first on The Fauxmartha.
January 17, 2018
Minimal Cabinets and Drawers

It’s January, and in January I always seem to tackle another problem area in my kitchen. The kitchen naturally comes with a complex set of issues. But the good news is, there are simple solutions to make the kitchen a friendlier space to cook in. I wrote a whole book about it! (My book, The Minimalist Kitchen, comes out this April! You can preorder now.) Today, I’m tackling the cabinets and drawers.

This post was created in an ongoing partnership with OXO, the brand I lean on in the kitchen. Their products just work. They’re smart, functional, and affordable.
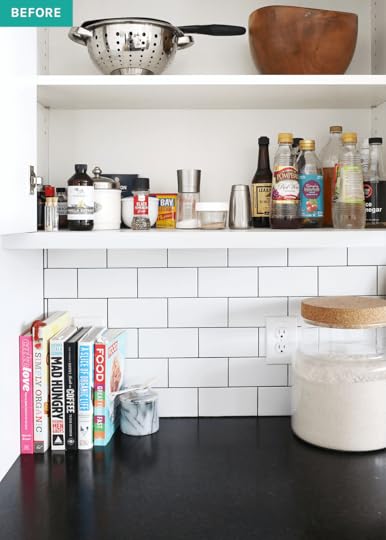
I’ve pared down a lot over the years. But even a pared down kitchen can feel disorganized and inefficient. For evidence, see the before shot depicting a chaotic shelf of vinegars, oils, salt, pepper, extracts, etc. It’s fine, but not friendly or organized.
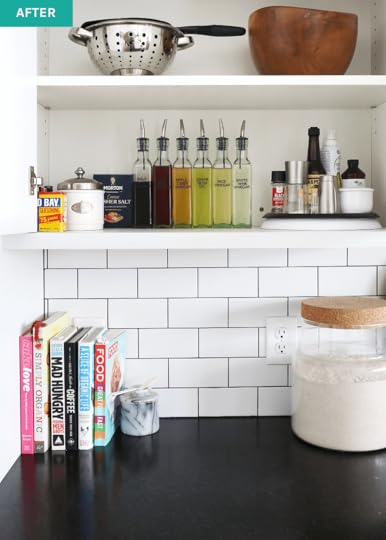
Enter the turntable. It’s not just for your grandma’s kitchen. If I was Oprah, I’d put one in every kitchen. You get a turntable! You get a turntable! Here’s why I love this gadget. For obvious reasons—it turns, making it easy to retrieve a specific item. But I also love that it acts as a divider. Dividers are a key ingredient to an organized kitchen. This one in particular from OXO has a lip to keep items contained.
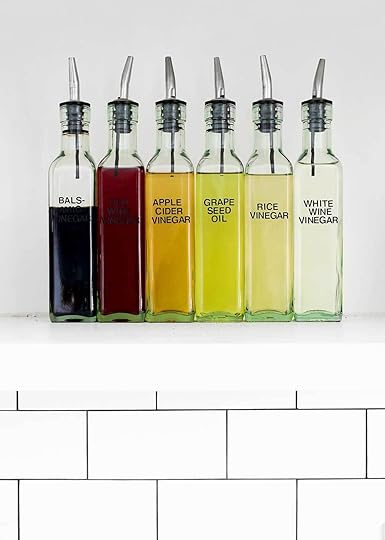
Originally, I planned on using the turntable to house the vinegars and oil. But after repackaging them into glass bottles, they became an art piece when color coordinated. Visual happiness! Almost Makes Perfect turned me on to adding vinyl decals to everything. I used these 1/4-inch letters to label the bottles. The remaining everyday items were moved to the turntable, and now I can see everything at a quick glance and retrieve it without digging.
Tip: Co-ops and Whole Foods often sell oils and vinegars in the bulk section. You can refill your bottles and save on packaging. (Weigh the bottle first before filling.) Or, you can buy larger bulk bottles of these items at a price break, refilling as needed.
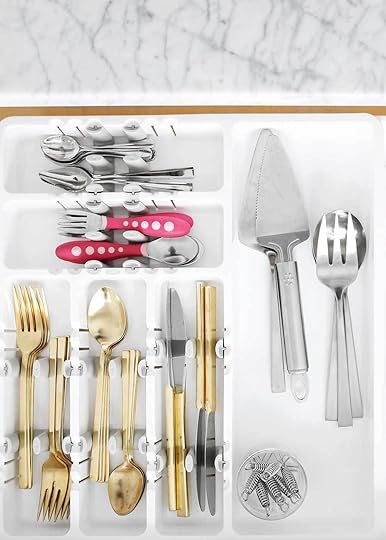
Drawers are another big problem area in kitchens. Without dividers, they are often chaotic, producing expletives upon retrieval of an item. Apply the cooking concept of mise en place to the kitchen cabinets and drawers—everything in its place. Designate a space for every item and give it a home bound by dividers. You’ll never be able to blame your husband for the missing spatula again. Ha!
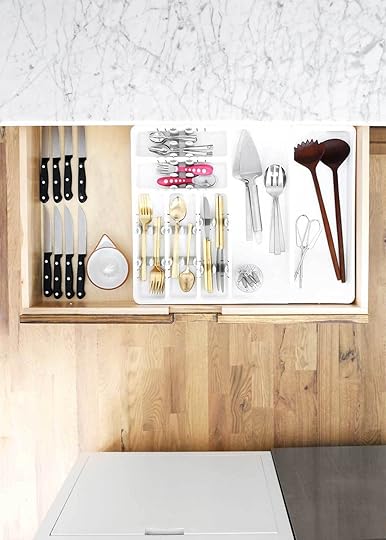
This expandable utensil organizer from OXO is great for the utensil drawer. It has adjustable utensil dividers that can be moved to fit the size of your utensils. Notice the notches for the toddler spoons versus the adult spoons. So user-friendly! We also use inexpensive bamboo dividers in our drawers. Divide and conquer … those kitchen cabinets and drawers!
For more kitchen organizing posts, check out The Minimalist Pantry Part 1 and 2. For a comprehensive guide to creating and cooking from a minimalist kitchen, pre-order The Minimalist Kitchen (April 2018!).
Kitchen Sources
Cabinet
11-inch OXO turntable | Oil and Vinegar Glass Bottles | 1/4-inch vinyl letter decals | Garlic Keeper (similar)
Drawer
Large OXO Expandable Utensil Organizer | Salad Tongs (thrifted) | Gold Utensils | Corn Holders
The post Minimal Cabinets and Drawers appeared first on The Fauxmartha.
January 10, 2018
Minimal Masculine Master Bathroom
This bathroom reveal is so bittersweet. It means means that I have one less room to design in our house. Kev told me once I finish our house, I have to use someone else’s money if I want to keep designing spaces. Ha! On the other hand, now that the house feels more like a home and less like a project, we’ve been filling it with our favorite people. That’s a really good thing. Now on to the Minimal Masculine Master Bathroom reveal.
The house had great bones thanks to our builder and designer, Brownsmith Restoration. But our budget didn’t allow us to really design out each of the rooms. So we’ve slowly finished them out as we could (and as inspiration struck). Our builder came up with a genius layout to the master bathroom, which is often one open room without much privacy. He divided the square-sized room with a wall. At the front of the wall is the vanity where we get ready. On the other side of the room is the shower and the toilet. The toilet is sits in a tiny nook at the back of the bathroom, just behind the shower. It’s as private as it can be without adding the cost of door and closing off the space. We love it.
It’s also worth noting, we decided to forgo a tub in the bathroom as neither of us are bath people. Hal’s bathroom has a shower/bath combo, so should the desire arise, we aren’t completely tub-less.
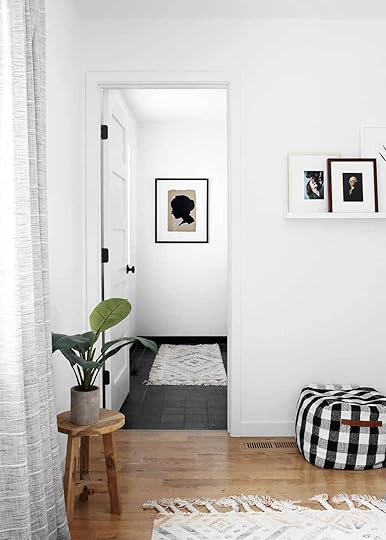
For the last 2.5 years we’ve been in the house, this room has looked so unfinished. Probably because it was. After finishing the design of the master bedroom, inspiration struck for this connecting bathroom. Though it’s funny, because all the inspiration for this bathroom was pulled from around the house. I’m a believer in repeating elements throughout a house in order to keep it cohesive, so we did. I pulled a lot of elements from the master bedroom—the walnut tones, kilim rugs, brassy accents, and overall masculine vibe. I stole the shiplap from the dining room and the matte black and buffalo check accents from around the house. We repeated the use of subway tiles but went extra large in here.

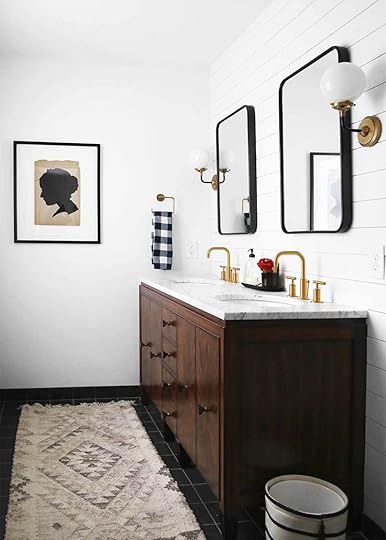
Like the bedroom, I wanted this space to feel special, like a boutique hotel. Not the formal type, the collected, eclectic type. The mix of metals (matte brass and black), vintage art, and toothsome towels and rug helped to pull that look together.

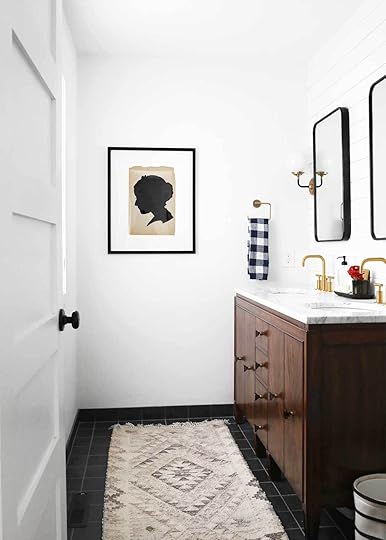
The Vanity
When you’re designing a new house, a minimal house at that, you really have to infuse it with character to keep it from looking like a generic white box. So for large pieces like the kitchen island and the bathroom vanities, I wanted to choose something closer to a piece of furniture—old and built with character. But unless you have quite a bit of time on your hands to find a vintage piece that will fit the space perfectly, you have to go to plan B. I found our plan B on Wayfair and fell in love! I changed out the pulls and our builder added the counter. (See a full list of sources below.)

To backsplash or not? Well, it depends on the look you’re going for. We actually removed our backsplash while finishing out the space. It didn’t read like a piece of furniture, my original intention. Practically speaking, our backsplash wasn’t protecting the wall. I don’t think it ever received a spot of water. To remove, see this tutorial from Young House Love.
Artwork
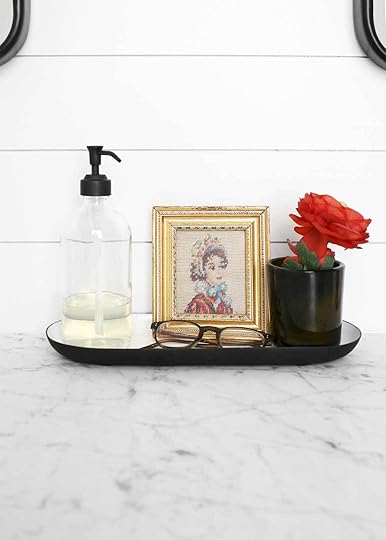
I’ve said it before, and I’ll say it again. Rugs and wall hangings are the hardest design choices. I like to find vintage, one-of-a-kind artwork while thrifting, which just takes a bit of time to find the right piece. For high-quality, framed pieces, I often look at Rejuvenation’s Antiques & Vintage section, which is where I found the art for the vanity area (see full list of sources below).
I took to making some of my own art for the back half of the bathroom—a simple Bathroom Counter Remnants drawing. If you’d like one for your bathroom, I’m selling a digital download here. It prints off nicely even on a home printer!

Shiplap in the Bathroom
This room needed an extra dose of character. We landed on shiplap over a paint color. We’re not nearly as handy as we think we are, so we hired this job out. We originally tried to use bender board after seeing Jenny use it here, but had a hard time finding it locally. Our contractor ended up using 4″ lattice boards. They primed and painted them (front and back) first to protect the boards from moisture. To install, they used liquid nails and a nail gun, and then did a final coat of paint.
PS—If you look really close on the seam, you’ll notice some cracking. Living in Minnesota with extreme temperatures on either end, our house majorly expands and contracts throughout the year. Cracks in the winter are gone by summer, and, if not, I pull out the caulking gun.

There’s that tiny, semi-private bathroom nook.

Towels
I feel a little strange dedicating a whole paragraph to towels, but these waffle bath towels are a game changer. They’re extremely lightweight, which was a bit concerning to me at first. But they are super absorbent and dry quickly. And because of that, they don’t smell musty, ever! I can’t say that of any other towel I’ve owned.

The Shower
We went with an open shower concept. I love the look visually, but it can be a tad chilly in the winter. Would a door solve that problem? Maybe. I’m pretty sure a door was way outside of our price range while building, and now I’m sorta set on the minimal look. I’ll update you if we ever change our mind on this topic.

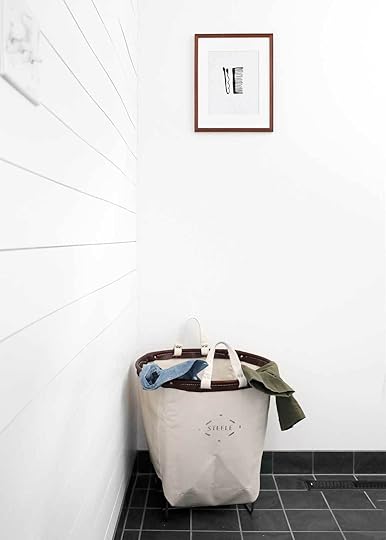
I walk in this room now, and it no longer looks like a project. That’s a really good thing. On to tackling the laundry room. Talk about an unfinished room…
Bathroom sources
VANITY
61″ Brentwood Vanity Base* with a custom cut Honed Carrera Marble Counter | Brushed Gold Faucets* | Rejuvenation Crystal Pulls in French Antique* | 20″x30″ Rejuvenation Metal Framed Mirrors* | McGee & Co Bistro Sconces with White Glass* | Rejuvenation Vintage Check Hand Towel* | Towel Ring | Rejuvenation Skyline 3’x5′ Rug* (folded to fit the narrow space) | Waste Basket | Soap Dispenser | Enamel Tray | Montauk Slate Tiles cut into smaller squares | Framed Vintage Artwork*
Shower
Brushed Gold Shower Head* (similar with lever handle) | Oversized 11.5″x5.75″ Matte Subway Tiles with dark grey grout | Rejuvenation Striped Waffle Bath Towels* | Double Towel Bar | Rejuvenation Reversable Bathmat in Chambray*
Toilet
Rejuvenation 1 1/2 Bushel Clothes Bin* | Bathroom Counter Remnants Artwork (by me!) | Black Antlers (thrifted)
*products generously provided
SEE ALL FAUXHOUSE POSTS>
The post Minimal Masculine Master Bathroom appeared first on The Fauxmartha.
December 19, 2017
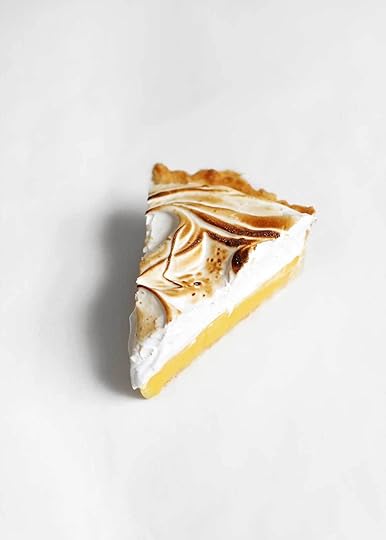
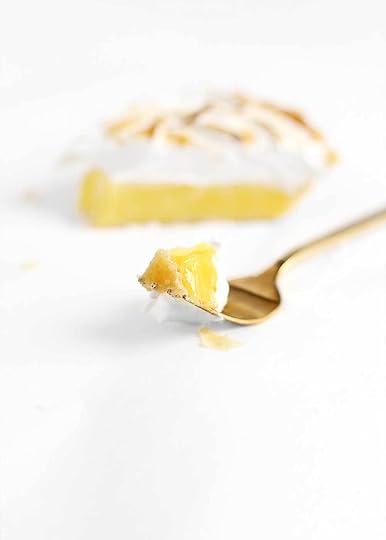
Lemon Meringue Pie

Margaret made the Lemon Meringue Pie every Thanksgiving. I only got to spend a couple of those with her. But each time she’d shuffle proudly into my mother-in-law’s kitchen (her daughter) with her homemade pie saying something like, “Isn’t that your favorite pie, Kevin?” It was a rhetorical question. It was everyone’s favorite pie at the Anderson Family Thanksgiving.

This post was created in an ongoing partnership with Wolf and the Reclaim the Kitchen initiative. In this two part series, we’ll be zooming in on specific cooking techniques to make the kitchen (and Lemon Meringue Pie) feel more doable. For more kitchen resources, visit ReclaimtheKitchen.com.
Kev flew home at the start of the year to say goodbye to his grandma. Margaret was 95. She was also a lot like you and me. She used real maple syrup and made jam, pies, and dinner from scratch.

Who would make the lemon meringue pie this year?
With a little nudge from the Reclaim the Kitchen mantra, I signed up to make it—a pie I had never attempted, a pie with very high stakes, a pie that meant a whole lot to the Anderson family. By the looks of Grandma’s brief recipe card, you’d assume it was easy (see similar recipe here). But if you’ve ever made a Lemon Meringue Pie before, you know otherwise. I’m so glad we’re not constrained to a 3″ x 5″ recipe card anymore, because this recipe needs a little more real estate.
In true last minute fashion (on time if you ask me), my mother-in-law and I crowded around her tablet learning to make Margaret’s pie the night before the big meal. We had a pie to show for Thanksgiving. And it disappeared happily. But my mother-in-law had to talk me out of remaking that pie several times. It wasn’t as good as it could be—the process or the final product.
We landed back in Minneapolis, and I’ve been working on that pie ever since. The Lemon Meringue pie comes with a complicated set of issues. The crust—will it be soggy from the acidic lemon filling by the time it’s served? The filling—will it set up or spill out upon slicing? The meringue, oh the meringue. Will it dry out? Will it collapse? Will it weep? Will it torch? Will it slice? Will it slip off the pie altogether? AND, is it possible to make the night before serving?

YES. After so many tests, it is possible to have all it. But you have to break some of the rules to do it.
I’ve been told Margaret would hold her breath while slicing the pie every year. She never knew what was inside. If it turned to soup, she’d just throw up her hands and say next year. It wouldn’t ruin her like this pie nearly ruined me. I wish Margaret was here to try this one. It’s a bit non-traditional, which might have made her wince, but it’s so reliable and best when made in advance. It’s even made a Lemon Meringue Pie lover out of me.
A special thanks to Zoë Fançois for fielding all of my 911 meringue texts. The kitchen can be a complicated place. And some recipes can sip the confidence right out of you. Make sure you have people in your court, like the Reclaim the Kitchen site, where you’ll find everything from braising videos to basic cooking techniques, tips, and tricks. I love this resource of a site. It’s a lot like my book coming out—a practical guide for making the kitchen more doable. Because sometimes it feels impossible. For a very in-depth, dare I say fool-proof, Lemon Meringue Pie recipe see below.
Lemon Meringue Pie
.
shopping list
Yields
10-inch pie
adjust servings
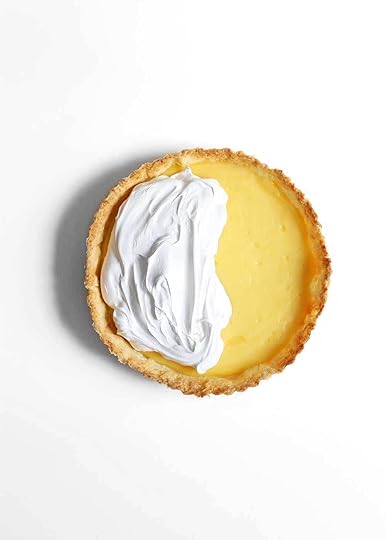
This non-traditional Lemon Meringue Pie boasts a crispy, buttery crust. A lemony filling that sets up confidently. And a simple, fool-proof meringue that pairs perfectly with the filling. Best of all, it can (and should) be made ahead of time. It's best this way. You'll want to make sure you have a couple special tools for this pie: 10-inch removable bottom tart pan with a 2-inch height, Pastry Torch, Butane Fuel, and 2 lb. of pie weights
Ingredients
Crust
1/2
c. + 2 tbsp. all-purpose unbleached flour
1
tsp. sugar
1/4
tsp. kosher salt
6
tbsp. unsalted butter, cold
1/4
c. cold water
Lemon Filling
6
large egg yolks (save 2 whites for the meringue)
1/2
c. lemon juice (about 3 lemons, save zest for the meringue)
1 1/2
c. water
1
c. sugar (see notes)
1/4
c. organic cornstarch
1/4
tsp. kosher salt
2
tbsp. unsalted butter
Fool-Proof Meringue
1 1/2
c. sugar
1/3
c. water
2
large egg whites (reserved from filling)
1/4
tsp. cream of tartar
1/4
tsp. kosher salt
zest from 1 lemon (optional)
Instructions
Make the crust 1 day in advance. In a medium bowl, whisk together the flour, sugar, and salt. Cut the butter into skinny shreds (as if you were cutting thin slices of cheese) and toss them into the flour mixture to coat. Using your hands, quickly incorporate the butter into the flour until the butter resembles pea-sized crumbles. Pour in half the ice-cold water. Use a large fork to bring the dough together. Continue adding water until dough holds together. Form into a rough rectangle.
On a lightly floured surface, roll or press the dough out into a rectangle (about 6 x 4-inches). Cut the dough in half and stack, adding any random pieces in between. Press out again and repeat 3 more times. Wrap the dough in plastic wrap and place in the freezer for 20 minutes.
On a lightly floured surface, roll dough out to 13 1/2-inches in diameter. (The crust will be on the thinner side. This is important for maintaining a sturdy crust that wont soften after the filling is added.) Fold in quarters and place in a 10-inch removable bottom tart pan with a 2-inch height. (I'm a believer that all pie should be made in a removable bottom tart pan for easy slicing. Or, they need to start making removable bottom pie tins.) Unfold and center within the pan. Trim excess. Place pan in the freezer to chill for 10 minutes.
Meanwhile, preheat oven to 425°F. Before baking, prick the bottom and sides of the dough with a fork to keep from bubbling. Line with parchment paper and fill with pie weights. (Pie weights are sold in too small of quantities in my opinion. Buy two bags of them for adequate amounts.) Place pan on baking sheet and bake for 15 minutes. Remove the parchment and pie weights, and bake for 4 minutes more to allow the bottom to finish cooking. Set aside at room temperature. It’s normal for the crust to shrink a bit. This can be made a day in advance and stored uncovered.
Make the lemon filling at least 5 hours in advance. Juice the lemons and set aside. If you decide to use the optional zest into the meringue, zest one lemon first before juicing, and store covered. (The lemon zest helps to even out the sweetness of the meringue and carry the tartness throughout.) Separate the yolks and set aside, reserving 2 whites for the meringue. (Note: cold eggs are easier to separate than room temperature eggs. Make sure no yolk (fat) gets into the egg whites as this will inhibit a proper meringue from forming.)
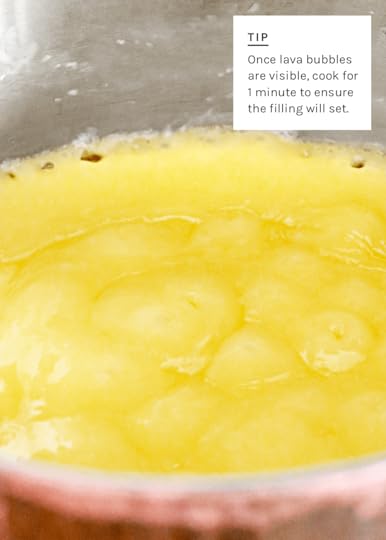
In a medium saucepan, add the water, sugar, cornstarch, and salt. Whisk to combine. Bring to a simmer over medium-high heat whisking continually once it begins to thicken. Cook mixture until it becomes thick, translucent, and bubbly. Turn off heat.
Temper the egg yolks by pouring about 1/4 cup of the cornstarch into the yolks, whisking continually to keep the eggs from curdling. Turn the heat back on the cornstarch mixture, and slowly pour in the egg yolks, whisking continually. Once incorporated, whisk in the lemon juice. Bring filling to a simmer. Once large lava bubbles appear on the surface, cook for 1 minute more to ensure a proper set. Remove from heat and stir in the butter until incorporated. Place a fine mesh sieve in the bowl of the crust. Pour the filling through the sieve to catch any larger, unwanted bits. Immediately cover the filling surface with plastic wrap, and place in the fridge to cool for 2 hours.
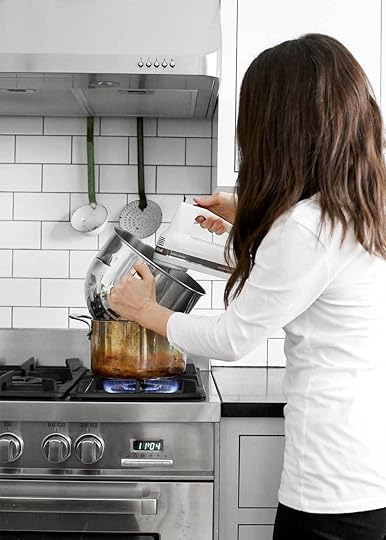
Make the meringue at least 3 hours before serving and once the filling has chilled for two hours. In a medium saucepan add about 2 inches of water and bring to a boil. Place a metal bowl (not glass) on top and check to make sure the water doesn't touch the bottom of bowl.
Remove the bowl and add all the meringue ingredients except for the zest. Using a handheld mixer, mix for 30 seconds to incorporate. Once the water comes to a bowl, place the bowl over the saucepan and begin beating immediately on high speed. Set the timer for 7 minutes and continually beat. Mixture will begin to thicken around the 3 minute mark. After 7 minutes, remove the bowl to the counter and continue beating until sturdy enough to hold stiff peaks. Add the zest and mix again until just incorporated.
Remove the pie from the fridge. Discard plastic wrap and add meringue on top of the filling. Using the back of a spoon, pull swoops and circles to create an organic pattern. Using a pastry torch, torch the top until golden. You can also place it directly under a broiler keeping very close watch. You wont have as much control this way. Lightly tent foil so that it's not touching the meringue and refrigerate for at least 3 hours or overnight. Pie is best served within 2 days.
To serve the pie, pop it out of the tart pan. Heat a sharp knife by running it under hot water first and wiping dry. Slowly saw to cut the pie. Rinse knife, heat, and dry before each cut. Pie is best served chilled. To save the cut pie, place a piece of plastic wrap on the exposed cut.
Notes
• The lemon filling can be made with 3/4 cup sugar while still setting up nicely. Sugar helps the filling (and meringue) to set up. If you remove too much of it, you may end up with a soupy pie. It's also worth noting that lemons vary in tartness. Meyer lemons are almost sweet and could use less sugar.
A note about meringues
There are 3 different types of meringues—French, Swiss, and Italian. I’m adding a 4th one to the line up. I guess we’ll call it an American meringue. More on this one in a minute.
The French meringue is classically used on this pie. It’s a raw meringue, and in the case of this pie, it’s baked off. The shelf life of its stability is pretty low. It dries out and weeps very easily.
And then there’s the Swiss Meringue. It’s more stable than the French meringue. It’s achieved by cooking egg whites and sugar over a double boiler and then whipped in the mixer until thick and glossy. My plan was to use this meringue, but it proved too finicky for a recipe you typically make a couple times a year. I also found it a little too dense for this pie.
Finally, there’s the Italian meringue. It’s the most stable of them all. It’s achieved by making a candy—cooking water and sugar until 240°F. It’s then carefully poured into egg whites that are whipping away in the mixer. I use this meringue method to make buttercreams. But in the craze of the holidays, when this pie is typically made, I wanted to leave you with something easier.
Which brings us to the 4th type, the American meringue. (I made that up.) You’ve seen this meringue before. It’s often called 7-minute frosting. I’ve never cared for its texture on a cake, but it’s absolutely perfect on this pie. It’s light yet stable. It hold swoops and torches perfectly. And, it’s nearly fool-proof on any site that has published it. I hope you’ll give this non-traditional version a try.
The post Lemon Meringue Pie appeared first on The Fauxmartha.
December 12, 2017
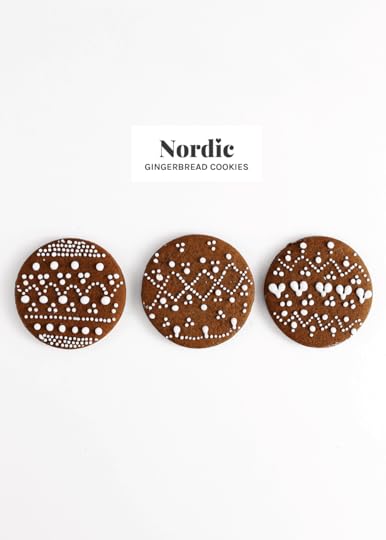
Nordic Gingerbread Cookies

I used to think gingerbread cookies were for decorating only. They were always teeth-shattering hard. But these cookies—they’re sturdy enough to decorate and soft enough to eat, using a super easy powdered sugar icing (not royal icing). Friends don’t let friends make rock hard gingerbread cookies. Bookmark this post.
Friends also don’t let friends sweat over cookie decorating. Piping straight lines once a year, mid-December is hard. I’m hoping to make this experience a little more pleasant and pretty this year with the stippled Nordic sweater look. Decorate smart, not hard.
To create the patterns, wear a Nordic Sweater or do a google image search for inspiration. Vary the size of the dots for visual interest. Create lines using a dotted pattern. Keep a toothpick around for dragging dots into shapes. (For example, you can create a heart this way from three dots.) And, when in doubt, add more dots.
I’m swapping these cookies with some of my blog friends around the states. See their recipes below. I’m also bringing them to a Red, White, and Nordic Sweater party later this week. (The red and white stands for wine.)

#ChristmasCookieSquad
Oatmeal Lace Cookies from Julie Blanner
Orange Gumdrop Bars from Freutcake
Cream Horn Cookies (Lady Locks) from Inspired by Charm
The Best Peanut Butter Blossoms from The Sweetest Occasion (Cyd)
Nordic Gingerbread Cookies
.
shopping list
Yields
40 2.75
adjust servings
These gingerbread cookies are sturdy enough to decorate and soft enough to eat. They also boast the easiest powdered sugar decorating icing (not royal icing). This recipe is adapted from Always Eat Dessert.
Ingredients
Creaming
3/4
c. (12 tbsp.) unsalted butter, room temperature
1/2
c. packed brown sugar
1/2
c. molasses
1
large egg, room temperature
Dry
3 1/4
c. all-purpose unbleached flour
1
tbsp. ground ginger
1
tbsp. cinnamon
3/4
tsp. baking soda
1/2
tsp. grated nutmeg
1/2
tsp. kosher salt
1/4
tsp. ground cloves
Icing
See recipe here>
Instructions
Begin creaming. In a stand mixer fitted with a paddle attachment, cream together the butter and brown sugar on medium-high until pale and fluffy.
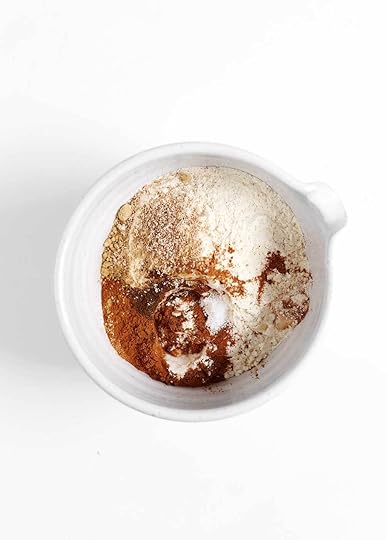
Meanwhile, combine all the dry ingredients in a medium bowl. Whisk together to evenly combine. Set aside.
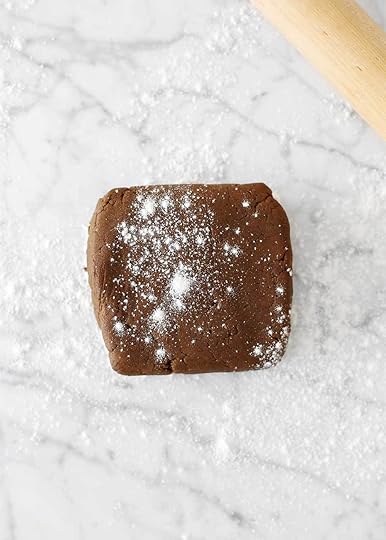
To the creaming ingredients, add the molasses and egg and mix until evenly combined. Turn the mixer down to low and slowly add the dry ingredients until just incorporated. Scrape down the sides of the bowl with a spatula and mix again to combine. Dough will be on the dry side. Divide dough in half and wrap with plastic wrap in a 1-inch thick disk for at least one hour.
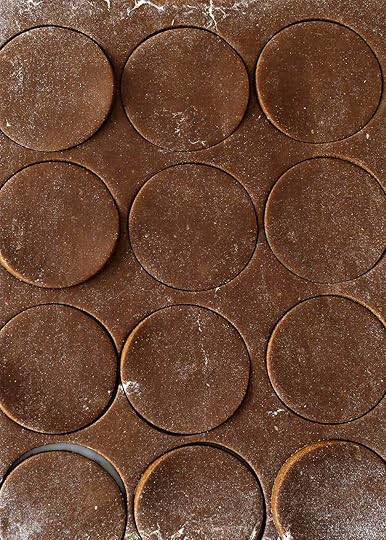
Roll out the cookies. Remove dough from the fridge and allow to sit at room temperature for 5 minutes. Preheat oven to 350°F. Line a baking sheet with parchment paper or a Silpat. On a lightly floured surface, roll out dough until about 1/4" thick. Using a 2.75" round cookie cutter (or similar), cut out dough. Place on the prepared baking sheet. Lightly knead dough scraps together until no seams are visible and then roll out again until all the dough has been used. Bake for 6-7 minutes. Allow to cool on the baking sheet for 5 minutes before relocating to a cooling rack to cool completely.
Make the icing. In a plastic sandwich bag folded over a cup, add icing. Snip a very tiny corner off the edge of the bag and pipe tiny dots on the cookies. Vary sizes of dots of visual interest. Use Nordic patterns for guidance. Once the icing hardens (this happens really fast) store in an airtight container for up to 3 days.
Notes
This recipe can easily be made gluten-free with Bob's Red Mill 1 to 1 GF Baking Flour as recommended to me by Heartbeet Kitchen.
The post Nordic Gingerbread Cookies appeared first on The Fauxmartha.
December 6, 2017
Minimal Holidays with Kids

The Christmas decorations are up, and I’m already starting to twitch a little. It’s the most wonderful time of the year. I wince. The house looks festive but full, maybe too full, especially with the tiny messes in every corner. Hal, age 4, is into wrapping the whole house and putting it under the tree. She, like most of us, thinks that empty space needs filling. For that very reason alone, minimalism is hard. It’s hard to do less. Minimalism is a continual, deliberate choice that manifests itself even in the space between the last branch of the lit evergreen tree and the hardwood floors. How will we fill that space? That’s a question we’re asking ourselves more intentionally this year, especially now that Hal can comprehend our decisions.
MINIMALISM SERIES
This post is an ongoing series on practical minimalism. Minimalism is typically marked by living with less. I also like to think of it as living intentionally and efficiently. Minimalist living exists on a spectrum. We’re a family of 3 (two adults and one 4 year old). This is how we’re trying to live a leaner life.
On her first Christmas, we gave Hallie 3 presents. She was 3 months old then and couldn’t understand if 3 presents were sufficient, much less hold her tiny body up to a sitting position. A minimal Christmas was easy then. But as she’s gotten bigger, so have her Christmases. Maybe too big. We live away from our families, and Hal is the only grandchild on all three sides. She’s also our only child. It’s hard to do less.
When I think back on the holidays as a kid, I remember the experiences over the individual presents, outside the Talkboy and recording my brother singing in the shower.
Short story long, we’re trying on less this year and asking our families to do the same, which is the hardest part for me. It’s really hard for me to articulate my personal needs. I hate to impose myself on anyone. But I’d also like to take the wince out of the most wonderful time of the year. Because I think it could be.
For joy doesn’t come in boxes
Nor peace in a heavy watch
Those red ribbon foxes are not so easy caught
But the search it never stops
—Red Ribbon Foxes, A Fine Frenzy
I don’t begin to have all the answers on this topic. In fact, we’re in the infancy of weaving minimalism into the holidays. With that said, I’m so excited to have two of my favorite minimalists, Denaye from Simple Families and Zoë from The Minimalist Plate, who have influenced me, weighing in on this topic. Read more below from them. We’ll all be hopping into the comments to continue this conversation. Leave questions, thoughts, advice, and concerns there.
Before I turn it over, I’d like to leave you with a couple things. Here’s my personal rule for keeping or getting rid of excess (gifts or otherwise): if we need to buy extra storage to keep something that we wont use, then it should be returned or donated. Zoë talks about this more in depth below. And my personal rule for gift-giving: I try not to think about it after it leaves my hands. And if I do, then I’ve placed an expectation on that gift. In that case, it’s no longer a gift but a one-sided barter.
If you’re looking for a couple non-present present ideas for kids try passes to museums, children’s theaters, magazines (like Bravery Mag that comes 4 times a year), and one-on-one dates. Or donate to a cause or a family that doesn’t have the luxury to ask for less. Talk to the child about your choice to give this way. They’re listening and watching. Or add to a college fund.

 Denaye Barahona Ph.D.
Denaye Barahona is the voice behind Simple Families, a blog and podcast that focus on simple living and intentional parenting.
simplefamilies.com


Family Values
In our family, we value living with less. My kids don’t get much in the way of wrapped, tangible gifts at the holidays. Passing on this part of the holiday tradition (click to read a more in-depth post) allows us to focus on a different type of abundance: the intangible blessings that surround us. Sometimes an abundance of wrapped packages can distract us from the real gifts of the holidays: life, love, family, religion, and togetherness.
You know, the good stuff.
This is our family value. But family values aren’t always easy to define and they are often even harder to uphold. Sometimes explaining our values can even be uncomfortable. We have pressure from society, peers, and perhaps even extended family members to forgo our values.
As a parent, it’s my job to instill family values into my children. Whether the family value is health, well-being, or abiding by the law. We start instilling these values in our children from the day they are born.
How do we instill family values, you ask?
We instill family values through leading by example (click to read a more in-depth post). In our family, we value living with less. So each time I honor this value and uphold it on behalf of my children—I am modeling for them how to tactfully and effectively stand up for our family values. Because someday, somewhere these kids are going to be grown-up and far away from my watchful eye. And I want them to know how to stand up for our family values. It starts with me.
So yes, we have the uncomfortable, yet heartfelt conversations with well-intentioned gift givers about scaling back on the presents. It goes something like this:
“Our kids really love spending time with you, and I have enjoyed seeing that relationship grow. I fear that too many packages may distract them from appreciating all the wonderful intangible gifts you bring as a person. I don’t want them to anticipate and look forward to gifts more than they do special time with you. How can we work together to keep them focused on the important stuff?”
Expect this to be an ongoing conversation throughout the years—particularly if this family value runs counter to the values of the gift-giver. Don’t get frustrated with them, because they will need gentle reminders. In the end, it’s a beautiful message that will be appreciated when it’s articulated in a kind and thoughtful manner.
 Zoë Kim
Zoë Kim is an author, mom of four, and creative inspiring others to make room for what matters most. Check out her new book, Minimalism for Families.
 theminimalistplate.com
Giving and Receiving
Our best holiday memories are centered around faith, family, friends, experiences, and traditions, not around a specific gift. Gift-giving is a tradition, but it isn’t what makes for a meaningful holiday.
A minimal Christmas in our home means mindfully redefining the way we celebrate holiday, centering the holiday around the things that truly matter—which in my life are pretty much not things. We value living with enough. We exchange a few gifts during the holidays, but we don’t let this part of our celebration take center stage. We focus on making (and leaving!) room for what matters most. In our home, in our mind, and in our hearts. Below are a couple topics we’ve dealt with over the years.
How to show gratitude for others whose love language is gifting
We show our gratitude by honoring their desire to give the gift with these steps.
Explain your new direction in gift giving. Let them know their presence is the best present. Depending on the relationship, we share our simplicity message with them in full or part. You might say, we’ve found life is richer without all the clutter, kids need fewer toys (backed by research), I have more time to spend with my family, we’re debt free and we want you to be too because we love you! The list is endless. Share your why with them. A minimal Christmas is about trading—quality over quantity, presence over presents, and experiences over stuff.
Make your gift requests known early. Give your wish list to thoughtful gift-givers ahead of time. Provide them with a specific list of experiences or physical needs/wants your family would like. There are people who will still give gifts that weren’t on your list—but when you’ve done these three steps it will be easier to give the unwanted gift away without any guilt.
When you share your experience gift list, explain how that experience would be helpful. Not only does an experience gift keep the clutter out but it often provides a new way of connecting.
For more experience-gift inspiration visit these posts:
The White Envelope
7 Simplicity Gifts to Give this Season
The Other Question to Ask this Holiday Season
How to handle unwanted or excessive gifts
I’ve found there are people who will hear my simplicity message and honor my no-gift request. And there are people whom I love who will not hear my requests for less. When those people don’t hear me (for whatever reason) and give me gifts, I kindly accept the gift and thank them for their thoughtfulness. After that, I may keep the gift for a week or a year, but ultimately the gift has been given, and I’m free to do with it is as best for my life.
When I no longer wish to keep the gift I accepted, I typically make one of two choices depending on the relationship. One is to go to the gift giver and explain that while I appreciate this thoughtful gift, it isn’t finding much use in my home. I ask them if they would like to use the item and if it would be helpful to them. This can be very uncomfortable, I know. I’ve found most often people will give you permission to give the item away. I’m always mindful to mention how thankful I am for their thoughtfulness and my hope is that the item will be used.
The other option is to simply donate the item without telling the gift-giver. This option is easier when you’ve been given gifts from people who live far away and don’t visit your house!
Kindly accepting an unwanted gift and giving it away without guilt does get easier with more practice. When you have removed the excess from your home, accepting a few extra gifts doesn’t seem like such a stressful experience. When my family has received gifts we have no place or use for, we simply donate them. Accepting the gift with gratitude and choosing not to keep what we don’t need can be used as an opportunity to give to others.
How to talk to your children about gifts
Before the holidays (and throughout the year) we talk about gifts with our children. Sharing practical minimalism, through casual conversations and in small doses sinks the deepest. We always allow our kids to choose the fate of gifts given to them but we may ask them questions such as:
Do you think you will enjoy playing with that more than a few times?
Would you like to re-gift it to another child?
Is there room on your toy shelf (or other designated toy space)? If not, is their a toy you no longer play with?
Would you like to return the gift and use it for an experience (skating, bowling, a lunch date at their favorite restaurant?…)
We also teach them to apply guidelines for incoming gifts such as: designate a space for each thing, one comes in one goes out, and the use it or give guideline. When we talk about gifts ahead of time our kids are better prepared to let go of things they may not even really like. By asking our kids questions, we’re giving them the tools to learn mindful decision making in their own lives. Isn’t that what we parents want?
The post Minimal Holidays with Kids appeared first on The Fauxmartha.
November 30, 2017
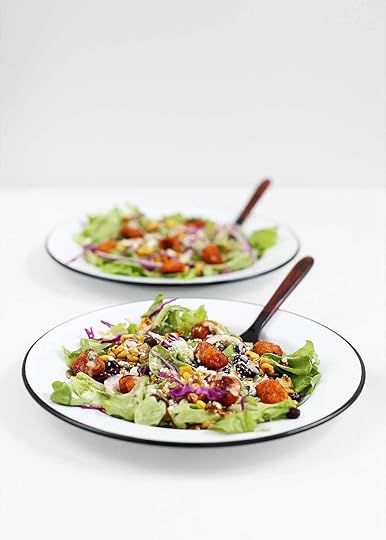
BBQ Ranch Southwest Salad
I have two favorite games in the kitchen. The first one: Dishwasher Tetris. He doesn’t realize we’re competing, but I always beat him. I can rearrange that appliance to fit every last dirty dish, even dishes Kev swears will never fit. And the second game: Fridge Foraging. (It’s important to note, these might be the only two games in life that I have the upper hand on Kev.)

This post was created in an ongoing partnership with Alexia. A chef once told me to source the things that others do better. That’s how I feel about Alexia’s fries and sides. To see how they are shaking things up with chef-inspired flavors, real ingredients, healthy alternatives, and surprising recipes, follow Alexia on Facebook and Instagram, or check out their website.

I first heard the phrase Fridge Foraging from Amanda Frederickson. You know those dinners birthed from an empty fridge and pantry? That’s how this game works. It’s true what they say—necessity is the mother of invention. And that’s where my best dinner recipes are born—at 5:30 pm from the random bits around the kitchen.
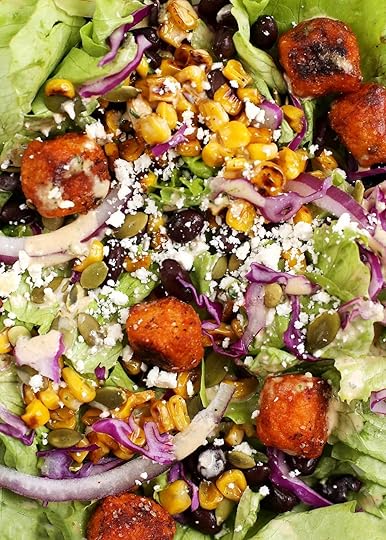
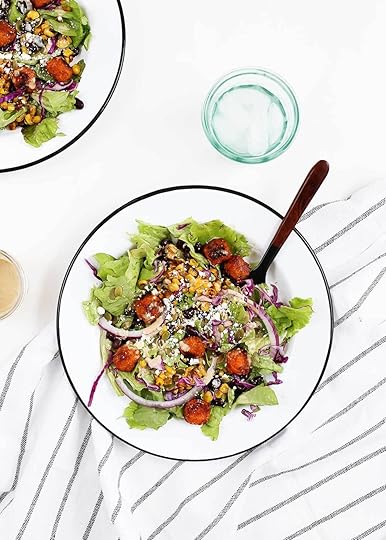
This BBQ Ranch Southwest Salad is composed from all the random bits. From the box of lettuce greens, the ripened avocado, the half eaten hearty head of red cabbage, the leftover red and green onions, the bucket of yogurt, and the condiment shelf in the fridge. From the always stocked organic sweet corn and the Alexia Sweet Potato Puffs in the freezer. From the can of black beans and the jar of pepita seeds in the pantry.

That’s how dinner was won the other night. Not that Kev was playing. What is it they also say? Celebrate the little things, like these little sweet potato croutons. I think I’ll start that all-salad diet before January after all.
BBQ Ranch Southwest Salad
.
shopping list
Prep Time
30 mins
Yield
4
adjust servings
The ingredient list for this recipe looks forever long, however, most of the ingredients are in your pantry, fridge, or freezer. It's 1 part nutrient dense, 1 part indulgent, and 5 parts delicious.
Ingredients
Sweet Potato Croutons
28
Alexia Sweet Potato Puffs
1/4
tsp. chili powder
heaping 1/8 tsp. kosher salt
dash of cayenne pepper
BBQ Ranch
4
tbsp. (1/4 cup) Plain Whole Milk Yogurt
2
tbsp. high-quality mayonnaise
1 1/2
tbsp. BBQ sauce
1
tsp. white wine vinegar
1/2
tsp. kosher salt
1
green onion, roughly chopped
1
tbsp. fresh cilantro, packed
1
small clove garlic, smashed
a couple cracks of fresh pepper
Charred Corn
1 1/2
c. frozen sweet corn
2
tsp. olive oil
1/4
tsp. kosher salt
Salad
1
(15 oz.) can of beans, drained and rinsed
8
oz. chopped bibb lettuce (or similar)
1
c. thinly sliced red cabbage
1
avocado, diced
1/4
red onion thinly sliced
sprinkle of pepita seeds
sprinkle of cotija
Instructions
Make the Sweet Potato Croutons. Preheat the oven to 450°F. On an unlined baking sheet, evenly place the Sweet Potato Puffs. Bake for 12 minutes. Meanwhile, stir together the chili powder, salt, and cayenne pepper in a small bowl. Set aside. Remove from oven and toss with spice mixture to evenly coat. Flip each puff over and bake for 12 minutes more.
While the croutons bake, make the BBQ Ranch. In a high-powered blender, add all the BBQ ranch ingredients and blend until smooth. (Tip: For easy clean-up, use a tablespoon and a teaspoon for all measurements. Measure the salt before the vinegar to avoid having to clean the utensil mid-measuring.) This can be made 1 week in advance.
Make the charred corn. In a preheated skillet over medium-high heat, add all the charred corn ingredients. Cook for about 10 minutes until charred, stirring occasionally. Taste and add more salt as needed. Set aside.
Prepare the salad ingredients. Evenly divide greens, beans, charred corn, and sweet potato croutons between plates. Top with the cabbage, avocado, and onions. Sprinkle with pepita seeds, cotija, and BBQ Ranch. Serve.
TO FIND ALEXIA NEAR YOU
Head this way. If you’re in Minneapolis, you can find it at Co-ops, Whole Foods, Target, Lunds & Byerlys, and Cub.
The post BBQ Ranch Southwest Salad appeared first on The Fauxmartha.
Melissa Coleman's Blog

- Melissa Coleman's profile
- 4 followers

