
Melissa Coleman's Blog, page 12
January 17, 2019
Mint Chip Green Smoothie

I want to take you to a warm place I met last summer. Under a big, tall tree. Beneath a lush pile of grass. On top of a kilim blanket. A blanket from the basket just outside the front door of the juice shop. There were mountains in the background. But this particular story isn’t about the mountains. Because traveling to the mountains with a then 4-year-old, like we did last summer to meet up with family, well, there’s only so much you can do. And not a lot of those things involve mountains. Except for the day we took the overpriced gondola to the top of the world. She loved it.


This post is a four part series sponsored by Vitamix and The FeedFeed. I’ve been using a Vitamix my entire adult life and have been known to travel with my Vitamix by car. I use my Vitamix as a blender, food processor, and sometimes a mixer. Thank you for supporting a brand that makes my kitchen run more smoothly.

But not as much as that spot under the big, tall tree, where we found ourselves every afternoon. Usually on our backs, looking up at the umbrella of leaves that blocked the sun like sunglasses. Praise be. Because, of course, we forgot those at home. Even on a warm day, someone must have turned on the air conditioning outside. Though, maybe that was the frozen smoothie in my hand. Usually the Mint Chip Green smoothie, except for the one afternoon when they ran out of bananas. Talk about bananas.

We brought the idea of the Mint Chip Green smoothie home with us to tinker with. It’s winter now, and the wild mint plant that was growing in the backyard is no longer growing. Which means we have to pay excessive amounts to buy handfuls of mint from the store. The heat is on. My jacket is on. But I’ve pulled out my Vitamix again to blend up that creamy (from the avocado and almond butter), minty (from the mint), chippy (from the cacao nibs), and green (from the spinach) smoothie to drift off to that warm place from last summer. Under the big, tall tree. At the base of the mountains. It’s getting warmer in here already. Though, maybe that’s the fireplace crackling.

Mint Chip Green Smoothie
shopping list
Yields
1 large smoothie (1 3/4 cups)
adjust servings
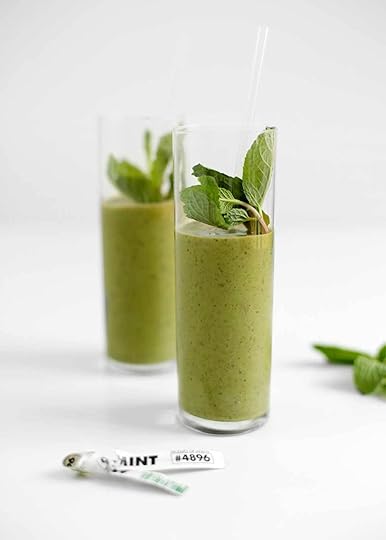
This wholesome Mint Chip Green Smoothie is reminiscent of a Mint Chip Shake. However it's high in protein and the good fats, low in sugar, and so satisfying as a smoothie or an end of day treat.
Ingredients
1/2
c. almond milk (unsweetened)
1/2
ripe banana
1/4
ripe avocado
1/4
c. fresh mint, tightly packed
1/4
c. spinach, lightly packed
1
tbsp. almond butter (unsweetened)
2
pitted medjool dates
pinch of kosher salt
1
scant c. ice
1
tbsp. cacao nibs
Instructions
In a these compostable straws for the past year and love them!
The post Mint Chip Green Smoothie appeared first on The Faux Martha.


January 15, 2019
Week 2: Take Inventory
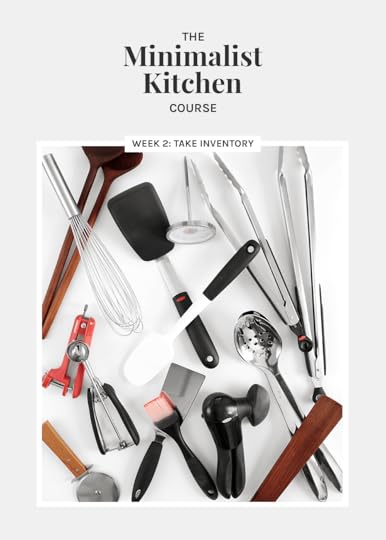
Keep your hard hat on. This week we’ll be taking inventory of the insides of your kitchen, to everything from the tools to the ingredients. And if your kitchen is spilling over as much as mine was a couple years ago (see below), that hard hat might actually come in handy. By the end of this week, we’ll be putting on a new hat, ready to finally pare down. Before we dive in, let’s do a quick recap of last week.

A NOTE OF GRATITUDE
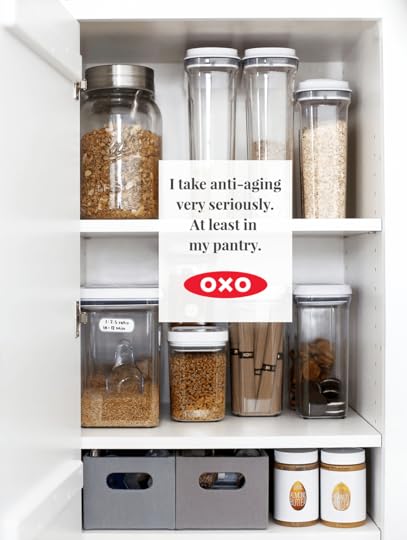
The Minimalist Kitchen Course is brought to you by our partner, OXO, a brand that has brought calm to the chaos of my kitchen. We’ve partnered together to make this course a free resource to you.
Week 2: Take Inventory
OBJECTIVES
• Understand the ecosystems of the kitchen
• Take inventory of the kitchen
• Take inventory of commonly made recipes
• Begin to identify frequently used items
• Identify kitchen specialty
Last week we audited the space of the kitchen, taking an honest assessment of the physical limitations of the space through a space assessment. We defined our objective for biting off this large task. And we also talked about two prominent tools we’ll be using throughout this process to problem solve—minimalism and working backwards, tools that work really well outside the kitchen, too. Finally, we identified the problem areas in the kitchen. Be sure to update the Week 1 worksheet this week as you notice new things.
If you did your homework (whatta teacher thing to say), you now have the answers to these questions below. I’ll briefly answer them so that we’re all on the same page.
What is a kitchen?
The kitchen is a room, but more importantly, it’s a closet—the largest closet in the home. Closets are natural troublemakers.
Why is the kitchen so complicated?
The kitchen is made up of many different ecosystems, each with a different set of needs. The kitchen can also be a shared closet for some, the very hardest kind of closet to maintain. This closet is filled with items that disappear, spoil, and in need of constant attention. Imagine if your favorite t-shirt acted like a stale box of crackers or an expired carton of eggs. It might not be your favorite anymore.
What is a minimalist kitchen?
A minimalist kitchen is a framework for creating and cooking in a pared down kitchen. (See sandbox analogy on page 14 of The Minimalist Kitchen for reference.) It’s the practical application of the idea that less is more. A minimalist kitchen is a whole lot like a capsule wardrobe, where you can mix and match and rearrange items to create a diverse set of outfits, or in this case, recipes. (See Aloo Gobi recipe for example.)
Ecosystems
Let’s stay on this idea of ecosystems for a second. Last week we were in 7th grade math class, and this week we’re in 7th grade science class. Let it be. Ecosystem, as defined by dictionary.com, is any system or network of interconnecting and interacting parts. We often think of ecosystems in the natural world. The earth, the animals, the climate, the process of precipitation, the food chain, etc. The basic idea of an ecosystem is that everything is influenced by, well, everything. When one thing changes, everything has the potential to change. And within the greater ecosystem, there are thousands of tiny ecosystems. This type of system acknowledges that things are complicated, dynamic, and interrelated.
Sound like the kitchen? Within the ecosystem of the kitchen, you have the pantry, the spice cabinet, the gadget drawer(s), the small appliance cabinet, the utensils drawer, the plates, the food storage drawer, the baking sheets, the pots and pans, the refrigerator, and the freezer. Each system mentioned has its own set of needs. To complicate things further, you have outside, contributing forces like humans and decomposition and depleting supplies from mealtimes.
In order to begin the paring down and rebuilding process next week, it’s important to know the capacity of your ecosystem (site audit) and the items inside each system (inventory).
Inventory
For that reason, we are going to take inventory of the insides of the kitchen.
Download the Inventory Worksheet here.
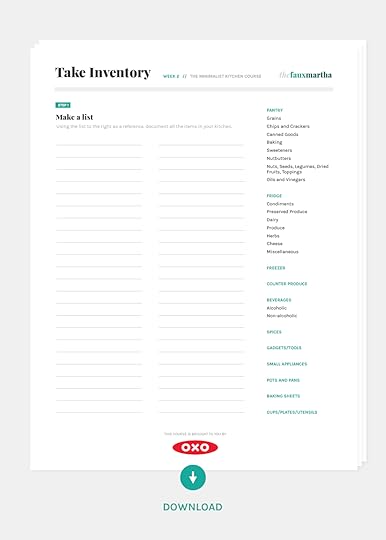
Step 1
Make a List
List each item in the kitchen. Seriously. This might take a couple pieces of paper and a bit of time. We’ll go ecosystem by ecosystem. To do so, use the list in the right hand column of the worksheet to guide the list-making process. Add a subtitle to the top of each list. Be sure to note any miscellaneous items, too. If you’re a list-maker, this might be one of your favorite tasks. Go forth. If not, break up this task, tackling a couple areas each day.
List-making is such a simple yet powerful tool. It helps you to see the information that’s right in front of you through a different lens, through a less personal lens. I found this to be true during the book writing process. Though I’d been slowly paring down my kitchen for years, it took writing it all down to help me realize how much I was keeping that I wasn’t actually using. The extra knives on the knife block that were razor sharp from lack of use. The 8 year old pot in mint condition. The rows and rows of ingredients sitting at the back of my pantry untouched, for at least year or more. I could go on. Seeing it all written down helped me to let go and pare down.
Now, we’re not going to pare down just yet. This week we are in the final stages of collecting information to help you make informed decisions next week, which is the hardest part of the process. It’s hard because there are no exact answers. No magic numbers. No one-size-fits-all solutions. Every kitchen is going to look different, and it should. If you dropped all of my decisions into your kitchen, you’d be very happy with some and sorely disappointed with others. For that reason, I won’t tell you exactly what to keep and get rid of.
The process of taking inventory, list-making, will guide you and empower you to make really good paring down decisions on behalf of your kitchen by next week. And by the end of this whole process, you’ll have a refined list of tools, ingredients, and small appliances, much like you see in my book on pages 18-23, 30, and 32-33. Having this list will also help to inform your shopping habits and recipe choices.
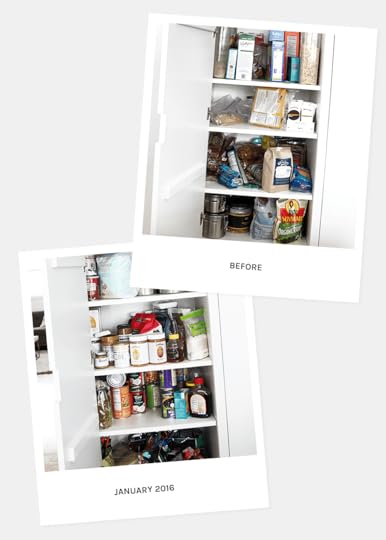
PS: Here’s my pantry 3 years ago during inventory. Believe it or not, I had pared down my pantry, however, it was visually chaotic. I was also having trouble getting rid of perfectly good ingredients that we just never seemed to eat.
Step 2
Recipes
As you’re taking note of all the items in your kitchen, also keep in mind the recipes you make most often. Make a list of those recipes. Begin to think about the overlap of ingredients, spices, and tools across those recipes. Is there a spice you use in nearly every dinner recipe? A pan that you end up washing once a day? Now, go back through your list and highlight the items that overlap. If you want to get a head start for next week, begin mentally compartmentalizing items as as either keep, discard, undecided, or special occasion. Next week, I’ll guide you through the process of paring down the maybes and the mint-conditions in a gentle manner.
Step 3
Specialty
You probably have a specialty (hobby) or three. It’s your poetry, that thing that makes you you. Specialties are varied. Maybe yours is baking or hosting large gatherings. Or maybe yours is making fancy pizza, homemade sourdough, pour-over coffee, or your great great great grandma’s lefse recipe. You get the idea. List your specialties, as well as the specialities of the other cooks in your home, on the worksheet. It’s important to preserve the thing that gives you life in the kitchen. On the other hand, if the special hobby tools are beginning to overtake the kitchen, like mine have a tendency to do, well, now’s a good time to notice that, too.
Byproducts
Let’s hang on to this word notice for a second. One of my favorites things about minimalism is that it’s excessive in byproducts. You set out to pare down and all these other wonderful things start popping up, things you didn’t set out to intentionally achieve. One of those things is that you begin to notice more, which I’ve mentioned a couple times throughout this post. You notice that making pizza on Friday nights makes you really happy. You notice that when the kitchen is organized, you feel calm. Or when it’s not, you feel chaotic. You notice that you buy more food than you’re able to consume. Or that you never get to your hobby because you’re constantly trying to tame the Tupperware drawer.
Noticing is the first step towards identifying a problem. It’s the beginning of advocating for a need. Though the task of noticing may feel menial and slow, it’s one of the best tools for creating a long-lasting solution. Let it be.
What are you noticing as you take inventory of your kitchen?
PUT ON A NEW HAT
One last thing. And it’s a big thing. You are the proud new owner of a hat bearing the title Boss. You’re the boss of a tiny, family-run restaurant. You were the boss last week as you were identifying the problem areas of your kitchen, this week as you were taking inventory, and a year ago as you shopped for groceries, cooked dinner, and made decisions on behalf of your kitchen. It’s time to make this whole thing a little more official. It’s a big role, a powerful role, especially if you share your kitchen space with other people. As you assume this title, think about someone who has used their power positively to affect change. What was their demeanor? Most of us are uncomfortable with change. Resistant. How will you bring along your housemates in this process? How can you make them feel heard and thought of? The kitchen is an ecosystem after all. And its inhabitants are a huge part of it.
We’ll continue to talk more about this responsibility next week.

Homework
READ
 The Minimalist Kitchen, pages 17-23, “Develop a system” on page 26, and pages 30-33. If you’re reading on an e-Reader without page numbers, the readings will take place in Chapter 1. Read “The Essential Tools,” “Develop a System” under “How to Build a Minimalist Pantry,” “How to Build a Minimalist Spice Cabinet,” and “The Ingredients.”
WORKSHEET
Fill out the Take Inventory worksheet.
LIVE DISCUSSION
Join me on Thursday, January 17 from 8:30-9:00 pm CST for a Facebook Live in The Minimalist Kitchen community group. I’ll recap the content from this week and answer any questions that came up for you, so bring your questions about Week 2.
STAY UP-TO- DATE
For a guided process through this course, be sure to sign-up to receive The Minimalist Kitchen Course emails. I’ll send out early bird worksheet downloads, Facebook Live reminders, and any additional course information straight to your inbox.
If you’d like to share your progress along the way, use these hashtags: #theminimalistkitchen and #OXObetter.
Course Outline
WEEK 1: JANUARY 8
Audit the Space // Watch the Q&A on Facebook or YouTube
WEEK 2: JANUARY 15
Take Inventory
WEEK 3: JANUARY 22
A Gentle Paring Down
WEEK 4: JANUARY 29
Putting it all Back Together Again
Giveaway

Organizing your kitchen is an investment—in your sanity and your wallet. OXO is giving two lucky winners $250 worth of food storage and five lucky winners the 10-piece POP set to makeover their minimalist pantry. Oh em gee is right! To enter, sign up to receive the OXO newsletter below.
#mc_embed_signup{background:#fff; clear:left; font:14px Helvetica,Arial,sans-serif; width:100%;}
/* Add your own Mailchimp form style overrides in your site stylesheet or in this style block.
We recommend moving this block and the preceding CSS link to the HEAD of your HTML file. */
#mc-embedded-subscribe-form input[type=checkbox]{display: inline; width: auto;margin-right: 10px;}
#mergeRow-gdpr {margin-top: 20px;}
#mergeRow-gdpr fieldset label {font-weight: normal;}
#mc-embedded-subscribe-form .mc_fieldset{border:none;min-height: 0px;padding-bottom:0px;}
Subscribe to the OXO Newsletter to enter the giveaway.
OFFICIAL RULES: Sweepstakes valid from 9am CST on January 8, 2019 to 9am CST on January 22, 2019. Must be a resident of the United States to enter. Void where prohibited. By entering this giveaway, you are opting in to receive email marketing communications from OXO. View their Privacy Policy.
The post Week 2: Take Inventory appeared first on The Faux Martha.
January 10, 2019
Pantry Friendly Aloo Gobi

The practical art of making more with less. It’s the tagline of my book. It’s one of my favorite things to think about and implement into my life. I like to talk about it, too. You can listen to this podcast with Robyn of Real Food Whole Life. Throughout our conversation, Robyn asked me to break this idea down and break it down again. To be honest, it’s a complex, multi-faceted thing to break down. While this idea is intuitive for some, it’s counterintuitive and confusing to others. Many would think, if I pare down my kitchen, for example, then I’ll only be able to make basic, 5-ingredient recipes. Aside from Marcella Hazan’s brilliant 5-ingredient tomato sauce (you can see my version here), not a lot of recipes come together in so few of ingredients. At least not many you’d want to make again and again. That’s why this whole less-is-more thing is so incredible. Stay with me. If you do, there’s a Lodge Cast Iron giveaway at the bottom.


This post was created in partnership with Muir Glen Organic. Muir Glen harvests organic tomatoes at the peak of ripeness. Tomatoes go from field to can in 8 hours or less. When I shop for canned tomatoes, I stock my pantry with Muir Glen. Thank you for supporting the brands that keep this site running.
When you pare down, you learn how to use the things you own really well. You learn how to configure and reconfigure the same set of tools and ingredients into an entirely new creation. You become less of a recipe regurgitate-er and more of a critical cooker, a resourceful dinner maker, using what you have. A by-product is a kitchen that stays in tact. Not one that is bursting at the seams with each new recipe. If this all sounds a little overwhelming (it was for me once too), check out The Minimalist Kitchen course I’m running right now, or stay right here. I’ll break down this abstract idea further into practical application by using this recipe for Aloo Gobi, a delicious little teacher.

Let’s take the spice cabinet, for example. In the process of paring down my kitchen, I pared down my library of a spice collection to around 20. And then one day I wanted to make Aloo Gobi, a vegetarian and vegan Indian dish made with cauliflower and potatoes (Aloo Gobi). The recipe calls for garam masala, a spice I don’t stock. Garam masala, however, is a spice mixture, like pumpkin spice, Italian spice, curry, etc. It is composed of cumin, coriander, cardamom, pepper, cinnamon, nutmeg, and cloves. These are all spices I keep stocked. Great news! I don’t have to pass on this recipe. I can assemble a similar spice mixture, which you’ll see below. What you’ll also see is a long list of ingredients. But wait, aren’t you a minimalist? That list is sooo long. Well, yes. (This is the counterintuitive part.) I’ve pared down, but now I can use what I have to its very fullest. And that’s the beauty of this idea and recipe.

And now on to tools. I have 4 pots/pans, 1 Dutch oven, 1 nonstick pan for eggs, and 1 cast iron skillet. I know which one to grab for the occasion, how to cook with it, and how to properly care for it in hopes that I can get a lifetime of use. One such pan I grab for daily is the cast iron skillet, a surface that people either love or hate. (I’ll be posting soon on how to care for your pots and pans and move you into the love category for the cast iron skillet.) This particular skillet conducts heat so well. It heats fast and maintains heat long after it’s left the heat source. Which is so very important to know. Things cook faster in this pan compared to the stainless steel pan. Because of that, it’s necessary to adjust cook times. This pan, too, can tolerate really high heat, something that would ruin a nonstick pan, and take a lot of elbow grease to clean if using a stainless steel pan. Best of all, when maintained well, it can be passed down generation after generation.
And then there’s the pantry staples. Over lots of time, I’ve whittled our stocked pantry ingredients down to the ones we use the most, and from there, to the ones that perform the best. One such beloved ingredient is the can of fire-roasted tomatoes. Muir Glen to be exact. They’re organic, low in acidity, and consistently full of flavor. I load up when they go on sale, always buying diced, even if a recipe calls for crushed. And then I pull out my Vitamix to blend the tomatoes to the desired consistency. You’ll see this play out in the recipe below.
Are you feeling this less is more thing? When you pare down, you naturally figure out how to use your belongings to their fullest potential. And it tastes a whole lot like Aloo Gobi. So very good.

Pantry Friendly Aloo Gobi
shopping list
Prep Time
20 mins
Cook Time
20 mins
Yield
3-4
adjust servings
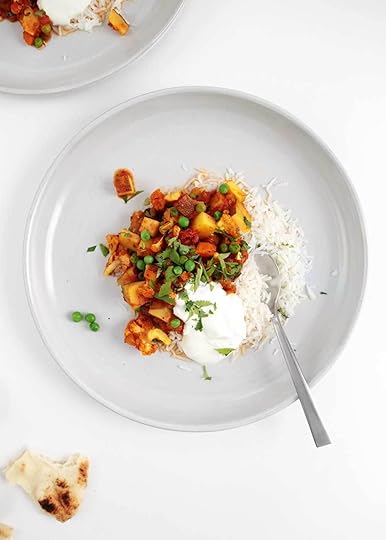
Aloo Gobi is a delicious Indian dish that is naturally vegetarian and vegan (unless you add the yogurt like we do) and perfect for the weeknight. If you like Tikka Masala, you'll also enjoy this dish. It's a touch sweeter in flavor from the garam masala spice mixture, which I've made from spices I keep stocked. Note: Turmeric is not in garam masala but it is in the dish. You can also add a touch of nutmeg and cloves if desired. To add natural sweetness, I've added carrots and frozen peas to this recipe, two ingredients I always keep stocked. Then finished the dish with a short squeeze of honey to bring all the flavors together quickly. Traditionally, this dish is made with fresh ginger. Feel free to sub in a thumb tip size of minced ginger in with the garlic, omitting the ground variety.
Ingredients
Rice
1
c. rice
1
tbsp. unsalted butter
1/4
tsp. kosher salt
Spice Mixture
3/4
tsp. ground ginger
3/4
tsp. cumin
3/4
tsp. coriander
3/4
tsp. turmeric
1/4
tsp. cinnamon
1/8
tsp. cardamom
1/8
tsp. cayenne pepper
Filling
1/2
large sweet onion, roughly diced (about 3/4 cup)
1
large carrot, roughly diced
1
tbsp. olive oil
1
can (14.5 oz) Muir Glen Fire-Roasted Tomatoes
1/2
tomato can of water (1 scant cup)
1 1/2
tsp. kosher salt, plus a pinch
2
c. cauliflower florets
2
c. russet potatoes, diced into 1/2-inch cubes
1
c. frozen peas
drizzle of honey
Optional Garnish
chopped cilantro
whole milk yogurt
Instructions
Make the rice. In a small saucepan, make rice according to package instructions, adding salt and butter.
Assemble spice mixture. Stir together all the spices and set aside.
Make the filling. Roughly chop the onions and carrots. We'll pulse them in the blender shortly, so don't spend too much time here. In a 10-inch cast iron skillet, heat pan to medium-low. Once warm, add the oil, onion, and carrots plus a pinch of salt, and sauté for about 4 minutes. Add the garlic and spice mixture and toast for 30 seconds more. Stir in the canned tomatoes, 1/2 a tomato can full of water, and salt, and simmer for about 3 minutes. Remove sauce from heat and pour into the blender, pulsing until it resembles a crushed texture, not a puree.
Pour sauce back into the pan, adding the cauliflower and potatoes. Stir to coat and bring to a simmer. Cover and steam for 15 minutes at a low simmer, stirring occasionally.
Test the potatoes to make sure they are cooked through. Then remove the lid, and add in peas, plus a drizzle of honey. Cook until peas are just warmed through and still bright green.
Serve Aloo Gobi over a bed of rice. Add optional garnishes as desired.
Giveaway
I’m teaming up with Muir Glen to giveaway one of my favorite pans to one lucky winner, the aforementioned Lodge Cast Iron 10-inch Skillet. To enter, leave a comment below with the name of your favorite pantry friendly recipe. Giveaway closes January 17, 2019 at 10am CST. Open to US residents only.
The post Pantry Friendly Aloo Gobi appeared first on The Faux Martha.
January 8, 2019
Week 1: Audit the Space

Welcome to Week 1 of The Minimalist Kitchen Course! I don’t know about you, but I’m always itchy to get life back into some sort of order after the holidays. It’s a great time to get started on this course. This week we will be auditing your kitchen space, doing a whole lot of thinking and not a whole lot of doing. If you’re anything like me, you’ll want to jump ahead and pare down your kitchen this weekend. Take a long exhale out. We are going to be thoughtful and deliberate about this process, which basically means slow, so that you’re not redoing this again in a month or two. Before we dig into the course content, I’d like to go over a couple things in the intro, like ground rules and my approach to teaching, so that you know how best to consume this information.

A note of Gratitude
The Minimalist Kitchen Course is brought to you by our partner, OXO, a brand that has brought calm to the chaos of my kitchen. We’ve partnered together to make this course a free resource to you.
Intro
Ground Rules
Good things take time. I’m going to present this course in the space of 4 weeks. However, it’s not my intention to communicate that it will only take 4 weeks to complete. It might. Or it might not. Mine was a slow process of intentionally paring down over the course of years. My book didn’t exist, and I rarely used the word minimalism. I was just trying to solve a problem—my kitchen wasn’t working. You can read more about my story on page 14 of The Minimalist Kitchen. Now, there are quick answers and long-term solutions. I recommend pursuing the latter in the case of the kitchen. It takes time to build a really good long-term solution. Let it be.
Once you clean out the front of the drawer, you’ll notice the back. Take comfort in knowing that this is an ongoing process. But once we get a good framework in place, you’ll know how to repeat the process as new issues pop up.

“Pare down to the essence, but don’t remove the poetry.” Use these words from Leonard Koren as a guiding principle. This quote means several things. One, every kitchen is going to look different. There is no right or wrong. That’s the poetry. You are the poetry. Two, we’re not trying to strip this room down to bare. We’re paring it down to the point of functional without removing the beauty, the poetry.
Use minimalism as a tool. Not a religion or an identity. It’s a really wonderful tool for paring down and solving the problem of too much. I’ve successfully used it so many times throughout adulthood. For the purpose of blogging, I call myself a cozy minimalist so that you can quickly identify my approach to the content I share. However, it does not define me. I hope you won’t let it define you either. In fact, you do not have to be a minimalist to use this framework.
The process of paring down is emotional. It just is. Listen to the emotions. Acknowledge them. Notice if there’s repetition of a certain emotion. Maybe it’s trying to communicate something.
Advocate for yourself. I started this process for myself because the kitchen was making me crazy. I brought that negative energy to the dinner table with my family. It followed me like Peter Pan’s shadow. I imagine if you’re taking this course, you know exactly what I’m talking about. Maybe the people you share your home with aren’t into this new change you’re about to implement. Advocate for your sanity and kindly bring them along in this process. We’ll talk more about this in the weeks that follow.
Trust your gut. Trust it over anything I say or a friend says. You will end up with a much more successful framework this way.
I’m here to help. Leave a comment below or join The Minimalist Kitchen community on Facebook, a community of people in pursuit of a similar thing. Paul Wellstone said, “We all do better when we all do better.” I’d love for you to share your experience, questions, and successes.
My Approach to Teaching
If I were a doctor (I am not), I’d be a holistic doctor, considering the whole person, not just the headache. That’s the approach I’m taking for this process. The person matters just as much as the organized or disorganized shelf. In fact, the two are constantly influencing one another. After taking this course and reading The Minimalist Kitchen, I hope you leave knowing how to think about and conceptualize the kitchen, so that you can solve problems as they come up, because they will. Don’t worry, we’ll get into the nitty gritty, practical ways of solving problems, too. However, a solution that works for one person, might not work for everyone. For that reason, conceptualization is key. Ok, I get it. I’m taking this role way too seriously, but here’s to being critical kitchen thinkers. Let’s begin.

Week 1: Audit the Space
Objectives
• Understand the DNA of the kitchen
• Introduce problem-solving tools: Minimalism and Working Backwards
• Define a solution
• Conduct a space audit
• Identify specific problems of the space
It’s naturally difficult to look at a personal situation with a neutral, outsider perspective. Companies know this problem to be true. They hire out consultants and agencies to perform this task, the task of honest auditing. While we don’t have that luxury for the kitchen, we’re going to pretend like we do. Put a hard hat on. Not literally, but if it helps you to get into character, then do it. We’re going on a site visit today as a general contractor or an auditor to look at your kitchen, take measurements, and collect information. In other words, we’re auditing the space, making an honest assessment of its capabilities and shortcomings.
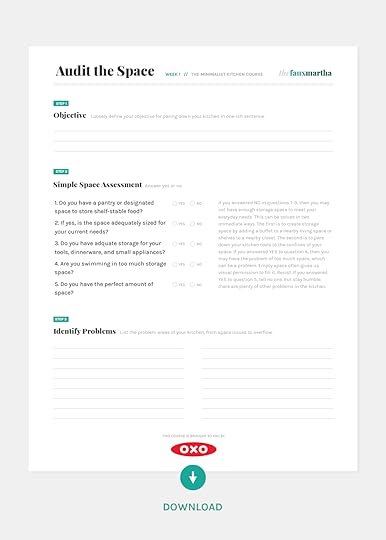
Download this worksheet before reading further to keep track of your notes. If you subscribe by email to this course, you received the early bird copy in your inbox. We’ll spend the rest of today talking through the worksheet. By the way, we’ll be utilizing several worksheets throughout the course to help guide the process, so hang on to each one until the very end.
Aside from minimalism, there’s another tool I love to use to solve problems. It’s called working backwards. I learned it first in 7th grade math class to solve word problems. With this method, you begin with the end, the solution/answer, and work backwards to formulate an equation. It’s a tool I use all the time as a designer. I love to use it because it doesn’t produce concrete, simple equations, and it allows for variables. It’s a more dynamic way of solving a problem, an approach more similar to conducting an experiment, allowing the process to guide you and provide answers. In the case of the kitchen, working backwards might look like this. I want to create a pared down, efficient, and user-friendly kitchen. There’s the answer. But how am I going to get there? (How many times have you asked yourself that question?) I’m going to suggest that we work backwards by defining our problems, solving each one, until we make our way back to the aforementioned answer. The beauty of using this process is that we’re all looking to accomplish a very similar end result. However, each person is going to arrive there from a unique equation. Let it be.
Step 1
Define your objective
In one sentence, why do you want to pare down your kitchen? What is your end goal? This is the answer to the math problem. I’ll go first. To create a pared-down, user-friendly kitchen that works and somehow makes meal times more doable and me less frustrated. This doesn’t need to be fancy or well-written. Run-on sentences, like mine, are more than welcome.
Now we begin the slow process of working backwards towards our end goal. This is going to take time and investment to get there. Let the real fun begin.
Step 2
Simple Space Assessment
Let’s take a simple space assessment of your kitchen to understand what we are working with. There is such a thing as too much space and not enough space in the kitchen. Both can create problems if we don’t handle them before moving forward.
We’ll handle the easier one first. Too much space often gives us visual permission to fill the open, empty space with things we don’t actually need or use. If you have this problem, resist the impulse to fill the space. Let it stay as empty as an awkward conversation. The good news is, you have plenty of space to begin this process. Continue on to Step 3.
Not enough space makes for overflowing countertops, random stacks of stuff, and little room to work. Mess begets mess, and the kitchen becomes nearly impossible to organize long-term. This can be solved in two immediate ways, and I would highly recommend handling it before moving forward. The first is to create additional storage space by adding a buffet, or a similar piece of furniture, to a nearby living space. Or, you can add shelves to a nearby closet. The second is to pare down your kitchen tools and ingredients to fit the confines of your space. Maybe you’ve tried this again and again with no luck. It’s just too small! In that case, it sounds like you have inadequate storage space. I’d recommend creating new, nearby storage spaces.
Over the years, we’ve done a little bit of both. Our kitchen now has just enough space; it feels perfect. I know. Annoying! However we started out in 4 very tiny kitchen apartments. Oddly enough, we have less gadgets and small appliances now than we did in our tiniest apartment. In each space, we found ourselves having to add storage. Adding a buffet was a great investment for us. It moved with us and offered a beautiful storage solution. We also added inexpensive shelving to nearby closets for additional storage. I use nearby loosely. In our teeny tiny apartments, everything was nearby.

A lot of times we think of storage as utilitarian—unattractive and industrial. Storage can also be incredibly beautiful while solving a problem. Form meets function. Above is the additional storage we have now. We created a DIY, narrow buffet in our nearby dining room by using two Ikea upper cabinets. You can read more about it here. For additional ideas, check out Brittany Makes post about adding a permanent pantry using Ikea cabinets. Or think about adding a non-permanent solution like Ikea Free-Standing Shelving in a living room or closet space or this Free Standing Pantry from Home Depot.
Now I know some of you are cringing at the thought of having to spend money to get this room in order. I was once there, trying so many different ways of organizing my kitchen, only to have to redo it a couple months later. Ample storage is a key component in creating a user-friendly kitchen.
Let’s take your bedroom for example. Typically when you move in, the room itself has no way to store clothes besides a hanging rack in the closet. You add drawers and shelves and compartments to handle your wardrobe needs. Kitchens are deceiving. While they have some storage, more often than not, they aren’t equipped with adequate storage. So many of us think that we are the issue with the kitchen. Breathe a huge sigh of relief. It’s not you; it’s the kitchen. You’ll read more about the DNA of a kitchen in your homework for the week. The good news is— we can rework the kitchen to work better. And we will.
Step 3
Identify the problem areas of your kitchen
Don’t hold back. Do I even need to say that? Open the drawers and the cabinets, and take notes as an outside auditor. Observe. What do you see? Is the counter overflowing? Are the chips stale? Is there a layer of expired food hiding in the back of the cabinets? Are there 10 half-eaten boxes of cereal? A well collected library of spices in need of the dewey decimal system? Does this room make you feel frustrated? Write it all down. This is the critical part of critical thinking. If you don’t enjoy wearing the hat of the critic, hear me out. The only way to solve a problem is to first identify it. We’ll take this list in the following weeks and develop long-term solutions to handle each problem. For now, just take notes.
Homework
Read
The Minimalist Kitchen, pages 13-15 and intro on page 26. Be able to answer the questions—what is a kitchen, what is a minimalist kitchen, and why is the kitchen so complicated.
Worksheet
Fill out the Audit the Space worksheet.
Live Discussion
Join me on Sunday, January 13 from 8:30-9:00 pm CST for a Facebook Live in The Minimalist Kitchen community group. I’ll recap the content from this week and answer any questions that came up for you, so bring your questions about Week 1.
STAY UP-TO- DATE
For a guided process through this course, be sure to sign-up to receive The Minimalist Kitchen Course emails. I’ll send out early bird worksheet downloads, Facebook Live reminders, and any additional course information straight to your inbox.
If you’d like to share your progress along the way, use these hashtags: #theminimalistkitchen and #OXObetter.
Course Outline
WEEK 1
Audit the Space
WEEK 2
Take Inventory
WEEK 3
A Gentle Paring Down
WEEK 4
Putting it all Back Together Again
Giveaway
Organizing your kitchen is an investment—in your sanity and your wallet. OXO is giving two lucky winners $250 worth of food storage and five lucky winners the 10-piece POP set to makeover their minimalist pantry. Oh em gee is right! To enter, sign up to receive the OXO newsletter below.
#mc_embed_signup{background:#fff; clear:left; font:14px Helvetica,Arial,sans-serif; width:100%;}
/* Add your own Mailchimp form style overrides in your site stylesheet or in this style block.
We recommend moving this block and the preceding CSS link to the HEAD of your HTML file. */
#mc-embedded-subscribe-form input[type=checkbox]{display: inline; width: auto;margin-right: 10px;}
#mergeRow-gdpr {margin-top: 20px;}
#mergeRow-gdpr fieldset label {font-weight: normal;}
#mc-embedded-subscribe-form .mc_fieldset{border:none;min-height: 0px;padding-bottom:0px;}
Subscribe to the OXO Newsletter to enter the giveaway.
OFFICIAL RULES: Sweepstakes valid from 9am CST on January 8, 2019 to 9am CST on January 22, 2019. Must be a resident of the United States to enter. Void where prohibited. By entering this giveaway, you are opting in to receive email marketing communications from OXO. View their Privacy Policy.
The post Week 1: Audit the Space appeared first on The Faux Martha.
December 18, 2018
Flourless Chocolate Cupcakes

Ours is 72-inches long made from a soft wood. So soft it holds every scribble, a practice session of the letter “E”, and a splinter of red paint. It keeps records of our dinners, weekend breakfasts, and the occasional overly stuffed gathering by way of smeared avocados, petrified pasta noodles, and a never ending supply of crumbs. In a wild game of tag, it’s our home base. The dinner table, that is.


This post is sponsored by Driscoll’s and The FeedFeed. Here’s the secret to why Driscoll’s berries are always so flavorful. They follow the sun. So when nothing is growing out of the frozen Minnesota earth this time of year, my Driscoll’s organic blackberries are still juicy and flavorful. To learn more about Driscoll’s #BerryTogether campaign, head this way. Thank you for supporting the companies that support me.

This table. It also holds family who eat meat and friends that don’t—vegans, vegetarians, and meat lovers; gluten intolerant, paleo preferred, and picky 5-year-olds, too. I’m grateful for this table, despite the nights that end in alligator tears from my tiny human. It’s taught me new recipes, hospitality, inclusion, and how to make really good Flourless Chocolate Cupcakes.

Flour-lovers, this one is for you too. This simple cake finds its lift from whipped egg whites, its fudgy richness from from butter, chocolate, and egg yolks, and its sweetness from an extra hit of salt (it compliments the sweetness).

It’s fine on its own, sprinkled with powdered sugar, but I made an afternoon of it, topping it with the sturdy mascarpone whipped cream frosting from my book, a drizzle of reduced blackberry sauce, and sugared sage, which, if you squint hard enough, look like festive, snowy trees.

I hope your table is rich this season, if for no other reason than these cupcakes. PS—if you find yourself with extra blackberry sauce, add to plain yogurt, top waffles and pancakes, or make another batch of these. To make, search for Driscoll’s Organic Blackberries. They follow the sun to grow juicy berries all year long.

Flourless Chocolate Cupcakes
shopping list
Prep Time
25 mins
Cook Time
20 mins
Yields
12 cupcakes
adjust servings

Rich, naturally gluten-free Flourless Chocolate Cupcakes that will make even the flour-lover happy. Serve as is or top with a whipped mascarpone frosting, a drizzle of blackberry sauce, and sugared sage leaves.
Ingredients
Flourless Cake
8
tbsp. (1 stick) unsalted butter, diced
1
c. chopped bittersweet chocolate
1
tsp. kosher salt
6
large eggs, separated
1/2
c. sugar
Blackberry Sauce
6
oz. Driscoll's Organic Blackberries
2
tbsp. pure cane sugar
1
tbsp. water
Frosting
Mascarpone Frosting in The Minimalist Kitchen (pg. 254), omitting the cardamom
Optional Garnish
12
Sugared Sage Leaves (see notes for recipe)
12
blackberries
Instructions
Make the flourless cake. Preheat oven to 350°F. Line cupcake tin with 12 liners. Set aside.
In a double boiler, add chocolate and butter. Place over a saucepan filled with water so that water is not touching bottom of double boiler. Cook over medium-high heat, stirring until chocolate and butter have almost melted. Remove from heat and whisk in the kosher salt until smooth. Set aside.
Meanwhile, separate egg whites and yolks into two bowls, placing the whites in a mixing bowl. Using a stand or hand mixer, whip egg whites on high until soft peaks. Then slowly add sugar a little bit at a time, whipping until almost stiff, glossy peaks form. Using a spatula, fold egg whites into the chocolate mixture in 4 increments until just combined. Divide batter evenly into the cupcake liners. Bake for about 20 minutes. Tops will spring back when ready. Remove from the oven. Slight collapsing is normal.
While the cupcakes bake, make the blackberry sauce. Into a small saucepan, add all the blackberry ingredients. Cook on medium heat until sugar is dissolved, about 5 minutes. Pour mixture into a high powered blender, blending until smooth. Pour sauce back into the saucepan through a fine mesh sieve to catch the seeds. Cook for another 5 minutes until sauce begins to reduce and thicken. Remove from heat and allow to cool completely. Store leftovers covered in the fridge.
Make the frosting. (If you don't have my book, The Faux Martha.
December 13, 2018
The Minimalist Kitchen Course

I’ve been hard at work, behind the scenes, creating a comprehensive resource for you. The Minimalist Kitchen Course is coming to a computer near you, January 8th to be exact. This course is an addendum to my book. A prequel to the sequel. A tighter hand hold. Not like a squeeze-your-hand hold, more like a hold-your-hand hold. Many were able to take my book, The Minimalist Kitchen, and pare down their kitchen easily. And others were like, break it down now. Which is how I feel anytime someone talks about business or tax stuff. I’m like break it waaaayyyy down now. That’s how this course has been designed. The book still stands. In fact, you’ll need to use it as your textbook for the course.
So if you’ve ever said:
Her book is too minimalist.
It’s not minimalist enough.
Heck, I’m not a minimalist.
Oh my gosh, she keeps a tortilla warmer around. She’s no minimalist.
My kitchen makes me curse.
My kitchen is too small.
Mine is too big.
I used to love to cook.
I’ll get to that room one of these days.
Then this course is for you.
The Minimalist Kitchen Course Details
When
January 8–29: course will go live every Tuesday morning on the blog
Who
Everyone is invited
What
A 4-week course to help to simplify and organize the most complicated closet in the house—the kitchen—from the pantry to the spice drawer to your recipes.
Textbook
The Minimalist Kitchen
Purchase where books are sold, check out from the library, or borrow from a friend. If your library system doesn’t have a copy, you can always request it.
ALERT: I’m giving away two signed copies of the book for those who sign up by December 20, 2018 at 11:59 pm CST. Winners will be chosen at random from the course list. Join below.
Cost
This four-week pantry cleanse course is sponsored by OXO. We’ve partnered together to make this resource free to you. Thank you for supporting a brand that makes my kitchen—especially my pantry—run more smoothly.

The post The Minimalist Kitchen Course appeared first on The Faux Martha.
December 6, 2018
The Best Christmas Tree Stands

They don’t make things like they used to. But if you look hard enough, you’ll find a handful of artisans that do—that make things the old fashioned way. They just might not be on the internet. Ha! Our tree stand is one of those things. We bought it 3 years ago from the tree farm where we cut down our tree. And every year you ask, “Where did you get your tree stand?” And every year I go on a hunt that turns up empty answers. Not this year though! I dug a little deeper to find you similar options to our forever, heirloom, high-quality tree stand. Note: quality costs more, so you’ll see prices below to reflect that. Behold.

The Best Christmas Tree Stands
When buying a stand, consider the wingspan of the base, the maximum height tree it can hold (please no indoor timbers!), and whether or not the design is timeless. Buy this guy once. I’ve linked to stands that hold between 6′-12′ trees.
Vintage Enamel Tree Stand
You can find plenty of timeless, one-of-a-kind vintage tree stands out there. Of course, they go fast. I’ll link to a couple that will surely be gone by next week. Check out places like eBay, Etsy, and local vintage stores.
Etsy | eBay
Red Pipe Stand
This stand is made by the same manufacturer as ours, though I can’t find the red basin and green legs anywhere online. You could always hire someone or buy spray paint to coat the legs in an enamel green paint. (If you’re in the Twin Cities, go to Krueger’s Christmas Tree Farm to see if they still have some of these pipe stands. Don’t quote me, but I think their legs are green!)
$57.95 from Evans Christmas (max. 12′ tree)
Retro Tree Stand
This stand lacks removable legs, making it a large item to store. However it’s not lacking in classic beauty. That red is perfect.
$169 from Schoolhouse (currently sold out)
$118 from Amazon (max. 6′-7′ tree)
$144 from Amazon (max. 8′-9′ tree)
Cast Iron Stand
With a minimal wingspan, this stand is great for tight spaces. Made from durable cast iron, it’ll last a lifetime.
$99 from L.L.Bean (max. 8′ tree)
Green Pipe Stand
This one, too, is a lot like ours. While I love the contrast of a red base to a green tree, this base is still a great option and boasts a friendlier price tag.
$55.99 from Wayfair (max. 10′-11.9′ tree)
Wooden Artificial Stand
I grew up in Texas where real trees were just too much of a fire hazard. They didn’t survive the long drive down from the north. If an artificial tree is your mascot, look at this beautiful wooden stand. I’m drooling.
$36.99 from Wayfair (for artificial trees only)
SEE ALL FAUXHOUSE POSTS>
The post The Best Christmas Tree Stands appeared first on The Faux Martha.
December 4, 2018
Homemade Pantry Staples made with a Vitamix

If it looks like a blender, blends like a blender, and makes smoothies like a blender, then it must be a blender. Unless it’s a Vitamix. In that case, it’s a blender, a food processor, an immersion blender, a peanut butter maker, an oat flour blitzer, a whipped cream whipper, and the list goes on and on. I married into a Vitamix family. My husband grew up using this high-powered blender. His Uncle Rex sold these machines for many years. And his mom, Tamara, got him a Certified Reconditioned Vitamix as a college graduation present. It’s the same blender we’ve been using all these years. (Read on for giveaway.)

This post is a four part series sponsored by Vitamix and The FeedFeed. I’ve been using a Vitamix my entire adult life and have been known to travel with my Vitamixby car. I use my Vitamix as a blender, food processor, and sometimes a mixer. Thank you for supporting a brand that makes my kitchen run more smoothly.

I grew up with one of those leaky, screw apart blenders, that could barely handle ice. We replaced it every couple of years. You know, right after the warranty expired. And because of that, we rarely used that unreliable small appliance. It couldn’t be trusted. So when I married into a Vitamix family, I didn’t believe in a world where blenders actually worked, much less a blender that would let me over-use and abuse it. This tool is now my right-hand man in the kitchen, my sous chef. At minimum, I use it daily. It’s durable, minimal (in that it does the job of 4 small appliances), and it works like it should. A minimalist kitchen must have. And with that, [read in Oprah giveaway voice] I’m so excited to tell you that I get to give one lucky person a new Vitamix Ascent Series. Before you enter, let me show you several homemade pantry staples made right in the basin of this blender. (Uncle Rex, how am I doing?)
Homemade Pantry Staples

Oat Flour
Oat flour is something I use in a lot of recipes as a binding agent or flour. You can buy it at the store, of course, or you can just as easily make it in your Vitamix. To make: Add desired amount of regular oats, and blend on high into a fine powder, about 10 seconds.

Powdered Sugar
You’re mid-recipe and out of powdered sugar. Not a problem. To make: Add regular sugar to the Vitamix and blitz on high until you have powdered sugar, about 12 seconds. You can also make extra fine sugar this way, pulsing at medium speed until granules are extra fine, not powdered.

Whipped Cream
This is one of my favorite things to make in the Vitamix. You could just as easily make it in a stand mixer, but you can’t just as easily add hot water and dish soap to the basin to blend it clean. To make: Add desired amount of heavy cream and sweetener (powdered sugar or maple syrup) and slowly turn up the speed to medium-high, blending until stiff peaks, about 20 seconds. However, use your eyes as a timer for this one. It can turn from whipped cream to butter fast. If you take it too far, remove from blender and fold in a bit more cream to soften.

Peanut Butter
Skip the $10 jar from the store and make your own. You can get wild here. Mix nuts, add cinnamon, sweeten with honey or maple syrup, or not. Salt to your liking. For creamier results add a bit of oil, like grapeseed oil or coconut oil. To make: add dry roasted peanuts to the blender. Add in salt and sweetener if desired. Blend on medium-low until a creamy consistency has formed, about 1 1/2 minutes. Slowly add in a drizzle of oil to add creaminess while blending.

Hummus
Once again, skip the store and stay home. It’s so simple to make your own. To make: try this base recipe. Add in roasted red pepper or whatever your stomach desires.
Giveaway

And now, for the best part of all, the giveaway! To enter: Leave a comment below with either your worst blender flub story or the first thing you’d make in your blender by 12/11/18 at 10 am CST. Must be 18 to enter and live in the US. Winner will be chosen at random. Good luck!
The post Homemade Pantry Staples made with a Vitamix appeared first on The Faux Martha.
November 27, 2018
Winter Minimalist Wardrobe

Like my kitchen, I’ve been slowly paring down my wardrobe since the beginning of adulthood to make the everyday more doable. In the early days, my drawers could barely close and created daily frustration. I kept a lot around because, variety is the spice of life. At least that’s what they say. And yet, I always grabbed for the same pair of jeans, the ones that fit like a glove, and the same t-shirt that washed and wore well. I was wearing a uniform, though it took me awhile to realize it. But once I did, I slowly started getting rid of the excess. From there, I started buying my clothes like I buy pantry staples, in bulk—2 of the same favorite camisole, 2 of the same pair of jeans, 2 of the same favorite t-shirt, and 10 of the same pair (and color) of underwear.
But why, Melissa? You’re stripping the joy out of it. Actually, I feel like I’m injecting my life with more joy. Life is plenty complicated on its own. If I can simplify the things within my control, like my wardrobe or kitchen, then I have more mental bandwidth to handle the daily chaos. Not to mention, shopping is one of my least favorite activities. I suffer from decision paralysis, buyers remorse, and a hard-to-clothe body. If you too fall in that camp, I’ll break down my loose formula for creating a minimalist wardrobe below.
A couple things worth noting first. As with all things minimalism, there is no one-size-fits-all approach. Use my approach as one of many examples. Treat this as a lifestyle change rather than a fad. To do so, give yourself time to create a minimalist wardrobe. Years, even. My wardrobe is a very slow collection of the good stuff. I’ll link to similar things I own and love below. And finally, only buy in multiples after you know the purchase is a good one.
How to Create a Winter Minimalist Wardrobe
• List the occasions you need clothes for: everyday, work, working out, special occasions, lounging
• Consider how often you do laundry: once a week, twice a week, every other week
• Consider the weather: sub-zero vs. chilly temps
• Pay attention to the style of clothes you prefer, the color palette, and what looks best on your body.
• With this information, create a rough template for your wardrobe needs.
• Then place a giveaway box or bag in your closet for 3 months. This will allow you to slowly pare down and rescue an item if needed. Slow, thoughtful decision-making tends to be more trustworthy than rash decision-making.
• When you shop, shop with a purpose, for a very specific item. In other words, shop your list, not the store. If uncertain, leave the tags on for a couple days or a week after bringing it home to make sure the item is a keeper.

My Winter Minimalist Wardrobe Template
Color palette: black, white, chambray, and grey + a pop of plaid
Everyday
2 pairs of blue jeans (low-rise)
1 other pair of jeans (white jeans)
2 favorite long sleeved tees (like so)
2 white camisoles, 1 black (favorite cami)
3 different cozy open-front sweaters (cozy neutral or pop of pattern)
2 chambray button downs or popovers (like so)
1 patterned popover (like this one)
1 scarf/wrap (pop of plaid)
1 sweatshirt
10 pairs of underwear in black
Special occasion
1 black winter dress
Work out
2 workout shirts
2 pairs of yoga pants (so pricey but love the size varieties)
Shoes
Everyday low winter boots (favorite boot)
Tall, extra warm winter boots (favorite boot)
Flats (my favorite durable flat)
Closed-toed shoes (this is my task for the winter)
Interested in hearing more? Check out this interview I did with Real Simple and Project 333 by Courtney Carver.
The post Winter Minimalist Wardrobe appeared first on The Faux Martha.
November 16, 2018
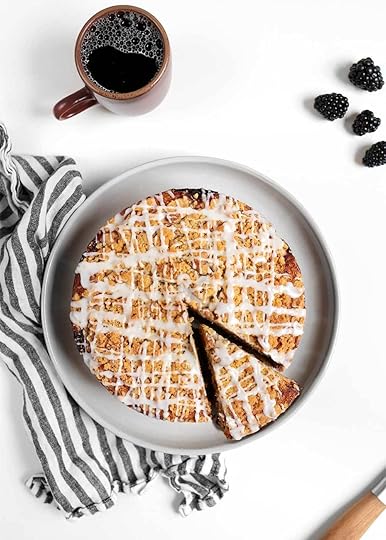
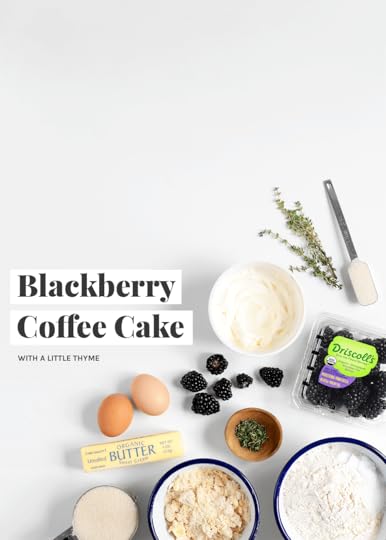
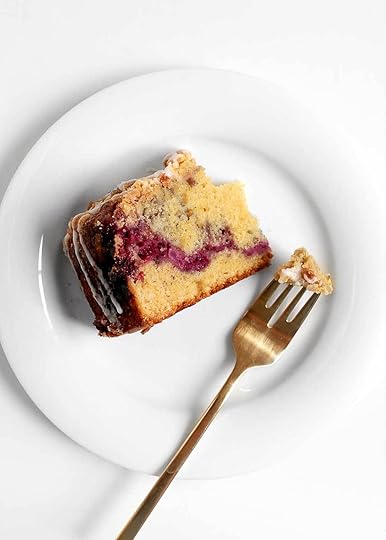
Blackberry Coffee Cake
I’m a 9 on the enneagram. The peacemaker. I love homeostasis, a 98.6°F basal body temperature, for everything to be right in my world. I tend to be easy going and agreeable, except in the presence of oysters, too tight of jeans, and the feeling of disappointing someone. That also makes me a people pleaser. It’s my biggest asset and my greatest deficit. I’m very good at self deprecating talk, but that’s not news to any of you. And if I get overwhelmed, I tend towards sloth. I said that way too fast, I tend towards sllloooooootttttthhhhhh. Which is how I’m feeling at the moment.
This post is sponsored by Driscoll’s and The FeedFeed. Here’s the secret to why Driscoll’s berries are always so flavorful. They follow the sun. So when nothing is growing out of the frozen Minnesota earth this time of year, my Driscoll’s organic blackberries are still juicy and flavorful. To learn more about Driscoll’s #BerryTogether campaign, head this way. Thank you for supporting the companies that support me.
I’ve always said, if you meet me at the end of the year, give me another chance at the start of the year. With the craze of the holidays, too many end of year deadlines*, and the constant message to buy more, more, more, I’m the worst version of myself. The weight of all the chaos and expectations is heavy enough to nail me to the couch. And yet, the people pleaser part of me wants to keep flitting away to keep everyone around me happy.
*I make most of my income at the end of the year. Actively working on trying to change that for my mental state and overall happiness. Sharing my new approach to a minimalist work life in the new year.
Underneath the surface of this inner turmoil, heightened by the end of the year chaos, are a bunch of should’s. I should write more holiday posts. I should host a party. I should send a holiday card. I should, should, should.
After one too many should’s over brunch, a much wiser friend said, “Melissa, stop should-ing all over yourself.” I laughed and choked on my coffee and said amen. We know these things in our head, but sometimes we just need someone to give us permission to stop should-ing all over ourselves. If you’re a number 9, if the end of the year stresses you out, if you are the queen of should’s, well then, I hope you can laugh and take her advice, too.
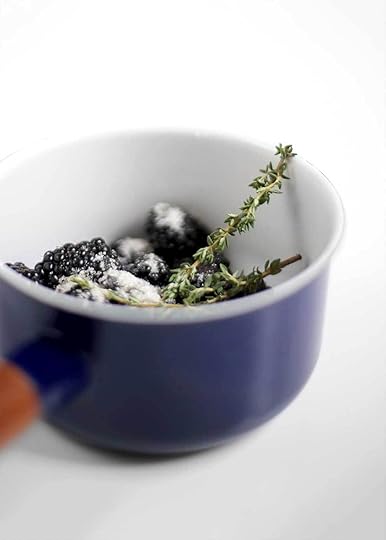
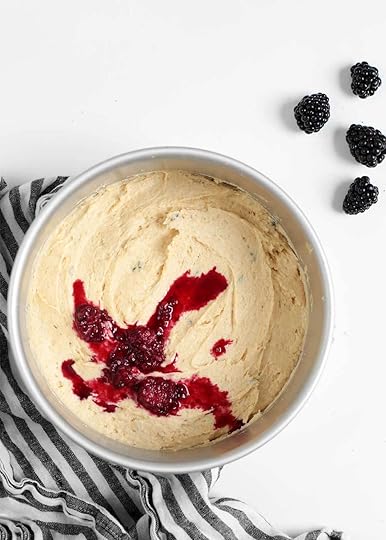
And if you find yourself saying, I should wake up early to make a special breakfast for holiday guests, then try this make-ahead Blackberry Coffee Cake recipe, and sleep in. It’s always best the next day. The ingredient list is long but familiar and the stripe of purple running through the center of the cake is stunning. Add fresh thyme for a touch of savory, and search for Driscoll’s Organic Blackberries. They follow the sun to grow juicy berries all year long. (So juicy Hal stole and consumed a whole container from my recipe-testing stash.)
Blackberry Coffee Cake
shopping list
Prep Time
25 mins
Cook Time
45 mins
Yield
8
adjust servings
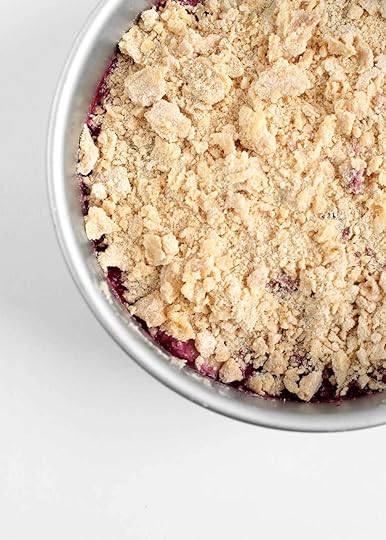
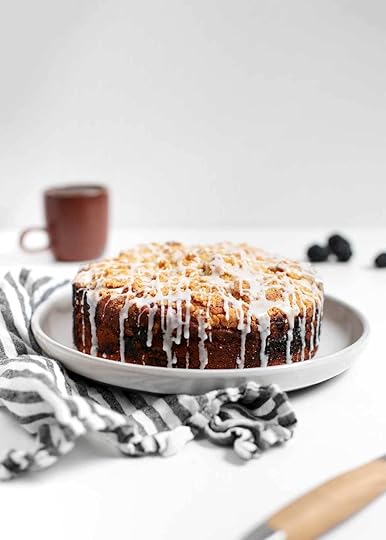
A 4-part coffee cake composed of a sour cream cake, a stripe of blackberry thyme, a crumbly streusel, and a messy glaze. Best made the day before serving.
Ingredients
Streusel
3
tbsp. cold salted butter, sliced
1/2
c. unbleached all-purpose flour
1/4
c. packed brown sugar
Blackberry Thyme Filling
6
oz. Driscoll's Blackberries
1
tbsp. pure cane sugar
sprig of thyme
Coffee Cake
1
stick (1/2 cup) unsalted butter, room temperature
3/4
c. pure cane sugar
1
c. unbleached all-purpose flour
1
c. wheat pastry flour
2
tsp. fresh thyme
1
tsp. aluminum-free baking powder
1
tsp. baking soda
3/4
tsp. kosher salt
2
large eggs, room temperature
1
c. sour cream
1
tsp. pure vanilla extract
Glaze
3/4
c. powdered sugar
1
tbsp. milk
Instructions
Preheat oven to 350°F. Line the bottom of an The Faux Martha.
Melissa Coleman's Blog

- Melissa Coleman's profile
- 4 followers

