
Amy Tangerine's Blog, page 14
November 17, 2018
Violeta's Expo Layout
Hello!
I am Violeta Scrap and I am very happy to show you a layout that I have made using some Amy Tangerine’s products of her very last collection.

For this Project I have used some pictures of some years ago that I wanted to use for a layout, but I could not find the perfect combination of papers and embellishments for them.

But some embellishments of the latest collection of Amy Tangerine inspired me to create a layout with earth tones.


As base of the layout I have used a paper with orange tones that combines perfectly well with the pictures. Over it I have glued a white basic cardstock where I have cut some words with my silhouette Cameo. After that I have glued the pictures and I have decorated the layout with different scrapbooking elements.

For the title of the project I have used some thickers in black from the latest Amy Tangerine’s collection. Moreover, I have added some chipboard in white and foil. They are perfect for this project. I think that the color combination and the embellishments of this layout are perfect to work with any of the others Amy collections.

I hope you liked this project. I have enjoyed so much doing this layout. If you have any question regarding the project, you can leave it in the comments section below. Thanks!
Supplies: On a Whim - 12x12 Double Sided Paper - Ray of Light (378722), On a Whim - 12x12 Double Sided Paper - Good Stuff (378735), On a Whim - Sticker Book (378748), Sticker Book (376233)
Blog| Instagram| Twitter| Facebook| YouTube
Thanks so much for sharing this layout with us, Violeta! Other Design Team member posts can be found here . Shop Sunshine and Good Times at your local retailer or online at Scrapbook.com and Simon Says Stamp .


November 16, 2018
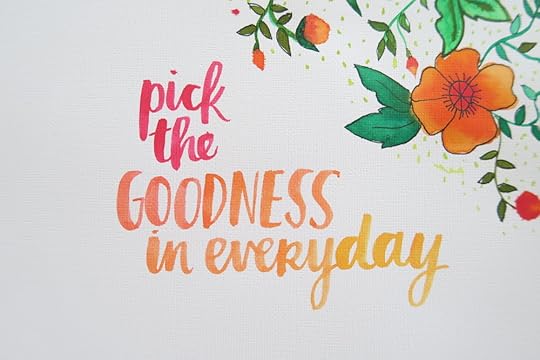
be kind

One of the best things you can do for yourself is be kind to others. Today and every day, let’s transform negativity and bad vibes with goodness and positivity. I know things can seem dark, discouraging and cynical. There’s so much happening that feels beyond our control. But I want to challenge you to put something beautiful out in the world today and just see what happens. It can be as small as a smile or word. It can also be a phone call, a pay it forward at your coffee shop, or sending a pretty card in the mail. Will you pay it forward?
November 6, 2018
Zinia's Colorful Pattern Strips
Hello everyone, it’s Zinia here and today I’d like to share with you a layout I created using thin colorful strips of pattern paper from Amy's Shine On Collection.
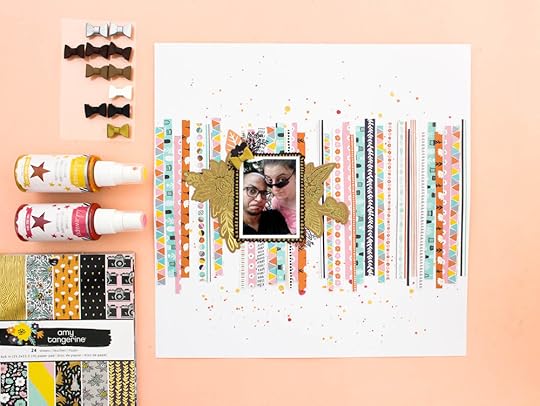
I absolutely adore working with stripes, especially when we are talking about pattern paper. I love mixing colors and patterns in fun ways while working with simple and fun shapes.
Since I wanted my strips to be very thin, I chose to work from my Shine On 6x6 Paper Pad, however you can totally use your 12x12 paper scraps for this design. You can even use carstock scraps in rainbow order for a super bright and colorful result!
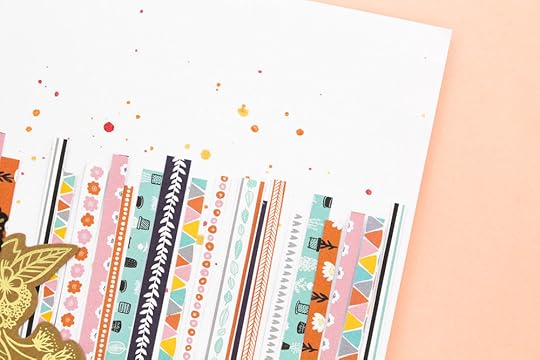
So anyway, back to the 6x6 pad, I picked out patterns in all the different colors that are featured in the collection and cut them down to the thinnest strips that my paper cutter could handle.
Before I started adhering my strips, I wanted to add a little something to break the white background, so I pulled out a couple Color Shine sprays and added some messy splatters all over the page. I made sure to let my splatters dry for a few minutes so I won’t risk smudging the color and then I went back to my paper strips.
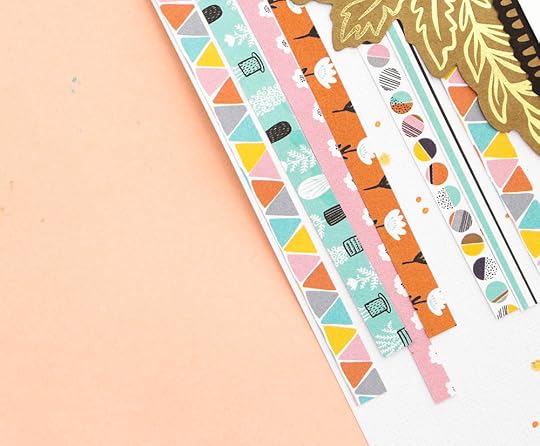
I didn’t really overthink the order of the colors and patterns, I just made sure to spread them as evenly as possible. To do that, I just stuck my strips one pattern at a time so all the pieces of the same design are far from each other.
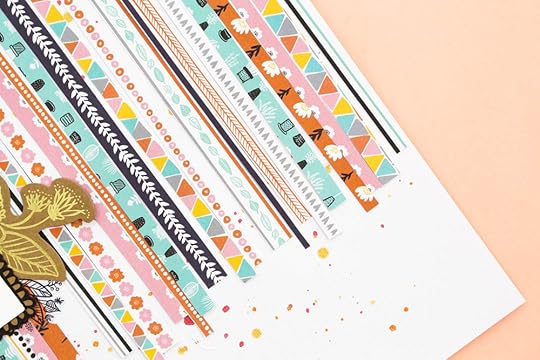
When all the strips were in place, I created a little cluster using some of my favorite ephemera pieces from the collection. I used one of the journaling pieces as a border around my photo and also added a few stickers as well as one of the adorable leather bows.

I really hope you enjoyed this page, until next time, happy crafting.
Blog | Instagram | Twitter | Facebook
348247 Shine On 6x6 Paper Pad, 348254 Shine On Sticker Book, 348256 Shine On Bows, 348250 Shine On Ephemera, 00795 Color Shine Mustard, 00797 Color Shine Pink
You can find all of the Shine On Collection here.
October 29, 2018
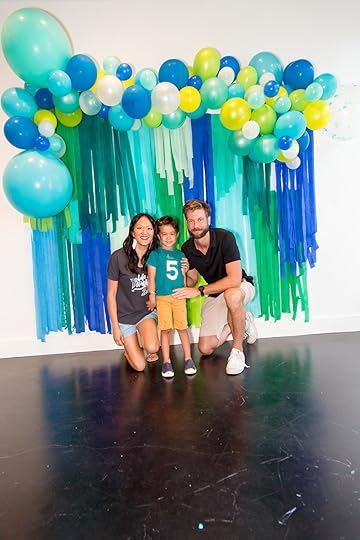
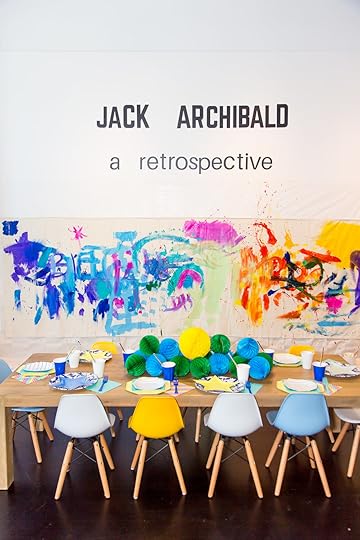
Art Opening: Jack's 5th Birthday Party!

Jack’s 5th birthday bash was a total hit! I was so excited to celebrate the occasion in style and was thrilled to collaborate with so many amazing people and companies to make the big day come together. About a month before Jack’s birthday (it really snuck up on us!) we decided on a theme since Jack is really into art. He loves going to museums and tagging along for gallery openings, so it seems fitting that we would celebrate his birthday in a similar fashion. This summer he spent a lot of time attending Art Camp LA, so I really wanted them to be a big part of the party and to handle the hands on activities. The space at Runway Playa Vista is basically empty, so everything had to be brought in. Party prep for decorations went late into the night before and set-up started bright and early at 7 am the morning of the party. Of course, it all turned out to be worth it. After all, we had amazing decorations, food, and friends to help us celebrate. There are so many amazing photos from the party taken by ographr. I also wanted to share my top tips for making a party come together.

We had so many great companies come together to make Jack’s party incredible. This Modern Art Gallery-themed Birthday party is now an Amy Tangerine #partyblueprint at Black Twine! Please follow @blacktwine for the best party inspiration and check out their website (www.blacktwine.co) for easy to follow, step-by-step guides to help you throw your next amazing party! Here’s a special thanks to everyone who helped the event come together so beautifully:
ooly - art supplies + party favors
Black Twine - collaborator for decor
Art Camp LA - kids crafts and instruction
Bashery Co. - event design
Geese & Ganders - party goods
Teak & Lace - furniture
Pipsticks - party favors
Amy Cakes and Sweet Treats - cupcakes
ographr - Photography


I was so happy with the way the party turned out, especially because we only had one morning to do the actual party set-up. The pace was a little hectic, but everything came together thanks to the amazing vendors who contributed their expertise along the way.

1. Choose a color palette and stick with it. Save it on your phone and reference it when you are buying anything. Often, you don’t have access to a space until a few days or hours before your event. Having items that fit within the color palette provides a cohesive feel.
2. Designate spaces so that your guests know where to go— especially if you’re offering multiple types of activities for various age groups. This also helps limit messes!
3. Offer finger foods! Because your guests will be mingling and talking and (in our case) watching their children all at once, you want to make sure the food you serve is easy to eat and carry on a party plate.
4. Keep the space cool. It might make party set-up a little chilly, but once guests start to filter in, it will be worth it. A vibrant even full of people will heat a room quickly. If it’s a little cold before party-goers arrive, it will easily become the right temperature and people will feel more at ease.
5. Have plenty of baby wipes handy. These are great for wiping hands and cleaning up minor messes.
6. Give yourself grace and take the help from others when it’s offered. It’s impossible to pull off something of this scale all on your own, so collaborate and have fun!

Such a wonderful day!!

Our friends at ooly provided the most epic goodie bags ever so the kids would continue crafting and making art in their very own Carry-Along Sketchbook when they got home. The Zippered pouches included: Comic Attack Pencil (single) | Sweet Things Pencil (single) | Write In Style Pencil (single) | Heart To Heart Crayon (single) | Forest Friends Pocket Pals Mini Journal (single) | Comic Attack Click-it Eraser (single) | 2 Petite Sweet Ice Cream Erasers (singles) | 2 Macaron Erasers (singles) | Mighty Sharpener (single) | 2 BFF Bracelets (1 set)
Here’s a video of all of the fun on my YouTube channel as well!
October 26, 2018
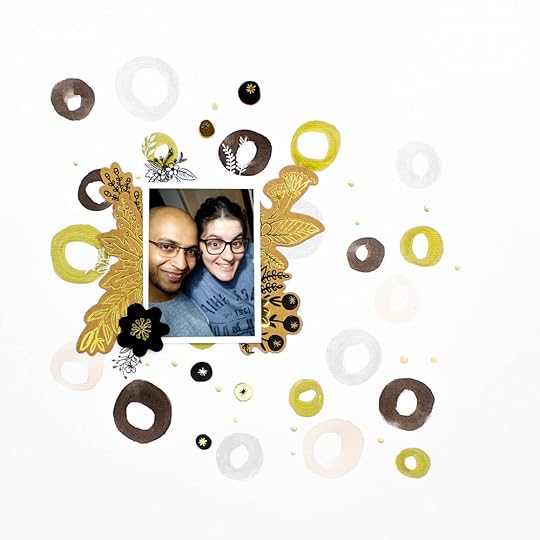
Violeta's Somos Scrap Layout
Hello!
As always it is great to be here in Amy Tangerine’s blog to show you a new scrapbooking project.

I have made a very funny layout, using different elements from different collections of Amy Tangerine. It is so cool that I can combine papers and embellishments of the different collections.
For this layout I have used a white cardstock paper and I have made a composition where I combine mint, pink and yellow.


This time I have used a picture with the shape of a 3 inches circle that I have cut. I have put it in the center of the layout. Around the picture I have added different leaves that I have cut from different papers of Amy Tangerine.

For the title of this project I have combined different letters of materials and sizes. And as a decorative element I have used some transparent stickers in yellow and pink tones. I love this color combination!

I love making layouts with different and daring compositions like this one I’ve made. I encourage you to make a layout or a mini album using one or more circular pictures. You can create loads of combinations using geometric shapes in your scrapbooking projects.

I hope you’ve liked this layout and if you have any question leave in the comments section below! See you soon!
Violeta Scrap
Supplies: Sunshine & Good Times - 12x12 Double Sided Paper - Family Fun (345685), Shine On - Thickers - Miscellanea (348249), Shine On - Sticker Book (348254), Shine On - Die-Cuts Shapes (348250), Shine On - Stickers (718813482530)
Blog| Instagram| Twitter| Facebook| YouTube
Thanks so much for sharing this layout with us, Violeta! Other Design Team member posts can be found here . Shop Sunshine and Good Times at your local retailer or online at Scrapbook.com and Simon Says Stamp .
Disclosure: Some of the links above are affiliate links. I receive a small percentage of sales at no cost to you. My creative partners and I really appreciate your continued support and every little bit helps me to bring you consistent content!
October 17, 2018
DIY Halloween Costumes

Hopefully, you were able to catch the Facebook live video where I demoed three super cute kids costumes for Halloween in collaboration with our friends at Primary. We love Primary for their colorful and super soft basics, and they make Halloween DIY super easy and affordable. Kids can be anything they want! Jack decided he wanted to be a Love Robot with rainbow powers, so we made that happen. Primary is the only kid's clothing brand to offer an awesome DIY concierge service where customers can call in about any DIY/how-to inquiry - they can call or text 1-833-DIYEASY. Primary concierge we will be available through the end of October: M-F 9am-10pm EST, Wkend 10am-6pm EST!
If you want a step-by-step walk through of this unique love robot, you’ve come to the right place. I still recommend checking out the video on Facebook because it’s always nice to be able to see a craft come together in real time. Here at the studio, we’re constantly figuring out the best ways to bring you guys the tutorials and videos you want to see, so be sure to give feedback. Do you like the live video format?

The Love Robot
What you will need:
Plain Gray Sweatpants (I used Primary’s awesome basics because they’re soft, comfy and some of Jack’s favorites)
Felt cut into various shapes (try to imitate buttons, gears, anything robotic!)
Thin Cardboard
Needle (Large)
Embroidery Floss (Various Colors)
Step 1: Cut out buttons, gears, and any other shapes you think will look good for the robot. You can use the thin cardboard to make a pattern and then trace it out on the felt or you can freestyle. Either way, remember, it doesn’t need to look perfect. This is a love robot after all.
Step 2: Lay out the felt shapes on the clothing and style. Figure out where you would like the pieces to fit together on the shirt and pants.
Step 3: Secure the felt by gluing it down with the fabric glue. If you like, outline each felt piece with simple stitching using the needle and felt.

The Rainbow (This can be a solo or bff costume)
What You’ll Need:
Thin Cardboard
Felt in rainbow colors (red, orange, yellow, green, blue, purple and white)
Needle (Large)
Embroidery Floss
Step 1: Create your rainbow by drawing and cutting out cardboard pieces in the shape of half a rainbow. Remember, you should have 6 pieces. I also traced and cut out a puffy cloud. These cardboard pieces will be your pattern and your guide for the felt pieces.
Step 2: Cut out the felt on appropriate colors and lay it out on the clothing. (Optional: if you’re doing the BFF version of this costume, you’ll need to cut out two of each color.) Once you’ve laid out the rainbow felt pieces, place the cloud at the base of the rainbow.
Step 3: Glue and stitch. Carefully glue the pieces in place and allow them to dry. If desired, stitch around the outline of each color.
The Avocado
What You’ll Need:
Thin Cardboard
Step One: cut out two pieces of brown felt (one light and one dark). If you would like to give your avocado a face, make sure to cut those shapes out in the darker felt color.
Step Two: glue down the larger piece and then the smaller on top of it.
Step Three: Finish your avocado off with some cute stitching.
Remember to let all of the glue dry on all three projects before wearing. It takes several hours to allow the glue to dry completely. Here’s the YouTube video sharing some of the finishing touches we put onto the
What are you or your kids going to be this Halloween and are you going the DIY route?
Get 20% off your first order at Primary.com.
This post is in collaboration with Primary, all ideas and opinions are my own. As always, my creative partners and I appreciate the support.
October 12, 2018
Journal Studio Collection

Releasing a new collection is always so exciting for me because I get to see my work turned into something new and different. When something you doodle on paper turns into a real life journal or washi tape design, it feels like magic. And you all know how much I love traveler’s notebooks and this method of documenting and capturing the goodness in life. For a long time many of you have been asking about covers and other stationery specific products and we were able to make them happen!

This collaboration with Journal Studio by American Crafts is a great example of that because what we’ve put together is a set of unique supplies and materials that will look super cute no matter what you decide to use them for or how you may combine them. One of my favorite things about this collection is the way you can mix and match styles to suit your personality and lifestyle.


We all have different routines, schedules and needs when it comes to planners and journals, which is why so much of this collection is about being able to customize the supplies to fit your life.

The collection includes journal inserts, washi tapes, sticker books, craft pouches, journal covers, and so much more! The designs feature vibrant, colorful, and playful patterns that will be sure to brighten your day, no matter what may happen.


I hope you enjoy this collection and find all kinds of creative ways to use Journal Studio. This will be shipping to stores at the end of October, so let your local paper stores know you want them to bring it in! I’ll let you know here online too when it hits retailers and try to even film a walk through video showing all the products. Be sure to let me know what you like about it and if you’d like to see more collaborations like it in the future.
October 9, 2018
Zinia's Monochromatic Layout
Hello everyone, it’s Zinia here and today I’d like to share with you a monochromatic layout I created using the beautiful Shine On collection by Amy and American Crafts.

This collection is full of gorgeous colors as well as a bunch of amazing neutral elements. I decided to embrace the kraft and gold elements from the collection and create a monochromatic layout design.
Since most of the pattern papers are full of amazing colors, I decided to work on a white piece of cardstock and focus on the embellishments.

To make my background a bit more interesting, I grabbed some Mermaid Markers in neutral colors and doodled some rings around the page. I felt that the circles will match beautifully with the circular flower designs that are included in the collection.
I created a cluster of floral images on kraft paper to create a cozy bed for my photo, making sure there’s a lot of the design showing around the edges as I didn’t want to cover it up.

Then I picked some of the clear stickers from the sticker book and spread them around for more lovely details. I really love how the white clear stickers sit on top of the rings I painted with my markers, making them pop against the darker colors.
Other than that, I kept my design very minimal as I wanted to embrace the whole black and white/neutral spirit without added clutter.

Of course you can recreate this design with any colors you love but I’d highly recommend that you give these neutral elements a chance and allow them to be the stars of your creations.
I really hope you enjoyed this page, until next time, happy crafting.
Blog | Instagram | Twitter | Facebook
320572 MERMAID MARKERS - CELESTIAL SKY, 376369 MERMAID MARKERS, 348253 Shine on Cardstock Stickers, 348249 Shine on Thickers Miscellanea, 348250 Shine On Ephemera, 348256 Shine On Bows, 348254 Shine On Sticker Book
You can find the entire Shine On collection here.
October 4, 2018
Altenew Watercolor Brush Markers Release Blog Hop + Giveaway

As you probably already know, I am pretty obsessed with watercolors and brushes, so when Altenew combined the two, I was beyond excited to try them. Any excuse to play around with Altenew's Watercolor Brush Markers is fine by me, so here we are - another blog hop. If you’re coming from Therese Calvird and you’re new here - welcome! Please check out the other blogs in the hop and see the amazing creations people are coming up with all using these beautiful, vibrant brush pens.
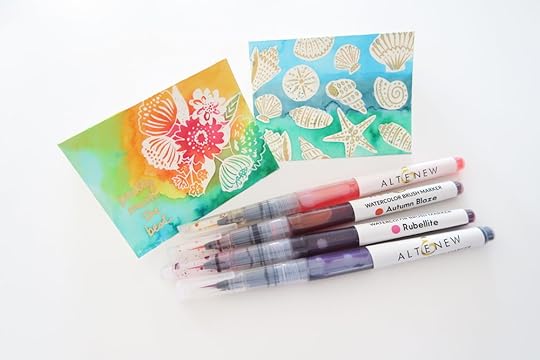
Create stunning works of art with these Watercolor Brush Markers. The barrel is filled with water-based color, and coordinates with Altenew’s line of inks. The flexible, yet sturdy bristles on the brush tip allow you to form both broad and fine strokes. Color can be applied straight from the marker, or diluted with water for a softer look.
I loved diluting them with water and even blending colors while doing lettering. You can see how I played around in this video on my YouTube channel. That’s also where I will be giving away a $40 gift card ($20 from Altenew and $20 from me) so you can get crafty. Just be sure you’re subscribed and check out the details in the description box.
Altenew is giving away a $40 gift certificate to six lucky winners! Please leave a comment on the Altenew Card Blog and/or Altenew Scrapbook Blog by Wednesday, October 10th for a chance to win. Six winners will be announced on the Altenew blogs on 10/12/2018.
The next stop on the hop is the Altenew Scrapbook Blog!
October 3, 2018
Jack loves his books!

People often ask me what I’m reading and what books I’m loving most. Funnily enough, a good portion of the books I read these days are not necessarily for me, but for a 5 year old. It’s a true gift for an author to be able to appeal to both the parent and child, especially since many of the books we read are read not just once, but sometimes hundreds of times. Although Jack has mastered his ABC’s, he’s not quite ready to move on to reading books by himself, he is reading and recognizing certain words! Jack’s taste in books has changed quite a bit over the years. Luckily, thanks to gifts from close family and friends, our little library has grown to keep up with him! I thought I would go ahead and share a list of Jack’s favorites right now and what he likes about them.


Meet the Artist: David Hockney
Why Jack likes it: This book covers the life of an amazing artist and it includes so many fun ideas and activities for a budding artist.
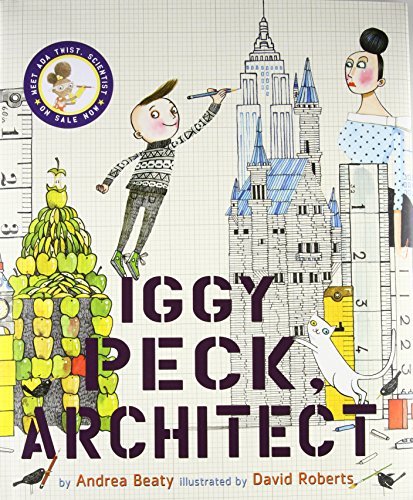
Iggy Peck Architect
Why Jack likes it: It’s so creative and it rhymes. Iggy builds incredible things out of unusual materials — like a bridge out of diapers! Jack loves the hyjinx and gets lots of laughs from a heartwarming story about a boy who stands up for what he loves.
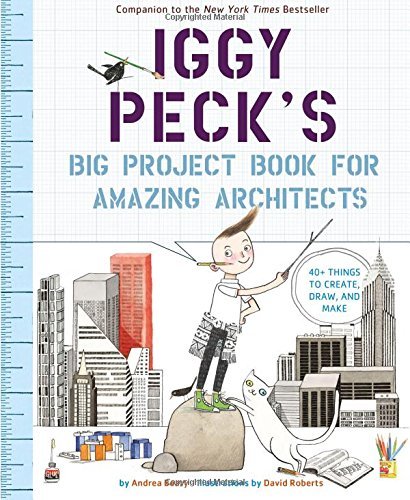
Iggy Peck’s Big Project Book for Architects
Why Jack likes it: This book is so hands-on. There are activities, drawing prompts and challenges! Plus, Iggy’s adventures as an unusual architect continue.
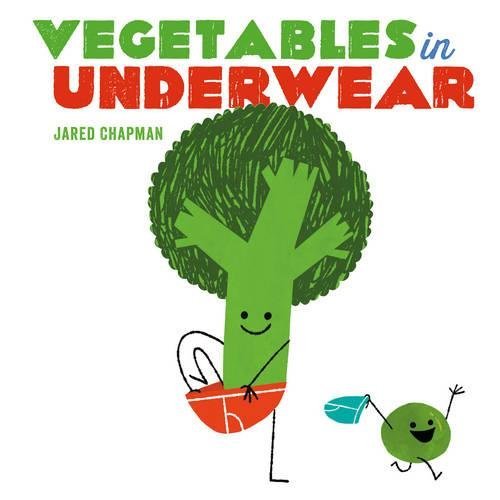
Vegetables in Underwear
Why Jack likes it: the words rhyme, the illustrations are so cute, and of course what 5-year-old boy doesn’t love talking about underwear?!?
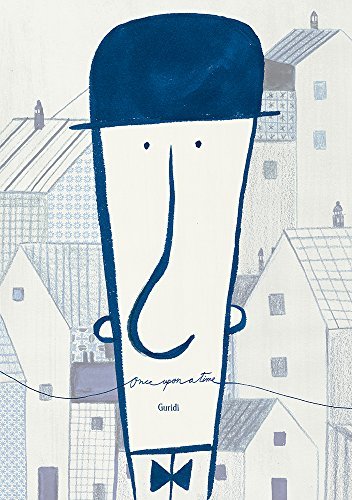
Once Upon A Time by Guridi
Why Jack likes it: The real draw here are the cute illustrations…. I mean, just look at that little mustache. Plus it’s kind of a cliffhanger, but if I am being completely honest, this one isn’t my favorite to read over and over again.
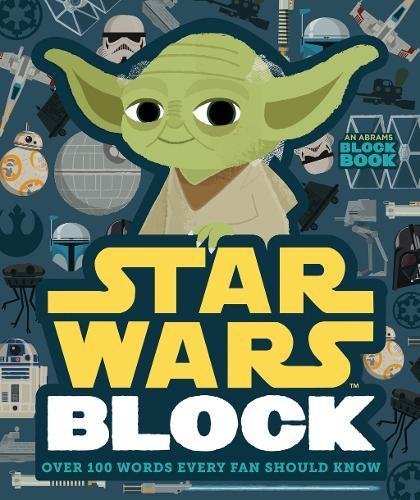
Star Wars Block: This is a complete guide to a Galaxy far far away.
Why Jack Likes It: All the characters! With this book, Jack feels like the force is always with him!

Do you and your little ones have any favorite reads? Be sure to pass along recommendations!
Amy Tangerine's Blog

- Amy Tangerine's profile
- 62 followers

