
Cassie Stephens's Blog, page 3
March 13, 2025
Let's Create a Folk Art Flower Crayon Batik!
 I Hey, y'all! Have you ever tried doing a crayon batik with your students? It's something that I've seen art teachers do and have always wanted to try but...just didn't seem to know how to make it happen. Do I use ink or acrylic paint? Do the kids rinse it off or wipe it with a sponge? Do I dilute the paint or no?
I decided to give it a go and I will say this: there was a huge learning curve! I tried several methods and came up with what worked best for me.
But! Even if you don't go the batik route, the flower drawing portion of this lesson still yields beautiful results. Says me.
I created both a video for your artists AND this free download!
 And here's the video:Now, if you don't want to go this route, you could use this flower idea sheet to create this lesson that I did with my second graders. It's always a hit and the results are so stunning:

You can find all the details for that lesson right here! In fact, you can find ALL of my favorite art lessons for spring in that link...and most come with video!
 I've always wanted to do a crayon batik lesson. I learned some things along the way and I shared a lot of those tips in the video. But...here are some other things I'd recommend:
* Use thick paper Because this paper is going to be crumpled and then saturated with paint and water, it could tear easily if thin paper is used. I'm using 80 lbs. mixed media paper.
* Work small I learned this the hard way! Because students will be adding color by firmly coloring with crayon, be ready for a little coloring fatigue. A way around that is to use small paper. I used 6" and 4" squares. I wouldn't recommend anything larger!
* Use India ink, not paint I noticed that with acrylic paint, it didn't really stay in the crumbled areas once rinsed where the permanent ink did.
* Crumble the paper ONCE I tried crumbling the paper multiple times to add more cracks and you can see that in the piece that is in the golden frame. However, once I rinsed the ink off the paper, all those cracks caused weak spots in the paper and it did tear in a couple of places. Which leads me to my next suggestion:
* Rinse once and that's it! I would recommend students carry their artwork to you on a tray so as not to drip. Then, simply slide the artwork under the running water, allow the ink to rinse off quickly and then set on a paper-towel covered surface like a counter. This should be a quick process to keep the paper from becoming too saturated and fragile.
 And...by the way...the "gold frame" I used for mine is actually a paper plate from Hobby Lobby! I spotted them a while back and had to get them to frame student artwork in!
 Also! Are you going to NAEA next week? If so, I'd love to see you there! I'll be hanging out with my friends at Prang in their booth number 117. I'll be there on Thursday, March 20th and Friday, March 21st from 11am - 2pm. I'll have all of my books with me to sell and sign. Prang has some super fun hands-on activities planned for you that I know you'll love!


But if you can't make it, know that you can always find my books here! I always sign my books before sending them out.
Have a great week, y'all!


March 6, 2025
Let's Make a Sandwich Collage!
.jpg) Hey, friends! I'm coming at you today with a fun lesson that's the perfect thing to introduce collage, ignite the imagination and review shapes...a Sandwich Collage!
Hey, friends! I'm coming at you today with a fun lesson that's the perfect thing to introduce collage, ignite the imagination and review shapes...a Sandwich Collage!I shared a similar lesson years ago and you can find it here. And, if you want to continue on the food theme, I have a whole unit of lessons for you! It's one of my fave themes and you can find details here.
For this lesson, all you'll need is construction paper, glue or a glue stick, scissors and maybe markers and crayons. I created this video for you to play for your students so...have fun!For a quick link to the supplies I am using, jump over here!
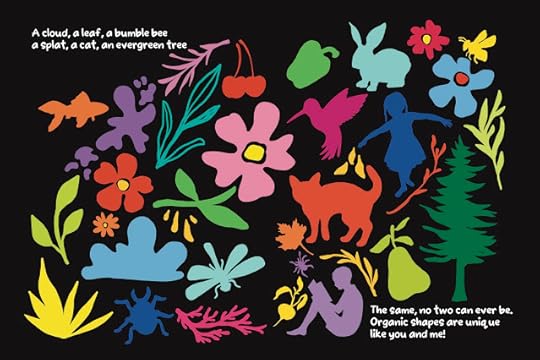
 I mentioned that this lesson would be a great way to reintroduce the element of art of SHAPES to your students. When I wrote my book Alfred the Ape Knows his Shapes, I wanted it to go beyond the basic shape books I had on hand. So I dug into the first and second grade curriculum on shapes and made sure to include that.
 As an art teacher, I focused on geometric and organic shapes. However, in the classroom, teachers talk a lot about sides and vertices. Which...I learned from my students! To support the classroom teachers and continue the education of shapes in the art room, I included the vocabulary and standards in my book.

 Because Alfred the Ape Knows his Shapes introduces so much, I recommend reading it in two parts! On the first day of the collage project, try reading about how line creates shape, the difference between organic and geometric shapes and what makes a shape. The first half of the book chats about geometric shapes, what makes them unique and how to tell them apart. From there, the book discusses organic shapes. Perhaps that could be discussed on the second day, when the artists focus on the organic shapes of the food they wish to include in their collage sandwich.
 By the way, if you are interested in checking out free lessons and downloads, you may want to subscribe to my email list! You can do so here.
And often I share videos on YouTube before I have a chance to chat about them here. So...be sure to subscribe! You can do so here.
February 26, 2025
How to Have a Calm and Productive Art Class!
.jpg) It's that time of the school year, friends.
It's that time of the school year, friends.That time of the year when your classes may be a little LESS focused and a little MORE squirrelly. For me, that stretch between winter and spring break is always the longest. This is when the burnout always seems to hit me AND my students.
For that reason, I'm always looking to try a little something new and different this time of year. Something (anything!) to keep myself and the kids engaged and excited.
So, if that's you too, let me share my favorite way to create a calm and motived art class...while also integrating art history! When I was in fourth grade, I had a teacher who would read aloud from a chapter book after recess. I don't remember what the book was but I do remember that it was something I looked forward to.
Several years ago, I had a very difficult group of fourth grade students. They were argumentative, loud and VERY unmotivated. I had one boy in particular who let it be known that art WAS NOT his favorite. I began to dread the class.
One day, I spotted a chapter book in my storage closet. I remembered my fourth gade teacher and thought...what if I read to them while they work? I loved it when I was a kid...
 When the class arrived, I told them that I was going to read to them and taht they had to work quietly in order to hear. I animated the story with silly voices, sound effects and movement. When the clean up alarm went off, something wild happened: the kids and I were bummed art class was over!
From there, reading became my constant motivational tool. After I gave directions and students were settled in and working, I would read. And that boy who previously wasn't a fan of art class? He asked if he could sit CLOSER to my destk so he wouldn't miss any of the story.
 While I felt like I'd hit the art teacherin' jack pot with this new tool in my tool belt, what I still wasn't lovin' was that I could never seem to find THE PERFECT book to read.
You see, I wanted to read an artsy chapter book. Something that would excite them about the world of art and art history. So...I wrote one!
I knew their favorite types of books were the ones where they could decide their adventure. And that's how Find Your Way came to be. It's a Decide Your Direction Art Adventure!
 Find Your Way features 7 artists: Leonardo da Vinci, Salvador Dali, Frida Kahlo, Augusta Savage, Hokusai, Vincent van Gogh and Claude Monet.
There are over 32 endings in the book for countless adventures!
The book is filled with quotes from the artists as well as adventures based on their real life events.
I created over 80 illustratios to help bring the book to life for your artists.
Also included are 7 biographies on each artist as well as 7 art activies.
 I wrote Find Your Way while I was teaching. My students weighed in on my first, second and third drafts as I would edit and rewrite in the evenings and weekends. They enjoyed the adventures....and I know your students will too.
But you don't have to read Find Your Way to have an engaged and motivated class. Maybe start with a book or an author that you loved as a kid! I have always found that the best sources for inspiration are my own childhood interests.
Most of all, go easy on yourself, take a breath and have fun. This time of the year is tough! But so are you.

February 6, 2025
Happy Heart Drawing Game! A Valentine's Game
.jpg) STOP! Before we dive in, HAVE YOU SIGNED UP FOR MY EMAIL LIST?!
STOP! Before we dive in, HAVE YOU SIGNED UP FOR MY EMAIL LIST?!If you haven't, you might wanna! For the last four weeks, I've been sending out weekly free lessons and downloads! So...if you'd like to take advantage, you might want to sign up. And now...back to the program...
Hey y'all!
I thought I'd share a fun spin on a much-loved lesson, my Chris Uphues-inspired Happy Hearts project!
 This lesson is just the thing to brighten these long winter days. My students always love creating a variety of silly faces. AND this lesson comes with some free downloads which makes it even better! Tap here for the free heart face idea sheets.
 After I got such a good response from my Roll-a-Snowman download (another freebie here) , I thought I'd create one for this lesson too. This is the perfect way for your students to practice their heart drawing before diving into the lesson. Grab a copy of the sheet here.
 I know one of the toughest things for students is actually...drawing a heart! To remove that struggle, I did create a heart template. This way, you can simply slide it into a sheet protector and let them focus on the drawing activity.
 Free heart template here!
I did share how to draw a heart with simple steps and the rest of the details of this game and lesson in a video too! So...if you need a little break, let me help em out a bit. You can find the video here:Feel free to use and share in your art making world!
 This lesson can also be used as a line review! Did you know I have a huge set of line downloads? Yep! They go with my book Larry the Line.
 And BIG THANKS to all of you for making the launch of my new book The Paintbrush Ballerina a success! I know when you order the book, you receive an email to leave a review. If you have the time to do that, I would so appreciate it. I read each one and it really means the world to me!
Don't forget, that I created a bunch of FREE downloads to celebrate the launch of my book. Be sure and grab 'em. You can find them here and here.
Have a great week, friends!
January 28, 2025
Paintbrush Ballerina Bootcamp!
.jpg) Hello, friends!
Hello, friends! I got such a great response for my Paintbrush Practice sheets (available for free here), that I thought I'd create another way for your students to continue their paintbrush practice...with Paintbrush Ballerina Bootcamp!
 Inspired by my new book, The Paintbrush Ballerina, I created a series of fun and quick activities for your artists to practice their paintbrush skills before diving into any painting activity. Here's why:
Often, when painting with students, we assume they have used paintbrushes before and know the do's and the don't's. But many of our students have limited painting practice so...it's great to just start at the very beginning. Before diving into your next painting lesson, why not spend just one art class hosting a Paintbrush Ballerina Bootcamp!?
To begin, gather everyone around and read The Paintbrush Ballerina. It's the method I have used for over 20 years in my art room to teach my students how to use and care for their paintbrush.

From there, have your students use my Paintbrush Practice sheets (download them for free from here) and use their paintbrush on the sheet with just water! Be sure and slide the sheets into a clear plastic sleeve to do so. Here's a quick demo:
Once complete, they can move on to painting on a piece of construction paper and, still, just that cup of water and a paintbrush. This will move them from tracing the lines on the sheet to painting the lines themselves! Here's a look:
For longer format videos to share with your students, feel free to visit my YouTube video. I add content there weekly so be sure and subscribe!
 The final phase of Paintbrush Bootcamp can be painting...with watercolor paint! I created these free Fancy Frames for you and your students to enjoy as well as certificates to pass out once Bootcamp is complete. Here's one Fancy Frame download. I hope you and your artists love them!
 I printed my frames on white cardstock so they could withstand the watercolor paint. I also used Creativity Street metallic paintsticks to add a little sparkle to my frames.
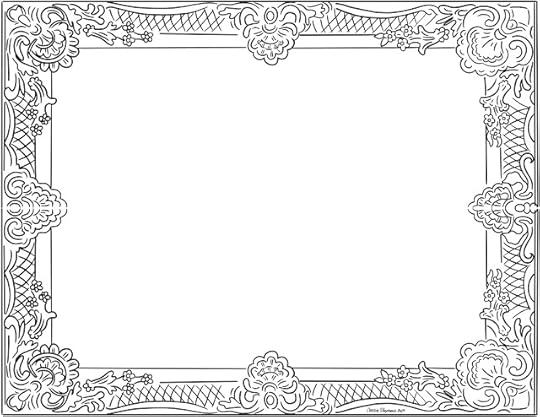 Find the second Fancy Frame here.
 Of course, introducing paint into the mix means another round of instruction. So...this could be your second day of Paintbrush Bootcamp! I did create a short video about using watercolor paint that you and your artists may find helpful:
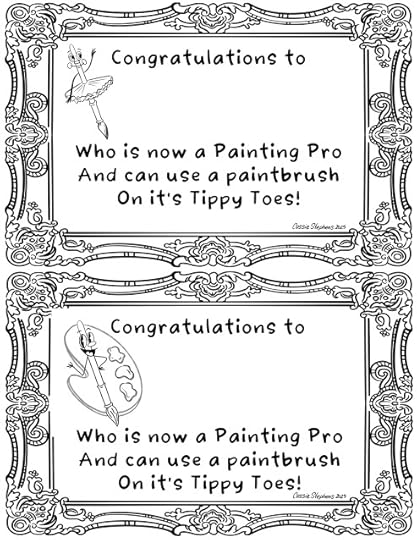
Once your artists have completed Paintbrush Ballerina Bootcamp, it's time to congratulate them! I created this for you to use too! I added color to mine with those paint sticks and some color pencils.
Find these certificates here!
Have fun, y'all! And stay tuned...I've got more fun projects and handouts coming your way soon!
January 22, 2025
Paintbrush Practice with the Paintbrush Ballerina!
 Hey, y'all! To celebrate the launch of my brand new book, The Paintbrush Ballerina, I created two FREE Paintbrush Practice downloads just for you and your young artists!
 I have always found that you can TELL students the do's and don't's of ANYTHING but until they actually put it into practice does it stick. With these two sheets, your students will be able to do just that. Yay!
 For over 25 years, I taught elementary art. It didn't take me long to realize that you have to teach students EVERYTHING. So many of them come to us never having painted before! So how to hold, use and care for a paintbrush is part of the art teacherin' territory.
 The method of explaining that a paintbrush is like a ballerina really clicked with my students. You can check out my book here. I share more about it here too:
Last week, I shared over 20 of my very favorite painting lessons in this blog post. But before even diving into those, it may be helpful to start here...with Paintbrush Practice sheets!
I would recommend using sheet protectors so that students can use these over and again. This is a low mess lesson that would be perfect for:
* Early Finishers! Keep this Paintbrush Practice available for students as a center so can practice any time.
* Intro to Painting! Students of all ages could use a painting intro or reminder when it comes to using paintbrushes.
* Short art classes or half days! With it being winter, I know your teacherin schedule can become a mess. With half days, kids behind on projects, field trips and the rest...a day to just practice painting with the lights dim and some soft music may be just the thing to get everyone back on schedule and reset the painting mood.
And...if you need a little help, I've created a painting video to share with your students. Here ya go:
Have fun and happy Paintbrush Practice!
 You can access this free download right here.
  And you can access this one here!
January 19, 2025
20 Painting Lessons for Kids!
.png) Hello, friends!
Hello, friends!Today I thought I'd put together a big ole blog post of some of my very favorite lessons that both introduce and continue to explore painting with children. So if you are looking for a fun and engaging lesson for kids of all ages, I think you'll find something here. Thanks for dropping by!
But first, I gotta let ya know that the REAL reason I'm sharing painting projects with you is because my new book, The Paintbrush Ballerina, launched this week!
 If you've been hanging out with me for a while, then you've seen me share my method of painting with my students. Here's a little background on how the journey of the Paintbrush Ballerina began:
If you'd like to hear a little big of the book, check this out:

I wrote the book in rhyme as those have always been my most favorite books to read to children. In this story, our paintbrush friend who has been abandoned in a watercup in front of palette tells the tale of the Paintbrush Ballerina. You can read more of the book and see the illustrations here.
 It's tough to watch out students struggle with the most essential art supply: the paintbrush. And it's a real bummer to see the destruction they do to our expensive brushes! So I took everything that I learned from 25 years of teaching art to small children and put it into this book!
 If you'd like to see me talking to my kindergarten about how to use their paintbrush, then check out this video here:If you are curious about my teaching methods and would like to see more, I have a playlist on my YouTube channel called "A Glimpse Inside" where you can visit me as I teach my students.
Keeping that brush on it's toes is always the goal! Check out this sweet kindergartener doing just that!
 Alright, now let's dive into those lessons, shall we? I have no rhyme or reason to the order of these lessons. This is just a big ole smattering of some of my faves!
Let's start with kindergarten who are my very favorite! After learning about the order of the color of the rainbow, we dive into painting our own with tempera cakes. Tempera cakes are a fave in my art room as they are low mess and, low prep and the colors are just beautiful! I'll circle back to this lesson in a moment.
To see more, check out this painting lesson here.
 Now let's skip forward to third grade. By then, you'd think they'd have a better idea of how to handle their brush. BUT I gotta tell ya, 'tis not the case. Even tho it feels like we say the same things all day long (cuz we do!) we are saying it to different groups of students! So I had the same sayings and phrases on constant repeat...and the bit about the Paintbrush Ballerina was one I always said. AND they always love!
Lesson details can be found here.
 To read all about bingo daubers and why I love them in the art room, visit here. If you've not tried them out in your art room yet...be prepared to fall in love!
 When it comes to painting, it can be overwhelming as to where to start! Do I begin with color mixing? Mark making? Introducing white and black to share tints and shades?
 Here's what I've learned: start wherever you like! BUT start with just one thing. That's the easiest for you and your students. So, first things first, begin with how to use the paintbrush! THEN...maybe go with mark-making. I introduced my students to a wide range of color and mark-making ideas to create these beauties.
Mark making lesson here.
 Of course LINE is a great place to start. And I do have a book on LINE...Larry the Line that is!

For many years, this is how I introduced both painting and line to my kindergarten students. By limiting the color to just black (we used a diluted black ink to allow the brush to paint more smoothly), we could focus on just the brush and the lines. From there, we were able to add color!
 When it came to introducing color to kindergarten, I usually did that, like I mentioned, the day after our black and white line painting lesson. That's when we did the rainbow paintings. BUT...since I'm skipping around a bit, you'll have to scroll down a pinch to see that first rainbow lessons.

Many of my kindergarten lessons are born out of "the fast finishers need another something to paint!". And that's what happened here! After painting the rainbow, many students then got a sheet of paper and painting stripes of rainbow color. This served to be the perfect background for these adorable self-portraits!
Complete project here!
 So sorry these are kinda out of order. Truth be told, when I try to edit or move images around, they tend to disappear. So...it's easier if you just scroll then if I sprout more gray hairs.
 Rainbow lesson here!

Meanwhile, in first grade, we took the idea of our paintbrush being a ballerina a little further. We listened to music and had her paint across our page!
More info here. You can also check out how we made these into beautiful weavings!
 And now...color mixing! These wee Mouse Paint masterpieces were created by kindergarten. The best part...the Hobby Lobby frames!
Mouse Paint lesson here.
 If you are rand new to painting with children then start here!
 This is the VERY first painting project I would do with my young students each year. It all starts with a dot. The Dot to be exact!
 Some years, we painted on paper and others, we painted on cardboard pizza rounds (one of my favorite surfaces for painting!).
You could paint on cardboard pizza rounds as my students did here.
 I recently had someone give me a hard time about this...
I shared that often, at the start of the school year, I do the same lesson with all of my students, kindergarten through fourth grade. Why? FOR MY SANITY! I'm usually trying to set up my classroom, introduce a thousand routines and just keep my head above water. Once I have my Back to School footing, I feel good venturing into different lessons with everyone. But, to start, we all begin with the same supplies, same visuals and same lesson.
This commenter DID NOT like that and let me know.
Now look, I'm cool with sharing your thoughts and opinions but...there's a way to do it. AND if you aren't an art teacher then...you might just wanna sit it out, you know?
Regardless! I did THIS same lesson with all students AND put a twist on it so it ended up being a big ole collaborative. So there! ;)
 Start with a dot and ...from there, you can go to here!
 And it's still one of my favorite collabs we have done!
 Or you could paint plates and then turn them into looms for weaving!
Since we are focused on painting today, I'll just be chatting about that. But for more weaving info, be sure and tap that link!
 This is the same idea as my kindergarten line lesson but with first grade and on pizza rounds!
 Now, let's jump forward to fourth grade! Here's one of my favorite landscape lessons based on folk art. We created these with tempera paint and you can check out more about this lesson here.
 My second grade students created these paintings with either a warm or cool color watercolor background. When using watercolor, I often have my students decide if they will use one family of color or the other. This keeps their paintings from becoming 'muddy'.
Full lesson details are here.
 Another spin on that concept of warm versus cool can be found in this spring-themed lesson.
 This lesson can be found here.
 I love a big ole painterly tempera paint lesson! This one was inspired by Vincent van Gogh. I love the cardboard printed trees!
More about this lesson right here.

 This lesson with fourth grade introduced my students to tempera cakes and many different painting methods. We began by painting these stripes of color that were later used to draw buildings in Sharpie. Full lesson on this process, with video, here.
  We used cardboard circles as our base for our snowglobe. I had my students create three sketches first. They LOVED those little small circle paintings so much that we turned THEM into a project too!
 Our marble "sketches" were used for a fun and quick follow up project! You can find the details on this lesson here.
 This snowglobe lesson was done with tempera cakes. And glitter...which I don't recommend, ha!
 I've done a couple hot chocolate/cup of coffee based lessons (I may be a little biased, I suppose!) and you can find this lesson here!
 Let's circle back to the ole bingo dauber, shall we? It's like a Sharpie on steriods!
 I LOVE that we can create the most epic contrast with the bold black ink and these bright paints! We are using Jack Richeson's neon tempera cakes here.
All the info is here.
 These looked epic in our Glow Gallery!
  This lesson is always a hit and the kids love it! You can check out the details, including video, here.
  Want to introduce the magic of oil pastel and watercolor paint?
Landscape with pattern resist by third grade lesson can be found here.
 And, of course, if you are in need of some LOVE this season, find this lesson, with video, here.
 If you are looking for more Valentine's-themed lessons, check here for some short lessons and here for longer projects.
Thanks for dropping by, y'all! Until next time!
January 5, 2025
10 of My Favorite Heart-Themed Lessons of All Time!
 Hey, friends! Earlier this week, I shared some of my favorite lessons to ease back into the art room. They were all Valentine's themed to give you a jump start on a display for next month. You can check out that blog post (where each lesson comes with a video!) right here.
 Today I'm sharing lessons that are also Valentine's themed (or really heart/love themed!) but there are a little more in-depth and will take multiple class periods. Personally...I love a long project for these long winter days. It means less prep (after the first initial wave of tons of prep, ha!) and gives the kids something to really dig their teeth into. So, let's dive in! Just follow the lesson links and that will take you to the full lesson, video and resources!

Let's start strong with this Candy Hearts lesson that I did with my fourth graders! They loved creating large candy hearts and coming up with a (teacher-approved, ahem) saying. You can check out the lesson and video process here.
 Spring is when I LOVE to dive into weaving so...why not get everyone prepped by doing a paper weaving project? It's a great way to remind your students of the weaving process. Or...introduce them to it! This is a weaving (with a little bit of sewing) project that I did with my first graders. You can check it out here.
 Looking to dive into printmaking in the next couple of weeks? Here's a lesson that I did year after year with my second graders because it was such a hit! We made so many prints that we did some print swaps before adding our cut letters to these pieces. We even framed them with our scrappy messy mats! All the details can be found here.
 Speaking of printmaking, would you believe that kindergarten created these?! We used foam stickers and had a blast. You can check out the lesson here.
 And we then used our printing plates to create THESE! I know, I love em! You can see how we did it in this blog post.
 My third graders FLIPPED OUT over creating these plaster chocolates with puffy paint icing! Send out an email requesting heart shaped boxes now and use them for a display or, do what we did, and make your own! Details here.
 If you are in the mood to bust out the clay, might I recommend these? This project was one I did with my teachers, faculty and staff at my school! It was so fun to come together and create. I did create a video for them to watch and you can check it out here.
  In the mood to try a new art supply? For these, we used Celluclay, one of my personal favorite supplies to use when I create! These were made with an aluminum foil armature and Celluclay on top. You can check out the details here.
 Since these projects can take a while, you'll find you have some students who finish before others. I resolve that a couple of ways: I allow those students to 'assist' other artists by creating with them (with student permission, of course) or...I give them another lesson to do! This was one of those 'early finisher art lessons' that I created. I simply played the video for those kids and they got to work. This one is much easier than it looks! Here's the details!
If you are looking for a lesson that can ultimately become a school wide collaborative or a mural, check out this one. This is a SUB PLAN! Granted, my sub KILLED it but...I do have the full video for you and your students to view here.
December 30, 2024
10 Lessons to Ease into the New Year, Valentine's Edition
 Okay, listen, I get it. We're still in December and you may not want to be thinking about what's gonna go down in your art room next week (or this week? Do you return to school on Friday?). Regardless, I thought I'd help you out by offering some of my favorite EASY and engaging lessons that will allow you to ease your way back to the art room. Most of these lessons have a video so you can play that for your students while you grab your coffee and try to remember what day it is.
Let's start here! This lesson is ALWAYS a hit and, believe it or not, I do it with kindergarten. HOWEVER...when I return to school after a long break, the last thing I wanna do is prep like mad for 5 different grade levels. It stresses me out and, because our students our little mirrors who reflect us, it stresses the kids out. SO! I often do this lesson with EVERYBODY, kindergarten through 4th. Does it make for a lotta messy paint trays, paintbrush washing and overflowing drying racks? YES. But does it also make for a gorgeous display of hearts created by the whole school that is ready to be hung BEFORE Valentine's Day (always the goal, right?!). Yes! So, let's go. Full lesson here.This is a fun one and totally addictive so...beware!
 If you want to start with a little less mess, then just bust out the black, red and white oil pastels and get the kids drawing! They adore drawing cute stuff and these little Valentines critters are perfect for that. I created a video for each. You can check out the blog post with all the info here. We also did a stamped background that is totally optional. Here's the video for the bunny:
Now, if you want a demo on how to create the stamped heart background, be sure and check out the panda video (below) as I walk you through those initial steps.
 Here's how you can draw a long with me to create this fox:
And here's how to create the background and draw that panda:
 Here's the video for that:
And last but not least!

Let's draw this cute Valentine's Pup!
For your older students, third on up, they may enjoy creating this 3-D heart!
 This one is super low-mess as all it requires are markers, water and a paintbrush (and an oil pastel once dry, but that's totally optional). I share the details in this blog post.
This project was done in just 30 minutes (the length of my art classes) and only uses chalk! I was also able to introduce my students to a contemporary artist for the process. Details here!
 This is probably one of my all-time fave kid-approved lessons: this Chris Uphues-inspired heart art!
  If you need a line review lesson, you might want to try these Romero Britto-inspired hearts on for size!
 Of course, you should definitely share my book Larry the Line which also has two printable pages of line-inspiration in the back!
And if you are looking for a lesson that packs a powerful contemporary artist punch, then THIS lesson with an introduction to four artists who use hearts in their art is the one for you! I did this on a half day with fourth graders and they knocked it out in one class period!
Of course, since we are going to be talking about hearts, now is also a great time to either introduce or review SHAPES! Don't forget...Alfred can help you with that!
 Remember: take it easy as you ease on in to this new year! Have fun!
December 23, 2024
Let's Paint a Christmas Tree!
 Got paper bags and an itch to paint? Let's create these Christmas trees! You'll just need the following:
*Acrylic paint*Paintbrushes*Paperbags*Chalk (optional)*Palette (a paper plate or newspaper works too!)
Alright, let's get started!
Right? So fun and easy! I love doing a bunch at a time because then I have a stash for gifts. AND they make great framed works of art!

Have fun!
Cassie Stephens's Blog

- Cassie Stephens's profile
- 34 followers

