
Kristina Seleshanko's Blog, page 83
November 18, 2013
14 Thanksgiving Games and Activities for Kids
 In years past, I've blogged about some great Thanksgiving crafts for kids, but this year I'm focusing on games and activities kids can do on without adult help. You might use these at the kids' table on Thanksgiving day, as a way to occupy kids while you cook Thanksgiving dinner, or as fun things to do leading up to Thanksgiving.
* Starting with the most obvious, there are tons of free Thanksgiving coloring pages available online. There are also color by number pages, word searches, and mazes.
* Or what about some Pilgrim paper dolls? Let the kids cut them out. Check out these and these - both free.
* School-aged kids can make this Native American toilet paper tube centerpiece (or turn it into a play set). Or print out these paper pilgrims and Indians instead.
* Thanksgiving Mad-Libs . These are so fun for kids who can read! (Here's another version.)
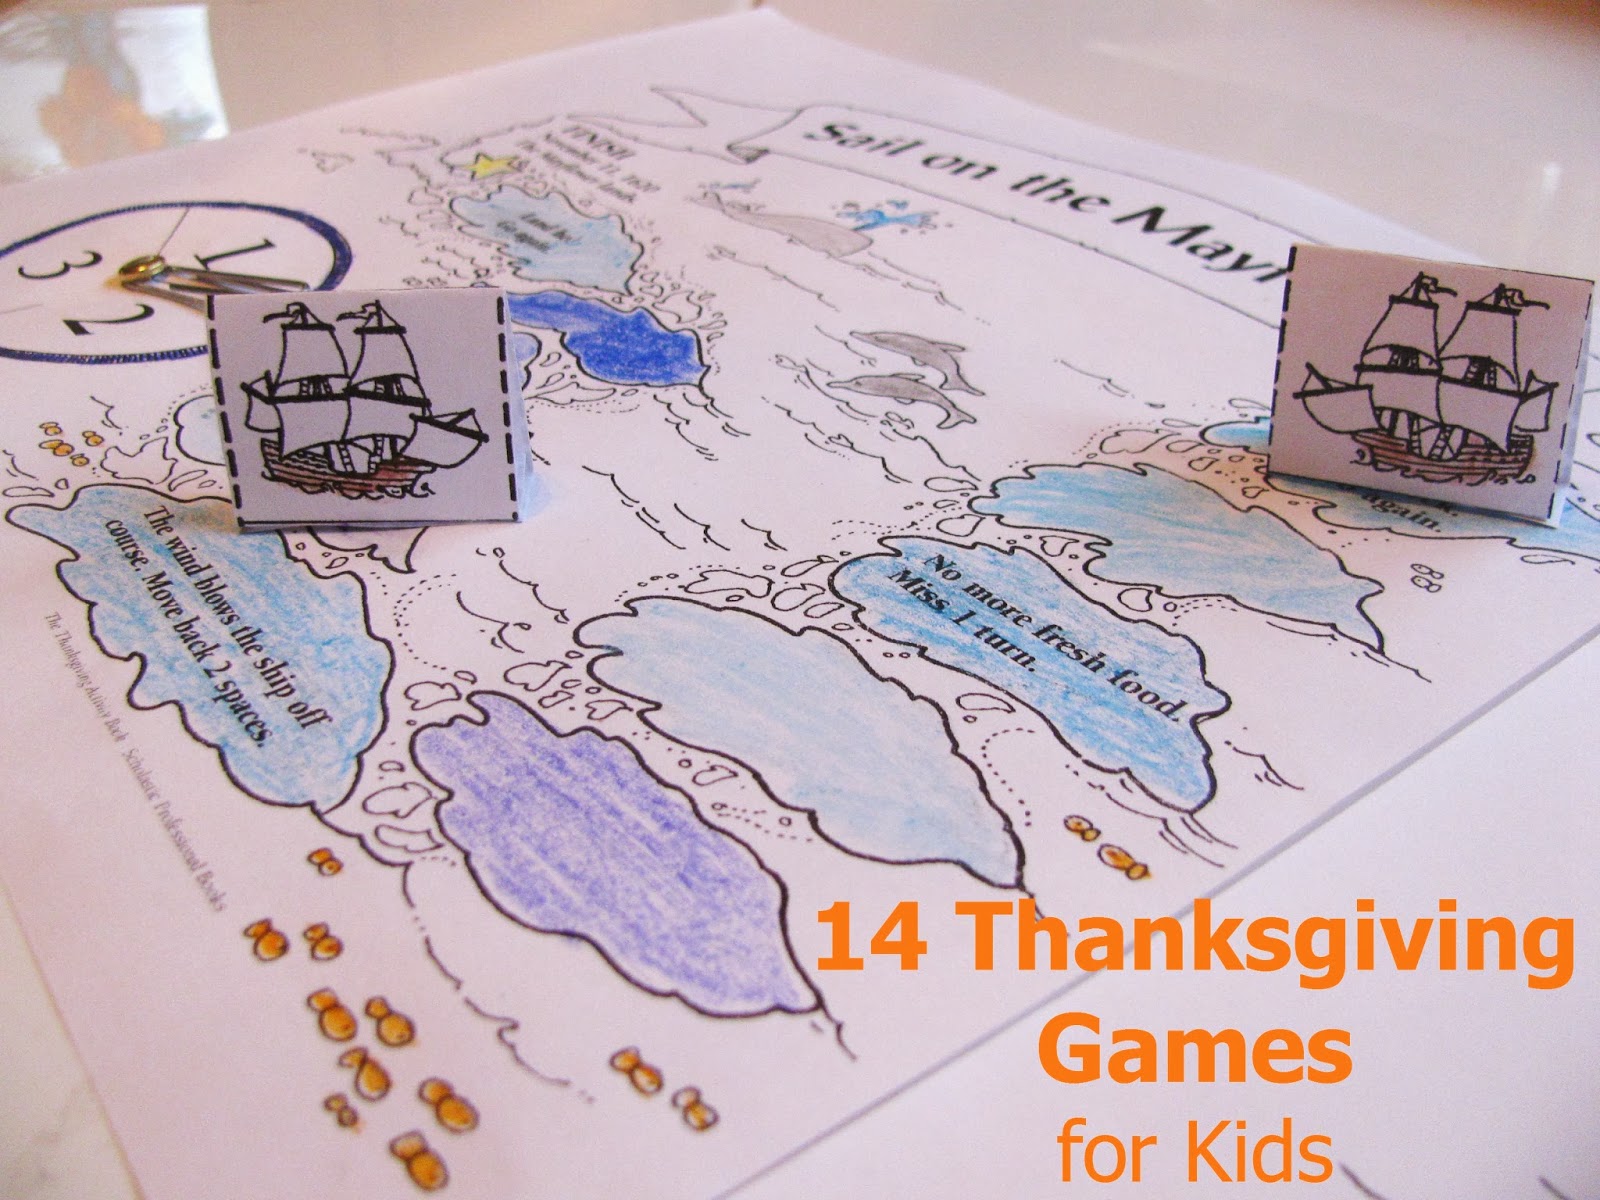
* Print out and assemble the "Sail on the Mayflower" game . Kids will have fun playing it - plus they'll learn a little history. Or have the kids play this Candyland-like homemade Thanksgiving board game .
* Give the kids a Thanksgiving themed cootie catcher .
* Set the kids up with turkey bowling .
* Give the kids activity placemats. Try this Mickey Mouse Thanksgiving placemat, or these Micky and Friends mats, this Thanksgiving activity mat, this "I'm thankful for" mat, or this one.
* Hide a bunch of paper turkeys around the house and have the kids scavenge for them.
* Print out these simple Thanksgiving puzzle pieces for young kids to match up.
* Buy this Thanksgiving roll the dice game (for $1) and let the kids have at it.
* Print out the "Don't Eat the Tom!" game . This is simple enough for preschoolers on up.
* Do your kids like the "Would You Rather?" game? Here are some fun Thanksgiving related questions to add to the game.
* Print this Roll and Draw a turkey game ; even toddlers can do this one!


November 15, 2013
Letter of the Week: G
 A nice way to introduce your child to the letter G is to give him a snack of grapes. Ask him the name of the fruit, then repeat it back to him, emphasizing the "g" sound: "G, g, g,
g
rapes. The word 'grapes' starts with the letter G!" (If using green grapes, ask him what color the fruit is, then say: "G, g, g,
g
reen. Green starts with G, too!")
A nice way to introduce your child to the letter G is to give him a snack of grapes. Ask him the name of the fruit, then repeat it back to him, emphasizing the "g" sound: "G, g, g,
g
rapes. The word 'grapes' starts with the letter G!" (If using green grapes, ask him what color the fruit is, then say: "G, g, g,
g
reen. Green starts with G, too!")For more about Letter of the Week activities, click here.
* God (trinity) pretzel. (Make your own pretzel, if you like.)
* Green cookie snack.
* Green Grinch snack.
* Grinch Guacamole snack.
* Grinch craft.
* G is for Giraffe (uppercase) ("Giraffe" doesn't use the most common phonic sound for 'G;" use or not, as you see fit.)
* G is for Giraffe 2 (uppercase)
* G is for Giraffe (lowercase)
* Giraffe snack.
* Giraffe handprint craft.
* Giraffe paper plate craft.
* G is for Goose (lowercase)
* G is for Goose (uppercase)
* G is for Goose 2 (uppercase)
* Goose paper plate craft.
* G is for Grapes (uppercase)
* G is for Grapes (lowercase)
* G is for Goldfish (uppercase)
* Goldfish craft.
* Goldfish paper plate craft.
* Goldfish marshmallow pops snack.
* Goldfish math.
* G is for Green Grass (uppercase, but could easily do with lowercase)
* Grass toilet paper tube craft.
* Guitar craft.
* Guitar math.
* Grateful craft.
* G is for Gorilla (uppercase)
* Gorilla stick puppet craft.
* Gorilla printable craft.
* Gorilla handprint comparison.
* Glasses paper craft.
* Glasses pipe cleaner craft.
* Gingerbread man unit ("Ginger" doesn't use the most common phonic sound for 'G;" use or not, as you see fit.)
* Letter G worksheets.
* Sesame Street: G
* Sesame Street: Letter G Game
* Sesame Street: Grover and G
* Sesame Street: Oh, G
* Sesame Street: Letter G Song
* Sesame Street: Play Inside G
* Sesame Street: G, Giggle
* Sesame Street: Kids Explore a Wild Letter G
* Sesame Street: Gorilla Writes G
* Phonics: The Letter G
November 13, 2013
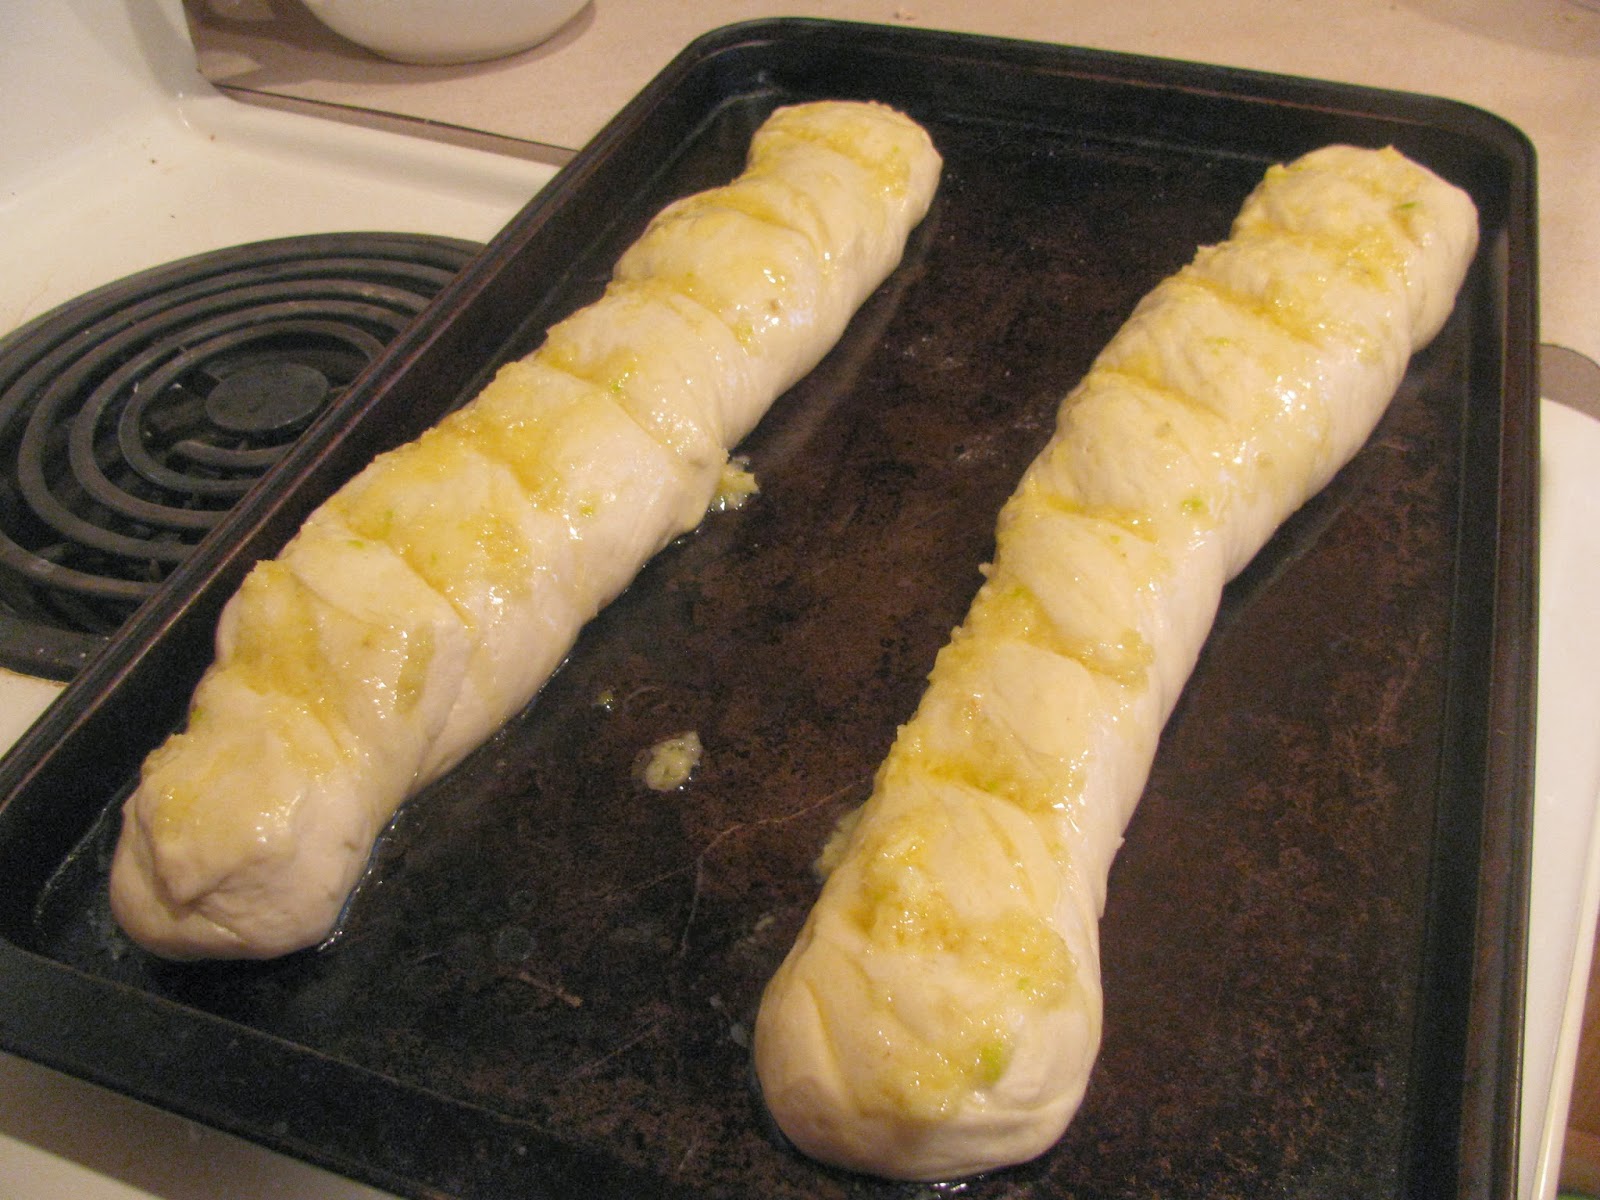
Easy Homemade Garlic Bread Recipe
 Looking for a light-textured, garlicy bread to round off meals? I've got the recipe for you! It's based on a much more naughty cheese bread featured at Lauren's Latest, but with a few important changes. Even if you've never made bread before, you can make this bread. Just allow yourself about an hour and a half before dinner is ready to get started on it.
Easy Homemade Garlic Bread Recipe
1 cup warm water
1 tablespoon real honey
2 1/4 teaspoons active dry yeast
1 teaspoon salt
3 cups bread flour
Olive oil
½ cup butter
3 - 5 garlic cloves, minced
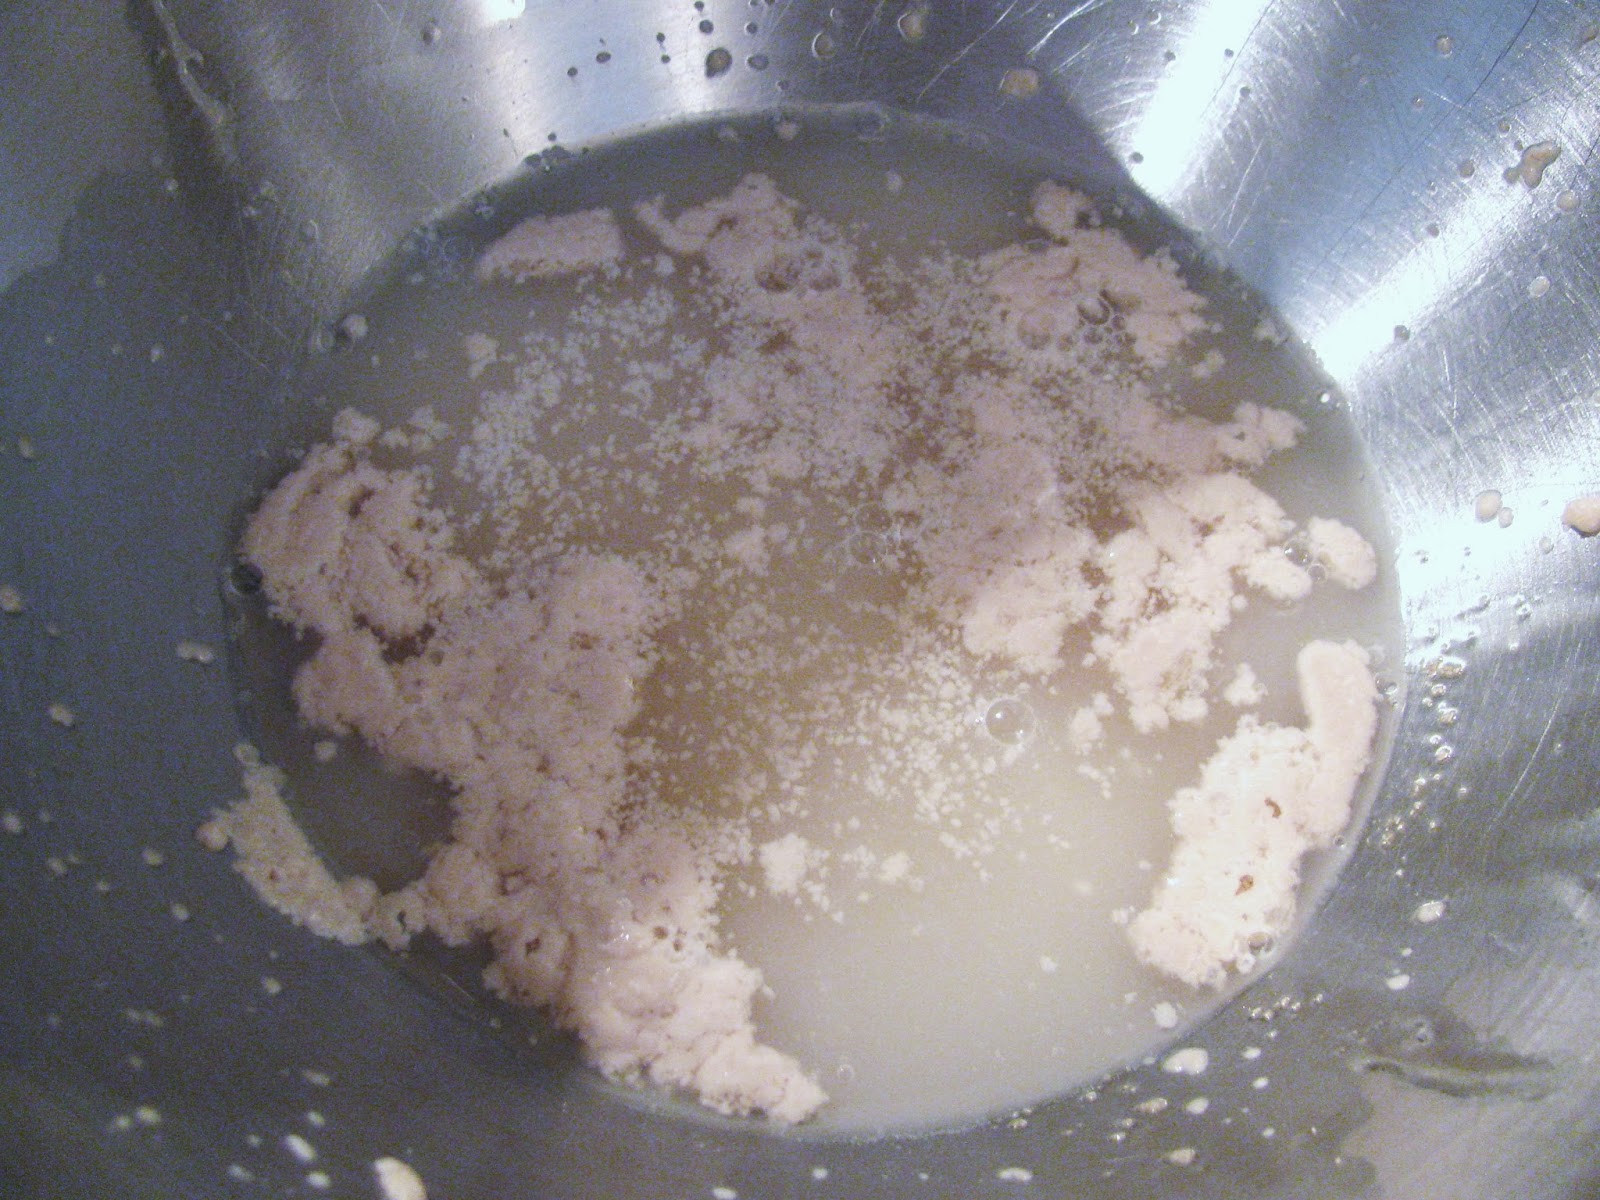
1. In the bowl of am electric mixer with a dough hook attachment (or simply in a large mixing bowl), pour in the water, honey, and yeast. Stir with a fork just a bit, to combine. Allow to sit for 5 minutes. After 5 minutes, the mixture should be foamy. If its not, the yeast is no longer good.
2. Add the salt, then add a little of the flour. Mix, gradually adding in the rest of the flour. (If you're using a mixer, keep the speed on low.)
3. When the dough pulls away from the sides of the bowl, allow the mixer to keep churning away for 5 minutes. (If not using a mixer, knead the dough by hand until smooth but tacky.)
 4. Remove the dough from the bowl. Spray the bowl lightly with oil, return the dough, and cover with plastic wrap or a clean dish towel. Set in a warm location for 1 hour. The dough should double in size.
5. Punch down the dough and cut into two pieces of about equal size.

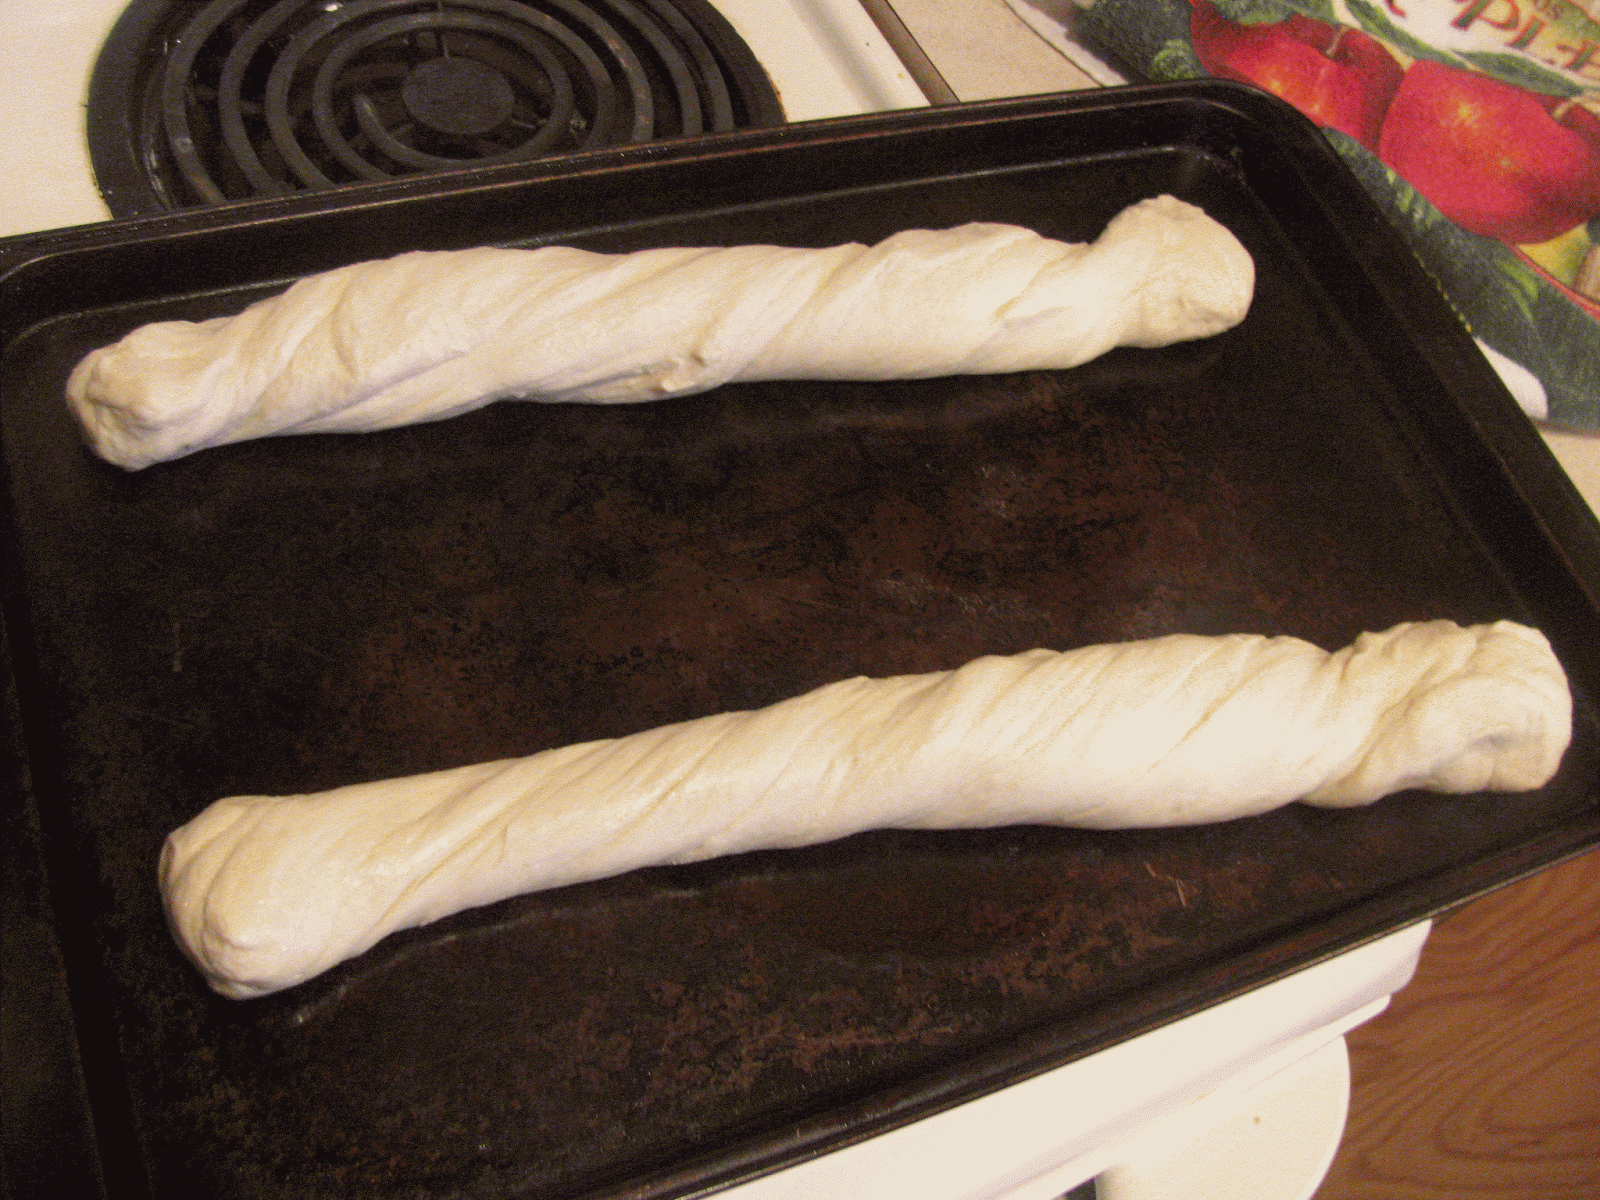
6. Shape each dough piece into a baguette. If you twist the dough, it won't shrink as badly - plus it looks nice. Place the baguettes onto a baking sheet and cover with plastic wrap or a clean dishrag. Turn the oven to 400 degrees F. and place the baking sheet on top of (not in!) the stove. Allow the dough to rise for half an hour.
7. Meanwhile, melt the butter and stir in the minced garlic.
 8. Using a sharp serrated knife, cut deep slits into the bread every inch or so. Brush the garlic butter into them and all along the top of the bread.
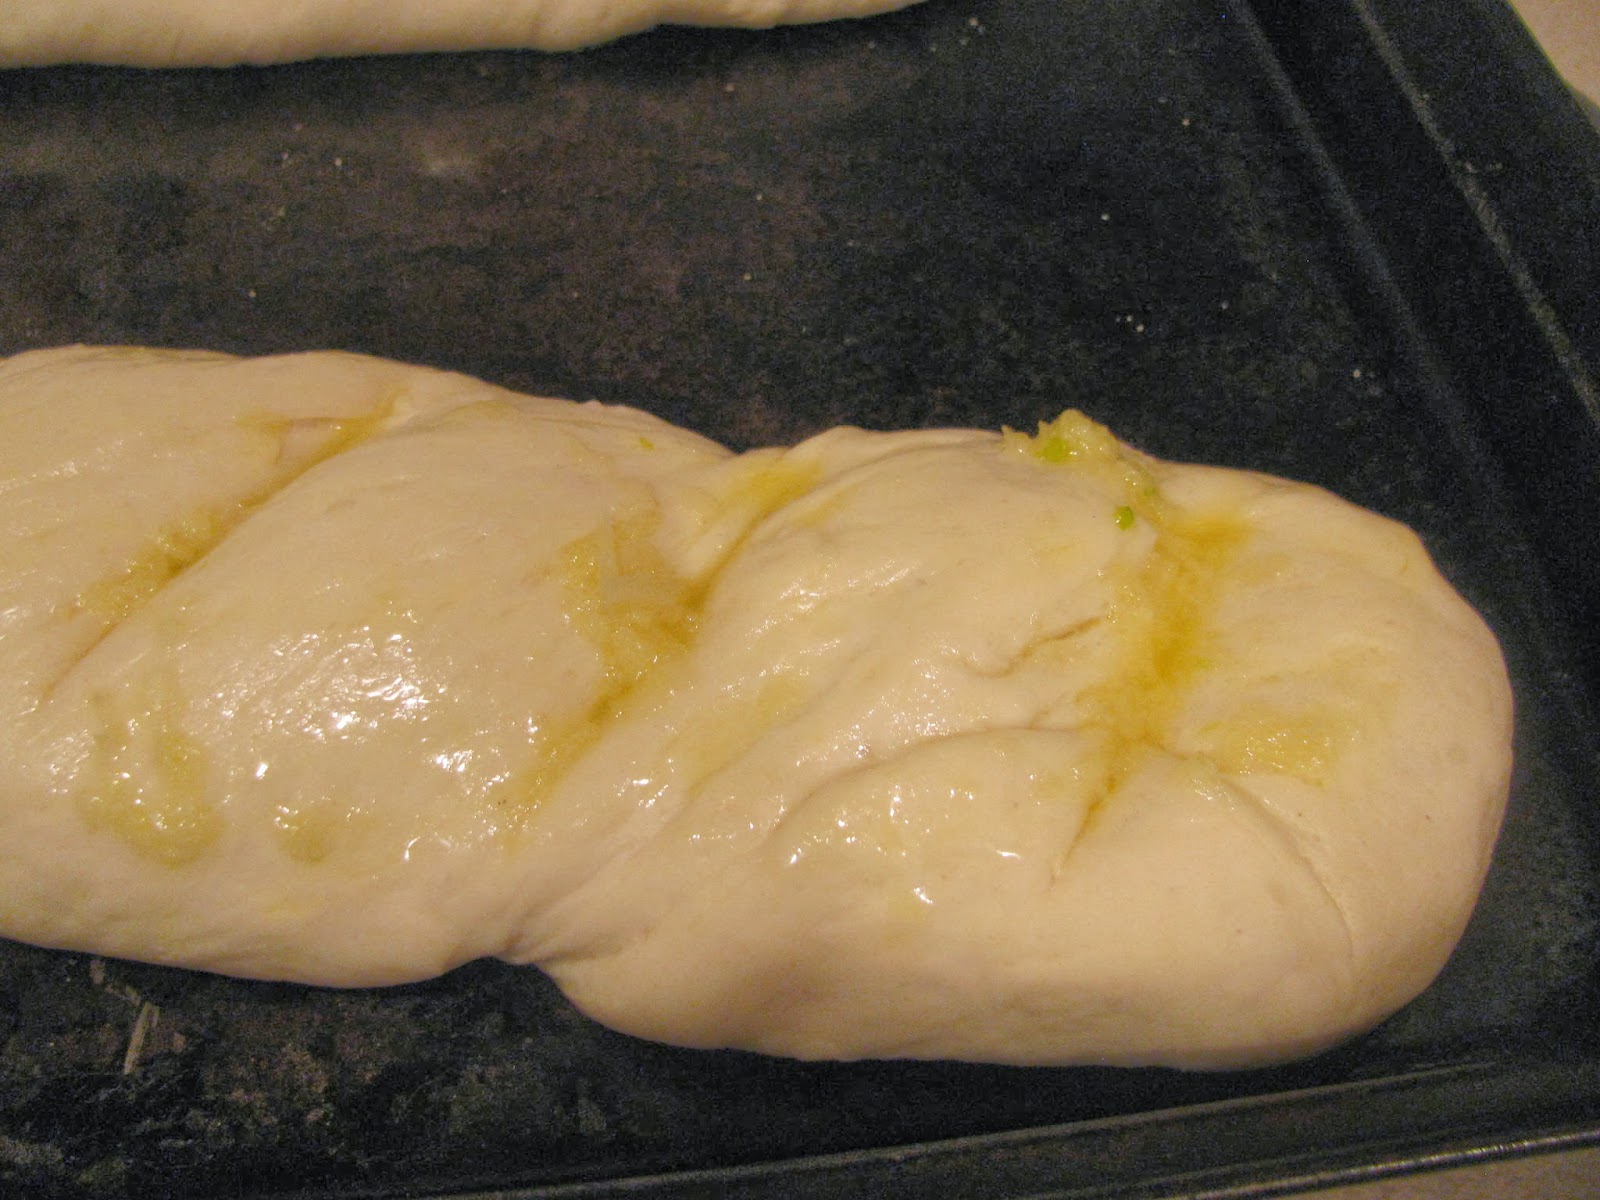
9. Reduce the oven to 350 degrees F. and place the baguettes inside. Bake 20-25 minutes, or until bread is golden.
Best served warm.
November 11, 2013
By The Shores of Silver Lake Activities
 By the Shores of Plum Creek
is a little different from the earlier books in the Little House on the Prairie series by Laura Ingalls Wilder. There are fewer descriptions of everyday pioneer life - and, overall, the book is more "quiet" and contemplative. Still, my children loved it. Here are the activities I planned for use while reading the book.
By the Shores of Plum Creek
is a little different from the earlier books in the Little House on the Prairie series by Laura Ingalls Wilder. There are fewer descriptions of everyday pioneer life - and, overall, the book is more "quiet" and contemplative. Still, my children loved it. Here are the activities I planned for use while reading the book.* Make a By the Shores of Silver Lake lapbook.
* Check out a photo of the surveyor's house, plus a photo of a replica of their homestead house.
* Take a virtual tour of the prairie. Also Also watch a video about the surveyor's house.
* Learn: Did Mary really go blind from scarlet fever? No! Read more here.
* Make a scrapbook, lapbook, or notebook about birds on the slough. List each birds on its own page, then draw a pictures of it; or print pictures from the Internet, cut, and paste them into the book. If you like, look each bird up in an encyclopedia to learn more about them. Good choices include: geese, ducks, herons, pelicans, cranes, mud hens, and swans.
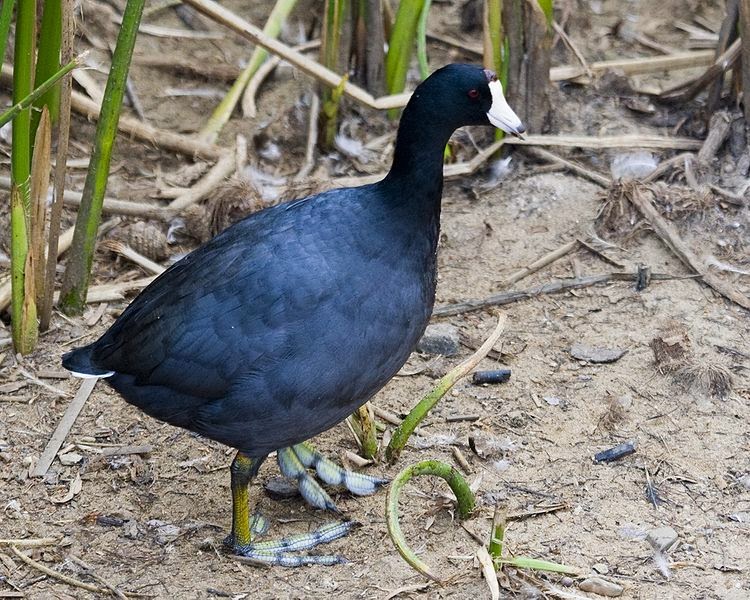 A mud hen (a.k.a., American coot), via Wikipedia.* Make your own sourdough starter and bread. Then make a simple yeast bread to compare taste and technique.
* While you're at it, learn a bit about the science behind sourdough!
* Cook some fried salt pork and gravy Or some bean soup, or baked beans.
* Plant a tree.
* Make a tree life cycle craft, like this one.
* Review what to do if your children get lost.
* Learn about buffalo (a.k.a. American bison).
 American bison track (via Wikipedia).
* Watch a buffalo wallow.
* Make a paper horseshoe to hang over your door.
* Learn why horseshoes were considered lucky.
Check out the Entire Little House series of Posts:
Little House in the Big Woods Activities
Pancake Men (from Little House in the Big Woods)
Little House on the Prairie Activities
Little House on the Prairie Birthday Party
On the Banks of Plum Creek Activities
November 8, 2013
Letter of the Week: F
 I recommend beginning this week with a "Fishing for Letters" activity. Begin by showing your child the letter F, then telling him the name of the letter and the "ffff" sound it makes: "Can you think of any words that have the ffff sound?...Does 'fffish?' How about 'fffishing?' Today we are going to fish...for letters!" Use the letters A - F for this activity. The rest of the week, choose from the F-related crafts and videos below.
Learn more about the Letter of the Week series here.
* Free "Letter F" printable book
* F is for Food
* F is for Fish
* F is for Fish (lowercase)
* Fish (ichthys) craft
* Fish CD craft
* Fish Math activity
* Fish/Fishing snack
* F is for Frog
* Frog craft
* Frog life cycle craft (plus other frog-related learning)
* 3-D Frog life cycle craft (there's a very small fee for this, but you could easily create something similar)
* F is for Flower (lowercase)
* Flower snack
* Flower math activity
* Flower handprint craft
* Flower lifecycle craft
* F is for Foot
* F is for Fox
* F is for Flag
* F is for Foil
* F is for Fire
* Fire handprint craft
* F is for Family
* F is for Fireman (lower case)
* F is for Feathers
* Letter F free printables
* Phonics: The Letter F
* Sesame Street: Letter F
* Sesame Street: Flea Circus
* Sesame Street: Typewriter Guy, Letter F
* Sesame Street: Small letter F
November 5, 2013
Preserving Herbs in Salt - an Update
 Last summer, I experimented with preserving basil in salt. This is a very old preservation technique - but one I'd never tried before. Basically, it consists of layering fresh basil (or other herbs) and ordinary salt in a jar, then storing it in the refrigerator. Basil is a particularly good way to determine if this method works, because it quickly becomes black and mushy if frozen or refrigerated.
This morning, I opened up the jar to see how the leaves were doing:
* Some leaves, I'd left only partially covered with salt. These have dried out, just as if I'd dehydrated them.

* The leaves that were completely buried in salt are well preserved. Their color is darker than fresh basil (khaki green as opposed to a brighter green), but they smell just like fresh. The leaves are moist, but not at all slimy.
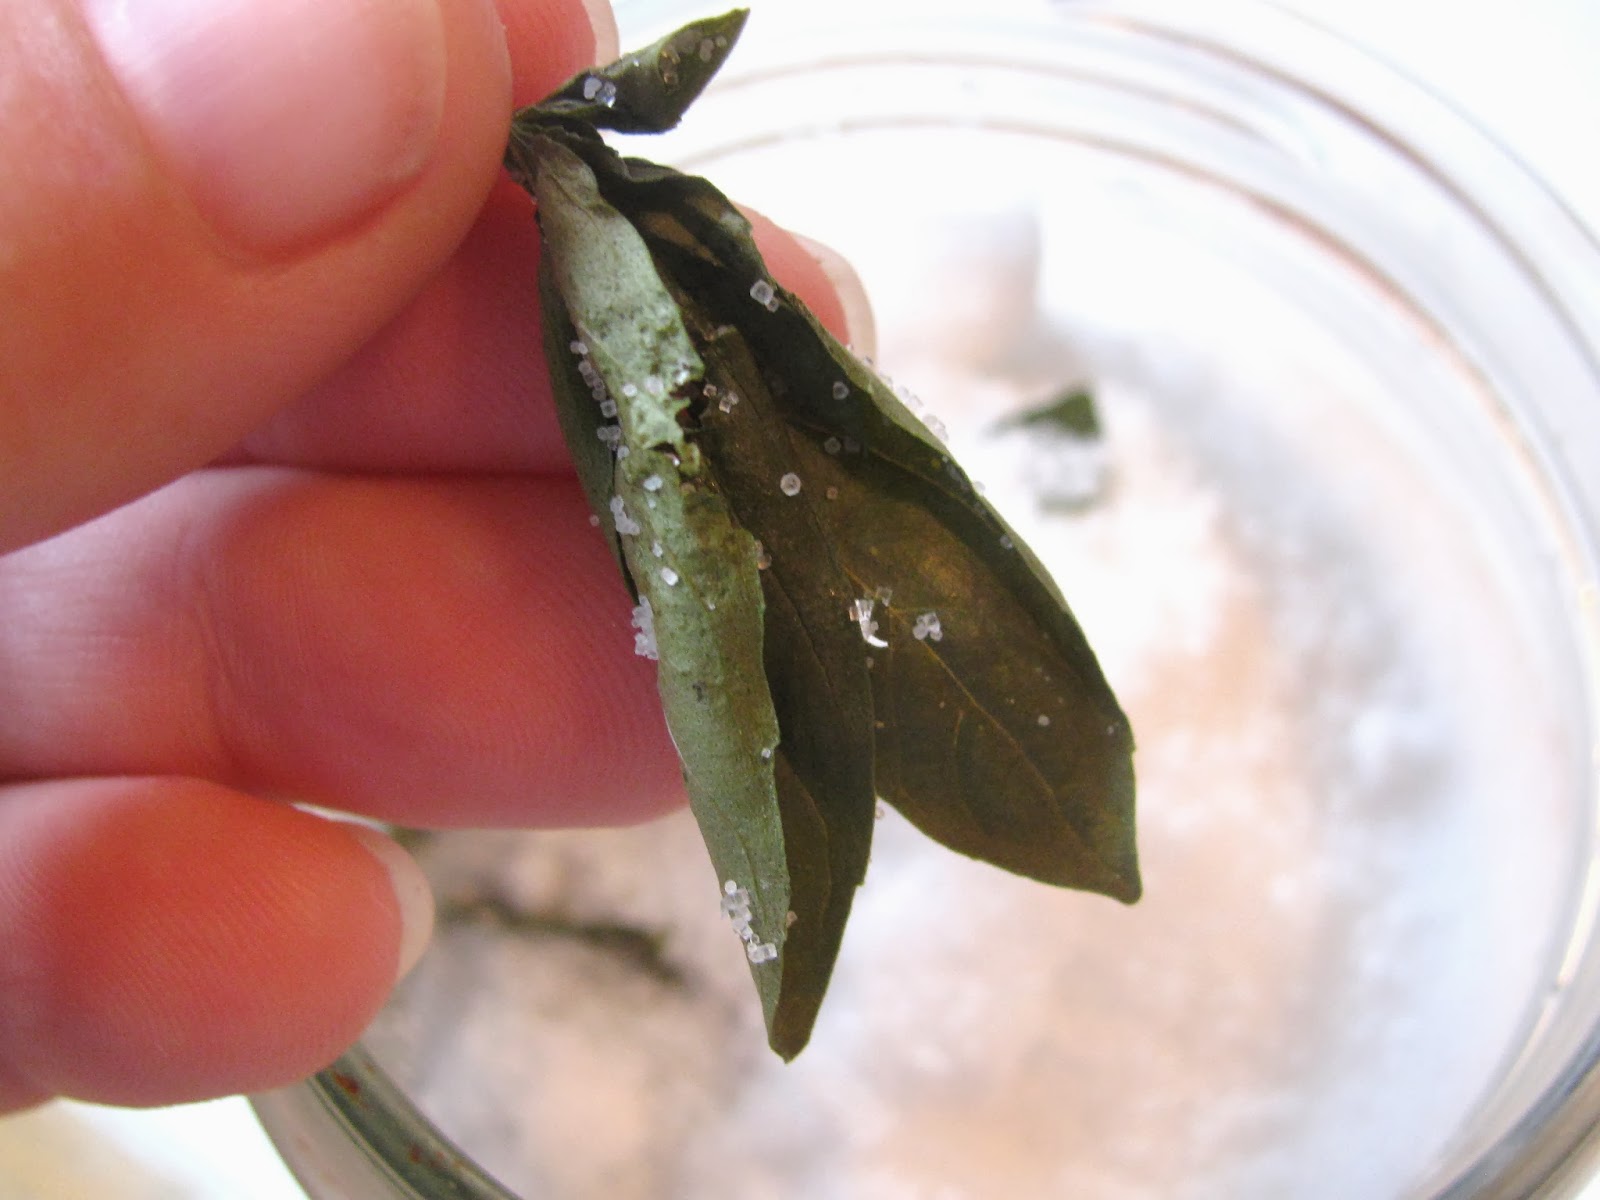 I'm really pleased with the results!
For more ways to successful preserve basil (and other herbs), click here.
November 1, 2013
Letter of the Week: E
 If your child eats eggs, start the day off with some, then head into one of these "E" related crafts. Learn more about the Letter of the Week series here.
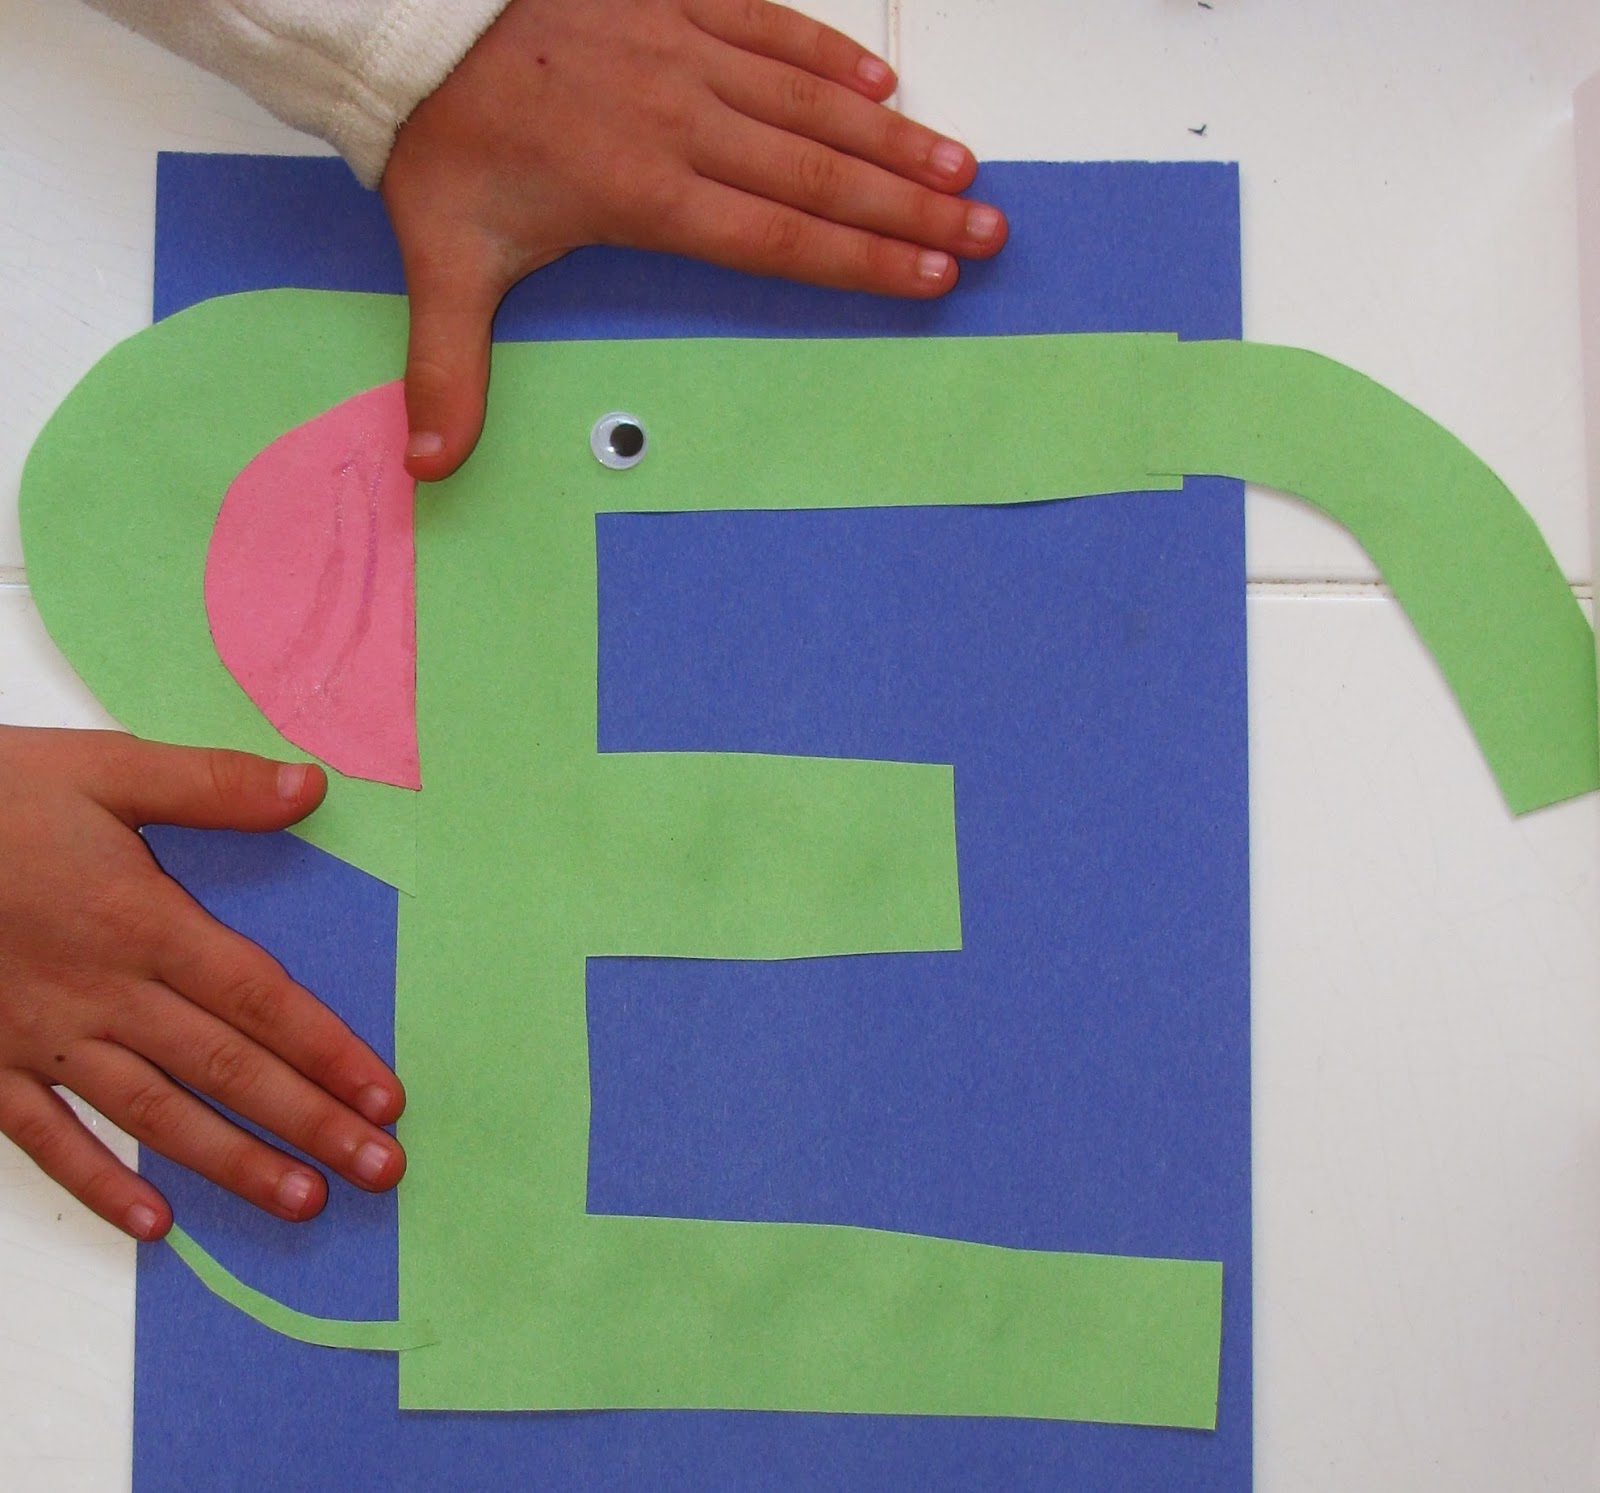
* E is for Elephant (lowercase)
* E is for Elephant (upppercase)
* Elephant feet craft
* Elephant bread snack
* Elephant finger puppet printable
* Elephant handprint craft (also here)
* Elephant mask printable
* E is for Egg
* E is for Egg Carton
* "Eggs" and "Bacon" snack
* Hatching Egg craft
* E is for Eagle (the "eagle" crafts are fun, but don't use the common sound for E; use with discretion)
* Handprint Eagle craft (more here and here)
* Eagle toilet paper roll craft
* E is for Eyes (the "eye" crafts are fun, but don't use the common sound for E; use with discretion)
* Glowing Eyeballs craft
* Eye Worm craft
* Earth craft (the "earth" craft is fun, but don't use the common sound for E; use with discretion)
* Eskimo craft
* E is for Elmo (lowercase)
* Elmo paper plate craft
* Elmo cut and paste printable
* Elmo stick puppet
* Elmo paper bag puppet
* Elmo cupcake snack
* Elmo watermelon snack (scroll to the bottom)
* Elijah and his chariot to Heaven
October 30, 2013
October on the Homestead
 Despite the fact that it's October - a time when people in my area are no longer growing vegetables, unless they've planted a fall garden (which is sadly rare) - we are still harvesting crops. Although I failed to get anything but a few carrots planted in late summer, the collards and kale I planted last spring are still producing quite a lot of food. Even my spring-planted zucchini is still giving me squash - though at a slower pace than in summer.
I've harvested only a few carrots because I'm still waiting for a good frost to sweeten them up. That goes for the parsnips (which I typically leave in the ground until just ready to use ) and Jerusalem artichokes, too. I did harvest my first batch of ground nuts, but I haven't yet used them because I've just been too busy for experimentation in the kitchen.
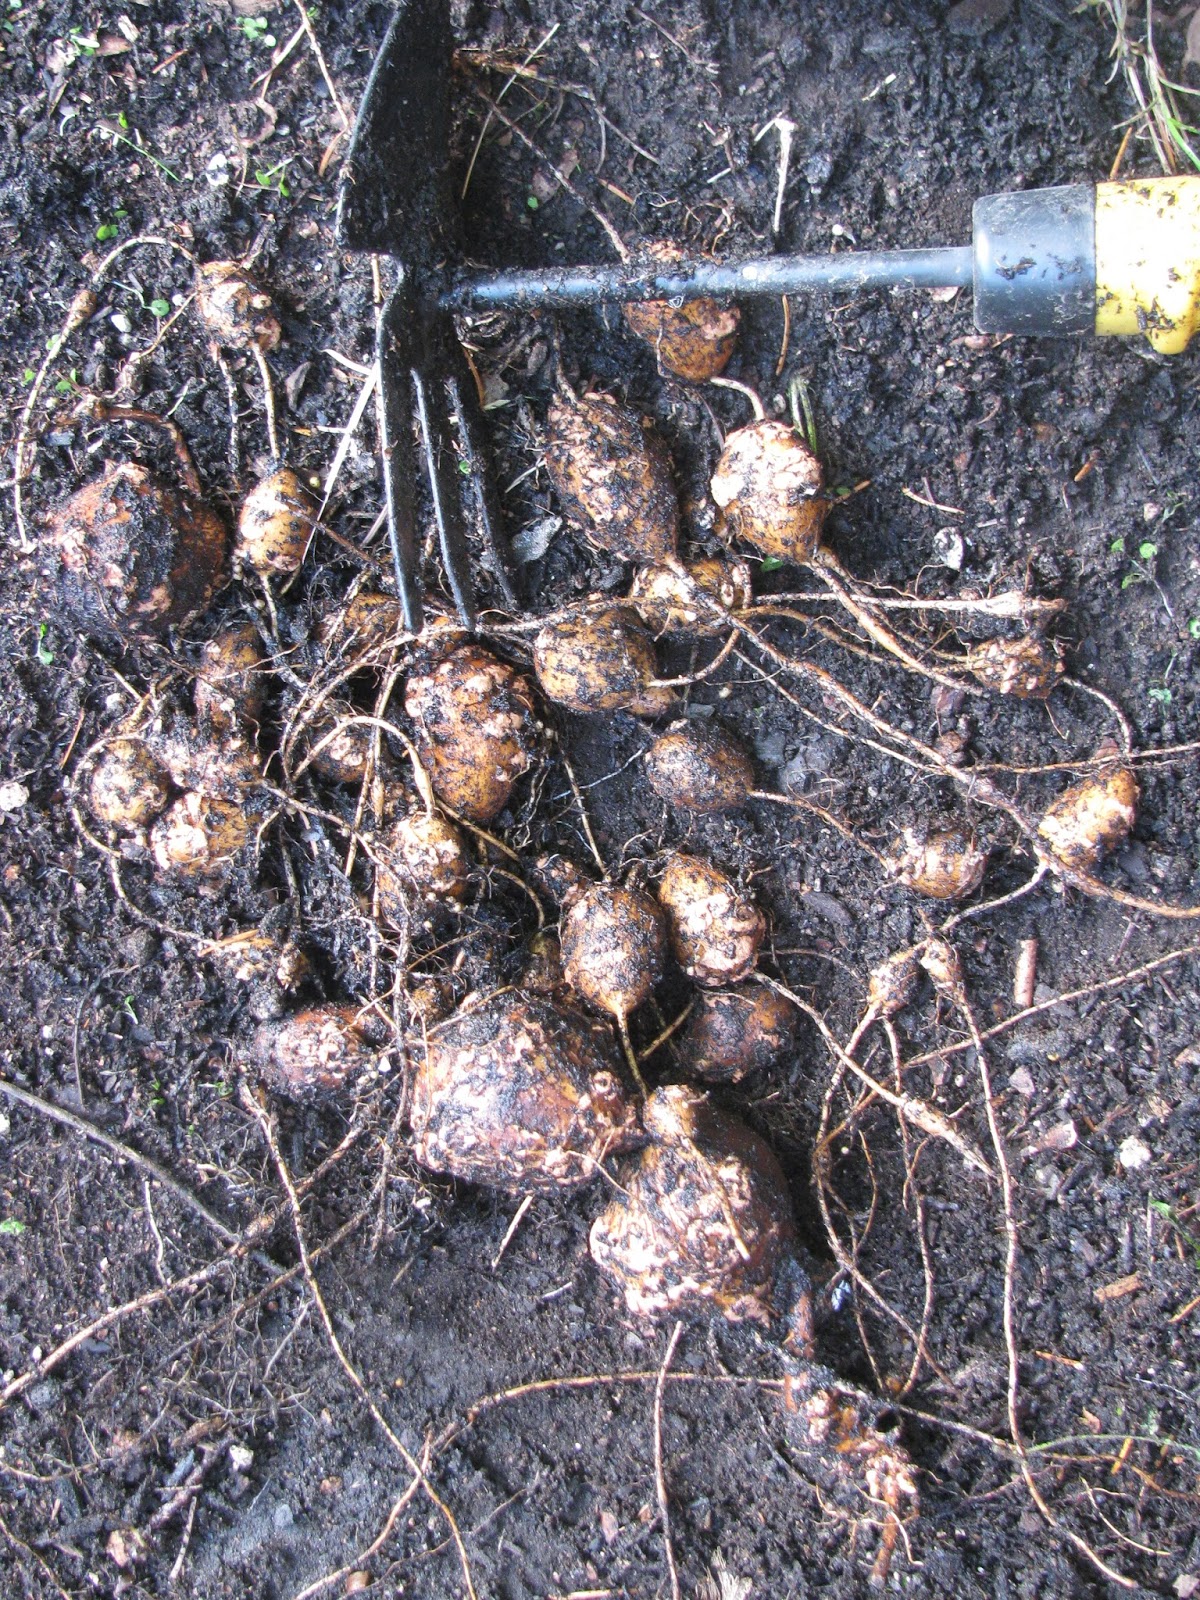 Ground nuts.
 The main veggie bed, covered with leaves. We plucked our first butternut squash out of the garden...Amazingly delicious! All the butternuts are ripe enough to eat now, but I'm waiting for the skins to harden so I can store them long term in a cool location. To test for this, I press my thumbnail into the skin of the squash. If it doesn't leave a mark, the squash is ready. However, the vines may die back before this happens; no worries. We love butternut squash and could probably eat it all within a short amount of time. Otherwise, I can freeze it.
Most of my green tomatoes have already ripened. This year, I had little room to ripen them in my pantry, so I just set them in boxes (single layer) in the kitchen. They are ripening very quickly this way and I'm freezing most of them as they do. The tomato crop was great this year, giving me far more tomatoes than I hoped for, so I think I will try canning some homemade catsup soon.

I'm also doing some light spring prep in the garden. One of my beds has become so overrun with buttercups (an impossible to pull up weed) that I mowed back the weeds and covered the area with cardboard held in place with a few bricks or stones. This should kill off most of the weeds while also making the soil looser and more full of worms and microorganisms next year.
In addition, fall leaves are everywhere, and I'm making good use of them. When they fall in the garden, I leave them be. They will rot and add nutrients to the soil. If they are very thick, I have my husband shred them and we put them in the compost. (For more ideas for using fall leaves in the garden, click here.)
 We're getting 5 - 6 eggs per day. This is the morning batch.Our chickens are still laying quite well. They haven't yet molted and show no signs of slowing down. Australorps, some say, lay better during the cold months than many other breeds of chicken. We'll see.
We thought we were going to loose one of our hens this month. She was quiet, always sitting in some corner far off from the rest of the flock, and not doing much. In the beginning, her symptoms were so subtle, we weren't positive she was sick - and by the time we decided she definately was, we saw no reason to separate her from the rest of the flock. If she had something contageous, she surely had already given it to the rest of the hens. So we just watched the flock closely.
Then suddenly, our sick hen perked up and was back to normal. It's a reminder than even hens sometimes feel under the weather without being seriously ill.
 Kennedy loves maple leaves!
Our rabbit is all set for the colder weather, too. His hutch is already in a sheltered location, but while rabbits have thick fur, in the wild, they get much of their winter warmth from snuggling with other rabbits deep in a rabbit hole. If it gets much colder, we'll line three sides of his cage with cardboard for extra warmth. He has a little house in his hutch, too, which we've lined with hay. As a side note, did you know rabbits purr? I sure didn't. When we pet him, he doesn't make any noise, but you can feel his throat vibrating.
2013 Produce Totals
(All but the squash and tomatoes were/are from a 12 x 14 ft. garden plot; the squash and tomatoes were in an area measuring 33 x 3 ft.) Eggs 751Chicken meat 20 ½ lbs.
Apples 13 1/4 lbs.Basil 3/4 lb.Beets 1 lb.Blackberries 3 lbs.Blueberries 7 1/2 lb.Buttercup squash 2 1/2 lbs.Butternut squash 3 ½ lbs.Cabbage 6 lb.Calendula 8 lb.Carrots 1 3/4 lb.Chives 6 1/2 lbs.Cilantro 1 1/8 lb.Collards 13 3/4 lbs.Dandelion flowers ½ lb.Dandelion greens 35 lb.Dandelion Root 2 1/8 lb.Garlic: ½ lb. scapes + 1 lb. headsGreen onions 1 lb.Ground nuts 1 lb.Kale 17 lbs.Kohlrabi 1 lb.Kiwi 1 lb.Leeks 5 lbs.Lettuce 11 lb.Mint 3/4 lb.Oregano 1 1/2 lb.Pattypan squash 44 lbs.Parsnips 1 lb.Passion vine 1 lb.Peas 5 1/2 lbs.Potatoes 11 1/4 lbs.Radishes 8 lb.Rosemary 1/2 lb.Sage 1 1/2 lb.Spinach 1 1/4 lb.Squash blossoms 3 1/2 lbs.Sunchokes 40 lbs.Strawberry 3 1/2 lbs.Tomato 38 3/4 lbs. + 28.25 lbs. greenWild onion 2 lb.Wonderberries 1 lb.Zucchini 60 1/2 lbs.
October 29, 2013
Got Fall Leaves? Here's What to Do With Them!
 Every year, I'm amazed that my neighbors rake the leaves off their lawn and put them in neat (initially, anyway) piles along the street for the city to pick up. Don't they know what a gold mine they are throwing away?! Apparently not. But you, my dear readers, have no such excuse. Because, if you don't know how useful fall leaves are already, you're about to learn!
* Add them in layers to your compost bin. Leaves are one of nature's great plant foods. However, it's important to not dump a huge pile of leaves into the compost bin all all once; they will become slimy mush and will slow down decomposition in the compost pile. So add a layer of leaves, then a layer of "green" (nitrogen-rich) things, like kitchen waste, then another layer of leaves, and so on. Shredding the leaves first speeds up their decomposition. (Running the lawn mower over them will shred them nicely.)
* Use them as mulch. Ideally, shred the leaves first, then place a few inches of the leaf mulch around your plants, keeping the leaves a couple inches away from the stems. Often, though, I don't bother to shred them; we get a lot of winter rain, so that keeps the leaves from blowing around. By spring, even unshredded leaves will be decomposed (or nearly so). Not only do the rotting leaves feed the soil, but they help prevent weeds while retaining moisture in the soil.
* Throw them in the garden bed. If you have any bare garden beds, sprinkle fall leaves over them, then lightly dig them in. The leaves will rot over winter, feeding the soil and encouraging good-for-your-garden worms and micro-organisms. Just don't add huge quantities that will stick together and be slow to decompose.
 * Make leafmold. Yes, you can buy it - but why buy it when you can make it for next to nothing? Leafmold is a rich compost that builds up nutrients in the garden - but it is, after all, just rotten leaves. To make your own, just devote a compost bin to fall leaves. Or fill a plastic bag (black contractor's bags work best) about three-quarters full. Close the bag securely and poke small holes all over the bag. In a year or two, you'll have leafmold.
* Use them for overwintering. If you are overwintering vegetables like carrots, parsnips, and leeks in a raised bed or under a tunnel, placing fall leaves over them will keep them sufficiently warm in most climates. If you get snow, you'll need to completely cover your overwintered crops with leaves, then add at least another foot of leaves on top. In climates where there's just a spinkling of snow, just a few inches of leaves is usually all that's required. Leaves for overwintering don't work well if you don't have a raised bed or something else to hold the leaves in place.
* Start a lasagna garden. This is a simple way to turn bad gardening soil into spectacular growing soil - and one main ingredient is leaves. Essentially, you're just layering "greens" (nitrogen rich materials) and "browns" (carbon rich materials) on top of the soil; you'll need about twice as many browns as greens, and you should stack everything two or three feet high. Read more about lasagna gardening here.
Not all leaves are created equal. Some are quicker to decompose than others, and some add more nutrients to the soil than others. Thick leaves (like holly leaves) must be well shredded before you can use them in the garden. And Eucaliptus, walnut, and camphor and cherry laurel leaves actually inhibit plant growth, so they shouldn't be used at all.
But leaves left on the lawn will kill it - and there's no reason to throw leaves away if they can make your garden more productive. Give it a try!
October 25, 2013
Letter of the Week: D
 Now is a great time to review the letters A - C; then introduce the letter D. Don't forget to sing the Alphabet Song at least once a week, and to watch The Letter Factory. Learn more about the Letter of the Week series here.
D is for Duck
D is for Duck (2)
Duck handprint craft
D is for Daisy
D is for Daisy (2)
Dragonfly craft stick craft
Dragon (printable) craft
Dragon paper craft printable
D is for Door toilet paper roll craft
D is for Dinosaur
D is for Dinosaur (lower case)
Dinosaur handprint craft
Dinosaur handprint craft (2)
"Dirt" Dessert
D is for Dog
D is for Doghouse
D is for Dots
Daniel (and the lions) activity
Daniel (and the lions) coloring page
Dandelion craft
Dandelion cookies
Doll paper chain
(Paper) doll craft
Dove craft
Sesame Street: Letter D
Sesame Street: Dee, Dee, Dee
Sesame Street: Daddy Dear
Phonics: Letter D


