
Kristina Seleshanko's Blog, page 79
February 17, 2014
Let's Get Real: To the Mom Who Thinks She's Not Doing Enough
 Some people look at my blog and think, "How does she do all that?" But ladies, let me assure you, I do not do all that.
You may think, "She homeschools, and works from home, and cans, and gardens, and does her own housework, and does fun projects with her kids, and cooks from scratch, and reads her Bible every day, and has a great prayer life, and, and, and, and..."
But the truth is:
I struggle to keep my prayer life strong; it's hard for me to have deep conversations with God when I have noisy children running around me.
I do read my Bible almost every day, but some days, I'm so tired, I can't concentrate long enough to really understand it - and sometimes all I can read in between calls for "mama" is a single paragraph.
I do mostly cook from scratch - but not always. And we don't eat a lot of foods (like crackers or yogurt) because I simply don't have the energy or time to make them.
I do sometimes do fun projects with my kids - but my Pinterest boards are packed with projects we will never get around to, and my kids always wish we did more fun projects than I find time for.
I don't have a maid, to be sure, and my husband doesn't do housework. My kids do help some (though probably not enough), but mostly my house is not guest-worthy. My kitchen floor is often more brown than it's original cream color, my fridge isn't spotless, my counters are usually a mess, and the carpet always seems to need vacuuming - even if I did just vacuum it a few hours earlier.
I do garden, but it's something I often have to force myself to do. I love that gardening saves us money and gives us healthy food...and that's what keeps me gardening every year. But my garden doesn't look like something from a magazine, and I never, ever do everything I wish I could do in the garden.
I do can food, but it's often a sacrifice - especially in the summer, when I'm canning large amounts of produce. I wish I could home can everything, but I just don't have the energy or time.
I do work from home, and while I'm thankful I don't have to send my children off to daycare, it's very, very, very difficult to work with young children underfoot. What should take an hour to complete takes several hours instead. It's exhausting and frustrating. And then I'm mad at myself for feeling frustrated that my kids want their mama.
I do homeschool, but it's definitely not all sunshine and roses. My five year old fights me at every turn, and my eight year old struggles to concentrate on anything during the winter months.
Often I'm less patient than I wish I was, often the days seem so very long, often I feel depressed, and have trouble keeping the big picture in mind, and cry out to God but don't hear his voice, and sob on my knees to Him each evening, and wish it was all a whole lot easier.
But being a mom isn't easy - especially in the 21st century. Modern women have set themselves up to fail. We expect ourselves to raise children, work for money, maintain a home, get just a handful of hours of sleep each night, and still be happy, cheerful wives and neighbors.
That is a fairy tale. No woman can "do it all." No mom completely has her act together. And the more stuff we do outside of raising children and home keeping, the more we have to let some things slide. We can't work from home AND have a spotless house. We can't read the Bible for hours each day AND give our children and husband all the attention they need. We can't sleep a handful of hours AND be healthy, cheerful Proverbs 31 Women.
It's time we started admitting to ourselves - and to each other - that that's okay! Real life mommyhood is tiring, difficult, and messy. It's time we started saying to our friends and acquaintances who are moms: "How are you doing? No, how are you REALLY doing?" It's time we started admitting to each other that we are struggling. And uncertain. And sometimes - even often - think we are failing.
It's time we started supporting and validating each other. It's time we got real.
I will start: I am Kristina, an imperfect wife and mom whose floor needs mopping and who struggles to keep her priorities (God, husband, children, others) straight.
Who are you?


February 14, 2014
Letter of the Week: U
 U is for Underground.As with all weeks, begin by reviewing the entire alphabet. Don't be afraid to pause to review and better learn letters your child may be struggling with. If your child can sing the "ABC Song" easily and recognizes all (or most) of the letters A - Q, your child is ready to move on to the letter U. (Please see the notes on here on whether or not you should teach your child Q and U together.)
Begin by showing your child an upper- and lowercase letter U. "U says uh! Uh! Uh!...Uh like 'up!' Can you think of any other words that start with the uh sound?"
Then I suggest playing Letter U Toss - it's like a horseshoe toss, but more preschool friendly! Another fun idea is to have an Upside Down day. What can you wear upside down? What can you eat upside down? (How about an Upside Down Sundae?) Then move on to one or more of the activities below.
For more about Letter of the Week activities, click here.
* Letter U color by letter printable
* U is for Umbrella (see also)
* Umbrella color by letter printable
* Umbrella craft (using white glue for rain)
* Umbrella shape puzzles, scavanger hunt, lacing and more
* Umbrella counting
* Umbrella shape match
* Umbrella mobile craft
* Umbrella snack
* Umbrella snack (2)
* U is for Underwater (see also)
* U is for Underground
* U is for Upside down
* Underwear painting
* U is for Ursula (print a picture of Ursula from The Little Mermaid, cut it out, and have child paste it onto a large letter U made from construction paper. "Ursula" doesn't use the most common sound for U; use at your own discretion.)
* U is for Utensil (This project doesn't use the most common sound for U; use at your own discretion)
* U is for Unicycle (This is a kit, but it would be easy to make yourself. This project doesn't use the most common sound for U; use at your own discretion.)
* U is for Unicorn ("Unicorn" doesn't use the most common sound for U; use at your own discretion)
* Unicorn printable craft
* Unicorn dot printable craft
* Unicorn handprint craft
* Unicorn lunch
* Phonics: The Letter U
* Sesame Street: Letter U
* Sesame Street: U Really Got a Hold on Me
* Sesame Street: My Best Friend's Ukelele
* Sesame Street: Cookie Monster's Letter of the Day: U
* Sesame Street: Here's to U
* Sesame Street: U with the Martians
February 12, 2014
Dandelion or Spinach Noodle Recipe

If you've never made homemade noodles before, you're in for a treat. They are easy to make - and taste so much better than anything you can buy. I consider this a beginner's recipe - that is to say, the taste is very mild. If you already love dandelions or other greens, feel free to increase the amount of greens in the recipe.
Spinach Noodle Recipe (Dandelion Noodle Recipe, Nettle Noodle Recipe, or Other Greens Noodle Recipe)
1 1/4 cups greens (dandelion leaves, spinach leaves, etc. If using greens with thick stems running through the leaf, be sure to cut the stems out. Pack down the greens in the measuring cup.)
2 tablespoons water1 eggSalt1 + cups all purpose flour
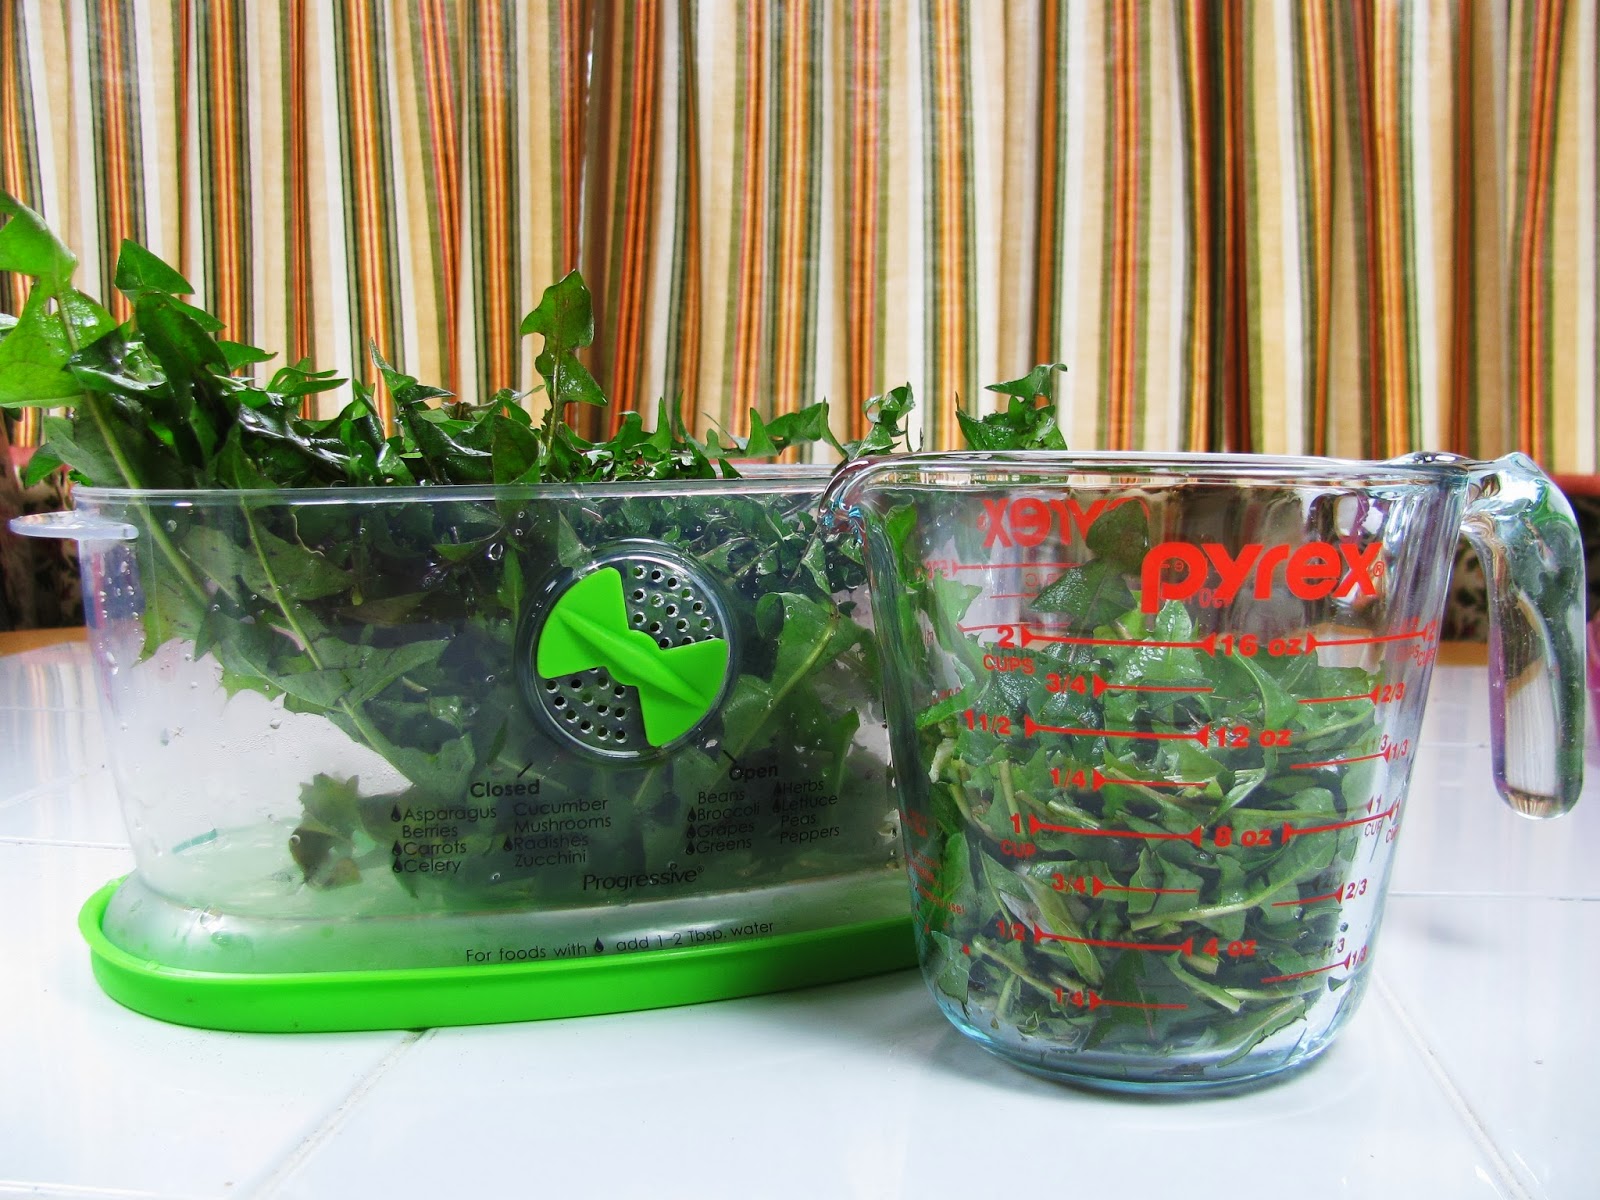 Pack down the greens when measuring. By the way, on the left hand side is my fruit and vegetable keeper. I highly recommend it! I find it adds weeks to the life of my veggies. 1. Place the greens and water in a saucepan. Cover and cook over medium until the leaves are tender. Watch closely; if the water evaporates, add a tablespoon more. Don't allow the greens to scorch!
 2. Add the egg and a pinch or two of salt, stirring to combine.
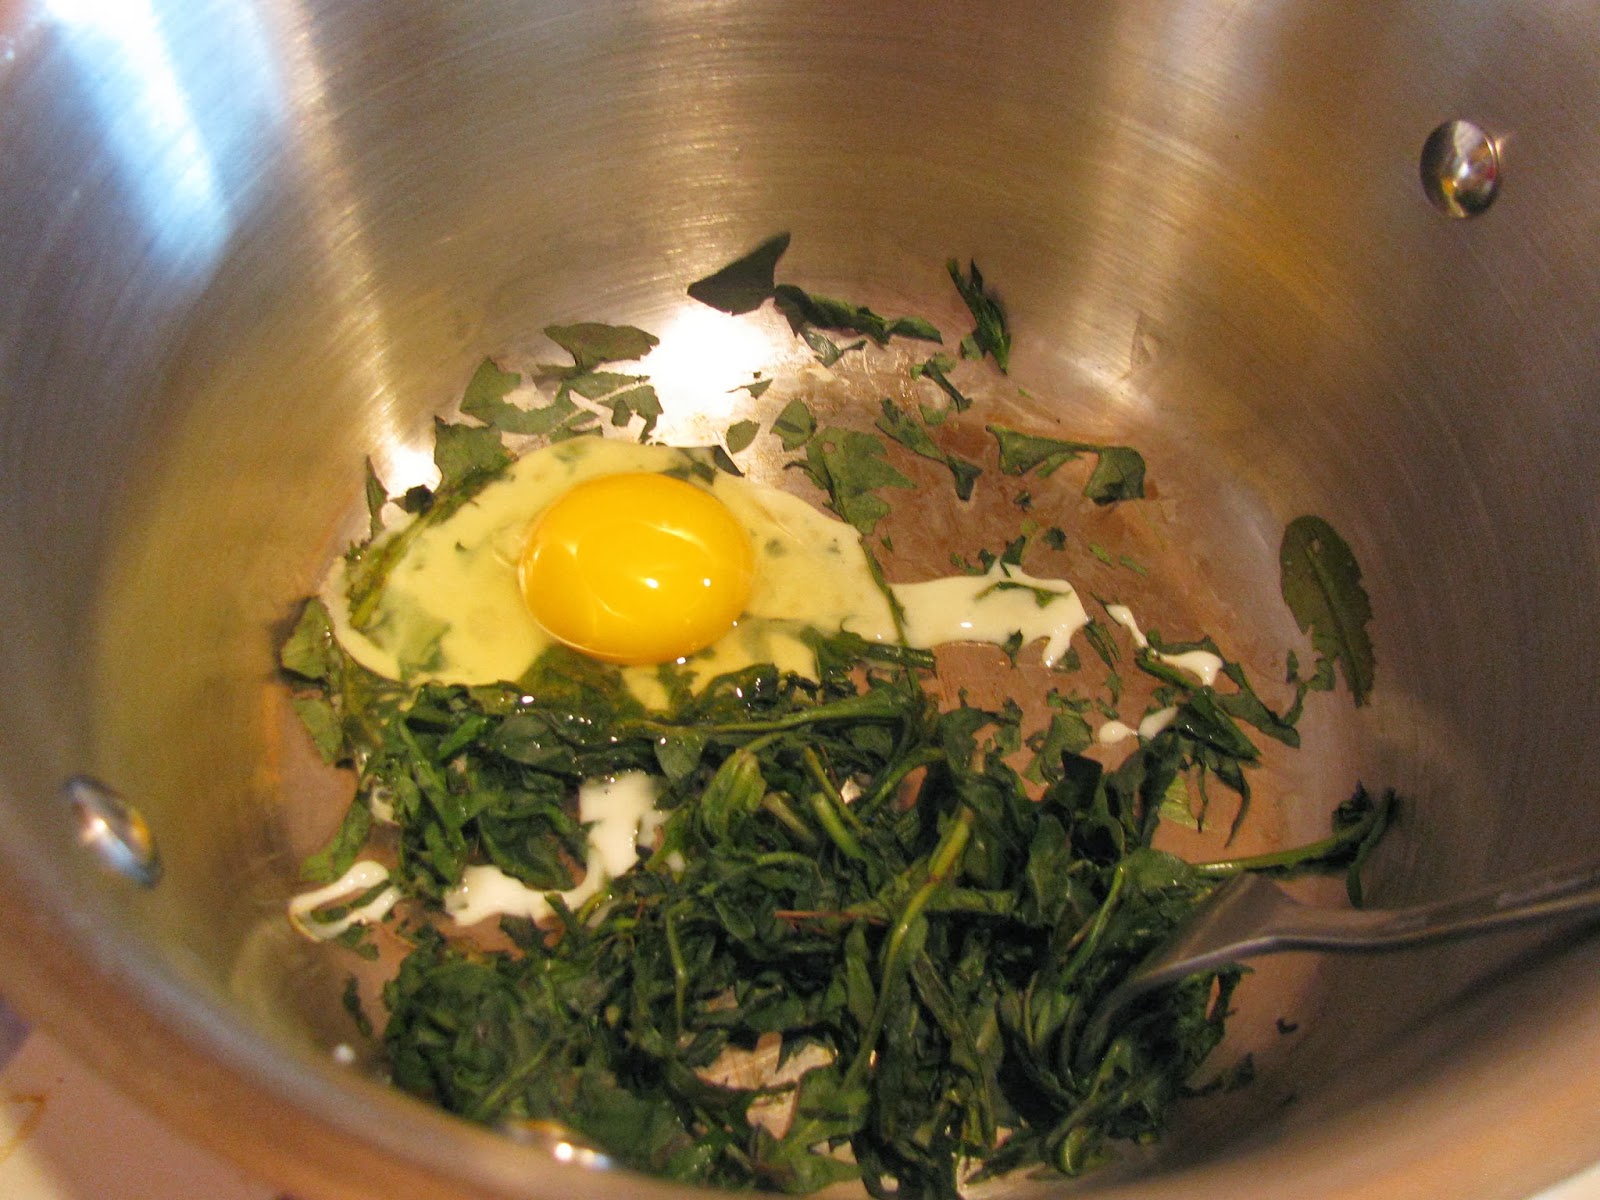
3. Carefully transfer the mixture to a food processor and pulse until pureed. (Or, use a blender to puree the greens.)
 4. Pour the leaf mixture into a mixing bowl and stir in 1 cup of flour. If the dough is still soft, add a little more flour and mix again, repeating until the dough is stiff. If the mixture is too dry, add water, a tablespoon at a time, until a stiff dough forms.
5. Turn out the dough on a lightly floured surface. Knead for about 1 minute.

6. With a rolling pin, roll the dough very thin. Leave the dough untouched for 20 minutes.

7. Cut the noodles about 1/4 inch thick. (For the photos, I made the noodles pretty thick; my kids like them that way. But rolling the dough as thin as you can and cutting the noodles no more than 1/4 inch thick makes them more like the type of pasta you buy in the store.) If desired, you can loosely roll the dough into a cigar shape, cut into 1/4 inch strips, then unroll the noodles and cut them to whatever length you desire.
8. You may now cook the noodles, or you may dry or freeze them for storage.
To dry the noodles, leave them in a single layer on the lightly floured counter, place them in a food dehydrator, or hang them on a pasta drying rack or a clothes drying rack. To avoid spoilage, be sure the noodles are completely dry before storing them.
I personally never frozen fresh pasta, but you can. Just place the noodles flat on a baking sheet, or form into little "nests" and set them on a baking sheet; place the baking sheet in the freezer until the noodles feel solidly frozen, then transfer to an air tight freezer container for up to three months.
To cook the noodles right away, just toss into boiling water. Fresh pasta doesn't take as long to cook as dried or frozen pasta, so test for doneness frequently. (To test, just remove a strand of pasta with a fork, allow it to cool for a minute, then taste.) If it will be 2 hours or less before you need to cook the noodles, place them in an airtight container, or in a platter covered tightly with plastic wrap. Refrigerate and cook as soon as possible.
To serve, use whatever pasta sauce you like, or just butter the noodles.
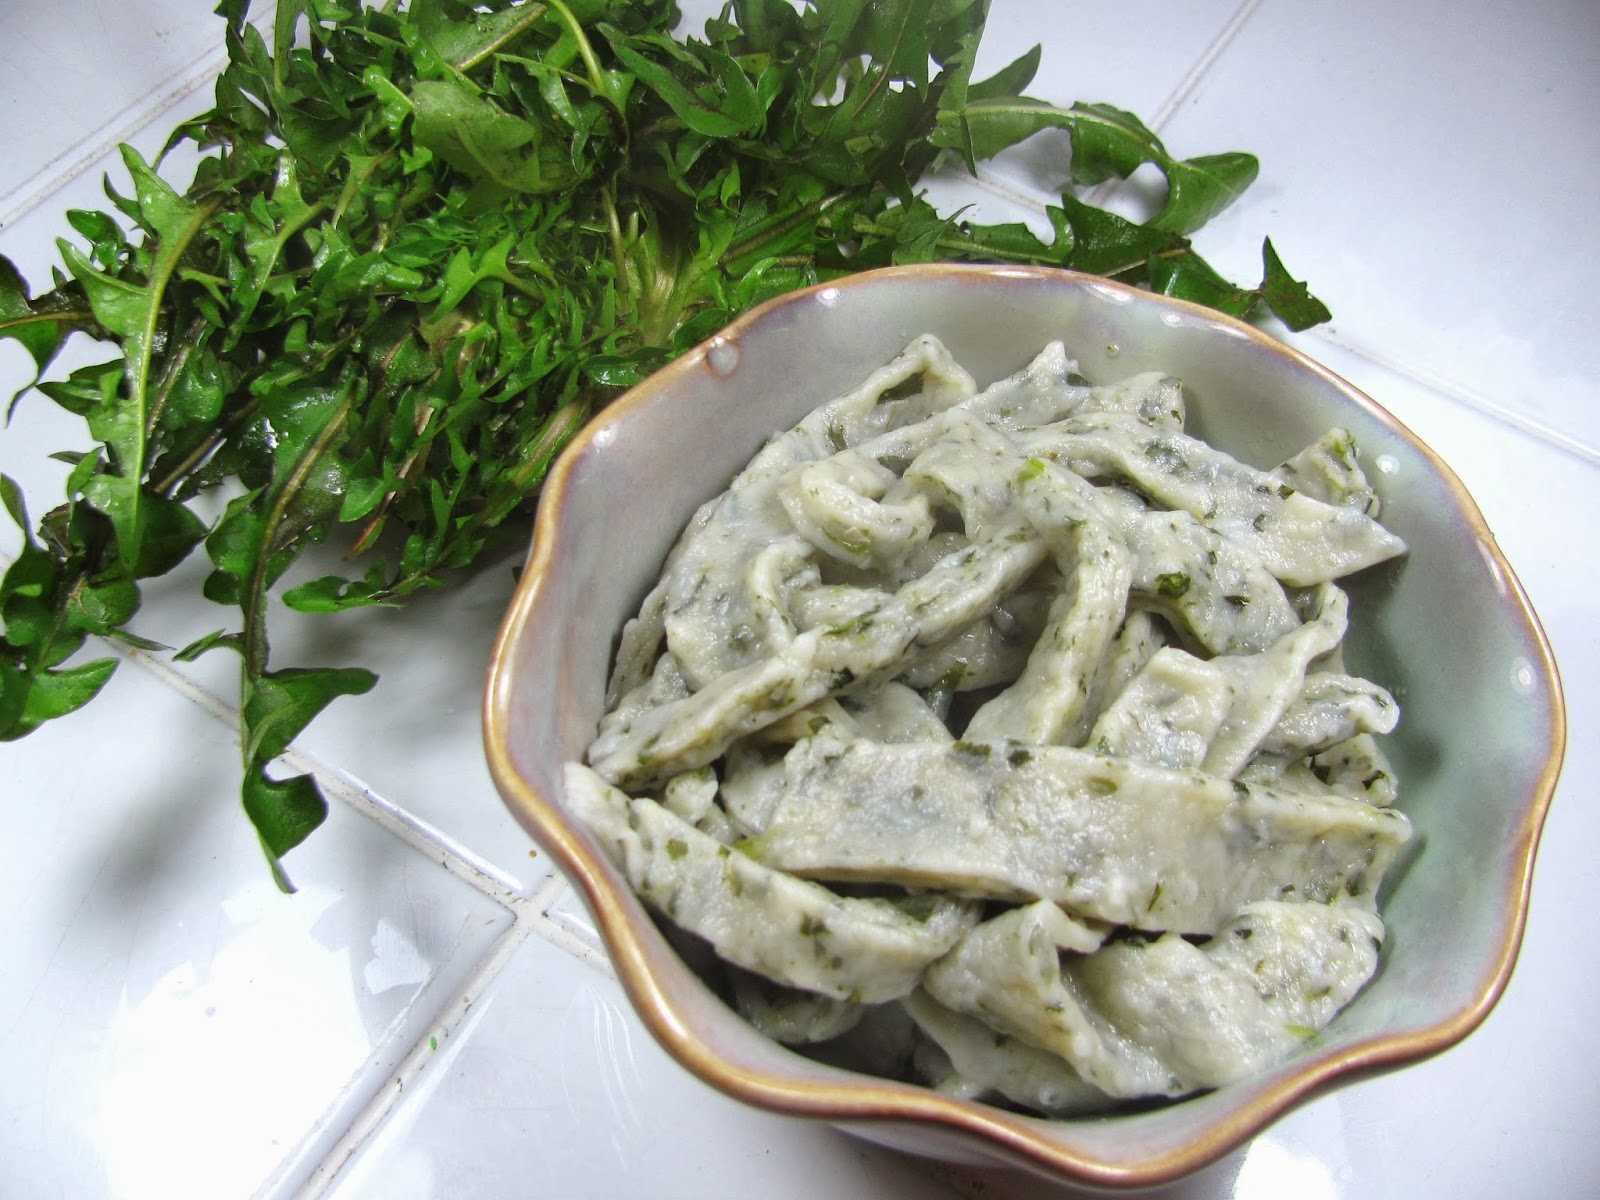
Serves 2.
February 10, 2014
Drought Gardening - How to Grow Food in a Drought
 Parts of the U.S. are experiencing droughts this year. This likely means grocery store food prices will increase - which makes this year a great year to grow your own food. (Actually, every year is a great year to grow your own food!) But what if you're living in a dry area? How can you grow food during a drought? What are the tricks to drought gardening? And, even if you aren't experiencing a drought, how can you conserve water in the garden?
* Don't intensive garden (space plants closer together than the seed packet recommends) or grow food in raised beds or containers. All these methods require more watering.
* Place plants far apart; generally at least 1 1/2 times more than seed packet guidelines. This allows plant roots to spread far underground, searching for water and nutrients. Naturally, this works best if you have plenty of room for a garden. (For more information on this method, read Steve Solomon's free Gardening Without Irrigation ; also, "Steve Solomon's Garden Innovations.")
* Use cisterns (or buckets or other containers) now to capture all possible rainwater. You can use rain barrels, too, but rooflines tend to harbor animal feces, chemicals, molds, and fungi, which all run directly into rain barrels. (NOTE: It may be tempting to use gray water - such as from your clothes washer - for watering, but this water may contain human feces, and therefore isn't recommended for edibles.)
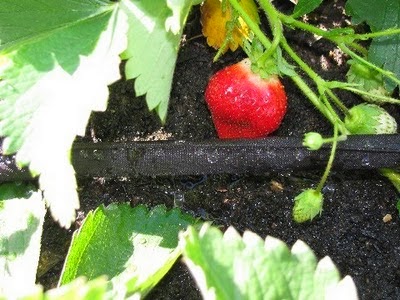 A soaker hose in action.* Use drip irrigation or soaker hoses. This brings water directly to the base of plants, where it is needed.
 * Learn how to tell if the garden actually needs water. With a trowel, remove the top three or four inches of soil; stick your finger into the bottom of the hole. If the soil feels dry, it's time to water. Also, there are critical times in a plant's life when it needs more water. See Old Farmer's Almanac for more information.
* Water in the morning, before the heat of the day. If you water later, much of the water will evaporate. (You might be tempted to water in the evenings, but this can leave plants damp - especially if you use a method other than drip irrigation - and this leads to disease.)
* Water deeply. This allows you to water less frequently and encourages a deeper root system in plants. To this end, try inserting a bit of PVC pipe with holes drilled throughout or a soda bottle with holes punched in it, near the base of plants. This is an especially good strategy for plants that require more than average water, such as tomatoes. Or bury clay pots in the soil near plants. (Regular terracotta pots will do, as long as you cover the tops with saucers to help prevent water evaporation; in addition, you can purchase clay pots made just for irrigating.) Fill the pots with water and the liquid will gradually seep from the pots, watering the plants.
* Add organic matter to your garden. This includes compost, mulches, and aged manure. Science has proven that healthy soil retains water much more effectively than soil that's depleted of organic material. To that end, you might try clear fallowing: Don't grow anything in the garden area for one year, but leave behind the remains of previous crops. (Alternatively, leave behind the remains of a cover crop.) This acts as a mulch, helping to retain moisture in the soil. This obviously works best if you have room for more than one garden area.
* Mulch heavily. Use about six inches of straw, hay, shredded leaves, wood chips*, or other organic materials over your irrigation hoses. However, make sure the soil is warmed up before you lay mulch down in the spring. Also, don't let mulch touch the stems of plants. (*Not sawdust or bark mulch; and don't even use wood chips if you till your garden, since it will rob the soil of nitrogen if tilled in)
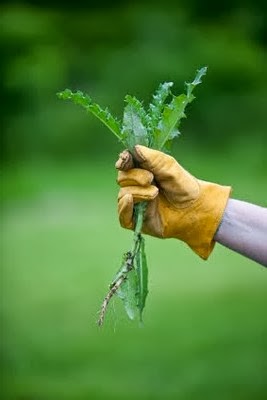 Weeding conserves water for desirable plants.* Weed, weed, weed. If there are weeds in your garden, they are using up precious moisture; remove them ASAP.
* Choose plants that come to harvest quickly. The less time plants spend in the soil, the less water the crop will need. All seed packets should indicate how many days it takes for the plant to become harvestable; if you have a choice between a plant that is ready in 75 days and one that is ready in 30 days, choose the 30 day plant.
* Focus on a spring and fall garden. More than likely the weather will be more moist and less hot during these seasons. This means growing mostly cool season crops - but there are lots of great cool season crops to choose from.
* Select drought resistant plants, such as mature rhubarb, okra, and peppers. For more ideas, visit Native Seeds, which specializes in plants that grow in arid locations; see also Burpee's list of heat tolerant vegetables.
* Use windbreaks to prevent wind from sweeping across your garden and taking water with it.
* Shade cloth placed over the garden in the heat of the day helps prevent plants from expiring so much water. You can use hoops to hold the shade cloth in space, or simply tie a shade cloth to posts or fences in the garden area.
* Try the dry gardening method of "dust mulching." This means cultivating the first two or three inches of soil to slow the wicking of water; this keeps more liquid in the soil just below the cultivated area. Dust mulching should be done after the garden is irrigated, or after a rain. (This method, while traditional, is controversial. Read more here.)
 Dry farmed Early Girl tomatoes. Via CUESA.* Dry farm your tomatoes. This only works if you have soil that's high in organic matter. Water the tomato only when the leaves start to yellow and completely stop watering the plant once it fruits. The plant yield will be less, and the plant will look ugly, but the tomatoes are said to taste superior.
* Don't fret about wilting. It's normal for plants to wilt in the afternoon heat. They will recover as the day cools. If, however, plants are wilted before the heat of the day, they require water.
* Look at the desert tribe gardening techniques of Native Americans. They sometimes built gardens that were not level; the planting area was low-lying, and small trenches were dug to funnel water toward the plants. Sometimes one end of the garden was higher and a ramp was formed out of the earth to funnel water down to plants. Creative thinking about funneling what water is available to your plants makes your job a lot easier.
February 7, 2014
Letter of the Week: Q (Including Free Q and U Get Married Printable)
 The marriage of Q and U!This week's letter (Q) can be taught two ways, depending upon how well your child already knows her alphabet. If your child recognizes and can name all or most of the letters, and is learning what sounds they make, it's a great idea to introduce her to the idea that the letter Q is never without U. They are always side-by-side.
One fun way to help your child remember this is to have Q and U get married. I've seen some schools put children through an elaborate wedding - with one child dressed as a bride and another as a groom, each with either a large Q or U pinned to their clothes. I find this a little disturbing (!). Instead, I'd recommend marrying two dolls. Or print out this Free Q and U Get Married Printable (After printing, cut out the bride and groom and tape or glue them onto popsicle sticks.)
On the other hand, if your child still doesn't know his letters well, I recommend focusing on each letter separately before you teach him about Q and U's "marriage."
For more about Letter of the Week activities, click here.
* Q is for Quail printable craft
* Quail paper plate craft
* Quail paper bag puppet (scroll down)
* Quail Bible story craft
* Q is for Queen (lowercase)
* Q is for Queen (uppercase)
* Q is for Queen (uppercase 2)
* Queen toilet paper roll printable craft
* Queen hand print craft
* Queen snack
* Q is for Quilt
* Q is for Quilt (2)
* Q is for Quilt Fruit Loop craft printable
* Quilt snack
* Q is for Q-tip
* Q is for Q-tip (2)
* Q-tip painting printables
* Q is for Quarter
* Quarter stamping
* Paper Quiver craft
* Paper Quill craft (Cut a piece of construction paper into a feather shape - as shown here - and let your child practice her cutting skills on it. Tape to pencils to create a "quill.")
* Straw Quill craft
* Phonics: The Letter Q
* Q Without U
* Sesame Street: Letter Q
* Sesame Street: TuTu Letter Q
* Sesame Street: This is the Letter Q
* Sesame Street: The Question Song
* Sesame Street: Quicy's Letter Q Song
February 5, 2014
How to Cut Long Hair...Even Your Own!
 A couple of weeks ago, I was talking to a mom who said she always cuts her daughter's hair - and her own hair. I was amazed. While I cut my husband's and son's hair, saving at least $600 each year, and while I trim my own bangs, I was too afraid to try giving we long-haired girls a hair cut.
Until this mom explained her simple method of doing it. A bonus: It creates a layered look, which is great for those of us who like a little extra fullness in our hair.
First, I tried my own hair. It worked! Then I cut my daughter's hair. We are both pleased with the result. Here's how we did it.
You'll Need:
A ponytail holder
A comb or brush
Sharp scissors
Spray bottle filled with water (optional, but recommended)
 Step 2.How to Cut Long Hair:
1. Damp hair is easiest to cut, so you can either wash your hair and let it partially dry, or spritz your hair with water to make it damp. I recommend the latter, since the cleaner your hair is the harder it can be to handle.
2. Brush your hair into a high ponytail. Think of it as a unicorn's horn;it should be high on the forehead. Secure with a ponytail holder.
3. Lean forward, so the ponytail hangs in front of your face. Comb the ponytail and cut off the desired amount of hair. Sharp scissors are a must here!
4. Brush or comb the ponytail again, and, if needed, straight the cut by taking small cuts.
5. Remove the ponytail holder and brush your hair.
Ta da!

February 3, 2014
How to Make a Bed
 Nobody ever taught me how to make a bed; so for years, I just plopped the sheets and covers on and called it good. But there is something to be said for a neat, welcoming bed. So recently, I started doing things the right way. It's not at all hard, and it gives a much nicer appearance to the bed.
 1. Remove all the linens. I only have two sets of sheets for each bed, so when I remove them, I wash them right away so they are ready to go next time. Although I wash most things in cold water, I wash linens in hot water, which kills dust mites.
2. Once in a while, vacuum the mattress. I only do this with the change of seasons. Again, the idea is to remove as many dust mites as possible.
3. Rotate the mattress. This prolongs the mattress' life and makes it more comfortable for a longer period of time.
4. Put a clean mattress pad over the mattress. It has elastic at every corner, so it's as simple as just slipping it on and making sure the edges are beneath the mattress.
5. Put the fitted sheet on over the mattress pad. I hear tell some people don't have fitted sheets. If that's the case, simply lay a flat sheet over the mattress pad and use hospital corners on all four corners to tuck it under the mattress. (See step 8 for more detailed info on hospital corners.)
6. Center the flat sheet over the bed so the bottom hangs below the mattress and the sides hang the same distance on each side of the bed. The short end of the sheet with the widest hem goes at the head of the bed.
7. Tuck the bottom of the sheet under the mattress, keeping the sheet smooth and wrinkle-free.
8. Make hospital corners at the foot of the bed:
a. Grab and lift the side of the sheet near the bottom corner of the bed and let it sit on top of the bed.
 b. Tuck in the long side of the sheet, beneath the part of the sheet you just lifted.
 c. Drop the part of the sheet you lifted onto the top of the bed and tuck it under the mattress.

d. Repeat on opposite corner of bed. If you're having trouble visualizing this, click the video below.
9. On both long sides of the bed, tuck the sheet under the mattress,. Although this gives the neatest appearance, some people prefer to skip this step.
10. If desired, center a blanket over the top of the sheet and make hospital corners at the foot and (optionally) tuck in the sides.
11. Place pillow covers on the pillows, followed by pillow cases. If desired, put pillow shams over the pillows. Lay at the top of the bed.
12. Center a comforter or quilt over the top of the bed and smooth out any wrinkles.
January 31, 2014
Letter of the Week: P
 P is for PuppyThis week, consider making one day an "eat P foods" day. Ideas include: Pancakes, pizza, peanuts, pineapple, pumpkin, peppers, peanut butter, pickles, parsnips, potatoes, pretzels, pork, peaches, pomegranates, plums, popcorn, peas, pasta, Popsicle, pie, pot pie...there are so many choices that start with P!
But first, show your child the letter P and say it's name: "puh!" What words can your child think of that start with the P sound?
For more about Letter of the Week activities, click here.
* P is for Puppy (see illustration to the left)
* Puppy lunch sack puppet
* Puppy heart craft
* Puppy ears craft
* P is for Pig
* P is for Pig (2)
* P is for Pig (3)
* P is for Pig (4)
* Pig finger puppet
* Pig lunch sack puppet
* Pig paper plate craft
* Pig lunch food
* P is for Peacock
* P is for Peacock (2)
* Peacock hand print craft
* Peacock paper plate craft
* P is for Pirate
* Pirate paper plate craft
* Pirate hand print craft
* P is for Piano
* P is for Puzzle
* P is for Popcorn
* P is for Palm tree
* P is for Peas
* Peas in a pod craft
* P is for Panda
* Panda paper plate mask
* P is for Pennies
* P is for Penguin
* Penguin hand print craft
* Penguin foot print craft
* Penguin toilet paper tube craft
* P is for Pocket
* P is for Princess
* P is for Pom-Poms
* P is for Pumpkins
* Pumpkin snack
* P is for Pasta
* Plagues of Egypt activity
* Phonics: The Letter P
* Sesame Street: The Letter P
* Sesame Street: What Foods Begin with the Letter P?
* Sesame Street: The King Banishes the Letter P
* Sesame Street: Letter P Story and Song
* Sesame Street: P is My Favorite Letter
* Sesame Street: P is for Party
* Sesame Street: Letter of the Day, P
* Sesame Street: P is for Pencil
January 29, 2014
How to Keep Your Kids in Healthy Snacks
 If you browse Pinterest, or a few mommy blogs, no doubt you've seen organized drawers for kids' snacks, filled with either small commercial packages or Ziplock bags filled with serving sizes. The idea here is a great one: Let kids be more independent by keeping a drawer where they can grab their own snacks. But I have two problems with this:
1. If kids have total access to snacks, they are likely to snack too often and not eat a balanced diet - let alone their dinner!
2. Every single snack drawer I've seen is full of processed food - which is not only expensive, but terribly unhealthy.
So here's how I keep my children in healthy snacks:
* I keep a counter top bowl of healthy fruit - usually washed apples and bananas, and mandarin oranges or pears, when in season (see photo to the right). Children are free to take whatever they want from this bowl.
* I also keep a drawer in the fridge for healthy snacks: mostly carrots, celery, a few cheese sticks, and when in season, grapes, green beans, peas in the pod, and cut up broccoli or cauliflower.
 Refrigerator snack drawer. There are baby carrots from our garden, cheese sticks, celery (my kids are big enough to break off stalks by themselves), and cut up cauliflower.You'll notice cheese sticks are the only expensive, packaged product I mentioned. I limit these, for the sake of frugality, by placing only a few in the kids' drawer. (If you like, you can slice blocks of cheese and place them in Ziplock bags, instead; it's cheaper. But my kids love string cheese!)
I also have other snacks available; mostly homemade dried fruit, nuts and seeds (if I can find a good deal on them), or (very occasionally) crackers.* However, I keep them up high and dole them out every once in a while.
We also have a two snacking rules:
1. Any child who doesn't eat everything he snacks on looses the privilege of getting himself snacks. (No half eaten apples allowed!)
2. All children must ask for a snack before taking it. This allows me to help the kids to learn to wait for our main meals, if appropriate. (It's also a good way to teach them to think about what time they normally eat meals and whether it's smart to snack right before a meal.)
Simple. Healthy. And it works!
* Why do I limit crackers? Because they are usually full of GMO ingredients, in addition to preservatives, soy (which may increase estrogen in the body and is almost always GMO), corn syrup, and other unhealthy ingredients. I could make healthier ones from scratch, but it's time consuming and not worth it at this point in my life.
January 27, 2014
How to Freeze Waffles and Pancakes - It's SO Easy!
 For many years now, I've been freezing pancakes and waffles. And, really, it's one of the easiest things you can do to reduce your dependance on unhealthy, expensive, processed food! In fact, it's so easy, for years I didn't write a blog post about it; I thought: "Well, the post would be all of one sentence!" But because so many people don't know about this, I decided to write up some tips and point you toward some from scratch recipes, in addition to giving you the really easy info on how to freeze pancakes and waffles at home.
How to Freeze Pancakes and Waffles
1. First, choose a good time to make waffles and/or pancakes. I like to pick an unhurried morning, cooking up enough that I can feed my family and make tons of extra to freeze. If that doesn't work for you, just choose a time when you can whip up a big batch of pancakes or waffles. The freezing part takes no more than 5 minutes, TOPS - so you really just need time for the actual cooking.
2. Next, choose a really good recipe. You can certainly make your waffles or pancakes with a product like Bisquick, but it's cheaper, healthier - and so easy! - to make them from scratch! I also recommend you try making your pancakes and waffles with some wheat flour. Not only does this make the end product considerably healthier, with more nutrients, but it makes the pancakes and waffles much more flavorful. Plus, pancakes and waffles made with wheat flour fill tummies far more quickly!
My recipes for whole wheat pancakes and whole wheat waffles are very simple. Even my husband, who chooses white bread over wheat bread every time, prefers my wheat pancakes and waffles to those made with white flour.
3. Once you have your recipe and ingredients together, just whip up the batter and start cooking. For pancakes, it might be nice to have a large electric skillet - but if you don't, no worries. I don't have one, yet I'm able to cook up quite a lot of pancakes in a short amount of time.
As the pancakes come off the skillet (or the waffles come out of the waffle iron), set them onto a plate to cool. It's fine to stack them.
The pancakes or waffles need to completely cool, so don't be afraid to leave the kitchen at this point and do other things. It won't hurt the waffles or pancakes to sit on the counter for a while.
4. Once the pancakes or waffles are completely cool, you have a few options:
* Place one each into half pint freezer bags.
* Place many in a gallon-sized freezer bag, separated by pieces of wax paper.
* Place many in a gallon-sized freezer bag, without anything to separate them.
Honestly, after years of doing this, I do the latter: I just throw them into a freezer bag and pop them into the freezer. Occassionally, some will stick together, but it's usually easy to just pull them apart. For those that aren't as easy to separate, I stick a butter knife between them - and they pop apart right away.
That's it! I told you it was SO EASY!
To heat homemade, frozen pancakes, I suggest using a microwave. To heat waffles, I suggest sticking them in a toaster or toaster oven. There is absolutely no need to defrost the pancakes or waffles before reheating.


