
Kristina Seleshanko's Blog, page 80
January 25, 2014
The Long Winter Activities
 The Long Winter
is the longest book in The Little House on the Prairie series, and as you read about the struggles of the Ingalls family, it's tough for a modern family to complain about modern life! As you read The Long Winter with your children, try some of these activities.
The Long Winter
is the longest book in The Little House on the Prairie series, and as you read about the struggles of the Ingalls family, it's tough for a modern family to complain about modern life! As you read The Long Winter with your children, try some of these activities.For more activities that go along with Little House on the Prairie books, click here.
* Make a button lamp.
* Make some hay sticks. (See also.)
* Cook up some ground cherry preserves.
* Prepare homemade cranberry sauce.
* Learn about little auks.
 Little auks. (Courtesy Wikipedia Commons.)
* Whip up some baked beans.
* Make a green pumpkin pie.
* Make green tomato pickles.
* Learn about muskrat houses.
* Read and study the Declaration of Independence.
* Look up calorie recommendations for men, women, and children. Estimate how many calories the Ingalls were eating each day. What happens when we eat too little or too much?
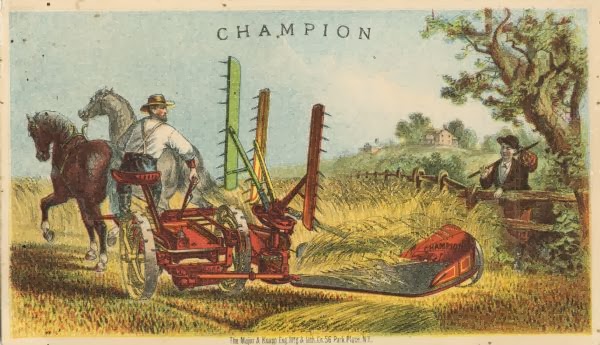 19th century mowing machine. (Courtesy Wikipedia Commons.)* If you have access to a hand-crank grain grinder (or an old fashioned coffee grinder that you're not worried about damaging) try grinding some wheat berries.
* Learn about 19th century mowing machines.
* Make ginger water (and read about the health benefits).
* Try some cambric tea.
* Learn about DeSmet (includes photos and videos).
* Look through a copy of Pa's "big green book" about animals.
* Do some "handiwork:" embroidery or other needlework, like Laura and Mary did to pass the time.
* Ask your children what would happen if a blizzard or other harsh weather/natural disaster cut you off from the rest of the world. What would you eat? How long would your supplies last? How does the U.S. government suggest families prepare for events like these?
* Remember what Pa said about "modern" conveniences? Ask your child what things we depend upon or want today that Pa might put into that category.
* Learn about frostbite and how to prevent and treat it.
* Find out who Tubal Cain was by reading Genesis 4:22. Also read Daniel 5: 17-24 to learn why Pa called Carrie "Nebuchadnezzar."
* Make a Long Winter lap book.


January 24, 2014
Letter of the Week: O
 This week, consider giving your child a bagel for breakfast. "Look! It's shaped just like the letter O!" Tell your child the sound O usually makes: "Ahhh! Maybe we should eat omelettes and olives today, because they both make the O sound!" What other words that start with the ahh sound can you and your child brainstorm?
 A special note about the letter O: This week, as I scoured the Internet for letter O crafts and activities, I discovered a great many people using words that don't make the most common O sound(s). The worst example was, in my opinion, "owl." I encourage you not to teach "owl" in connection with the letter O - at least not yet. "Owl" really makes the OW sound, not the O sound. Another is "oatmeal," which makes the OA sound, not the O sound. Both should be taught later, after your child understands the common sounds letters make.
For more about Letter of the Week activities, click here.
* O is for Otter
* O is for Otter paper plate craft
* Otter footprint craft
* Otter printable craft
* Otter snack
* Printable Otter mask
* Otter paper bag puppet craft
* O is for Ostrich printable craft
* O is for Ostrich
* Ostrich hand print craft
* O is for Octopus
* O is for Octopus size sort, simple puzzle, lacing cards and more
* Octopus paper tube craft
* Octopus hand print craft
* Octopus hand print and Cheerio craft
* Octopus Cheerio printable
* Octopus snack
* Letter O snacks
* O is for Olive
* Stamping Os with toilet paper rolls
* O is for Olympics ("Olympics" doesn't say the most common "ah" sound; use at your discretion)
* O is for Oatmeal ("Oatmeal" doesn't say the most common "ah" sound; use at your discretion)
* O is for Ocean ("Ocean" doesn't say the most common "ah" sound; use at your discretion)
* O is for Ocean 2
* Phonics: Letter O
* Sesame Street: Letter O
* Sesame Street: Kingdom of O
* Sesame Street: The O Network
* Sesame Street: Would You Like to Buy an O?
January 22, 2014
Homesteading Skills to Learn Now - BEFORE you head to the farm
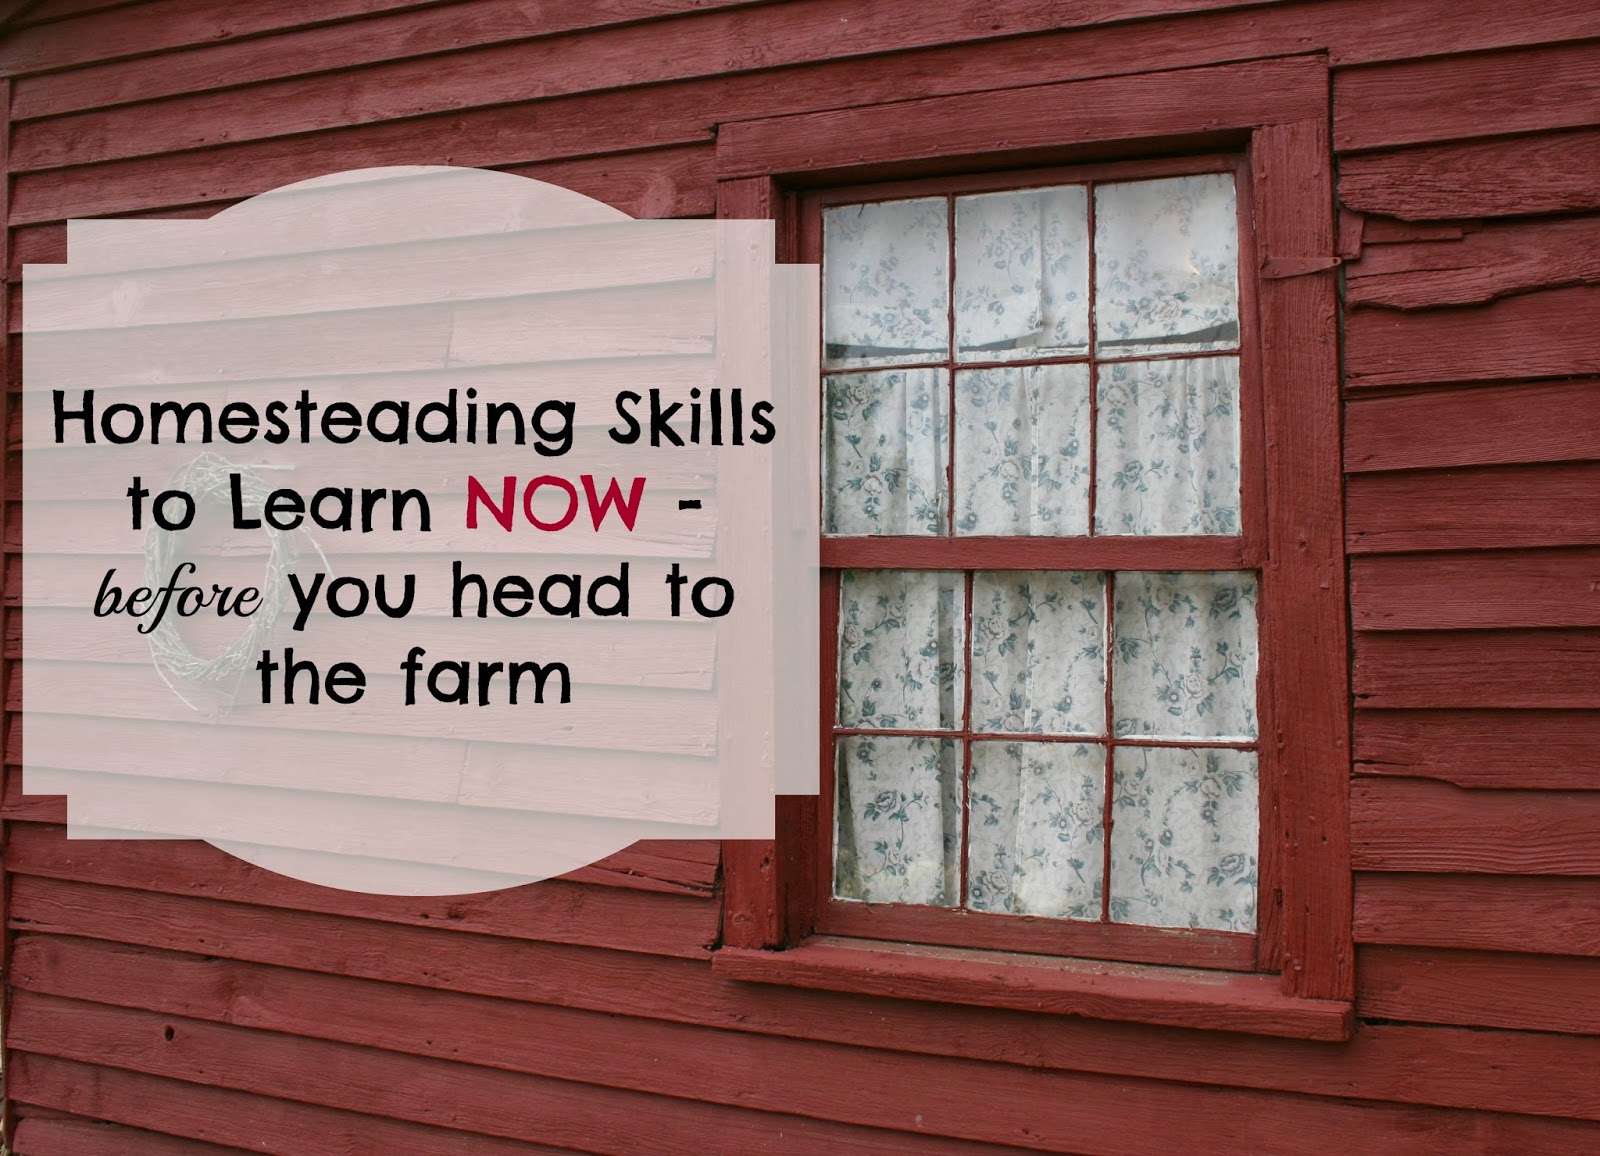 Do you dream of living out in the country where you can "properly" homestead? Me, too. But until that time, there's a lot we can do NOW to improve our level of self sufficiency, eat healthier and more sustainably, and gather the skills we'll need once we do have more land. Here are what I consider the most practical skills to learn when you are still living in the suburbs (or maybe even the city).
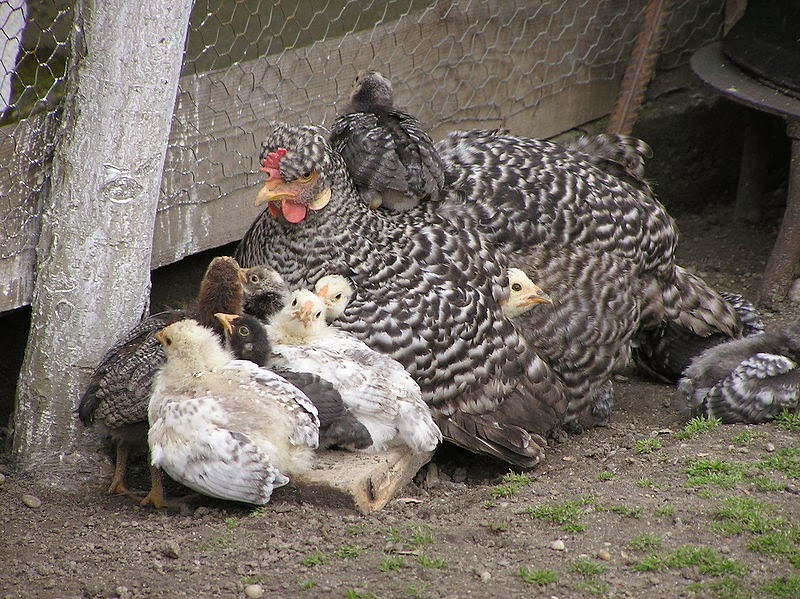 Photo by L.Kenzel.* Get chickens. They don't take much room, so anyone in a suburban area should get them. If your city doesn't allow them, appeal to your city.
 * Garden. As much as you can. If you can't have a big garden, have a small one. If you can't have a traditional garden bed, think outside the box and plant in containers, or use edible gardening - planting edibles among your pretty ornamental plants. Gardening is a skill that takes years to develop.
* Learn how to start seeds.
* Plant bushes and trees that provide food. If you think you'll be moving in a few years, plant bushes and patio trees in large pots. Otherwise, choose bushes that are a couple of years old, as well as patio or dwarf trees, which produce at a younger age than full-sized trees. You'll likely get at least some food for your effort - and you'll be doing a good deed for future owners of the property.
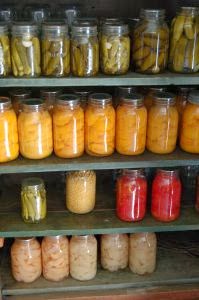 * Learn to preserve food by canning, dehydrating, and freezing. The first two are the best, since they don't require energy once the initial preserving is complete.
* Get rabbits. They are easily the best source of meat for the suburban homesteader.
* Learn to forage for wild foods.
* Learn to cook from scratch. I don't recommend doing this all at once, or you'll burn out. But little by little, learn to replace processed foods with homemade ones.
* Learn to make your own dairy products, including butter and cheese. For now, you may have to do it with store bought milk, but you'll be learning dairy skills, nonetheless.
* Learn to butcher animals, whether backyard hens and rabbits, or wild animals.
* Learn how to light a fire. Practice makes perfect! If possible (and you have a source for wood), switch to wood heat.
* Start saving seeds.
* Learn how to hunt and fish - and how to prepare and cook wild game.
* Get out of debt - and stay there.
* Learn to make soap and candles.
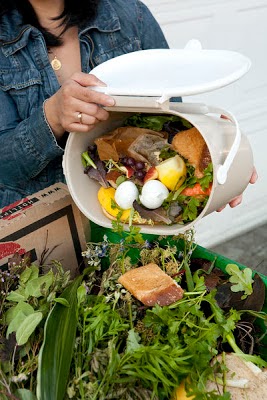
* Learn to compost.
* Keep bees. This is a real skill that takes years to get good at.
* Incubate and hatch chicken eggs. You can purchase fertilized eggs from a local farm store.
* Raise other poultry, like turkeys.
* Learn to mend clothes.
* Read, read, and read some more. There are some homesteading skills you just won't be able to practice in the suburbs or city. But you can read about them. Read everything you can get your hands on about modern homesteading!
January 20, 2014
Easy Homemade Hash Browns
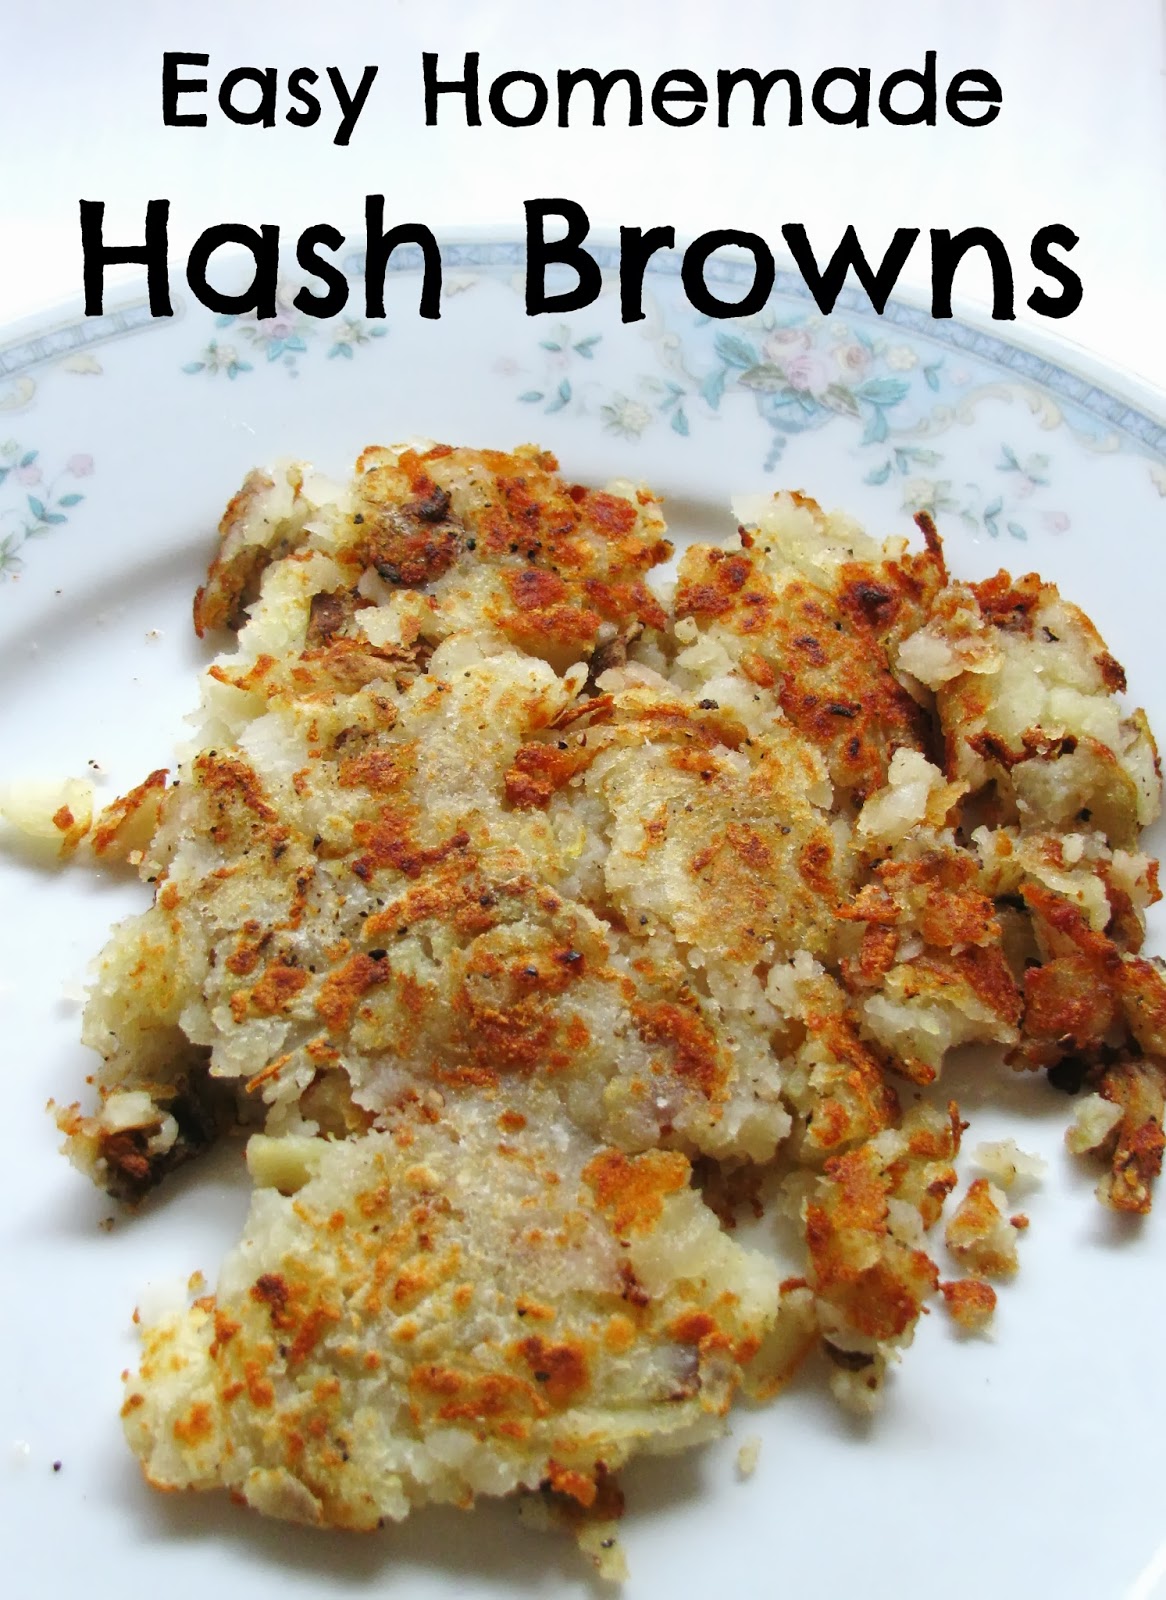 There are three reasons you might want to make homemade hash browns:
* DIY hash browns are healthier. Sadly, most frozen, store-bought hash browns contain GMO ingredients, soy, extra oils, preservatives, etc. (For example, see the ingredients in these Walmart brand hash browns, or in these Ore-Ida hash browns.)
* From scratch hash browns are more frugal than prepared, frozen hash browns, saving about $2 - 3 per pound.
* It's helpful to know how to make hash browns in case you run out of the frozen kind and don't want to spend the money and time to run to the store.
Besides, making hash browns from scratch is really easy.
What You'll Need:
Scrubbed potatoes
A large pot
A colander or strainer
A cheese grater
And if you want to freeze them for later use, you'll need:
wax paper or parchment paper
rimmed baking sheet
freezer bags
How to Make Homemade Hash Browns:
1. Place scrubbed potatoes in a large pot and cover with water. (How many potatoes you need depends upon the size of the potatoes. To give you an idea, though, four very large, baking style potatoes makes enough hash browns to fill about two full gallon-sized freezer bags)
 2. Boil the potatoes until they are "al dante." You should be able to prick them with a fork, but the potatoes should still feel firm.
3. Drain, but DO NOT rinse. Allow the potatoes to cool in the colander. Once they are cool enough to handle, remove the peels; they will slide off easily. Let the potatoes cool completely in the refrigerator. (If you try to grate the potatoes when they are still warm, you may end up with something that looks more like mashed potatoes than hash browns.)
For simplicity's sake, I recommend either boiling the potatoes in the morning and finishing them in the afternoon or evening, or boiling the potatoes the day before, placing them in the frige overnight, and finishing them in the morning.
4. Grate the potatoes using a cheese grater (or food processor).

How to Freeze Homemade Hash Browns:
1. Line a rimmed baking sheet with wax paper or parchment paper. Spread the hash browns over the paper in a thin layer.
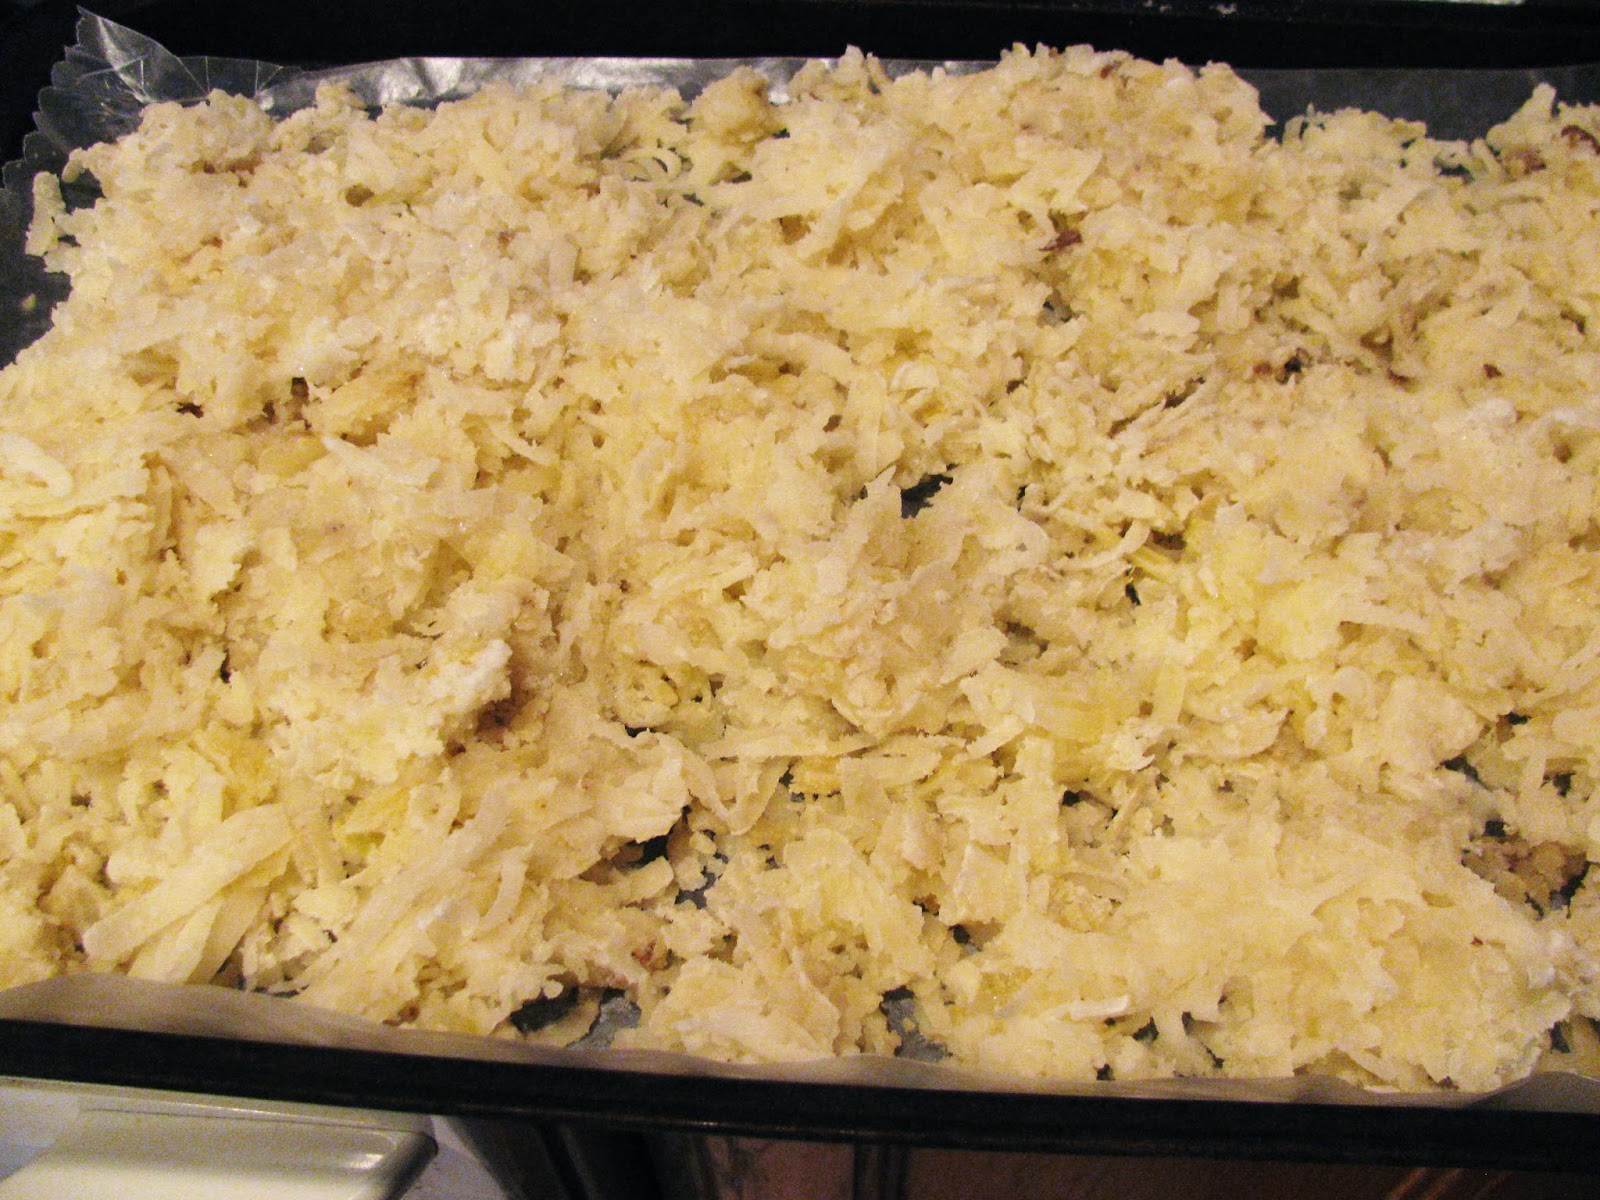 2. Place the baking sheet in the freezer until the potatoes are firm. Transfer to freezer bags, breaking into smaller chunks, as needed. Store in the freezer.
How to Cook Homemade Hash Browns:
1. Place a dab of butter, bacon drippings, or a tablespoon of oil in a skillet. Set the skillet over medium to medium high heat.
 2. When you can flick a little water in the skillet and it sizzles, add the hash browns. Season with salt, pepper, or other seasonings. Brown on both sides, until the desired crispiness and color is reached. Serve right away.
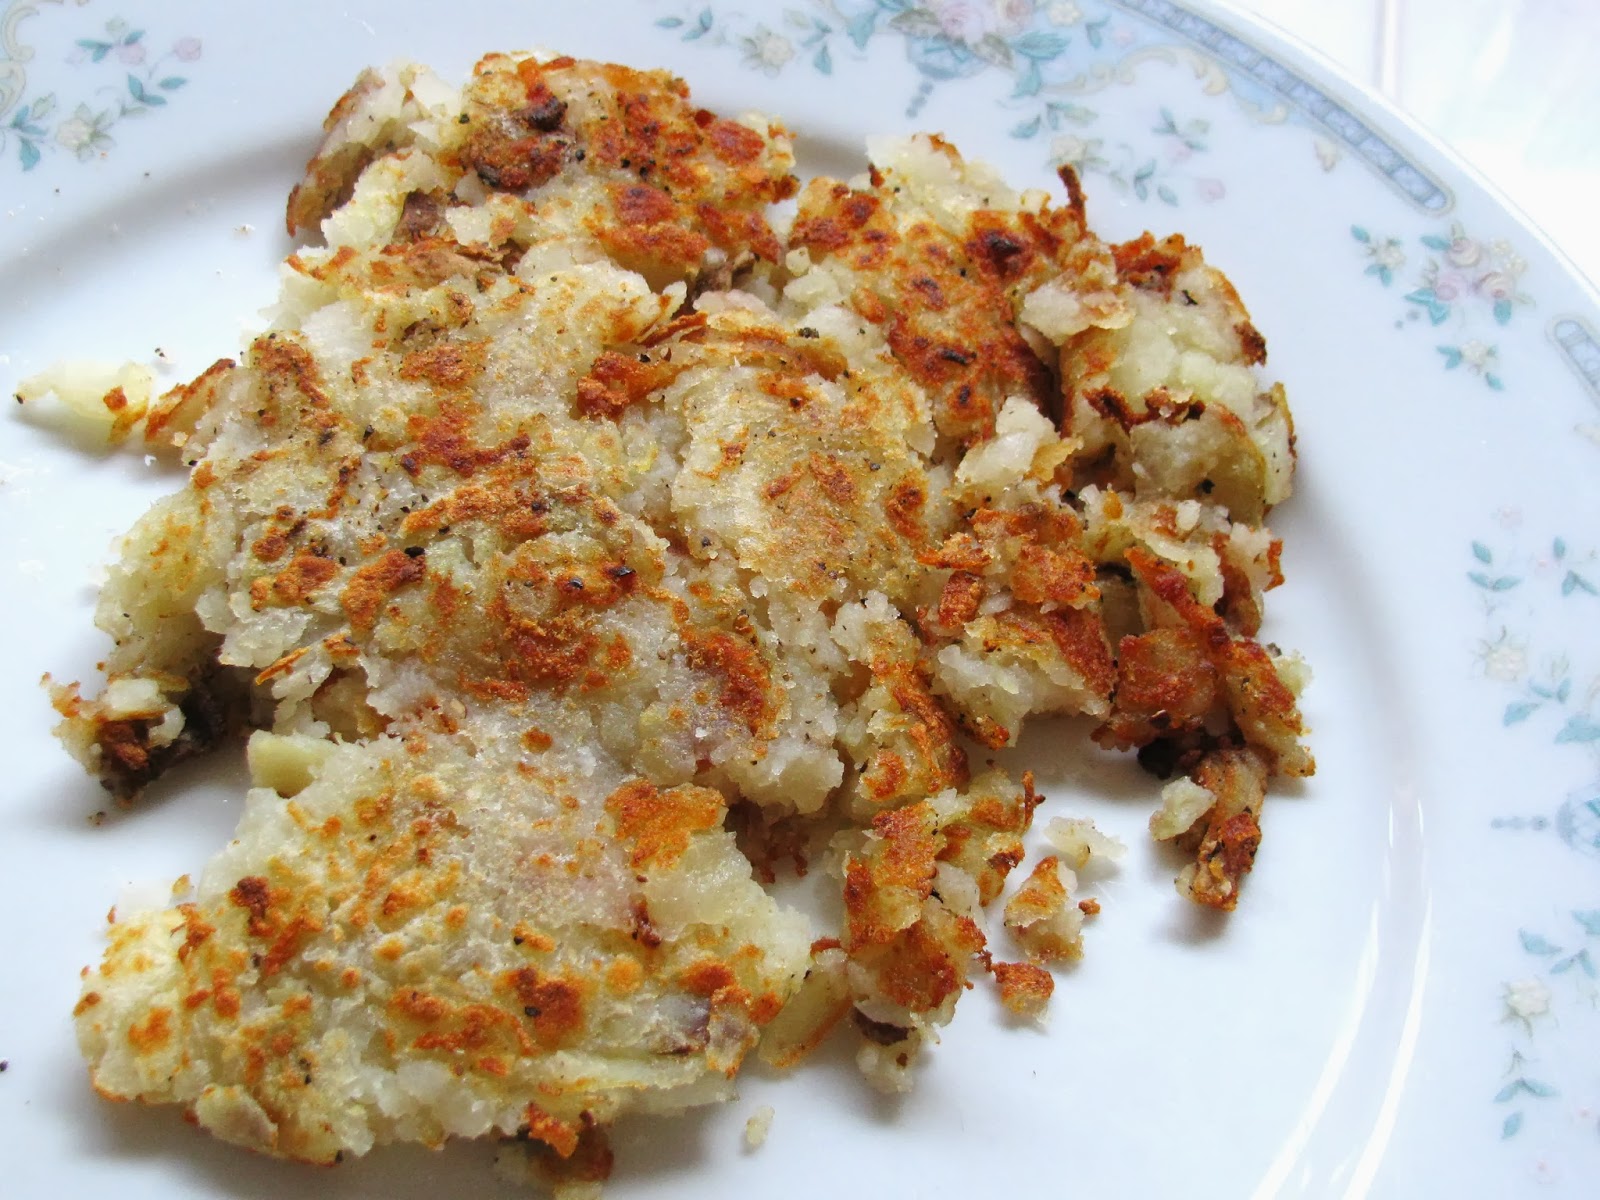
January 17, 2014
Letter of the Week: N
 After reviewing the letters A - M and singing The Alphabet Song, show your child am upper- and lower-case N. "N says nnnnn." Then brainstorm words that start with the N sound. See if your child can think of any favorite foods that start with N (like nuts, nachos, and nectarines); then reward him or her with a letter N food before proceeding to one or more of the activities below.
For more about Letter of the Week activities, click here.
* N is for Nap
* N is for Night (see also)
* N is for Nest (lowercase)
* N is for Nest (uppercase)
* Nest paper plate craft
* Nest hand print craft
* Nest printable craft
* Nest snack
* Nest worksheets, including nest size sort, letter N hunt, simple puzzle, and more
* N is for Noah coloring page
* Noah's ark paper plate craft
* Noah's ark picture craft
* Noah's ark unit
* Noah's ark snack
* Noah's ark snack (2)
* Noah's ark snack (3)
* N is for Nails
* N is for Net (lowercase)
* N is for Net (uppercase)
* N is for Noodle
* Noodle Necklace craft
* Noodle fine motor skills activity
* Noodle shape activity
* Noodle counting and sorting
* N is for Newspaper
* Newspaper hat craft
* N is for Number
* Number snack
* N is for Newt
* Phonics: Letter N
* Sesame Street: Letter N
* Sesame Street: Welcome to the Letter N Museum
* Sesame Street: Cookie Monster's Letter of the Day: N
* Sesame Street: Lonely N Song
* Sesame Street: Fireflies Letter N
* Sesame Street: Letter N Salesman
* Sesame Street: Letter N is Nice
* Sesame Street: Letter N Interview
January 15, 2014
Is Your Birth Control Causing Abortions?
 Most Christian women would be horrified to learn the birth control method they are using causes abortions - yet that's exactly what's happening in many, many cases.
This is such an important issue, I'm reposting - with updated information - this article from 2011.
* * *
Recently, I read a passing comment on a blog saying birth control pills cause abortions. Whoah! I thought. Could that be true? I certainly had never heard anything like that before. After a lot of research, here's what I discovered.
How the Pill Works - and Causes Abortions
According to Web MD, hormonal birth control (including the pill, the mini pill, the combination pill, Depo-Provera, the patch (Ortho Evra), and vaginal rings) work in several ways. They may inhibit sperm from traveling through the cervix by thickening the cervical mucus, and they may prevent women from ovulating (releasing eggs). Hormonal birth control also makes the lining of the womb "inhospitable."
The Association of Prolife Physicians has stated "there is an impressive amount of medical literature" backing up the last mentioned way the pill is known to work - by preventing eggs from implanting in a woman's uterus. The hormones in the pill do this by making the endometrium thinner and drier. Through in-vitro studies, most doctors believe a thin uterus makes it difficult to become pregnant. But if the pill works in this fashion, that means an egg has already been fertilized and the act of preventing it from implanting means the pill isn't actually working as a contraceptive. Instead, it's causing an abortion.
The combination pill and mini pill are the most popular forms of the birth control pill used today. The combination pill specifically works by usually preventing the pituitary gland to stimulate a woman's ovaries into ovulation. The mini pill doesn't usually stop ovulation (because it contains only artificial progesterone and no estrogen). Instead, it works by causing an abortion. It makes the lining of the uterus "inhospitable" for the fetus. Again, it causes abortions.
 Fertilized Eggs on the Pill?
Most of us were taught the pill works by preventing ovulation. Yet the pill is not 100% effective in this area. Even when you consider the best possible statistics physicians offer - that, as Planned Parenthood reports, 1 out of 100 women who take the pill perfectly get pregnant anyway - it's clear the pill does not always prevent ovulation or fertilization. (Other sites offer a lower effectiveness rate; for example, Feminist Women's Health Center says the pill is 91 to 99.7% effective. Mini pills are even less effective than traditional birth control pills, preventing pregnancy about 95% of the time.) So while hormonal birth control won't always cause an abortion, they sometimes will prevent a fertilized egg from implanting in the womb, causing an abortion.
Abortion - or Not?
So why don't doctors warn their patients about this? It comes down to definitions. The American College of Obstetricians and Gynecologists insists a woman isn't pregnant unless the fertilized embryo implants in the womb. So does the National Institutes of Health. Implantation, however, doesn't happen until about three to four days after conception, according to Planned Parenthood.
As the Association of Prolife Physicians website states (emphasis added):
"One of my patients informed me recently that her gynecologist insisted that the morning-after pill prevents pregnancy 100% of the time and does not cause abortions. This may be true given the gynecologist’s definition of 'pregnancy,' but she is dead wrong in...implying from that this is when her baby’s life begins. Though designating this stage as the point at which pregnancy commences and life begins is convenient, it is arbitrary, palpably erroneous, and deceptive. Implantation into your mother’s uterus did not make you any more alive or human than did your first breath of air, your first meal, your first bowel movement, or any other arbitrary event in your life....More Info
[When I was at college] I publicly challenged [a professor's view of the morning-after pill] and he reluctantly admitted that the morning-after pill worked by preventing implantation of an already-conceived embryo, but he resolved the dilemma with the statement, 'I don’t consider it much of anything at that stage.' It came down to his unsupported bias against the humanity of small human beings!"
In addition to all the other links in this post, you can read a referenced article by a physician at Eternal Perspective Ministries. Two more references worth reading are Prolife OBGYNs' article "Birth Control Pill: Abortifacient and Contraceptive" and "Hormone Contraceptives Controversies and Clarifications." The latter argues there isn't enough proof hormonal birth control causes an inhospitable environment for fertilized eggs. You can also use the Prolife OBGYN's website to find a prolife doctor in your area.
 Do Other Birth Control Methods Cause Abortions?

This post may lead some of you to wonder what other "contraceptives" might cause abortions. Me, too. After some research, it seems the IUD may also cause abortions. Despite the fact that Planned Parenthood's website states,
"Both the ParaGard and the Mirena IUDs affect the way sperm move, preventing them from joining with an egg. If sperm cannot join with an egg, pregnancy cannot happen. Both types also alter the lining of the uterus. Some people say that this keeps a fertilized egg from attaching to the lining of the uterus. But there is no proof that this actually happens."Studies do indicate that thinning ("altering") the uterus may prevent implantation, as referenced above. All the other websites I researched acknowledge this. For example, the Central Michigan District Health Department website states, "As with birth control pills, there is no single explanation for how IUDs work. Studies have shown that the presence of an IUD interferes with the movement of sperm, fertilization of eggs, and implantation." So if sperm does manage to fertilize an egg, the IUD's thinning of the uterus will cause an abortion.
What birth control methods definitely never cause abortions? Condoms, diaphragms, spermicide, cervical caps - and of course abstinence. But should Christians use birth control at all? What does the Bible say on that topic? It has plenty to say! And on that issue, I highly recommend Nancy Campbell's Be Fruitful and Multiply .
|
January 13, 2014
A Simple Way to Make Homemade Bread Better - with an electric knife
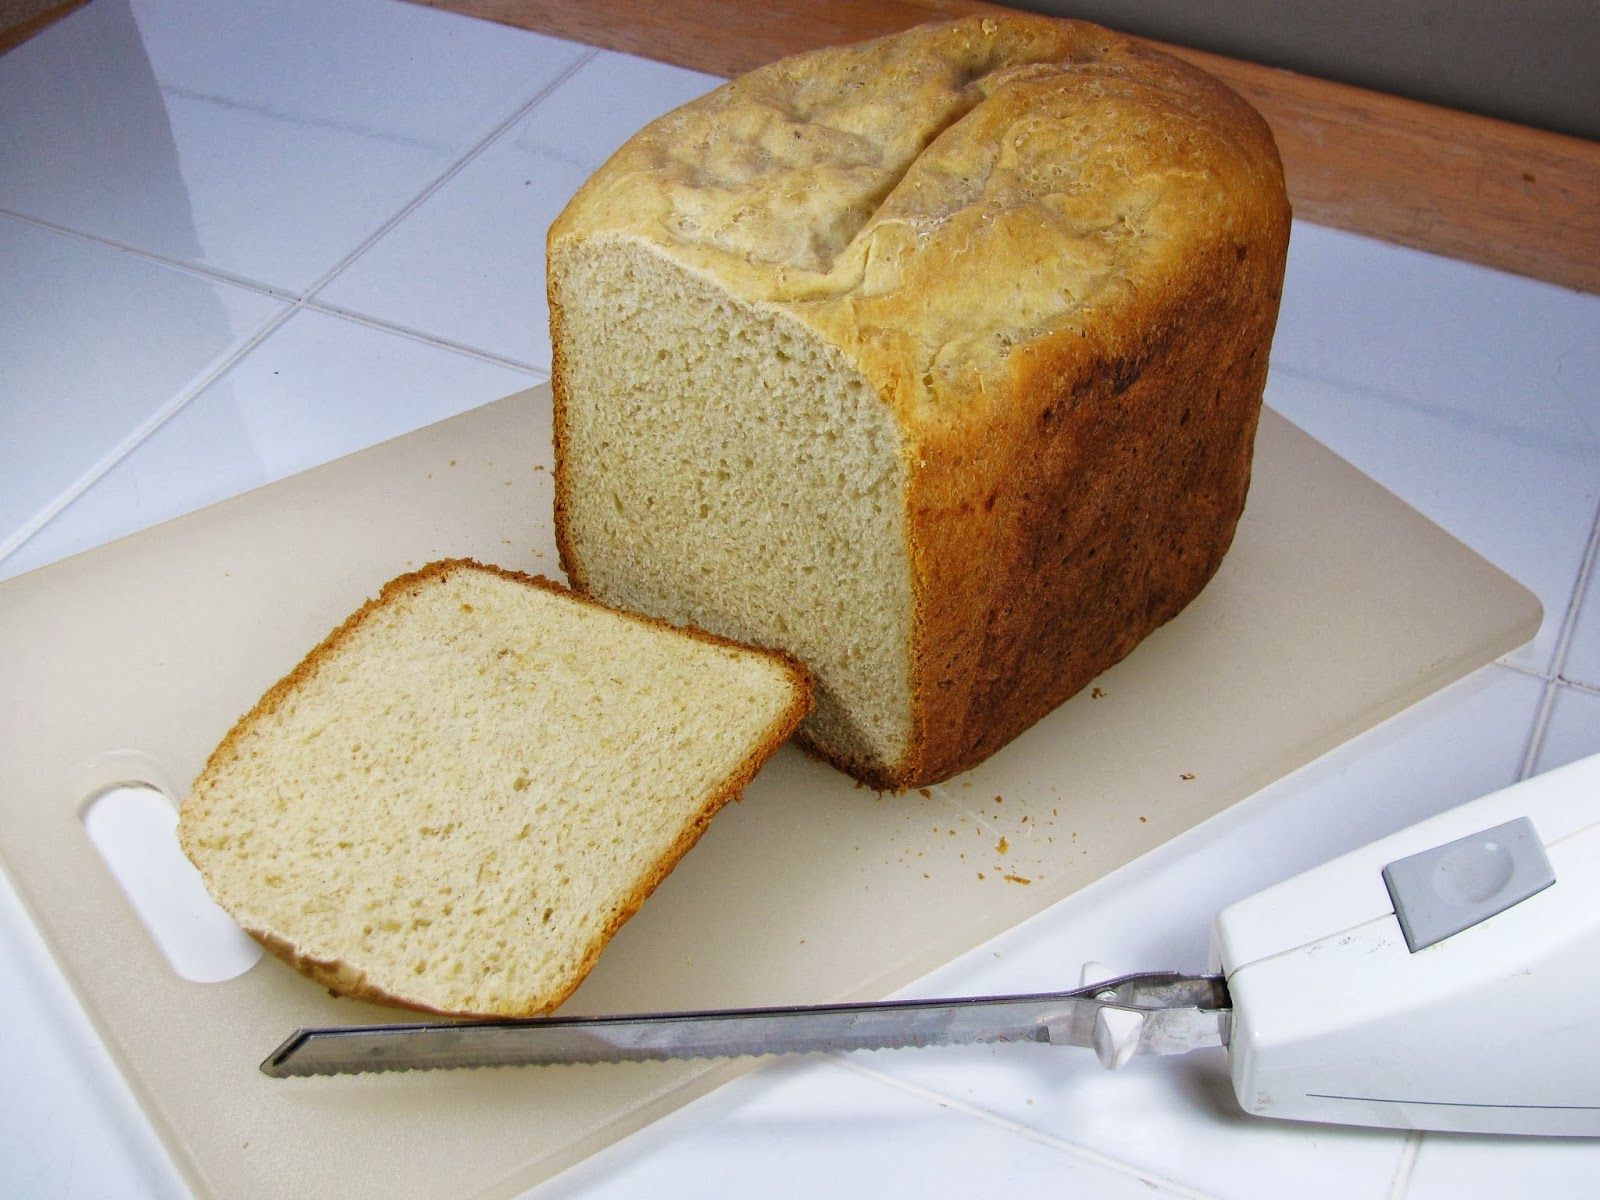 Last year I read somewhere that cutting homemade bread with an electric knife made cutting easier - and made the slices much less crumbly. I thought that made sense, since commercial sandwich bread is cut with, essentially, band saws. So I put an electric knife on my wish list.
Inexpensive electric knives - which are just fine for cutting bread - aren't expensive. You can easily buy one for about $20. But then I noticed something: Local thrift stores were inundated with electric knives! Most were in terrific condition, looking as if they'd been used only a handful of times (probably at Thanksgiving and Christmas for a couple of years). Best of all, they were only $2 - $3 a piece! (Most thrift stores also allow you to return electronic items if they don't work the way they should...so you don't even have to worry about loosing $3.)
So yes, I can now confirm that using an electric knife to cut homemade bread is easier - and it makes the bread far less crumbly to eat. And if you browse the thrift stores to buy your electric knife, you'll save a bundle, too!
January 10, 2014
Letter of the Week: M
 This week, introduce your child to the letter M by writing both the capital and lowercase version of the letter. Tell him the sound it makes: "Mmmmm...like what you say when something is yummy to eat." Then brainstorm words that start with the M sound. When you come to the word "marble," help your child make the letter M out of marbles. Then choose from the activities below
For more about Letter of the Week activities, click here.
* M is for Monster (see also; also here and here)
* Monster shape craft
* Monster mouth craft
* Monster cardboard box craft
* Monster toilet paper tube craft
* Monster paper craft
* Monster counting (also here)
* M is for Manger
* M is for Mittens
* Mitten lacing
* M is for Monkey (see also; also here)
* Monkey puppets
* Monkey mask
* Monkey paper plate craft
* Bendable Monkey craft
* Monkey paper craft
* Monkey snack
* M is for Macaroni
* M is for Mouse (see also)
* Mouse shape activity
* Mouse snack
* M is for Mountain
* M is for Marshmallows
* M is for Music - a free lesson plan
* M is for Map
* Phases of the Moon activity - plus other moon activities
* Moon paper plate craft
* M is for M&Ms
* M is for Moose
* Moose hand print craft
* Mushroom footprint craft
* Phonics: The Letter M
* Sesame Street: Letter M
* Sesame Street: Letter M Monster Meal
* Sesame Street: Letter M Day
* Sesame Street: M for Monsters
* Sesame Street: Special Letters Unit
* Sesame Street: Kermit Draws the Letter M
January 8, 2014
Organization Tips for Messies
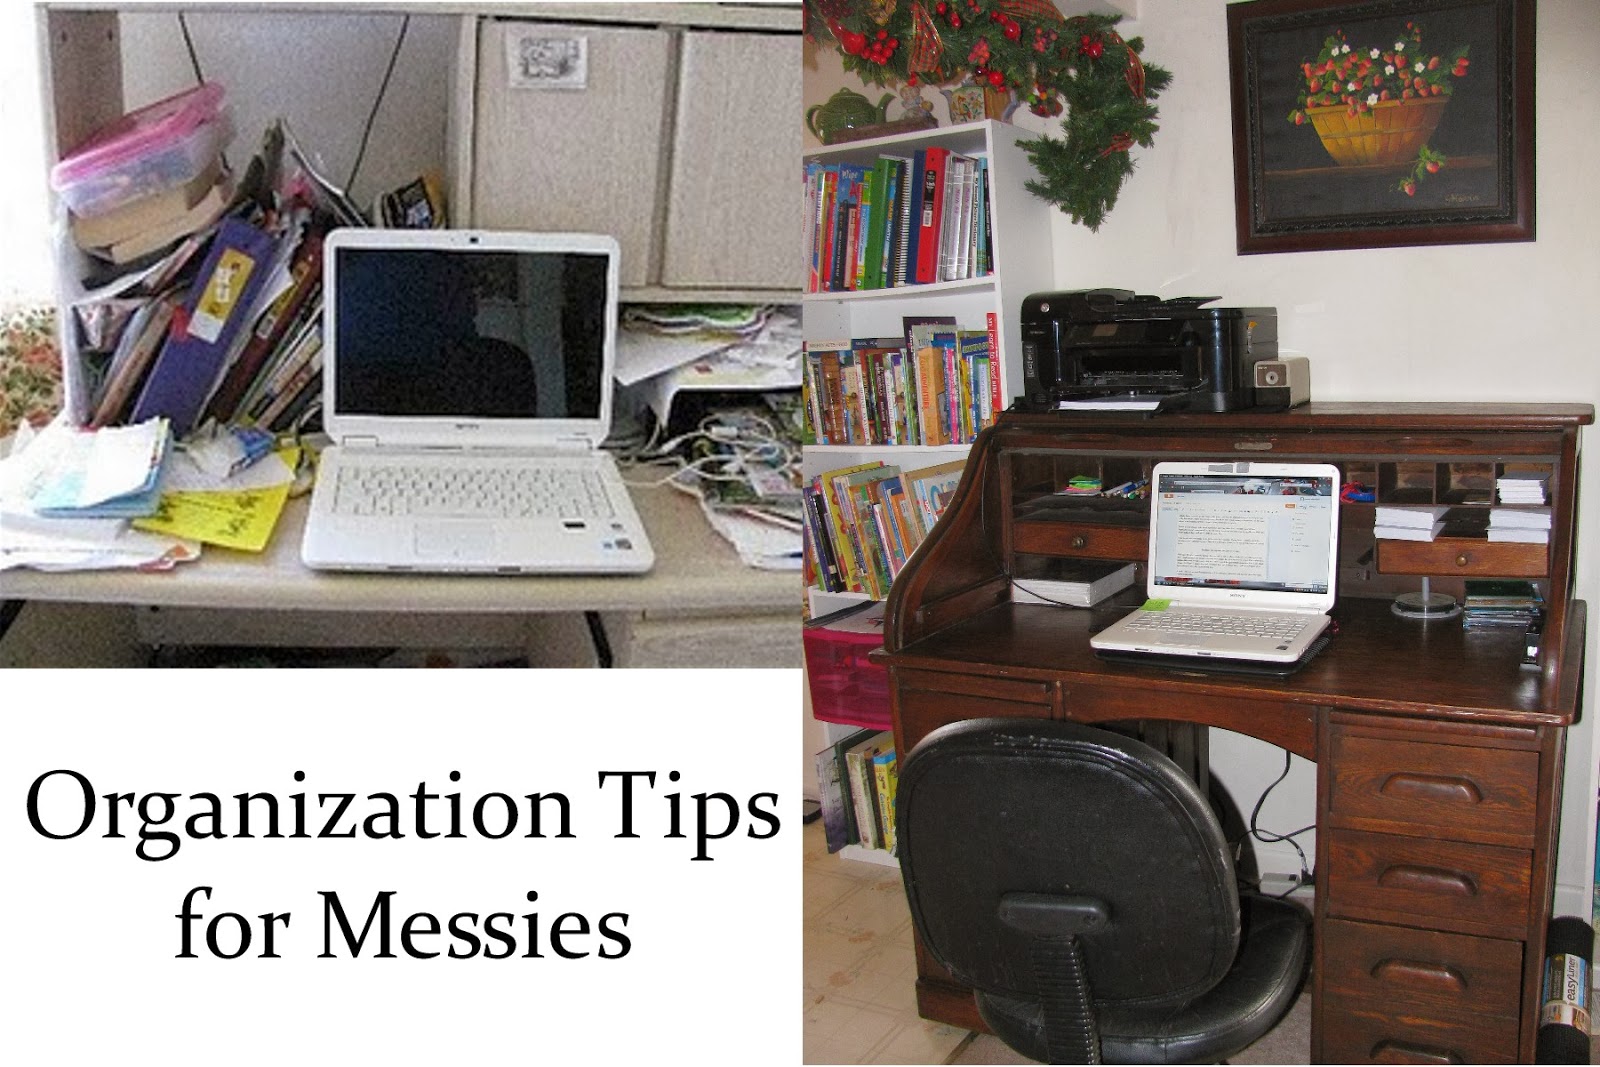 I have a confession to make: I'm a messy. Well, some of my readers may already know this, since I blogged about it in the House That Cleans Itself series. But sometimes I really can't get a handle on my messiness - and oh! I feel it ought to be a lot easier to be tidy! Anyone with me here?
In 2013, things got especially out of hand at my house - in large part because I had the attitude that as soon as I got one corner of the house really tidy, the kids had destroyed another part. And while that was (is!) largely true, it's no excuse. And all that mess was beginning to depress me and stress out my hubby. So, like many other homemakers, at the beginning of 2014, I began to work on the mess in earnest. (The above photo shows my desk. On the left, my old, broken, falling apart, messy desk. On the right, my new, truly organized desk.)
I know a lot of bloggers write about organization and being clutter free - but unlike most of them, organization doesn't come naturally to me. At. All. So here is my best advice for messies like me: Work on it a little bit every day.
Some people advocate turning the kitchen timer to 10 minutes. During those 10 minutes, they do all the decluttering and organizing they can. I think this is a fine place to start, but for me, the following motto works better:
Declutter and organize one spot every day.
Except the Sabbath, which is (gloriously!) organization free.
Most days, I'll tackle something largish - like one wall (or half a wall, if the room is really bad) in a certain room. On really busy or tired days, I might declutter and organize something more simple, like a kitchen drawer or two. The real trick to making this work, though, is not to feel like I have to get all the decluttering/organization done in one chunk of time. So if I have 5 minutes here and 10 minutes there and 3 minutes there, I will take advantage of all those minutes to get a little de-messifying done.
It works. And as I see myself making progress, I become more enthusiastic and energetic about the whole keeping tidying thing.
Other Tips for Messies:
* Pinterest is a fantastic place to find inspiration for organizing your home.
* A lot of the organizing ideas you'll find in magazines and online require an investment (like purchasing bins or shelving). If buying such items isn't do-able, consider less expensive alternatives, like purchasing bins and other items at The Dollar Tree or a thrift store or garage sale. Or, think hard about how you could repurpose something you already have. Even cardboard boxes can be made attractive, with a little know-how. (For one example, visit Catch My Party; for another, see HandiMania.)
* It's usually difficult for messies to see the answer to their organizing problems, so don't be afraid to ask someone who is more organized for advice. This could be your husband, another family member, or a friend. This can be tough, because often we messies feel judged by those to whom organization comes easy. So pray about it, confess to your family member or friend just how tough this is for you, and ask for help. I know when I do this, a great weight is lifted from me, and some really useful, true solutions are often found.
* Don't give up! If you try one type of organization (say, putting coloring books in a basket) and it just isn't working for you or your family, try something different (like putting them in a bookshelf).
* Never stop. This is the hardest part for the true messy. But if you don't continue decluttering and organizing, even after you've worked over the entire house once, the mess will return. Make tidying up a daily habit, continuing to use whatever method works best for you (my small chunks of time throughout the day method, or the 10 minute method, or something else that works better for you). You can do it!
January 6, 2014
The BEST Cinnamon Roll Recipe Ever
 We don't eat a ton of cinnamon rolls, but we do love them as a special, once-in-a-while treat. For years I've tried to find the perfect cinnamon roll recipe - and last month
I finally found it
. These are quite simply the best cinnamon rolls we've ever eaten. Period. The recipe comes from my Cuisinart breadmaker manual, but you can very easily make these cinnamon rolls without a bread maker. Here's how.
We don't eat a ton of cinnamon rolls, but we do love them as a special, once-in-a-while treat. For years I've tried to find the perfect cinnamon roll recipe - and last month
I finally found it
. These are quite simply the best cinnamon rolls we've ever eaten. Period. The recipe comes from my Cuisinart breadmaker manual, but you can very easily make these cinnamon rolls without a bread maker. Here's how.The Best Cinnamon Roll Recipe Ever*
For the dough: **
2/3 cup milk, warmed to 80 - 90 degrees F. (use a meat or candy thermometer to make sure the temperature is just right)
3 eggs, at room temperature
6 tablespoons unsalted butter, at room temperature, cut into 1/2 in. pieces
1/2 cup granulated sugar
1 teaspoon salt
1 1/2 teaspoons pure vanilla extract
4 cups bread flour (yes, it must be bread flour!)
2/3 cup cornstarch
2 1/4 teaspoons fresh dry active yeast, at room temperature
For the filling:
1/2 cup packed brown sugar
1/4 cup granulated sugar
2 1/2 tablespoons ground cinnamon
4 tablespoons unsalted butter, melted
Raisins (optional)
For the frosting:
4 oz. cream cheese, at room temperature
1/4 cup ulsalted butter, at room temperature
1 teaspoon pure vanilla extract
1 1/2 cups powdered sugar
1 tablespoon milk
1. Begin by making sure all the ingredients (except the dough's milk) are room temperature. This makes a big difference in the finished cinnamon rolls!
2. Make the dough: Place the warm milk, eggs, butter, granulared sugar, salt, vannilla, flour, cornstartch, and yeast in a large mixing bowl. You may either stir them together by hand, stir them together with the dough hook of an elextric mixer, or pop them into a 2 lb. bread maker (making sure to follow the manufactuerer's directions about which ingredients should go into the pan first; usually all the wet ingredients go on the bottom of the pan and the yeast must not touch the liquid.) If using the breadmaker, turn it to the dough setting, so it will mix and rise the dough by itself, and skip to step 4.
3.If not using a bread maker, cover the dough with plastic wrap or a clean kitchen towel and place in a warm location until it doubles in size.
4. Punch down the dough and allow to rest for 10 minutes. Lightly grease two 10-inch round cake pans and set aside.
5. In a small bowl, combine the filling ingredients until well blended. (If you like raisins in your cinnamon rolls, I recommend placing the desired amount in a bowl, covering them with water, and allowing them to soak for 10-15 minutes. Then drain and add to the filling.) Set filling aside.
6. Roll out the dough into a rectangle about 1/2 inch thick, or a little less. If desired, you may divide the dough in half and roll each part out separately, for easier handling.
7. Brush the rectangle with the melted butter. Evenly sprinkle the filling mixture on top. Take one short end of the rectangle and begin rolling the dough into a cigar shape. Pinch along the opposite end to "seal" the roll. Use a serrated knife to cut the roll into equally-sized cinnamon rolls. (You should get about 24 cinnamon rolls total.)
8. Place the cinnamon rolls in the prepared cake pans. Cover with plastic wrap and place in a warm location to rise for 40 minutes.
9. Preheat the oven to 350 degrees F.
10. Once the rolls have risen, bake in the preheated oven for 25-30 minutes, or until the rolls sound hallow when you tap them. Allow the rolls to cool for about 20 minutes.
11. In a small bowl, whisk together all the frosting ingredients. Brush the frosting onto the cinnamon rolls. (The frosting recipe makes a generous amount; apply according to your family's tastes and don't worry about using it all up - unless you like a lot of frosting!)
* If desired, you may cut this recipe in half.
** Throughout this recipe, it's fine to use lower-fat dairy products, if desired.


