
Kristina Seleshanko's Blog, page 85
September 30, 2013
Letter of the Week Series
 This year, I'm helping my preschooler focus on one letter each week. He's had a tough time getting his alphabet down, and I think this program is helpful to him.
The concept of teaching one letter at a time has been around a long time - at least since the 18th century, and probably longer than that. The Letter of the Week concept basically consists of exposing your child to a certain letter as much as possible during a set period of time (in this case, about a week). Here's how that might work, using the letter A as an example:
* Write the letter A and tell your child its name and what phonic sound it usually makes.
* Have your child trace the letter with his finger.
* Have your child trace the letter with a crayon or pencil. (Hint: There are lots of free printables online that give children dots to trace to make letters, but I prefer to write the letter with a yellow highlighter pen and have my child trace over that.)
* Watch a video about the letter. (Sesame Street has a YouTube video for each letter, and I find they captivate my children and get them more familiar with the shape of the letter and its name - though, sadly, they don't always include the sound the letter makes. You'll also find other letter specific videos on YouTube - just search for "letter A," or whatever letter you are focusing on.)
* Read books about things that start with the letter; for instance, for the letter is A, you might read a book where an alligator is the main character. (This is mostly for fun; you shouldn't expect your child to truly understand that "alligator" is spelled with an A.)
* Do one or more crafts centering around the letter A.
* At least once a week, sing the alphabet song. I also recommend the DVD The Letter Factory , which is, in my opinion, by far the best resource for teaching children basic phonics.
The idea is always to teach the name of the letter, in addition to the most common phonic sound it makes.
There are opponents to the Letter of the Week concept. They say that "removing letters from their meaningful context removes the meaning and purpose from the letter" and therefore doesn't advance literacy. However, if, during Letter of the Week activities, you keep your drawing or printout of the letter handy and reference it often, you are not taking anything out of context. (After all, we can't expect children who are just learning their letters to read whole words; this would simply confuse and frustrate them.)
The idea is not to focus on things that start with the letter, but rather to focus on the letter itself, and the sound it makes. If, while doing a craft, you say, "D is for dog," you can't leave it at just that. You'll need to explain repeatedly that all letters make a sound; here's what the sound is; and here is a word that starts with that sound. "Hear it? 'Duh-duh-duh- dog. What other words start with the 'duh' sound?"
In addition, most of the research against Letter of the Week took place among low income kids who were rarely read to. And yes, reading, reading, and reading some more is the #1 thing to do to increase your child's reading readiness. But, at some point, children need to know letter names and sounds. That's why I do some Letter of the Week activities - though I do not focus my child's whole life or education around them.
Starting this week, I'll begin posting Letter of the Week ideas - mostly crafts and activities - to help you with your own child's education. I certainly don't expect you to do all the activities suggested; please just pick a few you think will capture your child's imagination. And in between times, read to your child and talk to her about stories, letters you see in everyday life, and the sounds those letters make.


September 27, 2013
Immersing Your Children in God's Word
 As I aspire to become a Proverbs 31 Woman, my greatest responsibility is to train my children in the way of the Lord. As a person who did not grow up in a Christian home, this is sometimes more challenging than anything else I aspire to. But one of the greatest ways I can reach this goal is to immerse my children in God's Word. It's also one of the easiest - at least once you get the hang of it. My motto is: Never let an opportunity go by to read, talk about, or refer to the Bible. As Deuteronomy 6:5-9 says:
"Love the Lord your God with all your heart and with all your soul and with all your strength. These commandments that I give you today are to be on your hearts. Impress them on your children. Talk about them when you sit at home and when you walk along the road, when you lie down and when you get up. Tie them as symbols on your hands and bind them on your foreheads. Write them on the doorframes of your houses and on your gates."*Here are eight ways I immerse my children in God's Word. Are you doing all of them?
* Read to the children from your Bible. I like to do this at the beginning of the day - often while the children eat breakfast or while they color - both of which seem to improve their listening skills. I have recently taken to reading from the book of Proverbs. It seems there are fewer challenging words in this book, plus it's packed with excellent advice for children. We either proceed or follow this Bible reading with prayer.
* Read to them from a storybook Bible. Our favorites are The Big Picture Story Bible (for the youngest) and The Jesus Storybook Bible. Both do a great job of revealing Jesus in both the Old and New Testaments. We also read vintage The Bible Story (by Arthur S. Maxwell); this series does the best job of covering almost all the stories in the Bible than any other children's Bible storybook I've seen.
* Have them read from their Bible. For beginning readers, the Hear Me Read Bible is a nice choice. For readers who are a little more advanced, Zonderkidz publishes individual "I Can Read" leveled books that are Bible stories. More advanced readers should do fine with an NIV or NIrV translation of the Bible.
* Listen to the Bible. You can listen to it free at BibleGateway, Biblica, and Audio Bible, among many other places.
* Listen to Christian music. I want my children to know those old hymns; Hymns for a Child's Heart really speaks to them. We also listen to and sing together the memory verse songs in Hide 'Em in Your Heart. It's fine to listen to Christian music for adults, too, but I do think it's smart to have some music that is kid-specific and refers to actual passages of Scripture.
* Use other Christian media. My children have benefited tremendously from listening to Adventures in Odyssey and Jonathan Parks CDs. Learn about other great Christian media for kids by clicking here.
* Memorize scripture together. It is so true that the verses we memorize as children remain with us as adults.
* Refer to scripture throughout the day. This is perhaps easiest when we are correcting our children - especially if we can relate the correction to a memory verse. For example, if one child steals another's toy, you could say, "Is that doing to John as you would have him do to you?" But don't limit the scriptures to correction; use them in praise, too. For example, "Oh, Laura! I know it was hard for you to share with John, but you did a wonderful job of doing to others as you would have them do to you. I know God is pleased with you...and so am I."
How do you immerse your children in God's Word?
* In this passage, the Bible is referring specifically to the Ten Commandants - the foundational information everyone needs to know in order to repent and accept Christ's grace. But I believe it also applies broadly to all of God's Word.
Photo courtesy dvest / 123RF Stock Photo.
September 25, 2013
Tips for Taking Road Trips with Kids
 I just returned from a family road trip. And while I was really worried about my kids making my husband so crazy we'd end up in an accident (our youngest cried all 9 1/2 hours home the last time we attempted a road trip) the traveling went quite smoothly. How did we accomplish this feat? Through a lot of planning! Here are my best tips:
* Make packing lists, plus a list of chores to accomplish before you leave. Start compiling it early, because there's little doubt you'll think of stuff you need to do or things you need to pack as weeks pass. Divide your lists by major categories. For example, have one page for clothes, another for toiletries, etc. Then be sure to check off chores/items packed as you do them.
* Prepare the kids. Have not just one but several talks with the kids so they know exactly what to expect. For example, I explained how long we'd be sitting in the car, what potty breaks would be like and how often we'd stop, and how their behavior would either make the trip fun or horrible. We had this talk beginning a week before we left, and we reminded the kids of key points just before leaving, each direction.
* Make the kids comfortable. Put them in really comfy clothes - nothing that binds when they sit (elastic waistbands are perfect), comfy socks with slip on shoes (so they can remove their shoes while in the car, if they want to), their pillow, their favorite teddy, etc. If a child's feet dangle, put a small piece of luggage or a box beneath them for support.

* Bring the potty seat or chair. If you have a child who is new to using the potty and is hesitant to go in
unfamiliar places, this is absolutely essential. Also, it helps to "practice" by frequently taking your child to public restrooms a month or so before the trip.
* Have a bag of activities for each child. Bring more than you think they will need.
I'm not big on games because pieces can fall and scatter, resulting in a mess - plus screaming, crying kids. Magnet games are okay, although some loss of magnets is probably inevitable. Some people like to give each child a cheap baking sheet to hold coloring books and magnet sets, but after a lot of thought, I decided against this. If we got into an accident, those baking sheets would result in serious injury - possibly even death. Instead, I chose a clipboard for each child, being careful to pick a type that had a more kid-friendly, less aggressive clamp.
I bought new coloring books (new things are vital, since they will hold your child's attention longer; plus they make the trip more fun) at the Dollar Tree, along with some activity and sticker books. Be careful to only choose activities your kids can do on their own; you don't want them frustrated or trying to get your help all the time. I also printed out age appropriate mazes, plus coloring and activity sheets that tied in with our trip. For example, we visited an aquarium, so I printed out free sea life coloring pages and mazes. Other ideas include coloring pages/games for states you'll pass through and landmarks you might see.
 I also bought each child a new box of crayons - make them exactly the same! Plus dry erase crayons (far less likely to mark up the car than pens are) and dry erase boards from the Dollar Tree.
To hold crayons and keep them from rolling all over the place, some people use use suction containers like you'd find in a shower, but I was afraid they'd fall off the car windows, causing much yelling and crying. Instead, I chose cups I found in the office supply section of the Dollar Tree. Any short cup that fits into your child's car seat/booster seat/car cup holder would work fine. (Tall ones make it more difficult to get the crayons out and are more likely to tip over.)
Also from the Dollar Tree, I bought each child a cheap "Doodle Pro" type toy, plus blank notebooks. Variety is important!
Finally, I printed out free car bingo and license plate games for each child. Generally, to prevent quarreling, I think it's best to give each child exactly the same items. So even though our youngest couldn't really play the license plate game alone, I made sure he had one in case he felt left out. I also printed out a map of our route, so everyone could see how far we'd traveled and could mark off towns as we passed them. (I put ours in a plastic page protector so we could use dry erase crayons to mark it up, then erase the markings and use the same print out for the trip back.)
Some people like to give each child a binder with all these printables, but I thought it better to dole out games and printables as we went along. (My kids would try to do everything at once, if I gave them a binder. To make the activities last as long as the trip, it was vital for me to hang onto them and pass them out periodically.)
The only things the children had ready access to in the back seat were a basket of books ("I Spy" and "Where's Waldo" types for my pre-reader and early reader books for our older child) and their teddies.
* Bring plenty of water and snacks. I kept the snacks in a box up front with me so I could dole them out. Try to avoid things that are too salty, or your kids will drink a ton and need to make near constant bathroom stops. I allow them to drink water only, since they are less likely to guzzle it. To encourage them to sip and not gulp, I also filled their travel mugs with ice, then added water. Because it took a bit for the ice to melt, they didn't drink their water all at once.
I also like to bring a few snacks I wouldn't normally let them eat. This keeps things fun and makes the snacks more of an "event" that passes the time.
Ideas for snacks include: Grapes, apples, berries, baby carrots, celery sticks, breakfast/protein bars, Annie's graham bunnies (less messy than ordinary graham crackers), raisins/yogurt covered raisins, dried cranberries/blueberries, dried apple rings, really any dried food (but be careful about giving the kids too much fiber), jerky, and trail mix. Before you leave, portion everything out into individual serving bags.
* Bring music everyone enjoys. Audiodramas or books on tape are also handy.
* And yes, a portable DVD player. Part of me hates using movies to occupy my kids, but it's not like wedual-screen portable DVD player just for this trip. (About $70 at our local Wal-Mart.) It was fantastic; each child had his or her own screen (which meant no complaining about not being able to see well) and headphones (giving Mom and Dad peace!).
 do this every day. We purchased an RCA
 If you have a DVR, or know someone who does, I highly recommend recording a handful of children's programming onto one disc. This allowed the kids to watch for several hours at a time without an adult having to change the disc (which we really couldn't do without stopping the vehicle).
* Expect messes. Yes, I recommend cleaning and organizing the car before you leave - and trying to stay organized as you go along. But don't stress if things get a bit chaotic. To help with messes, I recommend a box of baby wipes, plus plenty of hand sanitizer.
Happy traveling!
September 23, 2013
Tips for Getting Clean Chicken Eggs
 Once you start raising hens, you quickly discover eggs aren't always clean when you gather them. The good news is there are some things you can do to encourage cleaner eggs.
1. Make sure the bedding in the nesting boxes is clean and plentiful. Also, if broken eggs are a problem, line the nesting boxes with outdoor turf (the kind that looks like plastic grass) or nest liners (found at farm stores).
2. Keep the bedding in the hen house clean, too. Chickens who walk in muck and manure get it on their feet - and on the eggs they sit upon.
3. Make sure there are enough nesting boxes for your hens. Experts generally advise having one box per four hens. Granted, hens have some funny ideas about nesting boxes. Mine, for example, usually decide only one nesting box is egg worthy. Sometimes hens also take a hankering to laying on the floor of the hen house. (In my experience, this usually happens because a hen decides she wants to use a certain nesting box while another hen is in it. Pretty soon, she can't hold it any longer and the egg ends up on the floor. Over time, this problem usually resolves itself, as the hens learn to be better at taking turns.)
4. Check for eggs regularly throughout the day, until you know when your hens lay. Unless the hens are new to laying, they usually have a set schedule for laying their eggs. Typically, this happens in the morning, but it may change as the seasons change. Prompt removal of eggs tends to mean fewer hens walking on the eggs, hence cleaner eggs. It also reduces the chances of broken eggs - and of hens learning to eat eggs.
5. Make sure hens have clean bottoms. If they are dirty, just wipe them with a warm, damp towel.
Despite all your best efforts, you will probably sometimes find dirty eggs in your nesting box. (Frankly, my experience is that some hens are just tidier than other hens - just as some people are pig-pens and others are neat-nicks.) The question then becomes: Should you clean dirty eggs before storing them?
Before you laugh and say the answer is obvious, you should know that egg shells have a natural coating (called "bloom") that prevents dirt and germs from being absorbed into the egg itself. Once you wash an egg, that protective coating is GONE. Therefore, in my opinion, it's best not to wash eggs until you're ready to use them. I place all my eggs - dirty and apparently clean - into egg cartons; when I'm ready to cook them, I wash them under warm, running water. (Cool or cold water draws germs into the egg.) Other people like to rub obviously dirty eggs with a rough cloth in order to maintain the egg's bloom.
September 20, 2013
How to Clean a Stove
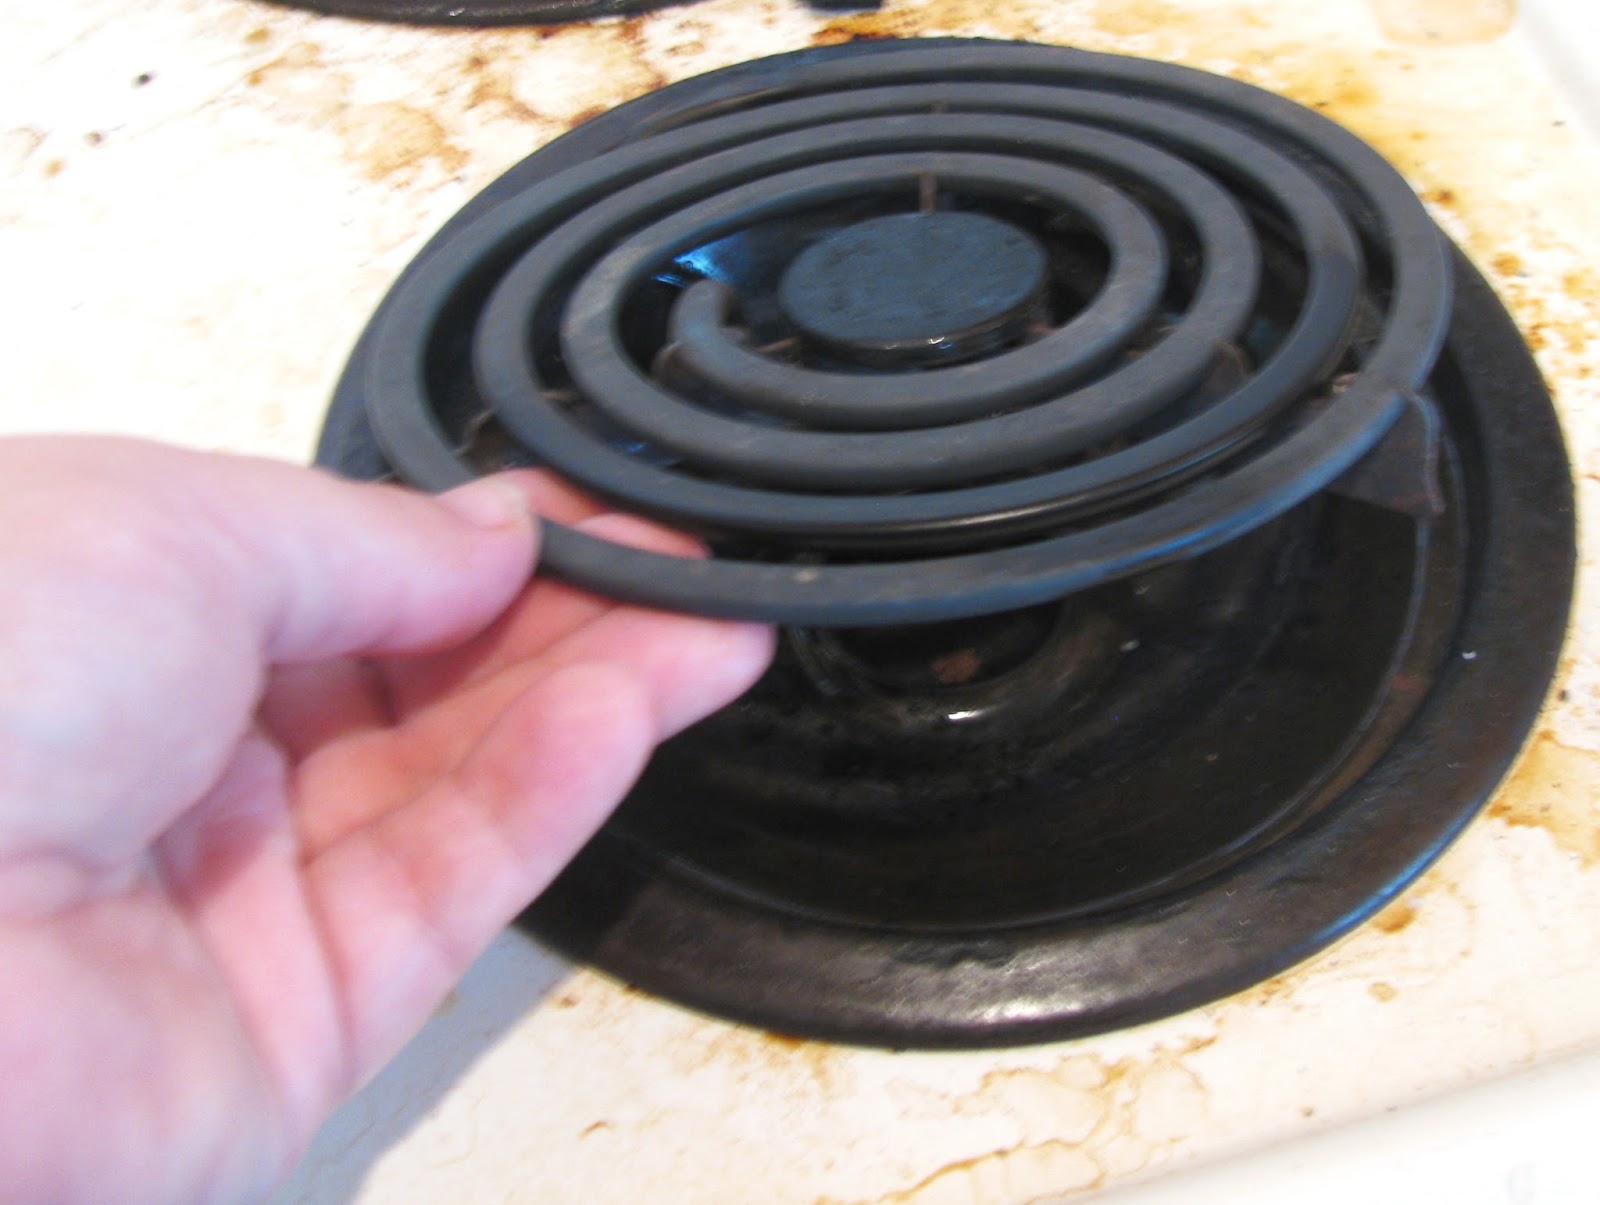
 Exhibit One: My dirty stove top.Until I got married, I never knew how to clean a stove. Oh sure, I wiped down the surface with a soapy sponge, but I didn't know how to clean under the burners, behind the knobs, or beneath the stove surface. I'm sure there are others who could use some tips on the finer points of stove cleaning - especially since "How to Clean a REALLY Dirty Stove" is one of this blog's most popular posts. And, keeping it real, I'm showcasing my extra-dirty, I-just-finish-canning stove top!
The first place to begin is with your stove's manual, if you have it. If you don't have it, try looking for it online. By Googling the manufacturer's name, the word "stove," and the model number (often found in the warming or storage drawer), you can probably find a free manual to download. Read the manual, noting what type of cleaners the manufacturer recommends. Then:
 Removing the knobs.1. Wipe off any food debris, using a damp, soapy dish cloth or sponge.
2. Clean the back of the stove, where the knobs are. Usually the knobs come off with a gentle tug. Degrease and clean that entire surface, as well as the knobs. Replace the knobs.
3. Remove the burners and drip pans. These typically just pop out if you gently lift and pull on them. Clean all around the surface of the stove, removing all grime and grease. If the stove surface just won't seem to come clean, be sure to read "How to Clean a REALLY Dirty Stove Top."
 Lifing up the burner...
 ...and the drip pan.4.
For electric stoves
, examine the burners. If they seem dirty, wipe them down with a cloth dampened in soapy water. Rinse, being careful not to get any part of the electrical plug wet. (Never soak electric burners in water!) If there is tough-to-remove gunk on the burners, in a bowl, pour a little baking soda. Add just enough water to make a paste. Use a cloth to put some of the mixture on the dirty area of the coils and allow it to sit about 15 or 20 minutes; scrub it off and rinse. Let the burners dry completely.
...and the drip pan.4.
For electric stoves
, examine the burners. If they seem dirty, wipe them down with a cloth dampened in soapy water. Rinse, being careful not to get any part of the electrical plug wet. (Never soak electric burners in water!) If there is tough-to-remove gunk on the burners, in a bowl, pour a little baking soda. Add just enough water to make a paste. Use a cloth to put some of the mixture on the dirty area of the coils and allow it to sit about 15 or 20 minutes; scrub it off and rinse. Let the burners dry completely.5. For gas stoves , read the manual for coil cleaning instructions. If you can't find the manual, very carefully use a pin to unclog the port of each gas burner. (If your stove has a standing pilot light, be sure to shut off the gas first!) Don't dig around in the port; just poke it. Soak all parts of the burner that can be removed in hot, soapy water. If needed for greasy or especially dirty burners, add some baking soda to the water. Scrub gently, if needed. Rinse well. Let the burners dry completely.
6. For smooth top stoves , there are no burners to remove. You simply need to clean the flat surface with a recommended cleaner.
7. There are several ways to clean drip pans; the easiest is to put them in the dishwasher. Soap, water, and the scrubby side of a sponge can work, too. For super dirty drip pans, try boiling them in water with a little vinegar added. Or place the drip pans in individual Ziplock bags; add 3 tablespoons of household ammonia. Seal the bag and let it sit overnight. In the morning, remove the burners from the bags and rinse clean. (Seal the bags and throw them in the trash.)
 Lifting the stove top.8. Replace the drip pans and burners. Finally, on electric stoves, lift the entire top of the stove. (Yes! It lifts up!) All this usually takes is a gentle tug. Clean the inner surface of the stove, as well as the outer sides of the stove, where food sometimes falls. Replace the lid.
But which cleaning products are best to use? Anything non-abrasive. Sponges are fine, but avoid the rough "scrubbing" type sponges. Dish towels work, too. For cleaners, I like a little Dawn and water. If the stove is particularly greasy, I follow this by putting a little white vinegar on a sponge. After wiping the stove down with that, I wipe off the surfaces again with a clean sponge. I've also heard of people using baking soda as their "soap." If you have a glass top stove, extra caution is needed, but you might wish to check out the homemade glass stove top cleaners here and here.
Just be sure, no matter what type of stove you have, that your cleaning products are not abrasive - or you could easily and permanently damage your stove top.

September 18, 2013
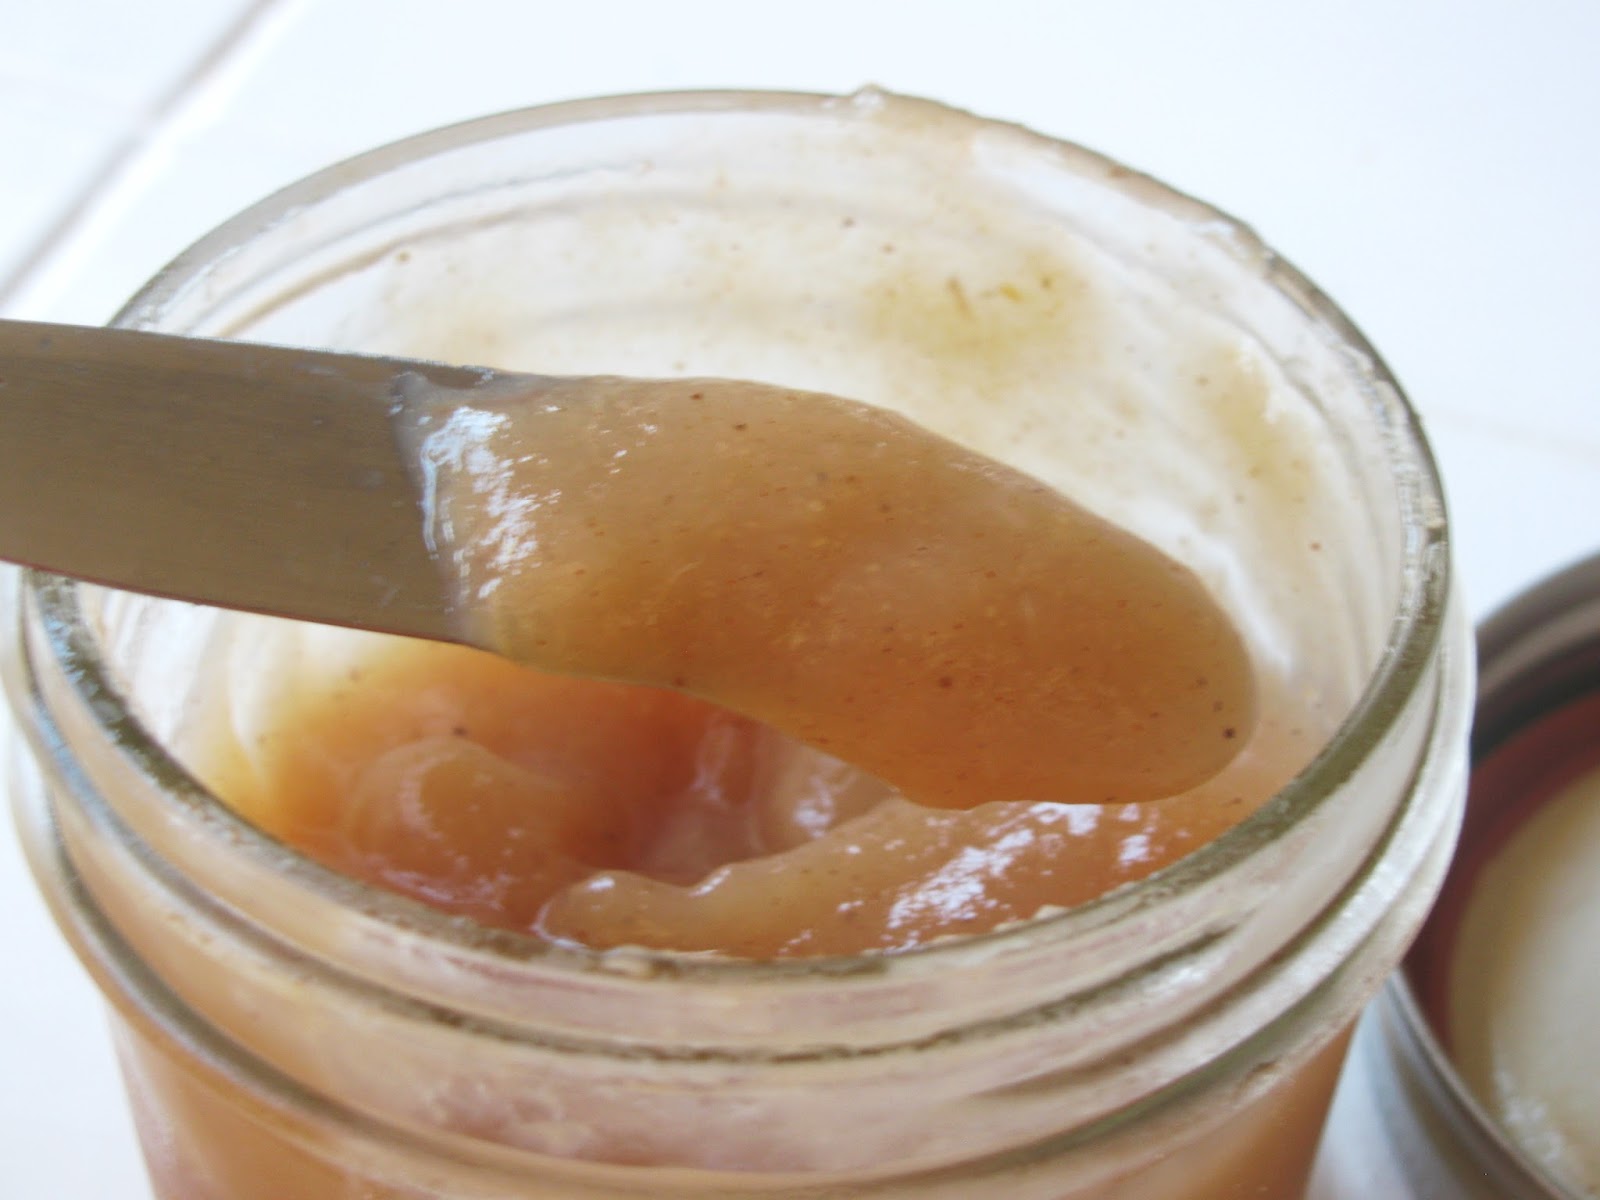
Canning Spiced Pear Butter
 If you've never had fruit butter, you're really missing out. I am not a huge jam or jelly fan...but it's tough for me to turn down fruit butter. Each year, I make large batches of apple butter (using the recipe in the
Ball Complete Book of Home Preservation
). We eat quite a bit - and I give many jars away as gifts - to recipients who hope they'll get some next year, too. This year, I had extra pears, so I decided to try my hand at pear butter. Oh my, is it good!
If you've never had fruit butter, you're really missing out. I am not a huge jam or jelly fan...but it's tough for me to turn down fruit butter. Each year, I make large batches of apple butter (using the recipe in the
Ball Complete Book of Home Preservation
). We eat quite a bit - and I give many jars away as gifts - to recipients who hope they'll get some next year, too. This year, I had extra pears, so I decided to try my hand at pear butter. Oh my, is it good!(As an aside, pear butter isn't real butter, nor does it have butter in it. It's actually something like thick applesauce - but using pears. It's perfect for toast or muffins, or as a topping for ice cream, or for use in things like my oatmeal crumb bars. So why is it called pear butter? Probably because it's thicker and more spreadable than jam.)
HINT: If you don't want to can this recipe, you may also freeze it.
HINT #2: You may use this recipe to make pearsauce (like applesauce, but with pears). Just don't cook it down as thick as you would for pear butter.
Spiced Pear Butter Recipe
What You'll Need:
12 lbs. firm, ripe pears
4 tablespoons lemon juice
2 cups granulated sugar (if your pears are overripe, use sugar to taste)
2 teaspoons ground ginger
1 1/2 teaspoons ground nutmeg
1 1/2 teaspoons ground cinnamon
1/4 teaspoon ground cloves
1. If you plan to can this recipe and are not an experienced canner, please review the water bath canning guidelines. Prepare jars, lids, and canner.
2. Peel, core, and coarsely chop the pears. ( TIP: For quicker peeling, use a soft skin peeler.) Toss into a large, stainless steel pot.
3. Add the lemon juice, sugar, ginger, nutmeg, cinnamon, and cloves. Stir together and place over medium high heat.
4. Cook the pear mixture, stirring often, until pears are tender. Use an immersion blender to puree the mixture (or carefully transfer the slightly cooled mixture into a traditional blender and puree in batches, returning to the pot).
5. Reduce the heat to low and continue cooking until the pear butter is the desired thickness. It should mound easily on a spoon. WARNING: Stir frequently to prevent scorching and be sure to cook the pear butter on LOW. Whenever people complain they burn fruit butter, it's because they are cooking it too hot and not stirring it enough.
6. When the pear butter has reached the correct consistency, ladle some into a hot jelly jar, leaving 1/4 inch headspace. Bubble, add lid and screwband, and place in canner. Repeat until all the jars are filled or all the pear butter is in jars.
7. Process in a hot water bath canner for 10 minutes.*
Makes about 13 8 oz. jars.
* NOTE: If you live at a high altitude, read this important information about adjusting canning times.
September 16, 2013
Homeschool Preschool: How Much Time?
 Parents have widely varying ideas about how much time preschool should take each day - or even if preschool is necessary at all.
Let's knock that second thought out right now. Kindergartens now expect new students to be able to name and write their letters (and probably have some facility with basic phonic sounds), know and write their numbers, be able to count to at least 10, and know their colors and shapes. (All these things, incidentally, used to be taught in first grade, then kindergarten...and now preschool.) However, this doesn't mean preschool has to be formal. If your child is curious and you are good about interjecting learning into everyday activities, there is no reason your child has to sit in a formal classroom setting for preschool. (Or even, in most states, for kindergarten.)
But let's assume you decide you want to do a more formal homeschool preschool. Your child may love doing worksheets, for example, or shows a real interest in writing, or simply seems ready to sit for a little bit and learn. The question then becomes: How long should formal preschool last?
Without question, any formal school time (i.e., sitting down with books or paper) should be short. The average preschooler won't be able to sit for more than 15 minutes - and some will be able to sit for far less time. Sure, you can interrupt sitting time with fun learning songs that you stand up and do movements to. And yes, you can have breaks where you allow your child to run around. But even so, it's completely unncessary to do formal preschool for more than 15 minutes. In rare instances, a child may ask to do more than 15 minutes worth of work, but as a general rule, 15 minutes should be the ultimate amount of time spent in formal preschooling.
What if your child can't sit for 15 minutes? You can:
* Break up sitting time, as mentioned above.
* Start with just a few minutes, and gradually work your way up.
Or simply not panic and know that as your child matures, he or she will be able to sit for longer periods of time and do schoolwork.
More Articles in the Homeschool Preschool Series:
Why Homeschool Preschool?
Thoughts on Readiness
Scissor Skills
Numbers
Letters
Colors & Shapes
Sorting
Worksheets
The Balance Beam Game
September 13, 2013
Handling Pressure with Grace - Guest Post by Liberty Speidel

Being told your child needs some pretty serious medical treatment is the last thing a parent wants to hear. A year ago, I was there. My son, Xander, needed a bone marrow transplant. And while the last year has been anything but a picnic, through the ups and downs of his treatment, God has taught me a lot about grace. Granted, the following are more applicable during large blocks of hospital time, but maybe there's a truth here that can be helpful in your own brand of stress.
Ask questions
When you're faced with a lot of decisions that may affect the long-term health of your child, you can feel pretty helpless. While I frequently have to tell my husband "I don't know," I ask a lot of questions where Xander's care is concerned. Write your questions down—it's clichéd, but there's an app for that, so keep a list of questions on your smartphone, if you use one. That way you don't forget what you need to ask.
Find reasons to laughIn July, Xander underwent his second surgery in five days (to replace his central line, which is used for giving IV medications and fluids over a long period of time). When I got down to the holding area, pre-surgery, the surgeon asked me what my expectations were of what would happen. “Central line placement,” I told him.
"There's not to be a bone marrow biopsy today?" he asked.
I stared at him, bewildered. "No," I said slowly. "That's not scheduled for a couple weeks."
Turns out, one of the physician's assistants on Xander's case had seen that Xander needed this procedure, so he thought he'd kill two birds with one stone—but hadn't informed anyone else!
In situations like these, it's easy to be upset—the left hand doesn't know what the right hand is doing—but the head doc on Xander's case was relieved when I laughed when she told me what had happened.
God's Got This
My pastor, Dan Sutherland, introduced this motto to our congregation in 2012. It became something I clung to during the past year. Very little in life is within our control, and when you're going through a trial, it's important to remember this. With Xander's transplant, we could choose the doctors who would treat him and the drugs they would use, but whether it worked—that was all in God's hands. While we've got a spunky three-year-old now, we know we're still wandering through the woods looking for the meadow as far as Xander's health is concerned.
 XanderBible Time I think my dependence on God got stronger throughout this whole experience—it almost has to when you realize how little control you have over this kind of situation. While I didn't find near as much time to read my Bible as I would have liked (or probably should have), I was able to sneak an earbud in and listen with the YouVersion app on my phone. Listening to God's word definitely was a quick way for me to get an attitude adjustment on my bad days.
 PrayerDuring this time, my prayers were frequently short snippets or sentences, dispersed throughout the day - not one long conversation at once, but a bit here and there throughout the day. If I had it to do all over again, I'd probably plan to do things differently, although with the irregularity in my son’s five month treatment, it might not have been possible to have a regular prayer schedule.
GraceThe biggest thing I learned through this whole experience is to offer everyone grace; even my husband had to receive it on multiple occasions. Stress leads to crankiness, making you lash out at everyone in your path. But if you offer everyone grace and keep a positive outlook, they'll thank you for it—and you'll show
 Christ to everyone you meet. You may even get a chance to share the Gospel with those who want to know how you keep such a positive attitude!
Liberty Speidel is a wife, mom, and writer of mysteries and science fiction who blogs at Word Wanderings. Though happiest at her computer creating fictional worlds, she enjoys baking, yarn crafts, hiking with her family, and taking very long walks with her family's Labrador Retriever. She and her family reside in Kansas. You can learn more about her son's medical struggles here and here.
September 11, 2013
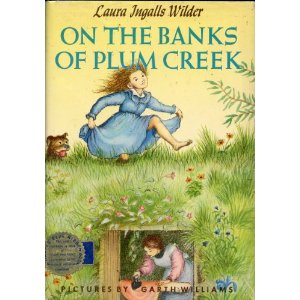
On the Banks of Plum Creek Activities
 As regular readers know, my children and I are working our way through Laura Ingalls Wilder's Little House on the Prairie series. Recently, we finished
On the Banks of Plum Creek
. And, if you know me, you know we had to some some activities to go along with the book. Here is a big list of ideas; try a few with your children!
As regular readers know, my children and I are working our way through Laura Ingalls Wilder's Little House on the Prairie series. Recently, we finished
On the Banks of Plum Creek
. And, if you know me, you know we had to some some activities to go along with the book. Here is a big list of ideas; try a few with your children!* Create an On the Banks of Plum Creek lapbook from these free printables.
* Download and complete this simple, free On the Banks of Plum Creek book report sheet.
* Build a sod house. (Just a mini one!)
* Plant some morning glories, black-eyed Susans, or blue flags. (They are very easy to grow!)
 Morning glories.
* Learn a bit about badgers at the San Diego Zoo website.
* Check out free badger craft ideas, free printable coloring pages, and more.
* Learn about a butterfly's life cycle .
* Have fun with free butterfly coloring pages .
* Get up early to watch the sunrise.
* See an antique photo of some of the grasshoppers that plagued the prairie in the 1870s.
* Learn why grasshoppers swarm.
* Make horehound candy - or buy some!
 Grasshoppers.
* Make a button necklace .
* Make star-edged shelf paper .
* Fry up some fish! (Clean and debone the fish, then dredge in cornmeal. Heat oil in a heavy pan, preferably cast iron; once it sizzles when you flick a drop of water on it, add the fish. Cook until golden on both sides.)
* Play "Ring Around the Rosie" or "Pussy wants aCorner" or "Uncle John" or "Cat's Cradle."
* Can you guess what a velocipede is? Check out some photos of old velocipedes.
* Make your own jumping jack toy. There are lots of instructions for these on the Internet, but start by looking at Handmade Charlotte, Spoonful, and Bookzoompa.
* Whip up some lemonade. (Here's my favorite lemonade recipe.)
* Throw a simple town or country party.
* Make vanity cakes .
* Make popcorn balls .
* Make a nine patch quilt - use the nine patch pattern to make a pillow or pot holder. Or use the more difficult bear track pattern, instead.
* Learn about ball lightening - the "balls of fire" that Ma battled. (Be sure to check out this video of real ball lightening.)
Check out the Entire Little House series of Posts:
Little House in the Big Woods Activities
Pancake Men (from Little House in the Big Woods)
Little House on the Prairie Activities
Little House on the Prairie Birthday Party
September 9, 2013
Cooking Eggs in "Nonstick" Cast Iron Pans
 Several years ago, I began cooking with cast iron - primarily with cast iron skillets and a Dutch oven. As I typed about then, there are many benefits to cast iron cooking - including it's non-stick qualities without the use of Tefflon. But, like many, people, I had trouble keeping eggs from sticking to my cast iron skillets. That is, until I recently discovered a simple solution!
Seasoning
Before you begin cooking with any cast iron cookware, it should be well seasoned. "Seasoning" consists of oil or natural fat seeping into the teeny tiny crevices in the pan. This creates an all-natural, non-stick coating. The easiest way to season a pan is to put a heaping tablespoon of coconut oil, lard, or bacon drippings in the pan, then place it in a 400 degree F. oven. Leave it in for up to a 20 minutes, very carefully using a paper towel to wipe some of the fat onto the sides of the pan at least twice.
Once the pan is well seasoned, just scrape it clean with a metal spatula or plastic pan scraper. It's okay to use water, but not soap. Be sure to wipe the pan dry after cleaning, putting it briefly on a warm stove burner until it's completely dry.
Re-seasoning is usually not necessary - unless you let a pan go "dry" while cooking or you use soap on the pan. (Learn more about cast iron care here.)
The Secret to Non-Stick Eggs
Yet even when I had a well seasoned pan, I found eggs stuck.
Then my father (who is something of an expert on cooking with cast iron) visited. He said, "You're cooking bacon in the skillet first. To keep the eggs from sticking, you have to scrape the bottom of the pan before adding eggs."
Yeah, it's that simple.
If you cook anything in a cast iron skillet before you add eggs, take a metal spatula and scrape the bottom of the pan well before adding the eggs. This gets up any bits of food, and keeps the eggs from sticking. So simple!


