Shawna Coronado's Blog, page 4
August 12, 2022
Hot Baked Apples with Sunbutter Recipe
Piping hot baked apples with no added sugar and all the delicious flavor of chewy coconut and rich seed or nut butter? YES! This recipe is dairy-free, grain-free, yet flavor – full. Perfect for apple season or any old time!
Apples are HealthyIt’s true; apples are healthy. They have fiber and nutrients that the body needs. They are best for you fresh and raw, but work well baked WITHOUT ADDED SUGAR because baking the apple releases sweet juices and flavor. Apples are a great source of vitamins A, C, and Carotene, among others. Mixed with the nuts, coconut, and other fiber-filled items in the baked apples dish and you have a win-win nosh.
While apples are a great part of a weight loss plan, they also work well to prevent cancer, heart disease, and diabetes in correct portions. Consuming one apple, which is a single portion, once per day is a great way to stay on top of a food plan that contains fiber. In fact, fiber is a unique food component because it contains items that your body cannot absorb or digest. That same fiber absorbs proteins, carbohydrates, and fats and helps push these things through your body.
Substitute Ingredients in this Baked Apples Dish – Customize to Your Hearts Content
This protein-rich sunbutter and nut stuffed baked apples dish is crackin’ good and totally addictive. Don’t like sunbutter? No problem, substitute whatever nut or seed butter you can find for an equally delicious anti-inflammatory result. There are no specific quantities of ingredients listed below because it is super-easy to make with no measuring restrictions. Want only one apple? Great. Want to make dozens of apples. Do it. Go crazy and put in the ingredients that make you happy.
Best yet, your kitchen will smell like a magic unicorn as baked apples slowly caramelize. The stuffed baked apples will store in the refrigerator and can easily be heated up in the microwave. Great as a snack, side-dish, or a dessert, Hot Baked Apples with Sunbutter are also wonderful served at a party.

 Print Add to Collection Go to CollectionsHot Baked Apples with Sunbutter Recipe#wprm-recipe-user-rating-0 .wprm-rating-star.wprm-rating-star-full svg * { fill: #343434; }#wprm-recipe-user-rating-0 .wprm-rating-star.wprm-rating-star-33 svg * { fill: url(#wprm-recipe-user-rating-0-33); }#wprm-recipe-user-rating-0 .wprm-rating-star.wprm-rating-star-50 svg * { fill: url(#wprm-recipe-user-rating-0-50); }#wprm-recipe-user-rating-0 .wprm-rating-star.wprm-rating-star-66 svg * { fill: url(#wprm-recipe-user-rating-0-66); }linearGradient#wprm-recipe-user-rating-0-33 stop { stop-color: #343434; }linearGradient#wprm-recipe-user-rating-0-50 stop { stop-color: #343434; }linearGradient#wprm-recipe-user-rating-0-66 stop { stop-color: #343434; }Piping hot baked apples with no added sugar and all the delicious flavor of chewy coconut and rich seed or nut butter? YES! This recipe is dairy-free, grain-free, yet flavor – full. Perfect for apple season or any old time!Servings 3Author Shawna CoronadoIngredientsApplesSunbutterShredded coconutPecans or almondsCinnamon to sprinkleInstructionsPreheat oven to 350 degreesSlice top off an apple, retain the top sliceSlice the bottom so it sets level on a baking dishCore the apple gently with a paring knife, retaining a bowl like shape, do not take too much apple awayPlace a layer of shredded coconut and nuts on the bottom of cored apple holeTop with a generous spoonful of almond butterAdd more nuts and coconutSprinkle all the apples with a bit of cinnamonPut the top back on the applePlace the filled apples on a baking sheet lined with parchment paper or sprayed with non-stick sprayBake 30 – 50 minutes or until apple is soft Serve warm, of course, the apples are great with coffee for an afternoon snack
The post Hot Baked Apples with Sunbutter Recipe appeared first on Shawna Coronado.


July 22, 2022
Basic Breakfast: Hardboiled Eggs N Berries Recipe
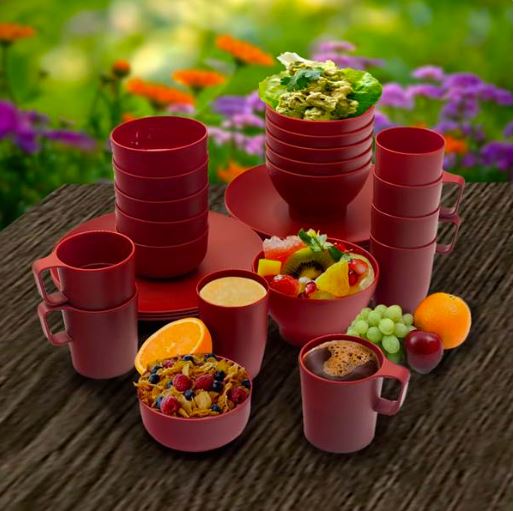
We are all challenged to sit down for a meal in modern times. I truly understand that as many mornings I do not have time to actually cook a meal – I know your life is similar, so a super basic breakfast I whip up on those busy mornings is simply hardboiled eggs with berries and coffee. That’s it. Simple. To the point. Takes about a minute to prepare if you have advanced cooked your eggs. Makes me feel as if I have had something substantial. If only all life’s problems could be solved so easily.
One of the reasons I like a simple breakfast like this in the summer is the HEAT. It’s hot in Arizona and I like to eat in the cool mornings out on my back patio. After breaking multiple dishes out there (apparently I’m clumsy as all-get-out), I use a great set of unbreakable bpa-free dinnerware while I’m dining outdoors. I love them so much that I have added them to my store here on the website. If you want a set yourself, they are currently 25% off on my site (clickety-click below).
 Unbreakable BPA-Free Dinnerware Set of 6Shop nowMeal-Planning Idea for Hard Boiled Eggs
When you meal-plan and cook in advance, it is super-easy to prepare breakfast, lunch, dinner, and appetizers. With eggs, you can cook and store the egg for up to 7 days. If you purchase pre-boiled eggs at the grocery store, they can last even longer.
My suggestion is to pre-boil the eggs, run under cold water, dry off, then mark the hard-boiled eggs with a pencil. This way you know which eggs are hard-boiled and which eggs are not in your refrigerator. Meal-planning means that you choose a day to cook, say Sunday, then cook a few foods in advance and store in the refrigerator so that you can quickly fix a meal from these items throughout the week. One of my favorite summer dishes is Curried Deviled Eggs. Yum!
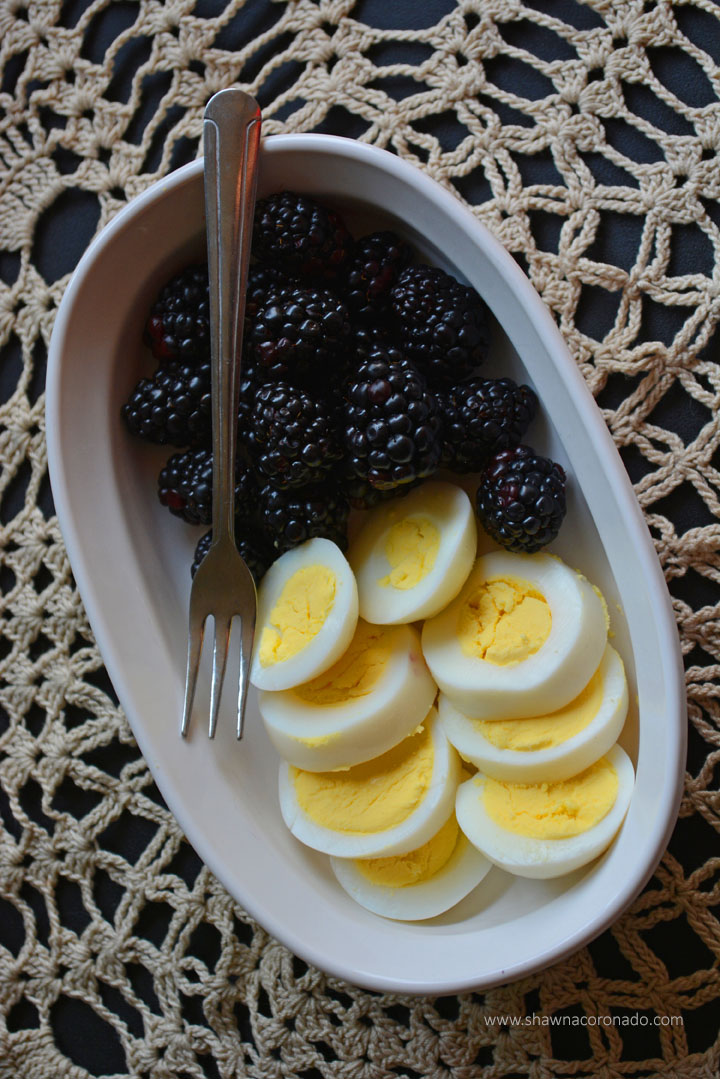
 Print Add to Collection Go to CollectionsHow to Hard Boil Eggs in Water Recipe#wprm-recipe-user-rating-0 .wprm-rating-star.wprm-rating-star-full svg * { fill: #343434; }#wprm-recipe-user-rating-0 .wprm-rating-star.wprm-rating-star-33 svg * { fill: url(#wprm-recipe-user-rating-0-33); }#wprm-recipe-user-rating-0 .wprm-rating-star.wprm-rating-star-50 svg * { fill: url(#wprm-recipe-user-rating-0-50); }#wprm-recipe-user-rating-0 .wprm-rating-star.wprm-rating-star-66 svg * { fill: url(#wprm-recipe-user-rating-0-66); }linearGradient#wprm-recipe-user-rating-0-33 stop { stop-color: #343434; }linearGradient#wprm-recipe-user-rating-0-50 stop { stop-color: #343434; }linearGradient#wprm-recipe-user-rating-0-66 stop { stop-color: #343434; }Basic breakfast – hardboiled eggs and blackberries. Perfect for the heat of summer. Learn how to do a basic hard boil with this recipe.Servings 3Calories 126kcalAuthor Shawna CoronadoIngredients6 to 12 eggsSalted water in a saucepanUS Customary – MetricInstructionsPlace a dozen eggs (or less) in a saucepan, covering with cold salted waterBring to a rolling boil over high heatWhen it begins to boil, turn off heat and cover for ten minutes (if you like a drier/harder cooked egg, leave simmering on low uncovered for the ten minutes)Pour eggs into a colander and run cold water over them or sit in a cold water bath for 10-15 minutes (this helps the eggs peel easier)Eat immediately or refrigerate up to 5 daysNutritionCalories: 126kcal | Carbohydrates: 1g | Protein: 11g | Fat: 8g | Saturated Fat: 3g | Polyunsaturated Fat: 2g | Monounsaturated Fat: 3g | Trans Fat: 1g | Cholesterol: 327mg | Sodium: 125mg | Potassium: 121mg | Sugar: 1g | Vitamin A: 475IU | Calcium: 49mg | Iron: 2mgAre Egg Whites Better for You?
Are egg whites better for you? It depends on what your body requires. I love the illustration from the National Center on Healthy, Physical Activity, and Disability (below). It shows that both whole eggs and egg whites have some excellent benefits. Egg whites are on my mind lately because I eat eggs quite regularly and my favorite integrative functional nutritionist suggested I start consuming egg whites only as a part of my anti-inflammatory food plan. I’ve been consuming too many fats and having some unusual auto-immune symptoms due to the intake. So I am lowering my fat intake.
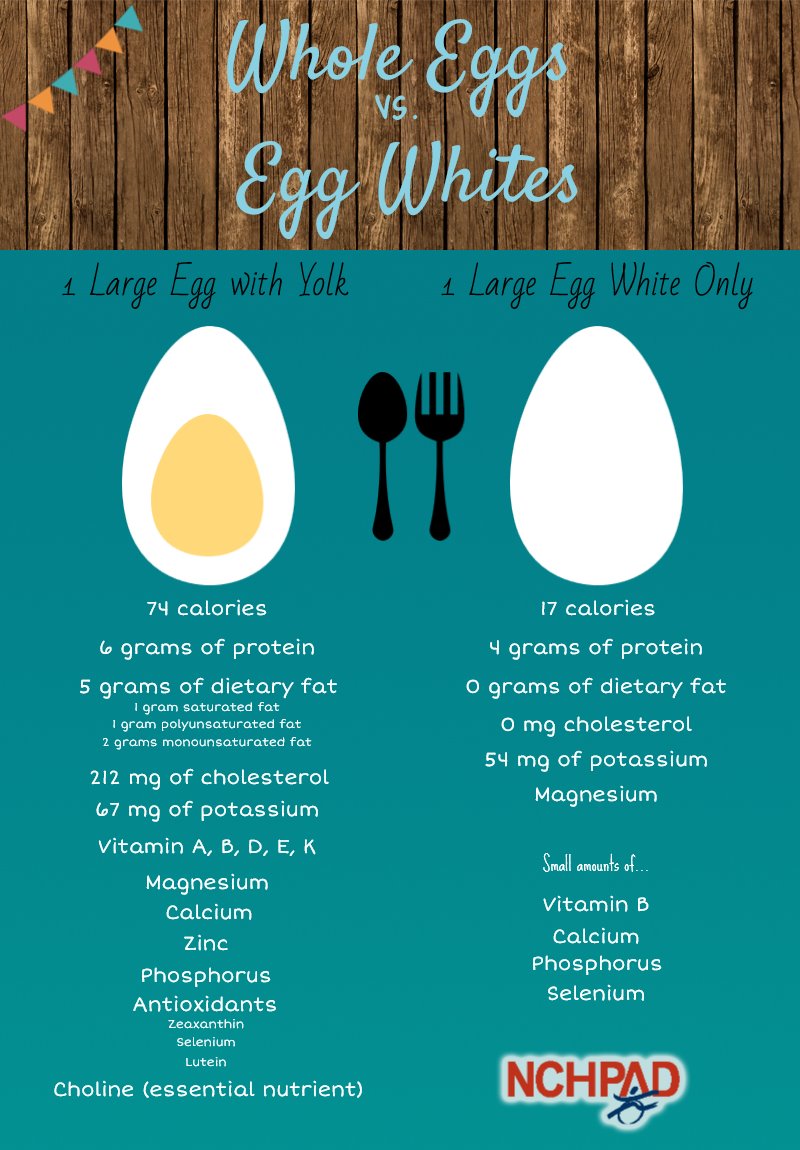
As you can see by the chart, a large egg white has far less fat and calories than an egg with a yolk. This means that if you are a bodybuilder or athlete, then this gives you more protein. If you are over-weight or suffer from painful conditions that are chronic, keeping your calorie count down can help you lose weight.
Egg whites are clearly very low in cholesterol, but still high in protein. If your medical professional is asking you to reduce your calorie intake or fat and cholesterol intake, kicking the egg yolk out of your life might be the answer.
Overall, a whole egg is better for you from a nutritional perspective because it has more vitamins and protein. If you are on a restrictive food plan, trying to lose weight, or have problems with fat, then removing the egg yolk and just eating the egg white is a great plan.
Either way – eggs are delicious and hard-boiled eggs are the absolutely perfect solution for a busy lifestyle, particularly in the hot summer.
The post Basic Breakfast: Hardboiled Eggs N Berries Recipe appeared first on Shawna Coronado.
July 9, 2022
MODERN CAST IRON WOK COOKING 101 – Ultimate Guide
Modern Cast Iron Wok Cooking 101 is ALL ABOUT VERSATILITY. Back in the olden times, we thought that wok-ing was only about the Asian stir-fry. Times have changed and I use a cast iron wok in my kitchen for all kinds of creative and anti-inflammatory cooking. I love my wok (see my favorite recipe below) and think you should try cooking with a cast iron wok in your kitchen.
Remember this secret for cooking in a wok – heat your oil in wok over medium heat. The pan is ready when you toss in a few drops of water and it pops and sizzles on the pan. If the water drops evaporate quickly, then the pan is too hot. Now – let’s begin with Modern Cast Iron Wok Cooking 101!
.
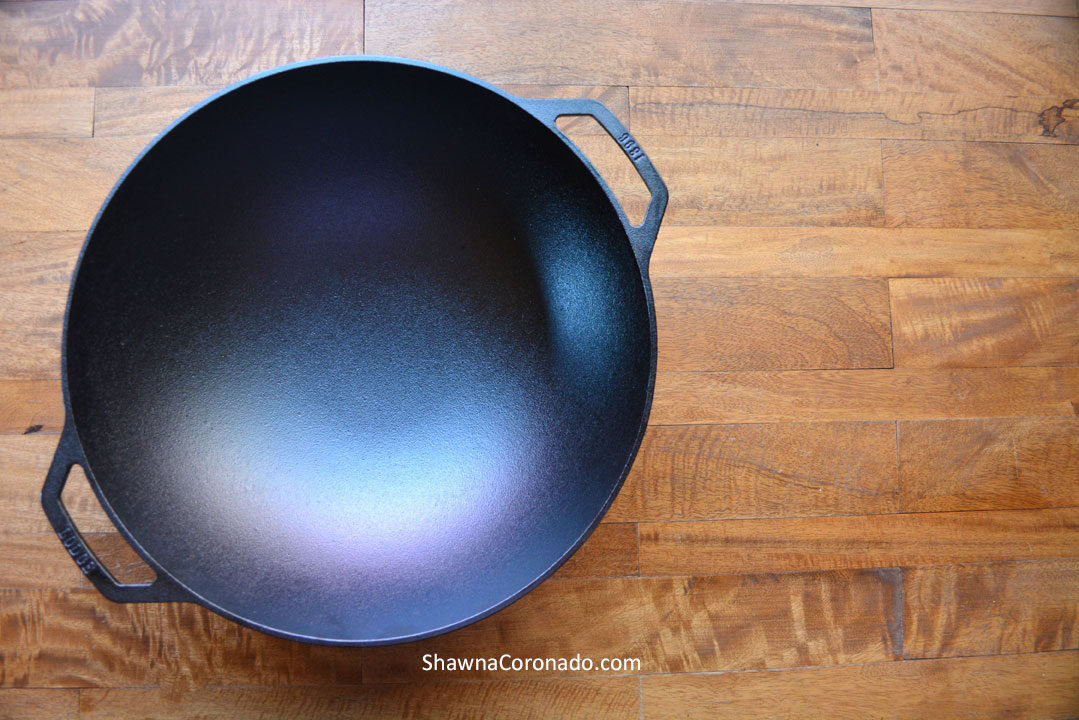
 Get the same wok I have!
This 14-inch 7.25-quart cast iron wok from Lodge Cast Iron is my latest favorite addition to my kitchen because it really works. Truly I LOVE THIS WOK because it is so easy to use, and no, Lodge is not my sponsor
(although – I am an affiliate partner for my product sales, so I really appreciate it if you order).
Click through HERE and order today!!!
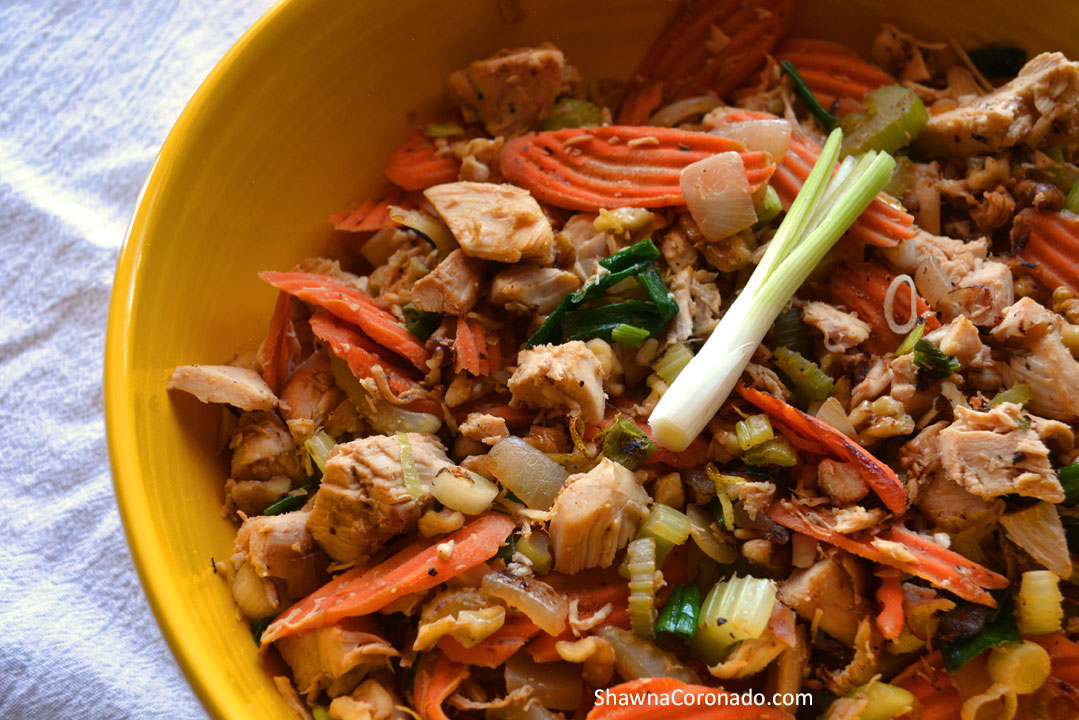 My Favorite Recipe for a Non-Traditional Stir-fry
Chicken Lemon Walnut Stir Fry is absolutely delicious and will be a great recipe to add to your family stir-fry recipes. We are starting off with my absolute favorite non-traditional stir-fry for the pre-seasoned wok (learn how to season a cast iron wok down below) because I adore the flavors in this recipe.
If I have leftover roasted vegetable, I often toss it in with the stir-fry. The reason I put the lemon juice in last is because iron skillets lose their seasoning with acid, so it is better to put strong acids on once the food is out of the pan. If you want to learn how easy it is to zest a lemon, check it out here. Make this Chicken Lemon Walnut Stir Fry recipe with pre-cooked chicken such as rotisserie chicken OR raw chicken; both are delicious!
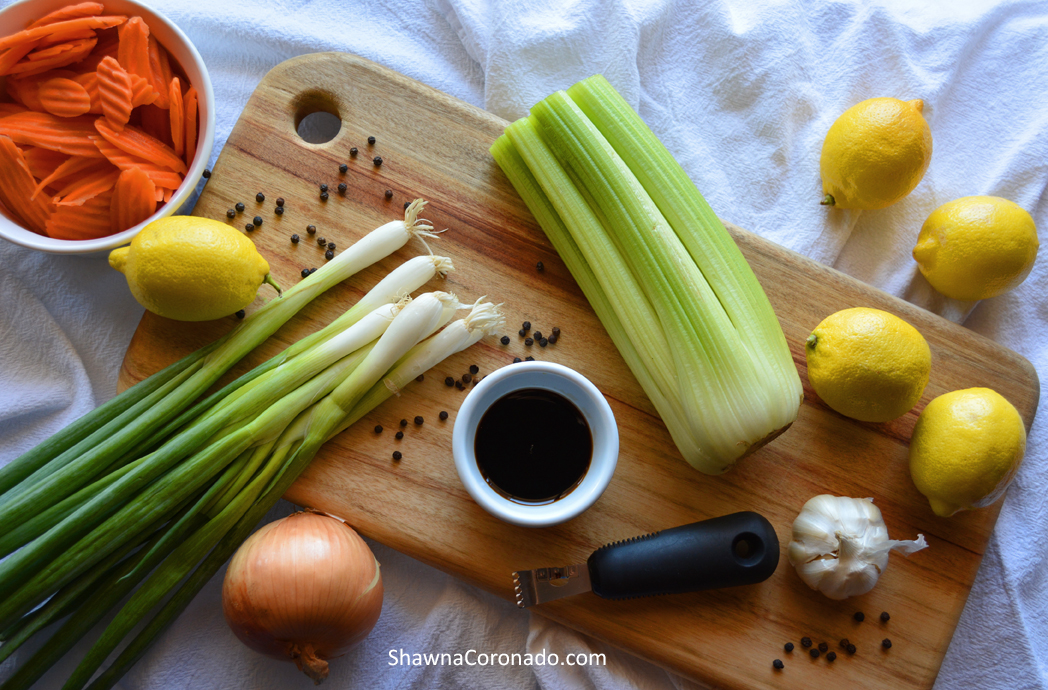
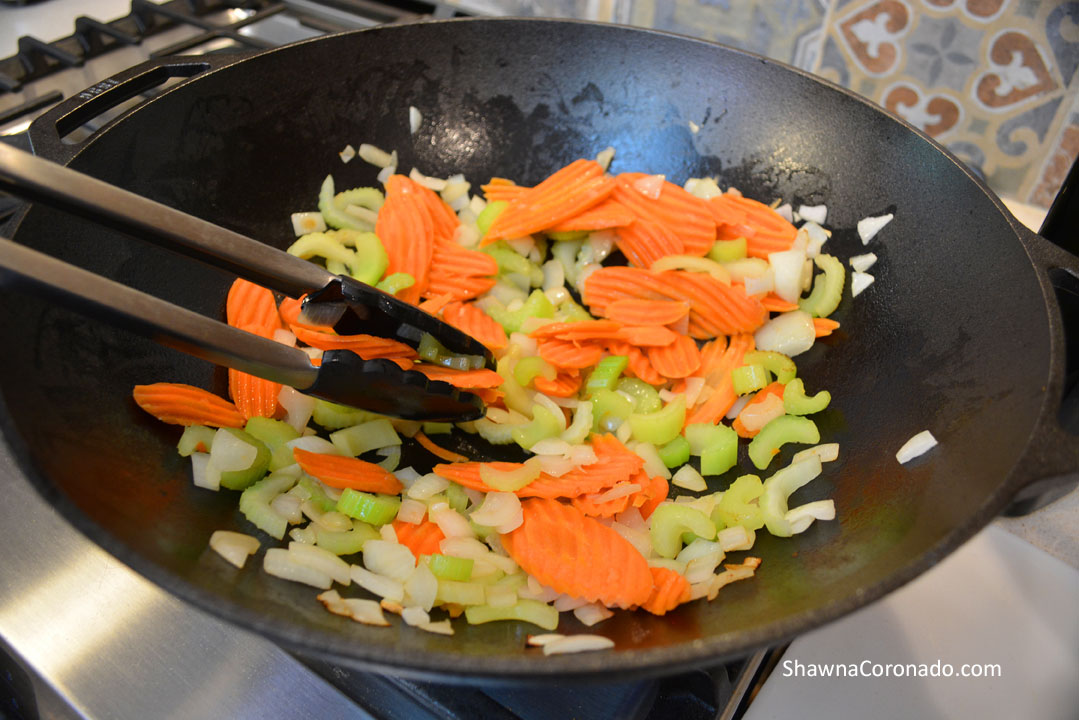
 Print Add to Collection Go to CollectionsChicken Lemon Walnut Stir Fry#wprm-recipe-user-rating-1 .wprm-rating-star.wprm-rating-star-full svg * { fill: #343434; }#wprm-recipe-user-rating-1 .wprm-rating-star.wprm-rating-star-33 svg * { fill: url(#wprm-recipe-user-rating-1-33); }#wprm-recipe-user-rating-1 .wprm-rating-star.wprm-rating-star-50 svg * { fill: url(#wprm-recipe-user-rating-1-50); }#wprm-recipe-user-rating-1 .wprm-rating-star.wprm-rating-star-66 svg * { fill: url(#wprm-recipe-user-rating-1-66); }linearGradient#wprm-recipe-user-rating-1-33 stop { stop-color: #343434; }linearGradient#wprm-recipe-user-rating-1-50 stop { stop-color: #343434; }linearGradient#wprm-recipe-user-rating-1-66 stop { stop-color: #343434; }A delicious lemony walnut stir fry filled with vegetables and full flavor. The recipe does not require soy and can work with either pre-cooked rotisserie chicken pieces or raw chicken. My favorite big taste quick-cook delight for dinner!Course Main CourseKeyword carrots, celery, chicken, coconut aminos, iron skillet, lemon, rotisserie chicken, walnut, wok, zestAuthor Shawna CoronadoEquipment1 cast iron wok or skilletIngredients3 boneless chicken breast or 6 cups pre-cooked chicken, cut into bite-sized pieces3 tsp high smoke point oil such as avocado oil (see suggested list below)2 cups carrots, chopped in rounds or slices1 1/2 cups celery, chopped in slices1 yellow onion, diced3 green onions, diced1 cup walnuts, chopped2 lemons, juiced and zested2 tsp organic coconut aminos (or soy sauce if you can have soy – not required)ground pepper to taste1 cup cauliflower rice, brown rice, or quinoa (not required)InstructionsCut and measure all foods before heating pan and have ready to toss into mixture.Heat oil in wok over medium heat. The pan is ready when you place a few drops of water in the pan and it pops and sizzles on the pan. If it evaporates quickly, then the pan is too hot.Add raw chicken and cook until browned BEFORE you add vegetables, but if using pre-cooked chicken, add chicken AFTER vegetables are cooked.Put carrots, celery, and yellow onion into wok, stirring and cooking until golden and cooked to your preferred tenderness.Add green onions and walnuts, heating through.Place lemon zest (and pre-cooked chicken, if you did not use raw chicken) in pan and toss quickly until warmed through.Turn off heat. Add coconut aminos or soy sauce (or don’t if you prefer it without a soy flavor – you might add salt instead).Place in serving bowl, then drizzle the juice from the two lemons over the mixture and ground pepper to taste. Toss vigorously.Serve over cauliflower rice, brown rice, or quinoa. Benefits that Make Cooking in a Cast Iron Wok Healthier for You
Cooking in cast iron can be beneficial and healthy. Below is a list of reasons why cooking in a cast iron wok can be better for you.
1. Use Less Oil –A properly seasoned cast iron wok uses less oil than other types of frying pans, but contains more food. Less oil equals less fat. While some fats are good for you, many cooking oils are made from saturated fats. This means that using less can be healthier.
 2. Versatile Cooking –
 Hot woks are typically used for steaming, stir-frying, and braising. A wok is also excellent for low temperature cooking like simmering and sweating onions or garlic. While I cook with the iron skillet on the stove, I also use the wok for creative salads and other side dishes using varying temperatures.
3. Even Cooking –When cooking with a sauté pan a hot spot develops at the center of the pan which makes for uneven cooking. A wok gets hot and stays hot, both the center and the sides. This heat enables you to cook quickly and evenly by moving the food around within the pan.
4. Cast Iron Woks or Pans Stays Hot –Once the wok reaches a hot temperature, the heat stays there. Once you are done cooking, the food will stay warm because the pan holds the heat for quite a while.
5. Cook in 8 Minutes or Less –It is very easy to cook an entire meal in a wok in 8 minutes or less. This makes it an excellent candidate for your kitchen if you are following The 8 Minute Method.
6. Non-Stick Without Extreme Toxicity –The FDA says that toxic nonstick cookware chemicals called PFAs (per- and polyfluoroalkyl substances) are contaminating our kitchens and our national water and food supply. With this in mind, the FDA is discouraging use of non-stick products with PFAs. These toxic substances have been found in nearly 98 percent of the American population. Cast iron can be seasoned, which creates a non-stick barrier when cooking. American cast iron skillets and woks do not expose you to these chemicals. Iron can leach into the food you cook in the pan, but the amount is small which means you will get extra iron in your diet (ask your doctor if you are concerned).
.
Get the same wok I have!This 14-inch 7.25-quart cast iron wok from Lodge Cast Iron is my latest favorite addition to my kitchen because it really works. Truly I LOVE THIS WOK because it is so easy to use, and no, Lodge is not my sponsor
(although – I am an affiliate partner for my product sales, so I really appreciate it if you order).
Click through HERE and order today!!!
Cast iron woks and pans are sometimes seasoned and sometimes not. If the pan is a silver-gray color, chances are it has not been seasoned. Most seasoned pans appear black or dark colored.
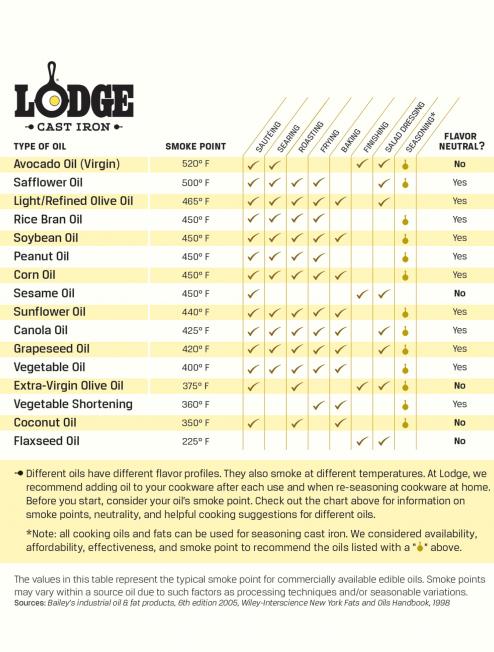
The base cooking oil for a wok or cast iron pan of any sort should have a high smoke point. Below is a guide from the Lodge Cast Iron company as to which oils might be best. What you choose depends on your allergies and health needs, and of course, flavor preference.
Allergies and Animal Fat in the WokBecause I am allergic to peanut oil and cannot have corn or soybean oil, I typically use avocado oil or light-colored refined olive oil. To be clear, a refined olive oil IS NOT THE SAME as extra-virgin olive oil.
Animal fat, such as lard, can be used regularly in your cooking. However, if you put your cast iron up for a while, the animal-based fats that are layered on the pan can go rancid and be harmful for your health. With this in mind, I do not recommend using animal fat as a first choice.
While seasoning and hot-cooking in a wok you will need a high smoke point oil, it is perfectly okay to add sesame oil or another uniquely flavored oil in your cooking as an additional flavor profile. Be sure you use a higher smoke point oil for the basic cooking process.
What does Seasoning a Pan Mean?When I say “season” I mean to apply a layer of oil that is baked onto the cast iron through polymerization. That’s a fancy word that describes the process of molecularly bonding oil to iron. Without that layer of magical carbonized oil, cast iron cookware will rust and corrode.
Seasoning gives your cookware a quick-release finish that makes your pan non-stick in nature. The more you use your cast iron, the more that layer builds up. The pan will become darker and smoother over time.
How do You Season and Maintain a Cast Iron Wok or Cast Iron Pan?According to Lodge Cast Iron, a cast iron product can be used for generations if seasoned properly. Purchasing a cast iron skillet or wok is like investing in your family – which is one of the reasons I love my wok so much.
Another reason is that I do not have to lift the wok while cooking. When I use flat skillets, I usually have to lift the skillet ONE-HANDED at the end to tilt the hot food out. The sides are not tall enough to scoop out food easily as it falls over the side. This lifting has hurt my osteoarthritic joints in the past and I have burnt myself a couple times.
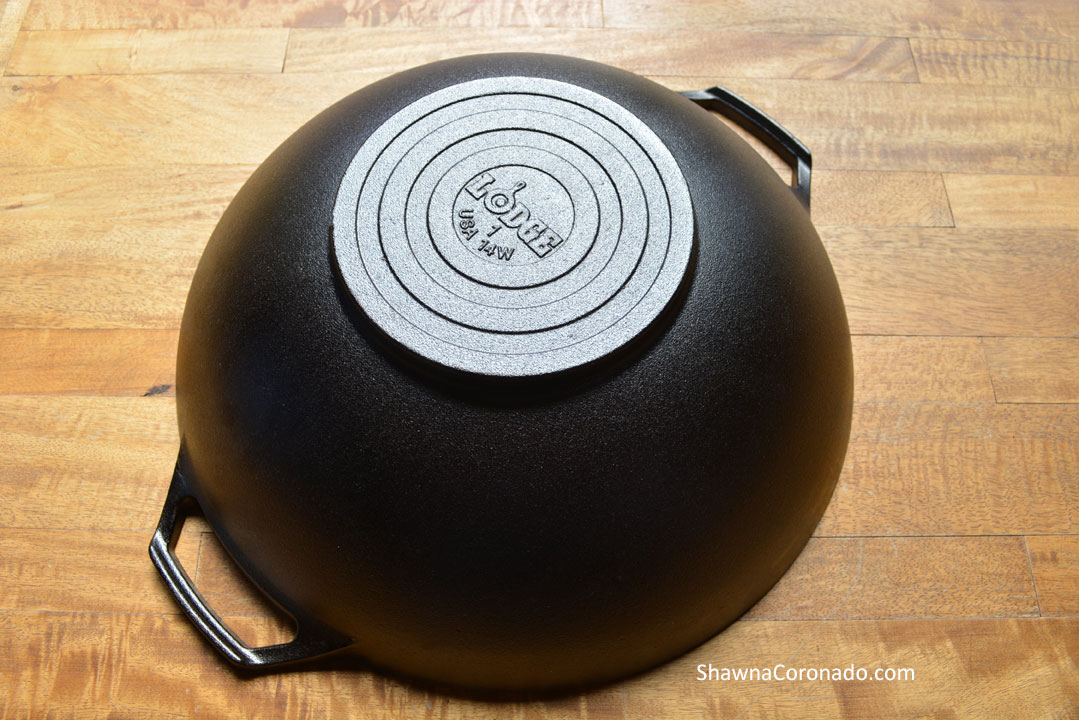
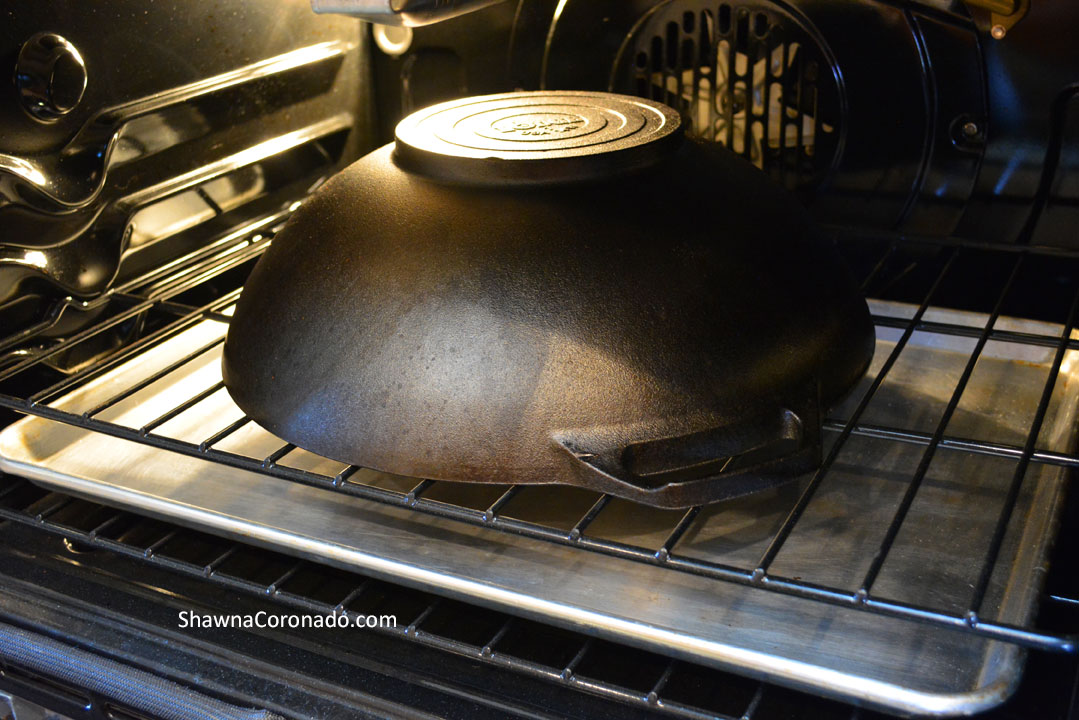
My 14-inch 7.25-quart cast iron wok is definitely heavier than most pans. Because my specific wok has a flat bottom (see below), I can lift it up two-handed before I start cooking, place it firmly on my cooktop, cook, then use tongs or a scoop to get the food out. Once cooking is done, I can move the pan two-handed after it cools to clean it.
 Steps to Season and Maintain a Cast Iron Wok or Pan
If you have a new pan that needs to be seasoned for it’s first use, a pan that had its seasoning eaten off with food acids, or if you are restoring a rusty cast iron pan, you will need to season the pan fully.
Step 1 – Clean your cast iron panUsing warm, soapy water, scrub the pan well. Be sure to get any cooked bits, rust, and particles off the pan. Rinse well and hand dry with a dry towel (do not air dry).
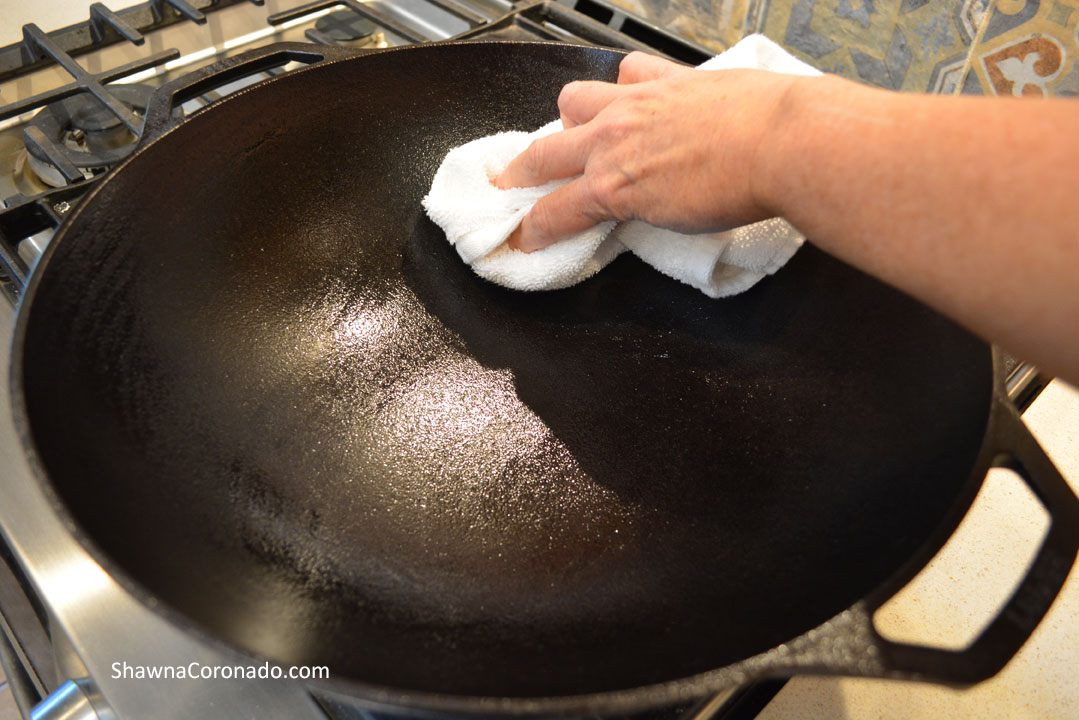
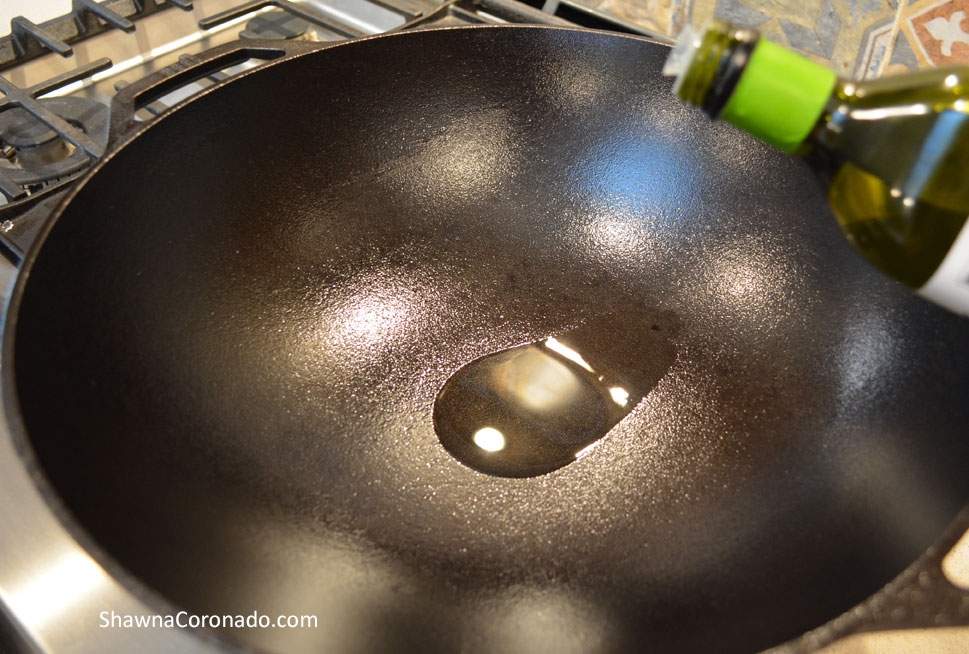 Step 2 – Apply a recommended oil to cast iron
Apply a very thin layer of a recommended oil. The oil should have a very high smoke point. Place the oil on the inside and the outside of the pan with a soft cloth or paper towel. Too much oil will leave the pan sticky and gummy. Use a very thin layer.
 Step 3 – Bake the pan upside down in the oven and let cool
Heat an oven to 450 to 500 degrees Fahrenheit (232 to 260 degrees Celsius). Put a sheet of aluminum foil or a very large baking sheet on the bottom rack in order to catch any oil drips. Then set the iron pan upside down in the oven on a rack. Bake for 60 minutes. Allow to cool in oven. The pan is now ready to use.
 Step 4 – Cast iron maintenance
Every time you cook with the pan you should clean, dry, and coat with a thin layer of oil. The process is very easy. Just scrub the pan with salt and a nylon brush if it needs cleaning, rinse with water, dry by setting on top of the stove for a few moments on a low temperature, then apply a very thin layer of oil, let cool on top of stove, then put away after it is cool.
What Should You NEVER do with Your Cast Iron Pan or Wok?While iron cookware might look indestructible, the truth is it can corrode and wear like any other type of iron. In order for a pan to last-and-last, it is important to keep the pan seasoned at all times.
 Do NOT add acids to the wok!
Acids like vinegar, soy sauce, citrus juice, tomato sauce, tomatoes, or peppers should not be regularly used in your pans because it will eat away at the seasoning, eventually removing it. Then you will have to re-season the pan in order to preserve the special seasoning. If you need to add more acidic ingredients, try adding the acids last and in small quantities.
Do NOT scrub the seasoning off!Another thing to avoid is heavy scrubbing with harsh detergents. While a little soap and water will not hurt the pan, heavy scrubbing with lots of soap or detergent is not a good idea. If you have something on the pan, try rinsing with water and giving it a scrub with a nylon scrub brush first.
The best way to season your pan is to cook with it as often as possible using recommended cooking oils. Every time you cook, you are adding another seasoning layer to the pan.
What is the Best Thing to Cook in a Wok? My secret is to break the rules and find out – here is a list!Like many people with inflammatory and auto-immune conditions, I can no longer have soy. While not all Asian-style dishes have soy in them, the question remains of “What CAN you cook in a wok that does not have soy?” The easy answer to this is “Anything you want!” I cook all kinds of food in my cast iron wok, not just Asian-style food. The only foods I avoid are strong acid-based foods.
Soy-Free Stir-Fry –My parents used to famously cook this dish they called “Chinese Chicken” in a hot pan. I remember it well because it was really the first Chinese-anything I ever tasted. It had a lot of garlic and soy sauce. Since I no longer eat soy regularly, I have found organic coconut aminos as a good substitute. Another thing I do – just leave the soy out of the recipe entirely. Recipes without soy sometimes need a little salt, but otherwise, taste great.
 Acid-Free Salad –
SALAD?!?! WHUT? Am I crazy? No! I cannot have heavy acids and traditional salad dressing has a lot of acid. Tossing salads works great with a wok. Place a bit of smooshed garlic and grated ginger in the base of the wok with salad oil, then heat on low. Just enough to sweat the garlic and ginger and release the flavor in the oil. Then turn off the heat. Add tahini, a bit of maple syrup, salt and pepper, then stir. Loosen the dressing up with a little water and whisk. Throw mixed greens directly in the cooled mixture. Toss. Blow your mind GOOD!
Soup or Stew –Start with cooking vegetables and meats in the base of the pan with a tiny bit of oil. Stir fry the veg and meats first, then add broth, seasonings, and simmer. It’s a quick soup. Braise meats in the wok before simmering stew slow and low for lots of flavor.
Scrambled Eggs –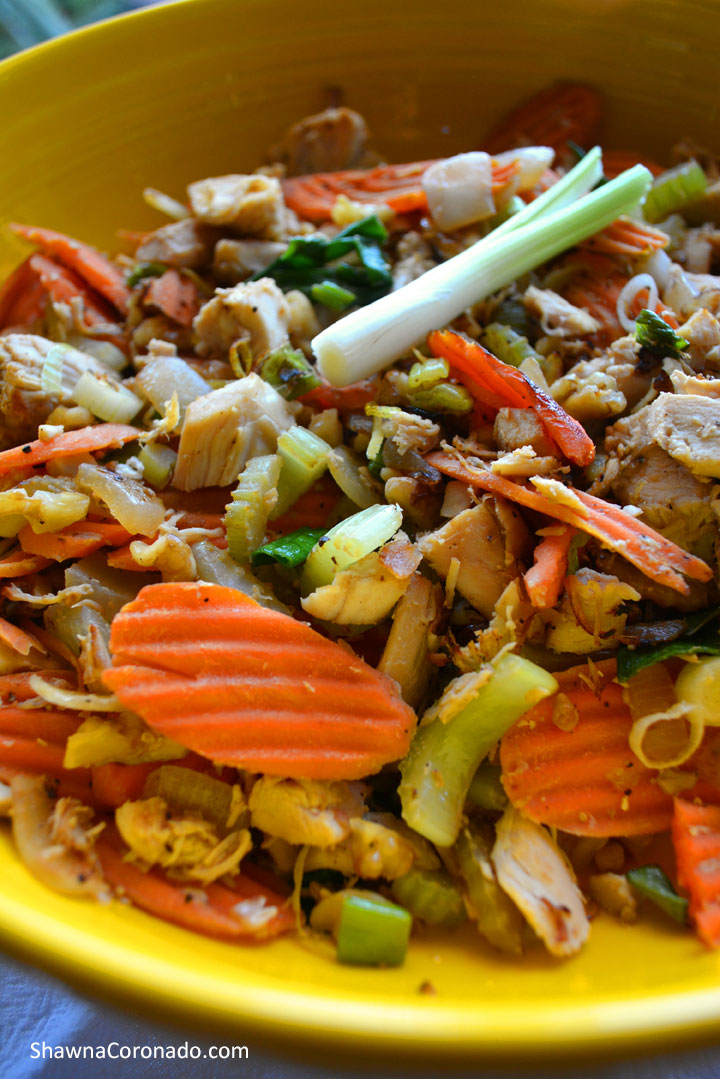
Super delicious scramble! I love to scramble up eggs with my leftover roasted vegetables and a little garlic. In fact, because the seasoning in my cast iron wok has some flavor it transfers to the cooking, the eggs taste absolutely delicious.
Burgers and Sausages –I love a good turkey burger or sausage. It’s easy to cook up if you place the meat around the edges of the pan. Toss in onions, mushrooms, or vegetables in the base of the pan and cook them in the center while the meat is cooking around the edge.
Steam Vegetables and Seafood –Fill the wok with several inches of water and get it boiling. Then place a bamboo steamer or aluminum steamer over the top. Plop in fish, seafood, or vegetables and away you go.
Pop Popcorn –Seriously. Popcorn. While I am corn-free, many members of my family are not and a wok is absolutely perfect for popping popcorn because of the quick heat that builds at the base of the pan.
There you have it – Modern Cast Iron Wok Cooking 101. Delicious and flavorful cooking – fast – in the kitchen is now at your fingertips.
.
Get the same wok I have!This 14-inch 7.25-quart cast iron wok from Lodge Cast Iron is my latest favorite addition to my kitchen because it really works. Truly I LOVE THIS WOK because it is so easy to use, and no, Lodge is not my sponsor
(although – I am an affiliate partner for my product sales, so I really appreciate it if you order).
Click through HERE and order today!!!
The post MODERN CAST IRON WOK COOKING 101 – Ultimate Guide appeared first on Shawna Coronado.
May 26, 2022
How Do You Make a Walking Schedule?
Forming a walking schedule can seem silly at first – just get out and walk, right? How hard can it be? Well.. the truth of the matter is that we all have incredibly busy lives; raising children, working full-time, and hustling to stay on top of all the worries of the world. These busy schedules often lead to starting up with a walking plan, but soon dropping it because you do not have time for an hour of walking every day.
The CDC recommends regular walking for better health. Forming a walking schedule can KEEP YOU ON PLAN, encourage you to walk year round, and help you keep your energy up and feel better every day. It makes sense to create a walking schedule. It can help you from falling off the walking wagon.
 Why is Walking Daily Important?
Walking is very important. You can cut your risk for heart disease by 23%, simply by walking 23 minutes per day. Letting yourself sit around in front of the television without exercise can increase your risk of virtually all inflammatory diseases such as diabetes, high blood pressure, and heart disease. In order to reduce your risk of disease, just increase your physical activity. No fancy exercise is needed. Walking 150 minutes per week (according to the CDC) can be accomplished with brisk walking.
Another benefit of walking is an increase in positive mental health and decrease in depression and anxiety. Whenever I feel a little blue, I know it is time to up the walking for a bit. It increases endorphins and mood. In these challenging times a good walk can make a huge difference.
 How to Schedule Daily Walking
In order to best understand how many steps you are taking daily and how many minutes you are walking, it is best to track your steps. You can get a tracker watch (I use a Samsung variety) or you can have your cell phone help you track with a walking app. I started out with a Fitbit and it worked just fine, so find a tool that works as a pedometer for you.
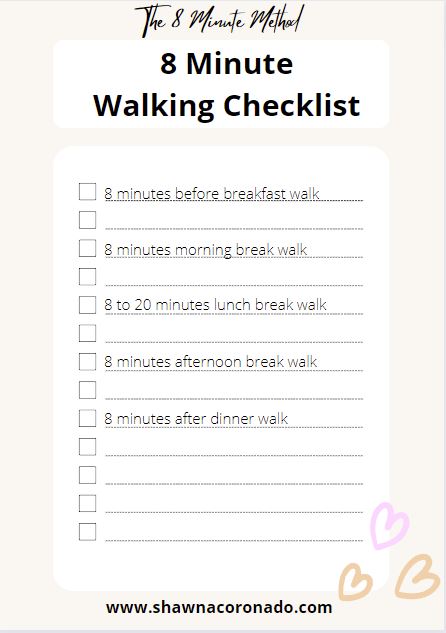 The 8 Minute Walking Schedule Checklist
Keep a daily schedule checklist. I started with a simple walking checklist (see right). Instead of walking for hours at a time, which I find completely unrealistic with my own daily schedule, I began with 8 minutes at a time.
Use The 8 Minute Method as a starting point. At first I walked before breakfast, during lunch break, and at my afternoon work break. Toss on supportive shoes and walk for ONLY 8 MINUTES. If you do this 5 times per day, you are getting nearly 40 minutes of walk time in every day. Then I began increasing the the frequency and time depending on my schedule.
Beginner WalkingDepending on your physical condition, a beginner walk might be a brisk walk for 8 minutes several times per day for the first month or so, gradually increasing. If you have balance issues and cannot walk briskly, walk slowly. Do this for 30 days before increasing to intermediate. The rule is 30 days to a good habit. This is your first 30 days of goodness for your body!
Intermediate Walking ScheduleIf you feel strong and ready to increase your times, try taking more breaks during the day to walk. It’s only 8 minutes, so a walking work break is usually no problem. Increase your walking time at lunch if this is comfortable for you. No time for a longer walk at lunch? Do it after work. Gradually increase how many breaks you take over several months.
Advanced WalkingOnce you fall into the intermediate walking schedule with ease, it is time to take it up a notch. Try walking up and down stairs for your 8 minute breaks. Increase your walking speed for more intensity. Walk with a 10 pound backpack. Use hand weights and swing your arms. It’s wholly up to your body and your doctors recommendations.
 Ways to Get Motivated to Do Daily Walking
Some days I don’t feel like doing the walking schedule; usually those days are the days I NEED TO WALK THE MOST. Every day is a little more progress towards your walking and wellness goals. There are many ways to encourage yourself to walk –
Listen to music. Popping in ear buds and listening to a strong beat offers fantastic motivation. It can encourage you to enjoy the walking breaks you take.Dog walking. Take your dog or pet for a walk – they need it as much as you do.Do not send an email. We are, particularly at work, likely to shoot off an email to get an answer. Why not get up off the desk and walk to ask the question in person? It is a great way to stay moving.Try mall walking. Particularly when you are leaning towards more advanced walks, it is a great idea to go to a mall and walk (mask up for safety). Mall walking offers level ground and a safe place to get your steps accomplished.Invite friends or family. Walking and hiking with friends on the weekend or after work or even during lunch hour, means you will have someone to share the time. Choose a beautiful location.Park a long way away. Running errands? Park your car far out in the lot so it forces you to walk further.Take the stairs. Instead of an elevator, take the stairs. It’s a great way to get more intensity in your walking.Walk the store. Do 5 laps around a store before you start shopping. How Many Steps Per Day Should Your Walking Schedule Include?
This depends on what your doctor or health expert recommends and if you are physically able to walk more or less as recommended. Definitely check with a medical professional before you get started. Then when you do start, do not be put off by all the online misinformation that says you HAVE TO step 10,000 steps per day. This is only a guideline, and a high guideline at that. It turns out that 3,000 to 4,000 steps per day for your walking schedule is what the average American accomplishes.
There was a study done which speaks to step quantity. Researchers discovered that step intensity did not equate lower mortality. There was a 41% lower risk of death for women who took 4,400 steps to 7,500 steps per day. Having a daily walking schedule set can encourage you to stick with both a number of minutes and a number of steps. Understanding how many steps per day you have when you begin your program gives you a goal to work towards.
How often you walk and how many steps you take when you are walking is an individual goal based on your doctors recommendation. Getting started with the first step is the best way to staying regularly active.
The post How Do You Make a Walking Schedule? appeared first on Shawna Coronado.
May 24, 2022
Soy Free Thai Vinaigrette Dressing Recipe
I adore the Soy Free Thai Vinaigrette Dressing Recipe I’ve created for you in this post. It is can be a challenge to find soy-free bottled dressings. Making your own dressing for your favorite salad is a tasty answer to that problem. It takes less than 8 minutes to whip up a dressing. Below is a list of my absolute favorite soy-free ingredients that work in all types of salad dressings.
 Soy-Free Salad Dressing IngredientsExtra Virgin Olive OilSunflower Seed OilCanola OilAvocado OilSesame OilSoy Free MayonnaiseTahiniFresh herbsDried herbsSpicesGarlic and onionsCitrus juiceBalsamic vinegarSherry vinegarApple cider vinegarMustardsHorseradishSalt and pepperAsian Vinaigrette Dressing Recipe
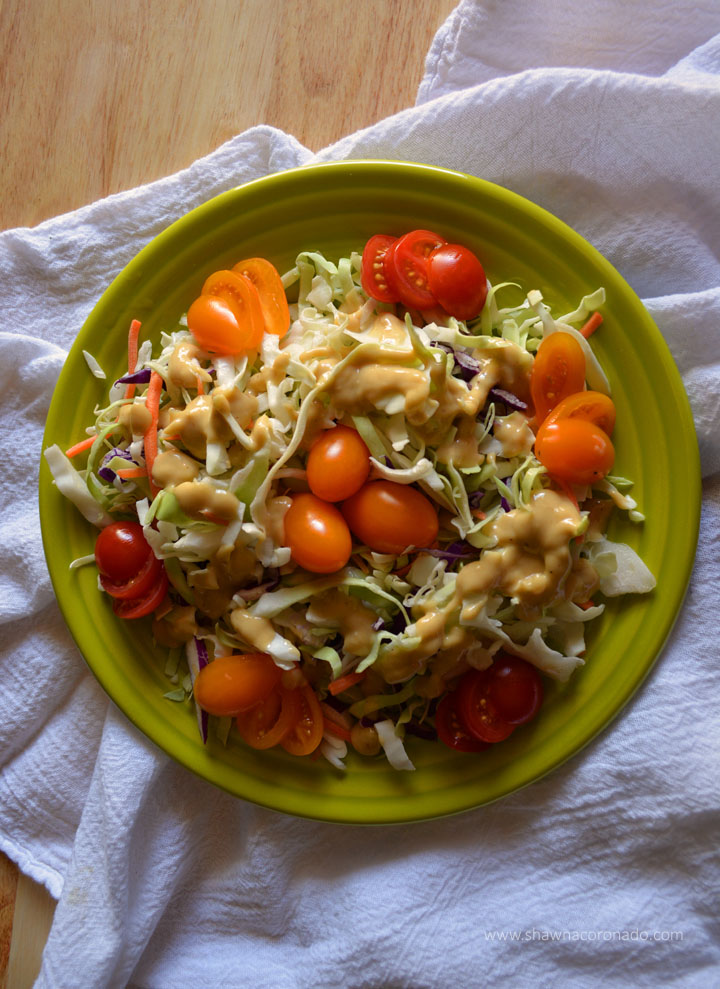
Asian salad dressings are light, spicy, and delicious. I love them but have been struggling for years to find a Thai-inspired dressing at a restaurant without soy and rice vinegar. Make your own in under 8 minutes! You will love the super tasty Soy Free Thai Vinaigrette Dressing Recipe as it has a homemade spice seasoning mix that is quite delicious. Make it in advance to save time. This will impress your guests.
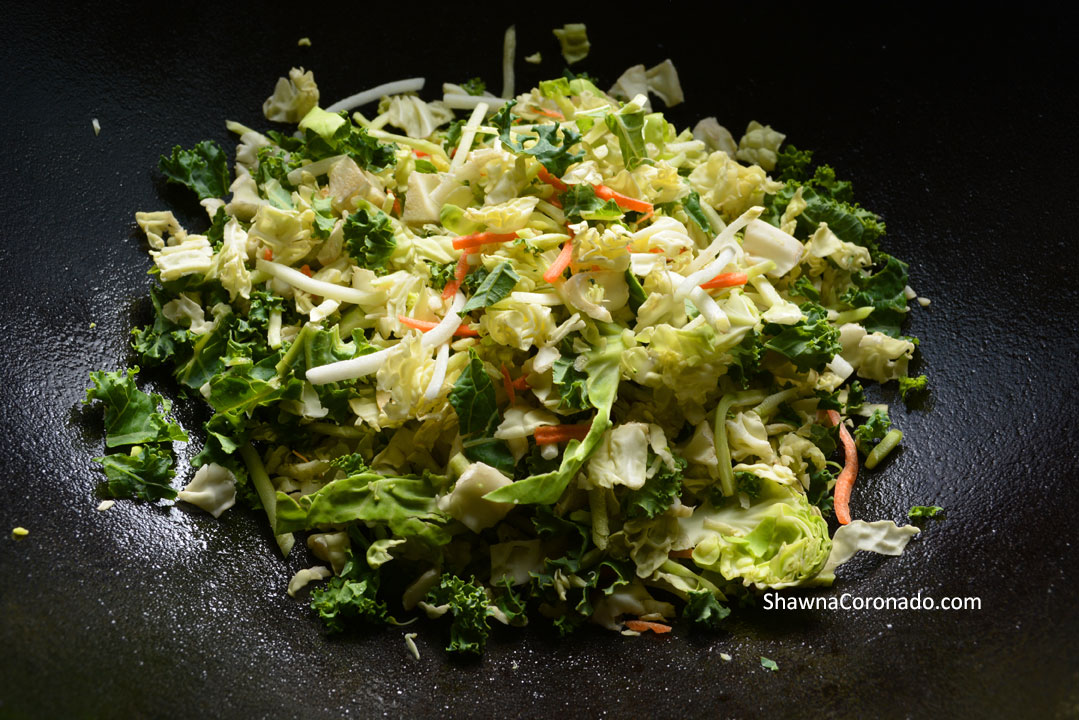
Other Uses For Thai Vinaigrette DressingThe No Soy and Lovin’ It Tasty Thai Vinaigrette Dressing Recipe is yummy over stronger greens like kale and shredded cabbage. It saves well for up to a week in the refrigerator.
How To Meat Marinade
This super-flavorful Soy Free Thai Vinaigrette Dressing recipe works doubly well as a chicken or fish marinade. Place raw chicken or fish in a glass baking dish, pour the dressing over the top, cover, and let marinade between 4 hours to overnight.
Easy Lettuce Wrap
To make an 8 Minute or Less to prep Asian lettuce wrap, tear up a rotisserie chicken, chop some cabbage, carrots, or onions, wrap in lettuce leaves, then drizzle this dressing over it all. Yum!
 Print Add to Collection Go to CollectionsNo Soy and Lovin’ It Tasty Thai Vinaigrette Dressing Recipe#wprm-recipe-user-rating-2 .wprm-rating-star.wprm-rating-star-full svg * { fill: #343434; }#wprm-recipe-user-rating-2 .wprm-rating-star.wprm-rating-star-33 svg * { fill: url(#wprm-recipe-user-rating-2-33); }#wprm-recipe-user-rating-2 .wprm-rating-star.wprm-rating-star-50 svg * { fill: url(#wprm-recipe-user-rating-2-50); }#wprm-recipe-user-rating-2 .wprm-rating-star.wprm-rating-star-66 svg * { fill: url(#wprm-recipe-user-rating-2-66); }linearGradient#wprm-recipe-user-rating-2-33 stop { stop-color: #343434; }linearGradient#wprm-recipe-user-rating-2-50 stop { stop-color: #343434; }linearGradient#wprm-recipe-user-rating-2-66 stop { stop-color: #343434; }A healthy, vegan, gluten-free recipe for a Thai vinaigrette dressing. It is soy-free and dairy-free.Servings 3Calories 146kcalAuthor Shawna CoronadoIngredients4 Tbsp avocado or olive oil3 Tbsp white vinegar (or rice vinegar if you are able to consume grains)1 1/2 Tbsp sesame oil 1 Tbsp sunflower seed butter or almond butter (optional)2 Tbsp citrus juice 2 Tbsp coconut aminos (optional – tastes like soy sauce, I prefer leaving it out of the recipe)1 Tbsp Coconut Thai Spice Seasoning Mix 2 tsp fresh ginger, grated1 fresh garlic clove, mincedSalt and pepper to taste US Customary – MetricInstructionsBlend ingredients togetherin food processor or use a mortar and pestleServe drizzled over salad or as a marinade. Works great on salads made from stronger flavored greens due to the strong flavors in the dressing recipeServe immediately, but will store for a few days if refrigeratedNutritionCalories: 146kcal | Carbohydrates: 7g | Protein: 2g | Fat: 13g | Saturated Fat: 2g | Polyunsaturated Fat: 3g | Monounsaturated Fat: 5g | Sodium: 229mg | Potassium: 124mg | Fiber: 1g | Sugar: 1g | Vitamin A: 33IU | Vitamin C: 3mg | Calcium: 13mg | Iron: 1mg
The post Soy Free Thai Vinaigrette Dressing Recipe appeared first on Shawna Coronado.
Coconut Thai Spice Seasoning Mix Recipe
Coconut Thai Spice is a favorite of mine! On one lonely evening in Philadelphia, I found a little Thai restaurant near my hotel. Their special for the night was a White Fish in Thai Coconut Sauce. After dinner I requested the recipe from the chef and the magic for the sauce was all about the seasoning – my own version of this memory is below.
Both the seasoning mix recipe and fish recipe, below, are fantastic. If you can’t find dried lemongrass on the spice shelf, try looking for it in the tea section. Pure lemongrass tea is dried lemongrass leaves.
Ways to Use Coconut Thai Spice Seasoning MixFish – This delicious Coconut Thai Spice seasoning is fantastic with white fish (see the recipe below). Mix it with a coconut milk sauce. Salad – It is absolutely brilliant in my Soy-Free Thai Vinaigrette Dressing Recipe. The recipe is light, bright, and perfect for any salad.Marinade – Combine 2 tablespoons seasoning mix with 1/4 cup oil and marinate chicken thighs overnight. Bake until the skin is crispy. Absolutely a fresh flavored chicken dish. All the recipes are brilliantly yummo!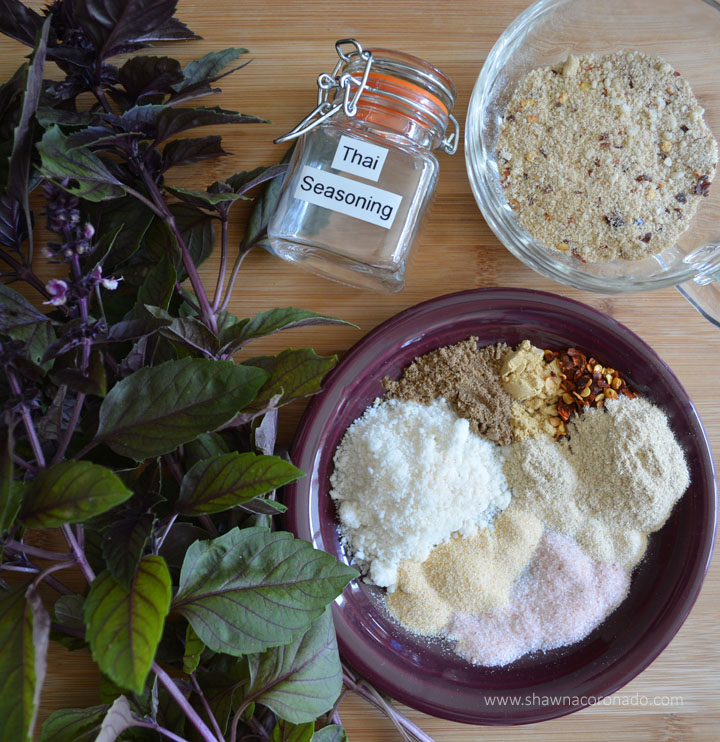
 Print Add to Collection Go to CollectionsCoconut Thai Spice Seasoning Mix Recipe#wprm-recipe-user-rating-3 .wprm-rating-star.wprm-rating-star-full svg * { fill: #343434; }#wprm-recipe-user-rating-3 .wprm-rating-star.wprm-rating-star-33 svg * { fill: url(#wprm-recipe-user-rating-3-33); }#wprm-recipe-user-rating-3 .wprm-rating-star.wprm-rating-star-50 svg * { fill: url(#wprm-recipe-user-rating-3-50); }#wprm-recipe-user-rating-3 .wprm-rating-star.wprm-rating-star-66 svg * { fill: url(#wprm-recipe-user-rating-3-66); }linearGradient#wprm-recipe-user-rating-3-33 stop { stop-color: #343434; }linearGradient#wprm-recipe-user-rating-3-50 stop { stop-color: #343434; }linearGradient#wprm-recipe-user-rating-3-66 stop { stop-color: #343434; }Coconut Thai Spice is a perfect blend of sweet, savory, salty and spicy. It goes great with beef, chicken, fish, pork or vegetables.Servings 3Calories 31kcalAuthor Shawna CoronadoIngredients2 Tbsp coconut flake powder1 tsp garlic powder1 tsp Salt½ tsp onion powder½ tsp coriander powder½ tsp ground ginger1 tsp crushed red pepper flakes1 tsp dried lemongrassUS Customary – MetricInstructionsCombine all the seasonings, mixing well (or grinding with a mortar and pestle)Place in an air tight jarStore in a cool, dry locationNutritionCalories: 31kcal | Carbohydrates: 3g | Protein: 1g | Fat: 2g | Saturated Fat: 2g | Polyunsaturated Fat: 1g | Monounsaturated Fat: 1g | Sodium: 788mg | Potassium: 58mg | Fiber: 1g | Sugar: 1g | Vitamin A: 198IU | Vitamin C: 1mg | Calcium: 9mg | Iron: 1mg Print Add to Collection Go to CollectionsWonderful White Fish in Thai Coconut Sauce#wprm-recipe-user-rating-4 .wprm-rating-star.wprm-rating-star-full svg * { fill: #343434; }#wprm-recipe-user-rating-4 .wprm-rating-star.wprm-rating-star-33 svg * { fill: url(#wprm-recipe-user-rating-4-33); }#wprm-recipe-user-rating-4 .wprm-rating-star.wprm-rating-star-50 svg * { fill: url(#wprm-recipe-user-rating-4-50); }#wprm-recipe-user-rating-4 .wprm-rating-star.wprm-rating-star-66 svg * { fill: url(#wprm-recipe-user-rating-4-66); }linearGradient#wprm-recipe-user-rating-4-33 stop { stop-color: #343434; }linearGradient#wprm-recipe-user-rating-4-50 stop { stop-color: #343434; }linearGradient#wprm-recipe-user-rating-4-66 stop { stop-color: #343434; }This is a wonderful fish dish for any occasion. It's easy to make, and it's healthy too!Servings 3Calories 756kcalAuthor Shawna CoronadoIngredients2 pounds white fish, skinless and cut into 2 inch pieces4 limes, juiced4 cloves garlic, crushed2 Tbsp Coconut Thai Spice Seasoning2 Tbsp olive oil1 large onion, diced4 tomatoes, chopped14 oz can of coconut milk6 sprigs fresh cilantro, choppedSalt and pepper to tasteUS Customary – MetricInstructionsMix juice, garlic, and Thai Spice in a bowl, marinate fish for two hoursHeat oil in pan and sauté vegetables until slightly tenderStir in coconut milk, fish, and marinade, letting simmer covered for about 20 minutesSalt and pepper to taste, and serve with chopped cilantro sprinkled over the topNutritionCalories: 756kcal | Carbohydrates: 44g | Protein: 70g | Fat: 40g | Saturated Fat: 31g | Polyunsaturated Fat: 2g | Monounsaturated Fat: 4g | Cholesterol: 151mg | Sodium: 1050mg | Potassium: 2487mg | Fiber: 12g | Sugar: 21g | Vitamin A: 978IU | Vitamin C: 86mg | Calcium: 272mg | Iron: 10mgTop Benefits of the Herb Lemongrass
 Lemongrass is an herb from in India. You can grow it in your garden. There are many medical benefits that include anti-inflammatory properties. Find it in the Coconut Thai Spice Seasoning Mix recipe. Lemongrass is great as a tea. Lemongrass prevents yeast and bacteria growth. Scientific studies reveal that lemongrass contains many substances. These substances include vitamins, quercetin, antioxidants, flavonoids, and phenolic compounds. These ingredients can be beneficial for treating the below conditions –
Stomachache and digestive problemsRheumatism and achy jointsRelieve painReduce high blood pressure and heart diseaseReduce cholesterolRelieve bloatingCertain skin conditionsFor higher dosing or daily tea drinking, please consult with your doctor or health professional. It can be a powerful diuretic in tea form. Cooking quantities are very small in the Coconut Thai Spice Seasoning Mix. If you are concerned, your medical team can advise.
The post Coconut Thai Spice Seasoning Mix Recipe appeared first on Shawna Coronado.
May 19, 2022
Lemony Tuna Celery Dip Recipe
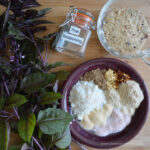
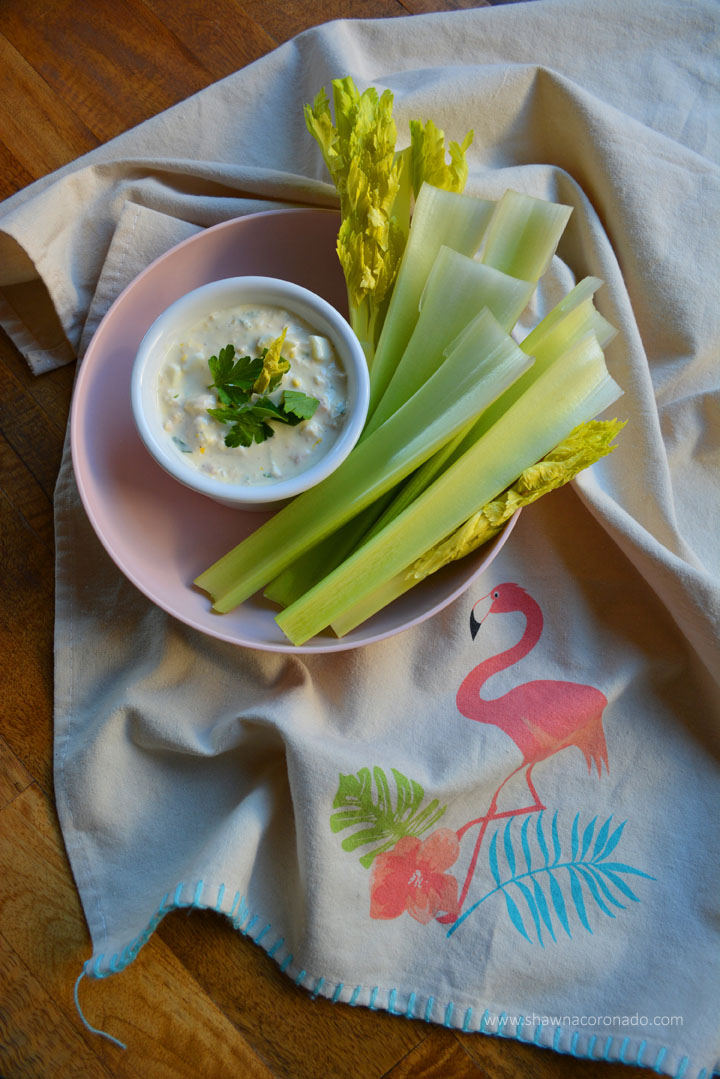
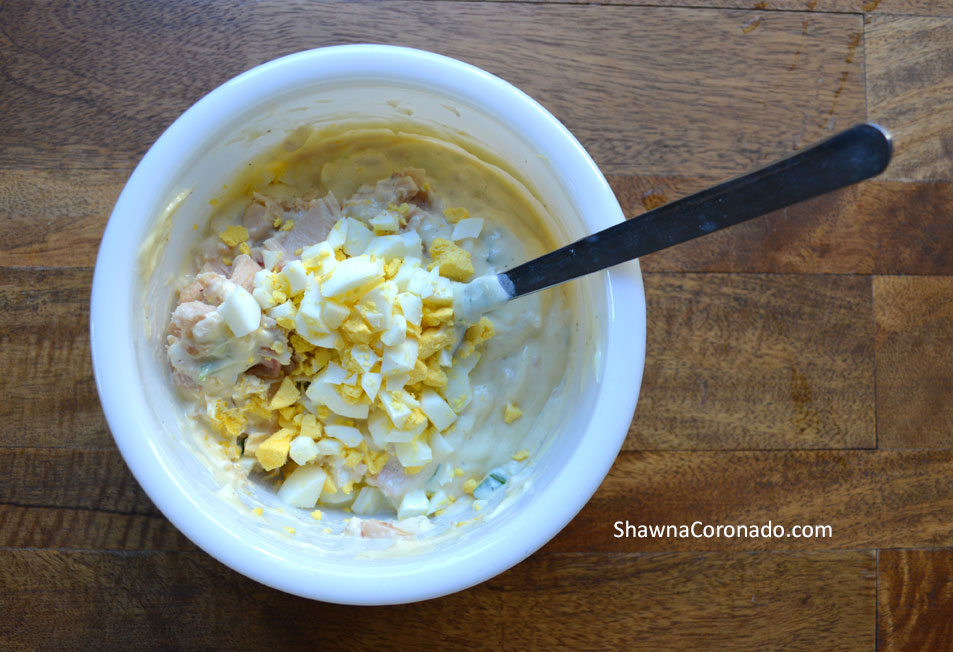
This Lemony Tuna Celery Dip Recipe brings back memories of my grandmothers Sunday dinner tuna salad recipe. Best yet – it can be put together in UNDER 8 MINUTES! While we tend to think of tuna salad as a lunch-only option, the truth is it is good any time. If I have leftover tuna salad from the day before, I’ll often have it for breakfast. The recipe below is great adaptation of the traditional tuna salad. When placed in romaine lettuce leaves for “lettuce wraps” or use the tuna dip to stuff in celery for celery boats. This dip is also fantastic with grilled romaine lettuce as a dipping tool – YUM!
Lemony Tuna Celery Dip Recipe is GREAT as a Dip!As a snack or appetizer, Lemony Tuna Celery Dip Recipe makes a lovely dairy-free, a grain-free dish that is beautiful. Be generous with the lemon zest for some extra oomph (I love my microplaner to grate lemon zest!), and if you want to lower the fat content, reduce the mayo content. Customize it based on your family’s taste preferences.
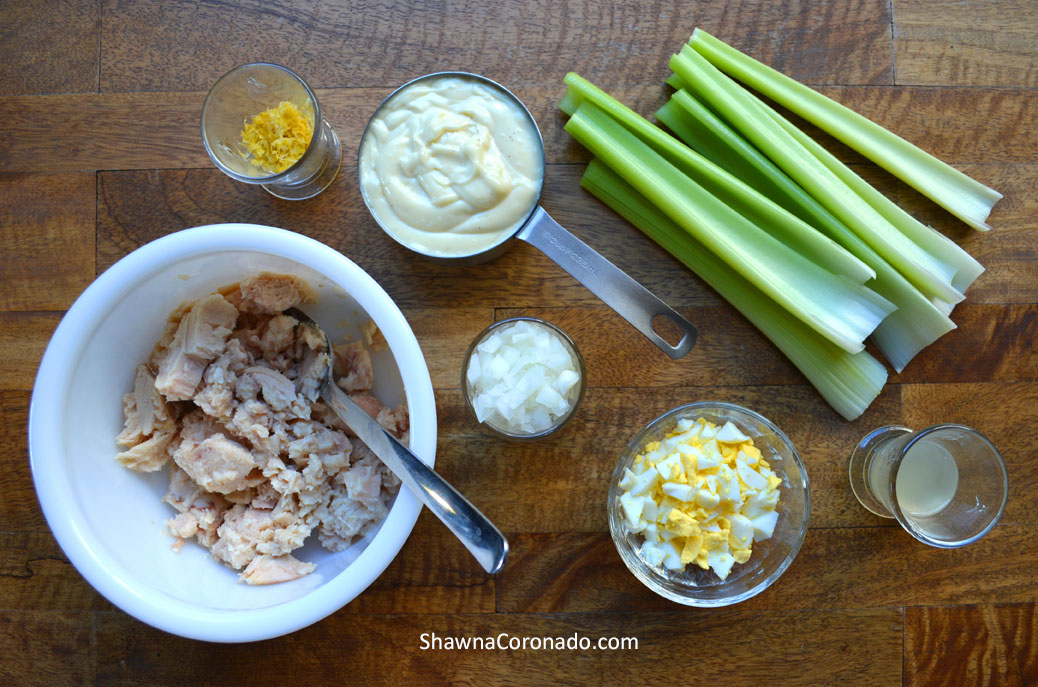
 Print Add to Collection Go to CollectionsLemony Tuna Celery Dip Recipe#wprm-recipe-user-rating-5 .wprm-rating-star.wprm-rating-star-full svg * { fill: #343434; }#wprm-recipe-user-rating-5 .wprm-rating-star.wprm-rating-star-33 svg * { fill: url(#wprm-recipe-user-rating-5-33); }#wprm-recipe-user-rating-5 .wprm-rating-star.wprm-rating-star-50 svg * { fill: url(#wprm-recipe-user-rating-5-50); }#wprm-recipe-user-rating-5 .wprm-rating-star.wprm-rating-star-66 svg * { fill: url(#wprm-recipe-user-rating-5-66); }linearGradient#wprm-recipe-user-rating-5-33 stop { stop-color: #343434; }linearGradient#wprm-recipe-user-rating-5-50 stop { stop-color: #343434; }linearGradient#wprm-recipe-user-rating-5-66 stop { stop-color: #343434; }Lemony Tuna Celery Dip Recipe has a great lemony bite. This is a great dip recipe that is a nice change from the ordinary for parties and entertaining. Servings 3Calories 496kcalAuthor Shawna CoronadoIngredientsCelery sticks, washed and ends cut2 – 5 oz cans albacore tuna packed in water¾ to 1 cup soy-free or vegan mayo1 hard-boiled eggs, chopped2 Tbsp onion, finely chopped1 Tbsp slivered Italian parsley (optional)1 Tbsp fresh lemon juice1 tsp lemon zestSalt and pepper to tasteChopped fresh Italian parsley for garnishUS Customary – MetricInstructionsCombine tuna, mayo, eggs, onion, slivered parsley, lemon juice, lemon zest, salt and pepper in a bowlServe on platterRefrigerate leftoversNutritionCalories: 496kcal | Carbohydrates: 2g | Protein: 18g | Fat: 46g | Saturated Fat: 8g | Polyunsaturated Fat: 26g | Monounsaturated Fat: 11g | Trans Fat: 1g | Cholesterol: 113mg | Sodium: 627mg | Potassium: 212mg | Fiber: 1g | Sugar: 2g | Vitamin A: 249IU | Vitamin C: 5mg | Calcium: 27mg | Iron: 1mg
 Is Mayonnaise Bad For You?
The Lemony Tuna Celery Dip Recipe has a strong portion of mayonnaise content and mayo is definitely heavy with fat content. But is it actually BAD for you? This is one of the questions I get quite often in relationship to healthy cooking.
According to VeryWellfit.com’s review expert, Marisa Moore, RDN, MBA, “Depending on the type of diet you follow, mayo can be considered good or bad for you.” Mayonnaise is high-fat and calorie-dense. The good news is mayo is mostly unsaturated fat, which doctors would recommend over saturated. If you are on a low-carb or ketogenic diet this condiment can be used more liberally. If you are watching fat consumption, then nutritionists might recommend a mayo substitute or reduced-fat mayo instead of a full fat variety.
 Is Vegan Mayonnaise Good For You?
It depends. Vegan Mayonnaise often has less fat calories than traditional mayonnaise. While this sounds like a good thing, and vegan mayonnaise can be used as a substitute if needed, some vegan mayonnaise products are full of artificial fillers. Often fillers are higher in carbohydrates and artificial ingredients. A good vegan mayo which has no additives or preservatives is Vegenaise. In my opinion it tastes better than regular mayo and has a delightfully smooth texture.
The post Lemony Tuna Celery Dip Recipe appeared first on Shawna Coronado.
May 12, 2022
How to Build a Secret Purple Side Yard Garden
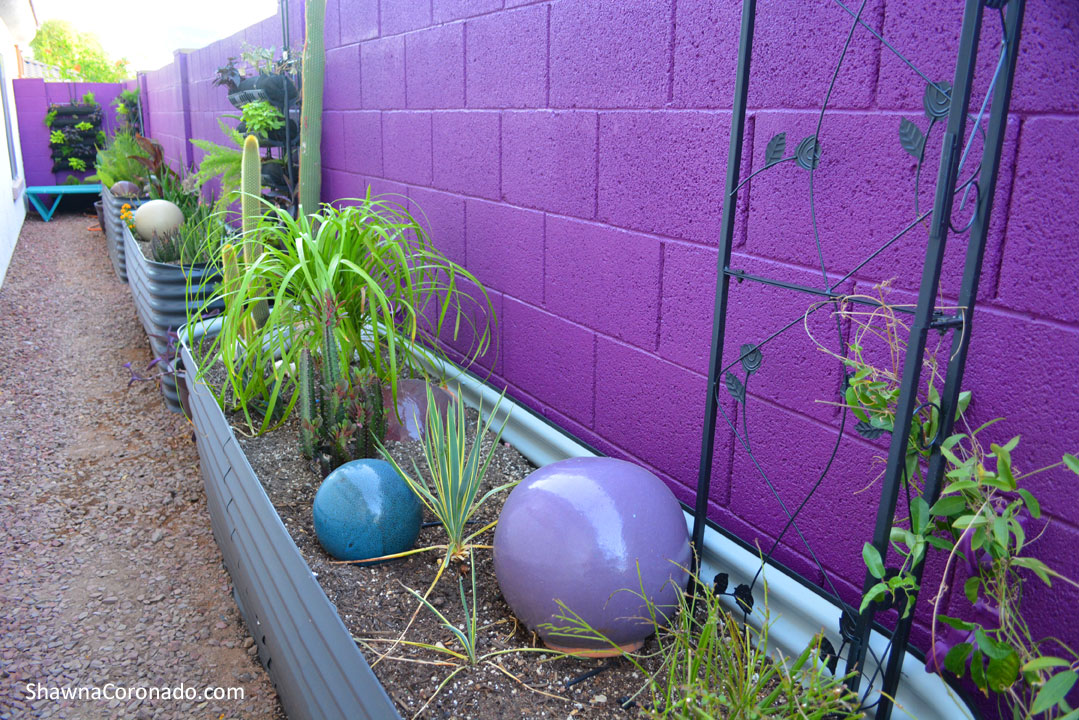
A secret purple side yard garden sounds like madness and magic, right? I mean PURPLE? Am I kidding you? The answer is a BIG FAT NOPE! Say YES to raised beds, living walls, lots of color, and bold plantings. Create the amazing and colorful in your garden; you are only limited by your imagination. Learn how I created the Secret Purple Side Yard Garden below.
Products I Used to Make a Secret Purple Side Yard Garden and Where to Get Them —Elevated Gardens – 5% OFF use Discount Code “SHAWNA5” – Epic Gardening’s Birdies Raised BedsLiving Walls – 5% OFF use Discount Code “CORONADO”- Vertical Garden Supply Outdoor Varden KitMeditation Benches -25% OFF use Discount Code “SHAWNA25” Glodea Bench 90Soil – Beyond Peat Professional Organics Soil MixesPumice Soil Amendment for Succulents – Garden Pumice Arbor – Tierra Garden Rosetta Garden ArchIrrigation – For $5 off orders of +$75! use Code “easygardening” – Garden in Minutes Irrigation lines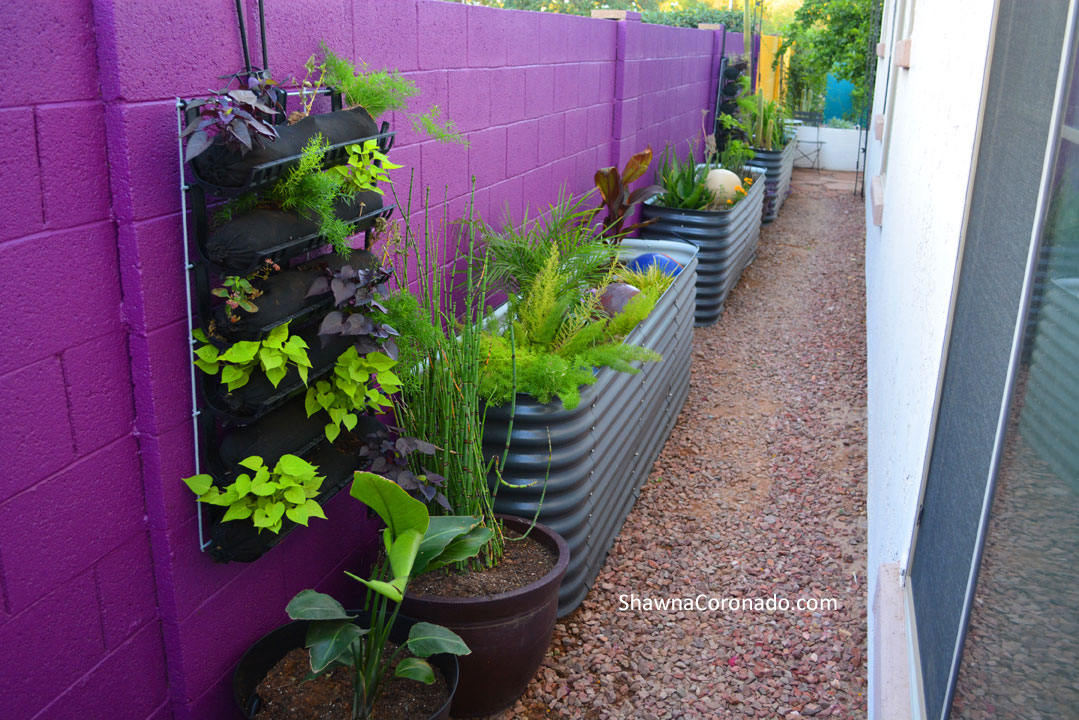 How to Build a Secret Purple Side Yard
Before you build a useful area in your side yard, you need to determine a design goal. If you are doing it yourself you can look at ways to save energy as well as make your garden beautiful. Check out this Energy.gov link. Do you want a side yard garden like I have that will focus attention on mental health and wellness? Or perhaps you simply want an attractive area to play games and entertain? Maybe you need a storage area in your side yard?
No matter your dream, write down a list for what components you would like to include in your side yard space. Then get all the components together (for example – storage, garden beds, tools, irrigation lines, soil, and plants) before you begin the transformation. Interrupting your work to run errands only drags the project out longer. Be prepared!
 1 . Level the Ground and Plan Irrigation Lines
My evil master plan: build a secret meditation garden area that will allow me to meditate for 8 minutes or shorter with my 8 Minute Method plan. My goal is to set up elevated beds that are easy to garden for people with chronic pain. I also want a quiet outdoor meditation room.
Platforms and elevated garden beds require a fairly level area with which to reside. I carefully measured out the side yard, ordered the elevated Birdies Raised Beds [For 5% off orders use Code “SHAWNA5”!], then went about leveling the areas that would hold the gardens.
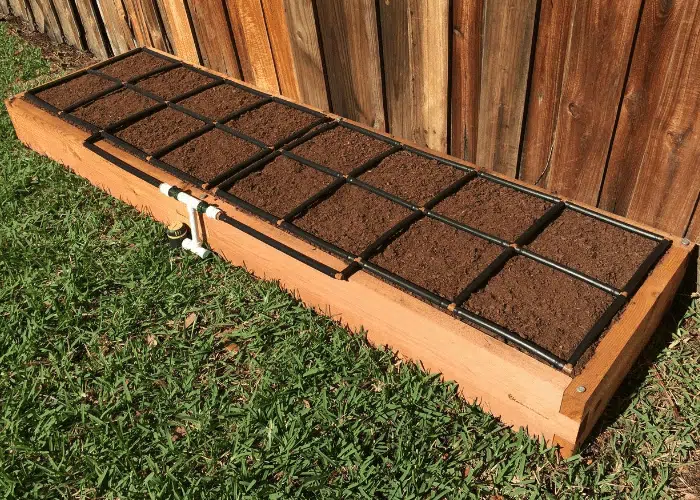
If you want to add irrigation lines to the side yard, now is the time. Above the ground I use spaghetti lines and garden grids. A great elevated bed garden grid solution is Garden in Minutes Garden Grid Watering Systems (see image below of my OTHER side yard garden filled with all the GIM garden grids). [For $5 off orders of +$75! use Code “easygardening”!] I love the garden grids and have been using them for a while now in my elevated beds. SO EASY TO USE!
 2. Cover the Fence Walls
After leveling the ground, it is important to consider what you might like on your garden walls. Once Birdies Raised Beds are built and filled with soil, they become difficult to move. Therefore, adding interest to the garden walls before the beds are built is necessary. Hanging interesting paintings, metal sculpture, or living walls on a wall is a great way to add pizzazz. Whether your garden has a fence that is wood or concrete, you might consider paint. It was the least expensive tool to make attractive change.
When I made the big move to Mesa, I was shocked that most of the homes are surrounded by concrete brick walls. Wood dry rots here. Concrete is very difficult to drill into, so drilling items into the wall does not easily work. I softened the walls with vines in my back garden. The side yard, however, has a long ugly concrete wall that needs something colorful and I want more than vines. Paint works as it is inexpensive and easy to apply. Purple is a surprising secret garden component and works well in my side yard design.
If you want to paint your fence or home, be sure to purchase paint that is specifically meant to the material you are painting, such as wood or masonry.
 3. Assemble the Elevated Garden Beds
Elevated beds are very important to my personal wellness plan. By lifting the gardens up close to waist height, you reduce the strain on joints and back. While I have vegetable beds on my property, I wanted the Secret Purple Side Yard Garden to have unique plants which will grow year-round here in Arizona. You can plant vegetables, herbs, shrubs, or whatever perennials do well in your neck of the woods.
Epic Gardening offers this best-in-class elevated bed from Birdies Raised Beds line [For 5% off orders use Code “SHAWNA5”!]. The beds are cold-rolled galvanized steel. They are powder-coated with a non-toxic, food-safe paint and easy to assemble. Each unit is customizable in size and dimension. I assembled the Tall 8-in-1 Metal Raised Garden Bed so that each garden bed would be long, but very narrow. The gardens fit perfectly in the side yard and enable lots of room on the walking side.
Before assembly, I broke out all the pieces from the shipping boxes and laid everything in configuration. Although a drill can help, you don’t need fancy tools to assemble the nuts, bolts, washers, and side panels. I did it myself.

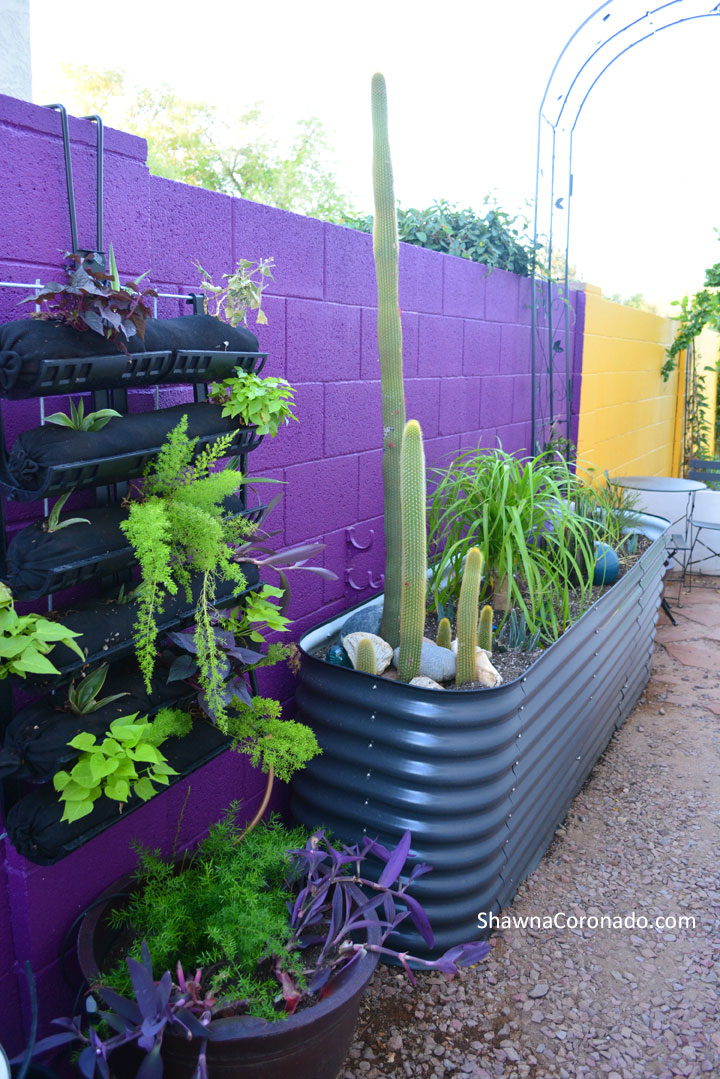
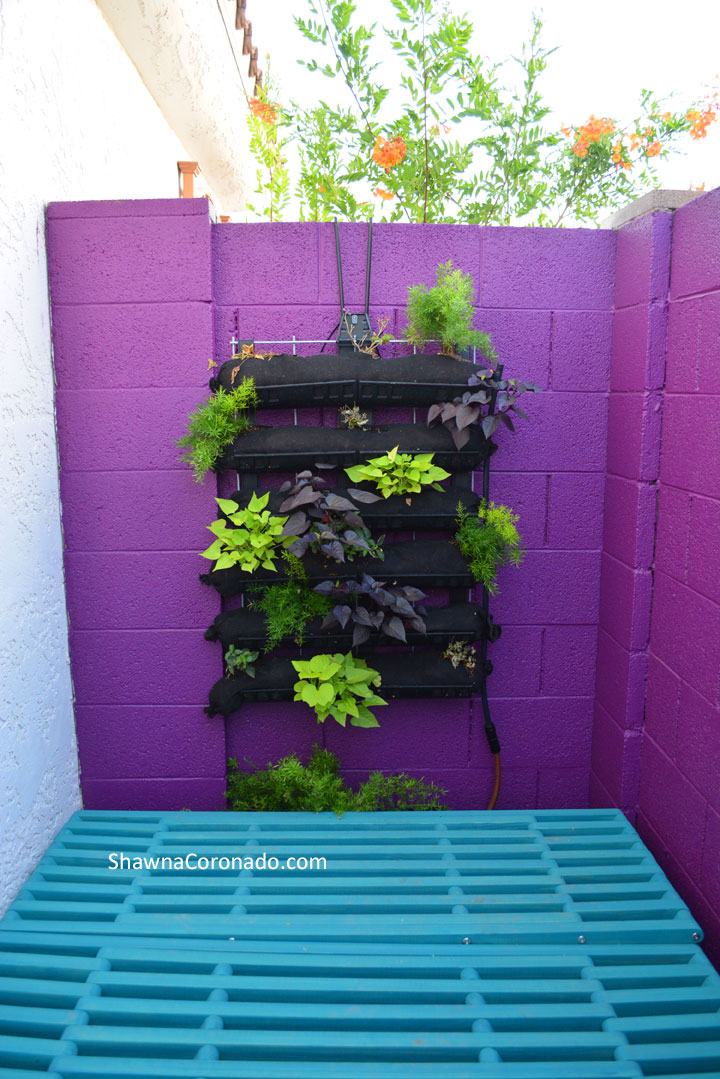 4. Assemble the Living Walls
I have been testing the Vertical Garden Supply Outdoor Varden Kit. The units are easy to maintain and can feature vegetables, annuals, or perennials. Best yet, the irrigation lines are automatically built in; all you have to do is hang the walls, then connect your irrigation lines to the units.
Because my walls are concrete, I simply strapped the Varden Kits onto an L bracket which I draped over the top of the concrete fence. Fill the Vardensoks with soil [suggestions below in item 5], then cut holes in the “sock” to plant the plants.
This season I am planting a mix of sweet potato vines along with other herbs, annuals, and a few succulents which will all do well with part sun and regular irrigation. (Remember, purchase HERE, then get 5% OFF when you use Discount Code “CORONADO”.)
5. Fill Garden Beds and Living Walls in the Secret Purple Side Yard Garden with Appropriate Soil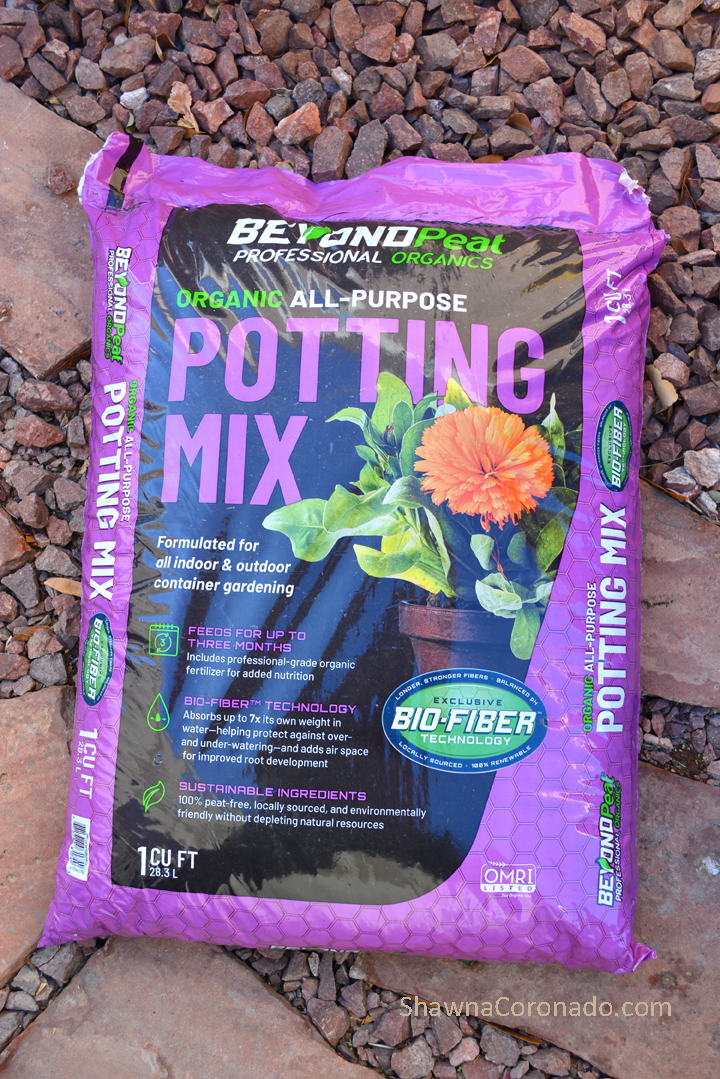
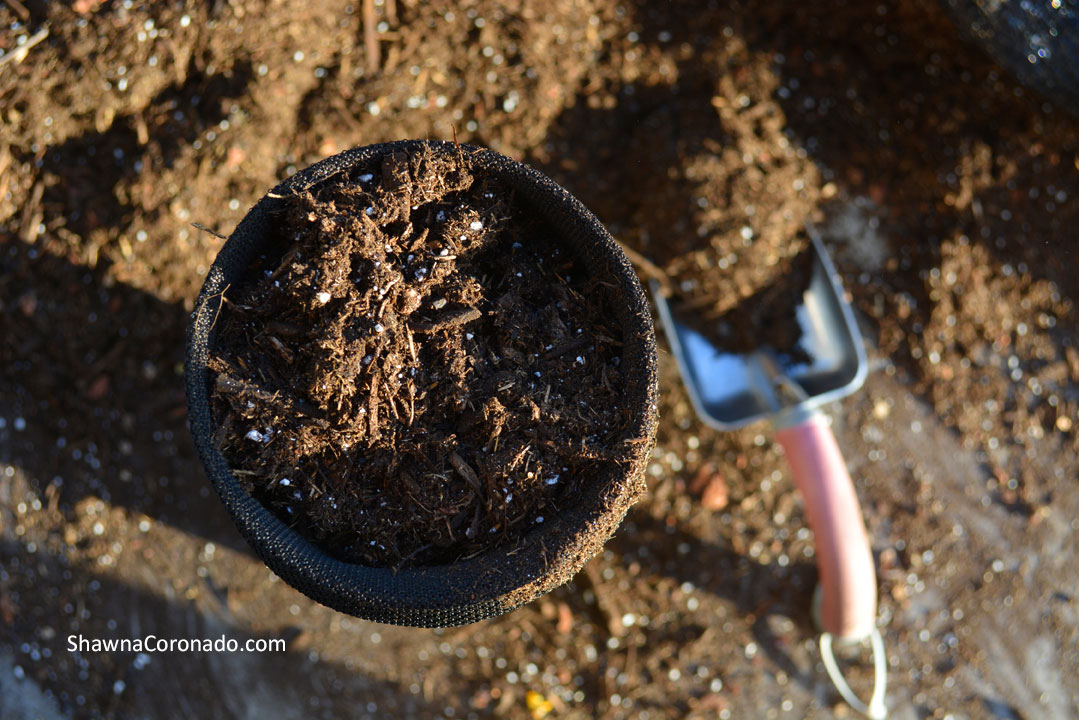
This season I have been using Beyond Peat Professional Organics Soil Mixes because this soil is 100% peat-free and has bio-fiber technology which absorbs and holds up to 7X its own weight in water. The soil also contains organic fertilizer. This helps build stronger roots.
General Container Planting Soil FormulaIf planting annuals or perennials in containers or living walls, I use one-part Beyond Peat Professional Organics All-Purpose Potting Mix combined with two-parts mixed compost.
Succulent and Cactus Container Soil FormulaIf planting succulents or cactus, I use one-part Beyond Peat Professional Organics All-Purpose Potting Mix combined with one-part grit or pumice.
If you feel that is “too draining” for your succulents and you need more moisture, you can mix two-parts Beyond Peat Professional Organics All-Purpose Potting Mix combined with one-part grit or pumice.
Plant your plants in the proper soil with appropriate organic fertilizer. It is important as it can truly help a plant’s root system become strong. There is never a guarantee on a plant surviving, but soil can make a huge difference.
6. Install Arbors and Accessories
Once the elevated beds and living walls are built, it’s time for the fun stuff!
At one end of the Secret Purple Side Yard Garden, I installed a destination meditation platform made from 2 Glodea Bench 90’s placed side-by-side. The Glodea Bench 90 [25% OFF use Discount Code “SHAWNA25”] is the perfect height and comes in an abundance of colors. I chose Gypsy Teal as a fantastical contrast to the purple walls. If you sit on the meditation platform and look down at the other end of the side yard, you will see a teal wall looking back at you. From a design perspective, it connects nicely.
Another addition to the side yard is a sturdy 8-foot-tall arbor. The Tierra Garden Rosetta Garden Arch works as a nice solution for a vine. I tucked the arch into one of the raised beds and have a Tangerine Crossvine climbing up the arbor. It will take a year, but the secret garden will have a beautiful entrance covered in blooms.
Between the elevated beds are container gardens tucked in nicely with smaller plantings. Then clay garden balls, broken tiles, and a bit of gravel are placed in the tops of the beds after planting. I focused on very creative plants that would do well year round in Arizona (more on that in a future post). A black patio set at the garden entrance finishes off the look. When you walk around the side of the house you are certainly surprised and delighted by all the color and plants.
 How Can You Make Your Side Yard Useful?
Side yards are the dramatically challenging area in most gardens. These areas are often filled with shade and can be very narrow. Sandwiched between your neighbor’s house and your home in the city or suburbs, the space can be anywhere from 1 foot wide to 40 feet wide. In suburbia, many side yards are commonly between 3 feet and 6 feet wide. Such a small difficult space to design. My secret purple side yard garden is only 4 feet wide and over 50 feet long. I have another side yard that is almost 20 feet wide. I’ve used that for a garden as well (see above).
There are lots of things you can transform your side yard into something useful. I dreamed of a secret purple side yard garden that truly spoke to wellness and meditation. At the back of the garden is a meditation platform. Walk back, sit down, cross your legs, and breathe deep. It is quiet and beautiful. A “secret garden” concept works well there.
 A List of Useful Side Yard IdeasGarden Shed – Keep your garden shed out of sight by placing it in your side yardPotting Zone – Bring in a potting table and your extra containers. Use the area as a place to pot your houseplants and outdoor plants alike.Outdoor Shower – An outdoor shower is fun and is a great place to dog wash. It offers gardeners a perfect place for cleanup.Dog Run – With little difficulty, you can make a doggy door on the side of your home. Enclose both ends of the side yard. Then it becomes a convenient dog run.Shade Vegetable Garden – Side yards are perfect for vegetables that do well with less than 6 hours of sunlight per day such as leafy greens and herbs.Putting Green – Surprise the golfer in your life with a nice stretch of putting green area. Artificial turf works great in the side yard so you do not have to mow the area.Wellness and Meditation area – This is what I did with the secret purple side yard garden. It is a great place to plant gardens which require little maintenance and might inspire someone to stay outside longer in the sunshine.Bocce Ball Court – A bocce court requires 60 feet length and 15 feet wide. Bocce Ball is a family-friendly game which uses a bowling technique and keeps the balls on the ground. The area is too close to windows for flying balls or horseshoes, so bocce is perfect.
Try building your own secret garden on the side of your home. Side yards like the Secret Purple Side Yard Garden can make your outdoor lifestyle a step above the ordinary. Maybe a side yard can be the unexpected encouragement to get your family outdoors for a wellness adventure.

The post How to Build a Secret Purple Side Yard Garden appeared first on Shawna Coronado.
May 9, 2022
Baptisia Australis – False Indigo is a Garden Rattlesnake
 How to Grow Baptisia Australis – False Indigo
 Baptisia Australis, also known as False Indigo, is a fantastic native plant (order LIVE plants here).
Native plants are often quite versatile as well as beautiful; baptisia is definitely one of those plants. This herbaceous, branching plant with tall late spring flowering racemes can be a significant contribution to both native landscapes and traditional garden designs. American Colonists and Native Americans used the flower of the plant to make indigo colored dyes and boiled the roots of the plant to create an antiseptic. Modern day medicinal uses of the plant include antiseptic and laxative purposes. While Baptisia is considered edible, caution must be used in administering it as too much of the plant can be toxic. Baptisia is long lived and remarkably tough and reliable. Faded blooms convert into interesting black seed pods which sound like a rattle snakes tail when shaken.
1. When, Where, and How to Plant Baptisia AustralisBaptisia tend to sprawl in part shade, so it is best to position in full sun. They require good drainage and a medium-fertile soil. Amend soil to create proper drainage if necessary. Start from plant or seed. Keep placement in mind as baptisia has a large taproot that does not like to be disturbed. Seeds perform better when exposed to up to six weeks of cold conditions, most likely blooming in the second year. Baptisia will self-seed, but the plants are very slow growing so will take many years to flower.
 2. Best Growing Tips for False Indigo
Water well the first season. Ignore the plant thereafter as it typically requires no watering, no fertilization, and no fungal treatment. Without a doubt this is one of the easiest plants to grow. A surprising benefit of the Baptisia plant is that it will help add nitrogen to the garden soil it is planted in. This occurs because all baptisia plants belong to the Fabaceae or pea family, and pea plants naturally return nitrogen to the soil.
3. Garden Growing Advice and Care for BaptisiaShould baptisia become too floppy or take over an area in the garden, feel free to cut back the plant by one quarter to one third. Leave the black seed pods on for winter interest. Should you want to prevent self-sowing, simple cut the seed pods out as soon they form.
Plant en masse or in drifts for a more prairie-like appearance. Because it only blooms in early spring, most of the summer baptisia can be an astounding green backdrop for native plants such as blazing star, butterfly weed, beardtongue, and tickseed. To create a cottage garden look, consider mixing baptisia with peony, foxglove, lilies, catmint, and lamb’s ears.
4. Try These Varieties of Baptisia Australis‘Solar Flare’ is vigorous. It has up to 100 flower stems and lemon-yellow flowers that take on an orange to violet blush with age. ‘Midnight’ has deep midnight blue flowers and a double bloom cycle, extending its bloom time. ‘Twilite’ has violet-purple flowers with yellow keels and three year old plants can produce upward of a hundred flowering stems. There are dozens of new varieties coming out every spring.
What Happens to Baptisia Australis in a Northern WinterA few winters ago, when I still lived in Illinois, I saw the red in the thermometer plummet. It gets cold and most of us hurry in and out of our homes as quickly as possible. Dressed up in layers, it is not always opportune to catch visions of nature. Quite frankly, in Chicagoland sub-zero weather, I am too busy running and thinking of my freezing body parts to look at the all-but-dead perennial beds next to my driveway.
Baptisia Sounds like a Rattle Snake When DriedOne day with arms loaded and knit cap pulled down past my eyebrows, I walked past an open car door and was absolutely certain I heard a rattle snake. No kidding. A rattle snake.
Convinced this was the winter I had finally lost my mind from garden-withdrawal, I dropped my armload and walked past the car again listening carefully. A long, dead and rather bony arm of Baptisia Australis – or False Indigo – was sticking out beyond the garden into the driveway. My coat caught it as I walked by and the now blackened seed heads trembled and waved as I past. The seeds were still thick inside the heads and were making a delightful rattling noise when I touched it. The wind had the same effect and I stood outside for a half hour or so playing with the seed heads like a little girl.

In the early summer False Indigo comes alive with color. Long flower spikes of purple flowers wave above the green foliage. Small flowers which resemble “Sweet Pea’s” in size appear along the spikes, although there is very little scent. The flower is delightful and attracts all matter of butterfly’s and even hummingbirds.
Native Plant Summer Flowering SpikesOnce the plants are established, it seems a completely indestructible plant and perfect for the often-salted by-way of my front drive. It is deer resistant, wet tolerant, tolerates salt, does not mind drought, and loves poor soil. Without a doubt, the beautiful Baptisia Australis is my choice for one of the best all around performing plants in the perennial bed.
When the flower spikes are spent and looking dreary I cut off about two thirds of the unattractive flowers spikes, then bend down the other third of the flower tops without removing them, mixing them in with the foliage.
Saving a third of the spikes assures me I will have seed to spread in the spring – or a rattlesnake in my garden during the winter. Either way, it puts a smile on my face and happiness in my heart.
The post Baptisia Australis – False Indigo is a Garden Rattlesnake appeared first on Shawna Coronado.
May 2, 2022
Grain-Free Lemon Pecan Coconut Macaroons Recipe
When you need chew, there is no substitute for a grain-free coconut macaroon. I know you know what I’m talking about “chew”. When a snack craving is not really about the snack, but about the “chew” itself. All food should be chewed thoroughly. It is the first essential step of digestion. Chewing also gives personal satisfaction if you consume a lower carbohydrate food plan. Having a chewy treat once in a while – within reason – can help you stay satisfied.
Grain-Free Coconut Macaroons also Have FlavorFlavored with maple syrup and shredded coconut, these little cookie bites have some sweetness to them. Overall the sugar levels are reasonable. It is balanced out nicely by the nutty chew factor. If you really want to get brave, you can dip these in melted unsweetened dark chocolate and use it as a frozen desert cookie.
Here’s the thing: flavor plus chew equals more eating satisfaction! More satisfaction often means that your body can be satiated more quickly. When I crave something sweet or chewy, I can usually be satisfied with just a bite. These little gems are bite-worthy and particularly flavorful. A little flavor goes a long way towards satisfying in just one bite without over-doing it.
Freeze Grain-Free Coconut Macaroons and Eat Them One at a TimeMy secret trick for a “splurge snack” that is grain-free, dairy-free, and filled with flavor is to freeze these babies individually wrapped. Then I pull one out once in a blue moon and let it thaw just a tiny bit on a fancy plate while I fix a hot cup of tea. One coconut macaroon with a cup of tea for your afternoon break is easy to fix. I usually take my 8 minute walk break, then sit down with tea and macaroon while I catch up on email. Whether fresh from the oven or frozen, these macaroons are a delightful snack.

 Print Add to Collection Go to CollectionsGrain-Free Lemon Pecan Coconut Macaroons Recipe#wprm-recipe-user-rating-6 .wprm-rating-star.wprm-rating-star-full svg * { fill: #343434; }#wprm-recipe-user-rating-6 .wprm-rating-star.wprm-rating-star-33 svg * { fill: url(#wprm-recipe-user-rating-6-33); }#wprm-recipe-user-rating-6 .wprm-rating-star.wprm-rating-star-50 svg * { fill: url(#wprm-recipe-user-rating-6-50); }#wprm-recipe-user-rating-6 .wprm-rating-star.wprm-rating-star-66 svg * { fill: url(#wprm-recipe-user-rating-6-66); }linearGradient#wprm-recipe-user-rating-6-33 stop { stop-color: #343434; }linearGradient#wprm-recipe-user-rating-6-50 stop { stop-color: #343434; }linearGradient#wprm-recipe-user-rating-6-66 stop { stop-color: #343434; }Are you looking for a healthy treat? Here is an easy recipe that will help you bake your own Grain-Free Lemon Pecan Coconut Macaroons with minimal effort.Servings 3Calories 575kcalAuthor Shawna CoronadoIngredients1 ½ cups unsweetened finely shredded coconut (small shreds)¼ cup finely ground almond flour2 Tbsp coconut flour3 Tbsp coconut oil, solid1/4 cup maple syrup1 Tbsp fresh lemon juice1 ½ Tbsp lemon zestPecan halvesUS Customary – MetricInstructionsPreheat oven to 350 degrees, line a baking sheet with parchment, set asideCombine all the ingredients in a food processorBlend until very moist and able to stick together in ball formScoop even sized balls with a cookie scoop or spoonPlace on parchment paper, spacing balls evenly apartTop each macaroon with a single pecan halveBake 10-12 minutes, until slightly golden or until firm – be cautious as it is easy to burn the bottoms of these little treats if the oven runs hotCool then serve Stores well in refrigerator and freezerNutritionCalories: 575kcal | Carbohydrates: 35g | Protein: 6g | Fat: 49g | Saturated Fat: 40g | Polyunsaturated Fat: 1g | Monounsaturated Fat: 2g | Sodium: 30mg | Potassium: 323mg | Fiber: 11g | Sugar: 20g | Vitamin A: 2IU | Vitamin C: 7mg | Calcium: 65mg | Iron: 2mg
The post Grain-Free Lemon Pecan Coconut Macaroons Recipe appeared first on Shawna Coronado.