
Ruth Soukup's Blog, page 49
February 24, 2017
Spring Break on a Budget
This is a Guest Post from Cherie at Queen of Free
I love living in Indiana. We’re a state of basketball and racing fanatics. We have the most beautiful fall. Our springs aren’t too shabby either. And Hoosier hospitality? That’s a real thing. The people are friendly, the property affordable, and most of all, it’s the place I call home.
I love my state.
However (you knew that was coming, right?), the months of January and February can be brutal here. It seems like it’s dark in the morning and it’s dark at dinner time. The temperatures drop low, making even running quick errands feel like a three day trek across the frozen tundra. We’re not even safe from the potential of snowfall well into March. Sometimes it can feel like Narnia here – always winter, never Christmas.
Combine the less than ideal weather with the monotony of our school routines and by late March, we’re all ready for a little vacation – from the cold, from the dark, from life. Cue Spring Break.
A few years ago, our school system shifted from longer summers to primarily the month of June and most of July. That means we get two whole weeks of vacation during the third month of the year. Having more time on our hands can be a blessing and curse. It means if we do decide to travel somewhere, that we have time on the front end to prepare and time when we return to get the laundry under control before heading back to the classroom. If we choose to remain at home, it doesn’t take long before we all begin getting a little stir crazy.
This is precisely why for both our sanity and our bank account, I try to be on my A-game in planning for Spring Break. Whether we remain at home or we take an adventure, we need to be sure to budget both dollars and time well.

When Renting Plan Ahead, Book Last Minute
Our family prefers to rent a condo or house instead of booking a hotel room when we travel. We like eating our meals at our home away from home to save a few extra dollars. We enjoy a bit more space to move around and it’s nice to have separate sleeping spaces so we don’t feel piled on top of each other.
We’ve used sites like VRBO and Airbnb and we’ve rented from local property management companies, too. I do a lot of research in choosing a home that best fits our needs. I read reviews, examine photos closely, and when I can talk to friends or family who may have stayed in the area before.
But the best savings strategy I’ve discovered is waiting until close to the last minute to book. Especially for homes that are owned by private owners, the desire to have someone in the home instead of leaving it vacant can make the price point much more flexible. Certainly you run the risk of needing a plan B; however, the steep discount you can receive might be well worth it.
Typically, it’s a good idea to have 3-5 properties in mind and send a direct message to each inquiring about flexibility in price or sharing your specific budget. The property owner may need to pass, but you won’t know unless you ask.

Visit Like a Pro
For the last handful of years, I’ve had the pleasure of blogging for Visit Indy, an organization that points convention goers and tourists to the best dining, destinations, and distractions in Indianapolis. Nearly every city has an agency like this. It may go by the Convention and Visitors Bureau or Visitors Center or even have the name of the city in its title.
Do a quick online search to discover if your destination (or nearest metropolitan area) has an organization like this. On their website, you’ll not only find pointers and tips for visiting well, but you’re likely to also discover a calendar where you can search for free events or discounts on entry fees. You may also want to consider looking for community calendars on local television stations, too.

Stay At Home Adventures Make the Best Memories
The best childhoods are filled with adventure. While we might think that we need to give our kids trips to the best theme parks or fill their daily calendars with activities out the wazoo, the majority of our offspring just want time with us. Here are some of my favorite low cost/no cost ideas to turn your own home into the very best Spring Break destination:
Blanket Fort Day: Take the cushions off the couch, pull the pillows off the bed, and turn the linen closet inside out looking for blankets. Build the most intricate blanket fort possible in your living room, using whatever you can find. Spend the rest of the day enjoying your comfy dwelling. Read books. Play video games. Eat your meals. Watch a movie. The possibilities are limitless. At the end of the day, have everyone help with the fort demolition and clean up together.
Stay At Home Chefs: Let your older children plan a meal from start to finish. Search the Internet for recipes and build a grocery store list to buy the items you don’t already have. You can be as simple or as elaborate as you’d like. If there’s a bit of *ahem* competition between your kids, then let each plan a course (appetizer, salad, main dish, bread, dessert, etc.) or choose a different day. Bonus: you don’t have to cook dinner all by yourself.
Build Something Together: Maybe it’s a picnic table for the backyard or a new garden bed. Perhaps it’s a small piece of furniture to add their bedroom like a side table or shelf. Spend the day getting all Bob the Builder as a family. Let the kids do as much work as possible. The shared experience, no matter how messy outweighs the perfection of the piece.
Get Your Game On: We LOVE board games in our house but it never seems like there’s enough time to play. Allow each family member to choose one game per day and spend at least one hour per day playing.
Park Bucket List: Draw up a list of parks in your area and visit one per day. Pack a lunch and have a picnic or choose to just spend an hour.
Begin Planning for Next Year
Maybe you don’t have the funds for a major vacation this year. That doesn’t mean you can’t begin the process for planning (and saving) ahead. Have a family meeting to brainstorm where you’d like to visit. Let your kids do research on both prices and destinations. Then together think about ways you could cut back or things that you could do to help fund that trip. You might be surprised at what your kids are willing to sacrifice. By the way, if your dream involves visiting a large mouse and his many friends, check out Debt Free Disney: Saving For Your Vacation.

Spring Break Jar O’ Ideas
Have your kids write down on slips of paper what they’d like to do on Spring Break that doesn’t cost any money. Add a few ideas of your own that are affordable but low in cost like a trip to the dollar theater or lunch out on the town. Fold the slips up and place them in a jar. Each day, draw out an idea to determine your destination or plan for the day. Allow your children to take turns pulling an idea from the jar, too.

Cash Flow Your Experiences
It’s incredibly easy to get caught up in the fun spontaneity of Spring Break. Your schedule is more flexible and sometimes that makes your spending a little too flexible. Whether you travel or stay at home, you always need a target budget in mind. The worst souvenir you could come home with is a gut full of regret from your overspending.
That’s why it’s a good idea to have a special bank account designated only for vacation expenses. You could choose to withdraw money from it and spend only cash during Spring Break. Or you could set up a secondary checking account with a debit card to help you manage your money. Either way, having a target budget can keep you from stepping out of bounds and making money mistakes.
Spring Break is a gift. You’re given a break from the humdrum schedule and the opportunity to relax as a family. Your kids won’t be this age forever. Make meaningful memories while you can. Invest in the relationships that really count while being wise about managing your money well to insure a bright financial future for your family.
Cherie Lowe is an author, speaker and hope bringer. Her book Slaying the Debt Dragon details her family’s quest to eliminate over $127K in debt in just under four years. As her alter ego the Queen of Free, Cherie provides offbeat money saving tips and debt slaying inspiration on a daily basis.
The post Spring Break on a Budget appeared first on Living Well Spending Less®.


February 22, 2017
Easy Broccoli Cheese Soup

When the weather is cold nothing quite hits the spot like a hearty bowl of hot soup and it is always good to have a few recipes that you can whip up out of the pantry staples you already have on hand. It’s even better if those recipes happen to be a family favorite that your kids and husband just love? Well then quite frankly, that’s a recipe you just can’t live without.
This creamy broccoli cheese soup comes together surprisingly fast, and serving it a yummy bread bowl will make it feel extra special. It is also a great dish to serve to a crowd!
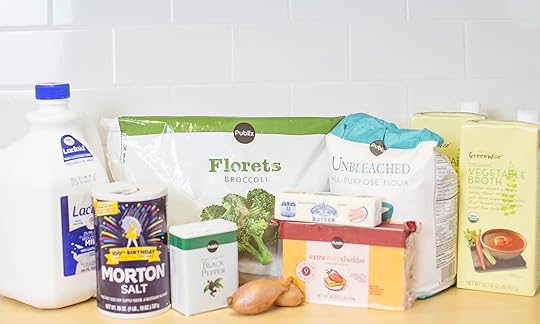
Here is what you need:
2 tablespoons butter
2 small shallots
1/2 cup butter
1/2 cup flour
4 cups milk
4 cups vegetable stock
1 320z package frozen broccoli florets
16 oz sharp cheddar cheese, shredded
salt & pepper to taste

Step 1: Steam broccoli until soft then let cool and mash with potato masher.

Step 2: Saute shallots in 2 tablespoons butter until soft, then set aside.

Step 3: Melt 1/2 cup of butter then add in 1/2 cup and 2 tablespoons flour. Mix well until combined and lightly brown.

Step 4: Slowly add milk and continue to stir, then add shredded cheese a 1/2 cup at a time.

Step 5: Add stock to large pot with broccoli, then add milk and cheese mixture. Continue to stir. Allow soup to come to a boil. Soup will continue to thicken as it cooks.

Step 6: Serve in bread bowls with some extra shredded cheese on top.
Print This!
Recipe: Easy Broccoli Cheese Soup
Summary: This delicious soup comes together easily with ingredients you probably already have on hand.
Ingredients
2 tablespoons butter
2 small shallots
1/2 cup butter
1/2 cup flour
4 cups milk
4 cups vegetable stock
1 320z package frozen broccoli florets
16 oz sharp cheddar cheese, shredded
1 320z package frozen broccoli florets
salt & pepper to taste
Instructions
Steam broccoli until soft then let cool and mash with potato masher.
Saute shallots in 2 tablespoons butter until soft, then set aside.
Melt 1/2 cup of butter then add in 1/2 cup and 2 tablespoons flour. Mix well until combined and lightly brown.
Slowly add milk and continue to stir, then add shredded cheese a 1/2 cup at a time.
Add stock to large pot with broccoli, then add milk and cheese mixture. Continue to stir. Allow soup to come to a boil. Soup will continue to thicken as it cooks.
Serve in bread bowls with some extra shredded cheese on top.
Preparation time: 5-7 minutes
Cooking time: 2-3 hours
Number of servings (yield): 16

The post Easy Broccoli Cheese Soup appeared first on Living Well Spending Less®.
February 20, 2017
Easy Care House Plants

There is abundant research touting all the many benefits of having plants inside your home–they improve the air quality by acting as a filter for toxins, produce oxygen that makes breathing easier, and release moisture, not to mention just look pretty. Research also shows that indoor plants promote better focus and can even improve your health.
And I don’t know about you, but while I love the idea of having houseplants…but it sometimes seems like I just cannot keep them alive. My thumb is browner than brown. Most of the time, there are just too many things going on to spend much time caring for plants.
Thankfully, there are quite a few types of houseplants available that nearly anyone can manage, with very little effort. In fact, some of these plants LOVE to be ignored! Plus, most of these houseplants are much less than $20, so keeping them around (or replacing them) is super inexpensive.
Whether you have a green thumb and you’re looking to add a few more houseplants to your space, or you think you can’t keep a plant alive no matter what, there’s something for everyone on this list of low-maintenance houseplants. We’ve also included their benefits and how to care for each of them.
I promise: every houseplant on this list is low maintenance and almost impossible to kill. Take a look at these easy ways to add a little more green to your home!
A word to the wise : Many houseplants are poisonous or toxic to kids and pets. Please read labels carefully when selecting your plants, and be sure to hang toxic plants out of reach of children and animals.

1. Pothos
Pothos are the “classic” houseplant. They have heart-shaped leaves that are deep shades of green or striped with green and yellow. Some climb, while others just crawl along. Pothos is a low-maintenance houseplant. It does well in sun, but also does okay with shade or away from the window. It doesn’t require much care, other than a weekly watering when the soil becomes dry. It’s a great starter plant.
Maintenance
Weekly or bi-weekly watering, when the soil dries out. Keep in a window, but this plant doesn’t need direct sun.
Benefits
Pothos is a great air-cleaner! It removes formaldehyde and benzene from the air, so it’s great for bedrooms and other spaces where you’d like to breathe a little easier. Pothos also absorbs odors, which is the main reason you often see them at restaurants (besides the fact they’re pretty and easy to maintain)—they can absorb the smells and odors from cooking, as well as smoke. One word of caution about Pothos: they can make pets and kids quite sick if they’re eaten. While they aren’t highly poisonous, they can cause vomiting and GI distress.
2. Aloe Vera
Not only is Aloe Vera a pretty succulent that’s very easy to keep up, but the spiky leaves contain a gel that can be soothing for cuts, sunburns, and other topical applications. These plants have a wonderful Southwestern look, with small spiky (not sharp) edges on each pointed leaf. The leaves tend to be dark green to grey with some red throughout (although they also can be found in light green varieties).
Maintenance
Aloe Vera is a succulent so it needs well-drained, sandy soil. It doesn’t require much in terms of water, and although it likes bright light, it shouldn’t be in direct hot sun all the time. This is another plant where “less is more” in terms of care. If you tend to forget about plants, you might want to give Aloe a try. Set it in a well-lit window and let the soil fully drain before you water it again.
Benefits
Aloe Vera is soothing to the skin when applied to a sunburn or irritation. Of course, you should always test it first to make sure you don’t have an allergy, but leaves can be broken right off and applied to skin for a soothing fix. Aloe doesn’t have much of a scent and the gel in the leaves dries quickly. People also drink Aloe and use it as a mild laxative, although those claims are unsubstantiated, and it can be considered toxic in large doses.

3. Peace Lily
The Peace Lily is a beautiful plant, often seen in stores around Eastertime. Its large, wide leaves are very showy and it can bloom with gorgeous white or greenish flowers a few times a year. These plants are low maintenance and very popular.
Maintenance
Peace Lilies aren’t sun lovers, so this is a great plant to put in the middle of a room. They’re large, so they can go on the floor or up on a table. They do need regular watering—but just once a week—and they do well in cooler rooms. Keep this one out of direct sun. Remove the flowers once they’ve wilted and cut just the flowers down to the base.
Benefits
A NASA Clean Air study found that Peace Lilies are one of the top air-cleaning plants, as they remove formaldehyde, benzene, and other household contaminants from the air. They’re also said to remove mold spores and generally keep the air fresh and clean. Again, this plant is another one that can make pets and kids sick if ingested, so keep it out of the reach of your kitties and kiddos.
4. Spider Plant
Spider Plants are very popular, as they grow cute “babies” on long offshoots. You can easily start one of the babies in its own bottle of water, and, before you know it, you’ll have a whole houseful of spider plants. These plants have long light green leaves with a stripe around the edge. They actually do resemble spiders, especially the babies hanging down from the main plant. When very healthy, Spider Plants will grow tiny white flowers.
Maintenance
Spider Plants do well in medium light, and can be hung or placed on a shelf where their offshoots can cascade down beneath them. They should be watered regularly, but allow the soil to dry in between watering.
Benefits
This is yet another great air cleaner. Spider Plants, in addition to being low-maintenance, are great reproducers, so they’re fun to give as gifts and share with others. Simply cultivate by cutting off a “baby” and placing it in a vase or jar until roots form. After a few weeks, you can transplant the new plant into a pot.

5. Snake Plant
Snake Plants are also known as “mother-in-law’s tongue.” They have tall leaves that are stiff and run straight up and down. They’re a beautiful dark green, and some have yellow around the edges. These plants are classic, so you can use them to create a great retro look, but they also have a great modern vibe to them as well. Spider Plants look really great grouped on the floor or in a window.
Maintenance
Do you forget to water your plants? Then Snake Plants will be great for you! In fact, in the winter, you can get by with only watering them every 3 weeks or so. They do great in light, but also can thrive with indoor lighting or in shaded areas. They make really great office plants, too!
Benefits
Snake Plants give off oxygen at night, so they make great bedroom plants. Like all plants, they absorb some environmental toxins, but these are particularly good at absorbing nitrogen oxide from fuel-burning appliances. They’re great in areas with not much natural light, so they offer all the benefits of houseplants without the need for a window.
6. Boston Fern
The Boston Fern is a classic with full, frilly leaves. It’s often hung in baskets or placed in stands where the leaves can hang down below as they get quite large. It’s easy to maintain and it grows well in humid areas and weather. It’s the easiest fern to maintain and care for.
Maintenance
Boston Ferns like water and prefer damp (not soaked) soil. They may need to be misted during winter months, if your house gets dry. They also prefer bright, filtered light, so near (but not directly in front of) a window works great for these plants.
Benefits
The Boston Fern is yet another great air purifier. As much as they like moisture and humidity, they’re also great at giving it right back to the environment, so they act as a natural humidifier! These plants are very safe for children and pets (so if Fluffy nibbles on this plant, it’s okay).
7. Rubber Plant
Rubber Plants are beautiful, with huge glossy leaves that look almost too perfect to be real. They’re often large (2 feet or taller), and can look great on the floor as a room divider. These plants have dark leaves with a reddish tint. They have a woodsy stem and look almost like a miniature tree.
Maintenance
Rubber Plants need sunlight and should be placed in a warm spot that’s not damp and doesn’t get drafty. These plants need regular water, but the soil can dry out between watering without negative effects on the plant. They require very little additional care.
Benefits
This plant gives off a high oxygen level, and like all the plants listed here, it absorbs environmental toxins. Rubber Plants are from the Ficus genus and, of the most common Ficus plants, they’re the best at removing air toxins from their environment. They also remove and filter ammonia from the air, as well as formaldehyde.

8. Cacti
Popular, eye-catching and fun, cacti are some of the top picks for houseplants—they always seem to be everyone’s favorite. You can group small cacti together in a pot for a cut diorama display or you can go for large, tall cacti that can really make a statement in a room. They don’t require much care and they look great in groupings. They also don’t require huge pots or a lot of room, plus, they’re often left alone by curious pets and children.
Maintenance
Most cacti simply need a window, well-drained sandy soil, and a monthly watering. (That’s right: monthly!) If your cactus looks a little shriveled, you may need to water more often, but be aware that, if over-watered, they can become ill, so use caution. There are many different shapes and sizes available, and they play well together, so you can group several cacti in one pot for a great look.
Benefits
Cacti and succulents don’t have the air purifying power of the more tropical houseplants, but they still offer great benefits in terms of being low-maintenance, offering green and character to a room and environment, and creating a great feel to your décor. They’re low maintenance and easy going, and they’re a great pick for a starter plant, especially if you’re nervous about your ability to care for something higher maintenance.
All plants can benefit your home by bringing a little green indoors, especially during the winter months, and brightening your spirits. There’s something about a room with houseplants that makes it feel more upbeat and cheerful, no matter how many or what type they are.
So pick something low maintenance off this list, especially if you’ve been hesitant to care for plants in the past. Give a new houseplant a try and see what you discover about it. You just might find you really enjoy caring for plants and you have a green thumb after all.

The post Easy Care House Plants appeared first on Living Well Spending Less®.
February 17, 2017
Beauty Made Simple

I don’t know about you, but some days I feel like it’s nearly impossible to look polished and “together.” Between running the kids from place to place, taking care of commitments, and (somehow always) rushing to get out the door, it’s so much easier to just throw something together and GO.
…and then it happens: we rush out the door in yoga pants with no makeup on and we run into someone we know or we end up having to run in somewhere unexpectedly, and the whole time we’re just cringing, like, “Why did I have to run into her TODAY? I feel like a mess!”
We’ve all got that friend who’s so good at fashion she looks like she’s walking right out of a catalogue or off a Pinterest board. And she seems so…effortless! How on Earth does she do it? What are her secrets?
It’s true. When we look good we feel good…but why does it have to be so hard?! Why do we sometimes feel like we’re one safety pin away from falling apart?
I went looking for answers. I found a few go-to fashion and beauty “hacks” and tips we can all use to help us feel like we’re looking great no matter the situation, from job interview to coffee date to Target trip.
The best part? Most of these tips aren’t very hard and can even help streamline our routines so we can get out the door even faster! In fact, it’s all about doing less, not trying to do even more. So try a few today and rock your next appointment or errand with confidence and a smile!

1. Lay Out Your Clothes the Night Before
This timesaving tip is the secret of busy ladies everywhere. It helps ease morning routine struggles and gives us time to answer the “what to wear” question before the morning rush.
When laying out clothes at night, be sure to include accessories such as shoes, jewelry, and other things that tend to get misplaced in the morning hustle and bustle. Check over all of your clothes to make sure there aren’t stains, holes, runs, or other issues. (If you’ve ever had to change an entire outfit because you pulled on hosiery only to realize you have a big run and no backup pair, you totally know what I mean!)
Set aside just five minutes or so before bed to pick out tomorrow’s look. It doesn’t have to cut into bedtime or take long, but having the leisure to deal with everything at night means mornings will flow much smoother. Eventually, it might even mean you can set the alarm five minutes later!
2. Consider a Capsule Wardrobe
If you’ve ever looked at “capsule wardrobes” on blogs or on Pinterest, you’ve probably been amazed at how great everything coordinates and goes together with a minimal number of pieces. It can seem a little daunting at first, especially if it seems to call for going to the store and buying even more clothes to stretch a wardrobe.
But, how many of us have tops or pants that don’t seem to go with anything else in our closet? Wouldn’t you love a whole closet full of coordinated options, where everything went together?
The idea behind a capsule wardrobe is that there are basic foundational pieces that are interchangeable, like black pants, a navy skirt, a classic trenchcoat, a white t-shirt, or a grey sweater. Then, a few “trendier” pieces are added, but in workable and coordinating patterns. For example, a yellow polka dot sweater, a red floral blouse, or a purple corduroy skirt. Everything still coordinates and can be interchanged and paired together. One of the main capsule wardrobe tricks is to pick neutrals (like polka dots, animal prints, or stripes) and pieces from a similar color scheme, such as jewel tones or pastels.
If this seems like a lot of work, simply consider paring down your wardrobe to the items you truly love and wear. Look at the classic pieces you have already and only keep items that “go” together and coordinate. Donate the rest to someone who can use them. When I took my closet down to 40 hangers, it was a little scary at first, but really helped me find the things I loved in my wardrobe that went together and made me feel my best. Sometimes it helps to cut the clutter to see what’s really working.

3. Go with Classics & Basics
A basic wardrobe doesn’t mean it needs to be boring, or well…”basic.” Instead, when it comes time to shop for clothing, focus on finding clothing that will last and that you feel great wearing. Look for the classics. To streamline your wardrobe, find things that might have looked good ten years ago and will probably still look good in ten more years.
I love fashion just as much as the next gal and I know it’s how many of us express our personality, but try to opt for things you’ll wear and items that fit, flatter and enhance your best assets. For some, that might mean long sleeve t-shirts, classic jeans, and some blazers or cardigans. For others, it could be a button-down blouse and wool pants.
Quality fabrics tend to last longer. Wool, tweed, cotton, and quality knits will last through many wears and are easier to care for and hold their shape. Read labels to make sure items aren’t high maintenance. (Avoid dry cleaning, lots of ironing and special care.)
4. Polish Your Look (and Shoes)
Clothing doesn’t need to be new or expensive to look nice. You can find some really fabulous items at second-hand and thrift stores. To make a wardrobe seem much more fashionable and together, just steam, iron and polish.
Back in the mid-1900s, people got by with fewer items of clothing, and they often repaired and cared for what they had very deliberately. Looking at old mid-century photographs, it’s amazing to see how “together” people looked back then (and not because they were wearing dresses).
Touching up shoes with a coat of polish, repairing buttons and loose threads, and shaving pills and nubs off of sweaters can make old clothes seem new again. As much as ironing can be a pain, it makes a very impressive difference when it comes to finishing a look. If you don’t have time to iron, consider buying a little travel steamer or even touching up the hem of your blouse with your flat iron (just make sure it’s hairspray free). It can make a huge difference!

5. Accessorize!
Perhaps my favorite fashion hack is adding accessories. How about you? A pretty necklace, a scarf, or earrings can dress up a t-shirt, add a pop of color to an outfit, and instantly make your style look deliberate.
The trick with accessories is just a little goes a long way. One bold necklace and some earrings, or a cool cuff bracelet is all that’s really needed. Highlight one or two items to really make a statement.
Add a scarf to finish off a plain long sleeve tee and jeans, or cinch a basic t-shirt dress with a bright wide belt in a fun color. Add all sorts of personality and flair to any look simply by adding some inexpensive jewelry. It’s so easy and goes a really long way to finishing a look.
6. Look Great in Layers
Another secret of fashionistas? They know how to layer! It’s definitely an art, but it’s something the rest of us can learn to do, too. One of the best parts about layering is it can cover a myriad of concerns.
Layer a camisole or simple t-shirt under a too-see-through shirt. Bring a cardigan or jacket along to throw on if you need to hide a stain or have a top that’s a little too snug. Even layering tights under a skirt or dark pants can mask a threadbare area, small holes, or even legs that are looking less-than-their best.
Keep the thinnest layer closest and layer out from there, adding thicker pieces as outerwear. For example, a bright tank under a v-neck sweater with a cute fleece and then even a scarf and puffy vest over the top will keep you warm and looking together. If it gets too hot, you can simply shed a few layers throughout the day.

7. Add a Little Stylizing
One reason photos online look so “together” is because the subjects have been “styled.” Styling sounds intimidating—like something done on a movie set or on a photoshoot, but really it’s pretty simple.
Styling simply means to do some artful tucking, knotting, rolling or finding creative ways to wear something. A basic “styled” look to try is just to roll up your sleeves, add a half-tuck to your shirt (tuck in the front to show a belt, but leave the back undone), or add a waist-accenting belt and you’ll look totally pulled together.
It might feel a little strange to knot your shirt or leave a sweater unbuttoned, so only try the things that make you feel coordinated and at ease. Experiment with different style tricks until you find a few “go to” tricks you’re comfortable with.
8. Embrace Your Hair
Another way to get out the door quickly in the morning? Style your hair the way it looks best. We each have a pretty good handle on the temperament and abilities of our hair. If it takes a lifetime to blow dry in the morning, try washing it the night before, then simply touching it up in the morning.
If your hair is naturally curly, embrace it rather than fighting against it. If your hair is straight, why spend hours trying to get it to stay wavy? For a special occasion it might be fun, but when trying to streamline a routine, why fight against nature? There are wet-to-dry flatirons on the market now, as well as brushes and towels that can cut back on blow-drying time. Dry shampoo can also be a great timesaver.
When all else fails, every girl needs a go-to style that makes her feel polished and together in five minutes or less. For some, it’s a ballerina bun. For others, it’s a low ponytail with hidden elastic or even a French braid. The idea is to find a style that says “effort” without requiring too much effort.
Visit a salon and ask what they recommend for a very easy style. Be as honest as possible with the stylist and know it’s okay to say, “I need a style that looks great air-dried and is long enough to pull back.” Ask your stylist to recommend a type of product to help you achieve your look as quickly and easily as possible.

9. Minimize Your Makeup Routine
Find what makeup items are MUST-haves and then consider ditching (or doubling up) on the rest. For some, this might be mascara and concealer. Others of us like blush and a little bit of lip balm to look alive. Find your must-have products.
Many of us accumulate makeup that we really don’t use, like eyeshadow pallets without the “good” colors left, or lipsticks that were just a little too bright or too dark yet we think we might wear them to something. Or how about eyeliner that needs a sharpener we can never seem to find? It can be hard to rummage through all the “extras” to find the things we really want to wear, especially if we’re in a hurry.
Go through your makeup and toss as much as you can part with. If there are items you just don’t wear, like, or don’t work for you, get rid of them. A lot of makeup only lasts for 6 months to a year anyway, and can actually make you break out or clog pores if it’s beyond its prime. Instead of risking it, just let it go.
Once your makeup routine is streamlined, it will feel more doable in the morning, and you won’t feel the mad crunch to get out the door. For most of us, our routine means foundation or tinted moisturizer, a concealer, blush that can double as eye shadow, mascara and a soft lipstick or balm. Easy-breezy, right?
10. Find Products that Do Double-Duty
With any beauty products, try to find items that can do double-duty. Most of us moms will take any help we can get and any extra products we can cut out and use to save time and still feel great.
A pretty-scented body wash and moisturizer might eliminate the need for another layer of perfume. Some shampoos have conditioner right in the formula or try a leave-in spray that also works as a style spray. Look for moisturizers with SPF built in and watch for blush and bronzer in colors that look great on you so you can use them as both an eyeshadow and on your cheeks.
Look for cleansing cloths that remove your makeup as they cleanse, as well as whitening toothpaste, color-enhancing conditioner, and other great double-duty products.

11. Mind Your Mani
Ready for a game-changer? Try a nail buffer. Many of us are so busy, the thought of going to get a manicure sounds almost laughable, right? Plus, the thought of painting nails at home means they’ll inevitably get smudged before they dry because someone will need a glass of water, help in the bathroom or help with homework (or like me, you’ll just forget about the paint and touch something without realizing it—d’oh)!
Enter the nail buffer. These little block things shine up your nails to a polish finish with no drying time. They’re cheap and simple to use and your hands will look instantly better as soon as you use them! It literally works in less than two minutes.
Add a little lotion or coconut oil and keep your nails clean and your hands will always look great! Even if you’re a nail-biter or if you do a lot of work with your hands, you can still make things look great with some moisturizer and a little nail buff!
12. Add Some Sparkle
To always look polished and together, think of ONE thing you can do to add a little sparkle or shine to your look.
For some of us, it might mean adding a great statement necklace or bright shoes with a pop of color. For others, it might mean adding a scarf, a little bit of finishing gloss on our hair, or some lipstick in a bright shade.
When we have a little bit of sparkle or shine to our look, we instantly feel boosted and more confident. It’s amazing what cool earrings, a manicure, or some lip-gloss can do to make us feel like our best self.
When it comes down to it, the best thing is to have great posture, a kind smile, and a little spring in your step. But hey, give yourself a break! Even that friend who seems so polished doesn’t have it together all the time!
In the words of Audrey Hepburn, “The beauty of a woman is not in the clothes she wears, the figure that she carries, or the way she combs her hair. The beauty of a woman is seen in her eyes, because that is the doorway to her heart, the place where love resides. True beauty in a woman is reflected in her soul. It’s the caring that she lovingly gives, the passion that she shows and the beauty of a woman only grows with passing years.”

The post Beauty Made Simple appeared first on Living Well Spending Less®.
February 15, 2017
Easy Chicken Pot Pie

It’s no secret that we LOVE quick & easy freezer meals around here, especially ones that use budget-friendly ingredients! Believe it or not, this tender, juicy, flavor-packed Chicken Pot Pie is a winner. It’s uses mostly basic ingredients, whips up in minutes, then goes straight from the freezer to the crockpot to the table, all while tasting like you spent hours slaving away in the kitchen!
To make it as part of a freezer cooking day, just split the sauce & chicken into multiple bags, then throw it right into the freezer–no cooking required!
To make this even easier we used a rotisserie chicken. But you can use any type of chicken you have on hand.
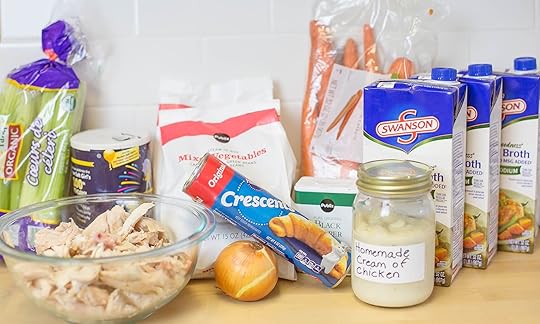
Here is what you need:
1 small onion, diced
1 bag carrots, chopped
2-3 stalks celery, chopped
salt & pepper to taste
6 cups chicken stock
3-4 cups chopped chicken
2 160z bags mixed vegetables
1 container homemade cream of chicken soup (cooking day only)
1 container refrigerated crescents (cooking day only)

Step 1: Chop Rotisserie chicken and set aside.

Step 2: Dice onion, carrots and celery and set aside.

Step 3: In a large bowl; mix together onions, carrots, celery and mixed veggies then add chicken stock, slat and pepper.

Step 4: Divide chicken into 2 gallon size freezer bags ( be sure to label bags first.) Then add stock and veggie mixture over top chicken .

Step 5: Thaw if frozen; cook in crockpot on low for 4-6 hours or high for 3-4 hours; until chicken is cooked. (Note-don’t worry if your chicken isn’t all the way thawed. It can also cook from frozen, it might just take a little longer.)

Step 6: Once you are ready to serve the pot pie, add your container of homemade cream of chicken soup to crockpot, stir and make sure crockpot is on high. Your pot pie mixture will thicken as it cooks.

Step 7: Once the potpie has thickened, preheat oven according to package on crescent package. Then unroll and cut triangle shapes in half. Bake until golden brown.

Step 8: Scoop pot pie mixture into bowls and place cooked crescent triangle over top of pot pie.
Print This!
Recipe: Easy Chicken Pot Pie
Summary: This classic dish comes together so easy and tastes amazing!!
Ingredients
1 small onion, diced
1 bag carrots, chopped
2-3 stalks celery, chopped
salt & pepper to taste
6 cups chicken stock
3-4 cups diced chicken
2 160z bags mixed vegetables)
1 container homemade cream of chicken soup (cooking day only)
1 container refrigerated crescents (cooking day only)
Instructions
Chop Rotisserie chicken and set aside
Dice onion, carrots and celery and set aside.
In a large bowl; mix together onions, carrots, celery and mixed veggies then add chicken stock, salt and pepper.
Divide chicken into 2 gallon size freezer bags ( be sure to label bags first.) Then add stock and veggie mixture over top chicken .
Thaw if frozen; cook in crockpot on low for 4-6 hours or high for 3-4 hours; until chicken is cooked. (Note-don’t worry if your chicken isn’t all the way thawed. It can also cook from frozen, it might just take a little longer.)
Once you are ready to serve the pot pie, add your container of homemade cream of chicken soup to crockpot, stir and make sure crockpot is on high. Your pot pie mixture will thicken as it cooks.
Once the potpie has thickened, preheat oven according to package on crescent package. Then unroll and cut triangle shapes in half. Bake until golden brown.
Scoop pot pie mixture into bowls and place cooked crescent triangle over top of pot pie.
Preparation time: 5-7 minutes
Cooking time: 35 minute(s)
Number of servings (yield): 16

The post Easy Chicken Pot Pie appeared first on Living Well Spending Less®.
February 13, 2017
Pay Off Debt or Build Up Savings?

Figuring out this financial freedom stuff can be a little confusing sometimes! Save first or pay down debt? If we save first, aren’t we just accumulating more debt? But if we focus on paying down debt, then how do we even begin to save money? Ack!
Anyone going through the process of trying to gain more stable financial footing eventually finds themselves feeling stuck in a catch 22. If you feel like you’re running in circles trying to figure out how to do what and when, you’re definitely not alone!
I know I’ve definitely struggled finding these answers. It seems logical to pay off debt as fast as possible. After all, debt usually includes interest and interest is time-sensitive. The longer it takes to pay off debt, the more interest we end up shelling out for. Yikes!
On the other hand, if there’s an emergency while paying off debt, then we’re really in trouble, right? Basically, an emergency will swiftly undo any progress we’re making as we pay off debt. Suddenly, with one swipe of the credit card, one car repair, one plumbing emergency, or one vet bill, we’re right back in debt again.
It’s enough to make your head spin.

Where to Start…
First off, I should start by saying that I don’t consider myself to be some sort of financial guru or expert. In fact, when I started this blog, I was pretty much a disaster with money. My husband and I were fighting about money all the time, and I had no idea how to get a handle on literally anything. I wasn’t making good choices, and although he had always been pretty good with money, I was taking him down with me.
After a few life changes (which you can read about here), my husband and I started to figure out ways we could successfully tackle our debt, make better money choices, and start building up our savings. We looked to experts who could help us on our journey. We started to live more simply and embrace a less-is-more-mentality. We also started to eat at home more often, and we cut back on shopping for toys, books, clothing and “stuff.”
One of the biggest helpers along the way was our participation in Dave Ramsey’s Financial Peace University. It helped us identify some roadblocks we were running into and figure out how to even start to tackle our debt and make headway financially. In Dave Ramsey’s course, his first recommendation for getting out of debt is to stop following the advice of broke people. Again, we have to look at the successful debt slayers and figure out what they can show us.
That’s why I also recommend Slaying the Debt Dragon (love that title!) written by my friend Cherie Lowe. In her book, she outlines how she successfully paid off $127,000 in debt. (Wow.) Cherie offers several tips for those of us who are getting started paying off our debt and facing these questions.

First, Start an Emergency Fund
Both Cherie Lowe and Dave Ramsey recommend starting an emergency fund. This is Dave’s Step One in his Total Money Makeover Baby Steps. Cherie swears by it as well.
The thought behind an emergency fund is this: When life’s unexpected emergencies come along (and they will come along), an emergency fund of $1,000-$2,000 will help you address the emergency without going further into debt.
Time and time again, savings bloggers and financial experts have reiterated the importance of an emergency fund. It can seem a bit scary, of course. Coming up with $1,000 seems nearly impossible when you’re broke. In fact, you might be thinking, “I could sooner fly to the moon than produce $1,000 today.”
However, there are ways you can easily start an emergency fund today. You don’t have to do it all at once. Break it down into smaller parts. $1,000 is less than $20/week (it’s $19.23 to be exact).
Think of the ways you can possibly come up with $20 extra per week. Could you skip a trip to the coffee shop? Forgo a magazine in the checkout line? Pack a lunch instead of buying something? Just by performing these small actions, you can sock away $20 per week. In a year’s time, you’ll have $1,000 put away.
Now, if going without an emergency fund for a whole year seems a bit scary, there are other ways you can build up your emergency fund right now. You can sell something (or a few somethings) you have on hand. You can cut back on your bills, utilities, and eating out. Or, you can pick up an extra job or do some work from home. There are many surprisingly simple ways you can build your emergency fund quickly.
Financial planning company brightpeak offers a free eBook with tips to help you boost your emergency fund. The sooner you build up your fund, the sooner you’ll feel safer and more at peace if you’re facing any emergency.

Then, Start Paying Off Debt
Once you’ve determined you want to start working toward slaying your debt and tackling savings, the first thing you need to do is to examine your budget. This means gathering together all of your bills and looking at what you owe—the good, the bad, and yes, even the super ugly.
If you’re new to budgeting and aren’t sure how to get started, check out our budgeting 101 archives for tons of tips and our free budget planning worksheet. These resources will get you set up to start making real headway on your debt and figuring out where you can save a little and how to get control of your finances.
Once you’ve gathered your bills and assessed your budget and amounts, it’s time to make yourself a promise. This was one of the biggest challenges for me, and I know it’s hard. Promise yourself you will stop taking on more debt.
If you really want to get things paid off, you have to stop taking on more debt. Having an emergency fund in place will help give you the confidence and safety net if something comes up unexpectedly. But to really make progress and headway on getting your finances under control, you have to stop taking on more. Then, you’ll be ready to pay it down and slay it!
Once you’ve figured out your budget and you’re ready to start crushing your debt, you’re probably wondering how to begin. Again, I have to recommend a Dave Ramsey method: the “Debt Snowball.” (Sounds kind of fun, right?)
With the Debt Snowball, you gather all of your debts together and start to pay off the smallest debt first. Other advisers recommend looking at interest rates and other factors first, but the Debt Snowball method is one of the most satisfying and gives you almost instant gratification.
When looking at your budget, figure out how much extra you can put toward paying down your debt, while still making all of your other minimum payments. If you’ve just worked on your emergency fund, chances are you’ve gained a few tips you can now apply to earning extra to pay off debt.
For some, it might be really challenging, so maybe you can only afford $10 extra toward paying things down. That’s fine! Any progress is still progress. Don’t get discouraged. Just do what you can (and continue to look at areas of your budget you can shave down to boost your snowball).
Each month, as you pay that little extra toward your debt, you’ll see real measurable progress! It’s exciting to see it go down—and so freeing! Once your smallest debt is paid off, take everything you were paying toward that debt and roll it over toward tackling the next smallest item on your list. Keep going and use your momentum to propel you forward!

When to Boost Savings
If you’ve managed to slay all your debt (with the exception of your mortgage), then you’ll want to start building up your savings. It can take quite a while for most of us to get to this step, because the reality is, so many of us are living with the burden of debt.
Coming out from under the weight of debt is a tough battle, but once you’ve waged war, you’ll feel such confidence and reassurance in your abilities that you’ll want to keep going. It can be a challenge not to backslide, and of course, there are always unexpected things that can happen like a job loss, injury, or major emergency—all of which can derail some of your progress.
When you’re out of debt, you’ll want to start building up enough savings so that NO disaster out there will derail your progress. This means saving up 3-6 months’ worth living expenses. Think of how much peace it brings to know you could survive a 6-month crisis without losing your home or sending your family into a debt spiral. That is true financial peace.
If the idea of becoming debt free and creating ample savings seems like an impossible dream, don’t give up! Take small steps to move toward your goals and you’ll reach your destination before you know it. It’s all about progress and moving forward, even when things seem hard or scary. Take small steps to keep you moving on your way.
We can all benefit from feeling at peace from our financial worries. Even if we’ve made mistakes, we can forgive ourselves and start to work toward our goals. Try not to beat yourself up about the past. Instead, move forward with a plan and know you can start saving and tackle your debt today!

The post Pay Off Debt or Build Up Savings? appeared first on Living Well Spending Less®.
February 10, 2017
Become a Weekend Warrior

Don’t you just love the weekend?
If you’re anything like me, your weeks are just so so SO busy! There’s school, work, errands, soccer, piano lessons, meetings, obligations—ack! Sometimes it’s hard to fit in quality time.
But the weekend–especially a three day weekend–is like a little gift. I like to think of it as a special “bonus” day where we get to treat ourselves to something we’d really like to do. It can give us enough time to do something productive we just can’t normally fit in during the week. Or it can be a reward after a busy week—that time we take to rest and recharge.
So the next time you have a free weekend on the horizon, whether it’s a holiday or just a day when school’s off, here are a few ideas to help you make the most of it!
Feeling productive? Start with #1.
Feeling like you need a break? Skip to #7!

1. Tackle an Organizing Project
Tackling a big organizing project over a three-day weekend can leave you with an enormous sense of satisfaction and accomplishment, when all is said and done. A long weekend is the perfect opportunity to address something you’ve been holding off on until you have more time.
This is a great weekend to organize your garage, deep clean your fridge or pantry, or really make headway with your closets. Whatever you choose, a full, extra day off gives you time to organize your plan of attack. You can even use this time to sketch out your organizing calendar far into the future to get your house organized and into the shape you desire most.
Eat that Frog and start with the project you dread the most. Is it the attic? Organizing the basement? Cleaning out the bathroom cabinets? Whatever it is, take a little time when you have a “free day” and get it done. Think of how relieved you’ll feel once you’ve taken care of something challenging!
2. Create or Review Your Budget
If you have a quiet third day off and you feel like you can finally address some paperwork, it might be a good day to start creating a budget. For those new to budgeting or wondering where to start to get your finances in order, a Monday or Friday off can really be a great chance to get a leg up on the project.
One thing to keep in mind: if it’s a three-day holiday weekend, making phone calls might be difficult as other businesses, banks, and bill collectors might also have the day off. However, if your three-day weekend falls on a regular ol’ Monday or Friday, then don’t delay!
Starting your budget can seem daunting, so setting aside an extra day when you can quietly examine everything and make a plan going forward really helps. Once you know the lay of the land you can figure out how to navigate going forward. Download our budget worksheet here to get started.
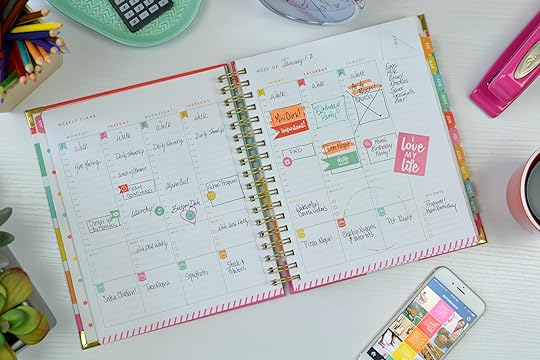
3. Set Up a Planner
If you’ve ordered our Living Well Planner, take advantage of your three-day weekend by scheduling a little time to really get your planner set up. You can add your own personal touches, schedule out your appointments and plans, and spend the whole day “playing” in your new organization tool.
Even if you prefer to use Google Calendar or an electronic organizer, your day off can give you a chance to look over everything, check out what’s on the horizon, and set up some appointments, goals and plans for the future. A three-day weekend is a great time to “catch your breath” and look at new ways to manage your tasks, plan menus, create your to-do lists, and more.
If you use apps or other tools to help you organize your schedule, the extra day off will give you an opportunity to get to know how to use them and ensure you’re taking full advantage of their utility. You might also want to use the day to update any software, organize your digital photos, and/or do some archiving and filing. Look at the three-day weekend as an opportunity to reset and move forward fresh!
4. Catch Up on Sunday Prep
I don’t know about you, but some Sundays go very fast for me—especially on weekends when we have other obligations, appointments and activities. As much as I love to use Sundays to prepare my family’s upcoming meals and do my freezer cooking for the week, some weeks…well…it just doesn’t happen.
A three-day weekend can be a great chance to do a little extra freezer cooking and create some make-ahead meals. Consider cooking up some extra soups and sides so you’ll have options on those weeks when things are a little lean. You might also like to prepare baked goods like cookies and bread, which always seem to take a little bit longer or require you go into “baking mode” instead of cooking.
If you’re working ahead on freezer cooking, consider making items like Buffalo wings, soups, dips, and party fare. It’ll save you from stressing out the next time an opportunity to entertain arises and you don’t have time to cook a big meal.
For more ideas on what to cook, visit our freezer cooking archives where there are plenty of options to get you started!

5. Go on a Weekend Purge
A three-day weekend is a great opportunity for a “weekend purge” because you’ll still have an extra day to recover (or finish up the process). If you feel like you have a little too much “stuff,” taking time to start clearing and organizing can be a great three-day weekend project.
What’s a weekend purge, you ask? It’s a chance to get a leg up on decluttering and “unstuffing” your space. If you’ve been looking for an opportunity to make headway on organizing your life, but you aren’t sure where to start, a weekend purge is the ultimate opportunity to really take it on.
If this sounds up your alley, I’ve detailed the entire process in my book, Unstuffed: Decluttering Your Home, Mind and Soul. Check it out!
6. Hold a Yard Sale
If you’re hoping to hold a garage sale, a yard sale, or even just drop some items off at the Goodwill or offer them for pick up on Craigslist, take advantage of your three-day weekend.
A yard sale often takes a good deal of setup and planning. Plus, once you’re finished, you’ll need to figure out what to do with the items that didn’t sell or that you plan to donate. Rather than trying to box everything up and put it away for another week (or month or year), take care of it right away on your extra day off!
A yard sale can be a great way to earn some extra cash and it’s a wonderful family project because everyone can help out and get involved. Once the sale is complete, you’ll be proud of what you’ve achieved together and you just might have a little extra money in your pocket as well. (Tuck it away for your next three-day weekend! After all, three-day weekends don’t come around that often!)

7. Take a Staycation
If you can’t get away on a three-day weekend jaunt, it’s the perfect time for a “staycation” right in town. Staycations are so great! You get the opportunity to do something fun and local, and experience the often-overlooked right in your own town.
Set some “vacation rules” to really make your staycation feel like vacation. For example: no cellphones, email, TV, fighting, working, housekeeping or worrying! It’s a chance to escape, unplug and reconnect with each other. It can be a really renewing and refreshing experience and it gives us all that same post-vacation bliss we’d experience if we went out of town (without the expense and headaches of travel).
If you’re looking for staycation ideas, try checking out your local visitor’s bureau website, which likely offers great resources for your town. Museums, parks, theaters, zoos, aquariums, and even your local baseball diamond and library can be fun ways to build memories and see your town from a fresh perspective.
8. Hold a Craft Day
Who doesn’t love a craft day? I know my girls get behind any chance to get creative with mom! We’ve tried painting mugs, sewing, making playdoh, stamping, printing and cards (and there are plenty more ideas here).
A three-day weekend is a great chance for kids to refresh their artwork displays all around your house. It can also be a chance to create some crafts for other people. For example, if there’s a birthday or holiday coming up, try crafting some handmade gifts.
The wonderful thing about a craft day is that it really gets your creative juices flowing. Sometimes in the 9-5 of the workweek and school days, things become stressful and heavy. Taking time to indulge your creative side gives you a chance to feel calm, relaxed and refreshed.

9. Treat Yourself to a Spa Day
Who doesn’t love a spa day? But a spa day sounds expensive, right? In the interest of full disclosure, I worked at a spa many years ago and many of the treatments can be easily performed at home and they’re just as rejuvenating (and much less pricey)!
Diffuse some essential oils to really create a spa atmosphere in your home. Try lemon, peppermint, eucalyptus, or lavender. Play some soft music, get out your fluffiest towels, and put on your softest robes or jammies.
Don’t stop at just a facial or body scrub. Try treating yourself to a pretty manicure and pedicure, and take a long, luxurious bath…with bubbles, of course! Finish off your spa experience with some lemon water, herbal tea, and perhaps a square or two of antioxidant-rich dark chocolate. Mmm!
10. Play Games
Family Game Day is just about one of our favorite things to do together as a family. If the weather is nice, try outdoor games as well. You could try a good old-fashioned hide-and-go-seek, tag, or yard game to get everyone moving. If it’s a warm day, try shaving cream twister or blow giant bubbles. Have FUN!
Make your family game day festive with popcorn, bite-sized treats and game-friendly food. Spread your games out on the floor or put some comfy chairs around the table and really get into it.
The next time you’re lucky enough to have a long three-day weekend on your calendar, take full advantage and use it to accomplish something, get a jumpstart on a big project, knock off a project you’ve been putting off, or simply to treat yourself to a fun time with family. It might be your most productive (or relaxed!) long weekend ever!

The post Become a Weekend Warrior appeared first on Living Well Spending Less®.
February 8, 2017
Double Chocolate Rebel Cookies

This is a guest post from Sammi of Grounded & Surrounded
Cookie recipes of every flavor and kind can easily be found in this day and age. However, there is something to be said for recipes that are passed down by family and friends. There’s a connection. You can trust those special recipes will be delicious.
I am trilled to share this particular cookie recipe with you. It has been passed down through the years to me and someday my own daughter will be given the tattered and worn recipe card.
Over 40 years ago, a friend of my mother’s graciously shared this special recipe with her. Who would have thought all those years later, these chocolate cookies would become a treasured family recipe? Everyone’s eyes light up when they are baking!
It’s the feeling and love behind recipes that make them special isn’t it? I hope you will make room in your own hearts and ovens for these delicious cookies.
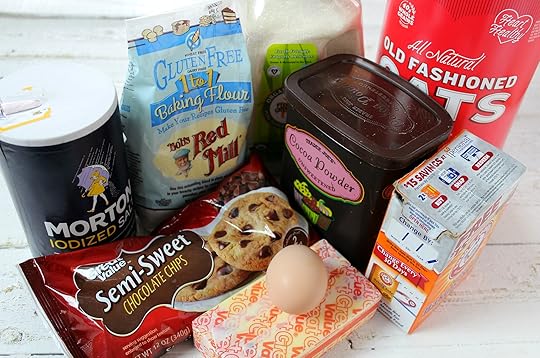
Here is what you need:
1 cup sugar
1 cup butter, room temperature
1 egg
6 Tbsp cocoa powder
2 Tbsp water
1 cup gluten-free flour
1/2 tsp baking soda
1/2 tsp salt
3 cups oatmeal
2 cups semi-sweet chocolate chips

Step 1: Preheat oven to 350 degrees. In a large bowl, cream together sugar, butter, egg, cocoa powder, and water.
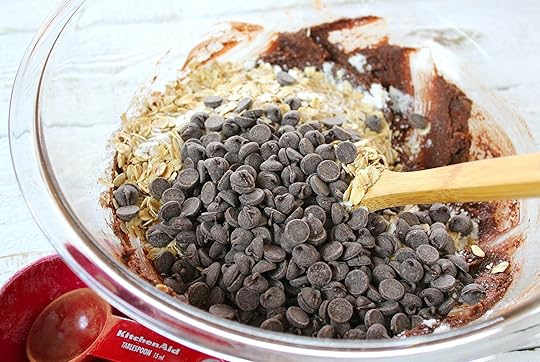
Step 2: Then add to that same bowl, flour, oats, salt, baking soda, and chocolate chips.

Step 3: Mix ingredients until a thick dough is formed.

Step 4: Form dough into 1 Tbsp balls and place on a cookie sheet lined with parchment paper or sprayed with non-stick cooking spray. Bake for 10-12 minutes or until tops of cookies are just set and a little hardened to the touch. Be careful to not over bake them. Remove from cookie sheet and allow to fully cool on baking rack and then store in an airtight container.

Recipe Notes: The original recipe was made with all-purpose flour, but after experimenting with a gluten-free version I found they retain their same shape, delicious flavor, and soft texture as the original.
If you are lucky enough to have these cookies left for more than a few days, take the remaining cookies and crumble them into a decadent granola and sprinkle over ice cream or yogurt!
Print This!
Recipe: Double Chocolate Rebel Cookies
Summary: The crunchy outer shell of these cookies gives way to an ooey-gooey chocolate center. This recipe will quickly become your family’s favorite cookie!
Ingredients
1 cup sugar
1 cup butter, room temperature
1 egg
6 Tbsp cocoa powder
2 Tbsp water
1 cup gluten-free flour
1/2 tsp baking soda
1/2 tsp salt
3 cups oatmeal
2 cups semi-sweet chocolate chips
Instructions
Preheat oven to 350 degrees;In a large bowl, cream together sugar, butter, egg, cocoa powder, and water.
Then add to that same bowl, flour, oats, salt, baking soda, and chocolate chips.
Mix ingredients until a thick dough is formed.
Form dough into 1 Tbsp balls and place on a cookie sheet lined with parchment paper or sprayed with non-stick cooking spray. Bake for 10-12 minutes or until tops of cookies are just set and a little hardened to the touch. Be careful to not over bake them. Remove from cookie sheet and allow to fully cool on baking rack and then store in an airtight container.
Preparation time: 3-5 minutes
Cooking time: 10-12 minute(s)
Number of servings (yield): 40 cookies
Sammi Ricke likes to keep things simple, delicious, and nutritious in her kitchen.
She enjoys the challenge of finding unique ways to incorporate “just one more whole food” into every meal while leaving just enough room for life’s essentials: chocolate and peanut butter. If you are looking for “healthified” versions of your family’s favorite meals be sure to visit Sammi’s Grounded & Surrounded Blog. You can also find her on Pinterest, Instagram, and Facebook.

The post Double Chocolate Rebel Cookies appeared first on Living Well Spending Less®.
February 6, 2017
Online Banking 101
We’ve all made a banking mistake or two (or twenty) before. At any given time we’ve got a million different things competing for our attention, which makes it pretty easy to forget to schedule an online payment or keep on top of bank and credit card statements, history and activity. Miss a payment and suddenly fees pile up or in comes a call from a collector—or even worse, your debit card is declined while in a busy line. (Been there. So embarrassing!!)
While online banking is super convenient, I still worry that theft or error could spiral out of control before anyone notices, despite all the notifications and fraud alerts. Before we know it, we could be arguing on the phone with the bank, chasing receipts for proof of purchases, disputing fees, and worrying about outstanding checks clearing before our account is reimbursed. Who needs THAT hassle?
Take heart! There are some cool apps, simple alert features, and convenient programs many banks offer to help us stay safe and protected, as well as save time dealing with all this banking “stuff.” When you’re banking in this digital age (and especially if you’re on the lookout for a new bank), here’s what to look for…

1. Beware of Phishing Emails & Calls
We’ve all heard the warnings, but it’s worth repeating. Legitimate financial institutions will never contact a customer and request protected information via email or over the phone (like an account number, social security number, or ATM PIN). When your bank contacts you, insist they provide the proper information to prove who they are and be suspicious of anyone asking for a password, PIN or full account number.
Many scammers “phish” by sending out legit-looking emails, directing the victim to similarly-named websites and prompting them to log in with their bank information. Beware, if you follow the prompts and log in, these “camouflaged” sites can capture your username and password, allowing criminals to steal money and sensitive personal information. Scary, right?!
Whenever you receive an email like this, call your bank right away and report it. If you call the branch you’re familiar with, they can help you navigate through any scams and information theft.
These days experts recommend that you NEVER answer a call you don’t recognize, but in the event you do receive a questionable call, never answer in the affirmative. Instead, immediately ask for the caller’s full name as well as what branch or location they’re calling from, and let them know you’ll call back to confirm. Then, call your bank with the information to check legitimacy and verify. Scammers are getting smarter and smarter these days, but they don’t hold up to questioning, so go with your gut! If it doesn’t feel right, hang up without responding!

2. Ensure You’re Offered Protected Access
Many banks offer “two-step authentication,” a great security feature. This means that any time someone logs in to a bank account from a new device, that user must provide a password PLUS a unique piece of code. The bank may text or email the code to a trusted account or device (such as a cellphone) or they may give the user a “fob” that generates a unique code that changes every few minutes. When logging in to an account, the user has to enter the regular password PLUS the code from the text, email or fob.
Carrying around (and keeping track of) a fob might seem like one more thing to lose, but many of these devices are keychain ready or can hook right on to your purse or be stored somewhere safe in your house.
In case your bank doesn’t offer two-step authentication, be sure to use a very strong password. Most strong passwords contain upper and lowercase letters as well as numbers and symbols, and should be changed every three months or so. (So if your password has been the name of that first pet for years, or worse “password123,” it’s probably time to change it up!)
Managing passwords can be kind of a pain, especially for those of us who do a lot of work and activity online. Consider using an app like LastPass, Dashlane or KeePass to conveniently store passwords. Many of these password managers are highly secure (offering two-step authentication of their own), which means we don’t have to remember the nuances of 27 different passwords.
It’s also important to always use a trusted internet connection to access information. You don’t need to have your own personal server or encryption software to access your bank account, but only log on from a trusted device. Accessing bank account information from a public computer (such as at the library) isn’t so safe.
If you must access your account away from home and trusted devices, always be sure to log out completely when done. It’s good practice to log out from your home computer as well, rather than simply closing your browser window. Change your browser settings to private on both your computer and smartphone to add another layer of protection.

3. Set Up Automatic Alerts, Payments, Reminders & Syncs
When convenience is available, we should take advantage! If your bank offers automatic notifications, you may want to set them up to alert you when certain activities occur. For example, you could set up an alert to notify you when someone withdraws over a certain amount, when there’s heightened activity on your account, or when a very large and/or international purchase is made. These notifications can help you keep an eye on your money and catch fraud early on, before it’s too late.
In the event, you become a victim of fraud, don’t despair! This happens to many of us and it’s pretty common these days. But still, it can be really scary. Due to increased identity theft and fraud, banks are very aware of changes in your banking behavior and they aim to always protect you as a customer. You can report any fraudulent activity (like charges or withdrawals you didn’t make) to your bank, and they will investigate and take care of it, especially if you report it quickly. (Federal law protects personal accounts from fraudulent activity for 60 days.)
Lessen the load by setting up automatic withdrawals, regular transfers to your savings accounts, and online automatic bill pay whenever you can. Nowadays, many (if not most) banks also offer the ability to make deposits right from a smartphone by simply taking a picture of the front and back of a check and sending it in via their website or through an app. Always keep your mobile-deposit checks for 30-60 days, just in case there are any discrepancies.
Apps like Venmo, Pay with Amazon, and Square Cash allow users to make payments and transfer money right to other people’s accounts (like the babysitter or the dog-walker). While these services often include some fees, the convenience is really nice. If you’re going to run into ATM fees anyway or if you have a hard time organizing cash, these apps can actually save you money.
Another key is to set up regular reminders. Whether you use a digital calendar (like Google Calendar) or a physical planner (like my Living Well Planner), make it a priority to set up alerts and block out time to regularly review your bank accounts (monthly, at minimum). Compare and contrast your statements and activity to your budget, so you don’t miss anything or accidentally overspend.
Whether you use QuickBooks or another accounting software, you can conveniently sync it to your bank account to update in real time. (So helpful!) Even if you aren’t super-techie, most programs offer online tutorials to help walk you through the process. You can even consult with a customer service representative at your bank. They can usually help you set it all up, too.

4. Always Read the Fine Print
When signing up for an online account, whether it’s checking, savings, or a credit card, always check out the terms and fees, and read through all that (headache-inducing) fine print. I know, I know—trust me, no one likes doing it!
Unfortunately, banks expect customers to skip the fine print, so some financial institutions take advantage by including provisions that allow them to charge crazy-high fees or require complicated qualifiers to actually access their services or those great interest rates they advertised. It might seem like you qualified for a great deal, but then you learn it’s only available if you carry a high minimum balance, plus your interest earnings and savings are negated by inflated annual fees. (Be sure to know what credit card tricks to avoid, too.)
Online banks can provide access to checking, savings, and credit accounts with fewer fees, as well as offer appealing products like CDs and mutual funds, plus convenient services like online bill pay. But be sure to read through everything to be safe. Banks should always allow access to basic services (like viewing electronic bank statements or withdrawing cash from ATMs) without paying fees.
Check that any online bank is FDIC insured and by what institution. Some online banks (like SmartyPig) have snappy names online, but they’re overseen by larger, reputable financial institutions and insured through them, so they’re safe. Don’t ever give money to an institution that’s not clearly insured.

5. Check for Rates, Perks & Apps
If you’ve opted for an online bank rather than a brick and mortar bank, you’re in good company. More and more people are opting for online services, especially when it comes to services like lines of credit, CDs, and special savings accounts such as college savings (529).
Going with an online institution can save you from lots of rates and fees, but be sure to do some comparative “shopping” before you commit. Money-Rates.com offers a comparative list of the various rates and services offered by online institutions, so you can compare and contrast quickly in one place.
You may also want to compare different perks (like miles, bonuses and cash back) offered by credit companies and financial institutions. NerdWallet keeps a running list of the best credit card offers so customers can sort by perks and rewards, credit score requirements, and other factors.
No matter what, find what works for you and use what helps you most. When it comes to digital banking, there are many tools available, and, depending on your comfort level, some can be great time and money savers. We can use these security tips and digitized tools to our advantage to help us manage money and stay on top of our finances, even when we’re crazy busy!

The post Online Banking 101 appeared first on Living Well Spending Less®.
February 3, 2017
How to Create a Financial Plan for the Year: February

Do you ever feel like saving money is impossible? Like no matter how hard you try, putting away money just doesn’t happen?
Figuring out finances can be SO overwhelming (and sometimes it can be hard to even know when, where or how to begin). That’s why I’ve decided to create this Financial Plan for the Year Series.
Each month, we’ll detail three simple action items (yes, just 3!) to help you get and keep your saving and spending on track, all year long! Each month is broken down into bite-sized tasks, so you can start saving money without upping your stress level.
You can start working on your finances any time of year, so don’t feel like it’s too late to start the year out right. This roadmap is designed so you can jump in at any time, although seeing as we’re only into February, you may want to refer back to January to ensure you’re getting the most out of this year-long plan. Up to you!
Either way: you can do this and it’s never too late to get going! Let’s go!
Just getting started? Either jump right in this month or skip back to our January post to learn how you can create a financial plan for the whole year!

February: Focus on Saving
Ah, February. It’s that tough time of year when we take pride and joy in how much we’ve kept our New Year’s momentum going…or we find we’ve fallen off the wagon.
So often the resolutions and positive habits we embraced in January can start to falter a little in the second month of the year. If you’ve had a stumble or didn’t hit your mark for January, it’s okay! Dust yourself off and get back in gear. You can do it!
Despite being in the middle of the winter, February is a great month! It’s short (with 28 or 29 days), it’s sweet (with Valentine’s Day), and the days are just starting to get a little longer and a little brighter. It’s a great time to keep up your new financial resolve.
Action Items for February:
Focus on Saving
Reduce Bills by Picking Up the Phone
Cut Your Grocery Bill in Half
Before You Start: Assess Your Budget
In January, we were all about getting started. You gathered your bills together and created a budget. Now it’s time to see how your budget worked for the month. (If you’d like to start a budget this month, it’s a great first step to getting your financial plan on track. Skip back to the January Financial Plan post to get started.)
Take an in-depth look at your budget and spending for January. In which areas did you hit your target numbers? Where did you miss the mark a bit? Did you track your spending? If you didn’t, February’s a great month to start! Make adjustments to your budget and plan, as needed.

1. Focus on Saving
February is a perfect time to find great ways to save money and bolster that budget. If you don’t have much in the way of savings, don’t despair! Now’s the time to get started.
We all know unexpected things happen in life, so part of being financially safe and sound is finding a way to take care of those “surprises” so they don’t derail your financial progress. Just like preventative maintenance on your car or going to the doctor for an annual checkup, establishing a savings plan is like insurance…it’s there to help when something goes awry. It’s called an Emergency Fund and it’s your safety net for life’s little emergencies.
$1,000 is usually a good target for an Emergency Fund. That’s enough money to ensure you don’t swipe a credit card when something unexpected happens, but it’s not so much that it seems unattainable. In fact, with a little dedication and outside-the-box thinking, you just might be able to hit the $1,000 mark before tax time! Read this post to learn discover 10 Ways to Build an Emergency Fund.

2. Reduce Bills by Picking Up the Phone
Last month, we looked at a few ways to save on utilities and bills. Did you make any calls? February is a great month to set aside some time to call your bill collectors, utility and service companies and see where you can save even more!
Sometimes we don’t pick up the phone because we’re nervous about what they might say or we just plain don’t feel like waiting on hold with the cable company or a credit card representative. Give yourself a little pep-talk beforehand and find something enjoyable to do (like flip through a magazine or look at Pinterest) while you wait on hold.
One of the things I’ve been surprised to find is that every single bill is negotiable! Now, I’m definitely not the kind of person who loves to drive a hard bargain or enjoys “wheeling and dealing,” but I’ve found the magical phrase, “Is that the best offer you can provide?” seems to work well. It’s not too intimidating to say, and often, when you use a polite approach, card representatives, utilities, cable, car insurance and other companies are helpful and happy to see what they can do for you.
Inspired? Read this post to learn 12 Super-Smart Ways to Save on Utilities.

3. Cut Your Grocery Bill in Half
Food can be super expensive, and most of us hate wasting it. Shopping carefully, always following a list, watching for sales, and creating a meal plan can help keep you on track and keep your budget in check.
If you’re interested in saving a ton of money at the grocery store, there are plenty of ways you can literally cut your grocery bill in half. For example, what if I told you relying on coupons alone shouldn’t be your first step? It’s true! You’ll save much more when you focus on shopping the sales FIRST. Stockpiling food for your family is another awesome way to save on groceries.
Check out these resources to learn more about how to put your grocery bill on the chopping block:
How To Cut Your Grocery Bill in Half
Family Meal Plan Checklist
The Beginner’s Guide to Coupons

Bonus: Best Purchases in February
February is a shorter month and it’s not often a month where items fly off the shelves. That said, February is a great month to continue to watch for winter boots and clothes. (The selection won’t be great, but the deep discounts roll out now.)
Seasonal items like snow blowers are priced to move and winter sports equipment is at the best prices of the season.
With the Super Bowl in February (and the end of football season), you can find great deals on sports team apparel and big televisions (for all those Super Bowl get-togethers). You can also score good deals on party foods like chips, salsa and soda.
Presidents’ Day is traditionally time for cameras to go on sale, so if you plan to upgrade from your cellphone camera to a “fancy” camera, it’s a good month to find the best deals.
February might be a short month, but it’s a great time to focus on saving and establish great habits to lower your bills all around. Don’t get discouraged! Spring is right around the corner, so even if you haven’t had a perfect month in January, there’s still plenty of time to get on track. Make February your month to keep your momentum going full steam ahead!

Pin It
The post How to Create a Financial Plan for the Year: February appeared first on Living Well Spending Less®.


