
Ruth Soukup's Blog, page 47
April 12, 2017
Cauliflower & Broccoli Slaw Salad

This is a guest post from Sammi of Grounded & Surrounded
If you could embody the season of spring on a plate it would be this salad! With it’s abundance of colors and flavors, you will be proud to share this beautiful Cauliflower Slaw Salad with family and friends.
The warming temperatures always make me crave the fresh flavors of produce especially in salads. You will be surprised at the big flavors in this side dish considering the simple ingredient list of fresh vegetables and the easy homemade dressing. The key to this dressing is the fresh basil. Dried basil usually works well in recipes, but not this one. Fresh is best and you won’t be disappointed by the few extra dollars you spend on this herb!
Feel free to put your own spin on this salad by using purple or green cauliflower or by shredding your own broccoli stalks to make the slaw. I often choose to purchase a bag of broccoli slaw mix and pre-chopped cauliflower just to save on time, but rolling over discarded broccoli stalks into another dish always makes my frugal heart happy!

Here is what you need:
Salad Ingredients
12 oz bag broccoli slaw
1 cup frozen corn, thawed
6 radishes, thinly sliced with a knife or mandolin
5 cups or 1 small cauliflower, chopped into bite-sized pieces
Dressing Ingredients
2 TBSP or 6 large leaves fresh basil, minced
1 TBSP lemon juice
1 TBSP red wine vinegar
¼ cup mayo
3/4 tsp sea salt
¼ tsp black pepper

Step 1: Place all salad ingredients (broccoli slaw, cauliflower, corn, and radish) in a large bowl. Set aside.

Step 2: Whisk all dressing ingredients (basil, lemon juice, red wine vinegar, mayo, sea salt, & black pepper) together in a small bowl.
[image error]
Step 3: Pour your homemade dressing over the bowl of salad ingredients. Mix all ingredients well and refrigerate covered for at least 2 hours or overnight before serving. This allows the flavors to mingle and the vegetables to be seasoned perfectly.

Whether you choose to follow this recipe to a “T” or use your creativity to create your own version, enjoy this deliciously colorful salad.
Print This!
Recipe: Cauliflower & Broccoli Slaw Salad
Summary: If you could embody the season of spring on a plate it would be this salad! With it’s abundance of colors and flavors, you will be proud to share this beautiful Cauliflower Slaw Salad with family and friends.
Ingredients
Salad Ingredients
12 oz bag broccoli slaw
1 cup frozen corn, thawed
6 radishes, thinly sliced with a knife or mandolin
5 cups or 1 small cauliflower, chopped into bite-sized pieces
Dressing Ingredients
2 TBSP or 6 large leaves fresh basil, minced
1 TBSP lemon juice
1 TBSP red wine vinegar
¼ cup mayo
3/4 tsp sea salt
¼ tsp black pepper
Instructions
Place all salad ingredients (broccoli slaw, cauliflower, corn, and radish) in a large bowl. Set aside.
Whisk all dressing ingredients (basil, lemon juice, red wine vinegar, mayo, sea salt, & black pepper) together in a small bowl.
Pour your homemade dressing over the bowl of salad ingredients. Mix all ingredients well and refrigerate covered for at least 2 hours or overnight before serving. This allows the flavors to mingle and the vegetables to be seasoned perfectly.
Preparation time: 5-7 minutes
Cooling time: 2 hours or overnight
Number of servings (yield): 6
Sammi Ricke likes to keep things simple, delicious, and nutritious in her kitchen. She enjoys the challenge of finding unique ways to incorporate “just one more whole food” into every meal while leaving just enough room for life’s essentials: chocolate and peanut butter. If you are looking for “healthified” versions of your family’s favorite meals be sure to visit Sammi’s Grounded & Surrounded Blog. You can also find her on Pinterest, Instagram, and Facebook.
[image error]
The post Cauliflower & Broccoli Slaw Salad appeared first on Living Well Spending Less®.


April 10, 2017
Find More Balance

A few years ago, I read an article on balance and I remember thinking, “Balance? What does that even mean? And who has TIME to find this ‘balance’ anyway?? I’m a mom!”
Yet one of the most common goals I was hearing from readers is that they hope to find more balance…and I had to agree: I wanted it, too. So I started really thinking about it.
When it comes to finding balance, aren’t we just looking for a little more “zen” in our lives? We want to feel put together, more whole, more on top of it all, and less stressed.
…but we have our schedules, our families, our jobs, our homes, our churches, and our friends. We have goals we want to achieve, we have hopes and things we want to do with our lives—but also things we have to do to keep our families afloat and happy.
Balancing it all can feel challenging—if not impossible—a lot of the time.
But there is hope! We can all start slow and add a little balance to our lives every day. Whenever we start to feel like things are out of control or we can’t quite get a handle on literally anything, there are some specific, simple steps we can take to perk ourselves up, feel calmer and more focused, and feel like we’re getting our “zen” back.

1. Get Some Rest
Whenever I’m feeling stressed out, one of the first things I look at is how I’m sleeping. Stress messes with our sleep patterns and leaves us feeling deprived and foggy.
When we have too much on our plate, we often think that encroaching on sleep time will make up for it. In reality, taking time away from sleep actually leaves us less productive and focused. So if you’re feeling imbalanced, one of the best solutions is to make sure you’re getting some rest.
If you’ve got too many things on your mind and you just can’t calm down, set the stage for sleep: drink some warm tea (caffeine-free), turn off electronics a few hours before bedtime, sleep in a cool dark room, and use white noise to drown out the world. If your brain still won’t stop, consider writing down your worries or “scheduling” time to worry about them tomorrow. Often, after a good night’s rest, you’ll find problems aren’t as insurmountable as they seemed in the dark.
2. Move More!
Even though we feel like we’re running around all the time, many of us actually lead fairly sedentary lives—at our offices, in front of our computers, and in front of the TV. Not surprisingly, sitting around can cause health issues like heart problems, high blood pressure, obesity, and more.
You don’t have to run a marathon or take up a major sport to get benefits from moving. Find ways to fit in more fitness. Simply going for a walk, taking more steps, and taking standing breaks every so often can make a huge difference when it comes to health, stress and balance.
Walking and moving gives us time to think and sort things out. When we stretch, stand and move, we break up our “stuck thinking” and start to see things differently. Think of how many times you’ve been working on something, only to walk away for a moment and have the answer come right to you! Sometimes getting up, moving around and stretching it out can be great stress relievers!

3. Disconnect
We’re very connected to the world around us, whether it’s through social media, the news, the television, or even the barrage of advertising we see when we walk down a city street. We’re constantly bombarded by what we should buy, eat, do, think, and deal with.
All of this input can leave us on information overload mode. It’s easy to feel like we’re unable to keep up with it all, especially when most of it’s accessible right from our phones in the palm of our hands.
Take an information breather. Put down your phone and even consider turning off your electronics a few hours before you go to bed. Use social media for positive interactions and to connect with friends and family, but if you find yourself getting too overwhelmed, turn it off, tune it out, and focus on “real life.”
4. Take a Break
In a world that’s constantly saying go, go GO!, taking a break can seem impossible, unproductive, or even selfish. We might beat ourselves up for not doing more, while continuing to jam more into our schedules.
Breaks are important. Giving ourselves downtime helps keep us fresh. It helps stave off the feeling of being overwhelmed and helps us remember that life is short and we have to enjoy ourselves along the way.
Rather than berating yourself for taking a break, instead embrace it! Think of how much you’re enjoying yourself and how calm and good it feels (rather than mentally listing all the things you need to do later). Just allow yourself to BE in the moment and enjoy!

5. Spend Time Outside
When we’re outdoors, we get vitamin D and sunshine. Our mood feels lifted and we may even feel more energized and calm. Nature is the anecdote to stress.
Now you don’t have to go all Call of the Wild, but getting outdoors in fresh air can work wonders for your outlook and your balance. It might seem like yet another thing to fit in, but an outdoor workout, a walking errand, or just time in the garden or the park can be a great mood booster.
When you’re outdoors, notice the sounds and sensations. Feel the sun on your face, the wind in your hair, or the rain on your arms and legs. Look at the beauty of the earth and ponder the cycle of living things.
6. Indulge Your Senses
Our senses can play a powerful role in balancing our moods and helping us feel grounded, calm and in control. Dim the lights, roll out your muscles with a foam roller, or sit back in a comfy chair or on a pillow.
Use your sense of smell through essential oils to add to your wellbeing and give your mood a boost. Lavender, frankincense and peppermint can all be used to help bring a sense of balance and peace. There are also oil blends that come in kits offering a fusion of oils that will help you feel more at ease.
Put on some sweet smelling lotion and some cozy slippers, or curl up with something delicious like coffee or a sip-able treat and give yourself time to really enjoy the moment.
[image error]
7. Talk to a Friend
When I’m truly struggling with balancing it all and I’m feeling overwhelmed or defeated, I turn to a friend. Friends listen to our struggles, help us figure out solutions to our problems, and advocate for us and cheer us on.
It’s easy to feel like your social calendar is just another obligation or something you have to check off your to-do list. If you feel like you’ve got too many obligations and not enough connections, it’s probably time to get one-on-one with a buddy.
You don’t have to schedule a whole big to-do just to connect with a friend. You can simply find time to pick up the phone and chat, take an exercise class together, offer to go to the store, or get your kids together for a playdate while you talk it out.
8. Laugh!
Laughter is truly the best medicine. When you’re feeling stressed out or worn thin, it might be time to check out a funny blog, watch a few late-night show clips, or just put on a movie that makes you laugh.
Our kids can also be a great inspiration and source of joy—and sometimes that’s hard to remember when your tween is arguing about picking up her clothes or you’re on constant back-and-forth carpool duty to Little League. Kids know how to laugh and be silly, so by watching them we can learn a thing or two.
Try a fun family game, one that gets everyone involved and laughing, and just enjoy each other’s company. Watch a silly show or use a filter and see who can take the weirdest selfies on their phone.
You’ll end up in giggles in no time.

9. Evaluate Your “Time Jar”
We all have a time jar—the big things go in first, and then the little things get poured in around those. When our time jar is out of whack or we’re trying to fit in too much “big stuff,” it might be time to reassess our schedule and commitment load.
Look at your calendar and schedule. Find some little blocks of time you can book out just for yourself to gain some renewal. If you can’t find them on your calendar, it might be time to cut back on some of the bigger obligations.
Just like scheduling your appointments at the office or for the dentist, you have to schedule time for yourself. This might mean writing in a date night with your spouse or just making time for you to do something you really enjoy. If you schedule it in, keep your appointments with yourself!
10. Find Your Sanctuary
We all have a sanctuary spot: someplace that makes us feel calm, safe and balanced. For some of us, it might be in our yoga class, at a church service, in the kitchen making a fancy meal, or meditatively painting our nails.
Find your sanctuary. Find a place you can escape to that makes you feel calm, balanced and connected. When you have a place, even if it’s in your car with music turned up or on the couch make it your place where you recharge.
Your sanctuary should be a priority. Whenever you visit your spot, tell yourself that worry and stress aren’t allowed because this is where you recharge, heal, and renew yourself. All of that can go on “out there” in the real world, but here, in your sanctuary, you are safe, calm and balanced.
Can we eliminate stress from our lives? No! Of course not. No matter how hard we try, the toilet will clog, someone will be late for something, a bill will be due, or we’ll have an obligation we forgot. Life happens and stress happens.
The trick to balance is to work within the stress to find ways to heal and calm yourself—to nurture yourself through the times of stress so you can be strong enough to tackle whatever comes your way!

The post Find More Balance appeared first on Living Well Spending Less®.
April 7, 2017
How to Keep Your Car Clean
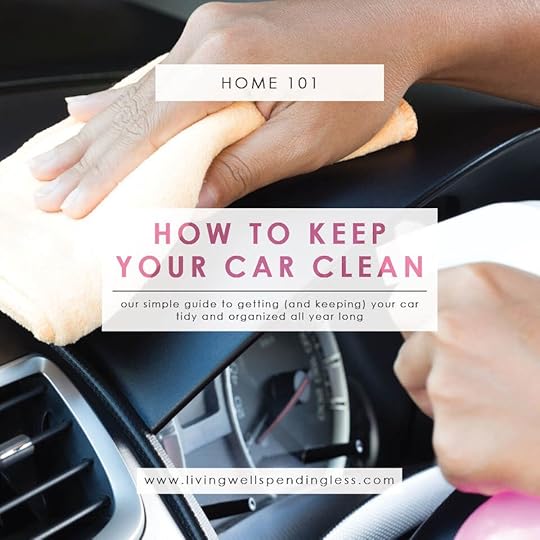
I don’t know about you, but sometimes it feels like we live in our car.
Okay, not literally of course—but you might think so if you looked in there! Between backpacks and schoolwork, snacks, games, shopping bags, sports bags, paperwork, extra jackets, and who knows what else, the family car gets a little cluttered and, well, messy.
As busy moms, our cars become our home, office, closet, and more while on the road. Plus, on top of all the “stuff,” there’s this mom-need to be prepared for any scenario, so we keep all kinds of stuff in our cars “just in case.”
But eventually, it all adds up and it’s just TOO MUCH. After way too many cringe-worthy incidents (like a fellow mom getting out of my car with crumbs on her pants from my car seat—eek!), I devised a plan to help me commit to keeping my car clean all year long.

Ruthlessly Purge and Clean Out Your Car
First up, set aside an hour or two and do a deep clean of your car. With some garbage bags on hand, divide everything up into the following categories: goes into the house to be put away, goes into the garbage, or stays in the car (which should be a very small pile).
Ruthlessly purge your car. Tackle the backseat, the trunk, the glove compartment, and that space under the seat where empty cups and change collect. Pull out car seats and remove any organizers on seat backs. Don’t forget to check the center console.
Throw away all garbage. Take items like change, extra clothes, paperwork and toys into the house to be dealt with and put away. Any remaining items you’d like to keep in the car should be removed as well.
Take everything (everything!) out of your car.
Once the car is completely empty, vacuum and wipe down all surfaces. Take out all floor mats and shake them. Hose down rubber mats and vacuum off upholstered ones. Spot treat any stains or spots on the seats of your car.
Vacuum the dashboard and console of your car. Using a butter knife or another thin object wrapped in a damp cloth, clean cracks in the console and in your dashboard. Use window cleaner to clean all glass surfaces from the inside of your car. Watch especially for fingerprints in the back windows.
Wipe down each door and check for any lingering wrappers, bottles or little pieces of paper that made their way into the door’s cup holders and pockets. Wipe off window buttons and all handles and touchpoints with a damp cloth.
Vacuum the glove compartment and the console. Clean out the little change holder and wipe it out completely. Really get down in the cracks of the seats and be sure all seatbelts are pulled out and in good working order.
Prioritize Your In-the-Car Needs
After your car is all cleaned out, it’s time to go back through the pile of items you’d like to put back in the car. Ask yourself if you really, truly need each item you’ve determined “belongs” in your car.
Again, I get the mom-need to be prepared, so don’t feel like you have to skimp on preparedness—just be reasonable. We keep two canvas bucket tote bags stocked for the car: one for winter and one for summer. In our winter tote, we keep items like an extra set of mini gloves, an ice scraper, a sweater, and a small fleece blanket. In our summer bag, I’ve packed sunscreen, an extra pair of flip-flops, an umbrella, and a spare t-shirt. Both tote bags also include an extra garbage bag (which can serve as a poncho, a seat protector, or a myriad of other things), a small pack of hand wipes and a $10 bill.
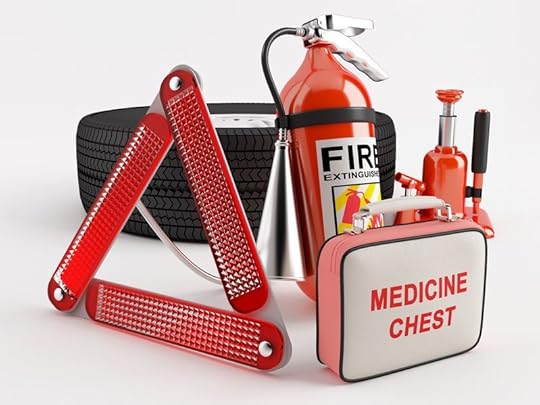
In the trunk, I keep a car emergency kit, which contains jumper cables and an old towel. In the winter (especially in cold climates), you may also want to include deicer, a small shovel, and a heavy-duty blanket.
In our glove compartment, we keep the paperwork for the car, including our AAA information, insurance information and registration. There’s also the car manual, a tire gauge, and a roll of quarters for emergencies. I’ve also packed a small flashlight and a phone-charger cord (our car has a USB port).
In the center console, I keep a pocket pack of tissues, and a small first aid kit with rubber gloves, bandages, pain relievers and alcohol prep pads. In the first aid kit there’s also a small pocketknife and matches. I keep a couple of chocolate-free (no melt) granola bars in there as well and a reusable shopping bag that folds up into a tiny pocket.
Plan to Stop Using Your Car as Storage
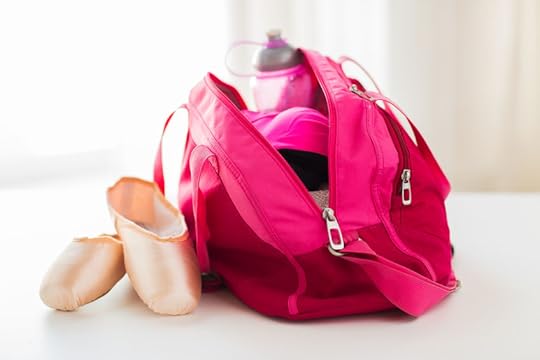
As a family, we’ve made a commitment to bring in everything from the car whenever we go to and from the house. This means backpacks, purses, sweatshirts, shopping bags, lunches, water bottles—EVERYTHING. This rule is a concerted effort to fight the flow of stuff and end the “car as storage” mentality.
When we go to dance lessons or a craft activity, we bring the bag of supplies we need with us. If we’re heading to the gym, to church or to a work meeting, I have various bags that go with me, each containing everything I’ll need. Each of these bags leaves the car with me when I exit.
In my purse, I try to carry items we may need that don’t store or hold up very well in a hot car, like lip balm, gum, lotion, and sunscreen.

Consider a “No Eating in the Car” Rule
One of the biggest car mess-busters I’ve found? I know this won’t be a popular answer, but we’ve simply stopped eating in the car. I swear, when we eat in the car, no matter how careful we try to be, we always end up with crumbs and spills. It’s inevitable and nearly impossible to avoid in a moving vehicle!
In this day and age, with fast food joints on nearly every corner, it’s tempting to go through the drive-thru and munch along on your road trip. We’ve actually found it slows us down and helps us appreciate the experience more when we sit together as a family and eat. We’ll find a picnic table, spread a blanket out on the grass at a park, or pull over at a rest stop and get out to enjoy our snack and our time together. It helps us avoid a stressful “mad rush” feeling when we’re trying to get to a destination and it keeps our car clean.
If you absolutely MUST eat in the car for whatever reason, try sticking to dry, non-sticky snacks like pretzels or carrot sticks. Enjoy water rather than sticky soda or juice, and keep coffee in a spill-proof travel mug. These little precautions really help us keep our car crumb and sticky-spill free!

When Your Passenger Has an Emergency…
With kids, life happens. Someone will have an accident, a spill, get wet, get muddy or end up with gum in their hair—it just happens. Your best preparation is to keep the old towel in your “car emergency kit” and the fleece blanket in your “seasonal car bag.” Both of these items can be quickly spread out on a seat or used to soak up accidents and spills.
When something happens in your car, clean it up right away or as quickly as possible. Unfortunately, cars get very warm and spills tend to set quickly. If there is a smelly spill (or someone gets sick in the car), clean it up as thoroughly as possible, and then sprinkle baking soda over the area of the smell. Allow it to set for a few hours or overnight, then vacuum up.
If you travel with pets, always keep them in a carrier for their safety, as well as yours. Not only will this dramatically cut down on pet hair, but pets can be very distracting in the car, potentially causing accidents. If your pet isn’t secured, they might be injured during a sudden stop. Never leave a pet (or anyone for that matter) in a car, even for a short time. The temperature in your car can climb quickly. In just ten minutes, an 80-degree car can climb to over 100. Keep everyone safe by never ever leaving anyone parked, even for just a minute.
If you’re ready to commit to ending your car clutter, way to go! Even though so many of us busy moms spend so much time in our cars (so much that for some of us, they end up becoming our traveling “home base”), we’re sure to feel lighter, more relaxed, and more prepared when we commit to fighting the flow of car clutter. While we all use our cars to move items and people, with a clean and organized car, we can tackle any situation that comes our way!


Ready to chase away the winter blahs with a freshly cleaned house? Packed with helpful tips, checklists, and the right amount of motivation to get you going, our 2017 LWSL Spring Cleaning Planner is just the tool you need to get started! For a limited time, get it free from Living Well Spending Less®–just our little way of saying Happy Spring! Be sure to print our brand new 2017 LWSL Spring Cleaning Planner. You can get it HERE, or simply click the button below!
The post How to Keep Your Car Clean appeared first on Living Well Spending Less®.
April 5, 2017
Lemon Bundt Cake

Mmmmm….dessert. We don’t know about you, but sometimes we want a sweet treat but nothing too sweet! Here at the LWSL test kitchens we’ve been working for months to create a recipe to fit the bill and we think we have finally found a winner!
This simple but delicious lemon bundt cake is absolutely amazing and oh-so-easy! This cake is so moist and has just the right amount of lemon flavor and is the perfect dessert to usher in Spring! Best of all, with healthy ingredients like real lemon essential oil and Greek yogurt, it’s a sweet treat we can all feel good about!
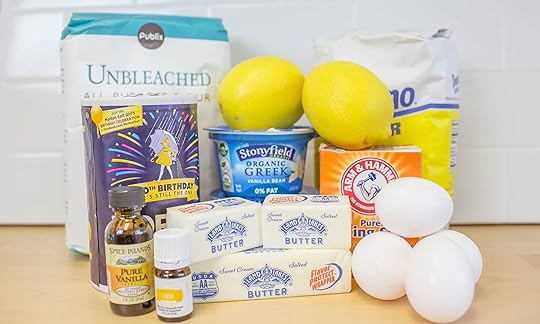
Here is what you need:
2 1/2 cups flour
1/2 tsp. baking soda
1/2 tsp salt
1 1/2 cups sugar
2 teaspoons lemon extract or Young Living Lemon Vitality EO
1 cup butter, softened
2 tsp vanilla extract
4 large eggs
1 cup Greek yogurt ( I used Stonyfield Vanilla Bean Organic Greek 0% fat )
Glaze
1/2 cup fresh lemon juice
1/2 cup sugar
1 Tablespoons lemon zest

Step 1: Pre-heat oven to 350 degrees. In a medium bowl, mix together flour, baking soda, and salt.

Step 2: In large bowl, mix together butter, sugar, eggs,vanilla extract and Lemon Vitality EO.
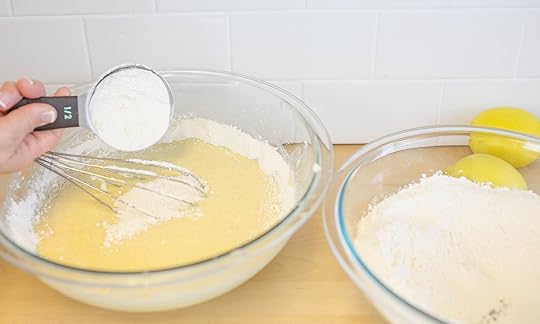
Step 3: Then start adding flour mixture into butter mixture a 1/2 cup at a time. Until it is all combined and batter is smooth.

Step 4: Spray bundt pan with cooking spray then add batter evenly in pan. (Note: drop pan on counter to release any air bubbles in batter.)

Step 5: Bake in oven for 35 minutes. Test cake with tooth pick,once cake is cooked let cool on rack.

Step 6: Make glaze by combining lemon juice, sugar and lemon zest in a small sauce pan. Cook until sugar is dissolved. Let mixture come to a low boil.

Step 7: Top cooled cake with glaze, slice and serve.

Print This!
Recipe: Lemon Bundt Cake
Summary: This homemade lemon bundt cake is absolutely amazing with just the right amount of sweetness and fresh lemon flavor.
Ingredients
2 1/2 cups flour
1/2 tsp. baking soda
1/2 tsp salt
1 1/2 cups sugar
2 teaspoons lemon extract or Young Living lemon Vitality EO
1 cup butter, softened
2 tsp vanilla extract
4 large eggs
1 cup Greek yogurt ( I used Stonyfield Vanilla Bean Organic Greek 0% fat )
Glaze
1/2 cup fresh lemon juice
1/2 cup sugar
1 tablespoons lemon zest
Instructions
Pre-heat oven to 350 degrees. In a medium bowl, mix together flour, baking soda, and salt.
In large bowl, mix together butter, sugar, eggs,vanilla extract and Lemon Vitality EO.
Then start adding flour mixture into butter mixture a 1/2 cup at a time. Until it is all combined and batter is smooth.
Spray bundt pan with cooking spray then add batter evenly in pan. (Note: drop pan on counter to release any air bubbles in batter.)
Bake in oven for 35 minutes. Test cake with tooth pick,once cake is cooked let cool on rack.
Make glaze by combining lemon juice, sugar and lemon zest in a small sauce pan. Cook until sugar is dissolved. Let mixture come to a low boil.
Top cooled cake with glaze, slice and serve.
Preparation time: 5-7 minutes
Cooking time: 35 minute(s)
Number of servings (yield): 16

The post Lemon Bundt Cake appeared first on Living Well Spending Less®.
April 3, 2017
How to Create a Financial Plan for the Year: April

April is a crazy-busy time, between spring cleaning, tax season, kids’ springtime sports starting, Easter festivities, and summer vacation saving and planning—there’s a LOT going on, so if you’re feeling overwhelmed and stretched a bit too thin…I get it!
Tis the season when we’re financially focused on ways we can save money, but we still want to be sure we have the time and money to enjoy the beautiful spring weather and fun family activities.
Figuring out finances is a challenge for almost every family. So rather than trying to tackle everything at once, I’ve broken down a year of financial planning into month-by-month steps. This Financial Plan for the Year Series features tips and tricks for each month that will keep you energized and motivated all year long! Each month, we’ll detail three simple action items (yes, just 3!) to help you take the next steps, save, get a handle on your budget, and find ways to organize and keep track of your finances.
Whether you’re following along or just jumping in, you may already be feeling overwhelmed. Don’t lose hope! If the thought of tackling three new ideas is making your head spin, set a goal to try just one each month.
You can do this!
Just getting started? Either jump right in this month or skip back to our January post to learn how you can create a financial plan for the whole year!

April: Tax Time, Meal Planning & Make More Money from Home!
April’s here, so tax season is upon us. Most of us are thinking about finances during this time—whether we’re worried we might owe money (and how to pay taxes without breaking our budget or killing our savings), or if we’re getting a refund and we aren’t sure the best way to use it toward our financial goals.
As spring gets going, we can also start to feel more social, so we may find ourselves going out more often or just grabbing a quick bite between baseball, track and soccer practice. Starting to meal plan and eat at home more often can help us stay on track with our budget.
Lastly, if you’re having a tough time making progress on your financial goals, it might be time to explore a few options to generate some extra money from home.
Without further ado, let’s get started on April!
Action Items for April:
Make the Most of Tax Time
Meal Plan and Eat at Home More Often
Find Ways to Generate Extra Income from Home
Before You Start: Review Your Goals
What are your financial goals? Are you trying to stay on budget? Build up a savings account for emergencies? Pay off debt? Or just make the most of your income?
Whatever your financial goals, take some time at the beginning of the month to see how you’re doing. Maybe you need to revisit your budget or maybe you have some summer plans you’d like to save for and you’re wondering how to work them in? Do you need to take some time to get organized before you go forward? Sometimes it helps to take a moment to get a handle on what we have so we can figure out what we need in the future.

1. Prep for Tax Time
Normally April 15th (unless it falls on a weekend or a holiday), tax day always seems to sneak up on me, which always makes April feel like a financially challenging month.
When it comes time to figure out your taxes, you can often save money by hiring a professional. While there are plenty of software options out there (like TurboTax or TaxAct), if you’re married, own a home, or have experienced any financial changes over the last year, it might be best to consult a professional. (Plus, hiring a tax pro will certainly save you TIME.)
If you’re unsure where to look, find an Endorsed Local Provider. These tax professionals are vetted and endorsed by Dave Ramsey. So you can rest assured they’ll be up on the latest in deductions and credits to help you save as much as possible on your taxes.
In a perfect world, you should break even with taxes. If you receive a refund that actually indicates you’ve withheld more than you needed to (so you’ve missed out on the interest and ability to invest that money for a whole year). If you owe, you may want to examine your withholding status for next year, so you break closer to even in the future.
If you get a refund: Want to be sure your tax refund goes farthest toward helping you achieve your financial goals? Well, first off (sorry): don’t run out and spend it on a shopping spree. Instead, consider more practical options like paying off a debt, putting it toward your emergency fund, adding it to your savings, or investing it in your retirement. It’s not the most exciting answer, but it’s the most financially sound.
If you owe: First of all, don’t panic. But if you owe, you do have to pay. You know what they say: death and taxes—the two inevitabilities of life. (Ugh.) Avoiding it, putting it off, or trying to hide from it simply won’t help. File your taxes on time and pay as much as you can. Use your emergency fund if you need to, for now. Then, work with your accounting professional to figure out how much you can afford to pay and keep moving forward. If you owe a lot, be sure to discuss how to adjust your withholding status so you can avoid owing so much in the future. I know this sounds tough, but it’s tough love. You can definitely handle this!
If you’re an independent contractor, you might be a little surprised at how much you owe in taxes, especially if you’re just starting out. Make it a point to tuck away about a quarter (perhaps a little more) of your income next year if taxes aren’t withheld from your paycheck. If you’re making more and more money each year, you’ll eventually need to start paying quarterly estimated taxes, which will help you avoid owing a huge chunk of money at the end of the year. If you need help, your accountant should be able to recommend how much to pay in each quarter and they should provide you with payment vouchers so you’ll easily know where to send your money and when. Also, be sure to ask your accountant about any additional business expenses you can claim as tax deductions, such as your home office space, internet, phone, travel costs, and other items and services you may have overlooked that might be business-related.

2. Meal Plan & Eat at Home
If you’re feeling overwhelmed with all this tax time talk, one of the best ways to save money is by eating at home as often as possible. You know the saying, “If you fail to plan, you plan to fail”? Well, it definitely applies to meal planning. If you want to be successful at eating at home, meal planning will help tremendously.
I realize meal planning can sound a little (or a LOT) intimidating, especially if you’re totally new to trying it out. However, meal planning can make your life SO much easier—I promise!
Follow my Meal Planning 101 Guide if you need help getting started. There are a few different options to try: Freezer Meals (meals you make ahead on the weekends when you have more time, which you simply warm up on weeknights); the “Just Wing It” approach (cooking based on what you commonly have on hand or what was on sale) or the more traditional Meal Planning.
If you opt for traditional meal planning or even freezer meals, take time to browse through some of the recipes/plans on this site for ideas. Most meal plans come together in 10-15 minutes of prep, so you can make a whole bunch of meals all at once. (Try 10 Meals in an Hour!)
That’s one of the greatest things about meal planning. With just a little time on the front end, you can save SO much time on weeknights when you don’t have the time or energy to deal with planning a family meal. Meal planning gives you an opportunity to look ahead at the week, consider what you have on the docket, and then quickly and easily come up with an answer to the eternal question, “What’s for dinner?”
I dare say that meal planning/eating at home is one of the biggest ways you can become a great debt slayer, slashing your budget and saving money (all while enjoying delicious food that your family will actually eat)!

3. Find Ways to Generate Extra Income from Home
If you’re having a tough time making ends meet or if you’d really like more money for your upcoming summer vacation, it may be time to figure out a few ways you can earn some extra money from home. There are plenty of fairly simple ways you can earn a few extra dollars to help stretch your budget.
First look at your areas of expertise. Do you love to write? You could try blogging, becoming a virtual assistant, or even doing freelance work. Are you amazingly crafty? Consider party planning, teaching craft or arts classes out of your home, or even selling your creations on sites like Etsy.
You can earn extra money through sites like eBay, selling thrift-store finds and products, or you can try your hand at becoming a representative for many of the multi-level marketing options out there. (Just do your research first because many of them require a great deal of time, up front investment, and selling to be profitable.)
If you’re a stay-at-home mom, consider taking on childcare or even pet sitting during the day. You could teach lessons or offer consulting services in your area of your expertise. If you have a way with seniors, you can check with your local senior center to see if there’s someone looking for an assistant.
For those looking for just a little extra money from a lower-effort job, try Inbox Dollars, Swagbucks, Ibotta, Viggle or Ebates. These and other apps allow you to earn points and store credits by completing simple tasks like taking surveys, shopping or watching TV, and some even offer rebates for items you were already planning to purchase.

Bonus: Best Purchases in April
The housing market usually opens up in the spring, so if you’re in the market for real estate, spring is a good time to buy.
If you aren’t planning for a big move, April can be a great time to find thrift store items (everyone’s spring cleaning) and it’s also a good time to buy vacuums. Spring organization + tax time means office supplies also go on sale. Additionally, you can find discounts on certain electronics (such as TVs) that are marked down in the hopes that people will blow those tax refunds (but you’ve got a better plan)!
Spring clothing (often suitable for summer) is usually clearing out around this time, so watch for great discounts on dresses, skirts and bright, light fabrics. It’s also the best time to buy athletic sneakers, as many runners are transitioning to running outdoors and preparing for summer races.
Easter candy and traditional foods like ham will go on sale right after the holiday. Seasonal veggies like asparagus, peas, radishes and lettuces are also in great condition and on great sales in the month of April.
As we move through April, the days get longer and brighter and everything starts to feel more upbeat and motivating. Use that excitement and “spring fever” to keep focused on your financial goals!

The post How to Create a Financial Plan for the Year: April appeared first on Living Well Spending Less®.
March 31, 2017
Take Control of Your Taxes

This is a Guest Post from Cherie at Queen of Free
When asked about the newly established United States system of governing, Benjamin Franklin once quipped “Our new Constitution is now established, and has an appearance that promises permanency; but in this world nothing can be said to be certain, except death and taxes.”
Like it or not, every single April we all find ourselves up to our ears in numbers and receipts, bottom lines and deductions. I consider myself a decently educated woman with a sensible head on her shoulders, but ay yi yi with all of the details at tax time. It’s enough to make anyone’s head spin.
While I’m not a tax professional and this in no way can be considered tax advice (said in my best low rumbling, legal disclaimer voice), I have found a few methods to the madness when it comes to keeping our junk in order each year. I’m hoping they can help you stay organized during tax season, too.

Create a Designated Space
We all know that the time to begin organizing to pay Uncle Sam (or get a little something something back from him), doesn’t begin in mid April the day before your returns are due. No, you absolutely must keep excellent records all year long in order to remember each and every particular.
While you could go all HGTV DIY, creating an adorable organizational system, you don’t really have to have a drool worthy signature piece to keep things in order. A simple file folder or a box will do the trick, just fine. We actually let our daughters decorate an old shoe box where we place our receipts, important billing statements, records of charitable contributions, and eventually W-2s and 1099s when they arrive.
Place your tax box or folder in a place that’s easily accessible and clear from other papers and bills.

Document and Value Donations
It’s easy to assume the clothes, toys, and household goods we send packing to Goodwill or the Salvation Army have very little value. You may be surprised at their actual valuation rate though. Keep a detailed list of each and every item that you donate as you’re loading up bags to clear out the clutter.
We actually keep a spiral bound notebook inside of our tax box to document what we give away throughout the year. Each line contains a simple listing like “Child Jeans” or “Adult Sweater” and then hash marks corresponding with each item. When dropping off items, we’re always sure to request a receipt to certify our donation.
The real fun (okay, so maybe it’s a little bit of work, too) begins when you sort through the actual value of all of those bags. The Salvation Army has an excellent Donation Value Guide chart that helps you assign a number to each item. Be realistic and honest as you tally your gift. Consider tears, stains, or wear on clothing items. Think through the true condition of your household goods.
In the end, I’m always pleasantly surprised at the amount we’re able to deduct for items we’ve outgrown or simply don’t use.

Know When to Ask for Help
Even though it might seem complicated or confusing at first, most consumers are able to file taxes on their own. You can use a simple piece of software like TurboTax, H&R Block, or TaxAct. Check out this overview of how much each costs and the pros and cons of each platform.
But if your needs expand beyond the basics, it’s a good idea to contact a professional both at filing time and throughout the entire year. Don’t know where to begin when it comes to choosing a CPA or tax specialist? Skip doing a random Internet search or flipping through the phone book (do people still use phone books?).
Instead, ask the people you trust the most where they go for advice and professional services. Use your social media channels to request recommendations. Take things a step further by checking out the website of the suggested businesses. Read ratings and reviews to inform your decision (while realizing that few individuals can please all people). During the month of April it may be difficult to interview an accountant but in an off season you might be able to pop into their office and get a good feel for the culture and flow of their organization.
While you may pay a little bit more for a pro to file your taxes, you might be pleasantly surprised at their far reaching knowledge and ability to make the most of your money. Again, each of us has our own unique employment situations but if you feel over your head in the least, it’s time to call in someone with education and experience when it comes to your taxes.

Spreadsheets Are Your Friends
While tracking your income and expenses might make you want to break out in cold sweat, the work is much easier if you take things one day at a time. You could use software like Quicken to keep your records up to date. Or you could set up a simple spreadsheet on Google.
Consider having separate tabs for Income, Expenses, Mileage, Product Sold (if applicable), and any other random notation that you might need come tax time. Date each entry and group the information by month. Be sure to note any specific details.
Most importantly, guarantee that your information is backed up on a regular basis. Google saves your document automatically. If you choose to use Excel or another piece of software on your computer, consider investing in an automatic backup service to keep your records safe in case of a computer crash.
I only note this and would double underline the entire paragraph if I could because I once lost valuable data that could not be recovered one year. And I cried in my driveway because I knew I had unnecessarily blown it. No one else should have to cry in their driveway unnecessarily.
I update my Google Sheet at least twice week and more often when reconciling my business income and expenses. When you check in daily or every few days, the workload requires little effort. Leave everything to the last minute and you’ll find yourself buried in a flurry of details.
We might not be able to avoid death or taxes in this lifetime, but that doesn’t mean you have to suffer through the entire month of April. A tiny bit of organization spread out over the calendar year yields a great reward. And while it can’t guarantee a huge payout in the form of a refund, it can save you headaches and stress for sure.
Cherie Lowe is an author, speaker and hope bringer. Her book Slaying the Debt Dragon details her family’s quest to eliminate over $127K in debt in just under four years. As her alter ego the Queen of Free, Cherie provides offbeat money saving tips and debt slaying inspiration on a daily basis.

The post Take Control of Your Taxes appeared first on Living Well Spending Less®.
March 29, 2017
10 Meals in an Hour™: Part 11

Here at Living Well Spending Less we are 100% committed to bringing you easy recipes that taste great and don’t take a lot of time, effort, or expensive ingredients to throw together. As a busy mom, I also want meals that can be made and frozen ahead of time to save time on hectic weeknights, especially as part of a Sunday Prep plan. My goal is to spend less time in the kitchen, not more, but I still want to be able to provide tasty meals that my family loves (and avoid eating out when we can!)
Over the past year and a half we have shared seven different 10 Meals in an Hour™ plans, which have each included 5 great freezer recipes that can be prepared together in about sixty minutes. (You can find the previous plans here: Part 1 , Part 2, Part 3 , Part 4 , Part 5 , Part 6, Part 7 , Part 8 ,Part 9 and Part 10. They have been a huge hit, not only with our own families, but with many of your families as well, and we’ve absolutely loved hearing how much you all are enjoying these tasty recipes!
Today I am s0 excited to share with you another NEW series of awesome freezer to crockpot recipes.
As usual, in order to make the cut, each recipe must meet ALL of the following criteria:
Deemed delicious by both our kids and our husbands!
No pre-cooking required
Freezer friendly
Easy to cook
Uses budget-friendly ingredients and pantry staples
In this one post you will find everything you need to prep 10 awesome freezer meals in about an hour of hands-on time (not including grocery shopping.) Just think, in just one quick weekend session you could have almost two weeks worth of absolutely delicious, family-friendly meals all ready to go!
Before you begin, you will need to gather your tools & supplies and also make sure that you have all your groceries on hand. I find it is easiest to go grocery shopping the day before I do my cooking. To save time unloading, only put away the items that need to be refrigerated. Finally, make sure your kitchen counters are cleared of clutter and sanitized and empty your dishwasher and sink of any dishes. (Check out this post for more tips on freezer cooking like a pro!)

Here are the five recipes we will be making:
Easy French Onion Soup
Chicken & Vegetable Noodle Bowl
Easy Chicken Curry
Spinach & Sausage One Pot Pasta
Easy Chicken Pot Pie
Here are the supplies you will need:
10 gallon size zipper freezer bags
labels or permanent marker
large mixing bowl
cutting board
sharp knife
garlic press
can opener
dry measuring cups
liquid measuring cups
dry measuring spoons
liquid measuring spoons
colander

Here are the ingredients you will need:
Produce
2 small yellow onion
4 cups sweet onions or Vidalia if in season, sliced
1 bag of shredded slaw mix (cooking day only)
1 red bell pepper
6-10 cloves garlic
1 red chili pepper
1 bunch of green onions
1 bag carrots
1 large lemon
1 9oz. bags of fresh baby spinach (cooking day only)
Thyme (fresh or dried)
celery
Pantry Staples
Honey
Ginger Paste
Garam Masala
Sriracha sauce
Red Pepper Flakes
Black pepper
Chili powder
Salt
Sesame oil
Sesame seeds, toasted (cooking day only)
Soy sauce
1 container homemade cream of chicken soup
Canned/Dry Goods
1 28oz. can crushed tomatoes or 2 15oz can diced tomatoes with chilies
1 8 oz. can tomato sauce
2 15 oz. can of diced tomatoes
9 32oz. cartons chicken stock
2 cartons Beef stock
Dairy
1 cup plain yogurt (cooking day only)
Butter
Pecorino Romano
Gruyère
Meat
6-8 pounds boneless, skinless chicken thighs or breasts
2 packages chicken Italian sausage, chopped
1 rotisserie chicken
Frozen
2 16oz. bags mixed vegetables
2 16 oz. bags of frozen vegetables (Broccoli, Carrots & Water Chestnuts)
3 7 oz. packages of frozen sliced mushrooms
Starch
1 container refrigerated crescents (cooking day only)
1 box of rice noodles (cooking day only)
1 20 oz. package of cheese tortellini (cooking day only)
Rice
Italian bread, sliced (cooking day only)
Naan (optional, cooking day only)
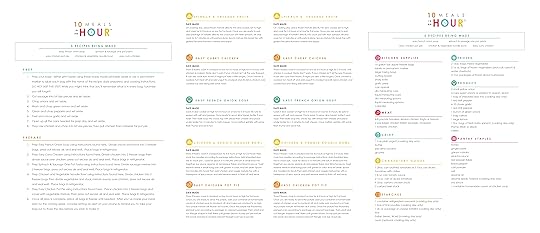
Be sure to print the following pages before getting started:
Printable labels (designed to work with Avery 8163 shipping labels)
Printable Shopping List
Printable Prep & Prepare Instructions
Be sure to also print the following recipes:
Easy French Onion Soup
Easy Chicken Curry
Spinach & Sausage One Pot Pasta
Chicken & Vegetable Noodle Bowl
Easy Chicken Pot Pie
PREP
Prep your bags—either print labels using these ready-made printable labels or use a permanent marker to label each bag with the name of the recipe, date prepared, and cooking instructions. DO NOT SKIP THIS STEP! While you might think that you’ll remember what is in every bag, I promise you will forget!
Cut sausage into bit size pieces and set aside.
Chop onions and set aside.
Wash and chop green onions and set aside.
Clean and chop peppers and set aside.
Peel and mince garlic and set aside
Open up all the cans needed for prep day and set aside.
Prep raw chicken and chop into bit size pieces, then pull chicken from rotisserie for pot pie.
PREPARE
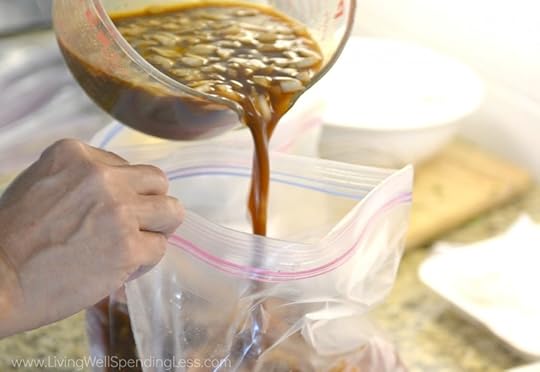
Prep Easy French Onion Soup using instructions found here . Divide onions and stock into 2 freezer bags, press out excess air, and seal well. Place bags in refrigerator.
Prep Easy Chicken Curry using instructions found here . Divide chicken into 2 freezer bags then divide sauce over chicken, press out excess air, and seal well. Place bags in refrigerator.
Prep Spinach & Sausage One Pot Pasta using instructions found here . Divide sausage mixture into 2 freezer bags, press out excess air, and seal well.Place bags in refrigerator.
Prep Chicken and Vegetable Noodle Bowl using instructions found here . Divide chicken into 2 freezer bags then divide vegetables and stock mixture evenly over chicken, press out excess air and seal well. Place bags in refrigerator.
Prep Easy Chicken Pot Pie using instructions found here . Place chicken into 2 freezer bags and cover with vegetable mixture, then press out excess air and seal well. Place bags in refrigerator.
Once all prep is complete, place all bags in freezer until needed. After you’ve made your meal plan for the coming week, consider setting an alert on your phone to remind you to take your bag out to thaw the day before you plan to make it.
P.S. The new Living Well Planner has a SIMPLIFIED MEAL PLANNING section. It gives you the option to plan just one meal a day, or all three. Check it out HERE.
The post 10 Meals in an Hour™: Part 11 appeared first on Living Well Spending Less®.
March 27, 2017
Simplify Your Wardrobe

Do you ever feel totally overwhelmed by your closet? Have you ever stood in front of a wardrobe FULL of clothes and still felt like you had NOTHING to wear?
Yep, been there!
It can be SO hard to find the things we want to wear or even figure out what goes together, especially when we are in a rush (which is often!) We have enough to worry about and plenty to do—who the heck wants to worry about what to wear on top of everything else?!
Wouldn’t it be nice to be able to just simplify your wardrobe?
Imagine opening your closet every morning and easily picking out an outfit that flatters, feels good, fits, and looks great. It can happen to you, I promise!
It’s time to take back your closet! Let’s get your wardrobe simplified and organized. Really, it’s so freeing!
Wondering how to get started? Learning how to keep a wardrobe of beloved, fresh, quality pieces means you’ll always have something great to wear. Less clothing actually becomes more. Here’s how…

1. Keep Only What Fits
When you start to weed through your wardrobe, one of the first rules of thumb is to keep only what fits and what’s in good repair. While I know it may sound difficult, if you really want to simplify, you can quickly eliminate any items you’re hanging onto because you’re waiting for weight gain or weight loss, or because you’ve set them aside for repairs and alterations. If there’s a quality item requiring tailoring, ask yourself honestly if you’re going to have it done or refashion it yourself. If you are, then by all means take it to the tailor NOW. Give yourself three days—and if you haven’t dropped it off for alterations or made the repair, then let it go.
If you have gently used items that just don’t fit, consider donating them to a woman’s shelter or program helping needy women find professional dress. You can always give these pieces to a friend with similar taste who would give them a good home or post them on a neighborhood swap page.
Have several items in a similar size range? Consider selling them as a “lot” on eBay. Group the items together and sell as a “lot of five skirts, size 10.” Sometimes grouping items together can help you get a better price because your listing is more appealing to buyers looking for bargain clothing. Plus, you’ll have less to ship!
2. Keep Only What You Love
What items in your closet are you excited to put on? Are there items that make you feel great and look terrific every time you wear them? Hold on to those items. The things you feel kind of “meh” about or the items you’re keeping out of guilt (maybe you spent too much or got a gift that didn’t quite fit), let go.
So often, we keep clothing that’s out of style hoping trends will come back around. While it’s amazing to find a closet full of vintage dresses or awesome 70s polyester pants, these items can feel more costume-y than comfortable. It’s pretty hard to find a closet full of vintage items that are still relevant and in good shape.
If you’re thinking of holding on to items that are more recently out of style, chances are they’re even less likely to hold up. Vintage items from the 60s, 70s, 80s and even 90s are often made of higher quality and detail than items of today. The fashion industry has changed and clothing simply isn’t as durable or lasting as it once was.
If there’s something you just don’t feel amazing in, donate it to someone else. Unless you have endless storage space, there’s just no reason to hang on to it. If there’s something you’re unsure about, put it on “ice” for a few months and then revisit it. Chances are, you’ll probably forget you even had it in the first place, so you won’t have any problem letting it go.

3. Try a 40-Hanger Closet
When I started my 40-hanger closet, it was because that was the number of beautiful “Huggable Hangers” I could afford. I determined that sticking with only 40 items would still give me enough to wear, without so much I couldn’t sort through it. The process helped me get rid of items I was constantly skimming over.
Since paring down my closet to 40 items, I’ve found getting dressed to be a breeze. I love everything I own and I feel great in it. I can find everything and my clothes hold up much better because they aren’t jammed into a closet, getting wrinkled and smooshed. I can find things I’m looking for quickly, plus, most of the items are interchangeable and “go” together.
As a rule, when something comes in, something must go out. If I see a new top or pants, I’m much slower to buy, because I know I have to let go of another beloved item. I carefully ensure all of the clothing I purchase is something I love and feel great in. I choose only items I like and items I feel are “closet-worthy,” knowing they’ll bump something else out of the running.
4. Buy Quality Clothing
If you need something new, when you shop purchase well-made, quality items. Don’t buy things simply because they’re on sale or a great deal. Think about how they’re made—look at the quality of the stitching, the weight of the fabric, the drape, and of course, the fit.
This can be a tall order in a world full of “haul videos” on YouTube, where a few hundred dollars can buy you a closet full of clothes. We’ve become accustom to cheaper clothing. In Overdressed: The Shockingly High Cost of Cheap Fashion, author Elizabeth Cline points out the amount of waste and refuse that comes from the fashion industry each day. Working conditions of garment workers in third world countries are atrocious. Quotas are high and to keep up with the outputs, quality and safety are sacrificed.
Instead of opting for “bargain retailers” who can often be the worst fashion offenders, consider looking for vintage items at second-hand stores. Online stores like threadUP offer items on consignment from quality sources.
If you need something staple like a black pencil skirt, don’t feel guilty splurging on something of a little higher quality. If you have one item you can interchange in many outfits, feel great in, and it’ll hold up to washing, it’s worth its weight in gold. Cheap clothing just leaves us disappointed, especially when a loved item falls apart after a few wears.

5. Try a Capsule Wardrobe
Fashion bloggers often recommend capsule wardrobes because they know it’s a great way to stretch your options and make your clothes work for you. It’s really as difficult as it may seem, and you can find some great suggestions on Pinterest and on fashion websites. Basically, the idea is that each piece in your wardrobe should be interchangeable with several other pieces.
Having a capsule wardrobe doesn’t mean everything has to be plain or black and grey. A basic rule of thumb is to make sure each item you own can be layered or matched with at least four other items in your wardrobe. A cardigan might go with several blouses, a navy sheath dress, and a skirt. A patterned floral top might pair with jeans, grey pants, under a sweater, with a red skirt, under the same navy sheath dress, and with a contrasting striped skirt.
It can take a while to get the hang of a capsule wardrobe, but make it simple by starting with basics: classic patterns like tweed, pinstripes, houndstooth and small plaid; quality fabrics like cotton, silk, and wool; and shapes with easy-to-match silhouettes. When you run across a “wild” item like a lacy blouse, a loud pattern, peplum tops, trendy cuts, or something that just doesn’t seem to play well with other pieces in your closet, ask yourself if it isn’t time to replace it with a more flexible piece.
6. Watch for Easy Care
When you’re shopping for clothing, watch for items that don’t need to be dry-cleaned or require a lot of extra care. Merino sweaters or cashmere might be lovely, soft and go with everything, but for moms with babies, spit-up stains are going to show. Items made from suede or itchy fabrics like wool can be a challenge to layer and don’t clean up easily.
It might seem less exciting, but be sure the things in your wardrobe are ready-to-wear by opting for fabrics needing less specialty cleaning. I’m talking about avoiding hard-to-press linens or fussy things with ruffles, buttons, hooks and other “bling.” Go for pieces that are simple and easy to wash and then follow the instructions carefully.
I once had a very cute top with a row of beaded sequins around the bottom. Each time the top went through the wash I lost a few of the sparkles. Eventually it just looked ragged and silly. Unfortunately, the fussier and fancier the outfit, the more care and handling it will need. Give yourself a well-deserved break, make your life easier, and go for low-maintenance.

7. Opt for a Uniform
If you’re a mom of young kids or someone who just doesn’t like to stress about clothing but wants to look good (which probably fits the bill for most of us), consider dressing in a “uniform” of sorts. It doesn’t mean you have to wear the same thing every day, of course, but pick a few key outlines and pieces you know flatter your shape and watch for similar items.
Look for clothing that’s easy to layer—like a tank, a knit long-sleeved shirt, a cardigan, a button-down top or a blazer. Pair with a pencil skirt, an a-line skirt, skinny jeans, or anything you feel confident in. Once you know these are the basic components of your uniform, you can think of ways to interchange them, dress them up, and add personality.
If you prefer flats, tennis shoes or even boots, stick with a few pairs you can partner with your uniform as well. You can always throw on heels to dress it up or add some jewelry or a scarf to change the look. It’s just about having a basic idea and plan for what you know looks good.
Try these tips to simplify your wardrobe, clean out your closets, and reduce the clothing clutter. Trust me, you’ll feel great when you know you always have something fitting and flattering to wear.
Simplifying your wardrobe is a great way to give yourself a well-deserved break. After all, you have enough to worry about!

The post Simplify Your Wardrobe appeared first on Living Well Spending Less®.
March 24, 2017
Spruce Up Your Yard & Patio

Isn’t spring great? We start to spend more time out on the porch, grilling, playing games and hanging out. I can’t wait!
…but if your house is anything like ours, your deck and porch get a little grimy over the winter months.
Even if you live in a pretty moderate climate, the winter weather, dust and debris from fall, rain, hard water and sun damage can wear down your outdoor gear and damage surfaces. Patio furniture, decking, concrete, decorations and even your house and windows bear the brunt of nature’s forces.
The thing about outdoor surfaces is that they aren’t so easy to clean. If you rent a power washer, (first of all, your husband will be entertained for days), and mainly, you’ll be able to clean your house and concrete. But how do you maintain it during the season? Is there a way to clean your outdoor surfaces without having to rent equipment (…especially if your husband isn’t so into power-washing)?
There are plenty of ways to tackle outdoor grime and surfaces! Of course, one of the joys of outdoor living is that it’s simple and okay to be a little messy now and then. You can eat without fear of spilling on carpet and there’s plenty of water, sand and dirt for all your adventures. The outdoors wasn’t made to be perfectly pristine all the time, so cleaning up is even easier!
Here are some easy ways you can clean almost any outdoor surface. Break out the deck chairs and tables and haul out the grill—you’ll be on your porch in no time!

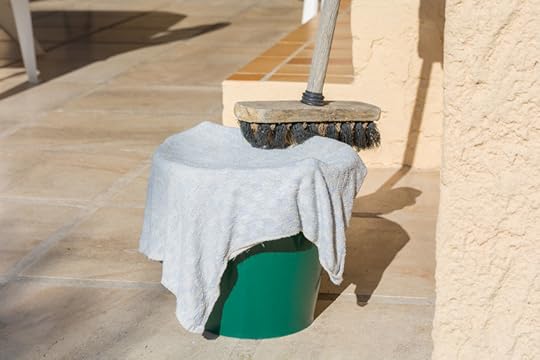
How to Clean Concrete
Many surfaces in the yard and surrounding the house are concrete—the driveway, the porch, and even the garage floor might be concrete. To clean these surfaces, first, move everything out of the way. (This might be a great opportunity to deep clean your garage, if you’re ready to take on the task!)
Use a stiff bristle broom made for outdoor use and sweep the surface to remove as much debris as possible. Sometimes a good sweep is almost all it will take to spruce up your concrete and have it looking nice.
If more cleaning is in order, get out the hose and wash the surfaces. If you have a spray attachment on your hose, it can give the oomph you need to really remove the dirt and dust. All joking about power-washers aside, they’re best used on concrete (they can damage wood and mortar), so if you really need to give your porch an overhaul, power-wash away.
Garage floors can be notorious for stains, especially oil. Clay kitty litter works to absorb the oil quickly. Simply pour it over the top of the stain and let it sit for a day or two. (You might have to use paper towels to absorb the oil if it’s a fresh spill.) Repeat the process with fresh litter to absorb as much of the stain as possible.
I’m not a big fan of harsh cleaners and prefer natural cleaning solutions whenever possible. If you have mildew or moss growing on your concrete, you can try spraying it with vinegar and scrubbing it. If that won’t do, you may have to turn to a solution of bleach (1 part bleach to 10 parts water) and a scrub brush to remove the growth. Lysol can also help prevent future mold growth.
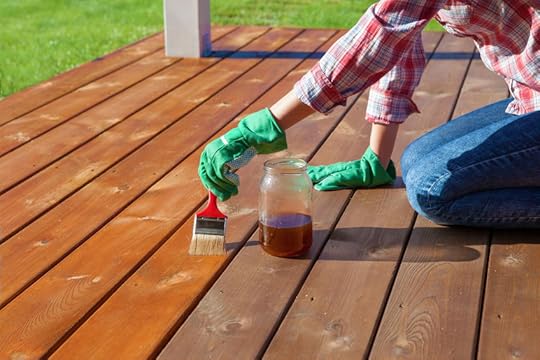
How to Clean Decking
Wood decking needs to be sealed annually to preserve the wood and keep it from mildew or rotting. The deck will need to be sanded, and then stained with a protectant or sealant.
To remove stains from wood, you can try a wood cleaner, like Murphy’s Oil Soap or simple soapy water. First sweep with a broom to remove all dust and dirt. Then you can use a stiff brush to remove any debris that might be sticking to the surface of the wood. Wash the deck with the soapy solution or the wood cleaner using a sponge and bucket (like the kind you’d use to wash your car). Then rinse the deck clean and let it dry.
If you notice mildew or signs of rot, you may want to replace out the wood plank before it spreads. You can try an oxygenated cleaner (like Oxy Clean) with water and scrub the surface before resealing to treat.
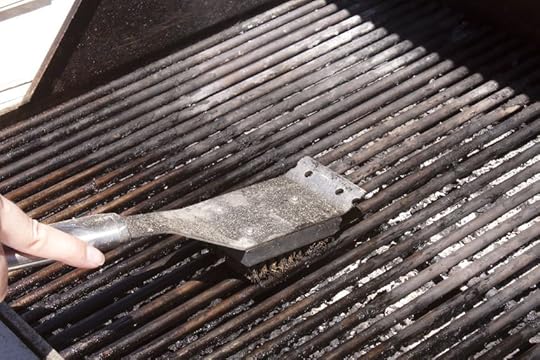
How to Clean the Grill
Hopefully the grill was cleaned and put away in the fall, so removing bits of food and caked on gunk won’t be a problem. If you forgot or it was overlooked, use a scouring metal brush or grill stone to scrape the grates. Using a soapy bucket of water (a storage bin works really well for this), soak the grill to loosen up any bits that are stuck on. Then scrape again using the stone or brush. Wipe the grates clean with a rag or paper towels.
If you just need to “spruce up” the grill, you can use a simple surface spray of water, a ½ cup vinegar, a teaspoon of Castile soap and few drops of orange essential oil to cut grease. Spray the grill and surfaces and then rinse and wipe clean and you’ll be ready to grill up dinner!

How to Clean Windows
For cleaning windows I use the following spray:
1 ½ cups vinegar, 1 ½ cups water and 5-10 drops essential oil (optional)
Mix vinegar, water and essential oil together in spray bottle. Spray on glass and use squeegee, crumpled newspaper (tip: use newspapers that are at least 2 weeks old to avoid black fingers!), or a lint-free rag to get a streak-free shine.
Yes, this might mean hauling out a ladder and doing the windows on the second floor, but if you just hit them with the hose, you’ll get streaks and spots. We use an extension handle on our squeegee to easily reach the upper windows (without balancing on a ladder).
How to Clean Your House Exterior
Depending on if you have aluminum siding, wood, stucco or brick, you may have to follow different methods to deep clean the exterior of your house. Fortunately, unless you have to paint and touch up the trim, the basics of general upkeep and surface cleaning are mostly the same.
A simple spray of the hose is usually enough to remove the majority of dirt and dust from your home. If you have bird friends that have left their (*ahem*) “mark” on your house, you might need to do a little scrubbing with a stiff brush and some soapy water.
There are stronger chemical treatments you can buy to deep clean brick and stucco, but for the most part, a little water and spot cleaning will do the trick. Assess the areas of the trim (or paint, if your house is wooden) that might need to be touched up. Composite and siding will stay looking nice with a little soap and water.

How to Clean Patio Furniture
Patio furniture is easy to clean. Use some soapy water and a sponge to wipe off the handles and surfaces of the chairs, wash off tables, and clean up any areas where food or dirt might have accumulated.
Most patio chairs are made of a weather-resistant mesh or plastic that wipes clean with soapy water and a squirt of the hose. Use a soft cloth or towel to dry off the surfaces and they’ll be ready for seating!
If you have cushions, you can run them through the washing machine a few times per year to keep them fresh and clean. Remove them when there’s a storm and keep in mind that sun can also fade them and cause the fabric to break down (so you may want to store them when they aren’t being used).
For pots, clean with a stiff brush to remove any caked on dirt, then rinse them off with the hose.
Umbrellas can be cleaned with soapy water and rinsed with the hose. Allow them to dry thoroughly before closing them or storing. If they’re put away with any moisture, they’ll get blackened from mildew and start to rot. Instead, allow them to dry completely in the sunlight and then wrap in a garbage bag to store.

How to Clean Toys
Swing sets, playhouses and outdoor toys can usually be cleaned with a little soapy water and the hose. Most plastic toys will start to break down and fade in the sun after a few years, so if you can store them in a covered area, that will keep them looking their best.
If you have a wooden swing set, most are pressure treated to prevent rotting, mildew and decay. However, they may need to be stained or re-treated every few years. Follow the manufacturer’s instructions for deep cleaning. For mild surface cleaning, a good sweep and brush off and some soapy water will do the trick. Wipe down plastic surfaces, handles and seats as well. Check for any cracking or anything that needs to be replaced (cracked handles can lead to injury, so always check the swing set thoroughly after winter).
Kiddie pools should be cleaned and stored at the end of the season (and in between each use), and can be wiped off before using in the spring. If you have a sandbox, it should be kept covered at all times when not in use, and the sand should be replaced each year.
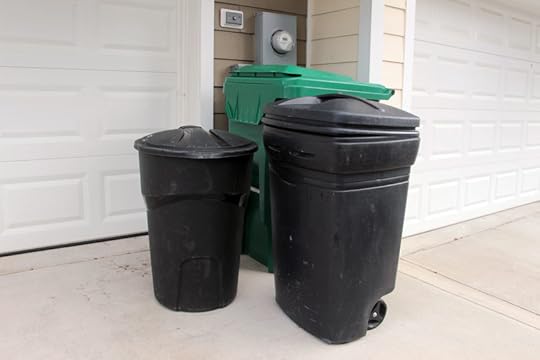
How to Clean Garbage Cans
To keep your garbage cans fresh (especially if you store them in your garage or near your house), hose them out and wash with soapy water once every few months or so. Always dispose of waste in a bag and quickly clean up any leaks from the bottom of the can. Dirty trash cans can attract pests and make your garage smell terrible. Make sure the lid fits tightly and properly, and always secure the can, especially if it’s stored outside.
Again, spending time outdoors is wonderful because we don’t have to worry about being all pristine and proper. We can be messy, have fun and really enjoy ourselves!
Don’t worry about keeping the outdoors perfect, but spending a little time on your outdoor surfaces and porch can keep your home looking its best. It also preserves the life of your patio furniture, toys and outdoor items.
Take a little time in the spring to spruce things up and you’ll enjoy your yard and outdoors all season long!
Ready to chase away the winter blahs with a freshly cleaned house? Packed with helpful tips, checklists, and the right amount of motivation to get you going, our 2017 LWSL Spring Cleaning Planner is just the tool you need to get started! For a limited time, get it free from Living Well Spending Less®–just our little way of saying Happy Spring! Be sure to print our brand new 2017 LWSL Spring Cleaning Planner. You can get it HERE, or simply click the button below!
The post Spruce Up Your Yard & Patio appeared first on Living Well Spending Less®.
March 22, 2017
Spicy Chicken Meatballs

It’s no secret that we LOVE quick & easy meals around here, especially ones that use budget-friendly ingredients! Believe it or not, these tender and juicy, flavor-packed Chicken Meatballs are a winner. They use mostly basic ingredients, whips up in minutes, and can be flash frozen and cooked in the oven in less than 30 minutes.
To make it as part of a freezer cooking day, just flash freeze the chicken meatballs and split into multiple bags, then throw it right into the freezer–no cooking required!

Here is what you need:
2 lb. chopped chicken meat
8 cloves garlic, minced
1 bunch green onions, chopped
2 cups shredded carrots
2 eggs
1 cup Italian Style Panko
Spicy Sauce
Sriracha Sauce
Mayonnaise

Step 1: Pre-heat oven to 375. Then chop green onions and garlic and set aside.

Step 2: Peel and shred carrots, then set aside.

Step 3: Then mix together green onions, garlic, carrots, eggs, and panko into chopped meat.

Step 4: Then use a tablespoon to spoon mixture and roll into meatballs. If you are planning to freeze them, flash freeze them for 30 minutes on a cookie sheet, then scoop into freezer bags.

Step 5: Bake in oven at 375 degrees for 20-25 minutes or until done. Then serve with your favorite vegetable along side some spicy sauce. Mix up some spicy sauce. 2-3 tablespoons mayonnaise with 2-3 teaspoons of Sriracha sauce. Add more Sriracha sauce for a spicier sauce less for more mild.

Recipe notes: If not cooking that day you can flash freeze meatballs for 20 minutes. Then place in labeled freezer bag to cook at a later date.
Print This!
Recipe: Chicken Meatballs with Spicy Sauce
Summary: These chicken meatballs are full of flavor and perfect as an appetizer or full meal!
Ingredients
2 lb. chopped chicken meat
8 cloves garlic, minced
1 bunch green onions, chopped
2 cups shredded carrots
2 eggs
1 cup Italian Style Panko
Spicy Sauce
Sriracha Sauce
Mayonnaise
Instructions
Pre-heat oven to 375. Then chop green onions and garlic and set aside.
Peel and shred carrots, then set aside.
Then mix together green onions, garlic, carrots, eggs, and panko into chopped meat.
Use a tablespoon to spoon mixture and roll into meatballs.
Bake in oven at 375 degrees for 20-25 minutes or until done.
Then serve with your favorite vegetable along side some spicy sauce. Mix up some spicy sauce. 2-3 tablespoons mayonnaise with 2-3 teaspoons of Sriracha sauce. Add more Sriracha sauce for a spicier sauce less for more mild.
Recipe notes: If not cooking that day you can flash freeze meatballs for 30 minutes. Then place in labeled freezer bag to cook at a later date.
Preparation time: 5-7 minutes
Cooking time: 20-25 minute(s)
Number of servings (yield): 30-35 meatballs, depending on size.

The post Spicy Chicken Meatballs appeared first on Living Well Spending Less®.


