
Ruth Soukup's Blog, page 48
March 20, 2017
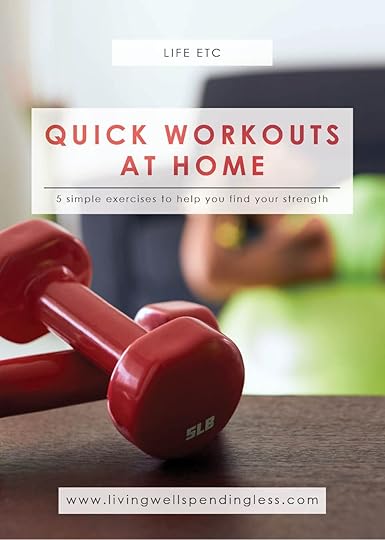
Quick Workouts at Home

This is a guest post from Tammy of tammystrait.com
The statistics are in. The most popular resolution for 2017 is to ‘Get Healthy’. While it’s no shocker that getting healthy tops the list, this year, people are specifically interested in getting strong. Why is that statistic important? Because upwards of 80 percent of resolutions fail.
Let’s face it: life is full. Every day you juggle a hundred different responsibilities, opportunities and distractions vying for your attention and finding time to exercise is hard. If you’re going to do it, it usually has to be easy or very convenient. But we all know most things worth having don’t come by either of those routes.
Here’s the trickiest part of a goal like getting strong: Strength isn’t measured by a number on a scale. In fact, sometimes strong numbers have a way of messing with your head. So if you’re like the vast majority of women, if you make it to the gym you deliberately dodge the weights and head to the cardio machines. You want strength and yet you fear it, so strength training isn’t part of your routine. But it should be. And you need not be afraid.

Here’s why. Strength training will help you:
1. Lose/maintain weight: Not only does strength training aid in weight loss, it also helps you keep it off over time. The more you increase your lean body mass the more calories you will burn even at rest.
2. Become stronger: Strength training tones and strengthens your muscles by contracting them against a resisting force. This force can be your body weight, added weight or pushing against a non-moving object like the floor. Strength training helps to enhance your performance of everyday tasks like lifting, carrying and walking up stairs.
3. Change body composition: While you’re busy burning calories during your strength session, you can take sweet satisfaction knowing you’ll continue to torch calories even after you’re done. Because more calories are required to make and maintain lean muscle than fat, strength training can boost your metabolism by up to 15%!

4. Protect bone and muscle mass: Lean muscle mass naturally diminishes with age. Starting at puberty, you begin to lose 1% of bone and muscle strength each year. If you don’t do anything to replace the lean muscle you lose over time, you’ll increase the percentage of fat in your body. Not only can strength training stop or prevent that loss, it can reverse it.
5. Manage stress: As you begin to notice the positive physical changes in your body and develop a regular exercise routine, your ability to handle stress will improve.
In addition to the above benefits, strength training is also correlated to things like injury prevention, overall wellbeing, deeper and better sleep and happiness. Who isn’t up for some extra of all of that?! Pressed for time or money, strength training delivers a powerful punch. AND, you can see significant improvement in your strength with just two or three 20-30 minute sessions per week.
So now that you know it matters and what you need to do, you might be wondering how to start. Here’s the great news: You don’t need a gym or fancy equipment to get a good strength workout. Often you can find everything you need right at home. A set or two dumbbells and you’re well on your way. You might also purchase a resistance band or kettle bell. If you don’t have any of these items, see what you have at home. A stair, bench or boulder work great for jumping, lunges, tricep dips and incline push-ups. A brick, piece of flagstone, a rock or even a soup can can be used as weights. What you want to do is start slow and increase your sets, reps and weights over time.
Not sure exactly what that means? A set is a group of repetitions performed for different exercises. You’ll often see it described like this: 2×12. That means you should do 2 sets of 12 repetitions, not twenty-four repetitions at once. You should lift a heavy enough weight that you can only do 12 reps. Then you rest and do it again.
How many sets should you do? There are different perspectives on this but the average is 1-3 sets. It really depends on your goal. If you’re a beginner, 1 set is going to be a great start, especially if you’re lifting a heavy enough weight. If you’re looking to build endurance or strength, aim for 2-3 sets. If you’re pressed for time, do less sets.
I created a circuit training workout to help get you started that requires zero investment. Only your time.

With circuit training, you do each exercise, one after the other without rest. This allows you to build muscle while keeping your heart rate elevated, which can help you burn more calories during and after your workout. One of the greatest benefits to circuit training is you won’t get bored. As you get familiar with the exercises and equipment you can switch up the sequence, swap in a different movement, do it at the gym with equipment or at home or outside with dumbbells and resistance bands. You can push yourself as hard as you want. To make it more challenging, move between exercises more quickly or boost the intensity. Not feeling your best? Move at a more comfortable pace.

For this workout, start with Set 1: Do each exercise one time through, 10-15 reps, then do it again. Move on to Set 2: Do each exercise one time, 10-15 reps, and then repeat. Move to Set 3 and do the same. When you’re ready, increase to three sets of each exercise, doing 10-15 reps. As you continue to build strength and endurance, increase the amount of weight you’re lifting. Still feel great? Add 20-30 minutes of cardio after your workout. Walk, jog/run, dance, bike, swim, stairs or chase some kids around!

This workout targets all the major muscle groups in your body including your core, arms, legs, glutes, back and shoulders. It combines strength with cardio bursts and flexibility, building strength for the everyday movements of your life. Your objective is to gradually increase your sets, reps, weights or time to keep your body reaching and working for more, and higher levels, of fitness. The sweat you feel will be your body thanking you.
Life is full. While you juggle all the responsibilities, opportunities and distractions vying for your time, you must remind yourself that taking care of your body matters. It matters to you; it matters to your children and your family; it matters to your purpose, your legacy and your life. After all, you’re in this for the long haul.
If you want to get healthy this year, the best time to start is now – AND you don’t need a gym membership or fancy workout equipment to get going. Chances are you already have everything you need at home. Adding two to three sessions of strength training to your schedule each week will not only change your physical body and it’s composition, but will help you build strength for a better life too.
Download a printable copy of your workout here.
Tammy is a wife, mother, writer, runner, dreamer
and soul seeker. She writes about food, fitness and freedom on her blog at tammystrait.com and recently launched Personal Training CardsTM at her new company COR44TM, a wholehearted fitness company designed to empower every woman to find her strength, love her body, and intentionally design her life. She is the author of Pretty: Breaking Free From the Illusions of a Superficial Life. You can find out more on her websites at www.tammystrait.com and www.cor44.com.
The post Quick Workouts at Home appeared first on Living Well Spending Less®.


March 17, 2017
Chef Secrets Revealed

What’s not to love about food? A delicious comforting bowl of pasta, a warm soup on a cold day, a crisp salad in the summer…food evokes memories, tantalizes taste buds, and just makes us feel good!
However, if you’re anything like me, you don’t have time to microwave, let alone prep, cook and put a gourmet meal on the table every night (or, let’s be honest, even once a week…or once a month, for that matter)! This is why so many of us end up going out to restaurants or relying on fast food. Even if we love cooking, with busy schedules, it can be SO hard to find the time to do it!
Unfortunately, as much fun as it can be to go out to restaurants, it can also add up and take its toll on our budgets. The average person spends around $13 per meal outside of the home…and we all know how fast that can add up. (Yikes.) For those of us trying to save, eating out can be one of the first budget areas we need to cut back on.
So, if you’re interested in saving money, but you still want to enjoy more meals at home that feel like the restaurant experience, it’s time to up your chef game! Does it mean spending hours in the kitchen each night as you reenact your favorite scenes from Chopped or Top Chef? Of course not!
But if you’re looking for less eating-sandwiches-over-the-sink and more wow-now-THIS-is-dinner, then here are a few little touches you can add to make your home meals feel more special and enjoyable.

1. Mise En Place
Mise en place is a French term (as many cooking terms are) that means “everything in its place.” Every chef knows this is one of the key concepts to keeping their kitchen running efficiently. If you’ve ever seen a chef’s kitchen or watched a cooking show or demo, they often keep ingredients in cute little bowls already pre-measured and ready to go—that’s mise en place. It’s organizing, assembling, and preparing the stage BEFORE you start the main performance.
For the home cook, it’s also when you check your ingredients and assemble them ahead of time, preheat your oven, and collect the tools you’ll need before you start cooking. This saves you from opening refrigerator doors with sticky hands or trying to find something buried in the back of the cupboard. It also helps you think of substitutions or change up your game plan if you realize you’re missing a key ingredient (before the dish is halfway prepared).
2. Prep Once/Use Multiple Times
When you have a family meal plan, you have a picture of the week’s meals and ingredients. You can look over the list and anticipate overlaps. Using a half-pound of ground beef in tacos on Tuesday and a half-pound in spaghetti on Thursday? Brown a whole pound at once and save yourself time (and dishes!) later on. Need onions for a few dishes? Chop them all at once rather shifting back and forth between the cutting board and the stove.

3. Clear Surfaces are Easier to Clean
This is one area where home cooks often differ greatly from commercial cooks. As home cooks, it can be hard to clear the counters! Often our countertops become a go-to place for papers, mail and such because the kitchen is a central hub of our home. It’s a gathering place and that means some clutter, but it also makes cooking a challenge.
Chefs know that food produces steam, grease, crumbs and splatters. When you’re cooking, it can be hard to keep those particles off of the rest of the items in your kitchen. Even decorative items can be hard to clean so they can end up grimy over time, let alone papers, mail and whatever-else-ends-up-on-the-counter. If you plan to do some cooking, take some time to clear the counters and make a space to work. It will keep you more efficient and cleanup will be simple at the end.
4. Use a Good Knife…and Practice
Chefs have great knife skills. They can slice, dice and chop—and in a matter of seconds, they can prepare a whole array of ingredients that would take most of us hours and hours. One of the secrets chefs know is that to gain excellent knife skills, you have to start with good quality, sharp knives.
Many of us try to chop things with dull, small knives that can barely cut through butter, let alone meat or veggies. Using a chef knife might seem intimidating (they’re big and sharp) but the extra pressure you use with a small, dull knife means a greater likelihood of slipping and having an accident. Using a sharp knife makes cutting fast and easy, and it’ll “cut” your chopping time way down (and boost safety way up)!
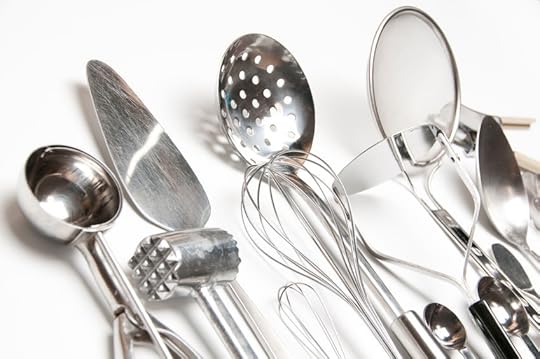
5. Gadgets Aren’t Necessary
Those strawberry hullers, avocado slicers, and onion-savers aren’t necessary and often clutter up your kitchen. Most chefs are pretty minimal when it comes to their use of gadgets and preparation tools. They know that having a bunch of small appliances and “one-trick pony” tools just clutters up your countertops and workspace. Often the jobs can all be done with just a few simple tools.
Now, don’t get me wrong, gadgets can be fun, and some really ARE useful, especially for specific tasks. But before you spend money on gadgets and appliances, ask yourself if there’s really nothing else in your kitchen that can do the same job, and consider how many times you will use the gadget in your cooking. Yes, a spiralizer might be awesome for zucchini noodles, but if your kids don’t like zucchini and you prefer regular pasta, then it’ll just end up taking up space in a drawer, adding to kitchen clutter.
6. Make Ahead and Freeze
When chefs have a big event, they often do prep way ahead of time and freeze ingredients or pieces for later use. Now, that doesn’t mean you can freeze a soufflé or meringue, but if you have leftover ingredients or if you prep two meals, freezing them can help you avoid waste and really stretch them out.
We have so many great ideas for freezer meals! Make-ahead freezer meals make your life SO much easier and they’re the secret helper for busy moms. By doing your prep and cooking ahead of time, all you have to do is heat and eat. It’s that simple! The great thing is that fully prepared meals often freeze beautifully! There are so many make-ahead ideas you can prepare all at once and eat from all week (or month) long!

7. Food Continues to Cook After the Stove
Do you ever wonder why your eggs turn out rubbery or your steaks seem over-done? Chefs know that after you remove food from heat, it can continue to cook. Unless you hit it with cold water or cool it down instantly somehow, food will continue the cooking process for a short time after it’s removed from the stove.
To avoid rubbery eggs and other hazards of overcooking, err on the side of undercooking ever so slightly. This is also important if you’re waiting for another ingredient to finish up or trying to keep things warm for a while. Veggies taste better with a little crispness and pasta is better when it’s “al dente.” Pull things off the stove a little ahead of time to avoid sogginess.
8. Don’t Over-Season
Commercial chefs know a little secret: people love to season their food. In fact, some restaurant patrons reach for the salt and pepper before they even have a chance to taste the meal. If the meal was already veering on salty or spicy, it might be pushed over the edge. It can be a challenge to season food properly as well, because raw meat and other uncooked ingredients can’t be sampled ahead of time.
Cooking concentrates some flavors (especially slow-cooking) and can dull others. Salty foods become saltier and spicy foods are even hotter after a few hours in the crockpot. More nuanced flavors disappear (like herbs). Seasoning foods at the end allows you to give it a taste, and, since it’s already cooked, now you can determine if it tastes how you intended. If you’ve over-seasoned: add a raw potato to the pot for a few minutes to help with over-saltiness, or add milk or cream to counterbalance too much heat. Always keep in mind, your diners will probably reach for the salt-and-pepper shakers or they may have sensitive palates, so a little under-seasoning can help.

9. Vegetables Can Be Exciting
Having a vegetarian meal once in a while can be a great way to save on your grocery bill, as meat can be expensive! If your husband and kids are anything like mine, though, they probably find vegetarian meals a little boring, bland or dull. Chefs know the truth: vegetables can be just as exciting as meat ingredients!
In fact, many chefs think of meat as more of a garnish or way to amp up flavor. A little bacon at the end or crumbled sausage can add a world of flavor without much fat (or expense). The key to cooking vegetables is to pick veggies your family is comfortable with and incorporate them into dishes they already like. Adding cheese, spices and dressing can also make veggies more fun and exciting.
10. Don’t Be Afraid to Experiment
Even professional chefs have a “miss” once in a while, but they don’t let it stop them from experimenting and trying new things. Combining new flavors, swapping out ingredients in a recipe to make it your own, or just using a new technique you aren’t as familiar with can help you take your cooking skills up a notch. If you mess up? It’s totally okay! Everyone has a kitchen fail once in a while. Laugh about it and see if you can learn something new for next time.
Sometimes experimentation is necessary, like when you’re out of an ingredient or dealing with food allergies or preferences. Ask friends, seek out new recipes, and give them a try. Pick a new vegetable or fruit at the store, or try a type of cheese you haven’t used before. These little touches can make your meals more exciting and interesting, and they’ll still help you save money by enjoying the experience from home.

11. Fresh Herbs & Lemon are Next Level
Restaurant dishes taste so good because they have a burst of freshness and flavor…that comes from adding fresh herbs, lemon and lime at the end. For very little expense, you can grow a few windowsill herbs like chives, parsley, thyme or dill and add them to your dishes. Watch for sales on lemons and limes, and buy real butter or a nice type of Parmesan cheese.
These little touches add tons of flavors to your dishes and make them seem restaurant-quality at the finish. You might use margarine or olive oil throughout the cooking process, but adding just a touch of the “real stuff” at the end gives it the polish and taste of something much fancier. If you love the cheese in the green can, shake away, but try a few shaves of Parmesan on your next pasta dish or in a salad to ramp flavors up. Using sharp cheddar at the end of the dish, whole milk, sour cream or other strong ingredients goes a long way. Try parsley, chives, capers or mint to make your meal complete.
12. Presentation Makes the Meal
Chefs know that presentation is SO important. Having the lettuce leaf on the plate, the little drizzle of sauce, or the sprinkle of herbs on the top makes it FEEL beautiful. It completes the experience and takes almost no time at all.
For home cooks, you can easily make slow-cooker meals or oven casseroles seem special by simply setting the table. Somehow, when you’re gathered around the table, eating off plates and chatting about your day, it makes it feel like a gathering, a meal—an experience. If you find it hard to get everyone together at the same time or find you’re running back and forth to the kitchen, bring the dishes to the table and allow everyone to serve him or herself. Add some final touches: a sprinkle of paprika, some flaky sea salt, or a wedge of lemon to squeeze over fish, and it’ll feel better than a restaurant.
Eating at home can be just as much fun as eating out—and these little touches go a long way (without stretching your budget). Take a few cues from chefs and you’ll be enjoying a meal at home that’s just as delicious as anything in a restaurant!

The post Chef Secrets Revealed appeared first on Living Well Spending Less®.
March 15, 2017
Tater Tot Casserole

For many households, Tater Tot Casserole is a familiar meal. You may have grown up enjoying this main dish with your family or eating while over at a friend’s house. However, there are plenty of us that have been missing out on this delicious meal over the years. This casserole did not grace my own table as a child, but luckily my children will never say that.
Tater Tot Casserole has become a much loved dinner in our home over the years. I am happy to tell you that even my husband, who grew up eating a version of this almost weekly and consequently tiring of it, was pleasantly surprised with this flavorful recipe. I have even seen him sneaking seconds when my back is turned!
This recipe uses a homemade cream sauce instead of canned soup and the entire dish contains only 10 simple ingredients. You will want to include the kids in the preparation of this meal too. They will love adding the final touch: a layer of tater tots!

Here is what you need:
1 lb ground beef
1 onion, diced
2 cups milk
2 heaping Tbsp cornstarch
2 tsp Worcestershire sauce
1 tsp salt
½ tsp ground black pepper
2 (15 oz) cans green beans, drained
32 oz bag tater tots
1 cup shredded cheddar cheese
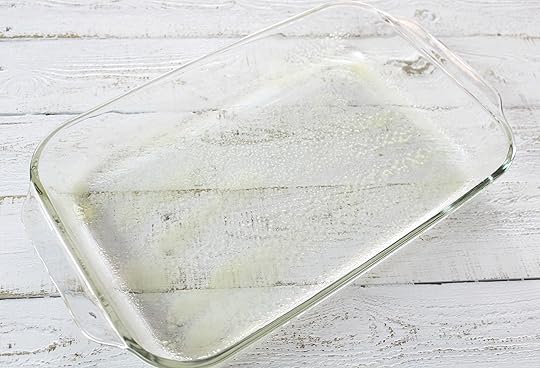
Step 1: Preheat your oven to 400F and grease a 9×13 pan. Set aside.

Step 2: In a large pan, brown ground beef. Add diced onions to browned ground beef and sauté for 5 min or until onions are translucent.

Step 3: In a bowl, whisk together milk and cornstarch.

Step 4: Add cornstarch and milk mixture to hot pan of ground beef and onions. Stir continuously for 3-4 min or until mixture is thickened.

Step 5: Remove pan from heat and stir in Worcestershire sauce, drained green beans, shredded cheese, and salt and pepper.

Step 6: Pour mixture into greased 9×13 pan. Top with frozen tater tots.

Step 7:Bake for 20-25 min or until casserole is bubbling and tater tots are golden brown. Allow to cool for 15 minutes and serve.
Print This!
Recipe: Tater Tot Casserole
Summary: Every family should have a simple casserole recipe to satisfy the whole family during the week. This Gluten-Free Tater Tot Casserole will do just that!
Ingredients
1 lb ground beef
1 onion, diced
2 cups milk
2 heaping Tbsp cornstarch
2 tsp Worcestershire sauce
1 tsp salt
½ tsp ground black pepper
2 (15 oz) cans green beans, drained
32 oz bag tater tots
1 cup shredded cheddar cheese
Instructions
Preheat your oven to 400F and grease a 9×13 pan. Set aside.
In a large pan, brown ground beef. Add diced onions to browned ground beef and sauté for 5 min or until onions are translucent.
In a bowl, whisk together milk and cornstarch.
Add cornstarch and milk mixture to hot pan of ground beef and onions. Stir continuously for 3-4 min or until mixture is thickened.
Remove pan from heat and stir in Worcestershire sauce, drained green beans, shredded cheese, and salt and pepper.
Pour mixture into greased 9×13 pan. Top with frozen tater tots.
Bake for 20-25 min or until casserole is bubbling and tater tots are golden brown. Allow to cool for 15 minutes and serve.
Preparation time: 15 minutes
Cooking time: 25 minute(s)
Number of servings (yield): 8-10
Sammi Ricke likes to keep things simple, delicious, and nutritious in her kitchen. She enjoys the challenge of finding unique ways to incorporate “just one more whole food” into every meal while leaving just enough room for life’s essentials: chocolate and peanut butter. If you are looking for “healthified” versions of your family’s favorite meals be sure to visit Sammi’s Grounded & Surrounded Blog. You can also find her on Pinterest, Instagram, and Facebook.

The post Tater Tot Casserole appeared first on Living Well Spending Less®.
March 13, 2017
Shop Less, Save More

For those of us who struggle with online shopping, the future can seem a bit, well, scary. Fifteen years ago, if I wanted to curb my shopping habit I would’ve just stayed home and avoided the store.
But now, wow, it’s just so EASY. I mean, you don’t even have to hit up a virtual store to shop. We’re constantly bombarded with opportunities to buy streaming music and video services, new apps, downloads, games, and more.
With Amazon Echo, Dash Buttons and Google Home, we can literally buy items simply by pushing a button or wishing for them out loud.
And especially when we’re struggling to get our finances under control, online shopping can become so tempting…even addicting. Just like a drug, we get a little rush of gratification when we purchase something online. It’s exciting! It’s fun to get things in the mail! The whole world of stuff is out there, waiting to be purchased!
The future is here…and I’m a little freaked.
We have to address our online shopping and rein it in. Money spent online (especially on all those little, intangible purchases) is still coming out of our wallets and adding to debt. If you’re working to tackle your debt or even go on a spending freeze, spending money online will work against your goals.
Now I’m not perfect at this. I LOVE a good deal, and it can be really hard not to spend money online. It’s always there and it’s always tempting. But if you’re trying to rein in your online spending, here are a few tips and tricks I’ve found helpful.
1. Make a Commitment
Any time we want to change or set a goal, the first step is committing to the goal. For me, I know if I write it down, tell my husband and add it to my calendar, it becomes more “real.” How we commit to committing can look a little different for each of us.
Your best bet? Make a commitment and say it or write it down. Put it in a place you’ll be reminded (like on a post-it on your computer). Each time you feel tempted to spend or when you get distracted by a sale, revisit your commitment and remind yourself why you want to achieve your goal. Is it to get out of debt? To spend less on stuff you don’t need? To teach your kids better values? Revisit your commitment and reasons each time you need a boost.

2. Write Out Your Budget and Limits
If you want to rein in your online spending, it helps to get a clear picture of where you are financially. If you have a budget, visit it and look at what you’re spending each month online. Examine your bank and credit card statements in case you forget about all those $1.99 app store charges or subscription fees.
If you need help setting up a budget, you can download this free budget worksheet. Look at areas you can cut back or places you’re overspending. For example, if you and your husband have music streaming accounts, perhaps you can combine them into one joint account. Look at your Hulu, Netflix and Amazon Prime accounts—can you get by with just one movie streaming service?
3. Cancel Email Alerts for Sales
Remember when we used to get catalogues in the mail? Tons of catalogues would pile up, and if you wanted to curb temptation, you’d just unsubscribe or throw them away, right? Well, you can do the same with the “sale” notifications in your inbox and alerts you receive.
Many stores and online retailers offer sales on a rotating schedule. For example, GAP and Old Navy offer some type of sale almost every week. Retailers know a sale creates a sense of urgency, so we’d “better buy now” lest we miss an opportunity. Turn off the sales notifications and you’ll stop feeling like you’re missing out.

4. Unplug If Necessary
We’re in a constant state of receiving information. Advertisements pop up on our screens and scroll across our inbox so often we hardly even notice them anymore. Sometimes we need a break to connect IRL (in real life) instead of being online. When we see streams of Facebook friends doing amazing things, wearing great clothes and getting more stuff, we can feel the urge to keep up.
The same goes for Pinterest and Instagram. When we’re scrolling through photos of ideas and “stuff” we need to buy, it can be hard to turn it off and tune it out. You don’t have to shut down social media, but give yourself an e-break once in a while. Spend a day outdoors with your family…without your phone.
5. Buy Based on Needs
It’s hard for me to pass up a sale, especially if it’s something I think we might need in the future. If I have a list though, and I know what I’m looking for, then I can usually stick to it. Just like you avoid those sale endcaps when you don’t want to be tempted at the store, avoid scrolling through and “pretend shopping”—you know, when you put things in your virtual cart to “think about it”?
Instead, when a need comes up, put the item on a list. When you go to the store or when you’re ready to buy several items together, then make your purchase and stick to just the items on your list. If you have to buy something like a new winter coat for your daughter, look for sales and coupon codes, comparison shop, and find the best deal, but stick to the item on your list, rather than adding tights, a sweater and a scarf.

6. Implement a Wait Period
Do you want to really get your online spending under control? Implement a mandatory waiting period. With Amazon Dash and other “instant order” services, we’re used to getting immediate gratification. When we want something, we get it right away.
Instead of clicking the instant you think of something you need, add it to your list. Wait three days (or however long works best for you). That gives you a chance to assess whether it was a real need or just an impulse buy. Think about items for a little while and sometimes you might find, like I do, you didn’t really want or need them in the first place.
7. Freeze, Hide or Cut up your Card
If you really have to wage war on your spending and you need to take some serious measures, take your credit card away altogether. Put it in the freezer in a jar of water. By the time the jar melts and your card is free, you’ll have had plenty of time to reflect on the purchase.
Alternatively, ask your spouse to hide your card from you (provided your spouse is on board with curbing online spending). If all else fails, we’ve all cut up a credit card before. If you have to go through the hassle of asking the bank to reissue a card, chances are you’ll probably decide the purchase isn’t really worth it.

8. Don’t Save your Information
My computer conveniently stores my credit card information for me. (I’ll bet yours does this too.) When I want to buy something, I just “autofill” and it goes right through. Many retailers also helpfully offer to store your information for future purchases.
To avoid the impulse buy, always opt NOT to save your information. Not only does it keep your identity and financial information safe and out of the hands of hackers, but it makes spending much less convenient. Instead of one click, you have to think about your purchase, find your card and enter in the information. It takes longer and gives you more time to change your mind.
9. Use the Buddy System
If you’re struggling to rein in your spending, consider enlisting an accountability buddy. Ask a trusted friend to check in with you once a week or every so often on how you’re doing with your spending goals. So often, when we’re battling overspending, we feel embarrassed and alone. We might feel silly that we don’t have enough self-control.
In truth, reining in our online spending is hard. Many of us have struggled with spending and debt. Asking a good friend to help you meet your goals will give you someone you can bounce things off of, and someone who will offer you support when it seems tough.

10. Set Goals & Rewards
When it comes to crushing your goals, you need to remember to “Treat Yourself.” Sometimes we forget that an important part of achieving goals is to have a reward to keep ourselves motivated and inspired as we work toward achieving things, especially hard things.
So, if you have a goal to curb your online spending, crush it, and reward yourself with something great—a day out with a friend, a trip to the salon, or how about uninterrupted time to do whatever you want?! Offer yourself little rewards along the way. For example, if you go a week without spending online, treat yourself! If you’re fighting the desire to click, try painting your nails, baking something you’ve been wanting to try, or reading a book you can’t put down.
Remember, doing anything new is hard. If you’ve been relying on the convenience of online shopping for a while, chances are it’s become a habit and you need to give yourself some time to rein in your clicking. You have to retrain yourself to do something different, rather than relying on your go-to methods of spending.
Reining in online spending is hard, but we can do it! Using these tips and tricks, we can start to form better habits that don’t derail our financial goals!

The post Shop Less, Save More appeared first on Living Well Spending Less®.
March 10, 2017
Discover Your Home Away From Home

Who doesn’t love a vacation?
Whether it’s a family road trip, a visit to Disneyland or travel to a big city, vacations give us a chance to bond, make great memories, explore, and embrace new adventure! Most of all, they give us a chance to relax and have fun.
If you’re looking to get away (or if you need to travel for business or pleasure), one of the biggest questions is always “where to stay.”
These days, with the rise of by-owner vacation rentals, companies like Airbnb, Homestay, HomeAway and Roomorama offer global hosting and tons of options and amenities that go beyond the typical hotel, hostel or standard bed & breakfast. We’re no longer forced to book stays at impersonal hotels or bound to staying at whatever hotel has a vacancy sign. (Hooray!) Better yet, with more space and a full kitchen, you can save a bundle on restaurant costs by cooking at least some of your meals at “home.”
Not to mention the price! If you’re looking to save on your next vacation, rentals can be the way to go!
You get all the personal touches of a bed & breakfast—and oftentimes the owner even hosts so they’re on hand if you have any issues. Plus, you have the advantage of local experience and guidance that goes well beyond a concierge at a hotel desk. You can also find family-friendly and/or pet-friendly hosts, which is a nice personalized touch to ensure your stay is hassle-free.
Convinced yet?
If you’re interested in booking your next trip at a by-owner vacation rental (and saving money), there are a few things you should look for to ensure you have the best and safest experience possible.

1. Consider Your Needs (number of guests, space, kitchen, etc.)
Most by-owner vacation rental sites (such as Airbnb) are very clear about the parameters and accommodations offered. Most offer a wide variety of options, especially in larger cities or popular vacation spots. You don’t have to settle for something that doesn’t meet your needs.
Be realistic about what you’re looking for. Are you traveling with kids? Pets? Do you want a host who lives on-site? Are you comfortable sharing a bathroom with other guests? Are you fine with just a room or do you need a kitchen and living space as well?
With by-owner vacation rentals, you can expect a more personal experience—but you also shouldn’t assume things like transportation, parking or meals will be readily available, unless indicated by your host. In a big city, this isn’t such a concern, but in a small town where the nearest store closes at 8pm, this could be an issue. Be clear about your needs and expectations and read the listings carefully.
2. Read Reviews and Verification
If you’re new to vacation-rentals, read all the online reviews thoroughly before deciding on a host. One bad review doesn’t necessarily mean anything (especially if they complain about things beyond the host’s control, like the weather), but a few questionable reviews should raise red flags.
Most sites verify hosts, meaning they’ve been vetted and reviewed several times, and you can trust what they say. One of the best guidelines I’ve heard is to think of it like a dating website, rather than Hotels.com. Opening up one’s home to outside guests is a pretty personal thing. You want to really get to know your host and they should be comfortable and curious about you, too.
There are “instant rentals” available, but for first-timers, you may want to do some more research and communicate with your potential host before making a decision. It can help you make a choice you’ll be happy and satisfied with in the future.

3. Look at Photos Carefully
Great hosts offer lots of photos of their property so you have a good idea of what the space looks like. Watch for verified photos, which means that guests have reviewed and vouched for the fact that the accommodations are as pictured.
When you’re looking at the photos, keep in mind that this is someone’s home—don’t expect the same perfection or standards you would find at a professional hotel or inn. At the same time, hopefully you’ll notice some personality so you can really get the flavor of your host and get a clear overview of what the space and property looks like.
If you have questions about the photos, communicate with the host. For example, if you’ll need a closet, but you don’t see one pictured in the photos, you should ask! Always review each listing carefully to make sure you’re really comfortable before you book!
4. Always Only Pay Through the Site
You should never “deal offline” with a vacation-rental host. Many sites prohibit off-site deals, plus, it’s a sign that the host isn’t so trustworthy.
Obey your gut instinct when it comes to booking your site and working with your host. This is one case where you can really expect hosts to give you the best deal up front, so there should be NO need to negotiate or try to “talk down” the price. The market is quite competitive and hosts may decline any guests who aren’t willing to pay the expected rate.
Making payments through the site doesn’t completely prevent worst case scenarios, but if you’re going through a host with great reviews and you’ve thoroughly done your research, obeying site rules and adhering to the guidelines just reinforces your positive impressions. You want to know that this is someone you can trust and that they’ll do things as outlined.

5. Consider the Host’s Personality
As you’re considering your host, look at their personality and the style outlined in their reviews. If you’re hoping for someone who will mostly keep to him or herself and just give you a space to stay, look for that in the reviews. If you want someone who will show you a great time, give you a tour of the city, and spend hours “hanging out,” then look for a host that offers a more outgoing style.
Most by-owner vacation hosts have day jobs and may even be renting while they’re out of town, living somewhere else or away. If you’re staying in a foreign city and you think you’ll need guidance and food, and you’d like to really make a connection with someone, you should thoroughly research and gauge your host’s responsiveness.
Similarly, if you have kids or if you’re traveling with pets, be very upfront about it, and ensure your host is kid and pet-friendly. You should go in with the expectation that your host will also be very honest and upfront about their children, pets, friends, engagement, and noise level.
6. Analyze Your Host’s Communication and Comfort
You might be wondering, “Well how do I find out all these things about my host?”
Most sites require a back-and-forth communication with host and guests before the decision to rent. This is so you can get to know your host and vice-versa. Be honest, upfront, friendly, and open with your host. Remember, this is a real live person who is renting out their home or room to you, not a company. It’s okay (and encouraged!) to inject a little personality and friendliness into your correspondence!
There are some “instant rent” options available, and oftentimes, professional companies or contractors in the area run these spaces. While that’s fine, you won’t receive the same level of personalization (like snacks, coffee in the mornings, or suggestions for the best café in town).
If you prefer the personalized experience, look for hosts who are friendly and honest about what they expect and what they can offer.

7. Look for Clear Rules and Guidelines
Newbies especially should look for properties that list clear house rules and guidelines. Not all listings offer these guidelines, but it’s a sign of a thorough host who’s going to keep up their end of the bargain as well.
Rules and guidelines help you know whether or not your host would like you to remove your shoes in the mudroom, if they have preferences when it comes to noise, if they prefer specific arrival and departure times, and similar information. Reading all the rules beforehand will go far in helping you both have a pleasant experience.
Hosts that don’t list clear-cut rules and expectations should still be prepared to answer questions on request. Similarly, if they list their rules, be sure you read them before emailing with questions they’ve already reviewed and answered in their profile.
8. Check for Extended-Stay Rates
While most rates aren’t negotiable, if you’re planning to stay for a week or more, it can be worth it to ask your host about extended-stay options and rates. If you’re traveling for several weeks on a business trip, staying at an owner-hosted rental can bring the consistency and comforts of home during your stay.
Some vacation-rental owners prefer to limit their guests’ stays or aren’t as comfortable with open-ended or extended stays. Others prefer the consistency and reliability of a guest who plans to stay for a longer period of time.
Vacation-rental owners rely on their properties to bring in a regular income, so having a guaranteed renter for a week or two is often worth giving them a discount. It can be win-win for both parties!

9. Check for a Home-Safety Profile
Check to see your potential host offers home-safety guidelines. These guidelines should include local emergency numbers and information about the home. The information should include how to work with and troubleshoot utility problems (like if the furnace or hot water goes out, or there’s a water leak), plus useful information like the WIFI password.
If you run into an emergency and your host isn’t available, the home-safety profile will be your go-to guide, especially in an unfamiliar town or even a foreign city. It’s also important to do a little research beforehand just in case.
Have a good idea of the weather and pack extra layers in case your host’s preferred temperature is a little different from your own. Know where there’s a nearby store, and have an idea of emergency medical and safety services in the area. Follow best “travel practices” and plan ahead, especially if you’re traveling alone or with kids.
10. Consider Parking, Transportation Access and Location
Some by-owner vacation rentals offer access to bikes or extra parking spaces—and some hosts will even pick you up from the airport. Most however, expect you to be responsible for your own transportation, so it’s best to err on the side of precaution unless it’s explicitly stated in the profile.
If you’re visiting a larger city, public transportation might be widely available, or you can rely on Uber or Lyft to get you to your destinations. On the other hand, many smaller cities, even suburbs, don’t have transportation available. The last thing you want is to be late for a meeting or a flight because you weren’t aware that cabs needed to be arranged beforehand or that public transportation routes won’t take you to your destination.
Similarly, many cities, especially during festivals, events and winter months have restrictions on street parking. Don’t assume you can park your rental car right in front of your accommodations or that there will be space available.
With a little planning ahead and some smart screening, you can save a bundle by using by-owner vacation rentals. The prices are often much more reasonable than hotels. The experience is much more personal and unique. It can add to your adventure and help you feel more at home on your trip.
So whether you’re headed to the mountains, to the beach or to a city, check out some of the great sites for vacation rentals and give it a chance! You might even make a few new friends and connections along the way!

The post Discover Your Home Away From Home appeared first on Living Well Spending Less®.
March 8, 2017
Easy Irish Soda Bread

I’ve never met a carbohydrate I didn’t love, and oh friends, let me just tell you that this Irish Soda Bread is so easy and delicious!
With just a couple of ingredients and five minutes to whip together. It is the perfect side to any hearty soup or stew. It is also great for breakfast, an afternoon snack or a midnight snack for that matter! But let’s be honest, we all know that bread out of the oven smothered in butter is the all time BEST!

Here is what you need:
3 cups flour
1/4 cup sugar
1 tablespoon baking powder
1 teaspoon baking soda
1/2 teaspoon salt
4 tablespoons butter
1 cup raisins (optional)
1 cup buttermilk
1 egg

Step 1: Pre-heat oven to 400. line baking sheet with parchment paper. In a large bowl, mix together flour, sugar, salt, baking soda, and baking powder.

Step 2: Then add softened butter to dry ingredients until it is well mixed.

Step 3: In a small bowl mix together the buttermilk and egg.

Step 4: Then add buttermilk and egg mixture into dry ingredients until well mixed.

Step 5 : Then mix raisins with a little bit of flour and add raisins into batter. Knead them into dough batter.

Step 6: Place dough on a floured work surface and knead. Shape into a round loaf. Then place on parchment covered cookie sheet and cut a cross in the top. bake for 15 minutes then reduce heat to 350 and cook for another 15-20 minutes.

Step 7: Let cool on cooling rack, then cut and serve with butter and a nice cup of coffee.

Print This!
Recipe: Easy Irish Soda Bread
Summary: This tasty bread comes together in no time and is the perfect addition to your St. Patrick’s Day celebration.
Ingredients
3 cups flour
1/4 cup sugar
1 tablespoon baking powder
1 teaspoon baking soda
1/2 teaspoon salt
4 tablespoons butter
1 cup raisins
1 cup buttermilk
1 egg
Instructions
Pre-heat oven to 400. line baking sheet with parchment paper. In a large bowl, mix together flour, sugar, salt, baking soda, and baking powder.
Then add softened butter to dry ingredients until it is well mixed.
In a small bowl mix together the buttermilk and egg.
Then add buttermilk and egg mixture into dry ingredients until well mixed.
Then mix raisins with a little bit of flour and add raisins into batter. Knead them into dough batter.
Place dough on a floured work surface and knead. Shape into a round loaf. Then place on parchment covered cookie sheet and cut a cross in the top. bake for 15 minutes then reduce heat to 350 and cook for another 15-20 minutes.
Let cool on cooling rack, then cut and serve with butter and a nice cup of coffee.
Preparation time: 5-7 minutes
Cooking time: 30-35 minute(s)
Number of servings (yield): 10-12

The post Easy Irish Soda Bread appeared first on Living Well Spending Less®.
March 6, 2017
How to Create a Financial Plan for the Year: March

Let’s be honest…..figuring out finances can feel stressful, time consuming, and just UGH. Maybe you’ve already made some positive changes this year. Great! But I totally understand if keeping up that momentum can seem daunting. Believe me, you are NOT alone!
To help you deal, my team and I have created this Financial Plan for the Year Series, which breaks it all down into a few simple monthly steps to keep you energized and motivated to save all year long.
Each month, we’ll detail three simple action items (yes, just 3!) to help you start (or continue) saving, get a handle on your budget, and find ways to organize and keep track of your finances. I’ve tried to keep the steps manageable, so each month you’ll only have to tackle a few goals to feel like you’re really making progress and keeping on track!
Even if you’re joining us mid-year, you can pick up at any time and keep going from there. If you prefer to start at the beginning, feel free to tackle the action items in my January post and/or February post, or simply start right now to find more ways to keep your financial mojo brewing.
You can do this!

March: Get Organized, Keep Your Momentum, and Find Free Money!
Whether you enter March with fluffy lamb-like finances or a lion-sized roaring hot mess, taking a few steps to get a jumpstart on some spring cleaning and organizing can help you feel calm and motivated throughout the entire season.
When March hits, we’re often ready to clear out clutter and come out of our winter hibernation. It’s a great time to start getting things organized. You may be surprised to find items you didn’t even know you had on hand and even find new ways to use them to move toward your financial goals.
As we start feeling a little spring in our step, we might also be feeling more social, so our thoughts turn to “getting out there”—running errands, finding creative ways to earn money, and thinking up ideas to keep up our social life rolling…without overspending.
Action Items for March:
Start to Organize Your Pantry
Spring Clean & Sell
Find Free Money!
Before You Start: Review Your Goals
If you’ve already set budget and savings targets for this year, revisit your goals to see how you’re doing. Are you staying on track? Are there any areas where you’re able to cut back? What needs to change going forward? Look at your emergency fund. This month we’re going to find a few more ways you can generate some extra income to start adding to your fund and preparing to tackle your debt. We’re also going to look at how staying organized helps you save more and spend less!

1. Start to Organize Your Pantry
Last month we talked about reducing your grocery bill. One of the biggest ways you can spend less at the grocery store is by knowing what you have on hand so you aren’t constantly buying the same things over and over.
Many of our pantries are a little cluttered from winter: there’s pasta, half-opened bags of rice, canned goods we’ve forgotten about, and spices looking a little lackluster. Go through your pantry and start to really clean and organize it. Assess what you have on hand, as well as what items you might need to watch for on sale.
Think of some quick and easy meals you can make for your family and ensure you have those items on hand. If you always have a few go-to items like macaroni, beans, canned tomatoes, oats and applesauce, you can throw together a quick meal and stretch your freezer-cooking repertoire as well. Look for items you may have forgotten about and put them to use!
Once your pantry is organized, make it a goal to see if you can use up the items you already have before running out to the store to stock up. Get creative with your meals and stretch them out to use up some of those ingredients before they expire!
You can get tips on organizing your pantry here. Plus, check out this list of 10 Pantry Staples to Always Keep on Hand.

2. Spring Clean & Sell
Even if the weather’s still a little chilly, you can start to move those mid-winter items out and assess which items might be ready for a new home. Look at coats, boots, sporting gear, and other winter items and décor that you might not need by next year.
Moms of younger kids can be assured that your little one will outgrow that cute snowsuit and won’t need those boots and bunting for next year. Assess your own closet, too. Are there items you didn’t wear or barely touched this winter season? Is there anything that doesn’t fit or doesn’t match your style anymore?
Gather any items you’re no longer using—and sell them! Perhaps there’s something you could sell on Craigslist or eBay. Have the kids grown out of their winter sports items before they’re worn out? Have you amassed some toys, books or games over the holidays to replace others that have become old hat?
If you have a local consignment shop, try taking in gently used clothing, especially name-brand items, which can get a great price. Toys, games and sporting goods can be sold on Craigslist or at recycled game and/or sports stores. Take any money you earn and use it to boost your emergency fund to ensure you have money to cover any extra costs at tax time!
If you’re really ready to tackle your closet and love everything in your wardrobe, try these tips to a 40 Hanger Closet!

3. Find Free Money!
It might sound a little crazy, but almost all of us have some “free money” lying around. I know you’re probably thinking, “I would definitely KNOW if I had any money lying around.” But trust me, gather your kids and your husband and go on a money hunt.
Check your couch cushions. Turn in the jar of coins you’ve been saving in your closet or in the laundry room. Search your inbox for old Groupons you’ve purchased, gift certificates and gift cards you might have forgotten about, store credits, and more. Check your PayPal account. Is there any money just hanging out in there, unused?
Check with any programs you belong to that offer cashback rewards, bonuses and gift cards. If you’re a member of InboxDollars, Cash Crate, Swagbucks, Ibotta or other rewards programs, check your balances to see if you’re owed any extra dollars. So many of us forget about these little “bonus” dollars and programs we sign up for—and many programs and retailers bank on you never cashing in.
Take that free money and use it toward any purchases you need to make, so you can roll your savings over into building up your emergency fund even more! Use gift cards and credits to purchase gifts or pay for activities that would have come out of your monthly budget. Use it or lose it!

Bonus: Best Purchases in March
Retail-wise, March is a pretty quiet month. It IS National Frozen Foods month, so grocery stores often have good buys on frozen foods. Food-wise, it’s also a great month to buy chocolate, leftover from Valentine’s Day sales.
Winter clearance is mostly over in retail, but you may still find some serious discounts on the last of winter coats and clothing. Videogames and equipment are often on sale, as the items that didn’t sell over the holidays are now up for grabs.
Exercise equipment like treadmills are often on sale during this time of year, as people’s workouts move outdoors and retailers are unloading stock from January resolutions. Ski and snowboard gear is on sale as the season ends. You might also find good deals on golf clubs, luggage and jewelry, again from Valentine’s Day.
March is a great month for feeling a renewed zest for cleaning the air and establishing new routines. As you declutter and organize your house, you might be very pleasantly surprised at the hidden treasures you find. Chances are, you can use them to generate some extra money, help stretch your budget, and move you toward your financial goals—all year long!

The post How to Create a Financial Plan for the Year: March appeared first on Living Well Spending Less®.
March 3, 2017
Spring Cleaning 101

I just love spring, don’t you? The birds are singing, the grass is greener, the air smells cleaner, the sun is shining—it’s the perfect time for a fresh start, and there is nothing I love better than a fresh start! And while spring cleaning can sound like a total drag, I swear it doesn’t have to be too hard. Plus, as I’m sure you know, when you put in the work, the results are SO rewarding.
We know you’re busy, so my team and I have pulled together some quick and easy tips, plus a straightforward step-by-step guide to ensure your spring cleaning process goes as smoothly as possible.
It’s a good idea to set aside an entire weekend to set ourselves up for a successful spring clean. (…and who wants to drag out the process anyway??) If you go in order, it can be easy to make over the whole house in just a short time. By the time summer arrives, you’ll be ready to sip some lemonade and enjoy a lazy day in the yard!
First, we’ll tackle the big stuff and clear out the clutter. Then, we’ll make some great natural cleaning products. Last, we’ll give the whole house a good clean from top to bottom.
There are always a few “problem areas” like the bathroom, the kitchen, or even your closet, which might need some extra time and attention. We’ve got a plan for rockin’ through all these areas so you can have the freshest, cleanest house of your dreams!

Of course, before you begin, the very first thing you’ll want to do is print our brand new 2017 LWSL Spring Cleaning Planner. You can get it HERE, or simply click the button below.
And then, without further ado, let’s get started!

Step One: Plan a Weekend Purge
The first step in spring cleaning is to clear out the clutter. When we found ourselves with a house (and attic, and garage) full of stuff a few years ago, we had to do a total clutter overhaul. The great news is, once we started, we loved the feeling of being clutter-free so much that it’s (mostly) stuck! We’ve been able to stop the flow of stuff for a while now, and you can too.
When winter’s in full swing, we can accumulate a lot of….stuff. We end up with Christmas decorations and gifts, outgrown winter clothes and accessories, and items from the school year that fill the closets and halls. When the weather’s cold, it can be challenging to organize and clean out. We end up shoving tons of stuff in the closet, or piling stuff in the garage or basement, and thinking, “I’ll tackle this later.”
Well, there’s no time like the present to roll up your sleeves and get started. Plan a weekend purge and get the whole family working together to fly through all that stuff! As you go through closets and cupboards, you’ll figure out what to do with all the excess stuff that’s cluttering your home.
Even better? You’ll probably end up earning a little money when you clean it out, whether you decide to have a yard sale, post a few items on Craigslist, or hit up your local consignment shop.
Set aside a weekend for the overhaul. You’ll want to plan for a weekend when you’ll have plenty of hands on deck and energy, so you can really dedicate yourself to the process. There’s a step-by-step guide for your weekend purge here.
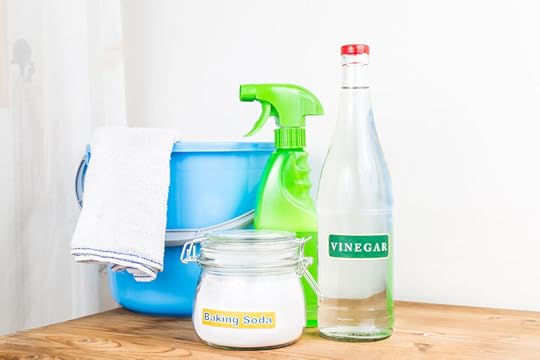
Step Two: Make Green & Thrifty Cleaning Products
Cleaning an organized house is SO much easier. We aren’t fighting against all the clutter and stuff. We’re able to clearly see where everything goes, so then it’s just a matter of doing some serious deep cleaning.
I’m not a big fan of using chemical products. My daughter is very sensitive to chemicals and has some allergies, so we’re very careful to use natural products as much as we can. I don’t know about you, but I just love having a clean house, as well as the smell of lemon, peppermint and other great “clean scents.”
If you also prefer “green” cleaning products, you can make a whole bunch of them for literally pennies on the dollar. Even better? Most of them call for ingredients you probably have in your kitchen right now! Vinegar, baking soda and lemon juice are simple but powerful ingredients that can clean and freshen your whole home.
Once you’ve cleared out your clutter, learn how to whip up a few green and thrifty cleaning products here so you can be 100% ready to get your house gleaming!

Step Three: Spring Cleaning Top to Bottom
When cleaning, go top to bottom. That means all the dust and dirt moves downward as you go, saving you time because you don’t have to keep cleaning the same surfaces over and over again. (Thanks, gravity!)
First, make sure everything is still put away. If you started with a weekend purge last weekend or even if you just did as much clutter clearing as you could, you’re ready to go. Touch up any areas that need some organizing and ensure your laundry is done and your counters are cleaned off. Ok, now we’re really ready to go!
Gather rags, cleaning products and dusters. Fill a bucket with some sudsy water and keep a few towels handy as well. Be sure you also have your vacuum handy, and ready any supplies you might need, like air filters and light bulbs.
You’re going to start with the “top zone” of the top floor of your home. What’s the top zone? It’s any area above your head. Start here:
Dust or vacuum upper ledges and above cabinets
Clean air vents
Dust or clean ceiling fans
Dust or wash light fixtures
Clean high windows
Change light bulbs and replace air filters
Once you’ve tackled the top zone, move to the “mid-to-top-zone.” This includes everything at eye level. Next steps:
Wash, iron, and re-hang curtains
Dust bookshelves and other tall furniture
Wash windows
Dust pictures, mirrors, clocks, and other wall hangings
Next, move to the “mid-to-low-zone,” otherwise known as waist-level. These are the surfaces you probably clean weekly, but for today, give them a little more attention and an extra deep cleaning:
Dust surfaces
Polish wood furniture
Clean leather furniture
Vacuum and spot clean upholstered furniture
Wash sheets and change bed linens
Clean and wipe down bathroom sinks and counters
Scrub showers and bathtubs
Clean toilets
Finally, move to the “bottom zone” or floor-level surfaces. It’s time to pick up ALL that dirt and dust that’s shifted down toward the floor. Now it’s time to:
Sweep hard floors
Spot clean and mop tile or linoleum floors
Vacuum rugs and carpets
Wash small area rugs
Dust baseboards
Sweep front and back steps and/or porch
It’s that simple! If you have a second floor, start there and move down, cleaning the stairs in between the two floors.
Bonus: How To Tackle the Tough Areas
There are a couple areas we might find a bit more challenging, like the bathroom, the kitchen, or even our closet. These areas tend to accumulate more “stuff” and get dirtier than other areas of the house. If you really want to crush your spring cleaning goals, set aside a separate weekend to tackle the really tough stuff.
The Kitchen: If you want to give your kitchen the ultimate clean, you’ll want to deep clean the fridge and freezer, clean the stove and oven, and really give your sink and dishwasher a little extra attention too. Spruce up your garbage disposal with a little baking soda, and wash and change your trash bin before replacing the bag.
The Bathroom: To deep-clean the bathroom and keep things clean and germ-free, spray down the toilet and sink, clean and scrub the tile and grout, and spend some time cleaning the shower, especially in the corners where mildew can build up. Clean mirrors and wipe with newspaper to really get them shining and sparkling. (To avoid inky fingers, be sure your newsprint is at least 4 days old.)
The Closet: Often spring gives us a desire to clean out our closet and overhaul our wardrobe as well. A few years ago, I was feeling particularly frustrated with my closet. I felt like it was full of clothes, and yet I had nothing to wear…
I went out and got some really nice hangers, but I could only afford 40 to start—so I decided to pare down my closet to only 40 hangers. Talk about a game-changer! I couldn’t believe it—when I narrowed down my wardrobe to 40 pieces that fit and flattered, I ended up having no trouble finding what to wear! I no longer felt like I was rummaging through piles of clothes every time I got dressed.
If you need help tackling your closet, check out this 40 Hanger Guide to help you get started. I know it sounds a little scary, but it really works!
Finally, check out any other areas of concern in your house—the laundry room, the “pet area” (if you have pets), and/or the garage or pantry. Establishing regular speed cleaning routines can help us stay up on these problem areas, and on the housecleaning in general. Once it’s clean and organized, it’s so much easier to keep it that way!
Congratulations! Your house is now clean, organized and ready for the summer sunshine! By taking a couple weekends in the spring to really overhaul and organize, you’ll create a home that’s fresh, clean and ready for spring!
P.S. Don’t forget to grab your 2017 LWSL Spring Cleaning Planner! It is available free, but only for a limited time, so get it now while supplies last! You can grab it HERE, or by clicking the button below.

The post Spring Cleaning 101 appeared first on Living Well Spending Less®.
March 1, 2017
Quick & Easy Breakfast Cookies

I don’t know how things are in your home, but in our family weekday mornings can be just a little bit hectic. And while there are many things that contribute to the chaos, at the top of our stressor list is the task of making a nutritious breakfast.
Luckily these quick and easy breakfast cookies fit the bill of being easy, nutritious and so tasty! Better yet, they can be made in bulk and placed in the freezer for a FAST breakfast on the go or a healthy afternoon snack!

Here is what you need:
1 1/4 cup whole wheat flour
1/2 cup rolled oats
1/2 cup cooked quinoa, cooled and dried
1/2 cup flaxseed meal
1 drop Cinnamon Bark Vitality™ essential oil or 1 teaspoon ground cinnamon
1/2 teaspoon baking soda
1/2 teaspoon baking powder
1/2 teaspoon salt
1/2 cup butter softened
1/4 cup sugar
1/4 cup packed brown sugar
2 large eggs
1/4 cup honey
1 teaspoon vanilla extract
2 cup cranberries or raisins
1/2 cup chopped walnuts (optional)

Step 1: Pre-heat oven to 375; then in a large bowl, mix together butter, white and brown sugar, eggs, honey, cinnamon bark vitality essential oil and vanilla extract.
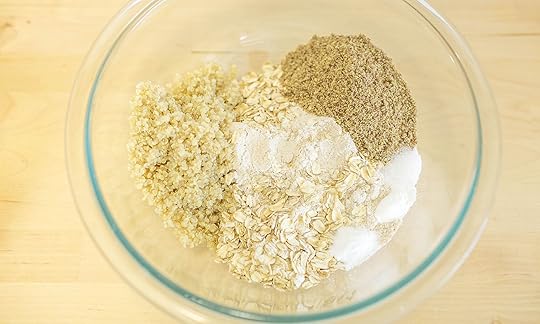
Step 2: In a medium bowl mix together flour, oats, quinoa, flax seed meal, baking powder, baking soda and salt .
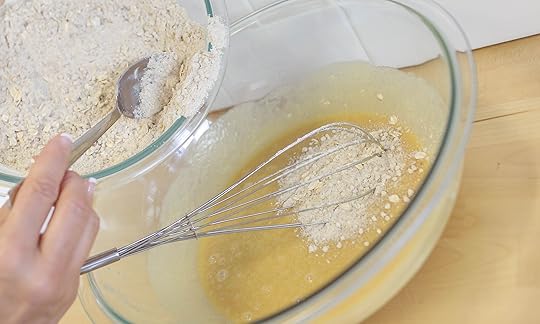
Step 3: Then add dry ingredients into wet ingredients, until all is combined.

Step 4: In a small bowl add 1 tablespoons of flour with the dried cranberries and walnuts.Then mix into the cookie batter.

Step 5: Spoon tablespoons of batter onto baking sheets, lined with parchment paper. Bake for 10-12 minutes or until bottoms are lightly browned.

Recipe note: Freeze cooled cookies in an airtight container for up to 3 months.
Print This!
Recipe: Breakfast Cookie
Summary: This healthy cookie can help you feed your kiddos fast without any mom guilt.
Ingredients
1 1/4 cup whole wheat flour
1/2 cup rolled oats
1/2 cup cooked quinoa, cooled and dried
1/2 cup flaxseed meal
1 drop Cinnamon Bark Vitality™ essential oil or 1 tsp ground cinnamon
1/2 teaspoon baking soda
1/2 teaspoon baking powder
1/2 teaspoon salt
1/2 cup butter softened
1/4 cup sugar
1/4 cup packed brown sugar
2 large eggs
1/4 cup honey
1 teaspoon vanilla extract
2 cup cranberries or raisins
1/2 cup chopped walnuts (optional)
Instructions
Preheat oven to 350 degrees; then in a large bowl, mix together butter, white and brown sugar, eggs, honey, cinnamon bark vitality essential oil and vanilla extract.
In a medium bowl mix together flour, oats, quinoa, flax seed meal, baking powder, baking soda and salt .
Then add dry ingredients into wet ingredients, until all is combined.
In a small bowl add 1 tablespoons of flour with the dried cranberries and walnuts.Then mix into the cookie batter.
Spoon tablespoons of batter onto baking sheets, lined with parchment paper.
Bake for 10-12 minutes or until bottoms are lightly browned.
Recipe note: Freeze cooled cookies in an airtight container for up to 3 months.
Preparation time: 10-15 minutes
Cooking time: 10-12 minute(s)
Number of servings (yield):

The post Quick & Easy Breakfast Cookies appeared first on Living Well Spending Less®.
February 27, 2017
Guilt Free Splurging
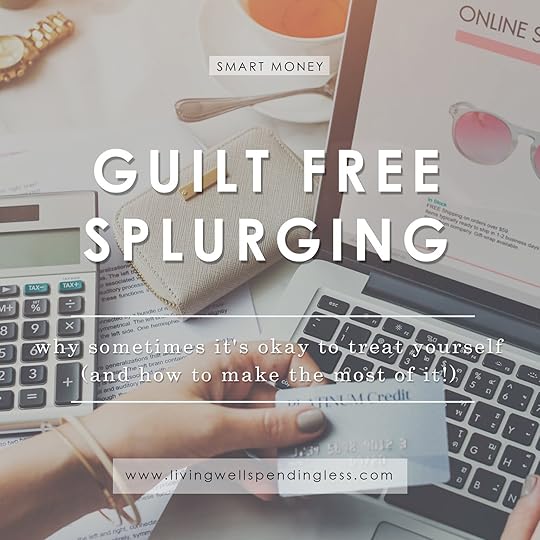
Repeat after me: “Sometimes it’s okay to splurge…”
I know, I know, many of us are working hard to save money, get out of debt, or even just pay the bills. Splurging feels “bad”—like something we should feel guilty about, right?
But shouldn’t we occasionally be able to experience the payouts and joys from our hard work? Life is short, and while yes, too much splurging can lead to debt and other financial problems, sometimes we all deserve to indulge a little!
It’s no secret we need to live within our means. Taking on more debt for a frilly vacation or a new outfit probably isn’t wise, nor is it advisable, especially when trying to tackle debt. When we don’t have the money in our budgets to do something (or when buying something means swiping a credit card), we may need to postpone it, find an alternative, or wait until a time when we can afford it more easily.
However, there are a few times in life when it’s okay to splurge a little—and when these opportunities come along, if we can, we should make the most of them. We can use these opportunities to strengthen our family bonds, to make wise purchasing decisions, and to create lifelong memories.
The most important part? Knowing when to splurge…and when to save.
Life is short, so we have to make the most of it! When these opportunities arise, when you can, carpe diem, seize the day, and make your splurge count!

1. When a Once-in-a-Lifetime Opportunity Arises
Once in a while, a unique opportunity presents itself. We get the chance to do something really adventurous, like travel abroad or go on a one-of-a-kind weekend retreat with girlfriends. If we don’t take these chances, we might deeply regret not going.
The thing is, many opportunities that come up aren’t once-in-a-lifetime chances. You might feel a sense of urgency because of a great airline deal or the chance to get cheap tickets to something you always wanted to see or do. First, ask yourself if this is truly a once-in-a-lifetime chance (few things are), or if a similar opportunity might present itself when you’re more financially sound.
We can also help determine if the experience is worth the expense by asking ourselves if there’s a way we can somehow earn extra money or forgo some less-exciting opportunities so we can better afford it. For example, maybe you want to see a theater production or concert that’s coming to town. Can you and your family give up going out to dinner or sacrifice spending on date nights for a month or two to offset the cost? Is there something you could sell, a few extra jobs you take on, or another way you could earn some money to pay for a trip or activity?
This is a good litmus test to see if the activity is something that’s really worth working for. If it’s something that’s truly an amazing opportunity, we’re usually willing to put in a little extra elbow grease to get us there.
2. When it’s to Protect Your Family
Splurging on a fence for your yard, extra safety for your car (better tires and breaks, for example), or safety equipment for your kids is almost always a necessity. In fact, when safety is concerned, spending money is hardly a splurge.
That said, sometimes it can be hard to resist the urge to put off spending when safety is concerned. Let’s face it, new tires aren’t very exciting or fun (at least in my opinion). It’s easy to procrastinate safety items in your budget, especially when things are tight.
One of the best ways to make room for safety equipment is to look at ways it’s saving you in the long run. For example, installing new smoke detectors, locks and other safety precautions can actually decrease the premium on your homeowner’s insurance. Taking a class on defensive driving (some are offered through insurance companies or your local DMV) can help save you money on auto insurance.
When it comes to sports equipment like helmets, and child safety items like car seats, contact your local police department. Oftentimes they have discounts on equipment to protect children. Your child’s school may also be able to assist you with padding and helmets for sports, especially if it’s needed to be part of a school club or team.
Before you spend: When you’re deciding if it’s really ok to splurge on anything related to family safety, it’s important to sincerely ask yourself if you truly NEED the item or service to protect your family. We’re all capable of making (sometimes really convincing!) excuses when we really want something. So be sure you truly need it, instead of merely wanting it.

3. On Preventative Care
Very few people in the world love going to the dentist, getting a checkup, or spending “extra” money on preventative care. However, “splurging” on your self-care and preventative medicine for your kids can help you save lots of money, sickness and heartache in the long run.
Dental care is a key factor in preventing certain major health issues, including heart problems. Your mouth is the gateway to the rest of your body, so keeping your teeth clean and healthy helps ensure the rest of you stays healthy as well.
Get regular checkups and schedule annual visits to the doctor, as recommended. So many minor situations can be taken care of easily in their early stages, but become so much more difficult to treat later on. Take note of anything unusual like changes in your hair, skin, mood, energy levels, and digestion and report it to your doc.
These little “preventative steps” will help you identify anything of concern and address it right away. Similarly, running bloodwork, checking your blood pressure, and running other tests can help your doctor notice any changes before they’re a problem. Insurance companies often offer discounts and rewards for taking preventative steps, because they know these measures help stave off more costly procedures down the road.
Again, be sure you’re not using this as an excuse to splurge on things like teeth whitening (unless it’s directly related to your profession), anything purely cosmetic or unnecessary, or anything that doesn’t truly fall under preventative healthcare.
4. On High-Quality Cookware
Another area where you can splurge a little? Kitchenware, especially if you cook at home often! Now, of course it can be tempting to buy every little item in William’s Sonoma or Sur La Table, and cookware can add up quickly and get expensive…so be very reasonable and do your research beforehand. Most items can be purchased online or at discount stores like Wal-Mart or Target.
When it comes to cookware, investing in some nicer pots and pans can make a huge difference. Things cook more evenly and you’ll have less wasted/burned food. There’s no risk of chipped Teflon making its way into your food, so you won’t find you have to buy a new set of pans every year or two.
You don’t have to buy high-end cookware, but even mid-level sets of pots and pans can last much longer than cheap cookware, so they’re a great investment, especially if you like to cook and eat at home. Invest in a slow cooker and other small appliances if you use them regularly.
Most cooks don’t need (or even like) “one trick ponies” like avocado slicers or egg poachers, so I’m not saying you should splurge to stock your kitchen with these types of items. They only clog up your kitchen and complicate your cooking. For many cooks, a nice set of pots and pans, bakeware, a chef knife, and a few other key items will keep you happily cooking for your family.

5. When You Need Appliances & Large Furniture
Again, this is a case where top-of-the-line isn’t necessary, but splurging on quality can be the difference between a five-year investment and a twenty-five-year investment.
Look at Consumer Reports or read reviews online before you make a major purchase on something like a dishwasher, washer, or even a mattress. Doing your research and splurging on a reliable, quality item will prevent you from spending money on a lemon. Always save the warranty and register your product in case you need repairs later on. Check the store warranty and guarantee against the manufacturer’s warranty. Sometimes the terms and conditions differ and you don’t want to think you’re covered only to find out you aren’t.
When you look at furniture from the past, you’ll notice that chairs, couches and tables had great “bones.” They were built to last with quality wood, and extra care was taken on the frame and design. This is why so many antique pieces from the 50s or 60s are still around, but pieces from the 80s and 90s have largely disappeared. They just don’t make them like they used to.
When buying furniture, look at the manufacturing and craftsmanship. Purchase reliable brands and splurge a little if it’s a piece you’re going to want to keep in your home for years. (And if you don’t absolutely need a fancy new fridge, again, keep yourself and your spending in check and honest.)
6. On Classic Clothing & Coats
With the plethora of cheap clothing available at discount stores like Wal-Mart, it can be hard to justify paying anything more than a few dollars for any item of clothing. However, this is again, a time when we can look at “vintage” items and learn something.
When you look at a vintage coat or dress, you might notice the quality of the stitches, the fabric (usually wool, cotton or a natural fiber), and the attention to detail. Old clothing was built to last in a way today’s fast fashion just isn’t.
If you’re looking for ways to build your core wardrobe and you want to buy classic pieces (like black dress pants, a blazer, or a pencil skirt), you may want to go ahead and splurge on a nicer quality item. Spending a little extra on a piece you’ll wear for years is well worth the investment.
Not every item of clothing needs to be an “investment” item, however. Trendy things, accessories, and accent items can be found on discount and used to add personality and flair to your fashion. When it comes to coats, boots and athletic shoes, investing in a quality item is well worth it, especially if you’ll be getting a lot of use out of it or wearing it almost every day.
If you’re hoping to splurge but stay on a budget, look at clothing on consignment or at second-hand stores, like threadUP, where you can often find high-quality name-brand items at deep discounts. Search for classic pieces you can wear over and over and use as wardrobe staples.
Rather than splurging on a dress you’ll wear to an event or one-time party, try sites like Rent the Runway or put out an A.P.B. to your friends on Facebook. We often spend money on “fancy clothes” we wear once or twice, and then skimp when it comes to the items we wear every day. In reality, it makes more sense to splurge on those items that get a lot of use, and save where you can on party-clothes.
Sometimes we all need to treat ourselves to a little splurge. When the occasion arises, indulge and make the most of it. Don’t beat yourself up about it—enjoy it! Make well-informed choices and do your research before you spend, then go out and get or do something you’ll love!
Make a great memory with your family, wear a gorgeous coat you’re excited to put on every day, or buy an appliance you know will be headache-free in the future. Spend a little extra on caring for your health and safety and keeping up the household items you use the most. Splurge wisely and enjoy it!
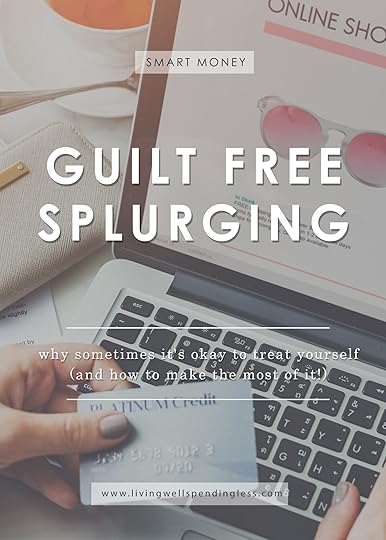
The post Guilt Free Splurging appeared first on Living Well Spending Less®.


