
Ruth Soukup's Blog, page 114
April 13, 2014
Weekend Wandering


Happy Palm Sunday! I hope you are having a fabulous weekend! Ours has been jam-packed so far, with a pancake breakfast, the town block party, a friend’s baptism, AND a birthday party. And that was just yesterday! Luckily today will be a little more low key–I am definitely ready for some down time! Also? I realized that I shouldn’t pick my favorite posts from Thrifty Thursday on an empty stomach. Hence the reason for all the food picks this week. 
In any case, here is what I drooled over loved this week:
* * *
First of all, this Pizza Noodle Dish from Mandy’s Recipe Box looks absolutely delicious! What a great way to combine two of my kids’ favorite things!

I’m also excited to try these Pesto Toasted Cheese Sandwiches from My Coupon Lady. YUM!

Moving on to dessert, these No Bake Key Lime Cheesecakes in a Jar from Life, Love & Sugar look absolutely amazing. How does the song go again? You put the lime in the coconut and eat it all up!

Have I ever mentioned that I really, really, really love coconut? This Ultimate Coconut Cream Pie from Speed With Pennies looks so dreamy!

And while we are on a roll, these Chocolate Coconut Bars from A Few Short Cuts look absolutely delicious!

My kids have inherited my love of all things coconut and I’m pretty sure they would go crazy for these Almond Joy Graham Crackers from Three Kids and a Fish.

Coconut Donuts Topped with Chocolate Ganache and Toasted Coconut? I’ll take those too! Thanks, The First Year.

Coconut and Rum…now we’re talking! These Coconut Rum Brown Sugar Cookies from This Bird’s Day sound so tasty!

Looking for a lighter refreshing dessert? About a Mom has an easy Lemon Tartlets Recipe that sounds perfect for Easter!

But moving on, I loved this step-by-step DIY Glitter & Gold Heart Sleeve tutorial from Put a Bird On It. How darling!

And speaking of darling, these cute and thrifty Bunny Party Favor Bags from Confetti Sunshine are pretty stinkin’ adorable too!

On the money saving front, Mission to Save has some simple steps to take to Never Pay for Toothpaste Again!

And finally, Raking in the Savings has five great tips on How to Make a Home Gym on the Cheap. Number #4 sound so cool!

* * *
What did you love this week?
Pin It
The post Weekend Wandering appeared first on Living Well Spending Less™.


April 11, 2014
Is Your Bank Taking Advantage of You?

This is a guest post from Kalyn Brooke of Creative Savings
Believe it or not, your bank does not always have your best interests at heart.
They are in business to make money, and to make money off your money. From interest rates to extravagant fees, not only are you beholden to the services they provide, they also make it extremely difficult to switch your accounts to a different bank when you finally decide to take the plunge and leave.
Maybe stuffing your cash under a mattress is a viable solution after all!
But in all seriousness, banks are truly a necessity for your finances, and can be very beneficial to help grow {and store} your savings, despite making you jump through hoops to get there. Here are 5 smart ways you can protect yourself right now, and take advantage of your bank, instead of letting it take advantage of you.

1. Choose a Small Local Bank
If you’re not banking with a small company, you may want to consider switching to one. Small banks generally work with you to customize their services according to your needs, rather than lump you into a corporate customer base that isn’t personal at all.
Big banks also have more rules, and are less likely to waive fees in defense of business protocol. I have personally worked as a teller for a small local bank, and we operated more on a case-by-case basis. We knew names, faces, and normal account history, and as a result, we had the authority to make better business decisions without a lot of red tape holding us back.
Just make sure the bank you switch to is FDIC insured, which means your cash is protected by the federal government against loss. Not all banks are mandated to offer this, and you definitely want your hard-earned money to be secure!

2. Negotiate Interest Rates
Despite what your banks want you to think, interest rates are negotiable. Perhaps not so much with Certificates of Deposit or Money Management Accounts, but definitely with your Personal Savings.
Stop by your local branch or write a letter saying you’re unhappy with rates on your savings account and compare them to other banks in the area. Doing so may encourage them to boost their rates a little to stay in line with their competitors, and even a half a percent is better than nothing at all.
You also have the option to open up an online savings account {my personal favorite is Capital One 360} to use for a child’s college savings, yearly vacation plans, or even to save for a home remodel. Online accounts generally have much better rates than brick-and-mortar banks, because they don’t need to operate with the same amount of staff, and can leverage their virtual presence.
On the other hand, transfers from an online savings to your personal bank account could take up to 3-5 business days to process, which might be seen as a disadvantage, or make it less tempting to spend. I guess it depends on how you want to look at it!

3. Don’t Ever Pay for a Checking Account
For every checking account that comes with a fee, there are 5 others that will actually pay you to open one up with them. This could be a great opportunity to try a new bank and see if you like them, while earning a little bit of extra cash on the side.
If you don’t decide to keep the account, most will let you close them without penalty after a 45-60 day period, but make sure you read the fine print first! Many checking accounts require that you accept e-statements, direct deposits, make a certain number of debit card transactions a month, and maintain a minimum balance before they give you the bonus.

4. Know Your Fees
Banks are notorious for their fees, and customers are notorious for not knowing exactly what they are. But can you blame us? It seems like it would be common courtesy to print off a statement, make account transfers, or use a bank ATM, without charging us so much!
But it is our due diligence to research and find out exactly what it costs to use bank services. Be a very careful consumer, and talk to your bank’s customer service representative to understand all fees associated with your account. Keep an eye on all mailings from your bank as well. This is the primary way your bank communicates with you about fee hikes, and you don’t want to be caught unaware because you thought it was junk.

5. Avoid Overdraft Protection
Overdraft protection sounds pretty good, but it’s actually not. Basically, you are allowing your bank to let you overdraw your account, and then charge you a fee for it. Without this service, they will just decline your debit card, and you won’t be able to make any purchases over and above your balance.
Sure, it can be really embarrassing to find out you don’t have enough to pay for your groceries, especially when you are already in a checkout lane with a couple of overtired kids, but it’s even worse to pay an extra $10-$30 fee just to save you the convenience of not having enough.
Maintain a careful checkbook, and a $100 buffer in your account just to be safe, which will help you avoid this cost all together.

Banks really are not as evil as I make them sound, but they can be if you aren’t fully aware of all their rules and regulations. A bank counts on your ignorance as a consumer, but you can fight back and make sure you know exactly the kind of account, and business relationship, you’re getting into before you ever sign an agreement.
And if you do decide to switch banks, take your time to read all the fine print and talk to friends who have accounts with the bank you’re considering. It certainly depends on what your financial goals are as a family when it comes to choosing a bank that’s right for you. These 5 tips will help you be smart with your decision!
Kalyn Brooke is a full-time writer and blogger at CreativeSavingsBlog.com. Where
she gives a fresh perspective on frugal living, and the kick-in-the-pants you need to create a budget from scratch. She lives in beautiful Southwest Florida with her news-photographer husband and the most adorable bunny you’ve ever seen. She loves making to-do-lists, reading good books, eating chocolate peanut butter ice cream, and pursuing big big dreams… all carefully planned out, of course.

* * *
What do you appreciate or dislike about your bank? How do you make sure your bank is not taking advantage of you?
Pin It
The post Is Your Bank Taking Advantage of You? appeared first on Living Well Spending Less™.
April 10, 2014
Thrifty Thursday {Week 55}

Happy Thursday! I have been in Orlando all week attending the Launch Conference, and let me just tell you….it has blown my mind! As a small business owner, I sometimes get so caught up in the day-to-day busyness of writing articles, responding to emails, & connecting on social media that I forget to sometimes stop to look at the big picture–who I am, where I’m going, and how I’m going to get there. It has been an incredibly inspiring couple of days and my team and I have some exciting ideas we definitely want to implement in the coming year. So stay tuned!
Just as a reminder that you might want to consider joining our collaborative Thrifty Thursday Pinterest Board. It is open to anyone who links up regularly here at Thrifty Thursday, and you may pin up to two of your own budget-friendly pins per day. To be added to the board, you must first be following LWSL on Pinterest. Once you are following, just shoot me an email at admin@livingwellspendingless.com & I will make sure you are added to the board!

Here are the most clicked links from last week:
1. The Budget Mama {How We Dumped $18 k of Our Debt in a Flash}
2. Sarah Titus {1 Weird Trick Saves Me $125/m in Groceries}
3. The Lady Prefers to Save { Beauty on a Budget Homemade Olay Regenerist Face Cream}
4. Purposely Frugal {5 Frugal Things #7}
5. Eat, Pray, Read, Love {5 Simple Ways You can Save Money Now!}
6. Simply on a Budget {How Being a Stay at Home Mom Almost Killed Me}
7. Six Figures Under {Benefits of Living in the Boonies}
8.Saving the Family Money {6 Ways to Save Money on Outdoor Projects}
9. The Latina Homemaker {How to Paint Furniture the Easy Way}
10. An Inviting Home {Monthly Budget Breakdown}
Never linked up before? Here’s how:
Scroll down, find the little blue “Add your Link” Button and click on that.
Follow the instructions on the next page – add a great image of your project and an interesting title. Make sure you link to the direct page of your budget friendly post – not the main page of your blog!
Try to visit at least a few other blogs at the party. Be sure to leave a comment to let them know you stopped by!
Please link back to this post somehow. There are badges available here; a simple text link is just fine too.
 Feel free to tweet about Thrifty Thursday so others can join the fun, and don’t forget to check back here Sunday morning to see which posts have been featured this week at Weekend Wandering!
If this is your first time here I also invite you to check out my eBook, How to Blog for Profit (Without Selling Your Soul). It is a fantastic resource if you are interested in building your blog, getting more traffic, or learning how to monetize. Or, if you have read the book and are still looking to take your blog to the next level, I encourage you to check out my options for one-on-one blog consulting.
An InLinkz Link-up
Pin It
The post Thrifty Thursday {Week 55} appeared first on Living Well Spending Less™.
April 9, 2014
Quick and Easy Taco Soup


It is always good to have a few recipes that you can whip up out of the pantry staples you already have on hand. It’s even better if those recipes also happen to be freezer friendly so that you can simply throw the ingredients together in a bag and freeze them for a later, busier day. And if the recipe happens to ALSO be a family favorite that your kids and husband just love? Well then quite frankly, that’s a recipe you just can’t live without.
This quick & easy taco soup literally comes together in just 10 minutes, including the time it takes to brown the meat! It makes 8 generous servings, I will often mix it up, then cook one half and freeze the other half for later. It is also a great “cheater” recipe for a freezer cooking day!
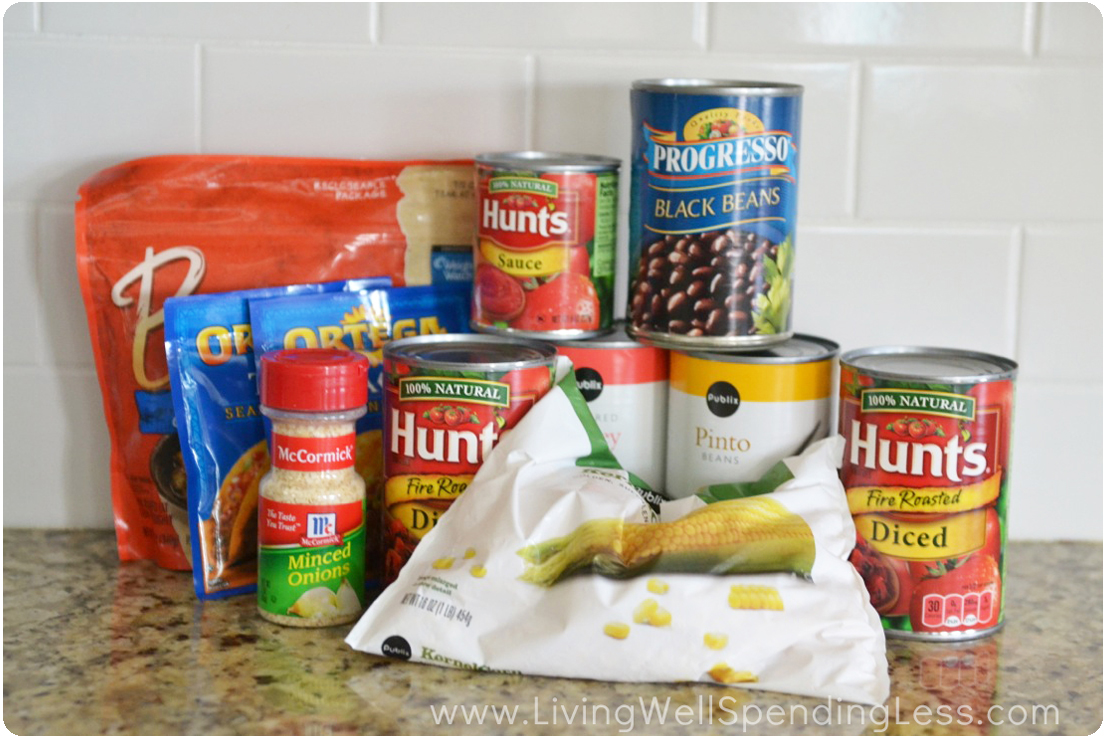
Here is what you need:
1 pound ground beef or vegetarian crumbles
15 oz. can pinto beans
15 oz can kidney beans
15oz can black beans
2 15oz cans fire roasted diced tomatoes
1 8oz can tomato sauce
1 cup water
2 packets taco seasoning
1 16oz bag frozen corn
1 cup diced onion
sour cream (optional)
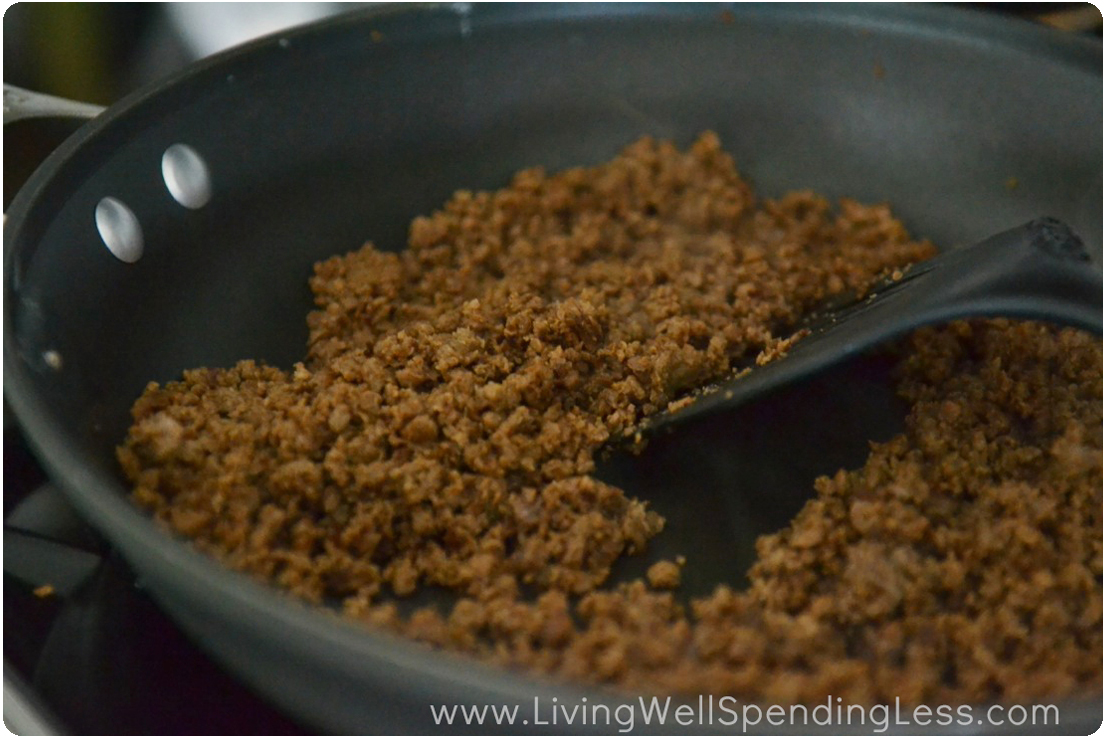
Step 1: Brown ground beef; set aside.

Step 2: Drain & rinse pinto, kidney, & black beans; pour into pot large bowl (if freezing) or large pot (if cooking immediately).

Step 3: Add tomatoes, tomato sauce, & water to beans; mix well.
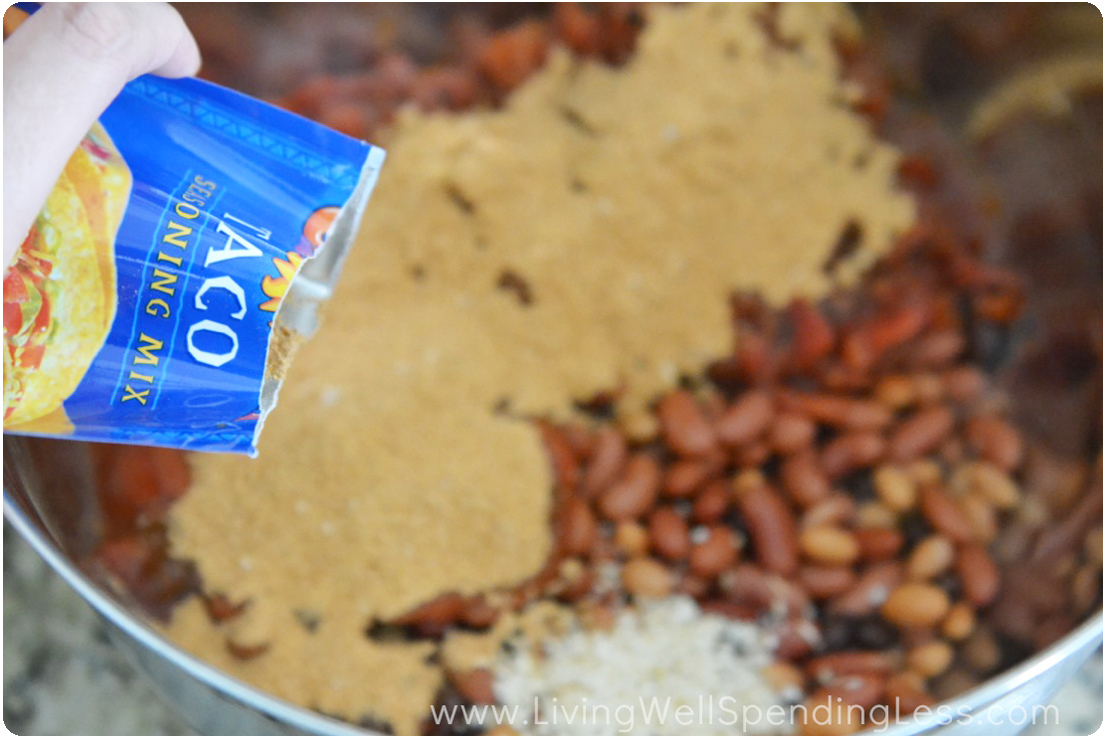
Step 4: Add taco seasoning; mix well.

Step 5: Add corn and onion; mix well.
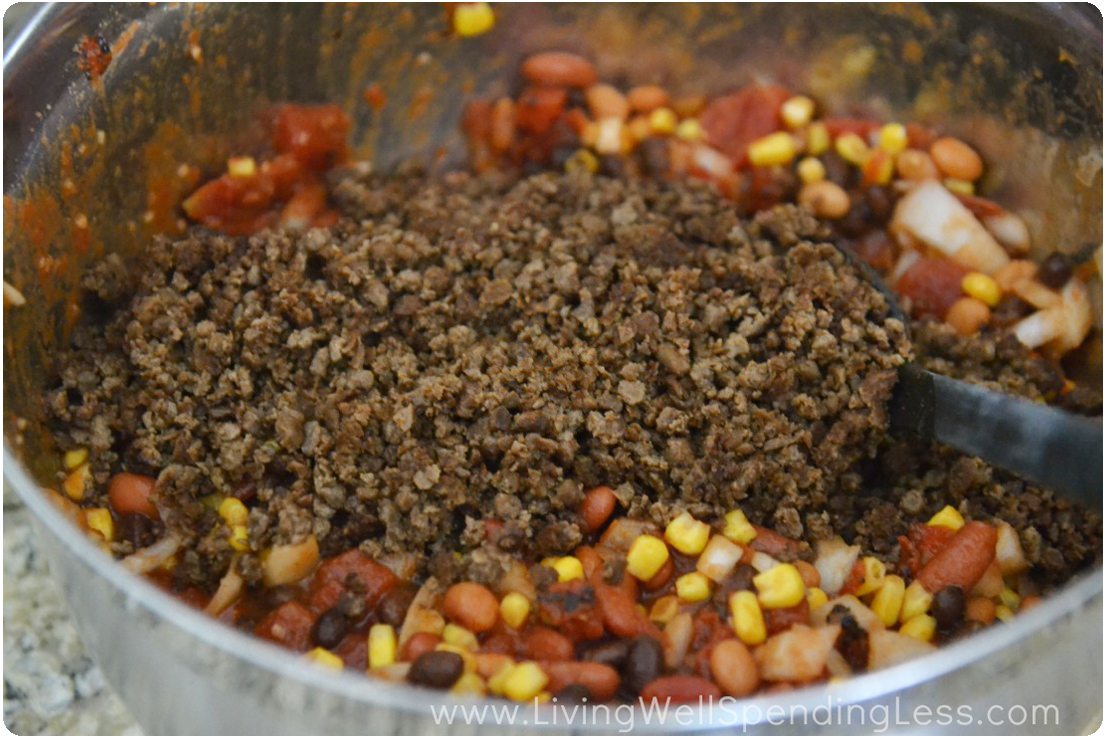
Step 6: Add beef; mix well.

Step 7: If freezing, divide mixture into 2 labeled gallon size freezer bags and freeze. To cook: Thaw if frozen; cook in crockpot on high for 2-3 hours or bring to a boil on stove then reduce heat & simmer for 20 minutes until cooked.

Print This!
Recipe: Quick and Easy Taco Soup
Summary: This soup is hearty, fast, delicious, and a perfect “cheater recipe” for any day of the week.
Ingredients
1 pound ground beef or vegetarian crumbles
15 oz. can pinto beans
15 oz can kidney beans
15oz can black beans
2 15oz cans fire roasted diced tomatoes
1 8oz can tomato sauce
1 cup water
2 packets taco seasoning
1 16oz bag frozen corn
1 cup diced onion
sour cream (optional)
Instructions
Brown ground beef; set aside.
Drain & rinse pinto, kidney, & black beans; pour into pot large bowl (if freezing) or large pot (if cooking immediately).
Add tomatoes, tomato sauce, & water to beans; mix well.
Add taco seasoning; mix well.
Add corn and onion; mix well.
Add beef; mix well.
If freezing, divide mixture into 2 labeled gallon size freezer bags and freeze. To cook: Thaw if frozen; cook in crockpot on high for 2-3 hours or bring to a boil on stove then reduce heat & simmer for 20 minutes until cooked.
Preparation time: 10 minutes
Cooking time: 2-3 hours in Crock-pot or 20 minutes on stove-top.
Number of servings (yield): 8
* * *
What’s your family’s favorite quick & easy pantry meal?
Pin It
The post Quick and Easy Taco Soup appeared first on Living Well Spending Less™.
April 8, 2014
Part 6: How to Clean Your Bedroom
This is Part Six of an 8-Part Beginner’s Guide to Cleaning Series. See the overview here.
* * *
Welcome back to the Beginner’s Guide to Cleaning! We’ve now tackled our living spaces, kitchen, and bathrooms, which means at this point, your house quite possibly looking better than it has in years!
I’m hoping that motivation is starting to get contagious, because this week we will be tackling the room or rooms that most often get completely ignored. Because let’s face it….while our living room, kitchen, and even the bathrooms are public spaces, our bedrooms are a little more private. And while privacy is nice, it is also very easy to just shut the door and ignore the mess.
But a clean bedroom is not easier on the eyes, it is a sanctuary from a hectic life. It your place to refresh and recharge, to get a good night’s sleep each evening so that you are ready to start your day. From a health standpoint, it should be kept relatively dust free to reduce the amount of allergens in the air while you sleep. And maybe it is just me, but I honestly believe there is nothing better at the end of a long day than snuggling into a well-made bed!
Once again I will walk you through the steps for cleaning the surfaces most commonly found in this zone, giving detailed instructions for how to clean each one. If you are already a bedroom-cleaning whiz, much of it may be review—feel free to skip to the end of the post, or add your own tips & tricks in the comments below! At the end of the post you will get a printable checklist to use as you tackle your bedroom.
Are you ready? Here we go!
 Step 1: Pre-clean & declutter
Supplies needed: A large basket + a large box
How-To: Start by stripping the bed; wash sheets while cleaning the rest of the room. Pick up any items lying around the bedroom, including any clutter that has collected on dressers and chairs. Hang clothes and place other items in appropriate baskets to be put away. (A great task for kids!) Use a large box to collect toys, clothing, and other items that are no longer used or needed, then donate items as soon as possible, before they find their way back into the house. If you are feeling extra motivated, you may want to try decluttering & organizing your bedroom closet before you begin. The 40 Hanger Closet Challenge is a great place to start. Or, if you are tackling your kids’ rooms, you may want to consider removing most of their toys.
 Step 2: Clean Ceiling Fans, Vents, Lights, & Upper Ledges
Supplies needed: Vacuum with hose attachment, hand vacuum, or portable wet dry vac, warm soapy water, rag
How-To: Vacuum excess dust from top of fan and/or upper ledges. Use wet rag to gently clean blades; rinse and repeat if necessary.
 Step 3: Dust
Supplies needed: reusable or disposable dusting wand
How-To: Run duster over all horizontal surfaces, including bookshelves, the tops of light switches and fixtures, picture frames, clocks, mirrors, and any knick knacks or figurines.
 Step 4: Wash Windows & Mirrors
Supplies needed: Glass cleaner, squeegee, rag
How-To: Spray glass; run squeegee against glass from side to side, wiping blade with rag as necessary.
 Step 5: Clean Curtains & Blinds
Supplies needed: washing machine, iron & ironing board, duster, mild soapy water & rag
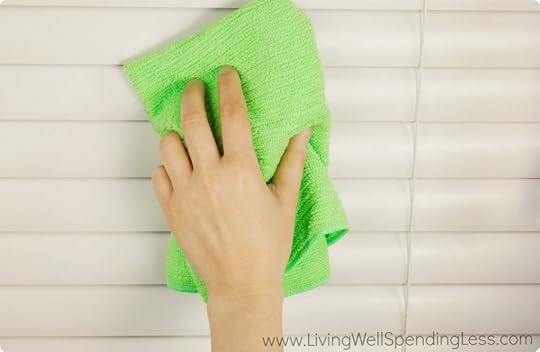
How-To: If curtains are washable, remove curtains and wash in cold water on permanent press. Tumble dry on low and remove while still very slightly damp. Iron and re-hang. If curtains are dry clean only, consider having them cleaned or spot clean with mild soapy water. For blinds, dust gently with dusting wand until all dust is gone. If necessary, spot clean gently with a wet rag and mild soapy water.
 Step 6: Clean & Polish Wood Furniture
Supplies needed: Murphy’s Oil Soap, Furniture Polish, rags
How-To: Fill sink or bucket with warm water and a few capfuls of Murphy’s oil soap. Use rag moistened with oil soap mixture to clean all wood furniture, including bookshelves or hutches, desks, tables, and dining chairs. I also like to use this mixture to clean my leather furniture, although it does not specifically say on the bottle that it is intended for leather, so be sure to test a small hidden area first! Once wood is clean, polish surfaces with an oil-based furniture polish. Apply polish to damp cloth, rub on surface, than buff off with a second dry cloth.
 Step 7: Clean Baseboards
Supplies needed: Vacuum with hose attachment, dish soap, rag
How-To: Start by vacuuming along baseboards to pick up any loose dirt, lint, or pet hair. Fill sink or bucket with mild soap solution, then wipe baseboards clean with wet rag.
 Step 8: Clean rugs & carpets
Supplies needed: Vacuum, baking soda, stain remover, dish soap, rag
How-To: Before beginning, be sure to check whether bag or canister is full, and empty if necessary. Also check rollers to make sure they are free of strings or debris. Vacuum rugs to remove all loose dirt and surface hair. Fill sink or bucket with mild soap solution, then spot clean rugs with stain remover and/or mild water solution. To deodorize after spot cleaning, sprinkle rug with baking soda, let sit for 20 minutes, then vacuum again. Be sure to get under bed!
 Step 9: Clean hard floors
Supplies needed: Broom & dust pan, dust mop, wet mop.
How-To: Before beginning, move as much furniture from the floor as possible. Starting at one end of the room, carefully sweep loose dirt and hair towards the center of floor. Methodically make your way around the room, sweeping all dirt towards the center into one pile. Sweep into dustpan and throw away. Next, do a sweep of the floor with your dust mop to remove any remaining dust or hair. Spot clean any sticky or dirty spots, or mop entire floor with wet mop and let dry.
 Step 10: Make the Bed
Supplies needed: Clean sheets & blankets, bedspread or duvet, pillows
How-To: (For step-by-step photos, check out this tutorial on how to make a perfect bed.) Start by smoothing the mattress cover & pulling it tight over all four corners. Unfold fitted sheet (check out this tutorial for how to fold a fitted sheet), then spread out over bed. Fit corners over mattress and smooth with your hand. Unfold flat sheet and spread over bed with finished edges facing down. The top of the sheet should be even with the top of the mattress, the sides should hang down equally, and there should be plenty of extra at the bottom to tuck into mattress. Spread blanket over flat sheet, checking to make sure it hangs equally on both sides. Tuck blanket and flat into bottom of mattress to hold sheet in place, then fold and tuck bottom corners. Fold top of blanket and flat sheet over about 12-15”. Tuck sides under mattress, if desired. Spread bedspread or coverlet over blankets, then fold additional blanket or duvet to cover bottom half of bed. Fluff pillows and arrange at top of bed.
Of course now that you know just what to do, it is time to get to work! To stay on task, use this handy printable checklist to help walk you through all the steps:
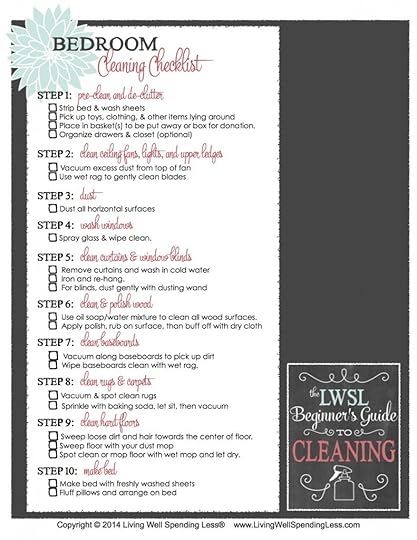
{Get your printable Bedroom Cleaning Checklist here}
Part Six Assignment
Just to review, here is your sixth assignment:
Set aside a good chunk of time—at least 2-4 hours—sometime this week to work on deep cleaning your master bedroom, as well as a few hours to work on your kids’ bedrooms (or to help them with their tasks.)
Clear the clutter in each bedroom. Make it a goal to keep nothing on your dressers. Continue working on training your family to use the “collection zone” you set up in week three.
Follow the Bedroom Cleaning Checklist to get your bedroom neat and tidy from top to bottom. If possible, open up the windows to let in some fresh air as well!

The LWSL Beginner’s Guide to Cleaning:
Part 1: Getting Started
Part 2: Cleaning Supply 101
Part 3: How to Clean Your Living Space
Part 4: How to Clean Your Kitchen
Part 5: How to Clean Your Bathroom
Part 6: How to Clean Your Bedroom
Part 7: Laundry 101
Part 8: Home Maintenance & Seasonal Cleaning
* * *
Did I miss anything? What are your biggest challenges to keeping your bedroom clean?
Pin It
The post Part 6: How to Clean Your Bedroom appeared first on Living Well Spending Less™.
April 7, 2014
DIY Heart Map Art

My husband and I have always made a bigger deal of our first date anniversary than our actual wedding anniversary (which happens to be tomorrow), and a few weeks ago we celebrated 10 years together! Woot! We are also not normally big on gifts, but in honor of this milestone I thought I would finally tackle a little DIY project I have been wanting to try for a few years now, ever since I spotted this pretty vintage map heart art on Pinterest (selling for $300!)
If you’ve ever read my Amazing Grace story you know that Chuck and I have moved around a lot in ten years! From Seattle to Saint Louis to Florida, we have shared no fewer than fifteen different addresses in six different cities, which pretty much made this the perfect gift! I printed a little phrase on the bottom–”it doesn’t matter where we go as long as I am with you”– but you could also leave it blank or write something in by hand. Other great phrases could be “home is wherever I’m with you” or “home is where the heart is” or just “places we love.”
Finally, in case you’re wondering, I got my frame on sale at Target for around $15.
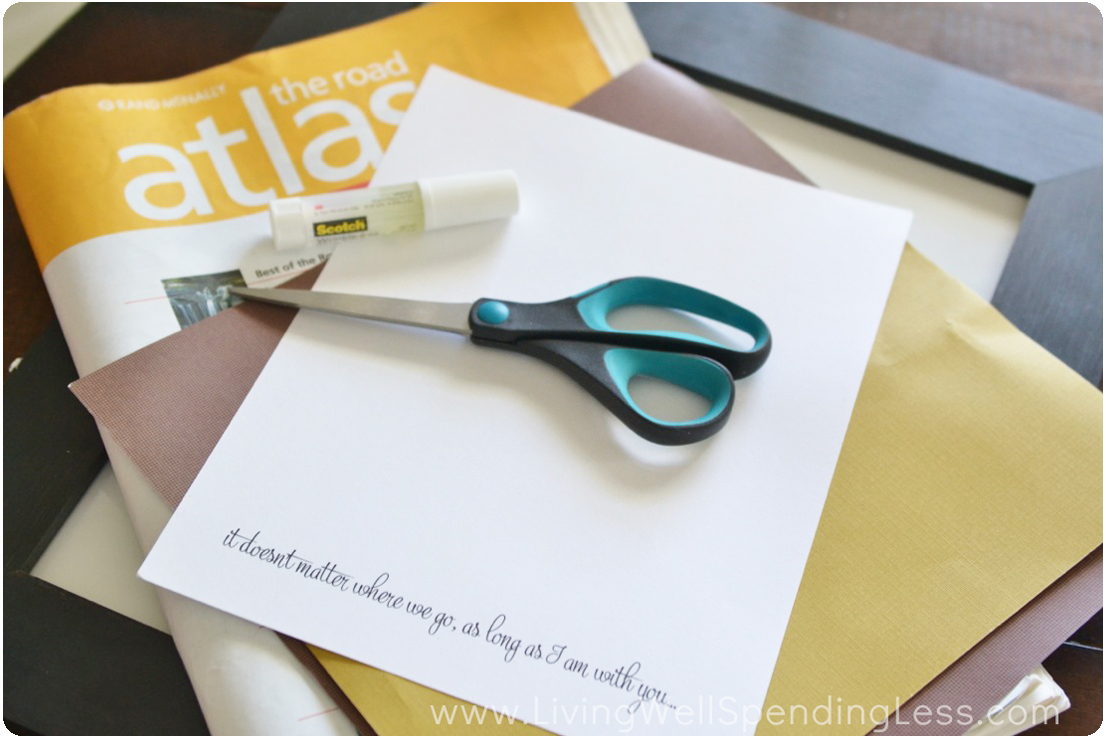
Here is what you need:
old map or road atlas
acid free card stock
scrapbook paper
frame with mat
scissors
wrinkle free glue stick
self-adhesive foam mounting dots (optional)
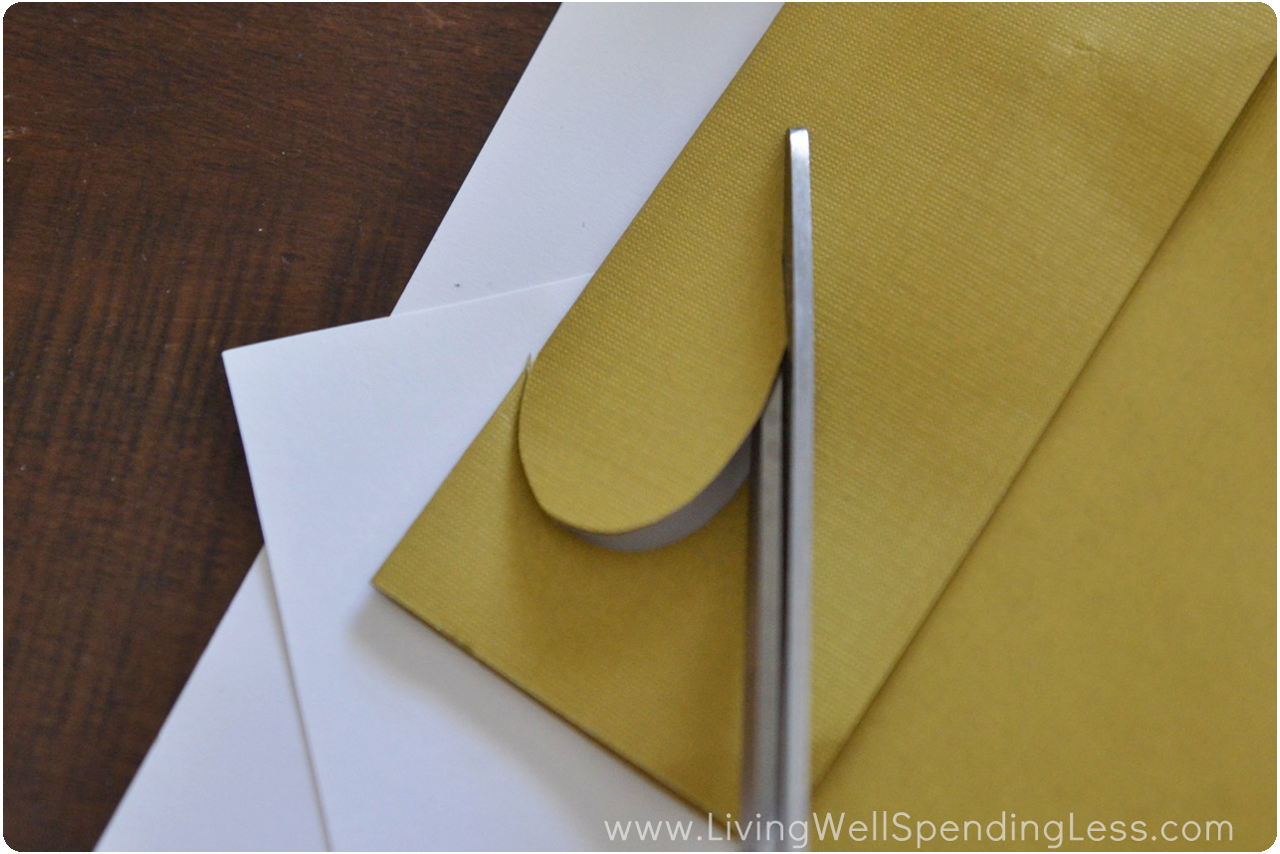
Step 1: Cut out heart template in the size you want.

Step 2: Trace template around the cities or places you want to include. These could be places you’ve lived, places you’ve visited, or simply places you’ve dreamed about going. I did six because that is the number of cities we’ve lived in, but you could just as easily make it work with 3, 4, or 5 hearts.

Step 3: Cut out a 2nd heart template slightly larger than the first.

Step 4: Trace template around scrapbook paper and cut out the same number of hearts as map hearts.

Step 5: Glue map hearts to scrapbook hearts.

Step 6: Glue finished hearts to card stock. I wanted a little more dimension so I used some self-adhesive foam mounting dots to glue the hearts to the card stock, but you could also just use glue or glue dots.
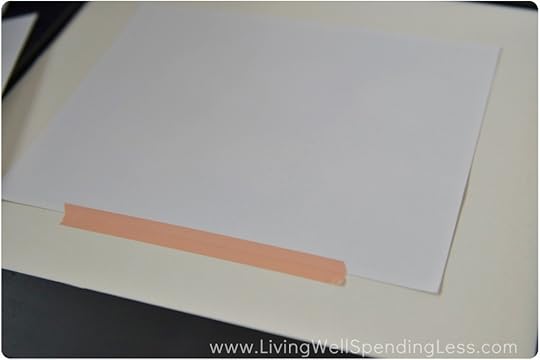
Step 7: Secure artwork to mat and place finished artwork in frame.


* * *
How do you celebrate your anniversary?
Pin It
The post DIY Heart Map Art appeared first on Living Well Spending Less™.
April 6, 2014
Weekend Wandering
Happy Sunday! I hope you are all having a fabulous weekend! The weather down here in Florida finally seems to be warming up so we had a great day yesterday just hanging out at home. The girls swam the entire day while I read my advance copy of Dave Ramsey & Rachel Cruze’s new book Smart Money, Smart Kids. It is SO good! This is a definitely subject that is near and dear to my heart and this book has some fantastic, super-practical, common sense ideas for raising kids who know how to win with money. The book will be available in bookstores on April 22nd, but is available for preorder right now. (If you preorder you can get a few extras, including the audio version, eBook version, and a video lesson called Safeguarding Your Legacy. Check out this site for details.)
But on to my weekend picks! Here is what I loved this week:
* * *
I love, love, LOVE Thai food and this Slow Cooker Thai Coconut Soup from Happy Mothering sounds delicious AND easy to make!

Next these No Fail Bread-maker Cinnamon Buns from Cha Ching on a Shoestring make me wish I had a bread maker!

I can’t resist sweet and salty combinations, and these Chocolate Salted Carmel Bars from A Thrifty Table look absolutely amazing.

There were a ton of fun Easter ideas this week! These White Chocolate Peeps from The Joy of Boys look so cute and simple to make. I might attempt them for my Sunday School class!

These Peanut Butter Cream Eggs from Life With The Crust Cut Off are absolutely adorable!

Kandy Kreations also has an egg inspired Easter Egg White Chocolate Fudge dessert. Yum!

Looking for a place to stash all those Easter treats? Sum of Their Stories has these adorable Carrot Treat Bags. So stinkin’ cute!

These Candy Filled Felt Easter Bunnies from Spindle Designs are another cute option for the Easter basket!

Looking for a new creative way to dye your Easter Eggs? Modern Christian Homemaker has a step-by-step tutorial on how to make Tie Dyed Easter Eggs. The kids would totally love this hands on project!

Need an alternative to candy for your child’s Easter basket? You might consider trying your hand at dollar bill origami. Crafty Journal provides 10 detailed steps along with pictures to make this oh so cute Bunny Money!

Don’t let your Easter basket buys break the bank. Creative Savings has 7 Step to a Budget Friendly Easter Basket!

And finally, after all the Easter parties, egg hunts and candy consumed you might have some sugar high kids. This Bird’s Day has Five Ways to Burn off Extra Energy in Kids. I might have to try number 3 with my girls!

* * *
What did you love this week?
Pin It
The post Weekend Wandering appeared first on Living Well Spending Less™.
April 4, 2014
6 Smart Ways to Save on Car Repairs

Few expenses are more annoying to pay than car repairs, especially when something goes wrong that we could have possibly avoided. But sudden car trouble–and the costs associated with it–can be far more devastating than just an annoyance. Most of us can’t go long without reliable transportation, which means that no matter how high the repair bill, we often have no choice but to pay.
This is definitely one reason it is important to maintain an emergency fund, but even so, there are a few smart things we can all do to help keep those car repair expenses to a minimum:
 1. Choose a Reliable Vehicle
Perhaps this seems obvious, but I had to learn the hard way that sometimes our emotions override our good sense. Several years ago, against my husband’s better judgment, we bought the pretty minivan I really, really, really wanted. I was swayed by the heated leather seats, wood-grain accents, and dual screen entertainment system and cared nothing about boring details like reliability and consumer reviews and my older, wiser husband’s own personal experience with that particular brand. It was pretty! And had a purse holder! What more did I need?
Well let me tell you, it was the first lemon of a vehicle I have ever owned, and I learned just how frustrating (and expensive) car repairs can really be. In the year and a half that we owned it, that vehicle was in the shop no fewer than ten separate times, which was hugely inconvenient. At the end of our rope, we finally traded it in for a much more reliable sedan, only to total that car in a bad accident six months later.
For the past year have relied on our trusty 2002 Tahoe to get us from point A to point B. It may not be the newest or shiniest vehicle in the parent pickup line, but 150,000 miles later, including 4 cross-country road trips, it is still going strong.
If you are in the market for a different vehicle, it definitely pays to do your research and get one with a great track record. Check out Consumer Reports for reviews of a particular make and model, then also be sure to ask for the service record of the vehicle you are considering.
 2. Find a Mechanic You Trust
I know this might come as a shock to some of you, but not all mechanics have your best interest at heart. There are even a few who might charge you for services you don’t actually need. That said, there are also plenty of decent, hardworking, and honest mechanics out there too. The trick is finding a good one, then establishing a genuine and long-term relationship. Even if your car is under warranty, don’t assume that you need to take your car to the dealer where prices are often significantly higher. As long as your maintenance is performed on time with quality parts, your warranty is still covered under the Magnuson-Moss Warranty Act.
To find a great mechanic, ask friends and family referrals or try RepairPal.com, then check out online reviews on sites such as Yelp.com, YellowPages.com, or Google.com.
 3. Learn How to Do It Yourself
While it might seem a little daunting at first, there are actually quite a few basic car repair and maintenance tasks that are simple enough for even a novice to take them on. At the very least you should know how to change your windshield wiper blades, replace your fuses, replace your air filter, replace your battery, and replace your headlights or brake lights.
Furthermore, you might also want to consider buying your own diagnostic reader. For around $20 you can find out exactly what is wrong when the check engine light comes on, possibly saving you a trip to the shop. Most auto parts stores keep common parts in stock and are happy to order any other parts you need. Plus, if you’re not sure how to fix something, you can check out free how-to videos at AutoZone or Advanced Auto Parts, or search for tutorials on YouTube.
 4. Find used parts
Taking advantage of salvaged parts can save you hundreds or even thousands in car repairs, especially if you are able to do the work yourself. Use a nationwide directory at Car-Part.com or LKQCorp.com to search salvage yards for the make and model of your car and the part you need. You can also limit your search to salvage yards within driving distance, though most will ship the parts. All parts are graded according to the shape they are in. Once you’ve located the part you can have it shipped or go directly to the salvage yard to pick it up. My husband has used this option several times, once for a side view mirror, once for a bumper cover, and once for a new trunk lid. It is also a great way to get new taillights and headlights, which can be very expensive to replace if broken or cracked.
You may also be able to find parts on Craigslist or eBay. Last year my husband and I were considering purchasing a larger vehicle with a 3rd row seat. Instead, we found a used 3rd row seat that would fit our Tahoe for sale locally through Craigslist. We then ordered some used brackets on eBay, and then watched a YouTube video to learn how to install it. In the end, the $400 or so dollars we spent on the seat and brackets was way cheaper than buying a new car, or even than having a 3rd row seat installed by the dealer.
 5. Do Preventative Maintenance
They say that an ounce of prevention is worth a pound of cure, and this is never truer than with proper car maintenance. I recently had the opportunity to ask an Allstate auto maintenance analyst a few questions regarding this topic, and he happily shared with me a few of the best preventative maintenance items you can do to keep your car running well:
Keep your tires properly inflated. Apply the manufactured suggested air pressure found on the inside panel of the driver side door or in the owner’s manual. Improperly inflated tires effect gas mileage, wear & tear on the tire, and also wear and tear on the suspension.
Replace brake pads at the manufacturer suggested interval. The longer you go without replacing the brake pads once they require replacement, damage to additional brake system components will occur. The longer the wait, the more expensive a brake repair becomes.
Keep your wheels properly aligned. The alignment of your vehicle should be checked routinely. If your vehicle is out of alignment, you will feel a “pull” on the car, either to the left or right. When a vehicle requires an alignment, tires will begin to wear unevenly. Too much operation of a vehicle with poor alignment will cause premature tire wear.
Check your owner’s manual for the proper gasoline. There are usually 3 options of gasoline to choose from when filling up your vehicle. Putting in more expensive gasoline can be a waste of money if the owner’s manual doesn’t specifically state your engine requires it.
Have glass chips repaired immediately. Auto glass companies will repair the chip, which is usually fairly inexpensive. Additionally, check your auto insurance policy – many policies will pay for the repair with no deductible or out of pocket expenses to the auto owner. An untreated chip in a windshield can lead to a larger crack from the fluctuations in temperatures. Bumpy roads will also cause the windshield to crack from that chip. Waiting too long to repair the chip will be cause for a much more expensive windshield replacement.
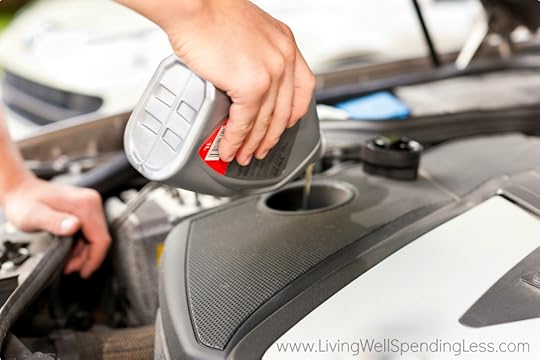
Check your fluid levels periodically. Low fluid levels can increase the stress to the part or systems the fluid is servicing. Low fluid levels can also tip you off to a potential fluid leak you may be unaware of. By catching fluid leaks early, you can avoid part or system failures and ultimately costly repairs.
 6. Do Your Research
When faced with a substantial car repair bill, it never hurts to get a second opinion. First, make sure you understand every single line item of the work that is being proposed. If you don’t, look it up! There may have been extra tasks added in that aren’t absolutely necessary. Look up free online diagnostics using sites such as AutoMD.com to make sure you are being charged properly, and also be sure to research whether there are any current warrantees or recalls for your vehicle on the work that needs to be done. According to Allstate’s analyst, it also pays to research the warranty programs that were available when your vehicle was new. For example, some automobile manufacturers have increased their power train warranty from the traditional 3-year, 36,000 mile to 6-year, 72,000-mile warranty and some include a lifetime powertrain warranty. If a repair is under warranty, you will not have any out of pocket costs.

This post was written as part of the Allstate Influencer Program and sponsored by Allstate. All opinions are mine. As the nation’s largest publicly held insurance company, Allstate is dedicated not only to protecting what matters most—but to guiding people to live the Good Life, every day.

Pin It
The post 6 Smart Ways to Save on Car Repairs appeared first on Living Well Spending Less™.
April 3, 2014
Thrifty Thursday {Week 54}
Happy Thursday! I hope you are all having a fabulous first week of April. Does anyone else feel like their calendar is a little crazy for the next couple of months? As much as I love springtime, it does seem like everything happens all at the same time! I’m trying hard to take it one day at a time and just enjoy each moment as it comes, but I am definitely feeling the crunch. How do you deal with added stress from a busy schedule?
If you haven’t already, you might want to consider joining our collaborative Thrifty Thursday Pinterest Board. It is open to anyone who links up regularly here at Thrifty Thursday, and you may pin up to two of your own budget-friendly pins per day. To be added to the board, you must first be following LWSL on Pinterest. Once you are following, just shoot me an email at admin@livingwellspendingless.com & I will make sure you are added to the board!
Here are the most clicked links from last week:
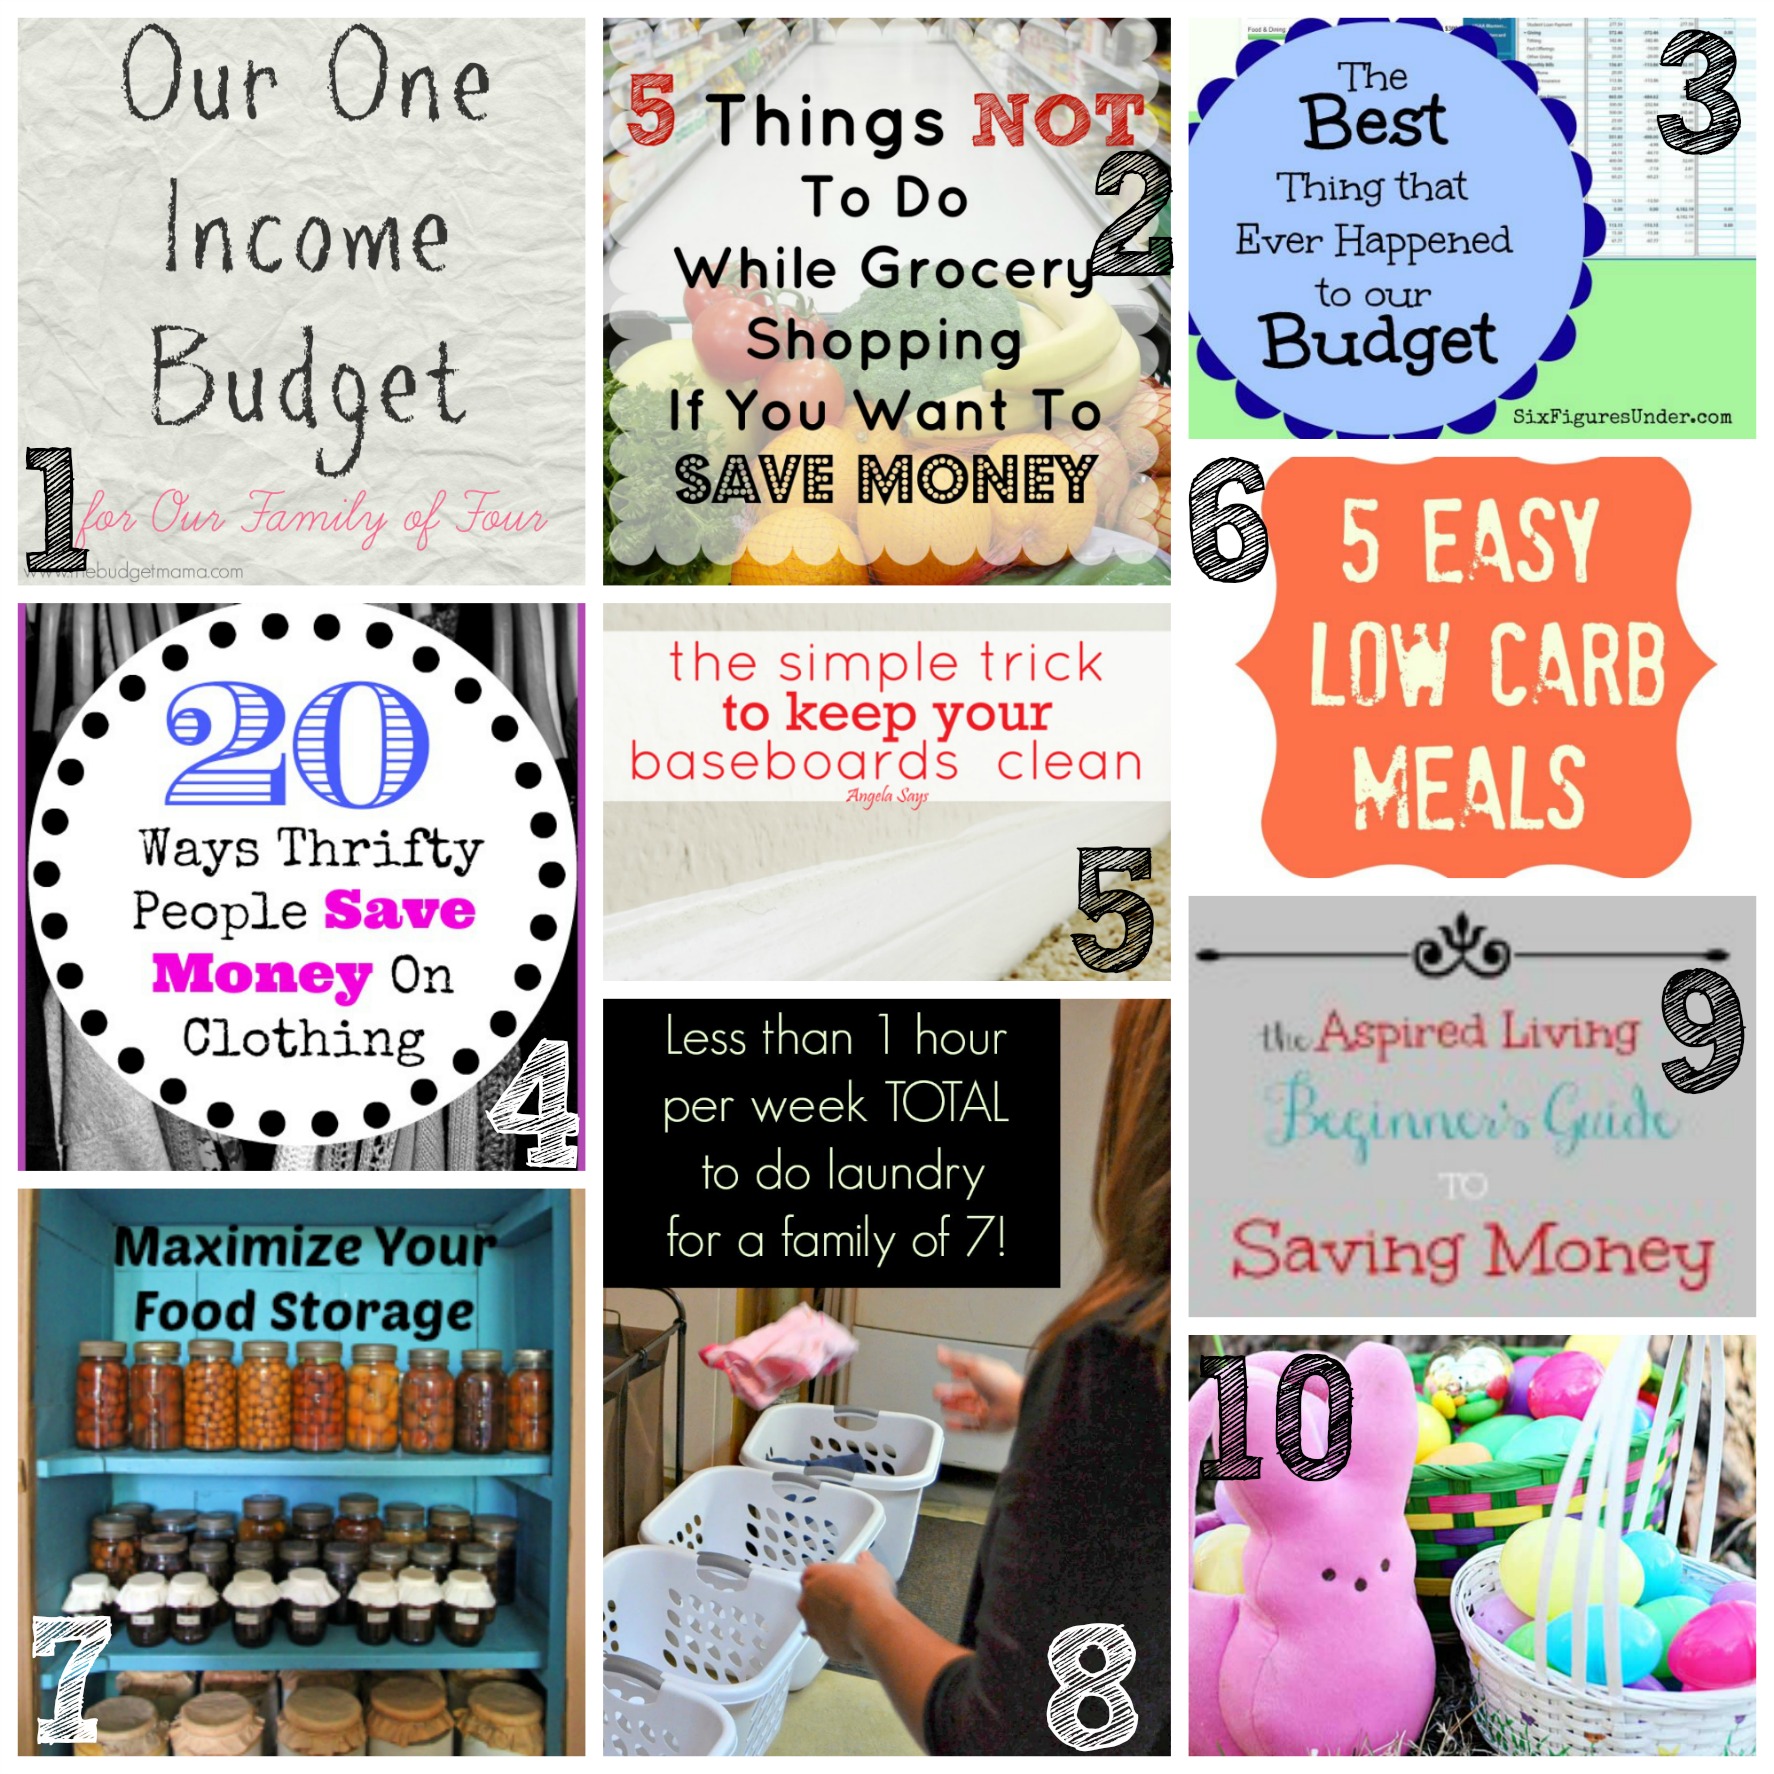
1. The Budget Mama {Our One Income Family Budget}
2. Saving the Family Money {5 Things NOT to do While Grocery Shopping}
3. Six Figures Under {The Best Thing That Ever Happened to Our Budget}
4. Snail Pace Transformations {20 Ways Thrifty People Save Money on Clothing}
5. Angela Says {The Simple Trick to Keep Your Baseboards Clean}
6. Detours in Life {5 Easy Low Carb Meals}
7. Savvy Shopper Central {Maximize Your Food Storage}
8. An Inviting Home {5 Laundry Tips You Might Just Love!}
9. Aspired Living {A Beginner’s Guide to Saving Money Part 1}
10. Modern Mrs. Darcy {37 Fun, Useful, and Generally Worthwhile Gifts for Easter}
Never linked up before? Here’s how:
Scroll down, find the little blue “Add your Link” Button and click on that.
Follow the instructions on the next page – add a great image of your project and an interesting title. Make sure you link to the direct page of your budget friendly post – not the main page of your blog!
Try to visit at least a few other blogs at the party. Be sure to leave a comment to let them know you stopped by!
Please link back to this post somehow. There are badges available here; a simple text link is just fine too.
Feel free to tweet about Thrifty Thursday so others can join the fun, and don’t forget to check back here Sunday morning to see which posts have been featured this week at Weekend Wandering!
If this is your first time here I also invite you to check out my eBook, How to Blog for Profit (Without Selling Your Soul). It is a fantastic resource if you are interested in building your blog, getting more traffic, or learning how to monetize. Or, if you have read the book and are still looking to take your blog to the next level, I encourage you to check out my options for one-on-one blog consulting.
An InLinkz Link-up
Pin It
The post Thrifty Thursday {Week 54} appeared first on Living Well Spending Less™.
April 2, 2014
Oh-So-Easy London Broil

Would you believe that until I attempted this London Broil that in ten years together, I had never once cooked my husband a steak?
I know. Shocking, right?
Of course in my defense, I haven’t eaten a steak since I was 16 years old, and because I don’t eat meat, cooking it kinda scares me, at least a little. As such, Chuck is normally the one in charge of all things meat related. But although I’m not really a meat-eater, the rest of my family can’t seem to get enough of it. And quite frankly what is motherhood if not (at least sometimes) putting your kids and husband first?
Thus, for the past couple of months I’ve been working on developing a few go-to meat recipes that are pretty much foolproof. And by foolproof I mean that not only are they totally delicious plus budget and freezer friendly, they are also so impossible to screw up that even a vegetarian can make them with the confidence that they will be moist and full of flavor. Last week’s Honey Lemon Garlic Chicken was the first to hit all my criteria. This week it is London Broil.
After doing a little research I discovered that London Broil sounds fancy but is actually super simple AND budget friendly as it uses an inexpensive cut of meat called flank steak. It is prepared by marinating the meat overnight, cooking it quickly on high heat under a broiler, then cutting it into thin slices. And, according to my family, it is completely delicious–a perfect 10.
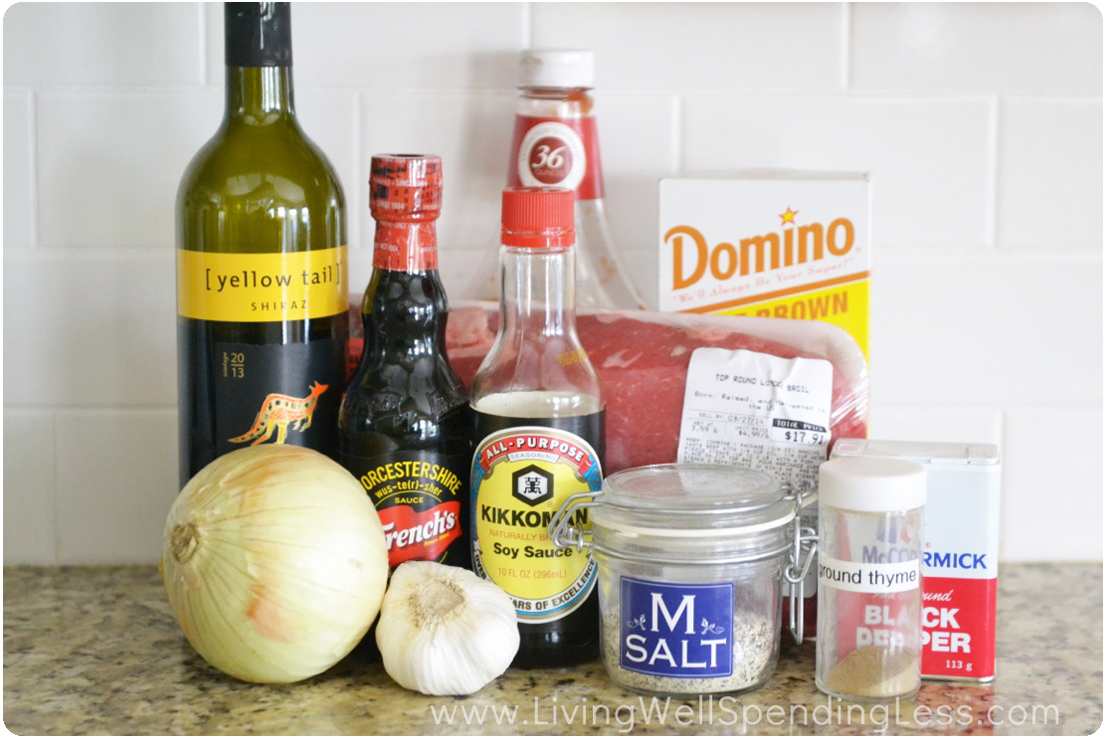
Here is what you need:
2 pounds London Broil or Flank Steak
seasoned salt
pepper
1/2 large sweet onion
2 cloves garlic
3/4 cup red wine
1/3 cup ketchup
1/4 cup soy sauce
2 tablespoons Worcestershire sauce
3 tablespoons brown sugar
1/2 teaspoon dried thyme
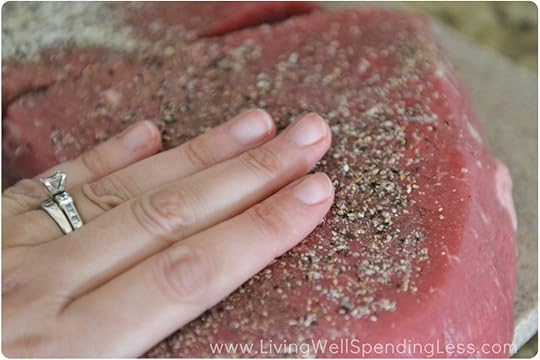
Step 1: Sprinkle beef with salt & pepper & rub into meat.
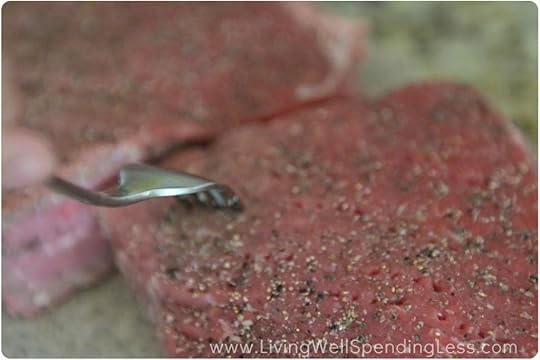
Step 2: Poke holes in meat with sharp fork to allow marinade to sink in. You can also use a tenderizer such as this one.
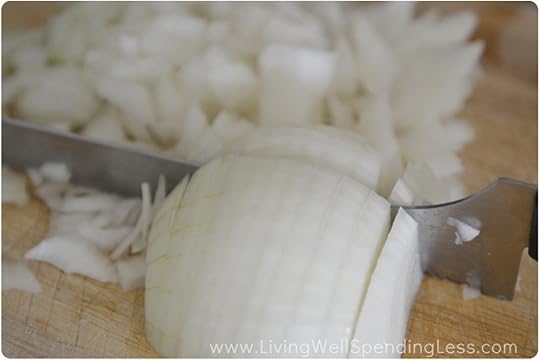
Step 3: Chop onion and garlic.
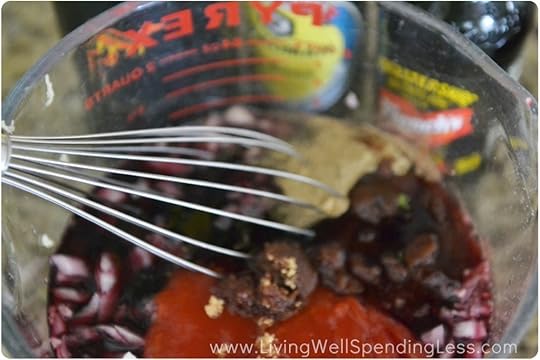
Step 4: Whisk together onion, garlic, red wine, ketchup, soy sauce, Worcestershire sauce, brown sugar, and thyme until well blended.
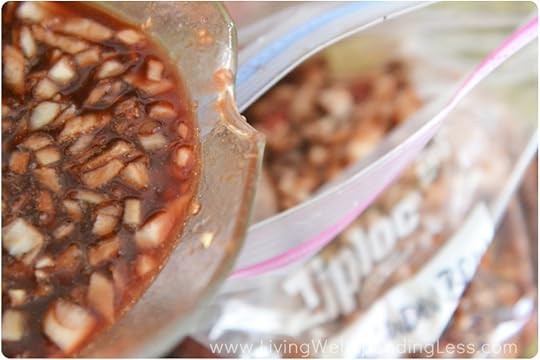
Step 5: Place meat in gallon size freezer bag, then pour marinade over meat. Squeeze air from bag & seal. Let meat marinate at least 6 hours or overnight. If preparing as part of a freezer cooking day, be sure to label the bag first, then freeze after sealing.

Step 6: Thaw meat (if frozen.) Turn on broiler with broiler pan inside. (I used my Ceramcor Pizza/Grill Pan–love that thing!) Preheat pan for 10 minutes. Place meat on broiler pan, then return pan to oven on top rack, about 4″ from heat. Depending on the thickness of your meat, broil for approximately 5-6 minutes per side, watching closely. Err on the side of undercooked–you can always put it in for another minute if necessary.

Step 7: (Optional) Pour leftover marinade in a small saucepan and bring to a boil, then reduce heat and simmer until thickened.
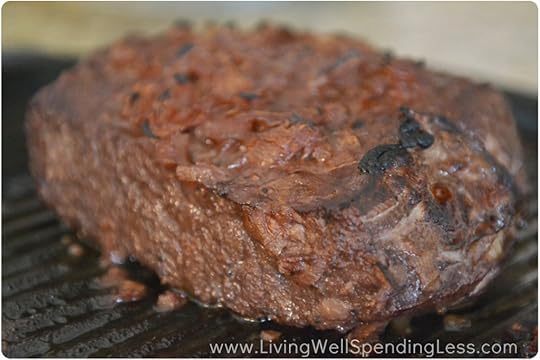
Step 8: Let cooked meat rest for 8 minutes, then cut into thin slices with a sharp knife. Drizzle marinade over top of meat, if desired.

Print This!
Recipe: Easy Tender London Broil
Summary: This tried and true cooking technique will work wonders on those tougher cuts of meat.
Ingredients
2 pounds London Broil beef
seasoned salt
pepper
1/2 large sweet onion
2 cloves garlic
3/4 cup red wine
1/3 cup ketchup
1/4 cup soy sauce
2 tablespoons Worcestershire sauce
3 tablespoons brown sugar
1/2 teaspoon dried thyme
Instructions
Sprinkle beef with salt & pepper & rub into meat. Poke holes in meat with sharp fork to allow marinade to sink in. You can also use a tenderizer such as this one.
Chop onion and garlic.
Whisk together onion, garlic, red wine, ketchup, soy sauce, Worcestershire sauce, brown sugar, and thyme until well blended.
Place meat in gallon size freezer bag, then pour marinade over meat. Squeeze air from bag & seal. Let meat marinate at least 6 hours or overnight. If preparing as part of a freezer cooking day, be sure to label the bag first, then freeze after sealing.
Thaw meat (if frozen.) Turn on broiler with broiler pan inside. Preheat pan for 10 minutes. Place meat on broiler pan, then return pan to oven on top rack, about 4″ from heat. Broil for approximately 5 minutes per side (6 minutes if you prefer your meat more well done), watching closely.
(Optional) Pour leftover marinade in a small saucepan and bring to a boil.
Let cooked meat rest for 8 minutes, then cut into thin slices with a sharp knife. Drizzle marinade over top of meat, if desired.
Preparation time: 6 hours
Cooking time: 10-12 minutes
Number of servings (yield): 8
* * *
Have you ever tried London Broil? What are your favorite foolproof meat recipes?
Pin It
The post Oh-So-Easy London Broil appeared first on Living Well Spending Less™.


