
Ruth Soukup's Blog, page 108
June 30, 2014
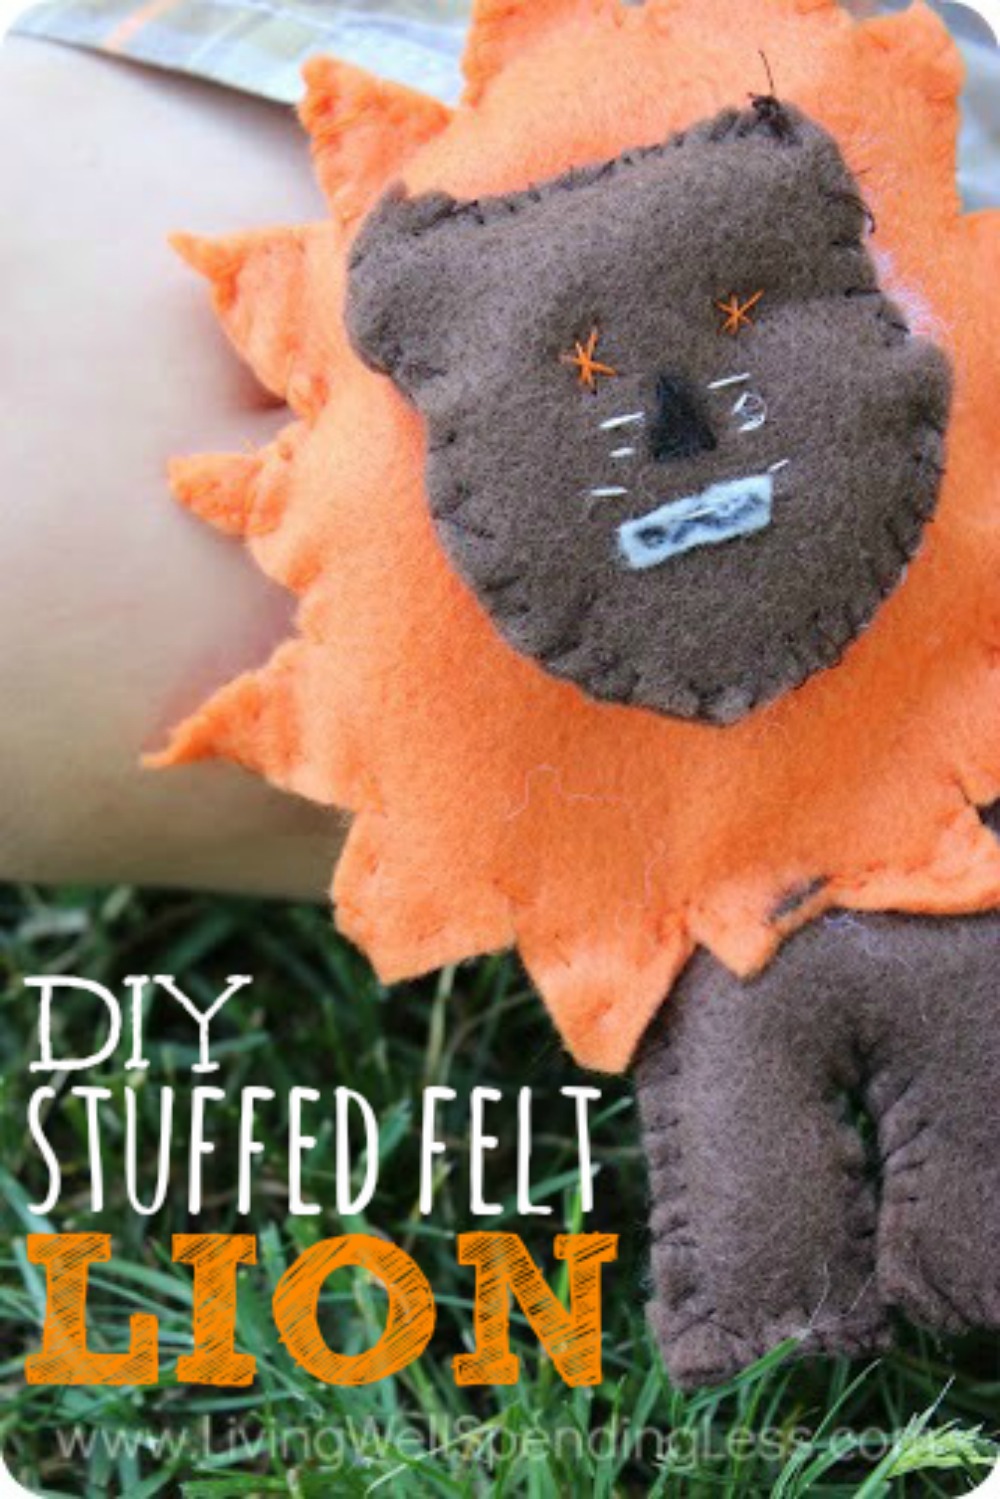
DIY Stuffed Felt Lion
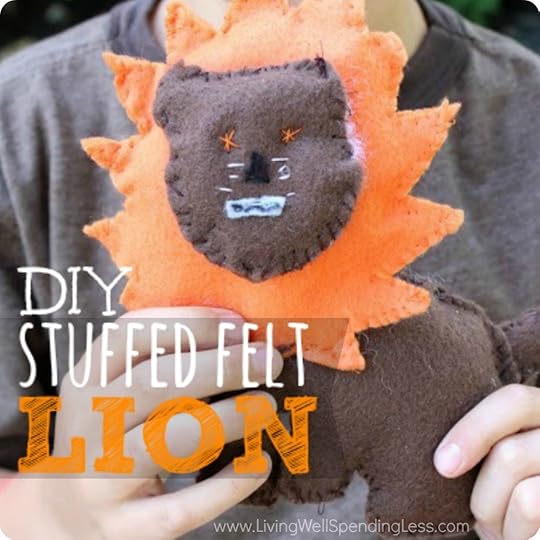

This is Week 5 of our 12-week Summer Fun with Kids series here at LWSL! Today we are welcoming Lauren from I am THAT Lady, who is sharing a fun & easy stuffed felt lion . For more summer fun, check out the overview page.
* * *
There are so many activities to entertain your children during the summer months outside, but what about when it is raining or just too hot? Rainy days during the summer seem to be the time when my children get restless and are looking for projects to do around the house, so I created a fun sewing project for my two oldest children who are ages 4 and 8.
We love doing crafts together as a family, and last month we made these Deck Candles for under $10.00 . Ever since then, my oldest has been asking me for another craft idea. He also started asking me to learn how to sew for a few months, since he tried it at his aunt’s house. Once we had a rainy day, I knew that I had to get a craft together to occupy him, so I figured it was the perfect time to teach him how to sew. I thought sewing on felt would be the easiest way to teach him, so my husband drafted up this template to make a lion out of felt.
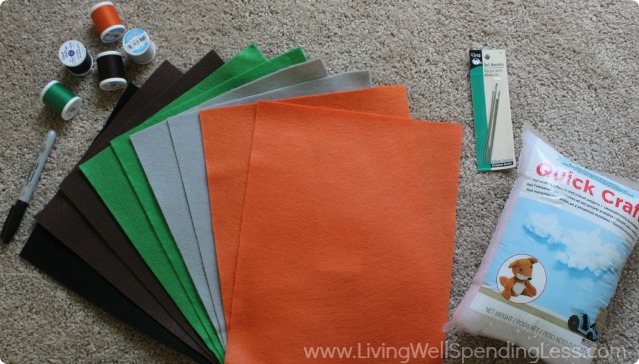
Here is what you need:
Lion template
Felt (different colors)
Thread ( to match felt)
Large sewing needles
craft stuffing

Step 1: Cut out the patterns from the template.

Step 2: I then pinned the patterns down onto the felt. I decided to use brown for the head and body, and orange for the mane of the lion.
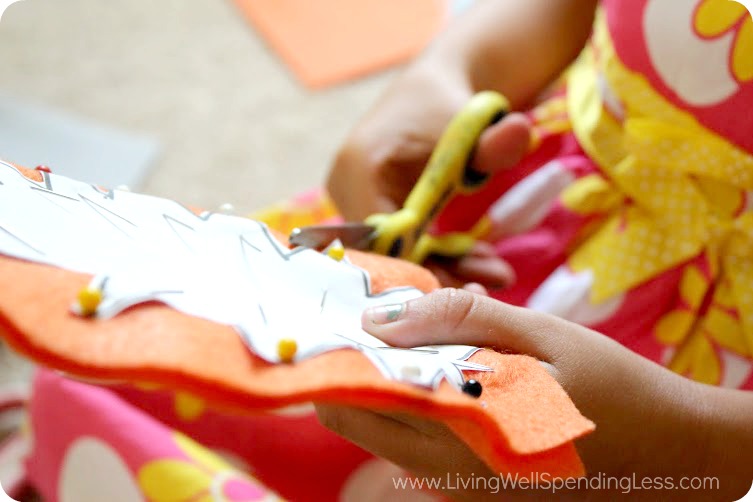
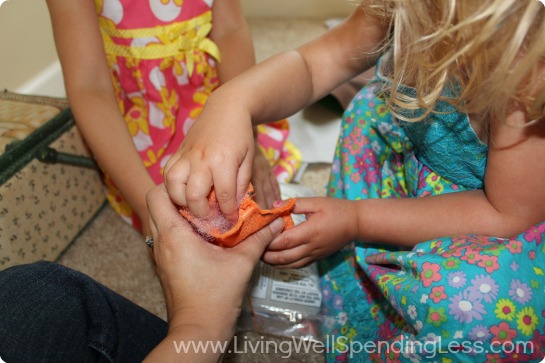
Step 3: Next cut around the pinned patterns. I had my 4 year old cut out the felt with some child friendly sewing scissors. Then when he had all the felt pieces cut out we could start sewing them together.
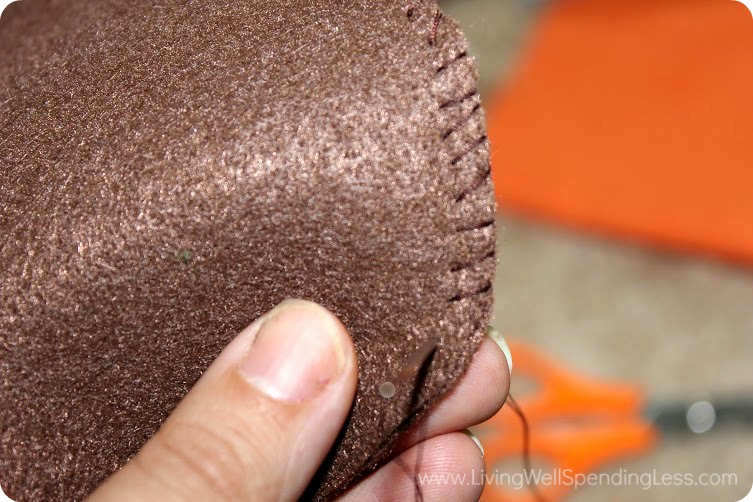
Step 4: Start sewing. I taught them both how to use a cross over stitch. You go from one side of the fabric to the other, pull through. This loops the thread over the edge of the felt, securing it a little better. Plus it is prettier since you will see all the stitching. STOP- Don’t forget to leave an opening on all 3 parts of your lion so you can stuff him.
Step 5: Stuff each part of your lion. You can use a pencil to push the stuffing into each part of the lion’s mane and other body parts. Then finish stitching it up.
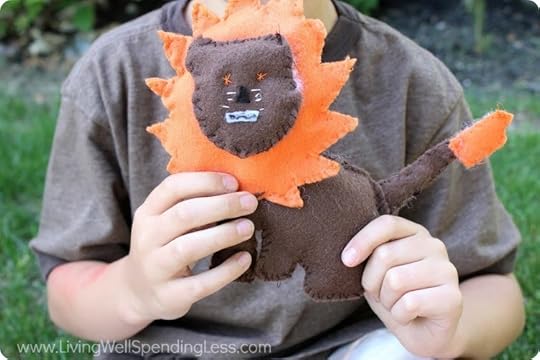
Step 6: Give your lion some character. I decided to stitch eyes, whiskers, and a nose on the lion. My son insisted that he needed to draw teeth onto the piece of felt that I was going to use for a mouth. Since this activity was designed for him, I chose to put aside my desire for making a Pinterest perfect activity, and let him design the animal he loved.
After I stitched the face, I went on to attach the mane to the body. I simply sewed through both the body and the mane. I sewed through the place on the mane where I would be covering it up with the head eventually. That way you wouldn’t see all the extra stitching. Once the mane was attached to the body I then went ahead and stitched the head onto the mane. My son then came to me with a tail that he had stitched all by himself! We put that on last.
This was the perfect rainy day craft for us; it helped me occupy my children for the entire day. They used a lot of creativity and best of all; it was under $15.00 for the entire craft. My son loved this craft so much that he made a snake all by himself later on in the day, he did need a little bit of help knotting the thread before starting the project but other than that, he did it all himself!
And now it is time for another fun giveaway! Today we are again giving away something EVERYONE can use–a $100 Amazon Gift Card–that you can use to make your own summer fun! To enter, just follow the instructions in the box below.
Lauren Greutman is a mother of 4 and blogger behind
iamthatlady.com and MarkandLaurenG.com. Once in $40,000 worth of debt and now debt free, she has a passion for helping busy women learn how to enjoy life on a budget and enjoy the same debt free lifestyle. She is the author of the books “How to Coupon Effectively” and “How to Decorate on a Budget”.

* * *
What are your favorite rainy day activities?
Pin It
The post DIY Stuffed Felt Lion appeared first on Living Well Spending Less®.


June 29, 2014
Weekend Wandering


Happy Sunday! I hope you are all having a fun and relaxing weekend! I wanted to let you know that if you are a blogger and are interested in attending FinCon this September in New Orleans, tomorrow will be the last day to qualify for earlybird prices ($249 instead of $499!) If you blog anywhere within the personal finance realm, this is definitely one conference you won’t want to miss. I will be there speaking about Pinterest and I would absolutely love to meet you! Get the conference details here.
Now moving on to my picks for Weekend Wandering! It is always so much fun to see what you have to share at Thrifty Thursday, and this week I was super inspired by all your summer recipes and 4th of July ideas. Here is what I loved:
* * *
First of all,these Peach, Honey and Blue Cheese Crostini from Made From Pinterest sound absolutely amazing!

Nothing says summertime like fresh corn on the cob! This Sweet Corn and Poblano Summer Chowder from Blue Crab Martini would be perfect for a light lunch or dinner!

This yummy Fresh Corn Salad from Modern Christian Homemaker requires only 3 easy steps to prepare.

Looking to keep your corn harvest fresh for weeks to come? Sweet Pennies From Heaven has a How to Freeze Fresh Corn tutorial that will preserve your farm fresh corn until winter. That is if it lasts that long.

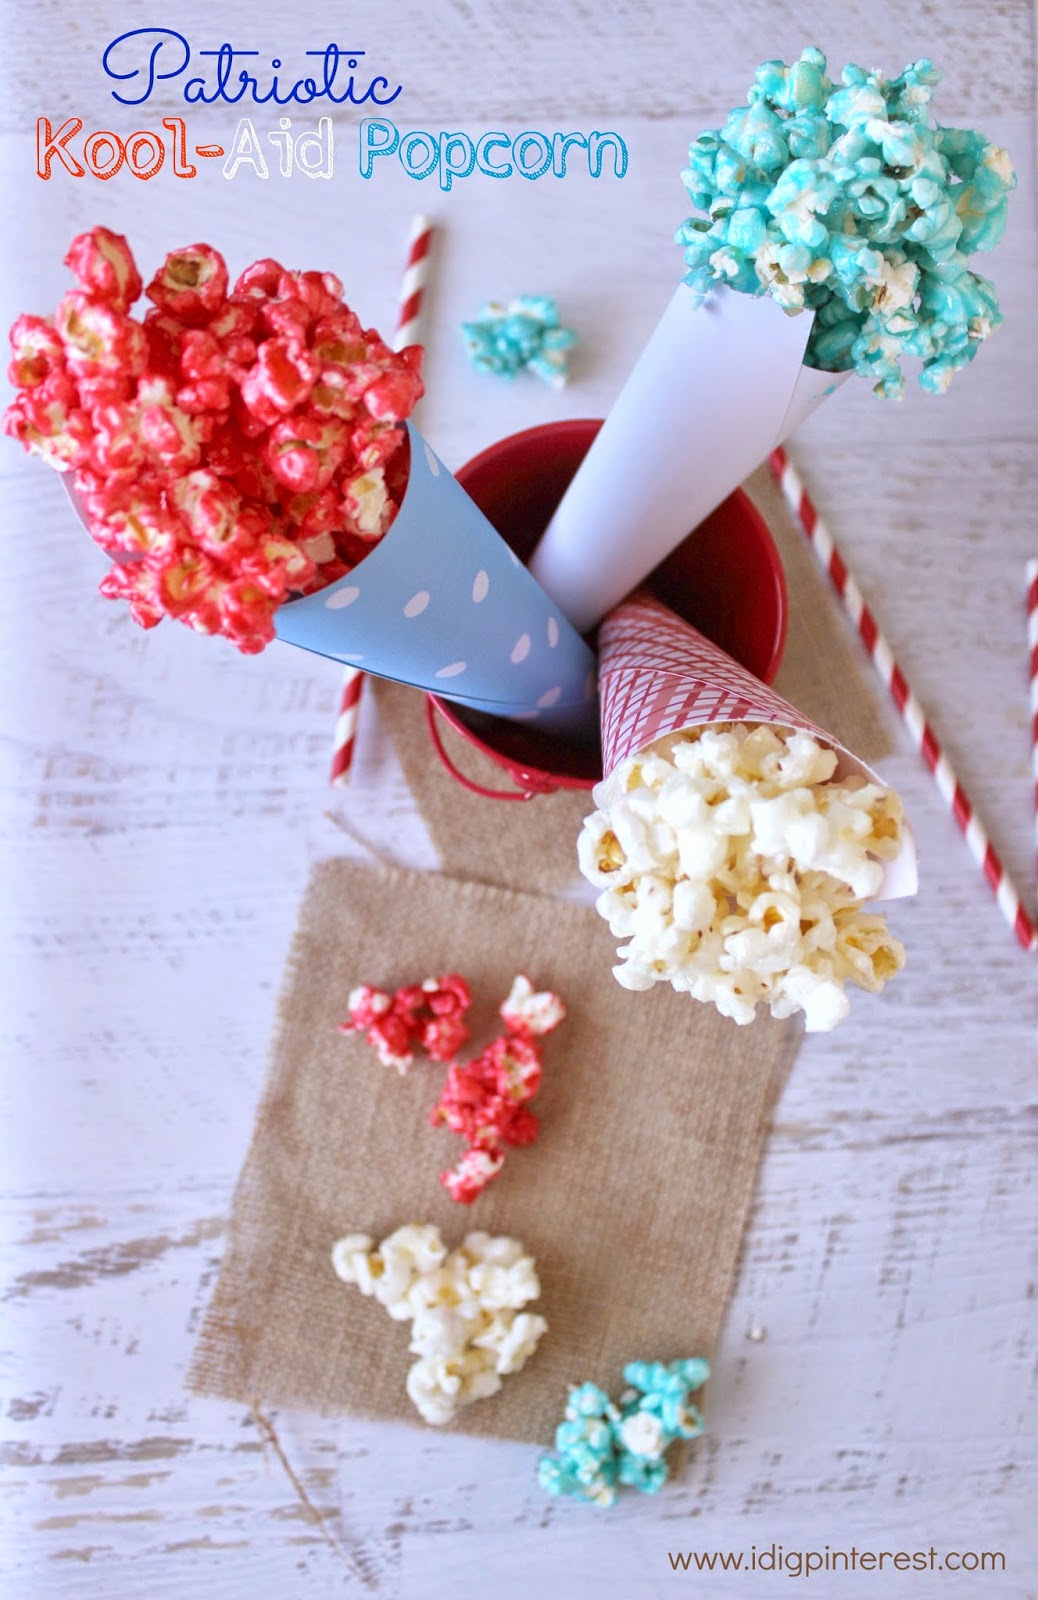
Of course if you’d rather your corn popped…then I Dig Pinterest has a recipe for a Red,White and Blue Kool-Aid Popcorn. The kids would love this!
There were a ton of awesome 4th of July desserts to pick from, so definitely check out Thursday’s post for more inspiration. I thought these Patriotic Kool-Aid Cupcakes from The Frugal Navy Wife were especially cute and also a great way to have the kids help in the kitchen.

And speaking if kids, if yours are anything like mine they love marshmallows! These Tri-Color Patriotic Marshmallows from Frugal Fanatic are super cute and would be a fun treat to share at your Fourth of July celebration!

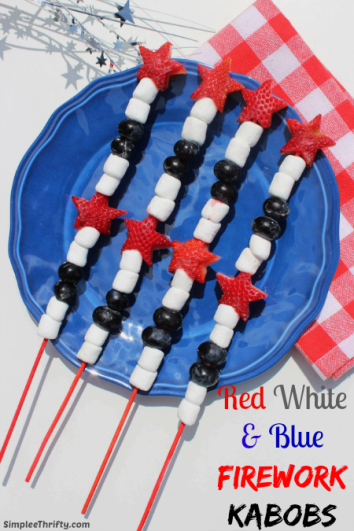
You could also make them a little healthier by adding some fruit. These Red White & Blue Firework Kabobs from Simplee Thrifty are easy to make and a absolutely darling.
Still not quite healthy enough? These Fruit & Yogurt Bites from Coupon Crazy Girl are full of protein!

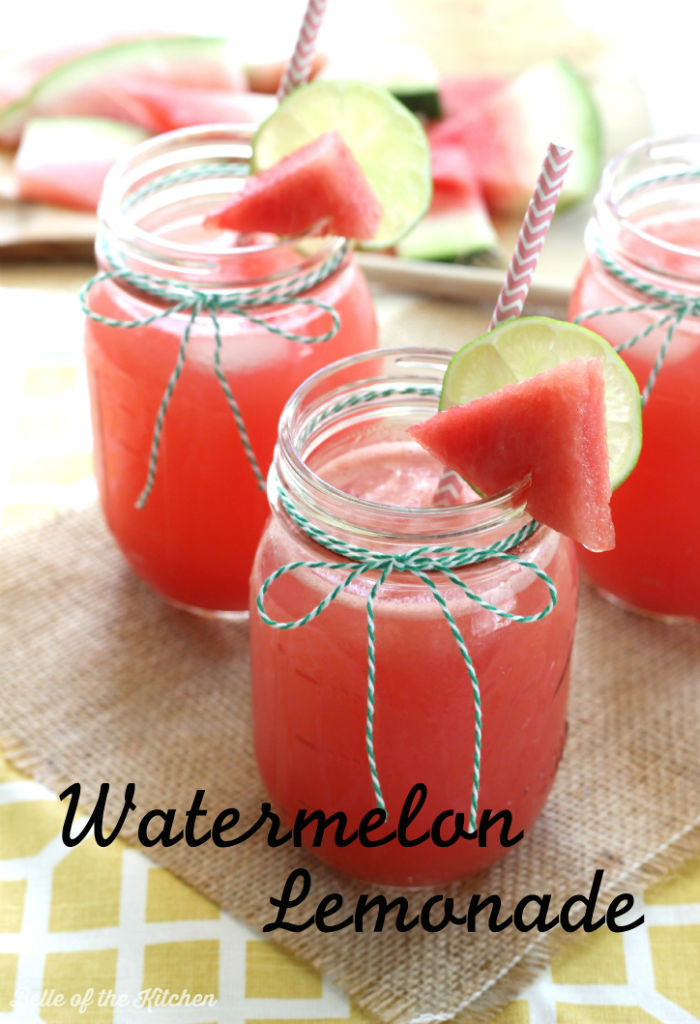
This Watermelon Lemonade from Belle of the Kitchen updates an old summertime favorite. Isn’t it pretty?
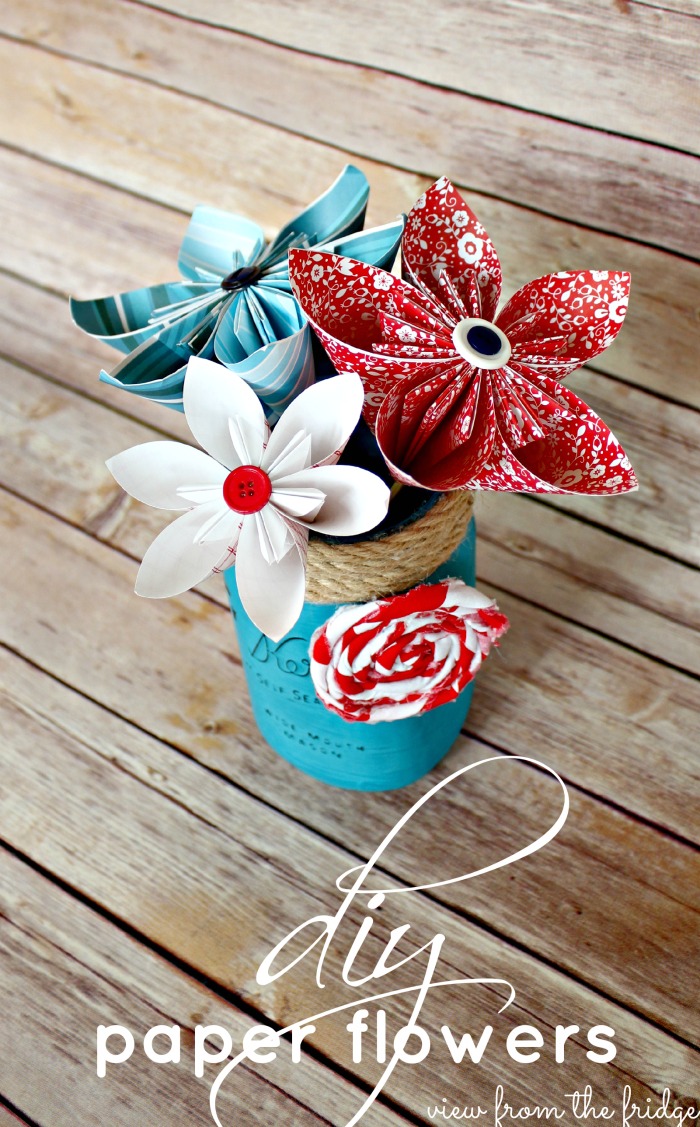
Moving on to some fun DIY projects, these Patriotic DIY Paper Flowers from View From the Fridge are absolutely adorable!
I also loved these fun DIY 4th of July Tie Dye Tea Towels from A Little CLAIREification!

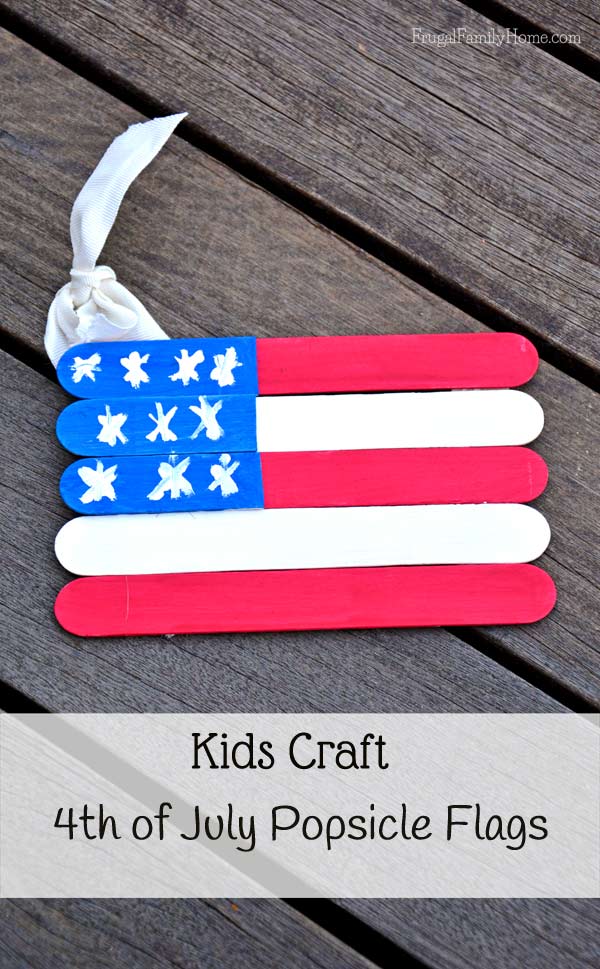
Sometimes the simplest crafts are the best. My kids would have a blast making these cute 4th of July Flags from Frugal Family Home are a wonderful way to keep the kids busy until the fireworks start.
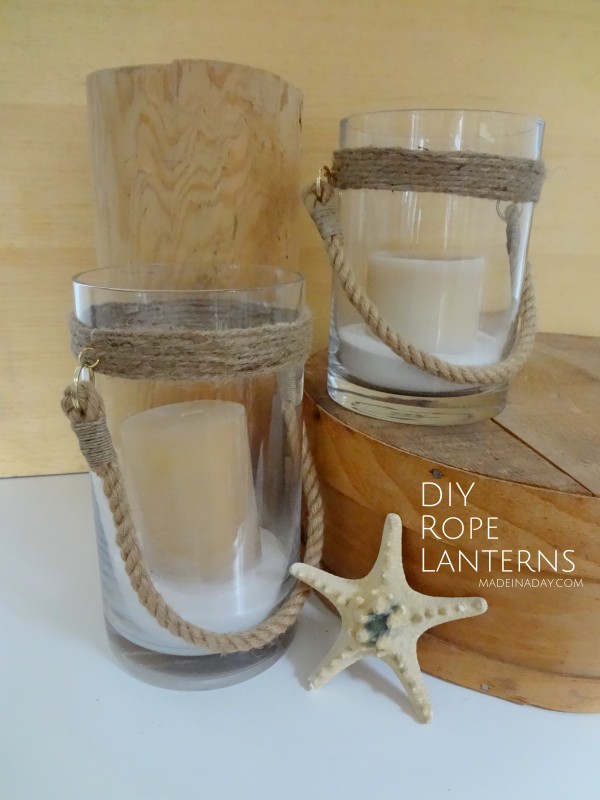
Finally, these DIY Rope Lantern Vases from Made in a Day are trendy and an inexpensive project that can be made in minutes. Love it!
* * *
What did you love this week?
Pin It
The post Weekend Wandering appeared first on Living Well Spending Less™.
June 27, 2014
6 Smart Ways to Get Your Kids to Stop Fighting

Summer can sometimes be a pressure cooker for sibling rivalry, and if your kids are anything like mine, they somehow manage to fight over pretty much anything! While the battles may be over the tiniest details, the effects of that constant turmoil wear on everyone’s nerves. Have you ever wished for surefire way to just get your kids to STOP fighting?
While there is no magic wand for nipping sibling rivalry in the bud, there are a few strategies to try that can help short-circuit a huge amount of noise — and help you teach your kids valuable lessons about family life at the same time. Ultimately, getting your kids to stop fighting takes touch of ingenuity, a generous dose of authority, and a commitment to consistency. Here are six smart ways to keep the fighting to a minimum.
1. Spend Time With Each Child Individually.
All too often, a bickering war starts because one child sees another getting something he/she doesn’t get, especially when it comes to time spent with a parent. The “slighted” child doesn’t even have to really WANT what’s being handed out; it’s the perceived preference (“Mom likes you best”) they find intolerable. You can short-circuit this nasty green-eyed monster effectively, and prevent the start of bickering, by making an effort to provide opportunities for each of them to participate with you in something they find enjoyable.
For example, if your son loves ball games, make sure your daughter (who could care less about sports) doesn’t have an opportunity to whine when Dad takes her brother off to the field, leaving her behind. Instead, think of something she loves to do, such as play her favorite board game or go out for ice cream, then make plans to do it at the same time. A little sneaky? Nope. Just creative.
 2. Refuse to Play the Blame Game
It’s a classic scenario: something spills or breaks, someone takes a spill or gets hurt, and the screaming starts. When we go to investigate, what’s the first thing we hear? “I didn’t do it!” or “It’s not my fault!” or “She started it!”…or any of a hundred variations on the “blame game.” But there are magical words you can say in this melee that will virtually stop it in its tracks. Those words? “I don’t care who’s to blame. No one is in trouble. I just need to know what happened.”
The first time you do this, it might actually be a little funny to see the expressions on your kids’ faces as they struggle to make sense of the idea of not blaming their sibling. What it also does — which is even better — is reduce the situation to just that: a situation. It shrinks from a capital crime on someone’s part to what, 99 percent of the time, actually happened — a mistake or an accident. Whose mistake isn’t important; fixing the problem is. Try it a couple of times and see how fast your screamers become helpful assistants, once the fear of someone getting in trouble is removed from the equation.
3. Pay Attention to What Goes In.
All parents would love to have kids who treat each other kindly — who don’t belittle each other, call each other vicious names, poke holes in each other’s dreams, or deliberately break each other’s toys — but they end up being happy if they keep the “little monsters” from killing each other! Part of the dilemma, of course, is that kids are learning boundaries (and pushing them!), and they have a lot of growing-up to do before nicely finished, evolved personalities come out. But another answer lies in what you feed them.
No, we’re not necessarily talking nutrition here — although healthy food, proper sleep, and other prudent practices reduce a lot of bickering that comes from hunger, fatigue, or stress. Instead, it is what goes into your child’s mind and heart that will also “recycle” in their behavior. Be careful about what television shows and movies your children watch. Even so-called family entertainment freely uses insults, sarcasm, “stupid” parental figures, or other ill-treatment of others for a cheap laugh. Make sure that you are gently but firmly reinforcing the message that that kind of behavior doesn’t work in your home.
 4. Make House Rules Hold…For Everyone
Speaking of what will or won’t fly in your house, don’t hesitate to make it clear (with appropriate consequences) that some things simply will not be tolerated in your home. Teasing a sibling can be fun and good-natured if both sides understand limits; taunting a sibling to the point of tears is neither fun nor acceptable. Letting kids fight it out can be a reasonable strategy if it’s a minor skirmish between brothers who are always roughhousing anyway…but it’s not if a much bigger kid is “letting loose” on a small, defenseless one.
It is also important that everyone in your home–even the adults–follow the house rules for fair fighting. If you wouldn’t let your kid behave in a certain way, don’t do it yourself. This doesn’t mean you shouldn’t discipline your children in an appropriate way, but it does mean that it is not okay to call your spouse or your children cruel names, even in jest, or to threaten them with violence. It also means that you don’t allow visitors in your home to cross those lines, either.
5. Keep Idle Hands Busy
Kids can often become whiny or argumentative simply because they’re bored. In situations where kids are forced to sit still, wear uncomfortable clothing, or be confined for long periods of time–such as a long car trip or rainy day–sooner or later, their patience wears thin and tears and complaints can follow. Working with your children’s lower threshold for frustration is key. It is a good idea to have high expectations for your kids, but it is also important to remember that they are still just kids, and plan accordingly.
This does not mean you should have the latest gadgets or technology to keep them busy at all times. Instead encourage your kids to find creative ways to entertain themselves by pre-planning a few options for them to choose from. (Our Summer Fun with Kids series is a great place to start!) It’s also helpful to know that your kids will be able to tolerate doses of confined spaces and quiet time a little better if they also have chances to get up and run around, play a game, read a book or sing a song, work a puzzle, or hear great stories that make them laugh along the way.
 6. Employ Creative Corrections
In our house most infractions are dealt with on the Naughty Stool (thank you Super Nanny!) But when it comes to two kids who are fighting, sometime drastic times call for drastic measures. We have found the best method to getting our kids to stop bickering is to put them on time-out together, facing each other and holding hands. They are not allowed to fight or bicker or they get another minute added to their time, and they don’t get to come off, even if their time is up, until they can apologize to each other and get along.
The first time I set the timer for 3 minutes, the next time it was 4 minutes, and so on, and, so that we don’t eventually accrue too may minutes, they can get time removed by getting along for a whole day. This simple solution has been an remarkably effective technique. (Apparently holding hands is tantamount to being tortured!) Most of the time we only have to mention holding hands to stop the bickering in its tracks.
Above all…
Show grace. Forgive yourself when all the preventive measures, firm rules, calm discipline, and ingenious attempts to keep your kids from meltdown don’t work, and show grace to your kids when they mess up too. No technique can guarantee 100 percent success 100 percent of the time. Conflicts, squabbling, and griping will happen; they’re human nature. When the blow-ups happen, try not to let them rattle you. Even mistakes can help your kids learn another invaluable lesson, that even when we all mess up, you don’t stop loving them — or yourself.

* * *
How do you keep your kids from fighting?
Pin It
The post 6 Smart Ways to Get Your Kids to Stop Fighting appeared first on Living Well Spending Less™.
June 26, 2014
Thrifty Thursday {Week 66}

Happy Thursday! I hope you are all having a fantastic week! This week my family and I are cruising in the Caribbean on board the Carnival Freedom, and it has been a wonderful trip so far. If you have ever thought about cruising, or plan to take a cruise soon, be sure to check out these 25 little-known cruise secrets for some great tips on everything from booking your trip to maximizing your time on-board!
Here are the most clicked links from last week:

1. Pins & Procrastination {The Secret to an Organized Home}
2. Sarah Titus {Money Saving Tricks:30 Days to a Better Life}
3. Intentionally Pursuing {How to Save Over 50% on Your Groceries with Little Effort}
4. Six Figures Under {Understanding Sunk Costs }
5. The Budget Mama {Debt Check-Up: An Honest Look at How Far We Still Have to Go}
6. Mums Make Lists {Time Saving Freezer Essentials}
7. Working at Homeschool {Cheap and Easy GF Trim Healthy Mama Dinners }
8. Modern Hen Home {5 Fast Rules for Debt-Free Living for Life}
9. Busy Mom Budgets {Why Your Debit Card May Not be Your Budget’s B.F.F}
10. Retired By 40 {Feed Your Family on $300 a Month}
Never linked up before? Here’s how:
Scroll down, find the little blue “Add your Link” Button and click on that.
Follow the instructions on the next page – add a great image of your project and an interesting title. Make sure you link to the direct page of your budget friendly post – not the main page of your blog!
Try to visit at least a few other blogs at the party. Be sure to leave a comment to let them know you stopped by!
Please link back to this post somehow. There are badges available here; a simple text link is just fine too.
 Feel free to tweet about Thrifty Thursday so others can join the fun, and don’t forget to check back here Sunday morning to see which posts have been featured this week at Weekend Wandering!
If this is your first time here I also invite you to check out my eBook, How to Blog for Profit (Without Selling Your Soul). It is a fantastic resource if you are interested in building your blog, getting more traffic, or learning how to monetize. Or, if you have read the book and are still looking to take your blog to the next level, I encourage you to check out my options for one-on-one blog consulting.
An InLinkz Link-up
Pin It
The post Thrifty Thursday {Week 66} appeared first on Living Well Spending Less™.
June 25, 2014
Easy Honey Dijon Chicken

Ready for another amazing grilled chicken recipe? This scrumptiously delicious honey dijon chicken is another favorite “cheater” freezer recipe–easy, delicious, practically mess-free, and freezer + grill friendly. What more do you need?
To make it as part of a freezer cooking day, just split the marinade & chicken into multiple bags, then throw it right into the freezer–no cooking required! Making it ahead of time is not necessary, though, as it is equally delicious just marinated at room temperature. And don’t let the simplicity of the recipe fool you–this is one moist & flavorful meal that your family will absolutely go crazy for!
You can use any type of chicken but my family much prefers the boneless, skinless chicken thighs, which are a darker, juicier meat and also tend to be cheaper than the boneless skinless breasts.
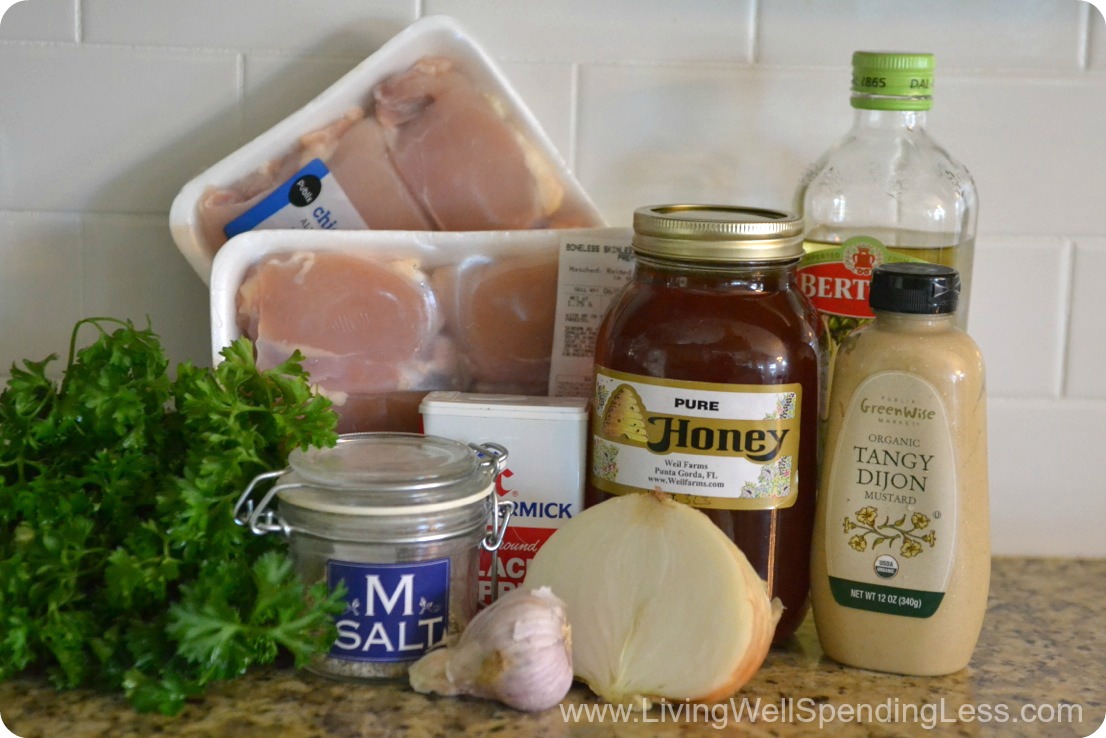
Here is what you need:
1/2 large sweet onion
3-4 cloves garlic
1/2 cup olive oil
1/2 cup dijon mustard
1/2 cup honey
2 teaspoons seasoned salt
1/2 teaspoon black pepper
1/2 cup fresh parsley, chopped (optional)
3.5-4 pounds boneless chicken
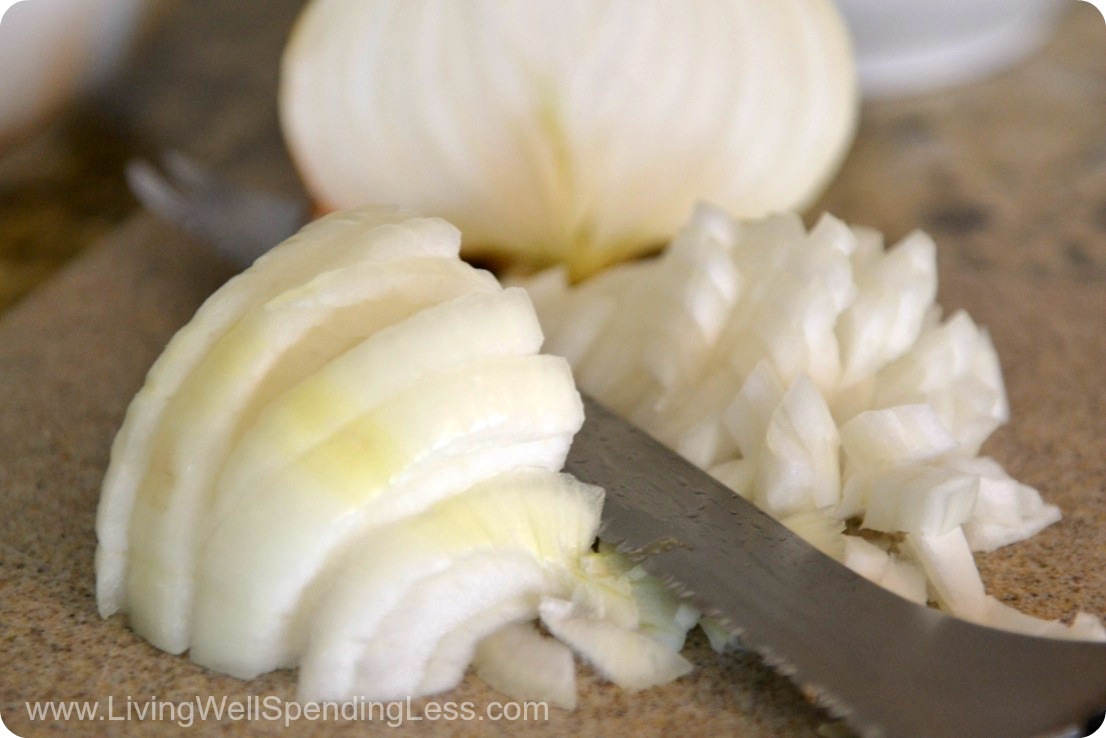
Step 1: Mince onion.

Step 2: Mince or crush garlic in garlic press.
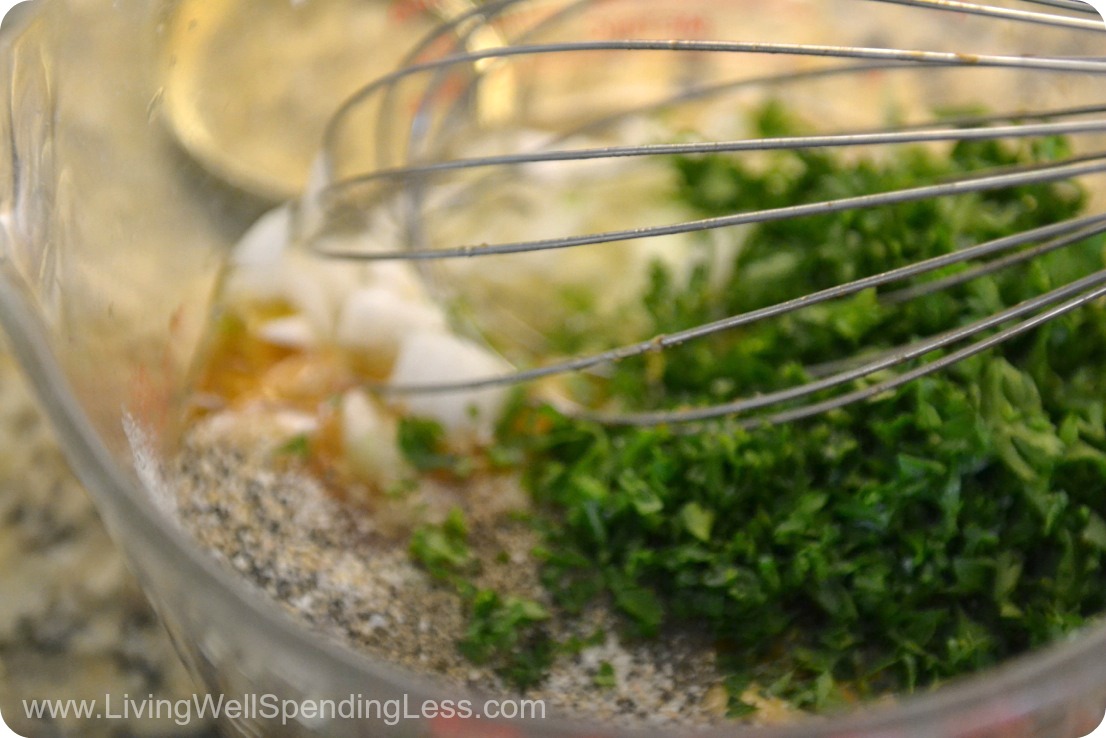
Step 3: Whisk together olive oil, Dijon mustard, honey, salt, pepper, onions, garlic, and parsley, then divide into 2 1-gallon freezer bags. (If freezing, be sure to label bags ahead of time.)
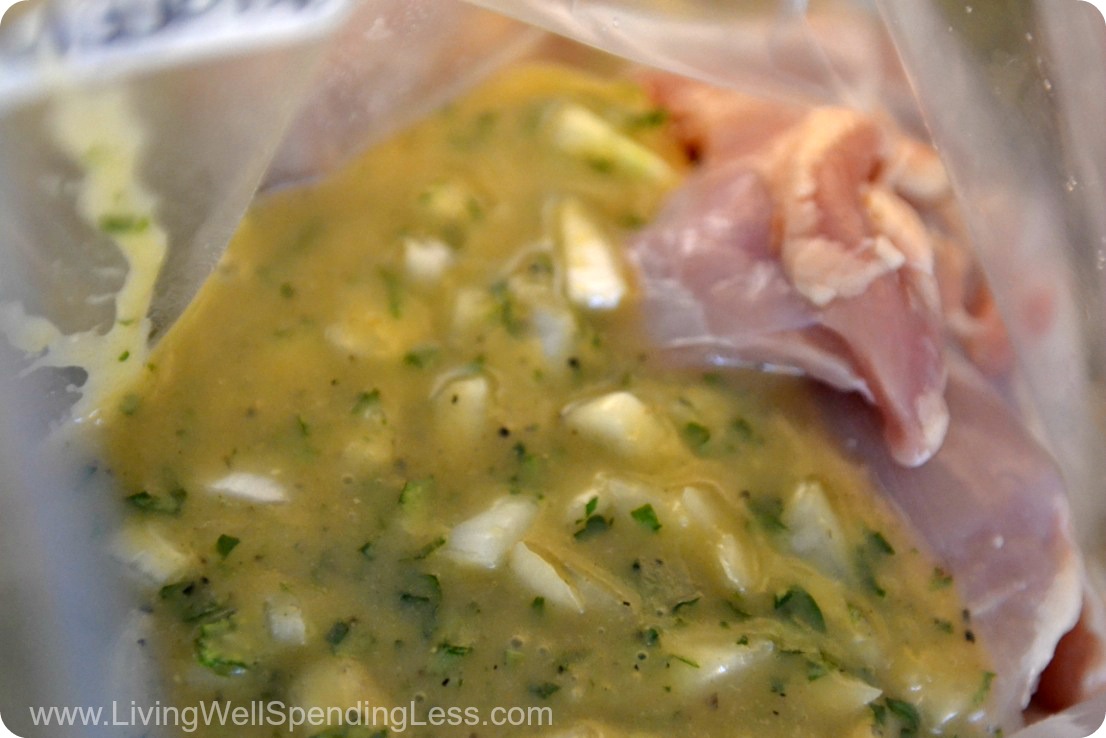
Step 4: Divide chicken into two bags of marinade; let marinate for at least 30 minutes or longer, or press out air from bag and freeze.

Step 5: Thaw if frozen. Grill 6-8 minutes per side, basting with additional marinade, if desired.
Print This!
Recipe: Honey-Dijon Grilled Chicken
Summary: This freezer friendly chicken recipe will be a great addition to any backyard barbeque!
Ingredients
1/2 large sweet onion
3-4 cloves garlic
1/2 cup olive oil
1/2 cup Dijon mustard
1/2 cup honey
2 teaspoons seasoned salt
1/2 teaspoon black pepper
1/2 cup fresh parsley,chopped (optional)
3.5 -4 pounds boneless chicken
Instructions
Mince onion.
Mince or crush garlic in garlic press.
Whisk together olive oil, Dijon mustard, honey, salt, pepper, onions, garlic, and parsley, then divide into 2 1-gallon freezer bags. (If freezing, be sure to label bags ahead of time.)
Divide chicken into two bags of marinade; let marinate for at least 30 minutes or longer, or press out air from bag and freeze.
Thaw if frozen. Grill 6-8 minutes per side, basting with additional marinade, if desired.
Preparation time: 30 minutes
Cooking time: 12-16 minutes
Number of servings (yield): 8

* * *
What’s your favorite grilled chicken recipe?
Pin It
The post Easy Honey Dijon Chicken appeared first on Living Well Spending Less™.
June 23, 2014
DIY Newspaper Kite

This is Week 4 of our 12-week Summer Fun with Kids series here at LWSL! Today we are welcoming Kelly from View Along the Way, who is sharing a fun and easy way to make creative, colorful newspaper kites. For more summer fun, check out the overview page.
* * *
Hi there! I’m Kelly and I blog at View Along the Way, sharing tips and tutorials to beautify your home on a teensy little budget. My husband Andy and I have two deliciously crazy and sweet kiddos, so like you, we’re always trying to find fun activities that keep them busy without breaking the bank.
I love this little activity, because it’s the perfect combo of craft and physical exercise. It’s educational and artsy, but then you get to run and play with it! You can buy kites at the dollar store, so while this is pretty much a free craft, it’s not something you’re doing to save money necessarily: it teaches the kiddos a little bit about physics and lets them make something that’s fun and actually works.
My kiddos did this craft with my mom, who used to make these kites when she was growing up as one of ten kids with no extra money for toys and crafts! (So that’s who you’ll see throughout these photos helping the kids make theirs.)

Here is what you need:
One sheet of newspaper (Make sure you get a large, full-size sheet. )
Kite string
Thin strips of an old sheet or scrap fabric
Two thin sticks of bamboo.
Clear packing tape or scotch tape
Elmer’s glue or craft glue

Step 1: Choose and prep your bamboo sticks. You’ll want one stick that’s pretty stiff that runs the width of your newspaper sheet, and one stick that’s a little more bendy that’s as the same length as your newspaper sheet. Part of the fun of this activity was taking my littles to the little bamboo forest to harvest our own!
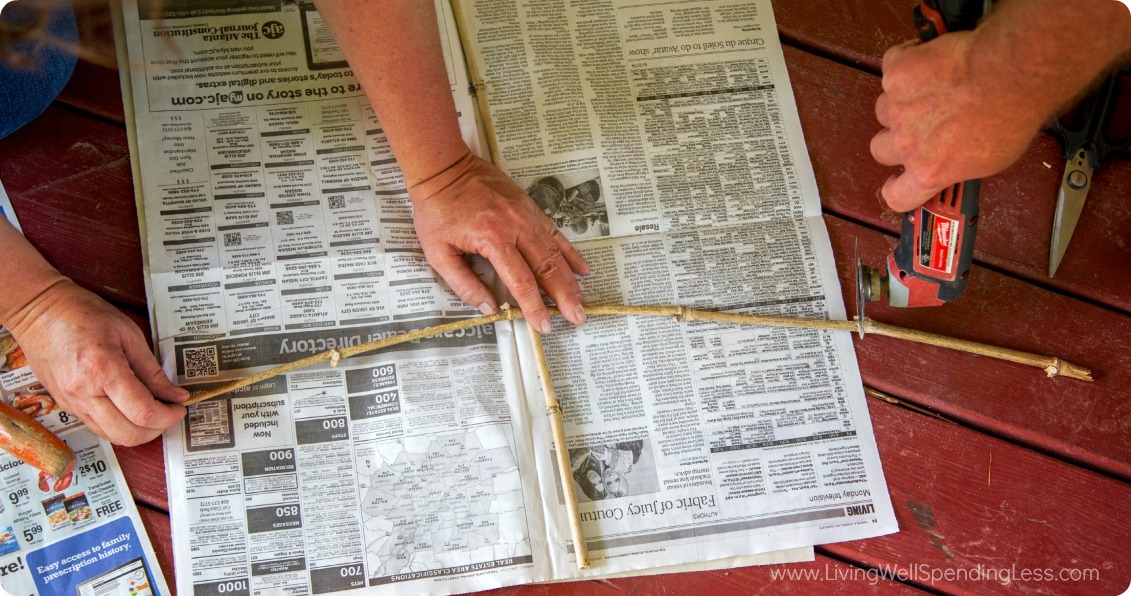
Step 2: Cut your stiffest piece to the length of the newspaper. And your bendiest (real word!) stick to the width of the newspaper. My kiddos did the craft with their grandparents this time, and my dad owns ALL THE POWER TOOLS, so he pulled out an actual power tool to do the cutting here, but plain garden shears will probably work just as well if you’re not the kind of person who looks for every opportunity to wield a powerful saw.
Then use some of your kite string to wrap the two sticks together at the center, making a “t” shape.
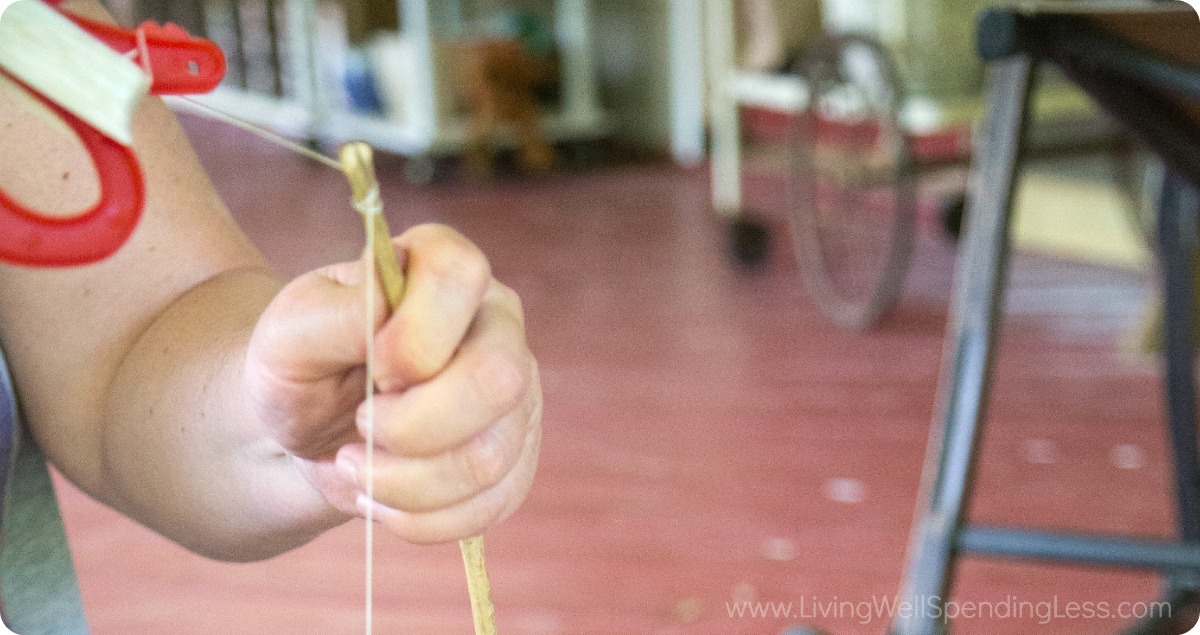
Step 3: Use a knife to cut a small slit in both ends of both sticks of bamboo. (The kite string will slide right in that little slot.) (This, I promise, is the hardest part, and it sounds so much more complicated than it is!) Insert the end of the kite string in that little slot on one side of the shorter, bendy stick, wrap it around the end of the stick a bunch of times, and knot it so it’s attached to the end of the stick pretty sturdily. Then pull the string tight across the stick, making the stick bend a little bit, and slide the string through the slot on the other end of the stick. Tie it off and cut the string.
Woohoo! Almost done!
Now you just need one more piece of string that goes around the outside of the kite, from one end of the bamboo stick to the other, so it looks like this:
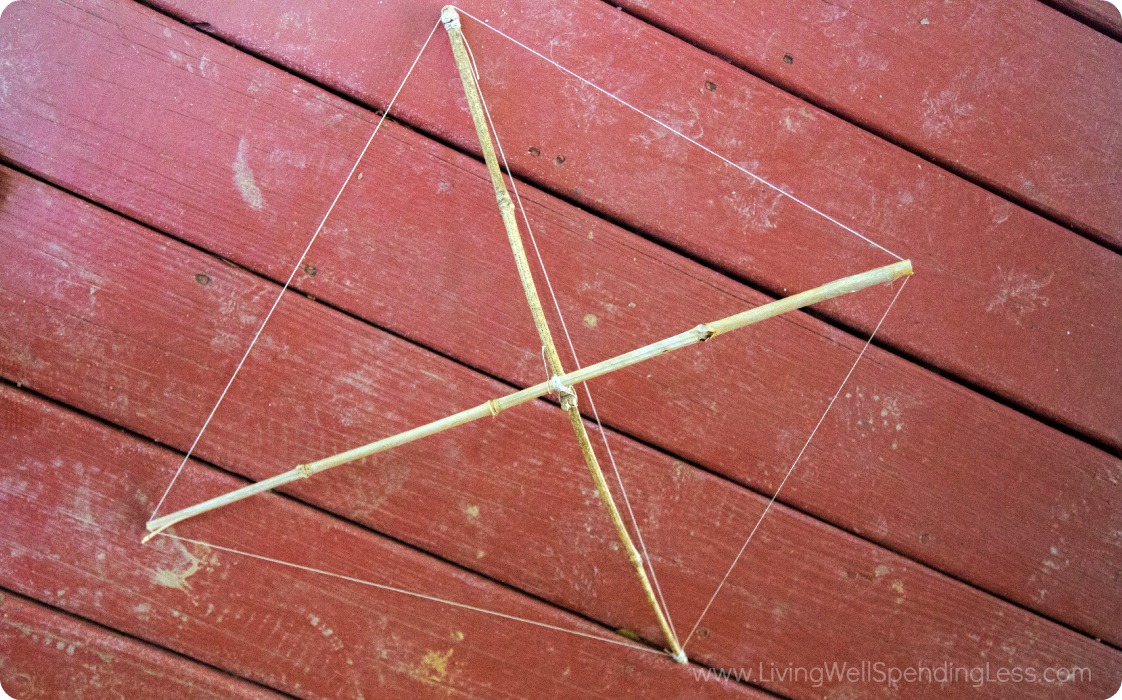
So starting on one end of one piece of bamboo, insert the string in the slot, wrap it around so it’s sturdy, then wrap the string around to the next end, and all the way around the other ends of bamboo, then tie it off again.
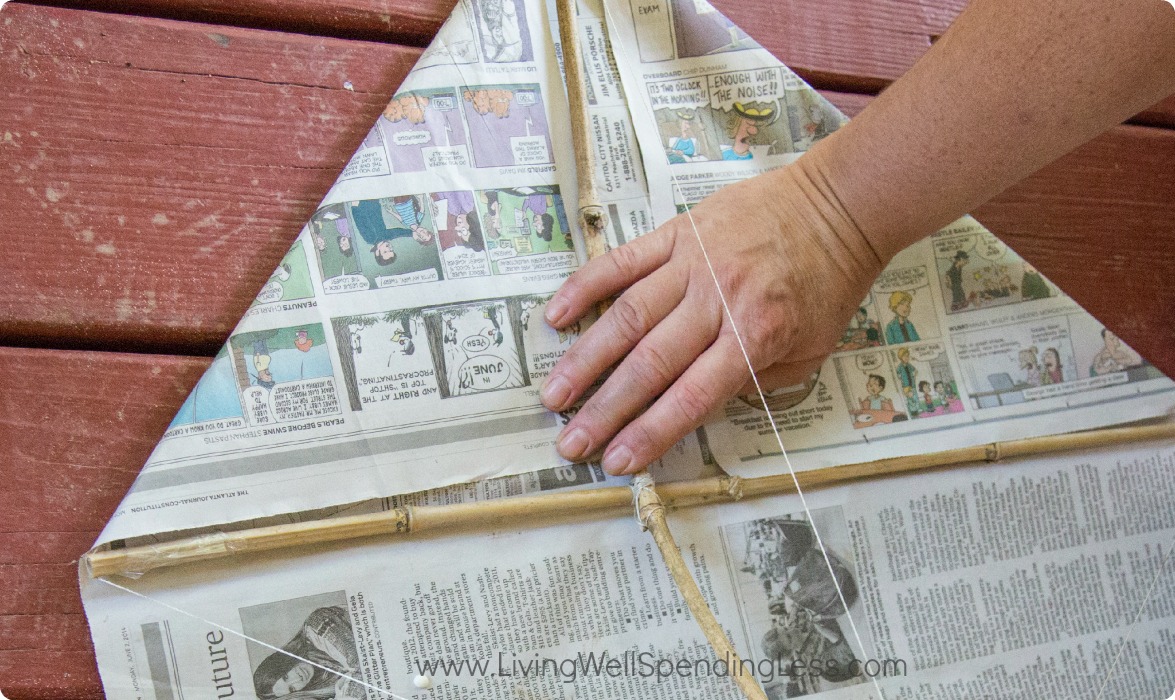
Step 4: Put your little kite skeleton on top of the newspaper, wrap the corners of the newspaper over the string and glue it to itself. It looks like a kite now, hooray! Look at you! You are rocking this parenting gig! *Totally optional, but you can whip out the finger paints right now and let your kids decorate the newspaper before you attach it now. Just one more way to keep ‘em entertained!
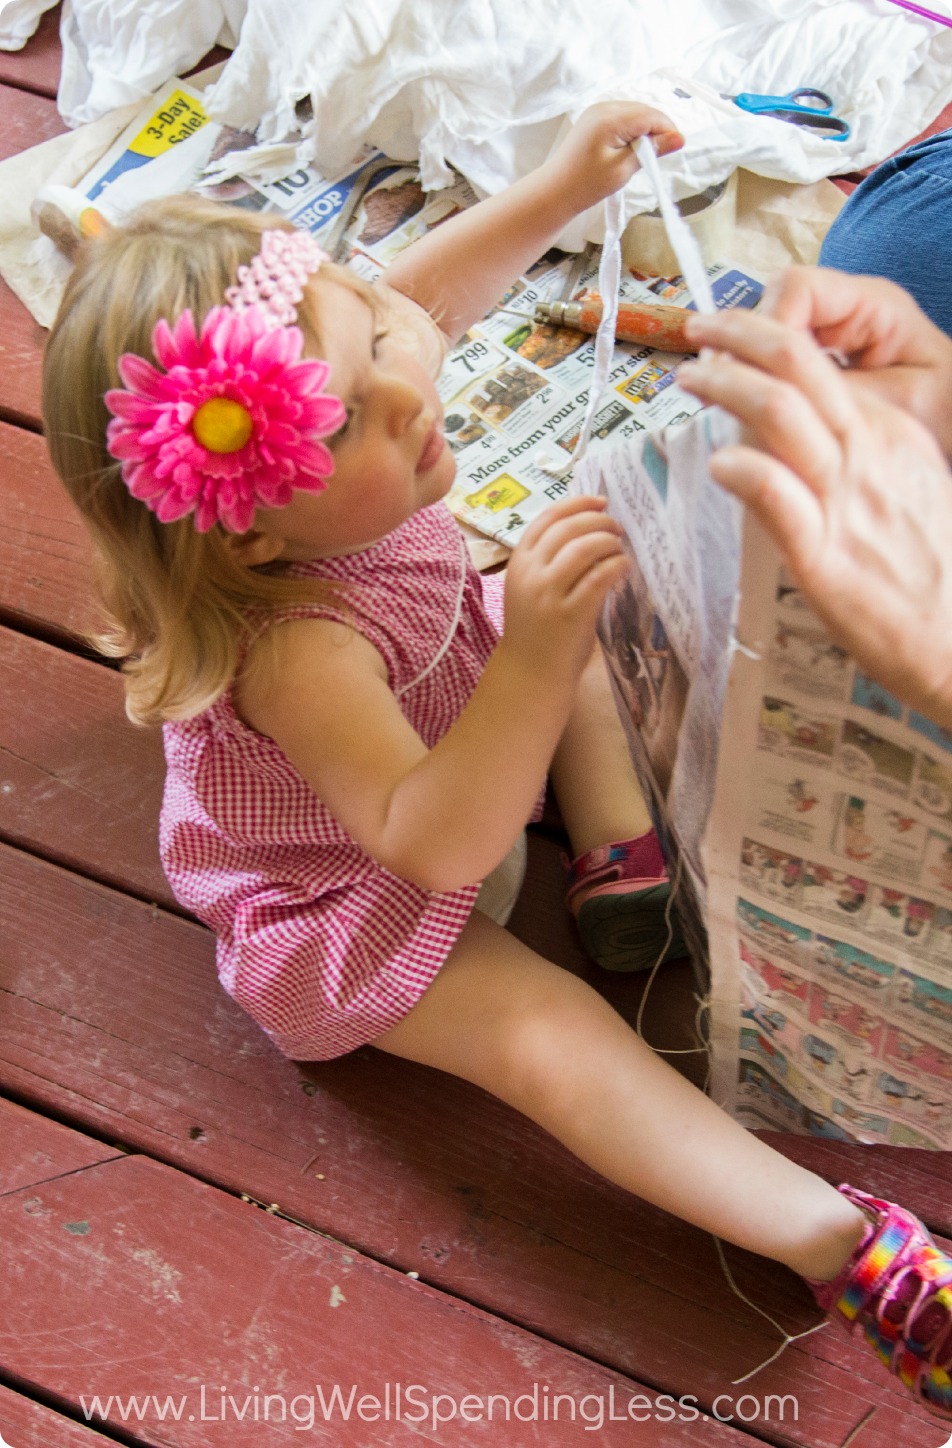
Step 5: Tear an old sheet into long thin strips and tie the strip to the bamboo at the bottom of the kite for a tail. Warning: toddlers come out of the woodwork when they see you tearing fabric! My littlest loved “helping” with this part!
Now add the string so this baby can fly! Turn the kite over so you can’t see the bamboo anymore. You’ll need to make two holes in the newspaper to thread the kite string onto the bamboo stick behind it, but just to be safe, put two small pieces of clear tape on the newspaper to reinforce it so it doesn’t tear. You’re going to make one hole in the center of the kite about one-third of the way down, and another about two-thirds of the way down. Use a pair of scissors to poke a hole in the newspaper where you added the tape.

Now poke the string through that hole on the front, loop it around the bamboo stick behind it and knot it, then cut the end of the string so it’s about 2 feet long, poke the other end of the string through the other hole you made, loop it around the bamboo stick there and tie it in a knot. Now tie the end of your whole spool of kite string to the center of that 2-foot loop. It should look like this. See the string coming out of the front like that?

And you’re done!

Step 6: Pick a windy day, pack a picnic and make an afternoon of it! We headed to our local high school football field and had lots of fun running around flying the kite, playing, and getting ALL THAT ENERGY OUT before nap-time. (Can I get an amen, mamas?!)

A few tips for best success:
Use the largest sheet of newspaper you can find so your whole kite is as large as possible. Ours was a little on the small side, so it flew but it didn’t SOAR like it could’ve otherwise.
Our kite was a little bit square, and you’d probably do better to make yours more of a diamond.
On kite-flying day, make sure you bring extra fabric for the tail. If your kite isn’t staying upright when you try to fly it, you can just add on another tail or a longer tail. The weight of the tail keeps the kite right-side-up.
Bring a few extra materials in case your toddler tears the newspaper when you’re just getting started. (Ask me how I know!).
This is definitely a one-time use kite, but in my experience, so are the ones you buy at the dollar store, and half the fun is making something anyway! When we flew ours, it was lightly sprinkling, so the kite even got a little damp and still flew like a champ.
But best of all: the kids thought it was super fun! You can use this project to teach older kids about physics and weather — or just use it to keep ‘em entertained and running around for an afternoon!

And now it is time for another fun giveaway! Today we are again giving away something EVERYONE can use–a $100 Amazon Gift Card–that you can use to make your own summer fun! To enter, just follow the instructions in the box below.
Kelly writes about how she and her husband are fixing up their gross ol’ foreclosure
on a teeny budget at View Along the Way. She shares inspiration and creative budget-friendly DIY ideas with a healthy dose of self-deprecating humor. Kelly lives in Atlanta, Ga., with her husband Andy and her two kids, Weston and Mila.

* * *
Have you ever made a kite? What’s your favorite summertime outdoor activity?
Pin It
The post DIY Newspaper Kite appeared first on Living Well Spending Less™.
June 22, 2014
Weekend Wandering
Happy Sunday! I hope you are all having a fabulous weekend! There were 465 budget-friendly blog posts linked up this past week at Thrifty Thursday and I think this was the hardest time I’ve ever had choosing favorites because everything looked absolutely incredible. Y’all are amazing! If you haven’t had a chance yet, seriously go check out all the other posts from the Thursday post. There are some fabulous looking recipes, creative DIY projects, and really smart money saving tips.
But while I was sorry I couldn’t pick them all, here are a few of the posts I really loved this week:
* * *
First of all, I love a recipe that doesn’t require me to turn on the oven, especially in the summer! This Crock Pot Zucchini & Squash Casserole from Moms With Crockpots not only sounds delicious but has only 3 steps!

This As Good as Take Out Fried Rice from Carrie This Home is both healthy and easy-to-make, not to mention super frugal!

Oh my, where to begin…These Peanut Butter Marshmallow Fluff Chocolate Dipped Frozen S’mores from The First Year sound absolutely incredible!

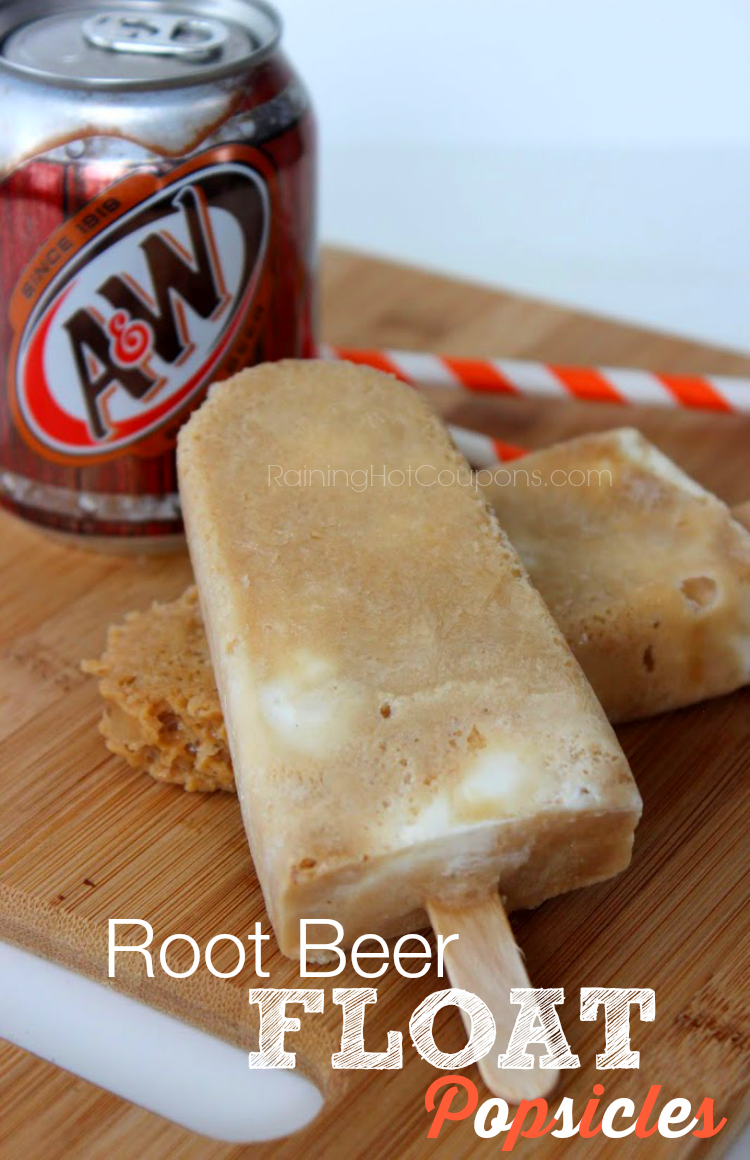
This next frozen treat only calls for 2 ingredients! Root Beer Float Popsicles from Raining Hot Coupons. Yum!
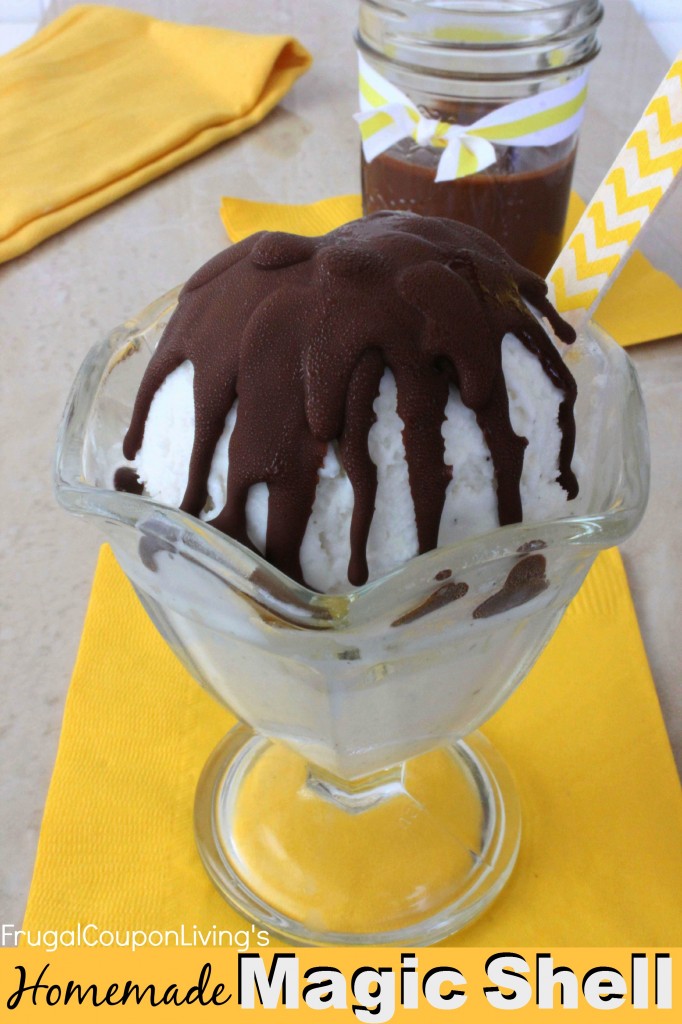
Here’s another 2 ingredient recipe! Homemade Magic Shell from Frugal Coupon Living. You can use it to top my 5 Minute Ice Cream Cake!
I know these next cookies are amazing because I have actually tried them! Flourless Monster Cookies from Life in Grace are chock full of peanut butter, oats and chocolate, and are gluten free. Yep, they are practically healthy!

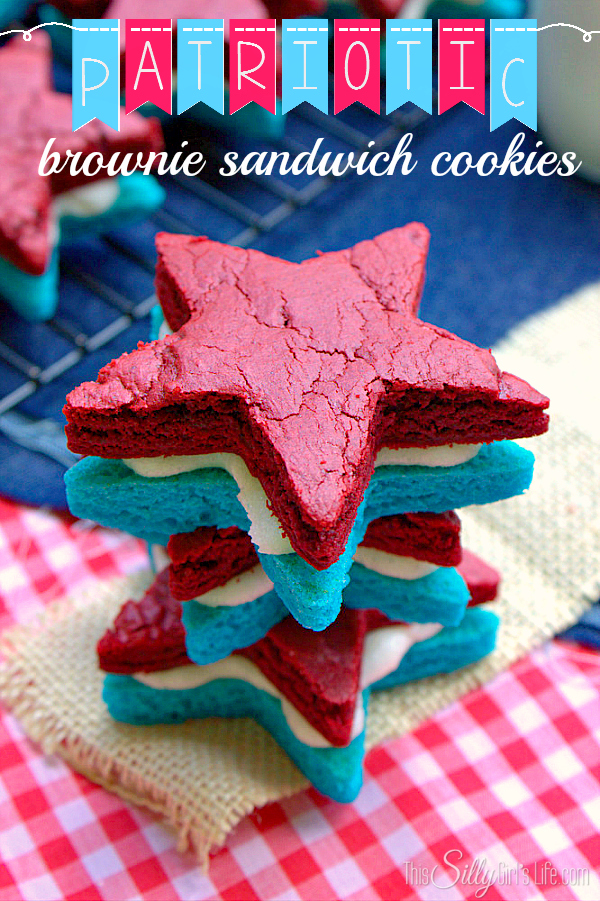
Aren’t these Patriotic Brownie Sandwiches from This Silly Girl’s Life absolutely beautiful? What a perfect treat to share at your Fourth of July gathering.
Speaking of the 4th, these table topper Fireworks from Spindles Designs are a fun center piece for your backyard barbeque, picnic or pool party!

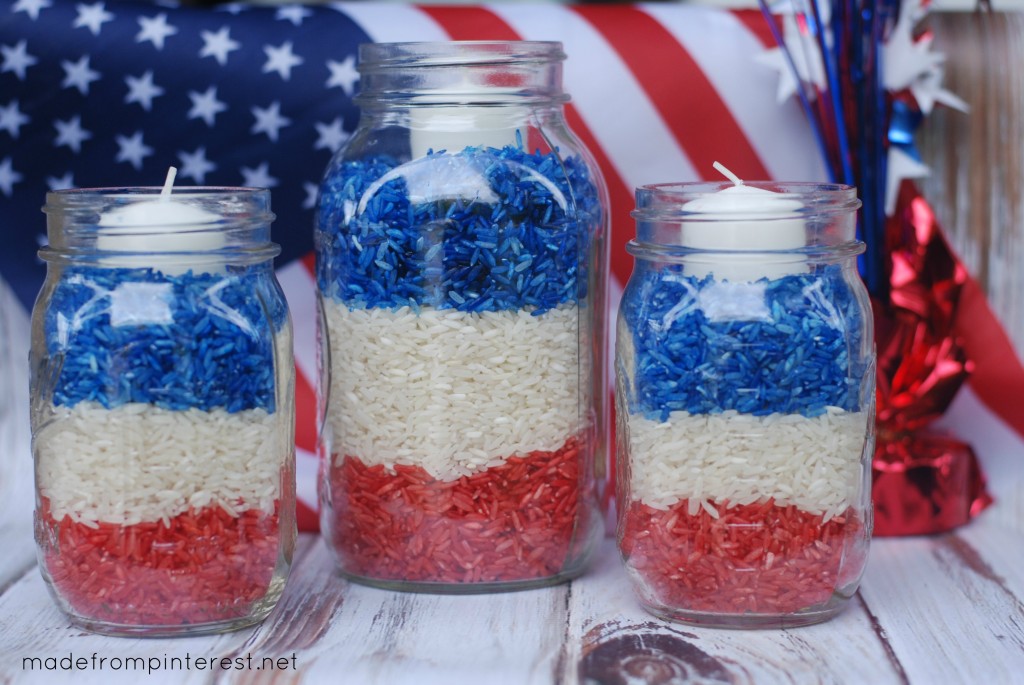
This next festive center piece is a perfect DIY project for the kids. 4th of July Mason Jar Candles from Made from Pinterest are crafted with materials you probably have on hand.
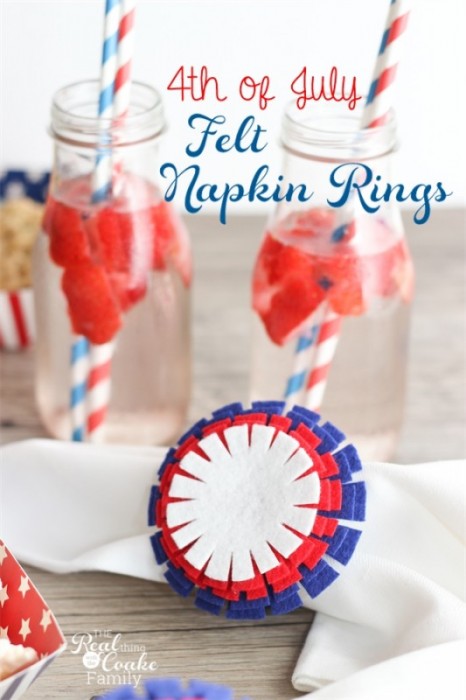
Keeping with the theme, these easy-to make 4th of July Felt Napkin Rings from The Real Thing With the Coake Family are just adorable!
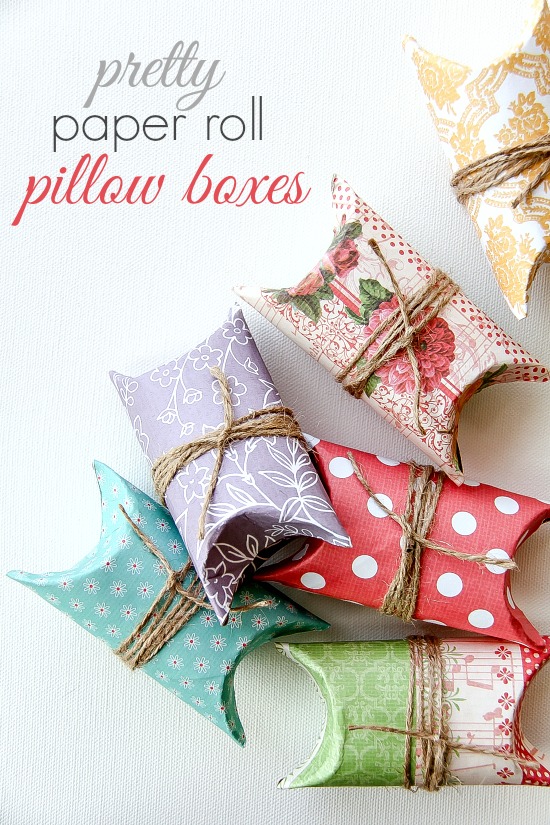
These Pretty Paper Roll Pillow Boxes from The Centsible Life are a clever and cute way to package small gift and a great way to re-purpose something you already have on hand!
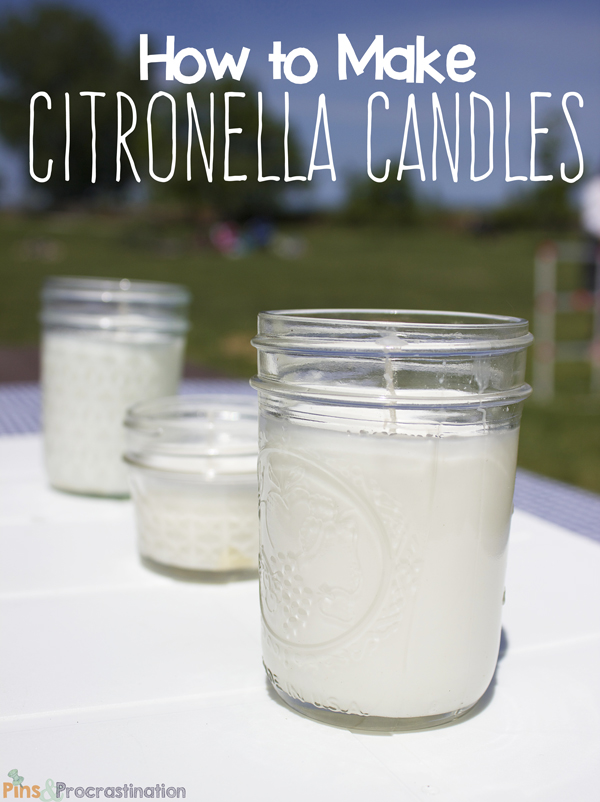
Pins & Procrastination has a step-by-step tutorial on How to Make Citronella Candles. These would be great to keep the bugs at bay while enjoying all your outdoor fun this summer.
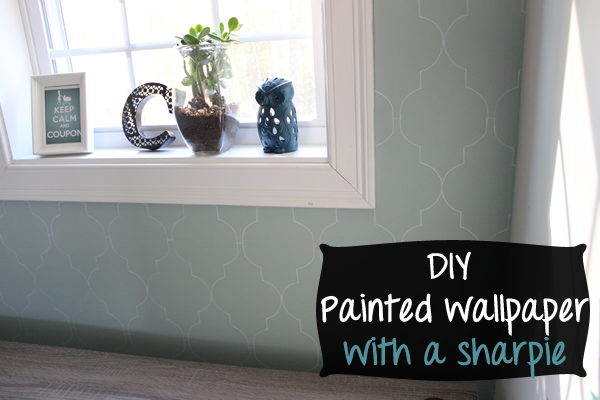
Want a quick update for your walls? This DIY Moroccan Tile Look with a White Sharpie from Money Saving Sisters is genius!
Lastly, food saving tips are also important for the summer months. Savings Mania has 6 Ways to Save at Costco. Tip number one was an eye opener!

* * *
What did you love this week?
Pin It
The post Weekend Wandering appeared first on Living Well Spending Less™.
June 20, 2014
25 Cruise Secrets Everyone Should Know


This weekend my family and I are heading to Fort Lauderdale to board the newly refurbished Carnival Freedom for eight days of fun & sun in the Caribbean. Needless to say, we are pretty pumped! Cruising is by far our favorite way to travel. Not only is it a great value and relatively easy to find fantastic deals, it is so relaxing to just get on the ship and have everything taken care of. No hassles, no decisions, no worries.
I realized it was high time I write a blog post about this topic, not just to list the benefits of cruising (which are many), but to actually share some of the best-kept cruise secrets we’ve learned along the way. Here are the 25 “insider” secrets to successful cruising that I think everyone should know.

Booking & Travel
You can guarantee about 80% of the success of your cruise vacation by taking a good amount of time to research and thoroughly plan for your trip in advance.
1. Choose the Right Ship for You
Choosing the right ship is the most important step in determining how successful your cruise vacation will be, and believe me, not all ships are created equal! Take the time to research the amenities of the exact ship you will be cruising on, not just the cruise line. We have cruised on Carnival, Norwegian, Holland-America, Royal Caribbean, and Princess, but our favorite ship so far has been be Carnival Sunshine. (Hard to beat a 4-slide water park and P.Y.O.B. (pour your own beer) on the Lido Deck!)
To avoid the cost of airfare, look for ports within driving distance, whether it be Florida, New York, New Orleans, California, or Seattle. Cruise Critic has an extensive searchable database of cruises where you can sort by destination, ports, special interests and more during specific travel dates. Or, if you are looking for a top rated cruise line, Conde Nast Traveler has an annual Gold List with the best cruise ships based on their readers’ choice ratings.
2. Check for Special Interests
Whether you are interested in a romantic trip for two or a trip the whole family will love, look into cruises that fulfill your and your guests’ special interests. Many cruise lines offer themed cruises or special events for singles, families, music lovers, etc. Carnival is now even offering big name concert events on some of their ships. This concert series, aptly named Carnival Live brings in some of the biggest names in classic rock and country music to do on-board concerts. For just $15 a ticket you can see big names like Lady Antebellum, Daughtry, Chicago, Kansas, and many more. (For $100 you can get a VIP ticket that gets you a front row seat and a chance to meet the band!)
3. Book at the Last Minute
If you are willing to be flexible with your travel plans you can get some amazing deals on last minute cruises! One of the smartest way to book a last minute cruise is to first find out how close to the departure date a traveler can cancel their reservation without a penalty. This time is typically 2-3 months prior to departure, and it is the exact time you will want to call and check back for better deals. Cruise lines will often try to sell any available space at this time by reducing fare. If your cruise is already booked, this is also a good time to call to check for cabin upgrades. On Norwegian we were once able to upgrade our inside cabin to a full suite (complete with butler service) for just $250 per person by calling a month before the cruise to check for cancellations. That same suite normally would have cost several thousands of dollars more had we booked well in advance!
4. Ask for Special Discounts
It doesn’t hurt to ask, and more than likely it will be worth the time it took to ask the question. Just like hotels, cruise lines have incentives for different travelers… seniors, teachers, military, FL resident, etc. Cruise lines master accommodating all types of passengers and love to incentivize you to cruise with them over their competitors.
5. Compare Prices
When you are shopping for a cruise, there are numerous sites such as Priceline that you can use to search for best rates. Find a great deal? Call the cruise line directly to get an even better deal! Sellers will compete to get your business and can often discount the price you see online or give other perks such as on-board credit, free wine at dinner, or priority boarding. And remember, even after you book, keep checking back for additional deals or upgrades!
6. Check in After 2pm
Most cruisers are eager to get on the ship as early as possible, which means that the cruise terminal can be really busy–and more than a little stressful–during the first few hours of boarding (generally from 11am-2pm). And while you may be able to get on the ship that early, chances are you won’t be able to get into your cabin until later in the afternoon, which means your first few hours on board will be spent hauling your stuff around. Not exactly the most relaxing start to a vacation! Instead, avoid the rush and the crowds by waiting to check in until after 2pm. You’ll be able to walk right on without waiting and then go straight to your cabin.
7. Pick the Right Time to Go
Want to get a great deal on a cruise? Book your cruise for just after Labor Day when kids are back in school–the 2nd week in September offers some of the very best deals of the year. Coming in at a close second is the weeks between Thanksgiving and Christmas, a time when most people are too busy to travel.

Cabins
Once you decide on the ship that’s right for you, look into room options that best accommodate you and your guest(s). Then, plan what to bring with you carefully and make yourself at home once you’re there.
8. Spring for a balcony (if you can afford it)
Room options are typically either Inside (no windows), Outside (window/porthole view to the outside), Balcony (a room with a balcony on the outside of the ship), and Suite (a larger cabin often with separate living and sleeping areas and more amenities). If you plan on taking advantage of in-room dining, have kids who will be taking naps or typically get seasick, you will really appreciate the extra space and killer view you get from a balcony room or suite.
9. Make the most of an interior cabin
If cost is your primary concern, plan on spending most of your awake time enjoying the ship and excursions, making the time spent in your room mostly for sleeping and getting ready. To avoid seasickness, keep the TV turned on to the ship camera which will create the illusion of having a window when you have an inside room.
10. Don’t Take Too Much Stuff!
Make a list of clothing you need on the trip. Then cut that in half! While ship cabins do make the most of a small space, they are still small, especially when you are traveling as a family! No one cares if you wear the same clothes over again, and all ships offer laundry service if necessary. Find out ahead of time how many “formal” nights the cruise has, if any, and also how strict the dress code is. If you don’t like dressing up, you can always choose room service or Lido dining those evenings to avoid having to pack a tux or formal gown.
11. Bring Magnetic Clips
An often forgotten detail about cruise ships–they are made out of metal! These handy magnetic clips make it easy to hang important items, such as your ship card, dining menus, reminders, and even notes to your family and friends if you split up for the day.
12. Take Time to Unpack
Though you’ll see many destinations while on your cruise, you only have to unpack once! Do unpack. Whether you are on a cruise for 3 days or 3 weeks, making yourself at home by unpacking will make your trip (and getting ready for each event) SO much more enjoyable. Room stewards are experts finding out-of-the-way places to stash suitcases, and even the smallest cabins have a surprisingly large number of drawers and closets.
13. Keep Things Tidy
Even “large” quarters on ships are a much smaller space than you are used to living in. Take a few minutes several each time you come back to the cabin to keep things tidy in order to avoid feeling like the walls are closing in on you.

Food & Drinks
Cruise ship cuisine is pretty spectacular! It is best enjoyed when you know all of your dining options and take advantage of them.
14. Don’t be Afraid to Order What You Want
You are on vacation! Many first time cruisers don’t realize that even in the main dining room, you can order as many entrees, appetizers, or desserts as you please. And if you have special dietary needs, there are always healthier options you can mix in with the meal of your choice. Ask for a special diet menu that may include lower sodium and lower fat options.
15. Plan Meals Ahead
Ask to see the main dining room menu for the week. That way you can plan your meals accordingly and book specialty restaurants for the evenings that the main dining room fare doesn’t excite you. On Carnival you can receive a free bottle of wine for booking a reservation at the steakhouse on the first day of your cruise.
16. Don’t Miss the Specialty Restaurants
Most cruise lines have now begun offering specialty fare at a slight up charge (between $5 and $25 per person, depending on the restaurant.) While your first inclination may be to skip the specialty dining in favor of all the free options, it is worth setting aside a little extra room in your budget for at least one night of specialty dining. Carnival’s JiJi Asian Bistro ($15 per person) is downright phenomenal, and the steak house on our Norwegian ship was absolutely amazing. Of course not all specialty dining has an added cost, and even some of the premium restaurants are free at lunchtime–just check your ship to see what is offered!
17. Take Advantage of Free Room Service
Most cruise lines offer free room service, which makes for a relaxing evening in. Don’t feel obligated to go to the dining room – this is your vacation! Room service breakfast is also a very nice way to start the day, particularly if you have a balcony room.
18. Drink Smart
While cruising is mostly all-inclusive, drinks are not generally included! Therefore it is smart to get creative on how you partake. A tip for wine drinkers? Bring your own wine (and don’t forget a corkscrew!). You may be charged a cork fee but it will be significantly cheaper than buying a full bottle on the ship. For non-alcoholic drinks you can typically purchase a drink card where you can use the ship’s soda fountain unlimited times.
19. Eat Lunch in the Main Dining Room
For a quieter, more relaxing lunch, try eating lunch at least a few times in the main sit-down dining room rather than the busy Lido deck buffet. The dress code is still casual but the food is usually amazing and the service impeccable. Carnival also offers a Sea-Day Brunch that is absolutely to-die for!

Excursions & Entertainment
Depending on the ship you choose, chances are each day you will wake up in a new place with the option to go onshore and explore or stay on the ship. By knowing what activities are available to you on and offshore, you will be sure to be entertained in a way that’s best for you!
20. Explore Your Ship.
There are tons of on-board amenities you can take advantage of when you are out at sea or want to stay on board vs. going on an excursion. In the first couple of days, be sure to walk around and familiarize yourself with the ship and its offerings. Also – ask others what they are looking forward to on the ship or have enjoyed doing thus far.
21. Choose Excursions Wisely
Cruise lines offer shore excursions at every port – from bus tours to activities like snorkeling and zip lining. You may also have the option to tour around yourself, but be mindful of time and language barriers. You are best off reviewing excursions in advance of the cruise and booking them online to avoid any confusion or overbooking the day of. This will also give you time to carefully read the fine print and excursion restrictions.
22. Don’t Miss the Shows
While the shows do vary from ship to ship, they are generally really good and very entertaining. You may even have the opportunity to see a big name performer for a concert or comedy show for almost nothing. Because of the smaller size of a cruise venue vs. an arena, these events are more intimate and enjoyable than typical concerts–there is literally not a bad seat in the house!

23. Take Advantage of the Kids Club!
A ship typically has well-organized camps and activities for children, organized by age, typically 3+. Sometimes, there are even classes for smaller children, 6-months to 3 years old accompanied by a parent. These interactive classes and activities will keep the kids entertained while giving parents a moment as well. We have personally been most impressed with the quality of kids club facilities and variety of activities on the Carnival ships we have been on, but all the cruise lines have been very good. The best part is that aside from late night babysitting, it is completely free!
24. Research Ports Ahead of Time
Take the time to find out a little about the ports you will be visiting to find out what you might like to do or see while you are there. You may also find some highly rated excursions at a better price than you would find if you purchased on the ship. Our all-time favorite excursion in Alaska was this Sea Plane excursion to Taku Lodge, which is significantly cheaper when not booked through the ship, and our favorite excursion EVER in was Dolphin Discovery, which we booked online before our cruise. We went to the one in Cozumel, but they have locations all over Mexico and the Caribbean.
25. Find a Favorite Hangout
Every ship is different but all are purposely designed to offer comfortable spaces for a variety of tastes. Often your favorite memories from a cruise will come from having found your “special” place somewhere on the ship, whether it be a particular bar or restaurant, deck chair, or cozy corner in the atrium. The staff assigned to that particular spot on the ship will generally stay the same through the duration of your cruise, which can come in handy, and it is also a good idea to have a designated meeting spot in case you get separated on board, since cell phones don’t usually work at sea!
Whether you plan to cruise for three days or three weeks, knowing some of these “insider” secrets can help make your next cruise your best trip yet. Bon voyage!

All photos courtesy of Carnival.
* * *
Do you have any other cruising secrets to share? What is your favorite ship?
Pin It
The post 25 Cruise Secrets Everyone Should Know appeared first on Living Well Spending Less™.
June 19, 2014
Thrifty Thursday {Week 65}
Happy Thursday! I hope you are all having a fantastic week and an amazing summer so far. Can you believe that June is already 2/3 of the way done? Seriously, sometimes I just don’t know where the time goes! Here in the Soukup household we are counting the days until our vacation starts on Sunday! We are heading out to sea for eight days on the Carnival Freedom, and when my husband asked what I was most looking forward to, I answered without hesitation: SLEEP! I think I might be getting old! :-)
Are you planning any vacations this summer? Where are you going?
Here are the most clicked links from last week:

1. Life in the Orchard {My Frugal vs My Grandmother’s Frugal}
2. The Latina Homemaker {Get Rid of Excess and Organize Your Home}
3. My Love For Words {If This Doesn’t Work I’m Eating a Tape Worm}
4. Sarah Titus {10 Ways to Earn Extra Income From Home }
5. Coupon Crazy Girl {5 Ways I Saved Money in May}
6. Saving the Family Money {Getting Organized to Save Money}
7. I AM That Lady {25 Meals for Under $150 at ALDI}
8. An Inviting Home {9 Reasons Why Mason Jars are Worth Using as Drinking Glasses}
9. Six Figures Under {May 2014- Debt Repayment Progress Report}
10. Simply Different Imperfect Change {3 Simple Things to Cut Your Budget}
Never linked up before? Here’s how:
Scroll down, find the little blue “Add your Link” Button and click on that.
Follow the instructions on the next page – add a great image of your project and an interesting title. Make sure you link to the direct page of your budget friendly post – not the main page of your blog!
Try to visit at least a few other blogs at the party. Be sure to leave a comment to let them know you stopped by!
Please link back to this post somehow. There are badges available here; a simple text link is just fine too.
Feel free to tweet about Thrifty Thursday so others can join the fun, and don’t forget to check back here Sunday morning to see which posts have been featured this week at Weekend Wandering!
If this is your first time here I also invite you to check out my eBook, How to Blog for Profit (Without Selling Your Soul). It is a fantastic resource if you are interested in building your blog, getting more traffic, or learning how to monetize. Or, if you have read the book and are still looking to take your blog to the next level, I encourage you to check out my options for one-on-one blog consulting.
An InLinkz Link-up
Pin It
The post Thrifty Thursday {Week 65} appeared first on Living Well Spending Less™.
June 18, 2014
Five Minute Ice Cream Cake


Everybody needs a go-to dessert and I’m pretty sure I just found mine! This oh-so-easy ice cream cake comes together so fast it can hardly even be called a recipe, and yet the pretty stripes make it an impressive showstopper. Because the only thing better than a delicious dessert that only takes minutes to throw together is one that LOOKS like it took all day!
For this version I used chocolate chip mint ice-cream and layered it twice, but if you wanted to get even fancier you could do two different flavors of ice-cream. The mint was a great combo with the Oreos but I’m sure you could substitute your own favorite flavors with just as much success. I used my silicone loaf pan which made the cake pop right out, but as long as you line the pan with foil you should be good with a standard loaf pan as well.
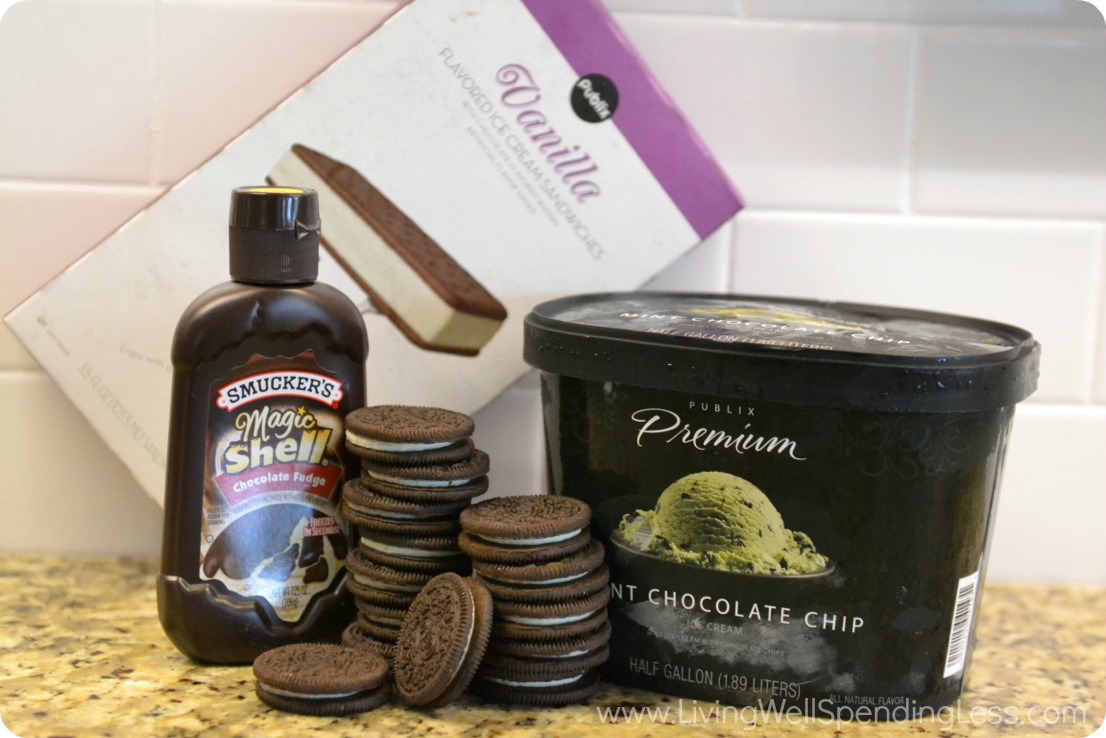
Here is what you need:
10 ice cream sandwiches
1-2 flavors of ice cream, slightly softened
12 Oreo cookies, finely crushed
Magic Shell ice cream topping
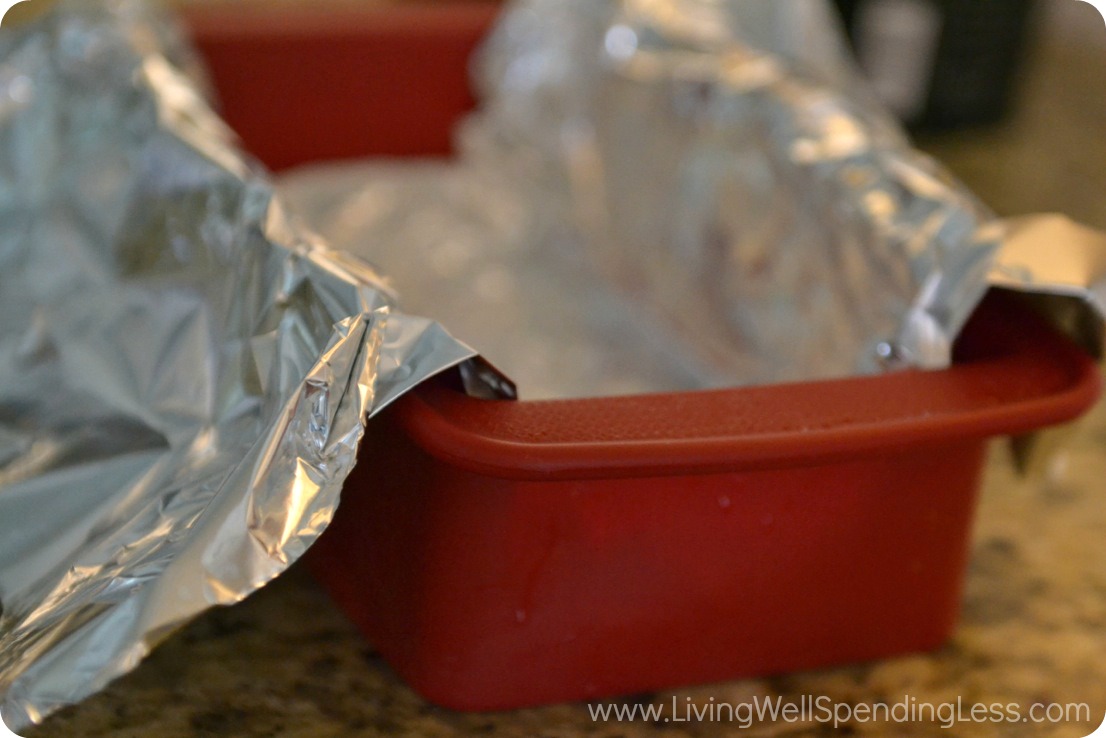
Step 1: Line a 9×5″ loaf pan with heavy foil, letting it hang over on each side.
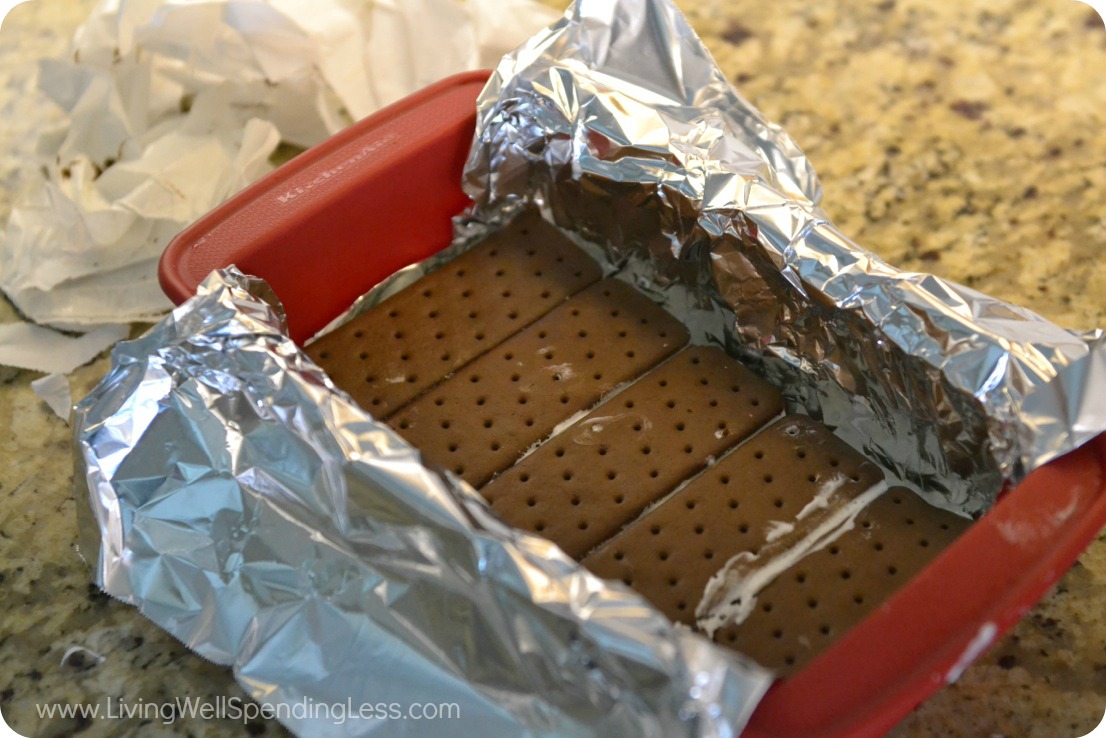
Step 2: Fit 5 sandwiches on bottom of pan. They should be snug.
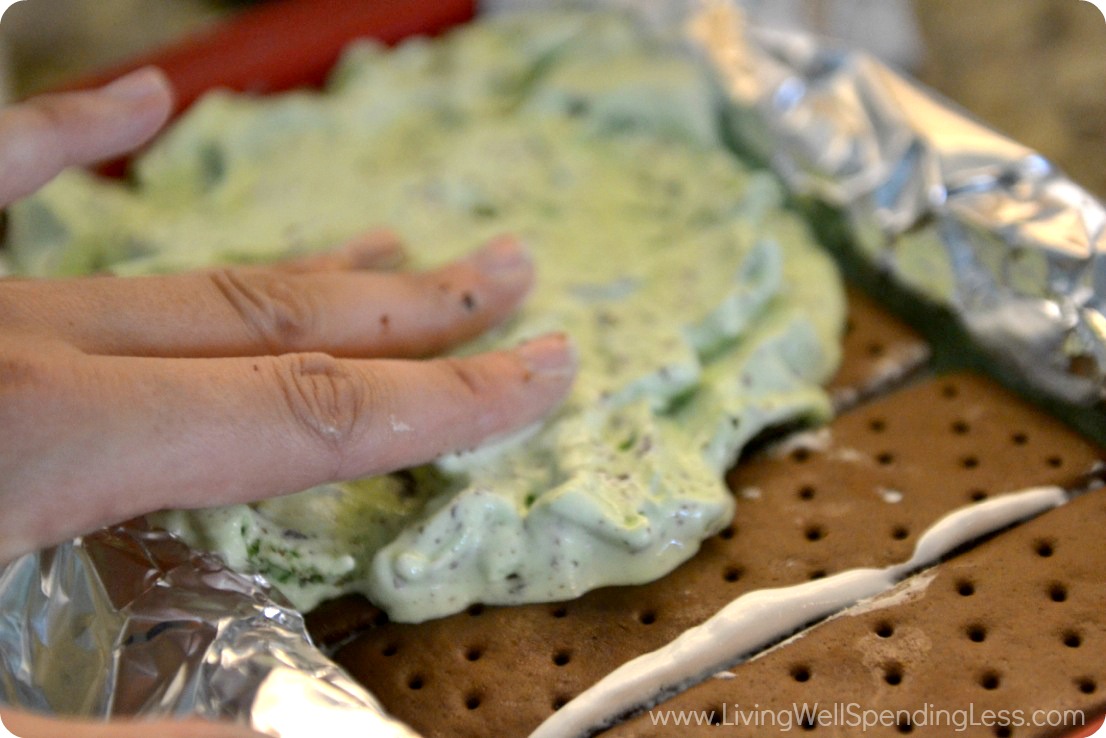
Step 3: Spread layer of ice cream over-top of sandwiches, about 1-1 1/2″ thick.
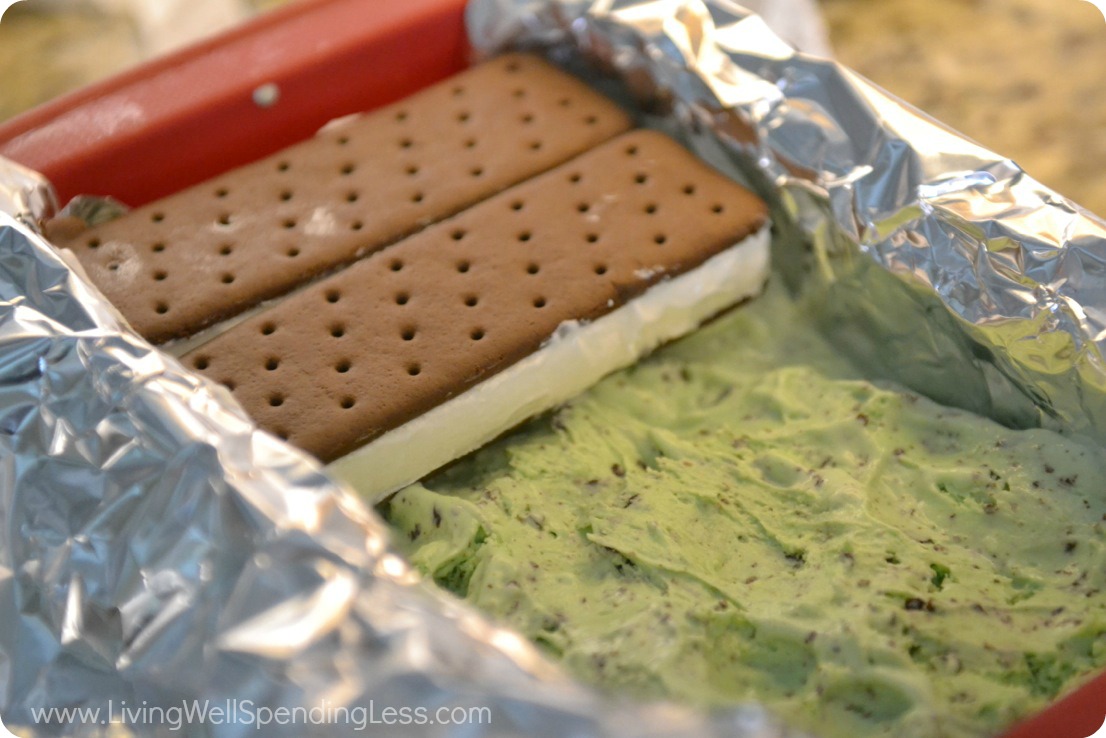
Step 4: Fit remaining 5 sandwiches over ice-cream.
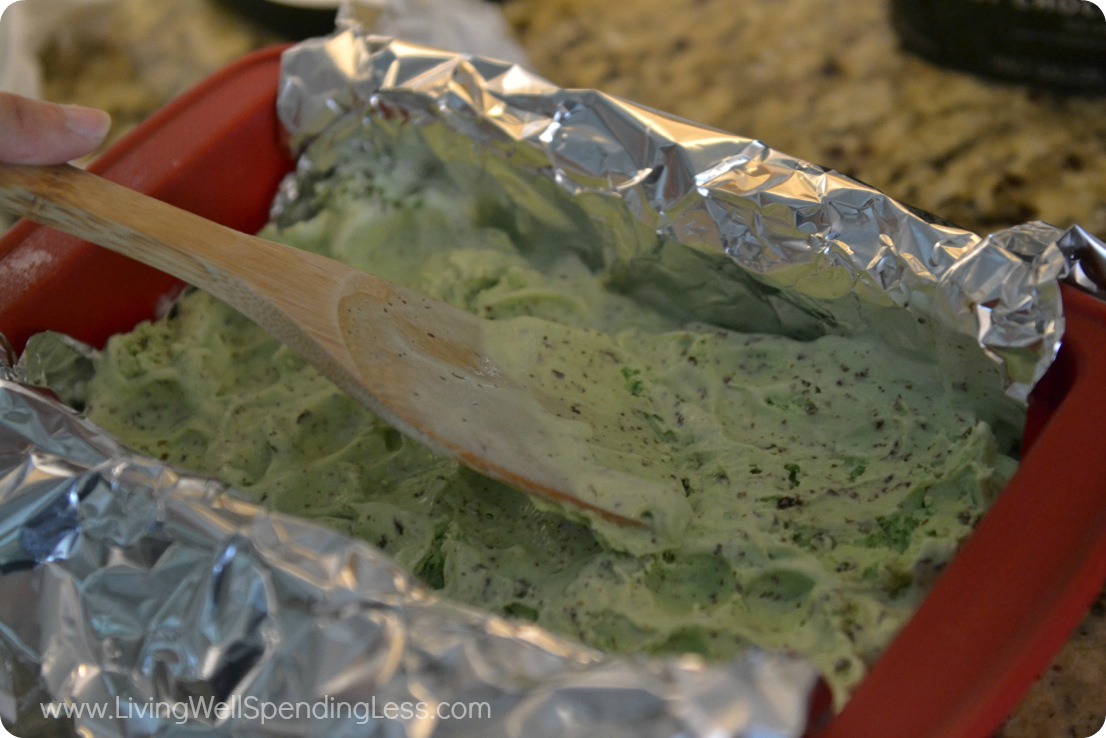
Step 5: Spread 2nd layer of ice cream over sandwiches.

Step 6: Cover ice-cream with crushed Oreo cookies.
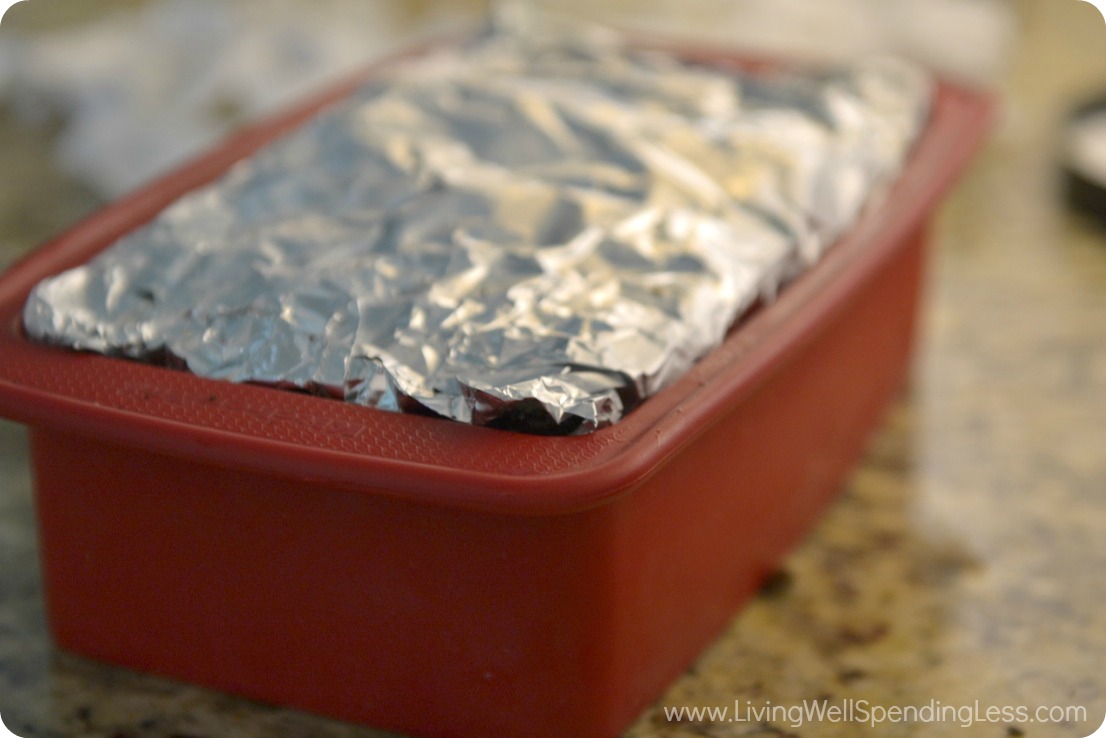
Step 7: Cover with foil or plastic wrap and freeze until set, at least 2 hours or overnight.

Step 8: To serve, invert cake onto plate or platter. Cover top with Magic Shell & cut into slices.

Print This!
Recipe: 5 Minute Ice Cream Cake
Summary: This oh so easy ice cream cake can be made in minutes and with any flavors you wish!
Ingredients
10 ice cream sandwiches
1-2 flavors of ice cream, slightly softened
12 Oreo cookies, finely crushed
Magic Shell ice cream topping
Instructions
Line a 9×5″ loaf pan with heavy foil, letting it hang over on each side.
Fit 5 sandwiches on bottom of pan. They should be snug.
Spread layer of ice cream over-top of sandwiches, about 1-1 1/2″ thick.
Fit remaining 5 sandwiches over ice-cream.
Spread 2nd layer of ice cream over sandwiches.
Cover ice-cream with crushed Oreo cookies.
Cover with saran wrap and freeze until set, at least 2 hours or overnight.
To serve, invert cake onto plate or platter. Cover top with Magic Shell & cut into slices.
Preparation time: 5 minute(s)
Chill time: 2 hours
Number of servings (yield): 12
* * *
What’s your favorite summer treat?
Pin It
The post Five Minute Ice Cream Cake appeared first on Living Well Spending Less™.


