
Ruth Soukup's Blog, page 105
August 7, 2014
Thrifty Thursday {Week 72}

Happy Thursday! I hope you are all having a wonderful week! This morning I am getting all packed up to head back up to North Carolina for the Becoming Conference, where I will be sharing four strategies for living Clutter Free Forever. Hopefully I will see some of you there!
In case you missed it, this past Friday I launched my new community site called LWSL Everyday. This new site features an amazing community forum, where members can connect and get advice and accountability for living well on a budget. In addition to the forum, there is additional members-only content that includes fun behind-the-scenes interviews with well-known authors & bloggers, exclusive giveaways, limited edition downloads, and a once-a-month live Q&A session with me. I’d love for you all to come check out it. You can even get a two month free trial here.
Here are the most clicked links from last week:

1. Six Figures Under { Living on Last Month’s Income }
2. Sarah Titus { Something We All Have in Our Homes Started This Fire }
3. The Budget Mama { My $500 Wedding }
4. Latte Everyday { How We Did Disney on a Dime: Part 1 }
5. A Cultivated Nest { Maximizing Space Under My Kitchen Sink }
6. Early Bird Mom { 3 Secret Amazon Prime Features You’ve Got to Try! }
7. Coupon Crazy Girl { 5 Ways to Save on Dining Out }
8.Letters from Sunnybrook { Re-gifting: Frugal or Cheap? }
9. Mommy Loves Money { Save Like your Future Depends on It-Because it Does }
10. Of The Hearth { The Lowdown on Microfiber Cloths }
Never linked up before? Here’s how:
Scroll down, find the little blue “Add your Link” Button and click on that.
Follow the instructions on the next page – add a great image of your project and an interesting title. Make sure you link to the direct page of your budget friendly post – not the main page of your blog!
Try to visit at least a few other blogs at the party. Be sure to leave a comment to let them know you stopped by!
Please link back to this post somehow. There are badges available here; a simple text link is just fine too.
 Feel free to tweet about Thrifty Thursday so others can join the fun, and don’t forget to check back here Sunday morning to see which posts have been featured this week at Weekend Wandering!
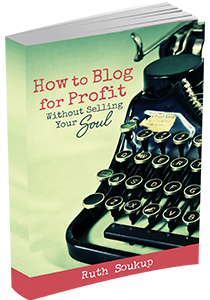
If this is your first time here I also invite you to check out my eBook, How to Blog for Profit (Without Selling Your Soul). It is a fantastic resource if you are interested in building your blog, getting more traffic, or learning how to monetize. Or, if you have read the book and are still looking to take your blog to the next level, I encourage you to check out Elite Blog Academy.
An InLinkz Link-up
Pin It
The post Thrifty Thursday {Week 72} appeared first on Living Well Spending Less®.


August 6, 2014
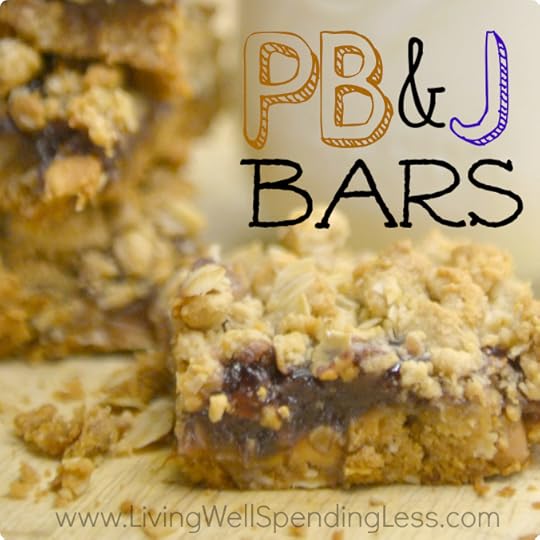
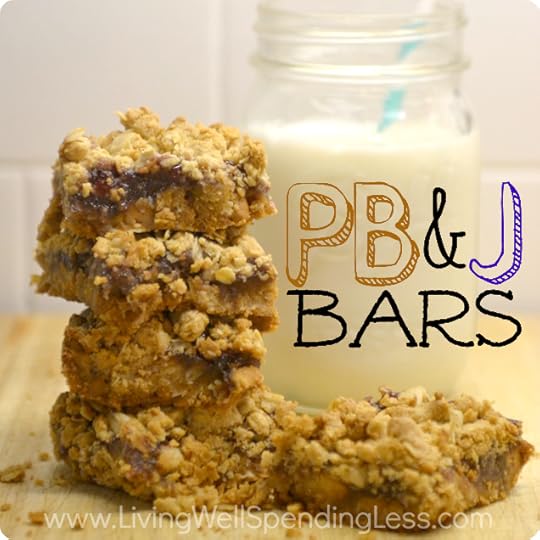
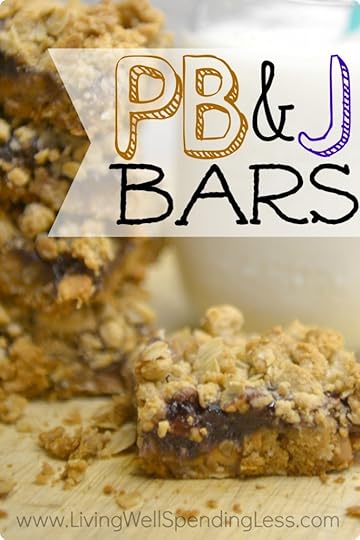
Easy Peanut Butter & Jelly Bars
 Growing up, I used to always look at my friends’ lunches with envy over their freshly baked treats. The brownies, the cookies, the homemade bars…..My own mom was never much of a cook, which meant that my own lunches were usually just a random assortment of pre-packaged convenience foods. And I swore to myself that when I had kids, their lunches would be so much better!
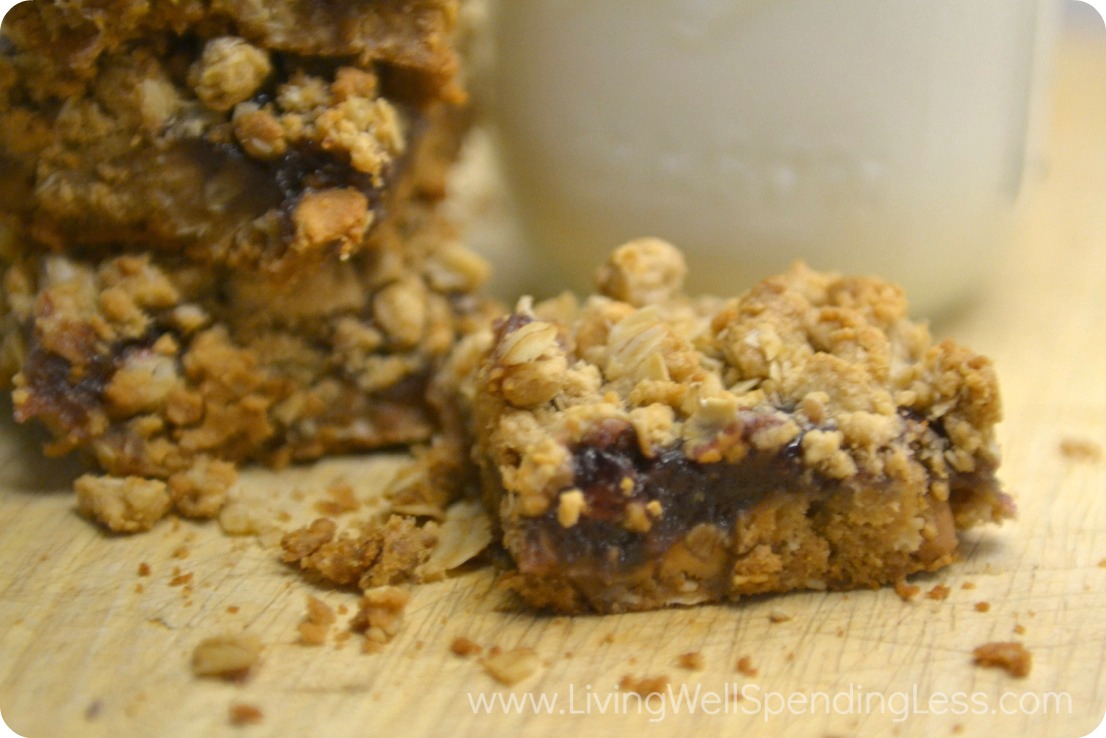
Well, I can’t say that my kids lunches never include prepackaged snacks–they definitely do–but I do enjoy including a sweet homemade treat whenever I can. These yummy peanut butter & jelly bars have quickly become a family favorite. They are incredibly quick and easy, take just a few easy ingredients, and my girls absolutely love them!
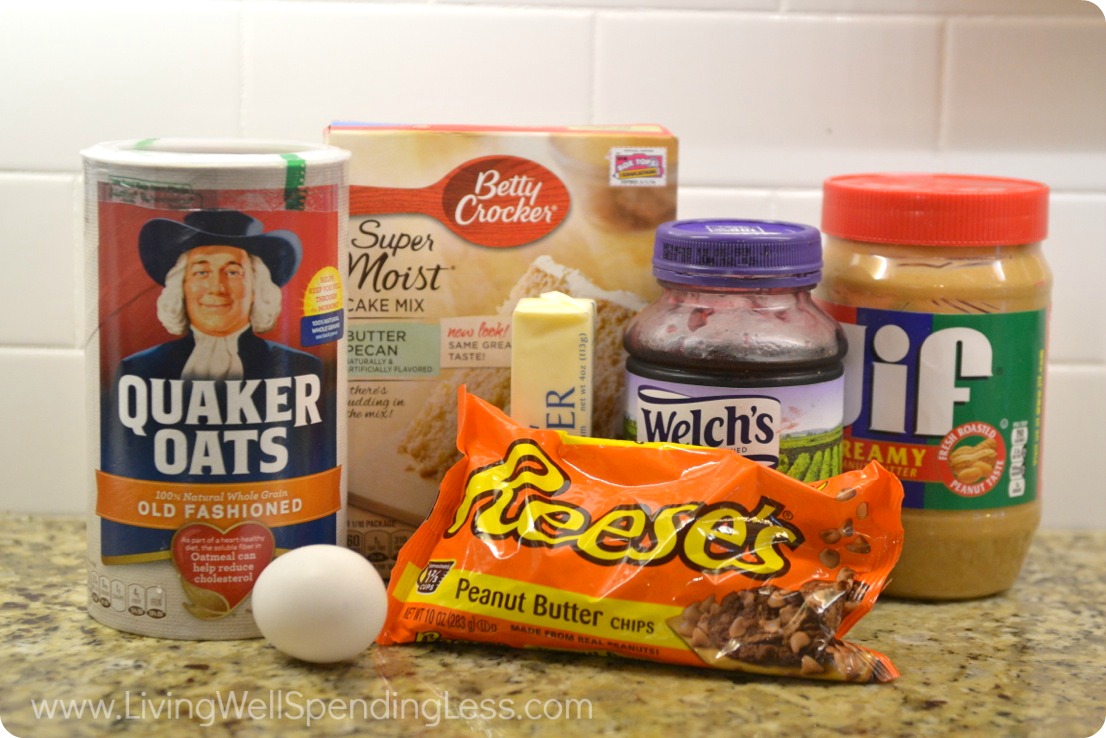
Here is what you need:
1 box butter pecan flavored cake mix (can also use yellow cake)
1/2 cup softened butter
1/2 cup creamy peanut butter
1 egg
1 1/4 cups old fashioned oats
1 cup peanut butter chips (about 1/2 a bag–can also use butterscotch chips)
1 cup grape jelly (or your favorite flavor)

Step 1: Preheat oven to 350 degrees; beat together cake mix, peanut butter, butter, and egg in mixing bowl fitted with paddle attachment on medium speed for about 30 seconds, or until well mixed.
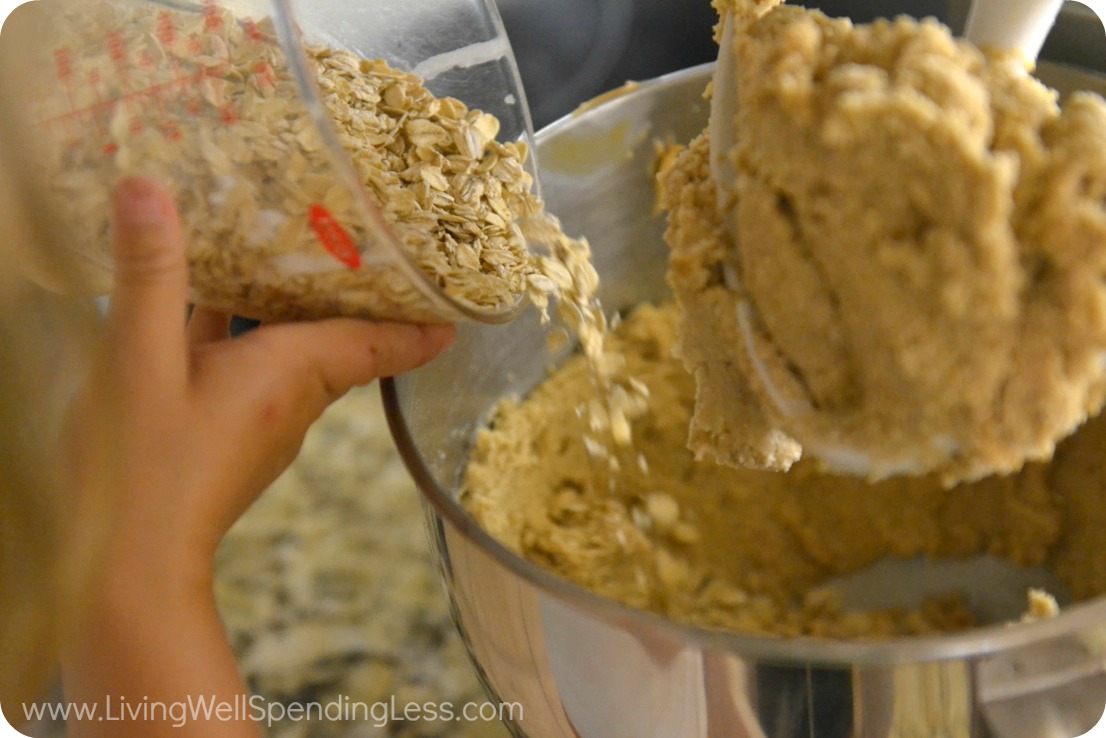
Step 2: Slowly add oatmeal to bowl, scraping with spatula if necessary, until oats are blended in.
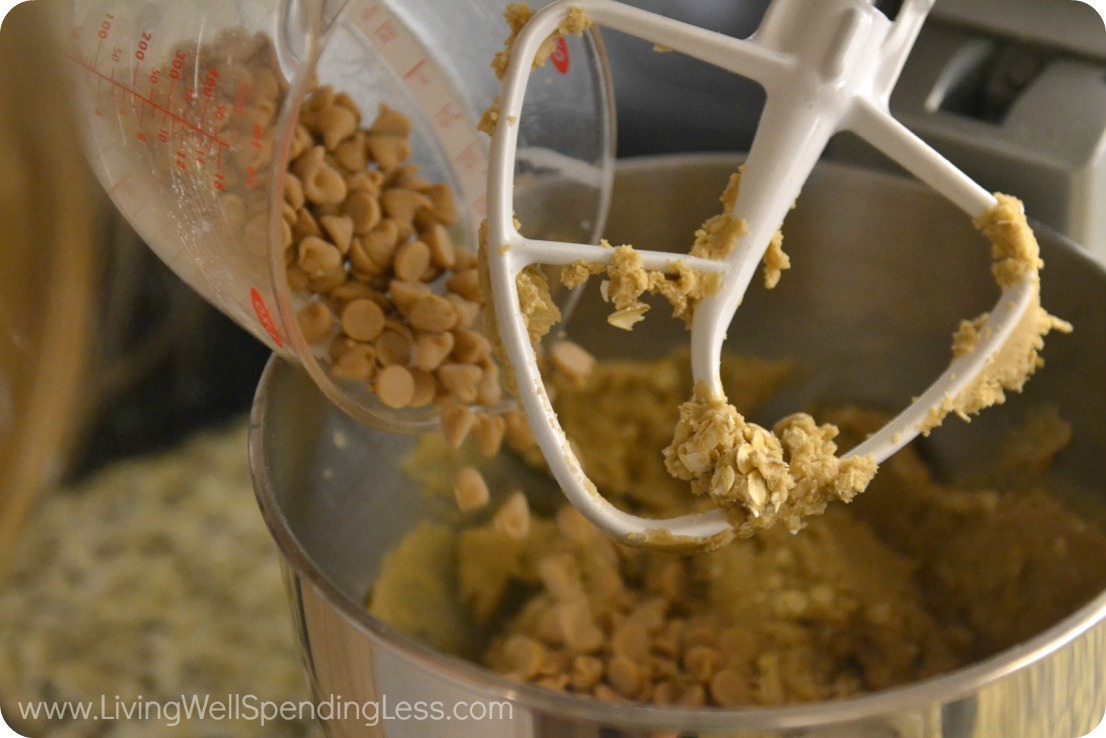
Step 3: Add peanut butter chips to bowl and mix well.
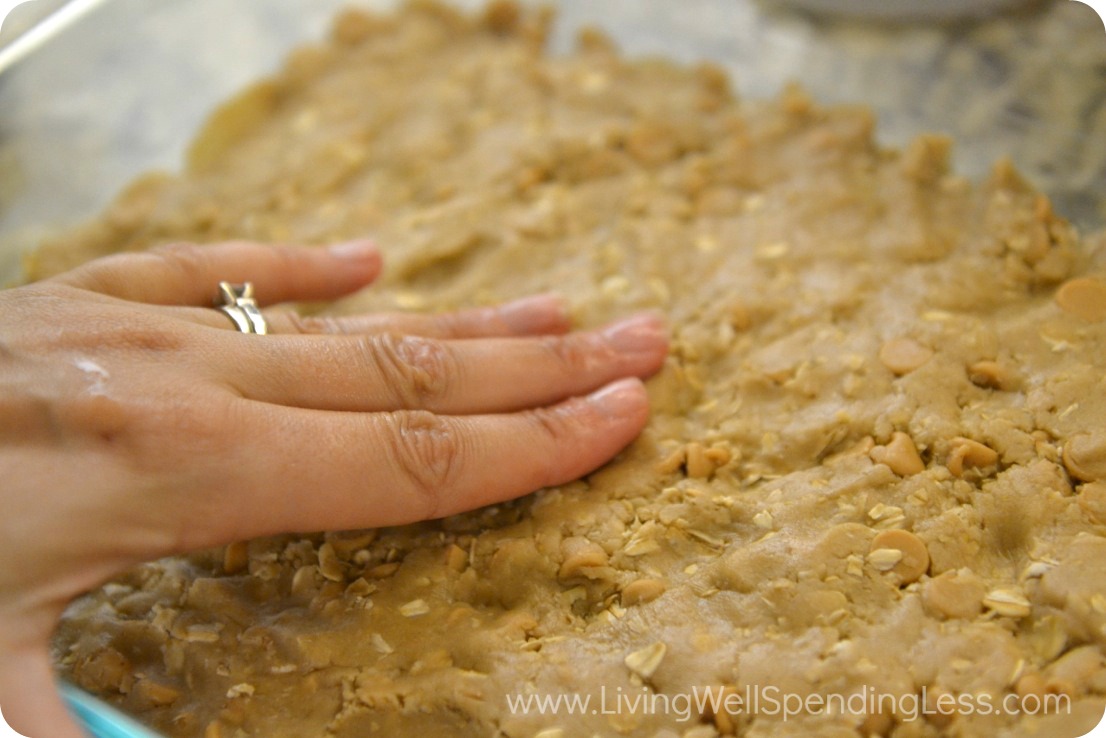
Step 4: Divide mixture into thirds. Press 2/3 of oat mixture into greased 9×13″ baking dish.
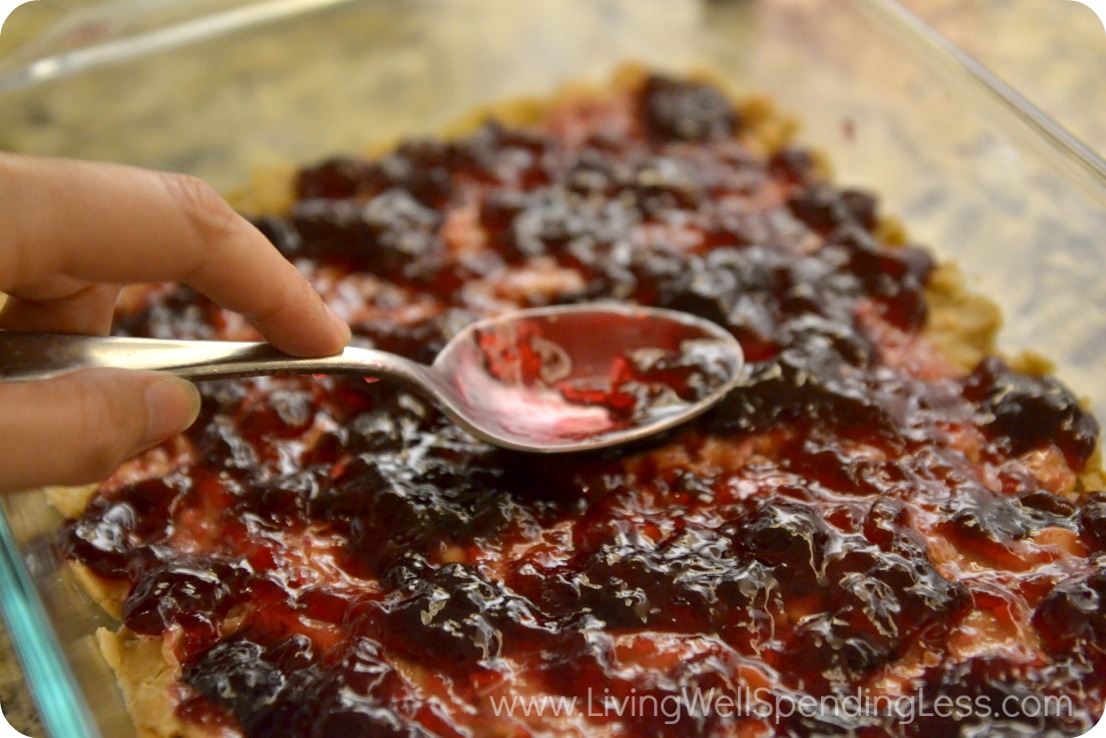
Step 5: Spread jelly over-top of oat mixture.
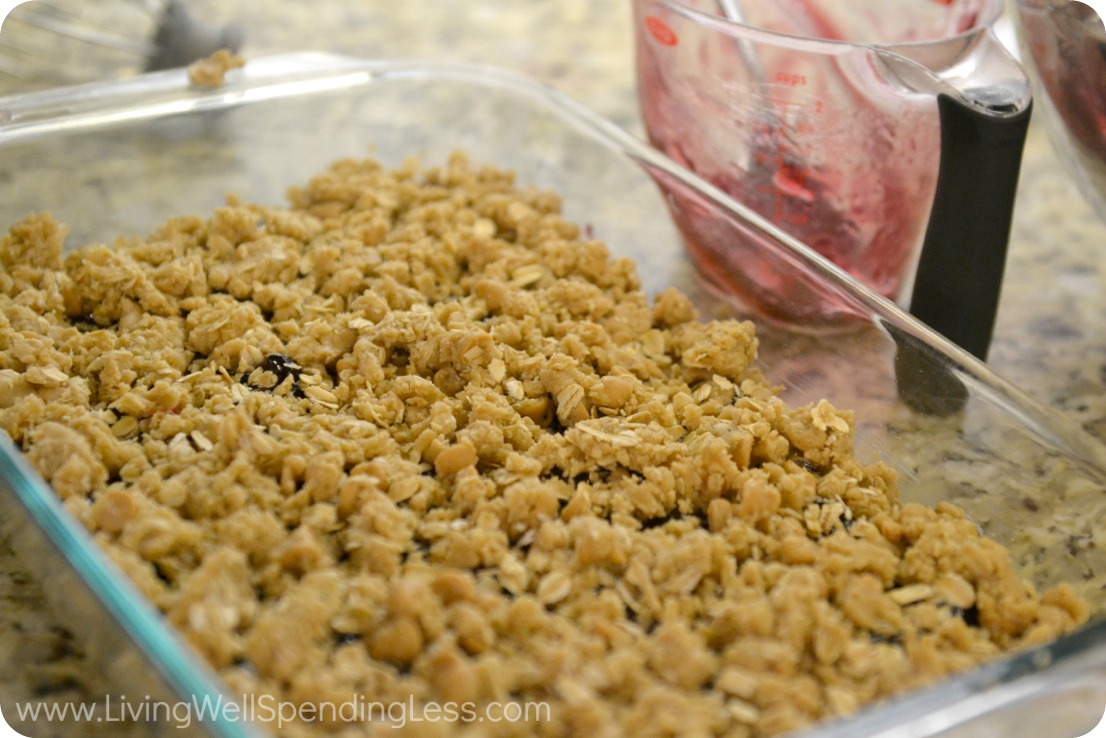
Step 6: Crumble remaining oat mixture over jelly. Bake 35 minutes, until top is golden brown. Cool completely, then cut into bars.
Print This!
Recipe: Peanut Butter & Jelly Bars
Summary: This classic combo is re-vamped in a yummy dessert that will please children young and old alike!
Ingredients
1 box butter pecan flavored cake mix (can also use yellow cake)
1/2 cup softened butter
1/2 cup creamy peanut butter
1 egg
1 1/4 cups old fashioned oats
1 cup peanut butter chips (about 1/2 a bag–can also use butterscotch chips)
1 cup grape jelly (or your favorite flavor)
Instructions
Preheat oven to 350 degrees; beat together cake mix, peanut butter, butter, and egg in mixing bowl fitted with paddle attachment on medium speed for about 30 seconds, or until well mixed.
Slowly add oatmeal to bowl, scraping with spatula if necessary, until oats are blended in.
Add peanut butter chips to bowl and mix well.
Divide mixture into thirds. Press 2/3 of oat mixture into greased 9×13″ baking dish.
Spread jelly over-top of oat mixture.
Crumble remaining oat mixture over jelly. Bake 35 minutes, until top is golden brown. Cool completely, then cut into bars.
Preparation time: 5-7 minutes
Cooking time: 35 minute(s)
Number of servings (yield): 16
* * *
Am I the only one who missed out on homemade treats as a kid? What did your school lunches include?
Pin It
The post Easy Peanut Butter & Jelly Bars appeared first on Living Well Spending Less®.
August 4, 2014
Giant DIY Tic Tac Toe Board


This is Week 10 of our 12-week Summer Fun with Kids series here at LWSL! Today we are welcoming Nici from Posed Perfection, who is sharing her DIY Tic Tac Toe Board . For more summer fun, check out the overview page.
Hi there! I’m Nici from Posed Perfection and I am absolutely thrilled to be here with you today sharing this Giant Tic Tac Toss game! At Posed Perfection, I share easy-to-duplicate crafts, family friendly recipes and some tips for making do with what you have. I’d love for you to come visit sometime.
I don’t know about you, but sometimes it’s hard for me to get my kiddos to go outside and enjoy the sunshine and fresh air. As they get older and the summer wears on, sitting in the cool of the air-conditioning playing video games usually trumps playing outdoors. Making this Giant DIY Tic Tac Toss game was a fun way to get them playing an old-school game in a new setting…the backyard.
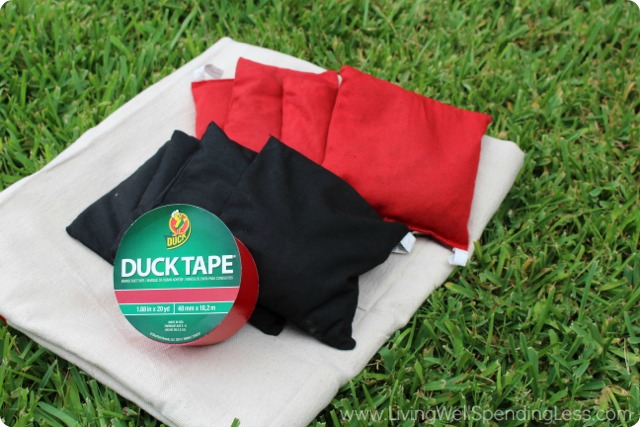
Here’s what you need:
4 x 5 foot canvas drop cloth
Colored Duck tape
6 bean bags (3 0f each color)*
*You could also make them, or borrow from your corn hole game.
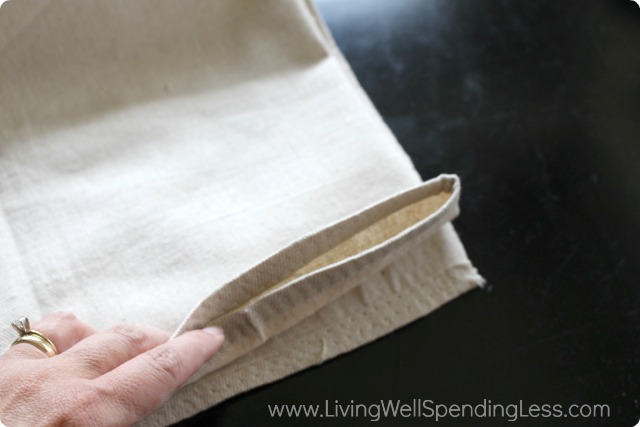
Step 1: Start by folding the canvas into thirds, either vertically or horizontally. (You could also measure and mark the cloth where you want the grid-lines to go.)
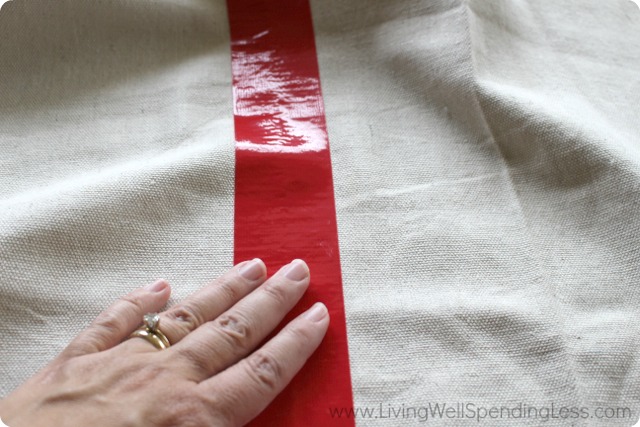
Step 2: Lay down a long strip of tape at each of the folds and press firmly into the cloth.

Step 3: Rotate the canvas and fold in thirds going the opposite direction to create the tic tac toe grid. Lay down more strips of Duck tape on the two folds.
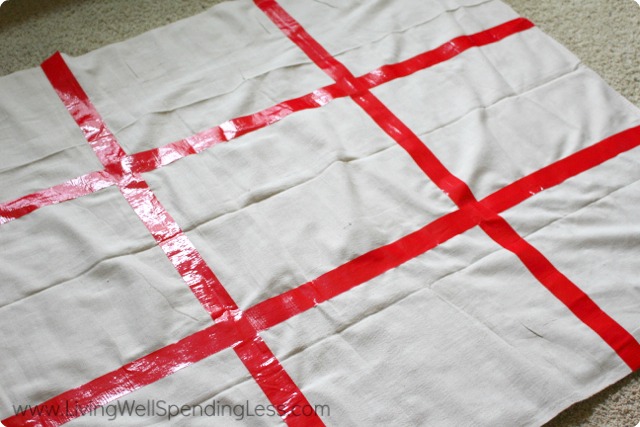
You should now have a grid with 9 equal spaces.
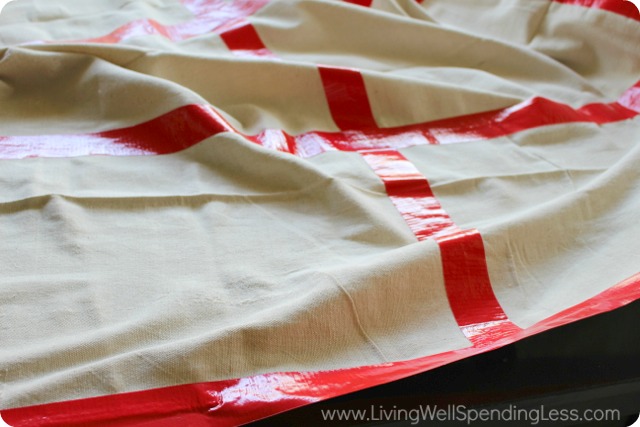
Step 4: To finish it off and secure the grid, make a border around the drop cloth canvas by pressing a strip of tape to the edge (about 1/2 the width of the tape) and folding over to the back, pressing it firmly to the fabric.

Your Giant Tic Tac Toss game board is ready! Grab a couple of kiddos, some bean bags and head outside! Have each player choose a color and start the game. You can determine how far your players need to stand from the game board before tossing their bean bags into the squares. Allow each player to toss a bean bag into an empty square on alternate turns. Whoever gets 3 in a row vertically, horizontally or diagonally wins the game.
***GIVEAWAY***
And now it is time for another fun giveaway! Today we are again giving away something EVERYONE can use–a $100 Amazon Gift Card–that you can use to make your own summer fun, or to purchase your own Tic Tac Toe board supplies! To enter, just follow the instructions in the box below:
Nici is the writer of Posed Perfection and residen
t”do-maker”. I am a homeschooling mom of two who loves the challenge of re-purposing items, finding substitutions in recipes and just “making do” with what I have to create something special. I love to share easy-to-duplicate crafts, family-friendly recipes, and my journey to finding joy in creating more with less.
* * *
What outdoor game does your family enjoy?

Pin It
The post Giant DIY Tic Tac Toe Board appeared first on Living Well Spending Less®.
August 3, 2014
Weekend Wandering


Happy Sunday! I hope you are all having a wonderful weekend! I have been busy this weekend doing some major freezer cooking to prepare for a big media tour I will be hosting from my house this Tuesday. I’ll be sharing tips for saving time and money for back-to-school by preparing simple, easy meals, and I’ll be doing LIVE interviews via satellite with around twenty local and national morning shows around the country! There are too many to list all of them here, but some of the national stations include The Daily Buzz, Get Connected, The Kristen Hagopian Show, and NewsWatch. It should be a little crazy, (and a LOT nerve-wracking), but hopefully a lot of fun too! I hope you’ll tune in and check it out!
And in case you didn’t see my big announcement on Friday, this past week was also exciting because we launched our amazing new community site, LWSL Everyday. I am so excited about this new project & I promise it is definitely something you will want to check out! Read all the details here.
And now on to the important stuff! Here is what I loved this week:
* * *
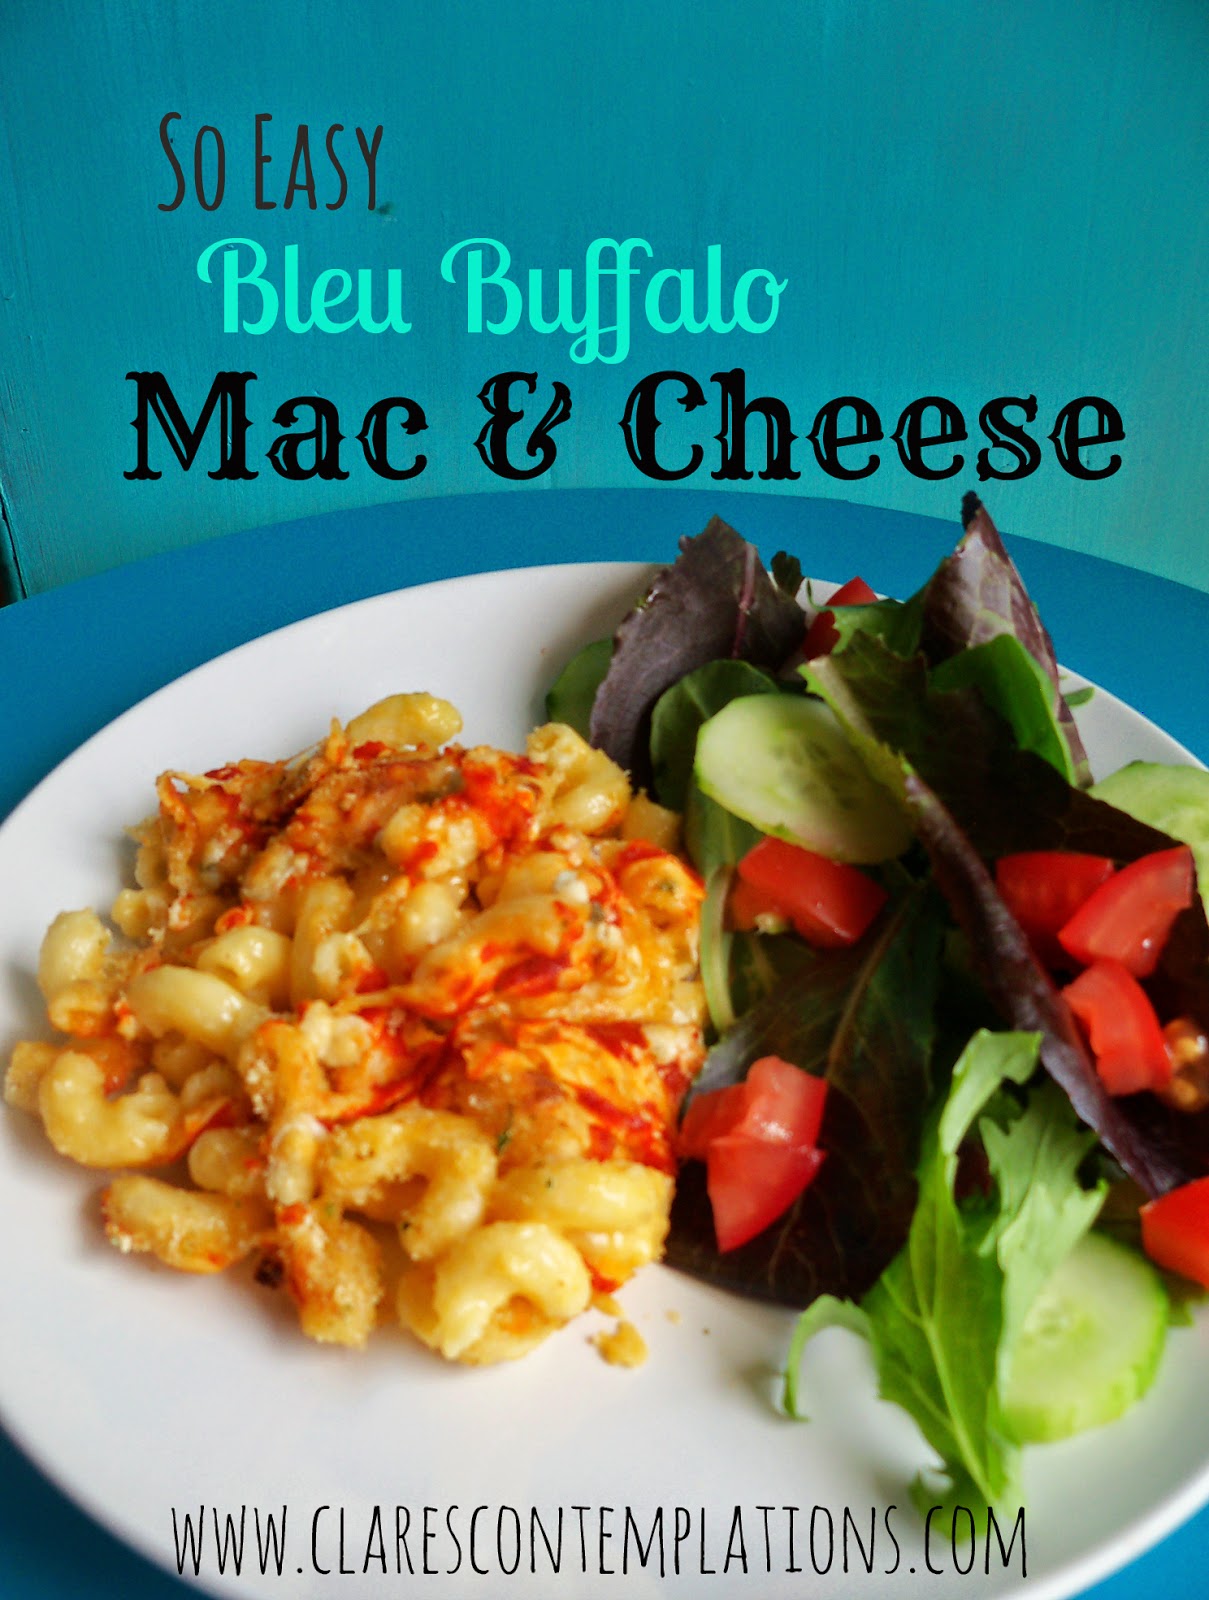
Let me just start with the disclaimer that in preparation for Tuesday’s media tour I haven’t had carbs all week and now I’m definitely craving some! As such, my picks may be a little biased!  And quite frankly, this Bleu Buffalo Mac and Cheese from Clare’s Contemplations had me licking my screen! Yum!
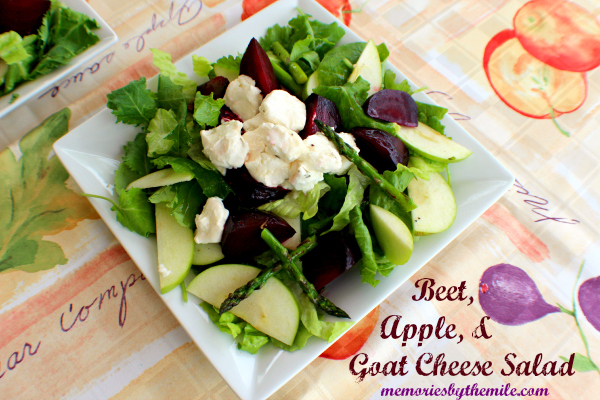
Luckily this Beet, Apple & Goat Cheese Salad from Memories by the Mile also sounds amazing AND a little lower in calories!
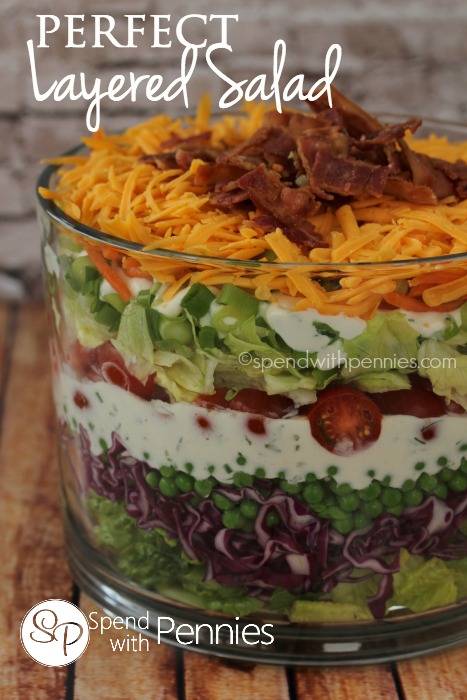
Mmm…this next Perfect Layered Salad from Spend With Pennies is almost too pretty to eat! It brings back memories of the church potlucks I used to go to as a kid!
I love me some Homemade Guacamole! This quick & easy version from Faith Filled Food for Moms is made with tons of fresh ingredients. Just add chips!

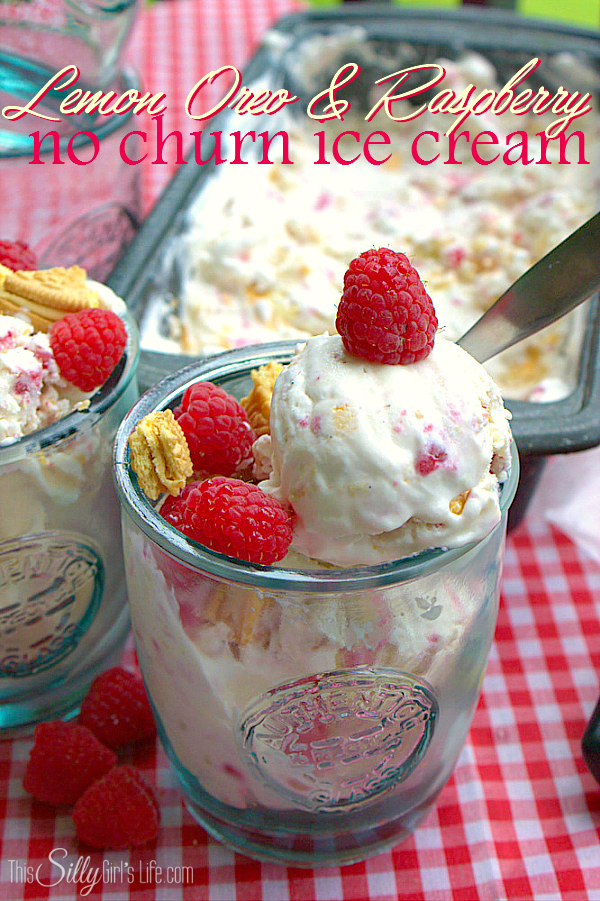
Mmmmmm…..lemon! This Lemon Oreo Raspberry No Churn Ice Cream from This Silly Girl’s Life is calling my name!
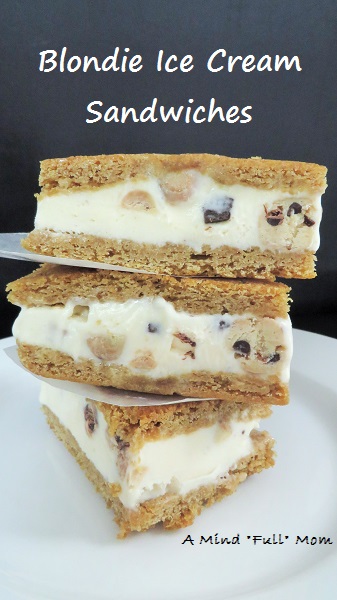
Okay, now I’m drooling! These Homemade Blondie Ice Cream Sandwiches from A Mind “Full” Mom look sooooo good!
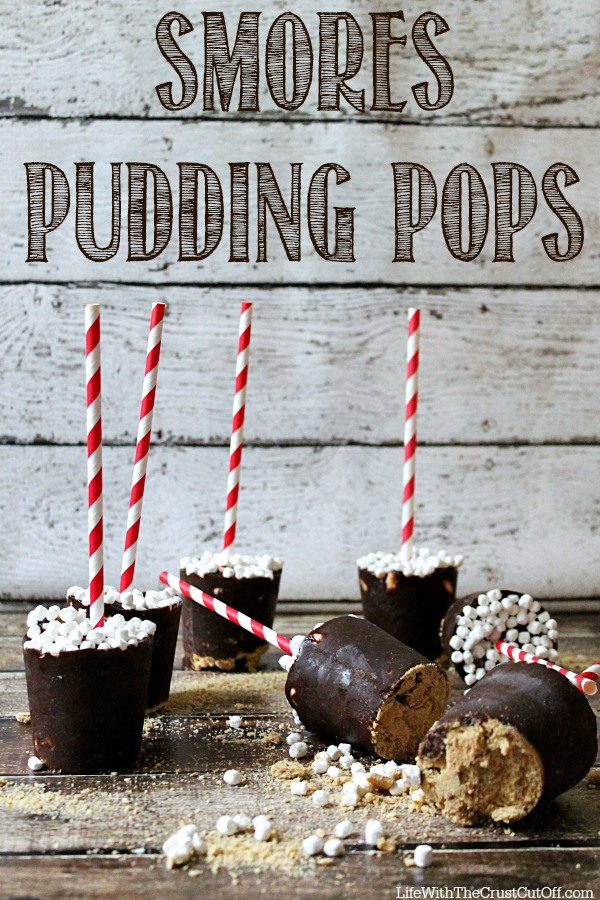
Oh my goodness, these Smores Pudding Pops from Life With The Crust Cut Off are SO adorable! Plus they only use 4 ingredients, you probably already have on hand. Perfection!
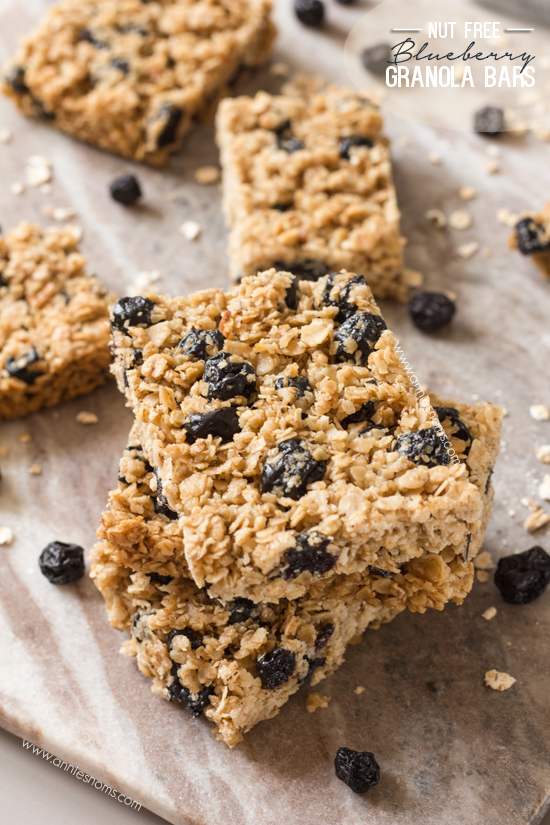
Granola bars are a perfect snack for sack lunches. Annie’s Noms has a recipe for Nut Free Blueberry Granola Bars that only takes minutes to make. These look great for back-to-school!
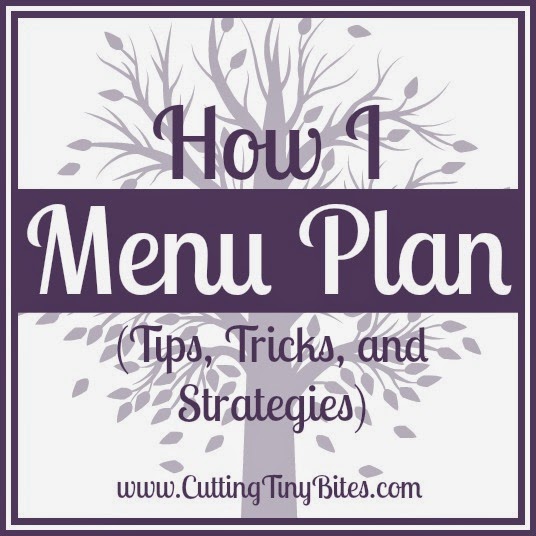
Sometimes figuring out what’s for dinner can be downright overwhelming after a long day. But Cutting Tiny Bites shares in great detail How I Menu Plan . She even provides a bonus tip!
School starts here is just a couple of weeks and my youngest is starting kindergarten! I always capture the first day of school with some cute pictures but this Back to School Printable from Woman of Many Roles will preserve memories a photo just can’t.
Many Homeschool families are also gearing up for the new school year. Moms are Frugal has 3 options for an Almost Free Homeschool Planner. The second option is so creative!

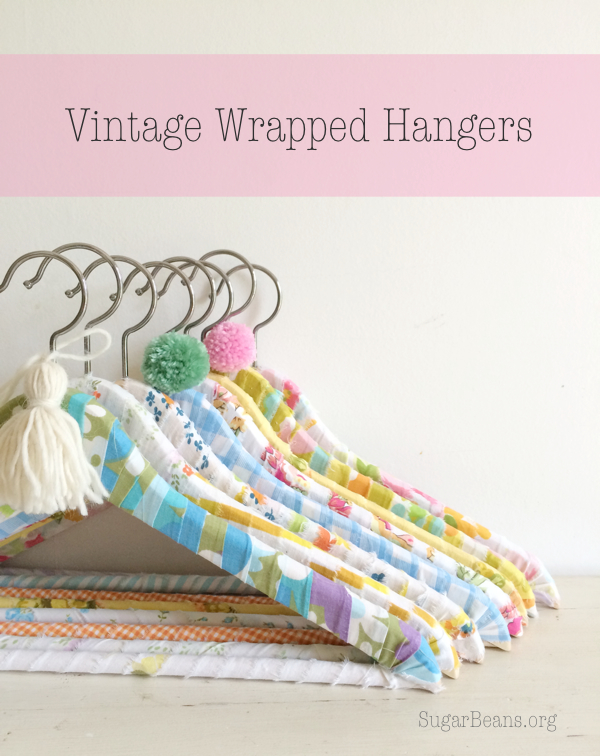
I might need to update my 40 Hanger Closet with these adorable Vintage Wrapped Hangers from Sugar Beans. Only 2 materials needed to create these and one is a glue gun. Love these!
Lastly, Retired by 40 has some practical tips for Going Back to Your Roots-in Finances and Heath. She even shares her personal action plan.

* * *
What did you love this week?
Pin It
The post Weekend Wandering appeared first on Living Well Spending Less®.
August 1, 2014
Introducing…..LWSL Everyday


Happy August everyone! Today I am so excited to finally share the BIG project that my team and I have been working on for months…..a members-only site & community forum for Living Well Spending Less readers called LWSL Everyday!
Why LWSL Everyday?
I originally started LivingWellSpendingLess.com in 2010 as a way to hold myself accountable. I was struggling to manage my budget and keep my spending in check, and I desperately needed to connect with others who were facing the same challenges.
Amazingly enough, it worked. I learned to use coupons and stick to a budget, and found ways to better manage my time, home, and family. Somewhere along the line, Living Well Spending Less became less about my personal story and more finding practical solutions to these challenges that we all face.
But the need to truly connect never went away.
It made me realize that deep down, we all crave a place to belong. Life can be stressful and sometimes feel out-of-control as we struggle to balance the demands of our day-to-day lives with the pressure of living within our means.
So, about two years ago, I started a private Facebook group that would allow LWSL readers to share tips and ideas and hold each other accountable. In the time since, that little group has grown to almost 40,000 members, and it has become obvious that we needed a better forum to manage the group that would allow such a diverse array of members to start and participate in only the threads they were interested in.
LWSL Everyday is that place, plus SO much more!
Through a combination of a active, engaged, and moderated community forum, inspiring behind-the-scenes interviews with well-known authors and bloggers, a live monthly Q&A session with me, and monthly limited-edition downloads, LWSL Everyday will encourage, empower, and inspire you to seek—and find—the Good Life every single day.
At LWSL Everyday, you will:
Gain access to the LWSL Forum and discover that you are no longer alone through a fun & encouraging community of like-minded women.
Get real-life accountability to help you set and achieve your financial and personal goals.
Be empowered and encouraged to seek the Good Life through simple but powerful changes in your day-to-day life.
Find new ideas for saving money and living well on a budget through inspiring behind-the-scenes interviews with your favorite authors and bloggers.
Gain exclusive access each month to beautifully designed, limited edition downloads, created by Heather Moritz of Moritz Fine Designs.
Connect with me and get honest answers to your hardest questions in a monthly live webinar.
Here’s how it works:
First, sign up at LWSLeveryday.com
When you sign up, you will have a choice to pay monthly or to pay annually (at a significant discount.) Regardless of the payment option you choose, as long as your membership stays in good standing, you will lock in that rate forever, even if the price goes up in the future.
For the month of August, you can secure your membership for the special introductory rate of just $1 a month or $10 a year, which will lock in that rate for you forever. Beginning September 1st, membership will be $3 per month or $20 per year. Either way, it’s less than the price of a cup of coffee!
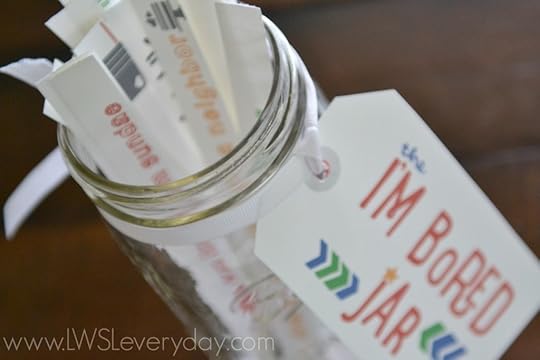
Your paid membership will give you a login access to the private content of the site, which includes an amazing forum where you can connect with other LWSL readers, ask questions, and share your own wisdom on a variety of living well and spending less subjects. You will also be able to download the current month’s beautifully-designed printable (this month’s I’m Bored Jar printable is featured above), as well as watch behind-the-scene interviews with some of your favorite authors and bloggers, as well as RSVP for the monthly Q&A session with Ruth.
I can’t wait to connect with all of you at LWSL Everyday.
Your community is waiting.
Sign up today and finally find your place to belong!
Pin It
The post Introducing…..LWSL Everyday appeared first on Living Well Spending Less®.
July 31, 2014
Thrifty Thursday {Week 71}
Happy Thursday! I hope you are all having a wonderful week–can you believe it is already the last day of JULY? Seriously, where did the summer go?!! I had an amazing time at the SheSpeaks conference last weekend, and loved catching up many of you. I am now getting ready to head back to North Carolina–this time to Asheville–to speak at the Becoming Conference. Have you heard of it? It was founded by Jenny Martin of Southern Savers & Jen Schmidt of Balancing Beauty and Bedlam, and is an uplifting and encouraging conference that focuses on becoming purposeful, creative, and frugal. If you live within driving distance, I highly recommend it, and I would absolutely LOVE to see you there!
In other news, I am getting ready to make a BIG announcement here at Living Well Spending Less tomorrow, August 1st! I can’t wait to share what I’ve been working on for these past few months, so BE SURE to stop back tomorrow morning around 9am EST to find out the exciting news!
Here are the most clicked links from last week:

1. Thrifty Little Mom { How Much Should You Spend on Groceries? }
2. Letters From Sunnybrook { 10 Bad Habits That Waste Money }
3. Sarah Titus{ August Sales Cycle: What to Expect to See on Sale }
4. The Budget Mama { July No Spend Challenge-Update #3 }
5. Creative Home Keeper { 7 Lessons I Have Learned in 7 Years of Marriage }
6. Frugality Gal { My $50 Menu Plan and 6 Ways I Keep Costs Down }
7. Freebie Finding Mom { 10 Weird Ways to Save Money }
8.The Latina Homemaker{ 5 Tips to Help Renters Save Money and Headaches! }
9. Detours in Life { 2 Easy Ways to Stay Organized- Back to School }
10. Graceful Little Honey Bee { Money Saving Tips From a Stay at Home Mom }
Never linked up before? Here’s how:
Scroll down, find the little blue “Add your Link” Button and click on that.
Follow the instructions on the next page – add a great image of your project and an interesting title. Make sure you link to the direct page of your budget friendly post – not the main page of your blog!
Try to visit at least a few other blogs at the party. Be sure to leave a comment to let them know you stopped by!
Please link back to this post somehow. There are badges available here; a simple text link is just fine too.
Feel free to tweet about Thrifty Thursday so others can join the fun, and don’t forget to check back here Sunday morning to see which posts have been featured this week at Weekend Wandering!
If this is your first time here I also invite you to check out my eBook, How to Blog for Profit (Without Selling Your Soul). It is a fantastic resource if you are interested in building your blog, getting more traffic, or learning how to monetize. Or, if you have read the book and are still looking to take your blog to the next level, I encourage you to check out my options for one-on-one blog consulting.
An InLinkz Link-up
Pin It
The post Thrifty Thursday {Week 71} appeared first on Living Well Spending Less®.
July 30, 2014
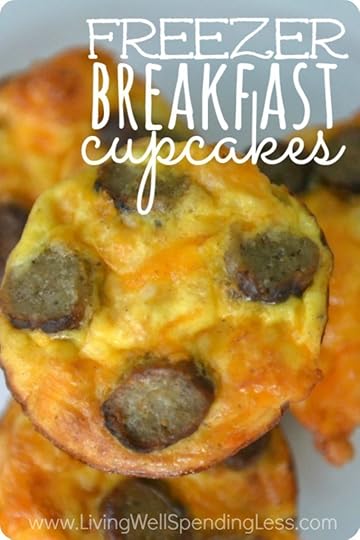
Freezer Breakfast Cupcakes
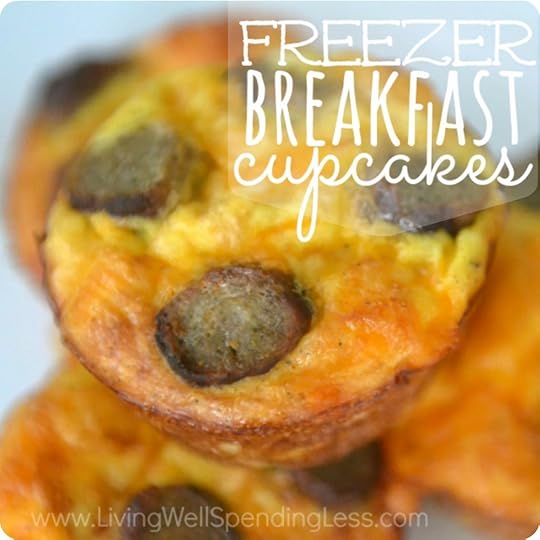
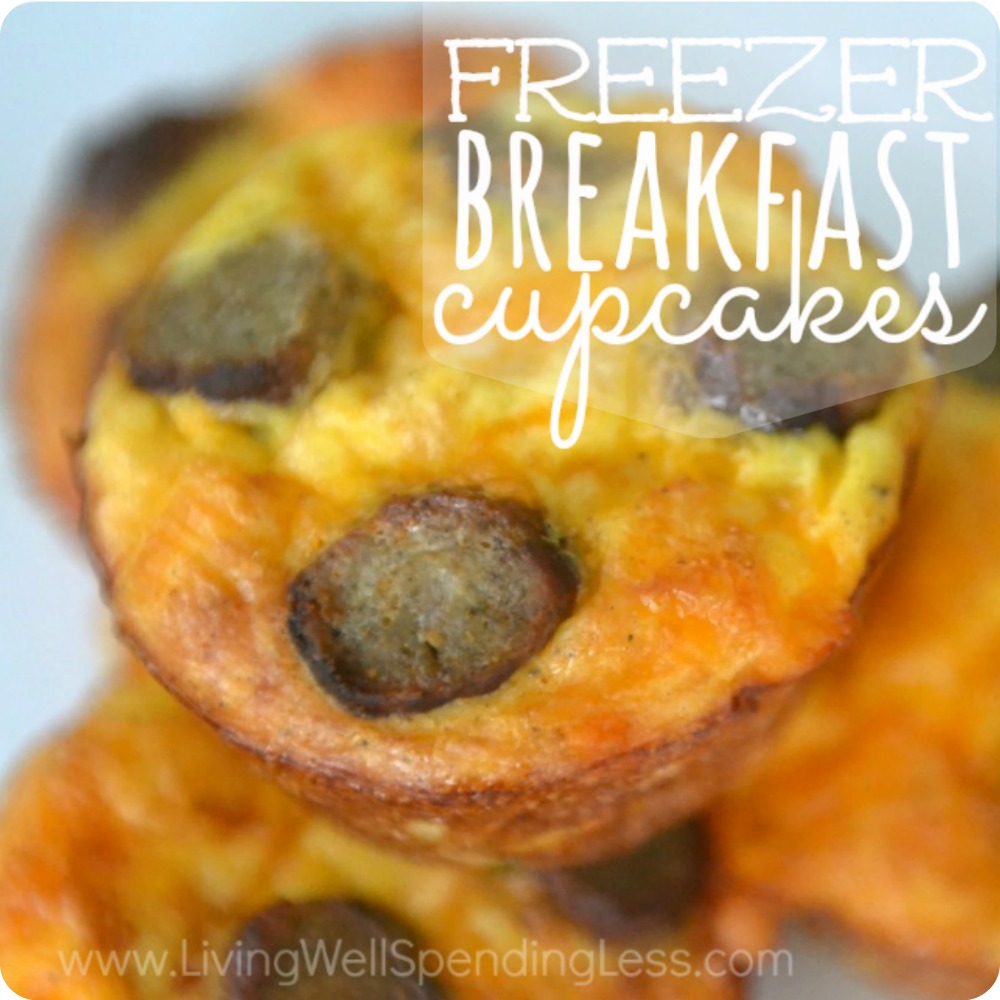
School will be starting again soon, and I don’t know about you but I’m already starting to dread our hectic mornings. My kids are not early risers, so getting them out the door and off to school with a hearty, protein-filled breakfast in their bellies can be a challenge.
Luckily these yummy freezer breakfast cupcakes are a snap to make in a large batch, then frozen ahead of time for a hot, hearty, delicious and FAST morning treat that my kids absolutely love.
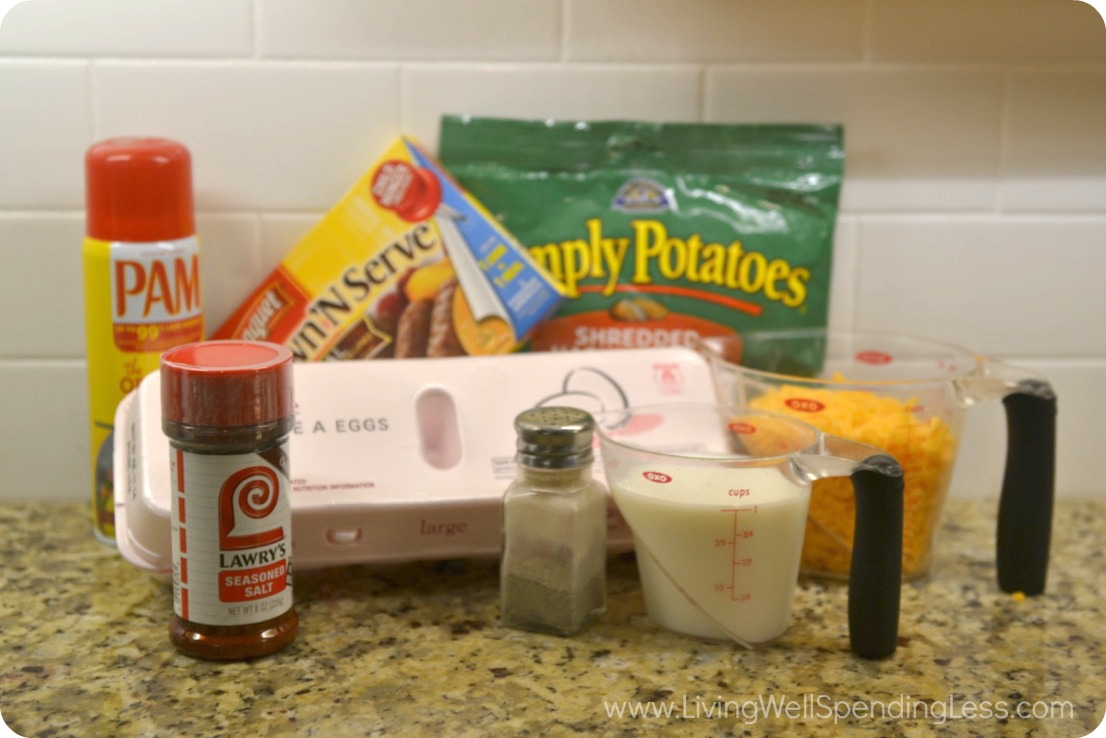
Here is what you need:
1 bag hash browns OR dry bread
1 package brown & serve sausage OR other breakfast meat
1 dozen eggs
1 cup milk
2-3 cups shredded cheese
1 teaspoon seasoned salt
1/4 teaspoon pepper
Cooking spray, butter, or cupcake liners
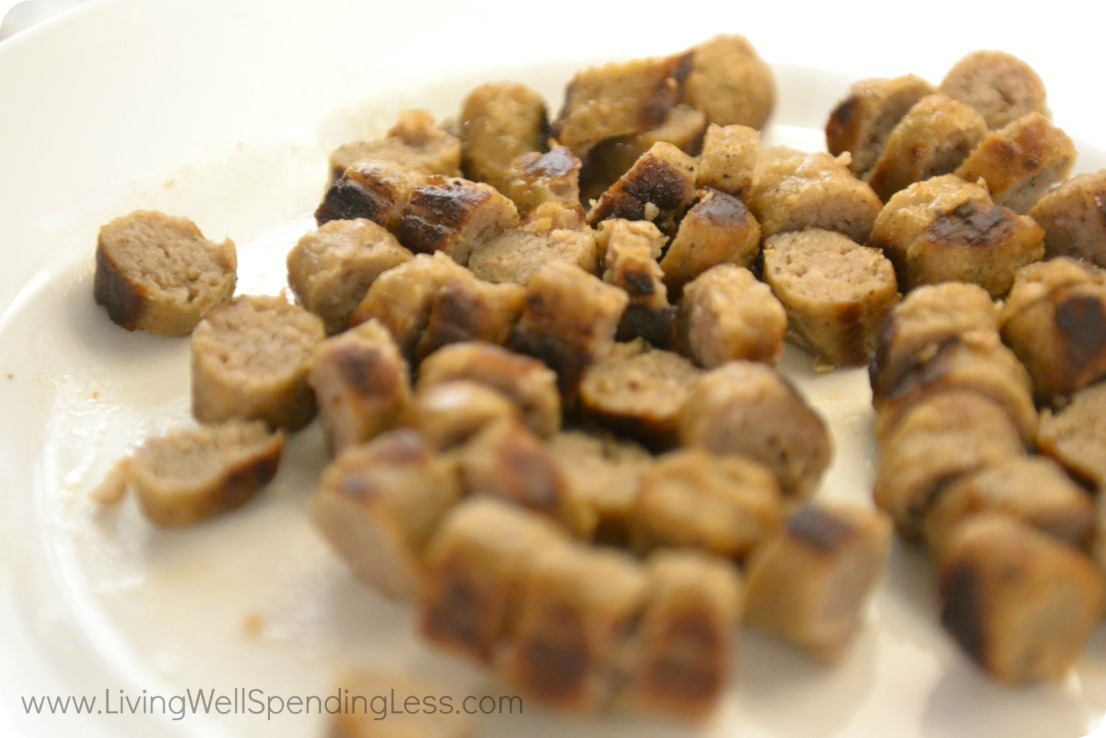
Step 1: Preheat oven to 350 degrees. Brown sausage or other breakfast meat; slice into bite-sized pieces and set aside.
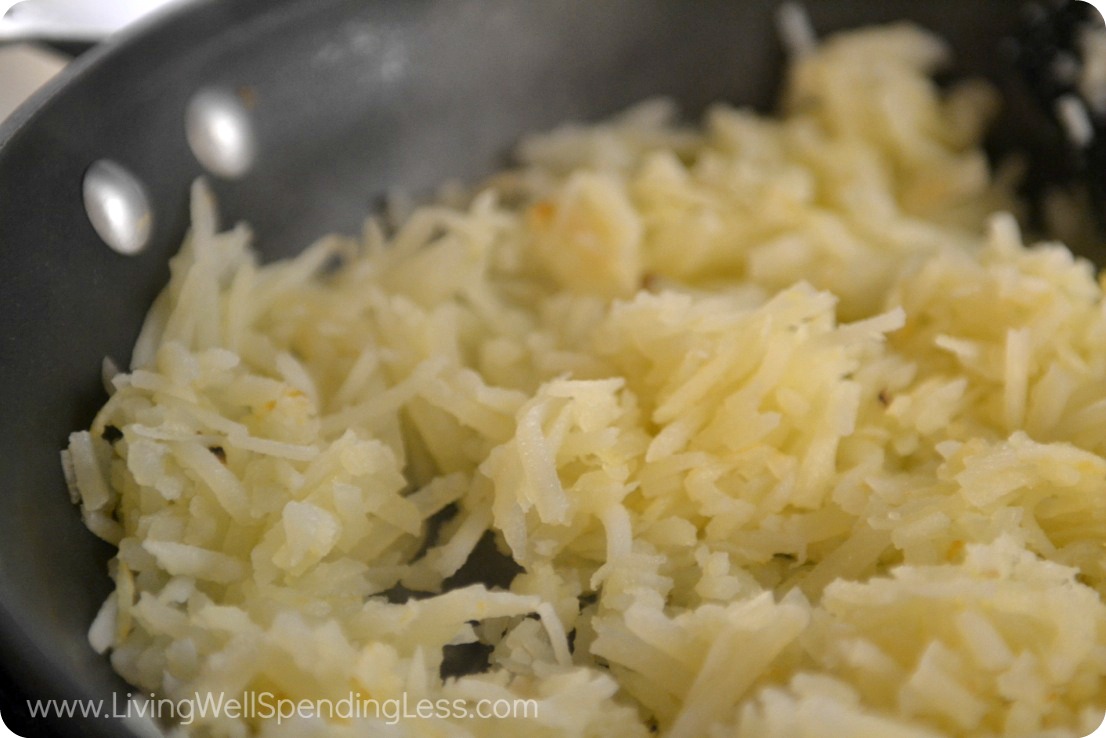
Step 2: Heat & lightly brown hashed browns until approximately 3/4 cooked. (If using dry bread skip this step & instead cut bread into small cubes.)
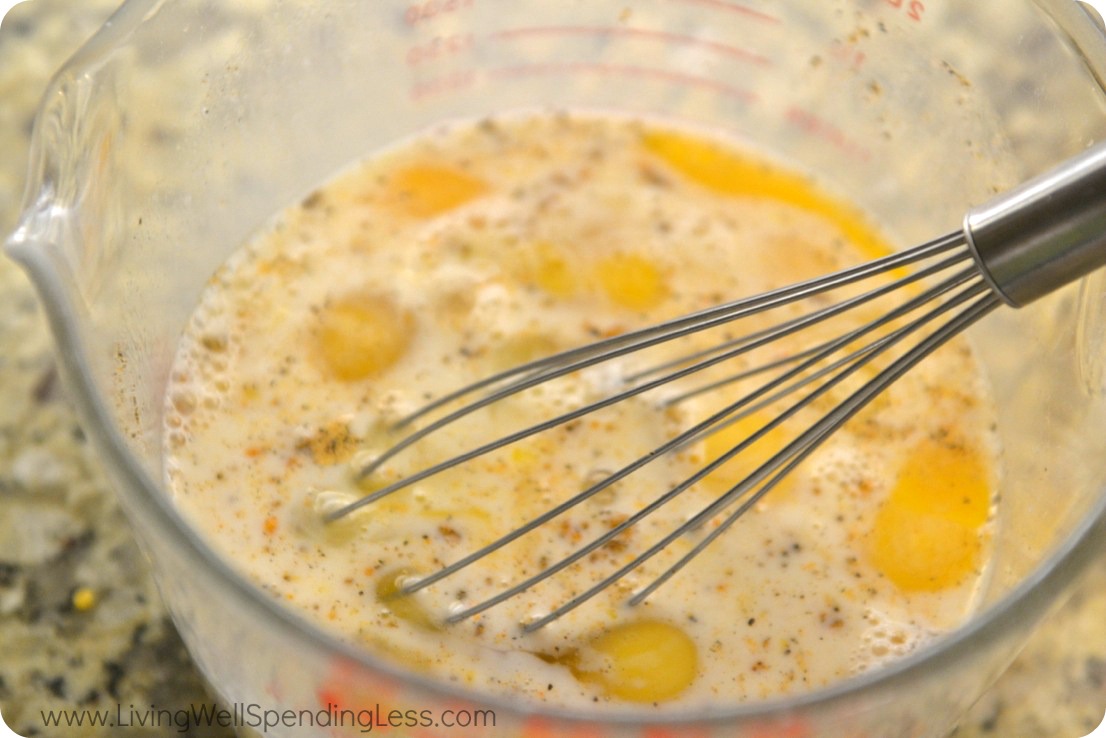
Step 3: While hashed browns are cooking, whisk together eggs, milk, salt, and pepper; set aside.
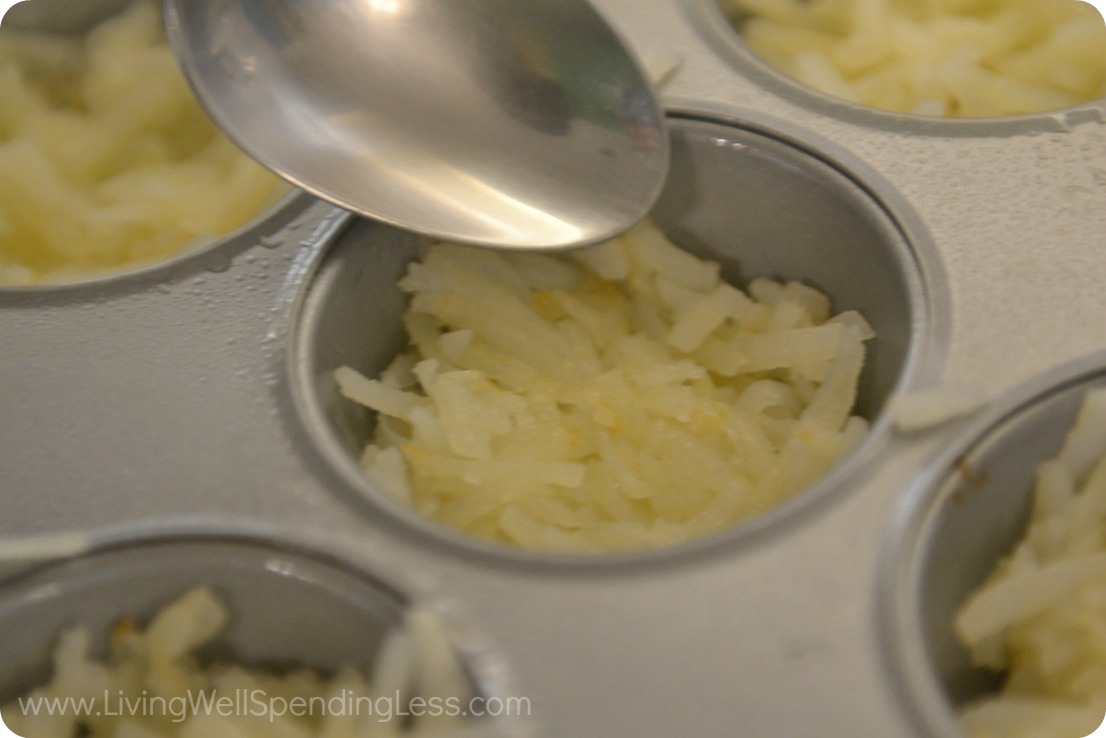
Step 4: Press hashed browns or dry bread into bottoms of 18 greased muffin tins. (You could also use cupcake liners instead)
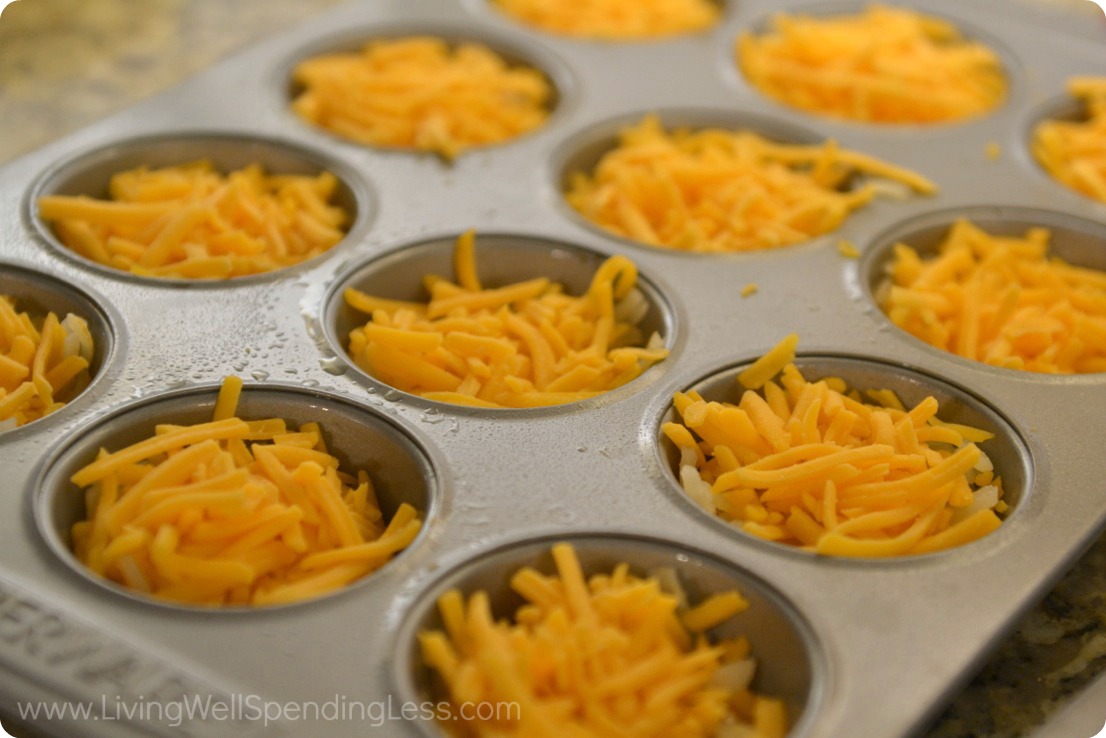
Step 5: Divide cheese overt-op of hashed browns or bread.

Step 6: Divide meat over-top of cheese.
Step 7: Carefully pour egg mixture over-top of meat & cheese until each tin is full. Bake at 350 degrees for 20-25 minutes, until egg is puffy and set.
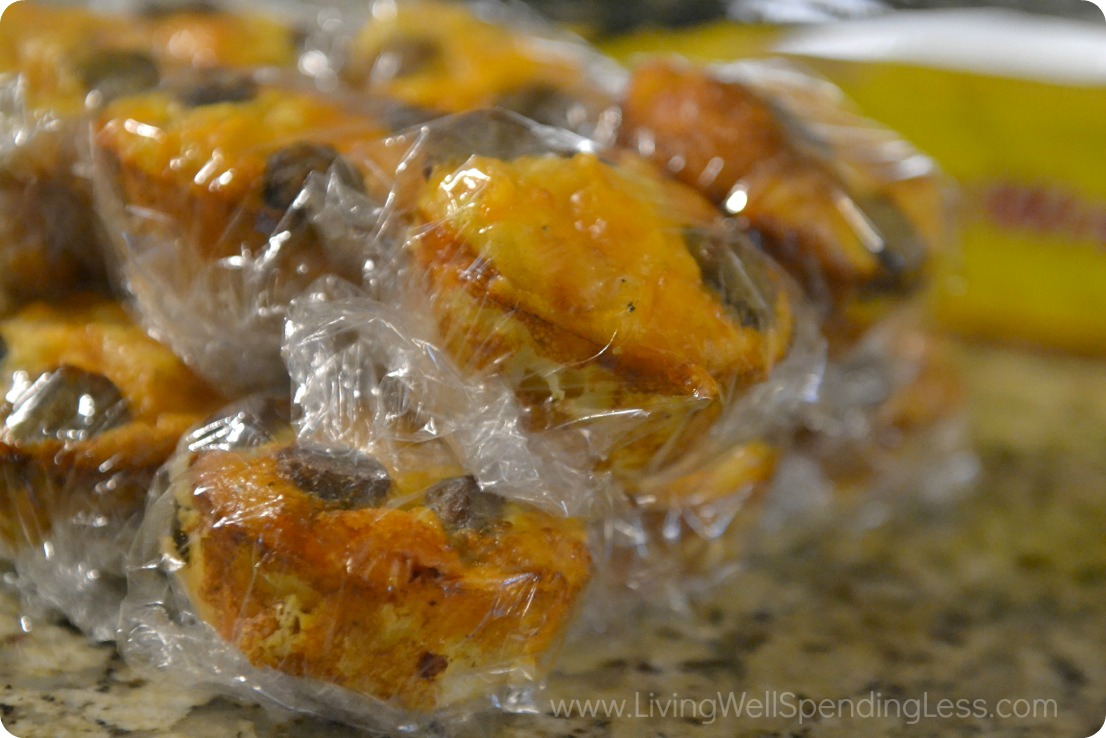
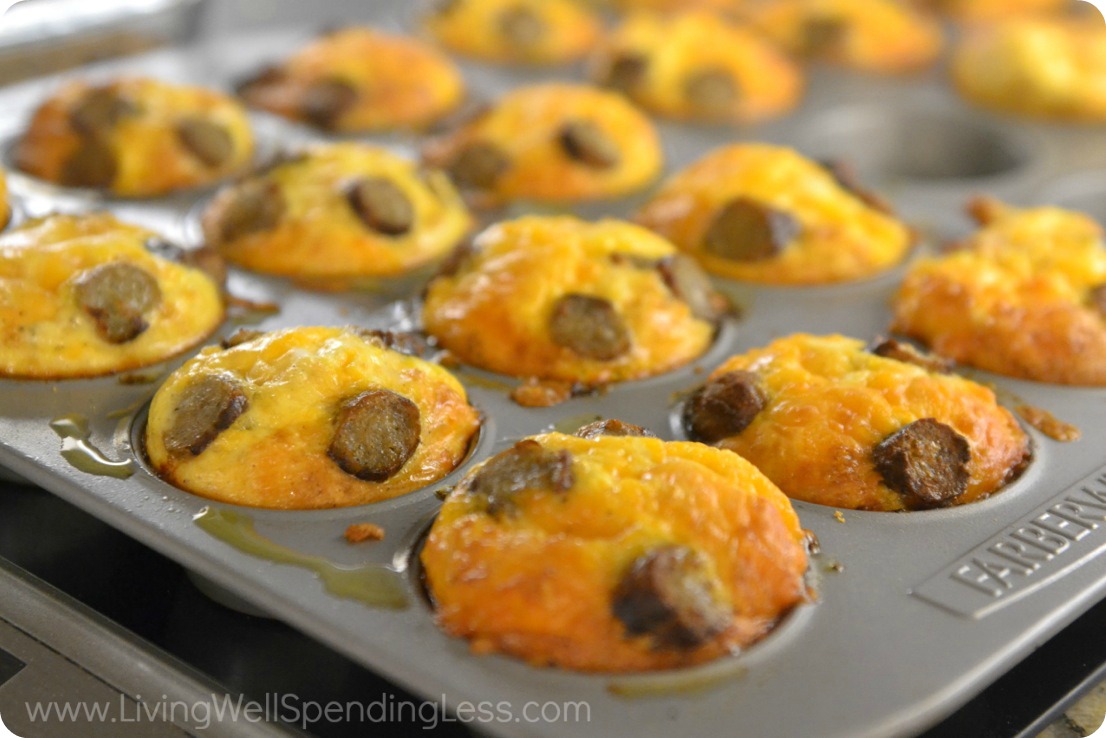
Step 8: Serve immediately or let cool completely and freeze. To serve on busy mornings, simply microwave for 30-45 seconds until warm! Makes 18 muffins.
Print This!
Recipe: Freezer Breakfast Cupcakes
Summary: These yummy freezer breakfast cupcakes are not only a snap to make, they can be frozen ahead of time for a hot, hearty, and delicious morning treat that is sure to be a hit!!
Ingredients
1 bag hash browns OR dry bread
1 package brown & serve sausage OR other breakfast meat
1 dozen eggs
1 cup milk
2-3 cups shredded cheese
1 teaspoon seasoned salt
1/4 teaspoon pepper
cooking spray, butter, or cupcake liners
Instructions
Preheat oven to 350 degrees. Brown sausage or other breakfast meat; slice into bite-sized pieces and set aside.
Heat & lightly brown hashed browns until approximately 3/4 cooked. (If using dry bread skip this step & instead cut bread into small cubes.)
While hashed browns are cooking, whisk together eggs, milk, salt, and pepper; set aside.
Press hashed browns or dry bread into bottoms of 18 greased muffin tins. (Or use cupcake liners)
Divide cheese over-top of hashed browns or bread.
Divide meat over-top of cheese.
Carefully pour egg mixture over-top of meat & cheese until each tin is full. Bake at 350 degrees for 20-25 minutes, until egg is puffy and set.
Serve immediately or let cool completely and freeze. To serve on busy mornings, simply microwave for 30-45 seconds until warm! Makes 18 muffins.
Preparation time: 7-10 minutes
Cooking time: 20-25 minute(s)
Number of servings (yield): 18
* * *
How do you make your hectic mornings a little easier?
Pin It
The post Freezer Breakfast Cupcakes appeared first on Living Well Spending Less®.
July 29, 2014
Pick Your Prize Giveaway!


Are you ready for another AMAZING giveaway? This week I am partnering with 11 more fabulous bloggers to shower THREE lucky winners with a prize of your choice! Each winner will be able to choose between the following three AMAZING prizes:
Canon Camera
IPad Mini
Kitchen Aid Mixer

Enter away my friends.
It’s going to be a great day!

Entering is super simple–simply follow the instructions in the box below!
* * *
Which prize would you choose–the KitchenAid mixer, the Canon DSLR camera, or the iPad mini?
Pin It
The post Pick Your Prize Giveaway! appeared first on Living Well Spending Less®.
July 28, 2014
Fun and Easy DIY Popsicles
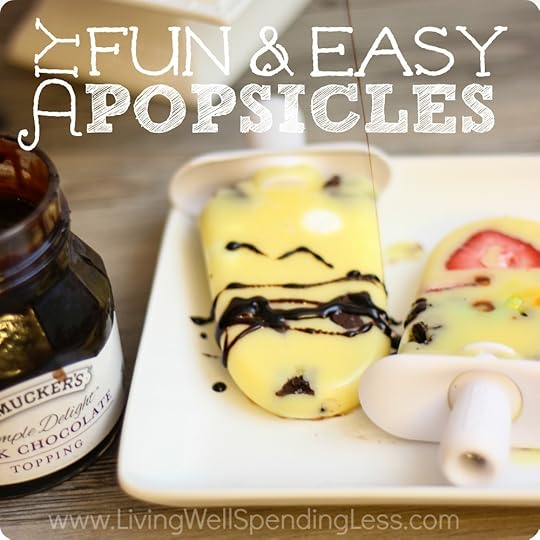
This is Week 9 of our 12-week Summer Fun with Kids series here at LWSL! Today we are welcoming KC from The Real Thing With the Coake Family ,who is sharing a super easy recipe for homemade popsicles. For more summer fun, check out the overview page.
I love coming up with fun and simple ideas of things we can do together as a family. It is so great to spend time with my girls and have some fun. It is also a perfect opportunity for some family bonding. I thought that since it is summer and hot, we needed a “cool” family activity. Now, buying popsicles and hanging out as family could be lots of fun, but making our own popsicles would be even more fun and more yummy, too!
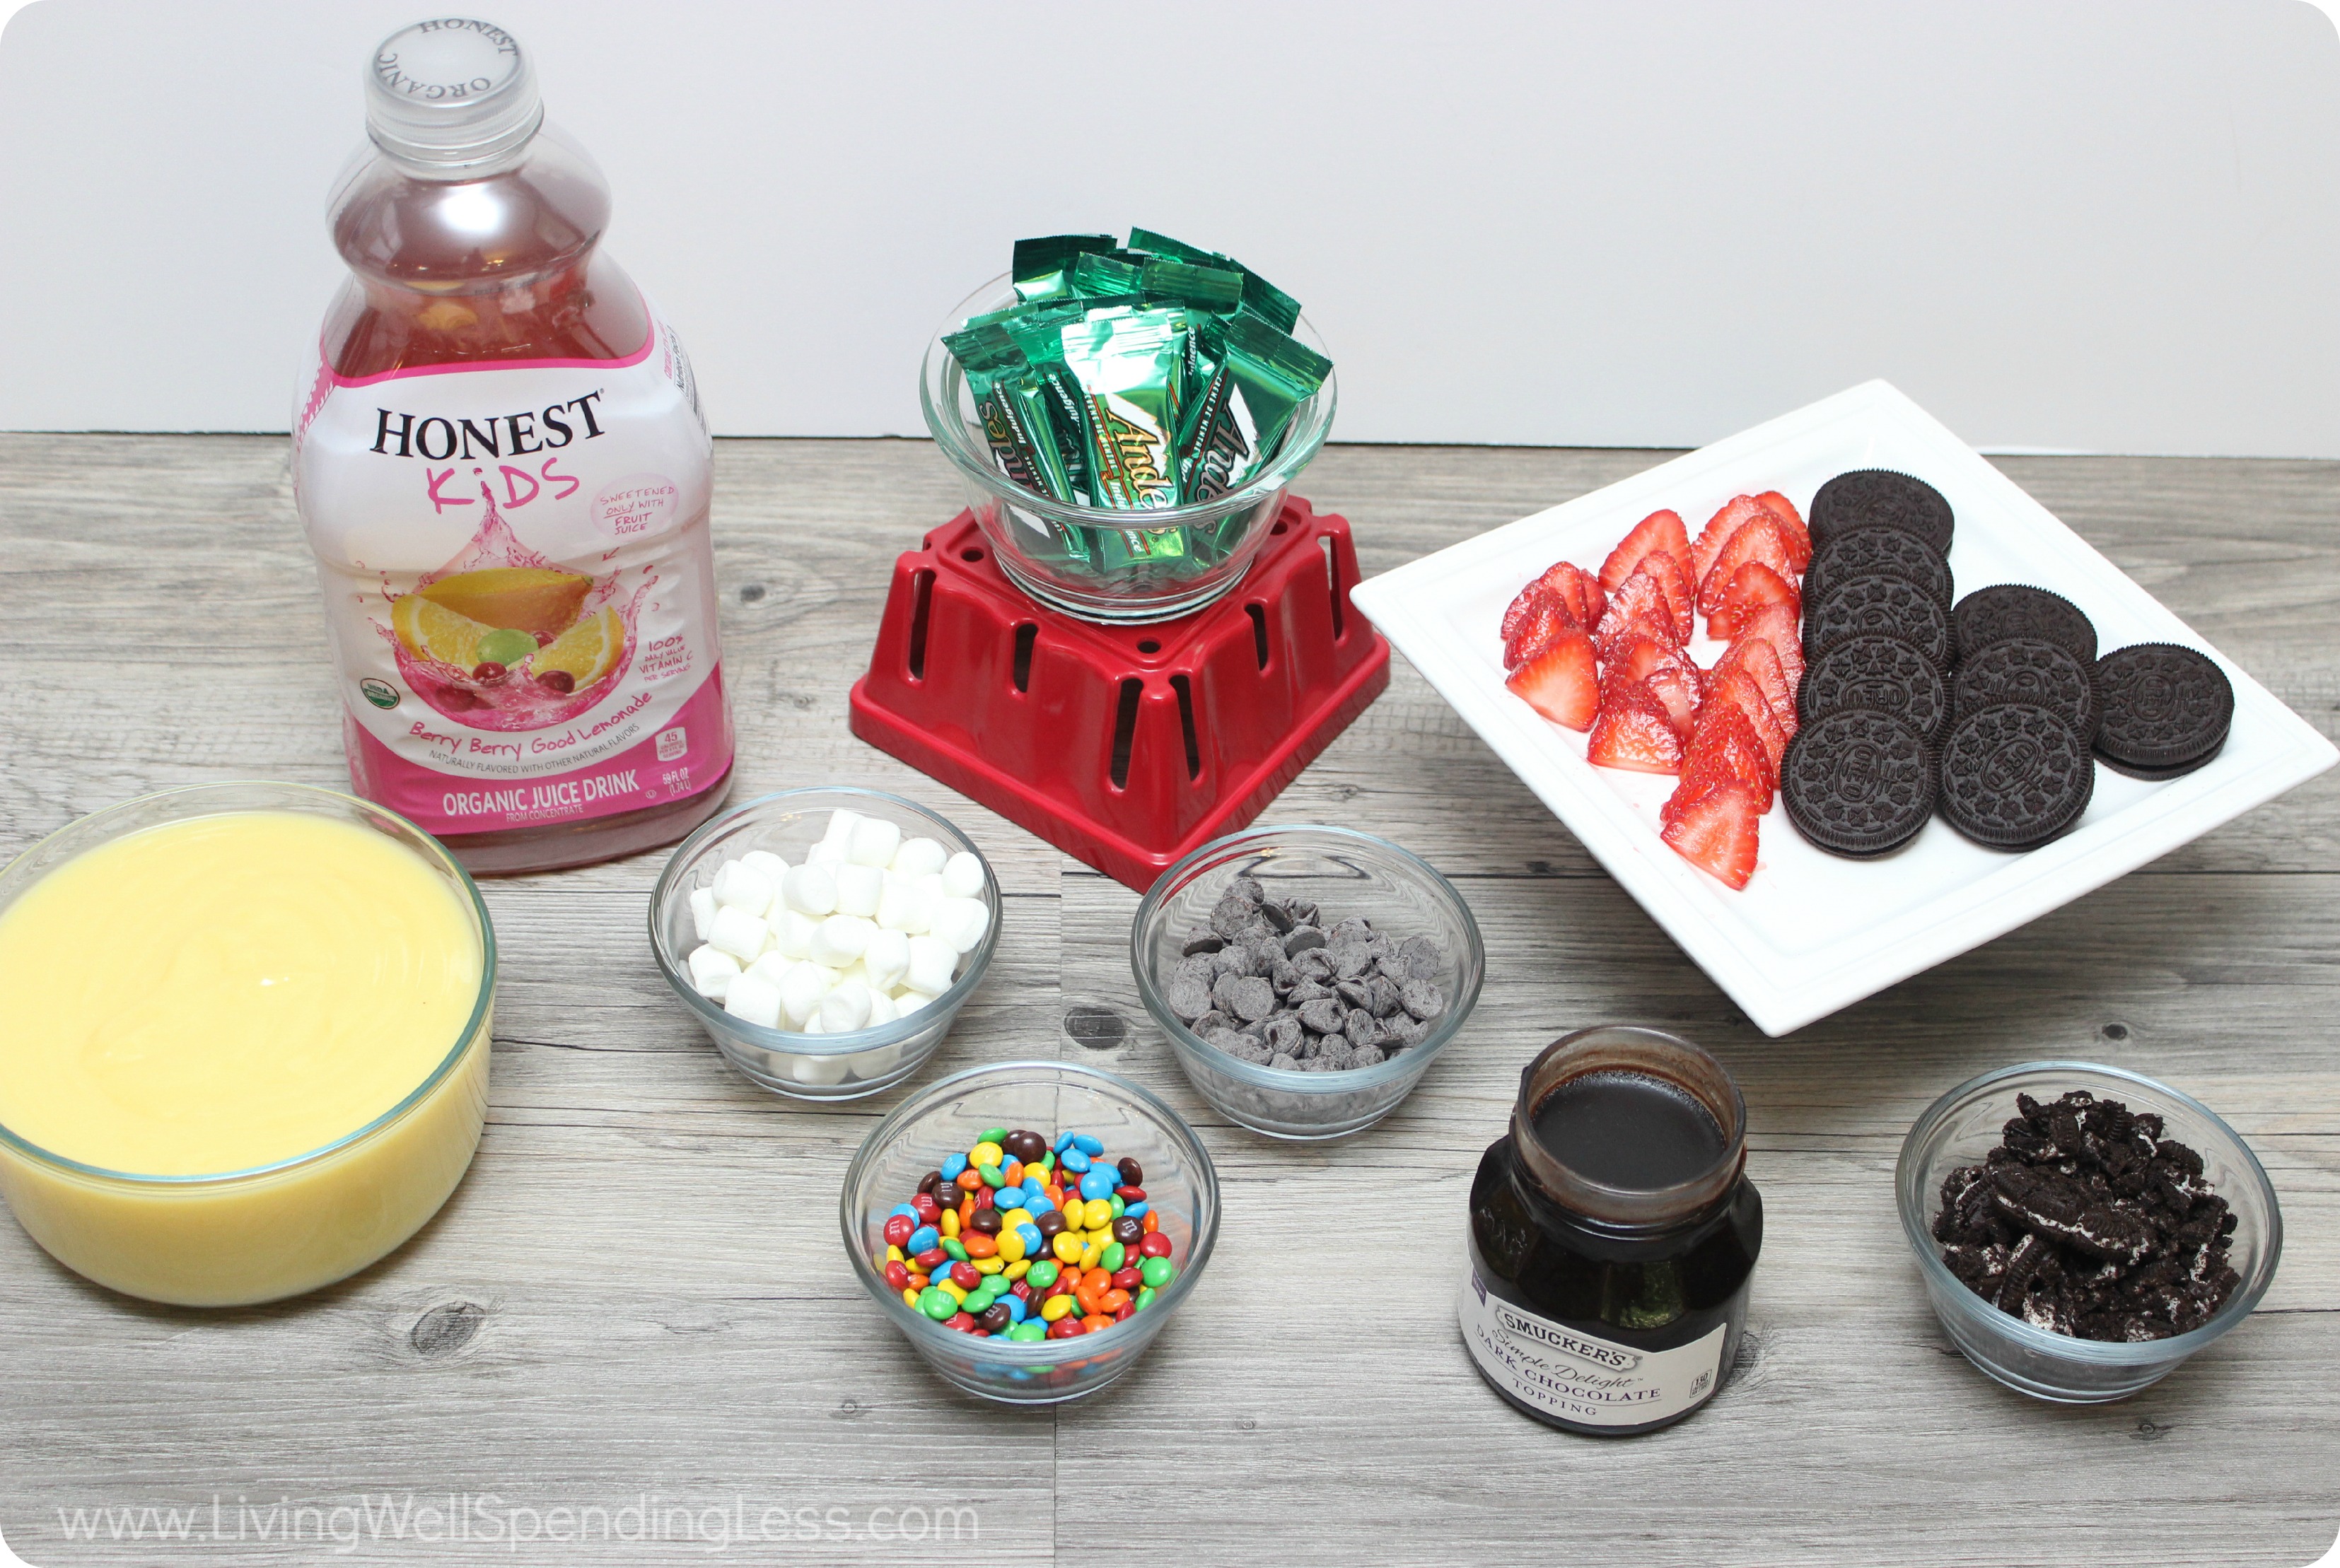
Here is what you need:
store bought lemonade with fresh fruit of your choice
or
1 5.1 oz box pudding
4 cups milk
3/4 teaspoon of vanilla extract (optional)
1 1/2 tablespoons of granulated sugar (optional)
a variety of toppings (optional)
Classic Popsicle molds or the Zoku

Step 1: If you decided on the Zoku, make sure it goes in the freezer the night before your activity. Then make the pudding (any flavor will work) according to the package. Then let is set up.

Step 2: Then thin the pudding, using the remaining 1 cup of milk along with ¾ tsp of vanilla and 1 ½ tablespoons of sugar. While you are waiting for the pudding to set up, you can get your popsicle bar ready. I put out all different kinds of toppings. Make sure to break things up into small bits or buy the mini versions of things.
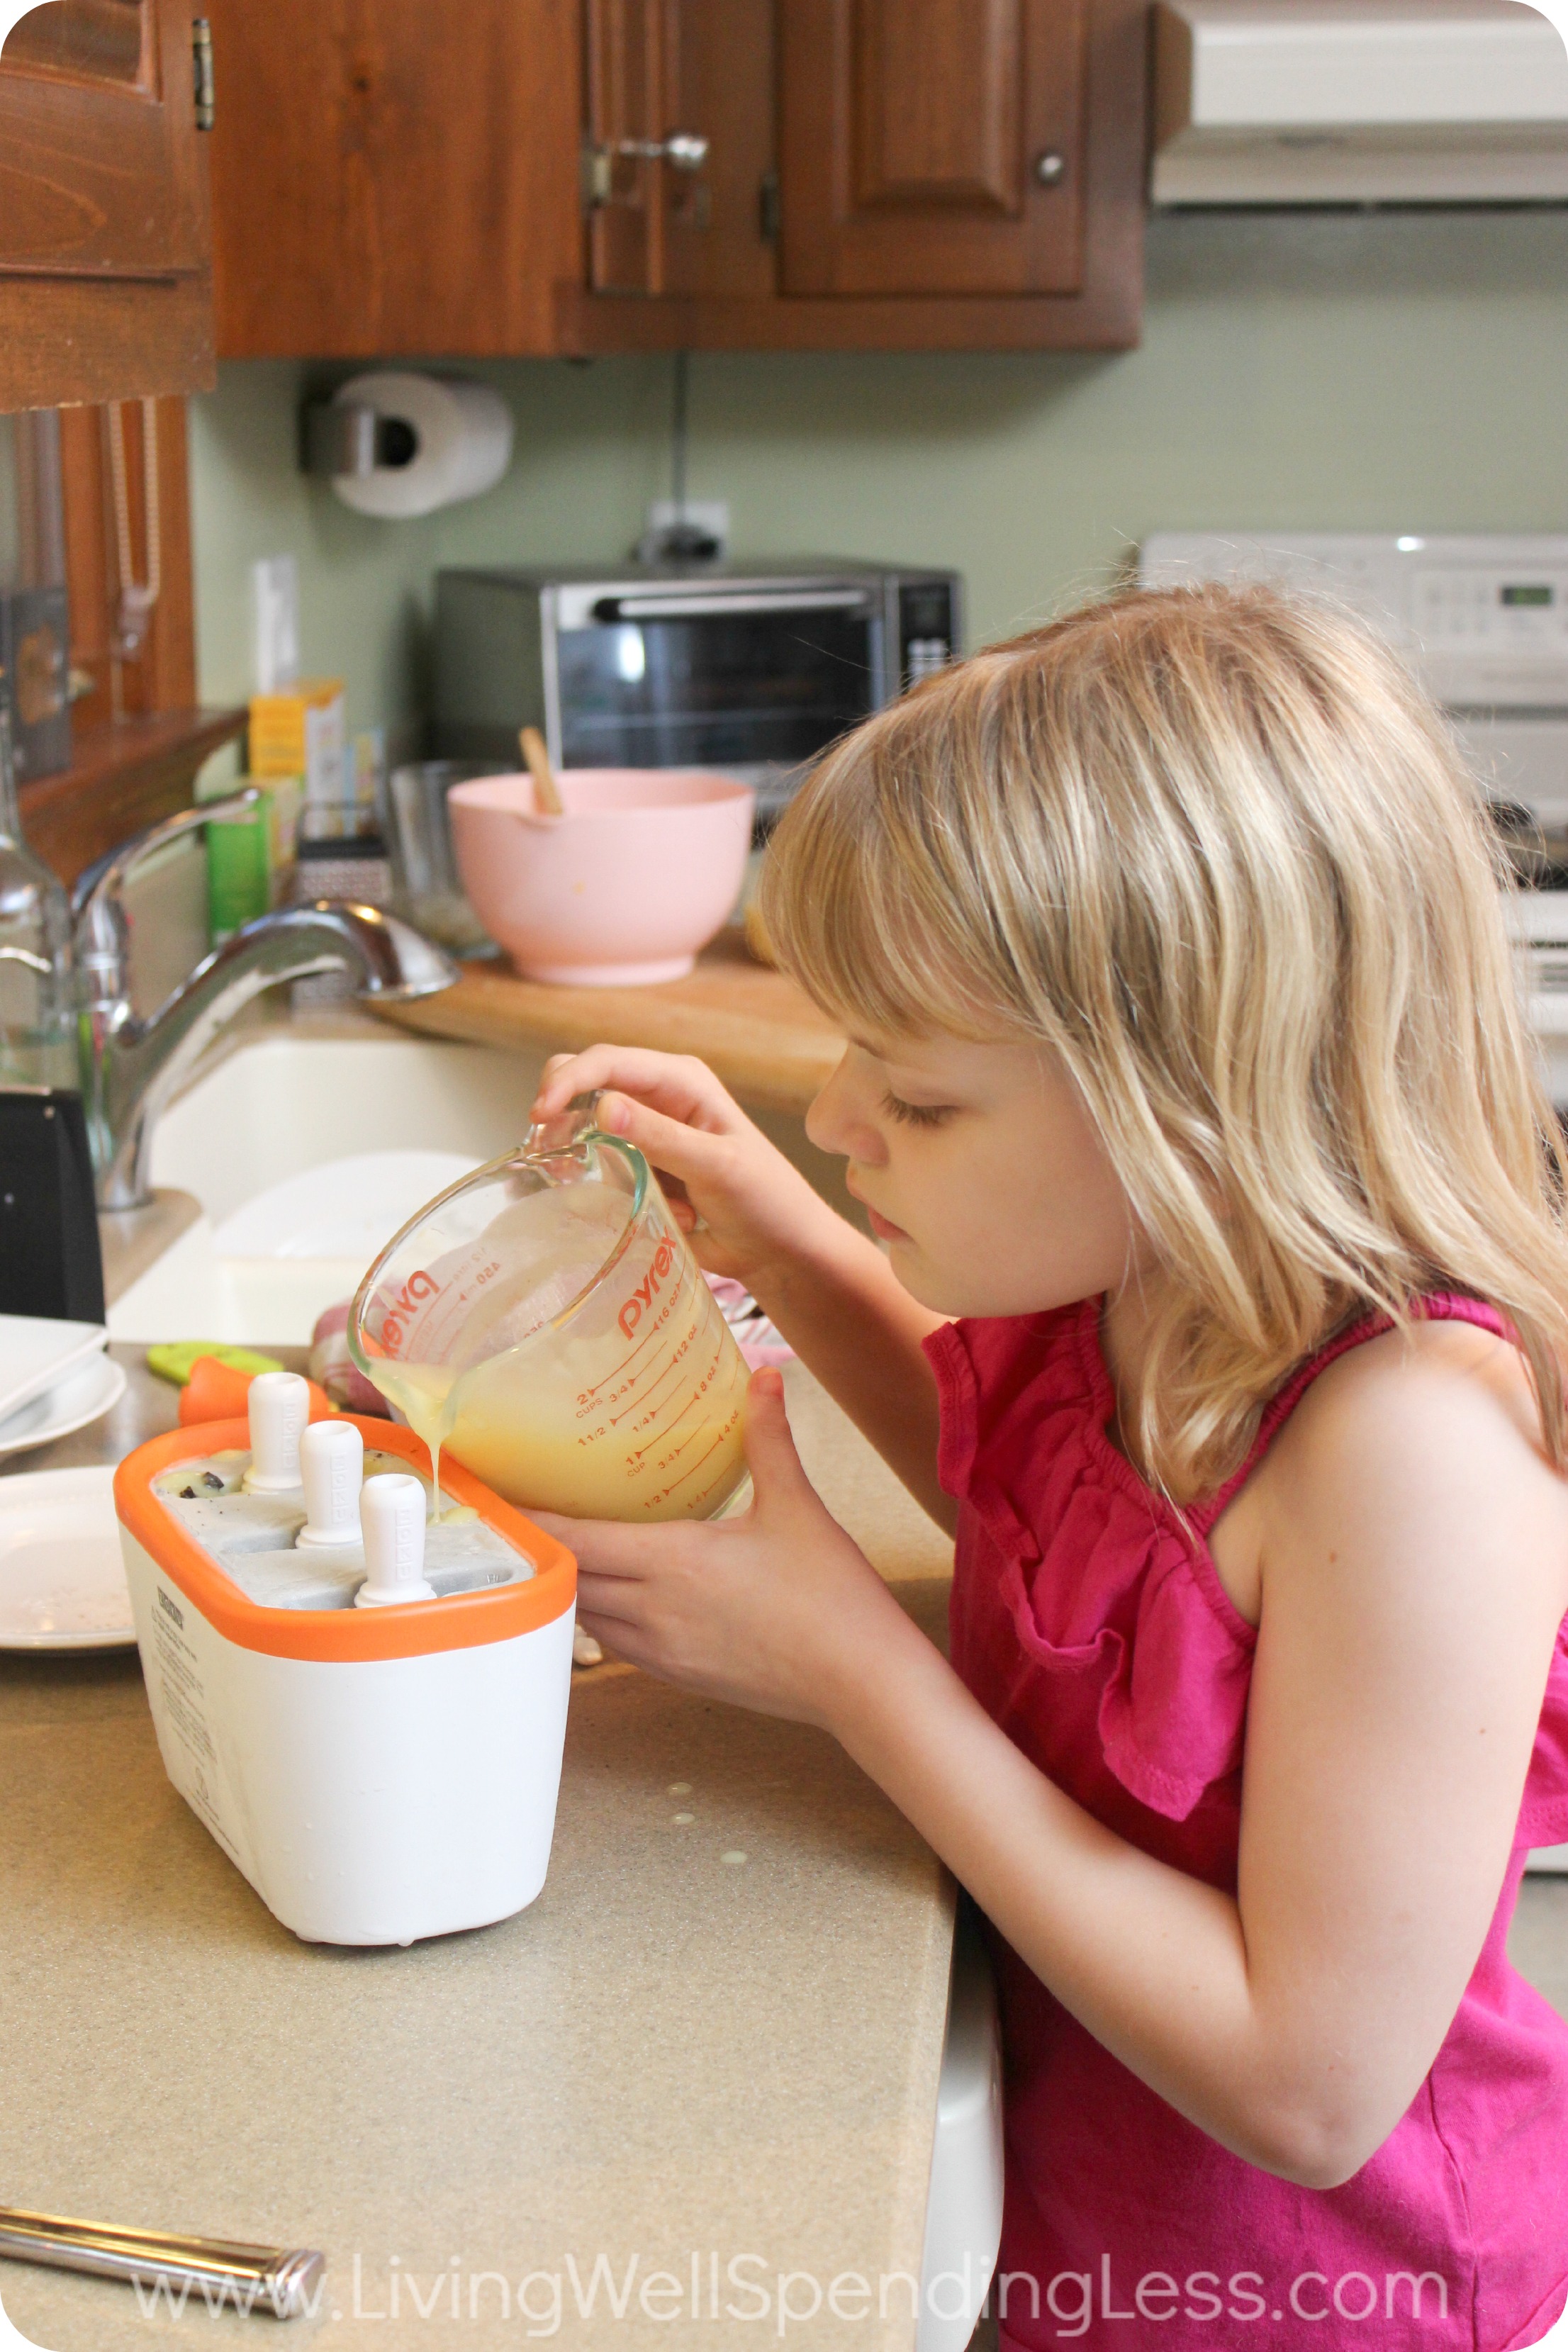
Step 3: Next pour a small amount of liquid or base into classic popsicle molds or the Zoku.
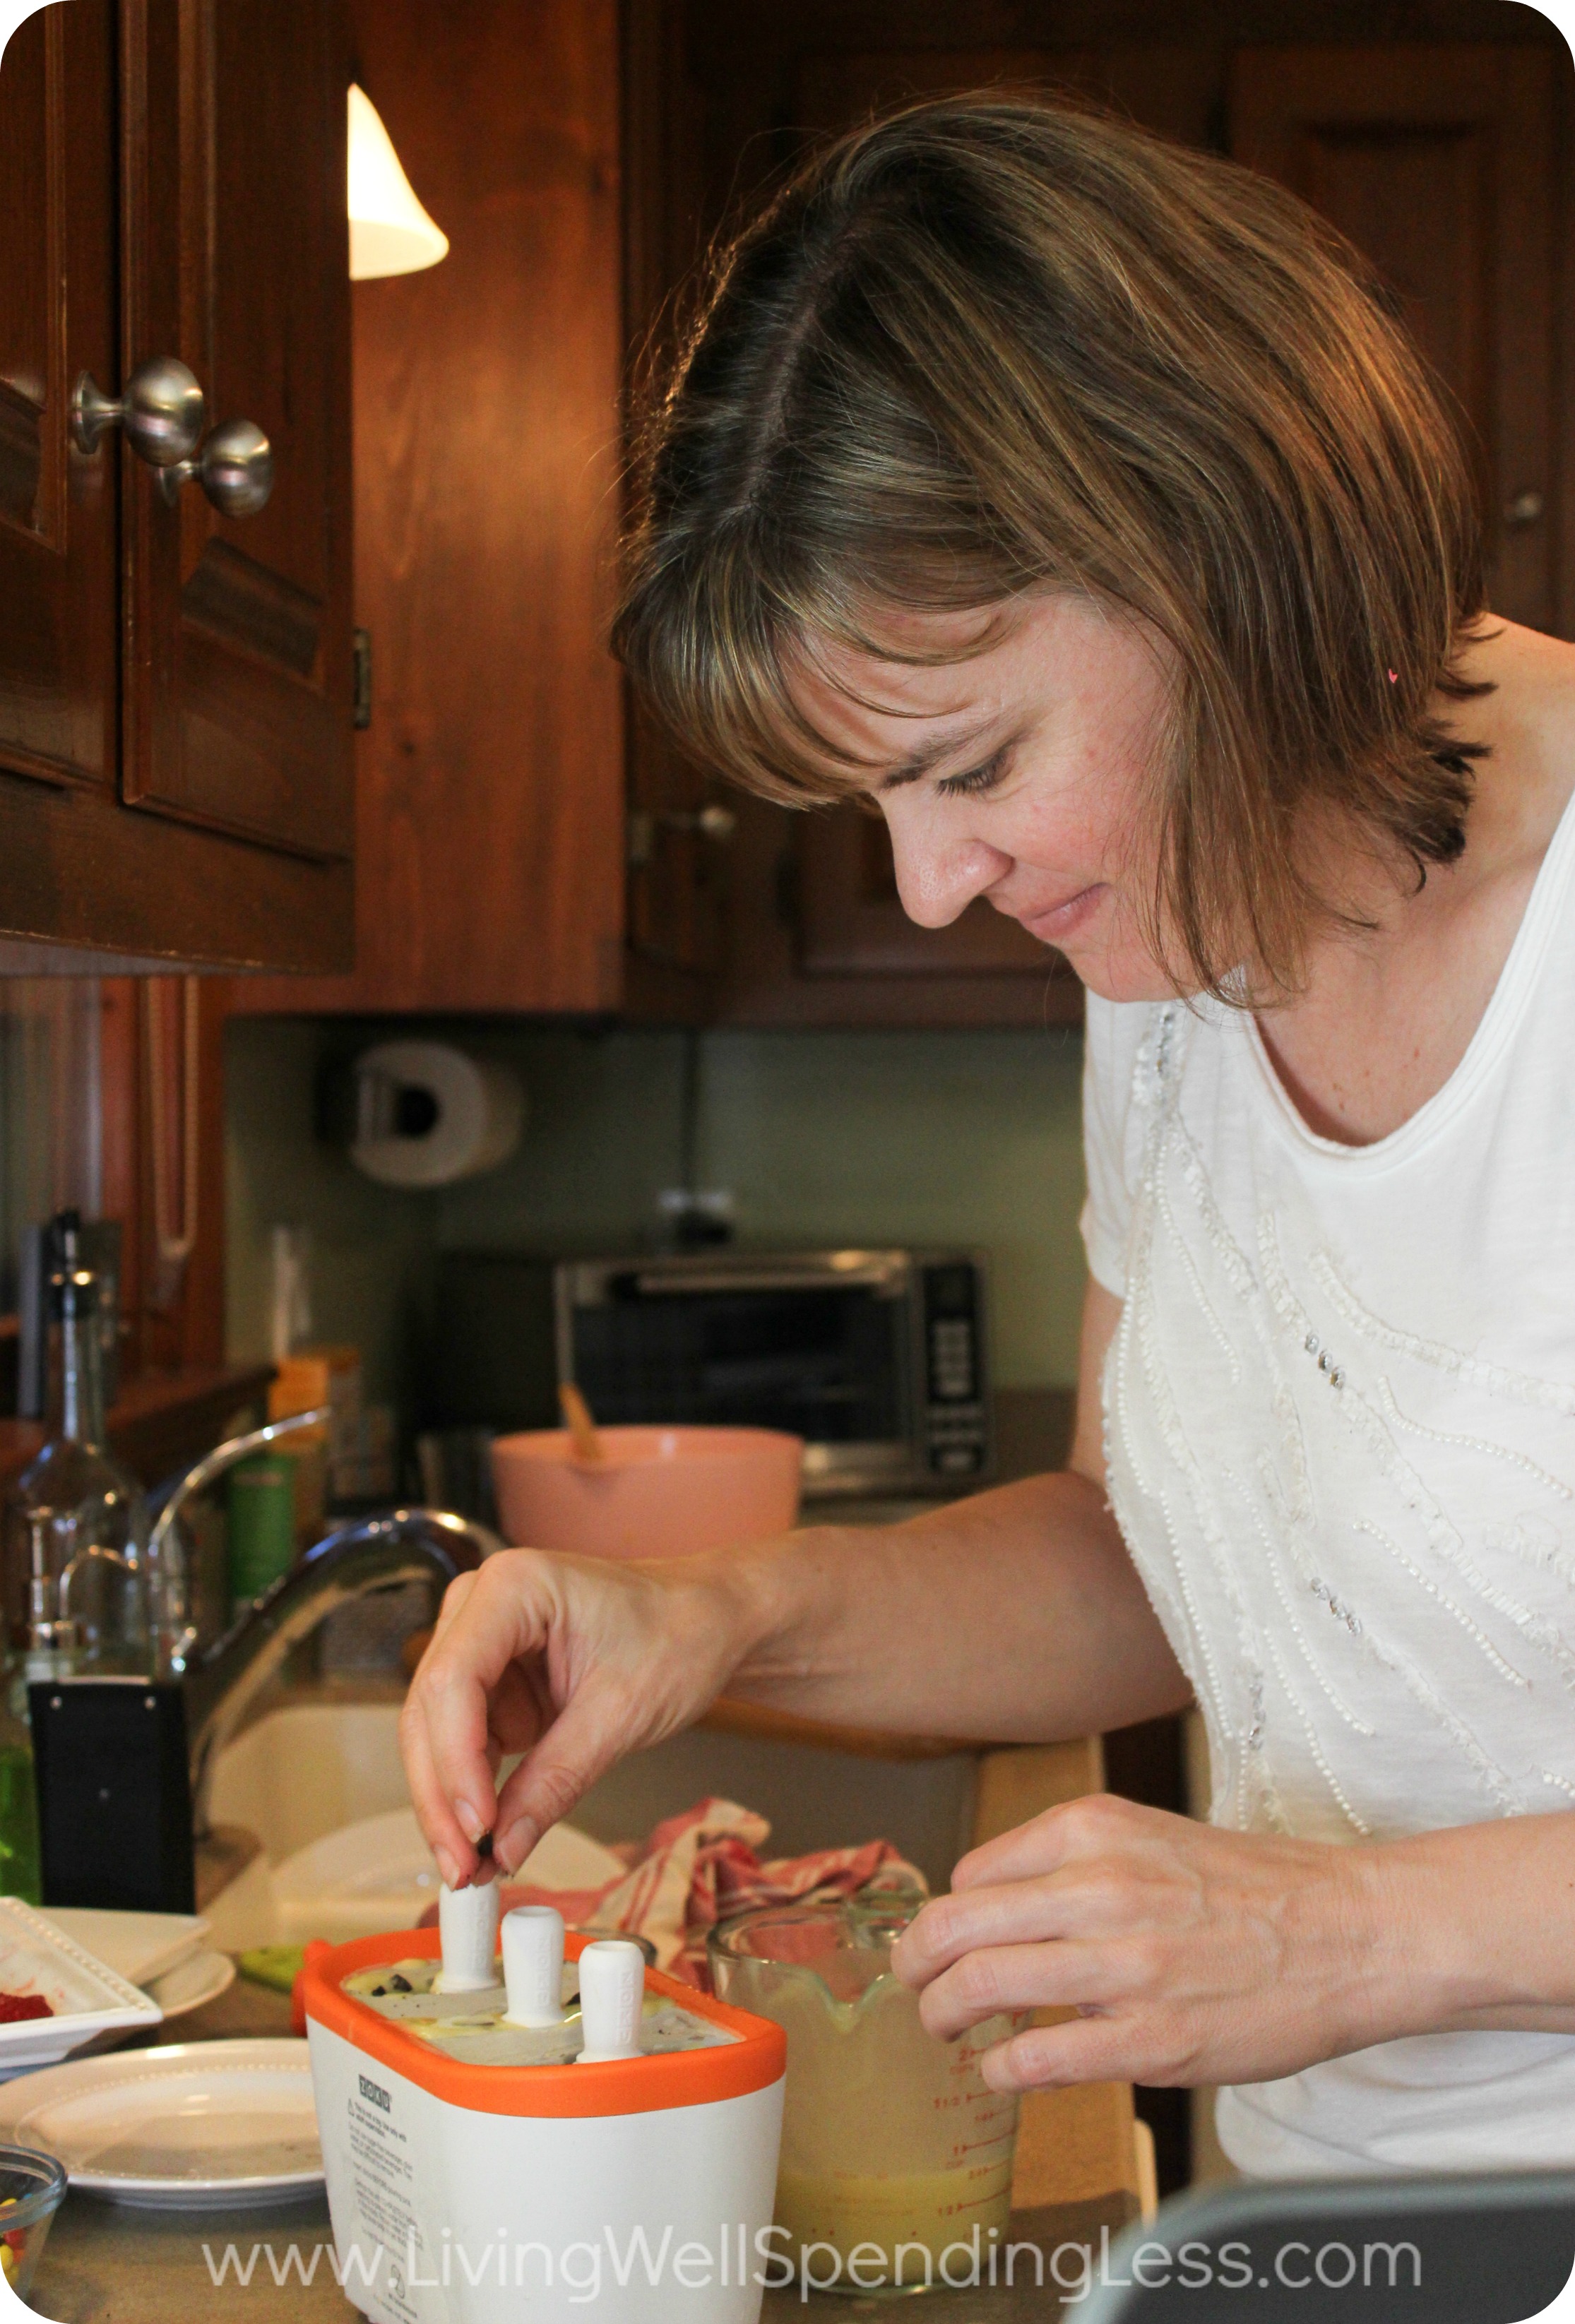
Step 4: Add toppings. Then continue to fill liquid or base until the molds have reached the fill line.

Step 5: Finally, here comes the hardest part. Wait,for seven whole minutes! After seven minutes…Enjoy!
This was such a fun activity. It was so great watching my girls come up with their own delicious creations. It was also an awesome activity to spend quality time together! So stinking delicious!
Print This!
Recipe: Fun and Easy DIY Popsicles
Summary: This super tasty summer treat is so easy and fun to create!
Ingredients
store bought lemonade with fresh fruit of your choice
1 5.1 oz box pudding
4 cups milk
3/4 teaspoon of vanilla extract (optional)
1 1/2 tablespoons of granulated sugar (optional)
a variety of toppings (optional)
Instructions
If you decided on the Zoku, make sure it goes in the freezer the night before your activity. Then make the pudding (any flavor will work) according to the package. Then let the pudding set up.
Then thin the pudding, using the remaining 1 cup of milk along with ¾ tsp of vanilla and 1 ½ tablespoons of sugar. While you are waiting for the pudding to set up, you can get your popsicle bar ready. I put out all different kinds of toppings. Make sure to break things up into small bits or buy the mini versions of things.
Next pour a small amount of liquid or base into classic popsicle molds or the Zoku.
Add toppings. Then continue to fill liquid or base until the molds have reached the fill line.
Finally, here comes the hardest part. Wait,for seven whole minutes! After seven minutes…Enjoy!
Preparation time: 5-7 minutes
Cooling time: 7 minute(s)
Number of servings (yield): 4-6

***GIVEAWAY***
And now it is time for another fun giveaway! Today we are again giving away something EVERYONE can use–a $100 Amazon Gift Card–that you can use to make your own summer fun, or to purchase your own ice pop maker! To enter, just follow the instructions in the box below:
KC is a creative, fun-loving, homeschooling mom
of two adorable girls ages 12 & 7. She has a passion for making special memories and carving out special time with her family. When not cultivating fun for the family, she can be found crafting, creating something, organizing or sprucing up the house. Whatever she is up to, you can guarantee she has a plan, which may be revised many times,a small budget, and strong will get the job done. She will most likely blog about it and make sure to keep it real because she doesn’t do fake.

* * *
What popsicle flavor would you make?
Pin It
The post Fun and Easy DIY Popsicles appeared first on Living Well Spending Less®.
July 27, 2014
Weekend Wandering
Happy Sunday! I hope you are all having a fabulous weekend! I am currently on my way home from North Carolina where I was attending the She Speaks conference. It has been an amazing couple of days, connecting with friends both old and new. I didn’t get nearly enough sleep but it was totally worth it for all the laughs!
I will actually be coming back to North Carolina in about a week and a half to speak at the Becoming Conference, which is happening just outside of Asheville on August 8-9th. Becoming is one of my favorite events each year–it is a fun gathering of women that focuses on becoming purposeful, creative, and frugal. The sessions this year look like they will be better than ever! Tickets and lodging are super affordable and I believe there are still a few tickets available. I would LOVE to have you join me there!

In the meantime, here is what I loved from Thrifty Thursday this week!
* * *
First of all, these Cantonese Soy Sauce Pan-Fried Noodles from The Woks of Life look so yummy!

This Summer Orzo with Shrimp from Modern Hen Home has my mouth watering–I love the use of the fresh corn and grilled shrimp!

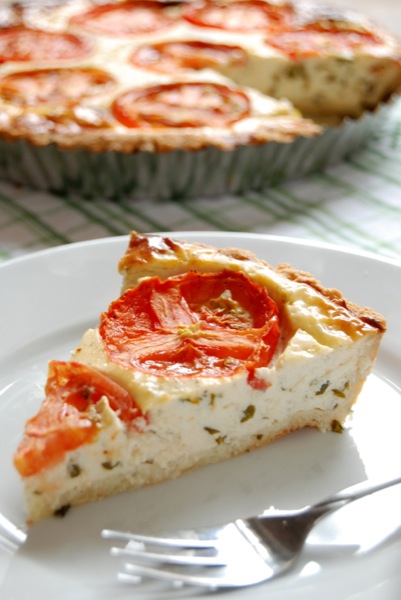
We love Frittatas in our house! They are perfect for a quick light meal any time of the year. Intoxicated on Life has an easy recipe for a Tomato Basil Pie with Parmesan Rosemary Crust that sounds and looks incredible! Bonus, it’s gluten free!
These Maple Bacon Biscuits from A Thrifty Table are a yummy copycat recipe from Ruby Tuesday! My littlest LOVES bacon and would totally be all over these!

Cha Ching on a Shoestring has The Best Ever Blueberry Syrup Recipe Ever, and it only takes 6 ingredients! This looks so good!

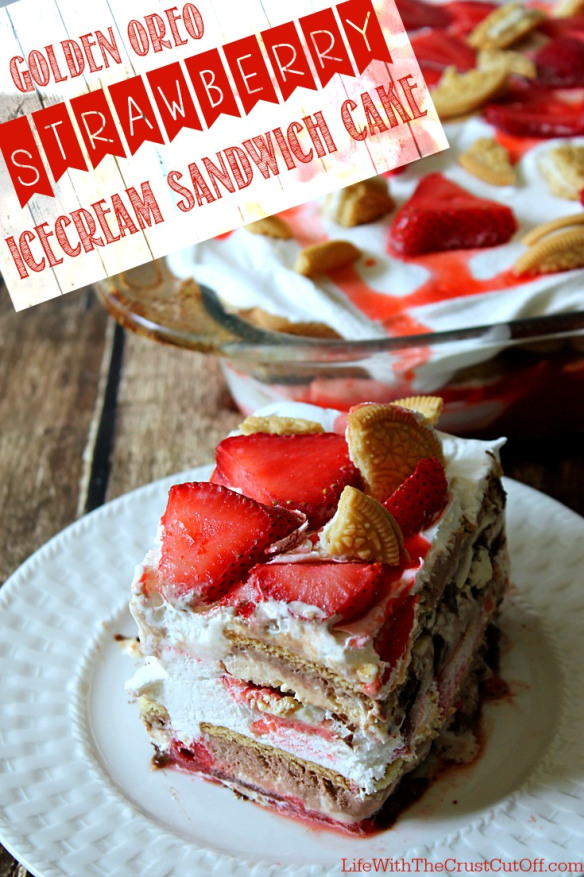
How delicious does this Golden Oreo Strawberry Ice Cream Sandwich Cake from Life With the Crust Cut Off look? I’m actually drooling…..
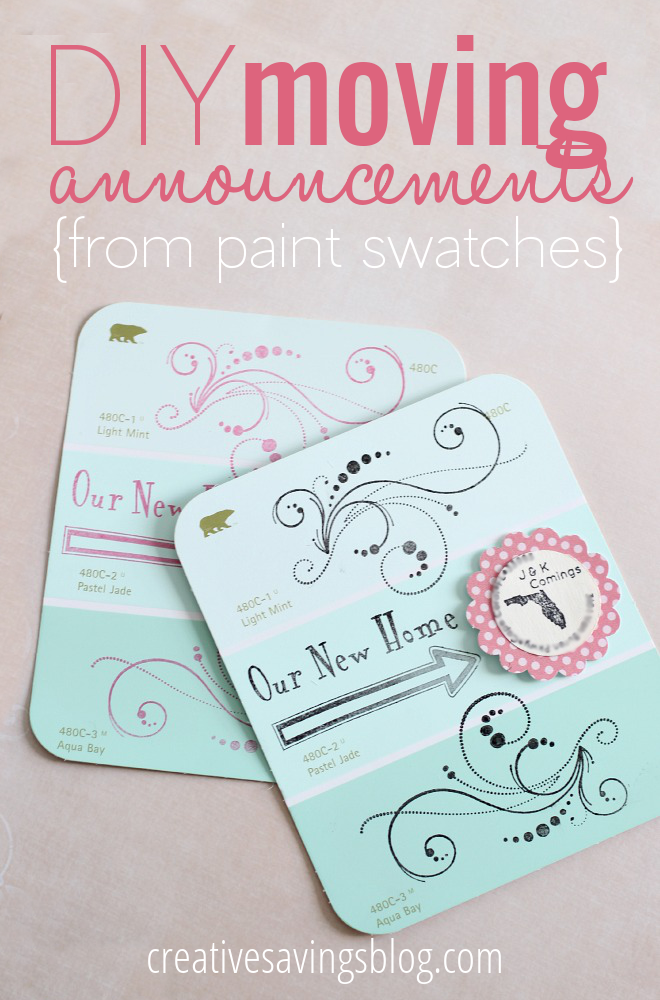
Planning a move soon? Creative Savings has very clever DIY Moving Announcements made from paint swatches. Aren’t these adorable?
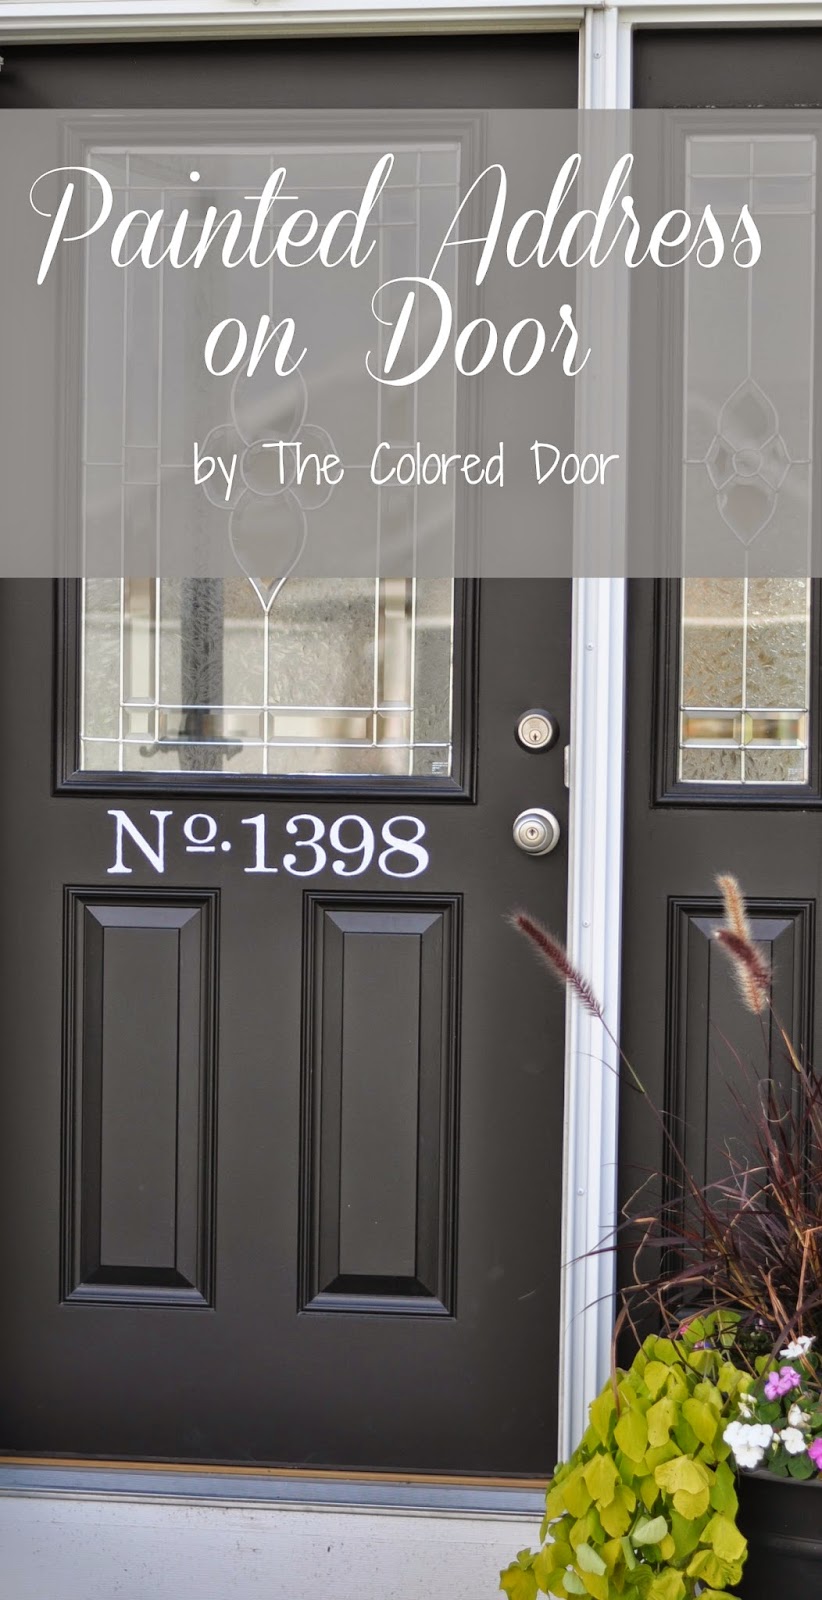
Do people have trouble finding your address? I love this Painted Address on Door project from The Colored Door.
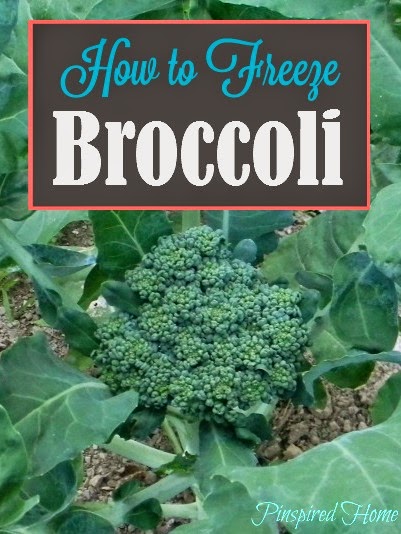
Need a tip for saving those summer vegetables? Pinspired Home has How to Freeze Broccoli. There are also tips on how to use each part of the plant. So helpful!
Staying Motivated to Live Frugally from The Teacher’s Wife can help you prevent burn out .

Still planning a summer getaway? Coffee With Us 3 has 10 Ways to Save Money on Vacation No Matter Where you are Headed. Number 5 is ingenious!

Finally, think you’ve heard ALL the ways to save money? Freebie Finding Mom has 10 Weird Ways to Save Money. Number 6 is great!

* * *
What did you love this week?
Pin It
The post Weekend Wandering appeared first on Living Well Spending Less®.


