Kaye Wright's Blog, page 14
May 9, 2016
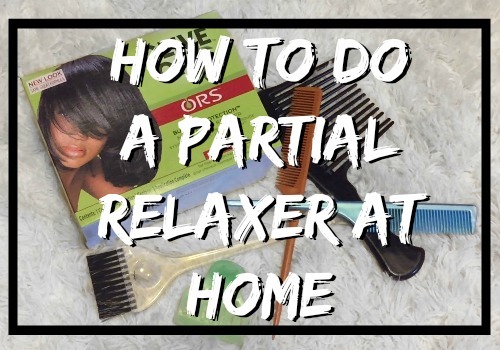
Short Relaxed Hair | How To Apply A Partial Relaxer At Home
 If you have short hair and your hair is relaxed, then you are probably familiar with the struggle that is uneven hair growth. Even if your hair grows at the exact same rate on every plane of your head, because of the tapered nature of a short cut, there will be parts of your hair that will require re-touching sooner than other parts.
The parts of your hair that are cut shorter will show signs of new growth faster than the longer parts of your hair. In addition, my hair for instance, grows twice as fast at the nape of my neck than the crown of my head. And because my hair is its shortest at the nape, I cut and relax that area more frequently than I do the rest of my hair.
To keep up with the pace of hair growth, often short haired ladies will opt to partially relax their hair. If you self relax, getting the hang of the schedule that works to keep your hair looking fresh while preserving your hair’s health, may seem a bit daunting. Have no fear, you can tackle this obstacle at home with a little practice.
The first thing you want to work out is, how often you apply a relaxer to your entire head of hair. For most people, a safe time frame is anywhere between 4 and 8 weeks, with 6 weeks being a sweet spot. Because of the shorter length of a pixie cut, care needs to be taken to prevent over processing, which can happen when the relaxer overlaps and is applied to parts of the hair that are already processed and straightened from a previous relaxer application. To further prevent over processing, applying relaxer only to the shorter parts of the hair that are cut often, and therefore, unprocessed or natural. Those areas are usually the nape and the sides of the hair near the ears.
ORS (organic root stimulator) makes a relaxer that comes in a smaller portion than their full sized product. I love the smaller portion. It is just enough so that product isn’t wasted. If you like their line, you could use the retouch product. Apply it as you would a full application, and follow the instructions on the packaging. Section off the parts of your hair that you do not want the product to touch. In addition to sectioning your hair, you could also apply petroleum jelly or any other type of protective product to your strands that are already relaxed. With an applicator brush, apply the relaxer as you normally would, working it through the hair in small sections. When the appropriate time has elapsed (refer to the packaging of the product you choose) rinse the product from your hair, neutralize the portion of hair that you relaxed, wash, condition and then deep condition all the strands of your hair. You are good to go!
Partial relaxers are a great way to keep your short hair looking fresh while maintaining the health of your hair. I will be posting a video on Hot To Apply A Partial Relaxer At Home. I will update this post once that video goes live. Until then, please leave any pointers you have about partial relaxers below in the comments. And if you haven’t already, subscribe to my SHORT HAIR YOUTUBE CHANNEL to see short hair styling videos along with tips, tricks and product reviews.
The post Short Relaxed Hair | How To Apply A Partial Relaxer At Home appeared first on Kaye Wright.


May 6, 2016
Short Hair | Understanding Face Shapes and Short Hair
 Understanding how face shapes enhance a particular style of short hair, can be something very handy. Once you have the basics down, you can use it in your favor. Whether you already have a short cut and are thinking of switching it up a bit, or you are considering a short hair cut for the very first time, understanding face shapes and short hair is worth taking some time to sort out.
There are 4 main face shapes. Some people argue that there are 5 or 6, and I will briefly mention the outcasted face shapes in this article. Let’s walk through each face shape, then I will explain how to quickly determine what your own face shape is. After we cover that, I’ll explain how tweaking a short hair cut to suit your particular face shape works.
First off is the oval face. This face shape is said to be “ideal”. It is the most symmetrical of all the face shapes we will talk about today.
Next up is the square face shape. With a strong jawline, this shape comes in as one of the more difficult to work with. I disagree and I’ll tell you how to make it look amazing no matter what.
Behind square, there is the round face shape. This one tends to be fuller all around. There are less defined angles to a round face.
Last up is the oblong face shape. This one tends to be narrow and long. There are a lot of variations to this face shape because the way a person’s features sit on their face, can alter or give the illusion of an altered face shape. So careful here.
Ok, this has been made to seem difficult, but is is actually pretty easy to understand. Higher cheek bones, fuller lips, a more narrow jawline, can all add something interesting to any of the face shapes, but the basics are not going to change. That is where we get into things like diamond and heart shaped faces. I think those are just face shapes that play off one of the main ones I mention here.
An oval face is proportionate from forehead to chin and from ear to ear. That is pretty much it.
A square face is the same width at the jaw line as it is from ear to ear.
A round face is shorter from the forehead to chin and full all over with less dimension than other face shapes.
The oblong face shape is longer from forehead to chin than it is from ear to ear. Simple.
To determine your own face shape, you can simply look in the mirror, but if you want to get super scientific, you can pull out the measuring tape. Look at your head from forehead to chin and from ear to ear. Then take note of your jawline. Those are the key components of what make up your face shape. Take a look at the definitions above, and you should have a pretty solid start.
Now, hair, what we’re all here for. If you have an oblong face, fullness on the sides of your style help your face look less narrow. So, keep that in mind.
For an oval face, you can pretty much get away with anything because your face is symmetrical.
A square face looks best when there is fullness toward the temples of the head and/or a heavy or feathered type bang. It balances the weight that the jaw brings to the face. So you may want to keep some length at the top of your hair.
A round face looks good with a sleek sides. Something that is very short or tapered near the ears will pull the appearance of the face down and give the illusion of a more proportionate face.
Here is a link to a video that shows images and breaks down some of what I’ve talked about here. It was created by a male model, but everything he says and shows, applies to women as well. I found it very helpful. What is your face shape? How have you worn your hair to look and feel your best?
The post Short Hair | Understanding Face Shapes and Short Hair appeared first on Kaye Wright.
May 5, 2016
How To Add Texture To Short Hair Styles
It is so easy to become bored with your pixie cut. It can feel like there are only a limited number of styles available. The truth is, that is simply not true! There are endless styling options available for short hair. Aside from the styles themselves, there are other aspects of a short cut you can play with. One such aspect, is texture. Textured styles add another dimension and can up the ante on almost any short hair do. So if there are looks you’re particularly fond of, keep reading to find out how to add texture to short hair styles the next time you do them to create a whole new style.
Styling products like pomades, soft holding gels and pastes can give you the versatility of playing with texture, while still allowing you to maintaining your style over several days. When looking for the right product for your hair, be sure to keep in mind that you want a soft hold. Something too stiff may give great results for the moment, but you may end up being stuck with it for longer than you’d like. If the style isn’t malleable, you will be forced to wash your hair sooner than you may otherwise have to.
To achieve a textured look, mold and curl your hair like you normally would. Access the shape of the style and decide where you want your textured pieces. After you have curled your entire head, go back in and pick up random sections of hair and work your product through the hair in that section. Repeat this process with different sections all over your head, in the places you decided on, taking care to keep in mind the overall silhouette you are creating.
Watch this video (How To Add Texture To Your Pixie Cut) to see a step-by-step walk through of how I add texture to short hair styles. Let me know what your favorite pomades, soft holding gels and pastes are, in the comment section below.
The post How To Add Texture To Short Hair Styles appeared first on Kaye Wright.
Short Relaxed Hair | How To Add Texture To Short Hair Styles
 Short relaxed hair. How To Add Texture To Short Hair Styles.
It is so easy to become bored with your pixie cut. It can feel like there are only a limited number of styles available. The truth is, that is simply not true! There are endless styling options available for short hair. Aside from the styles themselves, there are other aspects of a short cut you can play with. One such aspect, is texture. Textured styles add another dimension and can up the ante on almost any short hair do. So if there is a style you’re particularly fond of, you can try adding some texture to the style the next time you do it.
Styling products like pomades, soft holding gels and pastes can give you the versatility of playing with texture, while still allowing you to maintaining your style over several days. When looking for the right product for your hair, be sure to keep in mind that you want a soft hold. Something too stiff may give great results for the moment, but you may end up being stuck with it for longer than you’d like. If the style isn’t malleable, you will be forced to wash your hair sooner than you may otherwise have to.
To achieve a textured look, mold and curl your hair like you normally would. Access the shape of the style and decide where you want your textured pieces. After you have curled your entire head, go back in and pick up random sections of hair and work your product through the hair in that section. Repeat this process with different sections all over your head, in the places you decided on, taking care to keep in mind the overall silhouette you are creating.
Watch this video (How To Add Texture To Your Pixie Cut) to see a step-by-step walk through of how I add texture to an otherwise basic short hairstyle. Let me know what your favorite pomades, soft holding gels and pastes are, in the comment section below.
The post Short Relaxed Hair | How To Add Texture To Short Hair Styles appeared first on Kaye Wright.
May 4, 2016
4 Products That Add Instant Shine To Short Hair
Shiny hair is where it’s at! Shiny hair is amazing! Shiny hair is brilliant! Shiny hair is magnificent! When your hair is shiny it looks healthy, it looks polished and it look like you spent hours in a salon getting your coiffed so that you could go forth and be fabulous. Figuring out how to add shine to short hair at home is one of the simplest parts of DIY short hair.
The most problematic part of the whole “shiny hair” thing is finding the right product. The goal is to find something that adds legit shine and doesn’t give you that soul glow. Soul glow is a no-go.
Greasy is not hot. To avoid the greasy look, but get just the right amount of shine, you’ll have to keep in mind how heavy a product is. Also, consider the thickness and texture of your own hair. In addition to those two things, you will need to make sure to take note of how much product YOUR hair needs to get the amount of shine YOU are comfortable with. This step will take some experimentation, but it’s a quick learning curve, so, no worries ladies.
The main thing to avoid when adding products for shine, is weighing down your hair. Hair that is heavy with product will never perform ideally. Too much product at once, or a buildup of product over a series of applications, can cause your hair to become limp and be weighed down. Your curls will suffer, if you over do it, and your styles will look less than desirable.
Below are 4 products that I find work amazingly well for achieving shiny hair, without weighing it down. If you try any of them, or if you have tried any of them in the past, let me know your thoughts. You can also check out the mixture I stumbled upon that adds shine to your hair within the wet mold process, which makes this process even easier.
Coconut Oil. This is a staple and I think the word is out about how easy it is to instantly add shine to your hair by applying a little coconut oil. It’s affordable and readily available, which makes it one of my go-to products for shiny hair.
Aveda Brilliance. This product is a serum and a little goes a long way. Like with most serums, be careful not to over do it with this product, and be careful not to reapply too much over a series of applications.
Aveda Brilliant. Very similar in name to Aveda Brilliance, this product is like a paste. It is very smooth and has a similar texture to coconut oil. A dab of this IMMEDIATELY gives you shiny hair that lasts. This product doesn’t need to be reapplied. I’ve used it and seen the shine last for days.
Kenra. This is a light serum that smells delicious. I’ve over applied this, but it takes a lot to over apply. The formula is light and airy and the product does exactly what it claims. Add this after your style is finished for a long lasting shine.
The post 4 Products That Add Instant Shine To Short Hair appeared first on Kaye Wright.
Short Relaxed Hair | 4 Products For Shiny Hair
 4 Products For Instantly Shiny Hair.
Shiny hair is where it’s at! Shiny hair is amazing! Shiny hair is brilliant! Shiny hair is magnificent! When your hair is shiny it looks healthy, it looks polished and it look like you spent hours in a salon getting your coif done so that you could be fabulous as you prance down the street.
Now, the problem is finding a product that adds shine to your hair, but that doesn’t give you that soul glow. Soul glow is a no-go.
Greasy is not where it’s at. To avoid the greasy look, but get just the right amount of shine, you’ll have to keep in mind how heavy a product is. Also, consider the thickness and texture of your own hair. In addition to those two things, you will need to make sure to take note of how much product YOUR hair needs to get the amount of shine YOU are comfortable with. This step will take some experimentation, but it’s a quick learning curve, so, no worries ladies.
The main thing to avoid when adding products for shine, is weighing down your hair. Hair that is heavy with product will never perform ideally. Too much product at once, or a buildup of product over a series of applications, can cause your hair to become limp and be weighed down. Your curls will suffer, if you over do it, and your styles will look less than desirable.
Below are 4 products that I find work amazingly well for achieving shiny hair, without weighing it down. If you try any of them, or if you have tried any of them in the past, let me know your thoughts.
Coconut Oil. This is a staple and I think the word is out about how easy it is to instantly add shine to your hair by applying a little coconut oil. It’s affordable and readily available, which makes it one of my go-to products for shiny hair.
Aveda Brilliance. This product is a serum and a little goes a long way. Like with most serums, be careful not to over do it with this product, and be careful not to reapply too much over a series of applications.
Aveda Brilliant. Very similar in name to Aveda Brilliance, this product is like a paste. It is very smooth and has a similar texture to coconut oil. A dab of this IMMEDIATELY gives you shiny hair that lasts. This product doesn’t need to be reapplied. I’ve used it and seen the shine last for days.
Kenra. This is a light serum that smells delicious. I’ve over applied this, but it takes a lot to over apply. The formula is light and airy and the product does exactly what it claims. Add this after your style is finished for a long lasting shine.
The post Short Relaxed Hair | 4 Products For Shiny Hair appeared first on Kaye Wright.
May 3, 2016
Short Hair Problems | What To Do When You Miss Your Long Hair
 Short Hair Problems – What to do when you miss your long hair?
In cliques, so many times, the people who are a part of the clique hold some truths close to their hearts. It’s usually things that are seen as negative, which end up being withheld from the general public. Short hair is no different. There are the members of the short hair mafia who swear by their pixie cuts. They love every aspect of wearing, styling and having short hair. I am one of those women. I love my short hair. However, the truth of any matter always involves pros and cons.
Before I had short hair, I had long hair. Duh! For almost 5 years I was natural and I grew my hair out completely. I have also worn weaves and braids that were booty length, and I enjoyed every minute of it. Short hair has always been me. It’s been my go to since I shaved my head and dyed my hair blonde at 19. Yikes! It’s part of the reason I have so many short hair styles mastered. I’ve been living with short hair forever (*in my CardiB voice*) So no matter what I do, I always seem to find my way back home to my short hair. In reality, I’ve worn my hair short for the majority of my adult life.
I say all that to say that there will be times when you miss the old you. When you miss slinging your hair from side to side or tucking it behind your ear. Long hair has its place and at times, I want its place to be on my head. So there, the cat is out of the proverbial bag.
What do I do when I miss my long hair? I go get me some long hair. The feeling is usually temporary. I’ve come to learn that about myself. So in order to keep the universe at peace, I just go out and scratch that small itch, get over it and get myself back to reality sooner rather than later. Growing my hair long is not even an option. The patience and commitment that takes is not something I have. That is how I know any desire for length is a fleeting one.
Weaves, wigs, quick weaves and braids are all options that work for me when I have the craving for long hair. They are temporary fixes that, if done correctly, cause no damage to your short hair underneath. They are also great for when you want to give yourself a break for frequent styling of your own hair.
So the answer to what to do when you miss your long hair is simply – GO GET YOU SOME HAIR! No harm, no foul and you will be back to your cute pixie-d self in no time.
Do you ever miss your long hair? If so, what do you do to get past that hump?
The post Short Hair Problems | What To Do When You Miss Your Long Hair appeared first on Kaye Wright.
May 2, 2016
Short Hair Is Versatile | The Halo Braid on Short Hair
 There are times when women shy away from short hair because they believe it will limit their options. This couldn’t be further from the truth. Now, in all honesty, there are some hairstyles that I have not managed to pull off, due to the length of my hair. However, I can mimic pretty much any style I see and I can make it work!
Below is a tutorial on how I did just that. When Snapchat went into Cocahella mode, the filter that I saw most, was the flowered headband. That made me think about how I could recreate the Halo Braid on Short Hair. I had created Milk Maid Braids on my short natural hair many years ago, and I was confident that I could pull this feat off as well.
I mapped out the plan in my head and got to work. What came from those efforts was a beautiful Halo Braid that any short haired beauty can rock. I used braiding hair, rubber bands and lots of hair pins to keep things in place and secure. Here is a brief outline of the steps:
1.I molded my hair from a part that went across the crown of my head from ear to ear.
2. After sitting under the dryer for about 15 minutes, I braided my own hair around my forehead. I used rubber bands to tie off the ends of my braids.
3. Using braiding hair, I created my Halo Braid and then attached it to my own braided hair and used hair pins to secure it. I repeated this step to create a second braid for fullness.
4. I criss crossed the braids in the back and perfected my edges. And VOILA! A Halo Braid on Short Hair.
If you want to see how I did this, watch my HALO BRAID ON SHORT HAIR tutorial. Let me know what other styles you wish you could wear, but think your hair is too short to pull off.
The post Short Hair Is Versatile | The Halo Braid on Short Hair appeared first on Kaye Wright.
April 29, 2016
Short Relaxed Hair|5 Short Hair Instagram Accounts to Follow
 Short Hair Instagram Accounts to Follow. Keeping inspired when it comes to short relaxed hair styles, can be a challenge. There are times when I literally run out of ideas. That usually happens around the same time that I am tired of wearing my hair in a not-so-fancy style.
What I usually do to jolt myself out of a lack of hairspiration rut, is go to social media. All it takes is one glance at a pic that moves my spirit for me to suddenly thrust myself into the shower to wash, condition and style my hair from Awww Lawd! to YASSS God!
Because I am pretty creative myself, I need something that really has some type of twist to it. Whether the twist be color, a different silhouette, or a funky cut, it doesn’t matter, so long as it moves me. There are a few INSTAGRAM accounts that always give me what I need when I’m feeling blah. I’ve listed the ones below that always impress me. Take a look at them and let me know if there are any that I should be following, that aren’t listed below. Also, if you see a style that you want me to recreate, tag me on Instagram and I will do it! And of course, also follow me on INSTAGRAM at PrettyPixies.
1. THECUTLIFE
2. MSKJ5
3. KHIMANDI
4. TOSHADENISE
The post Short Relaxed Hair|5 Short Hair Instagram Accounts to Follow appeared first on Kaye Wright.
April 28, 2016
Short Relaxed Hair Tutorial|The Quick & Easy Spiked Pixie
 Short Relaxed Hair. The quick spiked pixie is one of the easiest thing you can do with your hair if you have a pixie cut. In this particular tutorial, I used a flat iron to quickly get a bit of a flip to the hair in the top of my head that has a little length to it. However, you can very easily achieve this same hairstyle without using a heat styling tool.
THE MOLD!
To get the perfect base for this style, you want to mold the hair flat and combed toward your face. Make a slight part at the crown of your head and use that as the starting point of your wet mold. For my edges, I molded the hair into a slight C-shape with the end of the side burn pointing away from my ear.
CURLING/STYLING!
After about 25 minutes under the hooded dryer, I combed out my mold and used my 1/2 inch tourmaline ceramic flat iron to lightly bump the top section of my hair into a few flips. Take big chunks of hair and flip the sections toward your face. For the sides, combed the hair toward your ears without adding any curls. The back of the hair is simply combed down toward the nape of the neck.
PRODUCTS USED!
I used Wrapp It Shine Foaming Lotion for the wet mold. Aveda Control Paste is the product I used to smooth and manipulate my edges.
You can see the step-by-step video tutorial on this Quick & Easy Spiked Pixie, to watch as I create this style on my own short relaxed hair. For more style ideas, go to the SHORT HAIR TUTORIALS page here on kayewright.com.
The post Short Relaxed Hair Tutorial|The Quick & Easy Spiked Pixie appeared first on Kaye Wright.