Kaye Wright's Blog, page 13
July 28, 2016
8 Steps To The Perfect Short Hair Wrap EVERY TIME!

I’ve talked to you guys about how to wrap your hair before. I have a short blog post with 4 quick tips. I’ve shown how I wrap my hair at night to preserve my styles in the video below. But what we’re going to go over today is better than both those posts.
Why? Because this post contains the 8 steps to the perfect short hair wrap EVERY. SINGLE. TIME. The 4 point post was an overview. It was like a Cliffsnotes version of the full length lesson. The video where I show you how to wrap your hair at night, is for, well, dry hair that has already been molded. But this, this right here, this RIGHT HERE…this is the one. These 8 steps will change your short hair life.
If you do what I’m telling you and follow these steps, your mold will come out perfect every time. So without further ado, let’s get into it.
RINSE RINSE RINSE
Make sure you rinse any and all product from your hair after you wash and condition it.
Shampoos, cleansing products and conditioners coat your hair. They leave a layer of film on your strands. That layer acts like a barrier between your hair and the foam. The foam can’t do its job as well when it’s fighting that added layer of product. So rinse until you are sure your hair it free of left over product.
**This doesn’t mean you can’t add oils or liquid leave in conditioners after washing, just be mindful of whether or not what you use as a leave in is water based and when you add oils be sparing and not too heavy handed.
BIG THEN SMALL
Use the big comb first. Using a wide toothed comb to direct the hair is just plain smart. Wet hair is more susceptible to damage and by using a less abrasive method to get your stands going in the direction you want, you prevent yourself from becoming a meme about lack of edges. Take care of your hair even though it’s short. Go in with a bigger comb first and save the small toothed or rat tailed combs for later on in the process.
FOAM FIRST
Add foam to your hair before you go in with the finer comb. By doing things in this sequence, you will be able to judge whether or not you need to add more foam, or add more water, etc. Also, you won’t have to do as much work later to work the product into your hair and to your roots. A light layer on the top layer of your hair at this point is like a guide. Just use it as a go-by for your final results.
USE YOUR TEETH
Once you’re ready to actually begin your wrap, place the teeth of your comb at the roots of your hair and keep the teeth on the roots as you make each stroke with your comb. This will prevent your hair from bunching up at the root and you won’t have to work so hard to get it to lie flat against your scalp.
THEN USE YOUR HAND
Use your hands to follow up each one of the strokes of your comb. Doing this smooths the hairs and blurs the lines that the teeth of the comb create. It makes for a very smooth and sleek mold once your hair has dried.
CHECK YOUR WORK
Check your mold for any breaks or separations at the parts of your head where the hair is wrapped in differing directions or where your head curves. Those gaps can sometimes be missed and when your wrap dries, you have to use heat or products to disguise the gaps.
START IN THE BACK
When you place your wrap strips, start at the widest part of your head in the back. Your hair tends to generally be denser in that area. The hairs in the dense areas of your head are less likely to shift or move when you adjust the wrapping strips to tie your mold down. If you place the wrap strip on the sides of your hair first, those hairs are less dense and the strip may disrupt the mold with even the slight tugging it takes to tie the wrap strips in place.
GET BACK UNDER THERE
And last but not least, let your hair dry COMPLETELY! Get your ass back under that dryer! You cannot cheat it, if you want a perfect wrap. You must let that hair dry. Wet hair frizzes and nothing combats frizz except high heat or heavy products. To avoid having to weigh your styles down with product or burn your poor stands to death, just let your hair dry.
Now go forth and slay your wet wraps. For more than 20 short hair tutorials and style inspiration, check out my YouTube channel Kaye Wright.
The post 8 Steps To The Perfect Short Hair Wrap EVERY TIME! appeared first on Kaye Wright.


July 11, 2016
How To Style Short Relaxed Hair In The Summer
Summer in the South is basically Satan in-person. It has already reached over 100 degrees on more than one occasion and we have yet to see the month of August. This is agonizing to someone who loves styling their hair, as I do. It led me to face the issue of How To Style Short Relaxed Hair In The Summer? Enjoy my pain, struggle and triumph below, as I answer that question.
I took 35 minutes and curled my hair perfectly and in a matter of seconds, it looked like shit on a stick. I can’t speak for anyone else, but where I live there seems to be a shortage of Uber drivers who can competently follow the directions their Waze apps are giving them. Because of this foolishness, my Uber driver was 4 houses down from my house and blowing me up like I was Jesus and my phone was the main line.
Out of frustration, I walked out of my house to meet her so that I would have some chance of being on time. Little did I know that Satan was outside waiting on me. He blew his breath into the air and my hair found its way to my forehead and the backs of me ears, where it stuck, wet and limp.

Just like that the entire 35 minutes I had spent meticulously curling and perfecting my hair, was gone. I got into the back seat and didn’t even bother to look in the mirror. I knew my style had been laid to rest.
Late and incompetent Uber driver’s aside, it’s really the summer heat that ruins relaxed hair styles. More specifically, short relaxed hair styles. In the summer you sweat and sweat destroys hairstyles because wet hair doesn’t hold its shape. That’s fact. I live in Florida and today when I got into my car, the temperature gauge read 102 degrees. And yes, another hair style bit the dust. FML.
This heat is not playing, it is real, it is unavoidable and because of Satan’s breath in the air, my short relaxed hair struggles are real. Today the temperature gauge in my car read 102. What.Da.Fuq.Is.Life. So now when I receive an invite to a summer fling, my thoughts are hijacked with images of me looking like a wet dog and still trying to hold it together and look summertime fine.
What is a girl to do? How can anyone style short relaxed hair if the sun literally throws balls of fire at you when you walk outside.
I WAS DETERMINED TO FIGURE OUT HOW TO BEAT THIS SUMMER HEAT!
The key to combating sweat, when it comes to hair, is to work with it and not against it. I wrote about how I came to this revelation in the post about HOW TO WORK OUT WITH SHORT RELAXED HAIR. You will never win against any moisture that your hair comes into contact with. In order to still wear your hair out in public and look decent, you will need to learn how to create styles that take advantage of what your hair does when it gets wet. Below are some videos of styles that do just that.
For me, figuring out how to work with my hair when it’s wet was easy because I wore my nature textured hair for about 4 ½ years after my disdain for sitting in salons all damn day on Saturday drove me to find a solution. You can read about that here. Wearing my hair natural taught me about how my hair behaves when it is without product and chemicals. Wet relaxed hair mimics some of those same behaviors.
I set out to create styles that would get me through the summer heat and not call for any drastic changes to my short cut. Below is a list of what has worked for me.
GELS
Gels slick your hair down. We all know that. But, did you know that when you are heavy handed and layer the gel into your hair, you can create smooth styles that withstand heat and water and that last for days? Be sure to choose a gel that is flake free and also use a leave-in conditioner that your hair responds well to. In the video the NINJA BUN on short hair, you can see how I apply the gel to my hair in layers. You can use this technique for lots of different styles, the bun is just an easy go-to for me.
2. CURLS
Any texture in your hair is likely growing in with a curl or bend in it. The whole point of applying a chemical relaxer is to straighten out that curl or bend. When summer time comes around, you can opt to stretch a little between relaxers so that you can take advantage of the texture and the volume that extra new growth provides. Using gels and doing curly styles will be super easy when you work with the curls you hair already has and the ones the devilish sun will create by making you sweat at your scalp. I did this in the TAPERED FRO look I created.
3. BRAIDS
Braids are a no-brainer. Then why would I mention it here, right? Well, because braids don’t have to be the same ole same ole we’re all accustomed to. Box braids, Marley twists, cornrows and other common styles are not the only options. Play around with bigger braids, halo braids, or even mix it up with a bun and braided ponytail.
Braids work because sweat and moisture can’t disturb the actual style. Even though your edges may curl up, the braids will remain intact and retouching edges is child’s play compared to trying to maintain and refresh a straightened style that has been attacked by the heat demon.
HOW CAN YOU GET THROUGH THE SUMMER HEAT WITH YOUR SHORT RELAXED HAIR ?
Assess your hair, what looks good on your face and what you will be doing in the summer heat. Once you have that nailed down, you can choose a style that suits your lifestyle and you can make it through the summer without looking like a plucked, wet chicken. After you have decided on a style, you have to try it out inside. Do the style, wear it and make sure it’s comfortable inside. Then venture out for a short rendezvous in the heat. If it holds up, then you know you’ve got a winner. If not, start over. It may take time, but the cool thing is that summer comes every year and once you have what works, you simply recycle it and update it each year. You only have to to the bulk of the work once.
If you opt for a style that calls for gel, purchase the one you like and get to work. A big budget isn’t necessary. You can get smaller sized gels and you can reuse tools such as perm rods and even braiding hair. When summer is over, store the gel in a cool place and wait for Satan to return in 11 months. I used the same braiding hair for the HALO BRAID I created, as I did for the NINJA BUN. Those packs of hair were 1.00 each and I still have them and I’ll reuse them again before the summer is over.
So save your money and your dignity and create yourself some summer styles that last and that actually work.
The post How To Style Short Relaxed Hair In The Summer appeared first on Kaye Wright.
July 5, 2016
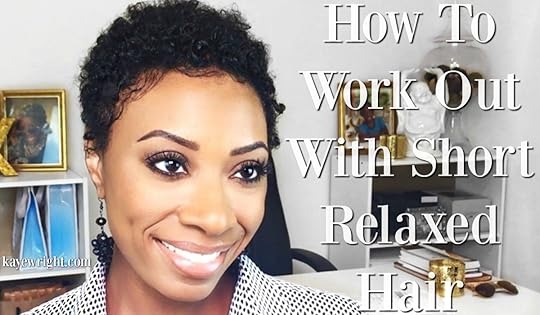
Work Out With Short Relaxed Hair
How to work out with short relaxed hair showed up, uninvited, on my doorstep and it has finally worn out it’s welcome and left the building. Thank God!
My YouTube channel (Kaye Wright) has grown steadily over the past few months. I decided to focus on hair tutorials because as I looked over my channel, I saw that most of the response I got came via the videos where I showed how I styled my short relaxed hair.
I’ve always been pretty good at styling my hair at home and it’s honestly fun to show the ladies that follow me all the tips and tricks I’ve learned over the years.
I get lots of questions from ladies asking about certain styles, products and techniques. Because I’ve been doing my hair at home for so long, I’ve MADE SO MANY MISTAKES, learned from them all and have finally come up with a SHORT HAIR ROUTINE that works – I am usually able to answer their questions off the top of my head. When I can’t answer the questions impromptu, I research until I find an answer.
Recently I got some questions about styles that would last during a gym workout. To be honest, it perplexed me for a few weeks. I didn’t have a real answer and all the research I did, was pretty much useless. Thanks for nothing internet.
I felt like I was going to let the women down who wanted help with a practical problem. The truth was, I simply didn’t know of a style that would work. Some DIY’er you are Kaye! Every idea I came up with ultimately failed. Either the style didn’t hold up or it was impossible to maintain for more than 1 day. That crap won’t help anybody! I was feeling useless too. But, I was determined to figure it out.
HERE’S HOW I CAME UP WITH THE SOLUTION.
Clearly, the enemy was moisture. In this specific case, sweat. Errbody knows that you don’t mix relaxed hair and water/moisture. It just doesn’t work. No matter what you do, if that hair gets wet, your hairstyle is ruined and it’s back to the drawing board. And by drawing board, I mean back to wash, condition, wrap, sit under the hot ass dryer, etc. I knew I had to figure out a way to combat the sweat.
Then I remembered that there is at least one day a week where I get to wash my face without worrying about the water touching my edges. That same night, I sleep without wrapping my hair and I literally don’t give a shit about my NIGHTLY ROUTINE.
It feels amazing and it’s incredibly freeing! This happens the night before I film. I wash my hair and I let it air dry overnight.
Albeit freeing, my hair is always a hot ass mess when I wake the following morning. The funny thing is that every time I wake, I see the reflection of myself in the mirror as I’m brushing my teeth and I miss the days when I was natural. I wore my hair natural for a little under 5 years and I loved it. I loved my curls, I loved my products and I went back to my relaxer after I got tired of the hours of maintenance required to keep it healthy and long.
So, a few weekends ago as I stood there with my toothbrush in my mouth, it hit me. The best way to combat the sweat was to work WITH it and not AGAINST it. The same way I create styles that take advantage of the texture in my hair when I’m in between fresh relaxers, is the way I would create a style that could withstand the rigors of a workout.
The answer to those ladies’ questions was actually simple and I’d had it all along. They needed a style that would last in the gym and the gym causes our short relaxed hair to curl up and dry frizzy. By working with frizzy or curly hair from the start, you can win this decade’s old battle.
Doing some maintenance in order to prolong the life of any hairstyle is something women have come to accept. It is what it is. It’s even more the case with women who do their own hair at home. We understand that hair has to be wrapped at night and lightly refreshed in the morning. No big deal. We got this!
As soon as I figured out that I’d work with my hair’s natural tendencies, rather than against them, I knew exactly what style I would create. I dug through my stash of hair products and tools and emerged with several packs of very small perm rods, some wrapping foam that made my hair a little stiffer than I liked (and that also I needed to use it up), a few clips to section off my hair and a spray bottle full of water.
PROBLEM SOLVED!
I took my tools and I got to work. What I ended up with is a style that looks very similar to a TWA and it is so easy to do. It lasted about 4 or 5 days.
The main takeaways for creating a short relaxed hair style that can withstand the moisture demon of working out are:
Play up the texture of your hair. Create curly styles or waved styles. Avoid styles that require heat.
Use a light gel for your edges, instead of a pomade or wrapping foam. Those breakdown with water whereas gels are water based (most times).
Braid, pin curl or two strand twist your hair at night OR while you’re working out. This will help maintain the texture of the style & actually take advantage of the moisture which can aid in making your curls and/or waves more defined.
Below is a tutorial on how I did it, which you can watch as many times as you need to recreate this style yourself! Thank me later.
I’m going to be posting a few more styles that work great in the summer heat and at they gym, so stay tuned! Leave all of your questions and comments below, and I’ll be sure to get back to you. Until next time…bye!
The post Work Out With Short Relaxed Hair appeared first on Kaye Wright.
June 21, 2016
The Best Foam To Wrap Relaxed Hair|Nutress v Nairobi
Let’s be honest here, if you are doing your hair at home, you main objective is probably to get salon quality results, right? Right. So when ‘t you wrap relaxed hair at home, you don’t go into things hoping for bootleg results. This is why products, techniques and results matter.
I’ve recently been on a mission to find the next amazing wrapping foam. My go-to is Nairobi Wrapp It Foam. It’s the best I’ve come across to date. However, I have suggestions that come in regularly via the comment section of my short hair YouTube tutorials. So, I decided to give some other foams a try.
My goal in all of this, is to find a comparable product to use to wrap relaxed hair. Right now I’m not solely dependent on the Nairobi Wrapp It Foam when I’m styling my short hair at home. Nairobi gives me salon quality results that I love. I based that on the fact that it doesn’t cause flakes, it dries fast, it provided great shine to my hair, the molds I do with Nairobi last, and it leaves my hair soft and manageable. These are the same variables I will apply to the performance of any wrap foam for relaxed hair that I review.
Before I started writing about foams here on kayewright.com, I had tried several other foams. To see what I think about those wrap foams, check out my video review here – ALL ABOUT WRAPPING FOAMS FOR SHORT HAIR or watch it below.

Now, on to Nutress Wrap Guard Foam Wrap. I had a subscriber suggest this product to me. Honestly, only one suggestion is not enough to move me. I took a mental note and kept it moving. A few weeks later I saw a video by TheHairRazor where she mentioned that she too, likes the Nutress Wrap Guard Foam. That made me think a little more about it. And when my Nairobi began to run low, I decided the time was perfect to give the Nutress a try.
I bought a bottle and when I washed and conditioned my hair, I gave it a spin. The product boasts: extra softness; protective shield; great air dry styling; non-flaking; dries fast. All those sound like great attributes and they are very similar to the results I know I get when I wrap my relaxed hair with Nairobi Wrapp It Foam.
The Nutress was similar in color and consistency to most other foaming wraps. It was light when I applied it. It smelled clean and fresh and I molded my hair as I always do with no issues at all.
After sitting under the dryer for about 30 minutes, my mold was completely dry. This is the same dry time I get with Nairobi, which I do consider fast drying. Check 1 for Nutress! There was also no flaking when I combed down my mold. Check 2!
When it came to shine, Nairobi wins this battle, hands down! Although Nutress did not cause any dryness, it definitely did not add any shine to my hair like Nairobi does. Ok, 2 for 1.
Normally, I wash and mold my hair 1 to 2 times per week. During the weeks that I only wash and mold my hair once, I am able to do so because of the long lasting hold the Nairobi provides. I like that and I need that. Some weeks I just can’t get to my hair twice. Nutress did ok in this category. My hair lasted for a decent amount of time, but I could tell that it would not last for an entire week if I had a week when I needed to push the limits. It wasn’t bad, but Nutress didn’t trump Nairobi with this one.
The last factor for me was the manageability of my hair. After a mold I want the versatility of being able to wear my hair in a flat, sleek style, like the one I did in the SLEEK PIXIE video tutorial, OR I want the option of curling and styling my hair and wearing a very ‘done’ look, if my life calls for it. Manageability is the most important factor when you wrap relaxed hair.
Nutress made my hair EXTREMELY soft and manageable. For sure, it beat Nairobi when it comes to the softness it provides. Check 3 for Nutress Wrap Guard Foam. Now, that being said, my hair did not last all week simply because it was so soft that the mold lost its shape sooner that it does when I use a product that gives a little more weight to the strands of my hair. This is something that is specific to each person who uses the product. If you want super soft hair, then this would be a plus for you.
*To see how I add weight to my hairstyles so that they last watch THE SHINIEST WRAP EVER! or watch it below.
Does it dry fast? YES
Does it flake? NO
Does it provide shine to the hair? NOT REALLY
How long do the molds last? AVERAGE (2-3 days)
Does it leave the hair soft and manageable? YES
Overall, I do think I may have finally found a comparable substitute for my beloved Nairobi. Nairobi Wrapp It Foam is still number 1 for me, but the Nutress Wrap Guard Foam Wrap Lotion is definitely a very close runner-up that I will repurchase because it worked. If you’re looking for a wrapping foam Nutress Wrap Guard is a great product to wrap relaxed hair with.
P.S. Nutress also claims to provide extra protection against thermal styling. I will use it again when I apply a fresh relaxer and I will heat style my hair and let you all know if that claim holds up in real life application of the product. Until then, tell me what your go-to wrapping foams are in the comment section below.
The post The Best Foam To Wrap Relaxed Hair|Nutress v Nairobi appeared first on Kaye Wright.
June 2, 2016
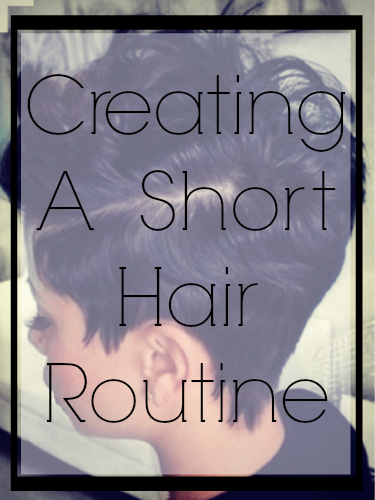
Creating A Short Hair Routine
Creating A Short Hair Routine
 WHAT IS A HAIR ROUTINE & WHY YOU NEED ONE?
Do you know how you feel about your one on one, personal relationship with whatever God you worship? Well, your short hair routine is something like your relationship with your Lord & Savior. How? How? How? Well, your relationship with the Lawd is private, it’s made up of whatever works for you and it’s between just the two of you, right? Your short hair routine is private, it’s made up of whatever works for you and it’s between you and your hair.
A good tip to remember is: when it comes to hair, things are cumulative. One day of flat ironing at 500 degrees will not cause you to go bald, but if you do that to your hair consistently, you will definitely end up with no hair on your head. The same theory holds true for positive hair practices. One day of moisturizing will not result in beautiful, shiny hair. However, a regular and consistent application of moisturizer will give you a head full of shiny and healthy hair.
Developing a hair routine is an essential part of doing your own hair at home. Your hair will respond to consistency and caring for your hair will become easier for your once you have a set of practices that you know and that you repeat.
One of the most universal factors of mastering your own hair at home, is learning your hair. The benefits of knowing the attributes and characteristics of your hair are immeasurable. You have to take the time to really learn all the different aspects of your hair. Once you know how your hair will respond to different techniques and products, you will be better able to choose new products, tools and even new styles that work well for you and your crown and glory.
I’ll start the list by saying that the condition of your hair when you begin developing your routine, will definitely play a part in what your routine includes. If you are looking to grow your hair to a particular length in order to cut 3 inches of damaged hair off, then your routine may be more tailored toward growth than say, someone who is focused on maintaining the moisture and protein balance in their hair.
With those things in mind, let’s get into some suggestions that are universally applicable. That way, everyone can take something from this post and then build upon it and create a short hair routine you are comfortable with.
THE STEPS TO DEVELOPING AN AMAZING SHORT HAIR ROUTINE
FIRST: Cleaning and Conditioning
Washing your hair goes without saying. And each time you wash your hair, you should condition it. How many times per week or month you choose to wash and condition your hair will depend on how quickly your hair or scalp gets dirty. We each produce sebum at differing rates, so this is a very personalized thing. I wash my hair twice a week because my scalp flares up in response to an allergy I have. Many ladies go up to 2 weeks in between washes. To see my wash day routine, watch my WASH DAY ROUTINE video.
Conditioning, like I mentioned above, goes hand in hand with washing.
Deep Conditioning is so so major for relaxed hair. I talked about why it’s so important in my post 3 Mistakes To Avoid When Doing Hair At Home. Deep conditioning helps to mend some of the bonds that are broken during the chemical process of relaxing the hair. It also helps to expose the cortex of the hair strand to the beneficial properties provided by deep conditioners. Those properties are commonly moisture and/or protein. You want the moisture and protein to get to the inner parts of your hair strand where they are most effective.
SECOND: Preventing Breakage
Breakage can occur as a result of many things we do to our hair. Some things we do with a full expectation that breakage will occur. If you dye your hair blonde, there will be some breakage to the strands of your hair. However, aside from the things we do expecting breakage, we can also do or NOT do things that cause breakage that we are not aware of.
One main reason for breakage is lack of moisture. The dryer the stand of hair, the more susceptible it is to breakage. Properly moisturizing your hair and taking measures to ensure that the moisture you apply to your hair is retained, is essential to preventing and minimizing breakage.
Trimming is an often overlooked step for women with short cuts. Lots of times, you assume that because your hair is short, you only need to get your hair cut when your style grows out. This isn’t the case. Trimming your hair in between cuts, even though your hair is short, will cut down on the amount of split ends that develop from the hair being exposed daily. So trim your hair.
Properly wrapping your hair at night will also protect your ends and help prevent breakage. If you are struggling with wrapping your hair, or if you just aren’t sure about how to do it, watch HOW TO WRAP SHORT HAIR AT NIGHT. When you smooth the ends of your hair down and add a snag free wrap to your hair, you are protecting it from rubbing against itself, your bedding and your face and arms, as you sleep. Less friction = less breakage.
THIRD: Styling Frequency
How frequently you style your hair will be determined by you hair’s ability to tolerate the types of styles you create. On my YouTube Channel, I create many, many different hairstyles. However, I KNOW my hair. I have low porosity, dense strands and very resilient hair. So my hair can take what I do to it. There was a time when I flat ironed my hair EVERY.SINGLE.DAY. My hair was in a pixie cut, like it is now, and it was fairly healthy. It wasn’t great, but a lot of women would have been bald had they taken their hair through what I put mine through. I learned how often I could style my hair and keep it as healthy as it can be.
Learn your hair! Learn how much heat your hair can stand and how often. Learn how much manipulation your hair can take and still remain full and flowy. Learn styles that work for your lifestyle. Be realistic. If you need to wear a flat wrap style 4 days out of the week and only rock a ‘styled’ or ‘curled’ look on weekends, then do that. Wouldn’t you rather have healthy hair that you can slay when you WANT as opposed to a head that looks like a mango seed that you can’t make look good … EVER? There are lots of very pretty styles that you can learn to create and maintain over several days. Those types of styles will help you preserve the health of your hair.
FOURTH: Caring for Your Scalp
The scalp is super important and your short hair routine should include some attention to your scalp. After all, hair grows out of your scalp, so if your scalp is jacked up, your hair won’t grow as well as it will if you take time to care for your scalp. Massage your scalp regularly, oil your scalp, and keep it cleansed. Those 3 things combined, promote maximum blood circulation to your follicles, and that aids in your hair’s overall health. Healthy follicles with a solid blood supply is the ideal environment for your hair to grow as full and strong as possible.
Also, pay attention to your scalp and any changes you notice. Your scalp can often be the first place where a sign of something gone wrong will appear. Rashes, dry scalp or other changes in your scalp can indicate that you need to adjust another area of your routine. You may need to wash your hair more frequently to remove the buildup of sebum. A dry scalp can be a clue that you may need to wash your hair less frequently. Washing your hair too much can cause excessive dryness.
GO FORTH AND CREATE YOUR OWN
This all leads back to the theory that you will have to learn your own hair and adjust your short hair routine accordingly. This post is a broad starting point to be used as a base model. From here add as many bells and whistles as suit your fancy until you come up with the perfect, customized short hair routine for YOUR hair.
What are some of the things you do regularly that contribute to the health of your hair?
The post Creating A Short Hair Routine appeared first on Kaye Wright.
June 1, 2016
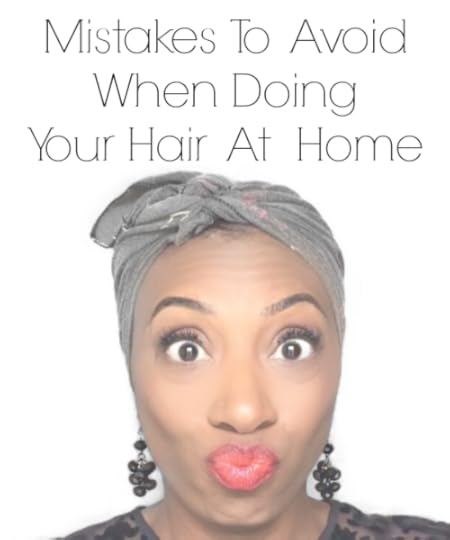
3 Mistakes To Avoid When Doing Hair At Home
3 Mistakes To Avoid When Doing Your Hair At Home
It took me some time. I took some determination, but after the foolishness that led me to do my own hair at home, I have learned so much and I want to share what I know. If you want to know why I escaped the salon and became a DIY’er, read Why I Learned To Maintain My Short Hair At Home.
I love showing other women how to manage their short hair at home. Part of that process that is very important to me, is being honest about the cons of it all. Learning to master at-home styling is a marathon, not a sprint. That run to the finish line will be paved with many bumps. Some of the bumps will be small, discrete and easily hurdled. Others, though … the damn OTHERS … they are big, ugly and will leave you exposed because everyone will be able to see that you did not know what the hell you were doing and you straight jacked up your hair.
Not to be discouraged, ladies. Anyone who does hair, has made major mistakes. Yes, mistakes, plural, more than one of them, probably a lot of them, not a little bit…you get the idea. Even professional stylists were not perfect at their craft when they initially began doing hair. Keep this in mind and be kind to yourself as you learn. It will take you some time, there is no way around it. So buckle up and enjoy the ride.
Below are mistakes I have made on my own head as I taught myself how to manage my short hair at home. My hope is that by sharing my mistakes, I will help you get to the finish line with fewer bumps and bruises than I had to endure. So, below are 3 mistakes to avoid when doing hair at home.
NUMBER 1: Over processing. Relaxing your hair at home may be a more advanced step. Not everyone will feel comfortable relaxing their hair at home, and many ladies will still opt to go in to see their stylist for chemical processes. I get it and for so many women, I totally agree that you should NOT relax your hair at home.
For the ones who want to wild out, myself included of course, then let’s proceed with caution. You want to stretch the time between relaxers as much as you can. Relaxing short hair is tricky simply by virtue of the fact that the hair is short and the possibility of overlapping product is high because there is a smaller space to work with. Overuse of the amount of relaxer, relaxing too soon, and not taking precautions to protect the strands of hair that you don’t want the relaxer applied to, will likely cause over processing. Contrary to what you may have heard or what lies you may want to tell yourself, there is no fix for over processed hair. Yes, you can apply products which may cause your hair to mimic the traits of healthy hair, but underneath, your bare hair is still over processed. Sorry, boo. It is what it is. Watch this tutorial At Home Relaxer for tips on how I apply my relaxer.
NUMBER 2: Skipping the deep conditioner. I know, I know, I know. The evil stylists only want you to get a deep conditioning treatment because they can charge extra for it. Boo hoo, poor you. Get yourself together honey! The fact of the matter is that yes, stylists do charge you extra for it, but your hair needs deep conditioning. The strands of your hair have been compromised by the chemical that is used to straighten it. There are no two ways around that. I was natural for over 4 years and I understand the difference between virgin hair and relaxed hair. Your hair can only be so ‘healthy’ when it is relaxed, simply because you have caused (minimal) damage by chemically straightening it. Give me one second and let me climb down from my soap box. Ok, there, that’s better. Now back to the subject at hand. Deep conditioning helps to maintain the strength of the strands of hair on your head. Without it, your hair will slowly degrade, to a point where it is very unhealthy. It doesn’t have to be that way. If you stop being lazy, and just do a deep conditioning treatment, everything will work out, I promise. So please do incorporate deep conditioning into your regimen.
NUMBER 3: Cutting when you’re NOT ready. Cutting your own short hair at home is scary. To be honest, not everyone will be able to master this step. What it takes to do it well, and then to do it consistently well, just ain’t for everybody. With that being said, if you are not ready or you are regularly scalping yourself and walking around looking like a mango seed, then my dear, you may just want to be realistic about the ability of your fingers to hold the scissors juuuuust so, and head on back to your local stylist, barber or Hair Cuttery, for a sprucing up. There is no shame in knowing, acknowledging and bowing down to your limitations. Don’t feel bad about any aspect of your hair care that you feel the need to hand over to a professional that is trained to do what you are struggling to do. It’s ok and no one will judge you here. If you are determined to master it, and you want a walk through of the process, watch How To Cut Your Own Hair At Home.
I have made all of the mistakes above. I learned from each one of them, too. If this post helps someone avoid some or even one, of the pitfalls of doing your own short hair at home, then I have done a good deed. And for my good deed, I will accept karmic payments in the form of amazing shoes, makeup and bottles of NAIROBI wrapp foam. Please and thank you.
Have I left anything out? Do you have specific questions about something I didn’t include in this post? If so, don’t be shy, leave it in the comments and I will get back to you ASAP.
The post 3 Mistakes To Avoid When Doing Hair At Home appeared first on Kaye Wright.
May 31, 2016
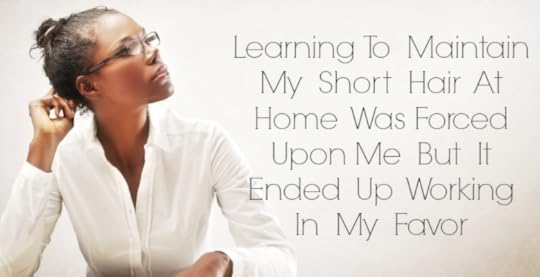
Why I Learned To Maintain My Short Hair At Home
Why I Learned To Maintain My Short Hair At Home.
Let’s be honest, if you have ever had your Saturday (your whole entire Saturday) held hostage by a late, overbooked and inconsiderate stylist who texts, talks, takes breaks and goes to pick her child up from home, ALL while you sit beneath the hood of a dryer that has long since shut itself off … THEN and only then, can you begin to understand the level of frustration that led me on a journey to figure out how to hijack my Saturdays and return them to their rightful place in MY planner and not my stylists’ undeserving hands.
To be fair, I must say that not all stylists are created equal. Because that is a fact, I didn’t feel the need to learn to do my own hair until I moved from my home town and came to know the stylists which would cause me so much irritation. I have had the pleasure of experiencing a professional stylist who actually was considerate of the amount of time clients were made to sit in the salon. That stylist was ALWAYS on time and NEVER took a phone call while working.
Coming from that, I had high expectations. So when I began to experience stylists who came in 45 minutes after my appointment time, talking on their cell phones and eating their breakfast from Chic Fil A, I was appalled. Initially, I thought it was that one stylist in particular, so I found a new stylist. When the second, and third stylists behaved similarly, I was done. If you’ve seen any of the recent #blacksalonproblem memes, then you know. That’s all I will say. You know.
My response to being done was to travel back and forth to my home town to get my hair done. When that became so impractical that I had to stop, I decided to big chop and I went natural. It was an idea I had toyed around with before and I took the plunge.
For months prior to my big chop, I stalked YouTube. I would literally watch hours of tutorials about maintaining natural hair. I had worn my hair very short before, so for me, the big chop was not so much about cutting my hair. It was more about learning about my hair’s behavior sans chemicals.
Natural hair was an awesome experience for me. I absolutely loved it. I was natural for 4 ½ years and I had never felt more free. No salons, no running away from water, no wrapping my hair, nothing but pure BLISS!
That bliss lasted about 2 years. There is something about that 2 year mark. Your hair makes a decision. It either stagnates or it grows like freakin’ Rapunzel. My hair, took the Rapunzel route. I felt trapped in the tower of endless washing, deep conditioning, detangling and diffusing. Don’t get me wrong, I still loved my curls, and even now, I occasionally miss them. But, the drudgery of keeping my long, natural hair healthy, began to weigh on me.
I decided to straighten my hair. That gave me a bit of a break and I enjoyed my straightened hair. It was a little past bra strap length and it was beautiful. If I do say so myself. However, I found myself once again, running from the rain, wrapping my hair at night, fretting about my edges curling up and so on and so forth.
One day, I took a good hard look at my hair story and I discovered that for me, the goal had always been ease. I don’t mind putting in some effort when I get the desired result, AND when that effort doesn’t have to be exerted on a daily basis in order for me not to look like a homeless heathen. From that thought, I mapped out the rest of my ‘hair must haves’.
I liked the look of short hair on myself. I look best with short hair or very long and full hair. Long and full was out due to the constraints mentioned above. I also knew that maintaining my hair was easiest when it was straight. Sorry curls, no shade intended but y’all are high maintenance and I ain’t got time for that. Last on the list was the most important variable of them all, my damn TIME! I refused to be a slave to the salon and the janky stylists I had encountered.
The list above left me with 2 options, search the globe for a professional stylist who could give me the looks I loved at a price that didn’t break the bank OR learn to handle my own business, at the house! I took door number 2 and that is how we got here, to this blog, to these short hair YouTube tutorials and to this glorious space I’ve created which is all about short hair.
I learned how to relax my short hair at home (watch the video here), cut my own pixie cut at home (watch the video here), color my hair at home, (watch the video here), and style the hell outta my hair at home (watch those videos here)! Ha! That’ll teach ’em. It took lots of time and patience, many a jacked up haircuts (I wrote about that here), and some styles that were so bad, they left me looking straight crazy. But many dedicated weekends and crying breakdowns later, I got this! And the best part of this story is that it isn’t over. You want to know why? Because I have learned so much that I can now help you too, be freed from the shackles and chains of rude, over priced and time snatching stylists. I will show you the way of the DIY short hair slayer.
That is my story and I’m sticking to it. So tell me, what experiences have you had that make you want to learn to handle your hair at home?
The post Why I Learned To Maintain My Short Hair At Home appeared first on Kaye Wright.
May 10, 2016
How to Create A Top Knot On Short Hair
Spring and summer bring out the flirty side of us all. Expressing your mood through hair, is one of the best parts of the freedom that the seasons seem to bring. I personally love top knots, buns, ponytails and lots of other styles that are traditionally reserved for longer haired mavens. However, because I refuse to submit to the restrictions of the short hair haters, I have developed quite a few sneaky techniques that allow me to enjoy the best of both worlds. Through sheer determination, I developed a method to create a top knot on short hair.
The top knot, specifically, is the one style that I refuse to let go of simply because I have no hair at the nape of my neck. I will not bow down! Instead I have learned how to rock it in a way that suits me and that takes advantage of the haircut I have, instead of working against it. Don’t be fooled, you can create a top knot or a twisted ninja bun if you put your mind to it. If you want to learn how you can create an updo with a pixie, check out my video How To Wear A Bun With A Pixie or Twisted Ninja Bun on Short Hair and tweak whatever you need to tweak to create the spring and summer styles that include rocking a top knot on short hair.
For more styles that defy the short hair odds, check out these SHORT HAIR VIDEOS.
If you know any other tips and tricks that will make styles like this easier, leave them below in the comments.
The post How to Create A Top Knot On Short Hair appeared first on Kaye Wright.
Short Hair Tutorial | How to Create A Top Knot On Short Hair
 Short Hair Tutorial – How To Create A Top Knot on Short Hair.
Spring and summer bring out the flirty side of any personality. Expressing your mood through hair, is one of the best parts of the freedom that the seasons seem to bring. I personally love top knots, buns, ponytails and lots of other styles that are traditionally reserved for longer haired mavens. However, because I refuse to submit to the restrictions of the short hair haters, I have developed quite a few sneaky techniques that allow me to enjoy the best of both worlds.
The top knot, or bun, is one of the styles that I refuse to let go of simply because I have no hair at the nape of my neck. I will not bow down. Instead I have learned how to rock it in a way that suits me. If you too would like to wear a bun, or top knot, or pony tail of any sort, please check out the video below and tweak whatever you need to tweak to create the spring and summer styles that your heart desires.
Please also leave comments below on any other styles you think may be out of reach for you because your hair is short. I promise I will find a may to make it possible.
For more styles that defy the short hair odds, check out these SHORT HAIR VIDEOS.
The post Short Hair Tutorial | How to Create A Top Knot On Short Hair appeared first on Kaye Wright.
May 9, 2016
How To Apply A Partial Relaxer At Home
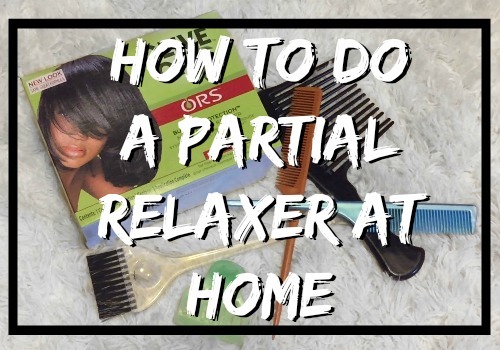
If you have short hair and your hair is relaxed, then you are probably familiar with the struggle that is uneven hair growth. Even if your hair grows at the exact same rate on every plane of your head, because of the tapered nature of a short cut, there will be parts of your hair that will require re-touching sooner than other parts. That is where the partial relaxer at home comes into play.
The parts of your hair that are cut shorter will show signs of new growth faster than the longer parts of your hair. In addition, my hair for instance, grows twice as fast at the nape of my neck than the crown of my head. And because my hair is its shortest at the nape, I cut and relax that area more frequently than I do the rest of my hair.
To keep up with the pace of hair growth, short haired ladies will opt to partially relax their hair. If you self relax, getting the hang of the schedule that works to keep your hair looking fresh while preserving your hair’s health, may seem a bit daunting. Have no fear, you can tackle this obstacle at home with a little practice.
The first thing you want to work out is, how often you apply a relaxer to your entire head of hair. For most people, a safe time frame is anywhere between 4 and 8 weeks, with 6 weeks being a sweet spot. Because of the shorter length of a pixie cut, care needs to be taken to prevent over processing, which can happen when the relaxer overlaps and is applied to parts of the hair that are already processed and straightened from a previous relaxer application. To further prevent over processing, applying relaxer only to the shorter parts of the hair that are cut often, and therefore, unprocessed or natural. Those areas are usually the nape and the sides of the hair near the ears.
ORS (organic root stimulator) makes a relaxer that comes in a smaller portion than their full sized product. I love the smaller portion. It is just enough so that product isn’t wasted. If you like their line, you could use the retouch product. Apply it as you would a full application, and follow the instructions on the packaging. Section off the parts of your hair that you do not want the product to touch. In addition to sectioning your hair, you could also apply petroleum jelly or any other type of protective product to your strands that are already relaxed. With an applicator brush, apply the relaxer as you normally would, working it through the hair in small sections. When the appropriate time has elapsed (refer to the packaging of the product you choose) rinse the product from your hair, neutralize the portion of hair that you relaxed, wash, condition and then deep condition all the strands of your hair. You are good to go!
Partial relaxers are a great way to keep your short hair looking fresh while maintaining the health of your hair. I posted a video on How To Apply A Partial Relaxer At Home. I will update this post once that video goes live.
You can also watch my At Home Relaxer Tutorial
Feel free to leave any pointers you have about partial relaxers below in the comments. And if you haven’t already, subscribe to my SHORT HAIR YOUTUBE CHANNEL to see short hair styling videos along with tips, tricks and product reviews.
The post How To Apply A Partial Relaxer At Home appeared first on Kaye Wright.