Kaye Wright's Blog, page 12
September 29, 2016
Don’t Hate On YouTubers Who Do Hair | September 29, 2016
I spend countless hours on YouTube. Why? It’s a part of what I do. I post videos about short hair to my YouTube channel, but I also consume a lot of content from other YouTubers who do hair. It keeps me current, it keeps me aware and more than anything else, I learn. To be fair, there is also an element of entertainment that comes with watching YouTube videos.
Let’s be real. YouTube has its fair share of bull! Some of the channels I visit have content that is made strictly for the purpose of gaining views. Some of it, however, is like social commentary and it keeps me apprised of what’s going on in the beauty community. The YouTubers who do hair are their own community and it’s a really good thing.

One such channel was updated recently with a vlog style post that focused on a particular comment made by a professional stylist. The comment was negative and it was clear that the stylist was in her feelings about the rise of the black hair DIY’er and the influence YouTubers who do hair have had on that particular group of ladies. The YouTuber who posted the video is very good at doing hair and has garnered a following as a result. The stylist was upset that “secrets” were being given away for free on YouTube. Girl, BYE!
The feeling of familiarity crept up on me as I watched the video. That led to this post. I know there are stylists out there who hate on the DIY’ers and they dislike YouTubers who do hair even more. They will spew slick comments into the ears of those sitting in their chair in hopes that it will somehow dissuade their current clients from ever considering doing their hair at home. Sad, but it is what it is. That thinking is fear based and it has no place in a productive and/or progressive atmosphere.
The fact of the matter is that the world is moving at lighting speed. Shit is moving fast. I get it. That can be scary to many, but it doesn’t have to be. Nor should it be.
What folks can now go to YouTube and learn for free, is no different than what stylists learn behind the chair. When an individual enrolls in cosmetology school, they are just as much a novice as the untrained YouTubers who do hair. When he or she graduates from school, their creativity is not in full bloom. They simply know the ‘proper’ terms and traditional methods recognized by those in their field.
We all know that the true masters and bad ass stylists are those who push the limits of their skills. The ones who take the initiative to learn the back end of their business. Those who are up late at night pondering over how to make this or that style turn out just right. Those stylists who doctor a woman’s hair who has a jacked up hairline and gives her back her confidence and edges. Those are master stylists and they are revered as the professionals they are. Both in their field and by the common client. They become masters by consistently learning and applying what they learn.
So the difference between a trained stylist and a self taught YouTuber is really only a matter of hours and a piece of paper. Both master their skills by using the exact same methods. Learning and applying what they learn.
As a client who was inquisitive, I learned a lot of what I know from a stylist who took the time to simply educate me and answer my questions. I’ve written before about 5 Short Hair Lessons I Learned From The PROS and Why I Learned To Do My Short Hair At Home , so I respect and appreciate true professional hair stylists. They are invaluable in the black hair care community. What I don’t respect is negativity, fearful thinking and straight up hatin’. Together we are much stronger than we are individually. The two, DIY’ers/YouTubers who do hair and Pro Stylists, can work together and impact people’s lives.
Stylists, stop hating and level up! Get your skills up. Ladies, don’t be discouraged and fooled into believing that you can’t do your hair and get amazing results at home. Each great stylist starting out making mistakes and figuring it out. You, at home, can do the same with a little time, patience and dedication.
The stylists will always be available for the things you cannot or do not wish to do yourself. So, it’s all good.
What do you guys think? Are YouTubers making things better or worse? What does your stylist think about this topic?
Watch my latest YouTube video. Click the pic! Until next time…BYE!
The post Don’t Hate On YouTubers Who Do Hair | September 29, 2016 appeared first on Kaye Wright.


Don’t Hate On YouTubers Who Do Hair
I spend countless hours on YouTube. Why? It’s a part of what I do. I post videos about short hair to my YouTube channel, but I also consume a lot of content from other YouTubers who do hair. It keeps me current, it keeps me aware and more than anything else, I learn. To be fair, there is also an element of entertainment that comes with watching YouTube videos.
Let’s be real. YouTube has its fair share of bull! Some of the channels I visit have content that is made strictly for the purpose of gaining views. Some of it, however, is like social commentary and it keeps me apprised of what’s going on in the beauty community. The YouTubers who do hair are their own community and it’s a really good thing.
One such channel was updated recently with a vlog style post that focused on a particular comment made by a professional stylist. The comment was negative and it was clear that the stylist was in her feelings about the rise of the black hair DIY’er and the influence YouTubers who do hair have had on that particular group of ladies. The YouTuber who posted the video is very good at doing hair and has garnered a following as a result. The stylist was upset that “secrets” were being given away for free on YouTube. Girl, BYE!
The feeling of familiarity crept up on me as I watched the video. That led to this post. I know there are stylists out there who hate on the DIY’ers and they dislike YouTubers who do hair even more. They will spew slick comments into the ears of those sitting in their chair in hopes that it will somehow dissuade their current clients from ever considering doing their hair at home. Sad, but it is what it is. That thinking is fear based and it has no place in a productive and/or progressive atmosphere.
The fact of the matter is that the world is moving at lighting speed. Shit is moving fast. I get it. That can be scary to many, but it doesn’t have to be. Nor should it be.
What folks can now go to YouTube and learn for free, is no different than what stylists learn behind the chair. When an individual enrolls in cosmetology school, they are just as much a novice as the untrained YouTubers who do hair. When he or she graduates from school, their creativity is not in full bloom. They simply know the ‘proper’ terms and traditional methods recognized by those in their field.
We all know that the true masters and bad ass stylists are those who push the limits of their skills. The ones who take the initiative to learn the back end of their business. Those who are up late at night pondering over how to make this or that style turn out just right. Those stylists who doctor a woman’s hair who has a jacked up hairline and gives her back her confidence and edges. Those are master stylists and they are revered as the professionals they are. Both in their field and by the common client. They become masters by consistently learning and applying what they learn.
So the difference between a trained stylist and a self taught YouTuber is really only a matter of hours and a piece of paper. Both master their skills by using the exact same methods. Learning and applying what they learn.
As a client who was inquisitive, I learned a lot of what I know from a stylist who took the time to simply educate me and answer my questions. I’ve written before about 5 Short Hair Lessons I Learned From The PROS and Why I Learned To Do My Short Hair At Home , so I respect and appreciate true professional hair stylists. They are invaluable in the black hair care community. What I don’t respect is negativity, fearful thinking and straight up hatin’. Together we are much stronger than we are individually. The two, DIY’ers/YouTubers who do hair and Pro Stylists, can work together and impact people’s lives.
Stylists, stop hating and level up! Get your skills up. Ladies, don’t be discouraged and fooled into believing that you can’t do your hair and get amazing results at home. Each great stylist starting out making mistakes and figuring it out. You, at home, can do the same with a little time, patience and dedication.
The stylists will always be available for the things you cannot or do not wish to do yourself. So, it’s all good.
What do you guys think? Are YouTubers making things better or worse? What does your stylist think about this topic?
Watch my latest YouTube video. Click the pic! Until next time…BYE!
The post Don’t Hate On YouTubers Who Do Hair appeared first on Kaye Wright.
September 22, 2016
Second Day Curly Hairstyles | Short Relaxed Hair | September 23, 2016

Curly styles are cute and all, but they usually have a very short shelf life. How short you ask? You must not have short hair, because if you did, then you would know.
To get 24 hours out of a short curly hairstyle, is considered a win. Some stylists even bank on it. I talked about that in this post titled Why I Learned to Maintain My Short Hair At Home. But me being me, I do NOT have time for the foolishness that is a one day hairstyle. So, can you get second day curly hairstyles?
The devil that is the lack of time in my life, has once again led me to doctor up some hair styling tips that will add longevity to your do’s. Below is a video I made which shows the steps I take to ensure my curly hairstyles last longer than one day.
Keep in mind, the style will not look exactly the same as it does when you finish it on day 1. It will, however, be presentable and very much wearable for up to 3 days following the initial mold and curl.
The main thing to remember when going for second day curly hairstyles is that you want to maintain the integrity of the shape of the individual curls you’ve created. Think of the curls as C shapes. You want to roll the curls with your fingers into a tight C shape.
Once you’ve done that, smash the curls. WHET? Yes. Smash the curls. Or smoosh them. Depending on your interpretation of these loose terms, you pick your poison.
Seriously though, you want to press each curl flat on your head while maintaining the C shape. That will allow you to simply reshape them in the morning. There may be a few disobedient stragglers that will need to be hit with some heat, but it should be quick.
And just as an aside, PRESS is the applicable term for all my country folks out there who are reading this. Don’t be embarrassed. I’m here to help. (*strong side eye*)
Once you have all the curls shaped and flattened against your scalp, use a wrap strip to secure the sides of your hair near your ears. Here’s a video showing how to do this and why it’s important. Next you want to use a scarf to tie your entire head up. The scarf will also serve the same purpose as the wrap strip for the curls on the top of your head. I prefer a cotton scarf because they don’t move. Silk scarves slide around and simply do not work for me.
Here’s a quick checklist of the steps to take to get second day curly hairstyles.
The same steps are demonstrated in the video.
1. Roll the curls back into C shapes;
2. Press them against your scalp so that they lie flat on their sides;
3. Use wrap strips to secure the sides;
4. Tie your head up with a scarf and use the scarf to flatten the curls on the top of your head;
5. The next morning, gently remove the scarf and wrap strip, add your oil or moisturizer of choice, and life the curls from your scalp, one at a time. You can then assess things and if needed, use a flat iron to reshape any out of line curls.
This works for me, but it does take some getting used to. You may have to reshape more curls when you first try this, than you will later down the line, once you’ve mastered the technique.
I hope this helps and if you have any questions, comments or suggestions, please leave them below. For all my short hair tutorials, check out my YouTube channel.
And until next time, BYE!
The post Second Day Curly Hairstyles | Short Relaxed Hair | September 23, 2016 appeared first on Kaye Wright.
September 13, 2016
Short Hair Mold |1 Mold 6 Days | September 13, 2016

There are days and weeks and sometimes months, when we just cannot seem to squeeze enough time out of our allotment to get around to maintaining our short hair. I find that it tends to happen to me the most when I fail to plan and then the days just slip away from me. Worrying about my short hair mold ends up on the back burner.
As much as I try not to be lazy and allow too much time to pass between washes, sometimes it happens. When it does, however, I can still make it through. The way I do that is outlined below.
Over the years, I have developed methods that help me get through the rough patches. Rough patches relating to my hair can include anything from a lack of time, to a disobedient wrap, to a plug of missing hair from a bad at-home haircut, to an overdue short hair mold.
Today we are going to talk about how to make it through an entire work week with the same mold. I normally wash, condition and style my hair on weekends. From that mold, I usually am able to make it to the middle of the week. At the mid-week point, I will rewash and condition my hair and then mold it again. That mid-week maintenance gets me through to the weekend and then the process starts again. For a day-by-day outline of my short hair routine, check out this video MY ENTIRE MONTHLY SHORT HAIR ROUTINE.
Like I said earlier, there are times when I just can’t or don’t keep to this schedule of doing my hair twice a week. This past week was one of those times. When I saw that the week was not going to go according to plan, I decided to document each day and explain what I do, in real time, so that you guys could see what short hair actually looks like when you streeeeetch out that mold.
As always, the video showing each day is below. 1 Mold = 6 Days
SHORT HAIR MOLD – Day 1:
I washed my hair with KeraCare Moisturizing Shampoo; then conditioned it with KeraCare Moisturizing Conditioner; after the wash and condition, I styled a Pixie Cut Wavy Bang Style using my beloved Nairobi Wrapp It Foam. That night I did like I always do (here’s my Night Time Short Hair Routine).
SHORT HAIR MOLD – Day 2:
So the night before, my wrap came off in the middle of the night and I woke up to some f_ckery atop my head. I didn’t panic because I know how to fix most of my short hair disasters. I fixed my Ruined Hair, salvaged my mold and kept it moving throughout the day. That night I did the same as always, except I made sure to tie my wrap extra tight.
SHORT HAIR MOLD – Day 3:
This day I woke up, fixed my edges and was out the door. I use a little dab of Nairobi Wrapp It Foam to Fix My Edges in the mornings. That night, I moisturized, wrapped my hair and called it a night.
SHORT HAIR MOLD – Day 4:
Now honestly at this point, the short hair mold is getting old and I can tell that I need to wash it, but … NOPE! I’m pushing the limits so DEAL! I fixed my edges again, but this time I left them molded. I didn’t comb them out so they were basically plastered to my face, but no one could tell that, buhcept me. That night was no different from the other nights.
SHORT HAIR MOLD – Day 5:
More of the same this morning. Edges and out the door. I did add a prayer to the routine because I was straight trying the universe but I DON’T CARE! *savage* That night I did what I always do. My hair was gross, but at this point, I was so close to the weekend that there was no turning back.
SHORT HAIR MOLD – Day 6:
YEEEESSSSSSS! I made it. My sides were lifting from the crust the layers of wrapping foam had created, but oh well. I wore it anyway and was careful all day not to scratch or manipulate my hair too much. It was straight nasty. Like dirt behind your ear nasty, but it worked and no one knew but me! BAM!
And that my friends, is how I made it through 6 days with the same short hair mold. Granted, by the end of the stint my hair was so dirty I was a little embarrassed, but not really. Sometimes life and time get the best of you.
This is not something I recommend doing on an ongoing basis, however, it you are in a pinch, it is possible to get through this many days on one mold.
Tell me if you guys have ever pushed the limits and if your hair suffered any long term effects from it. And until next time BYE!
The post Short Hair Mold |1 Mold 6 Days | September 13, 2016 appeared first on Kaye Wright.
September 8, 2016
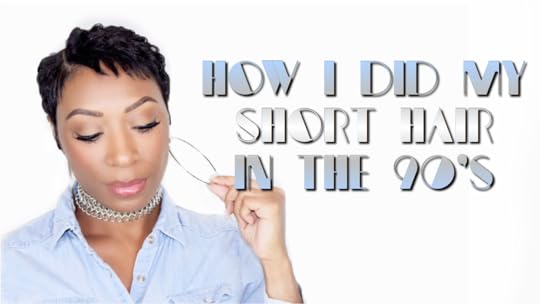
5 Short Hair Lessons I Learned From the PROS! | September 9, 2016
Doing my short hair at home is amazing. Creating short hairstyles that are exactly what I envision in my head, is a great thing. When I want something, I get it. If my hair is tore up from the floor up, it’s my fault. When my hair slays, it’s credited to me, my hands and my tools. All the things I’ve learned are displayed in my short hair styling videos.
The perks of doing my hair at home are well worth the time and effort I put into learning how to handle my own hair. However, there are things that I now know, which came from the mouths of those who learned and honed their skills in a professional atmosphere that was dedicated to hair care.
So for me to not give credit where credit is due, would be unfair and just plain shady. I’m not shady like that and I wouldn’t want someone to walk away with a benefit I bestowed upon them, and not give me credit.
We all know the struggle of being black, having short hair, and time-wrestling with hair salons on weekends. I wrote about my specific struggles and Why I Learned to Maintain My Short Hair at Home a few posts back.
You know that annoying, cheap friend that’s always hollering about how they could ‘make’ that themselves or how they could ‘do’ that for half the price? Yeah, she is I and I am her when it comes to my hair. You cannot convince me that I can’t replicate something I see a professional stylist do. I swear on all 12 disciples that I truly believe I can do…whatever!
That is a fantasy that lives on in my head, while the reality of what’s real Earth, begs to differ. Even though I don’t like admitting it, stylists have taught me a lot. The ones who have been there to correct my wrong assumptions and to guide me when I had legit questions, have been a blessing to my DIY short hair life.
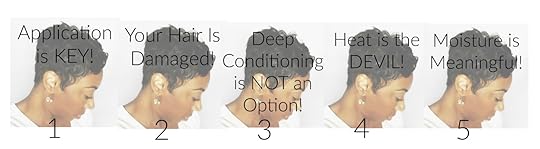
One stylist in particular, taught me more than any other and he will forever be hailed as the Best To Ever Do It, in my book. Below are 5 short hair lessons I learned from the pros!
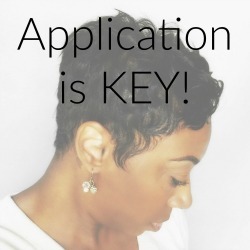
Application over Product!
 You can make a poor product work if you master the application process. This is especially true for relaxers. It may take more work with an inferior product, but it can work. You cannot, however, make a good product work well if your application sucks. That’s just what it is. You can fight against it if you want to, but it’s a waste of time. I use a product for my Partial Relaxer that I don’t use for my whole head relaxer. Mizani is bae and I use that all over my head because I think it’s better, but I can also make the partial relaxer work because of the way I apply that product.
Your Hair Is Damaged, Boo!

Relaxed hair is damaged. In the most technical sense of the word, your hair is damaged. Virgin hair is the most healthy hair can be. When you apply relaxer, you break the bonds that are present in virgin hair. There are also levels of damage. So it doesn’t mean that your relaxed hair is automatically going to be raggedy, but it can be. Think of it this way. Natural hair is Harrods of London, relaxed hair can be anywhere between Saks Fifth Avenue and Walmart. Chile you pick your lane by what you do and don’t do to your hair. Ok, bye!
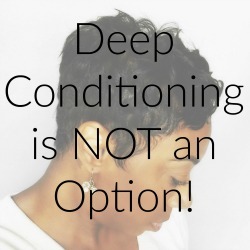 Deep Conditioning is Not An Option!
It’s a must! You cannot skip this step and stay outta Walmart. See line item number 2, above.
Heat is the Devil!
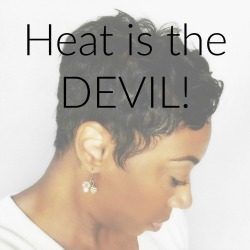
Everything that is good to you, ain’t good for you. Yes, you can create amazing short hairstyles at home and in the salon with the use of heat styling tools. Yes, you can slay girl. But, heat used too frequently is going to kill your hair. How do I know? I have done it to my own hair. I was walking around looking like a mango seed after styling my hair with a flat iron 7 days a week for months on end. Use heat sparingly. There’s no need to apply heat to your hair on a daily basis. Especially not over a long period of time. Trust me on this one. There are so many heat free styles for short hair that you can take advantage of. Give them a try.
Moisture is Meaningful!
 Relaxed hair absolutely cannot thrive without moisture. Your hair needs it whether it’s relaxed or natural, or somewhere in between. Regardless of the state of your hair, it will benefit from moisture. Figuring out how your hair prefers to receive moisture (that did not sound right) is essential. For instance, my hair is high porosity so it thrives on lighter moisturizing products and it retains moisture easily. If your hair is low porosity, you would need to determine what products and schedule suit your short hair.
And that’s it for this post. I have learned many things from pro stylists and I will likely share more later, but for now, this is a good start. Until next time – BYE!
The post 5 Short Hair Lessons I Learned From the PROS! | September 9, 2016 appeared first on Kaye Wright.
Pixie Cut with Finger Waves | Short Hairstyle |September 8, 2016
Finger waves are all the rage right now. It’s like the roaring 20’s have come to sit with us for a spell. I’m all for it. I think waves are one of the most classic styles a women with short hair can rock. A pixie cut with finger waves is just mo better, in my opinion.

On my YouTube channel, I’ve done a couple waved style tutorials, but for real, legit finger waves are hard for me. I can’t even lie. I struggle hard with doing them, but I’m determined to teach myself how to do them all over my head and have them turn out right. I’m talking Najah Like the River right. Not that hard, crunchy, brown gel mess from the 90’s. Soft waves, folks. Soft waves. (I’m screaming this just so you guys know)
Maybe it’s apparent, maybe not, but I like to be different. I love my pixie cut, but I do like to push the envelope when it comes to styling. I think that has helped me learn as much as I have about my hair and the various techniques that produce the results I want when I style my short hair.
With that being said, I find myself mixing styles and techniques, often. Don’t get me wrong, I’m not talking about mixing styles like wearing a french roll and a hard finger wave at the same damn time. Not that kind of mixing. Think more like Ciroc and cranberry juice. You know, a smooth, perfect pairing.
The pixie cut with finger waves is Ciroc and I decided to add a touch of cranberry juice. The cranberry juice came in the form of gentle flips, randomly placed. The flips give the overall style a little something extra. Some upmph., yamean? So I went for it and it turned out great. When that happens, greatness, I like to share it with you guys. See Exhibit A of my sharing. The video tutorial below.
On my YouTube channel you get the fast and dirty version of this short hairstyle. That’s for you experienced ladies out there who may just be looking for new short hairstyle ideas.
For those of you who are looking to learn and who need to see each step, I’ve got you covered. The video below gives you the blow-by-blow of the Pixie Cut with Finger Waves short hairstyle … with a twist. The products and tools I use are listed under the video.
Enjoy and leave any questions or comments below. I will get back to you. If you don’t want your business all out there, feel free to email me with any questions, comments or concerns at kaye@kayewright.com! Until next time BYE!
P.S. I have more that I’d like to share. I’m writing a short hair ebook on how to prepare your hair, style your hair, and preserve each style. If you want to pre-order, email me at kaye@kayewright.com. THANK YOU!
PRODUCTS USED:
Nairobi Wrapp It Foam
Kera Kare Creme Press
Sebastian Shaper Hair Spray
TOOLS USED:
Jilbere 1 inch flat iron
Curlamster 1/2 inch flat iron
rat tail combs
The post Pixie Cut with Finger Waves | Short Hairstyle |September 8, 2016 appeared first on Kaye Wright.
September 6, 2016
Short Hairstyles for Black Women | Kaye Wright | September 6, 2016

If you don’t know, then you’ve already lost half the battle. Seriously, if you don’t already know, I make video tutorials demonstrating how I create different short hairstyles for black women. Those videos are mainly published on my YouTube channel Kaye Wright.
Aside from YouTube, I have recently been uploading videos here on kayewright.com. Those videos are geared more toward teaching techniques and providing tips and tricks so that women can achieve the styles they want at home, while maintaining the health of their hair.
I’ve written before about why I learned to do my short hair at home, and a lot of women share all or some of my sentiments. Because of that, I get tons of questions from women who have yet to take the plunge and completely cut the cord and nix the salon altogether.
The main reason women hesitate when considering doing their short hair at home, is their fear of being able to maintain the style. It’s always interesting to me, because when a women goes to the salon and walks away with a short hairstyle, within 48 hours she is usually struggling to hold on to the last remnant of slayage from the original hairstyle. But when you mention doing hair at home, the first resistance is usually a worry about not being able to make the styles last. Girl the styles are not lasting even when you go pay an arm and a leg, because you don’t know how to make them last. I can show you how and save you some coinage.
As quiet as it’s kept, some stylists bank on that struggle. Literally and figuratively. They want you to come running back with a mango seed atop your head and a wallet in your hand.
But I can help you successfully break the ties that bind. It’s more doable than you think. And there are stylists out there who will actually help you get by at home. They will gladly answer your questions and educate you about the things your hair needs in order to thrive.
I had one such stylist. He did my hair for years and he taught me a lot of what I know about maintaining my short hair at home. Over the years, I’ve combined what he taught me with a lot of trial and error and I have mastered the art of short hairstyles for black women at home. Yes, it’s a thing and I just named it, so deal. In my YouTube videos, I show a lot, but I’m not able to show everything and my focus on that platform has mainly been on styling hair. However, I do want to expand that and actually teach women what I know.
Take a moment to check out the video above and let me know your thoughts about whether you think a product like the one I describe, will be beneficial to you. If you think it will, drop me a comment or subscribe by leaving your email address in the subscription box that you can find here (top left) and I will come back with a follow up to this post with details such as dates and prices.
Until next time, BYE!
The post Short Hairstyles for Black Women | Kaye Wright | September 6, 2016 appeared first on Kaye Wright.
August 29, 2016
Edge Control | Short Relaxed Hair Tutorial | August 31, 2016
Edge Control is essential, but obtainable too.
There are lots of paths that lead me to a particular hairstyle. Sometimes it’s necessity, other times it’s an idea I come up with out of the blue and sometimes I may see something and feel like I want to try to recreate it on my own head.
Other times, however, the straight disrespect that my hair exhibits forces me into a style. Such is the case that led to the style that is currently upon us. Many lies are sold to us by society and one particular lie is that aging is a beautiful and graceful succession of events. LIES! They are all LIES!

In the past, my edges have never needed anywhere near the amount of attention they deem necessary to keep me from looking crazy. I don’t really know exactly when this happened, but things between us have changed. And now the amount of edge control needed is aggravating!
I have to be careful an intentional when it comes to my edges and this hairstyle displayed below is a direct result of that intent. The style is one that relies heavily on the appearance of full edges, which I crafted with the help of some amazing wrapping foam (Nairobi to be exact), and the just right flick of my wrist. The cuteness that came from my attempt at camouflaging less-than-full edges is a residual bonus that I’m happy to accept.
If you too struggle with edge control, or if you simply want to create a really cute style that shows off the full edges God saw fit to bless you with, have at it. The video below is a blow-by-blow tutorial of how I achieved this look and you can follow along and do the same.
If you would prefer the fast and dirty version of this style, go to my YouTube channel Kaye Wright and watch the 4 minute version. Also check out my video on how to cut your own hair into a pixie cut as well as my video on how to get the perfect mold on short hair.
Until next time, peace from your #pixiemom!
PRODUCTS USED:
Nairobi Wrapp It Foam
Kera Care Crème Press
Aveda Control Paste
Sebastian Shaper Hair Spray
Jr. Wrap Strips (the black ones)
TOOLS USED:
Rat tail comb
½ inch flat iron by Curlmaster
1 inch flat iron by Jilbere
The post Edge Control | Short Relaxed Hair Tutorial | August 31, 2016 appeared first on Kaye Wright.
August 26, 2016
Why MIZANI BUTTER BLEND is bae!
For the longest time, I got my hair relaxed at a salon. My go-to stylist told me for many years that application was key to getting the best results when relaxing short hair. And that is true…but, the relaxer can also make a difference. Mizani Butter Blend made a difference for me and I’m gonna tell you about it.
Relaxing my hair at home was the last thing I tried at home. I cut my own hair before I attempted to relax it myself. Why? Cuz a sista was scared of the chemicals. I had an unnatural fear of giving myself a chemical burn and having my hair fall out in puss filled patches as I cried in agony. When I did decide to try and relax my short cut at home, I started to experiment with different types of relaxers. I went for normal strength and I literally just went down the aisle at the beauty supply store and tried a new box perm each time I retouched my hair. This was a sorry ass method, but you live and learn.
I eventually landed on 2 relaxers that I bounced between for the past 3 years or so. They were Creme of Nature Argon Oil relaxer and Organic Root Stimulator (ORS) relaxer. My hair would come out straighter with the ORS than it did with the Creme of Nature, but the Argon oil did give me more shine. At any rate, both of them are out now because discovered new love.
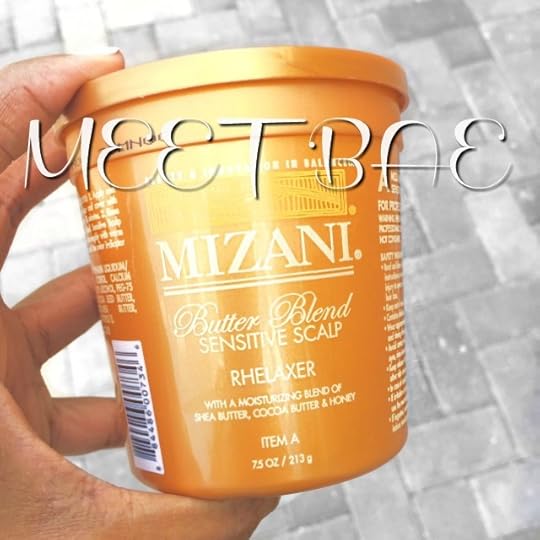
Ok, aside from making YouTube videos about short hairstyles, I also consume ridiculous amounts of content on there as well. During one of my late night online escapades, I heard someone talk about Mizani Butter Blend. Having never heard about it, I researched it to no end, watched a million super old, dark and grainy video reviews and tutorials and then I ran out and bought it from the shady beauty supply store in my city. It’s shady because they straight up sell things to the public that should not be sold to non-licensed folks. Like, it says that on the packaging! But anywho, it works to my benefit, so I won’t tell if you won’t tell.
Let me tell you this, though, that Mizani Butter Blend is bae, is life, is da shit! My hair has never looked as good as it looks when I use that freaking relaxer. From it’s appearance, it’s not anything particularly special. It comes with a bottle of activator, a tub of creme relaxer with simple text that let’s you know it’s Mizani Butter Blend and a standard issue wooden popsicle stick for stirring. Typical, right? Right. So I don’t know what kind of voo doo magic or secret witch piss they put in that damn tub of creamy crack, but that stuff has me HOOKED! It’s the best, you should go buy it, your hair will be bomb, you will look like a supermodel, people will think you’re lying about doing your hair at home…all dat! All dat! Below is a list of why you’re being foolish if you don’t try this relaxer.
DON’T BE FOOLISH! GET YOU SOME MIZANI BUTTER BLEND!
— Same price point as every other run-of-the-mill box perm;
— Smooth and super straight results;
— Leaves hair silky, shiny and soft like buttah;
-Have you guys tried this relaxer? If so, do you love bae as much as I do? Let me know.
The post Why MIZANI BUTTER BLEND is bae! appeared first on Kaye Wright.
August 23, 2016
Keke Palmer Inspired Short Hairstyle
Finding an easy style that still looks ‘done’ is a long-standing challenge for short hair lovers. You run the risk of looking frumpy if you go too simple, but you may end up looking prom ready at the local Whole Foods if you get too jazzy with your hairstyle. The added headache comes with trying to find a practical style that doesn’t require too much time to create or maintain. This Keke Palmer inspired short hairstyle fits the bill and checks off each and every one of those boxes.

I’ve found that the happy medium between ‘where the hell is she going’ and ‘is she homeless’ resides at the intersection of sleek and slightly bumped. Not a lotta curl keeps it casual, while the sleek mold keeps it polished, so that it looks like you at least tried. This Keke Palmer inspired short hairstyle can give you what you need, it doesn’t take long, and anyone can do it.
When I recently ran across a picture of Keke Palmer rocking this do from a while back, I knew I wanted to add it to my arsenal of go-to styles. I filmed a tutorial and put the shortened, straight-to-the-point version of it on my YouTube channel, but I decided to upload the full version here. If you’re scared to try it, don’t be. Just follow the steps in the video below and you can make it happen at home. The video tutorial includes tips & tricks that will help you get this style just right.
If you have questions or comments, please leave them below and I’ll get back to guys! And if you try this style, tag me on Instagram or Facebook so that I can see how you look rocking this style. A list of all the products and tools used is below. Enjoy!
PRODUCTS:
Nairobi Wrapp It Foam
Kera Care Creme Press
Design Essentials Reflections Liquid Shine
Sebastian Shaper Hair Spray
Aveda Control Paste
TOOLS:
Jilbere 1 inch flat iron
Curlmaster 1/2 inch flat iron
Rat tail combs
The post Keke Palmer Inspired Short Hairstyle appeared first on Kaye Wright.