
Colin McCrate's Blog, page 7
July 1, 2020
Mid-Summer Succession Planting

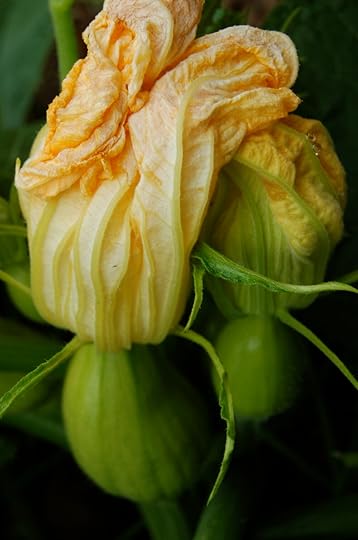
Mid-July brings warmer weather to many regions, and this weather brings the end of pea season. It’s also the time when garlic and onions (bulbing alliums) have matured and are ready to be pulled from the garden to make room for another crop. So...what’s next? Just when you thought your garden was full and it was time to sit back and enjoy the bounty, it’s time to start planting again! There’s rarely a dull moment in a high-yield vegetable garden!
Let’s start with peas. Peas are almost always planted along a trellis for support. I get a lot of questions about how to best use that trellis for a mid-summer planting. If you’re pulling your peas in mid-July, when they usually start to get powdery mildew from the heat, and you’re in the Pacific Northwest (PNW), you’ll only have 60-75 solid growing days left. There aren’t a ton of climbing crops that will mature in that time period, but cucumbers can!
Most cucumber varieties will mature from seed in 45-70 days. You can subtract 10 days if you can source or start your own transplants. Technically, if you looked at the days to maturity for another climbing crop, such as pole beans, you’ll notice that some mature in around 60 days. However, the longer it takes a crop to mature, the shorter your harvest window will be.
Another important thing to consider: those late summer/early fall growing days aren’t the same in quality as peak summer months! This means your plants won't grow as quickly (we talk about this in EB Podcast Episode 24: Crop Lifespan).
If you are dedicated to reusing your pea trellis, choose a cucumber variety that matures in about 48 days, and grow it from a transplant rather than by direct seeding. Once the plant, or plants, have matured, you should have a window of 3-4 weeks to harvest your cucs.
Honestly, I don’t like to rush to pull my peas until they powdery mildew sets in. Some seasons they can hold in the garden past mid-July. I don’t worry about reusing the trellis and I tend to transplant successions of half-season brassicas or summer squash in place of peas.
Of course, if you’re growing in a region with a longer season, then you’ll have more options when it comes to climbing crops in the second half of the summer.


Now for the summer-harvested bulb alliums. Garlic should be pulled as soon as the top 1/3 of the leaves have dried out and turned brown. If garlic is left in the garden, the tight bulbs will start to open up, the cloves will start to separate and the paper covering will split, or disintegrate completely. If this happens, the garlic is still fine for eating, but it won’t store long. In the PNW, garlic is almost always finished by mid-July, which just happens to be the perfect time to direct sow summer beets and carrots.
Onions tend to be ready to be pulled at this time as well. Unlike garlic, onions actually hold well in the garden, so there’s no huge rush to pull them if you don’t need the space. If you do want to use the space to plant another crop, onions can be harvested as soon as the stems start to turn yellow and brown. The tops will flop over and a portion of the bulb will usually be above the soil surface. If you’re clearing onions, you’ll want to set them out in the sun to cure for a few days. (More on this in EB Podcast Episode 55: Harvest and Store Your Onions and Garlic)
I like to plant my bulbing onions and garlic in a cluster because they mature around the same time and once I clear them, I have a decent swathe of planting space to dedicate to fall crops. I usually use this space to get my last planting of beets and carrots.
I’m not shy with this planting because fall harvested beets and carrots will hold for months in my refrigerator over the winter. Some years I dedicate all of the space from my cleared alliums to beets and carrots, and some years I’ll share the space with a final planting of bush beans.
Unlike pole beans, who’s production cycle is more of a dribble, bush beans put on a gush of fruit at once, meaning that even if your harvest window is short, you should still be able to pull a decent amount of fruit off of the plants.
Of course, as the summer moves along, there will be more spent crops to pull out of the garden, and other new transplants or seeds to fill their place. I focus on beets, carrots, summer squash and bush beans in mid-July because it’s the last call for those crops in the PNW.
For more clarification on the succession planting ideas I’ve presented here, and a visual of crops I’ve succession planted after peas and bulbing alliums, see Crop Planning: A Year in My Home Garden.


May 7, 2020
Gardening With Kids: Summer Crop Edition

Honeybee on cilantro flower
It’s never too early or too late to get your kiddo involved in the garden. You can have them help out on just about any project. If you’re like me and you’re a little bit worried about the mayhem that may ensue, think about giving them a space of their own.
Late spring is a particularly good time to launch new garden activities. As spring turns to summer, seeds germinate more quickly, sometimes within days of seeding; transplanted crops start to grow at a breakneck speed, often with daily growth that can actually be measured with a ruler; and the variety of insects and pollinators in the garden abounds!
Most garden projects begin with the planting of a new crop. Today I’ll focus on summer crops that can be direct-sown with large seeds whose size are well-suited for little hands.
Winter squash and melons: This group of plants, called cucurbits, includes pumpkins, which are a go-to for any gardener with kids. In addition, Cucurbit seeds are large and very easy to handle. They also produce large flowers which can be hand-pollinated to increase fruit production and make growing even more exciting. You don’t have to hand-pollinate, in most situations, flowers will be adequately pollinated by insects (which is also fun to watch).
Cucurbits have developed a symbiotic relationship with the squash bee (Peponapis pruinosa) which, unlike the European honeybee, is native to North America (just like the squash plant itself). The ground-nesting squash bee looks very similar to a honeybee, but it feeds exclusively on the pollen of the cucurbit family.
Squash bees are most active early in the first few hours after sunrise, so if you have a little one that likes to wake up with the roosters, squash bee hunting may be in your future!
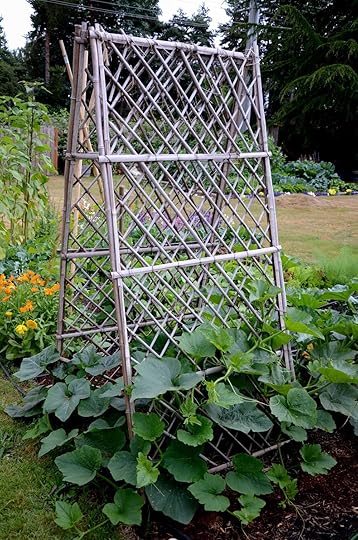
Winter squash and melons tend to be trailing crops, although there are some cultivars that are bred with a bush growth habit. If you’re growing a trailing variety, let the plants sprawl on the ground (ideally outside of your garden bed if you’re short on space) or train them up a trellis. Our simple bamboo tri-pod trellis works well for these trailing crops, as do A-frame trellises.
There are dozens of varieties of winter squash and melons. Different types are suited for different growing climates, but most mature around 85-100 days. No matter where you’re growing, it’s crucial that they’re seeded with plenty of time to mature before cold weather sets in.

Summer squash: Summer squash are in the same family as winter squash and melons, but I’m separating them here because they mature more quickly and tend to have a bush growth habit, as opposed to trailing. As with winter squash and melons, the seed of summer squash is large and easy for little hands to manage.
Summer squash stands out to me as one of the most exciting crops for kids to grow because, when the soil temps start to heat up, it grows a measurable amount each day!
Summer squash is an incredibly versatile and productive plant. Try teaming up with your little ones to bake zucchini bread, or have them weigh each fruit that comes off of the plant and total up the harvest weight at the end of the season- it’s sure to be an impressive number!
Another educational activity for winter squash, melons and summer squash: Identify the difference between a male and female flower.
Cilantro: This fast-growing herb can teach little ones a lot about the lifecycle of plants, in a relatively short period of time. Cilantro should be direct sown into your garden. It usually germinates within a week of seeding, and is ready to harvest 4-5 weeks later. In warm weather, the plant usually starts to bolt, or flower, a few days after it’s ready to harvest. This can be frustrating, or it can be an opportunity to observe the lifecycle of a plant. Eventually these flowers will start to turn to seed. Voila! The full circle of life for an annual crop!
The best part about letting cilantro set seed is the important shape of its flowers. The shape of cilantro flowers is categorized as “umbelliferous”. This flower-shape is unique to crops in the Apiaceae or Umbelliferae (aka. parsley) family, and the name comes from the same root as the word umbrella. Anyway...pollinators and beneficial insects are very attracted to this umbrella-shaped flower. I often see the widest variety of insects foraging and resting on my cilantro flowers, including Trichogramma Wasps (these are friendly little non-stinging insects that look more like flies), which are helpful at reducing cabbage worm populations in the garden.
Educational activity for cilantro: let some plants go to see and note the pollinators that hang around it’s flowers. Then harvest the dried seeds and use them as coriander or to plant more cilantro!


Beans: (Snap and shelling) From my experience, fresh-picked beans are one of the crops kids get most excited about eating in the garden. I can’t tell you how many clients have told me that their kid would never touch beans until they had the opportunity to harvest them and eat them straight off of the plant.
Beans come in a variety of colors and shapes, which also makes them attractive to little eaters. I have yet to meet a kid that doesn’t want to give a purple snap bean a try.
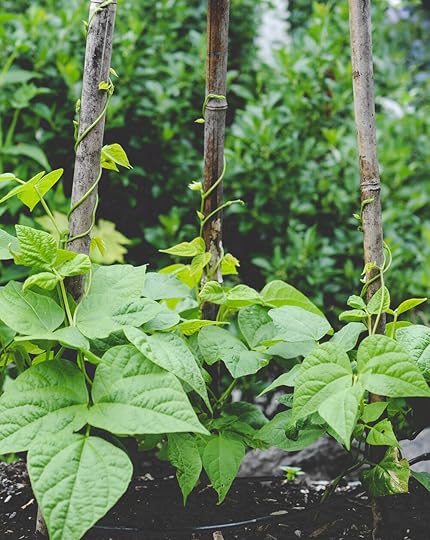
There are two major categories of beans: snap and shelling beans. Snap beans are the type that are eaten fresh, seed pod and all. Shelling are the kind that are removed from their pod. Some shelling bean varieties are meant to be eaten fresh and others are meant to be cured for storage. Many beans come in both bush and pole or trailing, growth habits.
If you seed a pole type, you’ll need a support structure, and yes, I’m going to suggest you check out our tri-pod trellis option here too. It’s definitely one of the quickest and simplest ways to support pole beans. If you and your kids want to have a little fun with the tri-pod trellis, add in more poles to make the base of the structure wider, and turn your tri-pod into a teepee that your kids can hang out in!
I’ve devoted a few episodes of the Encyclopedia Botanica Podcast to beans, so check them out if you’re looking for more on the subject:
EPISODE 3: BUSH BEANS - these were EARLY days…the podcast get better :)
EPISODE 46: CHOOSING THE RIGHT BEANS FOR YOUR GARDEN

Sunflowers: Not only are sunflowers an iconic summer garden plant, but growing them also provides lots of educational opportunities for little gardeners of all ages! Tiny gardeners will find sowing the large seeds very rewarding, and slightly bigger gardeners might enjoy measuring how tall their plants grow, saving the seed come fall, and replanting the following season.
Almost all sunflower seed you buy will be an F1 hybrid. This means that two distinct strains were crossbred, and the resulting offspring is a mixture of each parent's unique traits. Seeds saved from this offspring will have different qualities than the source plant. Older kids can measure the plant height and flower diameter of the seeds sown this year. They might even draw a picture, noting the color and size of the petals. Save seed from the plants from which these records were taken and seed them the following spring, then note the difference between the resulting plant and their parents.


To collect sunflower seeds:
Cut the heads of your sunflowers as they start to drop petals. If harvested too early, the seeds may be very small; if left too long, they will fall out of the seed head into the garden.
Hang flower heads in a dry, warm location until the seeds are completely dry and easily fall out of the head.
Store collected seeds in a cool, dry place. I’ve used paper and plastic bags, and both work well!
We designed our first book, Food Grown Right, In Your Backyard, with school gardens in mind, so if you’re looking for some homeschooling inspiration, check it out for discussion topics such as:
What is a vegetable?
Which part of a plant do you eat?
Why do plants produce flowers?
And other fun activities like step by step instructions for how to make a worm bin or build your own raised beds!
Educational garden activities from our friends:Tracking Butterfly Populations through Community Science
Bumblebee Watch - Identify the bumble bees in your garden and record your sightings!
April 11, 2020
Crop Planning: A year in my home Garden

April 28th in the garden described below.
Crop planning for the vegetable garden often feels overwhelming to new (and experienced) growers. There are many different schools of thought on how to plan and layout annual crops. As a result, there’s lots of conflicting information out there to confuse the well-intentioned researcher.
At Seattle Urban Farm Co., we create plans for 70 gardens each year. Our garden plans are devised to maximize the garden’s productivity, while keeping them neat and tidy. We organize our plantings to make ongoing maintenance as easy as possible.
For gardens to be productive and tidy, we make sure they have plenty of light, water, and nutrients; we work to keep pest pressure low; and we succession plant new crops all season long.
A key to our crop planning system is that we plant in individual rows and/or groups of the same crop. This has several advantages, including the following:
When a particular crop is ready to be removed from the garden, you will be able to clear a whole row or section of the bed, leaving adequate space to plant another crop. (See: Crop Rotation and Lifespan)
Some crops have growth forms that make them incompatible with other plants. By planting your crops in groups, it’s easier to keep compatible plants together and incompatible plants apart. (See: Growth Form)
Concentrations of the same crop are easier to manage—to apply fertilizers at the right time, thin the plants, etc. (See: Plant Family)
Even within the bounds of these rules, there are infinite crop combinations. To illustrate these concepts, I’m going to walk you through the crop cycle over one year in my home garden.
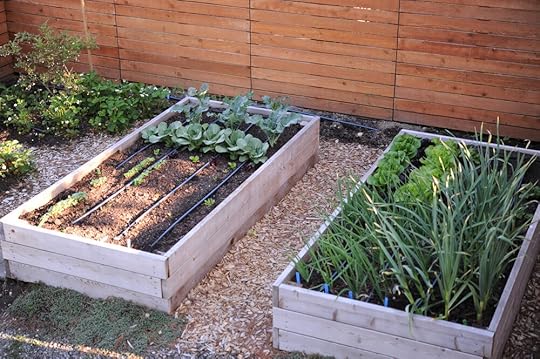
I chose the following crop plan because this garden is similar in size to many home gardens. It consists of two 4’ x 8’ beds and a surrounding 2’-wide L-shaped bed. In most years I am lucky enough to have more growing space than this (and I’ll take every square foot I can get!). However, I am hoping this particular year feels accessible to most gardeners- and it shows just how much food you can grow in a relatively small amount of space.
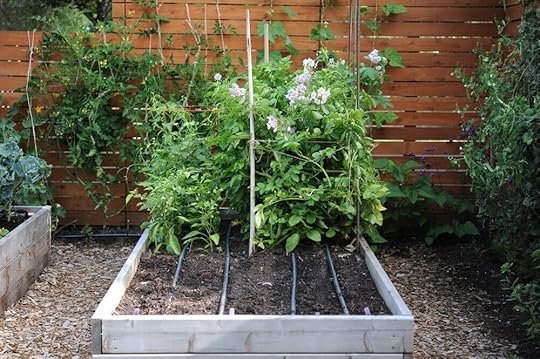
MARCH-APRIL
The first image shows the garden in March and April. Everything in the diagram, except the garlic, was planted during these early spring months. I just happened to be really into beets at this time, so I dedicated a lot of space to them. In other years, I would have probably divided the space dedicated to beets in half and added a planting of carrots.

MAY-JUNE
In early May I plant my summer crops and many cut flower transplants. Later in the month, the first successions of the season are planted. Throughout the spring, I harvest my first planting of head lettuce. I harvest the last of these heads and replace them with peppers and a cucumber cage of sour gherkins. Bok choy thrives in the cool spring months, but starts to bolt when the weather warms, so I also harvest the last of these heads and replace them with a round of warm-season head lettuce.
In this plan I have a row of shelling peas in front of a row of snap peas in a bed that’s less that 2 feet wide. This spacing works because the shelling peas are much shorter than the snap peas in both plant height and crop lifespan. I harvest and pull the shelling pea plants out of the garden in late June, about a month before the snap peas are finished. This allows the mature snap peas better air flow towards the end of their lifecycle, when they start to become susceptible to diseases such as powdery mildew.


JULY-AUGUST
By mid-July, many of my remaining spring crops are ready to be pulled out of the garden. In the early weeks of July, I harvest the last of my peas and clear the plants to make room for fall broccoli, kale and cabbage. Onions and garlic have matured and are ready to cure out of the garden in the summer sun by mid-July. Once those come out, they are replaced with a planting of bush beans and beets. Mid-July in the PNW is the time to plant your final succession of beets, carrots and bush beans. If you push it much later, these crops won't have time to mature.
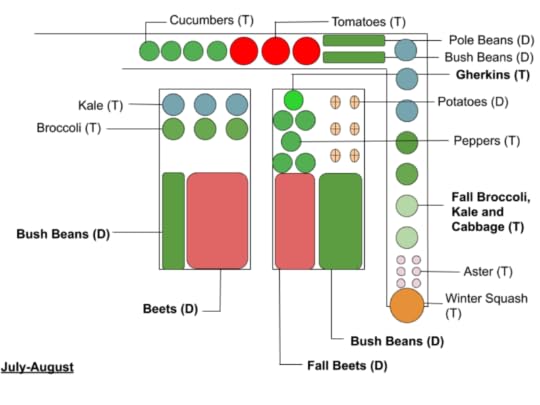
Below: July 5th, Juy 19th and August 3rd

SEPTEMBER-OCTOBER
September is the tail end of the planting season in the PNW, and not all crops have time to mature this late in the season. The good news is that most gardens are full and bursting with produce this time of year, so there isn’t always room for new crops anyway.
If you want to plant a swath of spinach to overwinter in your garden, early September is the time. Same with cilantro, which germinates quickly in the warm days of early summer, but resists bolting much longer in the cool days of fall. This is also the time to plant other shorter season cool-tolerant crops like turnips, arugula and radishes.
In this garden, I cleared more than ½ of a 4x8 foot bed to make room for these fall crops. Carrots can overwinter in the garden, and beets can hold in the garden into the fall, but these crops also hold well for months in my refrigerator, so I’d rather dedicate this space to growing something new and increase my overall garden productivity.
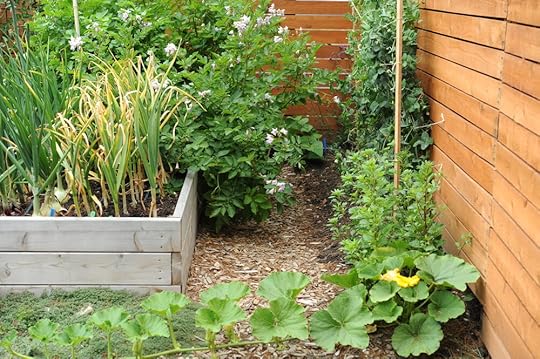
Also, I just want to make a quick note that I find that garden stakes are an essential tool for any high-yield gardener. You can see them featured pretty prominently in the images above. 3 foot wooden stakes are really useful when trying to wrangle bush beans and keep them from flopping over onto their neighboring crop. 6 foot stakes can be used in the same way for shelling peas, or any other short variety, and potatoes!

Below: September 1st in onion/potato bed and September 3rd in original beet/brassica bed

NOVEMBER-FEBRUARY
I planted garlic and fava beans in November, but besides those two crops, everything that’s in the garden at this point has been in place and growing to maturity for the past few months.
My spring planted kale and broccoli was still looking healthy and robust, so I left them in overwinter. In late February both plants start producing again; the kale with new leaves and the broccoli with substantial side shoots or mini-florets.
My fall planted brassicas also held well. On warmer days I harvested heads of cabbage and broccoli and leaves of kale. Like cilantro, brassicas are less likely to bolt during the winter months, so there’s less of a rush to harvest crops like broccoli, which can flower quickly in the summer after the plant has put on a head.
I harvested much of the spinach in the fall, but left about an inch of each plant to photosynthesize. These overwintered plants started putting on new growth in mid-February, and provided a large harvest in early March.
The remainder of the garden is cleared and topped with compost in November so that it’s ready to plant again the following March!

Below: Pulling the last of my late summer planted beets on November 27th and snow on overwintering broccoli on December 9th


Products we truly could not work without:
DIG BO9D - Battery Powered Digital Hose End Irrigation Watering Timer Clamshell Single Station
Drip Tape Row Crop Kit - Small
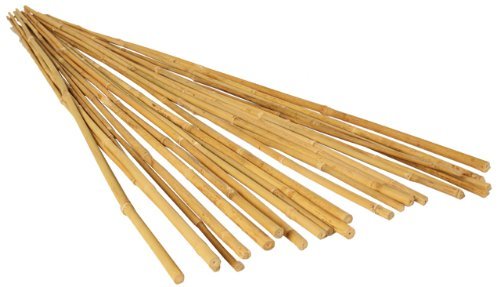
Hydrofarm HGBB6 6' Natural, Pack of 25 Bamboo Stake, 6 Foot, Tan
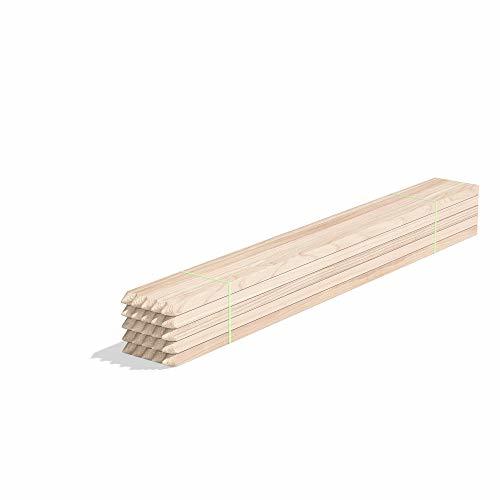
Greenes Fence 3 Ft. Wooden Garden and Sign Post Stakes (25-Pack)
March 28, 2020
Irrigating Your Container Garden
As I mentioned in my last post, automated irrigation for container gardening is crucial. Containers need to be watered frequently (up to three times per day in hot, dry weather) and that much hand watering can be hard to keep up with, especially if you plan to go out of town. Smaller containers require more frequent watering because there is a limited amount of soil and that soil can hold only so much water at a time. Also, in small containers, more of the soil surface area is exposed to the sun so the water evaporates quickly.
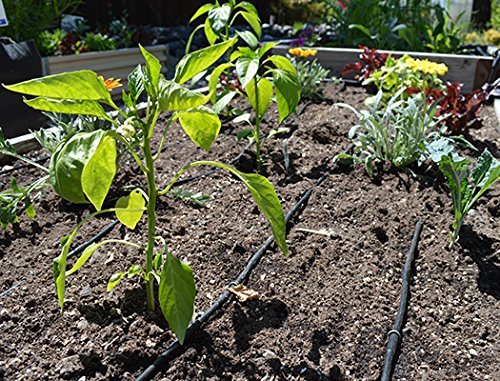
The good news is that setting up irrigation on an automatic timer can actually be really simple! If you have a number of pots clustered close together, then the best option is to set up a drip irrigation system. The framework of the system is the same as for any garden (see Drip Irrigation Q+A); the only difference is the drip lines themselves. Here’s a simple way to set up a drip system for containers, using 1⁄4 in. emitter tubing:
Run a 1⁄2 in. main line from your hose end timer, brining the main line as close as possible to your containers.
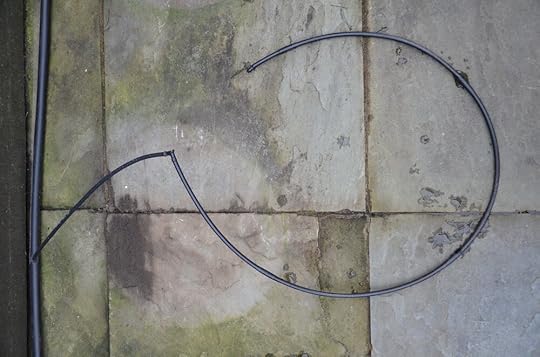
At each container, punch a hole in the main line and attach solid 1⁄4 in. line (often called microtubing- it doesn’t have emitters!). Run this up to the lip of the pot.
Attach an elbow fitting at the lip of the pot.
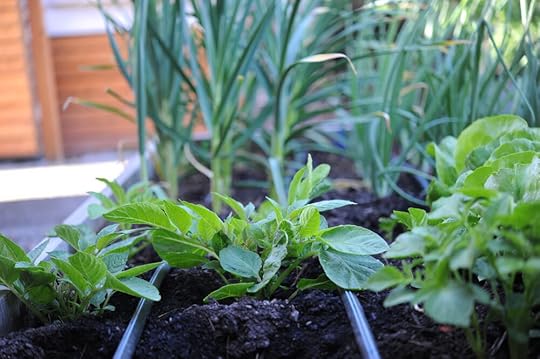
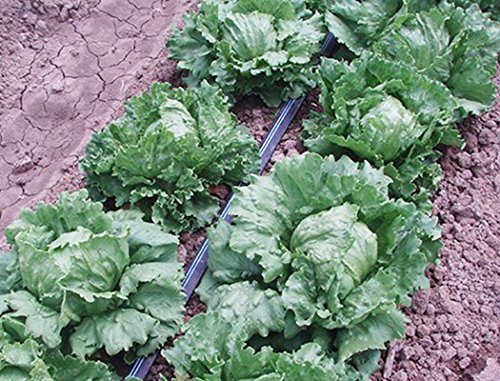
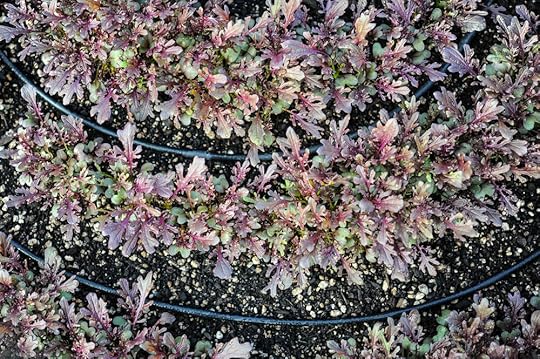
Attach 1⁄4 in. tubing with emitters spaced at 6 in. to the elbow, and circle it around the container. For 1⁄4 in. tubing with 8 in. or 12 in. spacing, or if you’re working with containers with a surface area that’s larger than 18” across, add a few extra coils. The goal is to never have your crops further than 6 inches away from a drip line. If you plant to grow direct seeded crops, coil the tubing in your containers so that the tubing is spaced 6 inches apart (see header image), this will help you maximize your growing space and improve germination.
Seal the end of the hose with a plug, and hold the line in place with a stake.
You’re done!
Here are a few not-so-gorgeous, but hopefully helpful images of this process:

#1
#2

#3
To water your containers, start by running the system until water just starts to seep from the bottom of the containers. Note how long this takes (probably between 5 and 15 minutes): That will be your watering duration.
Now set the timer to run twice a day. If you have the option of scheduling when it will run, try setting it at around 6:00 am and 2:00 pm. With larger containers (10 or more gallons), watering twice a day may be sufficient, but if you have smaller containers and are experiencing very hot, dry weather, consider watering as often as three times per day. When you are getting started, make sure to check the moisture in the soil with your finger each day and adjust the system as necessary.
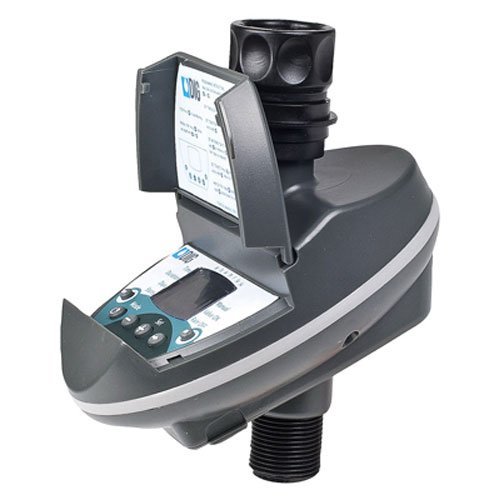
An alternative option:I do feel really strongly about the benefits of installing a drip irrigation system and think it is by far the most efficient and effective way to water your garden, no matter the size (more on this in Drip Irrigation Q+A). With that said, the goal is to get you growing food at home and if you’re feeling like setting up a drip system is beyond the scope of work you’re willing or ready to take on right now, setting up an oscillating sprinkler on an automatic hose bib timer (We use these ones from DIG pretty much exclusively) is the next best thing.
When using a sprinkler, you will want to water in the morning, as early as possible. This allows the water to soak thoroughly into the soil, and the leaves of the plants to dry off, before the hottest part of the day. Watering at midday is less efficient, since you will lose more water to evaporation. And watering in the evening can promote disease in the garden, since the water sits on the leaves of your crops throughout the night.
An oscillating sprinkler is a good choice for a beginning gardener, and the type most people are likely to have on hand at home already. They’re the type that sprays out water in a fan-shaped curtain with a metal that arm oscillates back and forth to cover a rectangular area. You can usually lock the oscillating arm in place so it only sprays in one direction, and depending on the orientation of your containers, you may want to do this to focus the water stream on your plants and reduce water waste.
If you don’t already have one, oscillating sprinklers are inexpensive, and with some adjustment you can get them to water over the top of tall crops later in the season. You can vary the watering area by turning your water pressure up or down at the hose bib, and by adjusting how far the sprinkler head moves back and forth.
To set up an oscillating sprinkler on an automatic timer, you’ll need:
An oscillating sprinkler
A hose
A hose end timer
You may also want a y-valve for your hose bib, so that you can leave your timer on one side of the valve while keeping the second available for use.
To set up:
Connect timer to the hose bib (with batteries)
Connect the hose to the timer
Connect the sprinkler to the end of the hose
Place your sprinkler near your containers and run the water to see where it’s landing. Adjust until you find the most efficient configuration. You might weigh the sprinkler down with rocks or bricks so you’re less likely to accidentally move it.
The following are products we recommend using to get his project done! As long as your containers are within 50 feet of your water source, the irrigation kit from Dripworks should have everything you need to set up drip irrigation in around 18-20 containers, depending on the size/shape/height of each container. If you don’t need that much, in my opinion, it’s still a better deal to buy the kit and have extra then to piece it all together. The link here doesn’t list every piece included, but I’ve verified with Dripworks that it includes micro-tubing and all of the necessary connection pieces.
As always, you can find more information on everything discussed in this post in our books, Food Grown Right, In Your Backyard and High-Yield Vegetable Gardening.
DripWorks Garden Bed Irrigation Kit - Small
Dripworks
DIG BO9D - Battery Powered Digital Hose End Irrigation Watering Timer Clamshell Single Station
DIG
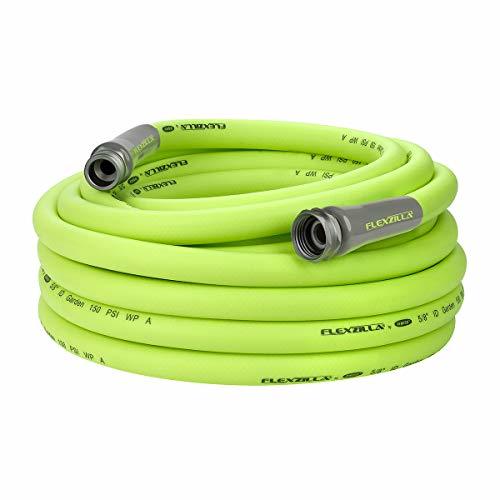
Flexzilla Garden Hose, 5/8 in. x 50 ft., Lightweight, Drinking Water Safe - HFZG550YW-E
Legacy
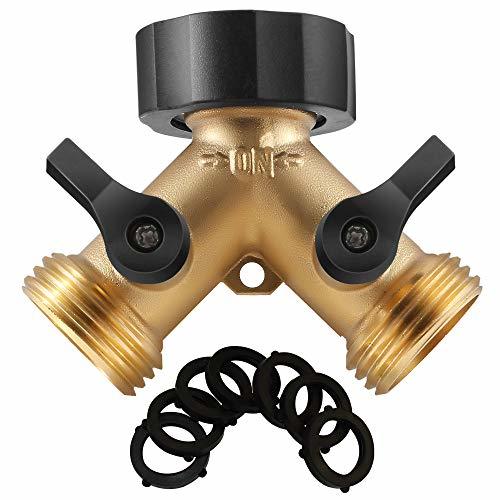
IPOW Solid Brass Body Backyard 2 Way Y Valve Garden Hose Connector Splitter Adapter + 6 Rubber Hose Washers with Comfort Grip
IPOW
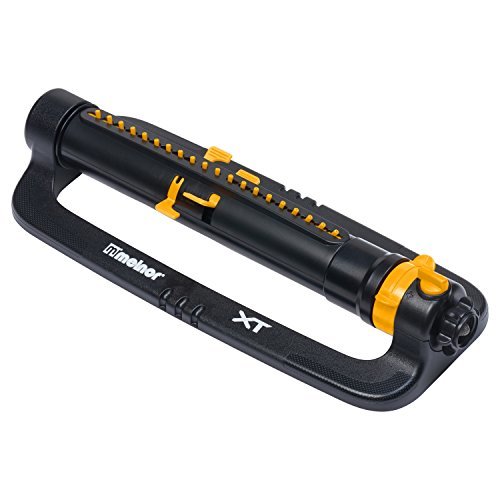
Melnor XT Turbo Oscillating Sprinkler with TwinTouch Width Control & Flow Control, waters up to 4,500 sq.ft. - XT4200-IN
Melnor
March 22, 2020
One Day DIY Project: Setting Up A Container Garden

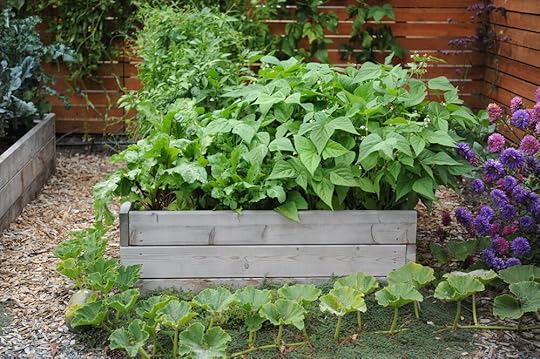
Direct sown lettuce (left) and arugula (right) growing in a 7 gallon pot.
Last year I built a container garden in my backyard. Before adding the containers, my garden had 140 square feet of raised beds for annual crops, and another 250 square feet of space for cut flowers and edible perennials. My garden was a decent size, and produced a ton of food. However, since I love to can, pickle, ferment and freeze, I can always use more.
To be honest, I’ve always been spoiled by having access to large growing spaces. For years, I grew food in the 1,200 square foot garden at Seattle Urban Farm Co. headquarters. I also had virtually endless growing space at our Urban Fringe Farm project (now Ecolibrium Farms).
After growing in such large spaces, I was a little hesitant to add containers. I didn’t think they would make much of an impact on the amount of food I could grow. Instead what I REALLY wanted to do was build more raised beds.
Alas, building new beds didn’t seem practical as I found myself chasing after my son to prevent new death-defying toddler feats. There was barely enough time for me to create an annual crop plan for my garden, let alone embark on a construction project. I wasn’t ready to give up on my garden expansion plans, I just needed to come up with a more realistic plan.
I decided to give some inexpensive containers a try. I chose pots with a simple design that were food safe and heavy duty, but that weren’t too expensive (eventually, I still want to get around to that raised bed expansion project). I planned to use the pots for crops such as tomatoes and peppers, and the in-ground and raised bed space would be reserved for plants like root crops, alliums, and peas.


With that rough plan in mind, I decided to use with 10 gallon pots. This size pot is plenty big for one large healthy tomato plant or pepper, but would also allow me some room to plant a trailing flower in each container to help beautify the pots. I could also interplant quick growing head lettuces around the container's edges in the early summer months before the main crops grew too large. Ten gallons is large enough to grow multiple basil plants in one pot (I’m always looking for more basil growing space in my garden!!).
I set up thirteen BPA-free 10 gallon plastic pots in an L-shape lining my garage and back fence (see first two images above). Each pot was filled with a blend of compost and potting soil*. It’s important to set up a drip irrigation system in any sized garden, but in my opinion, setting up an automatic drip irrigation for smaller growing containers is essential. Containers dry out even faster than raised beds or in-ground beds because more of the soil surface area is exposed to the sun. Running irrigation to pots can be relatively simple. We recommend this kit using ¼ inch dripline from Dripworks and setting your system to run for short intervals 2-3x per day.
* It takes about 1.5 cubic feet of soil to fill a 10 gallon pot.
Once the containers were filled with soil and the irrigation was run, the pots were ready to plant. I added ¼ cup of balanced fertilizer to each pot before planting and planted each pot with the following:

When it comes to container gardening, it’s crucial that you don’t overplant. It may seem like overkill to devote most of these containers to just one plant, but by doing so you’re setting that plant up for maximum productivity. Would you rather have 8 tomato plants that produce 3 lbs of fruit each, or plant 2-3 that each produce 10-20 lbs?
Most people aren’t going to devote ½ of their container garden to peppers, so if you’re looking for a little more variety, the following crops are great choices for a high-yield container garden. I’ve organized the crops by lifespan to help you think about how you can succession plant some crops in your container garden for an even more productive growing space.
You can plant most annual crops in a container, so the following are just a select few that I find to be particularly productive when there is only a small space available.
Short season - succession plant these throughout the season, or before planting a longer season crop, if you have time:
Arugula
Cilantro
Head lettuce
Lettuce mix
Half season - these crops can be planted more than once in a single season, but if you have these plants in your garden and they’re healthy and producing, I’d just leave them in until they finish producing. Most of these crops will provide multiple harvests per plant, so with proper care, they should produce for months:
Basil
Bush beans
Chard
Cucumber
Kale
Summer squash
Long season - these crops can only be planted one time per season, in most climates. All of these crops are fruiting crops, which means that you can start harvesting as soon as the first fruit ripen, and they should produce for an extended period:
Eggplant
Peppers
Tomatoes
Tomatillos
Flowers:
Alyssum
Marigolds
Nasturtiums
Trailing Lobelia
If you are looking for a more diversified container planting plan, here’s one example:

After all was said and done, I loved growing in my new container garden. It took just a few hours to set up and voila! It was an easy way to expand my growing capacity. I was really afraid that the plastic pots would look sloppy, but once the plants filled out, the pots were hardly noticeable and the whole installation ended up improving an otherwise empty space. Best of all, it was easy to keep tidy and weed free and each plant was incredibly productive!
If you’re looking to set up a container garden without leaving your house, the following are products that can be delivered right to your door:
Pro Cal HGPK10PHD Premium Nursery Pot 10 Gal (5/pk)
Hydrofarm, Inc.
VIVOSUN 5-Pack 10 Gallon Plant Grow Bags, Premium Series Thichkened Non-Woven Aeration Fabric Pots w/Handles - Reinforced Weight Capacity & Extremely Durable (Black)
VIVOSUN
DripWorks Garden Bed Irrigation Kit - Small
Dripworks
DIG BO9D - Battery Powered Digital Hose End Irrigation Watering Timer Clamshell Single Station
DIG
Dr. Earth Organic 5 Tomato, Vegetable & Herb Fertilizer Poly Bag
Dr. Earth
If you’re in the Seattle area, please consider supporting these local business that are offering delivery and curb-side pickup:
Bainbridge Hay and Feed
Dirt Exchange
March 18, 2020
Spring Gardening with Kids!

Potatoes make great crops to plant with kids because the seed is so large and they can see exactly where the plant is starting to grow!
If you’re at home looking for a fun project with your kids, you might want to head out to the garden and plant spring crops. Many spring crops just happen to be some of the easiest for kids to plant Peas, spinach, and fava beans all have large seeds that are easy to handle. Onions are usually grown from transplants or sets, and potatoes are grown from seed-potatoes (basically just pieces of a potato tuber).
Early spring gardening also invites other kid-friendly activities such as checking your soil’s pH, building simple trellises, weeding, and garden planning. We’ve laid out a few simple ideas to start with here, but this is just a jumping off point! Once you and your kiddos are out in the garden, you’re sure to find all sorts of fun projects (ladybug inventory?).
Checking your soil pH before planting in the spring is not only a good idea, but also a way to do a simple science experiment with your kids. We love the digital testers, but when working with kids, you want to use a manual Rapid Test Kit so they can see the colors change as the test reveals the results.
For more on vegetable garden soil pH: ENCYCLOPEDIA BOTANICA PODCAST, EPISODE 19: GARDEN SOIL PH
Peas:Pea seed is the size of a pea (surprise!). Direct seeding peas in the ground is a very kid-friendly activity because the seed is so large and the spacing does not need to be perfect.
How to plant: Set up either a tipi or net trellis. Dig a 1-inch. deep trench along the trellis. Inoculate the seeds with a mycorrhizal fungi and sow in the trench at 2 seeds per inch. Thin to 1 plant every 2-inches. If you can find them at a nursery or grow them yourself, peas also grow well from transplants. Plant these at 1 plant every 2-inches.
When to plant: You can set out transplants as early as late February and as late as mid-May. Direct-seed peas mid-March through late April. They don’t germinate or grow well when temperatures get above 75°F, so it’s best to sow them early.
Bonus activity: If your kid is a little older, task them on building your tri-pod pea trellis. The trellis needs to withstand the weight of the peas for the season, but doesn’t need a perfectly executed feat of engineering, making it the perfect activity for an older kid.
Potatoes:When planting potatoes, you’re burying chunks of potato in the ground every 12-inches or so. Planting potatoes is a great activity for kids because the “seed” is so large and they can already see where the plant is going to (or may have already) start to sprout! Plus, in my limited experience (aka. about 150 visits to the park with my toddler this past year), I’ve noticed that many kids love to dig big holes in the dirt!
How to plant: Potatoes are almost always planted using pieces of the tubers themselves. You can order seed potatoes or buy them from a nursery, or buy organic potatoes from the grocery store. Leave small potatoes whole, or cut mid-sized potatoes in half and large ones into quarters. Aim to plant pieces about the size of golf balls, but make sure each chunk has at least 1 or 2 eyes on it. Dig 8-inch. deep holes spaced 1-foot. apart for each piece, and add 1⁄4 cup of balanced fertilizer to the hole and mix with a trowel. Place 1 piece of potato in each hole with the eye facing up, and fill the hole with half of the soil you removed (to a depth of 4-inches.). Cover with the remaining 4-inches once the vines have grown 6–8 inches out of the soil.
When to plant: Planting potatoes is a St. Patrick’s Day tradition (March 17), but they can be sown anytime from mid-March through mid-June.
Bulbing onions:Unlike most transplants, onions don’t mind a little abuse. They actually thrive when their roots and growing tips are trimmed (or accidentally broken off).
If you choose to grow your onions from “sets”, then the planting process is even simpler! Sets are basically tiny, immature onions, so planting them is a lot like burying a seed the size of a marble.
How to plant: If possible, plant your bulbing onions from transplants or “sets.” Sets are small, dried miniature onion bulbs that can be planted directly in the ground. The bulbs should be set in holes 6–9 inches deep, in well-prepared soil. Space bulbing onions 6-inches apart. Growing onions from seed is also possible, but in order to mature in time they must be started very early in the year.
When to plant: Onions started from seed should be sown indoors in early to mid-January. This is much earlier than other transplants, so to preserve your sanity we recommend buying these plants from a nursery for at least your first few years of gardening.
Spinach:Spinach is yet another forgiving plant with large seeds. I prefer to direct-sow spinach in the spring. If your kiddo ends up sowing each seed 4-inches apart, you can end up growing larger plants for braising early this summer. If they sow 2-seeds per inch, you can harvest baby spinach in a month or so! It’s a win-win!
How to plant: Direct-seed or from transplants (but as noted, I prefer direct seeding in spring and with kids). Space plants every inch for baby leaves, or every 3–4 inches for large cooking leaves.
When to plant: Direct-seed any time of year once the soil temperature is 45°F or higher. For a continual harvest, plan to seed short rows every week during the growing season. Once temperatures reach consistently above 75°, spinach seed may have a difficult time germinating
We designed our first book, Food Grown Right, In Your Backyard, with school gardens in mind, so if you’re looking for some homeschooling inspiration, check it out for discussion topics such as:
What is a vegetable?
Which part of a plant do you eat?
Why do plants produce flowers?
And other fun activities like step by step instructions for how to make a worm bin or build your own raised beds!
More on the crops and topics discussed in this post:
Wildroot Organic Mycorrhizal Fungi Concentrate (16 Species) Endo & Ecto Mycorrhizae Inoculant Powder for Explosive Plant Root Growth -1 Scoop (About 1/4 TSP.) Makes 1 Gal (Powder, 1 oz.)

Luster Leaf 1601 Rapitest Test Kit for Soil pH, Nitrogen, Phosphorous and Potash
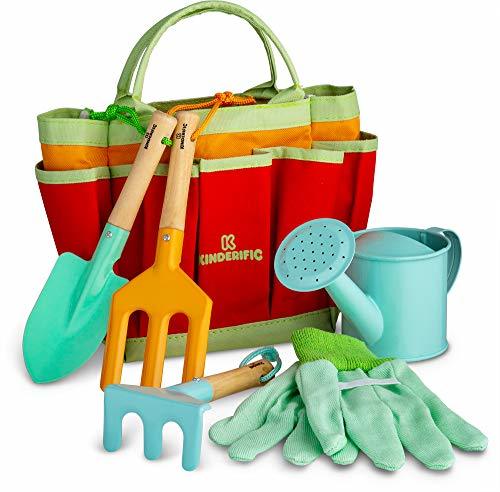
Kinderific Gardening Tool Set, Designed for Kids, STEM, Tote Bag, Spade, Watering Can, Rake, Fork, Trowel, Gloves
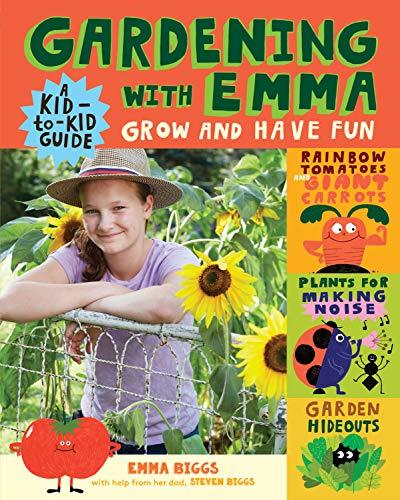
Gardening with Emma: Grow and Have Fun: A Kid-to-Kid Guide
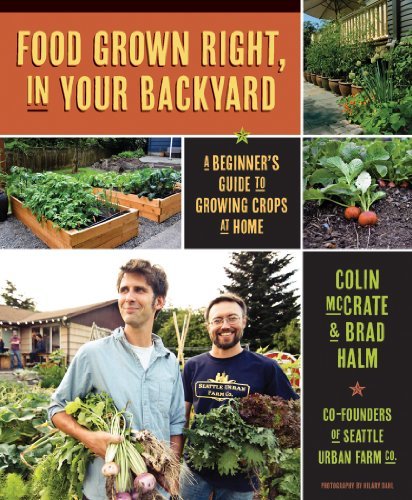
Food Grown Right, In Your Backyard: A Beginner's Guide to Growing Crops at Home
March 11, 2020
Growing Peas Q +A

Sugar snap peas on a tri-pod trellis.
We often quote our book “Food Grown Right, In Your Backyard” and say that fresh snap peas are a reason unto themselves for having your own garden. I’ve never eaten a pea that has tasted as good as the ones I grow in my home garden and I want to you have the same experience. I’ve created this post to help answer your pea-growing questions and set you up for success!
After reading the Q+A section of this post, if you still have questions about growing peas, or just want to learn more, scroll down to the bottom where you’ll see links to older blogs and podcast episodes we’ve created on the topic!
Pea Q & A
As with our previous post, the following questions are commons inquiries that we’ve been receiving from our followers on Instagram:
To keep the Q & A as simple as possible, I’m using the following guidelines:
This blog addresses snap and shelling peas (aka. edible peas. Sweet peas are a different beast).
Peas fall into two general categories. Shell peas are typically grown to maturity on the vine and then the shell is removed before eating. Snap peas are harvested before they are fully mature on the vine and usually eaten whole with the shell on.
The questions on planting timing were specific to the Pacific Northwest, so I’ll address them within that context. Broadly speaking, peas mature* in about 58 days and are a cool-weather crop.
*see last question in post!
Q: How close together can you seed/transplant snap, snow and shelling peas?
A: Pea plants should be spaced 1-2 inches apart. Peas can grow well when spaced close together, so don’t be afraid to pack them in a little. If you do plant them this close together, space rows several feet apart. Over-planting reduces air circulation and makes your plants more susceptible to mildew.
Q: When can you plant peas in the PNW?
A: You can set out transplants as early as late February and as late as mid-May. Direct-seed peas mid-March through late April. They don’t germinate or grow well when temperatures get above 75°F, so it’s best to sow them early!
Technically, you can also try planting peas for fall harvest by direct-seeding them in early to mid-July. We’ve found that this technique can be tricky for many home gardeners for a few reasons:
Mid-July tends to be when gardens are the fullest, so there often isn’t space to plant a second round of peas.
The plants are too heat stressed to produce a good fruit set.
Q: Should you direct-seed or transplant peas?
A: Both work well!
We tend to transplant peas because birds and slugs love newly buried pea seeds and tiny pea sprouts. We find that transplanted peas are more resistant to this type of damage. We visit the majority of our gardens on an every-other week basis. This means that if we direct-seeded peas in a garden and the new sprouts were munched by a bird, it would be a week or two before we noticed and could replant again. As the season progresses and the weather starts to warm up, the window for planting peas closes, so we want to get them established as early as possible to ensure an extended pea harvest.
If you’re a home gardener and want to direct seed, just keep an eye on your plants! The direct-seeded peas usually germinate within a week. If you notice that your new sprouts are getting mowed down by slugs or birds, just reseed as soon as possible. If your seed doesn’t germinate at all, or germination is spotty, gently dig around your seeded row and see if the seed is still there. Crows and other birds love eating them whole. You can fill in a spotty row with new seeds and the later-planted ones often catch up with the original row.
If you are having pest issues, sprinkle your planting with iron phosphate (to keep the slugs at bay) and drape some bird netting over your bed. After your peas have grown to about 3 inches in height, gently remove the bird netting. Be sure not to break any of the growing tips on your pea plants as you do this. If you forget to remove your bird netting, your plants will start to get caught in the netting and you’ll have created a new issue for yourself to negotiate. :)
A note on timing: If sown early enough (in the PNW, sometime in March), direct seeded peas tend to catch up with transplanted peas once it comes time to start producing.

Tomatoes (left) and snow peas growing together in a Seattle garden in mid June.
Q: Peas only take 58 days to mature, so if I plant them now (in early March), I can pull them and plant my tomatoes in their place in early May, right?
A: Not so much.
This is a popular misconception that many gardeners have and it all comes down to two things:
What I refer to as the “quality of the growing day”. To put it simply, not all growing days are created equally. Early spring days and early fall days may technically be part of your growing season, but plants are going to grow much more slowly in these cooler and shorter days then they will during the long, warm days of summer. This means that even though peas need to be started while the soil temperature is still cool, they won’t really get going until things warm up a bit.
Fruiting crops vs. bulbing, flowering or leaf crops. Peas are a fruiting crop, which generally means that they will produce many fruits over an extended period of time, as opposed to a head of lettuce, which is one done and ready to harvest for a short period of time. Your peas might START producing after 58 days in the ground, but that doesn’t mean you want to pick the first 10 peas and call it a season. You want those plants to continue producing as long as possible. After all, you’ve waited 58 days and probably dedicated some valuable garden space to the plants.
We tend to pull March-planted peas from gardens in mid-July, or closer to 110-120 days after planting. At this point in the season the heat is starting to get to the peas and they get powdery mildew. By this point we’ve harvested pounds and pounds of fruit off of the hard-working plants over an extended period of time.
Since we generally plant tomatoes in mid-May, there are actually 2 months of overlap when both peas and tomatoes are in the garden.
We often quote our book “Food Grown Right, In Your Backyard” and say that fresh snap peas are a reason unto themselves for having your own garden. I’ve never eaten a pea that has tasted as good as the ones I grow in my home garden.
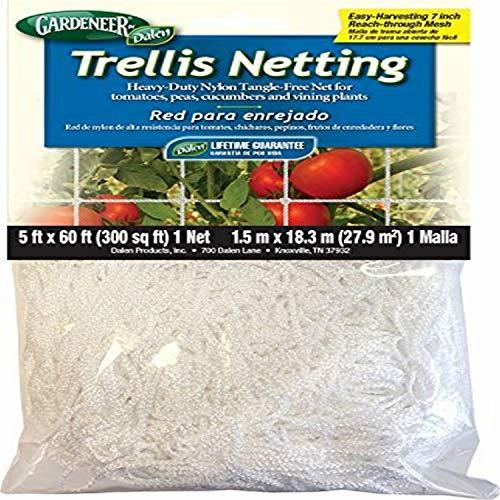
Dalen Products P TP-60 Trellis, 60 ft
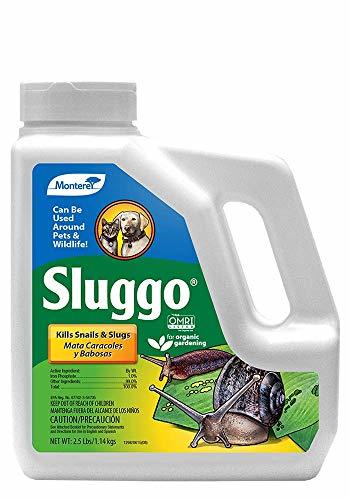
Monterey LG6500 Sluggo Wildlife and Pet Safe Slug Killer, 2.5 lb
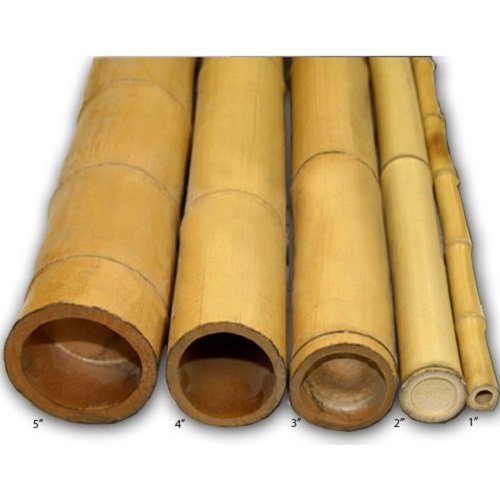
Forever Bamboo Bamboo Poles 2in D x 8ft L (10Pieces)
Chicago Heights Steel Green With Gray Top Studded T-post, 1.25" X 7' (Pack of 5)
Librett Biodegradable Natural Jute Twine, 890 FT - 32oz - 3 Ply
February 22, 2020
Drip Irrigation Q+A

All About Drip Irrigation
Installing a drip irrigation system on an automatic timer is one of the most effective ways to improve your garden’s productivity, while saving you time and money. Drip irrigation is a system of narrow plastic tubes that deliver water at a slow rate directly to the surface of the soil. Since the water is emitted slowly, it has time to soak into the soil, rather than run off or through the soil. A properly installed and monitored drip system will deliver just the right amount of water with very little waste.
Once installed, a drip system is largely hands-off, although you will want to check the moisture level of the soil every week or so as the weather changes. This will help make sure you are not over- or underwatering. A weekly moisture check and a 30-second update to your timer settings will ensure proper watering all season long.
Applying water directly to the soil surface is the most resource-efficient way to irrigate your plants. Drip irrigation allows you to water the portions of the garden planted in crops, reducing weed growth in bed edges and pathways.


Drip irrigation Q & A
We polled our followers on Instagram, and have answered their top drip irrigation questions below.
To keep the Q & A as simple as possible, I’m using the following guidelines:
This blog only addresses drip tape, which is best used in rectilinear spaces. I’ll address irrigation for container gardening and organic-shaped spaces in a later blog.
I’m using a 4’x8’ rectangular bed as my “control” here. Gardens come in all sizes and shapes, and I’m not saying that you should build 4x8 beds. They just provide an easy way to illustrate drip irrigation concepts.
Q: I'd be interested to know if there are ways to DIY this without a kit. Maybe more time/labor intensive, but cheaper?
A: It depends on the size of your garden. If you’re setting up a system for an area where the total bed space adds up to 192 square feet or less (or 6 4x8’ beds), I’d go with the one of the drip kits we recommend. Try the Dripworks Drip Tape Kit for rectilinear framed beds or in-ground beds, and the Garden Bed Irrigation kit for container gardens.
Of course, buying in bulk is always cheaper as long as you have the need for a lot of materials. For example, a 4000’ roll of Aqua-Traxx drip tape with 8” spaced emitters, costs around $228. This is enough tape to run irrigation to over one-hundred and twenty 4’x8’ raised beds! A small drip kit may come with 200’ of drip tape, or enough for around 192 square feet of garden space. This would allow you to irrigate six 4’x8’ foot raised beds and costs about $85.
Unless you’re planning to set up dozens of irrigation systems each year, or you’re creating a system for a very large garden, the 4000’ roll of tape will probably be a waste of money. This might be a better approach: For around $135 you can buy a drip tape kit that can service up to six 4’x8’* beds, extra tape locs, and the hose end timer we recommend. In other words, everything you need for your drip system.**
If you do want to piece together your own kit, our book, “Food Grown Right, In Your Backyard” lists out all of the different supplies you’ll need and you can find many of them here.
*How am I calculating the square footage covered by the small drip tape kit ? We recommend spacing drip lines about 12” apart, so in each 4’x8’ bed you’ll need 4 lines. When capping the end of your drip lines, you end up folding over a few inches of the line, so accounting for that and a few minor mistakes, I’m assuming at each bed will require four 8.33’ drip lines. (4 x 8.33)6=200.
**If you’re going to set up tapes in more than two 4’x8’ raised beds, you’ll need more tape locs (aka. Drip Tape Row Starts). We space our tapes about 12” apart, so each 4’x8’ bed needs 4 tape locs, and the kit only comes with ten. You can also buy more tape ends (to cap your irrigation) or you can use our old hack of cutting a 3-inch piece of drip tape (most of you should have extra!), folding your active tape ends over three times and sliding them into the cut piece.
Q: How much does it actually cost to install a drip system for four 4’x8’ beds?
A: I think the most efficient set up would cost around $135. See the last question :)
Q: Suggestions for installing amongst multiple raised beds without creating trip hazards? Is it as simple as burying lines between beds?
A: The main line, or header tubing, will be connected to your water source and you’ll run your drip tapes off of this line. This is the line you need to worry about becoming a trip hazard because it will likely run though parts of your site that are not necessarily designated garden space. In a perfect scenario you’ll be placing your beds near a water source and on top of sod, soil, gravel, or some other malleable surface that can easily be dug up so the lines can be buried a few inches underground.
If you can’t bury your main lines, you’ll have to get creative. Do your best to secure or bury any exposed lines running from your water source to your garden. In some cases, when lines can’t be buried, we’ll run our main line a little longer, and around a more circuitous route so that the lines can be secured to the edge of a house, deck or fence, instead of running across a patio or other impervious surface and creating an unsightly tripping hazard. These pipe straps come in handy when trying to secure your main line to your beds or surrounding surfaces.
Q: Do you bury [the drip tapes] or leave them on top of the soil?
A: We leave them on top of the soil during the growing season. We’ve found that they’re less likely to get clogged or damaged by our enthusiastic gardeners that way. Leaving them on top of the soil also helps to keep them top ½ inch or so of soil moist, which is crucial for seed germination.
In the winter, we top off all of our garden beds with 2-3 inches of compost. We leave the tapes under the compost during the winter.
Q: I want my drip system to be sustainable, it seems like everything at the local hardware store never lasts more than a season, so maybe products that are more sustainable.
A: A quality drip system should last many years. Off the top of my head I can think of at least a dozen gardens that we still maintain on a regular basis which have the original drip system we installed when we first built the garden over 10 years ago. Look for high quality, agricultural-grade materials, like the ones we recommend here.
Inevitably, any system is going to need repairs here and there, which is another reason why we recommend the products we do - they're much easier to work with than the other options out there.
Q: I’ve found with our hard water my system gets clogged easily, it may be the cheap stuff I bought?
A: Be sure to install a filter at your water source. These simple and inexpensive tee filters are what we use. The bottom screws off and the metal mesh filter can be easily taken out and cleaned or replaced without unscrewing your entire system.
Q: I would love to hear more about drip tape.
A: Drip lines bring water from your main line to your crops.
Drip tapes: If you have a square or rectangular garden, drip tapes are the way to go. They are low in cost, super-efficient at using water, and distribute it uniformly throughout your garden. Drip tapes are essentially long flat tubes with built in emitters that fill with water when under pressure.
When choosing a drip tape brand, look for a product that has emitters spaces every 6-9 inches and is pressure compensating, which means it distributes water equally throughout the whole system regardless of row length (within limits) and elevation changes. The downside of drip tape is that it can only be used in a straight line, so it’s not great for containers or curvy beds.
Q: I’m curious about how you address plants with different watering needs. My carrots germinate better if I have a sprinkler head spraying them, but other plants like to have water dripped right at the base of the plant.
A: This is a great question. In general, I’d say that a drip tape system should take care of all of your garden’s needs (I’m not addressing greenhouse or plant nursery needs here-which are different). It’s true that some crops such as carrots can benefit from additional overhead watering when it comes to ensuring consistent seed germination.
With that said, we don’t use overhead watering systems in any of the 80 or so gardens we maintain each year, and we have great success with germination. We’ve found that hand watering your newly planted seeds is crucial. Regardless of how effective our drip systems are, we never direct seed or transplant any crop without hand watering it in using a hose end sprayer set to “shower”. This first soaking goes a long way in assisting germination and reducing transplanting-related issues.
Also, as I mentioned earlier, we don’t bury our drip lines and ensuring high rates of germination is one of the reasons why. If your tapes are on top of the soil, the first ½ inch of soil is more likely to stay moist as seeds are germinating.
Another technique to be aware of when direct-seeding in a garden with a drip-system is seeding along the drip line. We space our drip tapes 12 inches apart because most annual vegetable plants require 6-12 inch spacing. Direct seeding within 1-2 inches of your drip line will also help to ensure consistent germination.
Q: I assume it's easiest to set up before the season starts.
A: The easiest time to install a drip irrigation system is while you are initially building the garden. The second best time is between garden seasons, either at the end of the fall season or early spring before planting begins again. Installing a system mid-season can be tricky because you will need to delicately work around all of your established structures and plants.
Q: What kinds of modifications, if any, does one need if they already have long season plants in beds, like garlic?
A: As long as your existing plants are spaced properly, installing drip lines around them shouldn’t be a problem.
Q: Should the lines be taken out over winter?
A: the drip irrigation systems we recommend are easy to winterize, because the lines don’t hold water when the system isn’t running. Thus, you may be able to leave main lines and drip lines in place over the winter without risk of damage. When setting up a system, it’s a good idea to create an end at the lowest part of the garden that can be opened up to let water drain out. Fittings for mainline tubing are easy to remove and function as this type of drain. If you live in an area with very cold winters, it may be a good idea to use an air compressor to blow water out of any buried lines before winter sets in.
Before the temperature drops below freezing, turn the water off at the hose bib and bring your timer inside for the winter. You may also want to disconnect any other fittings near the timer such as the filter and pressure regulator and store these in the garage. If you have a Y-valve, make sure both valves are open to let water drain out.
Q: If one has tall raised beds, should the line be buried underneath, or go over the top?
A: We always recommend running your main lines under your beds if possible. This isn’t always practical if you’re installing a system in an existing garden.
Q: How long should the lines last before they need to be replaced?
A: I can think of many gardens we installed 10-12 years ago that still have their original drip systems...so quite a long time! You will inevitably need to patch holes in the drip tape (use these couplers or just replace the entire length of tape), but the full system should last years.
Good luck setting up your drip system, I hope these tips help!

Irrigation Materials We
Recommend
More Drip Irrigaiton Resources:
If you’re a podcast fan, or just want to dig deeper into the world of drip irrigaiton, the following resources from our archives have got you covered.
January 28, 2020
To Build Wood-Framed Beds, Or Not To Build Wood-Framed Beds?

“To build wood-framed beds, or not to build wood-framed beds?” That seems to be the question many gardeners have on their minds right now. There are pros and cons to both gardening system and I’ll be discussing them here. Both bed types are technically “raised” beds, so to start, I want to explain how I define the two different growing systems:
Mounded Bed Gardens: A mounded bed is a garden bed that is raised slightly (4–8 in.) above the surrounding area but isn’t bordered by a wooden frame. You can put a mounded bed garden in just about any spot in your yard that has enough sunlight and soil. You create it by loosening and lifting the existing soil and adding new soil and compost to improve its structure.
Wood-Framed Gardens: A wood-framed garden is similar to a mounded bed garden, but it’s contained in a large wooden frame (hence the name). The frame can be made of almost any type and size of lumber and can stand anywhere from a few inches (we recommend at least 12”) to a few feet tall. Square or rectangular shapes are relatively simple to build and are the preferred structure for many home gardeners.*
*If you look around at the gardens we’ve designed and built, you’ll see that there are other materials such as metal and stone, that work well as a building medium for framed gardens. For the sake of keeping things simple, we’ll just call them all wood-framed beds for now.
Advantages of mounded beds:
• They’re simple. You can easily build a few mounded raised beds in a day, and you don’t have to worry about gathering up a lot of extra materials to get started.
• They’re cheap. All you have to buy is soil, compost, and organic fertilizers.
• They fit easily into existing landscaping. Most ornamental landscaping beds are mounded raised beds, so if one of these exists in your ideal garden site already, all you have to do is pull out the unwanted plants and improve the soil.
• They’re easy to dress up. You can make attractive edges for mounded beds by surrounding them with stones, bricks, or any other material you may have on hand. This is especially useful for keeping garden soil from slumping into an adjacent driveway, path, or patio, and it can also slow (but not stop) the intrusion of grass into the beds.


Limitations of mounded beds:
• You must have a location that has both sun and non-contaminated soil.
• Root-intrusion from surrounding trees can be harder to control.
• Burrowing pests can be hard to keep at bay (think moles, voles and rabbits).
• Beds are lower to the ground so they can be harder to work in.
• Mounded beds can take a little more work to keep looking tidy.
Advantages of wood-framed gardens:
• They’re deep. The frame lets you pile a lot of new garden soil on top of the existing soil. This is a huge advantage if your yard is really rocky or the soil is so compacted that you’d otherwise have to work it with a pickaxe. You can build the beds, set them in place in your ideal location, fill them with soil, and start planting. There’s no need to do anything with the grass underneath.
• The depth also allows you to build on top of contaminated soils. If you are working on a site where the soil is contaminated, cover your garden area with gravel and place landscape fabric-lined beds on top. This will prevent the roots of your crops from penetrating the contaminated soil. Fill beds with new, compost rich soil.
• Wood-framed beds make keeping pest and roots from surrounding trees very easy. If we think a raised bed garden we’re designing and building may have pest or root pressure, we’ll line the beds with hardware cloth and landscape fabric to prevent burrowing pests and/or root intrusion.
• They allow for clearly defined paths and planting space. With the frames in place, there’s no worry about tramping on the edges of your beds.
• They’re easier on your back. You can build a wood frame as high as you like, which can be a plus if you want to minimize back stress.
• They expand your garden location options. As long as you have sun, you can pretty much put raised beds anywhere: on top of concrete, on rooftops (pending an engineer's inspection), on steep slopes...so many possibilities!
• You can simplify your garden supply storage by building cold frame/shade cloth structures, trellises, and rabbit fencing right onto your wood-framed beds (see images below).


• They’re a good way to learn some new skills. If you’ve always wanted to learn a little basic woodworking, a wood-framed bed is a great first project.
Limitations of wood-framed gardens:
• You’ll end up investing more money in the initial set up.
• Unless you’re an extremely skilled craftsman, when it comes to wood-framed beds, you’re pretty much limited to working with rectilinear shapes. If your space is smaller, this can end up reducing to total amount of workable square footage you end up with.


Educational Resources We’ve Created for you!

Crop Planning for PNW Vegetable Gardens - Webinar Recording
20.00

Plan + Prep Your Edible Garden - Webinar Recording
20.00

High-Yield Vegetable Gardening: Grow More of What You Want in the Space You Have
By Colin McCrate, Brad Halm

Food Grown Right, In Your Backyard: A Beginner's Guide to Growing Crops at Home
By Colin McCrate, Brad Halm
June 28, 2019
Episode 108: Beets with Kellie Phelan

Early Wonder and Touchstone Golden beets
Kellie's back as a special co-host for this last episode of the 2019 season, and it's all about growing, harvesting and cooking with beets!
HOW TO LISTEN:Subscribe in iTunes , Stitcher, or any of your favorite podcast players to have new episodes sent directly to your device.
Listen right now in your browser by clicking above.

Beet thinnings

Properly spaced beets

Beets ready to harvest
SHOW NOTES and TERMS:
Garden Beets / Beta vulgaris
Part of the plant you eat: root and leaves
Days to maturity: ~ 60
How to plant: We recommend direct sowing beets. Overseed and thin down to 1 plant every 3-4 inches.
Ideal germination temp: 77 degrees F, but will germinate in the range of 50 degrees to 80 degrees F. Seed will germinate around 3x faster in the warmer end of the germination range.
Hardiness: Young plants can tolerate frost, but roots of large plants will start to rot when exposed to freezing temperatures.
Fertilize: Fertilize at planting and around 3 weeks after they emerge, or at thinning. Use 1/4 c of balanced fertilizer per row foot or liquid fertilizer.
Varieties:
Touchstone Golden
Cylindra
Early Wonder
Bolero
Chioggia
Merlin
Also mentioned in this episode: Salad Burnett

Beet greens

Cylindra beets

Harvested Early Wonder beets
More resources on growing beets:
By Colin McCrate, Brad Halm
By Colin McCrate, Brad Halm
By Eliot Coleman
Like what you hear? Please share our podcast with a friend. Subscribe on iTunes or your favorite podcast player so you never miss a beat. And we'd really appreciate you showing us some love by leaving a rating and review on iTunes.
Have a topic you'd like see us dig in to? Leave us a note in the comment section below or #EBpodcast on Instagram and Twitter!

More about this weeks guest expert:
KELLIE PHELAN is a self-proclaimed gardening nerd and has a deep passion for knowing where our food comes from, how it’s grown, and what we put into our bodies. She loves to share her knowledge and passion with others, and co-hosted over 50 episodes of the Encyclopedia Botanica podcast! When Kellie’s not busy running The Works or in her garden, she enjoys spending time with her partner Matt and new twin babes Ace & Pepper.
https://www.theworksseattle.com/
Instagram: @theworks.seattle

About the Host:
Hello, I’m Hilary Dahl. Outside of this podcast, my job is to help beginning and experienced growers create beautiful and productive gardens. I have the unique experience of working in on a wide range of projects, from small backyard garden plots to multi-acre vegetable farms. I also work in my own garden every day when I get home. This podcast is an opportunity to discuss seasonal garden topics and share the the joy of growing your own food.


