
Colin McCrate's Blog, page 6
November 17, 2021
Episode 113: Wood-Framed Raised Beds

A wood-framed raised bed garden consisting of two 4x8'x16” raised beds, made from rough-cut cedar 4x6x2” boards
In this episode Hilary and Colin answer a listener's questions about wood-framed raised bed construction best practices. Seattle Urban Farm Company has designed and built hundreds of custom raised bed gardens in the Seattle area, so check out this episode for an inside scoop on all of the pro tips!
HOW TO LISTEN:Subscribe on iTunes, Stitcher, Spotify, or any of your favorite podcast players to have new episodes sent directly to your device.
Listen right now in your browser by clicking above.
SHOW NOTES:In this episode, we discuss:
How to choose the best material and prepare your site for a long-lasting wood-framed raised bed garden.
The following garden beds are both constructed using 6” wide rough-cut cedar boards, and treated with internal wood stabilizer. The garden on the left was treated with the clear stabilizer, and the garden on the right was treated with the tinted version of the product:

[image error]
Important Take-aways:
Raised beds come in all shapes and sizes. In the episode we focus on wood-framed raised garden beds because they’re by far the most popular type with our clients; but technically, raised beds can be as simple as a mound of soil built up in a dedicated location, or as complex as mortared stone beds.
4x8' rectangular beds are the most economical size wood-framed bed to build because 8’ boards are the least expensive cut of lumber, and they require no wood waste. We like to build our beds out of 4x8’x6’ boards.
How to get the most life out of your raised beds:
Choose high-quality lumber
Treat lumber with a food-safe internal wood-stabilizer
Take the time to prepare your site so that your beds are situated on a stable, smooth surface
Install cross-bracing on any bed larger than 4x4’
Keep your bed construction simple; often details such as mitered edges won’t wear well when exposed to the elements
Lining your beds. The following are situations in which lining your beds with landscape fabric, and/or hardware cloth, will go a long way in improving your growing experience and the safety of the food you’re growing:
Line the inside of your beds with landscape fabric if your subsoil is contaminated, or if your beds are sited on an impervious surface.
Line the bottoms of your beds with landscape fabric, extending the material beyond the edges of the beds or if you have large trees or shrubs* near by. If you line the insides of your beds to exclude roots, it’s possible that the roots will work their way up the sides of the beds between the landscape fabric and the wood-frame. I know this sounds extreme, but we’ve seen it!
Line the inside of your beds with landscape fabric, and staple hardware cloth to the bottom of the beds if you think there’s a possibility that burrowing pests like moles and voles might be around.
*Leyland Cypress is a very common privacy hedge plant with particularly aggressive roots!
Beds that are built near large trees or shrubs (see photo on left for Leyland Cypress example from podcast), or on impervious surfaces such as patios and rooftops, should be lined with landscape fabric:


Like what you hear? Please share our podcast with a friend. Subscribe on iTunes, Stitcher, Spotify, or any of your favorite podcast players to have new episodes sent directly to your device. And we'd really appreciate you showing us some love by leaving a rating and review on iTunes.
Have a topic you'd like see us dig in to? Email us at eb@seattleurbanfarmco.com
We've opted not to get sponsors this season because of the additional time and energy the process involves. This podcast is a labor of love, and a way to connect with those of you whom we can't work one-on-one with, so if appreciate what we're up to, and you'd like to show your support for the podcast, please consider making one-time contribution here:
Click here to Support the Encyclopedia Botanica Podcast Our books will help you build a better garden: Grow More Food: A Vegetable Gardener's Guide to Getting the Biggest Harvest Possible from a Space of Any Size By McCrate, Colin, Halm, Brad
  Food Grown Right, In Your Backyard: A Beginner's Guide to Growing Crops at Home By McCrate, Colin, Halm, Brad Your Hosts:


Episode 112: High Tunnels, Hoophouses and Greenhouses

This gothic style production greenhouse on a small farm in the San Juan Islands allows the growers to plant out thier warm season crops earlier in the spring, providing an earlier harvest to bring to their local farmers market during peak market season.
This week we’re talking greenhouse management. Specifically, we disucss using high tunnels, hoophouses and greenhouses as production spaces. In a later episode, we’ll address how greenhouses can be used as part of a home plant nursery.
HOW TO LISTEN:Subscribe on iTunes, Stitcher, Spotify, or any of your favorite podcast players to have new episodes sent directly to your device.
Listen right now in your browser by clicking above.
SHOW NOTES:In this episode, we discuss:
How growing in large, covered structures can expand a gardeners year-round production potential
Organic management techniques for high tunnels, hoophouses and greenhouses
Roll up sides and interior hoops allow growers to utilize a high tunnel year round:
[image error]
Important Take-aways:
High tunnel, hoophouse, and greenhouse are essentially interchangeable terms — they all describe an arched or gabled structure that is tall enough to walk into. Some growers use the term greenhouse if the structure has a heat source in it and the term high tunnel if it’s unheated (but this distinction isn’t universally adopted). In an effort to limit confusion, let's refer to these growing structures as High tunnels throughout the episode.
For most season-extension purposes, the expense and complication of adding a light and heat source to a greenhouse are prohibitive. However, there are circumstances for which these extra costs and work might be worthwhile, especially for growers who produce young transplants, so we'll discuss this in our propagation episode (coming early 2022!)
Growing in a high tunnels provides you the freedom to:
work in a protected space over the winter
grow tall crops and grow vertically
install secondary covers (usually in the form of mini hoop tunnels)
grow in diffuse light during the warmest months of the year, when crop growth slows during the sunniest part of the day
Key management techniques:
One issue with permanent high tunnels is that the soil under them is never exposed to precipitation and extreme temperatures. This can lead to nutrient imbalances (high salt levels in particular) and a buildup of pest and disease problems. Careful ventilation, fertilization, and irrigation will help deal with these issues.
Usually, high tunnels have doors or windows on the ends for access and ventilation, and are outfitted with some way to open or roll up the sidewalls to provide for maximum ventilation during hot days. If you have access to electricity, greenhouses can be fitted with automatic ventilation shutters, fans, and heaters for further season extensions.
Removing the plastic during the winter to expose the soil to cool temperatures and precipitation.
Brad, Colin and the SUFCo team building a 12x30’ caterpillar tunnel, high tunnel at the Seattle Urban Farm Co. headquarters:
[image error]

Like what you hear? Please share our podcast with a friend. Subscribe on iTunes, Stitcher, Spotify, or any of your favorite podcast players to have new episodes sent directly to your device. And we'd really appreciate you showing us some love by leaving a rating and review on iTunes.
Have a topic you'd like see us dig in to? Email us at eb@seattleurbanfarmco.com
More about our special guest:
Brad Halm
Brad’s interest in food production started in a small vegetable garden at the Homestead, an experiential living center at Denison University in Ohio. After graduating, he apprenticed on organic farms around Ohio for several years, then took a position as the CSA (Community Supported Agriculture) Manager for Village Acres Farm in Pennsylvania. He moved to Seattle in 2007 to help Colin start the Seattle Urban Farm Company, and he is still building urban farms to this day.
Books by Brad and Colin:
Grow More Food: A Vegetable Gardener's Guide to Getting the Biggest Harvest Possible from a Space of Any Size By McCrate, Colin, Halm, Brad Food Grown Right, In Your Backyard: A Beginner's Guide to Growing Crops at Home By McCrate, Colin, Halm, Brad
November 5, 2021
Mulching Your Garden For Fall
Cover your beds in 2-3 inches of compost or mulch. We’re using Behren’s 4.25 Gallon Galvanized Steel Pail to bring material from our compost pile to our garden.
Garden soil loves to get dressed up. Instead of a tuxedo or gown, spruce up your beds with a stylish layer of compost, cover crops and straw. Covering your soil in this way is called mulching, and it keeps your garden soil protected from the elements. Protected soil helps maintain a healthy population of beneficial mycorrhizal fungi and other essential garden life. Leaving your soil bare during winter can be especially problematic because heavy precipitation can leach nutrients, acidify the soil’s pH, and compromise its structure.
What are mycorrhizal fungi and why should I care about their presence in my soil? Simply put, mycorrhizal fungi are a fungus (Myco) that attach to the roots (rhiza) of your plants. This relationship is symbiotic, meaning that it's advantageous for both organisms. Mycorrhizal fungi enhance the water absorbing efficiency and nutrient-uptake capacity of your crops.
Covering your soil with an organic mulch in the winter will provide a physical barrier that protects against nutrient leaching and helps preserve beneficial organisms. Fortunately, there are many soil-protecting mulches available. You can either use an organic material like straw or a “living mulch” made from cover crops. Let’s take a look at both options:
Cover crops:

A cover cropping mix of oats and field peas.
Cover cropping generates organic matter, protects the soil and captures nutrients. They’re often planted in late summer and fall, so that the crop is mature enough to offer good protection for the winter. Many gardeners use a combination of a leguminous cover crop and a grass. The legume fixes nitrogen from the air and adds it to the soil, and the grass supplies carbon to balance the nitrogen from the legume. Popular cover crop combinations include rye/vetch and oats/field peas.
Even though cover crops are incredible soil-builders, in many situations, it may not make sense for the home gardener because it can be tricky to get the timing just right. To grow a successful cover crop, you need to allow enough time for the crop to grow large from seed and cover the soil by the end of your growing season. Cover crops either “winter kill”, meaning that they die when exposed to cold winter weather, or are mowed and turned into the soil in the early spring. In either situation, cover crops usually take between three to five weeks to break down after they’ve been turned into the soil. During this time, they can tie up valuable production space in the spring. So if your garden is planted in cover crops, it can be challenging to plant early-season spring vegetables.
Cover cropping works best in larger gardens or in gardens where some beds are not in production for the season. If you have a smaller garden and want to keep all of your summer crops in place until the very end of the season, you may not have time to plant a winter cover crop. To grow cover crops in a fully-planted garden, you'll need to do one of the following: pull some of your summer and fall crops early, or plant next spring’s crops late.
One easier-to-manage winter cover crop is fava beans. Favas can be planted late in the fall and provide benefits to the soil as well as a spring harvest. In our growing region, the Pacific Northwest, fall-planted fava beans typically mature in early-mid May. Just in time to be replaced by summer crops like tomatoes and peppers.

Clear all of the crops that you don’t want to overwinter in your garden. In this photo Colin is harvesting beets into Behren’s 2.5 Gallon Galvanized Steel Oval Storage Tub
Organic mulches
A simple application of straw or compost is much less management intensive than growing cover crops. Organic mulches are easy to find, easy to apply and provide many of the same benefits as a well-grown cover crop.
Compost is our go-to winter garden mulch. High-quality compost is readily available in many parts of the country. It works well with our growing season, which tends to extend late into the fall, and start up again early in the spring. We also work in a lot of smaller gardens (most are less than 1,000 square feet), so we want to be ready to use all of that space first thing in the spring.
Just like the soil underneath, nutrients can be leached from compost during the winter. However, a 2-3” layer of compost creates a protective barrier between your soil and winter precipitation. It has the added benefit of making the soil easy to plant into the next season. There’s no need to work the soil or remove the mulch, you just seed or transplant right into your beds. If you don’t get around to winter mulching, you can add it at any point in the season, it’s always a good time to add compost to the garden.
Many gardeners struggle with making their own compost, and this is especially true for gardeners in urban environments. If you don’t have access to quality materials for your compost pile, it can be difficult for you to build a large top-notch pile from scratch. If this is the case, don’t worry. There’s nothing wrong with buying compost. Ideally you will be able to locate a locally produced compost product that is made specifically for vegetable gardens. Avoid compost that is typically sold for use on ornamental beds, as it’s likely to contain lots of high-carbon materials (undecomposed wood and bark), which can reduce the availability of nutrients for your plants.
Obviously, a certified organic product will help ensure quality ingredients, but well-made compost does not need such a certification to be a great product. Talk to the provider and learn how the product is made and what it is made from before purchasing it. Generally speaking, compost made with animal manure will provide more usable nitrogen, phosphorus, and potassium. Compost made strictly with plant waste is still a great source of organic matter, but will supply less of these nutrients.


At Seattle Urban Farm Co, we clean up around 70 gardens at the end of each season, so our motto is “work smarter, not harder”. Behren’s large Comfort Grip handles ergonomic design gives our hands a break when hauling buckets of compost all day.
Other great winter mulches:
Grass clippings: Apply a 2-3” layer to the top of your beds. It can be turned into the soil in spring.
Hardwood leaves: Use a thick layer for winter protection (4 to 6 inches). Avoid turning into the soil so as not to tie up nitrogen; instead, rake off remaining mulch and compost.
Shredded hardwood leaves: Can be turned directly into the soil in the spring to add organic matter and nutrients.
Rolled burlap or burlap sacks: Don’t turn these into the soil! Instead, store and reuse next year. Works for mid-season mulch, but can be difficult to lay in between plants.
Straw: Use a thick layer (4 to 6 inches). Avoid turning into the soil in the spring so as not to tie up nitrogen; instead, rake off remaining mulch and compost or reapply when crops begin to mature. Whether or not your straw supplier is certified organic, it’s important to verify that the straw you’re buying was not sprayed with herbicides. Chemical herbicides can persist for some time, and unwittingly adding them to your garden via straw may lead to years of problems.
Whatever mulch you choose, your soil will be happy, provide you with healthier crops and look great doing it!

[image error]
the Behrens products featured can be found along with the entire Behrens collection at www.behrens.com
November 2, 2021
Episode 111: Powdery Mildew

Powdery mildew on Sugar Snap peas.
This week on the podcast we're tackling powdery mildew! Colin and Hilary are joined by Jenny Rebecca Glass, Extension Coordinator and Plant Diagnostician for the WSU-Puyallup Plant and Insect Diagnostic Laboratory. Jenny will help us answer your questions about the lifecycle of this common garden disease as well as management tips and techniques.
HOW TO LISTEN:Subscribe on iTunes, Stitcher, Spotify, or any of your favorite podcast players to have new episodes sent directly to your device.
Listen right now in your browser by clicking above.
SHOW NOTES:In this episode, we discuss:
The lifecycle of the common garden fungus powdery mildew
Organic management techniques
Important Take-aways:
Powdery mildew is the name given to a group of diseases caused by several closely related fungi.
Powdery mildew thrives in humid conditions
There are hundreds of different strains of powdery mildew (PM), each with it’s on unique host. PM will not transfer between plant families.
Powdery mildew can be found on buds, blossoms, leaves, twigs, and fruit
Terms
Obligate parasite: one that is entirely dependent upon a host for its survival
Ascomycete fungus: a group of fungi that ejects it’s spores via a spraying mechanism. Powdery mildew are the spores of an ascomycete fungus
Chasmothecia: the sexual fruiting bodies produced by the powdery mildew organism
Integrated Pest Management options:
Look for disease-resistant varieties when sourcing your seeds or plants
Prune and trellis your plants to encourage air circulation
Remove infected debris
Organic fungicides like sulfur, potassium bicarbonate and horticultural oils can be used to slow the spread
Spraying plants with water can also help break down the spores
Like what you hear? Please share our podcast with a friend. Subscribe on iTunes, Stitcher, Spotify, or any of your favorite podcast players to have new episodes sent directly to your device. And we'd really appreciate you showing us some love by leaving a rating and review on iTunes.
Have a topic you'd like see us dig in to? Email us at eb@seattleurbanfarmco.com
More about our special guest: [image error]Jenny R Glass,
Jenny Rebecca Glass is the Extension Coordinator and Plant Diagnostician for the WSU-Puyallup Plant and Insect Diagnostic Laboratory. She is responsible for diagnosing plant problems ranging from abiotic factors, such as nutrient deficiencies or water stress, to biotic factors including plant pathogens and arthropod pests. She also helps people understand the available management options. In addition to deftly managing the Diagnostic Laboratory, Jenny provides plant pathogen training, covering plant problem diagnosis and integrated pest management, to diverse audiences in western Washington. Her favorite pathogen group is the downy mildews; however she was saddened by the recent introduction of this disease to impatiens, the go-to-annual for shade.
Jenny attended Oregon State University, completing her Master’s study in the Botany and Plant Pathology Department. In 2000, she joined WSU-Puyallup, where in addition to her laboratory responsibilities, she participates in several campus initiatives including leading Roadside Cleanup volunteers in beautifying the campus roadways.
October 26, 2021
Episode 110: Growing Under Cover with Guest Niki Jabbour

In this podcast we chat with special guest Niki Jabbour about techniques for using structures of all sizes in your garden year-round to extend your season, reduce pest pressure, and improve yields.
HOW TO LISTEN:Subscribe on iTunes, Stitcher, Spotify, or any of your favorite podcast players to have new episodes sent directly to your device.
Listen right now in your browser by clicking above.
SHOW NOTES:In this episode, we discuss:
Garden covering systems and infrastructure
Under cover growing techniques

Chicken-wire low tunnels, stapled to wood stakes and covered in spun bonded polyester fabric. These were constructed by the Seattle Urban Farm Co team as a tool for pest exclusion.
Important Take-aways:
Niki is gardening in Halifax, Nova Scotia. Zone 5B
Structures:
Cloches: Small coverings for individual plants
Mini hoop tunnels: Also called low tunnels or row covers, mini hoop tunnels, are structures that are not tall enough to walk into. They often comprise hoops or arches that support fabric or plastic covers that protect plants. The cover of a low tunnel must be removed to manage and harvest the protected plantings. Low tunnels are inexpensive and easy to set up, but because they’re low, you can’t grow tall crops to maturity under them.
Coverings:
Shade cloth: usually a woven fabric that can reduce sunlight penetration and keep plants and soil cool. With a layer of shade cloth, almost any low tunnel, cold frame, or high tunnel structure can be adapted to help extend the summer growing time for cool-loving crops.
Spun-bonded polyester fabric: Often refereed to by the brand name called Reemay, This material provides some heat retention and wind resistance but is also breathable and lets precipitation pass through (Reemay and Agribon are common brand names). It doesn’t create the greenhouse effect like clear plastic, so you will not have to remove it when the sun comes out.
Greenhouse or UV-resistant plastic film: Using clear plastic to cover your hoops creates the greenhouse effect, and your garden beds will get maximum temperature gain. However, this material can cause your crops to fry on a sunny day (even in the middle of winter); you need to be prepared to open it partially or remove it for ventilation during sunny periods.
In this episode Niki recommended books by Penelope Hobhouse for all you history buffs!
The following photos were taken by Nik Jabbour and show some of the infrastructure we discuss holding up to a Nova Scotia winter!

Poly low-tunnels under snow (Copy) [image error]
Cold frame with polycarbonate panels (Copy)

Open cold frame with polycarbonate panels (Copy)
 By Jabbour, Niki
  By Jabbour, Niki
  By Jabbour, Niki
 Like what you hear? Please share our podcast with a friend. Subscribe on iTunes, Stitcher, Spotify, or any of your favorite podcast players to have new episodes sent directly to your device. And we'd really appreciate you showing us some love by leaving a rating and review on iTunes.
Have a topic you'd like see us dig in to? Email us at eb@seattleurbanfarmco.com
More about our special guest:
Photo from The Year Round Vegetable Gardener, taken by Joseph DeSciose
Niki is an award-winning author and edibles expert from Halifax, Nova Scotia, who believes that a long Canadian winter shouldn’t mean an end to the homegrown harvest. Niki grows dozens of different vegetable varieties in her 2,000-square-foot garden, including experimental crops like quinoa, peanuts, artichokes and figs. Niki’s unconventional – yet wildly successful – growing techniques are proof that elbow-deep snow is not, in fact, a valid excuse for a puny parsnip harvest. Her first book, The Year Round Vegetable Gardener, was honored with the 2012 American Horticultural Society’s Book Award, and her latest title, Groundbreaking Food Gardens: 73 Plans That Will Change the Way You Grow Your Garden (Storey Publishing, 2014) opens your eyes to an infinite number of tasty possibilities. Niki Jabbour’s Veggie Garden Remix introduces you to 224 New Plants to Shake Up Your Garden and Add Variety, Flavor, and Fun (Winner of the 2019 American Horticultural Society Book Award, Winner of the Gold Book Award from GardenComm, and winner of the 2019 Silver Award from Taste Canada).
Niki's gardening blog, SavvyGardening, has won Best Overall Garden Blog and Best Digital Media from the GWA, the Association for Garden Communicators!
www.savvygardening.com
Instagram: @nikijabbour
October 20, 2021
"Grow More Food" Prize Package Giveaway with Storey Publishing
 Introducing our updated guide to vegetable garden planning & design!
Now’s the time to pre-order Grow More Food by Seattle Urban Farm Company founders, Colin McCrate and Brad Halm! By pre-ordering you’re eligible to enter to win one of two grand prize packages worth $175.
Preorder now!
Grand Prize Package Includes:
- $100 Bogs Footwear gift card
- 5 seed packets from Halden Seeds
- $50 in your choice of Behrens products
Pre-order before 12/15/2021 for your chance to win!
Two grand prize winners will be drawn.
Already ordered? Throw your name in the hat here!Grow More Food: A Vegetable Gardener’s Guide To Getting the Biggest Harvest Possible From Any Size SpaceJust how productive can one small vegetable garden be? More productive than one might think! Colin McCrate and Brad Halm, former CSA growers and current owners of the Seattle Urban Farm Company, help readers boost their garden productivity by teaching them how to plan carefully, maximize production in every bed, get the most out of every plant, scale up systems to maximize efficiency, and expand the harvest season with succession planting, intercropping, and season extension.
Along with chapters devoted to the Five Tenets of a Productive Gardener (Plan Well to Get the Most from Your Garden; Maximize Production in Each Bed; Get the Most out of Every Plant; Scale up Tools and Systems for Efficiency; and Expand and Extend the Harvest), the book contains interactive tools that home gardeners can use to assist them in determining how, when, and what to plant; evaluating crop health; and planning and storing the harvest. For today’s vegetable gardeners who want to grow as much of their own food as possible, this guide offers expert advice and strategies for cultivating a garden that supplies what they need.
Take a look inside Grow More Food:
Grow More Food: A Vegetable Gardener's Guide to Getting the Biggest Harvest Possible from a Space of Any Size By McCrate, Colin, Halm, Brad Buy on Amazon View fullsize 
View fullsize

View fullsize

View fullsize [image error]
View fullsize

View fullsize

Preorder and Enter to Win Today!
October 19, 2021
Episode 109: Cucumbers

Socrates, a burpless cucumber variety growing in a greenhouse on a string trellis.
Photo by Hilary Dahl for our newest how-to gardening book, Grow More Food
Everything you wanted to know about cucumbers but were afraid to ask. We dig into the history of the cucumber, it's botanical curiosities and why you should start succession planting them.
HOW TO LISTEN:Subscribe on iTunes, Stitcher, Spotify, or any of your favorite podcast players to have new episodes sent directly to your device.
Listen right now in your browser by clicking above.
Show Notes and Terms:Cucumbers / Cucumis sativus
Part of the plant you eat: The fruit. Officially, the cucumber is classified as a pepo, which a type of berry.
Days to maturity: 45-65
How to plant: Sow seeds indoors as transplants 2-3 weeks before planting out. Wait until the temperatures are 65°-70° before planting out. Cucumbers can be direct sown when soil temperatures reach 70°. Plants should be spaced 12-18” apart. If you’re direct sowing, place seeds every 6” and thin once seedlings germinate.
Ideal germination temp: 70°
Hardiness: Hard frost will kill cucumber plants
Cucumber growth habit: Cucumbers varieties come in both bush and trailing growth habits.
Fertilization needs: Fertilize at planting and every 2-3 weeks with a liquid fertilizer.
Main categories of cucumbers:
Slicing
Pickling
Burpless
Also mentioned in this episode:
Linnaean taxonomy
Parthenocarpic plants
String trellising cucumbers:

In addition to a new season of the podcast, we also have a new book coming out soon called “Grow More Food.” It’s a revised version of our earlier book “High-Yield Vegetable Gardening” but with over 200 new photos, updated illustrations and loads of new information, it’s available for preorder now everywhere you buy books online.

The survey…! In order to keep making this podcast, we need your support. In the past, we had some incredible Patreon and Kickstarter contributors - thank you 1000x to any past contributors who may be listening, you are amazing!!! However, going forward, we think it’ll be more manageable to take advantage of the ads platform our hosting service provides to help make this podcast sustainable. The only thing we need is for some of you wonderful listeners is to take a quick survey for our podcast hosting platform. This survey should only take about 30 seconds and will help make it possible for us to continue start creating episodes again.
Have a topic you’d like to see us dig into on the podcast? Send us an email at eb@seattleurbanfarmco.com
More resources From the Seattle Urban Farm Co: By Colin McCrate, Brad Halm
  By Colin McCrate, Brad Halm Past podcast episodes and recent blog posts:
Like what you hear? Please share our podcast with a friend. Subscribe on iTunes, Stitcher, Spotify, or your favorite podcast player so you never miss an episode. And we'd really appreciate you showing us some love by leaving a rating and review!
Have a topic you'd like see us dig in to? Send us a note at eb@seattleurbanfarmco.com
About the Hosts:
September 30, 2021
Fall 2021 New Season Preview Mini-Episode!
Late-summer garden harvest from Hilary and Colin’s home garden
Hello! After an extended hiatus, we’re back and ready to bring you some amazing new episodes of the Encyclopedia Botanica Podcast!
HOW TO LISTEN:Subscribe on iTunes, Stitcher, Spotify, or any of your favorite podcast players to have new episodes sent directly to your device.
Listen right now in your browser by clicking above.
Important show updates:Colin McCrate, founder of the Seattle Urban Farm Co., author of 3 great gardening books, and garden writer for the Seattle Times, will be co-hosting this season!
As in past seasons, we’ll also be bringing in guest experts to help us answer your questions and to offer their unique perspective on the topic!
In this season we’ll be addressing topics selected by you! The format will actually be pretty similar to the way it has been in season’s past, where we spend the entire episode on a deep dive into a gardening topic, but we’ll wrap the discussion up by answering the listeners question! So, starting now please email your garden questions or topics you’d like us to cover to our new dedicated email address: eb@seattleurbanfarmco.com
To keep a more manageable schedule, we’re going to be breaking up the podcast into smaller, mini-seasons of 6 episodes each. We’re planning to release our first set later this fall and then more mini-seasons through the winter and into next spring and summer.
The survey…! In order to keep making this podcast, we need your support. In the past, we had some incredible Patreon and Kickstarter contributors - thank you 1000x to any past contributors who may be listening, you are amazing!!! However, going forward, we think it’ll be more manageable to take advantage of the ads platform our hosting service provides to help make this podcast sustainable. The only thing we need is for some of you wonderful listeners is to take a quick survey for our podcast hosting platform. This survey should only take about 30 seconds and will help make it possible for us to continue start creating episodes again.
In addition to a new season of the podcast, we also have a new book coming out soon called “Grow More Food.” It’s a revised version of our earlier book “High-Yield Vegetable Gardening” but with over 200 new photos, updated illustrations and loads of new information, it’s available for preorder now everywhere you buy books online.
More resources From the Seattle Urban Farm Co: By Colin McCrate, Brad Halm By Colin McCrate, Brad Halm Past podcast episodes and recent blog posts:Like what you hear? Please share our podcast with a friend. Subscribe on iTunes, Stitcher, Spotify, or your favorite podcast player so you never miss an episode. And we'd really appreciate you showing us some love by leaving a rating and review!
Have a topic you'd like see us dig in to? Send us a note at eb@seattleurbanfarmco.com

About the Host:
Hello, I’m Hilary Dahl. Outside of this podcast, my job is to help beginning and experienced growers create beautiful and productive gardens. I have the unique experience of working in on a wide range of projects, from small backyard garden plots to multi-acre vegetable farms. I also work in my own garden every day when I get home. This podcast is an opportunity to discuss seasonal garden topics and share the the joy of growing your own food.
August 13, 2021
Organic Insecticides: Soap Spray

Aphids on parsley
To start, a few thoughts on insecticides, organic or otherwise:We think of sprays as the last resort in a pest management strategy. This is not to say that these sprays should never be used — only that it is important to utilize techniques such as hand picking, traps and exclusion first in an effort to reduce the need for these products.
Pests and diseases can develop a resistance to even the most benign organic pesticide. If a spray kills 99 percent of the existing population, the crop may be saved in the short term, but the remaining 1 percent of pests that are naturally resilient against the spray will survive to breed the next generation of pests that, in turn, will all have a better likelihood of also having this resistance.
The use of preventative strategies first, and the use of many different types of organic pesticides, will discourge pests from developing a resistance to a single pesticide. That is, by varying your control method, you prevent pests from selecting themselves for resistance to a specific method. Judiciously used in this manner, organic pesticides and fungicides can become an important tool for maintaining a productive garden.
It is equally important to keep in mind that many broad-range organic sprays can negatively affect the beneficial insects in a garden. Some pesticides affect only a narrow range of insects, but even these can kill innocent bystanders. For example, Bt, a spray intended to manage caterpillar pests like cabbage loopers and tomato hornworm, also kills any butterfly larvae in the sprayed area. Other sprays are more broad-spectrum and can damage or kill a huge range of insects, pests and otherwise.
Now, for the part about the soap spray:Probably the most commonly used home gardening spray is a simple mixture of soap and water. This mixture can help control or eliminate hordes of insects. It’s especially useful for aphids, but works on any soft-bodied insect including spider mites. The soap coats the insects and breaks down their cell membranes, drying them out and killing them relatively quickly. This spray is nontoxic and is safe to use around children and pets.
Soap spray should be used judiciously on crops because heavy and consistent applications can result in phytotoxicity (damage to the plant). Spraying early in the morning will help minimize this. To control aphids, spray the soap every 2 or 3 days for a week or two, and then stop applications. These repeated applications in rapid succession should disrupt the reproductive cycle of the insects.
To make your own soap spray:
Mix 1 tablespoon soap (liquid dish soap, castile soap, or a specialized insecticidal soap) with a quart of water in a spray bottle. Shake it vigorously and spray it on insect populations. This spray should keep indefinitely.
We hope this is helpful!
Tools you’ll need: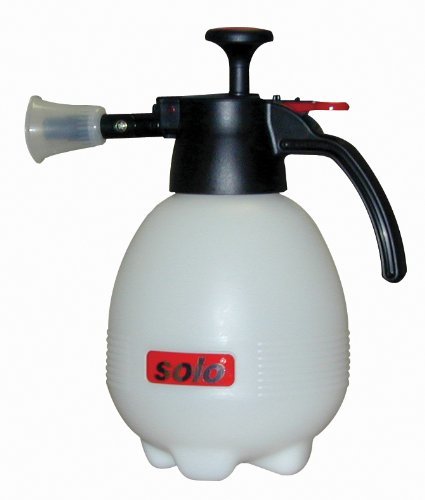 SOLO 418 2 Liter One-Hand Pressure Sprayer, Red and White Solo
 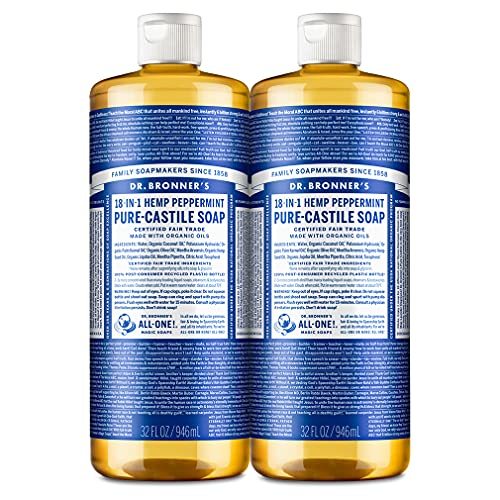 Dr. Bronner’s - Pure-Castile Liquid Soap (Peppermint, 32 ounce, 2-Pack) - Made with Organic Oils, 18-in-1 Uses: Face, Body, Hair, Laundry, Pets and Dishes, Concentrated, Vegan, Non-GMO Dr. Bronner's Pre-Order Our Newest Book Today! Grow More Food: A Vegetable Gardener's Guide to Getting the Biggest Harvest Possible from a Space of Any Size By McCrate, Colin, Halm, Brad
October 23, 2020
Homemade Sambal Hot Sauce

Homemade Sambal Hot Sauce
Sambal is a spicy pepper condiment that originated in southeast Asian countries such as Indonesia, Malaysia, Sri Lanka, and Singapore. While it is traditionally made daily with a mortar and pestle, this recipe uses a food processor and is aimed at longer term storage. In temperate climates, fresh peppers from the garden are only in season a few months each year. Because hot sauces keep an amazingly long time in the fridge, it’s a good idea to process your hot peppers in the fall or early winter so that you can use them all winter long.
We spend a lot of time during the summer and early fall processing the most perishable vegetables like green beans and tomatoes. Therefore, hot peppers tend to sit in waiting for a month or two before we have time to deal with them. This recipe works best with fresh or relatively fresh peppers, but still works even if the peppers are starting to dry out and shrivel up.
Like with any hot sauce preparation, make sure the kitchen has adequate ventilation before getting started.
Ingredients:-1 cup of coarsely chopped cayenne peppers (use a blend of peppers if you don't have enough of one type)
-1/2 cup of coarsely chopped garlic (a great use of hardneck garlic that might need to be used up in the early winter before it starts to dry out!)
-3 Tbsp vegetable oil
-1 tsp coarse salt
-2 Tbsp vinegar
1. Cut off the tops of the peppers
2. Finely chop the garlic
3. In a skillet, heat the oil on medium heat
4. Add the garlic to the oil and cook for 30 seconds
5. Add the peppers
6. Sprinkle salt over the mixture
7. Lower heat and cook for 15 minutes
8. Remove from heat and allow to cool to room temperature
9. Pulse in food processor to desired consistency
10. Put mixture back in skillet, add vinegar and cook for 5 minutes
11. Remove from heat and allow to cool to room temperature
12. Store in the refrigerator


![View fullsize [image error]](https://images.squarespace-cdn.com/content/v1/52cdaaf4e4b0b5ef88cb0b93/1634754729411-6P2AIJI44JEKGLCTYLA2/220-221_GrowMoreFood_3rdPgs_V4.jpg)