
Marisa McClellan's Blog, page 48
February 20, 2017
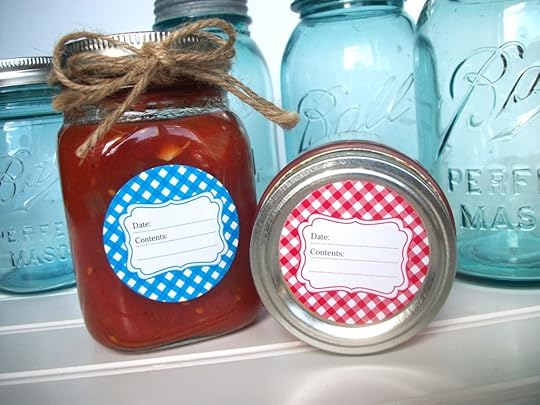
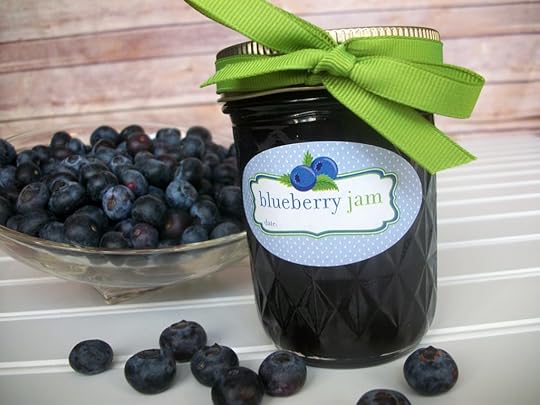
Giveaway: Jar Labels from CanningCrafts
Cute mason jars labels and a giveaway from new site sponsor CanningCrafts! What more can you ask from a Monday?
We had a glorious, unseasonably warm weekend here in Philly. The balmy weather reminded me that while we’re still months away from strawberries here in the northeast, many of you down south are already well into your berry season and that it’s a perfectly reasonable time to start thinking about the 2017 canning season.
It’s a good time of year to start inventorying your empty jars, and to take a look at the pantry to see what’s all gone (I didn’t do nearly enough tomatoes last September and so that shelf is beginning to look painfully bare) and what remains. It’s also the ideal time to start thinking about getting some pretty labels for the preserves you’ll make this year.
Lately, I’ve been swooning over the labels and hang tags from new Food in Jars sponsor CanningCrafts. It’s a one-stop shop for all your jar labeling and decor needs.
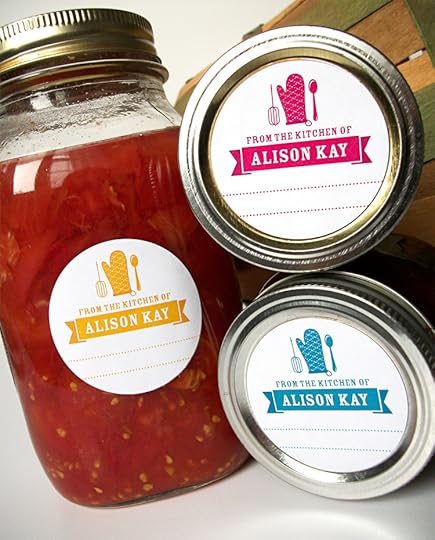
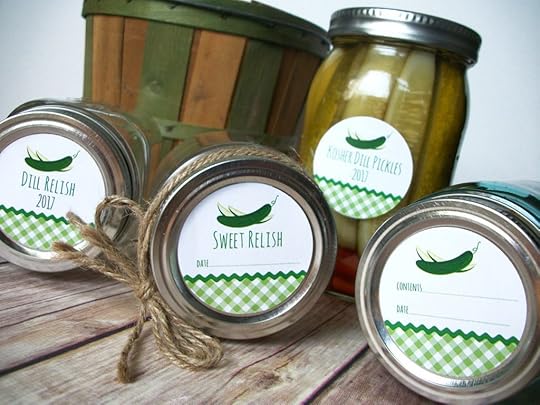
CanningCrafts offers an array of labels to ensure that there’s something for everyone. You can choose between labels with blanks that allow you to write in your various preserves (good for folks who do small batches and rarely make a lot of one thing) or custom labels designed expressly for your project (a perfect solution for shower and wedding gifts – these pickle gingham ones are so cute!). They also offer hang tags, cookie kits, ribbons, and pre-cut fabric squares for decorating the tops of your jars.
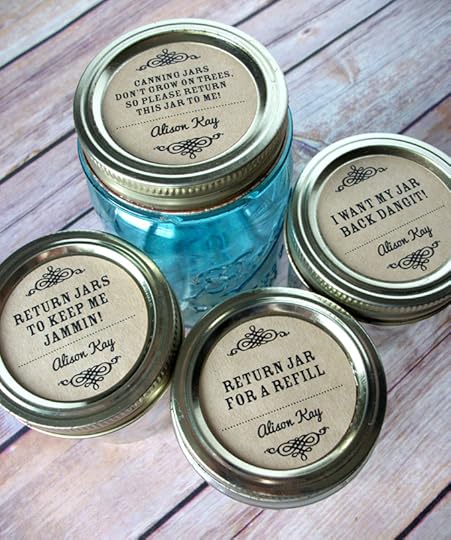
I’m particularly charmed by the return jar labels. Shop owner Alison admitted that she first created these in a fit of frustration after her sister failed to give her back her jars again! I know that she’s not the only one to face that issue!
For this week’s giving, Alison from CanningCrafts is offering up five sheets of labels to three lucky winners. Each of the three winners will get to choose the labels they want from the shop! And for those of you who need labels now, Alison is offering all Food in Jars readers 10% off their order with the code FOODINJARS-MARCH2017. This coupon code expires on March 31, 2017, so get to shopping!
Related Posts:
Giveaway: Cheese Making Kit from Hobby Hill Farm
Giveaway: A Canning Stamp from A Sensible Habit
Giveaway: Canning Gear & Jar Accessory Grab Bag


February 15, 2017
Mastery Challenge: Cured Duck Egg Yolks
Food in Jars contributor Alex Jones is back, this time with her February #fijchallenge project. These cured duck yolks have me itching to work up a batch myself!

As soon as I saw the focus of February’s Mastery Challenge, I got excited. A focus on salt curing for the month of February would give me a reason to try preserving a food I had read about but never attempted, nor tasted, myself: cured egg yolks.
The curing process transforms yolks — already the coveted portion of the egg in most preparations — from runny, fatty richness into a solid form, a concentration that calls to mind umami-rich Alpine cheese.
Slivered onto a salad, grated over a simple fresh pasta dish, or stirred into a soup, it’s a way to add lots of flavor and richness (plus a pop of gorgeous golden color) to all kinds of dishes.
I was even more excited to try out this preserve with one of my favorite farmers’ market finds: pasture-raised duck eggs from Livengood Family Farm, a multigenerational diversified vegetable and livestock farm in Lancaster County, my source at the Clark Park Farmers’ Market here in West Philly.
This recipe from Bon Appétit seemed straightforward enough and quick, eschewing the slower method of wrapping each cured yolk in cheesecloth and hanging it to dry in favor of a few hours in a low oven or dehydrator.

Since I was using 12 instead of four yolks and they’d be larger in size, I planned to triple the amounts of salt and sugar. Once I had my kosher salt and sugar mixed together — the Bon Appetit recipe calls for roughly a 60-40 ratio — it was time to get cracking.
A note on cracking eggs: If you’ve worked with duck eggs before, you know that the membrane beneath the shell can be much tougher than that of a chicken egg, making a clean break (and an unbroken yolk) harder to achieve.
So while I’d learned to crack chicken eggs on a flat surface to prevent shards of shell from being driven into the egg, I carefully tapped the equator of each duck egg on the rim of my bowl in hopes of a clean break.
I wish I could tell you that this worked perfectly, but a full half of my dozen yolks got the better of me and broke, either during cracking or separating. This happened even when I switched to separating the eggs by letting the whites flow through my fingers rather than passing the yolk from shell to shell.

If you plan to make this recipe with duck eggs, you may want to stock up on a few more than you think you need — and plan to cook some egg dishes with the whites and broken yolk you may accumulate.
If you use chicken eggs, it’s still important to treat the yolks very gently, but I imagine you’ll have a better unbroken-to-broken yolk ratio.
All told, I ended up with six intact yolks — a bummer considering that I could have gotten away with using half as much salt and sugar if I’d known I’d have half as many to work with. Consider separating your yolks first, then mixing your salt and sugar based on how many you’ll separate intact to help prevent waste.
The rest of the process is pretty straightforward: lay about half of your cure mixture in a shallow pan, then make gentle depressions with the back of the spoon in which to gently nestle your yolks. (I’ve also seen lots of photos in the FIJ Community of the salt and yolks in the cups of muffin tins, an ingenious idea that makes thriftier use of the curing ingredients.)

Cover with the remaining cure, wrap the dish tightly in plastic, and chill for four days. (Due to life happening, mine stayed in for an extra two days and were perfectly fine.)
When it’s time, pull the pan from the fridge and carefully excavate the yolks from the curing bed with your fingers, or scoop gently from the bottom with a slotted spoon.

No need to worry about breakage now — the yolks will have solidified considerably — but they’re still quite soft and jelly-like.
If you’ll be drying your yolks in the dehydrator, prepare a clean rack by brushing the screen with vegetable oil or applying nonstick cooking spray. For oven drying, grease up a metal rack set in a sheet pan and preheat the oven to 150 degrees.
Give the yolks a quick rinse under cool tap water, then pat them dry with a paper towel. Work quickly, because at this stage, they’re very sticky. Lay out your yolks on the oiled rack, taking care to leave space for airflow in between.

Dry the yolks at 150 for one and a half to two and a half hours, until they resemble hard, grate-able cheese in texture. (You can also let them dry in your unheated oven for two days if, like mine, yours doesn’t go that low.)
If you have the space and a nice warm kitchen, wrap and tie each yolk in cheesecloth and hang to dry for about a week. Once dried, wrap or store your yolks in an airtight container and chill for up to a month.
There you have it: your own personal stash of culinary gold dust.

Use it to boost the richness and savory factor of just about any dish. I’m looking forward to grating my yolks over pasta carbonara, steamed or sautéed veggies, and tempura-fried mushrooms.
PrintCured Duck Egg Yolks
Ingredients
1 dozen duck eggs (chicken or goose would work too)4 1/4 cups kosher salt
3 3/4 cups sugar
Oil or nonstick cooking spray (to grease the drying rack)
Instructions
Collect three medium-sized bowls. One will be for your unbroken yolks, one for the whites, and one for any yolks that might break during the separation process. (If you're not worried about keeping whites and broken yolks separate for other uses, you can put them both in the same bowl.)Separate the duck eggs. On the rim of the bowl you're using to collect the whites, gently tap each egg around its equator, going around until the shell and membrane have both broken and you are able to open the egg with a relatively clean break. You can pass the yolk from one half of the shell to the other as you would chicken eggs, or gently turn the egg into your palm and allow the white to flow through your slightly separated fingers while holding onto the yolk (recommended to avoid yolk breakage). Collect intact yolks in their own bowl (it's OK if a little white clings to the yolk). Drop whites and broken yolks into their own bowls if you'd like to use them on their own in other recipes.
If all your yolks are intact and usable, mix the full amount of salt and sugar together in a large bowl. If more than a few are unusable, cut the amount of salt and sugar by one third. If half are unusable, cut the amount of salt and sugar by half, and so on.
Pour half the salt and sugar mixture into a shallow pan (9"x13" for a full dozen yolks; an 8"x8" would probably work better for a half dozen). Spread the mixture evenly, then use the back of a spoon to create gentle, evenly spaced depressions in the curing mixture, one for each yolk. Carefully pour each yolk into your hand and then place each one into its own depression in the curing bed.
Gently spoon the other half of the curing mixture over the yolks, ensuring that they are completely covered. Wrap the pan tightly in plastic wrap and refrigerate for up to six days.
When six days are up, remove the pan from the refrigerator and remove the plastic wrap.
Prepare a dehydrator rack or, for oven drying, a metal rack set inside a sheet pan and grease the rack with vegetable oil or nonstick cooking spray. If using, preheat the oven to 150 degrees. (If you plan to use the oven dry method but 150 is too low for your oven, you'll simply place the yolks on the rack and into an unheated oven for 2 days.)
Carefully remove the yolks, which will have become somewhat solid, to a separate dish. Rinse each yolk gently under cool water, then pat dry with a paper towel. Place each yolk on the oiled rack, leaving space between the yolks for air flow.
Place the rack with the yolks into the dehydrator or oven at 150 for one and a half to two and a half hours. You'll know the yolks are sufficiently dry when their texture and firmness resembles a hard-aged cheese.
Remove the yolks from the rack and store them in an airtight container in the refrigerator for up to a month. Grate as desired over your favorite dishes to add a rich umami element.
3.1http://foodinjars.com/2017/02/mastery-challenge-cured-duck-egg-yolks/
Related Posts:
How to Submit Your Salt Preserve for the February #fijchallenge
How to Use Salt Preserved Citrus
Salt Preserved Grapefruit with Black Pepper and Cloves
February 14, 2017
Sour Cherry Thumbprints for Valentine’s Day

When I was a kid, I loved Valentine’s Day. Not for it’s romantic implications, but for the simple fact that it was an excuse to take a trip to the craft store for heart-shaped doilies, glitter, and card stock. I would spent weeks making pretty cards for my friends and classmates.
It’s been years since I did anything particularly crafty for Valentine’s Day, but earlier this morning, I started feeling the itch to make something in honor of the holiday.
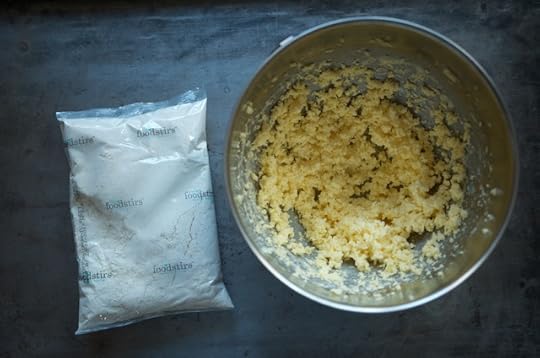
A couple weeks ago, the folks from Foodstirs* sent me few of their baking and frosting mixes and they’ve been sitting next to my desk, waiting for me to feel inspired to bake.
And so in between wrapping my husband’s birthday presents (he was a Valentine’s baby!) and slicing the last of my Meyer lemons for the dehydrator, I made some cookies.

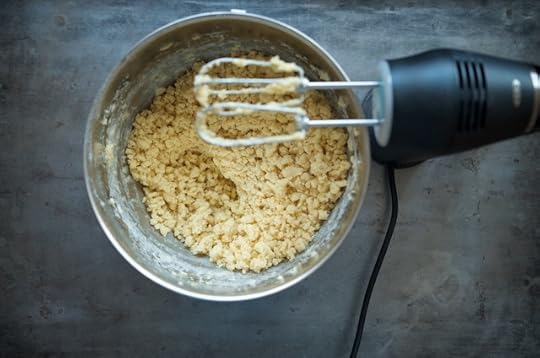
I have long been of the opinion that you can incorporate jam into nearly any cookie. Thin roll-outs? Turn them into jam sandwiches. Crumbly oatmeal cookie? Grab a baking dish and turn it into a jam-filled bar. And when you decide to make sugar cookies on a whim and have an open jar of sour cherry jam in the fridge? Turn ’em into thumbprints.

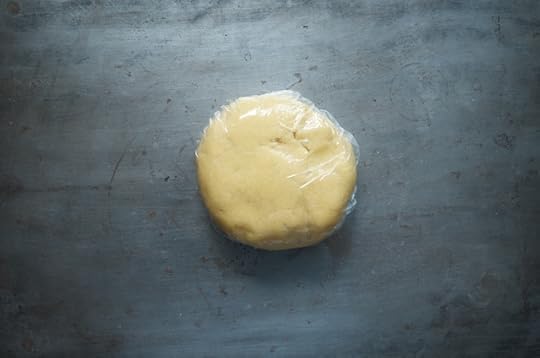
I used a tablespoon cookie scoop to portion out the dough and then used a wet fingertip to make them impressions (sometimes I use a melon baller for this task, but this dough was a little sticky for the task).

The tart jam is a tasty contrast to the sweet cookies and they look perfectly appropriate for the day.
*They offer baking kits featuring organic and non-GMO ingredients that can be ordered individually or you can subscribe to a monthly delivery. And for the Buffy fans among you, it also happens to be owned by Sarah Michelle Gellar.
Related Posts:
Preserves in Action: Thumbprint Cookies from The Cookiepedia
Small Batch Canning and Sour Cherry Jam
Sour Cherry Jam Recipe
February 13, 2017
How to Submit Your Salt Preserve for the February #fijchallenge
We’re wrapping up the second week of making for the February Food in Jars Mastery Challenge. So many people have already shared their finished projects with me on Facebook and Instagram and it’s been so fun to see all of your salt preserving projects.
At the bottom of this page, you’ll find the form I’m using to collect this month’s projects (and if you don’t see it at the bottom of the page, you can also find it here). This month, there are four required fields. I’m asking you tell me is your name, the name of your project, the city where you live (just so we can see the kind of geographic distribution), mark a check-box telling me what category your preserve (or preserves, if you made more than one) fell into.
Those are the only details I need to count you among the participants, but like last month, more fields do exist on the form. There’s a space to share a link to your project. That link can go to a blog post, a specific picture on Instagram, a Tweet, a post on Tumblr, or to a picture on Flickr or Google Photos. Just remember that you need to set your privacy settings so that wherever your post is, it is publicly available.
With more than 1,600 people signed up for this challenge, I cannot do a comprehensive round-up. However, just like last month, I will do my very best to link out to as many people as I can, though.
Please remember that the deadline to submit your salt preserve in order to be counted in the monthly total is Monday, February 27 (because let’s face it, I’m not going to be working on the round-up until the 28th anyway).
Oh, and if you’ve been sitting on the fence about participating, I’ve expanded the March topic a little. We’re going to be making both jellies and shrubs. Join us!
Loading…
Related Posts:
How to Use Salt Preserved Citrus
Salt Preserved Grapefruit with Black Pepper and Cloves
Salt Preserving for the February Mastery Challenge
February 9, 2017
Pantry Management: Organizing Your Freezer for the Year Ahead
Food in Jars contributor Alex Jones is back again, this time with a post about her goal to get a better handle on her freezer situation for 2017. It has inspired me to do an inventory of my own freezer compartment and I’m with her in resolving to be better about keeping that space in check!

I don’t usually make resolutions, but 2017 so far has definitely been about refining some parts of my life that overwhelmed me in 2016. For me, that’s looked like refocusing my freelance work, getting a better handle on healthy eating habits, setting financial and life goals with my partner, engaging in political activism, and taking time for regular self-care.
Another has been a newfound focus on maintaining my living space, the two-bedroom apartment in West Philly that my man and I have lived in for almost six years now. We’re both the kind of people who can spend days (or weeks) stepping over and working around clutter and messes when other responsibilities take precedence. But more and more, we realize what a positive effect a clean, organized, and uncluttered space has on mood and productivity in our home.
So far I’ve swept the clutter from my desk, deep-cleaned the bathroom, and KonMari-ed my clothes. Now, I’m focusing on the kitchen, and I’ll be sharing some of my cleaning and organizing projects with you over my next few posts.

First, I wanted to reckon with my freezers. I have a 5.3-cubic foot chest freezer in one corner of the big front room that serves as our living room, dining room, and kitchen, plus the freezer compartment of my fridge.
Over time, the contents had become the ice-crusted and mysterious, with plastic tubs of last year’s leftover soup jumbled with big bags of flour and tiny bags of roasted jalapeños. Finding ingredients I’d frozen months before while a hot pan was waiting on the stove had become more and more of a hassle. It was time to excavate and take stock.

If you’re particularly worried about the effects of a brief thaw on your food or have a hoard of delicate freezables like ice cream, you can prepare some coolers with ice packs in which to stash your items before you empty the freezer. I planned to work quickly, so I simply cleared the counter and the dining table and used those as my staging surfaces.
I sorted items by type as I pulled them out of the deep freeze. There weren’t too many surprises, but the biggest shock was seeing all that food set out in one place.
The three gallons of sour cherries I’d picked from neighborhood trees and then stemmed and pitted. The fresh-milled flour I purchased with the intent of starting up a weekly bread baking habit. The leek tops I always tuck away to add to my next stock pot. The expensive foraged mushrooms I’d dried to flavor a future batch of risotto. And so, so many tomatoes—frozen whole, roasted into wrinkles, peeled, stewed, sauced.

Once the chest freezer was empty, I chipped away at the ice buildup around the lid with a metal spoon and used a turner to scoop up the frost (and a few stray blueberries) at the bottom.
Then I stacked my gallon ziptops of precious local fruit one on top of the other by type, so that I wouldn’t wonder what lurked underneath without digging to the bottom, along with my big ten-pound bags of flour. Smaller bags of grains went on top of those, then bags of ginger, leeks, and parsley. I bagged up my cold packs to keep them together.
I made the choice to cut my losses and compost some especially unappetizing items, like stale baguette ends (for the breadcrumbs I’d never make) and batches of green soup (which I love fresh but just turns into runny green mud after freezing and thawing).

Next, I turned to the small freezer. Since it opens from the front, landslides of oddly-shaped items are a common occurrence. Despite its smaller size, so many bags of food covered my dining room table. (I pulled out everything but the gelato and the frozen fish fillets since I was worried about those thawing).
Once again, I sorted by type and had to let go of some dreams. I was never going to turn these two-year-old green gooseberries into something palatable, nor cook the fenugreek leaves I bought for curry shortly after moving into this apartment in…2012.
After wiping out several years’ worth of crud, discarding some of those sad, old items and grouping others (like the bags of aged celery hearts and bunches of parsley I save for stock) in the chest freezer with similar items, I restocked the small freezer.

I decided to keep ready-to-eat foods like recent leftovers, veggies, packages of meat, and small bags of items like nuts, dried mushrooms, and peppers there. I deliberately restocked this freezer so that there would be lots of extra room and easy-to-cook items in heavier rotation would be easy to find. (This is especially a plus with a colorblind partner who sometimes has trouble keeping up with my typically overstocked fridge full of unlabeled items).
As soon as everything was back in its frosty place, I felt much better about my year ahead. Not just because I’d crossed a long-nagging item off my to-do list, but because having a better handle on these ingredients makes me feel more confident about my ability to put some of my 2017 intentions into action.

Now that I know what’s in the freezer, I know what I should be using a little (or a lot) of each week until midsummer comes around, when I’ll start the cycle over again—a little more organized this time.
How do you guys handle your freezers? Are you good about keeping an inventory? And what’s your approach when it’s time to do a big clean-out like this one?
Related Posts:
Mastery Challenge: Meyer Lemon Grapefruit Marmalade
February 8, 2017
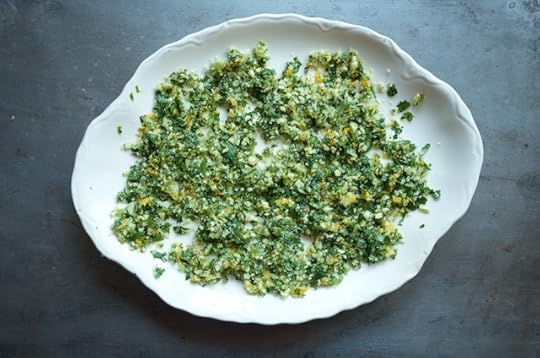
Meyer Lemon, Garlic, & Cilantro Salt
This hand chopped Meyer lemon, garlic, & cilantro salt is quick to make, easy to use, and offers a simple way to keep from throwing out expensive herbs. You could just as easily use a bundle of parsley, a few sprigs of rosemary, or leaves from a package of fresh sage. And it’s an ideal project for the February’s Mastery Challenge topic – salt preserving.
Last week, I bought a bag of cilantro. I needed just a few sprigs for a batch of soup I was making and didn’t have a good plan for the rest (so often the death knell for fresh herbs). Yesterday, with this month’s salt preserving challenge top in my mind, I went looking for that bag. It was a little wilted and a few leaves had gone slimy, but plenty was still useful and salvageable. And so I made a little batch of flavored salt.
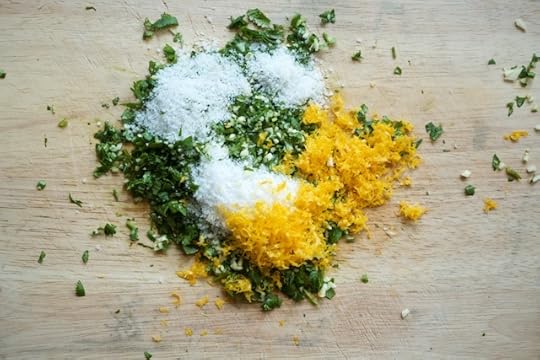
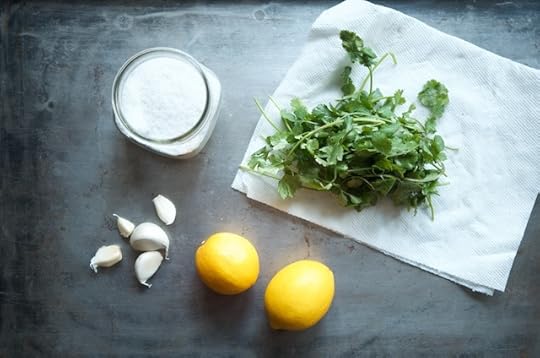
I cleaned the useable cilantro, gathered up a few cloves of garlic, grabbed a precious two Meyer lemons (from the batch that I got from Lemon Ladies last month), and pulled down a jar of salt. A big cutting board and a sharp knife and I was ready to go. I started by peeling and chopping the garlic, because it was the most dense of the ingredients I was working with. Once it was chopped down into manageable bits, started chopping in the cilantro (stems and all).
Once those two were well integrated, I grated the fragrant zest off the two lemons and added that to the pile. Finally, three tablespoons of sea salt. Chop, chop, chop – gather – and chop some more.
Once I liked the consistency of the ingredients (not too fine, but relatively uniform and well-integrated), I spread it out on a plate and set it in the corner of my dining room to dry for a few days. Right now, it’s still damp, but after 48 hours, it should be quite crunchy and crumbly (and if it’s not, I’ll either let it sit for another day, or I’ll finish it off in the oven).
In small batches, hand chopped flavored salts like this are incredibly quick to make and a pleasure to use. You don’t need to dirty the food processor, or even be particularly precise with your measurements. It’s about extending the useful life of ingredients and making something that will bring easy flavor to basic cooking.
Related Posts:
How to Use Salt Preserved Citrus
Salt Preserved Grapefruit with Black Pepper and Cloves
Salt Preserving for the February Mastery Challenge
February 7, 2017
How to Use Salt Preserved Citrus
Looking for ways to use the preserved lemons, limes, or oranges you made this month? Here are more than 40 ways to use salt preserved citrus to delicious effect.
Lots of you have taken a leap of faith with me this month and have made a jar of preserved lemons, limes, oranges, or grapefruit for the Food in Jars Mastery Challenge without really knowing what to do when them when they’re ready. In order that I’ve not led you astray, here’s a list of things that you can make with your salt preserved citrus when it’s ready.
I will say that most of these recipes do call for preserved lemons, but take heart, most will work beautifully with any preserved citrus. I’ve made note down below when I think substitutions would be particularly tasty.
From New York Times Cooking
Chicken Tagine with Olives and Preserved Lemons
Veal Shanks with Preserved Lemon
Soft Shell Crab with Preserved Lemons and Almonds
White Gazpacho with Preserved Lemon
Moroccan Chickpeas with Chard
Green Lentils with Roasted Beets and Preserved Lemons
Artichokes and Preserved Lemon with Honey and Spices
Chermoula Eggplant with Bulgar and Yogurt
Charred Shallots with Labneh and Pita (any kind of preserved citrus will work here)
Couscous Salad with Dried Apricots and Preserved Lemons (this one would also work beautifully with the grapefruit or orange)
Lemon Angel Food Cake with Preserved Lemon Curd
From Epicurious
Slow Cooker Marrakech Chicken Stew with Preserved Lemons and Olives
Lamb with Preserved Lemon
Strozzapreti with Spinach and Preserved Lemons
Spicy Crab Spaghettini with Preserved Lemons
Cod with Potatoes and Preserved Lemon Relish (that relish would be good with any preserved citrus and would be good on all manner of protein)
Harissa Onion Dogs with Preserved Lemon Relish
Spicy Potato Tagine with Preserved Lemons and Olives
Roasted Fingerling Potatoes with Preserved Lemon (think of all the roasted root vegetables that would benefit from preserved citrus)
Roasted Radicchio with Anchovy Vinaigrette, Preserved Lemons, and Breadcrumbs
Herb Salad with Pickled Red Onion and Preserved Lemon (any of the citrus would be good here)
Red Onion, Parsley, and Preserved Lemon Salad
Arugula Salad with Pickled Beets and Preserved Lemon Vinaigrette
Cracked Green Olives with Herbs and Preserved Lemons
From Food52
Shrimp with Chickpeas, Green Olives, and Preserved Lemon
Chicken with Caramelized Sumac Onions, Preserved Lemon, and Israeli Couscous
Chicken Thighs with Lemon
Roast Chicken with Brown Butter and Lemon
Broiled Skirt Steak with Cilantro and Preserved Lemon Gremolata
Fennel, Merguez, and Preserved Lemon Braise
Grilled Bread with Thyme Pesto and Preserved Lemon Cream
Pea Greens and Sugar Snaps with Preserved Lemon Cream
Portobello Mushrooms with Pearled Barley and Preserved Lemon
Moroccan Carrot Salad with Harissa
Roasted Cauliflower with Tahini and Preserved Lemon Dressing
Preserved Lemon Aioli
Shaved Fennel and Tuna Salad with Preserved Lemon (would be so good with preserved orange)
Watermelon with a Preserved Lemon Vinaigrette
Preserved Lemon Margarita (imagine that with limes!!!)
Preserved Lemon Ice Cream
Preserved Lemon Butter (make it in smaller batches, slather it on everything)
Finally, some thoughts on using preserved citrus without a recipe. So many dishes, from simple vinaigrettes to grain salads, soups, and casseroles, can typically benefit from the addition of salt and acid. Thing of preserved citrus as a single condiment that can deliver both.
Chop the rind into tiny bits and stir it into your chicken, lentil, or bean soup. Pour a bit of the liquid off into a stew that needs brightening. Whir some of your jar into a thick puree and spoon it into hummus. Once you get to know the flavor, you’ll find that preserved citrus is endlessly useful.
Related Posts:
Salt Preserving for the February Mastery Challenge
Salt Preserved Grapefruit with Black Pepper and Cloves
Preserving Lemons
February 6, 2017
Salt Preserved Grapefruit with Black Pepper and Cloves
We’re talking about salt preserving this month as part of the Food in Jars Mastery Challenge. Several times now, I’ve read comments from people asking if it’s really as easy as it seems. After all, shouldn’t food preservation be labor intensive and time consuming? Happily, the answer is no. Not all acts of food preservation need to be hard. For instances, this batch of preserved grapefruit with spices. It took all of hands-on five minutes to make, and that includes the time I spent to take the pictures you see here.
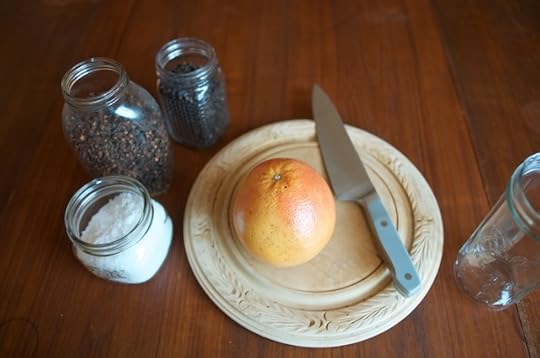
First, I gathered my ingredients. One hefty pink grapefruit. Some sea salt. And the spices that happened to catch my fancy this morning.
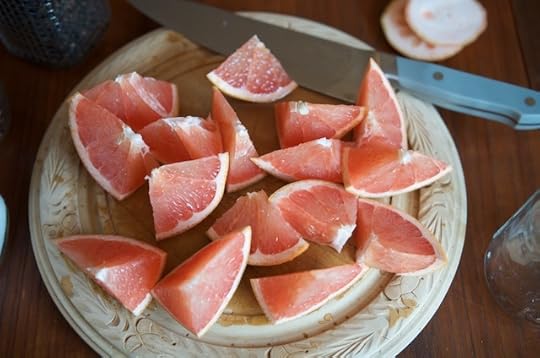
From there, I cut the grapefruit into manageable pieces. In this case, that meant eighths that were then each halved again.
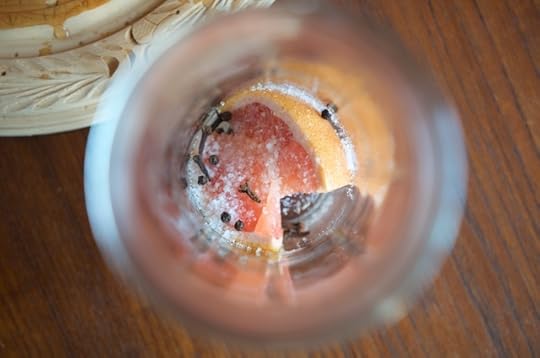
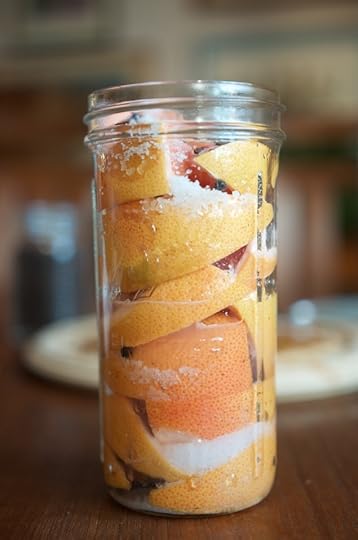
Then it was time to layer the grapefruit wedges. I took two pieces and snugged them into the bottom of the jar. I topped that with a teaspoon of salt, a few cloves and a couple black peppercorns.
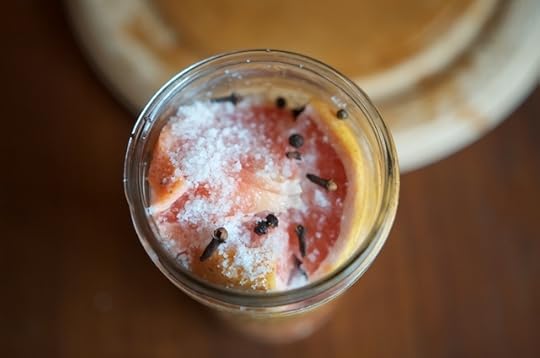
I kept layering grapefruit pieces, salt, and spices until all the jar was full and all the grapefruit was used up (and if you don’t recognize it, I’m using a pint & half jar here. It’s the one that holds three cups).
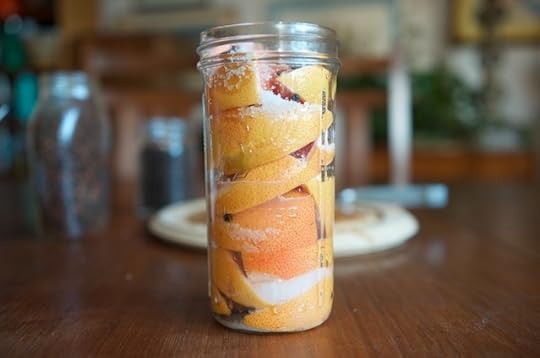
Once the jar was full, I pressed gently on the top to ensure that the salt was going to start dissolving and give me plenty of juice. I’ll let this sit on the countertop for the next week or so, until the grapefruit pieces are entirely covered with juice and they’ve started to soften and develop a pleasingly funky flavor. At that point, the jar will go into the fridge and I’ll start using these preserved grapefruit pieces to add flavor to dips, vinaigrettes, soups, and stews.
Related Posts:
Salt Preserving for the February Mastery Challenge
Mastery Challenge January Round-up: Marmalade
Lemon Lime Marmalade
Giveaway: Canning Gear & Jar Accessory Grab Bag
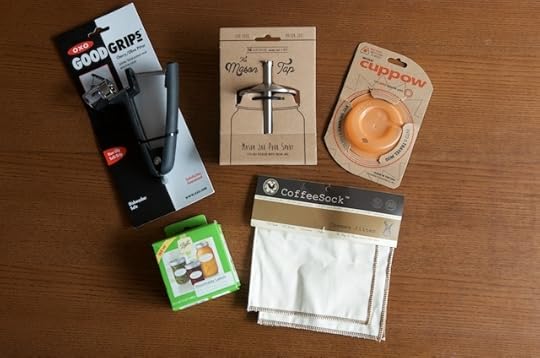
Over the weekend, Scott and I got a new TV stand. This led (as new furniture so often does) to a massive cleaning and reorganization spree. Drawers were emptied, DVDs and games found new homes, and I discovered a cache of unused gear from site sponsors in the past.
I didn’t have a giveaway lined up for this week, and so decided that instead of skipping the week, I’d give away a grab bag of goodies from the past. As it stands today, the lucky winner will get an OXO cherry pitter (by far, the best hand-held pitter I’ve ever used), a Mason Tap, one wide mouth Cuppow in orange, a pair of Coffeesocks filters for a Chemex, and some dissolvable jar labels from Ball Canning.
Because I’m still in clean-up mode, I’m certain that before the week is out, I will find even more jar-centric treasures to add to the winner’s box. So enter early and often, because this is going to be a fun one.
Related Posts:
Giveaway: Mason Tap, Coffee Sock, and BNTO from Cuppow
Giveaway: Smooth Sided and Mini Jars from Ball Canning
freshTECH HarvestPro Sauce Maker Giveaway
February 5, 2017
Links: Grapefruit Jam, Soup Class, and a Winner

Happy Sunday, friends! I hope your weekends have been filled with friends, family, and tasty game day snacks. Let’s have some links!
Grapefruit rosemary jam.
Huckleberry pate de fruit.
Linzer cookies for Valentine’s Day.
Toasted coconut milk.
How to freeze soups, beans and broths.
On building a freezer care package.
Frothy turmeric tea.
Apple slab pie (I love slab pies).
Rosemary almond meal bread.
Lebanese spiced meatballs.
Life-changing lentil soup.
My Local Mouthful co-host Joy Manning and I are teaching a soup making class at the Culinary Literacy Center at the Free Library of Philadelphia on February 22. Join us!
Congratulations to Amy for being the winner in the Lemon Ladies giveaway!
Related Posts:
Links: Cranberries, Marmalade Pie, and a Winner
Links: Peach Butter, Pickled Okra, and Winners
Links: Roasted Carrots, Rhubarb, and a Winner


