
Ali Edwards's Blog, page 60
October 7, 2022
In Case You Missed It | October 7
Happy Friday, friends! Welcome to the latest
In Case You Missed It. Just a reminder that this is a quick post that will happen every Friday afternoon with all the updates and links that have happened throughout the week. So, let's get to it:
DECEMBER DAILY® 2022 COLLECTION IS LIVE
Our 2022 collection is now available in the shop. Find the collection here.NUMBERS SCRAPBOOK KIT INSPIRATION
This week was full of inspiration using our latest Numbers Scrapbook Kit! Ali shared three new project ideas on the blog. On Wednesday, Ali participated in an Instagram Hop with a group of our Brand Ambassadors (find a summary on the blog now.) Krystal also hosted a Facebook Live in our Craft The Story Group on Thursday, which is available on the blog as well. So many great ideas this week! This is our second to last Quarterly Scrapbook Kit for 2022 (Tags is coming up) and we'll be back with four new kits in 2023 including: Daily, Go, Grow, and Labels. If you subscribed to the kits this year you'll be able to resubscribe again when the first kit is released. Shop the kit here.
NEW HALLOWEEN KIT
We are super excited to share our brand new (and for the first time ever) Halloween Kit! This kit is available for physical kit subscribers to add as an Add On and is available in our shop for anyone else who might want to use it to tell stories of Halloween. Find it here.
STORIES OF THE SEASON | FALL/AUTUMN
We’re excited to share a new class: Stories of the Season. Stories of the Season | Fall/Autumn is centered around the themes of Gratitude, Fall Activities, and Halloween with two lessons for each theme. Our talented contributors will be sharing a combination of story ideas and creative techniques in a variety of formats with the goal to encourage and inspire your fall storytelling. Class has begin, but all lessons are recorded and available for you to watch at your convenience. Class Contributors: Ashley Horton, Denine Zielinksi, Jenny Theriault, Kim Chaffin, Krystal Idunate, Sabrina Poole. Learn more here.
DECEMBER DAILY® PRODUCT PLAY | YOUR CHOICE
Product Play workshop registration is now available! For 2022 we are changing up our December Daily® Product Play workshop and this year will be focusing on an overall theme of Your Choice. For 30 days in November, you’ll receive one new idea per day (for a total of 30) brought to you by Ali and the contributors to this class. Ideas in this workshop will focus on physical products from this year’s December Daily® Collection. Each product with have three lessons taught by three different instructors and will be classified into different project levels depending on the amount of time or steps involved. Shop the class here.
As always, we’re so grateful to have you all as members of this community! Thanks for joining me today and have a great weekend!


Done By December | Special Guest Neela Nalam

I had the amazing privilege to be part of the December Daily Creative team last year. It was so much fun teaching product play lessons and inspiring and cheering on the DD community for this project.
I got a lot of pages done through the month but did not complete my December Daily Album for 2021. I thought I had a lot of pages to do and was putting it off, but when I went through my albums today, I realized that I don’t have that many pages to finish and I will definitely be able to finish this before December.

I luckily …. Hmm don’t know if I should say luckily, it’s more like lazily, haven’t put away all my December Daily supplies in boxes as I was hoping to finish my album. 9 months later and they are all still out. But I plan on taking this opportunity to join the team to be Done By December. I encourage any of with unfinished albums to join us in finishing your albums. Let’s cheer each other on.

I usually stop my December Daily on the 25th. When I look back on the pages, I realize that the pages that didn’t get completed are more towards the end of the album as by that time, I was losing my mojo ( I had a pretty bad creative slump for about 4 months in the beginning of the year). Also the pages that I had grand plans for didn’t get completed either. So the lesson learned for this year’s DD album is to keep it simple especially during the month. Maybe the complicated pages could be setup before December begins … just writing down my thoughts here.

So in order to finish the rest of my pages, here are the steps that I plan on taking:
Identify the days that are missing
Write down what story that I want to tell on each of the missing days
Pick the photos for those days
Keep the pages simple
Finish, finish, finish

Here is a photo of the notes that I took while going through my album:

Here is a video of the days that I have completed so far:
You can find me on instagram at @neelanalam and YouTube – Neela Nalam. I hope to post my pages on instagram and a walkthrough of my finished album on YouTube.
Crafting With Krystal | Numbers Scrapbook Kit
Hey there friends, Krystal here. I’m so excited to share a handful of layouts I created using the Numbers Scrapbook Kit during my Crafting Live with Krystal series on the Craft The Story Facebook Page.
Crafting Live with Krystal is a bi-weekly live video series on the Craft The Story Facebook Page. These lives take place every other Thursday at 12PM ET and feature layout processes using the Stories by the Month Kits & special kit releases. If you are not a member of the Craft the Story Facebook page, be sure to join the group and take part in the next Live event on Thursday, October 20th, 2022!
This week, I joined in on the Number Scrapbook Kit bandwagon and shared ideas for four layout designs. If you missed the video this week, you can watch the replay below:
LET’S RECAP
In today’s video, I worked through the process of creating four different layouts using the Numbers Scrapbook Kit. I really enjoyed the challenge of working in different sizes AND thinking of ways to deconstruct the papers and create something new from them.
1. Let Me Count The Ways (6x8 Layout)

At the end of September, my son (Jonah) turned four. Working with a kit designed around numbers, a layout celebrating his new age seemed too good a chance to pass up! I knew I wanted to use the 7”x8.25” Let Me Count The Ways paper to document five things I love about Jonah right now. It’s an easy page to add in words without having to start a design from scratch.

I also loved the way the red 7”x8.25” Number Outlines paper paired with the journaling page. I wanted to use it as a background… and to add photos of my son on top. To really highlight his turning four, I isolated the number 4 from the digital 12”x12” Big Block patterned paper in Photoshop. I resized the number four so it would take up a large portion of the space on the 7”x8.25” page and saved the newly sized element as a PNG.
Using the PNG #4, I create a cut file in Silhouette Studio (created by using the trace tool + offset tool), and as a layer template to clip my photos into. After printing + cutting everything out, I simply needed to adhere the cut file border to my photo, and then add that on top of my patterned page.

To finish off my layout, I located a few different star embellishments - six small red chipboard stars and two yellow puffy sticker stars. I added them next to a stamped “Love You Because” sentiment in each line of journaling, plus in a visual triangle around my photos.
2. Five Reasons to Love Fall (6x8 Layout)

Next up, I wanted to take my physical 12”12” Big Block patterned paper and fussy cut the numbers 1-5 out. I love how retro these numbers feel… and knew I could likely get a list of five of them added vertically to a 7”x8.25” photo. I am a HUGE fan of the fall season and thought it would be fun to document five reasons to love fall.

I printed a photo of myself at the full page size (7”x8.25”), which I then used as the foundation for my layout. Then, with my five numbers cut out and my photo printed, it was just a matter of layering the numbers down the left hand side so they could all fit while still being recognizable. (PS: if you love the layout concept but are not a fan of fussy cutting, this layout works great when created digitally as well!)

For the story, I printed five small sections of journaling - one for each reason why I love the season, trimmed them out and adhered each of them on top of a number. Then, I finished off the layout with some colorful asterisk chipboard stickers… giving this layout just a bit more dimension.
3. Top Ten (6x8 Layout)

For my third project, I was inspired by the 7”x8.25” Top Ten paper. I had a blank space in my 6x8 Story Album where I’d document portions of a recent vacation to Indianapolis. Putting together an easy “top ten moments” type of layout for the trip was a great way to fill in the space and also document some of the smaller details I’d missed in my previous layouts.

Using the Top Ten paper as my jumping off point, I printed ten photos of favorite moments of our trip - sized to fit into each of the ten boxes. I really love the visual grid look with the photos placed on the page this way.

On the left side, I created a journaling page in Photoshop - sized at 4”x8”. I typed out a list of the ten favorite moments, making sure to leave enough space on the left edge to add gold foil numbers to finish the listed look. To make the journaling page pop, I made the background color match the number 8 from the Top Ten page and printed my journaling in white.
4. The Plant Life (12x12 Layout)

For my final layout created with the Numbers Scrapbook Kit, I wanted to create a layout that featured the 4”x4” journaling cards. I loved the idea of adding circle photos into the middle with a number on top. After searching through my photos, I found that I’d recently taken a ton of my houseplants. That prompted me to tell the story of how I’ve accumulated them and their progress in my care. (PS: you could totally use this same layout design to tell a story of the stuff of life, small details around your home, different parts of a vacation, current details for your family members, etc.)

I started by printing my journaling directly onto eight of the 4”x4” cards. Then, I created my circle photos of my plants (photos sized at 1.75” circle + placed onto a black 2” circle), and punched them out with my 2” circle punch. These were added into the center section of the 4”x4” cards. Knowing I wanted to also add numbers on top of the photos but also didn’t want to cover them up, I decided to create transparent flip ups for each card.

Using a piece of 12”x12” clear transparency, I cut out eight 4”x4” squares and attached them to the top of each 4x4 journaling card with washi tape. Then, I fussy cut the numbers 1-8 out of the Plastic Number embellishments from the kit. I loved the bright colors of the plastic numbers and thought it would bring a pop of color to my page!

On top of each 4”x4” transparency, I added my plastic number with a tiny phrase I created on top. The small journaling phrases are simply the names of the different plants. I placed the number + name phrases in the center of the circle photos and attached them with my tiny attacher.

With my numbers in place, I then adhered all of the 4”x4” journaling squares around the perimeter of a piece of white textured 12”x12” cardstock. This left a section in the middle where I could add my title and date stamping.

To create my title, I stamped “The Plant Life” using the Totally Cool Alpha in black. I love how quirky and fun this font is! Finally, I completed the page by adding the flower and leaf die cuts (trimming the flower in half so I could add it in two places - helping balance the look)! This page is SUPER fun and is incredibly versatile for lots of different stories. To add this to my album, I will trim a piece of 12”x12” transparency down to 2”x12”, add my page to the strip, and hole punch it to get it in an album.
Thanks for stopping by to check out the projects I created with the Numbers Scrapbook Kit. I hope you feel inspired to tell your stories using these fun products. I can’t wait to see what YOU make.
October 6, 2022
Numbers Scrapbook Kit Instagram Hop
Yesterday, Ali and some of our Brand Ambassadors shared projects they've created using the Numbers Scrapbook Kit on Instagram. They're sharing traditional layouts, pocket page spreads, travelers notebook pages, and more. We were so inspired by all of their projects! Find each of their projects below, along with where to find them on Instagram.
Learn more about our Scrapbook Kit subscription here. And don't forget that your subscription includes the digital files for each kit.

Amanda Wilder, find her on Instagram @wilderstories

Amber Dawson, find her on Instagram @adawson816

Denine Zielinski, find her on Instagram @denine2

Emily Stebbins, find her on Instagram @peacock.pigments

Felicitas Mayer, find her on Instagram @felicitasmayer

Ingunn Markiewicz, find her on Instagram @smultringunn

Jeanne Williams, find her on Instagram @jeannemwill

Jen Wong, find her on Instagram @circleplusarrow

Jenny Theriault, find her on Instagram @jenny_theriault

Jill Drangsholt, find her on Instagram @jill.drangsholt

Kasha Gage, find her on Instagram @kashakgage

Kim Chaffin, find her on Instagram @kimdocumentslife

Kirsten Heal, find her on Instagram @kirstenh

Kristin Tweedale, find her on Instagram @rukristin

Linda Jordan, find her on Instagram @lindalovescreating

Neela Nalam, find her on Instagram @neelanalam

Nolana Lynch, find her on Instagram @nehlan.has.a.plan

Sabrina Poole, find her on Instagram @mrsscrapandplan

Shu-Wen Tham, find her on Instagram @chouxpuffcreations

Susan Brochu, find her on Instagram @littlethingsbigdays

Yin Goh, find her on Instagram @yin_dgs

Zoe Currie, find her on Instagram @zoe_scraps
October 5, 2022
December Daily® Stencil Alternatives
Thank you all for your enthusiastic response to our 2022 December Daily® Collection! We were delighted by the overwhelming interest in the stencil pack, and surprised at how quickly they sold out on release day.

For those of you who were not able to purchase the stencils, we understand your disappointment. Our team is working behind the scenes to provide instruction and ideas for creating your own stencils using the digital version of the stencils that will be available for purchase on October 14th. But for those of you who are uncomfortable with using digitals or creating DIY versions, we wanted to provide you with an alternative so that you can join in with all the crafty, messy, fun play that so many of us love about this project.
We have done some research and found that our friends at Scrapbook.com have a wide variety of stencils in their shop, and we have curated a list that we think echoes the look and feel of the stencils we released in our collection. Here is a sampling of some of their stencil designs that we loved for December Daily®.

Obviously, if you choose to go this direction, your creations won't look exactly like projects of others, but Ali wholeheartedly endorses the idea being a translator of ideas and using your stuff to tell your stories, regardless of the specific products.
We hope sharing this resource gives you some alternatives and helps you tell your December stories. As always, thank you for being a member of this special community. We are so grateful for you.
Numbers Scrapbook Kit | Ali's Idea #3

My third project using the
Numbers Scrapbook Kit focuses on the plastic rectangle embellishments as a jumping off point.
Today's project is also being shared as part of our Brand Ambassador IG hop. We'll have a round up of those projects here on the blog tomorrow.
For this project I created a free layered template + word art package for you to use if you'd like to create a similar project.
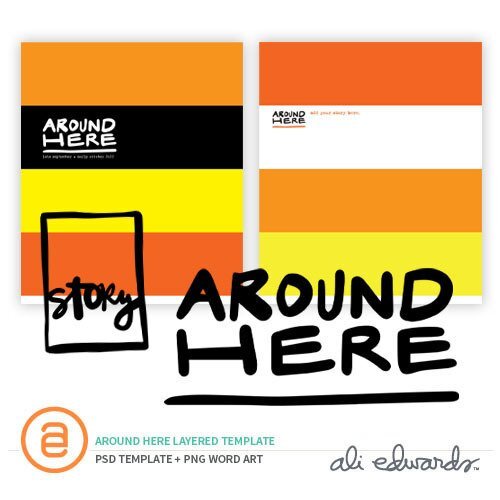
Download this freebie digital package here.
Let's dive in to the process of putting this one together:
Here's a closer look:

This project has a full photo foundation and was set up in Photoshop before printing here at home. You can use the layered template above + mask your own photos into the rectangles.
On top of the plastic numbers I layered a custom word art piece (also included in the download as both a PDF and an individual PNG) that was printed on ink jet transparency and on top of that I added the gold numbers from the kit.

If you are interested in learning more about working with layered templates or hybrid scrapbooking we've got a couple resources for you:
A how-to blog post from 2008 (the steps are still the same). Want to learn how to make your own layered templates? Check out this post. Check out my Hybrid Workshop which teaches you how to use digital products in paper projects. Check out our Canva workshop to learn how to use our digital products within the app.

Numbers Scrapbook Kit Tiny Attacher Epson XP15000 Printer Epson Ultra Premium Photo Paper Rolling Date Stamp Printable Ink Jet Transparency 6 Hole Punch Fiskars Paper Trimmer
October 4, 2022
December Daily® 2022 | Crafting With Krystal 05
Hi friends! Krystal here, back again with a recap of my final Crafting Life with Krystal - December Daily® Edition recap!
This mini-series is composed of a weekly Live video on the December Daily® Facebook Group. This live event takes place each Thursday at 12PM ET throughout the month of September 2022.
This week, our product topic was the Paisley Press Mini Kit + Misc Shop Items.If you missed the video this week, you can check that out below.
LET’S RECAP
In today’s video, we discussed different ways to use the Paisley Press Mini Kit - both physically and digitally, and brought out a few miscellaneous items from the shop to design layouts with as well. Let’s go through each product individually and talk about design ideas.
My hope is to give you ideas that you can translate into your own projects this year - helping you to love + use all the beautiful components of the 2022 December Daily® collection.
1. 7x8.25 PATTERNED PAPERS
Starting off, let’s talk about the five patterned papers included in the kit. These papers are sized to fit in a 6x8 album - outside of the page protectors. Here are some fun ways to think about using these papers:


2. 7x8.25 JOURNAL PAPERS
Along with the full pattern papers, the Paisley Press Mini Kit also include 4 journaling papers. These are also sized at 7”x8.25”. Whether you are using these physically or digitally, there are so many options for design/story with these four pages. Let’s take a look:


3. JOURNALING CARDS
Next up, let’s dive into the journaling cards. I began this process by dividing the cards into like-categories. There are a few of each type of design: journaling cards, filler cards, patterned cards, etc. After getting my cards organized, I could then determine how to use the different ones. Here are some ideas for the cards:


4. TRANSPARENCY OVERLAYS
The single 6x4 and three 3x4 transparencies in this mini kit are absolutely gorgeous! I especially love the floral and handwriting patterns. Here are some ideas for how to use these in your album this year:


5. EMBELLISHMENTS
The Paisley Press kit comes with a variety of embellishments: wood veneer, chipboard, and puccy stickers. Here are ideas for ways to use these:

6. WINDOW CARDS
I love the larger scale of the Window Cards this season. I think these will be so fun to include and LOVE that they are decorative and functional at the same time. Here are some ideas of what you can do with these:


7. CARDSTOCK INSERTS
The Cardstock Inserts are another favorite product of mine this month. Since I’m still debating between 6x8 or 10x8, I wanted to come up with ways to use all three of these in both albums. The full quote page was the trickiest, but I think I’ve got some fun ideas for this one! Here are a few ideas for page designs including these cardstock inserts:


8. ENVELOPE BUNDLE
Envelopes are products that are always handy to have around for projects like December Daily. They can come in handy as extra storage, or can be deconstructed/reconstructed into their own album covers. Here are a few ideas for how to use this year’s Envelope Bundle:

9. LARGE PENNANT FLAGS
The Large Pennant Flags were a product I knew would be a little tough to design a layout with. After doing some research on Pinterest, I found an idea that translates super well using the pennants from the collection. Here’s an idea for these:

CONCLUSION
Friends, we have come to the end of this mini series for the 2022 December Daily collection. I have super enjoyed going through this process with you and can’t wait to implement some (or many) of these designs in my own December Daily project this year. Thank you so much for following along on this series and I hope these ideas have helped to get you thinking about ways you may use your products this year.
In the comments below, tell me one design idea you are most excited to try out this year! And, if you have any additional ideas for these products, I’d love to hear those too!
Thanks again friends for being here and I can’t wait to see what you create this December.
Until then friends, let’s tell stories together!
Numbers Scrapbook Kit | Ali's Idea #2

Today I'm sharing a second project idea using the Numbers Scrapbook Kit.
Let's jump right into the process video:
Here's a closer look via images:

For this project I printed out a recent family selfie (sized to 7 inches wide x 8.25 inches tall) and paired that with two of the 12 inch x 12 inch pattern papers from the kit. I cut down the rectangle numbers to become a background pattern paper and then cut out the four starburst/flower shapes from another pattern paper and layered them on top using a mini brad.

On top I used Olympia Ink and the This Is Us Stamp Set (digital available here) to establish where my story would go.

I also cut up a piece of Grafix Plastic Sheets in order to have an overlay on top + create a home for the vellum "07" (for seven of us) and a chipboard messy circle from the September Stories By The Month kit (attached with a mini brad).

After that I added my story to all four of the journal areas (these are all held together by a brad and adhered to the background pattern paper with red line tape).


This one was super fun to put together!
Tomorrow I'll be joining some of our Brand Ambassadors for an Instagram Hop sharing projects created with this Numbers Scrapbook Kit. We will compile those ideas and share them here on Thursday.
SUPPLIESNumbers Scrapbook Kit
Olympia Ink
September Stories By The Month Kit
Grafix Transparent Sheet
Mini Brads
"we are" Stamp Set (digital available)
Uniball Vision Elite Pen
FIskars Micro Tip Scissors
6 Hole Punch
Tiny Attacher
October 3, 2022
Done By December | Special Guest Nolana Lynch

Hello Everyone! I am so very excited to be here with you today! I am an absolute December Daily fanatic! It is my favourite project of the year and I absolutely enjoy the entire process of putting the albums together and completing my album before or by the end of December.
So why am I here you ask? Last year, we welcomed out very first baby in to the world, at the end of October, and this December-born December-loving mom wanted to do a December Daily esque album to celebrate and commemorate Baby’s First Christmas. But what – there’s more! I also decided to produce these albums for my parents, and my in-laws as Christmas gifts this year – and hence they need to be DONE.BY.DECEMBER lol.

At first, I felt a tad bit overwhelmed – because let’s admit it – life is busy and three albums are a bit much – but thennnnn, I worked out a really simple formula to guide the entire process into doable chunks and this made me feel so much better. So with my “THIS IS GONNA BE SO MUCH FUN, LET’S DO IT” attitude – I dove right in to it, LAST WEEK!
Take a look at my video on YouTube here.
I must say this (and any simple) formula is also great for persons who really want to finish their albums quickly before delving in to their 2022 album, or for those who discovered December Daily later on and really still want to play catch up and tell stories of previous years, or for those like me who want to tell the story through a different lens, or create albums as gifts for families. It’s also a great way to USE.MY.STASH and guys let’s face it, our December Daily stash is precious, and many times endless!
So without further ado, let’s get in to it!

My formula for my cover pages are mostly – photo, vellum or acetate overlay, embellishments. I knew I wanted the embellishment for the 6 x 8 albums to land in the space between Mr and Mrs. Claus. I do not have a lot of Christmas vellum and acetate in the 6 x8 size, so I looked through my stash from last year and there were only 2 left in that pack – EASY AND DONE! For the 10 x 8, I have been wanting to use the quote vellum page since I laid eyes on it – so EASY AND DONE!

My formula for the daily pages are 1 full-page photo, one 3 x 4 card journaling in a 3 x 8 protector with a see through/shaker element on top. This I’ve been sticking with for the most part so far. I have also challenged myself to print my photos to fit inside the full-page protector as I have thousands of protectors since most of my projects are outside the page protector.
I then batch printed my photos and journaling for each day, cut them all down, and added them to the album.

Following this, I embellish the pages. I’ve also challenged myself to use my journal cards as I do not use very many of them in my projects – and they’re all so pretty – so I have created some flip ups and flip outs with them and I am really loving how they look. I am a fan of little stars and hearts and I’ve been enjoying using them throughout the pages.

So this is where I am currently at with my project. I am hoping to work on a page every couple days as I would like to IDEALLY complete it before my 2022 December Daily items arrive here in Australia – because I can’t wait to dig in and start my foundation pages!
I look forward to checking in with you soon at the midpoint of my project and at the end!
I can be found on Instagram at @nehlan.has.a.plan and on YouTube.
Numbers Scrapbook Kit | Ali's Idea #1

All this week we'll be sharing ideas for creating projects with our Numbers Scrapbook Kit.

This is our second to last Quarterly Scrapbook Kit for 2022 - the last one for this year will be Tags. We’ll be back with four new kits in 2023 including: Daily, Go, Grow, and Labels. If you subscribed to the kits this year you'll be able to resubscribe again when the first kit is released.
Also don't forget that the digital kit is always included with our physical Scrapbook Kit!
This week Ali will be sharing three ideas starting today. On Wednesday there will be an Instagram hop (a wrap up post will be here on Thursday if you aren't on IG) and/or YouTube hop. Krystal will be doing a Facebook Live post in our Craft The Story FB Group on Thursday which will be recorded + shared here on the blog on Friday. Lots of fun ideas coming your way this week!
Here's Ali:

I've long be a fan of numbers as jumping off points and supportive elements for my memory keeping projects. I'm excited to share three new projects this week using the Numbers Scrapbook Kit.
On this project I'm also incorporating an add-on set of wood veneer numbers that were available at the same time as the Numbers Kit. If you like the look of these we've made them available in the shop!
Let's dive in to the process video:
Here's a closer look:

I used Staz On ink + the Currently Story Stamp to add a text pattern on top of the add-on wood veneer numbers. I also layered vellum over top of the handwritten number pattern paper to mute it just a bit. On top of the yellow star I added a clear word phrase sticker and a silver mini brad.

I love how easy these direct storytelling pages are for adding in my words. On this pattern paper I added "the story" stamp (from a past 3x4 days of the week stamp set) and a star from the Christmas Past kit that includes a stamp set. For journaling I added a few things about the girls right now, including a few of their favorite things.
I'll be back here tomorrow with another project idea using the Numbers Scrapbook Kit.
SUPPLIESNumbers Scrapbook Kit Star Stamp from Christmas Past Scrapbook Kit Honeyman Ink StazOn Ink Currently Story Stamp (current observations stamp) Vellum (this is one you can print on with an ink jet printer) Uniball Vision Elite Pen 6 Hole Punch Wood Veneer Numbers (August Add On) Red Line Tape 3x4 Day Of The Week Stamp Set ("the story" stamp) : digital option (early bird stamp set in 2021)


