
Ali Edwards's Blog, page 59
November 2, 2022
December Daily® 2022 | Ali's Album Start

Today I'm sharing my starting place in my 2022 December Daily® album.
As many of you know I've long enjoyed doing some work in this project in advance of actually documenting my stories in December. I find that it helps me complete the project in December (which is my personal goal) and I simply enjoy a bit of a head start.
In today's post you'll find my title page/reason why/intention and a fun table of contents page. I've also got a couple downloads in a digital package for you below if you want to create some similar pages.
Don't forget to join us for a month of ideas in the December Daily® Product Play Workshop (already underway with a new idea each day for finishing up past projects or getting ready for this year's documenting) and our super fun $5 Prep Day happening on November 12th (if you can't join us on that day all the content is recorded for you to watch at a time convenient for you). Our goal is to give you lots of ideas + inspiration as we approach December.
A peek at the three projects I completed for this year's Product Play workshop (I'll share these here in December when the stories are actually added):

As always I'll be posting my pages here each day in December (or almost each day) as I tell one story per day.
Let's dive in to my process video:
Here's a look at my album so far via images:

I started off my album with the JOY envelope from the Envelope Bundle (adhered with red line tape). The black + cream ribbon is tied through the holes along the edge and is from May Arts.

The envelope is holding one of the small notebooks we offered with the collection this year. I'll be sharing my idea for the notebook in our $5 Prep Day (will include digital downloads).

The first page in my album is the Merry + Bright transparency that was part of the Specialty Paper Bundle.

For my reason why/intention/intro page this year I decided to play around with creating a large circle window which ended up turning into a shaker pocket (you can see all the steps in my video above). On top of that circle I added one of the felt pockets from the Main Kit to hold my intention statement.
I saved my Silhoutte/SVG/PNG files for you in case you want to do something similar in your album.
Download the digital package here.

Essentially I took two of the patterns from the Main Kit and used my Silhouette to cut out the 7 inch circle from each sheet. Sandwiched in between those two pattern papers are two sheets of Grafix Transparencies + two pieces of pattern vellum from the Specialty Paper Pack that meet in the middle (so the design on the top 1/2 is different from the design on the bottom half). I added star sequins + red sequins in between the Grafix Transparency and the front of the vellum.

After I had all my layers in place and adhered I ran it slowly through my sewing machine to create a circle around the outside edge.

I set up my journaling in Illustrator inside of a 4 inch circle (keep some space around the outside for the text that's already on the journal card). You can also add text in a circle in photoshop and some word processing programs. I printed that on laser transparency and ran it through a Minc machine to make the text gold foil.
My reason why/intention this year is to simply be present.
I also used red line tape to adhere one of the vellum quote strips from the Main Kit to the top edge of the felt pocket.
After cutting out my journaling circle I used a We R Memory Keepers hole punch to connect my journaling + the journal card and added red + cream ribbon from May Arts.

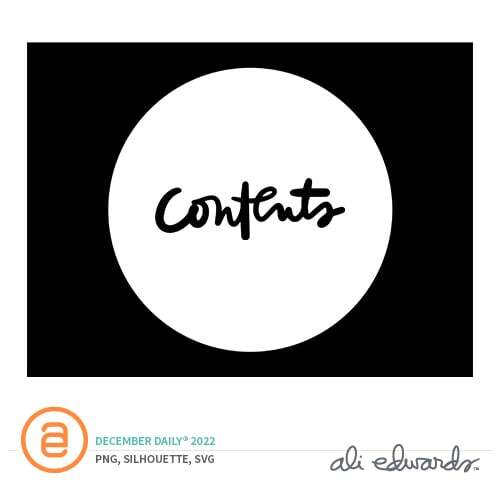
On the back of the first page (second side of the large circle window) I added the word "contents" as I decided to play around with creating a table of contents page for this project - similar to what I did earlier this year with the Begin Story Kit. The digital word art "contents" is included in the download above. I used my Silhouette to cut it out and then embossed it using gold embossing powder.
Above the word "contents" I added one of the wood veneer stars from the Main Kit and below I added the "22" using the numbers from the Main Kit. To complete this page I added a couple rub on words from Tim Holtz.

I loved working on this!

The next page is a pattern paper from the Paislee Press Mini Kit with twelve of the gold outline labels from the Main Kit. I'll use this page (and the next one) to create a table of contents for my stories this year.

To create a tab along the edge I used one of the stars from the December Daily® Variety Die Cut Pack. I cut it in half and added an extra little piece of paper between the two halves in order to attach it to the back of my first table of contents page.

The back of this page features a pattern paper from the 10x8 paper pack and 13-25 labels. I'm excited to have a table of contents list at the beginning of my album this time - it will be fun to add story titles to those over the course of the month.
Thanks for joining me for a look at my starting place! I'll be sharing more soon.
SUPPLIESDecember Daily® 2022 Main KitDecember Daily® 2022 10x8 Santa AlbumDecember Daily® 2022 Envelope BundleDecember Daily® Specialty 10x8 Paper PackDecember Daily® Paislee Press Mini KitDecember Daily® 10x8 Paper PackDecember Daily® Die Cut PackGrafix Transparent Sheets (12x12)May Arts Ribbon (Black + Cream)May Arts Ribbon (Red + Cream) 6 Hole PunchWe R Memory Keepers Hole PunchRed Line TapeVersamark Embossing InkGold Embossing PowderSequin PacksLaser Jet Transparency (use with Minc Machine)Minc MachineGold Minc FoilTim Holtz Christmas Rub Ons (similar)SilhouetteTiny Attacher

November 1, 2022
Day In The Life™ 2022 | Ali's 2nd Documenting Day In Her Album

Today I'm sharing a look at my second documenting day for
Day In The Life™ 2022 and finishing up this little album.
My story lens for this documenting day was "gratitude." It's always a good idea and a wonderful reminder that we have a lot to be thankful for in our lives.
You can see my first documenting day from earlier this year here. You can also check out how Azzari worked with this kit here and how Pam worked with this kit here.
Let's dive right in with a process video:
And some basic steps via images:

I started this one by cropping my photos to 6 inches wide x 2.5 inches tall and added my journaling on top before printing here at home on my
Epson PictureMate PM400. I decided to go this route and simply adhere my photo/word combo directly onto the gratitude journaling cards from the kit.

My journaling is simply copied + pasted from my Instagram posts.

After adhering my photos to the journal cards I added the chipboard number circle and small chipboard stars from the kit. I repeated this for each of my stories.
I love that some projects can be complicated and others can be quicker + simpler. They all tell a story.
Let's see what it all looks like in my album:

I had added this die cut page between the first documenting day this year and this second one. To finish it off I added word phrase stickers on top of white cardstock and adhered that to the back. On top of the word/phrase clusters I added chipboard stars.

On the back of the die cut page I added a piece of pattern paper from the Rainbow Scrapbook Kit and added die cut pieces + chipboard on top.


Used a rolling date stamp to add the date on the title card for this documenting day.

Then I simply slipped the journal cards with the photo/words into the pockets.


I ended this project by adding a chipboard tag + a word/phrase sticker on top of the patterned "enjoying" card.

On the back of the "enjoying" card I stamped "today" from
The Basics Stamp Set.

Thanks so much for joining me in the Day In The Life™ project this year. We are going to change things up a bit for next year and will share more details in 2023.
Day In The Life 2022 Kit Day In The Life 2022 4x6 Album Rainbow Quarterly Scrapbook Kit (digital version) Gold Puffy Numbers Precision Pen Epson PictureMate PM400
October 28, 2022
In Case You Missed It | October 28
Happy Friday, friends! Welcome to the latest
In Case You Missed It. Just a reminder that this is a quick post that will happen every Friday afternoon with all the updates and links that have happened throughout the week. So, let's get to it:
Today is the final day of our Price Point Sale! You have until 11:59pm ET to shop discounted products organized by price point. Hundreds of great deals for $1, $3, $5, $10, $15, and $25. Have you been thinking of stocking up on stamps and embellishments? Now is the time! Shop now here.
2022 DECEMBER DAILY® PREP DAY REGISTRATION IS LIVE
December Daily® Prep Day 2022 registration is live! Join the December Daily® community for a fun online prep day on Saturday, November 12th, 2022. Use this opportunity to finish past December Daily® projects or start working on your project for 2022. Ali will be our host this year and we are excited to have a variety of incredibly talented and inspiring contributors. And did we mention registration is only $5? Yep. Find more information and register here.
2022 DECEMBER DAILY® DIGITALS ARE NOW AVAILABLE
The 2022 December Daily® Digitals are here! Kits, Stamps, Paper, and Embellishments...the same fun & festive designs as the physical @decemberdaily products, only in digital format. We love to see how this incredibly creative community plays with digitals! Resizing elements and cards, adding journaling to papers, creating cut files, transforming files into transparencies, the sky is the limit with digital files. Want to learn more about creating with digital files? Don’t forget all of our hybrid scrapbooking classes are on sale now for $10. This promotion ends Sunday. Be sure to check out our hybrid classes, available now under the "classes" tab on our website. No promo code needed. Shop digitals.
DECEMBER DAILY® 2022 COLLECTION IS LIVE
Our 2022 collection is now available in the shop. Find the collection here.
STORIES OF THE SEASON | FALL/AUTUMN
We’re excited to share a new class: Stories of the Season. Stories of the Season | Fall/Autumn is centered around the themes of Gratitude, Fall Activities, and Halloween with two lessons for each theme. Our talented contributors will be sharing a combination of story ideas and creative techniques in a variety of formats with the goal to encourage and inspire your fall storytelling. Class has begin, but all lessons are recorded and available for you to watch at your convenience. Class Contributors: Ashley Horton, Denine Zielinksi, Jenny Theriault, Kim Chaffin, Krystal Idunate, Sabrina Poole. Learn more here.
DECEMBER DAILY® PRODUCT PLAY | YOUR CHOICE
Product Play workshop registration is now available! For 2022 we are changing up our December Daily® Product Play workshop and this year will be focusing on an overall theme of Your Choice. For 30 days in November, you’ll receive one new idea per day (for a total of 30) brought to you by Ali and the contributors to this class. Ideas in this workshop will focus on physical products from this year’s December Daily® Collection. Each product with have three lessons taught by three different instructors and will be classified into different project levels depending on the amount of time or steps involved. Shop the class here.
As always, we’re so grateful to have you all as members of this community! Thanks for joining me today and have a great weekend!
October 26, 2022
Done By December | Special Guest Sarah Lambeth

Hi everyone! My name is Sarah Lambeth and I have participated in December Daily® the past 2 years. For me, December Daily® helps keep the Christmas magic alive. It requires me to slow down during an extremely busy season and take in each day one at a time. I get excited just thinking about this upcoming December!
The first year I completed all of my pages for December Daily during the month of December. Maybe it was because the project was new for me, or maybe because a lot of things were still shut down due to COVID. Either way, I felt so accomplished to have a finished product in my hands. This year, however, I was a little less successful in completing my album. But the awesome part about not finishing during December is that I am able to join the community now and be Done by December!
The video below shows exactly where I left off in my album.
As you can see from the video, I have fully completed only about 4 days and have another 6 spreads halfway complete. That means that I have a total of 21 days and a title page that I would like to complete before the December Daily Prep Day. That gives me about 9 complete weeks to tackle all 21 pages. If I complete 3 stories a week, then I will be finished with all 21 stories in 7 weeks giving me a little wiggle room when things get busy and projects get pushed back to still get everything completed.
In order to complete my album on time, I am going to tackle each week in 4 stages:
Review my notes & plans for the stories
Evaluate what still needs to be done
Collect the stories & pictures
Have fun crafting

Even though I didn’t complete all of my pages during December, I have almost every story planned out with a drawing and notes written in my Day One app. This makes going back a little less intimidating. I am also flexible with myself and allow to change things up as I go. The main thing I keep in mind is have fun! I am looking forward to completing my December Daily album with y’all!
Instagram: @smile_with_sarah
October 21, 2022
In Case You Missed It | October 21
Happy Friday, friends! Welcome to the latest
In Case You Missed It. Just a reminder that this is a quick post that will happen every Friday afternoon with all the updates and links that have happened throughout the week. So, let's get to it:
December Daily® Prep Day 2022 registration is live! Join the December Daily® community for a fun online prep day on Saturday, November 12th, 2022. Use this opportunity to finish past December Daily® projects or start working on your project for 2022. Ali will be our host this year and we are excited to have a variety of incredibly talented and inspiring contributors. And did we mention registration is only $5? Yep. Find more information and register here.
2022 DECEMBER DAILY® DIGITALS ARE NOW AVAILABLE
The 2022 December Daily® Digitals are here! Kits, Stamps, Paper, and Embellishments...the same fun & festive designs as the physical @decemberdaily products, only in digital format. We love to see how this incredibly creative community plays with digitals! Resizing elements and cards, adding journaling to papers, creating cut files, transforming files into transparencies, the sky is the limit with digital files. Want to learn more about creating with digital files? Don’t forget all of our hybrid scrapbooking classes are on sale now for $10. This promotion ends Sunday. Be sure to check out our hybrid classes, available now under the "classes" tab on our website. No promo code needed. Shop digitals.
DECEMBER DAILY® 2022 COLLECTION IS LIVE
Our 2022 collection is now available in the shop. Find the collection here.
STORIES OF THE SEASON | FALL/AUTUMN
We’re excited to share a new class: Stories of the Season. Stories of the Season | Fall/Autumn is centered around the themes of Gratitude, Fall Activities, and Halloween with two lessons for each theme. Our talented contributors will be sharing a combination of story ideas and creative techniques in a variety of formats with the goal to encourage and inspire your fall storytelling. Class has begin, but all lessons are recorded and available for you to watch at your convenience. Class Contributors: Ashley Horton, Denine Zielinksi, Jenny Theriault, Kim Chaffin, Krystal Idunate, Sabrina Poole. Learn more here.
DECEMBER DAILY® PRODUCT PLAY | YOUR CHOICE
Product Play workshop registration is now available! For 2022 we are changing up our December Daily® Product Play workshop and this year will be focusing on an overall theme of Your Choice. For 30 days in November, you’ll receive one new idea per day (for a total of 30) brought to you by Ali and the contributors to this class. Ideas in this workshop will focus on physical products from this year’s December Daily® Collection. Each product with have three lessons taught by three different instructors and will be classified into different project levels depending on the amount of time or steps involved. Shop the class here.
As always, we’re so grateful to have you all as members of this community! Thanks for joining me today and have a great weekend!
October 20, 2022
Day In The Life™ | Special Guest Pam Baldwin
Hey friends, this is Pam! I am delighted to be here today, sharing my first completed “Day in the Life” documentation day of 2022! Putting this project together is definitely a “process”; first living the day, then compiling and organizing the content, and finally bringing it all together. Here’s how I approached my first “Day in the Life” day for 2022.

March 10th was a pretty ordinary day around here, and I did what I could to capture it by taking photos throughout the day with my phone. A few days later, I did the journaling in a Word document, using the time stamps from my photos and the images to jog my memory. As I wrote chronologically, I found myself identifying the “-ing” words that worked to categorize large sections of journaling. (It felt like a puzzle to solve, and honestly, that was really satisfying!). The “-ing” guided storytelling was a fantastic way to prompt stories that hadn’t necessarily been captured in my photos and made for a more “complete” story. I should also mention, I didn’t stress at all about having the journaling fit exclusively within an “-ing” category. It was a guide, but I was flexible to include the stories I wanted to tell, even if they didn’t fit in a specific category or seemed like the exact opposite (“enjoying” definitely held some “not enjoying” moments).

I’ve done this project in a variety of different formats over the years, but this is the first time I’ve completed my documentation in a 4x6 album. My preferred method of scrapbooking is with a hybrid approach, so I used the 4x6 album, the 2022 Day in the Life Main Kit, the 2022 Day in the Life Digital kit, the digital Day in the Life 2022 Half Circle Phrases Stamp Set, and the Digital Day in the Life 2022 Chipboard Dividers and album art. I’ve got lots leftover to use for the next documenting day, and the products are definitely a great fit for everyday storytelling that I can sprinkle into other projects throughout the year! I used a plain old notebook and pen to plan my pages, then headed over to my computer to piece them together in Photoshop Elements.

Most of the photos I take with my phone are vertically or “portrait” oriented. I knew I wanted to include several full page photos, so I went through what I had and picked out ones that would work well cropped to a horizontal or landscape orientation. The full page photos in my album are sized to 7” x 4.5”.

I used the digital kit and stamp set to create a set of journaling cards that are also sized to fit outside the page protectors at 7” x 4.5”. I copied and pasted the journaling from my word document right onto the journaling cards and printed them out.

I knew I wanted to start off my album with the coated cardstock divider that came with the album. I already had my photo set-up pretty much figured out, so I needed to come up with something else for the back. I decided to create a custom pocket with the digital “enjoying” design from the chipboard dividers collection (the background has been recoloured from white to black), and an enlarged digital die cut. I printed the elements, trimmed them down to size, stitched on the pocket, then adhered it to the back of the cardstock divider. This pocket holds journaling on a tag that’s a little contextual round up of life right now for our family.


After that, I followed a pretty simple formula to put my pages together. Each spread has a full page photo, a journaling card, and a page protector that holds 4 – 3x4 photos sandwiched in between.


There are at least 2 spreads in my album where I didn’t have enough 3x4 photos to add a page protector, so I left it out, OR I cut the page protector down to hold just 2 photos. I don’t think it negatively impacts the flow of the album at all!

My top 3 favourite elements from the main kit were the chipboard stars (I used every single one!), the clear label stickers (love this extra detail on top of the photos!), and the die cuts pieces (also a fantastic addition right on top of photos or journaling card headers with some dimensional foam).

The photos here are just a sampling of my completed project. If you’d like to see more, you can see a video flip-through of the completed project on my Instagram account! Thanks so much for stopping by today!
October 15, 2022
Day In The Life™ 2022 | Join Us On October 27th

Join us for the second documenting day for our community Day In The Life™ project coming up on Thursday, October 27th.
For this documenting day Ali will be using the lens of gratitude to structure her stories for the day and will be using the gratitude cards from the Day In The Life™ kit and the 4x6 album released earlier this year.


The half-circle stamp set was also recently re-stocked:

You can check out how Ali documented her first Day In The Life™ earlier this year here. We also shared Jennie's project here.
Looking forward to telling stories with you soon!
October 14, 2022
In Case You Missed It | October 14
Happy Friday, friends! Welcome to the latest
In Case You Missed It. Just a reminder that this is a quick post that will happen every Friday afternoon with all the updates and links that have happened throughout the week. So, let's get to it:
STAMPS SHIP FREE WORLDWIDE
Are you ready? From now until Sunday, October 17th, all clear stamps ship free anywhere in the world! That’s right! Anywhere. In addition to free shipping, we’ve restocked your most requested stamp sets: our 4x6 Art of Noticing stamp set, 6x8 USA Map stamp set, 4x6 Getaway stamp set, 4x6 Half Circle Phrases stamp set, our December Daily® 2021 6x8 Wintery Botanical stamp set, our December Daily® 2021 6x8 Holiday Icon stamp set, our Tree Stamp, and more! This promotion has no exclusions! That means you can grab any of our in-stock 2022 December Daily® sets as well. Shop stamps here. OCTOBER REVEAL | NEW HISTORY STORY KIT + NOVEMBER STORIES BY THE MONTH KITSThis week we revealed a new Story Kit™ theme: HISTORY! We are made up of all the stories and seasons and chapters we've experienced in our lives. This month we are inviting the community to document and share stories from our past whether that's long ago or yesterday. We hope this kit encourages you to dive into stories not yet told and look for opportunities to document more of your life. Head to the link in our bio for Ali's blog post with all the details about this month's release. Looking for sparks related to this theme? Don't forget to tune in to #aestorychat Monday, October 17th at 1pm ET when Krystal and her guests will take a deep dive into this theme! Check out Ali’s reveal post here.
2022 DECEMBER DAILY® DIGITALS ARE NOW AVAILABLE
The 2022 December Daily® Digitals are here! Kits, Stamps, Paper, and Embellishments...the same fun & festive designs as the physical @decemberdaily products, only in digital format. We love to see how this incredibly creative community plays with digitals! Resizing elements and cards, adding journaling to papers, creating cut files, transforming files into transparencies, the sky is the limit with digital files. Want to learn more about creating with digital files? Don’t forget all of our hybrid scrapbooking classes are on sale now for $10. This promotion ends Sunday. Be sure to check out our hybrid classes, available now under the "classes" tab on our website. No promo code needed. Shop digitals.
DECEMBER DAILY® 2022 COLLECTION IS LIVE
Our 2022 collection is now available in the shop. Find the collection here.
STORIES OF THE SEASON | FALL/AUTUMN
We’re excited to share a new class: Stories of the Season. Stories of the Season | Fall/Autumn is centered around the themes of Gratitude, Fall Activities, and Halloween with two lessons for each theme. Our talented contributors will be sharing a combination of story ideas and creative techniques in a variety of formats with the goal to encourage and inspire your fall storytelling. Class has begin, but all lessons are recorded and available for you to watch at your convenience. Class Contributors: Ashley Horton, Denine Zielinksi, Jenny Theriault, Kim Chaffin, Krystal Idunate, Sabrina Poole. Learn more here.
DECEMBER DAILY® PRODUCT PLAY | YOUR CHOICE
Product Play workshop registration is now available! For 2022 we are changing up our December Daily® Product Play workshop and this year will be focusing on an overall theme of Your Choice. For 30 days in November, you’ll receive one new idea per day (for a total of 30) brought to you by Ali and the contributors to this class. Ideas in this workshop will focus on physical products from this year’s December Daily® Collection. Each product with have three lessons taught by three different instructors and will be classified into different project levels depending on the amount of time or steps involved. Shop the class here.
As always, we’re so grateful to have you all as members of this community! Thanks for joining me today and have a great weekend!
December Daily® DIY Stencils Tutorial
Hello everyone. It's Kelly Ishmael here, and I am excited to share a couple of options for creating DIY versions of the December Daily® stencils using the digital versions of the stencils which are now available in the shop.

When it comes to creating your own stencils, you basically have two options - the first option is to use an electronic cutting machine and the other method is to cut out the stencil designs manually using either an Exacto knife or stencil cutting tool. For more information and step-by-step instructions, please check out the process video at the bottom of this blog post.

Whether you are using a cutting machine or a manual method, you will need some type of stencil material to create your stencils with. For this demonstration I will be using two different types of stencil material:
Silhouette Stencil Material (non-adhesive)
Zicoto Acetate Mylar Stencil Sheets
There are other options available but these were the two that came up the most in my research and I found them both to be really good options.

The first option for creating your own stencils is to use an electronic cutting machine such as a Silhouette or Cricut. This is by far the fastest and easiest way to go, and it creates the cleanest cuts with excellent detail.
Note: For Cricut users, I realize that the settings I reference might be a little a different, but I believe the overall process is basically the same.
To get started, it's important to have a very clean and sticky cutting mat. Because of the smaller, more intricate designs in many of the stencils, it's important that the cut areas stay stuck to the mat during the cutting process so that they don't lift up and get caught in the cutting blade. If (like me) you are using a mat that is a bit older or not as sticky, you can restore it by washing it in the sink with warm water and a small amount of dish soap, then rinsing it well and letting it air dry.
Next, I placed my material on my mat and smoothed it out to make sure I had good adhesion and that there were no pockets or air bubbles. After loading my mat into my Silhouette I opened up my Silhouette Studio software. We have provided .studio3 versions of the digital stencils so that you are able to simply drag and drop the file directly onto your page design window. For Cricut users, we have provided .SVG versions of the files as well.
Here are the cut settings I used for both types of stencil materials:
Silhouette Stencil Material Settings
Blade - 3
Speed - 2
Force - 33
Passes - 1

Zicoto Acetate Stencil Material Settings
Blace - 2
Speed - 1
Force - 33
Passes - 1

Both of these stencil materials resulted in precise, clean cuts that will work really well in your projects, however since the Silhouette stencil material is a little bit thicker, I think it might hold up to repeated use a little better.

The second option for creating your own stencils is to use a manual cutting method using either an Exacto knife or stencil cutting tool. In the spirit of full disclosure, both of these methods are extremely tedious and time-consuming, but we wanted to provide an option for those of you who might not have an electronic cutting machine. Also, these options definitely lend themselves to the less intricate stencil designs.
For the Exacto knife technique, I printed out the gray and white version of the tag stencil onto plain copy paper. I then placed the mylar stencil material on top of the design and secured it to the paper with strips of washi tape. Using a cutting mat, I traced around the tag shapes (with extreme caution) using a clear ruler to create straight cut lines. A new, sharp blade was extremely helpful here and I was pleasantly surprised at how well the final stencil came out.
The next option for manual cutting is to use a stencil cutting tool. When I was researching ways of cutting stencils without a machine, I found that there are two basic types of tools - those that use rotating steel blades for smooth, precise cuts and those that use heat to melt through the plastic or mylar material. Here are the two options I found on Amazon:
Gyro-Cut Cutting Tool
Plaid Stencil Cutter
As I read more about the heated tip of the Plaid Stencil Tool, I remembered that my Fuse tool came with a small, pointed tip so I decided to give that a try. Once again, for this manual method I chose a less-intricate design and printed out the heart stencil on copy paper. I placed a piece of the Silhouette stencil material over the top and secured it with washi tap. Next I set my paper on top of a piece of glass (from an old picture frame) and traced around the designs with my Fuse too. From my previous experience, I found that the Fuse tool worked best when I let it heat up for at least 10 minutes before using it.

Obviously, as with anything made by hand, both of these methods are going to offer less than perfect results. It's also possible that using one of the "official" stencil tools mentioned above might have resulted in cleaner, more precise cuts. But even so, I believe that, like any kind of mixed-media art technique, stenciling is already an imprecise, imperfect way of adding dimension and texture to our projects, so I'm not sure that really matters in the end.

To test my theory, I created these simple journal cards using all three version of the heart stencil.

The manually cut version definitely isn't as sharp as those I cut with my Silhouette, but I think the overall vibe is the same.
For step-by-step instructions and more detailed information, you can check out my process video where I am demonstrating both electronic and manual stencil cutting options.
For those of you who are uncomfortable with using digitals or creating DIY versions, we wanted to provide you with an alternative so that you can join in with all the crafty, messy, fun play that so many of us love about this project. We have done some research and found that our friends at Scrapbook.com have a wide variety of stencils in their shop, and we have curated a list that we think echoes the look and feel of the stencils we released in our collection.
For ideas and inspiration for using your stencils in your projects, be sure to check out our December Daily® 2022 Product Play class. We will have three contributors showing three different levels of use for creating projects that help support your December storytelling.
Finally, if you are interested in learning more about using digital products in your projects, we invite you to check out our hybrid scrapbooking classes. And to celebrate the December Daily® 2022 digital release we are offering them for only $10 each!
Hybrid (self-paced)Hybrid Product PlayHybrid All Year Round Create With Canva
(Offer ends Sunday, October 16th at 11:59pm ET).
We hope sharing these resources gives you some alternatives and helps you tell your December stories. As always, thank you for being a member of this special community. We are so grateful for you.
October 10, 2022
History Story Kit + November 2022 Stories By The Month Kits
Today's the 10th of the month and that means a new
Story Kit, Story Stamp, and Stories By The Month kit.
This month we are focusing on stories related to the theme of
History.
We are made up of all the stories and seasons and chapters we've experienced in our lives. This month we are inviting the community to document and share stories from our past whether that's long ago or yesterday. We hope this kit encourages you to dive into stories not yet told and look for opportunities to document more of your life.
Initial story ideas for this theme include:
This theme is a wonderful opportunity to tell some of the stories of your past. What is a piece of your story you haven’t yet told?
Make a list of your very own “good old days.” What would you include on that list?
Document three things that make you who you are (we are a combination of all the things we’ve experienced).
The
Story Kit™ includes:

Here's a video overview of the
Story Kit™ and Add-On options this month:
The
Stamp Set:

Here's a video overview of the Story Stamp:
DIGITAL STORY KIT™ (Included with the STORY CLASS)
Here's a look at what's included in the Digital Story Kit™:

Your digital kit and the classroom and any Add-Ons purchased will be available to you on the 12th once your card has been charged for the month.
This kit is also available to all subscribers as an Add On each month.
Here are a few sneak peeks at projects you'll find in the classroom this month from our team:


Again, thanks so much for subscribing and/or considering our
Story Subscription program! If you have any questions about this program please let us know below in the comments.
Stories By The Month™ kits include 4x6 chipboard, 3x4 and 4x6 cards, a 3x4 stamp, a sticker sheet, and an embellishment. Here is a full look at the kit this month:

And a video overview:
This subscription is a great option for those who are looking to tell more calendar/everyday life sorts of stories.
This kit will be offered for only $9.99 as an ongoing month-to-month commitment.
Our month-to-month subscription option allows you to cancel at any point prior to the 7th of the following month without penalty or a cancellation fee.

CURRENT SUBSCRIBER BONUS: Stories By The Month™ physical kit, Story Kit™, Story Stamp™ and Story Class™ subscribers will be able to add the new Stories By The Month™ Digital Kit as an add on to their order for only $5 during the add on period each month.

Make sure you check out what's all available via your My Subscriptions page.
Add On options are available to all Story Kit™, Story Stamp™, and Stories By The Month™ subscribers (this excludes Digital Story Kit/Story Class subscribers since you don't have any part of your subscription shipped already). Current and new subscribers can select + purchase Add-On's via your new drop-down menu access under your user name in the top right corner of the site: you need to do this before the 11th of the month in order for them to ship with your kit.
Depending on product availability subscribers may be able to purchase the Add-On's after the Add-On period has ended and regular shop shipping rates will apply because they will ship separately from the kit.


