
Nancy Zieman's Blog, page 50
March 3, 2020
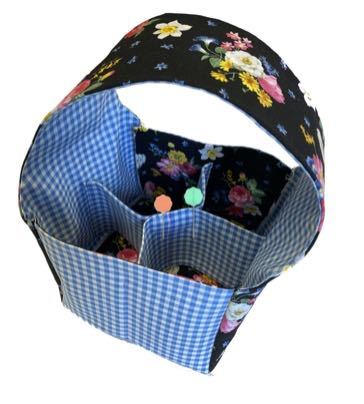
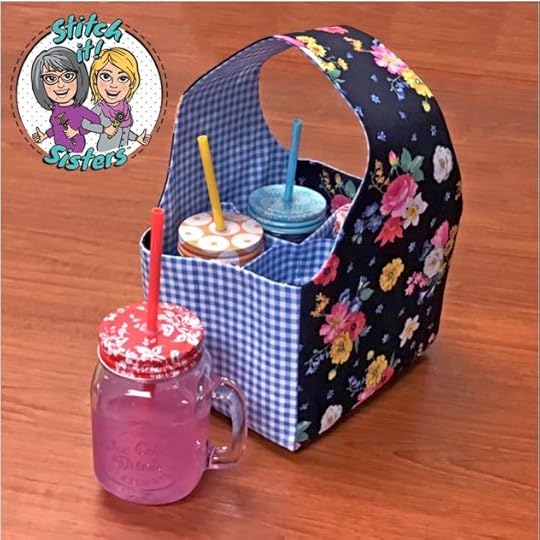
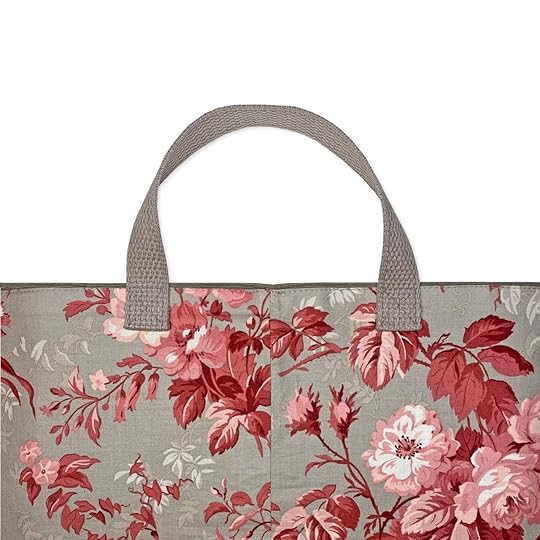
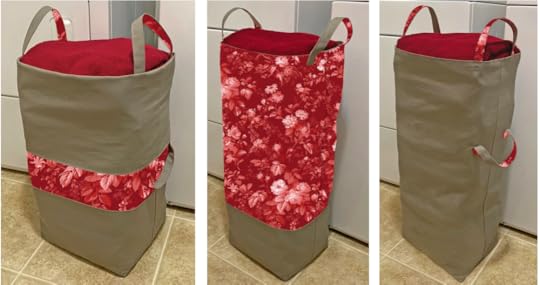
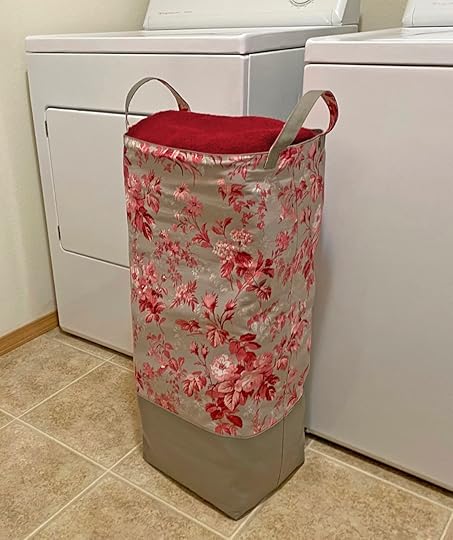
NEW! Fun Fabric Caddy Sewing Tutorial

NEW! Watch Stitch it! Sisters Program 110: Fun Fabric Caddy
NEW! Watch the NEW! Stitch it! Sisters Program 110: Fun Fabric Caddy Video with hosts Deanna Springer and Dana Casey. In this video, the Stitch it! Sisters share step-by-step fabric cutting and sewing techniques for making NZP’s NEW! Fun Fabric Caddy from our NEW! Fun Fabric Caddy Pattern.

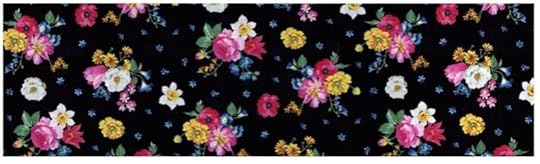
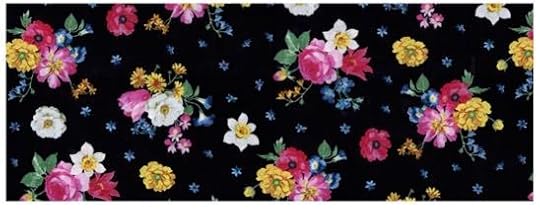
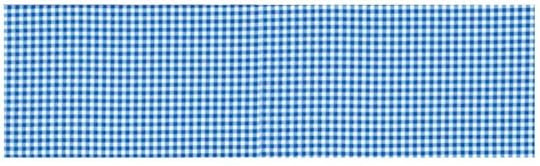
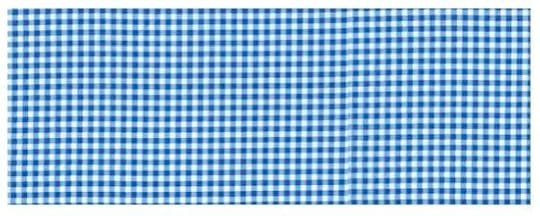
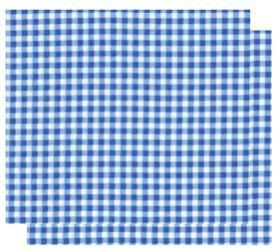
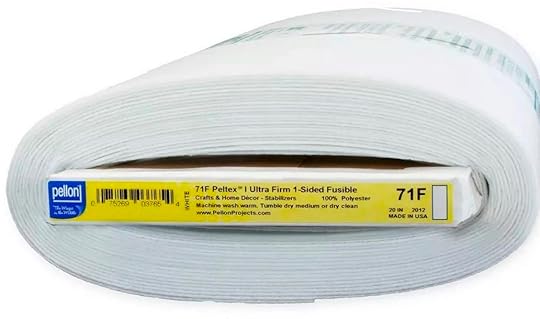
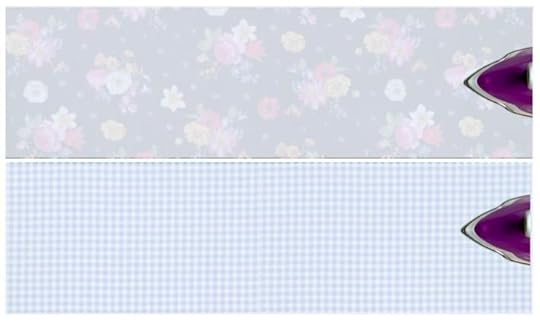
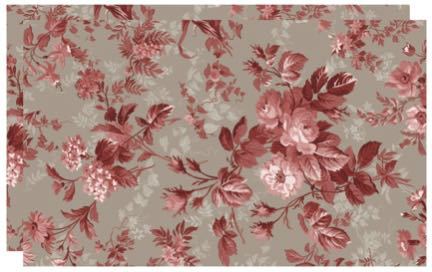
 Then, head over to the shopnzp.com and purchase our exclusive NEW! Fun Fabric Caddy & Fabric Bin Bundle Box designed by the Stitch it! Sisters! This NEW! Fabric Caddy Bundle Box features NZP’s Afternoon Picnic Fabrics by Riley Blake Designs, and includes ALL SUPPLIES needed to make one Fun Fabric Caddy and one Fabric Bin, including: Afternoon Picnic Black Floral, Afternoon Picnic Blue Gingham Fabric, Pellon ShirTailor Interfacing, Pellon Peltex, and our NEW! Fun Fabric Caddy Pattern – with Classic Timesaving Tips by Nancy Zieman — you’ll supply the thread. Quantities are limited.
SHOP our NEW! Patterns and Exclusive Bundle Boxes at shopnzp.com
NEW! Watch Stitch it! Sisters Program 110: Fun Fabric Caddy and learn how easy it is to sew our All-New Fun Fabric Caddy!
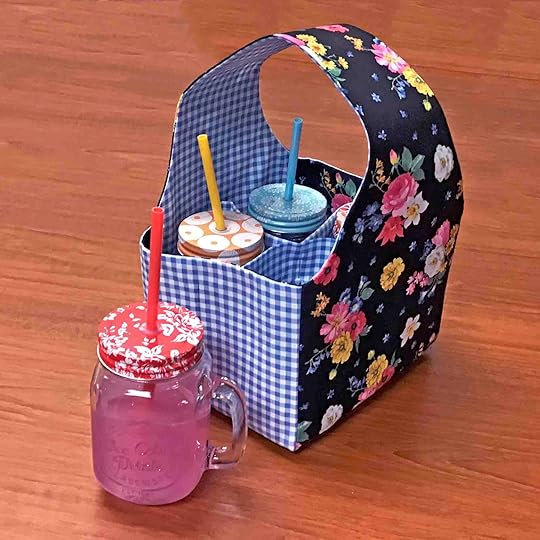
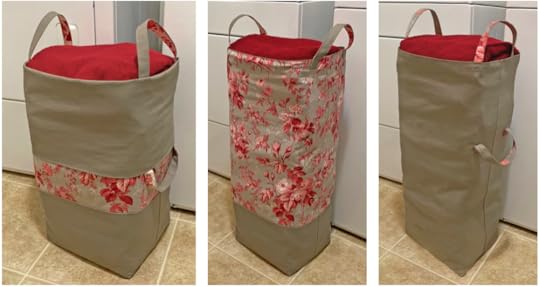
Fun Fabric Caddy FREE! Sewing Tutorial
Sew our NEW! Fun Fabric Caddy with our easiest ever sewing techniques, and Classic Timesaving Tips by Nancy Zieman, and see how using the right tools makes the sewing process enjoyable, even for beginners!
To make our NEW! Fun Fabric Caddy, follow our easy instructions – within our NEW! Fun Fabric Caddy Patternincluded with the NEW! Fun Fabric Caddy Bundle Box! Note: All seam allowances are 1/4″ unless noted.
Prepare Fabrics:
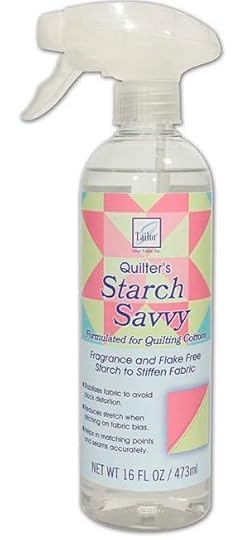
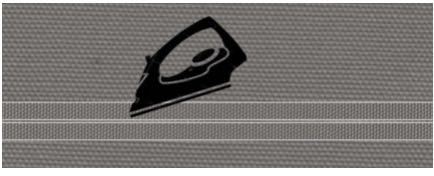
 Pre-shrink project fabrics by steaming and pressing, and steaming and pressing a second time, and then spray starch and press one more time – using June Tailor’s® Starch Savvy.
Make Fun Fabric Caddy Patterns:
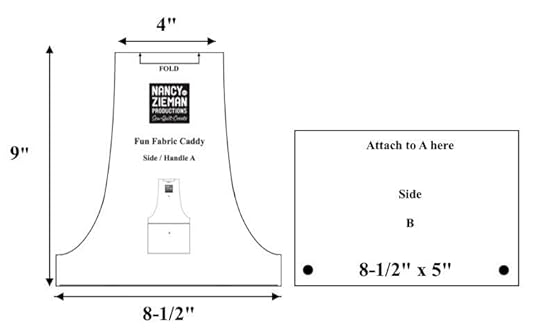
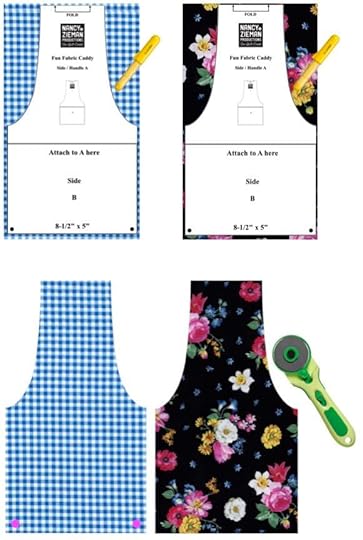
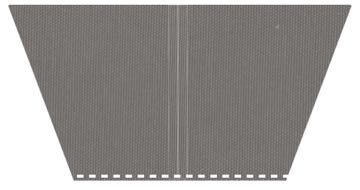
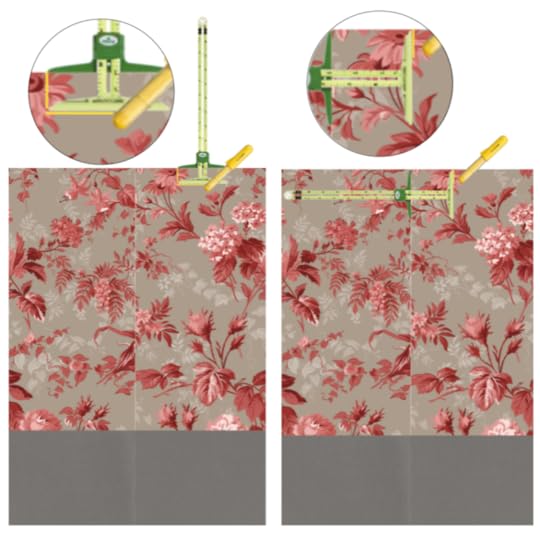
Using our Pattern Making Paper , trace and create, and cut out the Fun Fabric Caddy Side/Handle Pattern pattern piece from our NEW! Fun Fabric Caddy Pattern . Label pattern piece accordingly and transfer markings and dots to paper pattern.
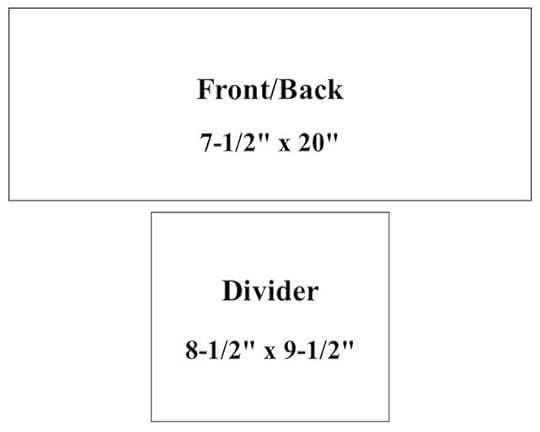
 Streamline the pattern making process and opt to cut simple rectangles from fabric and interfacing, and skip making the rectangle Caddy Front/Back and Caddy Divider paper pattern pieces below!
Using Pattern Making Paper, create and cut out one 7-1/2″ x 20″ rectangle for Fun Fabric Caddy Front/Back Pattern , and one 8-1/2″ x 9-1/2″ rectangle for Caddy Dividers Pattern . Or opt to cut simple rectangles from fabric and interfacing, and skip making these two rectangle paper pattern pieces.
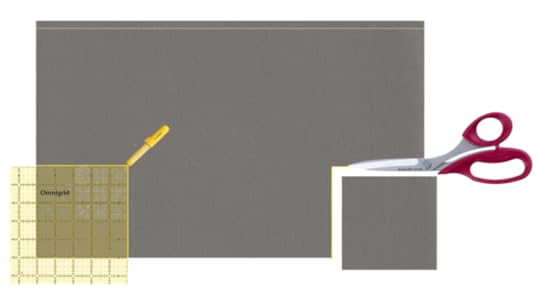
Cut Fabrics and Interfacing:
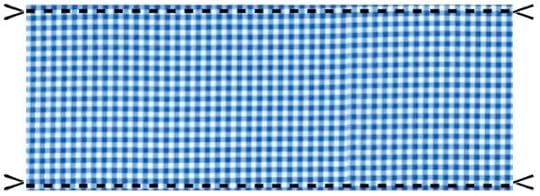
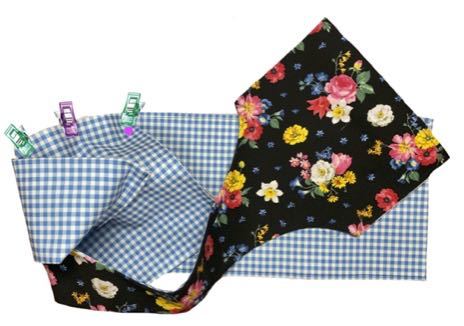
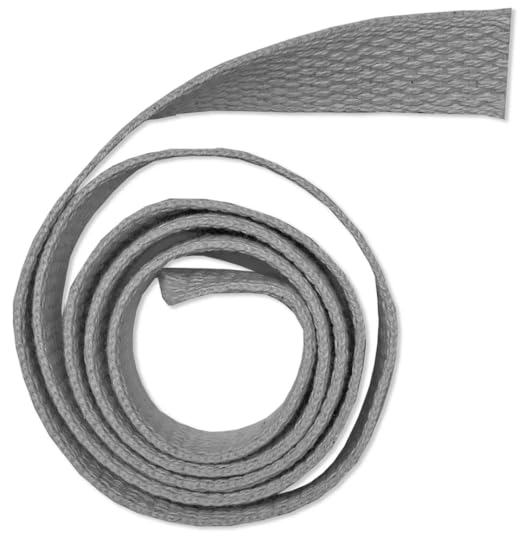
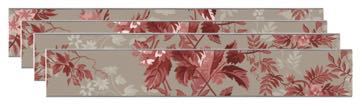
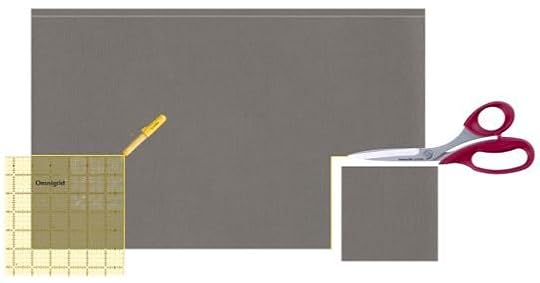
Cut one 8-1/2″ x 28″ rectangle from outer Caddy fabric for Fun Fabric Caddy Side/Handle.
Cut one 7-1/2″ x 20″ rectangle from outer Caddy fabric for Fun Fabric Caddy Front/Back .
Cut one 8-1/2″ x 28″ rectangle from inner Caddy contrast fabric for Fun Fabric Caddy Side/Handle.
Cut one 7-1/2″ x 20″ rectangle from inner Caddy contrast fabric for Fun Fabric Caddy Front/Back .
Cut two 8-1/2″ x 9-1/2″ rectangles from inner Caddy contrast fabric for Caddy Dividers .
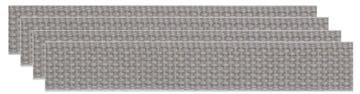
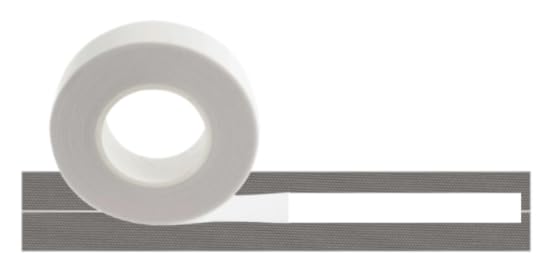
Cut two 8-1/2″ x 28″ rectangles from Pellon ShirTailor for Fun Fabric Caddy Side/Handle.
Cut two 7-1/2″ x 20″ rectangles from Pellon ShirTailor for Fun Fabric Caddy Front/Back .
Cut two 8-1/2″ x 9-1/2″ rectangles from Pellon ShirTailor for Caddy Dividers Pattern .

Cut one 6-1/2″ x 6-1/2″ square from Pellon Peltex One-Sided Fusible Ultra Firm Stabilizer for inner Caddy.
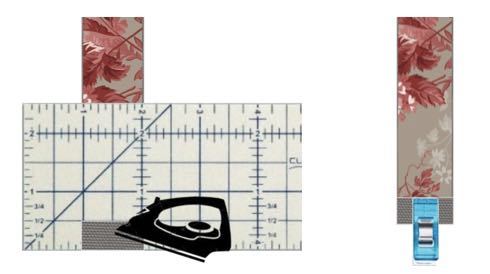
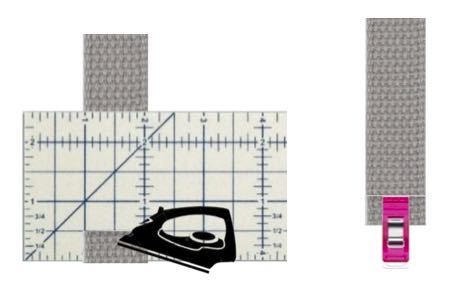
Press Interfacing to Fabric Pieces:
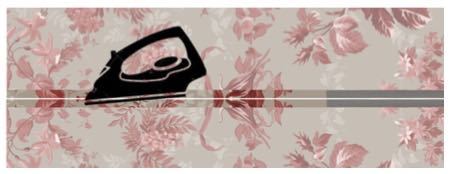
Following manufactures instructions, press Pellon ShirTailor interfacing rectangles to back of companion fabric rectangles.
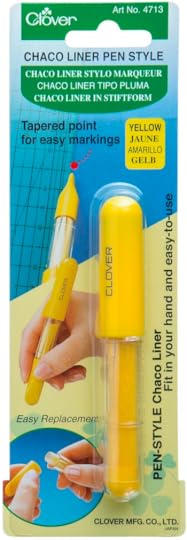
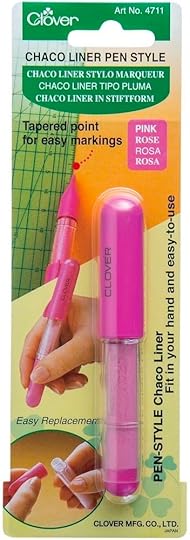
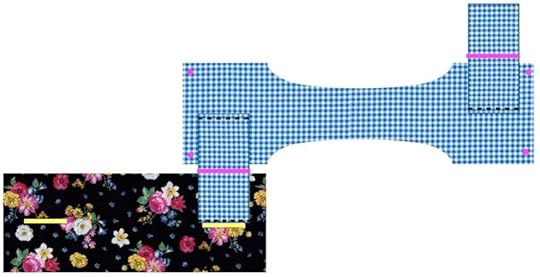
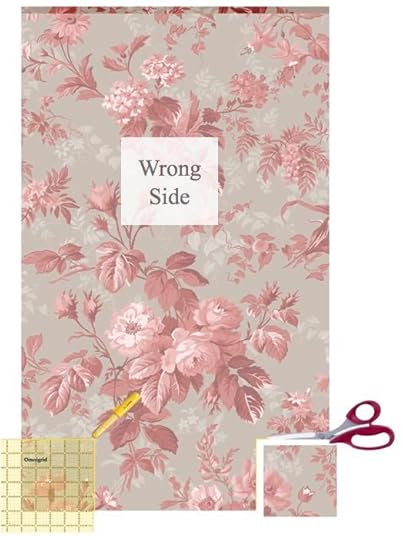
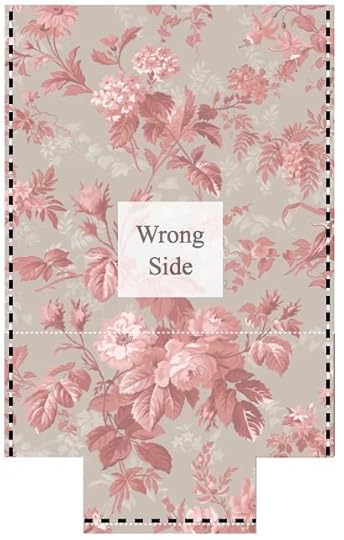
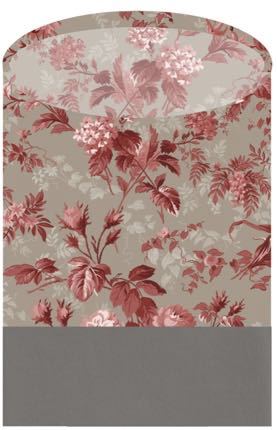
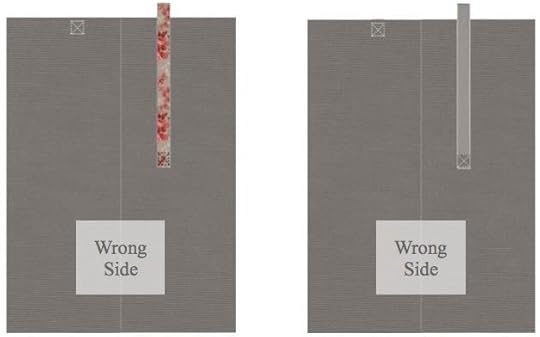
Using Fun Fabric Caddy Side/Handle Pattern and Clover’s Chaco Liner, trace and cut out fabric Caddy Side/Handle from two 8-1/2″ x 28″ interfaced fabrics, and transfer lower dots to right side of fabric pieces.
Be sure to position the paper pattern on fabric top folds, for Caddy Side/Handle pieces.
Assemble Fun Fabric Caddy:
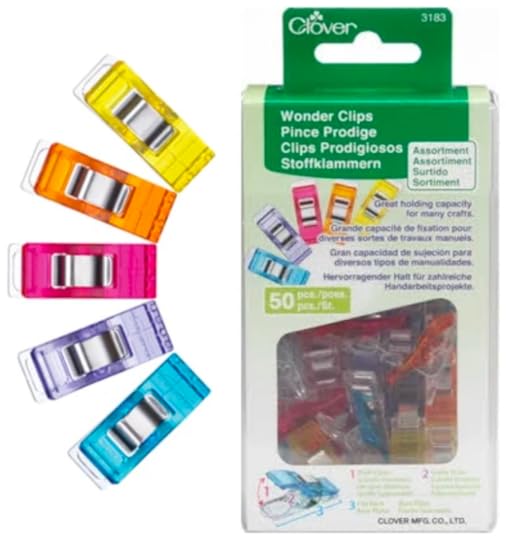
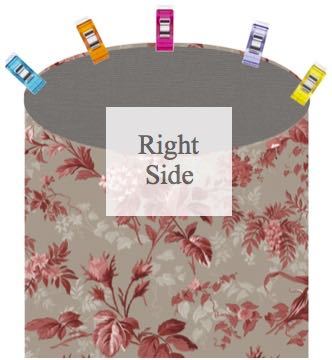
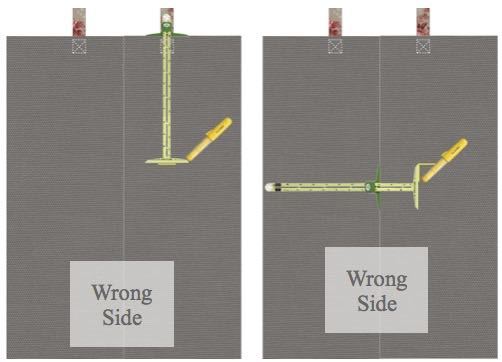
Place outer and inner Fun Fabric Caddy Side/Handles right sides together. Wonder Clip/pin.
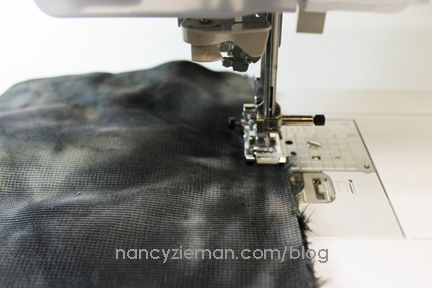
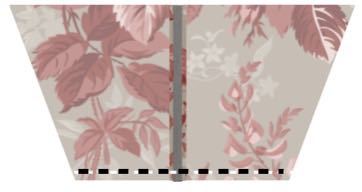
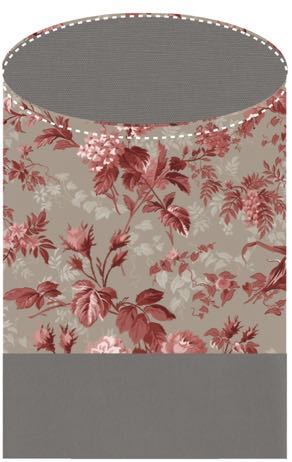
Using a Schmetz Universal Size 80 Needle , stitch curved handle seams. Press seams flat.

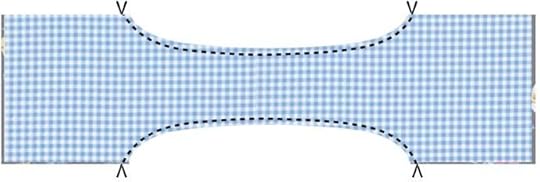
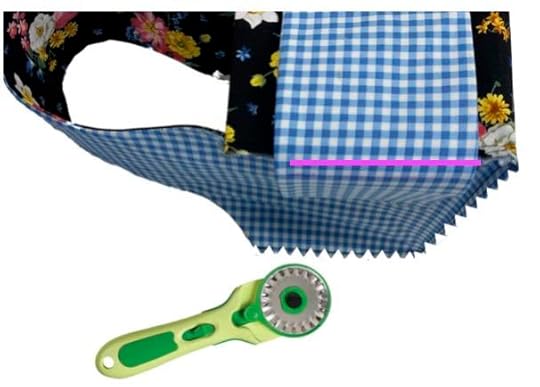
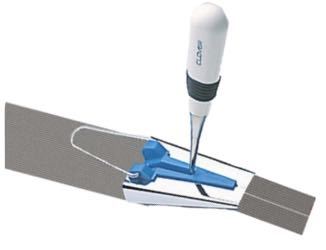
Grade/notch inner curved seams using a scissors or a 45mm rotary cutter with pinking blade.
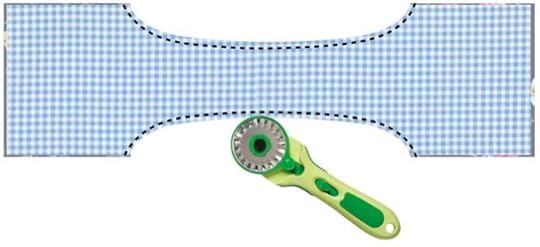
Use a rotary cutter with pinking blade to grade and notch inner curved seams quickly and easily.
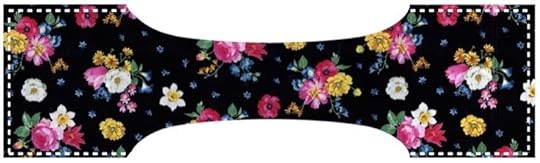
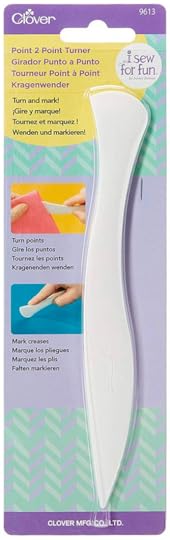
Using Clover’s Point 2 Point Turner , turn Fun Fabric Caddy Side/Handle right side out. Press. Baste around sides and lower edges with scant 1/4″ seams. Set aside. Optional: Edgestitch Fun Fabric Caddy Side/Handle curved edges.

A scant 1/4″ seam is slightly smaller than a 1/4″ seam. Use scant 1/4″ seams for basting the layers together. When the Fun Fabric Caddy is later seamed together, use actual 1/4″ seams — and basting stitches will be hidden within seam allowances.
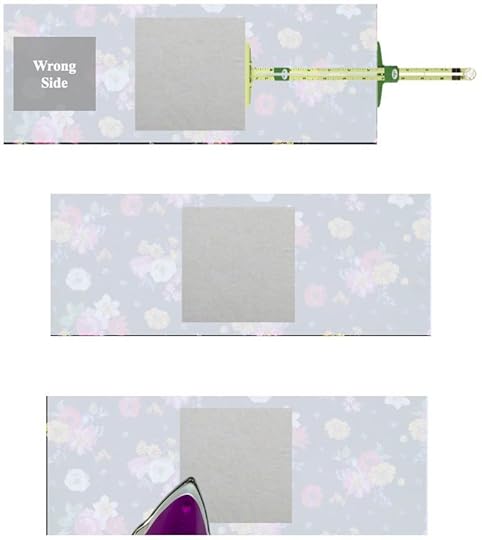
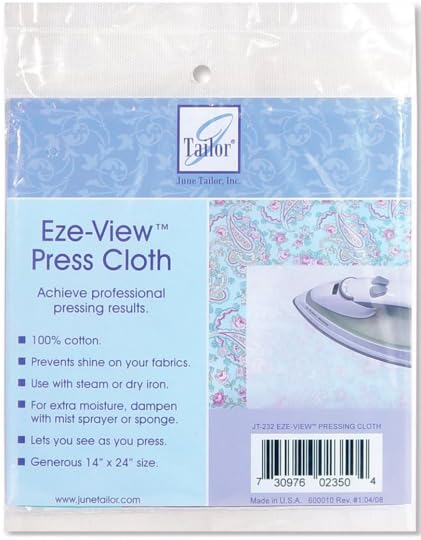
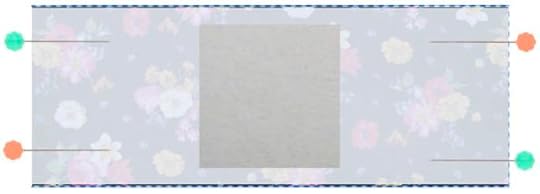
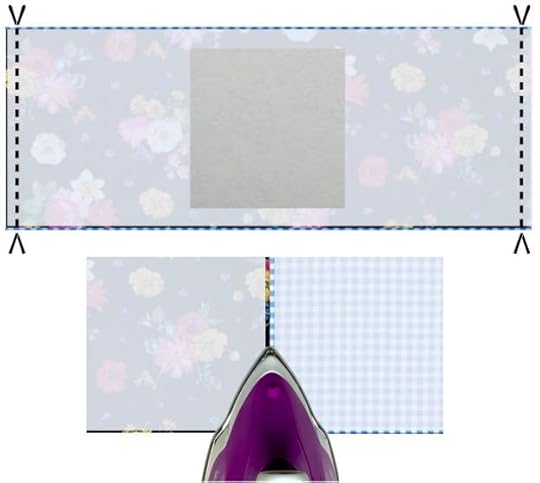
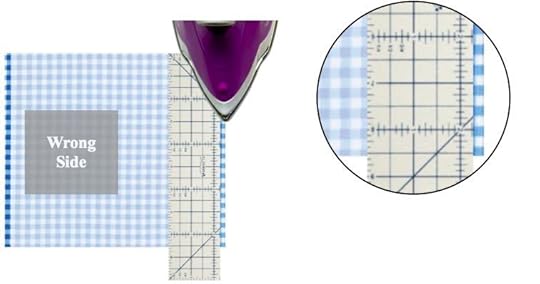
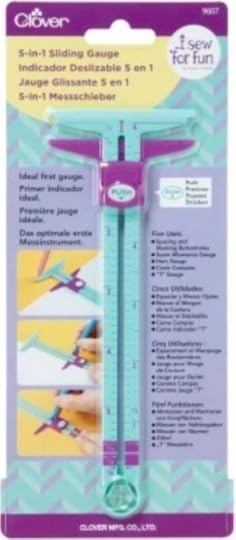
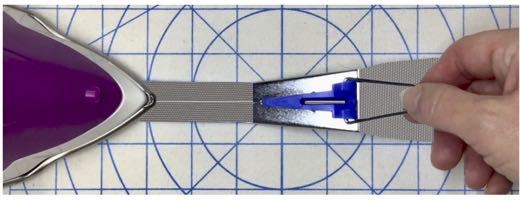
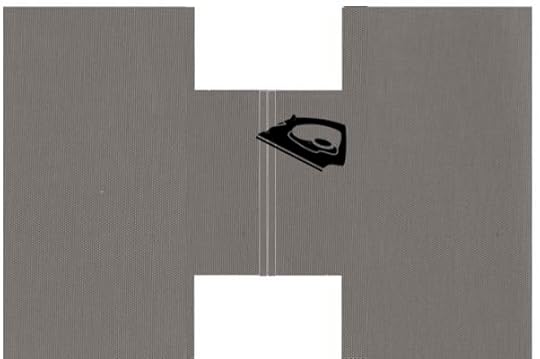
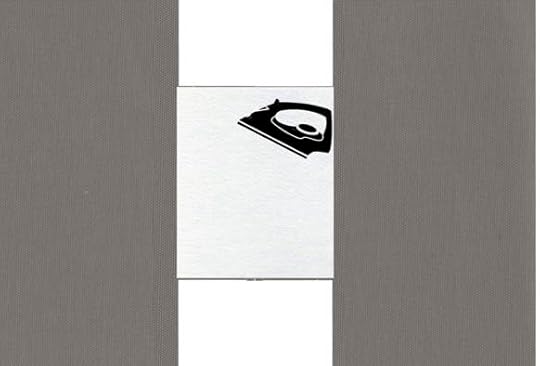
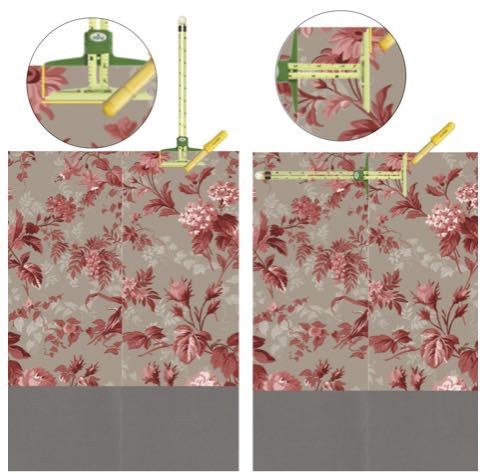
With Clover’s Supersize 5-in-1 Sliding Gauge, position and center 6-1/2″ x 6-1/2″ Pellon Peltex square to center wrong side of inner Fun Fabric Caddy Front/Back . Using June Tailor’s® Eze-View Pressing Cloth , press and fuse Peltex into place following manufacturer’s instructions.

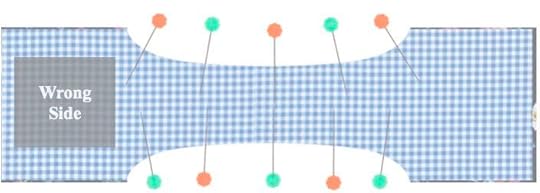
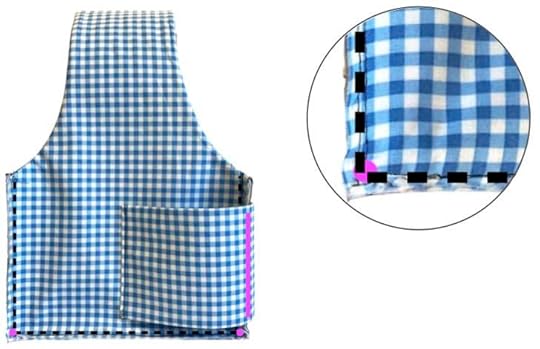
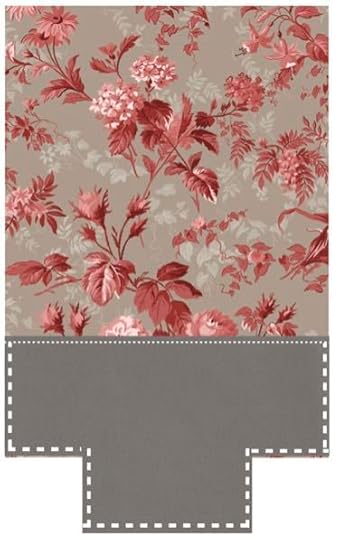
Place outer and inner Fun Fabric Caddy Front/Back right sides together. Wonder Clip/pin .
Stitch seams, joining 7-1/2″ short ends of Fun Fabric Caddy Front/Back, leaving long edges open. Press seams open.
Turn Fun Fabric Caddy Front/Back right side out. Press. Baste long edges with scant 1/4″ seams.
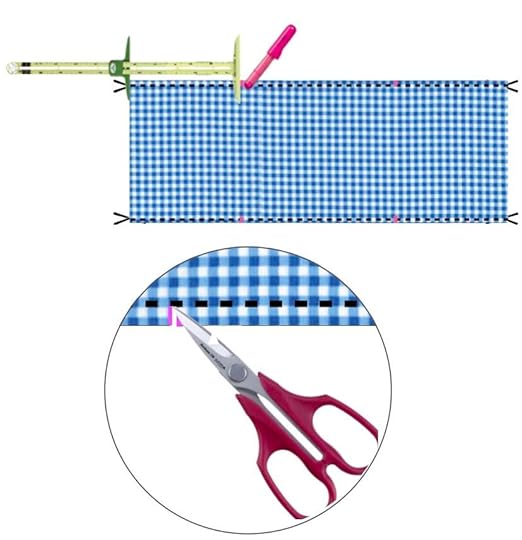
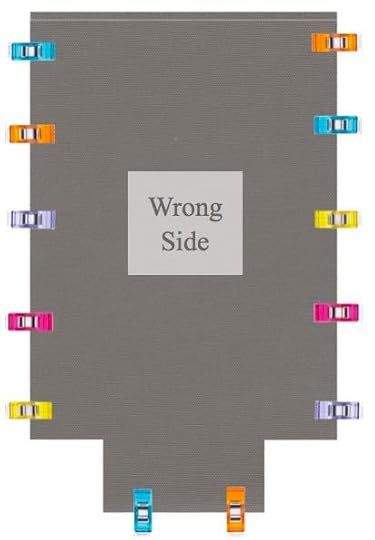
Using Clover’s Chaco Liner and Clover’s Supersize 5-in-1 Sliding Gauge, place a mark within each seam allowance, 5-1/2″ down from Fun Fabric Caddy Front/Back narrow edge. With scissors , clip at mark to basting line, as shown. Repeat making a total of four clips within seam allowances. Set aside.
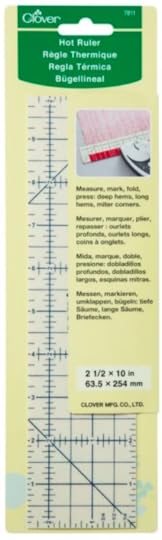
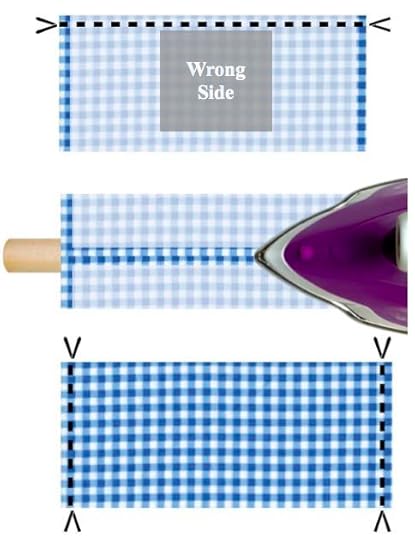
Using Clover’s Hot Ruler , press under 1/2″ at both 8-1/2″ short ends of one Fun Fabric Caddy Center Divider.
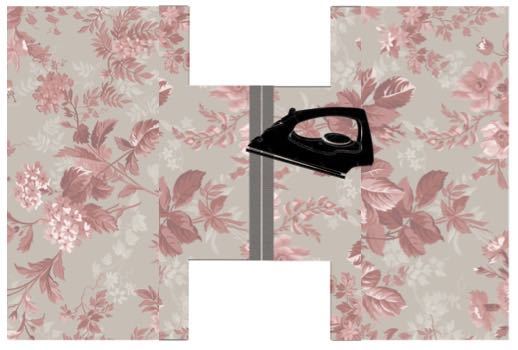
Fold Fun Fabric Caddy Center Divider , right sides together, meeting 9-1/2″ long edges.
Stitch seam, joining 9-1/2″ long edges, leaving short ends open. Press seam open over a Seam Stick . Turn right side out. Press. Baste short ends closed with scant 1/4″ seams.
 Easily press Caddy Center Divider seams open using a Seam Stick placed on top a sleeve board.
Using Clover’s Chaco Liner and Clover’s Supersize 5-in-1 Sliding Gauge, mark center vertical line on both front and back of Fun Fabric Caddy Center Divider .
Repeat steps above for remaining Fun Fabric Caddy Center Divider . Set aside.
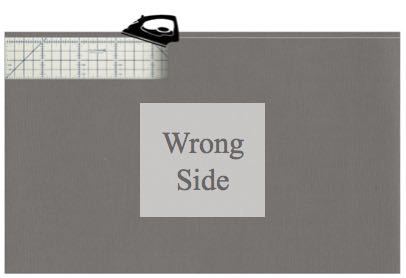
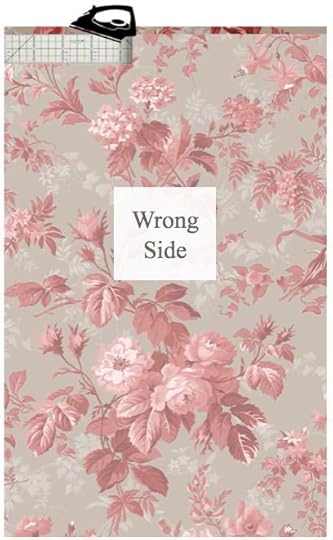
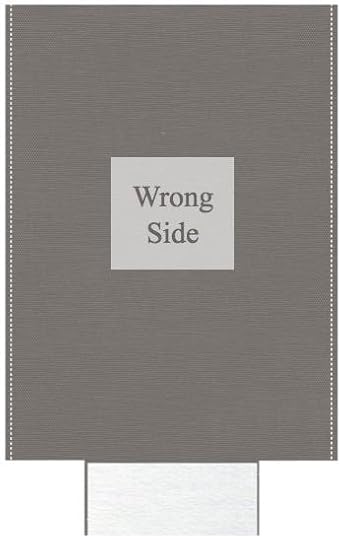
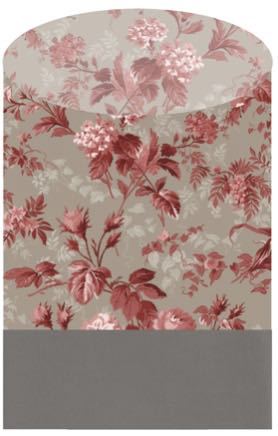
You’re the designer! There is no right or wrong side to the Caddy Front/Back. Choose to have the contrast fabric facing outward or choose to have the outer fabric showing on the outside for a unified look.
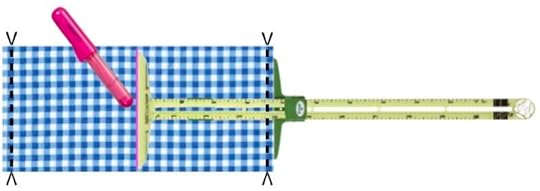
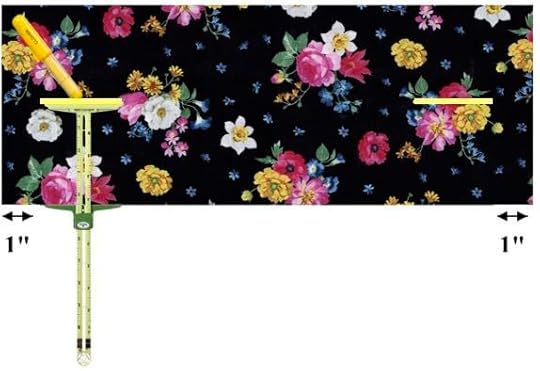
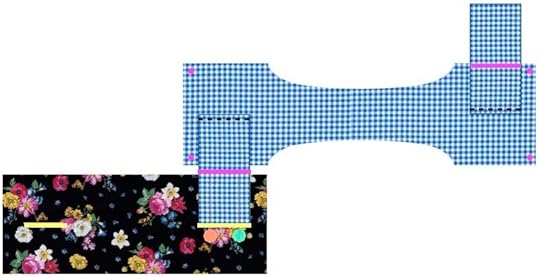
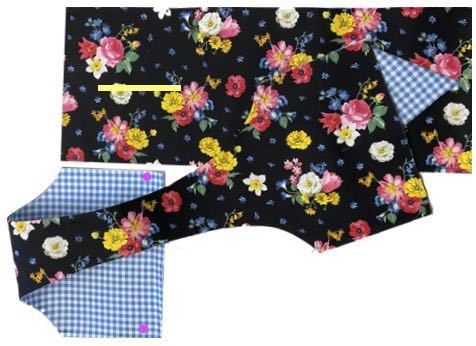
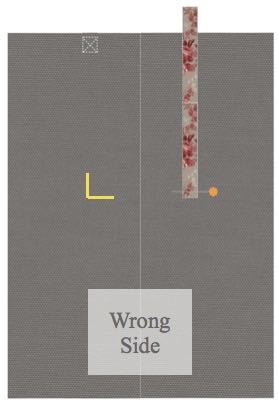
Using Clover’s Chaco Liner and Clover’s Supersize 5-in-1 Sliding Gauge, place a 4″ long marked line at center Inner Fun Fabric Caddy Side/Handle , at 1″ below upper side edge, as shown.
Repeat marking a 4″ long center line on opposite end of Inner Fun Fabric Caddy Side/Handle .
Using Clover’s Chaco Liner and Clover’s Supersize 5-in-1 Sliding Gauge, starting at 1″ below upper side edge, mark a 4″ long center line on Inner (dark fabric side) Fun Fabric Caddy Side/Handle , as shown below.
Repeat marking a 4″ long center line on opposite end of Inner (dark fabric side) Fun Fabric Caddy Side/Handle . Set aside.
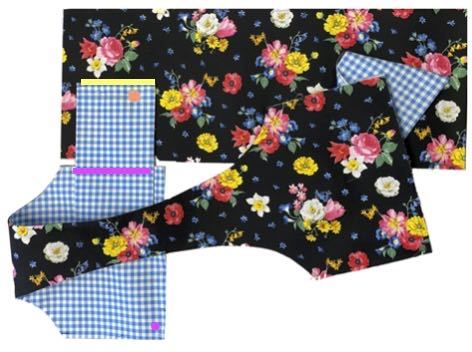
Position and pin the folded narrow end of one Fun Fabric Caddy Center Divider to one of the marked lines on Inner Fun Fabric Caddy Side/Handle , as shown.
Topstitch inner Fun Fabric Caddy Center Divider to Inner Fun Fabric Caddy Side/Handle along basting stitches.
Repeat steps above and attach remaining Fun Fabric Caddy Center Divider to opposite end of Inner Fun Fabric Caddy Side/Handle , as shown.
Because we’re using both dark and light fabrics, opt to use clear monofilament thread in the top and bobbin — when stitching Caddy Center Dividers in place.
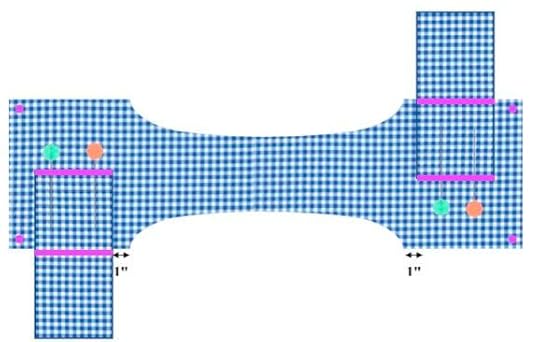
Position and pin one folded narrow end of one Fun Fabric Caddy Center Divider to marked line on Inner Fun Fabric Caddy Front/Back , as shown.
Topstitch Inner Fun Fabric Caddy Center Divider to Inner Fun Fabric Caddy Front/Back along basting stitches.
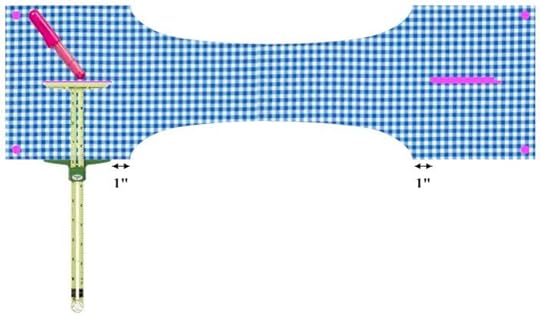
Fold opposite end of Inner fun Fabric Caddy Side/Handle over Fun Fabric Caddy Front/Back , aligning unsewn seams, as shown.
Repeat steps above and attach opposite Fun Fabric Caddy Center Divider to opposite end of Inner fun Fabric Caddy Center Divider , as shown.
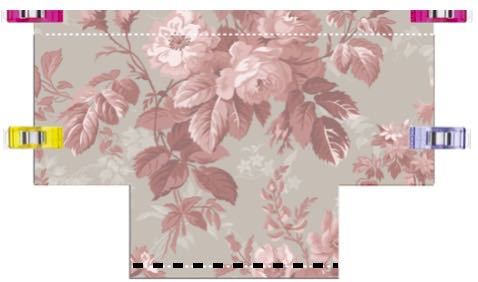
Fold one Fun Fabric Caddy Center Divider in half, meeting Fun Fabric Caddy Side/Handle to Fun Fabric Caddy Center Divider , right sides together, as shown. Wonder Clip.
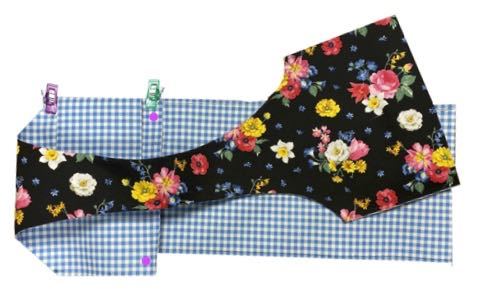
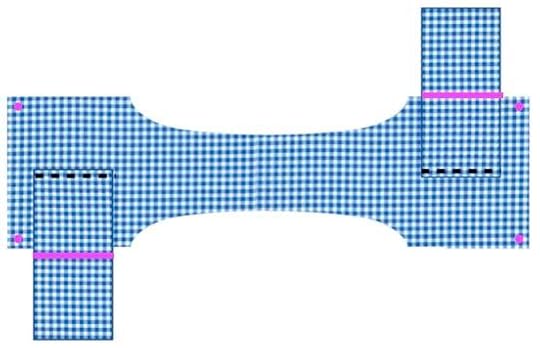
 Move Center Dividers up out of the way before stitching Caddy seams, as shown.
With Fun Fabric Caddy Side/Handle facing up/toward you, stitch Fun Fabric Caddy Side/Handle to Fun Fabric Caddy Front/Back , stopping with needle down and pivoting at dots on lower Fun Fabric Caddy Side/Handle .
Repeat steps placing and stitching remaining Fun Fabric Caddy Side/Handle to remaining Caddy Front/Back.
Using a 45mm rotary cutter with pinking blade , trim seam allowances to prevent fabric edges from raveling.
Using Clover’s Point 2 Point Turner , turn Fun Fabric Caddy right sides out. Press.
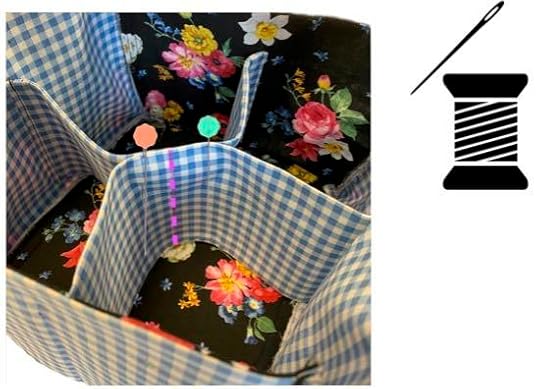
Align Fun Fabric Caddy Center Dividers at center markings, forming four equal sections. Pin .
With Hand Sewing Needle and thread, stitch Fun Fabric Caddy Center Dividers together at center markings.

NEW! Patterns and Bundle Boxes at shopnzp.com


Visit shopnzp.com, or click the “ shop ” tab
at the top of the NZP blog, anytime!


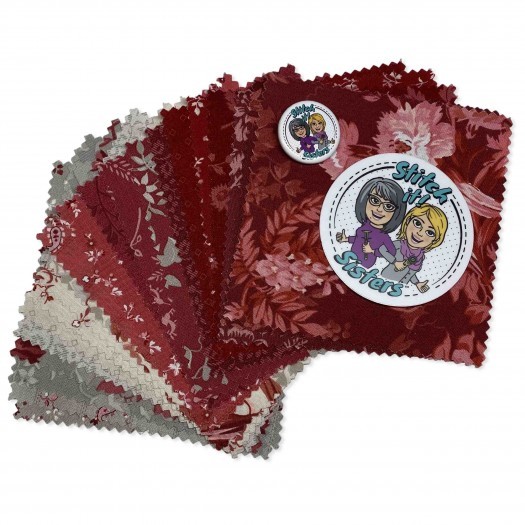
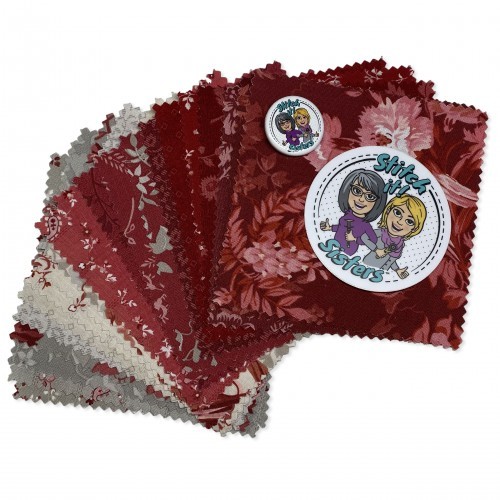
For a chance to be the random winner of a Stitch it! Sisters 5″ Fabric Short Stack with exclusive S!S button & sticker, please leave a comment below sharing where/how you’d use the NEW! Fun Fabric Caddy.
Nancy Zieman Productions will give away one Stitch it! Sisters 5″ Fabric Short Stack to one US resident in the 48 contiguous states. Winner must reply within 30 days to the official giveaway announcement email message – sent from Nancy Zieman Productions. Email Team NZP at info@ziemanproductions.com.

The randomly selected winner of a Stitch it! Sisters 5″ Fabric Short Stack with exclusive S!S button & sticker, from the February 11 Blog Post, Watch Stitch it! Sisters on our NEW! YouTube Channel is A. Rock.
Their comment is: Will definitely start watching regularly! Will start with a pot holder!
Be sure to join in and follow the 2020 Nancy Zieman Productions Pillow Sewing Challenge at the NZP Blog. Find Pillow Sewing Challenge details on our Official Nancy Zieman Productions 2020 Pillow Sewing Challenge Launch Posting. Deadline to enter is Sunday, March 22, 2020.
Happy Sewing!
Team Nancy Zieman
Nancy Zieman Productions. LLC.
[image error]
Stitch it! Sisters is a production of NZ Productions LLC. Content in this feed is © copyright 2020 by Nancy Zieman Productions, LLC and may not be republished without written permission. You’re welcome to forward the email to a friend or colleague but it’s not okay to add the RSS feed automatically as content on a blog or other website. The FTC requires us to tell you that Nancy Zieman Productions, LLC has provided products by other companies in the course of doing business. The FTC requires us to advise you to take this information into consideration when reading this posting.
Make sure you are subscribed to Nancy Zieman Productions, LLC enews mailing list so you won’t miss a thing. Sign up at nancyzieman.com/blog/enews. And join us on YouTube, Facebook, Instagram and Pinterest!


February 29, 2020
NEW! Stitch it! Sisters Fun Fabric Caddy Program 110
NEW! Starting TODAY! Watch Stitch it! Sisters Program 110: Fun Fabric Caddy
NEW! Starting TODAY! Watch Stitch it! Sisters Program 110: Fun Fabric Caddy
Starting TODAY, watch the NEW! Stitch it! Sisters Program 110: Fun Fabric Caddy Video with hosts Deanna Springer and Dana Casey. In this video, the Stitch it! Sisters share step-by-step fabric cutting and sewing techniques for making NZP’s NEW! Fun Fabric Caddy from our NEW! Fun Fabric Caddy Pattern.
Then, head over to the shopnzp.com and purchase our exclusive NEW! Fun Fabric Caddy & Fabric Bin Bundle Box designed by the Stitch it! Sisters! This NEW! Fabric Caddy Bundle Box features NZP’s Afternoon Picnic Fabrics by Riley Blake Designs, and includes ALL SUPPLIES needed to make one Fun Fabric Caddy and one Fabric Bin, including: Afternoon Picnic Black Floral, Afternoon Picnic Blue Gingham Fabric, Pellon ShirTailor Interfacing, Pellon Peltex, and our NEW! Fun Fabric Caddy Pattern – with Classic Timesaving Tips by Nancy Zieman — you’ll supply the thread. Quantities are limited.
SHOP our NEW! Patterns and Exclusive Bundle Boxes at shopnzp.com
NEW! Starting TODAY! Watch Stitch it! Sisters Program 110: Fun Fabric Caddy
Starting TODAY, watch the NEW! Stitch it! Sisters Program 110: Fun Fabric Caddy video. Sew our NEW! Fun Fabric Caddy and pick up ice coffees for your coworkers – or organize your sewing area with this unique Fun Fabric Caddy! – the sewing is streamlined with our simple sewing steps and Classic Timesaving Sewing Tips by Nancy Zieman! — you’ll supply the thread. Quantities are limited.
SHOP our NEW! Patterns and Exclusive Bundle Boxes at shopnzp.com
Then, stop back next Tuesday – right here at the NZP blog – when Deanna shares her Fun Fabric Caddy Sewing Tutorial with our easiest ever sewing techniques, and Timesaving Sewing Tips by her longtime friend and sewing mentor, Nancy Zieman, and see how using the right tools makes the sewing process enjoyable, even for a beginner!
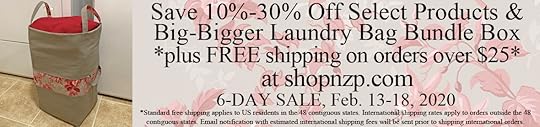
SAVE 10%-30% Off Select Products at shopnzp.com

Follow the Stitch it! Sisters on Facebook by clicking the “Like” and “Follow” buttons at facebook.com/stitchitsisters.
Stitch it! Sisters is a production of NZ Productions LLC. We’ll be releasing a new video – every few weeks – right here on the NZP Blog. Make sure you are subscribed to Nancy Zieman Productions E-news mailing list – so you won’t miss a thing! Sign up and receive email updates from Nancy Zieman Productions at Sign up and receive email updates from Nancy Zieman Productions at nancyzieman.com/blog/enews.
Visit the NEW! NZP Online Shop for the latest tools, patterns, fabrics and more at shopnzp.com!
Visit shopnzp.com, or click the “ shop ” tab
at the top of the NZP blog, anytime!
SHOP our NEW! Patterns and Exclusive Bundle Boxes at shopnzp.com
For a chance to be the random winner of a Stitch it! Sisters 5″ Fabric Short Stack with exclusive S!S button & sticker, please leave a comment below sharing your thoughts about our NEW! Fun Fabric Caddy sewing project.
Nancy Zieman Productions will give away one Stitch it! Sisters 5″ Fabric Short Stack to one US resident in the 48 contiguous states. Winner must reply within 30 days to the official giveaway announcement email message – sent from Nancy Zieman Productions. Email Team NZP at info@ziemanproductions.com.

The randomly selected winner of a Pen Style Chaco Liner from Clover, from the February 22 Blog Post, FREE! Faux Fur Infinity Scarf Sewing Tutorial by Team NZP, is Janice Nagle.
Her comment is: I’ve been working on baby quilts for charity. I love “fearless finishes”” by Nancy. Since I’m a beginning quilter, these techniques have been a life saver! I only do straight line quilting with a walking foot. I think the chaco pen style liner would be perfect for marking the quilting lines on my baby quilts!
Happy Sewing!
Team Nancy Zieman
Nancy Zieman Productions. LLC.
[image error]
Stitch it! Sisters is a production of NZ Productions LLC. Content in this feed is © copyright 2020 by Nancy Zieman Productions, LLC and may not be republished without written permission. You’re welcome to forward the email to a friend or colleague but it’s not okay to add the RSS feed automatically as content on a blog or other website. The FTC requires us to tell you that Nancy Zieman Productions, LLC has provided products by other companies in the course of doing business. The FTC requires us to advise you to take this information into consideration when reading this posting.
Make sure you are subscribed to Nancy Zieman Productions, LLC enews mailing list so you won’t miss a thing. Sign up at nancyzieman.com/blog/enews. And join us on YouTube, Facebook, Instagram and Pinterest!
February 27, 2020
Fearless Quilting Finishes Part Two on The Best of Sewing With Nancy
 Today’s Sewing With Nancy online featured video is Fearless Quilting Finishes, Part 2. During this 30-minute show you’ll learn three quilting options: stitching in the ditch, decorative “tie” stitching, and stippling.
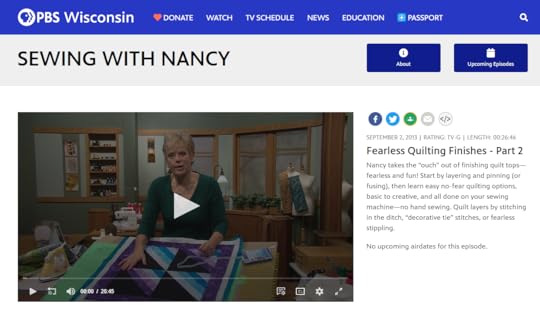
It’s easy to show stippling, but not as effective to write about it. After all, it’s the action that causes many to shy away from this particular quilting process. So, what better way to teach the technique than to click here and watch Fearless Quilting Finishes!
Stippling Review
Setting up your sewing machine is the first step in learning stippling.
Lower the feed dogs.
Attach a quilting foot.
Set the machine for a straight stitch.
Choose a thread that matches the background, or use a variegated thread as featured in the quilted project.
Use a needle compatible with the thread. With the thicker variegated thread, We suggest a topstitching needle—the large eye accommodates the thread.
Helpful notions
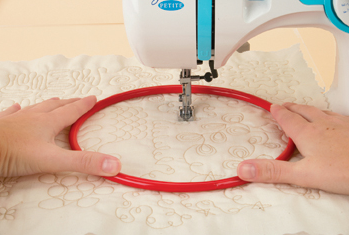
With the feed dogs lowered, you’ll be guiding and moving the quilt layers underneath the needle area. This is the motion or process that makes many people leery! Consider using a Supreme Slider on the bed of the machine. We use it since it helps the fabric move effortlessly under the needle. It has a Teflon top and a tacky underside that sticks to the machine.
To help control the fabric, comparable to the steering wheel on a car, use a Quilt Halo. Position the halo on top of the basted quilt and slide it under the foot of the machine. Then, hold the sides of the notion using gentle pressure. The tacky underside of the Quilt Halo grips the fabric while giving you a sense of control.
Begin by stippling a small project
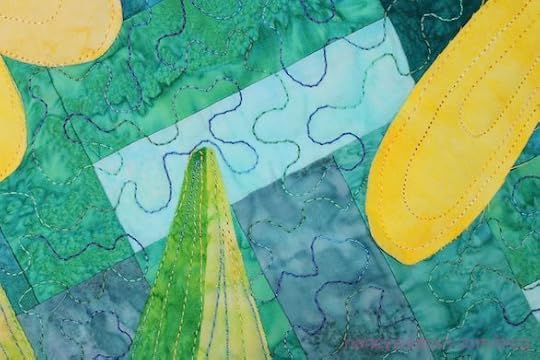
Choose a small quilting project for your first stippling adventure such as a placemat or small wall hanging, Then, move the fabric under the needle to create medium to even large “puzzle-end” shapes. Big shapes are okay, in fact that’s the best way to learn. Just be consistent in size.
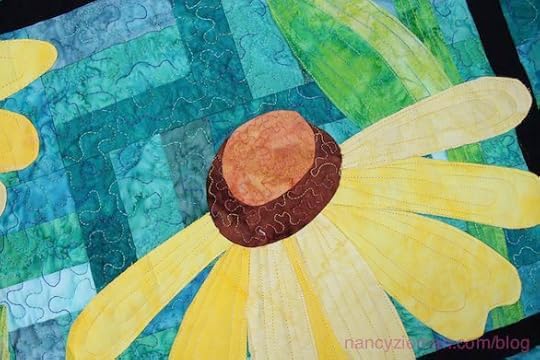
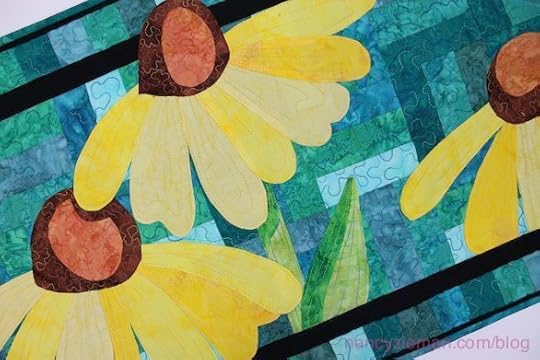
Or, stipple following the shape of the design as featured in the petals and leaves of the coneflower. It’s best to watch the process online!

Watch Fearless Quilting Finishes (Part 1, Part 2 and Part 3) on The Best of Sewing With Nancy.
The randomly selected winner of a Stitch it! Sisters 5″ Fabric Short Stack with S!S button & sticker from the February 18 Blog Post, NEW! Big-Bigger Laundry Bag Sewing Tutorial is Jenise LeMay.
Happy Quilting!
Team Nancy Zieman
Nancy Zieman Productions. LLC.
[image error]
Stitch it! Sisters is a production of NZ Productions LLC. Content in this feed is © copyright 2019 by Nancy Zieman Productions, LLC and may not be republished without written permission. You’re welcome to forward the email to a friend or colleague but it’s not okay to add the RSS feed automatically as content on a blog or other website. The FTC requires us to tell you that Nancy Zieman Productions, LLC has provided products by other companies in the course of doing business. The FTC requires us to advise you to take this information into consideration when reading this posting.
Make sure you are subscribed to Nancy Zieman Productions, LLC enews mailing list so you won’t miss a thing. Sign up at nancyzieman.com/blog/enews. And join us on YouTube, Facebook, Instagram and Pinterest!
February 26, 2020
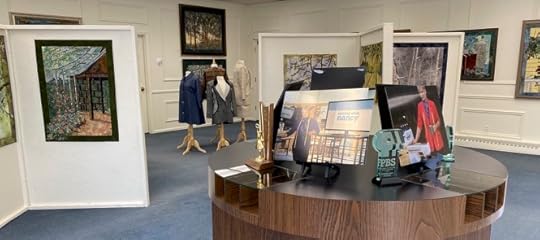
Celebrating Nancy Zieman Fiber Arts Exhibit on Display this March in Wisconsin


Nancy Zieman Fiber Arts Exhibit on Display This Winter in Beaver Dam, Wisconsin

Make plans this March to visit the Celebrating Nancy Zieman Fiber Arts Exhibit – hosted by the Dodge County Center for the Arts, in Beaver Dam, Wis., February 28 through March 29, 2020. The Celebrating Nancy Zieman Exhibit features a large collection of original Landscape Wall Quilts designed and sewn by Nancy Zieman. Zieman learned the art of landscape quilting from her longtime friend, Natalie Sewell of Madison Wis.
Nancy Luedtke Zieman was born, on June 21, 1953, and she passed away November 14, 2017, at the age of 64. Today we celebrate Nancy as a businesswoman, home economist, national sewing authority, daughter, niece, sister, aunt, wife, mother, grandmother, friend, and inspiration to all.

Nancy fulfilled her true calling as an educator and inspiration to the world around her. Nancy touched the lives of millions as they stitched alongside, or simply tuned in to watch, the inimitable Nancy Zieman and guests on Public Television.
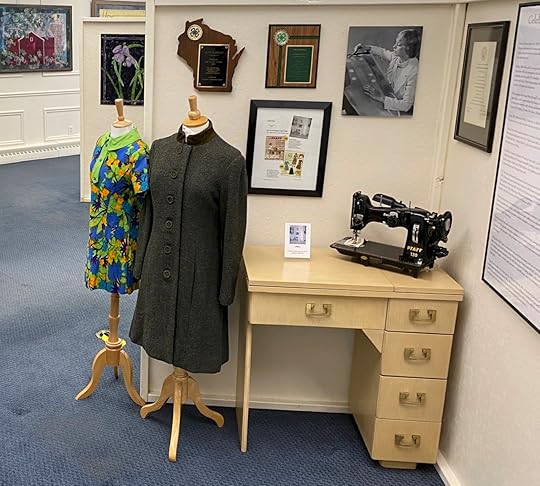
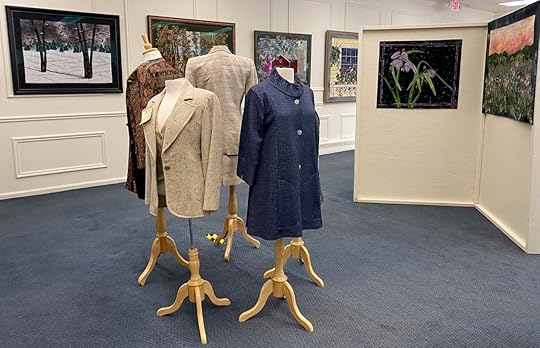
Nancy Luedtke Zieman was born to Barbara and Ralph Luedtke on Father’s Day in 1953, and she grew up on her family’s dairy farm—near Winneconne, Wisconsin. This special Celebrating Nancy Zieman Exhibit includes images, awards, and early garments sewn by Nancy—including 4H projects from the 1960s.
In 1971 Nancy graduated high school in Winneconne, WI, and later graduated in 1975 from University of Wisconsin–Stout, where she studied clothing textiles design and journalism.
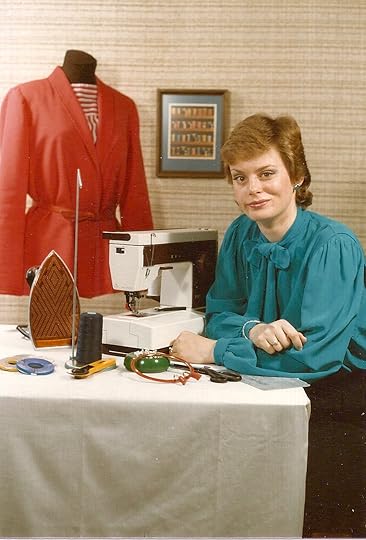
In 1979, Nancy started Nancy’s Notions at her kitchen table. Nancy grew her business at home, later moved to a building on her husband Richard’s parents farm, then opened the Nancy’s Notions catalog warehouse/showroom in Beaver Dam, WI, in 1985. At the same time, the couple welcomed their first son Ted in 1982, and their second son Tom in 1991.
View articles from Nancy’s personal collection, including the very first “Nancy’s Notions” one-sheet product sale flyer, along with first edition sewing books—written by Nancy.
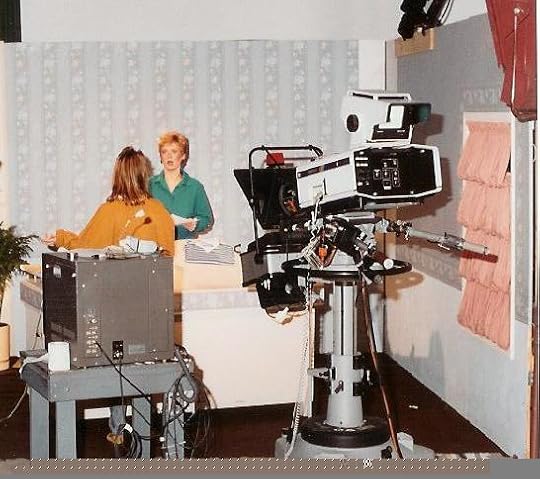 Nancy began her TV show Sewing With Nancy in 1982. Since 1992, PBS Wisconsin in Madison, Wis. has been Nancy’s partner in television production with Laurie Gorman serving as the executive director for the past 25 years. Nancy recorded 35 years of how-to educational programing and is the longest running sewing show on TV. Sewing With Nancy continues to air on Public Television, Create TV, 24/7/365 at NancyZieman.com, and on YouTube.
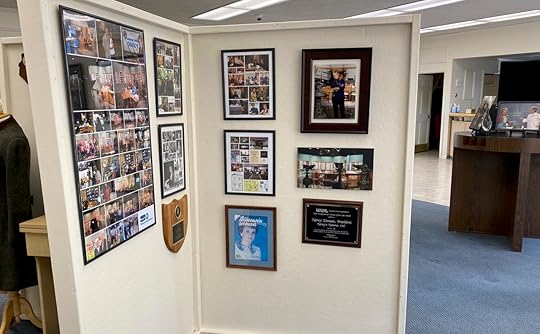
Included in the Celebrating Nancy Zieman Exhibit, are images of Nancy with friends Gail Brown, Mary Mulari, Eileen Roche, and Natalie Sewell, images of Sewing With Nancy behind the scenes.
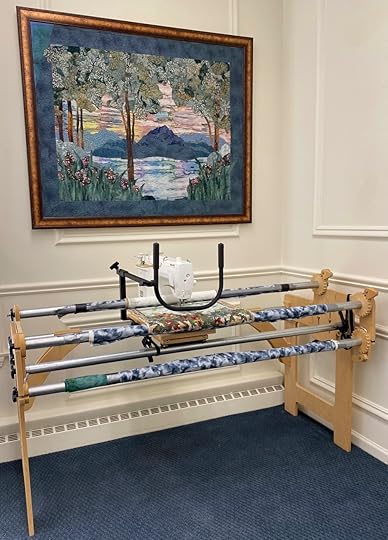
View Nancy’s very own machine-quilting frame and Baby Lock Sewing Machine—used by Nancy to sew nearly 70 landscape quilts. Also on display is Nancy’s Bible along with an original landscape quilt made by Nancy—as a gift for her church.
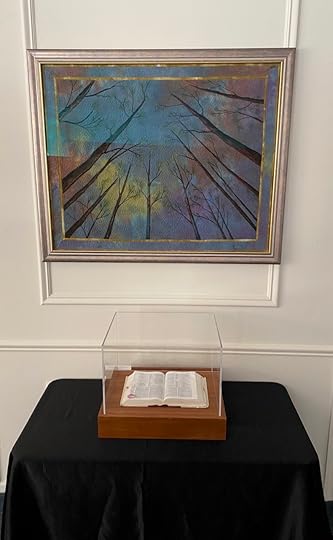
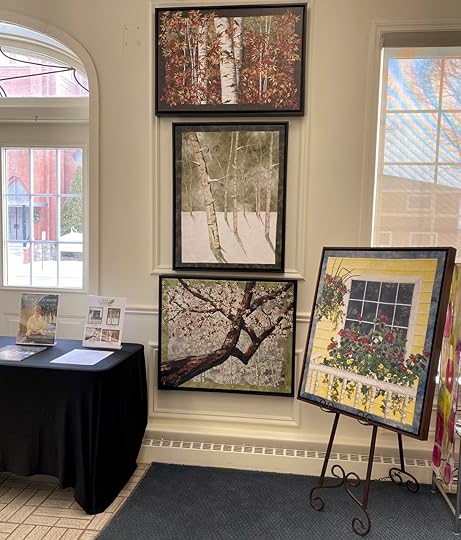
The Celebrating Nancy Zieman Exhibit also includes a gallery of Original Giclee Canvas Landscape Art Prints by Nancy Zieman.
The Celebrating Nancy Zieman Exhibit will be on display February 28 through March 29, 2020 – in the gallery of Dodge County Center for the Arts and is open free of charge to the public from 2 p.m. to 5 p.m. Thursday through Friday, 11 a.m. to 5 p.m. on Saturday, and Sunday 1 p.m. to 4 p.m. Exhibit is closed Monday through Wednesday.
There will be an opening reception for the Celebrating Nancy Zieman Exhibit Friday February 28th from 6 p.m. to 8:30 p.m.
Celebrating Nancy Zieman Fiber Arts Exhibit
February 28–March 29, 2020
Dodge County Center For The Arts
130 W Maple Ave, Beaver Dam, WI 53916

Are you traveling through Wisconsin, now through March 29? Please share a comment below for a chance to be the random winner of Richard Zieman’s new book,Nancy Zieman the Rest of the Story—A Memoir of Faith, Family, and Friends.

The randomly selected winner of a Stitch it! Sisters 5″ Fabric Short Stack with S!S button & sticker from the February 18 Blog Post, NEW! Big-Bigger Laundry Bag Sewing Tutorial is Jenise LeMay.
Her comment is: I would make one for my son at college – it would be much sturdier than the mesh one he is using!
Happy Sewing,
Team Nancy Zieman
Nancy Zieman Productions. LLC.

Content in this feed is © copyright 2019 by Nancy Zieman Productions, LLC and may not be republished without written permission. You’re welcome to forward the email to a friend or colleague but it’s not okay to add the RSS feed automatically as content on a blog or other website. The FTC requires us to tell you that Nancy Zieman Productions, LLC has provided products by other companies in the course of doing business. The FTC requires us to advise you to take this information into consideration when reading this posting.
Make sure you are subscribed to Nancy Zieman Productions, LLC enews mailing list so you won’t miss a thing. Sign up at nancyzieman.com/blog/enews. And join us on YouTube, Facebook, Instagram and Pinterest!
February 25, 2020
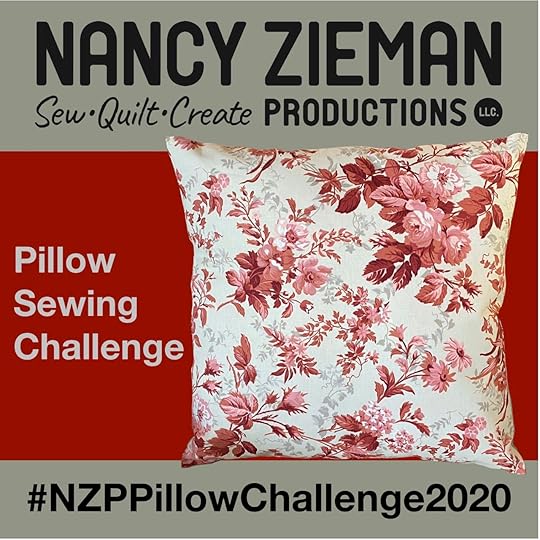
2020 NZP Pillow Sewing Challenge Announced & Pillow Sewing Challenge Round Up
The Nancy Zieman Productions Team is excited to announce the 2020 Pillow Sewing Challenge, taking place February 25– March 24, 2020! You’re invited to participate in the Nancy Zieman Productions 2020 Pillow Sewing Challenge. Brainstorm, browse, design, and plan. Then, sew a pillow! Enter the NZP 2020 Pillow Sewing Challenge by emailing one pillow image to info@ziemanproductions.com.
Make a pillow to showcase your sewing talents. Entries may be for any occasion, any color, or any size (that fits on a sofa or comparable household furniture). Sew a pillow using as much imagination as you like. You may enter ONE pillow: Pillow must be completed within the last year and may not have been entered into previous Nancy Zieman Productions Pillow Sewing Challenges.

How to Enter
2020 Nancy Zieman Productions Pillow Sewing Challenge Guidelines
Select or create your design. All sewing, quilting, serging, machine embroidery, and embellishment techniques are eligible. Pillow must be made within the last year and may not have been entered into previous NZP Pillow Sewing Challenges.
How to enter: Send ONE high-resolution quality image of your Pillow to info@ziemanproductions.com by 11:59 p.m. CST on Sunday, March 22, 2020. Include your full name, hometown, and a sentence or two about your Pillow.
One entry per sewist; open to US residents in the 48 contiguous states only.
All Pillows will be judged, and winning entries will receive a prize from our generous sponsors! Explore the full list of prizes, totaling over $875 (see below).
Make sure you are subscribed to Nancy Zieman Productions enews—so you won’t miss a thing. Sign up today! Join us on Facebook, Pinterest, Instagram, and YouTube.
Grab our Pillow Sewing Challenge blog badge and let your friends know about this fun Sewing Challenge.
Share your progress and projects on your social media sites using the hashtag: #NZPPillowChallenge2020
Schedule:
February 25, 2020—Pillow Challenge Kick Off
March 22, 2020—Pillow Challenge Entry Deadline
March 23, 2020—A Panel of Judges Review Entries
March 24, 2020—Winners Announced! All decisions made by judges are final.
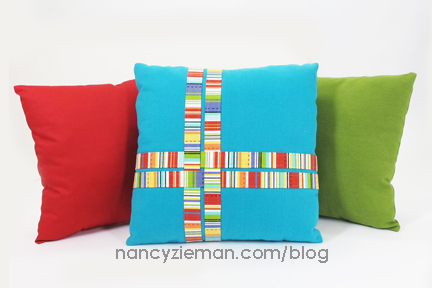
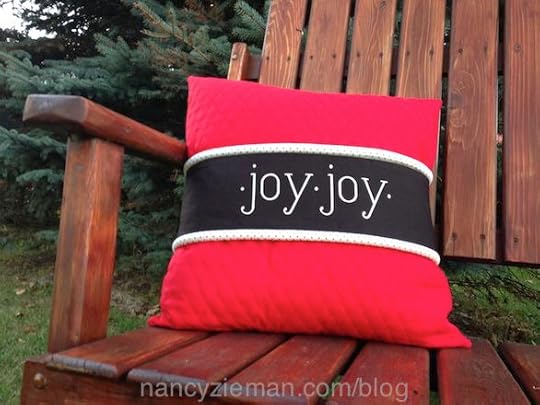
As the calendar starts to turn toward Springtime, it’s time to start thinking spring/summer decorating. Pillows are a go-to sewing project for any skill level, they’re quickly sewn in most any size, and they can be made in multiple styles!
Tutorials Included
Nancy Zieman’s Off-Kilter Log Cabin Quilt Block Pillow
Wrapped Pillow Corners
Boxed Pillow Corners
Envelope Pillow Backs
Embroidered Pillow Wraps
Recycled Button-up Shirt Pillow
Throw Pillows Made from Quilt Blocks
Pillows from Quilted Fabrics
NEW! Afternoon Picnic Floating Star Pillow Tutorial
Nancy Zieman’s Off-Kilter Log Cabin Quilt Block Pillow

Nancy designed this Off-Kilter Log Cabin Quilt Block Pillow for the 2017 NZP Pillow Challenge. Made from five cotton solid fabrics, this pillow design features Nancy’s modern approach to a traditional Log Cabin quilt block design. The color choice gives the pillow a mid-century modern feel—the process is Nancy’s time-honored Stitch ‘n Flip technique.
Wrapped Pillow Corners
Pillows, collars, and cuffs are just a few of the areas where corners need to be sewn. Cast aside the traditional technique and incorporate Nancy Zieman’s “absolute easiest way” to handle sewing corners. Learn to make crisp pillow corners using this tutorial .
Boxed Pillow Corners
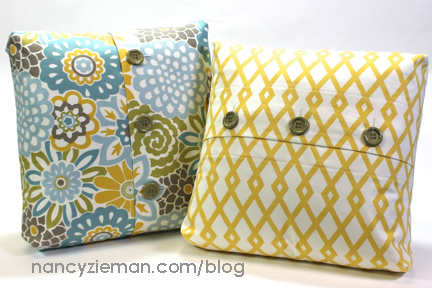
Give your living space a breath of fresh air by sewing new pillows. These boxed-cornered pillows are almost effortless to make. Learn how to add a neat boxy edge to each of the four pillow corners – with our Boxed-Corner Pillow Sewing Tutorial .
Envelope Pillows
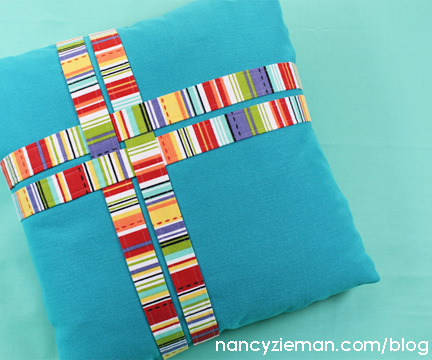
You can, of course, make any pillow design you wish. We thought this easy pattern might spark your creative juices. Our Lattice Pillow features four machine appliquéd fabric strips interlaced on a solid background square. The pillow back is created envelope style and uses a hook-and-loop closure!
Embroidered Pillow Wraps
You can easily change your seasonal home décor with a little fabric and a great embroidery design. With our Pillow Wrap Sewing Tutorial , embroider a seasonal motif on fabric or choose an elegant fabric design to complement your décor. Then, follow our simple directions and create a Pillow Wrap , or two! We’ve made our pillow wrap two-sided, which will save time, fabric, and add a splash to the family room – all year ’round.
Recycled Button-up Shirt Pillow
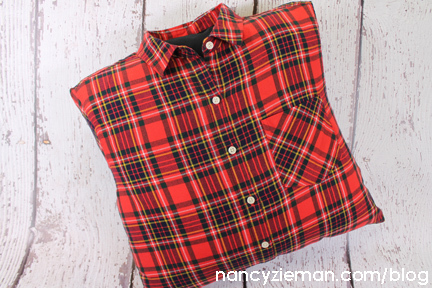 Sew our Lumberjack Pillow—from a flannel shirt! We call this recycled-garment project our Lumberjack Pillow, although you could make this from any loved ones’ shirt and make a memory pillow. Our technique fits the shirt around a pillow form insert, allowing for many different shirts and pillow sizes to be easily created.
Throw Pillows Made From Quilt Blocks

Along our quilting journey, we try new techniques and test interesting ideas. Sometimes these valuable lessons and attempts yield “orphan blocks” or leftover quilt blocks – that don’t belong to a larger quilt. Take one or more of these treasured quilt blocks and sew them into Quilt Block Pillows – our simple idea doesn’t require any additional quilting!
Pillows from Quilted Fabrics

Making pillows from double-sided prequilted fabrics is easier than you think! Nancy was smitten with the quilted eyeglass frames and polka dot duo fabrics from Riley Blake. Nancy just knew that a Trio of Pillows were destined for this playful fabric.
Afternoon Picnic Floating Star Pillow Tutorial
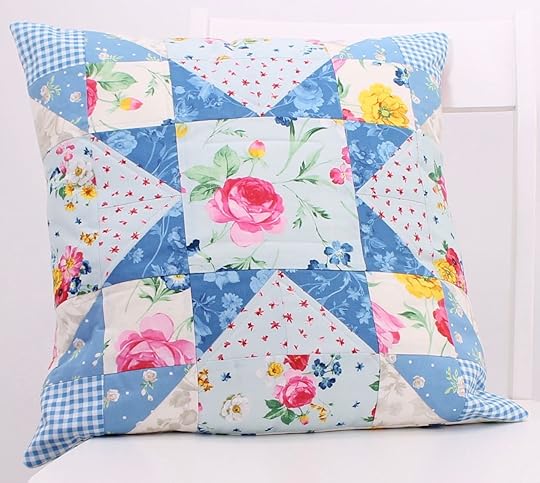
Stitch our beautiful Afternoon Picnic Floating Star 18-inch quilt block, and showcase your quilt piecing talents. No time right now to stitch an entire bed quilt? No worries! Our one-block pillow project is for you! We’ve selected eight fat quarters from Nancy’s Afternoon Picnic Fat Quarter Pack to make our striking pillow. See how quick this quilt block comes together with TEAM NZP’s FREE! Afternoon Picnic Floating Star Pillow Sewing Tutorial!
Pillow Size Reference Chart:

Over $875 in prizes! Thank you to our generous 2020 Pillow Sewing Challenge Sponsors!

C&T Publishing: Gift card to ctpub.com A $200 value

Clover-USA: Gold Eye Milliners, Gold Eye Sharp Needles (No. 10), Threader and Petit Cut, Tailor’s Chalk (White), Seam Ripper, Water Erasable Marker (Thick), Protect ‘n Grip Thimble (Medium), Wonder Clips (Asst. 10pc), Bordeaux Ultimate Shears 200, Rotary Cutter (45mm), I Sew For Fun Pin Caddy, I Sew For Fun Heart Shaped Pins, I Sew For Fun Roll & Press & I Sew For Fun Point 2 Point Turner. A $184 value

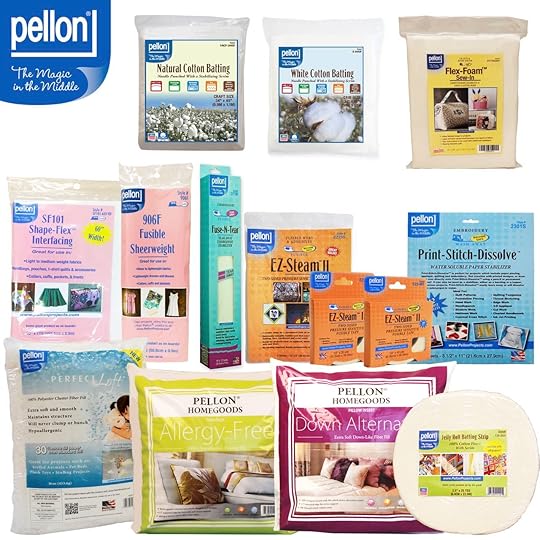
Pellon: Perfect Loft Cluster Fill: PLOFT 16, Allergy-Free Pillow Insert: AFPI1616, Down-Alternative Pillow Insert: DAPI1616, Print-Stitch-Dissolve: 2301S, Fusible Sheerweight: 906F-201YD, Shape-Flex: SF101-601YD,Flex Foam: FF776020P, EZ-Steam II Sheets: EZ25S, EZ Steam II Tape: EZ2-20T, EZ-Steam II Tape: EZ2-40T, Fuse-N-Tear: 371R, 100% Cotton Jelly Roll Batting Strip: FJR-2525, Craft Size Natural Cotton Batting: F/NCP3445 & Craft Size White Cotton Batting: GB-3445. A $145 value

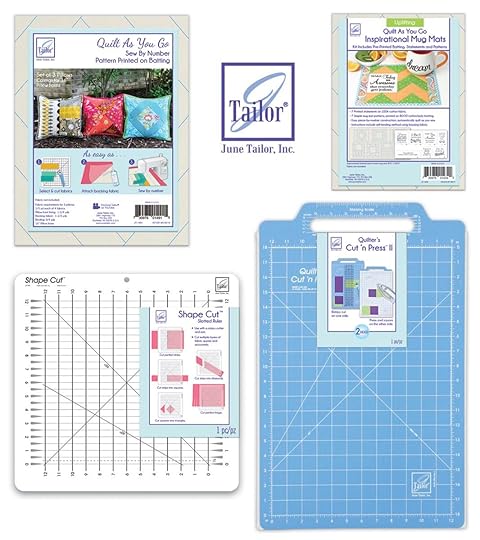
June Tailor: Quilt As You Go set of 3 Pillow Covers, Quilt As You Go set of 7 Uplifting Inspirational Mug Mats, Shape Cut Ruler & Cut ‘n Press II. A $130 value

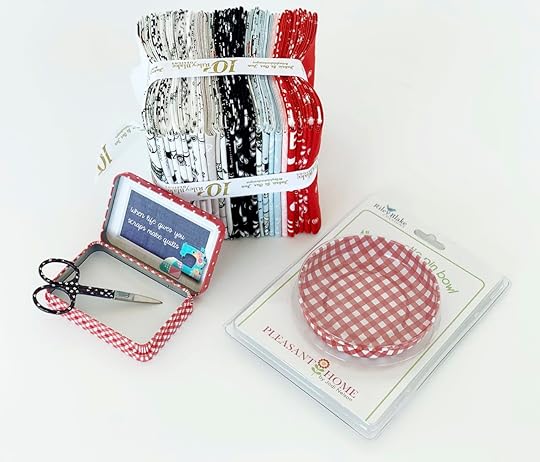
Riley Blake Designs: Couturiere Parisienne Fat Quarter Bundle, Pleasant Home 4″ Pin Bowl, Travel Magnetic Pin Tin & Blossom Embroidery Scissors. A $98 value

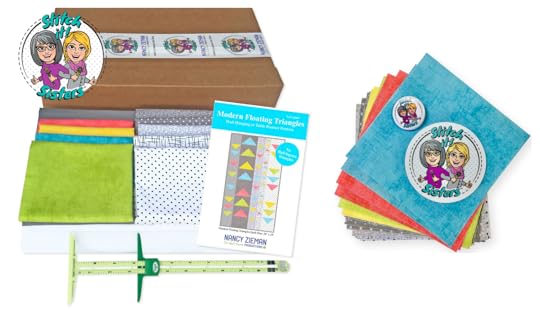
Stitch it! Sisters: NEW! Modern Floating Triangles Wall Hanging/Table Runner Bundle Box with Supersize 5-in-1 Sliding Gauge and Stitch it! Sisters 5″ Fabric Short Stack with S!S button & sticker. A $75 value

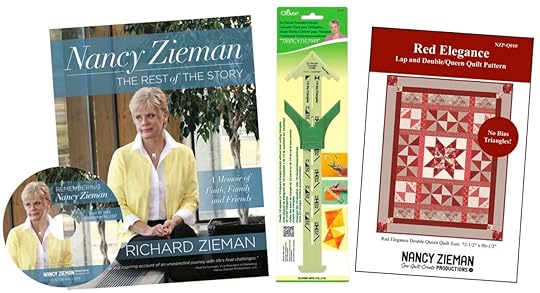
Nancy Zieman Productions: Nancy Zieman, The Rest of the Story Book with DVD by Richard Zieman, Nancy Zieman’s No-Hassle Triangles Gauge by Clover and NEW! Red Elegance Lap and Double/Queen Quilt Pattern. A $53 value

For a chance to be the random winner of a Red Elegance Stitch it! Sisters 5″ Fabric Short Stack with S!S button & sticker, please leave a comment below sharing where you’ll showcase your new pillow sewing project: Family Room, Bed Room, RV, or ?
Nancy Zieman Productions will give away one Stitch it! Sisters 5″ Fabric Short Stack to one US resident in the 48 contiguous states. Winner must reply within 30 days to the official giveaway announcement email message – sent from Nancy Zieman Productions. Email The NZP Team at info@ziemanproductions.com.
Be sure to join in and follow the 2020 Nancy Zieman Productions Pillow Sewing Challenge at the NZP Blog. Deadline to enter is, Sunday, March 22, 2020.
Happy Sewing,
Team Nancy Zieman
Nancy Zieman Productions, LLC.
[image error]
Stitch it! Sisters is a production of NZ Productions LLC. Content in this feed is © copyright 2020 by Nancy Zieman Productions, LLC and may not be republished without written permission. You’re welcome to forward the email to a friend or colleague but it’s not okay to add the RSS feed automatically as content on a blog or other website. The FTC requires us to tell you that Nancy Zieman Productions, LLC has provided products by other companies in the course of doing business. The FTC requires us to advise you to take this information into consideration when reading this posting.
Make sure you are subscribed to Nancy Zieman Productions, LLC enews mailing list so you won’t miss a thing. Sign up at nancyzieman.com/blog/enews. And join us on YouTube, Facebook, Instagram and Pinterest!
February 22, 2020
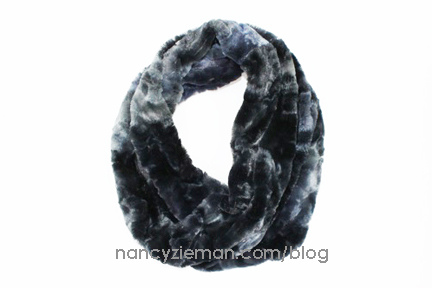
FREE! Faux Fur Infinity Scarf Sewing Tutorial by Team NZP
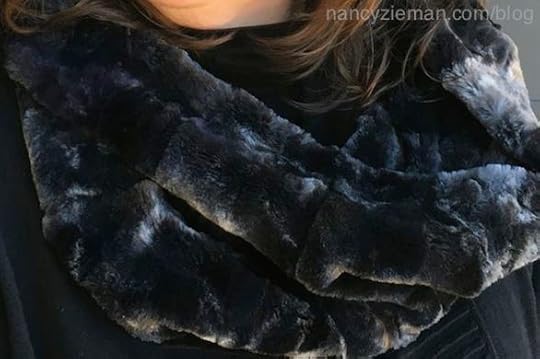
Stitch a warm and snuggly winter scarf with our FREE! Faux Fur Infinity Scarf Sewing Tutorial by Team NZP. If you’re in a cold climate, like the NZP Team in Wisconsin, you’re already familiar with “bundling up before heading out”. Take on winter in style with our Infinity Scarf! Yes, you can make a fabulous infinity scarf from faux fur!

SAVE 10%-30% Off Select NZP Sewing Tools and S!S Bundle Boxes, plus *FREE STANDARD SHIPPING on orders over $25* Now through February 29, 2020 at shopnzp.com.
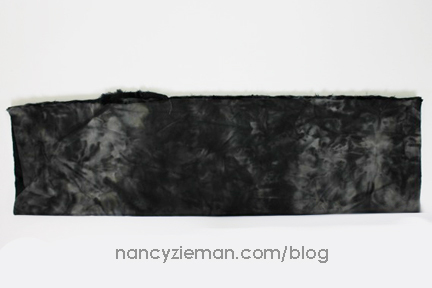
Deanna, from Team NZP, made this Faux Fur Infinity Scarf with 2/3 yd. faux fur. She’s also successfully stitched our infinity scarf from 1/2 yd. faux fur – cutting a faux fur fabric rectangle measuring 18″ x 40″.
Supplies
2/3 yd. Faux Fur Fabric
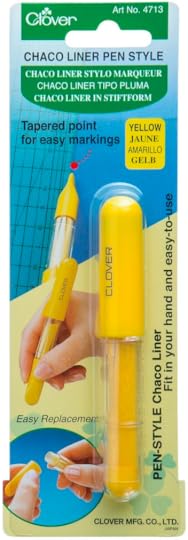
Clover’s Pen Style Chaco Liner
6-3/4″ Bordeaux Ultimate Scissors
5-in-1 Sliding Gauge
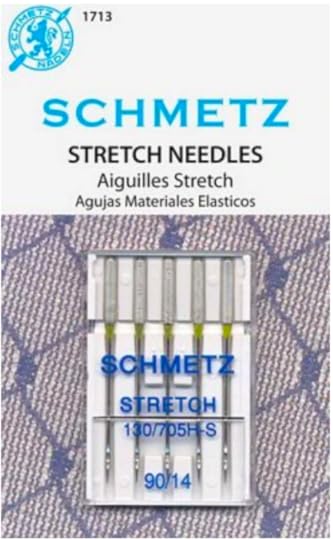
Schmetz 90/14 Stretch Needle
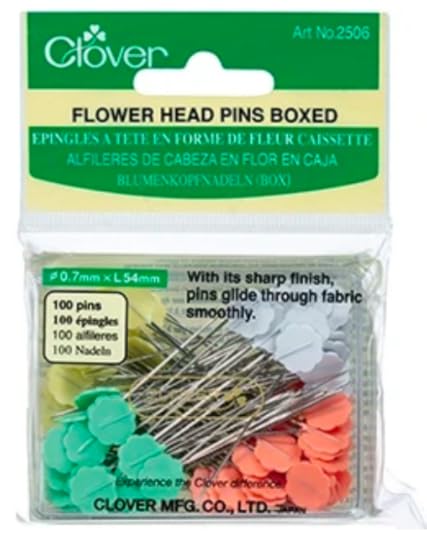
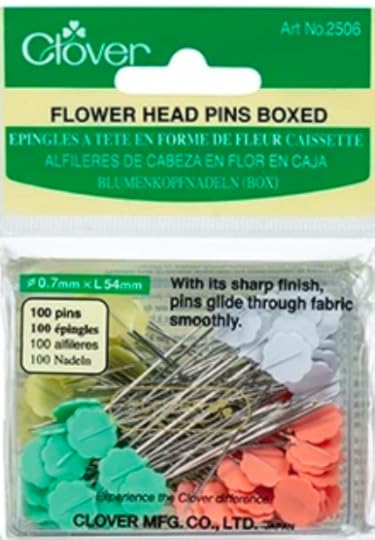
Flower Head Pins
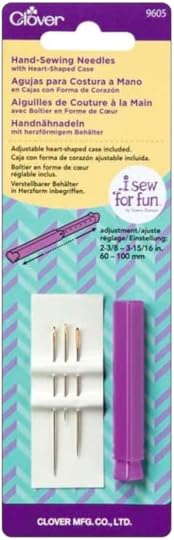
Hand Sewing Needles
Optional:
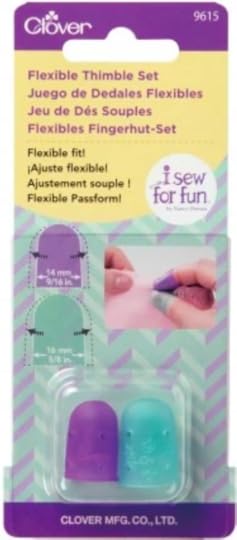
Protect ‘n Grip Thimble
Flexible Thimble Set
Cutting
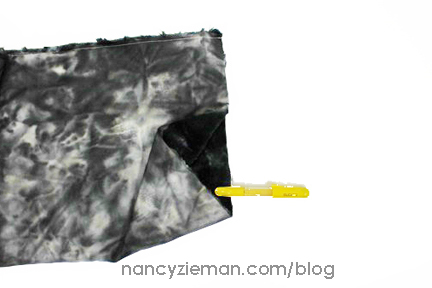
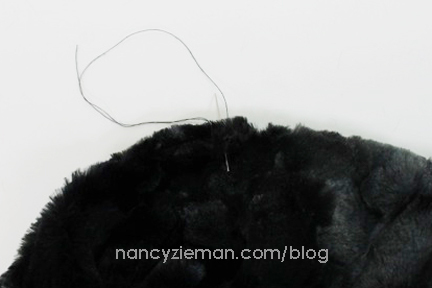
Measure and cut a faux fur rectangle measuring 24″ x 40″.
On fabric wrong side, mark cutting lines with Clover’s Chaco Liner .
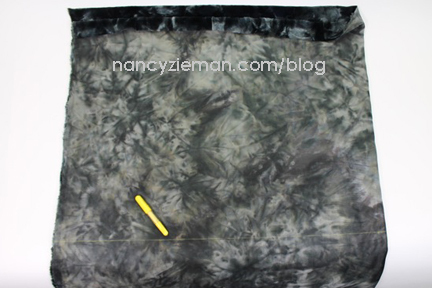
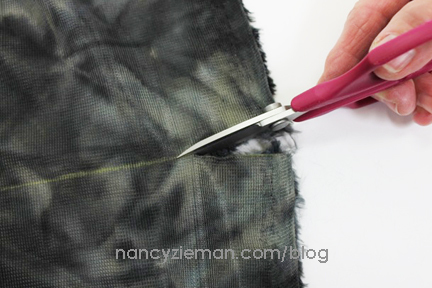
Using a 6-3/4″ Bordeaux Ultimate Scissors cut along marked lines, cutting only the fabric backing—not the fur.
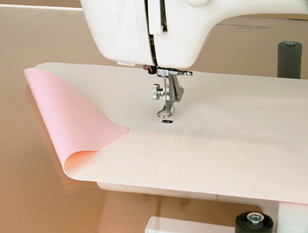
[image error]
Cut on marked lines with the tip of the scissors, cutting only the backing, not the fur. Cutting faux fur in the traditional manner leaves you with a complete mess of fur! If you happen to cut the fur, simply use a vacuum to help with the clean up! 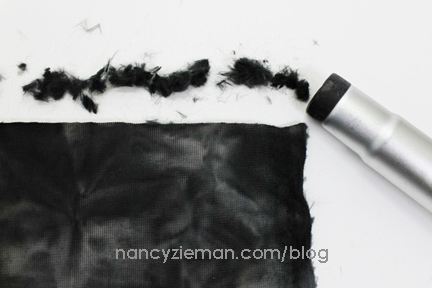
Faux Fur Scarf Sewing Tips
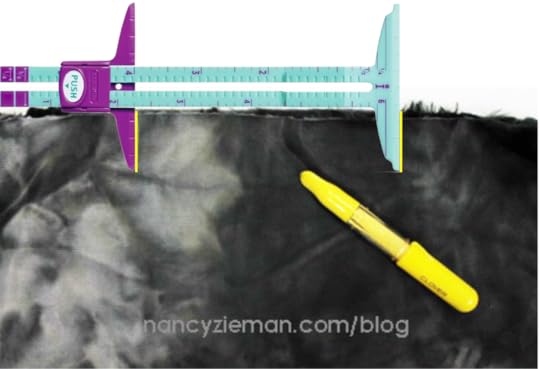
Using a 5-in-1 Sliding Gauge and Clover’s Chaco Liner , measure and mark a 4″–6″ distance along one long fabric edge. Mark the 4″–6″ distance at about 6-8″ from one end. This area will later remain unstitched.
Place faux fur right sides together, matching long 40″ edges. Pin .
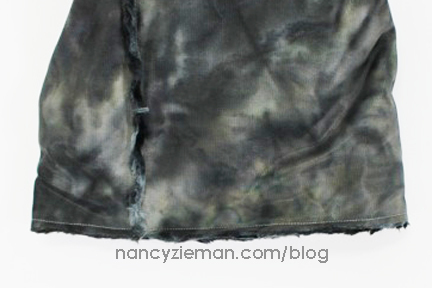
Using a Schmetz 90/14 Stretch Needle and 1/4″ seam allowance, stitch the long 40″ seam, backstitching on each side of the 4″-6″ opening.
Be sure to leave the 4″–6″ marked opening unstitched!
Stitching the long 40″ seam, creates a faux fur fabric tube.
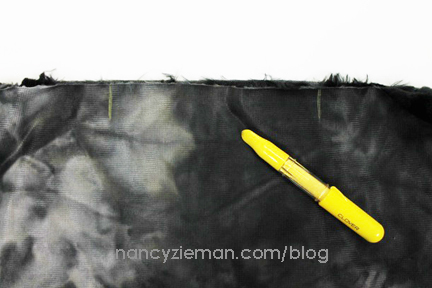
Using Clover’s Chaco Liner , place a mark on fabric wrong side – marking the fold line at one short end. Repeat marking the fold line at opposite short end.
Using a 6-3/4″ Bordeaux Ultimate Scissors, make a small 1/4″ snip/clip at each marked line.
Through the seam opening, turn the long tube end right side out.
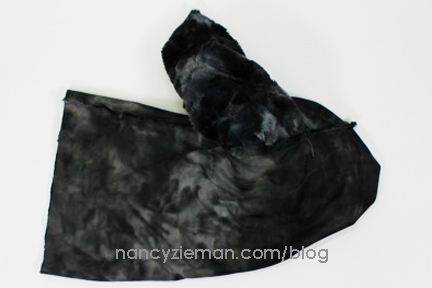
Give the scarf a half-twist while folding the tube onto itself, matching right sides of the short ends.
Align opposing seams and snips at the end to maintain the twist. Pin seam with long Flower Head Pins.
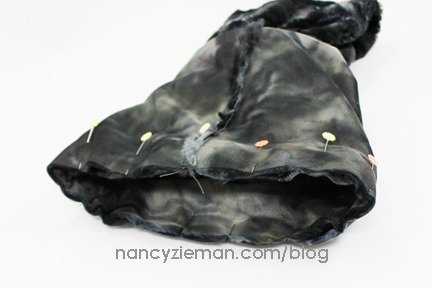
Sew scarf ends together, using 1/” Seam.
 .
.
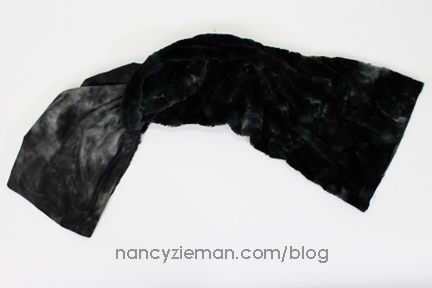
Turn the faux fur scarf – right side out - through the opening.
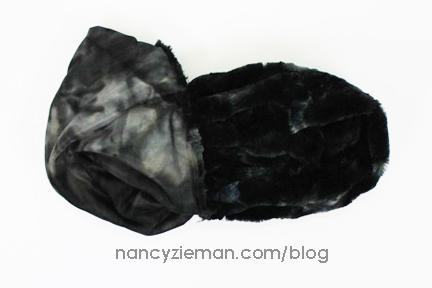
Stitch seam opening closed with a hand sewing needle and thread and optional thimbles.

Presto—a fabulous Faux Fur Infinity Scarf!
SAVE 10%-30% Off Select NZP Sewing Tools and S!S Bundle Boxes, plus *FREE STANDARD SHIPPING on orders over $25* Now through February 29, 2020 at shopnzp.com.
Watch Nancy’s Favorite Scarves to Sew Part One and Part Two on Sewing With Nancy online.
Fake fur scarves are most attractive made as an infinity scarf. Watch Nancy’s Favorite Scarves to Sew Part One on Sewing With Nancy and see how Nancy creates the twist design element when stitching an infinity scarf from knit fabrics on a serger.

For a chance to be the random winner of a Pen Style Chaco Liner from Clover, please leave a comment sharing what you’re sewing this winter.
Clover will give away one Pen Style Chaco Liner to one US resident in the 48 contiguous states. Winner must reply within 30 days to the official giveaway announcement email message – sent from Nancy Zieman Productions. Email Team NZP at info@ziemanproductions.com.

The randomly selected winner of a Stitch it! Sisters 5″ Fabric Short Stack with exclusive S!S button & sticker, from the February 14 Blog Post, NEW! Stitch it! Sisters Big Bigger Laundry Bag Program 109 is, Rita Skraba.

Her comment is: The big bigger laundry bag would be a great graduation gift and made even more special if monogrammed too!
The randomly selected winner of a Stitch it! Sisters 5″ Fabric Short Stack with S!S button & sticker, from the February 15 Blog Post, February 2020 NZP Block of the Month: Hearts & Gizzards Block, is Gloria Fraley.
Her comment is: I am excited to see how these eight blocks are to be used in the final quilt. The curves are a new quilting technique for me and the appliqué technique makes it so much easier.
Happy Sewing!
Save
Save
Team Nancy Zieman
Nancy Zieman Productions. LLC.
[image error]
Stitch it! Sisters is a production of NZ Productions LLC. Content in this feed is © copyright 2019 by Nancy Zieman Productions, LLC and may not be republished without written permission. You’re welcome to forward the email to a friend or colleague but it’s not okay to add the RSS feed automatically as content on a blog or other website. The FTC requires us to tell you that Nancy Zieman Productions, LLC has provided products by other companies in the course of doing business. The FTC requires us to advise you to take this information into consideration when reading this posting.
Make sure you are subscribed to Nancy Zieman Productions, LLC enews mailing list so you won’t miss a thing. Sign up at nancyzieman.com/blog/enews. And join us on YouTube, Facebook, Instagram and Pinterest!
February 20, 2020
Fearless Quilting Finishes Part One on The Best of Sewing With Nancy

Nancy Zieman was often asked, “How do you determine topics for your TV show, Sewing With Nancy?” Good question! There are many answers to that question—what she wanted you to learn, what she thought you’d like to know, what’s trendy in sewing, quilting, or embroidering . . . and the basics, there are always newcomers or those of us who need refresher courses.
The basics, that’s what drove Sewing With Nancy’s 3-part series, Fearless Quilting Finishes, teaching the basics of quilting borders, quilting, and binding.
During the first online Sewing With Nancy streaming video, you’ll learn eight, yes eight, techniques in one 30-minute show! From the most simple border to some artsy options!
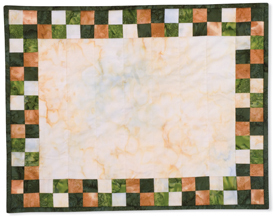
Checkerboard Border Preview
Cut crosswise strips of light and dark fabrics to use in the main quilt design. (Nancy used 1-1/2″ strips in this small wall quilt or table topper.)
Stitch together a light and a dark strip, right sides together. Press seam toward the dark fabric. Cut strips in half.
Stack two of the half-strips, right sides together, positioning the light coloration of one strip over the dark section of the second strip.
Subcut strips into sections the same width as the strip.
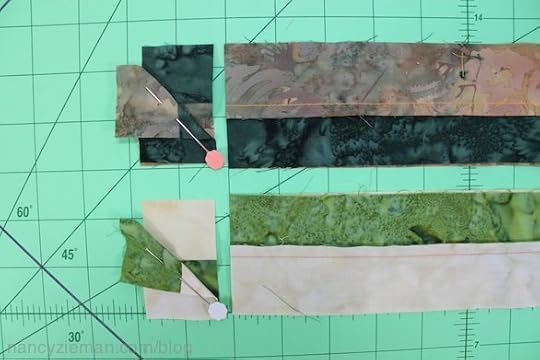
Join subcut pairs, right sides together, to form the 4-patch. Chain stitch pairs, one after the other.
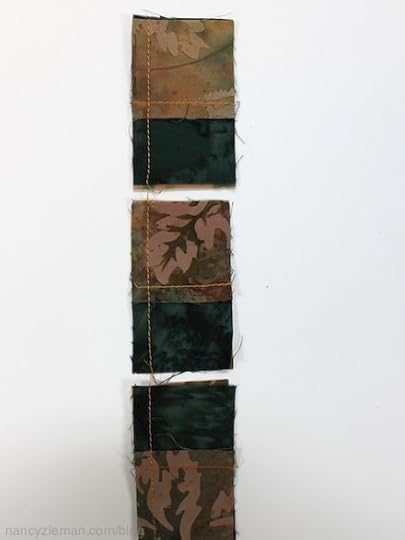
Press the seams open and lay out the 4-patch blocks to create a checkerboard border.
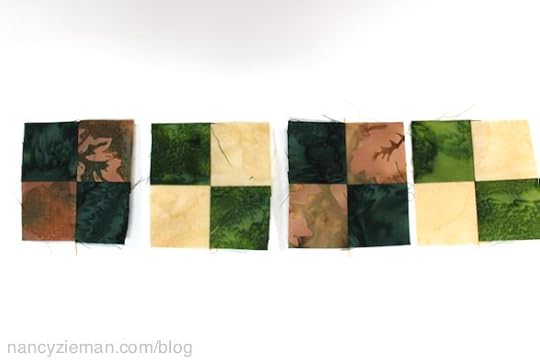
Simple, but creative, don’t you think? This border shines by itself!
Seven more ideas during the show!
Happy Sewing!
Team Nancy Zieman
Nancy Zieman Productions. LLC.
[image error]
Stitch it! Sisters is a production of NZ Productions LLC. Content in this feed is © copyright 2019 by Nancy Zieman Productions, LLC and may not be republished without written permission. You’re welcome to forward the email to a friend or colleague but it’s not okay to add the RSS feed automatically as content on a blog or other website. The FTC requires us to tell you that Nancy Zieman Productions, LLC has provided products by other companies in the course of doing business. The FTC requires us to advise you to take this information into consideration when reading this posting.
Make sure you are subscribed to Nancy Zieman Productions, LLC enews mailing list so you won’t miss a thing. Sign up at nancyzieman.com/blog/enews . And join us on Facebook, Instagram and Pinterest!
February 18, 2020
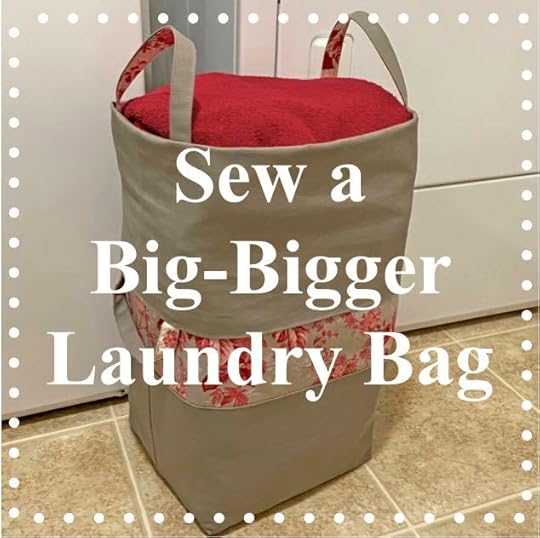
NEW! Big-Bigger Laundry Bag Sewing Tutorial
NEW! Watch Stitch it! Sisters Program 109: Big-Bigger Laundry Bag
NEW! Watch the NEW! Stitch it! Sisters Program 109: Big-Bigger Laundry Bag video with hosts Deanna Springer and Dana Casey. In this video, the Stitch it! Sisters share step-by-step fabric cutting and sewing techniques for making NZP’s NEW! Big-Bigger Laundry Bag from our NEW! Big-Bigger Laundry Pattern.
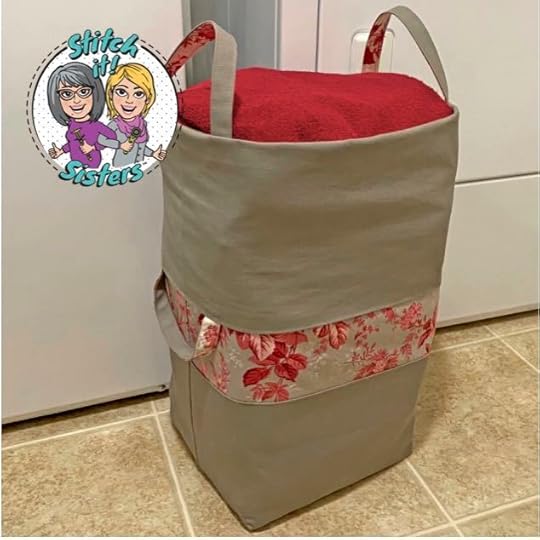
Watch the NEW! Stitch it! Sisters Program 109: Big-Bigger Laundry Bag video and learn step-by-step how to sew our NEW! Big-Bigger Laundry Bag. Sew a Big-Bigger Laundry Bag that expands to handle laundry and/or storage needs. It’s a bag or tote that has both function and style! Reverse the Big-Bigger Laundry Bag for a whole new look!
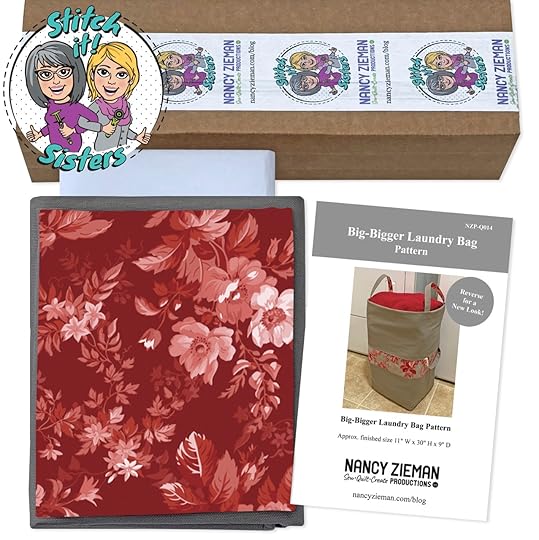
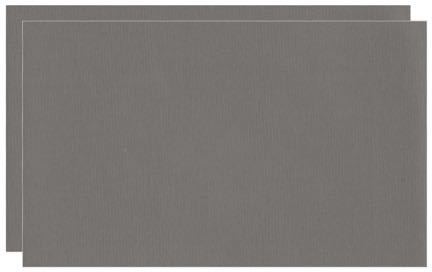
Then, head over to the shopnzp.com and purchase our exclusive NEW! Big-Bigger Laundry Bag Bundle Box designed by the Stitch it! Sisters! The NEW! Big-Bigger Bag Bundle Box is available in two fabric choices, and each Big-Bigger Bag Bundle Box includes ALL SUPPLIES needed to make one Big-Bigger Bag, including: Red Elegance Floral Fabric, Gray Cotton Canvas Fabric, Pellon Peltex, and our NEW! Big-Bigger Laundry Bag Pattern – with Classic Timesaving Tips by Nancy Zieman — you’ll supply the thread. Quantities are limited.

SHOP our NEW! Patterns and Exclusive Bundle Boxes at shopnzp.com
Watch the NEW! Stitch it! Sisters Program Program 109: Big-Bigger Laundry Bag video and learn how easy it is to sew our Big-Bigger Laundry Bag.
Big-Bigger Laundry Bag FREE! Sewing Tutorial
Sew our NEW! Big-Bigger Laundry Bag with our easiest ever sewing techniques, and Classic Timesaving Tips by Nancy Zieman, and see how using the right tools makes the sewing process enjoyable, even for beginners!
To make our NEW! Big-Bigger Laundry Bag, follow our easy instructions – included with our NEW! Big-Bigger Laundry Bag Pattern and NEW! Big-Bigger Laundry Bag Bundle Box!Note: All seam allowances are 1/4″ unless noted.
Prepare Fabrics:
Pre-shrink project fabrics by steaming and pressing, and steaming and pressing a second time, and then spray starch and press one more time – using June Tailor’s® Starch Savvy.
Cut Fabric and Interfacing
Streamline the sewing process by cutting easy fabric rectangles!
You’re the designer! Choose to make self-fabric bag handles with a 1″ Bias Tape Maker, or opt to make bag handles from ready-made cotton webbing (below).
Cut two 1-3/4″ crosswise fabric strips from cotton quilting fabric for self-fabric handles.
 Cut two 22″ x 36″ rectangles from cotton quilting fabric for outer bag.
Cut two 1-3/4″ crosswise fabric strips from canvas fabric for self-fabric handles.
 Cut two 22″ x 36″ rectangles from canvas fabric for inner bag.
Cut two 22″ x 14″ rectangles from canvas fabric for contrasting outer lower accent.

Cut one 9″ x 11″ rectangle from Pellon Peltex One-Sided Fusible Ultra Firm Stabilizer .
 Optional: Cut four 14″ lengths of Gray or Red Cotton Webbing (for handles made with webbing).
You’re the designer! Choose to make make bag handles from ready-made cotton webbing, or opt to sew self-fabric bag handles with a 1″ Bias Tape Maker (below).
Prepare Self-Fabric Bag Handles
Use a awl to help advance the fabric strip through the bias tape maker.
Pin fabric strip end to ironing board, and iron the folded fabric strip as you pull the bias tape maker.
Position Double-Sided Basting Tape on the backside of one folded canvas fabric strip. Finger press in place. Remove paper backing from tape.

Center and place one folded cotton quilting fabric strip over the tape on the folded canvas fabric strip, wrong sides together, and finger press to secure.

Edgestitch along the two long edges of fabric strip set.

Repeat steps above for remaining self-fabric handle fabric strips.
Sub-cut fabric strip sets into four 14″ handles.
 • Using Clover’s Hot Ruler and an iron, press under 1/2″ along each short end of handle strips. Place a Wonder Clip at each pressed handle end and set aside.
Optional: Prepare Ready-made Cotton Webbing Bag Handles:
Sub-cut purchased cotton webbing into four 14″ handles.
Using Clover’s Hot Ruler and an iron, press under 1/2″ along each short end of handle strips. Place a Wonder Clip at each pressed handle end and set aside.
 Prepare Bag Accent
Turn the two 22″ x 14″ rectangles of canvas fabric horizontally, with wrong sides facing up.
Using Clover’s Hot Ruler and an iron, fold and press under 1/2″ to wrong sides along 22″ top edge of both rectangles.
Using a 6-1/2″ square ruler and Chaco Liner, mark and cut out 5″ squares from each of the lower corners of both canvas rectangles. Cutouts will later form gussets at bag bottom!
Create Outer Bag
Turn two 22″ x 36″ rectangles of cotton quilting fabric vertically, with wrong sides facing up.
Using Clover’s Hot Ruler and an iron, fold and press under 1/2″ to wrong side along 22″ top edge of both fabric rectangles.
Using a 6-1/2″ square ruler and Chaco Liner, mark and cut out 5″ squares from each of the lower corners of one cotton quilting fabric rectangle. Cutouts will later form gussets at bag bottom!

Place one canvas accent rectangle to lower edge of one cotton quilting outer bag rectangle, wrong side of canvas fabric to right side of cotton quilting fabric. Wonder Clip /pin.

Topstitch along upper edge of canvas accent fabric, near fold.
Baste canvas accent to outer bag along remaining fabric edges, using a 5mm stitch length and scant 1/4″ seam.
Repeat steps above and create a second outer bag unit and set aside.
Machine basting is a great way to keep fabric layers together during the sewing process and eliminates pinning! Machine baste with long running stitches, 5mm in length, to hold 2 or more layers of fabric in position. And, there’s no need to remove the basting stitching – they’ll be hidden within the seams of the finished bag project.
Place the two outer bag units right sides together. Wonder Clip /pin.

Stitch or serge bottom bag seam.
Using an iron, press seam open or to one side.
Unfold pressed under outer bag top edges and align side seams, with right sides together. Stitch or serge side seams.
Using an iron, press seams open or to one side.
Meet bag gusset cutouts on one lower bag edge, right sides together, folding side seam to align/stack with bottom bag seam.
Stitch or serge gusset seam. Press seam flat.
 Repeat steps above for opposite outer bag gusset and set aside.
Create Inner Bag
Turn two 22″ x 36″ rectangles of canvas fabric vertically, with wrong sides facing up.
Using Clover’s Hot Ruler and an iron, fold and press under 1/2″ to wrong side along 22″ top edge of both canvas rectangles.

Using a 6-1/2″ square ruler and Chaco Liner, mark and cut out 5″ squares from each of the lower corners of one canvas rectangle.
Repeat steps above for second canvas rectangle.
Place the two rectangles of canvas fabric, right sides together. Wonder Clip /pin.
Stitch bottom inner bag seam.
 Using an iron, press seam open or to one side.
Position and center 9″ x 11″ Pellon Peltex One-Sided Fusible Ultra Firm Stabilizer rectangle over center of canvas inner bottom bag seam. Using June Tailor’s® Eze-View Pressing Cloth , press and fuse Peltex into place – following manufacturer’s instructions.
Unfold pressed under inner bag top edges and align side seams, with right sides together. Stitch side seams.
Using an iron, press seams open or to one side.
Meet bag gusset cutouts on one lower bag edge, right sides together, folding side seam to align/stack with bottom bag seam.
Stitch gusset seam. Press seam flat.
Repeat for opposite inner bag gusset.
Use your standard sewing machine to sew gusset seams. The layers of fabric may become too thick to stitch with a serger.
Assemble Inner and Outer Bag and Attach Handles
• Using Clover’s Point 2 Point Turner, turn outer fabric bag right side out.
Re-fold pressed under top bag edges at 1/2″ pressed line.
Insert inner canvas bag inside outer bag, wrong sides together, aligning side-seams. Pin or Wonder Clip .
Topstitch inner and outer bag together, near folded edge. Press.
Using an erasable fabric marking pen, or Chaco Liner , and Supersize 5-in-1 Sliding Gauge place a 3″ mark on each side of side seams, 1″ down from upper edge of outer bag (make a total of four markings.)

Position the folded end of one handle to one of the marked lines. Carefully pin through layers with a sturdy Flower Head Pin .
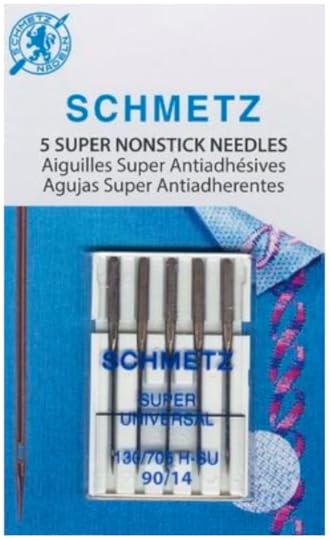
Because we’re stitching through Double-Sided Basting Tape, use a Super Nonstick Needle
Size 90/14 – to topstitch handles in place.
Topstitch fabric strip set handle or optional ready-made Cotton Webbing handle to bag – stitching along handle side, top, and bottom, forming a stitched 1″ square with optional “X” pattern.
Repeat steps above and attach handle at opposite edge. Be sure handle is not twisted!
Repeat for second handle on opposite side of bag.
Turn bag wrong side out.
Attach Secondary Handles 10″ Below Bag Top Edge
Using a Chaco Liner and Supersize 5-in-1 Sliding Gauge , place a 3″ mark on each side of side seams at 10″ down from upper edge of inner bag. Repeat marking a total of four markings.
Position and pin the folded end of one handle to one of the marked lines.
Using a Super Nonstick Needle size 90/14, topstitch handle in place:
Topstitch fabric strip set handle or optional ready-made Cotton Webbing handle to bag – stitching along handle side, top, and bottom, forming a stitched 1″ square with optional “X” pattern.
When sewing handles to bag, convert sewing machine to free arm position.
Repeat steps above and attach handle at opposite edge. Make sure handle is not twisted.
Repeat for second handle on opposite side of bag.
Big-Bigger Laundry Bag Features
For a “big” fabric bag, fold top edge over at secondary handles.
For “bigger” fabric bag, extend bag fully up.
Reverse Big-Bigger Laundry Bag for a whole new look!

Follow the Stitch it! Sisters on Facebook by clicking the “Like” button at facebook.com/stitchitsisters
The Nancy Zieman Productions Team is pleased to announce our NEW! video series, Stitch it! Sister s
Watch Stitch it! Sisters right here on the NZP Blog, with hosts Deanna Springer and Dana Casey – real life sisters from Team NZP. This NEW! Video Series features our latest sewing projects and fun sewing adventures! Join Deanna and Dana as they share sewing and quilting project tutorials – featuring their easiest-ever sewing techniques, timesaving tools, and Classic Timesaving Tips by Nancy Zieman.
Stitch it! Sisters is a production of NZ Productions LLC. We’ll be releasing a new video – every few weeks – right here on the NZP Blog. Make sure you are subscribed to Nancy Zieman Productions E-news mailing list so you won’t miss a thing. Sign up and receive email updates from Nancy Zieman Productions.
Visit the NEW! NZP Online Shop for the latest tools, patterns, fabrics and more at shopnzp.com!
Visit shopnzp.com, or click the “ shop ” tab
at the top of the NZP blog, anytime!
NEW! Patterns and Bundle Boxes at shopnzp.com
For a chance to be the random winner of a Stitch it! Sisters 5″ Fabric Short Stack with S!S button & sticker, please leave a comment below sharing how you’d use your Big-Bigger Laundry Bag.
Nancy Zieman Productions will give away one Stitch it! Sisters 5″ Fabric Short Stack to one US resident in the 48 contiguous states. Winner must reply within 30 days to the official giveaway announcement email message – sent from Nancy Zieman Productions. Email Team NZP at info@ziemanproductions.com.
The randomly selected winner of a Stitch it! Sisters 5″ Fabric Short Stack with exclusive S!S button & sticker, from the February 11 Blog Post, Watch Stitch it! Sisters on our NEW! YouTube Channel is A. Rock.
Their comment is: Will definitely start watching regularly! Will start with a pot holder!
Happy Sewing!
Team Nancy Zieman
Nancy Zieman Productions. LLC.
[image error]
Stitch it! Sisters is a production of NZ Productions LLC. Content in this feed is © copyright 2020 by Nancy Zieman Productions, LLC and may not be republished without written permission. You’re welcome to forward the email to a friend or colleague but it’s not okay to add the RSS feed automatically as content on a blog or other website. The FTC requires us to tell you that Nancy Zieman Productions, LLC has provided products by other companies in the course of doing business. The FTC requires us to advise you to take this information into consideration when reading this posting.
Make sure you are subscribed to Nancy Zieman Productions, LLC enews mailing list so you won’t miss a thing. Sign up at nancyzieman.com/blog/enews. And join us on YouTube, Facebook, Instagram and Pinterest!
February 15, 2020
February 2020 NZP Block of the Month: Hearts & Gizzards Block
Nancy’s Red Elegance
2020 Block of the Month February: Hearts & Gizzards Block
Introducing the second of 12 FREE! Quit Block Tutorials for the NEW! 2020 Nancy Zieman Productions Nancy’s Red Elegance Block of the Month Mystery Quilt Series! The Hearts & Gizzards Block is a great block to sew in February and celebrate Valentine’s Day – Happy Valentine’s Day!
In January, Team Nancy Zieman introduced the NEW! 2020 Nancy Zieman Productions Nancy’s Red Elegance Block of the Month Mystery Quilt Series. Join the NEW! 2020 Nancy Zieman Productions Nancy’s Red Elegance Block of the Month Mystery Quilt Series, anytime, by viewing the Basic Supplies and Tools Listing in the January 1, 2020 NZP BoM20 Kick Off Blog Posting.
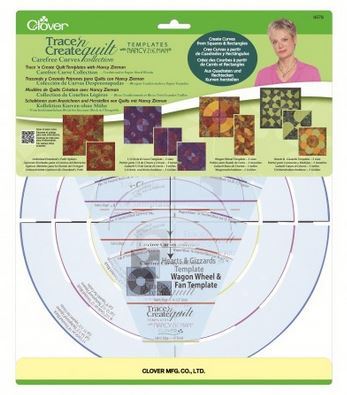
On the third Saturday of each month, we’re featuring one block design, and we’ll be stitching one or more blocks of the same design each month. The blocks are created using Our NEW! Red Elegance Fabric Collection by Riley Blake and the Carefree Curves Trace ‘n Create Template Set by Nancy Zieman for Clover. Follow along as we show step-by-step how to create the February Hearts & Gizzards Block.
February Hearts & Gizzards Block
NOTE: This block is 8-1/2″ square; 8″ finished square when sewn into finished quilt.
Block Fabrics
For the Nancy’s Red Elegance February Hearts & Gizzards Block, select the following fabrics from the NEW! Red Elegance Fat Quarter Bundle along with the “Circle” Template from the Carefree Curves Template Set.
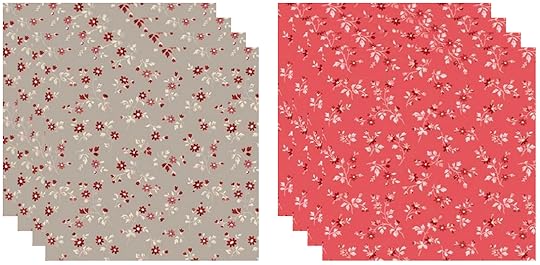
 Red Elegance Stems Taupe. Red Elegance Stems Berry, Red Elegance Wallpaper Taupe and Red Elegance Wallpaper Berry
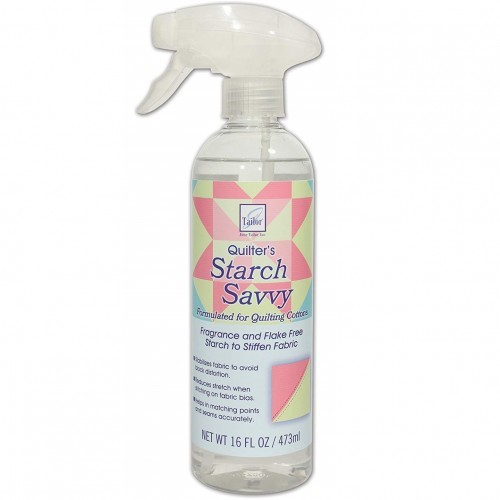
Prepare your fabrics! Pre-shrink fabrics by steaming and pressing, and steaming and pressing a second time. Then, stabilize fabrics for the sewing process by pressing and starching fabrics with June Tailor’s Starch Savvy. Press and starch, press and starch.
Carefree Curves Trace ‘n Create Template by Nancy Zieman for Clover
View the complete Basic Supplies and Tools Listing in the January 1, 2020 NZP BoM20 Kick Off Blog Posting , .
Cut Fabrics for the February Hearts & Gizzards Block
Create EIGHT! Hearts & Gizzards Blocks from four fat quarters and a little Pellon SofShape!
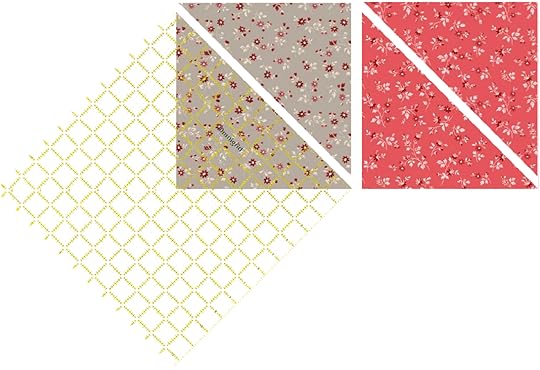
Cut four each 8-7/8″ background squares from Red Elegance Stems Taupe and Red Elegance Stems Berry.
Cut background squares in half diagonally, cutting each of the eight background squares from Red Elegance Stems Taupe and Red Elegance Stems Berry into two half square triangles.
Cut three crosswise fabric strips from both Red Elegance Wallpaper Taupe and Red Elegance Wallpaper Berry fat quarters. Note: Each strip will measure 6″ wide by approximately 20″ long.
Cut seven 2-1/2″ crosswise strips of Pellon SofShape Fusible Interfacing. Note: Each strip will measure 2-1/2″x 20″.

For this second block of the month in the NEW! 2020 Nancy Zieman Productions Nancy’s Red Elegance Block of the Month Mystery Quilt Series, we’re sharing Nancy Zieman’s techniques for creating the curvy Hearts & Gizzards block – without ever piecing a single curve!
Construct the Block
Create the Hearts & Gizzards Appliqué
Select the Hearts & Gizzards Template from the Carefree Curves Trace ‘n Create Template Set and align
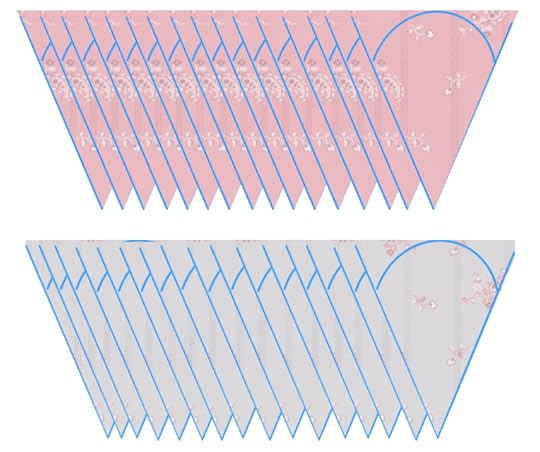
Align the Hearts & Gizzards Template to the wrong side of one 6″ Red Elegance Wallpaper Taupe crosswise fabric strip. Place the “Fabric Edge” red line marking (on the smallest template) to fabric top edge.
Using a Fabric Marking Pen, trace around the smallest Hearts & Gizzards Template shape: Starting at one edge, trace both sides of template and around curved die-cut area – along the red curved line.
Rotate template 180-degrees and align smallest template “Fabric Edge” (red line marking) along bottom fabric edge. Trace curved die-cut area and remaining side.
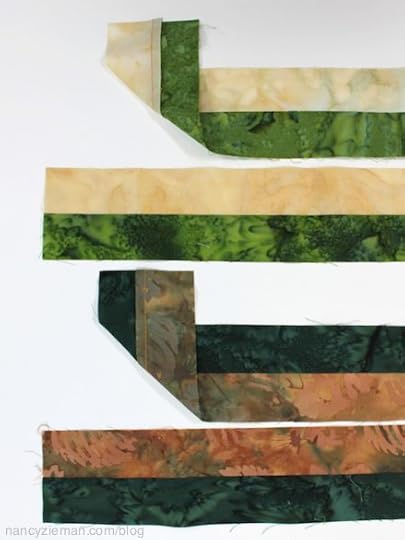
Repeat tracing and rotating – and trace 16 Hearts & Gizzard shapes on the wrong side of the Red Elegance Wallpaper Taupe and 16 Hearts & Gizzard shapes on the wrong side of the Red Elegance Wallpaper Berry .
Using a rotary cutter, ruler, and mat , Cut along side straight traced lines only. NOTE: Do not cut along curved traced lines.
Cut fabric strips into triangle shapes, along straight traced lines only. The curved traced lines will later be our stitching lines!
Cut a total of 16 triangle shapes from Red Elegance Wallpaper Taupe , and 16 triangle shapes from Red Elegance Wallpaper Berry .
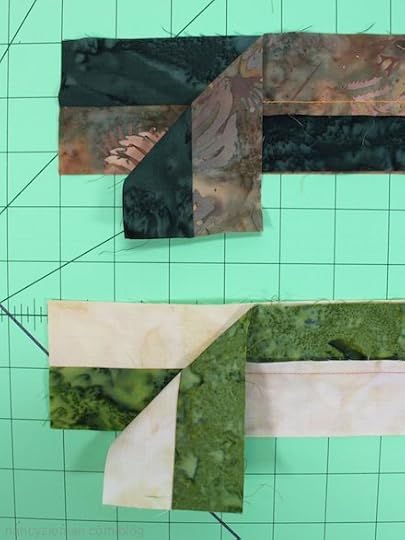
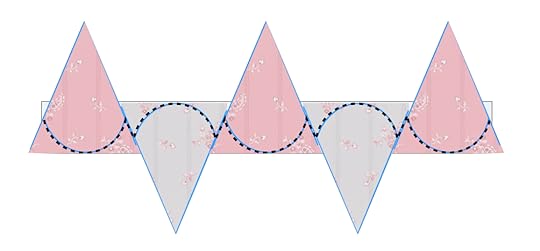
 Align top edge of one fabric triangle to long straight edge of one
Pellon SofShape Fusible Interfacing strip
, with right side of fabric to the smooth non-fusible side of the interfacing.
Pin
. Rotate and position top of next fabric triangle along the lower edge of the interfacing strip; pin. Repeat rotating, positioning, and pinning remaining fabric triangles to the smooth non-fusible side of the remaining interfacing strips.
Align top edge of one fabric triangle to long straight edge of one
Pellon SofShape Fusible Interfacing strip
, with right side of fabric to the smooth non-fusible side of the interfacing.
Pin
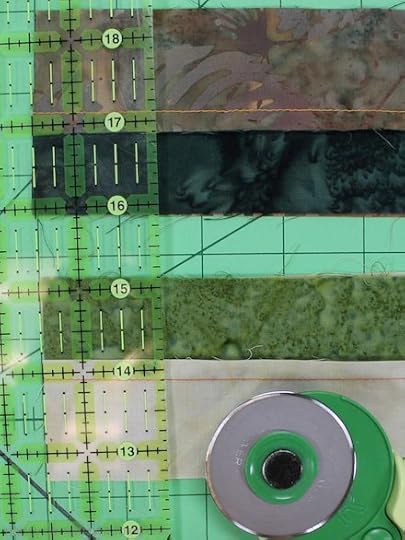
. Rotate and position top of next fabric triangle along the lower edge of the interfacing strip; pin. Repeat rotating, positioning, and pinning remaining fabric triangles to the smooth non-fusible side of the remaining interfacing strips.Set sewing machine for a short 2.0-2.5 mm stitch length, and stitch along the curved marked lines using a Size 75 Schmetz Quilting Needle .
It’s always easier to stitch smooth curves with a shorter stitch length!
Using a rotary cutter, ruler, and mat , cut interfacing strips between triangle fabric shapes.
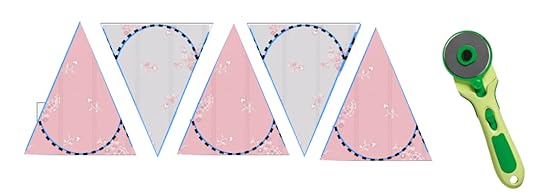
Using a 45mm Rotary Cutting and Pinking Blade , trim away excess fabric and interfacing, leaving about 1/4″ seam allowance on the outside of the curved stitching line.
With a
February 14, 2020
NEW! Stitch it! Sisters Big Bigger Laundry Bag Program 109
NEW! Starting TODAY! Sew our Big-Bigger Laundry Bag with our easy sewing steps!
NEW! Starting TODAY! Watch Stitch it! Sisters Program 109: Big-Bigger Laundry Bag
Starting TODAY, watch the NEW! Stitch it! Sisters Program 109: Big-Bigger Laundry Bag video with hosts Deanna Springer and Dana Casey. In this video, the Stitch it! Sisters share step-by-step fabric cutting and sewing techniques for making NZP’s NEW! Big-Bigger Laundry Bag from our NEW! Big-Bigger Laundry Pattern.
Then, head over to the shopnzp.com and purchase our exclusive NEW! Big-Bigger Laundry Bag Bundle Box designed by the Stitch it! Sisters! The NEW! Big-Bigger Bag Bundle Box is available in two fabric choices, and each Big-Bigger Bag Bundle Box includes ALL SUPPLIES needed to make one Big-Bigger Bag, including: Red Elegance Floral Fabric, Gray Cotton Canvas Fabric, Pellon Peltex, and our NEW! Big-Bigger Laundry Bag Pattern – with Classic Timesaving Tips by Nancy Zieman — you’ll supply the thread. Quantities are limited.
SHOP our NEW! Patterns and Exclusive Bundle Boxes at shopnzp.com
NEW! Starting TODAY! Watch Stitch it! Sisters Program 109: Big-Bigger Laundry Bag
Starting TODAY, watch the NEW! Stitch it! Sisters Program 109: Big-Bigger Laundry Bag video and learn how to sew our NEW! Big-BIGGER Laundry Bag. Watch the NEW! Stitch it! Sisters Program 109: Big-Bigger Laundry Bag and learn how to sew our NEW! Big-Bigger Bag with two sets of handles! Sew a Big-Bigger Laundry Bag that expands to handle laundry and/or storage needs – the sewing is streamlined with our simple sewing steps and Classic Timesaving Sewing Tips by Nancy Zieman!
NOW AVAILABLE at shopnzp.com! Purchase our exclusive NEW! Big-Bigger Laundry Bag Bundle Box designed by the Stitch it! Sisters! The NEW! Big-Bigger Bag Bundle Box is available in two fabric choices, and each Big-Bigger Bag Bundle Box includes ALL SUPPLIES needed to make one Big-Bigger Bag, including: Red Elegance Floral Fabric, Gray Cotton Canvas Fabric, Pellon Peltex, and our NEW! Big-Bigger Laundry Bag Pattern – with Classic Timesaving Tips by Nancy Zieman — you’ll supply the thread. Quantities are limited.
SHOP our NEW! Patterns and Exclusive Bundle Boxes at shopnzp.com
Then, stop back next Tuesday – right here at the NZP blog – when Deanna shares her Big Bigger Bag Sewing Tutorial with our easiest ever sewing techniques, and Timesaving Sewing Tips by her longtime friend and sewing mentor, Nancy Zieman, and see how using the right tools makes the sewing process enjoyable, even for a beginner!

SAVE 10%-30% Off Select Products and Exclusive Bundle Boxes at shopnzp.com
Follow the Stitch it! Sisters on Facebook by clicking the “Like” and “Follow” buttons at facebook.com/stitchitsisters.
Stitch it! Sisters is a production of NZ Productions LLC. We’ll be releasing a new video – every few weeks – right here on the NZP Blog. Make sure you are subscribed to Nancy Zieman Productions E-news mailing list – so you won’t miss a thing! Sign up and receive email updates from Nancy Zieman Productions at Sign up and receive email updates from Nancy Zieman Productions at nancyzieman.com/blog/enews.
Visit the NEW! NZP Online Shop for the latest tools, patterns, fabrics and more at shopnzp.com!
Visit shopnzp.com, or click the “ shop ” tab
at the top of the NZP blog, anytime!
SHOP our NEW! Patterns and Exclusive Bundle Boxes at shopnzp.com
For a chance to be the random winner of a Stitch it! Sisters 5″ Fabric Short Stack with exclusive S!S button & sticker, please leave a comment below sharing your thoughts about our NEW! Big-Bigger Laundry Bag sewing project. Nancy Zieman Productions will give away one Stitch it! Sisters 5″ Fabric Short Stack to one US resident in the 48 contiguous states. Winner must reply within 30 days to the official giveaway announcement email message – sent from Nancy Zieman Productions. Email Team NZP at info@ziemanproductions.com.
Nancy Zieman Productions will give away one Stitch it! Sisters 5″ Fabric Short Stack to one US resident in the 48 contiguous states. Winner must reply within 30 days to the official giveaway announcement email message – sent from Nancy Zieman Productions.
Happy Sewing!
Team Nancy Zieman
Nancy Zieman Productions. LLC.
[image error]
Stitch it! Sisters is a production of NZ Productions LLC. Content in this feed is © copyright 2020 by Nancy Zieman Productions, LLC and may not be republished without written permission. You’re welcome to forward the email to a friend or colleague but it’s not okay to add the RSS feed automatically as content on a blog or other website. The FTC requires us to tell you that Nancy Zieman Productions, LLC has provided products by other companies in the course of doing business. The FTC requires us to advise you to take this information into consideration when reading this posting.
Make sure you are subscribed to Nancy Zieman Productions, LLC enews mailing list so you won’t miss a thing. Sign up at nancyzieman.com/blog/enews. And join us on YouTube, Facebook, Instagram and Pinterest!
Nancy Zieman's Blog

- Nancy Zieman's profile
- 21 followers

