
Gesine Bullock-Prado's Blog, page 24
March 10, 2012
I'm Pie-ing It Forward!

This is the first of a few giveaways connected with Pie It Forward's release.
It's easy to enter...simply leave a comment and on Pie It Forward Day, 3/14, I'll choose a winner randomly.
What will you win, you ask?

A copy of Pie It Forward, of course
and...

a bottle of our house made maple syrup to get you started on a new sweet adventure (see the Bruléed Maple Tart demo here for a little inspiration).
Good luck!
Valid in the U.S.A. only!


March 9, 2012
Pie Day...it's already come for some of you!
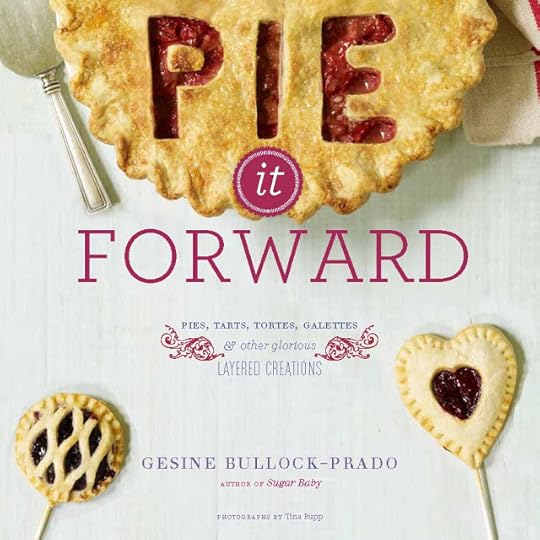
At my pastry shop in Montpelier, Friday was pie day. We'd cram the pastry case with all manner of pie, from caramel apple to tart tatin. I've written a cookbook, Pie It Forward, to commemorate the pastry that made Friday grand and added a legion of pies and tarts that are both beautiful and delicious. And isn't it just perfect timing that Pi(e) Day, 3/14, is just around the corner!

While our official release day for the book is April 1st, the book is ALREADY AVAILABLE and fellow bakers are getting their pie on in anticipation of Pi(e) Day.
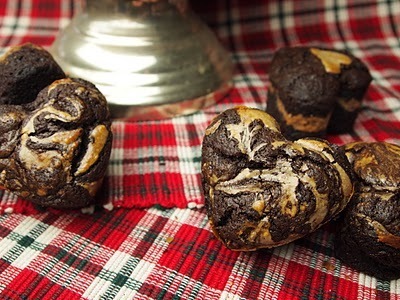
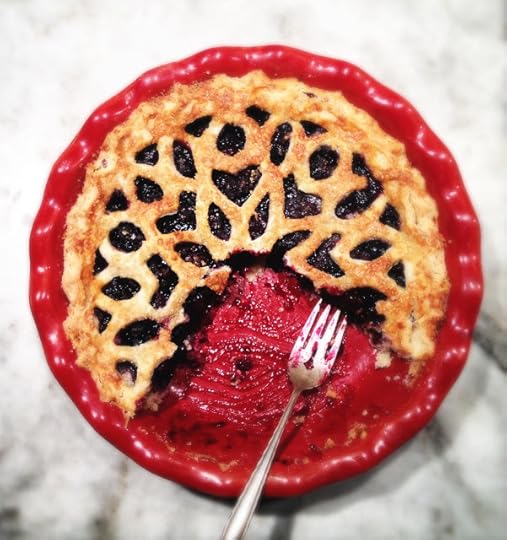 Wild Blueberry!
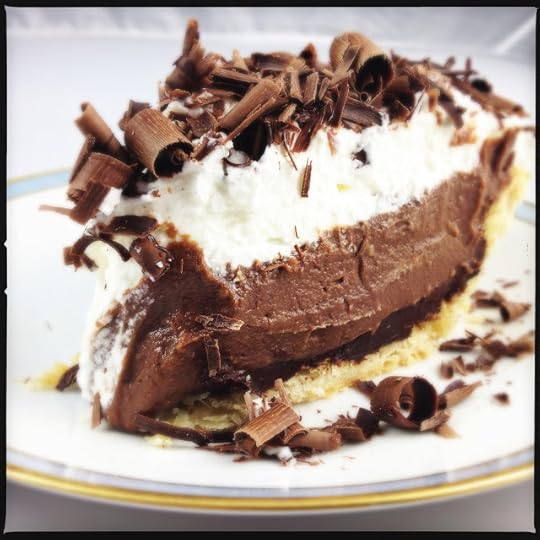 Chocolate Cream!
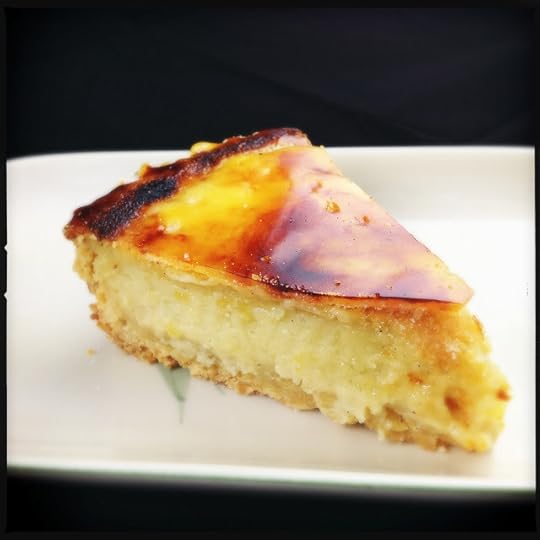 Bruléed Maple Tart!
I've created www.pieitforwardcookbook.com as a companion piece for Pie It Forward, full of demos and extra pictures. I'll continue filling the site with information to enhance your pie experience.
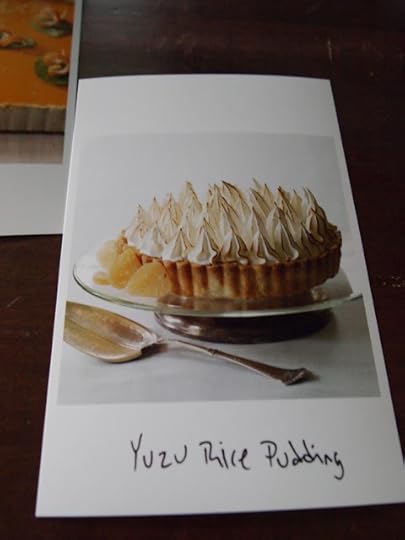
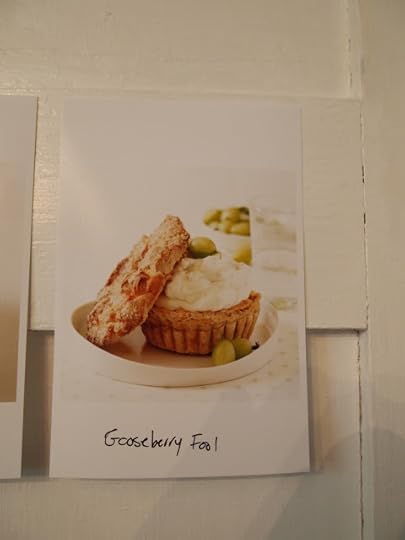
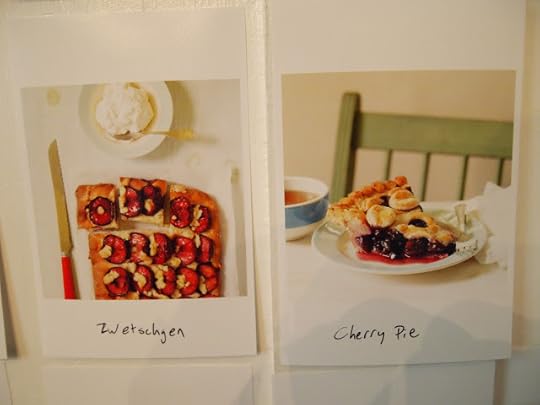
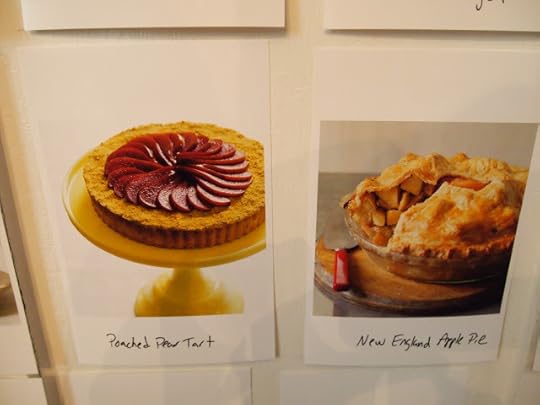
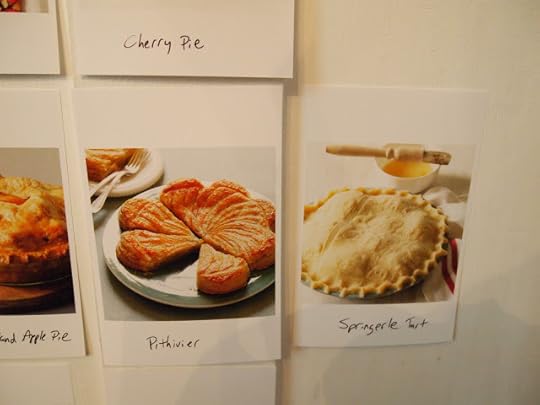
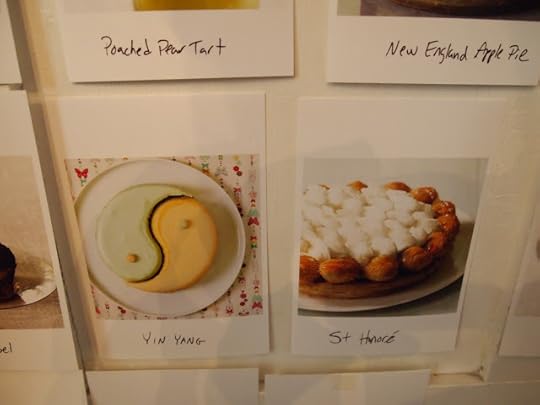
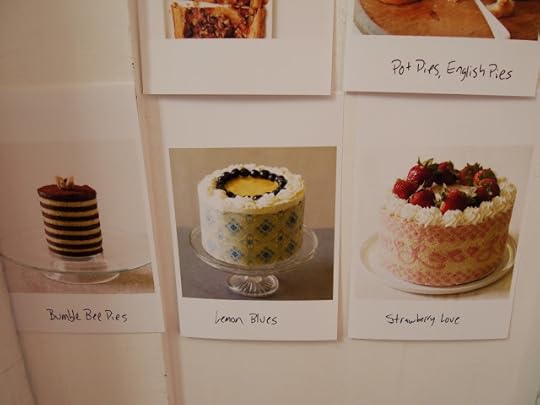
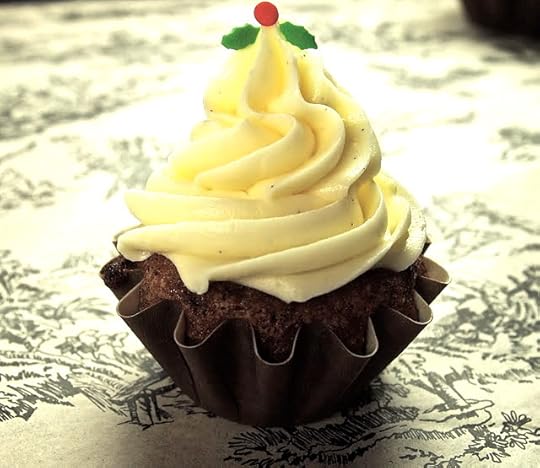
The following are pics of Polaroids from the Pie It Forward photo shoot to wet your whistle.


While our official release day for the book is April 1st, the book is ALREADY AVAILABLE and fellow bakers are getting their pie on in anticipation of Pi(e) Day.
 Wild Blueberry!
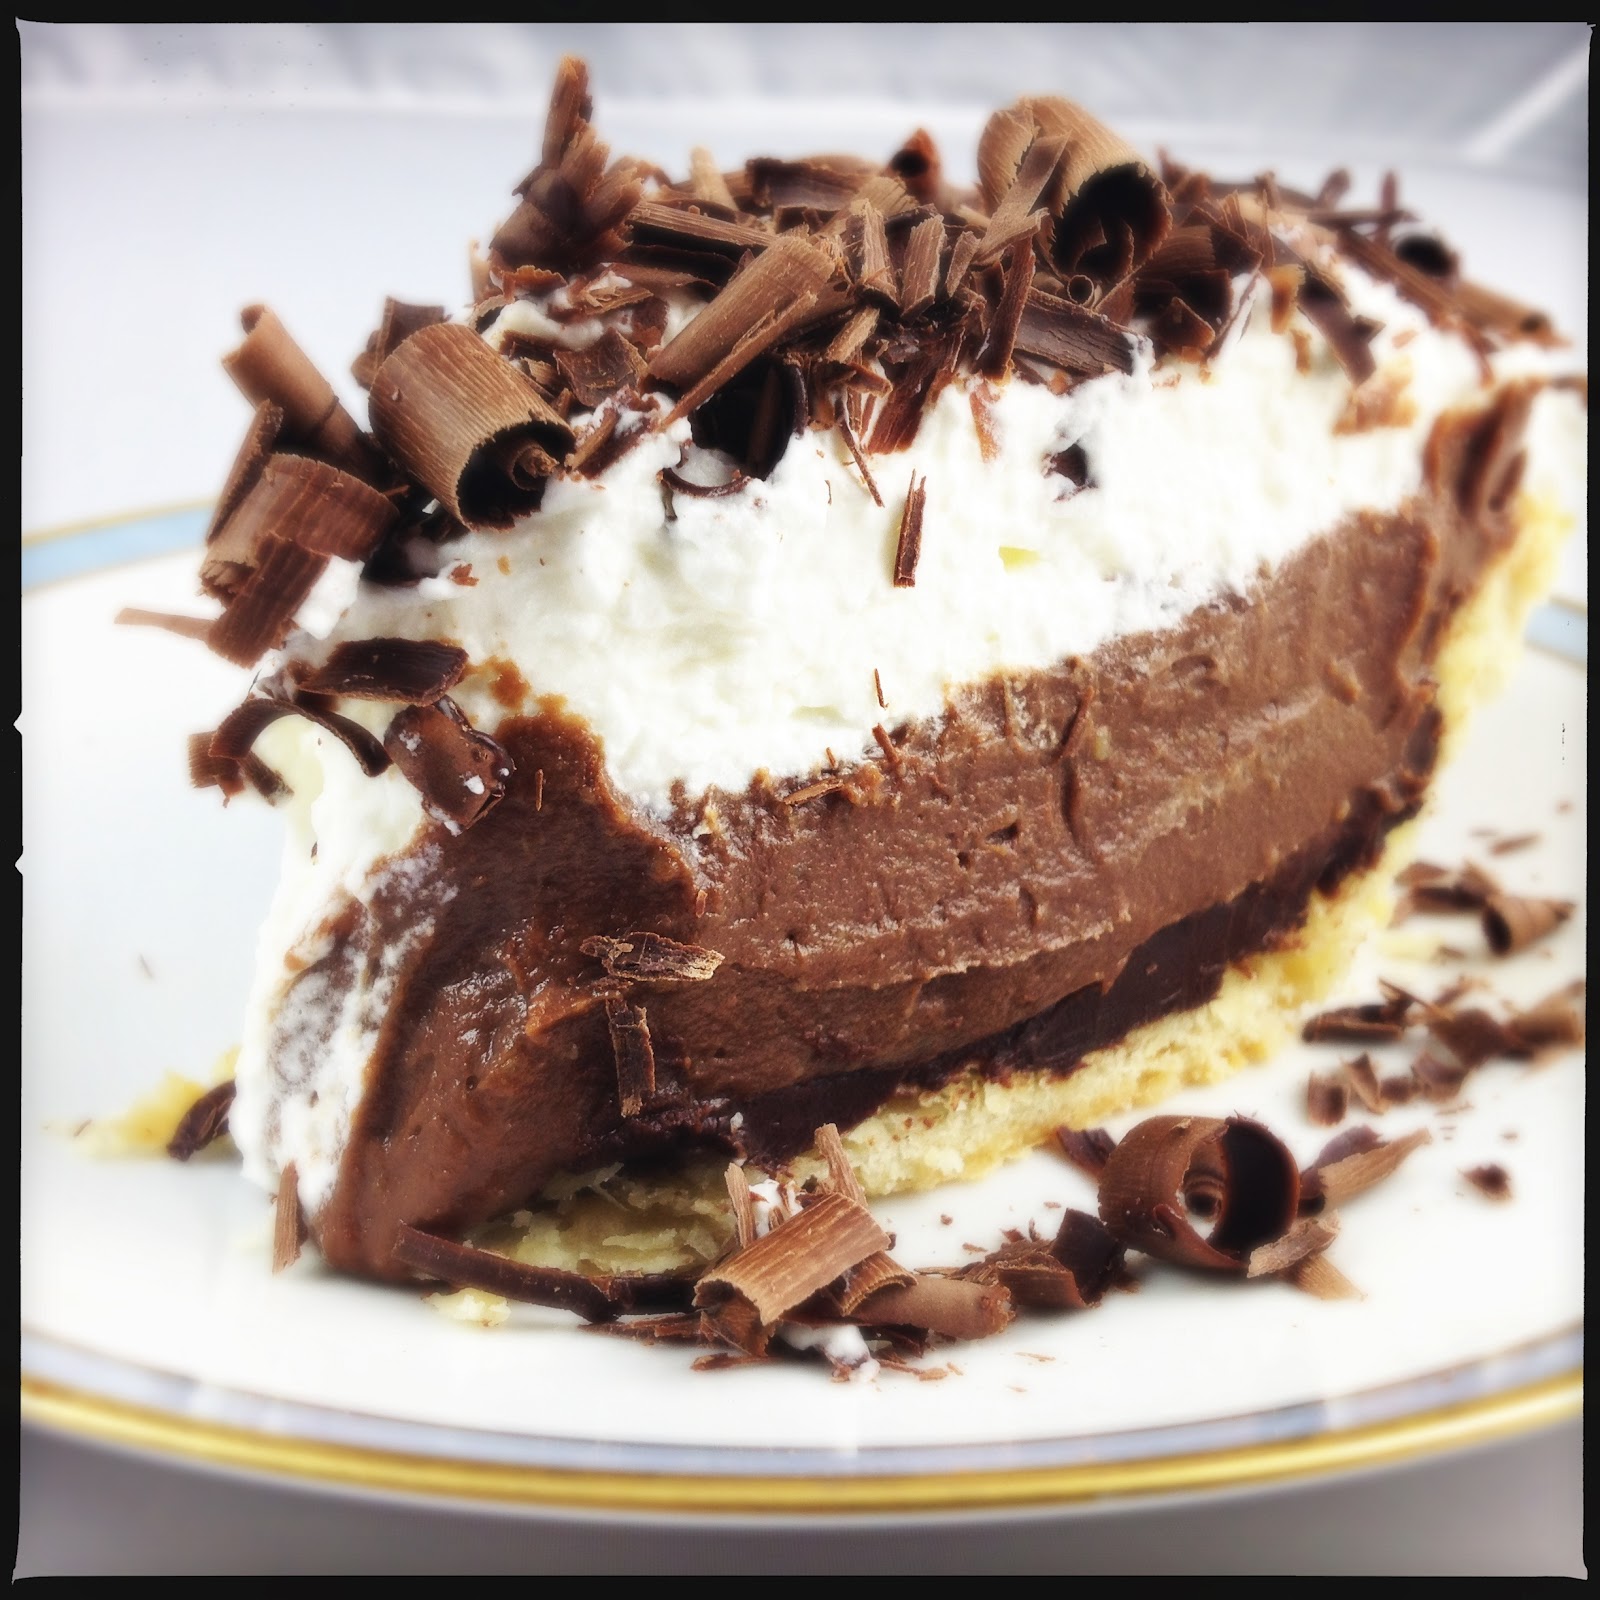 Chocolate Cream!
 Bruléed Maple Tart!
I've created www.pieitforwardcookbook.com as a companion piece for Pie It Forward, full of demos and extra pictures. I'll continue filling the site with information to enhance your pie experience.
The following are pics of Polaroids from the Pie It Forward photo shoot to wet your whistle.


March 3, 2012
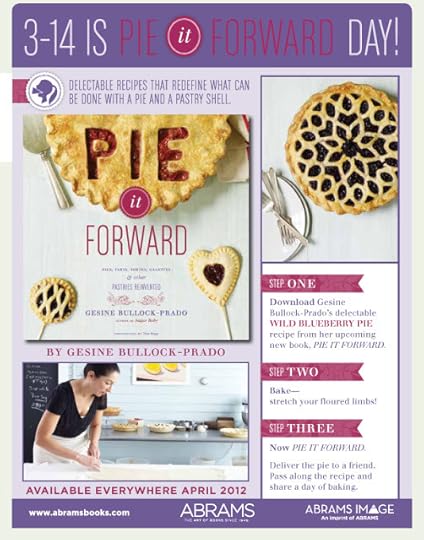
PIE IT FORWARD DAY! Share the pie love on 3/14
 DAY!
DAY!Join me on 3/14, on my quest to Pie It Forward!
1. DOWNLOAD THE RECIPE!
I'm sharing a favorite recipe from Pie It Forward,
my super duper book coming out April 1st
and
I've made a demo so you can follow along with me!
Go to www.abramsbooks.com/pieitforward/ for
all the details!
 I'm adding the pie crust recipe here for you to follow here, in the video I use Option 1, the part butter/part shortening option for more control over the finished look of the dough. You can use either!
 Bake a pie (or two). One for Pie-ing It Forward and one for you!
 2. BAKE THE PIE!
or two.
Look at step three and you'll see why
you should bake an extra. One to complete step three and
another so you can partake in the pie goodness.
 Box it up with a ribbon and the recipe. Pie It Forward!!!
3. PIE IT FORWARD!
Gift the pie to a friend or anyone who could use a
wonderful treat to brighten their day.
Share the recipe with them so they can Pie It Forward too.

And I'd love to see your beauties, so take a picture of
your creation and share on my baker's page on facebook.

February 25, 2012
Sugaring, Baby!

 Bottling Vermont gold.
It's early in the season to begin the long process of making maple syrup. We're a few weeks ahead of schedule but it's been so damn warm lately that Ray and I didn't want to miss the prime sap running days. And lucky that we did because we've hit the motherlode.
 Ray drills the last tap hole.
The sugaring ideal is a day that rises about freezing and an evening that dips below. The sap in the maple oozes when the heat of the day hits the bark. We don't tap many trees, this year only eight in all. Some trees that show terribly healthy sap production get two taps.
 A row of sap buckets.
Sap runs completely clear, as crystal as water and barely hints at sweetness. So you may wonder how this all works, if it's clear and barely sweet, where does the syrup come into it?
 The sap's flowing!
Well, so glad you asked. You boil it. At least we boil it. Fancy people with "sugar shacks" dedicated to large production of Vermont gold use evaporators. But we just use a huge stock pot and major ventilation.
 Starting our collection. Using every available bucket to store sap.
It takes 40 gallons of sap to make 1 gallon of syrup. And it takes hours to boil down.
 Introducing the Ruthie to the joys of sugaring.
Once the moisture has evaporated sufficiently (I make sure at least 3/4 of the sap has boiled down), I transfer the thickening sap to a smaller vessel. At this point, I attach a candy thermometer and wait until the temperature reaches 7.1ºF above boiling water. Water boils at an average of 212ºF but it differs depending on your elevation and the atmospheric conditions of your area on any particular day. The temperature I was aiming for was 219.9º. But I also have a hydrometer, which measures the density of the sugar in the syrup. If the hydrometer sinks to the bottom of the hydrometer cup, the sugars are still too low in the syrup. If it bobs in the syrup and hits the red mark indicated on the instrument, you're all good.
 Let the boiling begin! 9am on the dot.
Once we reach our proper density and temperature, we transfer the syrup to bottles and allow the sediment to settle. Once the syrup has cooled, we carefully pour the syrup off and leave the sediment behind and reboil the syrup to 180ºF. Only then are we ready to bottle (but first we pour the syrup through a fine cloth and sterilize our bottles).
 My sugaring Lab!
Let the boiling finish! 9pm, on the dot. That metal tube with the swirly handle is the hydrometer cup. The hydrometer is sitting inside.
All that work for less than a gallon of maple syrup. But it's all ours, mined from our ancient trees and more delicious than anything deserves to be. I'd say well worth the effort.
 Grading syrup: In the back row, from the left to the right: Vermont Fancy, Grade A Medium Amber, Grade A Dark Amber and Grade B (the darkest). Our syrup is up front, as fancy as can be.
And to celebrate our bounty, I made pancakes! And now that we have some snow, "Sugar on Snow" can't be far behind...
 Eat 'em if you got 'em! I bet you never look at syrup the same way.
SOUR CREAM PANCAKES
INGREDIENTS
1 1/2 cups all purpose flour
1 tablespoon baking powder
1 teaspoon salt (I use large flake sea salt)
1 cup whole milk
1/2 cup sour cream
1 tablespoon vanilla bean paste (you can substitute with extract but NEVER imitation)
1 large egg
4 tablespoons unsalted butter, melted
PROCEDURE
•In a large bowl, whisk together the flour, baking powder and salt.
•In another bowl, combine the milk, sour cream, vanilla bean paste and egg. Whisk together until smooth. Slowly pour the melted butter into the milk mixture while you continue to whisk.
•Make a well in the flour and pour in the wet ingredients. Stir with a wooden spoon until the batter is very smooth.
•Spray a hot griddle with non-stick cooking spray and drop 1/4 cup mounds of batter on the grill. Wait until you see bubbles start to rise from the batter and peak underneath the pancake to make sure it's uniformly golden brown. Flip! Continue cooking until the second side is golden brown.
•Serve immediately.

February 18, 2012
Ruffies

I'm determined to continue as I have, working on the cookbooks, posting fun stuff here, taking care of our animals, training for the next American Cancer Society Fundraising marathon...
 Ruthie's promised to beef up and train with me for the next marathon.
I'm trying my best. But there's something new in the mix, some little thing that has managed to distract me ever so slightly. Her name is Ruthie. She has puppy breath.
 Already getting into trouble.
She has been with us a short three days but we've already elaborating on her given name: Baby Ruth, Ruffie, Piranha.
 My poor slippers aren't going to survive much longer.
Determined to give her the love she deserves and I can't help but give her, keep her from eviscerating our house and footwear, and finish everything else on my "to do" list, I've inured myself to little sleep and a wardrobe of sweatpants and slippers.
I can't say that the recipe I'm about to divulge is terribly original or at all the work of a "master baker," closet or otherwise. But I can say that they are stupidly delicious and just a little bit silly. Almost as silly as an 8-week-old puppy. Hence, I've named these Ruffies. (*NOTE* These are NOT intended for dogs but are a human treat. Between the toxic and deadly chocolate and the sugar, this would be the worst dog treat ever devised).

RUFFIES
INGREDIENTS
For the base
2 sticks unsalted butter at room temperature
2 cups dark brown sugar, firmly packed
1/2 cup granulated sugar
2 eggs, room temperature
3 cups all purpose flour (I use King Arthur Flour)
1 tablespoon vanilla bean paste (can substitute vanilla extract)
1 1/2 teaspoons salt
3/4 teaspoon baking powder

For the Toffee:
1 cup sugar
2 sticks unsalted butter
1 teaspoon salt
For the remaining mix-ins:
1 (9.7 oz) bar Scharffenberger 62% cocoa semi-sweet chocolate (I only use this one since it's a lovely chocolate AND a very thick bar which makes for generous chunks instead of anemic slivers of chocolate)
2 cups Ruffles potato chips, broken up into slightly smaller pieces
1 cup roasted and sea salted almonds
PROCEDURE
Make the toffee:
•Combine the butter, sugar and salt in a large saucepan, attach a candy thermometer and stir constantly, over medium heat, until the temperature reaches soft crack (280º - 290º)
•Pour onto a parchment lined sheetpan and allow to cool completely.
For the base:
•Preheat oven to 350º
•Spray a 9" x 12" baking pan with non-stick cooking spray. Set aside.
•In the bowl of a stand mixer fit with the paddle attachment, cream together the sugars and butter until light and fluffy. Add the vanilla. Mix thoroughly.
•Add the eggs, one at a time, mixing thoroughly between additions.
•Whisk together the dry ingredients and add to the batter. Mix until just incorporated.
•Break the toffee into 1/2 inch size chunks and chop the chocolate into nice sized chunks. With the mixer on low, add the toffee, chocolate and almonds until integrated.
•Pat 1/2 the dough into the prepared pan. Sprinkle with 1/2 of the potato chips. Top with the remaining dough and press to create an even layer. Shove the remaining chips willy nilly into the batter.

•Bake for 1 hour to 1 hour 15 minutes or until the middle starts to firm up and the edges of the dough begin to brown. A slightly underdone bar isn't a bad thing.

February 13, 2012
A Love Round-Up
Just a few lovely things for your sweetheart:

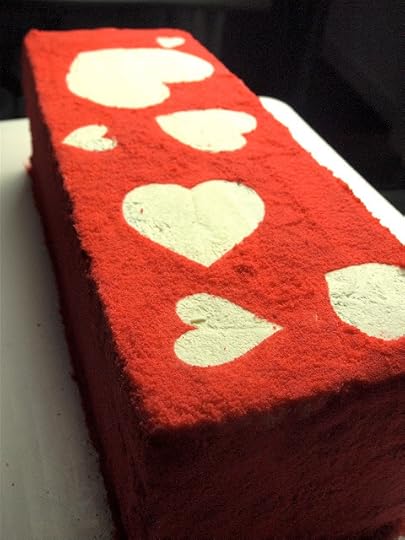
A SLICE OF LOVE

LOVE IS PATIENT (AND COMPLICATED)
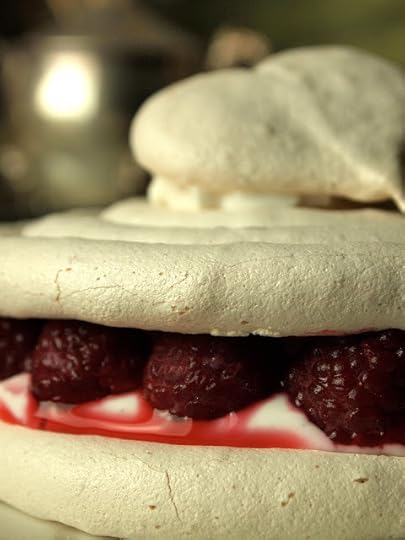
PavLOVEa

LOVERS & DREAMERS

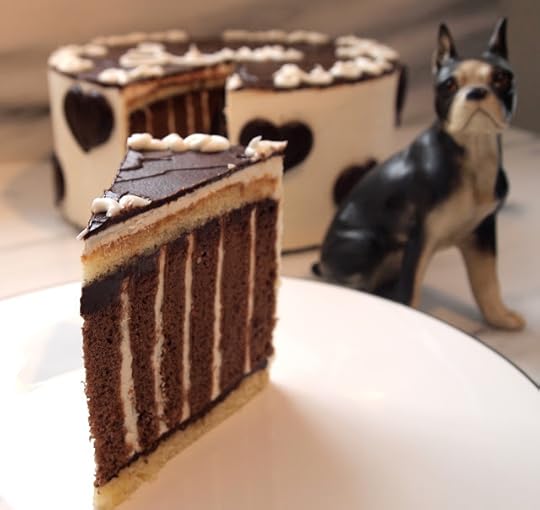
BECAUSE YOU'RE MINE
FLOURLESS CHOCOLATE
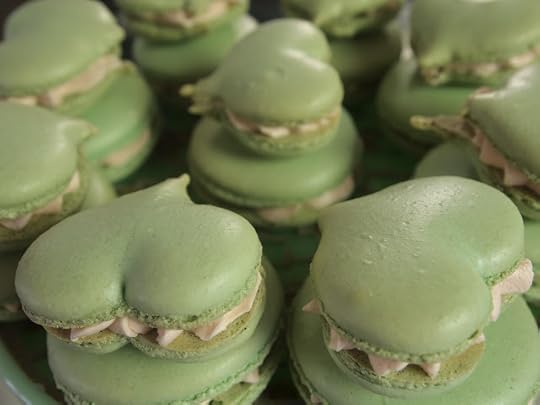
MACARON!
And you can always pre-order Pie It Forward for your sweetheart!

A SLICE OF LOVE


LOVE IS PATIENT (AND COMPLICATED)

PavLOVEa


LOVERS & DREAMERS


BECAUSE YOU'RE MINE

FLOURLESS CHOCOLATE


MACARON!

And you can always pre-order Pie It Forward for your sweetheart!
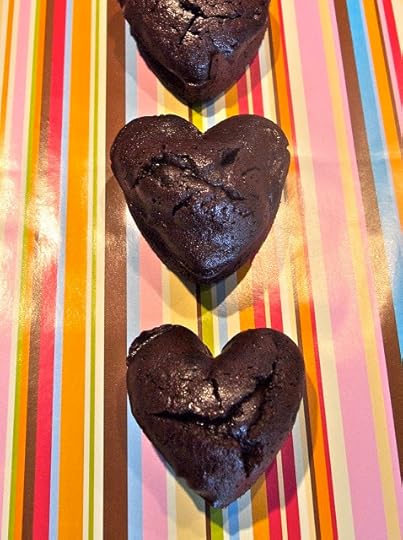
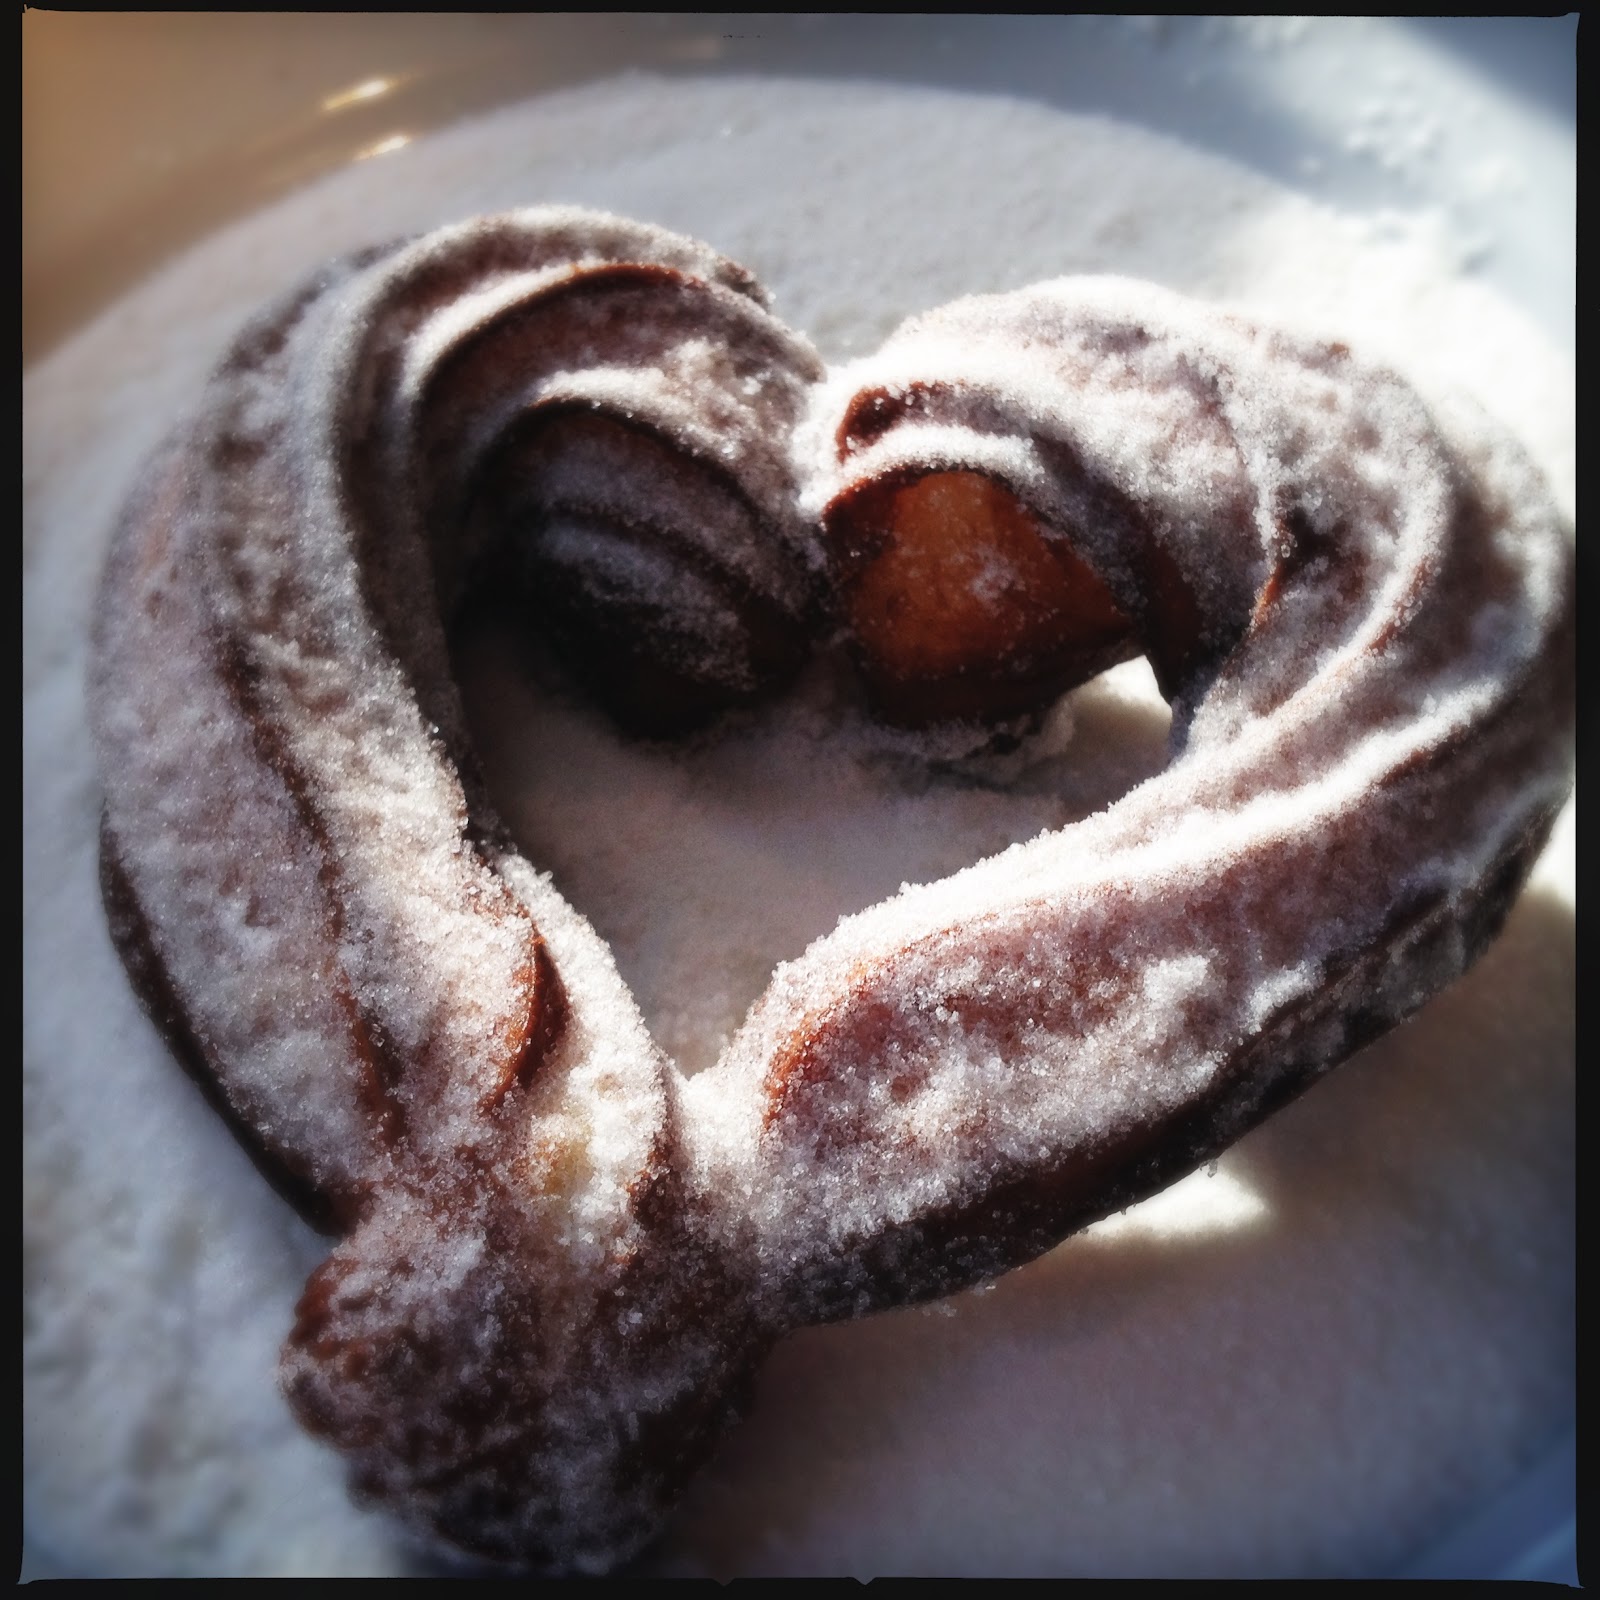
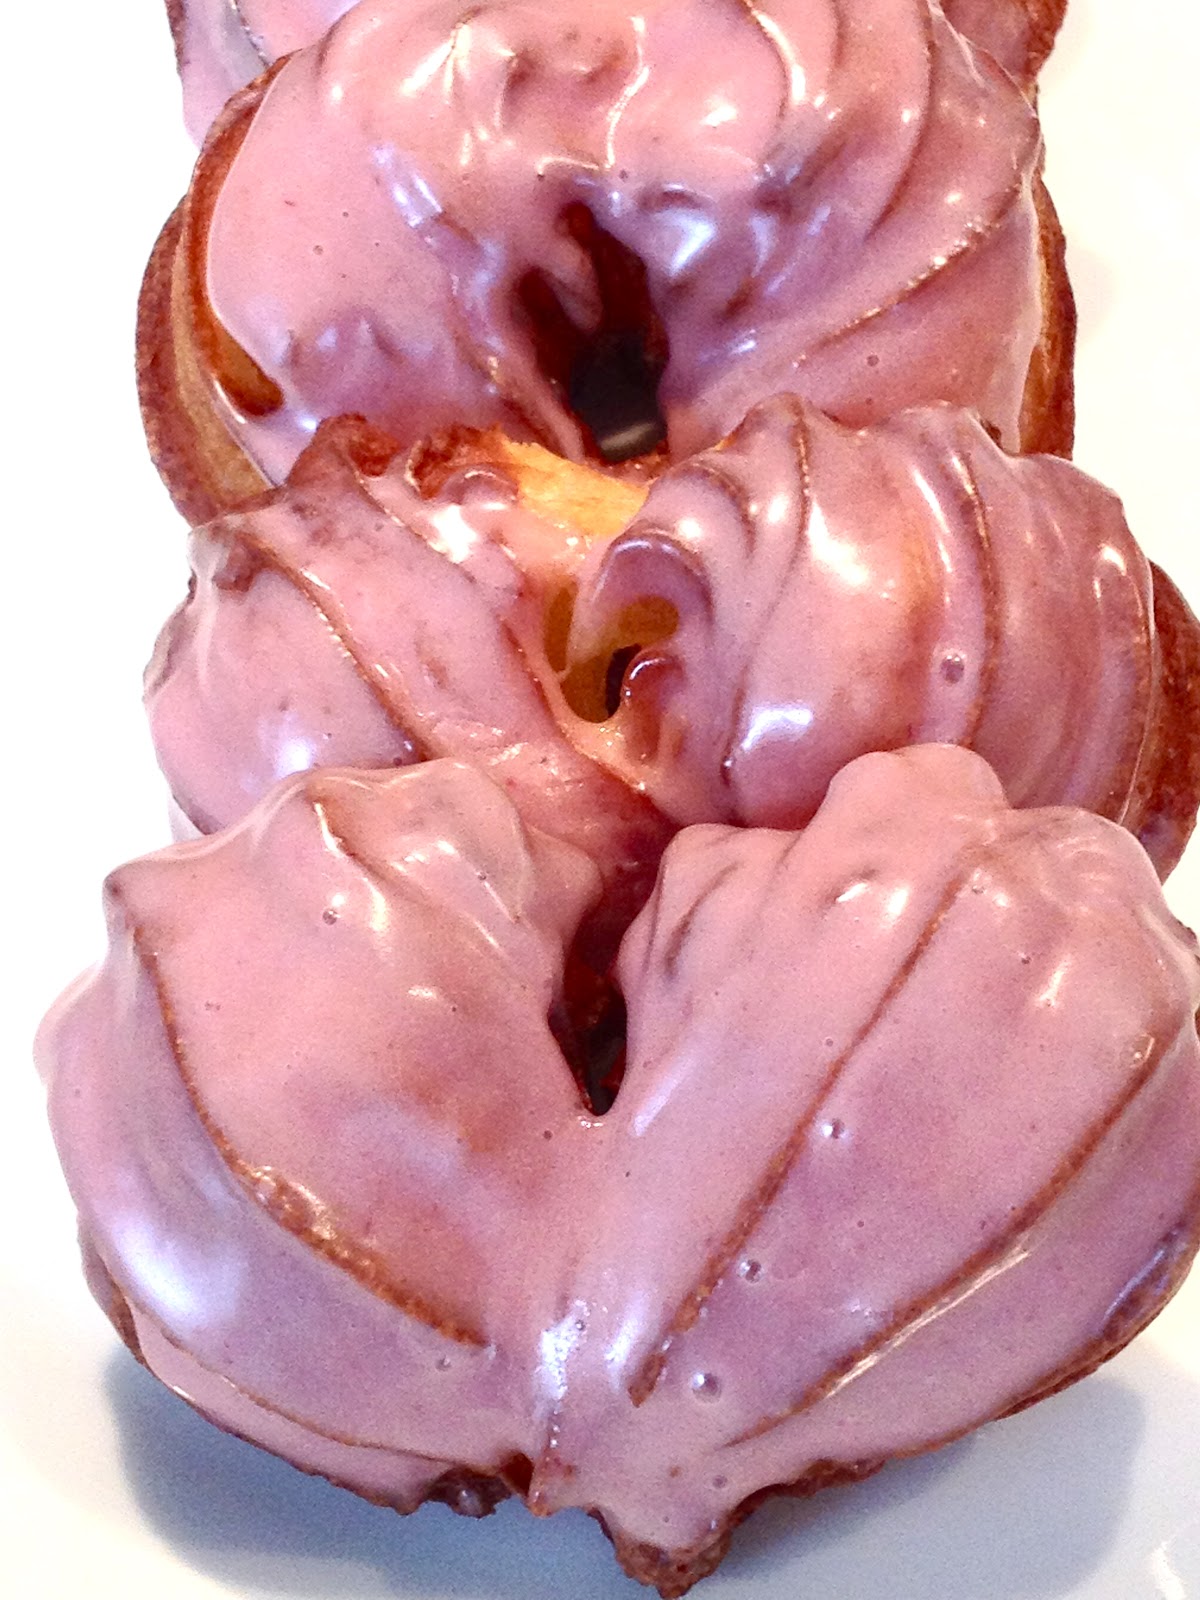
Deep Fried Love

Working towards a deadline for the third cookbook in a week (Bake It Like You Mean It), gearing up for the release of the second cookbook in mid-March (Pie It Forward), keeping all the farm duties straight, nursing a dying hen, puppy proofing the house...I'm stretched thin.
But no matter how it seems that time is accelerating, how a day slips away into the ether before you can make a dent into it, there's always just enough time to show a little love.
Tomorrow is Valentine's Day. The day we are required to make a sweet effort no matter how little time we have to spare. This recipe provides a big dose of love in just minutes.
The secret to this treat is to make and pipe the batter the evening before and FREEZE it overnight.
In the morning, you just need to fill a large, heavy stock pot with vegetable oil and heat to 350º. The hearts take mere minutes to fry up. Sweet indeed.
INGREDIENTS
For the crullers
1 cup 2% milk
1 stick butter
3 tablespoons sweetened condensed milk
1/2 teaspoon salt
1 cup all purpose flour
5 eggs
1/4 teaspoon baking powder
For the glaze
1 cup confectioner's sugar
1/4 cup milk
1 tablespoon raspberry puree (optional)
Or
2 cups granulated sugar and a pinch of cinnamon
PROCEDURE
For the crullers:
•In a large saucepan, combine the milk, butter, sweetened condensed milk and salt over medium heat. Stir until the butter is completely melted and the mixture comes to a gentle simmer.
•Add the flour all at once and stir with a wooden spoon constantly until the mixture thickens and pulls away from the sides of the pot.

•Transfer the flour mixture into the bowl of a stand mixer fit with the paddle attachment. Mix on low for a minute to allow the paste to cool a bit. Add one egg (you may not need all the eggs so I only crack them just before I add them). Mix until the egg is fully incorporated. Add the 1/4 teaspoon of baking powder and mix.
•Continue adding eggs until a smooth paste forms that flows easily from the paddle but still holds it's shape when piped. I added four eggs and then before I added the fifth, I beat it just in case I didn't need the entire egg. I ended up only using half of it. You may need to use the whole thing.

•Transfer the batter to a large pastry bag fit with a large star tip. Onto a large sheetpan, lined with parchment, pipe the batter into small heart shapes. The hearts can be quite close to each other as we're simply going to freeze them and not bake them on the parchment.

•Freeze the piped hearts overnight (this allows you to handle the choux easily without ruining the sweet heart shape. The batter can be fried while still frozen).
•On Valentine's morning, fill a large stockpot a few inches deep with vegetable oil. Attach a candy thermometer and heat the oil to 360º.

•Fry for a few minutes on each side. Be patient. Allow the the crullers to fry until deep golden brown and puffy.
•Transfer the crullers with a slotted spoon to a plate lined with a paper towel.
•In the bowl of an electric mixer fit with the paddle attachment combine the confectioner's sugar and the milk. Mix on high until smooth. Add the raspberry puree. The glaze should be smooth and rather thin. Place the crullers on a piece of parchment and while the crullers are still warm, spoon a layer of glaze over the cruller and allow the excess to drip onto the parchment. Or sprinkle with sugar! Serve immediately.
OPTION! If you like, you can do everything all at once. Make the batter and pipe it in strips straight into the hot oil as if you were making a churro. Sprinkle with confectioner's sugar or roll the hot crullers in cinnamon and sugar.

January 28, 2012
Bring your pie skills!
At the St. Paul's Parish in Cambridge, Mass!


January 13, 2012

December 12, 2011
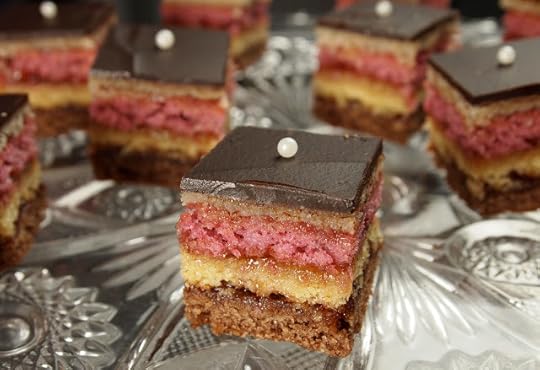
Holiday Treat-a-palooza Round-Up
This isn't an exhaustive list of the holiday offerings here but a nice collection to get you playing.
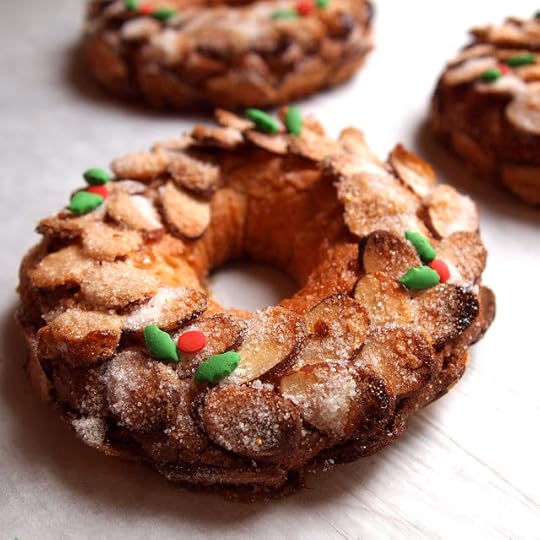
Mandelkränzchen
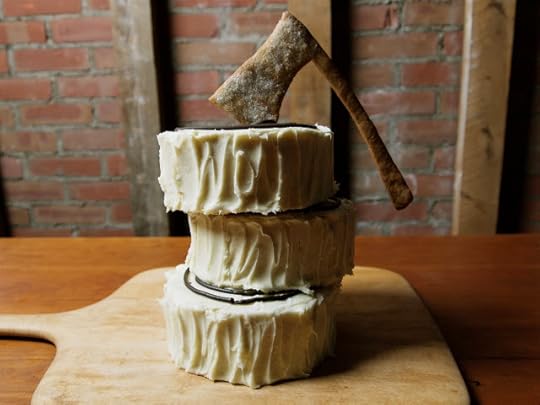
Drunken Figgy Pudding Log
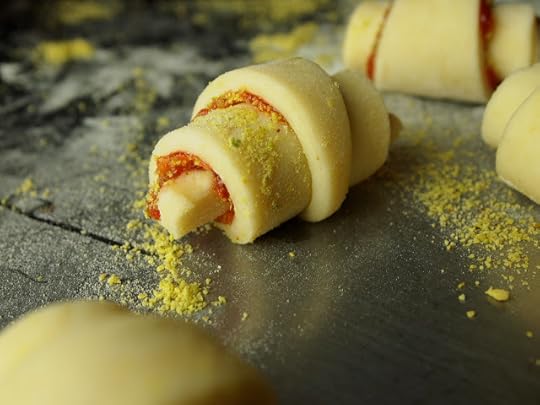
Rugelach
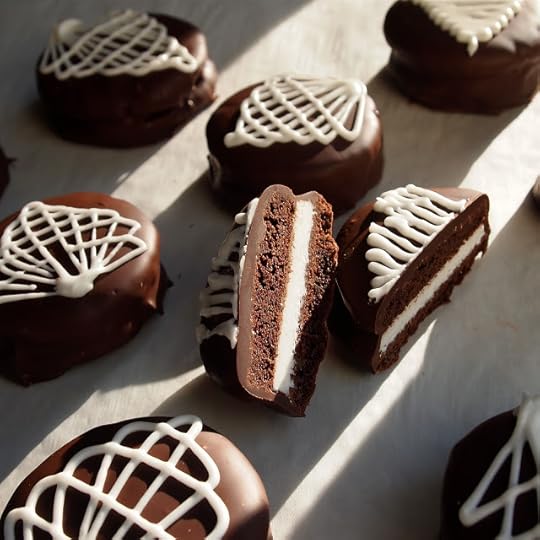
Minty Chocolate Dipped Chocolate Cookies
Dominosteine

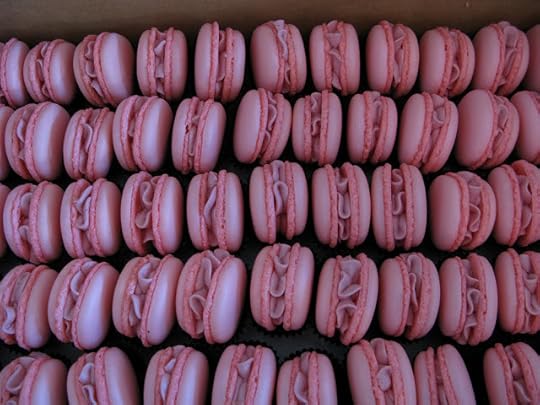
Macaron
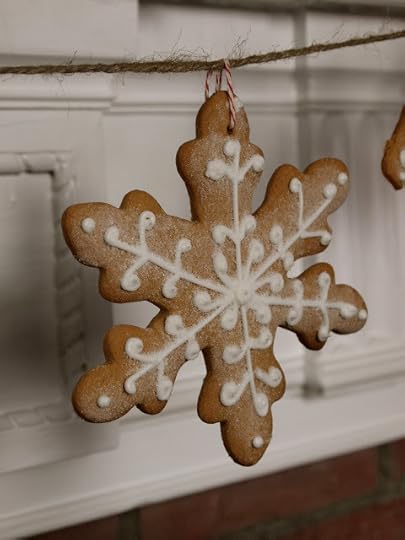
Gingerbread
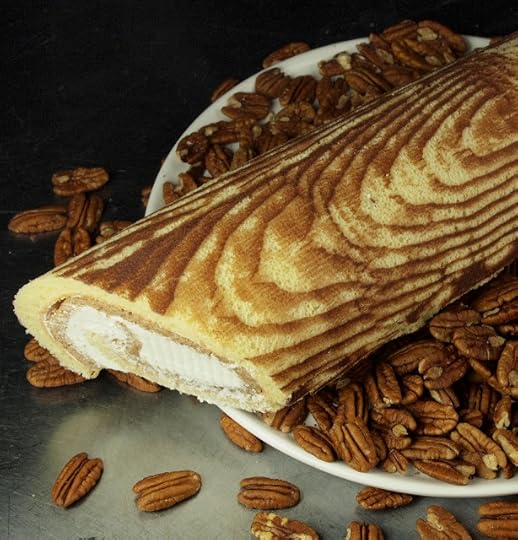
Buche
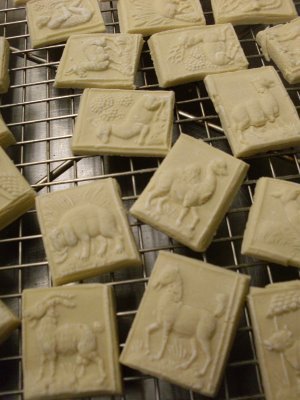
Springerle
Nutella Chevre Brownies
Carrot Cake
Starry Starry Nights


Mandelkränzchen

Drunken Figgy Pudding Log

Rugelach

Minty Chocolate Dipped Chocolate Cookies

Dominosteine

Macaron

Gingerbread

Buche

Springerle

Nutella Chevre Brownies

Carrot Cake

Starry Starry Nights
Gesine Bullock-Prado's Blog

- Gesine Bullock-Prado's profile
- 69 followers
Gesine Bullock-Prado isn't a Goodreads Author
(yet),
but they
do have a blog,
so here are some recent posts imported from
their feed.

