
Gesine Bullock-Prado's Blog, page 22
October 20, 2012
Toffee Apples...because I haven't bought any Halloween Candy.

I haven't bought any Halloween candy. Not yet. Last year I had stocked up by now and I thought I'd been very clever. I purchased the one thing in bulk I'd not be tempted to scarf entirely: Kit Kats smothered in orange dyed white chocolate. I hate white chocolate. And not just because white chocolate is technically not chocolate. I can't stand the waxy sweetness, that paraffin coating that sits on my tongue for what seems like days after one bite. And not one anti-oxidant to be had in the stuff either.

You've likely guessed what happened: I ate all the blechy not-really-a chocolate coated wafers. Each and every one.
This year I've decided to wait until the very last minute. This hasn't been easy. Especially when Christmas decorations are already festooning Home Depot, kicking my "sugar bacchanal" gene into high gear. I see the twinkly lights and my body asks me, "Why don't I have a month's long uninterrupted sugar ache behind the eyeballs by now??? Why haven't I had candy corn???"
Returning from the mecca of all things DIY, I walked into the bakery on autopilot and fetched butter, sugar, salt and a saucepan. Within minutes I was treating my seasonal disorder with a healthy dose of medicinal sugar AND I was eating an apple along the way, fulfilling some of my daily nutritive requirements. I'm a GENIUS!
(I was also celebrating the arrival of my newest baking tome Bake It Like You Mean It on Amazon for preorder. I always like to have two excuses when I'm putting myself into a sugar coma.)
 It's Here! Well, not really. Not until March 5th. But at least I get to look at the low resolution picture of the cover lovingly and imagine the day that it will arrive (one day before my birthday...not that I'm asking you to put it in your calendar or anything).
You too can join me in such goodness post haste.
TOFFEE APPLES
INGREDIENTS
1 cup (two sticks) unsalted butter
1 cup sugar
1 teaspoon salt
1 teaspoon pure vanilla extract (if you've got vanilla bean paste, use it instead. the same amount)
2 large apples or 4 small apples
2-4 twigs about 6 inches long, cleaned
1 cup bittersweet chocolate, finely chopped
1/4 cup roasted pecans, roughly chopped
Procedure
•Line a half sheet pan with parchment paper and coat with a light spray of non-stick cooking spray. Set aside.
•In a heavy bottom saucepan, melt the butter over medium heat. Add the sugar, salt and vanilla and stir constantly.
•You'll notice that at first the butter and sugar are separated. This is perfectly normal.
 Sugar and butter separated. Perfectly normal.
•Continue to stir. If you are a Sugar Baby acolyte or have heard me talk about hot sugar at all, you'll know that this seems anathema in the sugar world: one doesn't stir sugar after it's melted! But in this case, please do. The fat in the butter keeps the sugar from crystalizing while agitating and if you don't stir, the mixture will likely burn.
 Getting there! See that spoon? That's right, I'm stirring.
•Once the butter and sugar appear to be friends and are no longer separated, clip on a candy thermometer. Continue stirring.
 That's a lovely color!
•We're looking for the temperature to rise to 300º and as it gets ever hotter, you'll notice that the sugar mixture behind the thermometer is caramelizing more quickly than the rest of the toffee. Carefully move the thermometer about so you are able to stir those darker patches into the larger whole until you've reached temperature.
 We have arrived!
•Pour the mixture into the prepared pan until you have a thin even layer of toffee.
 Tis poured.
•Allow the toffee to cool just a bit, long enough that you can handle it without scorching your fingers BUT not so long that you can't bend it easily. Score the toffee (if you have large apples, cut it in half and trim the edges so that you have a square. Save the rest to nosh on. If you have smaller apples, cut into quarters).
•Place an apple in the middle of a cut area of toffee and bend the corners up to cover the apple.
 Make sure your toffee is malleable enough to cover the apples.
•If you find that you've waited too long, heat your oven to 200º and place the toffee inside and keep checking until the toffee is pliable.
•While the toffee cools around the apple, place the chopped chocolate in a small metal bowl and place over simmering water. Stir until melted. With a large spoon, drizzle the chocolate over the toffee and sprinkle with the chopped pecans.
*You'll need a sharp knife in order to cut into this puppy for eating. Mortal teeth are in grave danger if you bite right in.*


October 18, 2012
Better Homes and Gardens is HERE!!!

AHHHH! I've been so excited for this, my first (and hopefully not the last) cover of Better Homes and Gardens. You see, that's my pie! And there's a lovely article with pies galore on the inside. Not only do I love the article and pictures but the experience of working with the phenomenal peeps at BHG was unbelievable.
So run out, get yourself a copy and get your pie on.


October 17, 2012

September 20, 2012
Pumpkin Cheesecake Buns with Platinum Yeast

If you've watched the video I made for Red Star's new Platinum Yeast, you may have asked yourself, "Self, what the heck is she making and why can't I have the recipe?" Ask no longer! I present you with Pumpkin Cheesecake Buns!

In honor of this glorious season and the fact that my sugar pumpkins ripened early, I made these tender and succulent yummies. You needn't run out, buy seeds and grow your own pumpkins. Simply grab some pumpkin purée from the store (not pumpkin pie filling, just the purée).

If you can't find Platinum yeast (check Red Star's website for sales locations), you can enter my contest here for a lovely VIP gift extravaganza that includes Platinum yeast, the apron I wore in the video (not the actual apron but one just like it...it's NEW and flour free) among other wonderful goodies. You'll also get to try another recipe that I made with this fantastic yeast.
So enough of my yammering, here's the recipe:
 Yes please!
Pumpkin Cheesecake Rolls
INGREDIENTS
For the dough
5 (to 6) cups All Purpose Flour (I use King Arthur Flour)
1/2 cup sugar
1 packet Red Star Platinum Yeast
1 teaspoon salt
2 eggs, room temperature
1 1/2 cups whole milk, room temperature
1 teaspoon orange extract
1/4 cup unsalted butter, room temperature
PROCEDURE
•Combine dry ingredients in a mixing bowl fit with the dough hook attachment (5 cups flour, yeast, sugar and salt).
•Start mixing to combine the ingredients.
•Whisk together the milk, eggs and extract in a small bowl. Add to the flour mixture and mix until the dough is just combined and shaggy.
•Add the butter, about a tablespoon at a time. Continue mixing until a very smooth, shiny and elastic dough forms, 10 to 15 minutes. If the dough is very wet and sticky, add a little extra flour, about 1/8 cup at a time, until it comes together. This should be a lovely soft dough with "give" but shouldn't be wet and sticky.
 Nice and smooth, ready to rise.
•Transfer the dough to a bowl sprayed with non-stick cooking spray. Spray the top of the dough and cover with plastic wrap or a damp kitchen towel. Place in a warm area of your kitchen and allow to double in size, about an hour.
•Preheat oven to 350º.
•Roll the dough out into a rough rectangle to about 1/4 inch thick. Spread the filling (recipe follows) on the dough, leaving the top 1" of the dough free of filling.
 Spreading it thick.
•Roll the dough into a jelly roll.
 Roll it up neatly and tightly but not so tightly that you squish out all that yummy filling.
•Cut the roll into generous inch slices.
 Pull that tail.
•Tuck the tail under the bun to keep it from unraveling in the oven. Space the buns a few inches apart (alternatively, place them in a tart mold or flan round to keep the rolls contained as they grow in the oven).
 Tuck the tail under.
•Cover with a moist towel and place in a warm area of your kitchen. Allow to double in size.
•Brush with egg wash (1 egg whisked with 2 tablespoons water) and bake until golden brown and puffy, about 20 minutes.
 To keep the buns perfectly round, confine the little stinkers!
•Allow to cool slightly and then drizzle with glaze (recipe follows).
For the filling
 Ruthie watches as I make the filling. You'll notice that her eyebrows are pumpkin colored.
INGREDIENTS
One 8oz package of Philadelphia Cream Cheese, room temperature
1/4 cup unsalted butter, room temperature
3/4 cup confectioner's sugar
1/4 cup pumpkin purée
1/4 cup AP flour
pinch salt
1 egg yolk
1 teaspoon cinnamon (I use King Arthur Flours Vietnamese Cinnamon...AMAZING!)
1/2 teaspoon nutmeg
1/2 teaspoon ground cloves
1/2 teaspoon ginger
1 teaspoon vanilla extract
PROCEDURE
•Combine all ingredients in a stand mixer fit with the whisk or paddle attachment. Mix until smooth.
For the glaze
INGREDIENTS
1 cup confectioner's sugar
1/2 teaspoon vanilla
3-4 tablespoons milk
Procedure
•Whisk until smooth.

September 15, 2012
Meyer Lemon Sugar Crunch Buns with Platinum Yeast (and a contest!)

I'm just going to come out and admit that I eat sugar cubes. I'm like a horse that way; I see a glittering square of sweet and I ferret it into my mouth.
So it shouldn't surprise you a single bit that one of my favorite sweet buns is a craquelin, a brioche based pastry peppered with sugar cubes. When my craquelin craving hit fast and loose yesterday, I ran out to the grocer to pick up a box of sweet bits in the baking aisle, hightailing it through produce like a thoroughbred. I screeched to a halt when I caught site of the gentle orange of the lemon that's not exactly a lemon: the Meyer. I picked up a few to join the crunchy bun party.

At home, I made my sponge, let it rest and continued on with the dough, only to realize that I had too few eggs, 7 too few to be exact, to continue with my recipe. I ran to the chicken coop, wrangled 2 more eggs, which left me needing 5 more. No luck in the fridge but I did find some half-and-half. I poured in just enough to allow the dough to do it's thing and then added my butter and my sugar cubes. I was completely cognizant of the fact that I was on my way to making doughy hockey pucks with my egregious substitutions but that hockey puck would be studded with crackly sugar cubes and saturated with Meyer Lemon goodness, so St. Honoré would just have to let this one sin fly under the radar...and I had another trick up my sleeve that I'd added to the sponge that could save the day.

Just as I put my dough into the proof box, Ray poked his head into the kitchen, "we've got just 1/2 an hour before we're expected at Dartmouth College for the opening of The Black Family Visual Arts Center! Get defloured!" An hour and 1/2 later, flour and apron free, I'm sitting in the game design department called the TiltFactor Lab of the Arts Center, playing Pox: Save the People, a game wherein you try to save the human population from a dread contagion. No matter how I planned out my cyber vaccination plan in order to save the human race, I managed to kill everyone. On my 3rd try, as I'm notified on the iPad screen that yet again the game's over due to mass human extinction at my hand, I remembered that I'd left my craquelin dough in the steamy confines of my proof box without any hope for survival. Good golly, I'm a modern day Typhoid Mary.
 FYI: I'm not to be entrusted with saving the world from contagion.
We get home to an onslaught of 2 hungry Catahoulas and the aroma of that the bready and citrus brioche dough. I dread what I'll find in the proof box. But maybe, just maybe, my secret ingredient will have saved the day. For you see, I added Platinum Red Star Yeast to the dough. It's a new fangled instant yeast that includes dough enhancers. I've partnered with Red Start to launch this new marvel in the baking world so I know that one of the beauties of this yeast is that it takes so much of the guess work of playing with yeast out of the equation: is it proofed enough, is it over proofed, is it alive, is it too sweet a dough to handle yeast is, is the ratio of wheat flour to high to allow for a decent rise? No matter, Platinum yeast is going to work beautifully in almost all circumstances. But let's be fair here, not even this super yeast can save my onslaught of destruction. Just as the cyber population of the world has fallen dead under my ministration, so shall this yeast perish under my negligence.
 A perfect orb of sugary goodness.
But ho! What's this? The dough has risen extraordinarily and hasn't yet fallen. And I don't smell that heartbreaking malodor, "dead yeast funk." So I carry on, even though the sugar cubes have melted a bit from the sultry heat. I divide the dough and I make my single loaf and my precious buns. And what do you know? Glorious. Every bit is a crunchy, Meyer lemon celebration.
Here's the video, for you viewing pleasure. The crunchy bun recipe follows! And if you'd like a little gift basked of lovely baking goodies, including Platinum Yeast, a stripy apron like I use (sans flour) and other treats, please leave a comment and I'll choose a lucky winner on October 1st!
NOTE! Platinum Red Star Yeast is available NOW all across the country. Check their website: http://www.redstaryeast.com/platinum for a store near you. And sadly, this contest is limited to the United States.
Meyer Lemon Crunchy Buns with Platinum Yeast
(Makes 20 sugar buns or 10 sugar buns and one 9" loaf)
INGREDIENTS
For the sponge
2 packages Platinum Red Star Yeast
1 cup luke warm milk
1/4 cup granulated sugar
10 ounces bread flour
For the dough
1/2 cup sugar
1 tablespoon salt
3 eggs
1 cup (plus extra just in case) half-and-half
Zest and juice from two Meyer Lemons
2 pounds all purpose flour
8 ounces unsalted butter (2 sticks) at room temperature
32 sugar cubes (Domino Sugar makes sugar "tablets", these you should chop in half but still use 32)
Loaf optional ingredient: 4 ounces almond paste)
To Finish
1/2 cup turbinado sugar (Sugar in the Raw)
egg wash (one egg whisk together with 2 tablespoons water)
PROCEDURE
For the sponge
•Add the warm milk to a mixing bowl fit with the dough hook attachment. Then add the flour, yeast and sugar. Mix until a very soft dough forms, about 2 to 3 minutes. Cover with a damp dish cloth and set in a warm area of your kitchen until the sponge doubles in size, about an hour.
For the dough
•Preheat your oven to 350º.
•Whisk together the eggs, the 1 cup half and half and the juice and zest. To the sponge, add the flour, the granulated sugar and salt. Start mixing and add the egg, half and half and Meyer lemon mixture. If the dough is very dry, add a few more tablespoons of half and half.
•Add the butter, a few pieces at a time, and continue mixing until the dough no longer looks shaggy but becomes a smooth, shiny dough. Just as the dough is starting to look right, add the sugar cubes and continue mixing until they are well incorporated. Spray a large bowl with non-stick cooking spray and transfer the dough to the bowl. Spray the top of the dough with cooking spray and cover everything with plastic wrap.
•Set aside in a warm area of your kitchen until doubled in volume, about an hour.
•Punch dough down and transfer to a floured surface.
•Cut the dough in half. Divide one half of the dough into 10 even pieces and roll into uniform balls, placing the balls on a parchment lined sheet pan, seam side down and spaced a few inches apart. Cover with plastic wrap and allow to proof until they have barely doubled in size.
•For the loaf, gently pat the dough into a 10" long and 6" wide rectangle. Roll the almond paste into a 9" long rope and place in the middle of the dough. Fold the two sides of the dough over the almond paste and place the dough into a 9" long loaf pan, tucking the ends gently under. Cover with plastic wrap and allow to just double in size.
•Brush the tops of the buns and loaf with egg wash and sprinkle with turbinado sugar. Bake the buns for 25 to 30 minutes or until they are golden brown and spring back gently when poked. Bake the loaf for about 45 minutes until golden brown.

August 12, 2012

July 31, 2012


July 12, 2012
Love The One You're With: Apricot Tart

"What's your favorite pie?"
Daily, I'm asked this question.
It used to be, "what's your favorite candy to make" but that was when I was shamelessly promoting Sugar Baby. But now that I'm shamelessly promoting Pie It Forward, the questions are about pie. And what's my favorite.
And I always answer, because it's true, "It depends on the season."

If you bake as much as I do and if your purpose in baking is to conjure something new from the golden standards of butter, flour and sugar, one thing you can't afford is pastry monogamy. You must go with the flow of the seasons and experiment. Often. You seek out new partners and shower them with affection and attention. Get what you need and move on. No lingering. No coddling. The seasons are fleeting and there are too many ingredients screaming to be used! I'm just one woman. I can't afford culinary attachments.
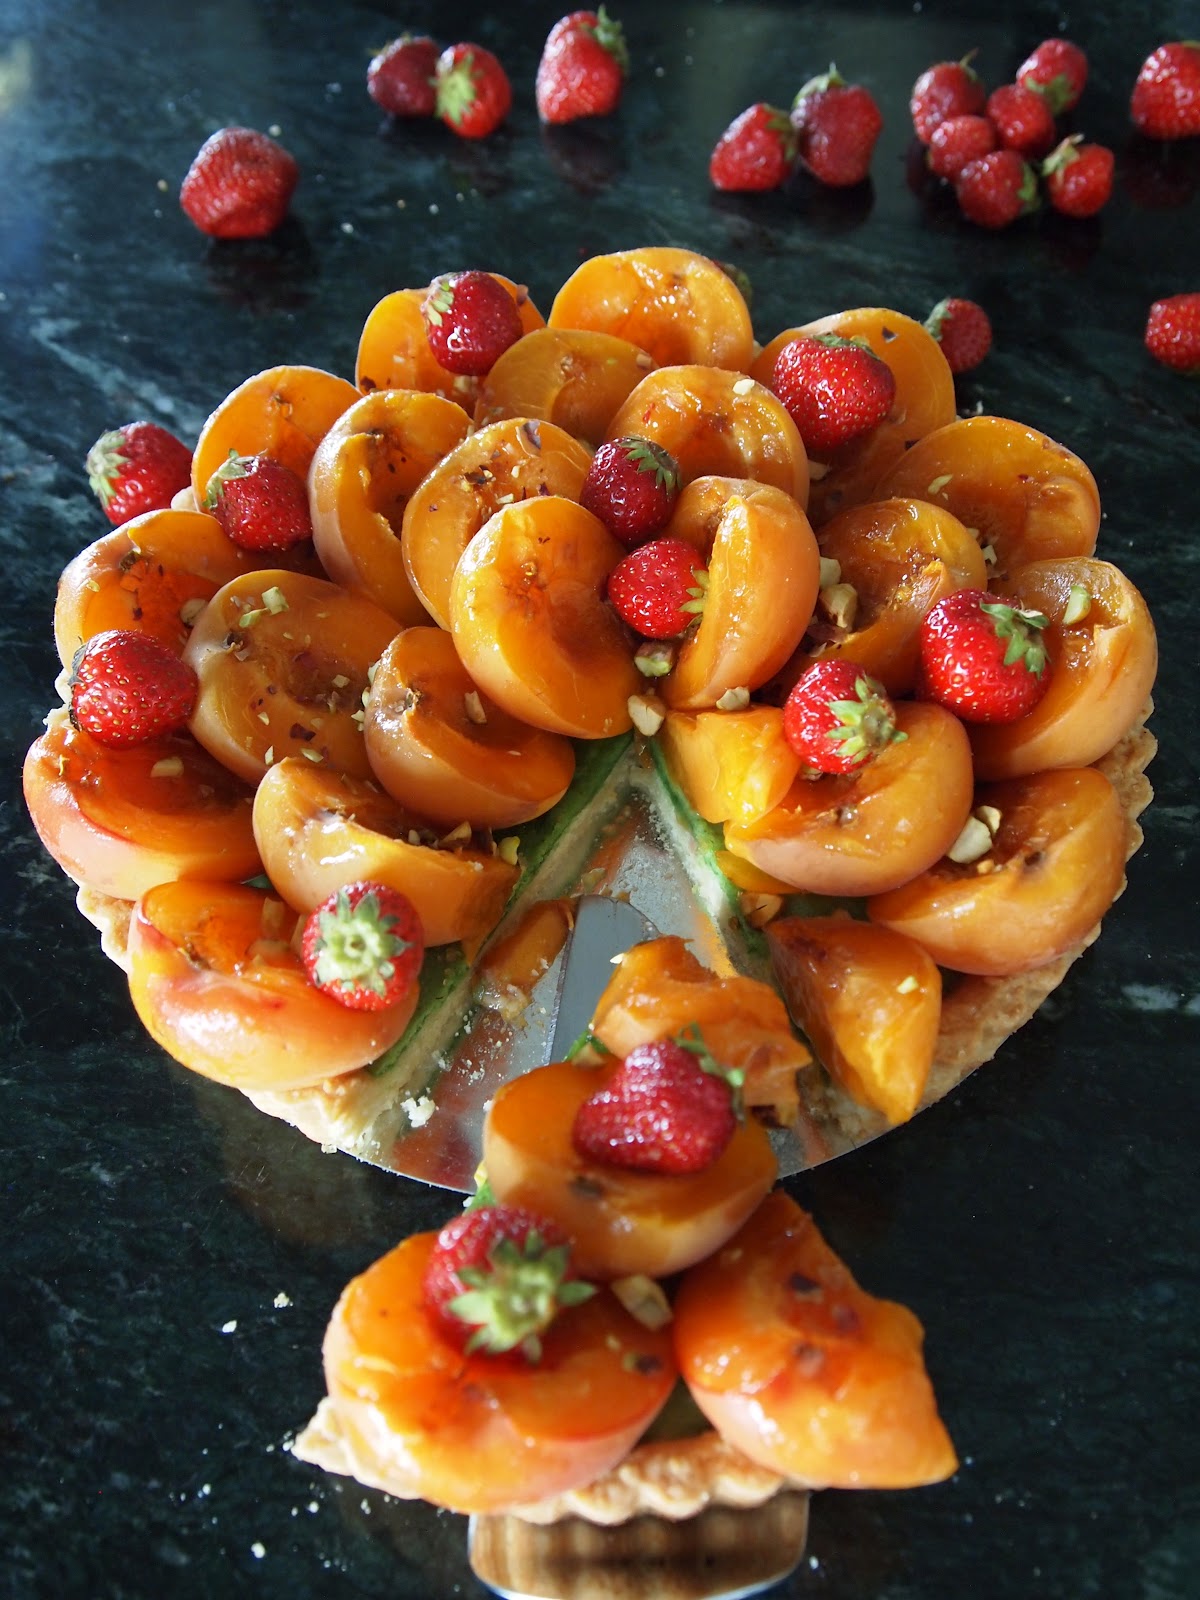
Today, the apricots are ripe and my strawberry patch is in danger from marauding bunny rabbits. And I had a random can of pistachio paste in the bakery pantry and a few lonely unshelled pistachios besides. Today, an apricot, strawberry frangipane tart is "my favorite pie." Because it's true...until the Italian plums are ripe and then I'll have to move on.
Apricot/Strawberry Pistachio Frangipane Tart
INGREDIENTS
For the crust
2 cups flour1 cup corn starch1/2 cup sugar1 teaspoon salt1 1/4 cups unsalted butter, very cold and cut into small pieces1 egg3 tablespoons sweetened condensed milk1 teaspoon vanilla extract
For the frangipane
5 ounces pistachio paste3 tablespoons unsalted butter, softened2 tablespoons all purpose flour1 egg
For the topping
12 ripe apricotsapricot preserves1 pint wild strawberries or just very small traditional strawberries10 pistachios, roughly chopped2 tablespoons turbinado sugar (I use Sugar in the Raw)
PROCEDURE
For the crust
•Preheat oven to 350º
•In the bowl of a food processor fit with the blade attachment, combine the flour, cornstarch, sugar and salt and pulse to combined. Add the cold butter and pulse until the mixture resembles very coarse cornmeal.
•In a small bowl, whisk together the sweetened condensed milk, the egg and vanilla. Slowly add the egg mixture to the processor while pulsing until the dough just start to look moist and come together.
•Turn the dough out onto a large sheet of parchment or plastic wrap and gently "massage" the dough with the tips of your finger to evenly distribute any drier bits with the more moist bits.
•Press a little over half the dough into a 10" tart pan. Use the tips of your fingers to pat the dough into place and up the sides of the pan. Bake for 10 minutes.
For the frangipane
•Combine all the ingredients in the bowl of a food processor fit with the blade attachment and process until smooth.
•Transfer the frangipane to the crust and smooth it into an even layer with a small offset spatula or the back of a spoon.
•Bake for 5 more minutes.
To finish
•Cut the apricots in half and remove the pit. Line the tart pan in concentric circles with the apricots and sprinkle with the turbinado sugar. Bake for 10 to 15 more minutes, until the apricots just start to be come fragrant and soften and the frangipane firms.
•Brush the apricots with the apricot preserves and top willy nilly with strawberries and the chopped pistachios.
**NOTE** You'll have extra dough from the crust that you can sprinkle over the apricots before baking, like a a crumble or just bake it like a shortbread!
 Left over crust dough makes for some mighty fine shortbread.
July 2, 2012
Flag Cake!

It's coming! That special day where we grill, drink beer, celebrate our nation's independence and swap stories of childhood traumas involving bottle rockets.
It's also time to drag out that sheet cake smothered in whipped cream and dotted with strawberry stripes and a field of blueberries. I have nothing against this cake. It can be terribly delicious. I'm all for using berries instead of toxic dye to pay homage to liberty, justice and anti-oxidants for all. But sometimes you need to break out the evil stuff to get the party started.

Well, not too much evil. Adding enough red to a cake batter to make it truly red gives me the creeps, so I tend towards a lovely fuchsia but you can go to town if you like.
Happy 4th, sweet people! Let freedom and dessert ring!

FLAG CAKE
For the white (and red and blue) cake
Ingredients
14 egg whites
3 sticks of unsalted butter, room temperature
3 cups sugar
2 1/2 cups buttermilk
6 cups cake flour
2 1/2 tablespoons baking powder
1 teaspoon salt
1 teaspoon lemon extract
blue food dye
red food dye
Procedure
1. Preheat your oven to 325º
2. In the bowl of a stand mixer fit with the paddle attachment, combine the sugar and butter. Cream until light and fluffy.
3. While the butter and sugar are creaming, place the egg whites, buttermilk and extract in a bowl and whisk. In another bowl, whisk together the flour, baking powder and salt.
4. Once the butter and sugar are light and fluffy, add 1/3 of the buttermilk mixture and then 1/3 of the flour mixture. Alternate between the buttermilk and flour until the batter is smooth.
5. Transfer 2 cups of the batter to a small bowl and stir in 2 to 3 drops of blue food dye.
6. Bake the blue batter in a 6" cake ring sprayed with non-stick cooking spray and bake for 20 minutes or until the cake springs back when gently poked.
7. Divide the rest of the batter in half. Stir enough red dye into one half of the batter until your are happy with the color (I used 4 drops).
8. Spray four 8" cake pans with non-stick cooking spray and line the bottoms with parchment rounds. Divide the white batter evenly among two of the pans and the red among the other two. Bake for 25 minutes or until the cake springs back when gently poked.
9. Allow all the cakes to cool completely.
10. Once the cakes are cool, using a very sharp serrated knife level the top of the blue cake. Set aside.
Cut each of the remaining white and red layers into 1/2 inch layers so you are left with 4 layers of red and white cake.
For the buttercream
Ingredients
10 egg whites
2 cups of sugar
6 sticks of unsalted butter, room temperature
Procedure
1. In the bowl of a stand mixer fit with the whisk attachment, combine the egg whites and sugar.
2. Place the bowl over a bain marie (a saucepan half filled with simmering water) and whisk until he sugar has completely melted and the egg white mixture feels very warm to the touch.
3. Transfer the bowl to the mixer and whisk until you achieve stiff, shiny white peaks and the bowl is cool to the touch.
4. Add the butter, a few tablespoons at a time and whisk until the buttercream thickens and becomes a smooth icing.
To assemble
1. Place a red layer on a cake platter and smooth 1/2 cup of buttercream in an even layer over the cake. Top with a white cake layer and add another 1/2 cup of buttercream. Continue until you've layered and butter creamed all 8 layers. Place the cake in the freezer for 1/2 hour to set.
2. Once the cake has set, measure the depth of the blue cake layer. Remove the layered cake from the freezer and measure the side of the cake from the top to see how many layers deep the blue layer will sit (mine was 3 layers deep). Take a 6" cake ring and plunge it into the middle of the cake to the depth of the blue layer. Gently remove the middle layers and toss or eat them.
3. Spread a 1/8 inch layer of butter cream along the bottom and side of the newly made cavity and drop in the blue layer.
4. Spread a crumb coat of buttercream over the top and sides of the cake and freeze for 10 to 20 minutes to set the buttercream.
5. Spread a finishing layer of buttercream over the top and sides and then decorate festive gear (I used Chocolate covered sunflower seeds).
HAPPY FOURTH!!!


We the people: a layered, patriotic pie to celebrate independence.
It wasn't easy, the road to independence. Neither is this cake. But both are worth all the trouble.

This is a layered pie. I created layered pies as an alternative to the "event cake." If you want to learn more about them, you can find more recipes and techniques in my book Pie it Forward but for now, let's move forward with this festive wonder.
The interior of this cake is comprised of puff pastry layers, lightened pastry cream and berries. The top is meringue. The sides are joconde decor sides.

First, make the puff. You'll be making more than you need but the technique is a little time consuming, so it's worth having extra in the freezer when you're in an appetizer or dessert bind.
PUFF PASTRY
Recipe from Pie it Forward
Ingredients
For the butter block
2 pounds unsalted butter, room temperature
1 teaspoon salt
1 teaspoon lemon juice
8 ounces bread flour
For the dough
2 teaspoons salt
2 teaspoons lemon juice
1/2 cup unsalted butter, melted and cooled
1 1/2 pounds all purpose flour
1 3/4 cups water, cold
PROCEDURE
For the butter block
1. Combine all the butter block ingredients in the bowl of a stand mixer fit with the paddle attachment. Mix until the mixture is smooth.
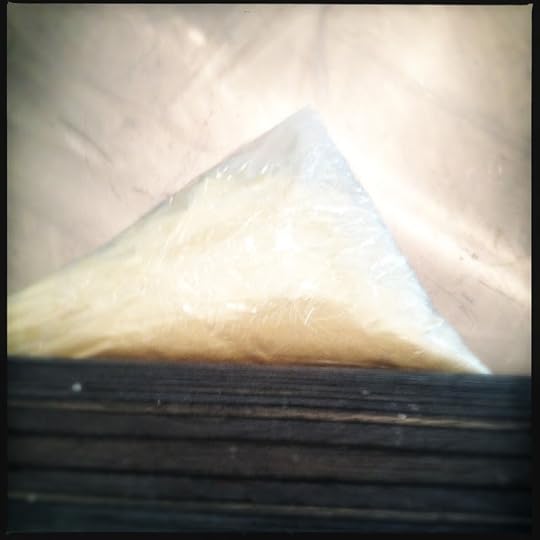
2. Transfer the butter to a piece of parchment and form into a 10 x 14 inch rectangle. Place another piece of parchment on top of the butter and tape the sides and then cover completely with plastic wrap. If you have a full sheet pan sized piece of parchment, this is how you use it:
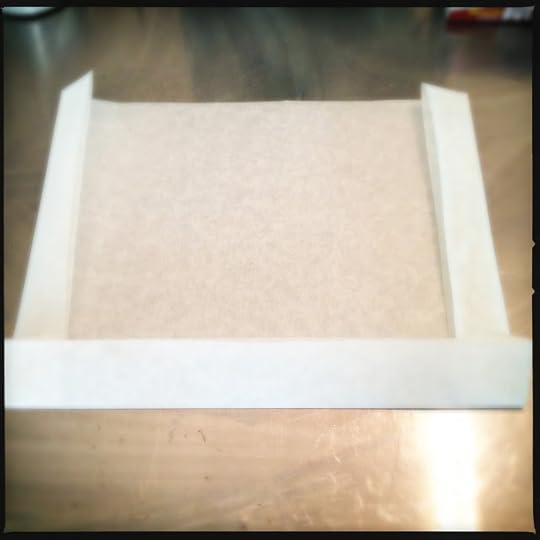 Fold the full sized parchment in half and then fold sides about an inch to provide a guide.
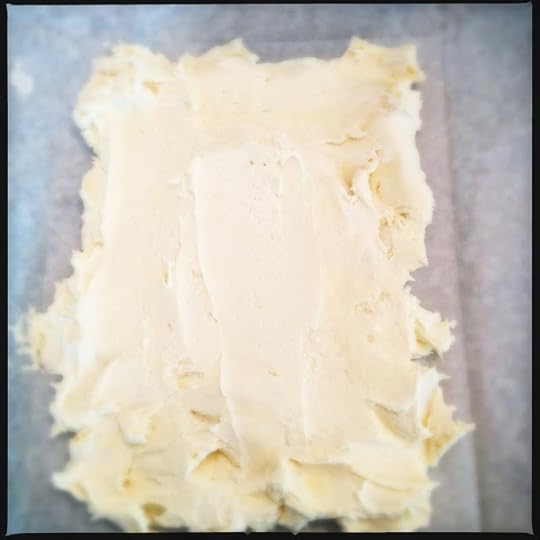 Smear the butter into a loose rectangle and then fold the parchment over the butter and fold the edges, along your guide lines, to create a tight little package. Tape the edges and wrap completely in plastic wrap.
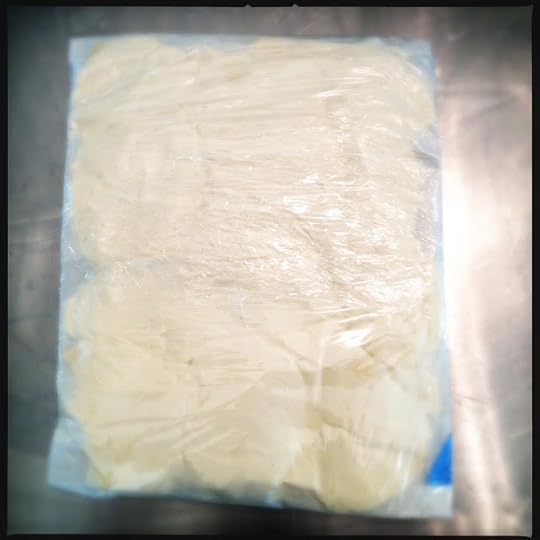 Covered in parchment, taped and covered with plastic wrap.
 Using a rolling pin, roll the butter block into a perfect rectangle, making sure to get the butter into the corners and make sure the butter block is level.
 Butter block, nice and even. Keep in a cool place or refrigerate while making the dough. Make sure that the butter is cool enough that you can easily remove the parchment from the butter without the butter sticking and you are able to pick up the block easily but not so cold that you can't bend the block without it breaking.
For the dough
1. In the bowl of a stand mixer fit with the dough hook, combine the water, salt, lemon juice and melted butter. Add the flour and mix on medium low until you have a very smooth, shiny dough. The dough will be very soft, just as it should be. Wrap in plastic wrap and rest for 20 minutes.
To laminate the dough
The process of making puff pastry (and croissant, and danish and kouign amann) is called "lamination." It's the process of placing a butter block in between layers of dough and folding the two together in multiple "folds" until you have many many (thousands!) of layers. Hence the French name for the dough, Mille Feuille, a thousand leaves (or layers).
1. Turn the dough out onto an evenly flours work surface. Roll into a 16 x 24 inch rectangle. Make sure the dough doesn't stick to your work surface.
2. Unwrap your butter block and place on one half of the dough, leaving a border free of about an inch.
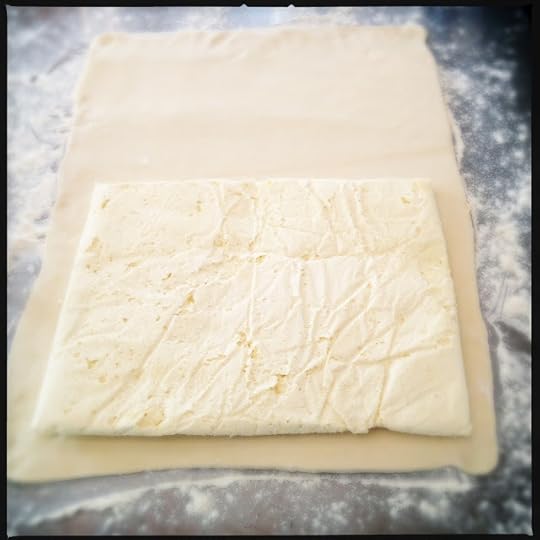 Place butter block on to half of the dough, leaving a border naked.
3. Fold the other half of the dough over the butter block and press along the edges to seal the butter into the dough package. This is called the "lock in." Using a rolling pin, roll the dough into a 16 x 24 inch rectangle and trim the edges.
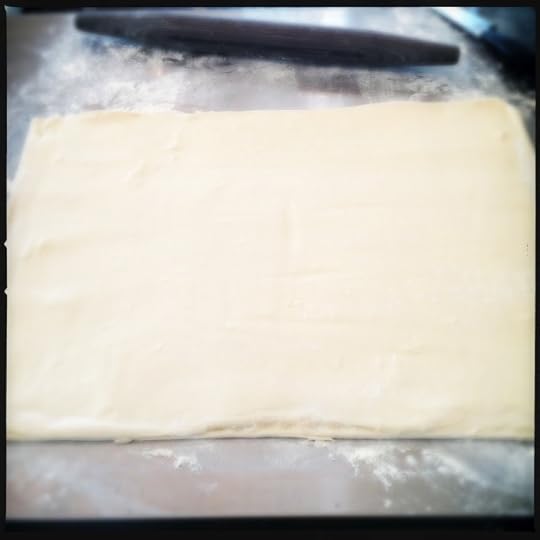 Roll the dough into a rectangle and trim edges.4. Start the "letter fold": Fold one short edge of the dough towards the middle:

5. Fold the remaining third of dough over the first fold, as if you were folding a business letter (hence the name, "letter fold").
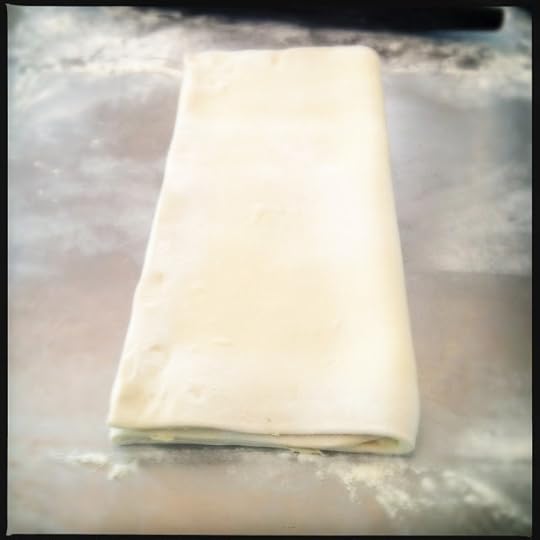 Letter fold complete.
6. Cover the dough with plastic wrap and refrigerate for 20 minutes (no more than that) to give it time to rest. Repeat the letter fold procedure again, 3 more times. Allow the dough to rest in between each fold for no more than 20 minutes.
Once you've got the puff resting in the fridge, move on to the decor sides. The recipe and technique is here from an earlier post.
Here's a little visual tutorial on how I used this technique to make flag sides:
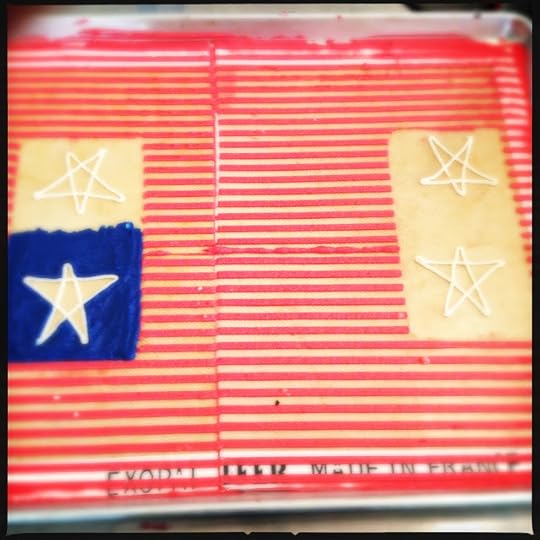 This is the tuile portion of the technique. I divided the tuille paste this way: I put a 1/4 cup into a pastry bag fit with a small open tip. Set aside. I place 1/4 of the remaining tuille into a bowl and dye with 2 drops blue gel food coloring and add about 3 to 4 drops of red food dye to the remaining batter. I first taped pieces of parchment on the silpat where I knew I'd want my blue field. I then made my red stripes. I removed the parchment and piped white stars on the field and then carefully smoothed blue in the empty area around the star. I cut this strip in half lengthwise to make two 10" tall 6" wide cakes.
 All baked!
Make the puff rounds:
Take half of the puff dough and divide it into 8 pieces. Roll each piece into a rough 7" circle and then trim the circle down to a perfect 6" circle with a very sharp knife.
Place the rounds on a parchment lined sheet pan (you'll probably need two) and bake at 375º for about 10 minutes, until the puff just starts to puff! Place a piece of parchment over the rounds and place a sheet pan on top of the parchment to weigh down the puff. It sounds strange but that's how it's down when baking puff for things like Napoleon. Bake for another 30 minutes or until dark golden brown. Cool the puff completely.
FOR THE FILLING
1 pint strawberries
1 pint blueberries
2 cups heavy cream
pastry cream (recipe below)
Make the pastry cream:
Ingredients
12 egg yolks
1 cup sugar
1/2 cup corn starch
1/4 teaspoon salt
1 tablespoon vanilla bean paste
4 cups half and half
Procedure
1. Place the yolks, sugar, corn starch, salt and vanilla bean paste in the bowl of a stand mixer fit with the whisk attachment. Whisk until smooth and pale.
2. In the meantime, pour the half and half into a large sauce pan and bring to a simmer. Slowly pour the hot half and half mixture into the whisking egg yolk mixture. Whisk until combined.
3. Transfer the mixture back into the saucepan and return to the stovetop and whisk over medium heat, constantly, until it has thickened (about the consistency of ketchup).
4. Transfer the pastry cream to a large bowl and cover the top completely with plastic wrap and refrigerate until cool (about an hour).
Assemble the cake:
1. Whip the heavy cream until stiff peaks form. Stir the cooled pastry cream to loosen and then fold the whipped cream gently into the pastry cream.
2. Line a 6 inch cake ring with the joconde sides. Place a puff round at the bottom of the ring and top with a layer of hulled strawberries. Cover with an even layer of lightened pastry cream, about 1 cup. Top with another layer of puff and then layer with pastry cream, about 1 1/2 cups. Place another puff round atop the pastry cream, cover with an even layer of blueberries and then add lightened pastry cream, about 1 1/2 cups. Add another layer of puff and add just enough lightened pastry cream to reach the top of the joconde sides. Wrap in plastic wrap and freeze until set, about 2 hours to overnight.
TO FINISH
Make meringue
Ingredients
1 cup sugar
1/3 cup water
5 egg whites
pinch salt
Procedure
1. In the bowl of a stand mixer fit with the whisk attachment, combine the egg whites and salt. Whisk until foamy.
2. In the meantime, combine the sugar and water in a large saucepans and stir over medium low heat until the sugar has completely melted. Raise the heat to high, attach a candy thermometer and heat the sugar mixture to 234º.
3. With the mixer running, carefully pour the sugar syrup down the side of the mixing bowl, into the whisking egg whites. Whisk until you get VERY stiff, white shiny peaks.
4. Remove the layered pie from the freezer. Gently warm the sides of the cake ring with a heat gun or blow dryer to release the ring.
5. Transfer the meringue into a large pastry bag fit with a large open tip. Pipe spiky dollops of meringue on top of the pie.
6. Refrigerate for 1 hour to allow the filling to thaw. Serve immediately.


This is a layered pie. I created layered pies as an alternative to the "event cake." If you want to learn more about them, you can find more recipes and techniques in my book Pie it Forward but for now, let's move forward with this festive wonder.
The interior of this cake is comprised of puff pastry layers, lightened pastry cream and berries. The top is meringue. The sides are joconde decor sides.

First, make the puff. You'll be making more than you need but the technique is a little time consuming, so it's worth having extra in the freezer when you're in an appetizer or dessert bind.
PUFF PASTRY
Recipe from Pie it Forward
Ingredients
For the butter block
2 pounds unsalted butter, room temperature
1 teaspoon salt
1 teaspoon lemon juice
8 ounces bread flour
For the dough
2 teaspoons salt
2 teaspoons lemon juice
1/2 cup unsalted butter, melted and cooled
1 1/2 pounds all purpose flour
1 3/4 cups water, cold
PROCEDURE
For the butter block
1. Combine all the butter block ingredients in the bowl of a stand mixer fit with the paddle attachment. Mix until the mixture is smooth.
2. Transfer the butter to a piece of parchment and form into a 10 x 14 inch rectangle. Place another piece of parchment on top of the butter and tape the sides and then cover completely with plastic wrap. If you have a full sheet pan sized piece of parchment, this is how you use it:
 Fold the full sized parchment in half and then fold sides about an inch to provide a guide.
 Smear the butter into a loose rectangle and then fold the parchment over the butter and fold the edges, along your guide lines, to create a tight little package. Tape the edges and wrap completely in plastic wrap.
 Covered in parchment, taped and covered with plastic wrap.
 Using a rolling pin, roll the butter block into a perfect rectangle, making sure to get the butter into the corners and make sure the butter block is level.
 Butter block, nice and even. Keep in a cool place or refrigerate while making the dough. Make sure that the butter is cool enough that you can easily remove the parchment from the butter without the butter sticking and you are able to pick up the block easily but not so cold that you can't bend the block without it breaking.
For the dough
1. In the bowl of a stand mixer fit with the dough hook, combine the water, salt, lemon juice and melted butter. Add the flour and mix on medium low until you have a very smooth, shiny dough. The dough will be very soft, just as it should be. Wrap in plastic wrap and rest for 20 minutes.
To laminate the dough
The process of making puff pastry (and croissant, and danish and kouign amann) is called "lamination." It's the process of placing a butter block in between layers of dough and folding the two together in multiple "folds" until you have many many (thousands!) of layers. Hence the French name for the dough, Mille Feuille, a thousand leaves (or layers).
1. Turn the dough out onto an evenly flours work surface. Roll into a 16 x 24 inch rectangle. Make sure the dough doesn't stick to your work surface.
2. Unwrap your butter block and place on one half of the dough, leaving a border free of about an inch.
 Place butter block on to half of the dough, leaving a border naked.
3. Fold the other half of the dough over the butter block and press along the edges to seal the butter into the dough package. This is called the "lock in." Using a rolling pin, roll the dough into a 16 x 24 inch rectangle and trim the edges.
 Roll the dough into a rectangle and trim edges.4. Start the "letter fold": Fold one short edge of the dough towards the middle:
5. Fold the remaining third of dough over the first fold, as if you were folding a business letter (hence the name, "letter fold").
 Letter fold complete.
6. Cover the dough with plastic wrap and refrigerate for 20 minutes (no more than that) to give it time to rest. Repeat the letter fold procedure again, 3 more times. Allow the dough to rest in between each fold for no more than 20 minutes.
Once you've got the puff resting in the fridge, move on to the decor sides. The recipe and technique is here from an earlier post.
Here's a little visual tutorial on how I used this technique to make flag sides:
 This is the tuile portion of the technique. I divided the tuille paste this way: I put a 1/4 cup into a pastry bag fit with a small open tip. Set aside. I place 1/4 of the remaining tuille into a bowl and dye with 2 drops blue gel food coloring and add about 3 to 4 drops of red food dye to the remaining batter. I first taped pieces of parchment on the silpat where I knew I'd want my blue field. I then made my red stripes. I removed the parchment and piped white stars on the field and then carefully smoothed blue in the empty area around the star. I cut this strip in half lengthwise to make two 10" tall 6" wide cakes.
 All baked!
Make the puff rounds:
Take half of the puff dough and divide it into 8 pieces. Roll each piece into a rough 7" circle and then trim the circle down to a perfect 6" circle with a very sharp knife.
Place the rounds on a parchment lined sheet pan (you'll probably need two) and bake at 375º for about 10 minutes, until the puff just starts to puff! Place a piece of parchment over the rounds and place a sheet pan on top of the parchment to weigh down the puff. It sounds strange but that's how it's down when baking puff for things like Napoleon. Bake for another 30 minutes or until dark golden brown. Cool the puff completely.
FOR THE FILLING
1 pint strawberries
1 pint blueberries
2 cups heavy cream
pastry cream (recipe below)
Make the pastry cream:
Ingredients
12 egg yolks
1 cup sugar
1/2 cup corn starch
1/4 teaspoon salt
1 tablespoon vanilla bean paste
4 cups half and half
Procedure
1. Place the yolks, sugar, corn starch, salt and vanilla bean paste in the bowl of a stand mixer fit with the whisk attachment. Whisk until smooth and pale.
2. In the meantime, pour the half and half into a large sauce pan and bring to a simmer. Slowly pour the hot half and half mixture into the whisking egg yolk mixture. Whisk until combined.
3. Transfer the mixture back into the saucepan and return to the stovetop and whisk over medium heat, constantly, until it has thickened (about the consistency of ketchup).
4. Transfer the pastry cream to a large bowl and cover the top completely with plastic wrap and refrigerate until cool (about an hour).
Assemble the cake:
1. Whip the heavy cream until stiff peaks form. Stir the cooled pastry cream to loosen and then fold the whipped cream gently into the pastry cream.
2. Line a 6 inch cake ring with the joconde sides. Place a puff round at the bottom of the ring and top with a layer of hulled strawberries. Cover with an even layer of lightened pastry cream, about 1 cup. Top with another layer of puff and then layer with pastry cream, about 1 1/2 cups. Place another puff round atop the pastry cream, cover with an even layer of blueberries and then add lightened pastry cream, about 1 1/2 cups. Add another layer of puff and add just enough lightened pastry cream to reach the top of the joconde sides. Wrap in plastic wrap and freeze until set, about 2 hours to overnight.
TO FINISH
Make meringue
Ingredients
1 cup sugar
1/3 cup water
5 egg whites
pinch salt
Procedure
1. In the bowl of a stand mixer fit with the whisk attachment, combine the egg whites and salt. Whisk until foamy.
2. In the meantime, combine the sugar and water in a large saucepans and stir over medium low heat until the sugar has completely melted. Raise the heat to high, attach a candy thermometer and heat the sugar mixture to 234º.
3. With the mixer running, carefully pour the sugar syrup down the side of the mixing bowl, into the whisking egg whites. Whisk until you get VERY stiff, white shiny peaks.
4. Remove the layered pie from the freezer. Gently warm the sides of the cake ring with a heat gun or blow dryer to release the ring.
5. Transfer the meringue into a large pastry bag fit with a large open tip. Pipe spiky dollops of meringue on top of the pie.
6. Refrigerate for 1 hour to allow the filling to thaw. Serve immediately.

Gesine Bullock-Prado's Blog

- Gesine Bullock-Prado's profile
- 69 followers
Gesine Bullock-Prado isn't a Goodreads Author
(yet),
but they
do have a blog,
so here are some recent posts imported from
their feed.

