Gesine Bullock-Prado's Blog, page 20
November 17, 2012
The Great Pumpkin Round-up

Is it Thanksgiving or Hanksgiving? My pie seems to think the latter. No matter what you celebrate this coming Thursday, pumpkin is going to show up to the party.Here's my annual pumpkin round-up to help you with your menu planning.

Do you have the latest copy of Better Homes and Gardens? You can choose from a host of my pies featured on the cover and inside...including a fluffy pumpkin caramel pie with nummy meringue.
 Caramel Mascarpone Pumpkin Pie
 Pumpkin Pullman Mousse
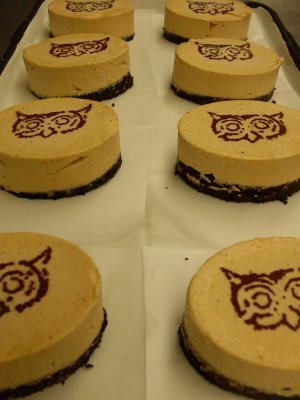 Pumpkin Mousse
 Sugar Pumpkin Roulade
 Pumpkin Cheesecake Buns
 Toffee Maple Coffee Cake
 Pumpkin Brioche Bread Pudding with Egg Nog Creme Anglaise
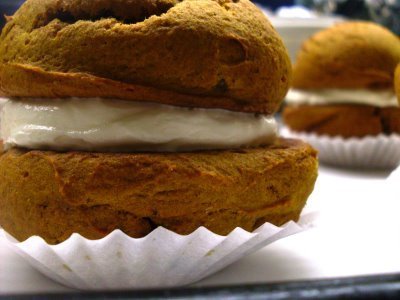 Pumpkin Whoopies with Cream Cheese Frosting
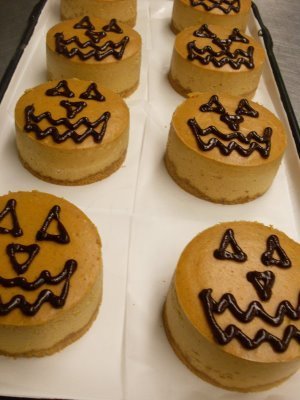 Pumpkin Cheesecake
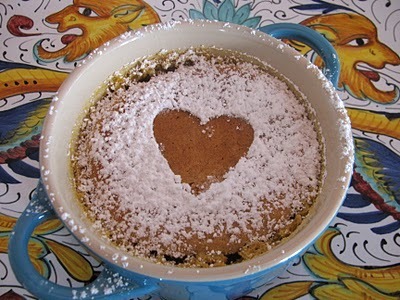 Pumpkin Pudding Cake
Published on November 17, 2012 13:17
The Great Pumpkin Round-up

Is it Thanksgiving or Hanksgiving? My pie seems to think the latter. No matter what you celebrate this coming Thursday, pumpkin is going to show up to the party.Here's my annual pumpkin round-up to help you with your menu planning.

Do you have the latest copy of Better Homes and Gardens? You can choose from a host of my pies featured on the cover and inside...including a fluffy pumpkin caramel pie with nummy meringue.
 Caramel Mascarpone Pumpkin Pie
 Pumpkin Pullman Mousse
 Pumpkin Mousse
 Sugar Pumpkin Roulade
 Pumpkin Cheesecake Buns
 Toffee Maple Coffee Cake
 Pumpkin Brioche Bread Pudding with Egg Nog Creme Anglaise
 Pumpkin Whoopies with Cream Cheese Frosting
 Pumpkin Cheesecake
 Pumpkin Pudding Cake
Published on November 17, 2012 13:17
GIVE THANKS! Caramel Mascarpone Pumpkin Pie and a BIG WINNER!
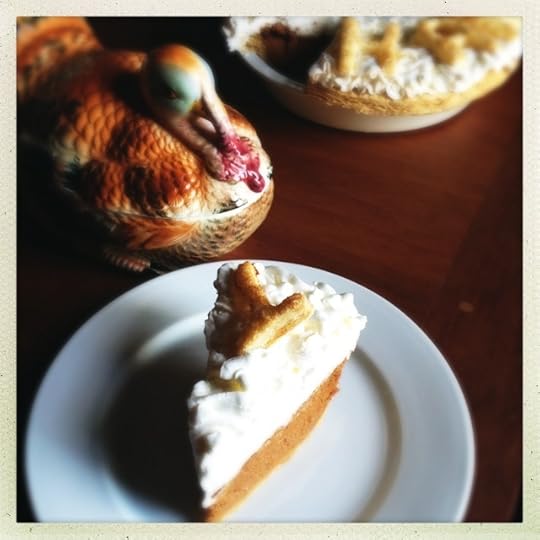
I've never posted my traditional pumpkin pie recipe. Never. I thought it high time since I made thousands of pumpkin pies every Thanksgiving at Gesine Confectionary. We'd have requests all year long for our pumpkin pie, that's how damn tasty it is. But as you'll see, what is meant to be traditional always gets a twist in my hands. The crust isn't your standard, tough pie dough. Instead I use quick puff. It's flaky, sinfully packed with butter and is the perfect foil for the sweet filling. My recipe gives you dough left over to freeze up to a month or to use as a shell for you Thanksgiving leftovers (it's just as good with savory as it is with sweet).
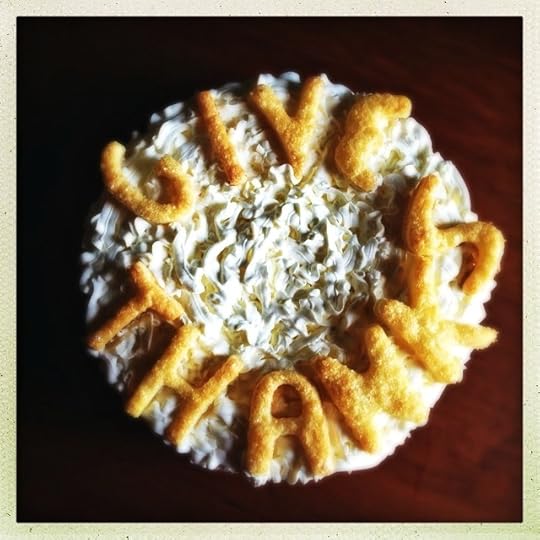
The filling is a combination of salted caramel and creamy pumpkin with a hint of tart mascarpone along for the ride. Top with luscious mascarpone whipped cream and you'll realize that you've just tasted what all pumpkin pies aspire to be.
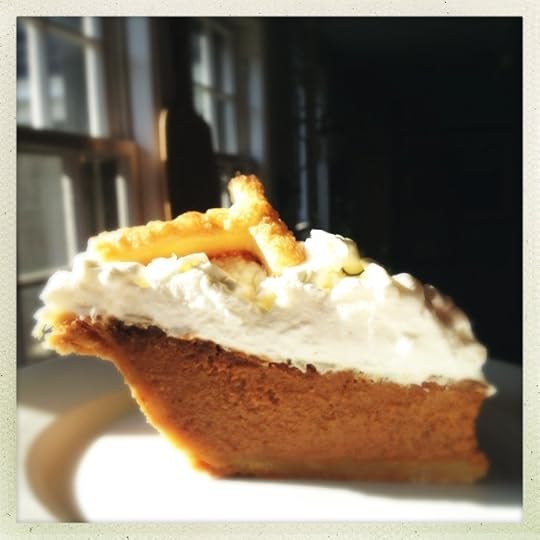
OH! And in case you were wondering, the winner of the Vermont Creamery giveaway is.... LENaile. Please email me at gesineconfectionary@gmail.com with your shipping info. Here's the comment in question:
 LENaile said...Yum! This cake looks incredible!November 8, 2012 11:47 AM
CARAMEL MASCARPONE PUMPKIN PIE
(Makes 1 - 9" deep dish pumpkin pie)
INGREDIENTS
For the quick puff
2 pounds unsalted butter, cut into 1 inch cubes and a bit colder than room temperature
2 pounds COLD all purpose flour (I use King Arthur Flour)
1 tablespoon salt
1 1/4 cups cold water
Extra flour for rolling
(For the letters, egg wash and a few tablespoons of Sugar in the Raw)
For the filling
2 cups pumpkin purée
1 cup heavy cream
1 carton (8 ounces) mascarpone (I use Vermont Creamery)
1 cup granulated sugar
1/3 cup water
1/2 teaspoon salt
squirt lemon juice
1/2 cup packed brown sugar
4 large eggs
1 tablespoon vanilla bean paste
1 teaspoon cinnamon
1/4 teaspoon nutmeg
1/4 teaspoon ground cloves
1/4 teaspoon ginger
For the topping
4 cups heavy cream
1/2 cup mascarpone
1/2 cup confectioner's sugar
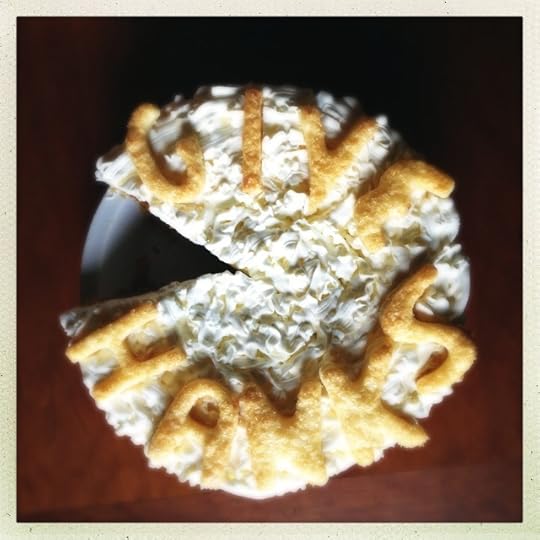 Give Hanks! Coincidence? I think not. Because don't we all give thanks for the T. Hanks on Turkey Day?
PROCEDURE
For the quick puff
•Preheat oven to 375º.
•Combine the flour, butter and salt in a large mixing bowl. Using the tips of your fingers, work the butter into the flour until you have a very chunky mixture (you do NOT want to work the butter in so well that it resembles a biscuit dough. You still want discernible dime sized chunks of butter).
 Butter integrated into the flour...waiting for water.
•Stir the cold water into the flour/butter mixture to distribute and then, using your hands, work the moisture into the flour/butter mixture very gently, turning the dough over itself to make sure there are no overly dry spots or wet spots. This is NOT kneading but a gentle dough tumble. Once the moisture is evenly distributed, smoosh the dough down into a tight package in the bowl (it will still look too dry...that's PERFECT!).
Cover with plastic wrap and allow to rest for ten minutes.

•Turn the dough out onto a lightly floured surface (in other words, just tip the bowl over and dump the dough).
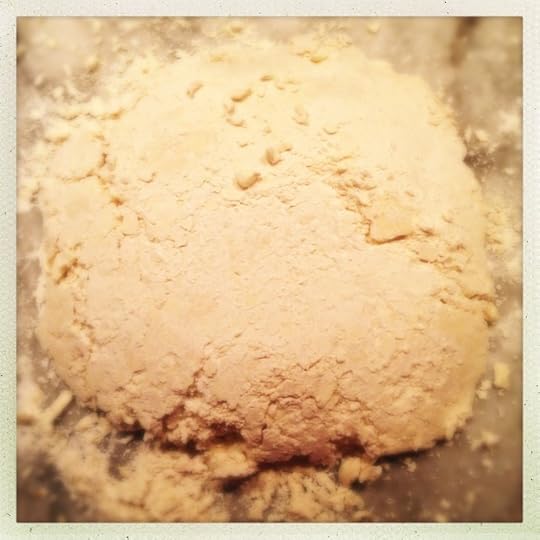 Dough...dumped
•Roll the dough out into a rough 12" x 24" rectangle. Press down firmly as you roll.
 large rectangle of shaggy dough.*** A NOTE FROM MY PIE HOLE: I've taught and demoed this dough hundreds of times and each and every time, my students are aghast at the appearance of this shaggy mess when I start. But then I explain that the beauty of any great pie dough is knowing that it's supposed to look butt(er) ugly before it turns into a beautiful dough. Too many people over work pie tough, making it tough and utterly inedible. The main culprit is adding far too much moisture and then overworking the dough. Most people when starting the process, whether they use a pastry blender, a food processor or their hands, want the dough to immediately transform into a smooth dough ball. I say, "Not so fast!" When I make a simple pie dough in a food processor, I pulse just until the ingredients are evenly distributed. I then pinch the dough to see if it holds together. To look at the mess, a novice would say "HELL NO!" But I say, "YESSIREE BOB!" I then pat the dough into a firm little disk and cover with plastic wrap to allow the moisture to continue saturating the dough. You see, flour LOVES moisture and it continues to absorb the water as it rests. If you add too much water and then overwork the dough, the flour will start getting it's moisture sucking paws on the butter and the flour will essentially consume the buttery goodness for it's own, leaving you nothing to create a lovely flakey puffiness in the oven. You WANT to see bits of butter because that's what creates the pockets of puff and flakey. If it's disappeared, you've gone too far (that is, if you're making flakey pie dough). Quick puff is the superior example of how butter and flour and just a bit of moisture can work together to make the most beautiful and insanely flakey pastry doughs. ***
•At this point, the dough is going to be an utter mess. Your going to make your first letter (or single) turn but unlike folding a business letter (hence the name of the fold) your sheet of dough isn't going to comply so neatly. First, take one third of the dough and fold it towards the middle. Some of the dough will stay behind. Bits and blobs will fall about willy nilly. Just smoosh those bits back in.
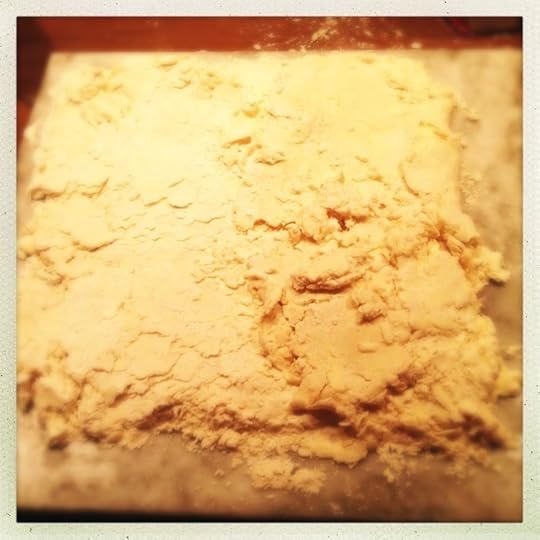 First third folded over. It looks a bloody mess, right? PERFECT!
•Then fold the other third over top the first fold (like folding a business letter). Again, smoosh all those stray bits back into the dough. Pat everything firmly together and then turn the dough 90 degrees so that the long end faces you.
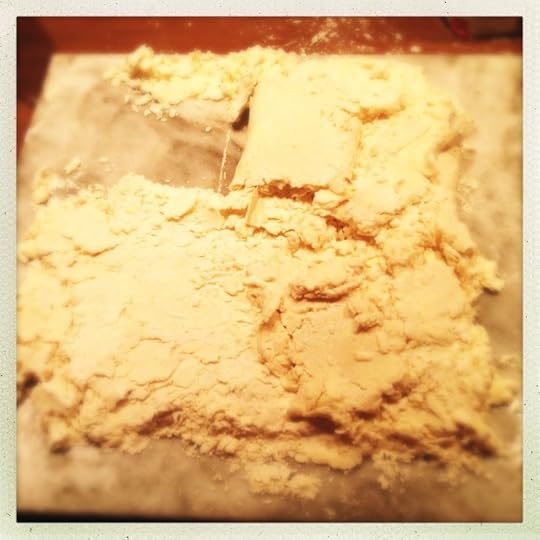 Oh lordy, what a mess it is to fold that second half over. But isn't it beautiful? It is to me!
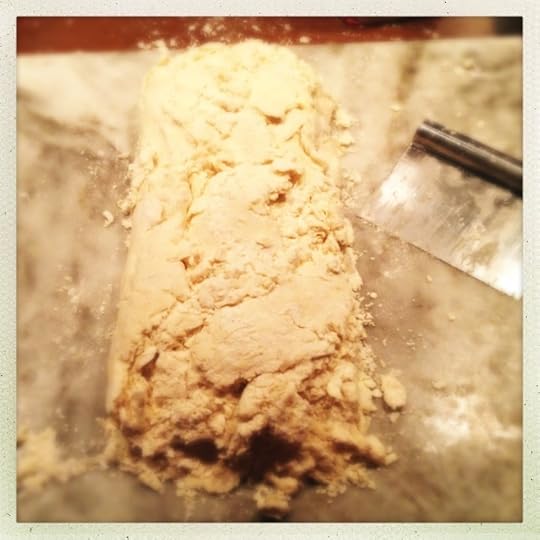 First turn DONE! WOOHOO! Take a deep breath.•Your going to do this three more times, rolling the dough out into a large rectangle, making a letter fold and then turning the dough 90 degrees to begin again. By the time you start your third fold, your dough should start holding together pretty well. Make sure you continue adding flour to your work surface and clean off your rolling pin from time to time.
 By the third letter fold, the dough should start coming together.
•Before your fourth and last fold, clean your work surface using a bench scraper. Apply another light layer of flour to your surface. Clean your rolling pin. Roll the dough out into your rectangle and before you start your last turn, trim the edges of your dough.
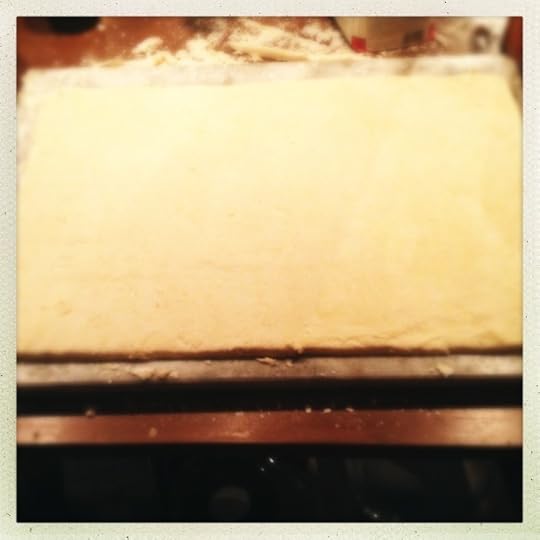 I always feel so much better after a good trim. •Do your final turn, cover the dough and refrigerate for at least 20 minutes so that the dough gets a good rest.
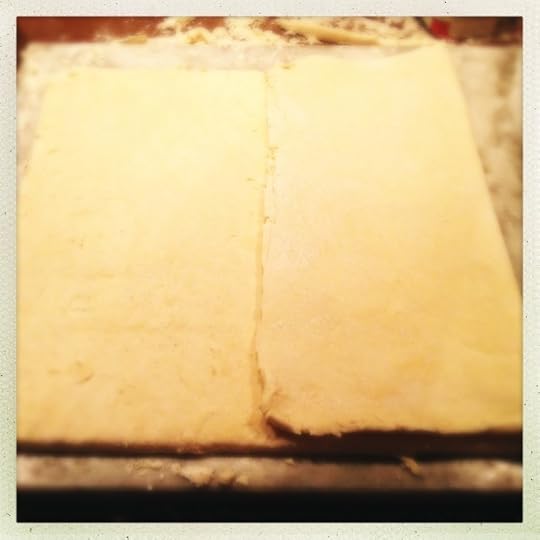 final...
 turn.•Once the dough has rested, cut off about 1/6 of the dough block and roll into a very rough 13" circle. Using a VERY sharp knife, trim the dough to a very neat 12" circle.
 Make sure to use a very sharp knife and don't press down on the edges of the dough. You want the puff to PUFF and pressing on the edges will cramp the dough's style.***A NOTE FROM MY PIE HOLE: If you're looking for the kind of pie dough that does all your bidding, that will stay crimped in the heat of the oven, this is not the dough for you. You'll notice, though, that those very compliant doughs aren't particularly tasty and aren't flaky. I tell my students that this is the gateway dough, it leads you to the best pastry pastures from croissant to mille feuille to kouign amann. And since the purpose of this dough is to puff and flake (or as I tell my classes "Let it make JAZZ HANDS!"), crimping the edges of this dough stamps down the puffy in the puff. I just make a very clean cut and gently place the dough into the pan and let it do it's thing...which is to PUFF!***
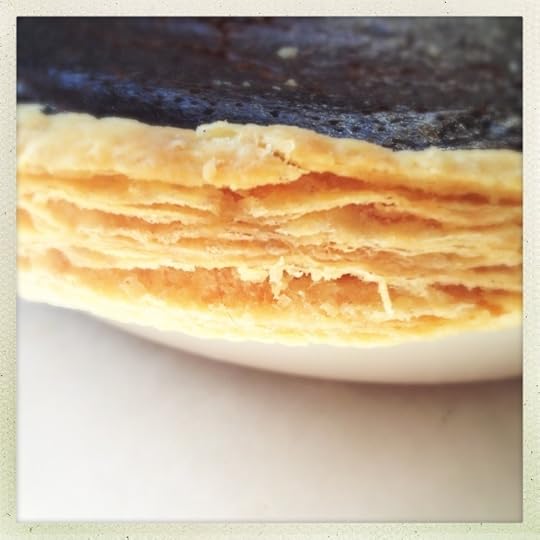 JAZZ HANDS!!! This is a puffed edge and it tells the story of this dough's flakiness. Show it off!
•Line your pie plate with the dough by first gently rolling the dough onto your pin.
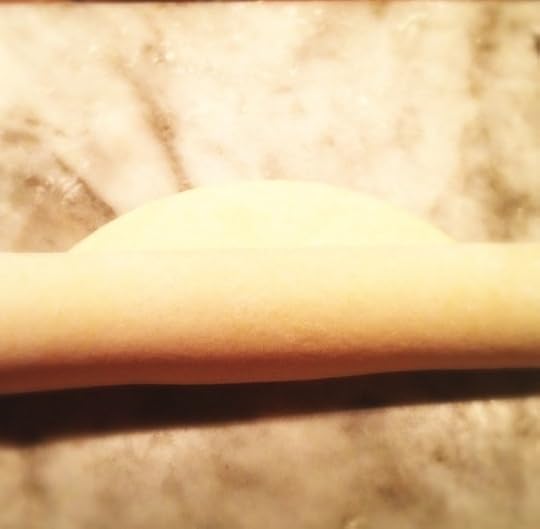 Dough on a pin•Dock the dough, line with parchment and fill with pie weights or dry beans (I use a mixture of both).
 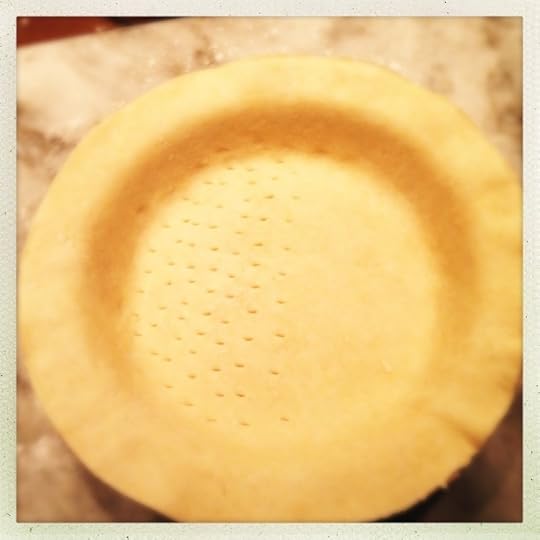 Half way finished with docking the dough
 Full of beans!•Bake for 10 to 15 minutes or just until the sides begin to puff. Remove the weights (grab the edges of the parchment and remove the weights all together. Keep them nestled in the parchment as you'll need this in a few minutes), bake for 10 minutes more or just until the bottom of the dough begins to lose it's raw dough sheen and starts to puff. Take the pie crust from the oven and immediately place the parchment and weights back into the pie plate to gently weight down the puffed crust. Take back out and allow to cool.
For the letters

•Cut off a little less than 1/4 of the puff and roll to about 1/8" thick. Using large letter cookie cutters, stamp out "Give Thanks." Place on a parchment lined sheet pan and brush with egg wash (1 egg whisked with 2 tablespoons water) and sprinkle with Sugar in the Raw. Bake until puffed and lightly golden brown. Allow to cool completely
For the filling
•Combine the sugar, 1/3 cup water. salt and a squirt of lemon juice in a large saucepan. Stir over medium low heat until the sugar has completely melted. Stop stirring, attach a candy thermometer and caramelize the sugar to the point that it looks medium amber.
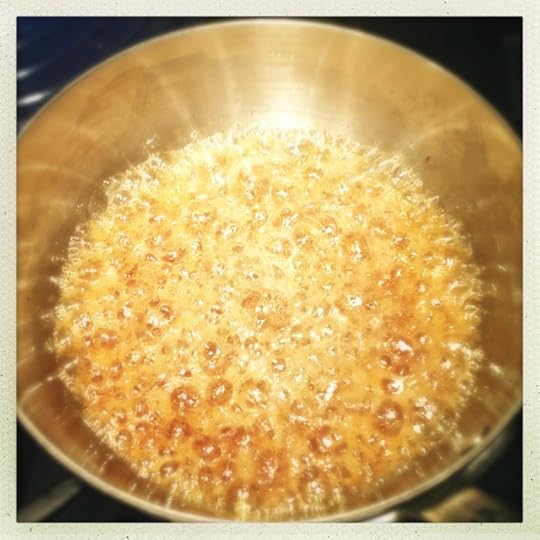 caramelizing. • Immediately add the cream and step away, the mixture will bubble like crazy. Stir over low heat until any hardened caramel melts into the cream. Stir in the mascarpone until it has dissolved into the caramel. Stir in the pumpkin purée, vanilla and spices into the mixture and allow to cool. Whisk in the eggs until the mixture is very smooth.
•Pour the filling into the prepare pie crust and carefully transfer to the oven. Lower the oven temperature to 350º. Bake for 1 hour 15 minutes to 1 1/2 hours. Could take longer in your oven. What I watch for is for the first 2 inches of the edge of the pie filing to puff up and for the middle to still have a slight wobble. I then turn the oven off and open the oven doors, allowing the pie to slowly cool. You can also shove a digital thermometer into the middle of the pie filling and if it reads 180º, you're all good.
For the topping
•Once the pie is completely cool, combine the heavy cream, mascarpone and confectioner's sugar in a stand mixer fit with the whisk attachment. Whip until stiff peaks form. Transfer the whipped cream to a large pastry bag fit with a leaf tip. Pipe ruffles on the pie, starting at the outer edge and spiraling in.
•Gently place the letters on top of the pie and give thanks.

Published on November 17, 2012 10:18
November 16, 2012
Pumpkin Spice Bread Pudding with Egg Nog Creme Anglaise
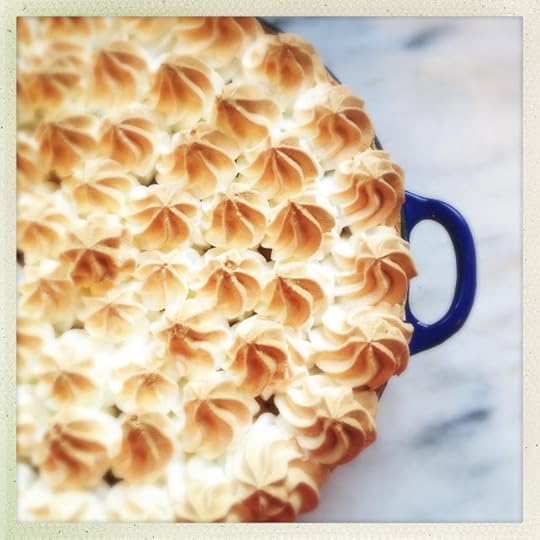
I give thanks daily for the bounty of this year's sugar pumpkin harvest. If not for the fertile vines on my family plot, I'd not have all this fodder for Thanksgiving recipes. And when I have fodder for recipes, I get to celebrate the treats of Thanksgiving weeks prior to the big bellied day.

On of my favorites is this bread pudding. It's lighter than the heavy stuff you're used too. Don't get me wrong, it's got all the bready goodness but by folding fluffy meringue into the baked custard, you create a buoyancy not often found in this time honored dessert. Pipe meringue over the pudding and you've got yourself a Thanksgiving capper for which everyone will be thankful.
PUMPKIN SPICE BREAD PUDDING WITH EGG NOG CREME ANGLAISE
(serves 8)
INGREDIENTS
For the bread pudding
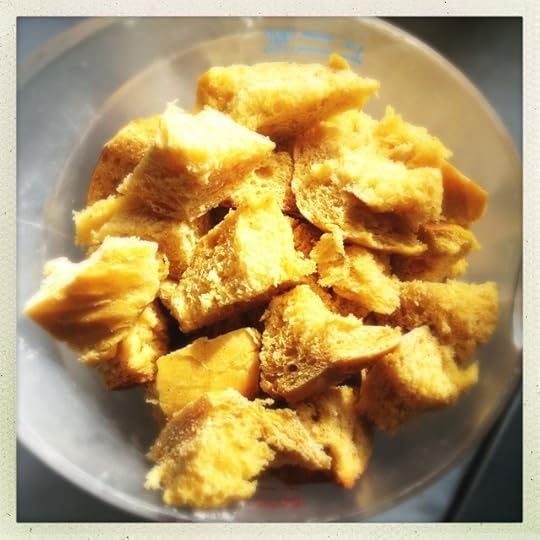 Pumpkin Brioche Buns, diced.
8 cups pumpkin brioche buns, diced into 1 inch pieces
1 1/2 cups heavy cream
1 cup pumpkin puree
1/2 cup maple syrup
1 cup dark brown sugar, packed
1/2 teaspoon salt
4 eggs
1/2 teaspoon cinnamon
1/2 cup craisins
1 - 2 tablespoons butter
For the meringue
7 egg whites
1 1/4 cups sugar
pinch salt
1/2 cup water
For the Egg Nog Creme Anglaise sauce
1 cup heavy cream
1 cup whole milk
1/3 cup brown sugar
7 egg yolks
1 teaspoon vanilla bean paste
2 tablespoons dark rum
1/4 teaspoon nutmeg
pinch salt
PROCEDURE
For the bread pudding
•Preheat oven to 350º.
•Butter the bottoms and sides of a large baking dish. Sprinkle the Craisins on the bottom of the pan.
•Whisk together the heavy cream, pumpkin puree, brown sugar, maple, spices and salt until smooth. Whisk in the eggs, one by one, until the custard is smooth. Stir in the brioche cubes and allow to soak, at least 10 minutes.
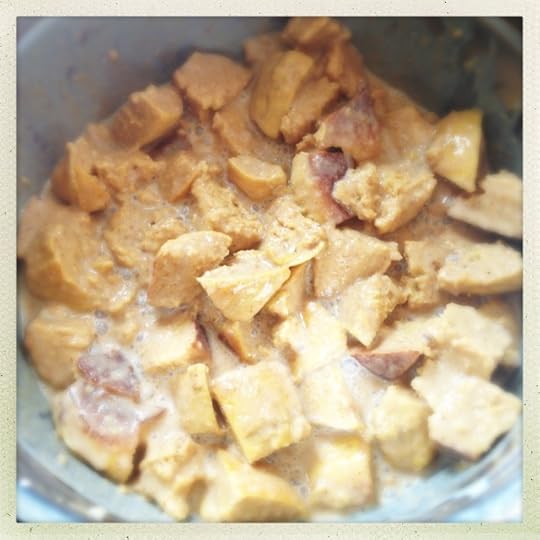 Soaking.
•Pour the custard and bread mixture on top of the Craisins and bake for 35 to 40 minutes, until the top is golden brown and the custard is set. Set aside to cool completely.
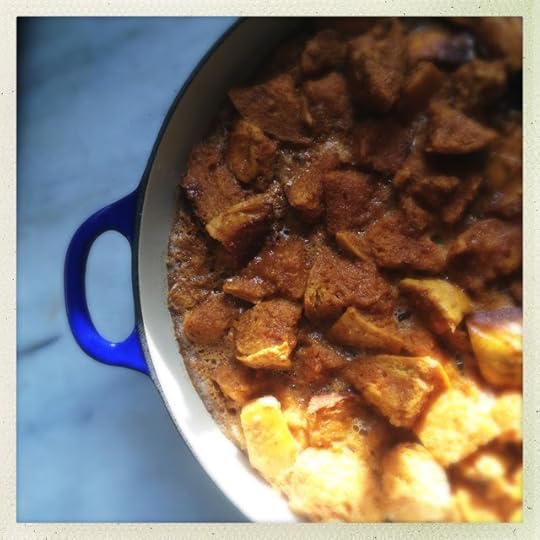 Baked and waiting to be meringued.
For the meringue
***NOTE: We're making an Italian meringue here. I do this for the greater stability of the meringue, which is crucial when you're traveling with a dessert or when you have to make it a day ahead. You can make a dry or French meringue (just slowly pour the sugar into the whisking egg whites until stiff peaked but not dry) and proceed with the assembly as directed below.***
•Whisk the egg whites and salt in the bowl of a stand mixer fit with the whisk attachment until light and frothy.
•Combine the sugar and water and stir over low heat until the sugar has completely melted. Attach a candy thermometer and increase heat to medium-high. Heat the sugar syrup to 234º.
•Carefully pour the sugar syrup down the side of the bowl of whisking egg whites and continue whisking on high until the egg whites quadruple in size and are stiff and shiny.
•Stir the bread pudding to distribute the Craisins and to make sure the pudding is cool to the touch. Transfer 1/3 of the meringue to the bread pudding and fold into the pudding until incorporated.
 Meringue...folded
• Using the back of a spoon, spread the pudding evenly over the baking dish. Pipe the remaining meringue on to the bread pudding in decorative peaks.
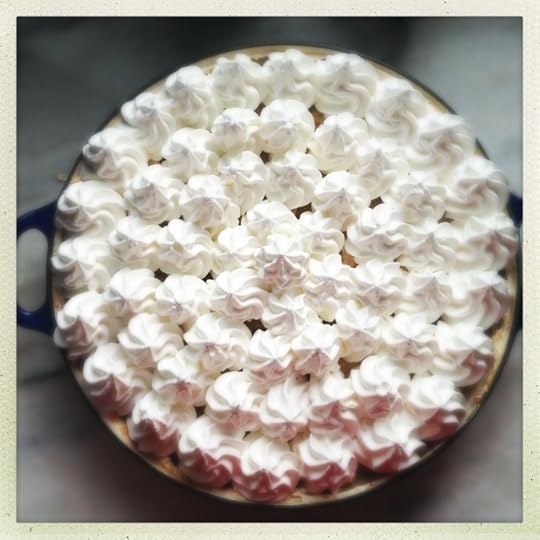 Peaked.
•Bake for 30 to 35 minutes, until golden brown and baked through.
For the Creme Anglaise
***Prepare while the meringue topped bread pudding is baking***
•Combine the cream, milk, rum and vanilla in a saucepan and bring to a simmer.
•In the bowl of a stand mixer fit with the whisk attachment, combine the egg yolks, brown sugar, nutmeat and salt. Whisk until combined and smooth.
•Slowly pour the simmering cream mixture down the side of the mixing bowl while whisking and continue whisking until the custard is well combined.
•Return the mixture to the saucepan and whisk constantly over medium heat until the sauce just coats the back of a spoon.
•Pour the custard through a sieve into a sauce boat and serve a hearty ladleful over each serving of bread pudding.
Published on November 16, 2012 12:49
Pumpkin Spice Bread Pudding with Egg Nog Creme Anglaise

I give thanks daily for the bounty of this year's sugar pumpkin harvest. If not for the fertile vines on my family plot, I'd not have all this fodder for Thanksgiving recipes. And when I have fodder for recipes, I get to celebrate the treats of Thanksgiving weeks prior to the big bellied day.

On of my favorites is this bread pudding. It's lighter than the heavy stuff you're used too. Don't get me wrong, it's got all the bready goodness but by folding fluffy meringue into the baked custard, you create a buoyancy not often found in this time honored dessert. Pipe meringue over the pudding and you've got yourself a Thanksgiving capper for which everyone will be thankful.
PUMPKIN SPICE BREAD PUDDING WITH EGG NOG CREME ANGLAISE
(serves 8)
INGREDIENTS
For the bread pudding
 Pumpkin Brioche Buns, diced.
8 cups pumpkin brioche buns, diced into 1 inch pieces
1 1/2 cups heavy cream
1 cup pumpkin puree
1/2 cup maple syrup
1 cup dark brown sugar, packed
1/2 teaspoon salt
4 eggs
1/2 teaspoon cinnamon
1/2 cup craisins
1 - 2 tablespoons butter
For the meringue
7 egg whites
1 1/4 cups sugar
pinch salt
1/2 cup water
For the Egg Nog Creme Anglaise sauce
1 cup heavy cream
1 cup whole milk
1/3 cup brown sugar
7 egg yolks
1 teaspoon vanilla bean paste
2 tablespoons dark rum
1/4 teaspoon nutmeg
pinch salt
PROCEDURE
For the bread pudding
•Preheat oven to 350º.
•Butter the bottoms and sides of a large baking dish. Sprinkle the Craisins on the bottom of the pan.
•Whisk together the heavy cream, pumpkin puree, brown sugar, maple, spices and salt until smooth. Whisk in the eggs, one by one, until the custard is smooth. Stir in the brioche cubes and allow to soak, at least 10 minutes.
 Soaking.
•Pour the custard and bread mixture on top of the Craisins and bake for 35 to 40 minutes, until the top is golden brown and the custard is set. Set aside to cool completely.
 Baked and waiting to be meringued.
For the meringue
***NOTE: We're making an Italian meringue here. I do this for the greater stability of the meringue, which is crucial when you're traveling with a dessert or when you have to make it a day ahead. You can make a dry or French meringue (just slowly pour the sugar into the whisking egg whites until stiff peaked but not dry) and proceed with the assembly as directed below.***
•Whisk the egg whites and salt in the bowl of a stand mixer fit with the whisk attachment until light and frothy.
•Combine the sugar and water and stir over low heat until the sugar has completely melted. Attach a candy thermometer and increase heat to medium-high. Heat the sugar syrup to 234º.
•Carefully pour the sugar syrup down the side of the bowl of whisking egg whites and continue whisking on high until the egg whites quadruple in size and are stiff and shiny.
•Stir the bread pudding to distribute the Craisins and to make sure the pudding is cool to the touch. Transfer 1/3 of the meringue to the bread pudding and fold into the pudding until incorporated.
 Meringue...folded
• Using the back of a spoon, spread the pudding evenly over the baking dish. Pipe the remaining meringue on to the bread pudding in decorative peaks.
 Peaked.
•Bake for 30 to 35 minutes, until golden brown and baked through.
For the Creme Anglaise
***Prepare while the meringue topped bread pudding is baking***
•Combine the cream, milk, rum and vanilla in a saucepan and bring to a simmer.
•In the bowl of a stand mixer fit with the whisk attachment, combine the egg yolks, brown sugar, nutmeat and salt. Whisk until combined and smooth.
•Slowly pour the simmering cream mixture down the side of the mixing bowl while whisking and continue whisking until the custard is well combined.
•Return the mixture to the saucepan and whisk constantly over medium heat until the sauce just coats the back of a spoon.
•Pour the custard through a sieve into a sauce boat and serve a hearty ladleful over each serving of bread pudding.
Published on November 16, 2012 12:49
November 15, 2012
Pumpkin Brioche Buns
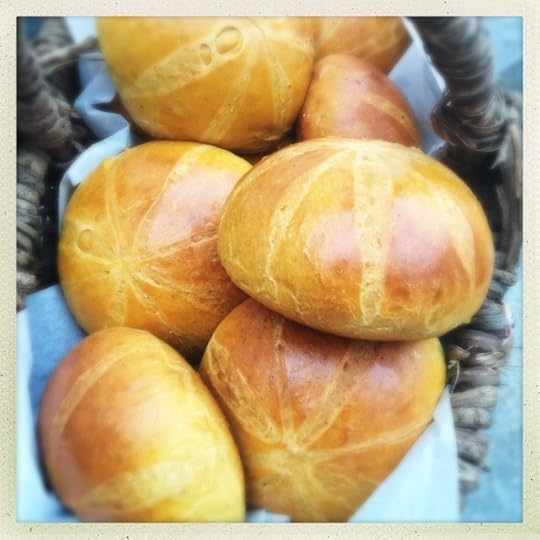
"Damn, that smells good,"
said the lady in the home wares section of TJ Maxx, who then proceeded to shove her nostrils in every scented candle to identify the emitter in question.
"Deb, help me find this freakin' amazing pumpkin candle."
Poor Deb. She's probably still in the votive aisle with her pumpkin loving friend, woozy as hell from snarfing at all the waxy offerings. What she doesn't know is that I took that luscious smell with me when I hooked a left and scampered towards the clearance shelf full of Le Creuset.
Had Deb and her friend sniffed out my car, they'd have doubly enjoyed that aroma. Had they followed me to stalk the gourd bouquet to its source, they'd have ended in my kitchen. The buns hadn't even finished proofing and the damn fragrance had already saturated every nook of the house and nestled deliciously into my clothes. Now that they've finished baking...oh the pumpkin humanity. I hope this gorgeous scent never leaves, even after we've eaten every last tender and slightly sweet bite.
But wait, I can't eat them all right away...I'm saving some for bread pudding tomorrow. Stay tuned...
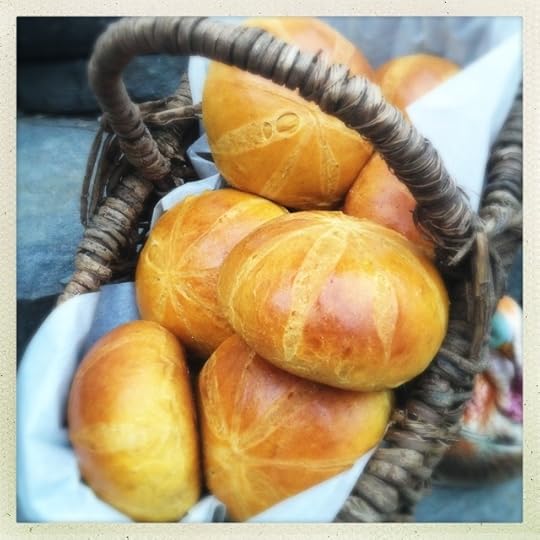
PUMPKIN BRIOCHE BUNS
(Makes 12 large buns)
INGREDIENTS
For the sponge
1 cup whole milk, room temperature
1/4 cup maple syrup
2 packets instant yeast (I used Red Star's Platinum yeast)
2 cups bread flour
For the dough
1/2 cup dark brown sugar, packed
4 teaspoons salt
1 cup pumpkin puree
8 eggs
2 pounds all purpose flour
1 teaspoon cinnamon
1/2 teaspoon ginger
1/4 teaspoon ground cloves
14 teaspoon nutmeg
4 ounces butter, at room temperature (I used Vermont Creamery's maple sea salt butter)
egg wash (1 egg whisked with 2 tablespoons water)
PROCEDURE
For the sponge
•Preheat the oven to 400º. Line two half sheet pans with parchment. Set aside.
•In the bowl of a stand mixer fit with the paddle attachment, combine the milk, maple syrup, yeast and flour. Mix until smooth. Cover and let rise until the sponge has double, about an hour.
For the dough
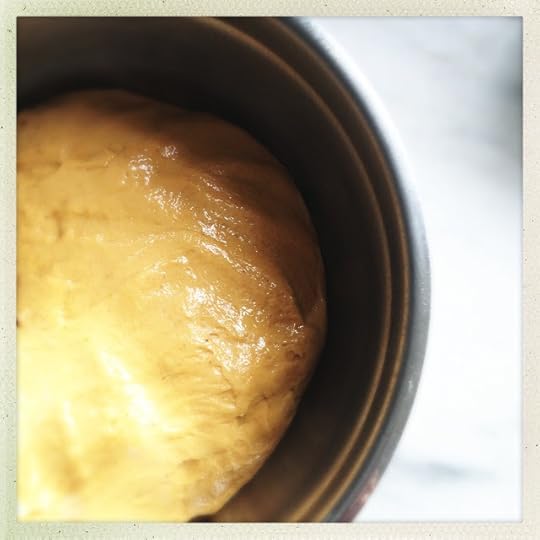 Dough, ready to proof.
•Add the brown sugar, salt, pumpkin and eggs to the sponge and mix until incorporated. Switch out the paddle attachment for the hook attachment and add the flour and mix until just combined. Add the butter, a small piece at a time and continue mixing until the dough is shiny and pulls away from the sides of the bowl. This can take some time, up to 15 to 20 minutes. It's a large amount of dough as well, so it's best to use a larger (5 to 6 quart) mixer to spare the motor of smaller mixers (it also tends to shimmy up the hook and invade mixer crevices). Otherwise, sprinkle a small amount of dough on a work surface an knead by hand. It's a great workout.
•Coat a large bowl with oil or non stick cooking spray and turn the dough over in the bowl so all the dough is coated. Cover and allow to double in size, about an hour.
•Punch down the dough and divide the dough into 12 even pieces.
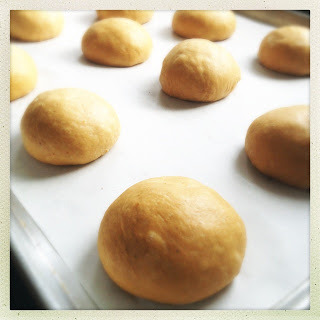
•Roll the dough into a tight ball, continue with the remaining pieces of dough. Cover the sheet pans with plastic wrap and allow the buns to barely double in size. Brush the bun with egg wash and using a bread lame or a razor blade, score each bun in a star burst fashion to mimic the look of a pumpkin.
•Bake until the buns are deep, golden brown, about 30 to 35 minutes.
Published on November 15, 2012 14:01
Pumpkin Brioche Buns

"Damn, that smells good,"
said the lady in the home wares section of TJ Maxx, who then proceeded to shove her nostrils in every scented candle to identify the emitter in question.
"Deb, help me find this freakin' amazing pumpkin candle."
Poor Deb. She's probably still in the votive aisle with her pumpkin loving friend, woozy as hell from snarfing at all the waxy offerings. What she doesn't know is that I took that luscious smell with me when I hooked a left and scampered towards the clearance shelf full of Le Creuset.
Had Deb and her friend sniffed out my car, they'd have doubly enjoyed that aroma. Had they followed me to stalk the gourd bouquet to its source, they'd have ended in my kitchen. The buns hadn't even finished proofing and the damn fragrance had already saturated every nook of the house and nestled deliciously into my clothes. Now that they've finished baking...oh the pumpkin humanity. I hope this gorgeous scent never leaves, even after we've eaten every last tender and slightly sweet bite.
But wait, I can't eat them all right away...I'm saving some for bread pudding tomorrow. Stay tuned...

PUMPKIN BRIOCHE BUNS
(Makes 12 large buns)
INGREDIENTS
For the sponge
1 cup whole milk, room temperature
1/4 cup maple syrup
2 packets instant yeast (I used Red Star's Platinum yeast)
2 cups bread flour
For the dough
1/2 cup dark brown sugar, packed
4 teaspoons salt
1 cup pumpkin puree
8 eggs
2 pounds all purpose flour
1 teaspoon cinnamon
1/2 teaspoon ginger
1/4 teaspoon ground cloves
14 teaspoon nutmeg
4 ounces butter, at room temperature (I used Vermont Creamery's maple sea salt butter)
egg wash (1 egg whisked with 2 tablespoons water)
PROCEDURE
For the sponge
•Preheat the oven to 400º. Line two half sheet pans with parchment. Set aside.
•In the bowl of a stand mixer fit with the paddle attachment, combine the milk, maple syrup, yeast and flour. Mix until smooth. Cover and let rise until the sponge has double, about an hour.
For the dough
 Dough, ready to proof.
•Add the brown sugar, salt, pumpkin and eggs to the sponge and mix until incorporated. Switch out the paddle attachment for the hook attachment and add the flour and mix until just combined. Add the butter, a small piece at a time and continue mixing until the dough is shiny and pulls away from the sides of the bowl. This can take some time, up to 15 to 20 minutes. It's a large amount of dough as well, so it's best to use a larger (5 to 6 quart) mixer to spare the motor of smaller mixers (it also tends to shimmy up the hook and invade mixer crevices). Otherwise, sprinkle a small amount of dough on a work surface an knead by hand. It's a great workout.
•Coat a large bowl with oil or non stick cooking spray and turn the dough over in the bowl so all the dough is coated. Cover and allow to double in size, about an hour.
•Punch down the dough and divide the dough into 12 even pieces.

•Roll the dough into a tight ball, continue with the remaining pieces of dough. Cover the sheet pans with plastic wrap and allow the buns to barely double in size. Brush the bun with egg wash and using a bread lame or a razor blade, score each bun in a star burst fashion to mimic the look of a pumpkin.
•Bake until the buns are deep, golden brown, about 30 to 35 minutes.
Published on November 15, 2012 14:01
November 13, 2012
Mascarpone Lemon Cloud Cake
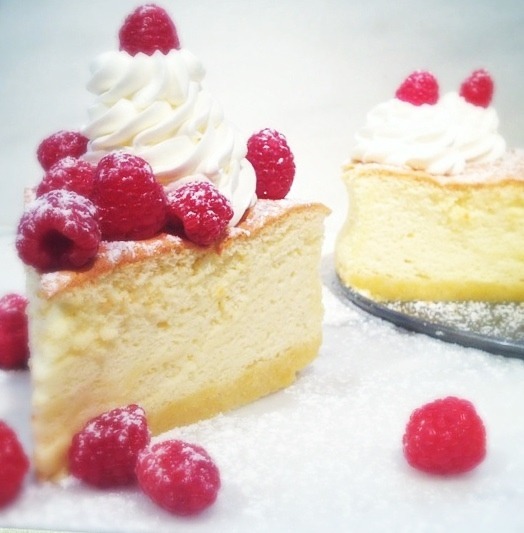
Be careful, this hummingbird of a cake may just fly away, it's so light and airy. This hybrid between an angel food and an Italian cheesecake melts away the second it hits your tongue, coating your buds with the gentle tartness of fresh lemon and mascarpone. This is a delightful way to end any meal, especially those heavy gut busters that require a delicate, sweet cap to the evening.
I also send you a gentle reminder that the Vermont Creamery giveaway is nearing an end...if you comment here or on the original link, you'll be entered to win a Vermont Creamery Creme Fraiche gift basket to kick off your holiday baking.

MASCARPONE LEMON CLOUD CAKE
INGREDIENTS
For the crust
1 cup all purpose flour
1/2 cup cornstarch
6 tablespoons, very cold unsalted butter
1 teaspoon lemon zest
1/2 teaspoon salt
1 egg yolk
2 tablespoons cold water
1/2 teaspoon lemon extract
For the batter
1 eight ounce container mascarpone (I use Vermont Creamery)
1 cup whole milk
4 tablespoons unsalted butter
6 tablespoons all purpose flour
4 tablespoons cornstarch
8 eggs, separated
2/3 cup sugar
zest of 1 lemon
1/2 teaspoon lemon extract
1/2 teaspoon cream of tartar
1/2 teaspoon salt
PROCEDURE
For the crust
•Preheat the oven to 350º.
•In a medium sized mixing bowl, whisk together the flour, cornstarch, salt and zest.
•In another, small bowl, whisk together the egg yolks, water and lemon extract.
•Using a box cheese grater, grate the butter on top of the flour mixture. Using the tips of your fingers, gently massage the butter into the flour mixture until it resembles coarse cornmeal.
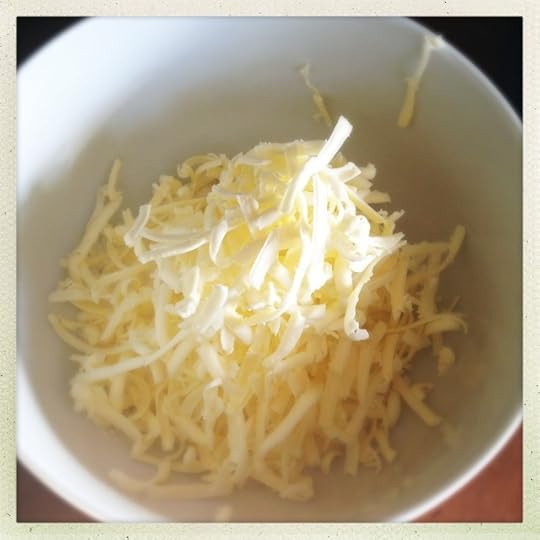 Grated butter!
•Stir in the liquid ingredients and continue stirring until the dough looks barely moist.
•Turn the dough out onto a piece of plastic wrap and gently turn the dough over a few times, pressing down down, to incorporate the dry flour into a smooth dough and then wrap in the plastic and refrigerate for 20 minutes.
•Line the bottom of an 9" round or square springform with parchment paper and spray with non-stick cooking spray. Crumble the dough into the bottom of the springform and gently press the dough into an even layer on the bottom of the pan. Freeze for 10 minutes and then bake for 5 to 10 minutes or until the dough just begins to lose it's raw dough sheen. Allow to cool completely.
•Wrap the sides of the springform in aluminum foil, I use quite a few layers to insure that the water bath we bake the cake in doesn't seep through and soak the crust and cake.
•Set the foil wrapped pan into a deep baking dish. Set aside.
For the batter
•Combine the milk, mascarpone and butter in a small saucepan and set over low heat, stirring until the butter and mascarpone have melted entirely. Whisk the flour and cornstarch into the mixture until smooth. Allow to cool and then whisk the egg yolks into the mixture until smooth. Transfer to a large mixing bowl, set aside and allow to cool completely.
•In the bowl of stand mixer fit with the whisk attachment, combine the egg whites, salt and cream of tartar. Whisk until the egg whites turn foamy. Slowly add the sugar, very slowly, and continue mixing on high until the egg whites have quadrupled in volume, are stiff, white and shiny.
•Transfer 1/4 of the egg whites to the egg yolk mixture and stir to lighten the batter. Transfer the remaining whites to the bowl and GENTLY fold the whites into the batter until no white streaks remain. Gently pour the batter into the prepared pan and pour boiling water into the baking dish so that the water just reaches half way up your foil wrapped pan.
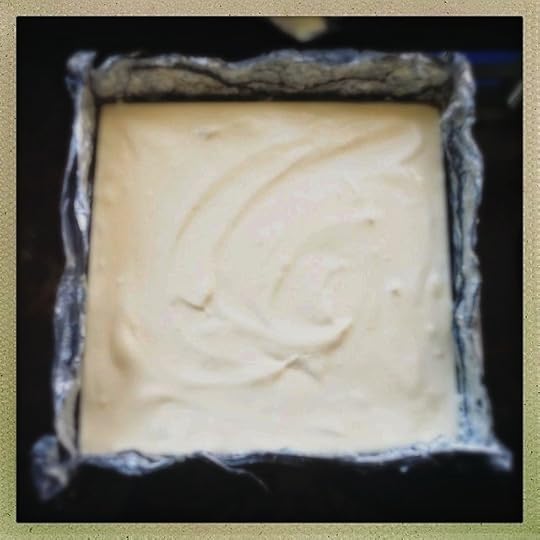 Batter in pan!
•Transfer carefully to the oven. Bake for 1 hour 20 minutes to 1 1/2 hours, until the cake has puffed and browned and a toothpick comes out clean. Turn the oven off and open the doors slightly. Allow the cake to come to room temperature in the cooling oven.
 OPTIONS! If you transfer about 1/3 cup of batter to a small bowl, add a teaspoon or two of raspberry puree (any puree for that matter) to flavor and color the batter. Transfer the batter to a pastry bag fit with a small open tip and pipe circles around the perimeter and the inside of the top of the batter. Drag a wooden skewer through the batter to create hearts.
Published on November 13, 2012 12:53
November 11, 2012
Chocolate cake...plain and simple.

I had a craving today. I wanted dark and dense and moist with hints of vanilla light peaking through. So I made it.
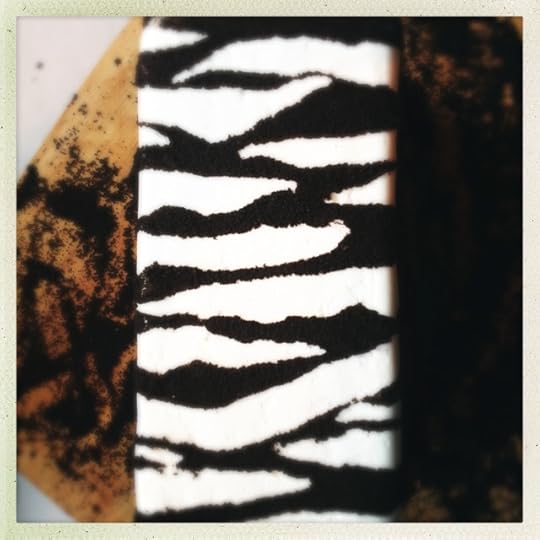
Chocolate Cake
INGREDIENTS
For the cake
6 eggs, room temperature and separated
1/2 cup dark, Dutched cocoa powder (I used King Arthur Flour Black Cocoa)
1/2 cup scalding hot coffee
1 1/2 cups cake flour (sifted before measured)
1 1/2 cups sugar, divided
1 teaspoon baking powder
1 teaspoon baking soda
1 teaspoon salt
1/2 cup almond oil (can substitute canola oil)
1 tablespoon vanilla extract (only real, for goodness sake. No artificial)
For the buttercream
5 egg whites
1 cup sugar
1 teaspoon vanilla extract
pinch salt
1 pound unsalted butter, slightly cooler than room temperature
PROCEDURE
For the cake
•Preheat oven to 325º. Line 2 half sheet pans with parchment paper and spray the bottom of the sheet pan with non-stick cooking spray. Avoid hitting the sides of the pan with the cooking spray. Set aside.
•Sift the cake flour, cocoa powder, baking soda & powder and 1/2 cup of the sugar into the bowl of a stand mixer. Using the paddle attachment, start the mixer running on medium speed and add the oil, vanilla and egg yolks. Mix until smooth. Slowly add the coffee with the mixer still running and continue mixing until the batter is very smooth. Transfer the batter to a large bowl. Clean the bowl!
•Add the egg whites and salt to the clean mixing bowl. Mix on high with the whisk attachment and once the egg whites have become foamy, start adding the remaining 1 cup of sugar very slowly, continue. Add all the sugar and turn the mixer speed to high and whisk until you achieve stiff, shiny white peaks being VERY careful not to over mix to the point of dry.
•Add 1/4 of the egg whites to the chocolate batter and stir to lighten. Add the remaining egg whites and fold gently until no white streaks remain.
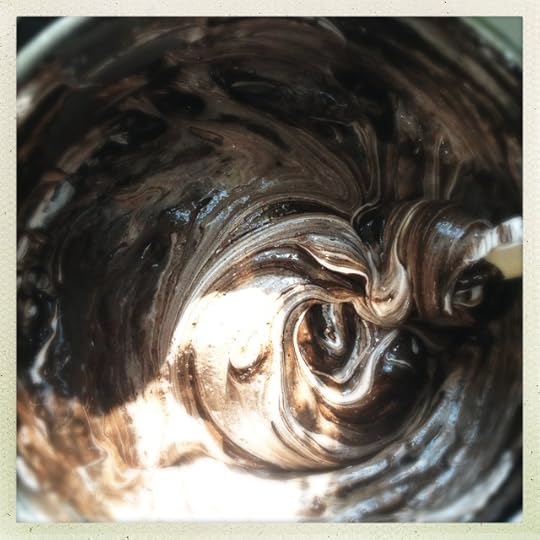 Gently fold the egg whites into the batter.
•Divide the batter evenly among the prepared sheet pans and smooth with a large offset spatula. Bake for 30 to 35 minutes, until the cake just springs back when gently poked. BE VERY CAREFUL NOT TO OVER BAKE! Once the cake starts to pull from the sides of the pan, it's done...perhaps too done...so check that puppy after 25 to 30 minutes.
•Allow to cool and then trim each cake into 4 even 4" x 10" rectangles (cutting vertically from the long side). You'll end up with eight 4 x 10" layers. Keep the scraps.
•Break up the scraps and the worst looking layer onto a parchment lined sheet pan and bake at 200º for 15 minutes to dry out the pieces. Allow to cool and transfer the pieces to a food processor fit with the blade attachment. Pulse until the cake turns into a fine, powdery crumb.
For the buttercream
•In the CLEAN bowl of a stand mixer fit with the whisk attachment, combine the egg whites, vanilla and pinch of salt.
•In a saucepan, stir together the sugar and 1/3 cup of water. Stir over medium heat until the sugar has melted and then heat to 234º.
•Whisk the egg whites until frothy and slowly pour the hot sugar syrup into the egg whites, making sure the sugar pours down the side of the bowl before hitting the egg whites so they don't scramble. Whisk on high until stiff, white peaks form and the bowl is cool to the touch.
•Add the butter, a small piece at a time, until the buttercream comes together into a smooth, spreadable frosting (you may not need all the butter). It will start to look curdled and chunky just before it starts to come together. This is perfectly normal.
To assemble
•Place a cake layer on a cake round. Spread an even layer of buttercream, between 1/8 to 1/4 inch thick over the entire slice. Continue alternating between cake and buttercream until all the layers are stacked. Cover the cake with plastic wrap and allow to set in the freezer for 20 minutes.
•Remove the cake from the freezer and gently lift from the cake round. Place the cake on a serving platter, turning the cake on it's side so that the horizontal layers are now vertical. Spread a very thin, crumb coat of buttercream over the entirety of the cake, making sure that it's perfectly smooth. Freeze for 10 minutes to set.
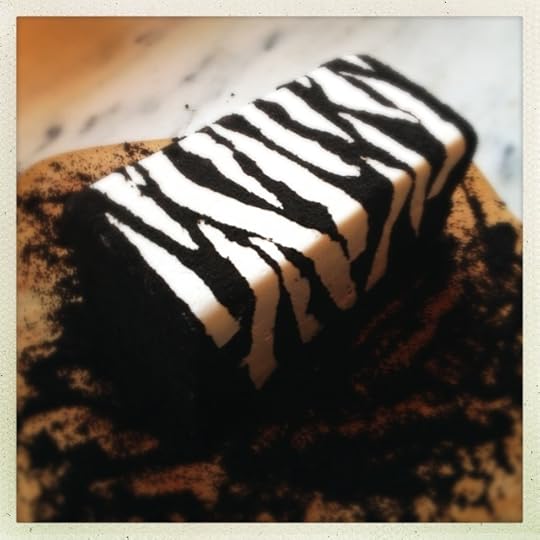
•Spread the remaining buttercream in a perfectly even layer over the cake. Using a piece of parchment, tear jagged strips from the parchment and lay over the top and sides of the cake, gently pressing to adhere. Press the cake crumbs onto the cake so that they adhere to the exposed buttercream and gently brush off the crumbs sticking to the parchment. Carefully remove the parchment.
Published on November 11, 2012 13:02
Gateau St. Swanaré
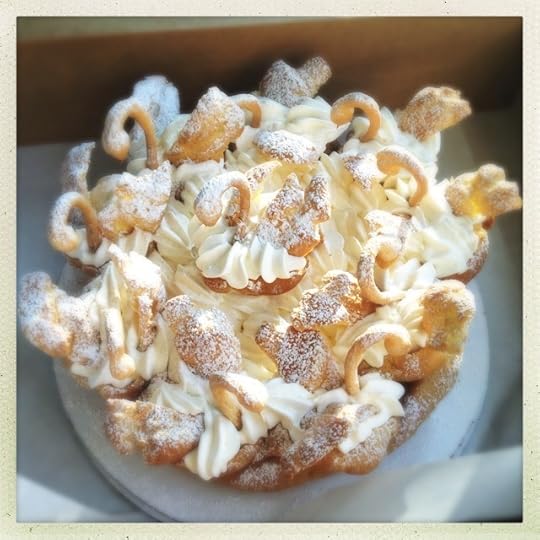 Gateau St. Swanaré: Puff, caramel/pumpkin pastry cream, hard caramel and choux. And swans!
If you didn't get to my classes this weekend at King Arthur Flour, you missed pyramids, swans and fun. And my ever present lopsided ponytail. Why, after all these years, do I have a complete inability to center my mop of hair at the center of my cranium? It's always listing to the left.
If you missed all the fun, not to worry, I'll be back at King Arthur Education Center in May. It's coming sooner than you think. I'll post the dates of my classes here, so stay tuned!
 Photo taken by Bill Stahr. Lopsided ponytail created by yours truly.
 Friday's class was dedicated to constructing my pyramid cake. Lopsided filling optional. Picture courtesy of Nancy Sturtevant Wolfe.
Published on November 11, 2012 05:11
Gesine Bullock-Prado's Blog
- Gesine Bullock-Prado's profile
- 69 followers
Gesine Bullock-Prado isn't a Goodreads Author
(yet),
but they
do have a blog,
so here are some recent posts imported from
their feed.


