
Gesine Bullock-Prado's Blog, page 28
February 22, 2011
Alles Gute Zum Geburtstag, Mutti. Helga's Birthday Wish!

Today is my mother's birthday. I won't tell you how old she'd have been; she'd find a way to haunt me if I disclosed her age...even if it's one she never reached.
If you've read my book Confections of a Closet Master Baker/My Life from Scratch, you are well aware of Helga's baking influence on her daughter. There's not a day that I don't think of her when I'm in my bakery, regretting that we never shared my professional pastry life. She'd have been a force in my kitchen. Perhaps she still is.
Take some time today to remember those you've lost who nourished your heart and your belly. That's what I'll be doing today. Thinking of my mother, my Omi and all the sweet souls who took time to feed me.
And while you're at it, you can show your love through a donation to the American Cancer Society. I'm running as many marathons as it takes to raise $64,000 in honor of my mom, that's $1,000 for every year she lived (Sorry mom. But you were a great looking 64, even with the crappy cancer).


February 16, 2011
King Arthur Flour Class! SUGARBABY!!!

I'll be teaching at King Arthur Flour in Norwich, Vermont May 6 (demo) and 7th (hands on!).
We'll be playing with sugar for hours, right out of the pages of Sugar Baby!
Come Join Us!

February 8, 2011
The Lovers, The Dreamers and Me Cake

Continuing as I have been, honoring modern day St. Valentines with cakes that most suit their loving personalities, I would be remiss if I didn't include the greatest romantic of our modern age:
Kermit the Frog.

It's not just any amphibian who would wrangle a bango onto a lily pad, serenading all and sundry swamp creatures in ear shot.
It's not just any amphibian who would hold fast to a porcine hellian, to a swine both vain and unpredictably violent with unwavering love and support. Miss Piggy is one lucky oinker.
It's not just any amphibian who made it look so easy to be green, when we all know it isn't.
And it's not just any amphibian who can sing of rainbows and dreams with an utter lack of cynicism and turn us all into believers.

So for Kermit, I make a cake built for the lovers, the dreamers and you.
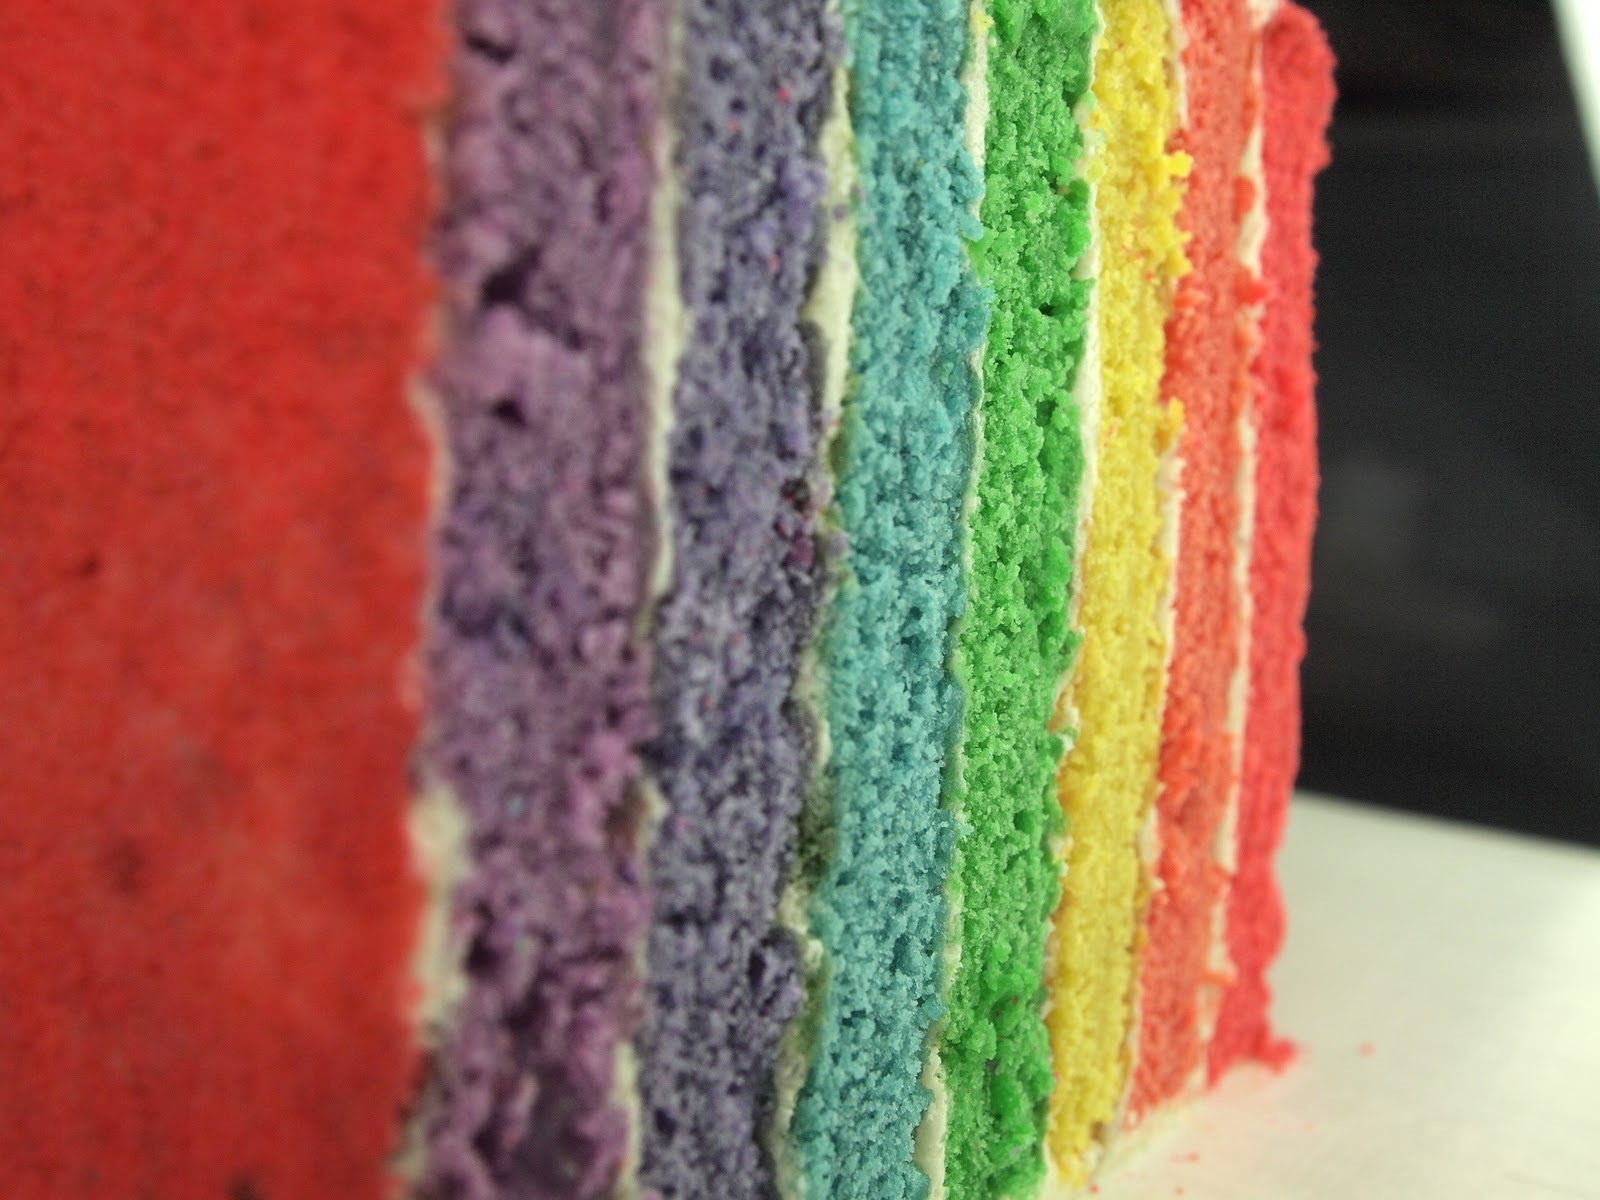
The Lovers, The Dreamers and Me Cake
For the cake:
1 pound (4 sticks) room temperature, unsalted butter
4 cups sugar
10 eggs
2 teaspoons salt
2 tablespoons baking powder
2 teaspoons lemon extract
6 cups All Purpose Flour
2 1/2 cups non-fat buttermilk
Procedure
-Cream together the butter and sugar until light and fluffy
-Slowly add eggs, one at a time. Beat for 1 minute between each incorporation. Add lemon extract
-Sift together the flour, baking powder and salt
-Add 1/4 of the butter milk and then 1/3 of the flour mixture. Continue alternating between each until both are completely incorporated. Don't over mix.
-Divide the batter between 7 bowls, approximately 2 cups of batter in each bowl.

-I mix and match my dyes to come up with the following colors, Deep purple, lighter purple, blue, green, orange, yellow and red. 2 drops of dye should be enough for each bowl.
-line a jelly roll pan or half sheet pan with parchment. Using a ruler, measuring along the width (the shorter side) of the pan, Divide the pan into 1/2. Fill a pastry bag fit with a large open tip with the red batter. Pipe the batter on half the sheetpan. You'll use all the batter. Clean the tip and bag (unless you use disposable bags), and fill the clean bag with orange batter. Fill the remaining 1/2 of the sheetpan with orange batter.
 I fit all the batter on to my mondo sheetpan. But you'll divide among half sheet pans.
-Continue dividing sheetpans with batter. There will be one sheet pan since there are 7 colors in all, that will only be half filled. The batter is rather sturdy and won't really spread to badly but if you fear spreading, use a square cake pan or pyrex to act as a dam.
-Bake at 350º for about 25 - 30 minutes. Poke the cake and if it springs back, it's done.
-Allow the cakes to cool completely. While they are cooling, make a batch of cream cheese frosting.
-once the cakes of cooled, trim each cake to 4 1/2 -5 inch wide strips. Trim the end of the cakes as well. Transfer the red layer to a clean sheetpan lined with parchment. Apply a very thin and even layer of frosting over the red layer and then carefully transfer the orange layer and place on top of the red frosted layer. Continue frosting and layer with the yellow, green, blue and purples. Freeze the cake for 1/2 hour to stabilize it.
 Not looking so stable at the moment. But freeze for a bit and it's all good.
-Remove the cake from the freezer and trip the sides and ends with a very sharp serrated knife. The sides need to be perfectly level so be slow and steady. Apply a thing crumb coat of frosting on all sides of the cake and freeze again for a half hour.
-Remove the cake from the freezer and gently transfer the cake to a serving platter. You can leave the cake with the layers lying horizontally. Or , if you prefer vertical layers (as I do), turn the cake over on its side. Apply a thin layer of frosting to the newly exposed side of the cake and freeze for 10 minutes until the frosting has set.
-Apply a finished coat of frosting over the entirety of the cake.
-If you have extra pieces of cake (I like to use the red), I put them on a sheetpan and bake at 225º until the cake has dried (but not browned). I cool the cake and then pulse to a fine crumb in the food processor.
-Fold a piece of parchment in half and cut varied sized hearts from the parchment and apply to the top of the cake. Pat the cake crumbs along the sides and top of the cake and brush away any excess. Make sure to brush the crumbs from the top of the parchment hearts so that the crumbs don't tumble onto the pristine outlines of the hearts. Gently remove the parchment.
 The cake crumbs give the cake a little "muppet" shag.
 -You can simply slice the cake and serve as is. But if you like the heart shaped slice, after you've cut a normal slice and use a heart shaped cake ring or cookie cutter to stamp out a heart shape.


February 5, 2011
Because You're Mine Cake

When I think of music loaded with romance, that pulls at the molten ganache core of my soft, pliant heart, my internal radio dial immediately tunes itself to the Man in Black. Johnny Cash.
Volumes of love balladeers cater to schmaltz and treacly sentiments. Not Mr. Cash, he struck the bull's-eye of love. He walked the line.
In honor of the Man in Black, a modern day St. Valentine if there ever was one, I present to you the "Because You're Mine Cake" because Johnny Cash was a stand-up man. He walked the line when it came to the cause of true love. His memory deserves a cake that does the same.

Because You're Mine Cake

Makes One Cake
This cake requires five separate elements. A vanilla cake that acts as base and top. Ganache for sealant and decoration. Chocolate roulade for the vertical layers. Sweetened, vanilla whipped cream for the roulade filling. And vanilla bean buttercream to hold it all together.
Click "ganache" and "buttercream" for the links on this site for those recipes. (For the buttercream, instead of adding juices or purées, simply add a teaspoon of vanilla bean paste. You'll also make a smaller batch. Follow the procedure however you'll only need 5 egg whites, 1 cup sugar , 1/3 cup water and 10 ounces of unsalted butter).
For the Vanilla Cake
Do you know the Golden Egg Cake? Of course you do. This is a version of that lovely pastry, the ratio is smaller than what you'll be used to.
Ingredients
4 ounces (one stick) unsalted butter
1 cup sugar
3 eggs (medium sized. Grab the smallest you can find)
1 1/2 cups all purpose flour
1 1/2 teaspoons baking powder
3/4 cup buttermilk
1/2 teaspoon salt
1 teaspoon vanilla bean extract
Procedure
-Preheat oven to 350º.
-Cream together butter and sugar until light and fluffy. This takes a few minutes. Patience, people.
-Add eggs, one at a time. Don't add another egg until the last is COMPLETELY incorporated. Wait a minute. At least. Add vanilla bean paste.
-Whisk together flour, salt and baking powder. Add 1/3 of the flour and then 1/2 buttermilk. Add another 1/3 of the flour mixture and then the remainder of the buttermilk and finish of with the remaining flour. Mix until just incorporated. Don't overmix!
-Spray a 10" cake pan or ring with non-stick cake spray and line the bottom with parchment. Fill the pan with batter and bake for 20 minutes, until done. Poke that cake and make sure it springs back to insure it's done.
-Allow to cool completely. Remove from pan and carefully cut the cake in half. Set aside.
For the Roulade
Ingredients
4 1/2 ounces bread flour
1 1/2 ounces cocoa powder (Dutch process. I use Callebaut Extra Brute)
6 ounces sugar
24 egg yolks (I KNOW! Don't even get me started. )
8 egg whites (I KNOW! So many more yolks than whites! But make meringues with the rest OR just freeze the whites for later use. I do.)
1 teaspoons vanilla bean extract
1 teaspoon salt
1 teaspoons coffee extract (optional)
Procedure
-preheat oven to 400º
-line two half sheet pans/jelly roll pans with parchment and spray with non-stick spray. I use a full sheetpan (see the picture) but I have a professional, gigantic oven. So you'll divide the batter evenly among the two half sheets.
-Whisk together the egg yolks, 1/2 the sugar and the vanilla bean extract and coffee extract until the mixtures lightens to a pale yellow
-Whip the egg whites with the salt until foamy and then slowly add the remaining sugar. Whip until stiff peaks form.
-Whisk together the flour and the cocoa powder.
-Stir 1/3 of the egg whites into the yolk mixture to lighten. Then gently fold in the remaining whites. Sift the cocoa/flour mixture over the eggs and continue to gently fold the until the flour/cocoa mixture is evenly distributed (pockets of cocoa/flour will stick around for a while so make sure to turn the bowl as you go to get into ever crevice where the flour may hide).
 This is my monster pan that can hold all the batter. You'll use two.
-Divide the batter evenly among the pans and bake for 7 to 10 minutes, until the cake springs back when you poke it. Let it cool completely.
For the whipped cream:
1 pint (16 ounces) heavy whipping cream
2 tablespoons mascarpone cheese (optional)
1/3 cup confectioners sugar
1 teaspoons vanilla bean paste
-whisk together until you achieve stiff peaks. Set aside in the fridge.
To assemble:
-Cut both roulades into long strips, 3" wide (you'll get 4 strips from each pan). I notch the top and the bottom of the cake at the 3" mark and then use a ruler to keep the strips even.
 Getting ready to make my first cut, using the ruler as a guide to keep it even.-Divide the whipped cream in half among the two cakes. Spread a very thin and even layer of whipped cream over the entirety of both cakes.
-Roll the first strip, the cream side in, into a tight roll. Move the strip over to the start of the next strip, and continue rolling, the end of the first roll touching the beginning of the second, and you'll keep add strips to make a big fat spiral of cake! A snowball effect but in cake! You may have more cake than you need. Stop when you're spiral is 10" wide.
 SPIRAL!-Add a thin layer of ganache to one of the yellow cake layers(make sure the ganache is spreadable before starting). Just enough to cover the top. Place your giant spiral on top of the ganache.
 Thin layer of ganache. Only enough to cover the top of the yellow cake but just enough to adhere the giant spiral!
-Schmear a thin layer of ganache over the top of the spiral cake and top with the remaining layer of yellow cake.
 Top layer!
If you have a 10 inch cake ring, to keep protect the cake while it sets. Otherwise, wrap in plastic wrap. Put in the freezer for an hour to set.
 The ring keeps it all together.
-When the cake has set, remove the cake ring or plastic wrap and cover the cake with a thin layer of buttercream. Put in the fridge to set. Put some buttercream aside in a pastry bag fit with a small, open tip for decorating the cake later.
-When the cake has set, spread a thin layer of ganache (again, make sure that it's spreadable. If it has hardened, warm it gently over a water bath) over the top of the cake. If you aren't confident with your skills, attach a parchment strip to the sides of the cake to keep the ganache from flowing over onto the sides. Once the top is covered, remove the parchment if using and transfer the cake to the fridge to set.
-Place the remaining ganache in a pastry bag fit with a medium open tip. Place a piece of parchment on a sheetpan and pipe hearts onto the parchment paper. Freeze the hearts until set.
 If the hearts won't stick, add a little extra ganache to the back to make 'em stick.
-When the ganache has hardened, both on the top of the cake and the individual hearts, remove the hearts with a small offset spatula and apply to the sides of the cake. If you're having trouble getting them to stick, add a little extra ganache to the back of the hearts as glue.
-Pipe your loving sentiment with the remaining buttercream on top.
Happy Valentine's Day! Now go listen to some Johnny Cash to set the mood.

February 3, 2011
Love is Patient Cake: Pomegranate/Key Lime Chiffon Puzzle Cake
 Pomegranate/Key Lime "Love is Patient Cake"
 Green Tea/Cassis "Love is Patient Cake"


In elementary school, we took a few hours the week of Valentine's Day to craft something special. We'd mangle craft paper with child safety scissors and adorn the soft paper with globules of paste. We'd wantonly sprinkle glitter and sequins in the general direction of our project. We'd weave heart shaped baskets to contain any sentimental missives we might receive as well. We took care and pleasure in our work, relishing in the possibility of making someone happy.
But to woo with any mastery, you must take time with your gifts of love. You must have patience.
This cake, requires both: love and patience. But if you master it, your sweet declaration will be very well received.
Love Is Patient Cake
For this puzzle of a cake, you'll need layers and layers of chiffon cake to assemble this properly. You may think to yourself that there's possibly too much cake involved. And I'd agree with you if you were already adept at making this. Otherwise, you'll thank me that you have extra with which to play.
Before we start, keep in mind that for a single cake, you're going to need 3 layers of pomegranate chiffon and 2 layers of key lime chiffon (or 3 layers green tea and 2 layers cassis). Each layer will be 1/2 inch thick. Repeat this to yourself, 3 layers pomegranate and 2 layers key lime chiffon. 1/2 inch thick. Before you start, make sure you have the following handy: (1) cardboard cake rounds or similar to hold all your layers (2) toothpicks (3) a large, very sharp, serrated knife (4) a revolving cake stand (5) 2 10" cake rounds (6) patience.
For the Chiffon Layers
Chiffon is made with oil. This means it's perfect for freezing. And because this cake takes such a long time to make, you can build it ahead of time, frost it and then cover & freeze until the big reveal.
Makes (2) 10" layers
Preheat oven to 375º (350º convection)
Ingredients
(NOTE: This recipe is for the white and pink cake, the green and purple cake is green tea/cassis. If you'd prefer this flavor combo, you'll need 3 layers of green tea cake and 2 layers cassis chiffon. In this case, for the green tea chiffon use 1 cup green tea +1 tablespoon matcha powder instead of the 1 cup juice along with a drop of green dye. For the cassis, use 1/2 cup cassis purée mixed with 1/2 cup water)
*** You'll need to make this recipe TWICE, once for pomegranate and once for key lime. So remember, you'll need double this amount in ingredients***
3 cups cake flour
1 1/2 cups sugar
8 eggs, room temperature and separated
2/3 cup vegetable oil (Canola is perfect as well)
1 teaspoon salt
1 cup pomegranate juice (for the key lime chiffon, you'll use 1/2 cup key lime juice and 1/2 cup water)
1 tablespoon + 1 teaspoon baking powder
1 drop red dye for the pomegranate cake (optional)
Procedure
-Prepare your cake pans by lining the bottom with parchment sprayed with non-stick spray. DO NOT SPRAY THE SIDES OF THE CAKE PAN WITH NON-STICK SPRAY! You don't want the cake to pull from the sides, this helps the cake from collapsing before it cools and keeps the size of the cakes uniform. (I use cake rings, that are bottomless. I place parchment on a sheetpan and spray that and then plop the rings down so none of the spray touches the sides).
-In a stand mixer with the whisk attachment, whisk together 8 egg yolks and oil until combined. Add pomegranate juice and dye if using (or key lime) slowly until just combined.
-Sift together the flour, 1/2 cup of sugar, baking powder and salt. Slowly add to the egg yolk mixture and whisk for about 40 seconds. Set aside.
-In a CLEAN and DRY mixing bowl fit with a CLEAN whisk attachment, whisk egg whites until foamy. Slowly add remaining 1 cup of sugar and whisk on high until you achieve, stiff white peaks. Make sure not to over whip to the point of chunky dryness.
-Gently fold in the egg white mixture into the yolk mixture with a rubber spatula, until fully combined.
-Divide the batter evenly between the 2 prepared pans. Bake for 25 minutes, until the cake bounces back when you poke it.
-Repeat with the key lime chiffon.
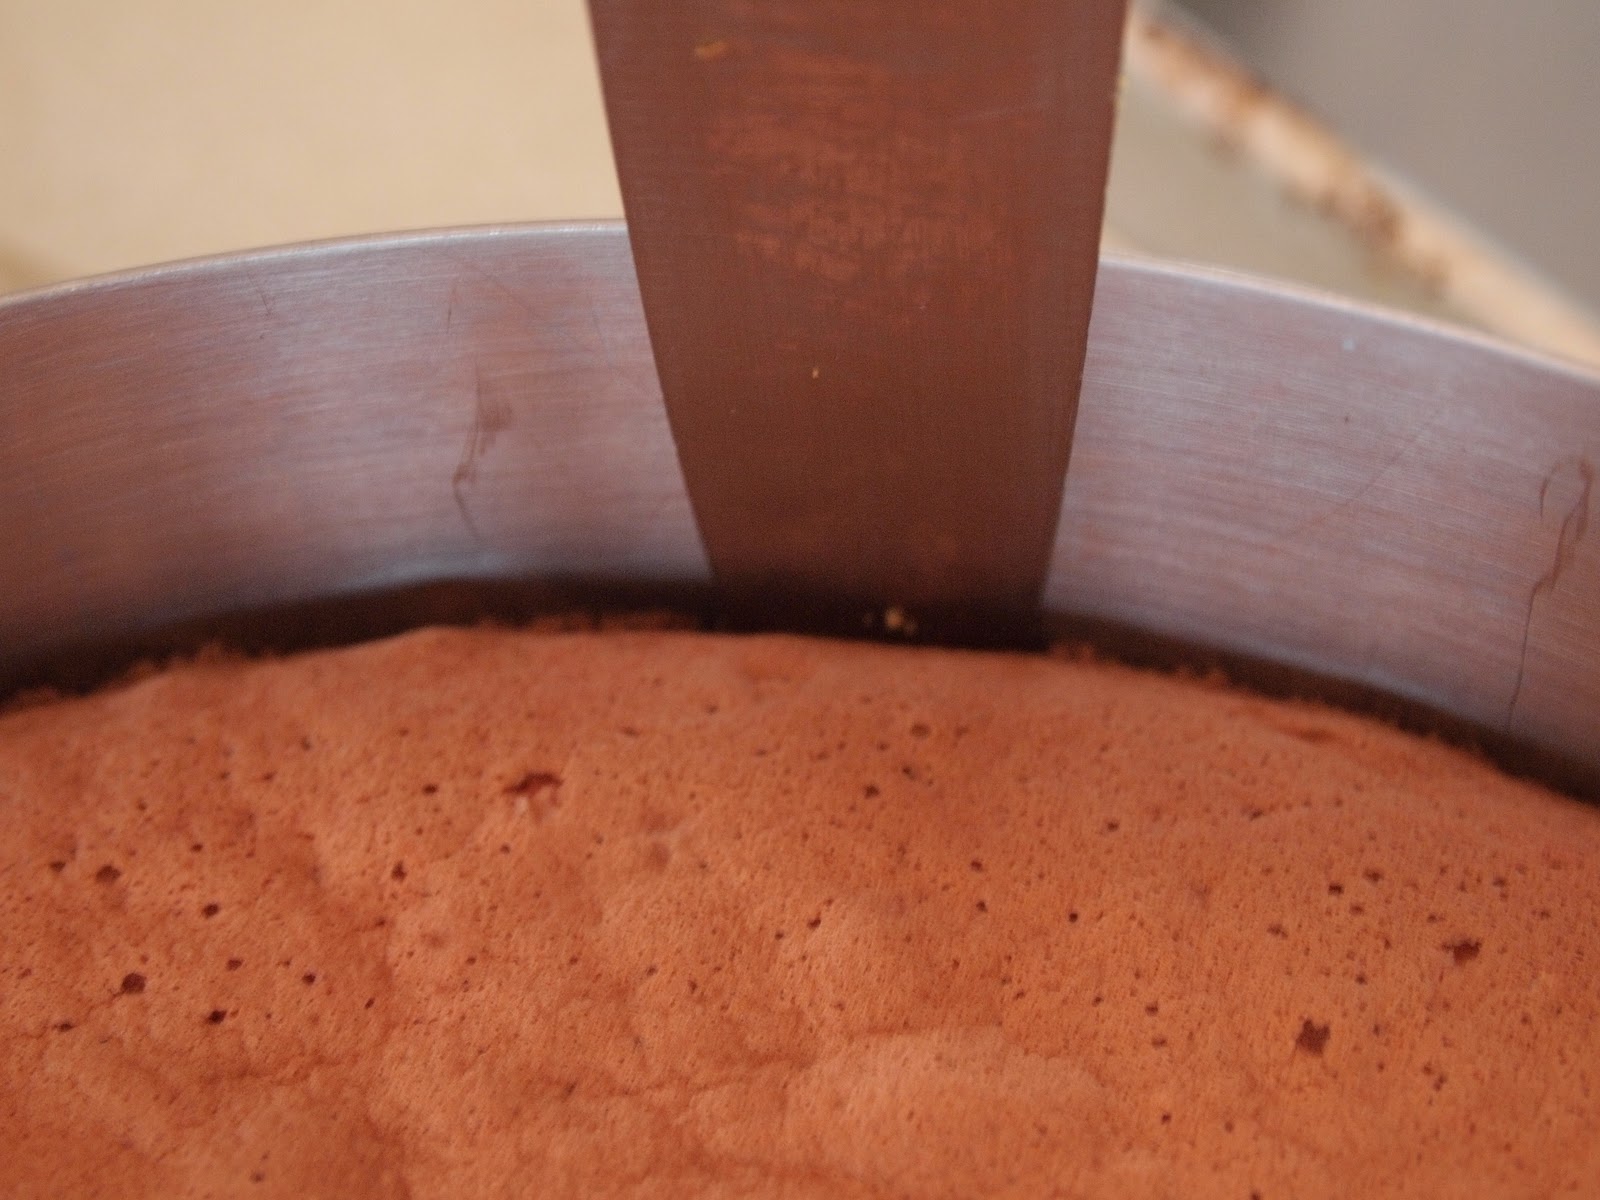 Wait until the cake is cool and run a thin, sharp knife along the sides to release the cake
-You'll have 2 cake rounds each of pomegranate chiffon and key lime chiffon. Allow the cakes to cool before you release them from the pan with a very thin, sharp knife run along the very edge of the pan. If you release the cakes too soon, they may collapse. PATIENCE!
-While your cakes are cooling make the buttercream.
BUTTERCREAM
Ingredients:
3 cups sugar
1 cups water
squirt of lemon
15 egg whites
pinch of salt
2 pounds unsalted butter, at room temperature (preferable a little cooler than room temperature, if possible)
1/4 cup pomegranate juice (if you're making the green tea/ cassis version, replace with 1/4 cup cassis purée)
1 drop red dye
You'll need: A sugar thermometer
Procedure
-In a heavy bottomed sauce pan, combine sugar, water and squirt of lemon. Make sure the sugar is completely saturated so that it looks like wet sand an no dry spots can be seen. Place over medium low heat and stir with a wooden spoon until the sugar has completely melted. With a pastry brush dipped in water, brush the sides of the pan to remove any sugar crystals clinging to the sides. Stop stirring, turn of the heat to high, attach the sugar thermometer and heat to 234º (soft ball).
-While you're tending your sugar, whisk the egg whites and salt together until they are foamy. When the sugar has come to temperature, very carefully transfer the HOT sugar syrup to the mixer and while the mixer is running on medium/medium high, SLOWLY and CAREFULLY pour the hot sugar mixture down the SIDE of the bowl and into the egg whites. Add all the sugar and whisk on high until the meringue achieves stiff peaks and the mixing bowl is cool to the touch (this is important, if the meringue is warm, the butter will melt and the buttercream won't come together. If think this has happened, put the bowl in the freezer for minute and then start mixing again).
-Slowly add bits of butter, about 2 tablespoons at a time. There's a chance you won't need all of the butter. Keep an eye out for the texture of the buttercream, it's takes some time to come together. But a visual cue is when it looks as if its starting to separate or curdle. This is an indication that with a little more whisking, the buttercream will smooth out and be ready.
-slowly add pomegranate juice and dye and whisk until fully combined.
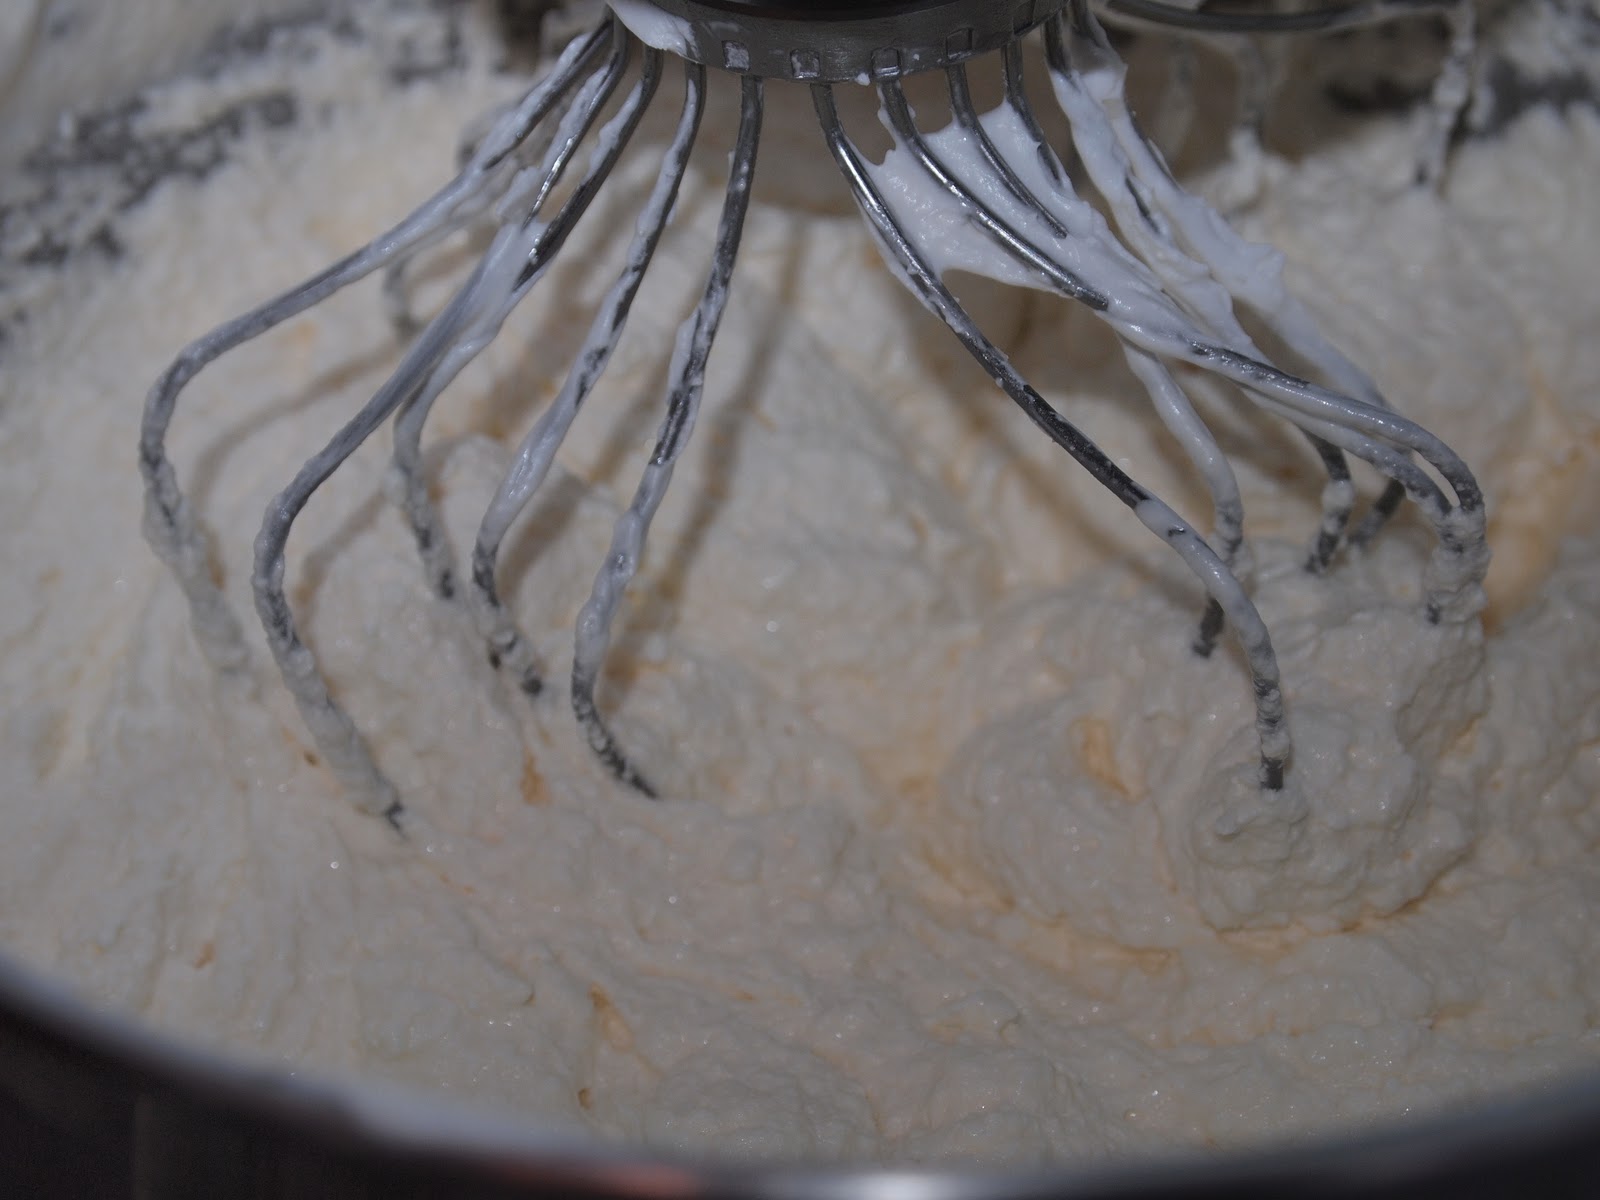 See, it looks a bit nasty and curdled. Just a few more seconds of whisking and it will be ready!
 SEE! It's ready!
ASSEMBLY
You'll need: Simple Syrup (microwave together 1 cup sugar and 1 cup water until the sugar has completely melted into the water).
This is what's going to blow your mind and your patience. But first, let's measure.
OK, we want 3 layers of pomegranate and 2 layers of key lime. You have 2 cake layers of each kind.
Take one layer and measure out 1/2 inch along the perimeter, placing toothpicks ever 2 inches or so along the perimeter and then measure out 1 inch thick. It's painstaking but if you're not a pro at eye balling and cutting layers, you'll thank me.
(helpful hint: Once the layers of chiffon are cooled and you've released them from the pan, put them in the freezer for 5 - 10 minutes. This will make the slicing easier.)
 Measure and insert toothpicks!
Take your very sharp serrated knife and place it horizontally on the edge of the cake where the one inch marker is. The trick is to keep the knife perfectly level, using the toothpicks as a guide. Put one hand on top of the cake and spin the cake on the cake stand slowly and just keep the knife level. Let the spinning motion to the hard work, don't move the knife. Keep spinning and let the knife naturally cut into the cake. Don't saw, just let it keep spinning and applying small pressure to the knife, keeping it level, so that it slices cleanly through the cake, making an even layer.
Put the top layer aside on a cardboard cake round. Continue with the second layer, so you end up with 3 layers total. Do this with the remaining (3) cake rounds.
 Keep the knife level and let the spinning of the cake platter do most of the work.
So if you're counting, you've got 12 layers of cake. But chances are, not all of them are perfect, are they? I didn't think so. If they are, then you could ostensibly make 2 separate cakes but I've got a feeling you're looking at the mess before you and you're thanking St. Valentine that you've got the extra.
Choose the BEST and most even layers of cake: 3 layers of pomegranate and 2 layers of key lime. Brush the top of each with simple syrup.
Take a layer of pomegranate and spread about 1 cup of butter cream evenly over the entire cake. It should be about 1/8" thick. Place a key lime layer on top of the buttercream layer and then add another 1/8" layer to that. Continue like this with another pomegranate layer and then another key lime layer. So now you have a 4 layer cake sitting in front of you. Phew. The easy part is over. Place this cake in the fridge until the butter cream has completely set. For about an hour.
Take a deep breath. Now take another. Find an 8" round cake pan or even a 8" pot lid. You need a guide, that's all. Set aside. Get a REALLY sharp, thin knife. It can be serrated or not. Get a tall glass of very hot water and dip the knife in the water. Take the cake out of the fridge and center the 8" circle guide on top of the cake and using your knife, draw a very shallow guide line. Again, this is just a marker, not a deep cut. And with a sharp knife in your hand and a prayer on your lips...
 This is my crater. See, it's not perfect. I'm going to be schmearing this with a layer of buttercream anyway.
Remove your guide and place your knife at an angle, about 45 degrees, and cut along the 8" guide into the cake. you are taking out a cone shaped chunk of cake from the middle of the cake and you may feel the knife hit the bottom. That's ok. Just keep it steady and even as you cut at an angle INTO the cake. When you've gotten all the way around, take another cake round and place it on top of the cake and invert it so that the cone piece you've cut comes out. If it's perfect, the narrowest end of the cone will measure bout 2" across. But if it's not perfect, don't worry. Set the cone piece of cake aside.
 The crater is schmeared and waiting to be topped with the last pomegranate layer.
Invert the original cake, now with a hole, back to it's original position so you're staring at a cake with a crater dug into it. Take a deep breath. Layer the crater and the top rim of cake with an 1/8" layer of butter cream. Take that 3rd layer of pomegranate cake that's been hanging around and place on top of the cratered cake so it sits on top. Don't press on it. You want this lying flat. Quickly grab a cake cardboard circle, place on top of the pomegranate layer and invert the cake, so that the pomegranate layer is now the bottom of the cake. Press GENTLY on the center of the cake so that you reverse the crater. It may crack a little, that's ok. Keep pressing along the top until you've created an indentation at the middle of the cake that mimics your original crater. It's scary to be shoving a cake into place but that's what you need to do.
Spread another 1/8" layer of buttercream into the crater and along the rim. Now grab the cone of cake you set aside and insert it into your newly formed crater. Press gently. Apply a thin layer (a crumb coat) of buttercream onto the top and sides of the cake and refrigerate until set.
Take a look around. It's a mess. but chances are you'll have a few cake bits lying around. I take the key lime bits and cut off any browned areas and place on a sheetpan. I dry out those pieces in a 200 - 250 degree oven for about 20 minutes. I cool the cake pieces and then pulverized in a food processor. I use those fine crumbs to coat the sides of the cake! You see, there is another use for all that extra!
Smooth the remaining buttercream on the cake in a smooth, finished layer. Cut hearts from parchment and smooth them onto the top and the sides of the cake until they are firmly attached. Gently press the cake crumbs on the cake until it's covered evenly. Brush off any areas where the crumbs have clumped and then carefully removed the parchment pieces.
Breath a sigh of relief.

January 27, 2011
Running in Circles
 that's me. No, not one of the dudes. The one with the white hat. No, not the dude with the green tank top. I'm the one with the blue tank top. Sheesh
Because I'm not cramming enough onto my plate, there's another blog that I'll now be nurturing. If you're looking for alternative baking recipes, ones that tend towards a super healthy bent, this is the place for you too.
Here's a the link if you're inclined to check it out. The focus of this blog is to follow my fundraising journey for American Cancer Society. I'll be running as many marathons as it takes to raise $64,000, that's $1,000 for each year my mother lived.
 Manna Bread. See, this is the kind of stuff you'll find there!
Along the way, I'll be baking things for long run sustenance not just for fun. No worries, I plan on making fun every day.
And since I bake as much as I do, running keeps the extra muffin tops off my muffin top.
And if you've ever thought to yourself, "Gee, I'd love to run a marathon one day but I don't think I can." Let me tell you, barring major physical impairment, you can. You don't have to win. You just have to run. And the experience is like no other. Especially when you run for people you love and for a cause you believe in.

Time Flies Like an Arrow. Fruit Flies Like a Banana.

With three brown bananas languishing on the kitchen counter, I had little choice but to toss them or pulverize them in the name of pastry.
I went the more destructive route and puréed those puppies in my food processor with a banana's closest chum, spiced rum.
It's the rare occasion that a food stuff's flavor is enlivened by a good dose of incipient rot but you can count bananas as the lucky benefactor of heightened piquancy by way of decay. As long as you don't mind the army of fruit flies setting up camp in your kitchen to enjoy the show.
While banana bread might be the cornerstone of overripe banana usage, I had pound cake on the brain and a pullman loaf pan begging for some action. So I give to you, one of the easiest recipes known to man: the banana pound cake.

Banana Pound Cake
Yes, pound cake is named quite justly, with a pound of each of four ingredients making up the whole. 1 pound butter, 1 pound sugar, 1 pound egg and 1 pound of flour. Some Americans add sour cream. Some folks trade out some of the butter for margarine. Others add some baking powder, though just a skosh. I add bananas. While most recipes call for less than a pound of each ingredient (it's quite a bit of batter in the end) I use a pullman loaf pan for pound cakes, which is a vessel large enough to take in all the batter and its perfect shape makes for a gorgeous finished cake.
Preheat oven to 350º (convection to 325º)
INGREDIENTS
1 pound unsalted butter (4 sticks)
1 pound brown sugar (one box of Domino's brown sugar is a pound)
1 pound eggs (9 large, usually)
1 pound AP flour (best to weight it out. Trust me).
3 large, overripe bananas
3 tablespoons Cap't Morgan's Spiced Dark Rum
1 teaspoon vanilla bean paste
1 teaspoon baking powder
1 teaspoon salt
PROCEDURE
-In a food processor, pulverize the bananas, rum and vanilla until completely smooth. Set aside.
-With the paddle attachment, beat the butter and brown sugar until light and fluffy. Add eggs one at a time, making sure each egg is completely incorporated before adding the next.
-Whisk together the flour, salt and baking soda.
-With the mixer on low, add 1/3 of the flour and then 1/3 of the banana purée. Keep alternating between the two until they are completely incorporated.
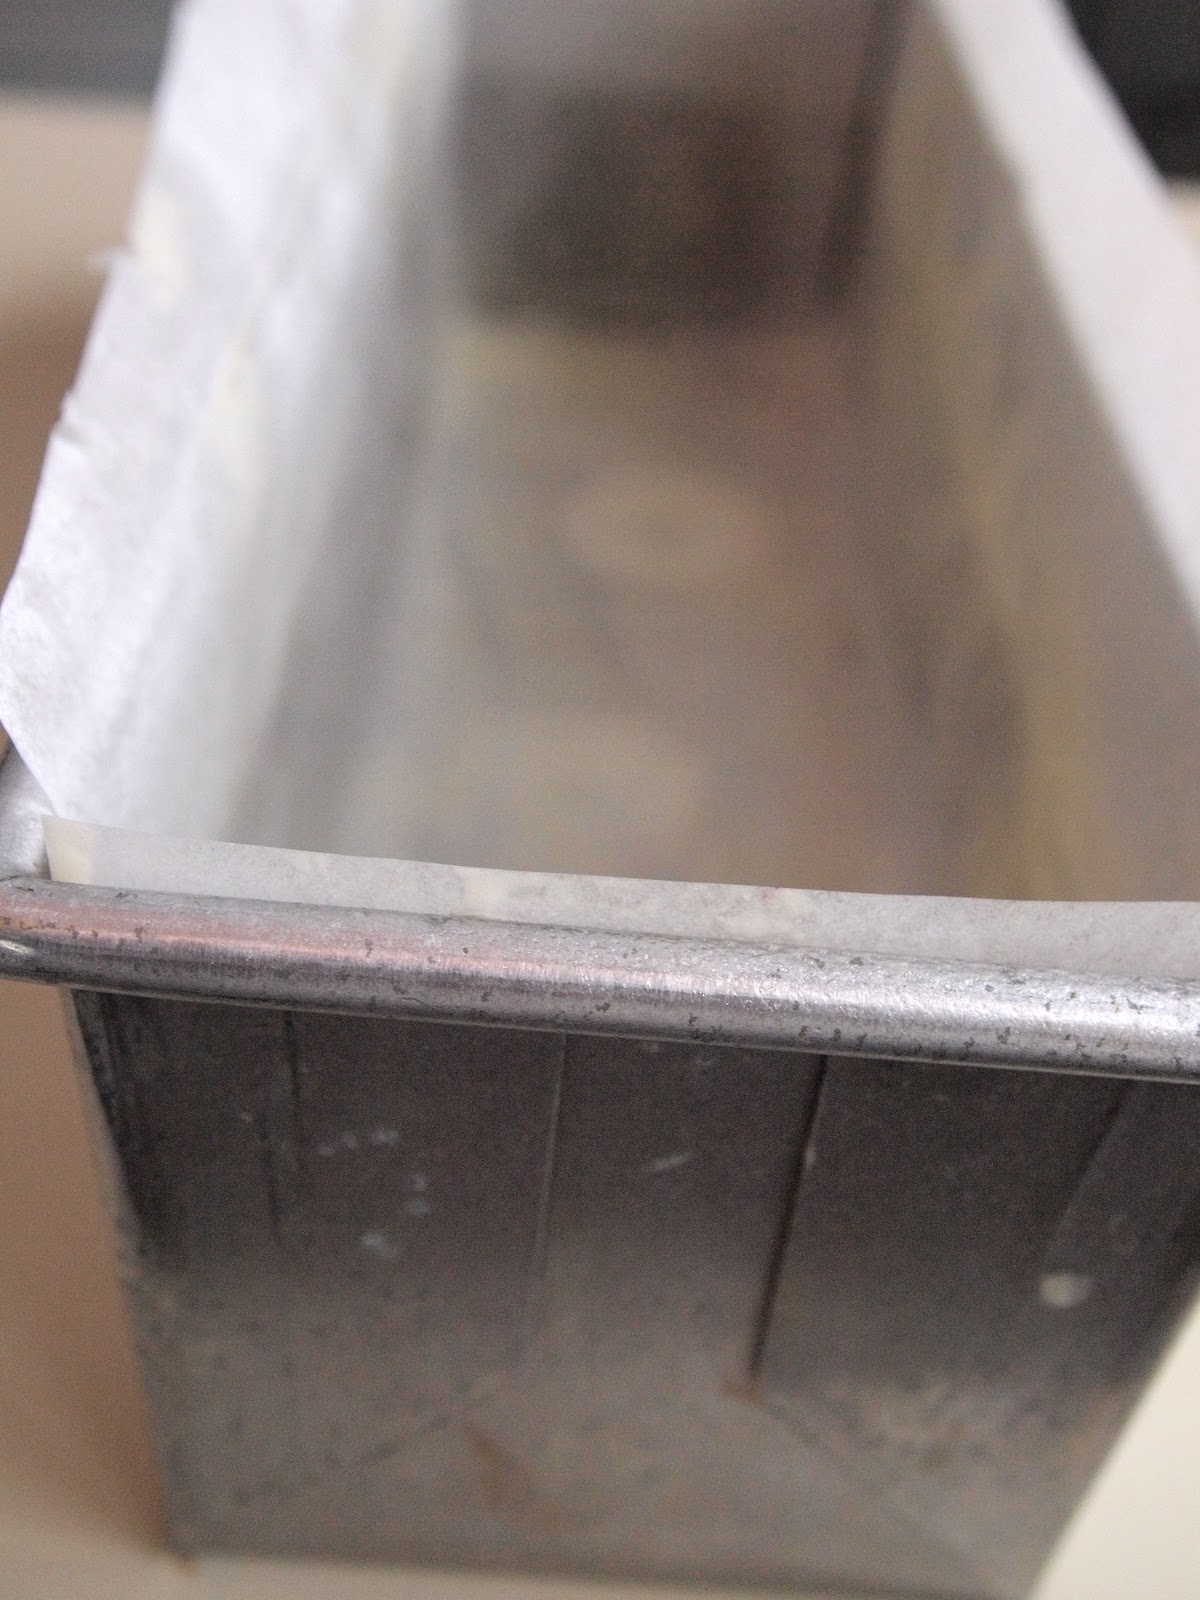
-Spray the pullman loaf with non stick spray. Line with parchment and spray the parchment again. Make sure the parchment hangs over the sides of the pan so that you have something to grab when you remove the cake
-Pour the batter into the loaf pan, schmearing so that it's evenly distributed. Bake for one hour to an 1 1/2 hours. Definitely check the cake with a toothpick after one hour to see if the toothpick comes away clean. The sides of the cake tend to over brown if you leave in the oven too long but even if this happens, the cake itself will stay beautifully moist.
-For a Valentines touch, I use a petite four heart cutter, stamp out a lovely heart and then fill the void with caramel.

January 25, 2011

January 24, 2011
Meringue for the Resolute

If I had but one morsel to tide me over for a life time, if some cruel cosmic joke required me to make a decision wherein I could only choose a solitary confection among the thousands I adore, I would choose meringue.
In my dessert doomsday scenario, I would choose that single pastry because it is allowed to be many things at once.
Meringue is an island: Ile Flottante!
Meringue is multi-cultural: Swiss, Italian, French! Oh my!
Meringue is the tops: Lemon Meringue pie!
Meringue is a ballerina: Pavlova!
Meringue is fancy: macaron!
Meringue is svelte: It's fat free!
During this one month in which we cling to a misguided belief that we can be resolute in our culinary restrictions, let's not forget that meringue is there to sweeten the dog days of caloric restraint (granted, it's full of sugar but let's ignore that for now).

Resolute Meringue
This is a riff of a traditional Pavlova: schmear a blob of meringue onto a baking sheet, with out any real care for presentation. Once it's baked you slather with whipped cream and top with fruit.
In the spirit of parsimony and structure, I prefer to pipe the meringue in tight circles and sandwich with a lightly sweetened greek yogurt. The presentation, however, if entirely up to you.
For the meringue:
preheat oven to 250º
Ingredients
5 ounces egg whites (approximately 5 egg whites)
1 cup sugar
2 teaspoons corn starch
1 teaspoon vanilla bean paste
1 teaspoon vinegar
1 pinch salt
Procedure
-Whisk together egg whites, vinegar and pinch salt until foamy
-Stir together sugar and cornstarch and slowly pour into the egg white mixture with the mixer beating on medium high.
-Whisk on high until you achieve medium stiff peaks. Be very careful not to over beat the meringue that it becomes dry.

-Draw out 4" circles on a piece of parchment (I draw out 8 circles. This may require two sheetpans). Flip the parchment over onto a sheetpan so that the ink or pencil is face down ( you don't want it to transfer to the meringue) but your still able to see the outline of the circle.

-Fill a large piping bag fit with a medium open tip with the meringue and pipe disks within the confines of the circles. Bake for about 45 to 50 minutes.

-On another sheetpan, lined with parchment, pipe small hearts with remaining meringue. Bake the hearts for 15 to 20 minutes.
For the filling:
Ingredients
1 cup greek style yogurt
1 tablespoon honey
1 pint raspberries
Procedure
-Drain excess yogurt water away. Mix yogurt and honey together well and chill.
-Layer one meringue disk (that's completely cool) with 3 tablespoons yogurt, making sure to leave room along the edges for the raspberries. Line the perimeter with raspberries and top with another disk of meringue.
-Pipe a small dollop of yogurt onto the center of the top disk and apply a small meringue heart.
-Serve immediately.

December 19, 2010
Keeping it Simple for Santa: The Perfect Chewy Chocolate Chip Cookie

He doesn't have the time or the patience to maneuver through elaborate culinary trickery. He wants it tasty and easy, a convenient nosh just out of the chimney flue to bolster him for the trip back out into the blustery night.
And it better be tasty.

So here's my recipe for what I believe is the perfect chocolate chip or anything chip cookie. It's chewy, flavorful and comes with an edge of crisp to tease your molars.
The Cookie

Ingredients
2 1/2 cups all purpose flour
1/4 cup bread flour
2 cups packed dark brown sugar
2 eggs
1 large egg white
11 ounces (22 tablespoons or just over 2 1/2 sticks) unsalted butter (I use European)
2 teaspoons salt
1 teaspoon baking soda
1 teaspoon baking powder
add ins
I divided the dough in half, putting 1 cup chocolate chips in one and 1/2 cup each of chopped macadamia nuts, dried cranberries and white chocolate chips in the other.
Procedure
preheat oven to 350º
-Cream together butter and sugar.
-Add eggs and egg white, one at a time.
-whisk together dry ingredients and slowly add to the mixer, being VERY careful not to over mix.
-fold in the add ins (this dough may require the use of your hands. Don't be afraid to use them).
-I used a VERY large cookie scoop and spaced the cookies 3 inches apart. Then I flattened them with the palm of my hand.
-Bake the cookies for 15 minutes or until slightly golden (you know how you like your cookies. I prefer just a wee bit underbaked).
Here's the trick, though. During the baking, about every 5 minutes, I pull on an oven mitt, open the oven and grab the cookie sheet and SLAM it down. You see, I notice that the cookies are starting to puff a little. Of course they are, they have leavening in them. But I also want them CHEWY and flat. So every 5 minutes I slam the cookie sheet to counteract the leavening puff. Sounds absurd but I swear, this is what makes them super special.

Merry Christmas, Happy Holidays and general happiness and well being, sweet people.

Gesine Bullock-Prado's Blog

- Gesine Bullock-Prado's profile
- 69 followers
Gesine Bullock-Prado isn't a Goodreads Author
(yet),
but they
do have a blog,
so here are some recent posts imported from
their feed.

