
Gesine Bullock-Prado's Blog, page 29
December 17, 2010
Drunken Figgy Pudding Log
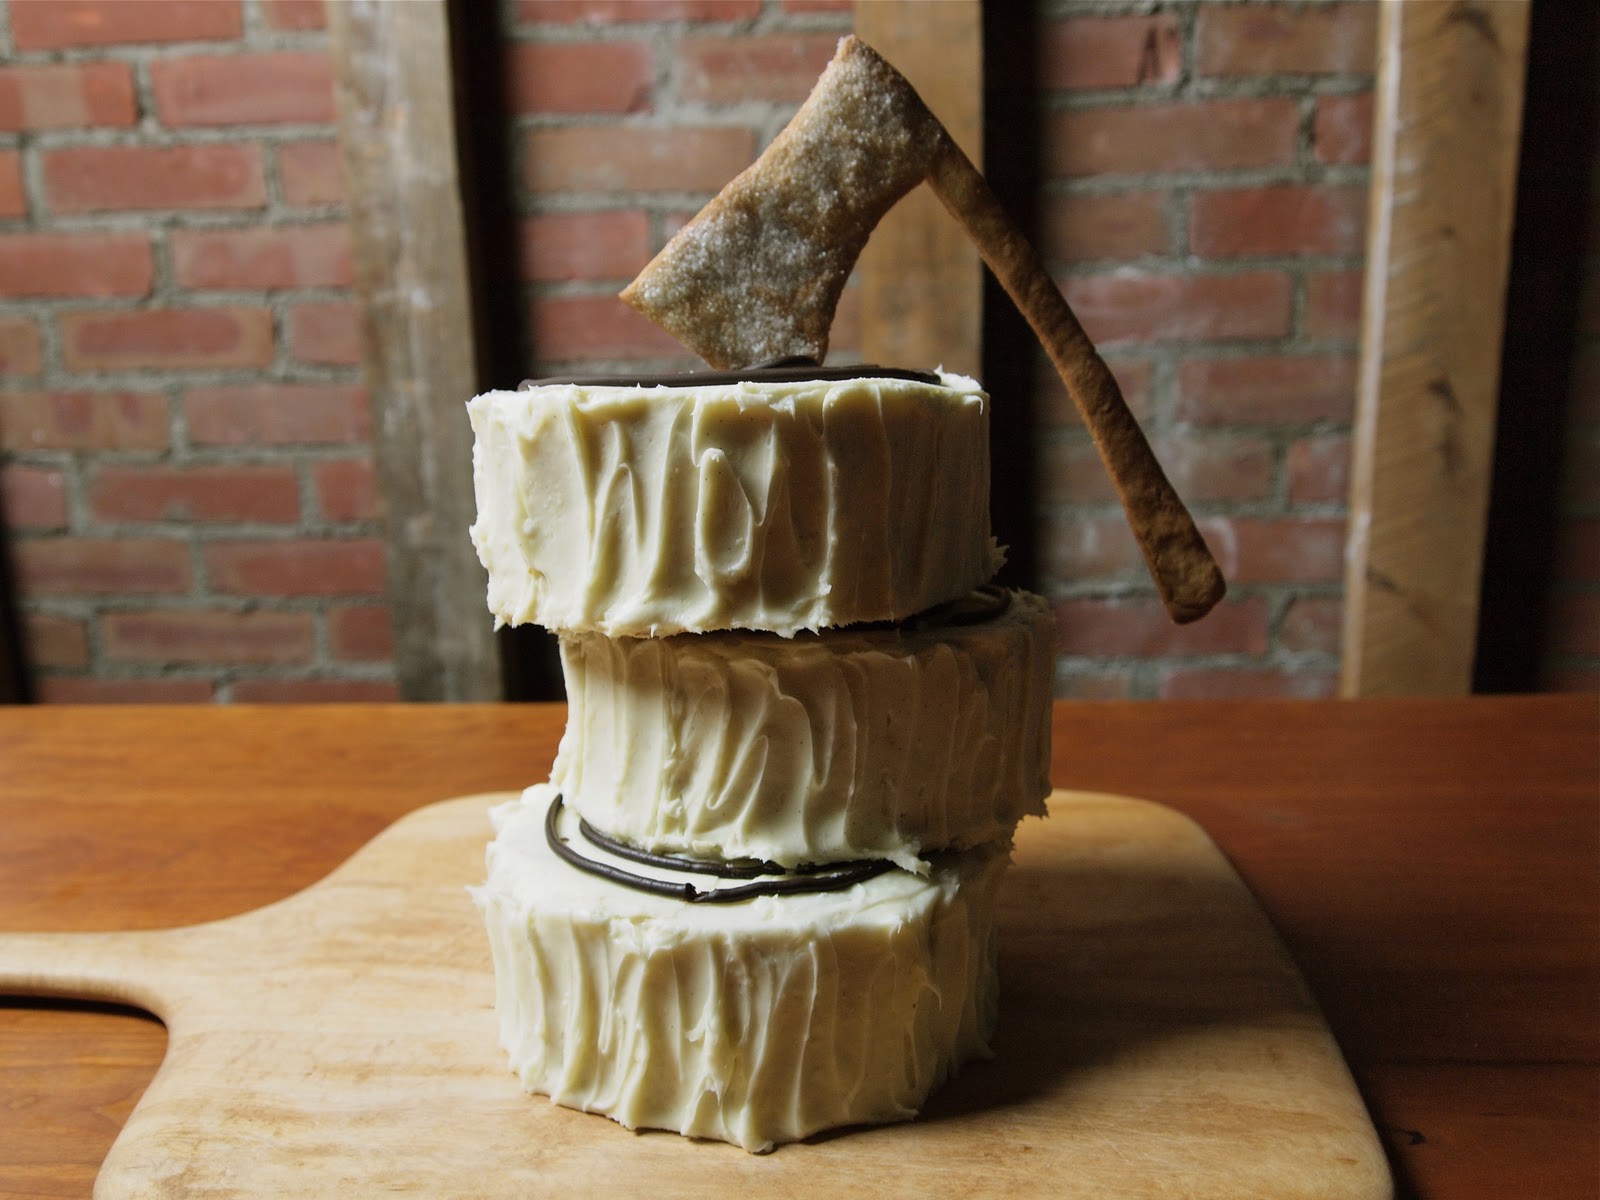
This is my favorite cake. I can't help it. The way it starts off, with the figs soaking in a brew of hot coffee and rum is absurd in its evil glory. And when it bakes, a blast of luscious aroma infuses everything and leads to the compulsion to check the oven every 2 minutes, "is it done yet? is it done yet? is it done yet?"
And once it's out of the oven, the flavor doesn't disappoint and paired with maple cream cheese frosting, this puppy is a damn fine beginning, middle or end to your day.
Figgy Pudding
3 cups brown sugar
2 sticks (8 ounces) unsalted butter
7 eggs (room temperature)
1 teaspoon vanilla bean paste
1 1/2 cups chopped dried fig
3/4 cup hot coffee
1/4 cup cap't morgan's spiced rum
1/2 cup heavy cream
3 cups all purpose flour
2 teaspoons baking powder
1 teaspoon salt
-Chop the figs and soak in the hot coffee and rum
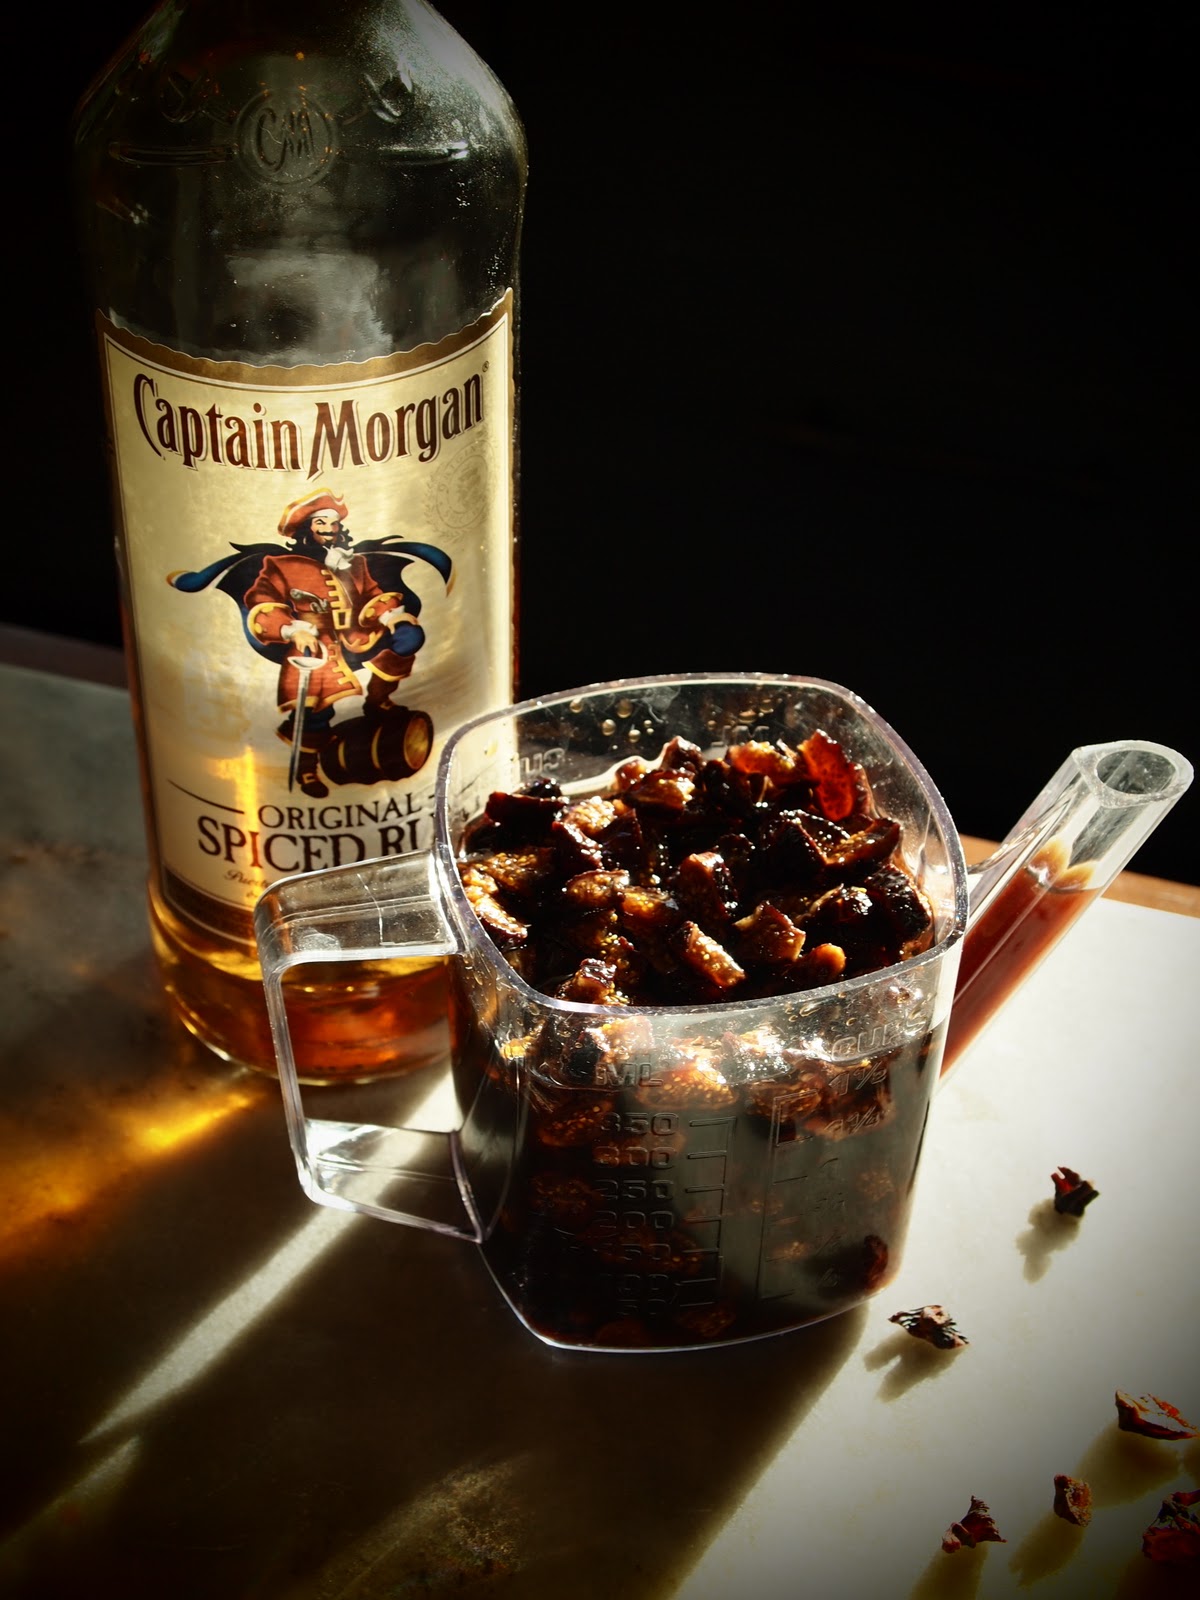 I use a measuring cup with a spout to easily pour off the coffee/rum mixture when the times comes.
-Cream together the sugar and the butter until light and fluffy.
-Add eggs, one at a time and then add vanilla. Whisk until well incorporated.
-Drain the coffee/rum liquids from the figs but keep the liquid.
-Combine the coffee/rum reserved liquid with the heavy cream and stir to combine.
-Whisk together the flour, salt and baking powder
-Add the flour and the coffee/cream liquids slowly, alternating between the two until they are just incorporated.
-Fold in the figs and pour the batter into a half sheet pan that's lined with parchment and has been sprayed with non-stick spray.
-Bake at 350º until golden brown, about 30 minutes. The cake should spring back when you poke it.
For the frosting
-Follow the directions for the cream cheese frosting but substitute maple sugar for the confectioner's sugar.
To assemble:
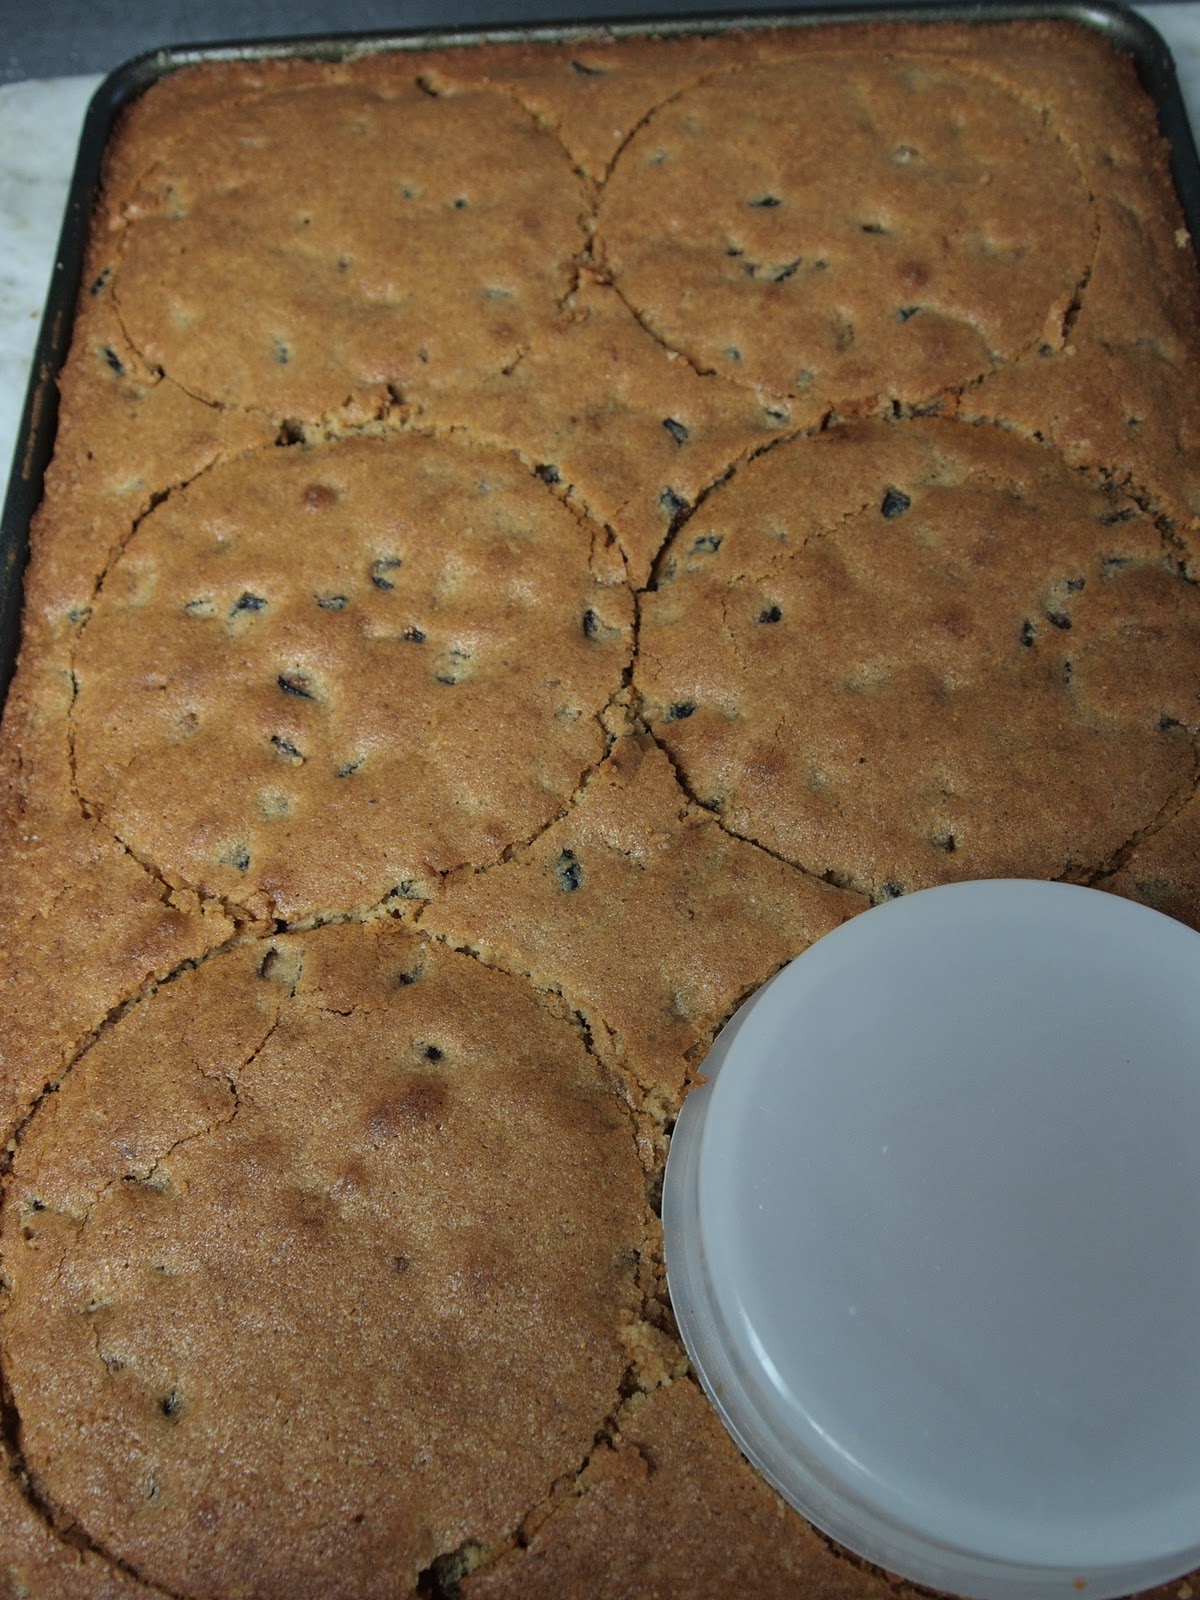 Cut the rings using a guide, if you don't have the appropriate sized cake rings.-Cut (6) 6" circles from the cake. Fill the cakes with 1/3 cup frosting so you're left with three, double tiered cakes. Freeze until set.
 -Using a small offset spatula, roughly frost the sides of the cakes with frosting to simulate bark. Refrigerate to set.
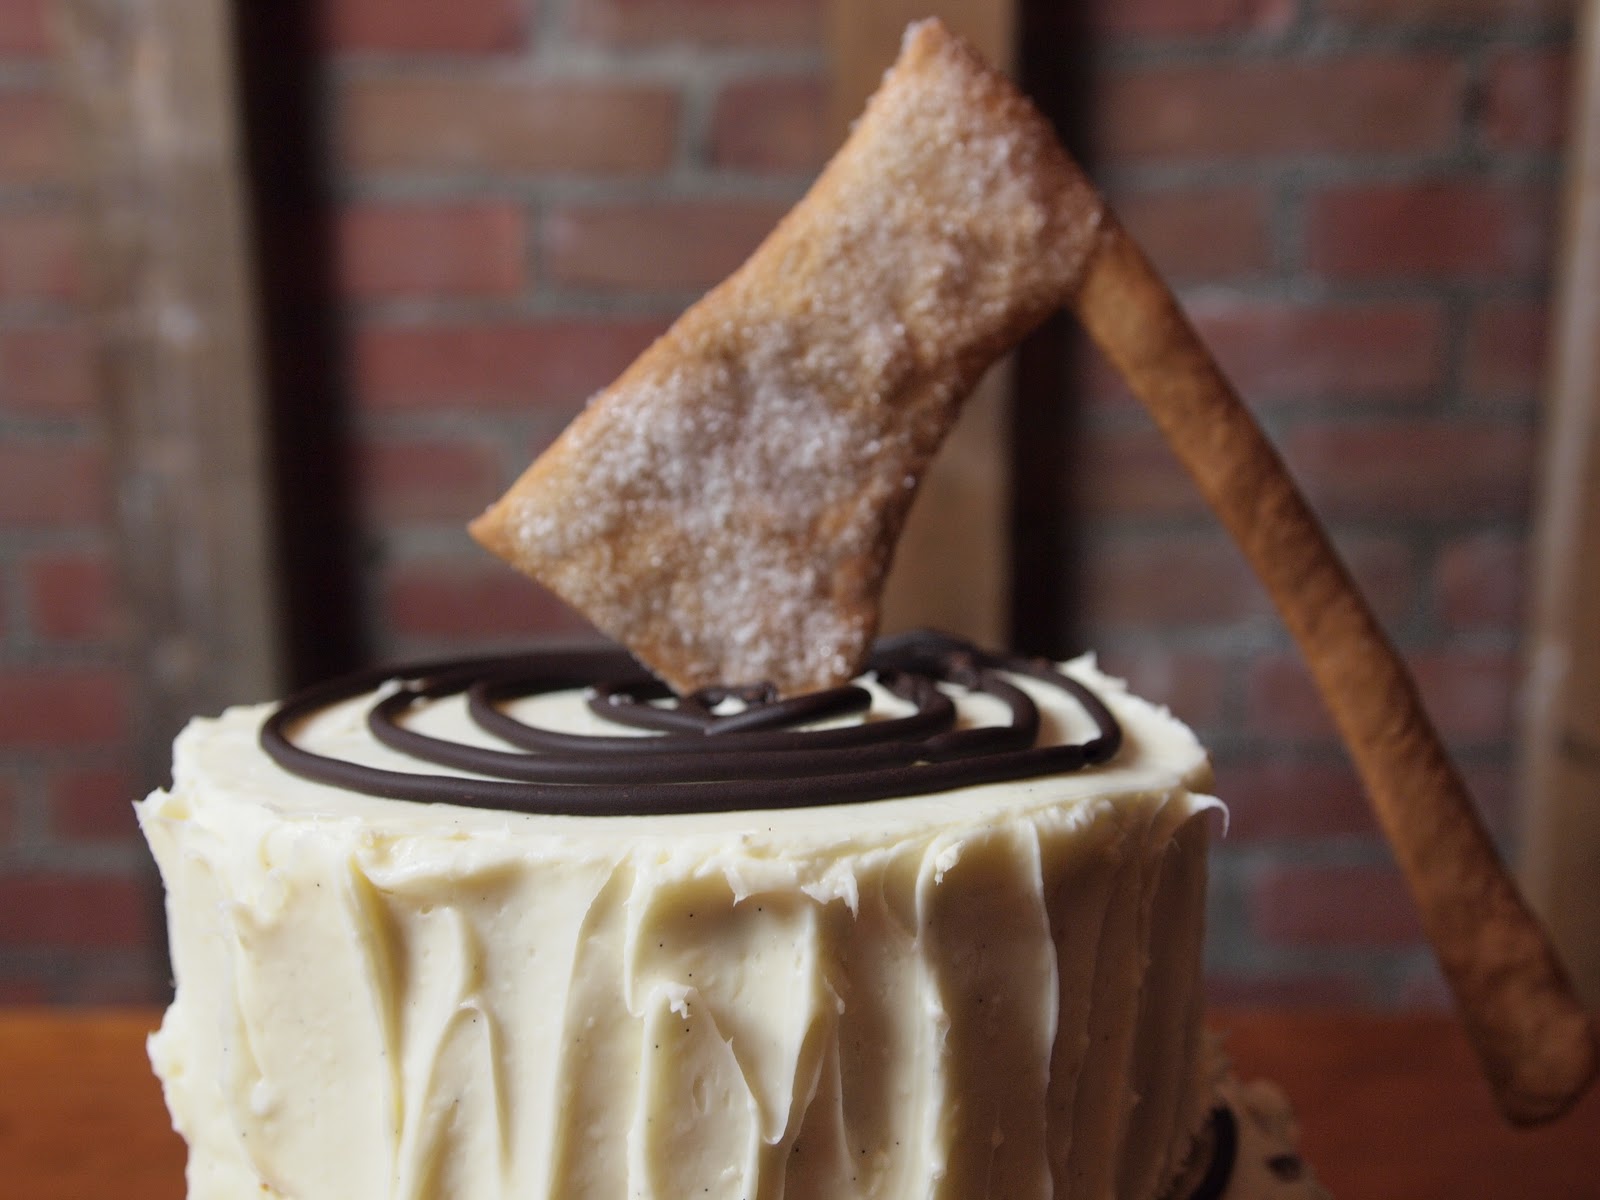
-While the cakes are setting, melt 1 cup of chopped chocolate and transfer to a pastry bag fit with a small open tip. Pipe tree rings on the top of each cake.
-Stack in a zig zag configuration. Impale the cakes with a wooden skewer if you're afraid that the cakes are unstable.


December 16, 2010
The Whoopie Claus

I'm not entirely comfortable with baking Santa. I'm even less comfortable with the thought of eating poor St. Nick. But I've had this mold for years. It was a gift and I had gingerbread cake batter ready and waiting for some use. So here he sits, warm from the oven and smelling of gingerbread.

I've hedged my bets, knowing I'd be hard pressed not to break off a piece of his face and chow down immediately, only to feel a guilt last felt on the Donner Pass (if only a wee bit tastier guilt). So I made some whoopie pies with my remaining batter. I filled them with vanilla bean cream cheese icing just to make them that much more irresistible. I'll save the cake for some kids who'll feel far less remorse at cannibalizing the jolly gingerbread man.
Gingerbread Cake
1 stick butter
1/2 cup brown sugar
1 cup molasses
1/4 cup honey
2 eggs
2 1/2 cups all purpose flour
2 teaspoons baking powder
1 tablespoon ginger
1 teaspoons cinnamon
1/2 teaspoon white pepper
1 teaspoon salt
1 teaspoon vanilla
1 cup of English breakfast tea, cooled to room temperature
-Cream together the butter and brown sugar until light and fluffy. Slowly add molasses and honey and beat until well incorporated.
-Add eggs, one at a time and then slowly pour in the tea and vanilla.
-Whisk together the dry ingredients and slowly add, being careful not to over work the batter.

-I used about 3/4 of the batter for the Santa mold. I baked him at 350º for about and hour and 15 minutes. These old molds have a front and back, so you fill the batter with Santa face down and then put his back on and hope that there's enough batter to fill up out his jeans. For the whoopies, I used a large cookie scoop and scooped the batter directly onto a sheet pan lined with parchment paper. I baked these for 20 minutes at 350º. With 1/4 of the batter left, I got a total of 3 whoopies. If I'd just gone ahead and gone all whoopie, I'm guessing I'd have ended up with 12 total.

December 15, 2010
With Delusions of Sugarplums...

I danced with the fire and intensity of a thousand suns. I pirouetted, I jettéd, I pliéd and arabesqued. I did all these things with the lumpy grace of an ardvark.
I never fathomed that the euphoria and beauty that I felt as I spun and sprung didn't manifest into physical divinity. I relished the glee and never bothered to look in the gargantuan mirror that lined the entirety of the studio of the dance academy on Wisconsin Ave. Had I chanced a peak, I'd have seen a schlumpy, slouchy dervish with a manic grin plastered to her face.
I should have sensed that my talents did not lie in dance when I auditioned for the Washington Ballet's annual production of the Nutcracker but I felt nothing but pride when I scampered into my mother's warm car and squealed, "I'm a rat! I'm a rat!"
That my dance instructors deciphered my corporeal movements as that of a rodent didn't squash my delusion one bit. I had a part!
It took some time, perhaps a year, for me to discover the truth. After a solo dance performance during my Junior High's annual musical production, my boyfriend broke up with me. He said, and I quote, "Man, that was just too embarrassing."
So it came to be that I would never dance the dance of the Sugarplum Fairy.
I can, however, make a sugar plum.

Sugar Plums for Pavlova
Anna Pavlova was a glorious dancer, one famed for dancing the role of the Sugarplum Fairy. So she had that going for her. Oh, and then someone named a fabulous dessert after her.
In honor of her injudicious fabulousness, I've built a pavlova bowl to house the sugar plums.
For the bowl
INGREDIENTS
4 egg whites
1 cups sugar
1 pinch salt
1/4 teaspoon cream of tartar
1 - 2 tablespoons cassis purée

PROCEDURE
Whisk the egg whites, purée, cream of tartar and salt until the egg whites start to foam. Slowly pour in the sugar and beat the meringue until you achieve very stiff peaks.
Pipe the meringues first into 3 disks: one 3 inches in diameter, one a 1/2 inch smaller and a third 1/2 smaller than the last.

Then pipe "flower" rounds. One 4" in diameter and increase the size from there, making each circle about 1/2 to 1 inch larger than the last. I've only used 3 disks and 3 florets to make a very shallow bowl. Any more and the whole thing can become very unstable. So I often pipe a few disks that are the same size and pick whichever looks the best and then eat the rest.

Bake at 225º - 250º for an hour and 15 minutes (or until the meringues harden). Monitor the meringues to make sure they aren't browning. Any hint of browning and you should lower the heat in your oven.
To assemble the bowl, stack the disks so the largest is first and then the middle and then the smallest is on top. The smallest "flower" disk will sit on top of the smallest regular disk and you'll add increasing larger flower disks to create your bowl. Stack as many as you dare.
For the Sugar plums
Sugar plums were originally simply sugar covered coriander and developed into a more involved confection as time passed. Now, it can include plums but needn't. The general ingredient list is dried fruits, spices, nuts and honey. I've added a bit more binding to the mix to keep the balls chewy and compact. Use which ever nuts and dried fruits you like best, you can even use prunes.
INGREDIENTS
2 cups pecans, toasted and finely chopped
1 cup dried apricots, finely diced
1/2 cup raisins
1/2 cup dried cherries
1/2 cup turbinado sugar (plus extra for coating the sugar plums)
1/4 cup honey
1 tablespoon bourbon
1 teaspoon powdered vanilla
1 teaspoon cinnamon
1/2 teaspoon ginger
1/2 teaspoon all spice
zest of 1/2 a lemon
pinch salt
PROCEDURE
***make sure to have a heat proof rubber spatula coated with non stick cooking spray (or a metal spoon coated with non-stick cooking spray) handy because you are going to need it immediately after your sugar syrup is ready.
-toss the nuts, dried fruits, zest and dry spices and salt in a bowl until the fruits and nuts are coated
-in a heavy bottomed saucepan, heat turbinado sugar with 1/4 cup water and the bourbon over low heat, stirring until the sugar has melted.
-increase the heat to medium high and cook the sugar until you reach "soft ball" on a candy thermometer or 234º. Stir in the honey and allow to dissolve into the sugar syrup. Take from the heat and pour the mixture evenly over the nuts and dried fruit. Immediately and very quickly use your spatula or spoon to stir the mixture so that they are all evenly coated.

-coat your hands with non-stick spray and grab small portions of the mixture and squeeze into golf ball sized orbs. Squeeze hard so that the stuff sticks together and holds it's shape. Roll in the turbinado sugar to coat and wrap in wax paper and store in a cool dry place or display for a short time in a Pavlova bowl to get the full sugar plum effect.

December 14, 2010
A Bird in the Hand Isn't Worth 2 Buches

I'm a big fan of using relatively inappropriate tools to great effect in pastry. Especially for home baking. I have tools that work beautifully for large scale production but they don't translate well when you have a smaller scale oven and sheet pans. So when I find something that works the same but on a smaller scale, even if I find it in the paint section at Home Depot, I do a happy dance.


As a matter of fact, I was in the paint section at the Home Depot this past Sunday and found the mother lode. The Martha Stewart paint effects collection. I immediately knew that I would use two of the tools to make buche. Run, don't walk, to your nearest Home Depot for some fabulous pastry supplies.
BUCHE, two ways
 stripe and wood grain tool.
 The buche I made with the wood grain effect was made with the decor sides and Helga Cake recipe for the interior cake, which I baked in a half sheet pan. I filled it with 2 cups of whipped cream, sweetened with 1/8 cup of maple syrup and flavored with 1 teaspoon vanilla bean paste. I colored the decor paste with 1 tablespoon of cocoa powder.
For the chocolate and peppermint buche:
For the decor: follow directions in the blog post. When using the wood grain tool, follow directions that come along with the paint decor set. Be careful to press down very firmly when using the wood grain tool and clean it thoroughly between "swipes."

INGREDIENTS
for the cake
preheat oven to 350º
6 room temperature eggs, separated
12 tablespoons sugar
1/2 teaspoon salt
2 tablespoons coffee
2 tablespoons corn starch
1/3 cup cocoa powder
1/4 teaspoon cream of tartar
PROCEDURE
for the cake
-whisk together the egg yolks, 6 tablespoons sugar, coffee, corn starch and cocoa powder until incorporated.
-in a clean mixing bowl, whisk the egg whites, salt and cream of tartar until foamy. Slowly add the remaining 6 tablespoons of sugar and whisk on high until you achieve medium firm peaks.
-stir 1/3 of the egg white mixture into the chocolate mixture to lighten. Carefully fold in the remaining egg whites.
-Spray a parchment lined half sheet pan with non stick spray. Using an offset spatula, evenly and carefully spread the cake batter over the half sheet pan
-Bake for 15 to 20 minutes or until the cake springs back when you poke it. Do not over bake. You want the cake very moist so that it doesn't crack when you roll it.
For the filling
2 cups heavy whipping cream
1/4 cup confectioners sugar
1 teaspoon peppermint oil
whisk until you achieve firm peaks
To assemble:
 thin layer of whipped cream on the decor side
 add remaining cream to the chocolate layer-If you are using decor. place the decor strip decor side DOWN on a piece of parchment. Spread a very small amount of whipped cream over the decor sheet to act as an adhesive. Gently place the chocolate cake on top of the decor.
-evenly spread the remaining whipped cream over the chocolate layer. Use the parchment under the decor sheet to help your gently roll the cake. Do not roll the cake too tightly, otherwise you'll crack the cake. Freeze the cake for 1/2 hour until set. Trim the ends.

December 11, 2010
Snap Out of It! Macadamia Rum Snaps for the Holiday Baking Blues
 Want fast? Want tipsy? Want to potentially burn off your fingerprints?
Welcome to the snaps.
Also referred to as lace cookies or Florentines, these sweet crispies are fast and furious. So fast, in fact, that you'll be inclined to do something fancy with them as I have.

Macadamia Snaps
INGREDIENTS
1 cup packed brown sugar
1 stick plus 2 tablespoons unsalted butter
1/2 cup glucose syrup (or corn syrup)
2 tablespoons Capt Morgan's Spiced Rum
1 teaspoon vanilla bean extract
1/2 teaspoon salt
1 cup finely chopped macadamia nuts
1 cup cake flour
PROCEDURE
-place sugar, butter, glucose (or corn) syrup, rum, vanilla bean extract and salt in a sauce pan over medium heat until the sugar and butter have completely melted.
-stir in the nuts and flour and refrigerate the batter for an hour.
-scoop the dough with a 1 1/2 teaspoon scoop (spray the scoop with non-stick spray to make it easier), spacing the cookies at least 2 inches apart (they spread) and bake at 350º for 10 minutes, turning the tray in the middle of the baking time, until the cookies brown.
 to the left, a cone mold. The top cookie has the shiny side down. Place the cone on top of that cookie and wrap around the cone. The shiny side (bottom cookie has the shiny/bumby side up) will then show.
-to make into cones, cool the cookies no more than a minute. When they just come from the oven, they won't hold their shape. When they cool too much, they'll crack when you bend them. Using a metal cone mold bend the cookie over the mold, the cookies will be very hot but you can take it. Work quickly making sure that you wrap the cookie so that the shiny and bumpy side faces OUT. Allow to cool.
-Fill with lightened pastry cream or sweetened whipped cream and fruits.

December 10, 2010
Pepper Nuts: The Gold Standard

Once upon a time it was impossible to purchase a 20 pound tub of Kirkland brand cinnamon for a fiver at Costco. In fact, spices were a commodity held as precious as gold. Sometimes more so.
Back in the day during the holidays, the gentry broke out the big guns (or rather, they paid the menial class to break out the big guns) and seasonings found their way into all manner of comestible where otherwise they'd be absent. And in Germany, no other morsel found itself as soused in gewürtz as pfeffernüsse. Drunk on pepper, ginger, cardamom and a bevy of goodies shipped at great expense from the East, the little pepper nut is a confectionary piece of historical Christmas excess. Enjoy it today at a fraction of the price.

Pfeffernüsse
INGREDIENTS
3 cups all purpose flour
2 sticks of unsalted butter (8 ounces)
1 cup brown sugar, packed
1/4 cup honey
2 eggs
1 teaspoon vanilla bean extract
1 1/2 teaspoons cinnamon
1 teaspoon white pepper
1 teaspoon salt
1 teaspoon baking soda
1 teaspoon ginger
1/2 teaspoon cloves
1/2 teaspoon nutmeg
1/2 teaspoon cardamom
(confectioner's sugar for dusting)
PROCEDURE
-With the paddle attachment, cream together the butter and the sugar until light and fluffy. Add eggs one at a time until combined. Add vanilla bean extract and honey and beat until well combined.
-Stir together dry ingredients and slowly add to the butter/sugar mixture until the dough begins to clump.
–Turn out the dough on to a very lightly floured work surface and gently knead the dough until all the ingredients are incorporated, being careful not to overwork the dough. Refrigerate for 1/2 hour.
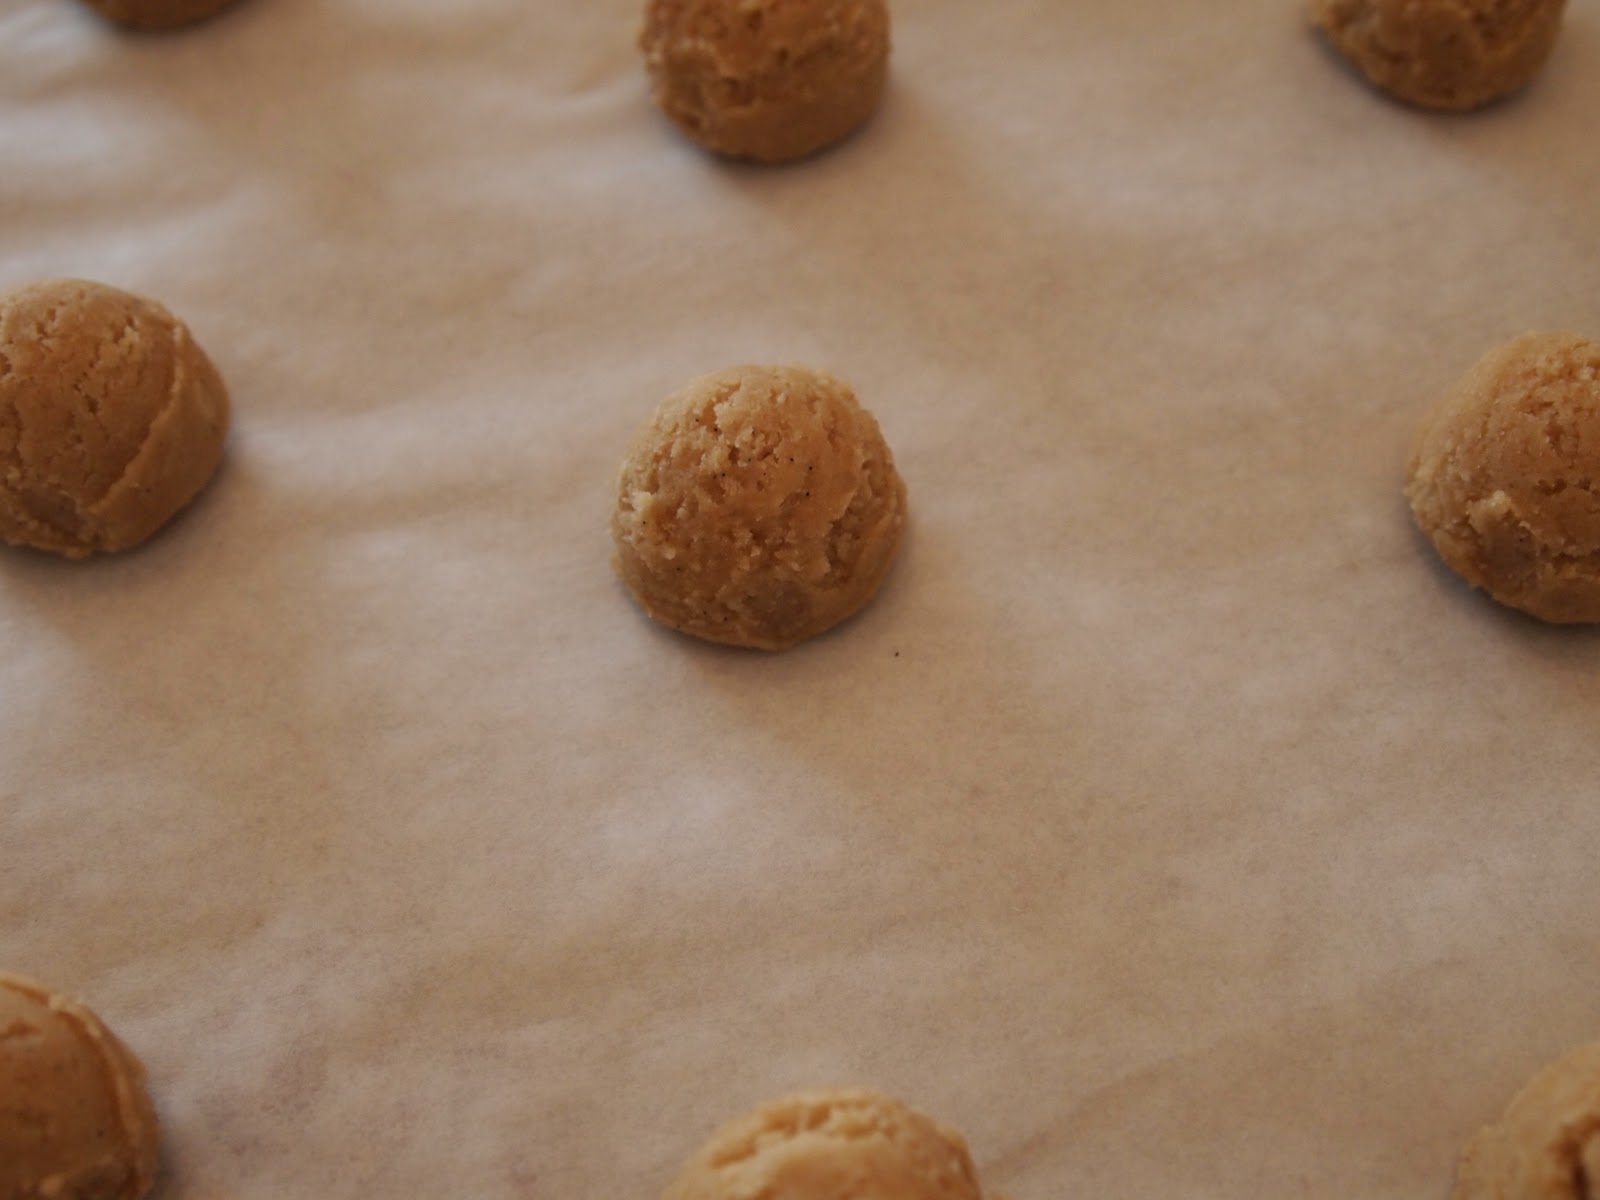
-Scoop the dough with a 1 1/2 teaspoon cookie scooper or hand roll small pieces of dough. Space on a parchment lined sheet pan an inch apart and bake at 350º for 10 minutes, turning the sheet pan half way through the baking process. The cookies should be firm to the touch and golden brown on the bottom.
-Allow the cookies to completely cook and dust liberally with confectioner's sugar.

December 9, 2010
Carrot Cake

With all the holiday tasties coming out of the woodwork, it's easy to forget everyday treats that pack as much festive, spicy punch as "once a year" fare. A few sparkly flourishes and you can bring carrot cake to the party.
 It doesn't have to be a three tiered colossus. Pick your favorite shape and bake.
Carrot Cake
This recipe can be found in my book "My Life from Scratch" but because I'm feeling generous and giving, I'm sharing it with you here. Doesn't mean I don't want you to buy the book. I do. But I also want you to bake scrumptious things right now
INGREDIENTS
for the cake1 1/2 cups vegetable oil2 cups sugar4 large eggs2 cups all-purpose flour2 teaspoons baking powder2 teaspoons baking soda1 teaspoon salt1 teaspoon cinnamon1/2 teaspoon nutmet3 cups finely grated, peeled carrots (about 1 pound)
for the frosting4 cups (2 boxes) confectioner's sugar2 8-ounce packages cream cheese 8 tablespoons (1 stick) unsalted butter, room temperature1 teaspoon vanilla bean extract
PROCEDURE
for the cake-preheat oven to 325º. Lightly grease your baking form-beat together sugar and oil until combined. Add eggs, one at a time, beat well after each addition.-sift together dry ingredients and add slowly to the sugar, oil and egg mixture.-fold in the carrots.-pour the batter into your prepared pans. Bake until the tops are golden brown and the cake springs back when you poke it. Timing depends on the size of your baking vessel. Check after 15 to 20 minutes.
for the frosting
-beat all the ingredients together until smooth and cream. Refrigerate to stiffen a bit.
Dollop and pipe at will. Make sure the cake has cooled completely and you don't have any extraneous lumps in the frosting to make piping breezy.


December 8, 2010
Dominosteine für Helga

I make things for my mother. She's been gone for close to eleven years and I still bake to please her.
While this brings with it great sadness and regret, it also brings her closer.
And nothing draws her more near than marzipan and chocolate.
Dominosteine littered our house during Christmas. The package from Germany would arrive early in the month and we'd be knee deep in those ginger cake, marzipan, currant and chocolate squares for days.
I know I can buy them in the states now; I don't have to beg my family to ship them across the pond. But I'd rather conjure a batch that recalls the best of my mother's favorite things, so that the sweet smell of baking almonds can reach high to her perch and surround her with earthly baking love.

Helgasteine
INGREDIENTS
for the cake
2 packages (14 ounces total) almond paste
1 cup sugar
2 sticks (8 ounces) softened, unsalted butter
2 ounces honey
6 eggs, room temperature
1/2 teaspoon salt
1/2 teaspoon baking powder
5 ounces all purpose flour
1 teaspoon ginger
1 teaspoon cinnamon
1/2 teaspoon nutmeg
pinch clove
pinch white pepper
(1 tablespoon black current purée, 1 tablespoon cocoa powder)
-Beat together almond paste, butter and sugar until smooth. I know this is against store policy but dammit if almond paste isn't often dry, so I surreptitiously squeeze the box to make sure the stuff is fresh and malleable before I buy it.
-Add eggs, one at a time and then add the spices.
-Fold in the flour, salt and baking powder until just incorporated. Divide the batter between three bowls. Leave one bowl plain, mix the tablespoon of black currant to one bowl and the cocoa to the third bowl. Mix until incorporated.
-On a sheet pan lined with parchment and sprayed with non stick spray, spread the batters so that each batter takes up 1/3 of the pan (spread with the long side of the sheet pan facing you). The batters will touch while baking but we'll trim those edges. Your main objective is to have three individual blocks of cake: one plain, one currant flavored and one cocoa. One way to make it cleaner is to pipe the batters out with a pastry bag fit with a large open tip.
-Bake at 325º for about 20 minutes or until the cake just springs back and begins to slightly brown.
-Allow to cool completely.
To assemble
You'll need
-1 jar currant (or raspberry) preserves (no seeds) 15 ounce jar
-2 packages of almond paste, rolled into a thin sheet about 1/8 inch thick), approximately the size of the finished stacked layers
-1/2 batch of simple ganache (make sure it's still warm and spreadable)
-simple syrup (1 cup sugar and 1cup water, sugar dissolved completely in the water and cooled)
-Using a sharp knife, separate the plain, cocoa and currant cakes, trimming the edges so the cakes have clean edges and are equal in size. Place the cocoa layer on a cake board and gently brush a thin layer of simple syrup with a pastry brush over the layer.
-Spread 1/3 of the jar of preserves with a small offset spatula over the cocoa layer and top with the plain layer. Brush the plain layer with simple syrup and 1/3 of the preserves and top that with the currant layer. Brush that again with simple syrup and add a few tablespoons of the preserves and using the offset, spread a very thin layer of the preserves over the surface to act as an adhesive.
-Double check to see that your rolled almond paste is large enough to cover the top of the assembled layers. If it's too large, trim it. Place it on top of the currant layer and spread a thin layer of ganache over the almond layer, about 1/8 thick.
-Chill in the freezer for about 1/2 hour. Dip a sharp knife in a glass of very hot water and dry. Score the ganache into 2" squares (I grab a ruler for this job. I can't be trusted to eyeball anything with accuracy). Clean the knife in the hot water often, making sure to dry completely. Once you have the top scored, dip your knife in the hot water, dry it off and cut the squares, cleaning the knife between every cut to keep the layers clean.

December 7, 2010
"Cookie. Earl Grey." Holiday Cookies from the Last Frontier

If you are of a certain nature, you'll get the reference. Even if it's a little skewed.
For those of you who studiously avoided any contact with that compendium of programming comprising the Star Trek oeuvre for fear of nerd contagion, you'll be clueless.
"Tea. Earl Grey," was a command uttered often and to the pathetic delight of Capt. Picard fans worldwide (that would have been a pubscent me). When Next Generation episodes air on BBCAmerica, my husband will pause on the station and observe me for any signs of geekish delight unbecoming of a grown woman. I comport myself beautifully, if only on the outside.
This doesn't stop me for craving a cup of Earl Grey.
Or at the very least, infusing lovely tuille fortune cookies with a splash of fragrant bergamot.
Cookie. Earl Grey.
BERGAMOT INFUSED HOLIDAY FORTUNES
(makes about 20 cookies)

INGREDIENTS
5 tablespoons unsalted butter, softened
1 cup sugar
3/4 cup AP flour
1/4 cup corn starch
1/2 teaspoon salt
3 tablespoons Earl Grey Tea (pour a small amount of boiling water, a little over 3 tablespoons, over the tea bag and let it steep until the tea cools. This creates a nice concentration of Bergamot flavor)
PROCEDURE
-Preheat oven to 400º
-whisk together the sugar, flour, cornstarch and salt
-combine all the ingredients in a mixing bowl and beat with the paddle attachment until a smooth paste forms.

-On a sheet pan lined with parchment paper, spread a tablespoon of batter with an offset spatula into a 4 inch circle. Only make about 4 circles of batter per sheet pan until you get proficient at making the cookies quickly. Space them evenly apart.
-Bake for about 6 minutes or until the edges of the cookie just start to brown, turning the sheet pan half way through the cooking time.

-using an offset spatula, carefully pick up a round and fold in half and bend the cookie at the center, drawing the two ends toward each other.

-I don't have the moxy to put fortunes in during the folding, so I have them printed out and thread them through once I've finished.

December 6, 2010
Happy St. Nikolaus Tag
 It started with a blender.
 I knew what mom was working on for dinner. Whatever it was, it never required that particular appliance but it made an awful racket and that's what she needed for her supterfuge. I sat still in the living room, goofy grin on my face, paying scant attention to whichever stop motion animation special was playing and waited for the blender to stop.

Then I'd listen for her declaration from the kitchen, "I think I heard something outside! You might want to check the front door!"
And I ran, 0 to 60 in 2 seconds, from ass planted on the carpet to feet scampering on the hardwood in record speed, to open the door.

I knew that she knew that I knew that she was the culprit, the mad woman in the brisk evening who ran around the entire house and bolted up the front stairs to put stockings at the door and sprinted back through the kitchen door to turn off the blender and make her holy pronouncement. And I loved her more for it, that she kept up such a lovely ruse when I was far too old to fall for it. As long as lived under her roof, until I was 18, she played St. Nikolaus and well after, she still sent care packages to mark the day.
So I wish everyone a happy St. Nikolaus Tag. Especially the wonderful moms and dads who take care to make moments magical for their children, no matter their age.
Spekulatius: St. Nikolaus' Cookie
Spekulatius is one of my favorite cookies, no matter the season. It is crisp and spicy. I'm partial to those with almond, although there are varieties without. But they all are thin, crunchy and delightfully spicy.
INGREDIENTS2 cups all purpose flour1 cup almond flour3/4 cup well packed brown sugar2 sticks (8 ounces/16 tablespoons) unsalted butter1 teaspoon salt1 teaspoon almond extract1/4 teaspoon baking powder1 teaspoon vanilla bean paste1 teaspoon cinnamon1/2 teaspoon cardamom1/2 teaspoon nutmeg1/2 teaspoon white pepper1/2 teaspoon cloves1 egg(extra flour for dusting work surface. Corn starch for dusting springerle mold)
PROCEDURE
-whisk together AP flour, almond flour, salt, baking powder and spices. Set aside.-cream together butter and sugar until well combined. Add egg, almond extract and vanilla bean paste. Mix until combined.-slowly add flour mixture until JUST combined and turn over on a work surface and gently knead until the flour is evenly distributed into the dough. Cover with plastic wrap and refrigerate for two hours.-Lightly flour your work surface and roll the dough until it's 1/4 inch thick, if you are using a springerle roller or mold. Otherwise, if you are using cookie cutters, roll to about 1/8 inch thick and cut the cookies and bake at 350º for 15 minutes or until the cookies are lightly browned and crisp.–If using a springerle mold, liberally dust with corn starch (don't use flour, it won't coat the mold properly and the dough will stick in the crevices). Press the mold into the dough evenly. The pressure from the mold should result in the dough being about 1/8 thick all around. Bake at 350º for 15 minutes or until the cookies are lightly browned.

Gesine Bullock-Prado's Blog

- Gesine Bullock-Prado's profile
- 69 followers
Gesine Bullock-Prado isn't a Goodreads Author
(yet),
but they
do have a blog,
so here are some recent posts imported from
their feed.

