Rachael Ray's Blog, page 66
March 28, 2013
Sprout It Out! Sprouting Is Easy and Good for You
Remember bean sprouts? You know, those, yummy, crunchy, mysterious things that you’ll sometimes find in salads and sandwiches? If you’ve ever tried buying them at the store, you may have found that they’re very expensive, and they never seem all that fresh. Well as it turns out, it’s much easier and cheaper to grow your own sprouts at home!
Let’s start by defining what sprouts are. When you buy dried beans and grains, they are actually alive, but just sleeping, in a way. When you put them in water, they come back to life, shooting out a fresh, green sprout. Some grains and beans are known for being easily sprout-able, including wheat berries, chickpeas, and lentils - which are what I used in my own sprouting experiment.
There are a few reasons why eating sprouted food is good for you. First of all, in beans, sprouting breaks down the sugars responsible for making beans hard to digest, and activates enzymes that promote good digestion. Sprouting increases the amount of carotene and B vitamins in the beans. The sprouting process also neutralizes phytic acid, allowing your body to better absorb minerals like calcium and iron that are present in beans. In addition, if you end up cooking the sprouted beans, they cook much faster than dried beans.
Now that you know why to sprout, here are the instructions on how to sprout. I used lentils, so I can guarantee they’re easy to sprout. Start with lentils, then move on to whatever bean or grain tickles your fancy!
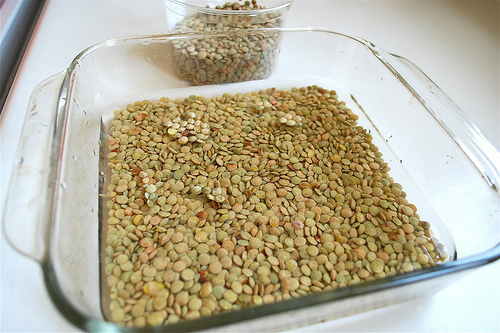
Step 1. Purchase organic brown lentils. Take half a cup of the lentils and submerge them in cold water overnight, or for about 12 hours.
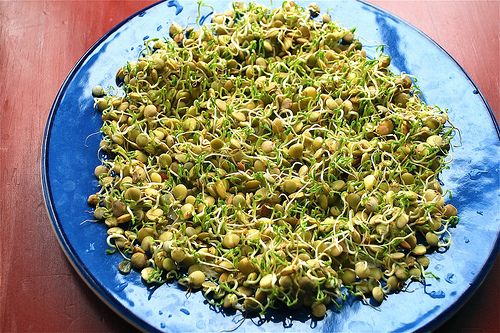
Step 2. Rinse the lentils in a fine mesh strainer under cold water, and shake out the extra water. Spread the lentils on a plate, and cover them with a damp paper towel or cheesecloth. Just as you would if you were letting bread rise, keep the lentils away from windows or drafts.
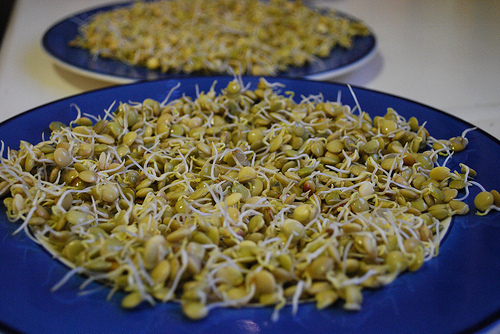
Step 3. Rinse the lentils under cold water a few times a day, each time shaking out the extra water. You don’t want any water sitting on the bottom of the plate, under the lentils. Keep rinsing like this for 2-3 days, making sure to spritz the paper towel with water so it remains damp. After 2-3 days, your sprouts will be about 1/4 inch long.
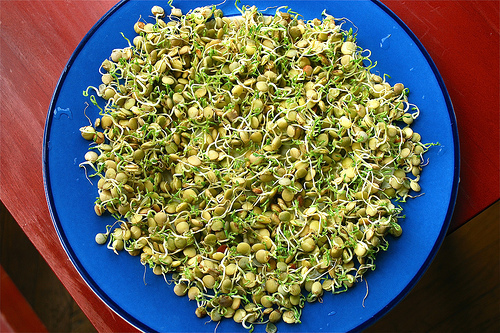
Step 4. Keep the sprouts going for another day or two to get longer, green sprouts. Eat the sprouts raw, or gently sauté or steam them to preserve the good enzymes that have developed during sprouting.
Hop-ful Time, Money ‘n Mani-saving Easter Clean-up Tips ‘n Tricks
With Easter just days away, so are egg hunts and holiday entertaining. Here are a few tips and tricks to help save you time, money and your mani when dealing with holiday preps and clean-ups.
Easter Egg Dye: Lemon-Aid
You’ve dyed the eggs, but what about your hands? If you find your skin is now a nice violet color, don’t despair – it’s not that difficult to remove. Place sugar in a small bowl and scrub/massage it all over hands. Use a toothbrush and brush back and forth to loosen/diminish the dye. Rinse with warm water then soak hands in lemon juice for 10 minutes. Wipe and rinse.
BONUS Mani-saver: If you notice your nails are yellowing, no problemo. Simply dig your nails into lemon halves, squish them around and they will naturally ‘whiten’. Wipe and rinse and you’ll be good to go!
Chocolate: Handy Dandy Sanitizer
Our kids love to use their clothing as napkins, but what if they wipe the remnants of that chocolate bunny or macaroon on their sleeve? Gently scrape any excess off the material and then grab the clear hand sanitizer (with alcohol). Squeeze a bit directly onto the stain and dab with a micro-fiber cloth
Tarnished Silverware: Got Ketchup?
Company is coming, and the last thing you want is silverware tarnish to ruin the meal. To get rid of the stains, put your sterling silver flatware into a bowl and cover with ketchup. Let is sit for 10-15 minutes and then use an old toothbrush to clean the nooks, crannies, and any detailing. If you’re wondering why ketchup works, it’s because of the natural acid in tomatoes and I think the vinegar in ketchup may also play a part. Rinse off in warm water, then dry with a soft micro-fiber cloth.
PLEASE NOTE: As much as I love wearing my rubber gloves to maintain my mani when I clean and wash dishes – it’s a no no when cleaning silver since the rubber is made with sulphur which will create tarnish. I use an old pair of cloth winter gloves instead.
Easter Lilies: Take Aim
As soon as you buy or receive these beautiful (but quick-to-stain) flowers, you can either cut the orange pistol or spray the pollen with aerosol hairspray (which will shorten the life span). However, if the dye is already cast, DO NOT RUB or brush. This will push the color in further. First shake the garment or cloth outside so you don’t get it on anything else. Next, use a piece of scotch tape to lift off any remaining residue. If it’s a nice sunny day and the item is a light colored, let it soak in the sun for a few hours. Then launder per usual.
Red Wine: White Wine Anyone?
Someone spill red wine on your carpet or upholstery? Blot any excess, then cover with Kosher salt (it’s coarse and works better). Leave it on for a few minutes before wipping off. Then pour either white wine, white vinegar, or baking soda on the stain and let sit for a few minutes. You can actually use the white wine or vinegar first, and then sprinkle baking soda on it to remove any odor.
And, just in case Aunt Annie leaves her ice tea directly on your fave wooden cocktail table, here’s a money-saving way to get rid of the watermark:
Ring Marks on Tables: Bring Out the Helmanns
Believe it or not, mayonnaise is a quick and easy way to get those watermarks left on your wooden furniture. Apply a generous dollop directly onto the mark, rub it in with a paper towel, and leave overnight. Wipe and buff with a clean microfiber cloth. Mayo will also shine your hubcaps and condition your hair – not to mention make a yummy chicken or ham salad with your Easter or Passover leftovers!
BTW: If you have any ashes, add them to the mayo watermark recipe. The ashes act as a mild abrasive to help remove the mark.
Easy Jellybean Centerpiece
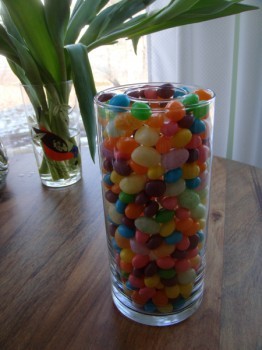
Sweeten up your Easter bouquet with this simple centerpiece made with jellybeans.
Materials
2 glass containers: one thinner than the other
Jellybeans
Fresh cut flowers
Ribbon
Find a container that will fit inside another glass container, but will leave enough space in between for the jellybeans.
If the inside container is shorter than the outside container, prop it up with jellybeans, or do what I did, and tape some squares of foam core together.
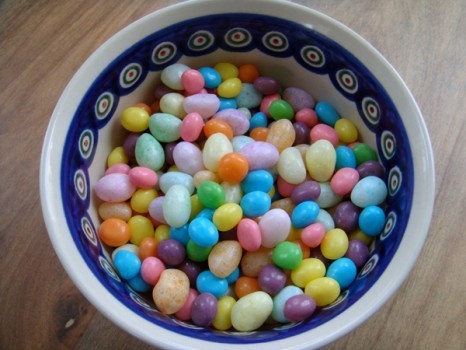
I used two types of jellybeans, so to evenly distribute them I mixed them in a bowl first.
Fill the space between the containers with the candy.
Add water and arrange the flowers in the center container. Tie a pretty bow around the vase.
When I first placed the tulips into my arrangement they were dramatically flopped over. The next day they stood up straight and completely transformed the bouquet!
Find me on Facebook!
March 27, 2013
Fun Decorating with Eggs!
Think outside of the basket. Use blown-out eggs as adorable Easter decorations that can hang, or add an Easter touch to a centerpiece.
Check out this video of a recent appearance on the TODAY Show where I show Kathie Lee & Hoda how to blow eggs.
Egg Ornaments
Materials
Blown-out, dyed eggs
Ribbon, beads, glitter and/or paint
Hot glue gun
18 gage galvanized steel wire
Wire cutters
Jewelers or needle nose pliers
String or jewelry wire
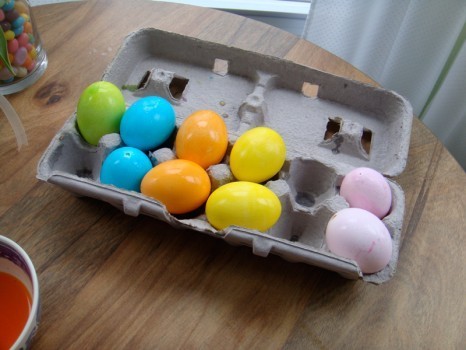
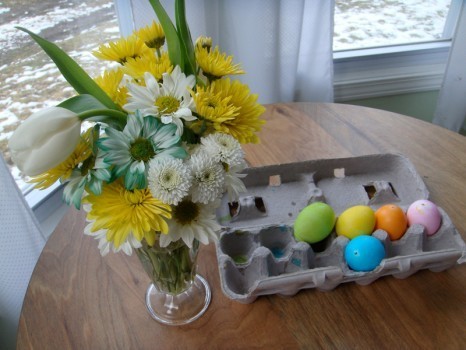
Blow out the insides of the eggs, dye them with traditional Easter egg dye, and let them dry completely. Using the carton as a drying rack is a great way to dry the eggs.
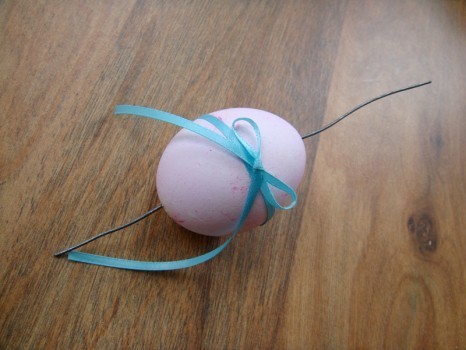
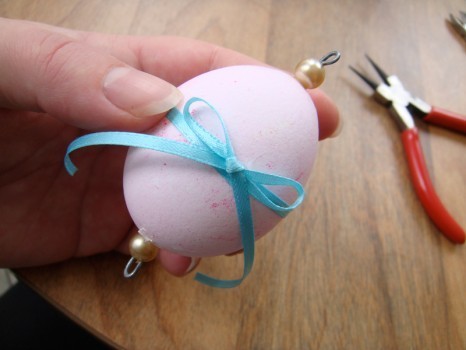
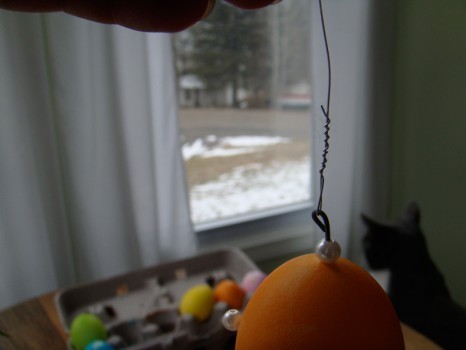
Decorate the eggs with ribbon, beads, glitter, paint, or any other way you like. Thread a piece of wire through the holes used for blowing out the insides. It’s easiest to start at the top of the egg where the small hole is, and push the other end through the larger hole in the bottom. Use a wire that is stiff enough to hold its shape, but easy enough to bend with pliers (like 18 gage galvanized steel wire).
Add some beads to the ends of the wire. Snip off excess, and bend the wire ends using jewelers or needle nose pliers into loops to secure.
As each egg is created, place them in a bowl or egg carton, so they don’t roll all over the place.
Attach a string or jewelry wire to the tops, so they can hang.
Hang the eggs in the window, from a chandelier, or a branch to display.
Easter Egg Centerpiece
Materials
Bouquet
18 gage galvanized steel wire
Jewelers or needle nose pliers
To add eggs to your favorite spring blooms, simply thread the wire through the egg the same way as the egg ornaments. Make a loop at one end of the wire, and make a bend in the other end to keep the egg from slipping. Use the excess wire as a stem and insert into the bouquet. I hot glued a little bird to one of the eggs for an extra springtime touch.
Find me on Facebook!
March 25, 2013
Spring Cocktail: Refreshing Mint And Lime Sparkler

It’s still freezing here in the North East. in fact, we are expecting some snow today. However, in my mind, it should already be Spring and with Easter festivities on their way I could not help but create a refreshing signature cocktail embodying the essence of Spring—light, refreshing and crisp. After all, a good cocktail has a way of lifting ones spirits and transporting them. This one will definitely get you through to Spring. The flavor of this cocktail is similar to that of a mojito only it uses vodka instead of rum.
Refreshing Mint And Lime Sparkler
Serves 1
Ingredients:
1/4 cup mint leaves
1/4 cup ice
2 ounces vodka
1 ounce sweetened lime syrup (Rose’s is a popular brand)
Juice of 1/2 lime
1 1/2 ounces club sold, cold
Instructions:
1. Place mint leaves into the bottom of your cocktail shaker and muddle them a little (smash/bruise them with the back of a spoon. This will release the flavor in the leaves.).
2. Add ice, vodka, lime syrup and lime juice. Put the cover on the shaker and shake for 20 seconds. Pour into a tall glass and top with club soda. Garnish with mint leaves.
March 24, 2013
A Minotaur in the Garden: Or, A Meathead’s Guide to Vegetable Cookery
This is a little bit hard for me to admit, so I’m just going to go ahead and say it.
I have started cooking, and eating, vegetables.
I’m not proud of it. Only the toxic bloat of my once-robust carcass brought about it about. But that said, having now committed to trying to cook plants, it seems only fair to share the process with you. After all, Rachael cooks vegetables all the time, and pretty goddamned well. Of course, she’s been doing it for her whole life. I have never done it for a single day. But armed with a few good cookbooks and a determination not to die before the age of fifty, I decided to go to the greenmarket and see what looked good. I could braise artichokes, maybe, or glaze little roasted carrots the way they do at ABC Kitchen, or I don’t know, make one of those mushroom lasagna I’ve so often not eaten. It wasn’t so bad; it would be an adventure!
Then I went to the greenmarket. Nobody told me there were no vegetables in winter! It was all weird roots, potatoes, and various kinds of pointless lettuce. This was what I had to work with? There weren’t even any broccoli! It was a daunting business, let me tell you. So I got what they had, which was cauliflower. This is a white, bulbous object that looks like an alien’s brain and has no flavor to speak of. I had planned on doing Rachael’s cauliflower gratin, but then I realized that loading up a casserole with butter, flour, and breadcrumbs, despite its obvious benefits, sort of defeated the purpose of my new healthy-eating program. So I said the the hell with it, cut up the cauliflower with my new knife, and roasted it in a big pan with chopped up garlic and white pepper and salt. I tossed it around from time to time and even tossed in a little butter to help with the browning. Why not! Think how ahead of the game I was. I had planned on making zucchini bagna cauda, a recipe I got from Urban Italian, my favorite non-Ray cookbook, but it turns out that zucchini only grows in summer. Again, who knew? So I bought some small cucumbers and sliced them up and dressed them with (what else?) salt and olive oil. They were cold and crunchy, the cauliflower was hot and soft and brown, and I finished the “meal” with my hunger neutralized if not exactly sated. I had some wine afterwards and wiped up the little last bits of garlic and cauliflower with an old piece of half-stale challah I had lying around. I wasn’t really cooking, I know that, but I felt better about myself.
It’s hard for me to be outside of my comfort zone. It’s hard to cook things that may or may not be available at any given time. It’s hard to cook things that don’t have parents. But I’m learning, and have even been able to formulate a few basic rules to guide me. These will seem hopelessly obvious to all you expert vegetable cooks out there, but I know there are a few meatheads out there like me, groping for a few maxims to guide them in this bewildering new world of edible flora. Here is what I have been able to figure out to date:
Almost any vegetable is edible if you cook it with salt, oil, and garlic.
Thick things like carrots, broccoli, and cauliflower will turn sweet and soft if you cook them long enough in a slow oven. Smaller piece cook better, and taste better, than bigger ones.
Unlike meat, which only requires salt, vegetables need aggressive seasoning. (And salt.) I am typically looking, as per Mr. Recipe’s instructions, to use pepperoncini, white pepper, Sicilian oregano, and whatever spices I have at hand to add oomph, especially to things like cauliflower that have little or no flavor. I steer clear of black pepper, which seems to somewhat overwhelm most of these things.
Fresh herbs are indispensable to vegetable cooking, particularly if used to flavor or infuse things like olive oil, wine, or other cooking liquids. Brussels sprouts, to take one example, are infinitely better if rolled in sage oil before roasting than not.
You are allowed to use chicken broth, butter, bacon fat, and other good things, albeit sparingly.
There are some things, like leeks and artichokes, that are far too complicated to mess with.
Now I need to ask you: what else do I need to know about cooking vegetables? I don’t claim to be an expert here, or even competent. I have a few maxims to go by, but I know I don’t know anything. Which, I guess, is the first, best thing you can know about any kind of cooking.
March 21, 2013
Lower East Side, NYC
Half the fun of discovering a new restaurant is sharing it with people you know will enjoy it. As Rachael Ray’s resident restaurant guru, here’s an inside look at what I report back to Rach about some of my favorite restaurant finds and food experiences!
From: Kappy
To: RR
Sent: Thursday, March 21, 2013 10:03am
Subject: LES, NYC
Hey RR -
I know that you have been here many, many, many times before (based on my recommendation, thank you very much), but I thought, why not share it with the peeps who come to your site? As you know, Yunnan Kitchen is a newish Chinese restaurant on the Lower East Side of Manhattan, and it’s awesome! When I went this most recent time, I sat at the bar with Katy and Lauren and went to town with the menu. I’ll start with the show stopper: the Mala Chicken. This is fried chicken, dusted with a Szechuan peppercorn blend and served as-is. The Szechuan peppercorn gives a slight tingle to your mouth and lips and a dose of spice as well.  We then ordered a charred eggplant with crushed peanuts and chilies and the Chicken and Pork Fried Rice - oh yes, and the rice cakes too - I love their rice cakes!
 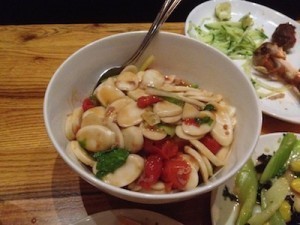 There was a mushroom and celery dish made with wood ear mushrooms that was super simple, but soooo good. We also were very happy that we tried the lamb meatballs and the chrysanthemum salad with sesame, which was totally different, but very clean and green, if you know what I mean. To end on another show stopper, I’ll conclude with the Tofu Ribbon Salad with mint, cilantro, and chilies (pictured above). Picture ribbons of tofu that look identical to pappardelle pasta. It was spicy (perfect) and beyond delicious! Don’t let Yunnan drop out of your restaurant rotation!
Now, I’ve got to be honest… I haven’t been to Fatta Cucko for a full meal, but I did go after a meal for cocktail on my last visit to New York and it was such a cool place! It’s super small, maybe 25-30 seats, if that, and it’s owned by a husband and wife team. One of them is an artist/painter and one is a set designer, so they basically designed and built the place themselves. They have a fairly new chef in the kitchen and the food coming out looked amazing. I need to go back for a proper meal. But their funky cocktails did the trick for me this time.
And that’s what’s on my plate!
~ Kappy
Yunnan Kitchen
79 Clinton Street
New York, NY 10002
(212) 253-2527
www.YunnanKitchen.com
Fatta Cuckoo
63 Clinton Street
Manhattan, NY 10002
(212) 353-0570
www.FattaCuckoo.com
Andrew “Kappy” Kaplan loves food. A professionally trained chef, by day he runs Yum-o!, Rachael Ray’s charity focused on kids and cooking, and keeps special projects running smoothly for her. By night he hops course to course, place to place, all across the country. He’s Rach’s own personal dining guide! You can also follow Kappy on Twitter to see what’s On Kappy’s Plate in real-time!
March 20, 2013
I’ve Changed My Mind About Roast Beef
I’ve always had an ambivalent relationship with roast beef. The truth is, that taken as roast beef, I don’t really like it that much — although I feel like I should. I love roast beef sandwiches, such as the life-altering one at Eataly in New York, but roast beef itself is always a big “meh”
The reason is clear: except in the case of a standing rib roast, it’s almost always made from the toughest, leanest parts of the beef carcass. Have you ever had a top round steak? No? There’s a reason. Beyond roast beef’s anatomical problems, though, there is a larger issue relating to what I think is the single biggest issue relating to meat: the relationship between the brown parts and the pink parts. The brown parts taste different: the proteins in them have been transformed by high heat via a process called the Maillard reaction, which has the effect of changing not only the color but also the taste of the meat, via a whole circus of biochemical reactions. Almost as importantly, the surface tastes great because that’s where all the salt, pepper, dried herbs, garlic, olive oil, and etc. are. The inside? A big pink lump at best, unseasoned and bland. You can slice the meat thin, dip it in juice, or even make a “board dressing” like Adam Perry Lang, which is probably the best bet of all. But that doesn’t really change the basic problem: there is too much pink compared to brown. And to make matters even worse, that pink meat tends to be tough and chewy.
I took my final shot at roast beef this past weekend, when I acquired a chuck roll from Dickson’s Farmstand Meats in Chelsea Market. Dicksons is probably one of the best retail butchers on the Eastern seaboard, and while they carry too much local, grass-fed beef for my taste, once in a while you see a beautifully marbled piece there. I grab it when I do, as the combination of fat and the grassy, herbaceous taste really is something special. And chuck roll, the inner heart of the beef shoulder, is a surprisingly flavorful piece of meat — one reason it makes such good hamburger. It’s tough, yes, but I thought I could obviate that with some slow, gentle cookery.
Not so. The beef was not just tough, but it was marked by multiple weird muscle groups, streas of tendon and sinew, and a generally unattractive appearance that made my wife want to go back to veganism. I wasn’t happy with it, either. It tasted good enough, but I had to cut it into a million odd shaped little pieces. And again, only a small portion of the whole had any of the precious brown in it. So this seems to be the deal: yo you can have a whole muscle, like a rump roast, that carves easily but is too lean; or you can have a rich, marbled cut like a chuck roll that has fat and flavor, but is too weird shaped to carve and is tough besides.
I don’t know if there is a solution to his, frankly. Actually no, I take that back. There is a solution. Take big steak cuts, like flank or top sirloin, have them cut thick, and cook them in the oven after a quick sear. You’ll still get nice slices, the price will be right, and you’ll have a lot better tasting meat, owing to our friend the maillard effect. And who knows? You might even be able to make a sandwich with them.
Top Sirloin Roast: the Anti-Roast Beef
A big, boned top sirloin roast, sometimes called a “spoon roast” by butchers
4 smashed garlic cloves
2 or 3 tbsp dried herb mix
Olive oil
Onions, carrots, or other vegetables to throw in there.
Kosher salt and freshly ground black pepper.
Oil the roast up as you would a child at the beach. Season liberally on all sides, and the ends, with herbs, salt, and pepper. Preheat the oven to 300 degrees.
Add enough oil to a dutch oven or heavy roasting pan to cover the bottom. Put it on top of the stove at high heat, and sear one side for a good 5 to 10 minutes. It will smoke a little, but so what? Open a window or turn on an exhaust vent if you are fortunate enough to have one.
Flip the roast and cook, uncovered, for 45 minutes to one hour, depending on how done you prefer it. You may want to surround it with some oiled and salted vegetables and garlic cloves, but be careful not to crowd the roast or for that matter even the vegetables; the last thing you want to do is steam them.
Remove the roast; let sit for fifteen minutes and then carve against the grain. There will be a lot of juice and grease on the cutting board; make sure to bathe each slice in it and then layer them on an oval platter, surrounded by the vegetables. Sprinkle some fancy finishing salt, like fleur de sel or Malden salt, over the top and serve. You’ll never make “roast beef” again.
Holi Celebration With Milk And Cookies
Holi is one of India’s biggest holidays, arguably more popular than even Diwali. It marks the celebration of spring and what better way to do it than with an explosion of color – quite literally. Whilst the faint hearted should consider staying at home, those with a bit of ‘oomph’ put on their gleaming white apparel and join the their neighborhood of fellow white clad community outside. Like a block party, everybody joins in; kids, extended family members, neighbors, local vendors. And the dress code is specific with it’s serene white varieties of pants, t-shirts, saris and salwar kameez – yet what follows is anything but serene. The commotion starts. Kids fling chipkaris (little balloon bombs filled with colored water) and grown-ups grab handfuls of colored flour and throw them at each other. Some duck and dive, whilst others launch themselves amidst the convivial chaos. Across the country, all those bright-whites turn in to a sea of tie-dye. This is a typical way to commemorate the day all over India . But then there are regional ways to get involved, for example, in Mahrastra, clay pots filled with milk hang like pendants between the tops of buildings and men climb up on each other forming a pyramid - the man that reaches the top of the pyramid and cracks the pot is considered the town hero.
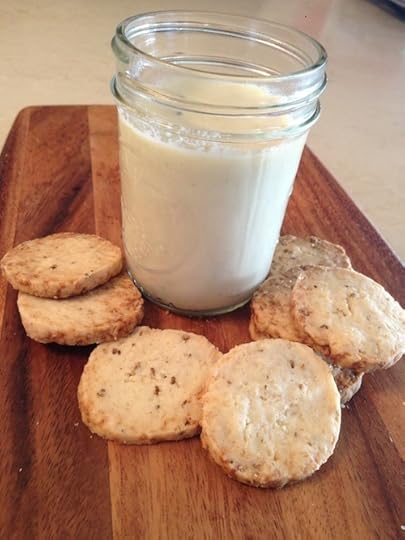
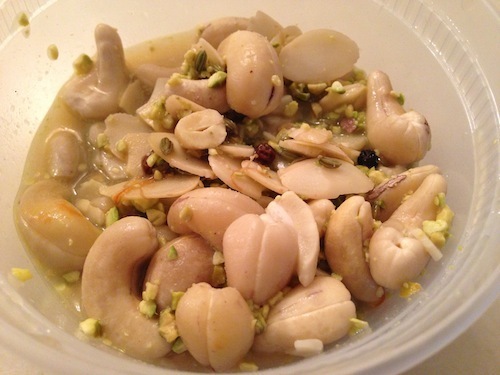
This year, Holi is on March 27th. Whilst it is hard to recreate the festivity at that level outside of India, it would be a shame to let a holiday slip that expresses such gratitude to vitality. I called my friend Surbhi Sahni of Bittersweet NYC, and a native of New Delhi. A trusted advisor on tradition and treats to match, Surbhi can always be counted on to come up with something fun yet relevant for the occasion. She reminded me of the traditional thandaii that is served to guests at Holi– a chilled glass of fresh almond milk steeped with saffron and cardomom. As we shared stories on the unleashing of our inner child at Holi parties – a play on milk and cookies felt like the obvious thing to do. She then baked me a fresh batch of carom seed cookies to pair with the thandaii. Oh, my family is certainly ‘in’ for quite a treat this Holi.
Thandaii and carom seed cookies courtesy of Surbhi Sahni
Recipes For Thandaii and Carom Seeds Cookies Courtesy Of Surbi Sahni, Bittersweet NYC
Recipe for Thandaii
Ingredients
A pinch of saffron
10 whole black peppercorn
¼ tsp. cardamom powder
½ cup blanched, sliced almonds
½ cup whole raw cashews
2 tbsp. crushed pistachios
3 cups whole milk (or 2%)
1/2 cup sugar
Soaking the nuts for Thandaii
Method
1) Soak all the ingredients except for the milk and sugar in hot water for at least 2 hours. Drain and blend to a smooth paste
2) Pour milk and blend well
3) Chill and serve
Recipe for Carom Seed Cookies
Ingredients
12oz All Purpose Flour
½ tsp. salt
1 tbsp. carom seeds (available at specialty stores like Kalustyans)
6oz butter
4oz sugar
1oz lemon juice (2 tbsp.)
1.2oz yoghurt (3 tbsp.)
¼ tsp. baking powder
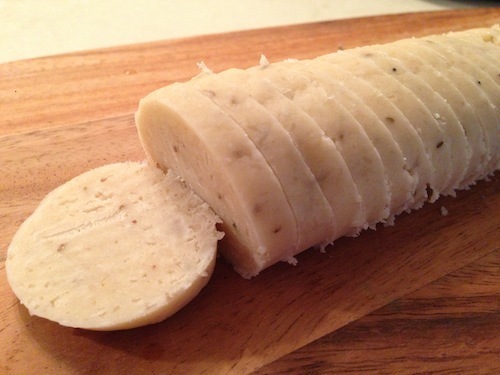
Carom Cookie Log
Method
1) Sieve flour with salt. Sprinkle carom seeds and sugar over the top. Rub the butter with the flour using your fingertips, bringing the mixture to breadcrumb consistency (avoid over mixing)
2) In a separate bowl, mix lemon juice, yoghurt and baking powder. Combine with flour to firm dough. Make 2 logs out of the dough and allow to rest in the freezer until firm. Slice in to ¼ “ rounds and bake on a sheet pan for 7 minutes, turn them over and bake another 7 minutes. Cookies should feel firm. Remove and allow to cool on wire racks
Saira Malhotra, is of British–Indian descent and is a chef, food writer and cooking instructor based in New York City. Raised in Hounslow, U.K, or rather ‘Little India’, where the air is aromatic with roasted spices, little did Saira know these moments would follow her from being a student in France and Italy to residing in NYC with her husband and kids and parlay themselves unexpectedly in to a culinary career. She is a graduate of the International Culinary Center in New York City. Come visit her at her food blog: www.passportpantry.com where she shares approachable and international recipes
Saint Paddy’s Day Leftovers: Drunken Irish Soda Bread French Toast
Who’s left with some Saint Paddy’s Day leftovers? I’ve got both hands raised. We all know what to do with the meat and cabbage, but what about all that leftover soda bread that we inevitably always have? You know, the one sitting around for day and days because we don’t have the heart to throw it out. The one that is usually hard as a rock by the time we muster up the courage to throw it out. Yup! That one. Well, I say, don’t waste it!!! Leftover soda bread is actually the perfect type of bread to make a delicious Drunken French Toast with. That’s right, I said “drunken”. No, you won’t get buzzed off of this recipe but, a little nip of whiskey in the custard definitely brings this french toast from ordinary to extraordinary.
You want to make sure that the soda bread you use isn’t the crumbly kind or else it won’t slice up nicely. As long as it can be cut evenly into slices using a serrated knife, you are good to go. And if you have the sweeter style, raisin studded bread, even better. Enjoy!
Drunken Irish Soda Bread French Toast
Serves 4
Ingredients:
2 large eggs, beaten
3/4 cup cream/milk
1 ounce dark rum
1 tablespoon sugar
1 teaspoon cinnamon
1/4 teaspoon salt
1 small loaf of leftover raisin studded Irish soda bread, cut into 1/2-inch slices (about 8 slices total)
2-4 tablespoons unsalted butter
* maple syrup, for serving
Instructions:
1. In a large bowl whisk together eggs, milk/cream, rum, sugar, cinnamon and salt. Dip each slice of bread quickly into the custard mixture. Note: don’t leave it soaking too long or the bread might fall apart.
2. Melt half of the butter in a large skillet over medium heat. Place a few slices into the pan and cook until brown on each side, about 2-3 minutes per side. Repeat with remaining butter and slices of bread. Serve warm drizzled with maple syrup. Enjoy!
Christina Stanley-Salerno is a mama, recipe developer, food stylist, photographer and blogger atTakeBackYourTable.com. She loves cooking for and with her family. Life is hectic, but Christina is passionate about mealtime because she believes that family meals are the glue that holds everyone together. Creating simple, quick and healthy meals is her specialty and her trick to keeping the family meal a reality, even on busy weeknights.
Follow her on Twitter @TakeBackTables
Rachael Ray's Blog
- Rachael Ray's profile
- 296 followers


