Rachael Ray's Blog, page 64
April 17, 2013
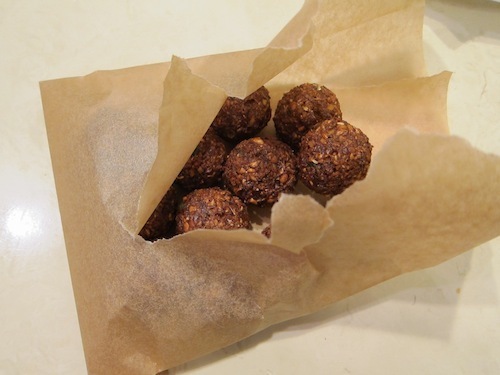
My Quick ‘2-bite’ falafels
This week has been nuts. Whilst ‘nuts’ brings with it an adrenalin rush, it also brings a lot of dodgy eating. Last week, my snacks were divided between hidden Halloween candy (wrong on more levels than one) and flavor-enhanced potato chips. Today enough is enough and I have decided to spend some time making snacks that will satisfy me without suspicious ingredients. One of the treats I am making is “Two-bite Falafels” - though some would argue that it takes but one. Yes, they are fried, but they are pretty much in and out of the oil and since I am making them, I know my oil is fresh.
Falafel On The Go
As for the falafels, time is of essence and I didn’t soak them over night. Instead, I cracked open a couple of chickpea cans and was ready to take off. These falafels are delicately spiced and hit that spot – try them at 4pm in the afternoon as the mind caves in to naughty treats and see how it satiates for the next couple of hours. Being a falafel fuss-pot, I tried a couple of different recipes. This worked best as it scored high numbers on it’s soft yet meaty texture, and it was perfectly moist without being either pasty or dense. Feel free to dress it up with some tahini or garlic yoghurt sauce or serve it up as dinner thrown with some salad in to a pita pocket.
Picture by Roboppy
Recipe for Falafels
Ingredients
2 cans chickpeas
2 cloves garlic
½ onion, minced
2TBSP. chopped cilantro
2TBSP. chopped parsley
1TBSP lemon juice
2 TBSP. flour
1 TSP. Salt
1 TBSP of plain yoghurt
½ TSP chili powder
1 TSP ground cumin
2 TSP ground coriander seeds
Frying oil
Method
1) Heat oil 2” deep in a suitable pan to 350 degrees (if oil is too hot, it will cook faster on the outside and remain uncooked on the inside, if the oil is too cold, the falafels will be greasy)
2) Put all the ingredients except for the oil in to the food processor and pulse a few times until coarsely ground. The mixture should stick together when you form a ball – if not pulse again. If the mixture is too wet, add a another TBSP. of plain flour
3) Rub a little oil on your hands and make 1” balls and deep fry until golden brown. Drain and set aside on paper towels
Saira Malhotra, is of British–Indian descent and is a chef, food writer and cooking instructor based in New York City. Raised in Hounslow, U.K, or rather ‘Little India’, where the air is aromatic with roasted spices, little did Saira know these moments would follow her from being a student in France and Italy to residing in NYC with her husband and kids and parlay themselves unexpectedly in to a culinary career. She is a graduate of the International Culinary Center in New York City. Come visit her at her food blog: www.passportpantry.com where she shares approachable and international recipes
April 15, 2013
Homemade Brown Sugar, Lemon Zest Waffles
My kids love homemade waffles. Who, doesn’t right? And let’s face a made-from-scratch waffle that’s crispy on the outside, soft and chewy inside beats the heck out of those cardboard ones that come in a box. For a while I was just making a standard recipe. It was delicious but nothing special. Then one morning I decided to play around and came up with the AH-MAZING combination of brown sugar and lemon zest. It’s a crazy good combo because the brown sugar caramelizes a bit under the hot waffle iron and adds this amazing warmth and sweetness which totally compliments the bright, citrusy, flavor of the lemon zest.
They. Are. Addictive.
This recipe yields quite a few waffles which is perfect because I like to take the leftovers and wrap them in wax paper and aluminum foil and store them in a freezer bag inside the freezer. This way, when my family wants homemade waffles, they can have them in a flash with no muss, no fuss. To reheat, all you have to do is pop them into the toaster (for crispy waffles) or if you prefer them on the softer side, microwave them for 15-20 seconds. You’ll never use a mix again after you try this easy and addicting recipe. Enjoy!
Brown Sugar, Lemon Zest Waffles
Yields 6 large round waffles
Ingredients:
2 cups all-purpose flour
1/4 teaspoon salt
3 1/2 teaspoons baking powder
2 eggs, separated
1 1/2 cups milk
1 cup butter, melted and cooled
3/4 cup brown sugar
1 teaspoon vanilla extract
Zest of one lemon
*maple syrup or confectioners sugar for topping
Instructions:
1. In a bowl, whisk together flour, baking powder and salt. In another bowl, whisk together egg yolks, milk, melted butter, sugar, vanilla extract and lemon zest. Whisk until all of the brown sugar breaks down and is no longer lumpy.
2. Beat the egg whites in the bowl of a standing mixer until stiff peaks form. Gently fold them into the wet mixture making sure to not over mix and deflate the egg whites.
4. Pour the wet mixture over the dry mixture and stir until just combined. Allow to sit for five minutes.
5. Meanwhile, heat your waffle iron. Ladle enough batter to cover 3/4 of the surface. Cook until desired doneness and according to your waffle iron’s directions. Serve topped with real maple syrup or a dusting of confectioner’s sugar.
Monday Night Means Dessert: Starbucks Oat Fudge Bars
I have never liked Mondays - back to school, back to work, the weekend is over. You would think I would feel differently now that I work from home, but oh no, I still suffer from the Monday blues. My older daughter has inherited this attitude - or more like she has observed her mother who is not setting a very positive example - shouldn’t we be taking the week by storm? seizing the day? Oh well. Is it Tuesday yet?
Instead I decided we should embrace our least favorite day of the week and try to do something fun. I told my daughter we would bake something special on Monday nights so at least one good thing could come out of this dreaded day.
I recently was in Toronto with a few friends and we stopped into a Starbucks where I was introduced to these oat fudge bars. I had never seen them stateside - they must be an exclusive Canadian treat (Canadians know their desserts - higher butterfat contents in their chocolate and ice cream makes for far superior products). I had to make my own and they are pretty close to the real thing - actually I think a tiny bit better (sorry Starbucks). Happy Monday!
Plan B Mom’s Starbucks Oat Fudge Bars
(click here for printable recipe)
Ingredients
3/4 cup sugar
1 1/4 cup brown sugar
1 cup butter, softened
2 eggs
2 cups flour
1 teaspoon baking soda
1 teaspoon salt
3 cups oats
1 cup sweetened condensed milk
2 cups chocolate chips
1/2 cup butter
1 teaspoon vanilla
Directions:
Preheat oven to 350 degrees F. Line a 9 x 13 inch baking pan with foil and spray foil with non-stick cooking spray. With an electric mixer with a paddle attachment, cream 1 cup butter, sugars and eggs. In a large bowl mix flour, baking soda, salt and oats and add slowly to creamed mixture. Spread 3/4 of the batter into the prepared pan (I wet my clean hands with water to press down the dough evenly). Reserve the remainder of dough for the topping. Combine condensed milk, chocolate chips, 1/2 cup of butter and vanilla in a microwave safe bowl and melt in microwave, stirring often to prevent scorching. Stir until smooth and pour chocolate mixture over dough in pan. Drop the remainder of the oats dough by spoonfuls on top - press down slightly. Bake for 22 - 28 minutes, or until a toorhpick comes out with very few moist crumbs. Let cool completely before cutting and serving.
My sanity was saved by phyllo. And other lunch tips
I did the math and I’m not much impressed by myself.
I have survived the packing of a daily lunch for my little demon for roughly five years now. It feels as though the tally ought to be substantial.
But even with generous rounding, I can’t get a decent count. You figure 180 school days a year, times five years, plus a few months of camp each summer… And maybe we’re at 1,100.
Which is not insignificant. And I don’t know what number I was expecting. It just seems that for all the pain, suffering and yogurt cups I’ve contributed to landfills, it should be… I don’t know… Something bigger.
Still, those 1,100 lunches have helped me squirrel away a few tricks and tips to make serving time in the lunch box trenches a little easier on the sanity.
My No. 1 tip is, of course, the most obvious: Learn to love leftovers.
Seriously. The biggest obstacle most people face when trying to muster the oomph to pack lunch for themselves or their kids day after day? Their own preconceived notions of what lunch is supposed to be.
It’s pretty easy to get sidelined by thoughts of what lunch should be. I’ve had people tell me they are stumped because they grew up eating PB&J every day, but their own kids’ schools don’t allow peanuts. Now what?
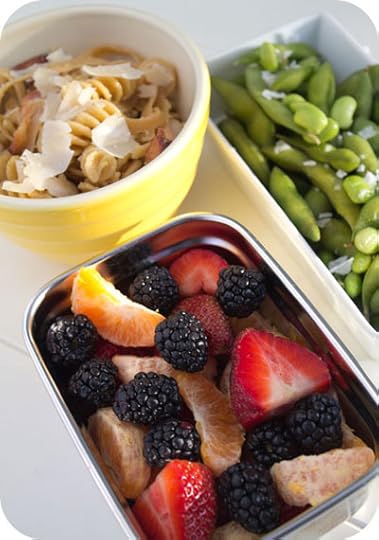
Thing is, lunch is just another meal, so in my book that means anything goes. Steak tacos? Sure. Leftover pasta carbonara? Pack it cold and call it an Italian version of an Asian noodle salad. Baked potato stuffed with the works? Please!
Which is why I say the first rule to keeping your sanity about you as you pack lunch is to embrace leftovers. If it was good enough for dinner, it’s good enough for lunch.
When I make dinner, I always make (or at least prep) too much. It rarely requires any extra effort. But it sure saves a lot of effort the next morning when I have something ready to go.
For example, my little guy happens to be crazy for steak. So any time I make it for dinner, I season an extra one and set it aside (uncooked) for use the next morning. Then I just sear it off in a skillet in the morning (I use the same pan I made breakfast in), slice it and pack it in his lunch.
My son prefers his rare — almost raw, actually — but cook yours however you like. And however you cook it, you can get seriously creative in how you use it. Let it cool and use it to beef up (pun intended) a salad or a wrap. Or pack the slices warm in a thermos and accompany it with a bun and cheese to assemble a warm steak grinder at lunch.
The result is a beefy, satisfying lunch that took just minutes to assemble thanks to thinking ahead during dinner the night before.
My No. 2 tip? Figure out which go-to food item you should never be without, then never be without it.
For some people, this is flatbread. Because no matter what they have on hand, they can stuff it in a flatbread, roll it up and have a satisfying wrap for lunch.
For others, it might be granola. Because just add fruit (warm applesauce in a thermos?) or yogurt or both and you have a seriously substantial lunch parfait.
Whatever your go-to food, it should be versatile enough to work with whatever you happen to have. It also should keep well (flatbread can be frozen, granola lasts forever, etc.).
For me, this food is mini phyllo pastry cups. I could put almost anything in these little pastry cups and my son would devour them, so I try to always have four or five packages of them in the freezer.
Parker’s favorite filling is quiche (leftover meat, cheese and a bit of whisked egg, baked at 400 F for 10 minutes), but he also loves yogurt and fresh fruit. I’ve even turned them into pizza cups by filling them with cheese, chopped salami and sun-dried tomato, as well as peanut butter and banana cups (filled with — are you ready? — peanut butter and banana).
The cups are inexpensive (usually less than $2 for a package of 15) and have about 12 calories per cup. You’ll find them in the grocer’s freezer section near the frozen pastry. Yet you don’t even have to cook them. Fill them with yogurt or such directly from the freezer and pack them that way. They’ll thaw and be perfect by lunch. And if you’re packing a thermos of warm chili, these cups make great scooper chips.
Do you have a go-to lunch item? Would love to hear what it is and what you do with it! For more of my go-to lunch staples, check out my running list here.
J.M. Hirsch is the national food editor for The Associated Press. He blogs about the trials and tribulations of his son’s lunches at LunchBoxBlues.com. His upcoming cookbook, Beating the Lunch Box Blues, will be the first to be released by Rachael’s new publishing venture, Rachael Ray Books. Hirsch’s previous books include High Flavor, Low Labor: Reinventing Weeknight Cooking and Venturesome Vegan Cooking. He lives in New Hampshire with his son, wife, and too many cats.
Flax Seed Hair Gel, A Natural Solution for Taming Unruly Hair
I’m a big fan of natural, homemade hair products, because I need to use a generous amount of conditioner and gel in my wild, unpredictable curls. I blended up this gel recently on a day when my hair was misbehaving, and I really like the way it helps to smooth my hair.
There are a few reasons that I’m motivated to make my hair care products at home, and not least of those is cost. A decent quality conditioner is expensive, and if you go through a large amount in a month like I do, it starts to add up. Another reason is environmental pollution. All of those plastic bottles of product end up somewhere, and more than likely when they leave my hands they’re contributing to part of the millions of tons of plastic trash that somehow ends up in oceans around the world every year.
Finally, the ingredients in some commercial products aren’t all that good for you. Skin Deep, the Environmental Working Group’s cosmetics database, has a list of virtually every hair care product on the market, along with a number grade for human safety. Each product on their list has a breakdown of the chemicals inside, and some of the ones in commercial hair gels include substances that can cause a whole lot of scary conditions that I won’t go into. And this ties in to my point about pollution, above, because when all of those toxins wash out of your hair, they find their way into streams and rivers where they can affect the habitats of marine animals and plants. Now you wouldn’t want to harm some sweet little fish with your Oh-So-Glow Super Shiny and Healthy Hair Dabbadoo product, would you? I didn’t think so!
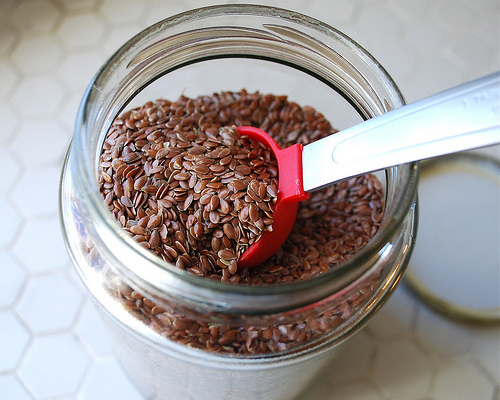
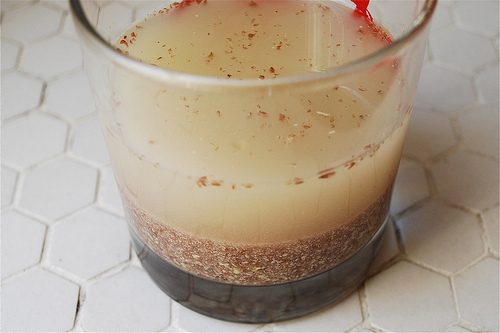
On to today’s “recipe” for one hundred percent toxin-free flax gel. The only ingredients are flax seeds and water, although you could add a drop of your favorite essential oil to give it a nice fragrance. The gel is quite thin, so there’s no risk that it will leave your hair “crunchy,” but for a thicker gel, you can add an extra tablespoon of flax seeds.
Once the gel is made, it should be stored in the fridge, where it will last for up to two days - products that don’t contain preservatives expire fast! If you go to the trouble of making it, though, I can tell you that this gel leaves my hair soft and smooth.
Flax Seed Hair Gel
Makes about 1/2 cup of hair gel
Ingredients
2 tablespoons flax seeds
3/4 cup water
Instructions
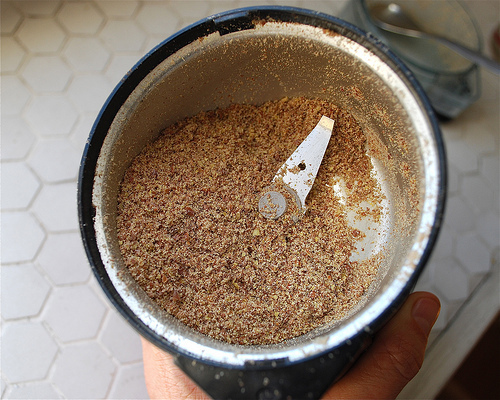
Grind the flax seeds into a fine powder in a spice grinder. Combine the flax seeds and water in a blender and let them sit for as little as 2 hours or as long as 12 hours.
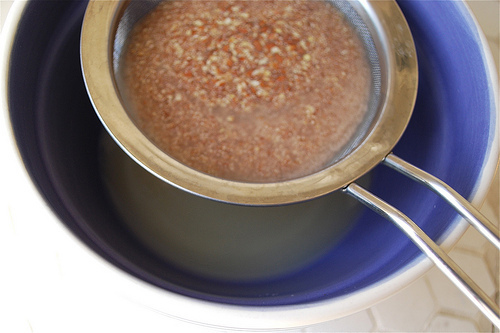
Blend the seeds and water for a minute or two on high speed. Set a fine mesh strainer over a small bowl, and pour the mixture through the strainer, pushing it through with the back of a ladle.
Let the mixture sit for 20-30 minutes, to allow any small bits of flax seeds to sink to the bottom. Pour off the clear gel into a small, resealable container.
The gel lasts for up to two days in the refrigerator.
April 14, 2013
THE DIRT ON HOUSEPLANTS Eco-Friendly Home Multi-taskers
With Earth Day less then a couple of weeks away I thought I’d share a multi-tasker that is right under our noses which can help cut your electric bill, reduce noise; beautify your home and keep your indoor air clean without even trying…Ye good ole houseplant. That’s correcto, according to a two-year study that NASA AND the Associated Landscape Contractor of America conducted, it seems that given the right environment certain houseplants can clean up to 87 percent of indoor pollutants. Seems plants absorb chemicals in the air, balance humidity and turn carbon monoxide into oxygen…hmmm wonder if it can turn grapes into wine LOL!
Truth be known, I have a black thumb and plants usually try and hide or pretend they’re wilting when they see me walk into a nursery. But, for those unlucky few that did come home with me, I selected them based on their need for very little water or care (and yes artificial plants were part of my collection!). The good news is as I started to research for my last book The Ultimate Accidental Housewife: Your Guide to a Clean Enough House , I learned that I had ‘accidentally’ bought what many in the know consider to be environmentally friendly plants. I also have come to learn that almost any plant has its virtues as I mentioned in the start of this post. Here is a list of what the experts think should be on your list:
Aloe Vera
Boston Ferns
Chinese Evergreen
Dracaenas
English Ivy
Golden Pothos
Palms (that’s what I have!)
Peace Lilies
Marginata (wonder if can use as an ingredient Margarita)
Mums and daisies
Snake Plant
Spider Plants
Plus with summer coming and mosquitos, decorate your deck or patio’s perimeter with Marigolds to fend them off. These blood-suckers don’t like their smell ‘n are repelled by Pyrethrum, a natural insect repellent found in them ‘n store-bought varieties.
And, lastly we often overlook cleaning our plants which harbor dust and other allergens which can contribute to health issues so here are simply enviro-friendly ways to clean ‘n preen them:
Go Bananas: Don’t throw out those banana peels after you munch one down. Use the interior of the peel to wipe down your plants leaves. It will also leave them shiny!
Toss in Some Vinegar: The saucer on the bottom can grow mold and other mineral deposits. Just toss in some good ole white vinegar and use a scrub brush, nail brush, or old toothbrush (one you’re preferably about to chuck) to get rid of residue. And another way to help avoid this don’t over water which will also help to reduce your plant’s lifespan and turn their leaves the colors of fall which is not a good thing…take it from me!
A few words of advice: If you have allergies, check with your local plant shops for their opinions. BUT, regardless what they say, stay away from Venus flytraps unless you’re in the mood to trade in your sneezes for some blood, and first see the cult classic movie Little Shop of Horrors!
One Haircut, Three Looks
We’re all told that our haircut should work for us. It should be easy to style at home, continue to look great as it grows out, and instantly transform us. After all, a woman’s hair is her crowning glory. But the ways in which you style your locks at home also make a huge difference to how much you love your new style. My latest looks for Ulta make it super easy to achieve hair greatness when you style them yourself at home, all you need is a little know-how!
For example, short hair can seem tricky, but there are plenty of ways to change your look from day to night, formal to casual.
The three looks above can take you to many different places, and all have very different messages. Not to mention, your cut should allow you to create many different personalities with your look. Style your new fabulous short cut into finger waves for a formal gathering—or when you’re feeling a little ‘20s glam. Give it some oomph and volume for a fun dinner or on the weekend (or to release your inner punk!), and for everyday running around, keep it sleek and simple. The most important thing? Your hair should have the ability to reflect your mood, no matter which one you’re in.
(And if you’d rather let a professional do it for you, head to your nearest Ulta salon).
April 13, 2013
What Kind of Grill Should I Buy, Josh?
It being spring, my mind has turned to thoughts of grilling. The fragrant smoke, the glowing embers, the sizzle and his of precious meat juices combusting like shooting stars as they fly from sputtering lamb chops. Sadly, as a New Yorker, I live in a tiny apartment and have no room for the offset smoker I so long for; I have to make due with a Weber kettle grill, a tool I have written about here with some frequency.
Still, as Uncle Charley says in Death of a Salesman, “a salesman is got to dream boy. It comes with the territory.” A friend of mine just bought a house in Westchester and has a big house there. Well, I’ve never seen it, but I assume it’s big. I don’t see anybody buying a hillbilly cabin in Westchester. One thing you know is that he has a big backyard, big enough for the barbecue engine of his choice. I am betting, Rachael Ray reader, that you do too. So the question becomes, what does the serious barbecue aspirant buy if they want to grill?
Well, it depends on where you are in life. A young person starting out life’s journey, who is just learning about the subtleties of outdoor cooking, should absolutely start with a Weber. The basic kettle grill is the first, best teacher of live fire cookery there is. It’s shape can’t be improved upon, and its minimalistic controls - basically a lid and two air holes - calibrate your sense of what is happening. (Two many variables, and you’d never know what you were doing right.) You can grill on it, and you can even smoke on it, once you learn about two-zone fires. And if you really want to barbecue seriously, you can even do that with the addition of an accessory called the Smokenator, which holds coals and wood apart from the live fire, allowing them to smoulder more or less indefinitely. Personallly, I don’t like the Smokenator; I think you should approach the Weber the way a kendo student does with his wood sword, or an apprentice conjuror his deck of cards.
Once you’ve mastered the grill, or even if you haven’t, you are ready to get serious about barbecue, and that means only one thing: an offset smoker. You can’t be mixing your fire and your smoke; not really, not if you want to do barbecue seriously. They have to be two seperate compartments, like lust and remorse. The design of any offset smoker is basically the same: there’s a tube where you stick meat, and there’s a box where you stick fire. There’s a hole that connects to the two, and there’s a chimney that lets the smoke out. That’s it. The things that matter about an offset smoker are not so much the design, which is as simple as a club, but the weight and gauge of the steel, because that’s what holds the heat steady. You can buy a cheap one, of the kind sold by Char-Griller or Brinkmann, but you shouldn’t, for this reason. They are basically big soda cans. Get a Smoke Hollow, and you’ll keep it for twenty years. And every year you’ll cook a little bit better.
But, of course, there may come a day when you will want something bigger. A trophy rig; a pro pit like the big boys use. This is a serious commitment, both in cost and in space. A full-size pro mobile rig is very large and very costly: the best ones, like those made by Dave Klose, the nation’s greatest barbecue builder, can run into the tens of thousands of dollars. You don’t need to go that far: but if you want to cook for 100 people or, god help you, get into competition cooking, this is what you’re going to need. A rig like this can hold heat in a freezing downpour, it can go anywhere, and you can cook upwards of 500 pounds of meat in it. Best of all, it looks awesome, and inspires a vague and nameless unease in your friends, all of whom will feel somewhat diminished by not having one. Of course, there’s always that one guy, the one with a chrome gas grill that cost as much as a used car, and which makes everything taste like it was cooked in the San Quentin death chamber. You moved past him the day you bought your first Weber. And that’s a feeling that, no matter where you are, you can’t put a price on.
April 12, 2013
Happy National Grilled Cheese Day!
Today is National Grilled Cheese Day so celebrate with one of Rachael’s many inventive twists on this classic favorite:
Grilled Cheese with Bacon and Maple Mustard
Italian-Style Grilled Cheese and Spinach
Welcome to lunch duty!
Now and then, we all get the blues. The lunch box blues.
Maybe it’s the daily struggle to find something - Anything! - your kid will eat and you won’t feel guilty about. Or maybe you’re battling the yet-another-salad demon in your own brown bag routine.
The particulars aren’t important. What matters is what we all know all too well - serving time in the lunch box trenches can seriously suck.
Except that it doesn’t have to.
I’ve been packing lunch for my son every day for the past five years. And early on I decided I didn’t want to succumb to the day-after-day PB&J routine.
So I decided to treat his lunch as I would any other meal. Because once you ignore what a packed lunch is supposed to be, the possibilities really open up.
As in, pizza “sushi.” Chicken and waffles. Steamed dumplings. Shepherd’s pie. Pancake sandwiches. And my 8-year-old’s absolute favorite - carpaccio.
The lunches I pack are creative, but they aren’t gourmet. They aren’t fancy. And they aren’t time consuming. I never spend more than 5 to 10 minutes packing his lunch.
Because even though my day job is being food editor for The Associated Press and writing cookbooks, neither of those gigs magically gives me extra time or energy for lunch prep during the morning rush.
About three years ago, I started a blog - LunchBoxBlues - about the lunches I pack for Parker. It’s as simple as it sounds - a Monday-through-Friday chronicle of the contents of my kid’s lunch box.
Along the way, an awesome community of like-minded folks sprang up around the blog, sharing ideas, commiserating failures. It’s been awesome and humbling.
And now even more so. About a year ago, Rachael asked me to turn my blog into a book - Beating the Lunch Box Blues - the first book she’ll publish under her new Rachael Ray Books venture.
Starting today, I’ll also get to share easy, affordable and fun lunch ideas here. For a day-by-day account of my lunch escapades, check out my blog. Then on Mondays, check in here for a rundown on what worked, what didn’t and some great recipes.
This week, for example. Parker was a demon for the quiche and the carbonara. Both were easy dinners made from whatever I happened to have on hand. And they made plenty of lunch box-friendly leftovers.
The dulce de leche and banana sushi on the other hand…? How many ways to say messy disaster? I’m sure he loved it. But I’m not sure most of it reached his mouth. At least not according to the state of his lunch box Friday afternoon.
But I will be doing more carpaccio, my little guy’s favorite meal, breakfast, lunch or dinner. For the recipe — and it’s crazy fast and easy — check it out here.
J.M. Hirsch is the national food editor for The Associated Press. He blogs about the trials and tribulations of his son’s lunches at LunchBoxBlues.com. His upcoming cookbook, Beating the Lunch Box Blues, will be the first to be released by Rachael’s new publishing venture, Rachael Ray Books. Hirsch’s previous books include High Flavor, Low Labor: Reinventing Weeknight Cooking and Venturesome Vegan Cooking. He lives in New Hampshire with his son, wife, and too many cats.
Rachael Ray's Blog
- Rachael Ray's profile
- 296 followers


