
Ruth Soukup's Blog, page 56
September 23, 2016
How to Save Money on Cable

True confession: I’m not a big fan of television. I’ ve never liked having a TV as the main focus of the room. It just gets in the way of conversation. We ditched our extended cable channels for a Roku years ago and we haven’t looked back. Not being avid sports watchers (or series watchers for that matter), I usually view television as a special treat…snuggling up with the family for movie time or to watch a special show.
That said, for many households, cable is a high priority. I have plenty of friends who look forward to their favorite shows–even going so far as to schedule them in. Likewise, some families love sports. My sister and brother-in-law, for instance, have a daughter playing volleyball for the University of Washington, and have opted for a premium package that gives them access to all the college sports channels.
So how do you save money on cable? Some premium packages with DVR, a subscription to Netflix, HBO Now and Hulu Plus can run upwards of $200 per month. The average cost of cable is around $64 per household—not horrible, but not exactly cheap. There are a few things you can do to save money on your cable bill and stop paying for services you don’t use.

Call Your Cable Company
If you can’t bear the thought of cutting out even a single service or channel, do yourself a favor and give your cable company a call. Ask to speak with their customer retention department and have a copy of your latest bill pulled up online or printed out in front of you. When you speak with the representative, explain you‘re looking to save money on your monthly bills, and that you wanted to check if there are any possible savings plans or deals they’re currently running.
Recently, there’s been a mass exodus of sorts from cable television, so cable companies are eager to hold on to customers who might ditch them in favor of alternative (and less expensive) options. If they think you might cut and leave, they may negotiate some savings or specials to keep you on.
Change Your Services
If your cable company won’t work with you to cut your bill, switch to a different company. Comcast, Time Warner, Dish Network or AT&T may offer different services in your area. Working with a new vendor will help you get the best deals—usually they offer new customers incentives and extras to entice them to change providers. Yes, changing services can be a pain, but it can also save you money, at least for your first year of new service. If you haven’t taken the time to shop around and consider all your options–do that now! And, remember–don’t be afraid to negotiate! Each company’s sales force has the ability to come down in price–never simply pay what they are asking!

Bundle Your Services
Packaging internet, phone and cable together can also be a way to save money. Many vendors offer customers an incentive for getting all their services from one source. I realize that these days many people have given up landlines, but most of us still pay for both internet and cable services. Grouping them together can help you save.
Cut Back Your Services
Maybe your husband insists on having EVERY sports channel available or you can’t imagine letting go of Showtime and other premium channels. Cutting out some extras (going for a lower tier of premium offerings, for example) will still give you access to more television than most of us can reasonably watch, I promise. If you don’t mind commercials when you’re casually watching, you can cut out DVR services, especially if you also subscribe to an online streaming service.
Consider lowering your bandwidth. If you only use the internet for Facebook, email and Pinterest, you may be able to cut back on some of the speed without even noticing it. Most Wi-Fi services are pretty fast for home use and you don’t need to have the most expensive option.
Use a Cord Cutting Calculator
The Verge offers a handy calculator to help you determine the cost of turning off cable and getting your television online instead. There are so many streaming service available now (more on those coming up), you can really get by with a subscription or two, which will give you access to your favorite shows. Check the calculator to make sure your favorite channels are still available with the new package.
Share Services
Some companies, like HBO, don’t necessarily mind if you share passwords for services. Ideally, most guidelines say you should only share with members of your household, but they’re pretty loose about what that entails. What about your daughter away at college? Or your mother who lives with you for a few months in the summer?
Obviously, if you have concerns about sharing passwords for HBO Now or Netflix, you should refrain. (During the Emmys last year, Andy Samberg gave out his password to the entire United States—probably frowned upon.) However, many companies, while discouraging it, don’t disallow it.

Go to the Library
Our local library has a pretty fantastic DVD selection. They have many series available, historical documentaries, children’s movies, and more. Even more amazing? If there’s something not available at our particular library, they can reach out to a neighboring town and get it for us within a day or two. Since Blockbuster and Hollywood Video are now relics of the past, it’s nice to know there’s an alternative to the limited selection of Redbox.
Get a TV Antenna
Did you know you can actually get television without cable? It seems so foreign to many of us these days, but it’s true. Without cable, there are still between 15-20 channels you can get “over the air.” Invest in a pair of rabbit ears, or better yet, a digital antenna (anywhere from $10-$75) and you’ll have access to CBS, ABC, NBC, PBS and plenty more. PBS offers great home and garden shows and most major sporting events come through on regular ol’ network television. If you’re ready to “cut the cord,” get an antenna and make the cut!

Stream to Your TV
There are many options for streaming shows and movies through your television. You can use an HDMI cable to attach a laptop or tablet to your television, you can purchase a Smart TV or an Apple TV, or you can get a Roku, which is what we have. I really like our Roku Box and it’s what helped us kick cable to the curb and save on our utilities. You can stream 2000+ channels and tailor it to your family’s viewing preferences, with the added bonus of NO commercials!
Other options for streaming television? Xbox, Wii, PS3 and other videogame consoles also offer a streaming option. Many DVD and Blu-ray players also have streaming ability as well.
Get Netflix, Hulu Plus and/or Amazon Prime
If you’ve cut the cord and you have a streaming device, getting Netflix or Hulu Plus is a bit of a no-brainer—zero (or minimal) commercials and tons of access. Netflix has some extremely popular exclusive series and movies galore. Hulu Plus offers TV shows right away, so there’s no waiting for your favorite series to hit. (Arrival on Netflix can take up to a year.)
Amazon Prime doesn’t offer as much in terms of original series or current television shows, but it’s becoming quite popular. With Amazon Prime, you pay an annual fee of $99 (which includes free 2-day shipping—a huge convenience for frequent Amazon shoppers), and with Netflix and Hulu, you pay about $7.99-11.99 per month. Even if you can’t make a choice between the three services, you can get an entire year for what you would pay for just a few months of cable.

Subscribe to Sling
Sling TV is a relatively new service, offered as a response to the loss cable companies were seeing among new customers. Sling is sort of like “cable lite.” For $20 per month with no contract, you can subscribe to Sling and get the 19 most popular cable channels, including CNN, A&E, History, Food Network, AMC and more. For an additional fee, you can add on other preferred sports or family channels.
Sling streams through your Roku, laptop, mobile or other device. You can only stream through one device at a time, per subscription. If you’re holding onto cable because you just can’t imagine life without the Food Network or the Travel Channel, this is your answer!
PlayStation Vue
Sling’s main competitor is PlayStation Vue—a similar service currently available in a limited number of large cities (Chicago, New York, LA, San Francisco, Dallas, Philadelphia and more to come). More expensive than Sling (at $50/per month), it’s available to stream through PlayStation devices. It‘s definitely geared towards the PlayStation audience (think teens through young adults) and the channels offered include Disney, ESPN and ABC Family. Apple is also slated to unveil a similar device in 2016.

Pay-Per-View with iTunes or Amazon
If you aren’t a frequent television watcher and you aren’t sold on the idea of paying for a monthly subscription service, it may be worth it to simply pay-per-view through iTunes or Amazon. Most televisions can be linked to your laptop or tablet with an HDMI cable.
You can simply purchase a video for $2 each time you get the urge to have a family movie night. Even at one or two purchases per week, it may be much less expensive than subscribing to regular services, which might not offer the movie or show you’re hoping for. Similarly, there are quite a few free kid’s shows on YouTube you can watch for FREE, as well as tutorials and DIY clips. TED Talks and many documentaries are also available online for free.
I found when we started saying no to television, we found we had more time, and the quality of our time increased exponentially. Our family was connected and had more fun. We enjoyed playing games together, spending time together and not just “zoning out” in front of the box. However, I understand why some families enjoy television—so use these tips to save!
Share Your Tip: How do you watch television?

Pin It
The post How to Save Money on Cable appeared first on Living Well Spending Less®.


September 21, 2016
Fish Tacos with Pepper Jelly

If you read this blog regularly, you already know that I am a little obsessed with “cheater” freezer cooking. Not only are these simple meals quick & easy to throw together, they save us a ton of money on groceries (and especially on eating out.) Better yet, they make our sometimes hectic weekdays SO much simpler!
Even so, every now and then it’s fun to throw in something a little new and different into the mix. Thus, so while these yummy–and super easy–Fish Tacos with Pepper Jelly are not a TRUE freezer recipe, they do call for frozen fish, which is usually more economical than fresh. The rest of this recipe comes together so quickly and with just a few ingredients. And don’t let the pepper jelly intimidate you–it really adds a great depth of flavor and the “heat” can be adjusted to your liking!
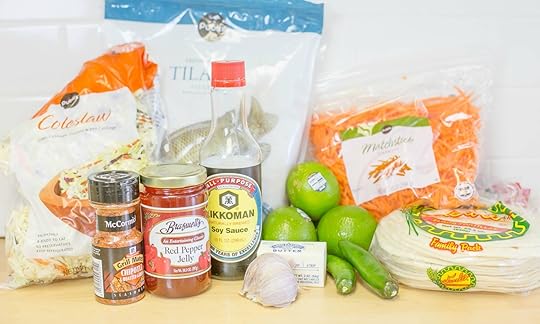
Here is what you need:
2 lbs. fresh or frozen cod, halibut or tilapia
1 teaspoon Grill Mates Chipotle & Roasted Garlic seasoning
2-4 tablespoons butter
1 package coleslaw mix
1 10oz. bag shredded carrots
2 -4 limes, juiced
10.5 oz. jar pepper jelly
1-2 jalapenos, diced
1 large clove garlic, minced
2 teaspoons soy sauce
12-16 6-inch flour tortillas

Step 1: If fish is frozen be sure to defrost. Then pat fish dry with paper towels then sprinkle fish with seasoning.
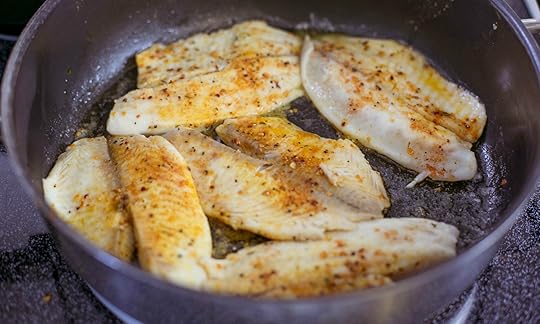
Step 2: Melt butter in pan. Then add fish and cook for 2-4 minutes per side until fish is opaque. Then set aside. (* Adjust cooking time if your fish is thicker.)

Step 3: In a small sauce pan mix together 2 cups of pepper jelly, lime juice, diced jalapenos, soy sauce and garlic. Cook on low heat till jelly has melted.
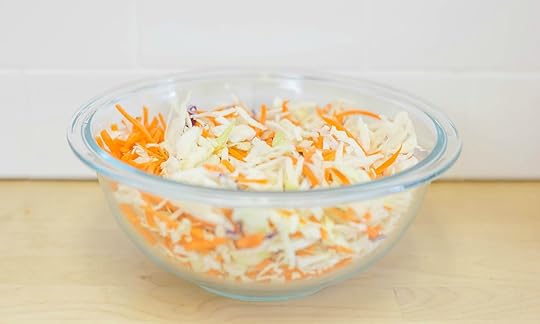
Step 4: In another bowl, mix together shredded cabbage and carrots.
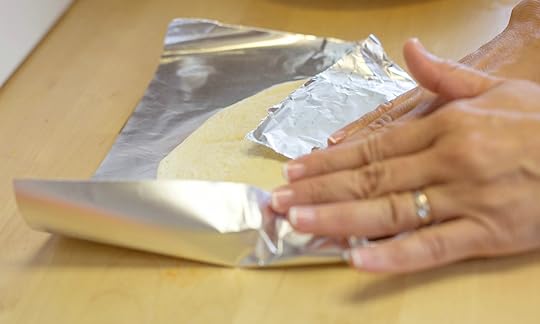
Step 5: Wrap tortillas in foil and heat in oven for 5-10 minutes.

Step 6: Add cabbage and carrot mixture to tortilla then add fish. Spoon pepper jelly on top and enjoy!
Print This!
Recipe: Fish Tacos with Pepper Jelly
Summary: This delicious fish dish sounds complicated but it comes together fast!
Ingredients
2 lbs. fresh or frozen cod, halibut or tilapia
1 teaspoon Grill Mates Chipotle & Roasted Garlic seasoning
2-4 tablespoons butter
1 package coleslaw mix
1 10oz. bag shredded carrots
2 -4 limes, juiced
10.5 oz. jar pepper jelly
1-2 jalapenos, diced
1 large clove garlic, minced
2 teaspoons soy sauce
12-16 6-inch flour tortillas
Instructions
If fish is frozen be sure to defrost. Then pat fish dry with paper towels then sprinkle fish with seasoning.
Melt butter in pan. Then add fish and cook for 2-4 minutes per side until fish is opaque. Then set aside.(* Adjust cooking time if your fish is thicker.)
In a small sauce pan mix together 2 cups of pepper jelly, lime juice, diced jalapenos, soy sauce and garlic. Cook on low heat till jelly has melted.
In another bowl, mix together shredded cabbage and carrots.
Wrap tortillas in foil and heat in oven for 5-10 minutes.
Add cabbage and carrot mixture to tortilla then add fish. Spoon pepper jelly on top and enjoy!
Preparation time: 5-7 minutes
Cooking time: 8-12 minute(s)
Number of servings (yield): 12-16

Pin It
The post Fish Tacos with Pepper Jelly appeared first on Living Well Spending Less®.
September 19, 2016
Why the World Needs Your Story

I couldn’t be more honored to introduce today’s guest author–my dear, dear friend and accountability partner, Edie Wadsworth. Edie and I have been friends for years, and I’ll be honest–I thought I knew everything there was to know about her. After all, we’ve stayed up half the night sharing our darkest secrets, our deepest desires, and our hopes and dreams, held each other’s hands through failure and toasted each other’s successes.
And then I read her story, and I realized just how much more there was to learn. It gripped me from page one and didn’t let go. It is both heartbreaking and hilarious and it will only make you love her all the more, because ultimately it is a story of redemption that each and every one of our hearts need to hear.
So please join me in welcoming Edie back to Living Well Spending Less! And just for fun, in celebration of her powerful new memoir, All the Pretty Things, I also hope you’ll join us next Wednesday, September 28th at 5pm EST for a special evening of fun & fellowship. This online event is FREE to join, but you do have to register HERE.
xoxo, Ruth
This is a guest post from Edie Wadsworth of Life in Grace
I stood in a room full of strangers. 500 of them. My hands were numb and sticky. I felt light headed. I was about to tell my story and Daddy’s for the first time and I wanted to throw up.
I took hold of the podium and looked out across the auditorium. I was stunned by the faces looking back at me. There were supposed to be five hundred people, but it looked more like ten thousand, a tsunami threatening to drown me. I cleared my throat and started with my opening line.
“I’m fourteen years old, and I’ve been to prison more times than I’ve been to the park or the dentist or the doctor’s office. I grew up in a broken home, the daughter of a wonderful but heartbreaking man who could never manage to stay sober.”
My voice was shaky, and my lips quivered at the end of every sentence.
“When I was seven, my cousin was hunted down like an animal and taken to prison while my sister and I stood there and watched. We visit him on the weekends. It’s a place I hope none of you ever have to go.”
You could have heard a pin drop in that auditorium. I looked around for reassurance and saw Coach Murphy sitting in the front row, eyes full of hope, nodding me on.
“Since I was a little girl I knew my daddy loved me, but his demons kept him away from us. I miss him every day and wish he wanted to be a part of our lives. The only time he ever came to one of my sporting events, he showed up drunk with one of his ex-con friends.”
I kept making eye contact with Coach Murphy, my youth leader, and finding enough strength to say the next thing on my paper.
“As hard as it’s been at times to live without a father at home, Daddy did something for me that I will always be thankful to him for. He took me to church when I was eight years old where I was introduced to Someone who changed my life forever, and that Someone is Jesus. I’m learning that no matter what has happened to me, Jesus loves me.”
Then I found my stride. My lip stopped quivering, and I straightened my shoulders, took a deep breath, and told about told my story and then I finished with the promise from Psalm 68 that God is “a father of the fatherless.”
I crumpled my papers together and hurried back to my seat, my heart flooded with relief and also a twinge of guilt for airing the truth about Daddy and me.
Years later, I would spend three years writing about my life’s most painful memories in my spiritual memoir called All the Pretty Things—a story of fatherlessness, of being untethered and unspoken for, a story of both profound loss and miraculous hope.
What I’ve learned about sharing my life is that it has not only brought healing to me but has led other women into their own difficult stories. Sharing the real and vulnerable parts of our lives with each other is life-changing. We live in a world of perfect images and superficial relationships and when one person has the courage to say the hardest thing, the rest of us stand up, one by one, and say, me too.
The truth sets us free, lights a path in the darkness for others, and heals us all in ways that nothing else can.

The Truth Will Set You Free
It’s an old adage, spoken in the wisest literature I know and it’s so true. When I first began to admit to myself that my past was haunting me, it was so scary. It took years before I could finally say out it loud, before I could finally give voice to my deepest hurts and pain. But what we keep hidden won’t go away. It will wreak havoc on us in a million ways, trying to find its way to the surface. Telling our hardest stories is like ripping off the bandaid and letting the wounds drain. Freedom will come when we finally have the courage to step into the vulnerable place of admitting we’re not okay; that we’ve been hurt, that we’re struggling, that we need help.

It Will Light a Path for Others
I remember the first time I told my story, it was as if a collective sigh could be heard around the room; as if everyone was waiting for one person to go first. Your courage will be the permission your sisters need to finally tell her truest story.
When I got a contract for a book, I gave the publisher of a list of things I wouldn’t write about. Most of them ended up in my book. Why? Because the place where the hurt lies is usually where the magic is. It’s usually the things that we’re most afraid to say that will lead the way for others to finally say me too. And then we all find ourselves feeling less alone and more able to be a comfort to our sisters who share the same pain and grief.

It Will Heal Us and Serve as our Greatest Gifts to the World
Perhaps the best thing about sharing the hard and ugly parts of our lives is that it provides a path to healing—both for us and for the world. The things I’ve been most ashamed of in my past are exactly the things God has used in my life to heal me. They’re also often the source of my greatest gifts to humanity. Growing up in poverty and addiction and chaos gave me an untold gift. It gave me eyes to see the hurt of others; it gave me compassion for people not like me; it gave me a burning desire to help others see hope in their dark places.

Our suffering, once redeemed my God, will be our greatest gift to humanity.
So, tell your story, dear sister, and watch all the ways God uses it to heal you and bless the world
Edie Wadsworth is the author of the spiritual memoir All the Pretty Things—the
searing story of her soul searching journey out of the rubble of her past into the life of healing and forgiveness she never thought possible. After overcoming her difficult upbringing to become a successful medical doctor, Edie left her practice to raise her family and pursue her love for writing. She is a speaker, writer, and blogger who has been featured in various print and online media. Her passion is to love her people well and to see women embrace the full measure of their life’s passion and purpose. She has shared her story at conferences and churches around the country and is a Compassion International blogger. She writes at Lifeingrace on a variety of topics that center themselves on home—including vocation, hospitality, faith, parenting, cooking, and life in the Appalachian South. She and her husband Steve live in East Tennessee with their kids.

P.S. Don’t forget to join us next Wednesday, September 28th at 5pm EST for a very special evening of storytelling and friendship. There will be lots of laughter and maybe even a few tears, but we promise you will leave encouraged, uplifted, and inspired. This online event is completely free to join, but you do have to register–do that HERE .

Pin It
The post Why the World Needs Your Story appeared first on Living Well Spending Less®.
September 16, 2016
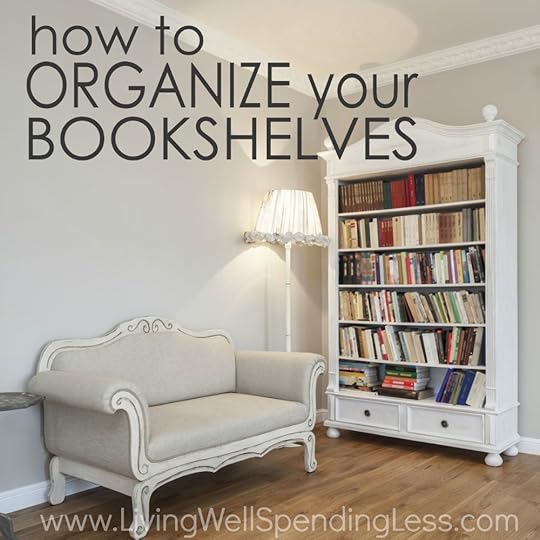
How to Organize Your Bookshelves
I love books. I do. And I always have, ever since I was a little girl. Books were my friends, my constant companions, my escape from reality anytime I needed it. There’s just something about the way the pages feel, the satisfaction of losing yourself in a storyline and being transported to another time or place…it’s a little big magical! And while I do love my Kindle, I don’t think anything can quite replace the feel of a book in your hand.
When we remodeled our home a few years back, I was thrilled to convert our dining room into my very own library. Now maybe it doesn’t quite rival the library say, at Hogwarts, but it’s definitely a childhood dream come true. And I love that having an abundance of books at home has helped my kids become avid readers too.
But despite my best efforts to declutter my home, and despite the fact that these days much of my reading is done via Kindle or Audible, keeping all those books organized can be hard sometimes! There’s just so many of them! And each one is like a friend that I can’t let go of! Can anyone else relate? The struggle is real, friends!
But all is not lost! If you are a book hoarder like me, here are a few ideas for how to organize your bookshelves that might just help:

Tidy Up Your Bookshelves
When you’ve decided to organize your books, the first step is to assess. Ensure you have a space big enough to store your books. We’re so fortunate to have built-ins now, but for many years we relied on simple pre-fab shelves you can purchase at IKEA, Target or another retailer. If you don’t have enough shelving, you may also want to consider some DIY shelves made from planks of wood and cinderblock, pipe, logs or other separators as they fit the aesthetic of your home. There are literally hundreds of ideas on Pinterest and Houzz, many of which can be done with found materials or items you might already have on hand.
Oftentimes, you can find inexpensive used bookshelves on Craigslist or on your neighborhood swap board. Look for shelves made with solid materials and with little damage. Pre-fab shelves with laminate over pressboard are often hard to repaint or decorate, so be sure you love the color and you’re happy with the shelves as-is. The good news about this type of shelf is the backing can be easily removed or changed. Old shelves look fresh mounted on a wall with the back painted a contrasting color or even covered in a pretty wallpaper or fabric.
Once your shelves are ready to go (even if you’re just updating your existing bookshelves), first dust everything off. Set up your bookshelves in the spot where they’ll live when filled. (You won’t want to move them when they’re filled with heavy books!)

Sort Your Books
Next comes the hard part: sorting your books. It’s very difficult for me to part with books—and I find the feeling is universal among many book lovin’ mamas I know. Something feels wrong about simply throwing out an old book, even if we never plan to read it again.
One of the ways to make parting with a few books a little easier is to know they’re going to a good home. There are several ways to do that: donate or sell your books, or give them away. There are pros and cons to each option:
Donating Your Books
Between shipping costs and the prevalence of electronic books, many national charities that previously accepted used books are now obsolete. Although post offices do offer flat rates and book rates, it’s always easiest to donate locally. Consider your local library, thrift store, Goodwill or Salvation Army. Other options include: senior centers, schools, and hospital and hospice organizations. They always appreciate new reading material. Many churches will also accept some reading materials and may even have humanitarian programs or sponsor community outreach.
The organization Books Through Bars helps donate books to prison programs on the East Coast, as does Books to Prisoners on the West Coast. For $.50 each, you can also ship books to the program Books for Africa. All of these organizations have guidelines about the types of materials they will accept, so check before you send. It’s a wonderful way to give a new home to your books and ensure they’re bettering someone else’s life.

Selling Your Books
First, let me just say—you probably won’t get rich selling your books online. Unless it’s a very rare copy or special edition, used books just don’t sell for huge returns. There are several places you can try, however, so selling can be a good way to clear out your clutter and earn a little bit of cash.
If you have recent textbooks, manuals and business books, you can check the ISBN and Book Scouter will search their database of resellers to see who will give you the highest return. You can also try Powell’s Books and Cash4Books, as they both buy textbooks.
Both Half.com (eBay’s bookselling service) and Amazon.com also offer ways to sell your used books directly to other users. However, it’s based on your rating system, so new sellers can have a disadvantage.
Give or Trade
The site Paperback Swap allows you to connect with other users to buy and trade your books. You simply list your books on the site. You can also browse other users’ listings for the cost of shipping the books.
Alternatively, try listing your books on Freecycle, Craigslist, or on your local community swap page on Facebook to see if anyone wants them. It can be appealing to list them in “lots” (i.e. Lot of Kids Books, ages 5-7) or group by type and series. If you can find a local taker, you don’t have to worry about shipping.
If you’re looking for fun and adventure, try BookCrossing. You can download labels for free and release your books “into the wild” in your city or town. You can track the books you’ve released, discover who found them, and see how far they’ve traveled. Fun!

Organize Your Books
Once you’ve sorted your books and pared down to those you want to keep, it’s time to decide which method you want to use to organize them!
There are several ways to go about organizing your books. It really depends on your preference, usage and the “look” you prefer for your shelves. One of the most visually pleasing ways is to organize your books by color. Depending on your organizing style (and if you’re a visual learner), you might actually have an easier time finding just what you’re looking for and it’s undeniably beautiful.
Another method is to organize your books by type (fiction and non-fiction, reference, children’s books, etc.). I find this is one of the easiest ways to quickly sort books and keep your mini-library in order. Once you have your books sorted by type, you can decide if you prefer to arrange them in alphabetical order, which is practical, or by height and size, which is more aesthetically pleasing.
You may find you have a plethora of paperbacks or a collection of beautiful vintage hardcovers. If this is the case, grouping these similar books together can be a great way to keep your shelves looking beautiful and uniform. If you’d like to use a few books as visual accents for your living room or a more formal bookcase, consider covering the books with paper and/or vellum. Not only will the books match and be beautiful, but they’ll be protected as well. That said, I wouldn’t recommend undertaking the project of recovering all of your books (especially if you have hundreds). It could be QUITE a project.

Put Your Bookshelves Together
When I think of truly beautiful libraries, I always think of the bric-a-brac, found items, sculptural pieces and other decorations that give shelves personality. If you have so many books they fill the shelves completely, consider placing a few items in front of your books on the shelves, or using framed art and photos in front of the spines to add visual interest.
If your bookshelves have some space, you may want to add some beautiful vases, some meaningful objects or bookends to break up the shelf and make it look appealing. Using items of a uniform color (all white or all black, for example) can add a lot of punch to a shelf and make it really come together.
When setting up your bookshelves, you’ll want to also consider the placement of the shelves in correlation with the height of your books. If you have many paperbacks and short books, you may want to leave a little space between your shelves to break things up a little, provided you have the option of moving the shelving.
As you put your books back, give them a little once over. Smooth any dog-eared pages and shake out any of those random bookmarks and papers hiding in the books. Show your books a little love and they will last much longer.
After you get everything put back on your bookshelves, you’ll be amazed how much easier it is to find books quickly and easily. You may also find you and your kids are motivated to read a little more and bask in the beauty of your library!
Share Your Thoughts: Are you a book hoarder too? How do you keep your books organized?

Pin It
The post How to Organize Your Bookshelves appeared first on Living Well Spending Less®.
September 14, 2016
5 Ingredient Chicken Bake

This is a guest post from Sammi of Grounded & Surrounded
We all have those times in life that call for easy meals. Meals that only require simple pantry ingredients and a protein of choice. Sometimes we are asked to share those simple meals with others. This five ingredient–not counting salt & pepper– Chicken and Rice Bake is just that meal!
Besides making this casserole for my own family, I often bring this dish to new moms after they have come home from the hospital. A fresh side salad or cooked vegetable is the perfect addition to this main dish. Don’t forget a dessert too! Every postpartum mama needs a few cookies in her life!
As you can see from the recipe step photos, I like to involve my kids in the preparation of this easy dinner. Whisking the rice mixture together and using tongs to place the browned chicken on the rice mixture is just the way to involve your kids in the kitchen. I love teaching them how to bless others with the gift of food!
Lastly, this meal lends well to ingredient substitutions too. Frugal moms, don’t make a special trip to the grocery store! Substitute cream of mushroom soup and pork chops in place of the chicken soup and chicken breasts.

Here is what you need:
1 can Cream of Chicken Soup (14.5 oz)
1 soup can of water
1 cup uncooked white rice
1 package dry onion soup mix (1.25 oz)
4 chicken breasts
Salt and pepper

Step 1: Preheat oven to 325F. Grease 9×13 pan with nonstick cooking spray.

Step 2: Add Cream of Chicken soup, soup can of water, rice, and dry onion soup mix packet to greased pan. Whisk ingredients together.

Step 3: Heat a large skillet over medium-high heat. Spray pan with non-stick cooking spray. Add the four chicken breasts when the pan is hot. Sprinkle with salt and pepper. Brown each side for 1-2 minutes or until the outside has started to brown slightly. You do not want to fully cook the chicken. (Honestly, this step is completely optional, but I prefer to do it because the dish looks more appetizing!)

Step 4: Using tongs, place browned chicken breasts on top of rice mixture in greased 9×13 pan.

Step 5: Cover pan with aluminum foil and bake for 1 ½ hours or until rice is tender and chicken breasts are fully cooked.

Print This!
Recipe: 5 Ingredient Chicken & Rice Bake
Summary: This chicken recipe is the perfect weeknight meal for the whole family to enjoy. Not to mention the perfect meal to bring to a new mom or share with an elderly neighbor.Ingredients
1 can Cream of Chicken Soup (14.5 oz)
1 soup can of water
1 cup uncooked white rice
1 package dry onion soup mix (1.25 oz)
4 chicken breasts
Salt and pepper
Instructions
Preheat oven to 325F. Grease 9×13 pan with nonstick cooking spray.
Add Cream of Chicken soup, soup can of water, rice, and dry onion soup mix packet to greased pan. Whisk ingredients together.
Heat a large skillet over medium-high heat. Spray pan with non-stick cooking spray. Add the four chicken breasts when the pan is hot. Sprinkle with salt and pepper. Brown each side for 1-2 minutes or until the outside has started to brown slightly. You do not want to fully cook the chicken. (Honestly, this step is completely optional, but I prefer to do it because the dish looks more appetizing!)
Using tongs, place browned chicken breasts on top of rice mixture in greased 9×13 pan.
Cover pan with aluminum foil and bake for 1 ½ hours or until rice is tender and chicken breasts are fully cooked.
Preparation time: 5-7 minutes
Cooking time: 60-90 minute(s)
Number of servings (yield): 4
Sammi Ricke likes to keep things simple, delicious, and nutritious in her kitchen.
She enjoys the challenge of finding unique ways to incorporate “just one more whole food” into every meal while leaving just enough room for life’s essentials: chocolate and peanut butter. If you are looking for “healthified” versions of your family’s favorite meals be sure to visit Sammi’s Grounded & Surrounded Blog. You can also find her on Pinterest, Instagram, and Facebook.

Pin It
The post 5 Ingredient Chicken Bake appeared first on Living Well Spending Less®.
September 12, 2016
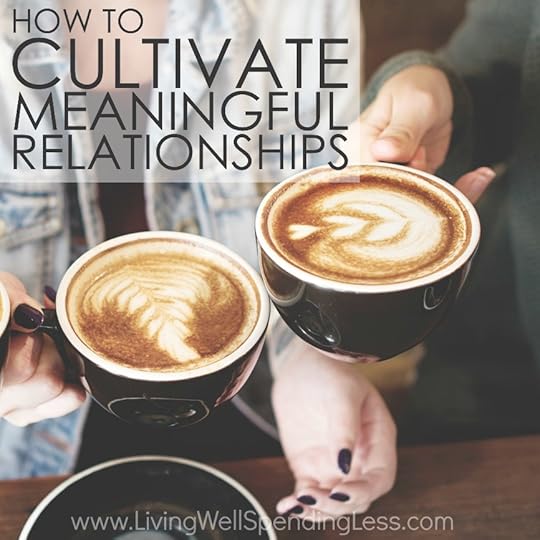
How to Cultivate Meaningful Relationships
Ah, friendships.
When they are good, there is nothing quite as soul-restoring as an hour or two spent with a true friend–someone who knows you inside and out, and accepts and loves you, imperfections and all. And yet, when friendships are weak or superficial or based on competition and insecurity, there is nothing quite as painful.
When I was in elementary school, my best friend and I were practically inseparable. We did everything together and planned to be friends for life. Our houses would be right next door and our kids would be best friends too. We even bought a set of “Best Friend” necklaces that fit together to form a heart.
And then in sixth grade, everything changed. My best friend abandoned me for an opening in the “Cool Club”–that ever-elusive group of popular girls I had never quite been quite cool enough to join. She was in, I wasn’t, and that was the end of that.
But I like to think that everything happens for a reason, and luckily, my sad tale has a happy ending. You see, sixth grade also happened to be the year that a new girl came to my school. And that girl–Alysha–has been my best friend ever since.
Chances are, you have your own friendship sagas to share as well. Maybe you’re still close with your childhood bestie. Or maybe not. Either way, chances are, you aren’t living side-by-side, married to brothers, and hanging out on a daily basis. It just doesn’t happen. Jobs, marriages, moves, kids…they all get in the way of maintaining those friendships.
As adults, our best friends are often not the center of our universe as they once were. You may still have very close confidants and deep friendships, but you probably also have a spouse, kids, family, coworkers and others in your life who fulfill some of that friendship role.
However, as women, most of us tend to have a need for closeness and connection that men down’t always share. And while we love our husbands–and probably may even consider our spouse our best friend (I know I do), there is still often a part of us that needs at least one or two close friendships outside of our marriage to feel whole and connected.
And let me just tell you–Facebook won’t do the trick!
Of course making friends and cultivating deep, meaningful relationships is easier said than done, right?
I’ll be honest–as someone who has moved many times in my life, I know that making new friends can sometimes be a big challenge. I might meet acquaintances at church, in the PTO, or through other activities, but true friendships take a great deal of time, effort and yes, work. Sometimes they don’t happen easily, and many of us give up on the process rather than see it through.
So, as adults, how can we make new friends, strengthen our old ties, and take our social circle from online to offline? Here are a few concrete ways to cultivate meaningful relationships in your life:

1. Look for Commonalities
When you’re seeking new friends, whether it’s after a move, in a new church or job, or simply because your social circle has been waning, look for people you have commonalities with. It seems like obvious advice, but many of us look for “surface” traits, such as age, style, and even looks, rather than finding the common threads we share on the inside. What are your passions and hobbies? Find those with common interests and get involved!
Wondering how to find common interests? Cultivate your own! Take classes, look for community meet-up groups, and start online conversations. The next time you see someone doing something you admire—whether it’s yoga, painting or playing an instrument—ask how and when he or she learned how and where he or she practices now. Let them know you share their interests and ask for advice on getting started.
Watch for fellow moms in the carpool lane, dog-moms at the park, or green thumbs at the farmer’s market. Look for book clubs at your local library, cooking classes in your community calendar, and sewing and craft classes at the craft store. Start pushing past your comfort zone and trying new things in real life.
And if you’re feeling really brave (or stuck)? Start your own group! Several years ago, when I was a stay-at-home mom living in Everett, Washingon and my husband was working long hours at Boeing, I knew I would go crazy spending all day at home alone. I started a group on Meetup.com called BoMoToGoMo, which stood for “Boeing Moms of Tots Who Want to Get Out More.” I was amazed to discover that I was not the only Boeing wife feeling lonely, and for the next two years, our group was nearly inseparable. Although in the years since, we have gone our separate ways, many of us still talk regularly.
2. Embrace Differences
Remember: your friends won’t have every single thing in common with you. (How boring would it be if we were all the same?) Instead, look for those who have traits you admire and qualities you’d like to learn or emulate, but don’t limit yourself to those with obvious similarities.
One of my close friends is quite a bit older than I am, and in a very different stage of life when it comes to kids and family life, but she and I both share a love of writing and business. If I had simply thought, “She’s retired and I have young children, what would we have in common?” I never would’ve gotten to know her.
Likewise, over the years, my friend Alysha and I have taken very different paths. She opted for community college and cosmetology school while I was on the law school path. It would have been easy, at some point, to simply say, “we’re too different to stay friends,” be we didn’t. We decided instead to support each other no matter where the path led.

3. Network Beyond Social Media
When you’re looking to expand your social circle, engage your network. Look at your social media connections and see if there’s a Facebook friend you wouldn’t mind getting to know better in person. Why not ask them out for lunch or for coffee? The worst they can say is no!
And on that note, the next time someone asks you to attend something new, make it a goal to say “YES!” It can be hard to break out of our comfort zones and agree to do things we aren’t so sure about, but oftentimes it can be very rewarding.
Take a cue from those in the business world and make new introductions and connections by working your network. If you don’t see any obvious opportunities on the horizon, make one! Invite friends over and ask each of them to bring along someone new. You’ll find your social circle grows exponentially.
4. Show Hospitality
Hosting a party or get-together can seem daunting, but it doesn’t have to be. Remind yourself things don’t need to be perfect. A simple soup and salad bar or a kid’s backyard playdate can result in a fun afternoon of new connections and camaraderie.
Invite the ladies you know over for a craft date or a clothing exchange party when you clean out your closets. Host a book club, a dinner co-op or swap, or a freezer-meal cooking party. Keep things light and casual.
The next time you’re in a school meeting or working on a project for church, invite everyone over to your place to brainstorm or go over plans. Rather than making it a meal or all-day activity, set up parameters for a mid-morning or mid-afternoon activity. Not only will you build more social connections, but you’ll be productive and accomplish some of your projects as well.

5. Stay in Touch
Staying in touch means more than simply “liking” and commenting on your friends’ latest social media posts. You may feel like you’re clued in to what’s going on in their lives, but in truth, most of us don’t show our struggles online or we tend to gloss over things. Instead of assuming you’re getting all the news from your newsfeed, pick up the phone or at least send a personal text or email every so often.
Again, it seems like “staying in touch” is a basic rule of friendship, but between our busy lives and the feeling like we’re in constant contact via Facebook, Twitter and Instagram, we might barely notice when a friend has slipped through the cracks. Similarly, we might wonder why no one is there for us in our times of need.
Keep personal connections strong by staying in touch the old-fashioned way—by actually talking. Pick up the phone for a quick call. Send a card via snail mail and make a point to keep your relationship strong.
6. Learn to Listen and Relate
It’s easy to “hear” people, but it’s a lot harder to really listen. To be a good listener, you have to ask questions, you have to make eye contact, and you have to put down your cell phone and have an in-person conversation. You also have to stop talking and really take time to absorb what the other person is saying.
Listening, as it turns out, is a true art. It’s not a skill everyone has. Plus, some of us can feel a little awkward being attentive when we’re interacting with a new person. We can try too hard to sound impressive, to tell our story so they know we’re relating, or to interrupt and talk about ourselves.
Instead, try to really focus on what’s being said. If you have a similar experience or want to relate, save it until your friend is done explaining and talking. Make it a point to avoid interrupting no matter how excited you are to share or make a connection.

7. Be Grateful
Chances are, you probably practice gratitude and etiquette with your kids, teaching them to say please and thank you. You may help them write thank you cards for gifts and help them learn to be thoughtful when they receive something from another person. Yet, as grownups, some of us forget this very basic tenet of Ps & Qs.
When you receive a gift or when someone goes out of their way for you, take a moment to send them a note. It takes very little time to construct a sincere thank you, and yet, it’s rarely done these days even though it means so much to the recipient. You can acknowledge little acts of kindness, too. Try thanking someone for a word that lifted you up or a gesture that was meaningful to you.
Gratitude can shift our focus and bring continued good into our lives. Remembering to be thankful for our relationships and friends helps us continue to strengthen those relationships and build them up.
8. Pencil Them In
We’re all busy, which is why it is so important to take the time to block out time for friendship. Just like any meeting or event, if it’s important, we learn we need to make room for it on our schedule. We need to write it in and adhere to it. When it comes to friendships and cultivating our relationships, they’re no different. If we want to have great relationships and closeness with others, then we have to make it a priority on our calendar.
It might mean you have to prioritize and put other things on the back burner. But try reframing how you think about scheduling social time—not as procrastinating so you can “go out and be social,” but instead, look at it as making time for your relationships and social nourishment. Our friendships give us joy and elevate our lives. We need them to keep us grounded and happy.
Rethink the traditional “friend date.” You don’t have to always do dinner or a big three-hour coffee and venting session. It doesn’t have to be expensive. Instead, consider taking a class together or scheduling your workouts at the same time. If you’re both running the kids to a dance lesson, grab coffee while they’re learning or make a date to do your grocery shopping together. Think of less-traditional ways to get things done and still spend time with your nearest and dearest.

9. Be Honest
All relationships thrive on honesty, including marriages and friendships. If you’re struggling, overwhelmed or need a break, be honest with your friends about your feelings. Don’t try to gloss over things or make up excuses. When we tell “white lies” or fib to avoid getting together, we’ll eventually either get caught or our friends will tire of getting shot down.
If you let your friends know you have a lot on your plate and you need a few months to tackle your to-do list, but you’ll still call them weekly or email them regularly, it lets them know it’s not purposeful avoidance. Help your friends understand it’s not something they did wrong, but instead just something you need to work through.
On the other hand, maybe there’s a friendship that monopolizes your time or requires too much of you. It’s also okay to let that friend know you’ve got a lot going on, so while you can’t meet for coffee every week, maybe you’d be able to do something once a month instead. Set appropriate boundaries to avoid getting burnt out.
As challenging as it can be, also embrace honesty when it comes to your feelings. When a friend lets you down or disappoints you, let them know. There’s a difference between being honest and being confrontational. It’s perfectly fine to let someone know your feelings were hurt or you were disappointed by their actions. Get things out in the open so you can talk it out rather than letting silent resentments build up and turn into something bigger.
10. Ask for Help (But Don’t Be Needy)
Strong relationships help us when we’re in a time of need. Friendships are there to support us and get us through. When you’re struggling or feeling depressed, don’t be afraid ask for help. Let your friends know you’re in need of a hand.
Of course this doesn’t mean becoming a burden or constantly asking for favors, but it does mean making yourself vulnerable from time to time, and trusting in other people instead of always trying to make it on your own. Team building exercises are built on the principles of building trust and reliance. Friendships are also built on the same ideas—so if you need a hand, ask
* * *
If we’re being honest, when was the last time you talked to a close friend? Has it been awhile since you’ve had some one-on-one time with one of your favorite people? Try reaching out to someone special today. It’s never too late to cultivate or reignite our friendships. Chances are, you’ll fall right back into conversation, even if it’s been awhile.
True and close friendships are important for all of us. Our friends nourish us and keep us strong. They’re there for us, but sometimes we need to reach out and nudge them along. Hey, we all get by with a little help from our friends. Use these tips to cultivate your relationships and keep them healthy and strong for the long haul. Friends are so worth it!
Share Your Advice: How do you cultivate your relationships?

The post How to Cultivate Meaningful Relationships appeared first on Living Well Spending Less®.
September 9, 2016
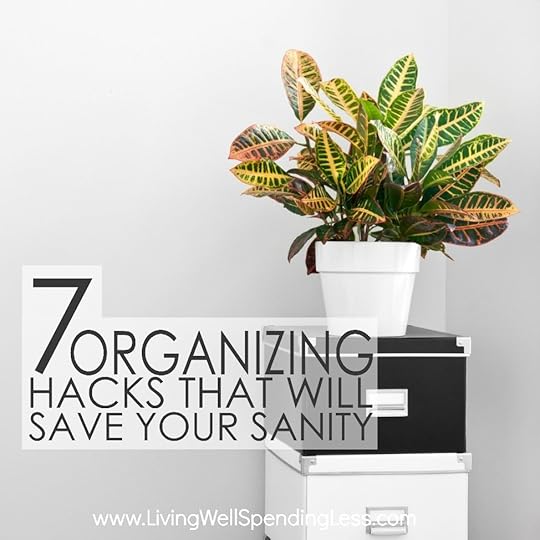
7 Organizing Hacks that Will Save Your Sanity
Organization.
It’s the ever-elusive word that we all seem to be striving for at any given time. In fact, whenever we send out a survey or ask LWSL readers what they would most like to accomplish in the next year, “getting more organized” is always high on the list. The reality is that organization is often a process. For most of us, getting–and staying–organized is something we have to work at.
I’m often asked about my favorite organizing tips or “hacks.” If you’ve read this blog for any amount of time, you’ve probably discovered that I have lots of ideas, organizing tools and storage solutions that work for my house and family and fit my style.
I’m sure you do, too.
But the reality is that the first step in getting organized is clearing the clutter and getting unstuffed. 
When we have too much stuff, we get distracted trying to make the most of our space and fit everything in. We try to find the best solutions to keep our hundreds of Christmas decorations, fifty bottles of cleaning supplies, and numerous bins of nail polish organized and accessible. Our organization problem is really often just a STUFF problem, which means we need to pare down to the things that truly serve our needs and let go of the rest.
It sounds extreme. And yes, it can be difficult. But as I’m often looking at storage solutions on Pinterest or elsewhere online, I’m struck by how much time and effort we spend trying to come up with new ways to store MORE stuff. It’s ridiculous. We look for ways to fit hundreds of hangers in a small closet. We try to fit more toys in the toy room by installing nets and bungie cord systems—all to hold the plush armies our kids have collected. We’re always trying to come up with new boxes, bins and holders for Legos, and new solutions for Barbie shoes and Little Pet Shop accessories.
It would better serve us to get organized by getting back to basics. It’s much easier to organize the items we find useful, purposeful, and truly need. Imagine a bookshelf full of books we love, a shelf where a few of our children’s prized toys can be displayed, and a closet of clothing we carefully select and curate, where each piece fits, and is flattering and loved.
This isn’t an impossible dream. When it comes down to it, my favorite organizing tip, hack, trick, or whatever you choose to call it is this–ruthlessly purge! Clean out what you don’t need. Donate it. Give it to someone who will use it, who can wear it and who loves it. Fight the flow and buy only what you need and what serves you.
It’s not an easy concept, but when we fight the flow, we can get ourselves organized. We can cut back on clutter and pare down to the items we truly need in our homes. We’ll find we have more room, so we don’t need to opt for so many “storage hacks” and “organizing tricks” just to get our stuff and ourselves under control.
Then, once you’ve pared down to the basics, apply the following hacks to take your organization to the next level:

1. Label Everything
It sounds obvious, but give everything a home with a label. Kids, babysitters, and even husbands can navigate their way around storage and return each item to its rightful place. It also helps you to know when you’re getting low on an item (like sugar or flour, for example) or when something’s lost (like a hammer or keys).
There are about a bazillion options when it comes to labeling. You can find pretty printable label templates that fit any décor. Some labels are reusable, like rewriteable dry erase and chalkboard labels, for example. Other labels work better for items like cords. Try using bread tags or plastic printable labels to label your cords.
When in doubt, you can always write out a simple label by hand with a Sharpie. I label everything, from freezer meals to storage shelves, hangers, cupboards and bins. This way, whenever I need something, I know it’s not slung in some unlabeled box or random drawer where I might never find it again.
2. Make the Most of Vertical Space
Every corner of your home doesn’t need to be filled with “stuff.” You don’t need to store items above the threshold of every door and every windowpane. You can, however, make use of vertical space in closets and cupboards, ensuring this less-used space works for you.
Try installing a tension rod in your closet or under a sink to get better use of the space. Lots of items hang great on rods, including spray bottles, scarves, and even heeled shoes. Assess your closets and cupboards and look for dead space where a shelf, hooks, or other storage solutions could maximize your options.
3. Use Your Control Center
If you have a family control center, it can be a great spot to post your goals and to do lists for the week. One quick and easy way to change things up is to write repeating items on sticky notes, so they can easily be moved from week to week. Dry erase and chalkboards also work great for dynamic and regularly changing information, or you can use a portable planner that allows you to keep track of everything on the go.
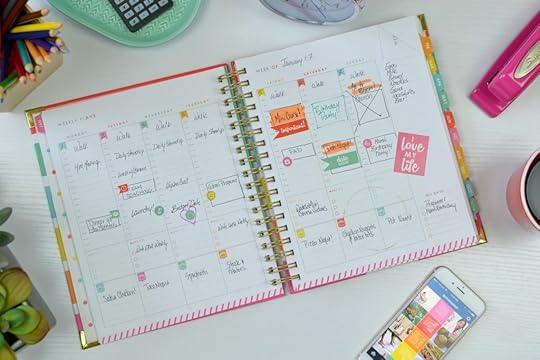
One of the best tips for getting organized is to write down your goals, to-do lists, and tasks. I like using my Living Well Planner to keep everything in a go-to space where I can easily keep track of my own goals and plans, my family’s schedule, our budget, and even our meal plan.
Your control center is a good place to keep important numbers, mail and correspondence you need to address—all in one easy-to-reach spot. Keep your coupon organizer, your meal plan, and any other regularly used tools at the command center as well. This will save you time and energy when you have to search and tear up your house just to find something.
4. Plan Your Meals and Learn to Slow Cook
Freezer meals have been a game-changer for me. In terms of organization, I can’t tell you how helpful and productive it is to review your meal plan, cook once a week during Sunday prep, and then have hot, delicious and nutritious meals at-the-ready.
No longer do we have to run to the store for one ingredient right before dinner. Meals aren’t a dreaded struggle after a long workday. I know what I have and know it’s ready to go. I can throw meals in a slow cooker in the morning and have something exciting and yummy on the table for dinner, with almost zero effort.
If you haven’t tried freezer cooking or meal planning, there’s no time like the present. Not only will it streamline your grocery shopping and help you make the most of your ingredients, but it will save you time, energy and yes, sanity every single day.

5. Simplify Your Wardrobe
When I started my 40 Hanger Closet, it seemed a little bit daunting, but I have to admit, I was tired of sorting through clothes that didn’t fit, didn’t go with anything, and didn’t make me happy. Now I can honestly say that when I get dressed every day, I feel great. I know everything in my closet fits and looks good. I’m careful with my wardrobe planning and purchases, only buying classic, high-quality items that pair well with other items.
I’ve cut back to mostly easy-care items, so I don’t have to stress out over ironing, dry cleaning, or anything that requires too much work and styling to look great. Keeping my wardrobe simple and stocked with quality, classic items, has been a life-changing organizational hack.
If you want to get started, it’s simple. Go through your closet and figure out what you truly love and what you could do without. Keep only things that fit, are in good repair, and make you feel confident and great. I found 40 hangers is a good number to give me enough variety and choices but still keep things under control. I never lose an item and I never stand there wondering what to wear.
6. Address the Problem Areas First
Is there a dreaded area of your house you hate to tackle? Maybe the pantry gives you a panic attack or your daughters’ hair accessories are out of control? Tackle those areas first and be ruthless. Purge anything you don’t need. Get rid of anything expired or out of date.
Once you’ve learned how to Eat That Frog and overcome your most challenging task, you’ll be psyched to take on the rest. Try finding new solutions. If throwing mail on the desk means bills get lost, maybe you need to make some baskets to house incoming mail and apply ”if this, then that” rules to get a handle on the flow.
Rather than continuing to try to apply the same solution to a problem and get frustrated when it doesn’t work, accept you may need to find a new answer. As much as I would love backpacks to always go up to bedroom desks, they usually end up slung on the floor or by the door. So instead of fighting it, I’ve placed a lovely basket at the bottom of the stairs where backpacks can go right when they walk in the door and wait for someone to take them up on their next trip.

7. Find Solutions You’re Excited to Use
Find storage solutions and organization tricks you’re excited to use. If you have pretty labels, painted jars, or an inbox for your mail that matches your décor and catches your eye, you’re much more likely to embrace it. Get your kids on board with storage ideas and solutions. If they help organize a desk drawer or take time to wrap and label each cord and tuck it in a toilet-paper-roll cubby, chances are they’re going to feel ownership and want to help preserve the organized space.
So often, as moms, we think we need to tackle projects alone. We forget to enlist the help of our spouse and our kids, then we feel disappointed and let down when they don’t cooperate with the upkeep. Instead, get the whole house excited about organizing. Maybe your husband will find his inner-carpenter by hanging pegboard for tools in the garage or mounting magazine files inside cupboards to hold plastic wrap.
I find my daughters really embrace new ideas. They really do want to help and jump right in when we try something new. When we cut back on toys and started focusing on experiences rather than things, they took to it faster than I did! They were coming up with creative and fun ideas and new ways to play and find joy.
When it comes to getting organized, finding ways to make the process enjoyable, nourishing and rejuvenating can help you change from simply a one-time solution to a lifestyle. Living with less and getting unstuffed can help us feel more at peace and in control. It can help us appreciate what we have and let go of the things we think we need. We can stop looking for fulfillment from our “stuff” and start finding joy from within!
Share Your Tips: How do you stay organized?

Pin It
The post 7 Organizing Hacks that Will Save Your Sanity appeared first on Living Well Spending Less®.
September 7, 2016
Make Ahead Lunch Wraps

I don’t know how it works in your family, but in mine, school mornings are not our best time. Try as we may to make them run smoothly, they are inevitably rushed and often stressful. Truth be told, those busy hectic moments are definitely NOT when our best parenting happens!
But over the years both my husband and I have learned that the key to combating morning chaos–at least a little–is to prepare ahead as much as possible. Following a Sunday Prep plan helps a lot, as does having a plan for quick & easy lunches that will come together fast.
These make-ahead lunch wraps can be easily stored in the fridge for up to 3-5 days & can be customized to your child’s taste. My girls both really love hummus so we have opted for that rather then mayo. It also provides some extra protein into their diet, and adds flavor without being too soggy. However, if your child doesn’t like hummus you could easily sub out the hummus for cream cheese instead!
We have found that these wraps stay fresh and and the veggies stay crisp and full of flavor all the way to day 5. If packing them in a lunch box be sure to include a freezer pack to keep everything cold until lunchtime!
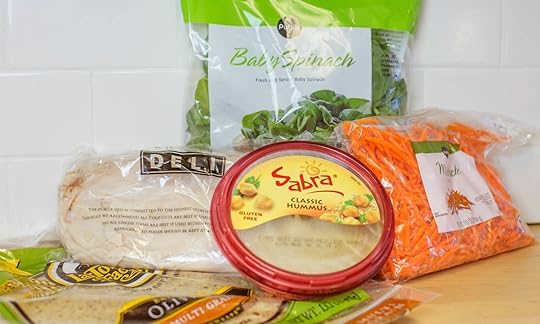
Here is what you need:
1 17oz. container hummus (can also use cream cheese)
1 9oz bag baby spinach
1 1/2 lbs. sliced turkey meat
1 6oz bag matchstick carrots
10 tortillas shells
parchment paper
Prep: Cut 10 pieces of parchment paper large enough for each tortilla shell. Place one tortilla shell on a piece of parchment paper (lay diagonal).

Step 1: Spoon one-two large tablespoon of hummus on to tortilla shell and spread out.

Step 2: Add 2-3 slices of turkey meat.

Step 3: Then add several baby spinach leaves and carrots to tortilla shell.

Step 4: Wrap in sides of tortilla shell and then roll, and wrap up in parchment paper and place in freezer bag. ( Be sure to label bag first)
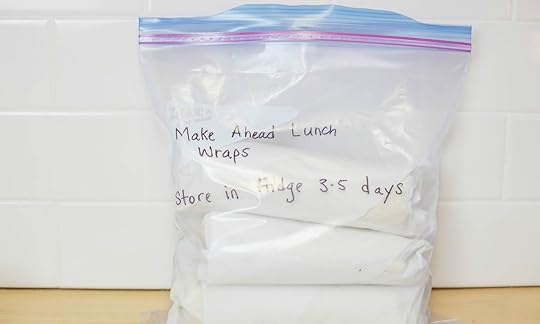
Step 5: Keep in fridge for 3-5 days. Perfect for lunch boxes or picnics.

Print This!
Recipe: Make Ahead Lunch Wraps
Summary: These make ahead lunch wraps are the perfect solution to lunch on the go.
Ingredients
1 17oz. container hummus
1 9oz bag baby spinach
1 1/2 lbs sliced turkey meat
1 6oz bag matchstick carrots
10 tortillas shells
Instructions
Prep: Cut 10 pieces of parchment paper large enough for each tortilla shell. Place one tortilla shell on a piece of parchment paper.
Spoon one-two large tablespoon of hummus on to tortilla shell and spread out.
Add 2-3 slices of turkey meat.
Then add several baby spinach leaves and carrots to tortilla shell.
Wrap in sides of tortilla shell and then roll, and wrap up in parchment paper and place in freezer bag. ( Be sure to label bag first)
Keep in fridge for 3-5 days. Perfect for lunch boxes or picnics.
Preparation time: 5-7 minutes
Keep in fridge for 3-5 days
Number of servings (yield): 10
Share Your Thoughts: Do you have any variation ideas for your own lunch wrap creations?

Pin It
The post Make Ahead Lunch Wraps appeared first on Living Well Spending Less®.
September 5, 2016
5 Ways to Create Meaningful Birthdays

This is a guest post from Krista Gilbert of kristagilbert.com
When I was growing up, birthdays consisted of a cake, a few presents, and friends sitting in a circle playing duck-duck goose. When I got older, I traded games for lip-syncing and air guitar. My mom didn’t stress about a color scheme, miniature flags decorating the cake, or whether or not the homemade pom-poms matched the party dress. In fact, there were no pom-poms.
I, on the other hand, am a Pinterest junkie who loves all of the details of throwing a complicated and well-designed party. For my daughter’s first birthday I had white tulle hanging from her high chair, a lavender homemade glitter crown, handmade invitations, and a sea of purple and white items displayed at varying heights just so on the table. Sure, it was beautiful, and the pictures turned out fabulous, but did my daughter need that kind of party? Was that the best way to spend her first birthday?
What I realized, as the years went by, is that I was spending far too much time thinking about the design of the parties, and too little time making them meaningful. I began asking myself, “what if you took all of that party motivation and energy and turned that toward making the birthday boy/girl feel especially honored?” And so I did.
I turned material to meaningful.
Decorations with matching plates and napkins are not a bad thing – in fact, that still happens in my house most of the time. I am a designer at heart and making parties aesthetically beautiful is an expression of art. But I now spend the majority of my time thinking through how to show honor to the one being celebrated, and how to mark the moment in a meaningful way.
Every human heart wants to be known and deeply loved. Birthdays provide an opportunity for us to practically demonstrate that kind of care. We get to single someone out, and shower them with a kindness that makes an impact. Birthdays provide an opportunity to love well and to water the soul planted in the garden of family. Let’s not miss that chance.
Here are 5 ways to make birthdays meaningful

Mark important birthdays with rituals.
When the kids in our extended family turn 13, they go on a walk down a path in the woods with a backpack. Along the way, they encounter various family members who give them a gift that represents something significant. When my nephew, Caleb, did it, we gave him objects that represented him, or that represented what we wanted him to take into the teen years. When my son, Dawson turned 13, we each gave him a book that had been significant in our life and wrote inside the cover about why that book had such an impact, and about our hopes for him.
This is not a new concept. Many cultures incorporate rituals and celebrate their children’s coming of age. These rituals help transition a child from childhood to adulthood in strength and confidence.
While most of us do not have these traditions in our culture, we can create ones in our families that mark special moments and send our children out into a new season of their lives.

Consider a person’s love language when planning a party.
When my daughter turned 16, each person in our family and extended family bought her a hand-stamped word or phrase and a charm to go with it. She is someone who values words of affirmation. We sat her by a campfire and one by one each person went out and presented her with their words and symbol. She changes out her necklace constantly, switching the charms and words around to fit different moods and occasions.
When my Dad had a stroke earlier this year, she put on his charm that said “Boppa’s Favorite” (he calls all of the grandkids his favorite). This helped her to hold him close during a vulnerable time.
What is your child’s love language? The five love languages are: words of affirmation, quality time, physical touch, acts of service, and gifts. How can you incorporate that into this year’s birthday celebration in a big or small way?

Think creatively about gifts.
Freshman year, my daughter took a photography class at school. About a quarter of the way through the class, she realized that she had a natural eye and aptitude for photography. That year, in place of a birthday gift, we gave her two private lessons with one of the best photographers in our area. Because I went with her, it was a bonding time for us, and it nurtured a budding interest, giving her more confidence and experience.
Recently one of my pastors surprised his wife with a trip to Washington DC. Not only was it meaningful to go visit our nation’s capital for her, but he also set up a coffee appointment with her favorite writer. This well-known author does not normally accept invitations, but he was so taken with this husband’s creativity and willingness to put himself out there on her behalf, he accepted. This hour long meeting turned out to be a divine appointment for my pastor’s wife.
What passions does your child, spouse, or friend have? How can you design a birthday around one of these, either in the celebration or as a gift?

Incorporate service or giving into the celebration
A few years ago my sister decided that she would plan her own birthday parties. But these weren’t going to be the usual lunch at a favorite restaurant, or coffee at Starbucks kinds of birthday parties. Instead, she would use her birthday as an opportunity to gather and bless others. Last year we potted plants in large containers and then delivered them anonymously to people’s doorsteps. We rang the doorbells and then ran! This year we participated in World Vision’s Walk for Water campaign. We created our own 6K race course in her neighborhood, and raised money for clean water.
Is there an organization that you would like to help instead of receiving gifts for your birthday? Could you take your child to see a non-profit in action? Or can you create discussions that increase awareness and compassion with your children?
One day a Heifer International booklet came in our mailbox. I talked to my 10 year old son about how these animals often determine whether a family will go hungry or have food to eat. He was so touched that he decided to forgo birthday gifts at his party, and instead raised money to buy a water buffalo for a family in Nepal through Heifer.

Create meaningful mini-traditions.
Mud pie is the birthday dessert of choice around our house. It’s tradition and no one dares break it. Another tradition is the birthday yes. Want cinnamon rolls for breakfast? Yes. Want to go jump in the lake? Yes. Want to watch your favorite movie? Yes.
What traditions can you create at each and every birthday?
Here are some more ideas:
The Bistro: Make a special dinner and dessert every year for the birthday child (their favorite).
The Birthday Hot Seat: Create a “hot seat” in the middle of the room. The birthday boy wears a crazy hat that is for birthdays only, and everyone tells him what they love about him.
The Kidnap: Kidnap the birthday kid from school and go out to lunch.
The Cake Smash: When the birthday boy blows out the candles, smash his head into the cake. Afterwards you can tell him why he is so smashing! This happened to my son when he celebrated his birthday in Costa Rica one year. It is a tradition there. He loved it!
Balloon Bomb: Fill a box, a car, or a room with balloons filled with special notes and money.
The Auntie Date: Take your nieces or nephews on a special one-on-one date for their birthday. It’s rare that an aunt or uncle gets that kind of quality time. When possible, I do this with my nieces (I have eight of them), and I treasure that time.
The Hidden Cupcake: Fill a ceramic cupcake, or other container, with a surprise. Hide it somewhere in the house. Have the birthday girl or boy go hunting for it.
Birthdays are a chance for us to take time out to truly celebrate people in a special and unique way. When thoughtfully considered, they offer us an opportunity to express just how much that person means to us. Let’s place our focus, time and energy into what matters most; not the decorations on the table, but the heart behind why we are celebrating in the first place.
Krista Gilbert lives in a small lakeside
town in the Pacific Northwest with her family. She likes to cook for a crowd. In fact, the bigger the crowd, the bigger the party. Her first book, Reclaiming Home: A Family’s Guide For Life, Love, and Legacy, released this year and shares many of the practical ways she makes her family functional, meaningful, intentional, and fun. At the center of all of this is Krista’s deep faith and her love for the people God has placed at her table. You will find her online at kristagilbert.com or daring families at meaninginaminute.com
Share Your Thoughts: How do you create meaningful birthdays in your home?

Pin It
The post 5 Ways to Create Meaningful Birthdays appeared first on Living Well Spending Less®.
September 2, 2016
Quick and Easy Lunch Ideas

‘Tis the season for school lunches!
To be honest, I love sending my kids to school with hand-packed lunches. Granted my husband is usually the one to whip them up most of the time, but I think it is such a great way to let our girls know we’re thinking of them throughout the day, even when they’re away—it’s a little touch of home and comfort, and it is also good to know you are nourishing their growing bodies with good food you actually want them to eat!
While it can sometimes feel a little time consuming to prepare lunches (especially if you wait until the morning rush), with some organization and smart strategies you can keep your kids happy, nourished and ready-to-learn, without stressing yourself out.
And let’s be realistic, too–hot lunch gets expensive fast! School lunches can run from $2-$4 per day—so with two or three kids, you can easily spend hundreds a month. The good news is many schools have overhauled their school lunch nutrition, so the choices are healthier these days. (Though not necessarily more appetizing–just check out the #thanksmichelleobama hashtag on Twitter sometime!) Even so, between food aversions, allergies, and worrying about what your kids will really eat when you aren’t there, a DIY approach gives us as parents just a little more peace of mind.
Luckily for you, the team here at LWSL has worked up a few strategies and techniques to ensure all our kids have happy, healthy and delicious lunches every day–they might just help you too!

1. Do Sunday Prep
Sunday prep work frees up the rest of your week, so you can take care of all those things that come up weekday mornings. Do I love spending Sunday afternoons in the kitchen? No, not always, but I do love seeing a freezer full of meals and a refrigerator full of lunches and snacks that are all prepped and ready to go.
If you do Sunday prep, pick items that store well. If you make sandwiches, wet fillings can get pretty soggy and not-so-yummy by the end of the week. You can, however, add the dry fillings (meat, cheese, lettuce) ahead of time or prepare fillings (like hummus, roasted vegetables or tuna) ahead of time, so it’s just a matter of scooping it on bread or adding a squirt of mustard and mayo right beforehand.
Sunday prep is a great time to get chopping out of the way—carrot sticks, celery, peppers and broccoli can all be cut up once and last all week. Scoop sauces like ranch, salsa or hummus into small containers so they’re prepped to grab and go. Bag individual servings of chips, pretzels, dried fruit and other munchies in containers or baggies to make for easy access (and to save money on individually packaged items which can be convenient, but a real budget-killer).
Get your kids on board
Get your kids on board with Sunday Prep. Most school-aged kids love to help out with bagging items and even some of the chopping. It’s a great way for your kids to learn their way around the kitchen, helps you get more done, and it gives them a great sense of responsibility. It teaches your children how to make choices and gives them autonomy when they get to help select their lunches. This sense of ownership will work in your favor when you realize there will be much less waste. When kids choose their own food, they tend to be more excited about eating it!
Plan ahead
One major success strategy is to prepare your menu ahead of time. Have your shopping list planned out and stick to it. Then, select from a few mix-and-match items to turn it into a full menu. If you want to have roast chicken one evening, plan to shred part of it for sandwich filling the next day. If you find a great deal on peppers, roast some to-go in wraps and serve the others raw with a dip. If you open a can of chickpeas or a jar of salsa, work some of it in as a salad topping for you and send some pureed with chips or crackers with the kids.
2. Make Finger Foods & Dip
I don’t know about your kids, but mine LOVE finger foods! Cutting sandwiches into bite-sized “lunchables” or sending a stack of pretzel chips with soy butter (our school is nut-free) floats their boat and means lunch bags come back empty!
To make dip less of a challenge to send, use a jar and put the dip in the bottom with veggies on top OR recycle applesauce and pudding cups to hold dip and keep the contents of the jar from becoming soggy.
When you’re trying to think of fun finger foods, there’s no reason to go out and buy items cut into little pieces—just DIY. Grapes, cheese, ham, turkey, cold chicken, tofu, and citrus fruits make great bites. Cut cucumbers and carrots into sticks or coins, or try a spiral cutter to get veggies into edible curls and noodles. These cutters work like a pencil sharpener and create fun shapes from zucchini, carrots, sweet potatoes and other veggies, all great substitutes for noodles, which don’t hold up as well to sauces and travel.
Try a fun “breakfast dippers” theme, with dipable pancake wedges, French toast sticks, or bananas and jam or a little maple syrup. To avoid a sticky mess, whip your maple syrup into butter, light cream cheese, or a nut butter. Cold pizza sticks, garlic bread, or cold mozzarella sticks can be fun with some marinara dip. Try teriyaki with tofu, or chicken or strips of pork and green beans, carrots or snow peas.

3. Pick Room-Temperature-Friendly Foods
Most schools don’t have access to heating sources at lunch. In the winter, it can be nice to have a thermos to send hot soup or chili with your kids, but I find it can be a bit messy (a leaking thermos in a backpack is a real nightmare) and hard for younger kids to pour out warm soup and eat. It also doesn’t always stay as warm as you’d ideally like.
On the flipside, most school lunches remain at room temperature during the morning before lunch. Make a DIY ice pack by freezing a damp sponge in a Ziploc baggy and placing it in your child’s lunchbox or bag. I generally avoid sensitive items like yogurt, cottage cheese and milk products, because my kids just don’t like them if they aren’t ice cold. Hard cheese and string cheeses, as well as most sandwich fillings hold up just fine in a bag with the ice pack.
When you think of sauces, you may want to avoid mayonnaise-based sauces and dips, and instead go for things made with sour cream or soy, which tend to be less temperature-sensitive. Hummus is a great filler and sauce, and salsa can stand up to regular temperatures as well. Mustards, ketchups, soy and oils can all be packed without much worry about temperature sensitivity.
4. Store Items Together for Easy Access
Ensure your mornings go smoothly by storing lunch items together. If you have a low drawer or pantry shelf, it can make a great lunch prep and storage area. You or your kids can simply go to the drawer or shelf, fill their lunchbox with a few items, and then go to a set shelf in the fridge to grab the cold items.
Bins make great sorters to keep your fridge shelves clear of clutter and keep lunch items cold and on-hand. If you really struggle with your morning routine, you may even want to put everything in containers and into your kid’s lunchbox the night before, then store it in the refrigerator so they can grab-and-go in the morning. Keep apple slices from browning by sprinkling them with a little lemon juice or wrapping a rubber band around the apple after it’s cut. Use lettuce as a barrier between sauces and bread to keep things from getting soggy.
We also keep a shelf in our pantry that houses “big bags” of lunch items. These chips, cookies, crackers and dried fruits are relatively off-limits for other times (like afterschool snacks). When I need to do my Sunday prep, I simply pull down the big bags and use them to fill lunch containers. Plus, I can tell at-a-glance if I have everything I need on hand.
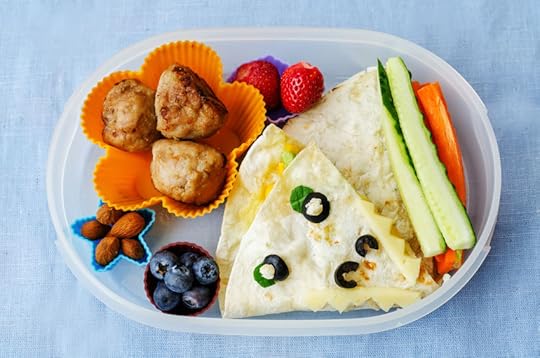
5. It’s a Wrap
If your kids tire of the same ol’ sandwich routine, try thinking of sandwich alternatives—wraps are a great way to mix things up. You can also create “sushi” rolls out of tortillas with meats, cheeses and fillings. Cut them into bite-sized pieces to quickly enjoy.
Quesadillas are great alternatives to cheese sandwiches, and cold, they make great dippers for salsa and sour cream. Soy butters or sunflower seed butter works just as well as the old peanut standby—pair with jelly, jam or fruit slices, then cut into bite-sized morsels.
Lettuce can also make for a great wrap container. Use big leaves of romaine, red or Boston lettuce to hold yummy fillings. Leftover rice and stir fry in a lettuce wrap, secured with a toothpick is delicious and exotic (without being too “out there”). Try flavored tofu or chicken with buffalo or barbecue sauce in a wrap or lettuce wrapper. I find most kids aren’t fans of salad, but a lettuce roll with a ranch or teriyaki dip is awesome.
I don’t like to include too many sweets in my kids’ lunches, but fruit, jam (or a little butter, cinnamon and sugar) rolled in a whole wheat tortilla can be a great treat—and it’s a little more sustaining than those Little Debbie and Hostess sugarbombs.
6. Freeze Sandwiches Ahead
You can make peanut butter and jelly “uncrustables” ahead of time and pop them in the freezer for convenience. If your school is nut-free, you can do the exact same thing with peanut alternatives like soy and sunflower butters. You can also try freezing hummus sandwiches with savory fillings like roasted red peppers.
Make a few weeks’ worth ahead of time or go through a loaf of bread. Pop the sandwiches in bags, then bag them all in a freezer bag. Remove each sandwich from the freezer a day ahead and let it thaw in the fridge for a few hours. You can even take them out of the freezer during your Sunday Prep and have them ready to go for the week ahead.

7. Go Vegetarian
When it comes to lunch prep (and meal prep in general), one way to save money on your grocery bill is to opt for vegetarian lunches when possible. Lunchmeat tends to be high in sodium, preservatives and other stuff you’d probably rather not have in your kid’s meals. Instead of lunchmeat, look for alternatives. Chickpeas, white beans, black beans, seed butters and cheeses all make for great fillings with less expense and concern.
Light cream cheese can be a great sandwich spread and it holds up very well between morning and lunch. Add jam or jelly to create a “bagel wrap” or cream cheese “tea sandwich” with cucumber (if your kids like fancy-sounding lunches like mine do).
Pickles and pickled veggies like dilly beans can get kids enthused about eating green. Watch for items with less sodium or can your own. Sliced tomatoes might get a little soggy, but over-roasted tomatoes hold up well into the lunch hour.
Quinoa is high in protein and has a mild flavor that kids can really get into. Try it with some vegetables and sauce mixed in. Whole-wheat pasta salads (made with oil instead of mayonnaise) and a little balsamic vinegar or mustard can be easy to transport and eat. Just be sure to include a fork or spork so your kids can dig into their yummy veggie bowls.
8. Find Balance Between the Familiar and Exotic
I find the key to a great lunch is to find the balance between something familiar and something fun or exotic. My kids love feeling like they’ve got a special treat to take for their meal. It doesn’t have to be complicated or expensive. Ants on a log (celery sticks with cream cheese and raisins) or crudités (chopped up veggies) or a lunch of appetizers (bite-sized morsels) can be super exciting and enjoyable.
Kids gravitate toward the familiar and sometimes they don’t like certain fruits or veggies. Let them have a voice in what they’re taking for lunch and listen to their likes and dislikes. If they want turkey and cheese, a bag of chips and an apple each day, then, well? Let them go for it. Forcing your kids to take a quinoa salad or lettuce wrap might just result in wasted food and money.
On the other hand, encourage your kids to try new things and give you feedback on what they like and dislike. Edamame or snap peas can be much more exciting than regular old beans. Try incorporating leftovers from dinner as sandwich fillings or toppings for salads and grain bowls.

9. Use Containers to Make Life Easier (and Greener)
When it comes to packing lunches, there can be a LOT of waste involved—paper bags, plastic sandwich bags, disposable containers for applesauce, yogurt tubes and little bags with trail mix and other treats—it all goes in the garbage (and costs extra to boot)!
Instead of using items that will just end up in the garbage, try to find containers that can be reused over and over. Lunch pails and bags are often insulated and safer for your child’s food anyway. Many of them can be found on sale during back-to-school time, and check your local Goodwill as well.
For small food containers, look for BPA-free plastic, metal or glass. I like metal containers because they’re long-lasting and there’s no concern about breaking or shattering. Glass mason jars can make great containers for snacks and salads as well.
Consider purchasing a yard of inexpensive heavy-fabric like denim or heavy cotton, and sewing a few snap-and-go containers to hold dry snacks like chips, crackers and cookies. These little bags can be simply tossed in the washer and reused over and over again. You can also find food-safe plastic coated fabrics like PUL (used in plastic pants for cloth diapers) and sew small bags to hold food with more moisture.
Another great solution? Take a clue from your local deli and wrap sandwiches in waxed paper or parchment. Kids can simply toss out the paper after they eat and it’s much more environmentally friendly. Try to minimize waste in your school lunches as much as possible.
10. Personalize to Show You Care!
One of the best ways to make a lunch feel special is to include a little note or message to your kids. Some parents draw on lunch bags, cut sandwiches into shapes with a cookie cutter, or spend time making intricate Bento-style lunches. While those things might take up a little more time than your schedule allows, it just takes a minute to show you care.
Add a sticker to your child’s lunch bag or use it to seal the paper around their sandwich. Keep stickers handy in the drawer where you keep lunch supplies, along with a marker to label the bags with your kids’ names and the contents of their lunch. Find printable quotes or messages and prepare a sheet or two so you can drop in a little thought each day.
Another idea to keep your kids smiling? Sending them off with a little printable joke or silly saying in their lunch bag. Think of the joy you experience reading a Laffy Taffy or fortune cookie—it’s the same concept. A little message from mom can make a hard day go that much easier.
Use these quick and easy (and cheap!) lunch ideas to help streamline your kids’ school lunches. With a little Sunday prep, clever organization and storage, and creative thinking, you’ll spend less time on lunches—plus, you’ll enjoy more stress-free mornings. So try these school lunch tips and tricks anytime. It’s never too late to make school lunch easier on your schedule (and your wallet)! With a little planning and a few good ideas, you can rock lunches and brighten your child’s day, which gives every parent peace of mind!
Share Your Tips: How do you make lunch easy and special?

Pin It
The post Quick and Easy Lunch Ideas appeared first on Living Well Spending Less®.


