
Jennifer Moorman's Blog, page 9
April 16, 2022
Easter Bread Basket

Are you looking for a fun Easter or spring project?!
I bet you've seen bread baskets online. Maybe you've felt too daunted to try or you think it's out of your skill set. Let me assure you that if I can create one, you can too!
You can make homemade dough or you can purchase pre-made dough (such as breadstick dough found in the refrigerated section of your grocery store). I weaved my bread dough over an oven-safe glass bowl to ensure that I achieved the round shape. I braided the handle separately and then attached it with toothpicks. The bread flowers were rolled into pinwheels and baked in a muffin tin. Easy peasy!

Want to try your hand at this baked delight? ,A Red Spatula has a great tutorial if you'd like extra assistance!
Happy Easter and happy baking!


April 13, 2022
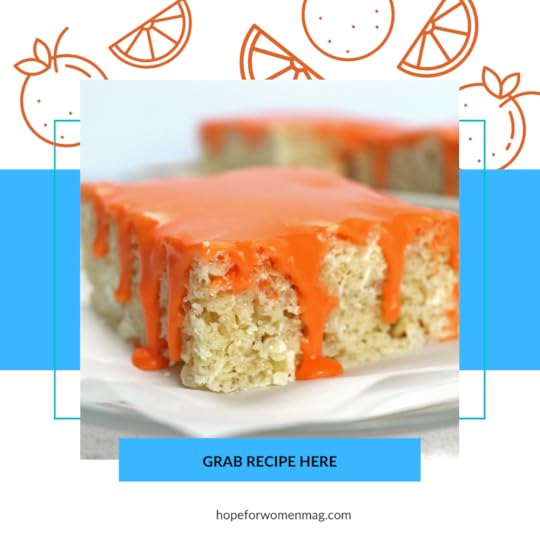
Orange Dreamsicle Crispy Treats

Who's ready for a fun spring treat?
If you remember hearing the enchanting music of the ice cream truck and running outside to spot it, maybe you also remember those creamy creamsicle delights! My Orange Dreamsicle Crispy Treats are a no-bake, jazzed-up classic. They're bursting with creamy orange flavor. You can whip these up in minutes, and one bite will take you back to memories of a favorite childhood treat!
@hopemag is featuring my Orange Dreamsicle Crispy Treats this month! Pop over there for the full recipe and get baking!
For the treats:
¼ cup plus 6 tablespoons butter, softened, divided
10 ounces jumbo marshmallows
1 ¾ teaspoons vanilla extract, divided
½ cup orange cake mix
6 cups crisp rice cereal
1 (12-oz.) bag white chocolate morsels
Cooking spray
3 cups powdered sugar
6 tablespoons fresh orange juice
¼ teaspoon orange extract
Food coloring (optional)
March 22, 2022
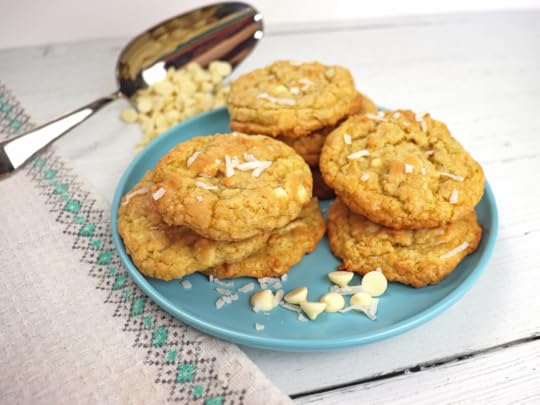
Tropical White Chocolate Cookies
Who's ready for a delicious treat?
Anybody else love the coconut and lime combo? My TROPICAL WHITE CHOCOLATE COOKIES are sure to become a favorite treat. They're easy to make and bursting with flavor!
Loaded with white chocolate, macadamia nuts, lime zest, and sweetened coconut, these Tropical White Chocolate Cookies will have you dreaming of a vacation. The rich, neutral white chocolate flavor allows the zest of the citrus to shine. Easy to bake, easy to share, and makes enough to freeze dough for extended enjoyment.
@hopemag is featuring my TROPICAL WHITE CHOCOLATE COOKIES this month! Pop over there for the full recipe and get baking!
For the cookie dough:
¾ cup butter, softened
¾ cup firmly packed brown sugar
¾ cup granulated sugar
1 teaspoon vanilla extract
2 large eggs
1 ½ cups sweetened, flaked coconut
1 tablespoon loosely packed lime zest
2 tablespoons fresh lime juice
2 ½ cups all-purpose flour
1 teaspoon baking soda
½ teaspoon salt
1 (12 oz.) package white chocolate chips
½ cup chopped macadamia nuts

February 11, 2022
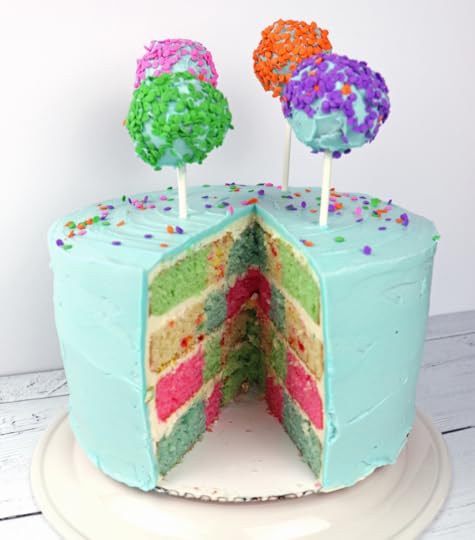
Dr. Seuss Checkerboard Cake
 OH THE CAKES!
Oh the cakes you'll make
Whimsical yummy bakes!
Vibrant, splendid things
Slices to make us sing!

Inspired by Dr. Seuss' Oh, the Places I'll Go, this checkerboard cake is a colorful display of magical cakery! I had never made a checkerboard cake before, so for a first attempt, it wasn't as challenging as I thought it might be, which means you can do it too!

Even if it had been a checkerboard fail, it tasted delicious! I used a traditional vanilla cake with a hint of lemon in the layers and covered in Swiss meringue buttercream. The wonky little trees are cake pops.
 Dr. Seuss Checkerboard Cake
 Prep Time: 4 hours
Cook Time: 25 minutes
Total Time: 4 hours, 25 minutes
Yield: 10–12 servings
Ingredients
3 and 3/4 cups sifted all-purpose flour
2 teaspoons baking powder
3/4 teaspoon baking soda
1 teaspoon salt
1 and 1/2 cups unsalted butter, softened to
2 cups granulated sugar
5 large eggs, at room temperature
3 teaspoons pure vanilla extract
3 teaspoons of lemon extract (optional)
1 and 3/4 cups buttermilk, at room temperature
1/4 cup rainbow sprinkles (plus more for garnish)
2–3 drops food color of choice
Swiss meringue frosting
Instructions
1. Preheat oven to 350°F (177°C). Grease four 8-inch pans.
2. Make the cake: Whisk the flour, baking powder, baking soda, and salt together in a large bowl. Set aside. Using a handheld or stand mixer fitted with a paddle attachment, beat the butter on high speed until smooth and creamy, about 1 minute. Add the sugar and beat on high speed for 5 full minutes until creamed together fairly well. Scrape down the sides and bottom of the bowl with a rubber spatula as needed. On medium-high speed, add 1 whole egg at a time, beating well after each addition, about 30 seconds. Beat in the vanilla extract (and lemon if using). Scrape down the sides and bottom of the bowl as needed.
3. With the mixer on low speed, add the dry ingredients in three additions alternating with the buttermilk, beginning and ending with the dry ingredients, and mixing each addition just until incorporated. Do not overmix this batter. The batter will be smooth, velvety, and slightly thick.
4. There will be 8 cups of batter total. Depending on how many colored layers you want, divide the batter eventually between bowls. I used 4 colors, so I transferred 2 cups of batter into 4 bowls. I dyed 3 bowls of batter and left one vanilla, adding ¼ cup sprinkles to the vanilla batter. Pour batter evenly into prepared cake pans. Use an offset spatula to smooth the cake into the pans evenly.
5. After baking for 20 minutes, start checking for doneness. Insert a toothpick into the center of the cake. If it comes out clean, it is done. Allow cakes to cool completely in the pans set on a wire rack. The cakes must be completely cool before frosting and assembling.
6. Using a 6-inch round cookie cutter, cut a circle into each cooled cake. Using a 3-inch round cookie cutter, cut a circle out of the 6-inch circle. You will have 4 3-inch circles, 4 6-inch circles (the outlines), and 4 9-inch circles (which are just a thin outline of cake since the centers are missing). Find wonderful videos online for a step-by-step visual of this process.
7. Make the frosting of choice. I prefer Swiss Meringue because it’s less sweet than traditional American buttercream, it’s easy to spread, and it holds its shape well.
8. Assemble the cake: Place one assembled cake round onto a serving plate or cake stand. Spread frosting evenly on top. Repeat with next 3 layers, icing in between each layer. Spread the remaining frosting all over the top and sides. I did a light crumb coating and put into the fridge to chill for 30 minutes. Then I added more frosting to finish off the cake with a nice layer. Decorate top and sides of cake with extra sprinkles, if desired.
9. Refrigerate the cake for at least an hour before slicing and serving, which allows for a nice, neat cut when serving.
10. Cover and store leftover cake at room temperature for 1–2 days or in the refrigerator for up to 1 week.
January 4, 2022
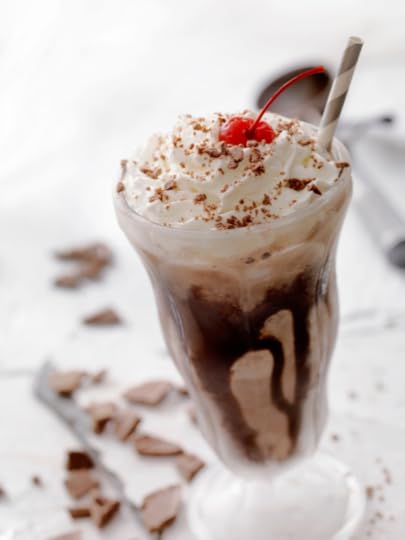
The Catcher in the Rye Grilled Cheese and Malt

The Catcher in the Rye, written by J. D. Salinger, was published in 1951 and was originally meant for adults, but its popularity rose among teenagers due to its rebellious, angst-driven themes.
Holden Caulfield, the protagonist and narrator, is a sixteen-year-old, six-foot-two-and-a-half-tall cynical, foul-mouthed young man who despises all things phony. And yet, he is still one of the most loved characters of the 20th century. He’s one of my favorites as well. But dang, that boy has the mouth of a sailor on a bad day.
In an attempt to waste time and prolong telling his parents that he’s received the ax again, Holden takes a table at a little sandwich bar.
“I was supposed to be on this diet where you eat a lot of starches and crap, to gain weight and all, but I didn’t ever do it. When I’m out somewhere, I generally just east a Swiss cheese sandwich and a malted milk. It isn’t much, but you get quite a lot of vitamins in the malted milk. H. V. Caulfield. Holden Vitamin Caulfield.” (Salinger, J. D., The Catcher in the Rye. Little Brown and Company. New York: 1951, p. 140)
 Grilled Swiss Cheese
Serves 1
Level of Difficulty: zero
Ingredients
3 slices of Swiss cheese
unsalted butter
2 slices of white bread
How to Make
Heat a cast iron skillet on medium. Butter both sides of the bread. Layer cheese in between bread slices and toast until desired doneness is reached. Malted Milk
Serves 2
Level of Difficulty: as easy an drinking both servings at once
Ingredients
1 pint premium chocolate ice cream
¼ c whole milk
2 tbsp malt
2 tbsp chocolate syrup
optional garnish: whipped cream, maraschino cherries, chocolate shavings
How to Make
Place the ice cream, milk, malt, and syrup in a blender and process on low speed for 30 seconds. Pour into 2 tall glasses and serve each with a straw and long-handled spoon. Talk about Holden. Brood. Drink more.December 17, 2021
Inspiration for the Holidays

A Festive Explosion of Inspiration & Creativity!
✨It's here! Are you ready for a creativity boost? To feel encouraged and uplifted? I have the perfect magazine for you!
✨This Inspired Life Magazine highlights a community of creatives who share their art, writings, crafts, recipes, and hearts. You’ll find these pages offer a wonderland of imagination and soul. The magazine’s mission is to inspire readers with stories of hope and encouragement and to spark the creative spirit in all of us.
❤️ I’d love for you to read it and support these inspiring stories. Share it with someone you know who could use a smile or a laugh or a feel-good afternoon of fun holiday reading.
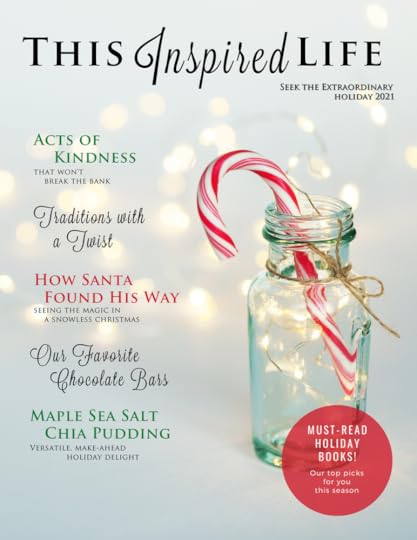 What's in this edition?
✨Fabulous articles about life, time travel, unique gifts, self-care, baking, cooking, traditions, health & wellness, inspiring lives, what to read and listen to this season, and more!
Fascinating Q&A with novelist Sean McMahon @restarterlodge
✨Random acts of kindness, self-love tips, dazzling lore surrounding opals & inspiring articles by Natalie Banks @officialnataliebanks and Cara Nadolny @lowercasegirl
⛄️ Read lifestyle & holiday articles by Jeanne Arnold @jeannesbooks Becky Jackson @cabin_granny Barbara Delinsky @barbaradelinsky and Ruth Yunker @ruth.yunker
Find fitness motivation by Lanie Mores @laniemores
Try the holiday recipes by Jennifer Moorman @jennifer7478 and Ashley @wellwithashley

December 7, 2021
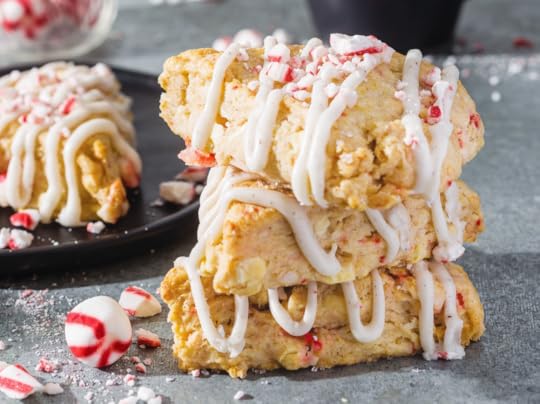
White Chocolate Peppermint Scones
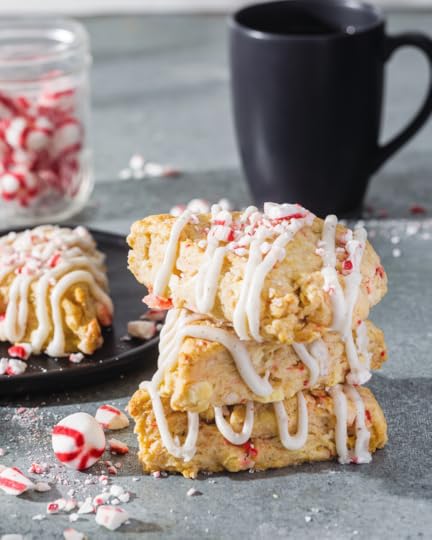
Peppermint is one of my favorite smells and flavors. I don't limit my peppermint
intake to the holiday season only, but I will agree that the scent of peppermint is
especially festive and fits perfectly with all things holiday, winter, and lively.
These White Chocolate Peppermint Scones are featured in This Inspired Life Magazine and they are easy to make, and paired with white chocolate and a warm scone, soft peppermint candies make this recipe wonderful for a holiday breakfast treat or tea with your best friends.
This Inspired Life Magazine highlights a community of creatives who share their art, writings, crafts, recipes, and hearts. You’ll find these pages offer a wonderland of imagination, heart, and soul. The magazine’s mission is to inspire readers with stories of hope and encouragement and to spark the creative spirit in all of us.
Read an edition today and bake up these delicious scones!
 White Chocolate Peppermint Scones
Difficulty: Easy
Yields: 6 scones
Prep Time: 15 minutes
Freeze Time: 15 minutes or overnight
Baking Time: 27 minutes
Ingredients
For the Scones
2 cups all-purpose flour
1/4 cup granulated sugar
2 teaspoons baking powder
1 teaspoon Kosher salt
1/4 cup cold unsalted butter, cubed
1 cup cold heavy whipping cream, plus more for brushing
1 teaspoon vanilla bean paste
1/2 teaspoon peppermint extract
3 ounces white chocolate, finely chopped (about . cup)
1/2 cup crushed soft peppermint candies*
White sparkling sugar, for sprinkling
Vanilla Glaze
Garnish: crushed soft peppermint candies
For the Vanilla Glaze
⅔ cup confectioners’ sugar
2 1/2 tablespoons heavy whipping cream
1/2 teaspoon vanilla bean paste
1/2 teaspoon Kosher salt
Directions
1. Line a baking sheet with parchment paper.
2. In a large bowl, whisk together flour, granulated sugar, baking powder, and salt. Using a pastry blender or 2 forks, cut in cold butter until mixture resembles coarse crumbs.
3. In a small bowl, stir together cold cream, vanilla bean paste, and peppermint extract. Gradually add cream mixture to flour mixture, stirring with a fork until dry ingredients are moistened.
4. Gently stir in white chocolate and candies. Dough will be quite crumbly or shaggy in parts.
5. Turn out dough onto a clean surface; gently knead 8 to 10 times to bring dough together. If dough is too dry and crumbly, add more heavy cream 1 tablespoon at a time. Roll or pat dough into a 7-inch circle (about 1 inch thick), very lightly flouring surface as needed to
prevent sticking; press together any cracks that form, if necessary. Using a bench scraper or a thin-bladed knife, cut circle into 6 wedges; place wedges at least 2 inches apart on prepared pan. Wrap pan tightly with plastic wrap, and freeze overnight if wanting to makeahead.
If wanting to bake same day, freeze for at least 15 minutes.
6. Preheat oven to 350°F (180°C).
7. Brush tops of scones with cream; sprinkle with sparkling sugar.
8. Bake until lightly golden and a wooden pick inserted in center comes out clean, 22–27 minutes.
9. Make vanilla glaze. In a small bowl, stir together all ingredients until smooth and well combined. Use immediately.
10. Spoon Vanilla Glaze into a small pastry or resealable plastic bag; cut a .-inch opening in tip or corner. Drizzle glaze onto scones as desired. Garnish with candies. Serve warm or at room temperature.
*Note: Use only soft candies and avoid using hard peppermint candies
November 16, 2021
Virtual Baking Class with Jennifer Moorman
 Join Me!Free Virtual Cooking ClassLive baking experience with recipes inspired by fiction.
December 11 at 11 AM Eastern.
Join Me!Free Virtual Cooking ClassLive baking experience with recipes inspired by fiction.
December 11 at 11 AM Eastern.

Join me for a whimsical time of cooking through fiction where our baking experience happens live via Zoom from my kitchen and yours!
On December 11 we'll be baking Holiday Whoopie Pies, which are inspired by The Baker's Man, and you don't want to miss these treats.
Once you've signed up, you’ll receive an email with all the class information, the recipe, and a detailed list of ingredients and the quantities you'll need to make this recipe at home.
Come enjoy a FREE and fun cooking class where you’ll not only smile and laugh but you’ll also have a delicious treat to share with loved ones!
Adults & children (with supervision) are welcome! No previous cooking experience required!
 Holiday Whoopie Pies
"Saturdays meant a hodgepodge of chocolate treats—chocolate peppermint cocoa, chocolate flavored coffees, éclairs, tarts, turtles, truffles, cookies, fudge, and mini cakes. Chocoholics came in on Saturdays just to indulge."The Baker's Man
 Let's Bake Together!
November 9, 2021
Dracula's Robber Steak

Within a few chapters of Bram Stoker's Dracula, it’s as though a shroud has been draped over the entire world. Sunlight cannot penetrate the darkness, and as a reader tumbles into this gothic realm, one begins to wonder if anything other than flickering firelight exists at all.
Perhaps there are only degrees of darkness, ranging from the silvery gray of twilight to the absolute stygian blackness. On the rare occasions when a moon can be seen, villagers are mesmerized, desperate for its light.
But the novel starts innocently enough with Jonathan Harker’s journal entry. In his travelogue, he details his adventure through the Carpathian Mountains toward the castle of Count Dracula, and Harker describes the food he eats during some of his stops before the story becomes ghastly and dark. However, the recipe (taken nearly verbatim from the text) was delicious and satisfying.
“There are many odd things to put down, and, lest who reads them may fancy that I dined too well before I left Bistritz, let me put down my dinner exactly. I dined on what they called ‘robber steak’—bits of bacon, onion, and beef, seasoned with red pepper, and strung on sticks, and roasted over the fire, in simple style of the London cat’s meat!” (Dracula by Bram Stoker, Chapter 1)
Dracula’s Robber Steak
Serves: 6Difficulty level: Easy
Ingredients
1 lb beef cut into cubes10 strips of thick cut bacon, cut into pieces1 sweet yellow onion, or red onion, cut into cubes2 bell peppers (a mix of colors or red only for dramatic effect), cut into cubes
1 bunch of button mushrooms1 tbsp Hungarian paprika2 tbsps olive oil, dividedsalt and pepper to tasteskewersoptional: pita or flatbread
How to Make
If using bamboo skewers, soak in water for at least 15 minutes. Heat grill to medium high heat. Season the beef with paprika, salt, and pepper. Toss with 1 tbsp olive oil. Toss cubed onion and peppers, along with mushrooms, with 1 tablespoon olive oil. Season with salt and pepper. Alternate the ingredients on skewers. Grill until meat is cooked to desire temperature. Serve with warmed pita or flatbread.October 27, 2021
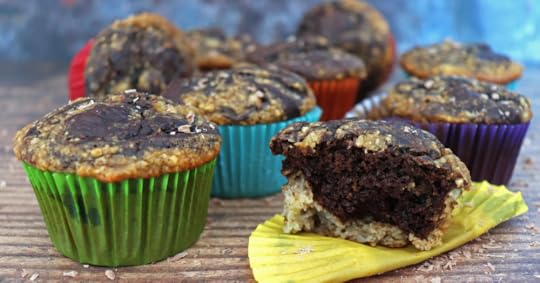
Chocolate Banana Muffins
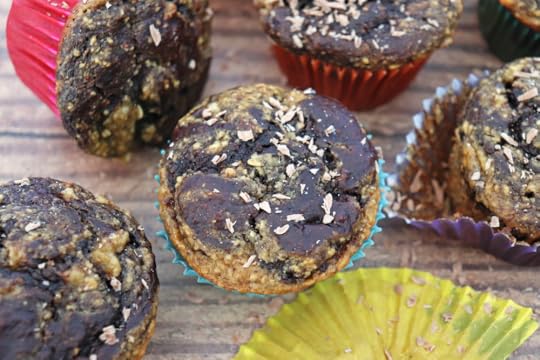
These delicously soft and tender muffins are gluten-free, dairy-free, oil-free, and refined sugar-free. Which means not only are they yummy but they are also a perfect fit for your healthy diet!
These Chocolate Banana Muffins were featured in This Inspired Life Magazine and they are easy to make and the perfect on-the-go snack to keep on hand for those times you're craving something sweet that will also give your body a healthy boost.
This Inspired Life Magazine highlights a community of creatives who share their art, writings, crafts, recipes, and hearts. You’ll find these pages offer a wonderland of imagination, heart, and soul. The magazine’s mission is to inspire readers with stories of hope and encouragement and to spark the creative spirit in all of us.
Read an edition today and bake up these delicious muffins!
 Chocolate Banana Muffins
Makes: 10–12 muffins
Ingredients
1 1/4 cups (101g) rolled oats
3 tablespoons (21g) ground flaxseed
2 teaspoons (8g) baking powder
1 teaspoon baking soda
1/4 teaspoon salt
2 large eggs
1/2 cup (118ml) unsweetened almond milk
6 tablespoons (96g) almond butter
6 tablespoons (128g) honey
1 tablespoon (15ml) vanilla extract
2 medium ripe bananas, mashed (about 1 cup)
6 tablespoons (30g) unsweetened cocoa powder
Directions
1. Preheat the oven to 350 degrees F (177C). Prepare muffin pan by lining the cavities with parchment paper liners. Set aside.
2. Add the oats, ground flaxseed, baking powder, baking soda, and salt into a blender. Process on high for 10 seconds, or until the oats have the consistency of flour.
3. Add all of the remaining ingredients to the blender except for the mashed bananas and cocoa powder. Process on high for about 30 seconds or until the batter becomes smooth and creamy. Scrape down the sides of the blender as needed.
4. Fold in the mashed bananas by hand.
5. Transfer half of the batter to a separate bowl, and set it aside. Add the cocoa powder to the batter remaining in the blender. Process for about 10 seconds until the cocoa powder is fully incorporated. Scrape down the sides of the blender as needed.
6. Spoon a tablespoon of the banana batter into each muffin paper. Follow with a tablespoon of the chocolate batter. Continue alternating the batters until the muffins are 3/4 full. Use a toothpick to gently swirl the batters together.
7. Bake for 18–20 minutes or until a toothpick inserted into the middle comes out clean. Allow the muffins to cool in the baking pan for 5 minutes before transferring to a wire rack to cool completely. As soon as they're cool, transfer to an airtight container at room temperature for 5 days, or freeze for up to 3 months.


