
Jennifer Moorman's Blog, page 10
October 17, 2021
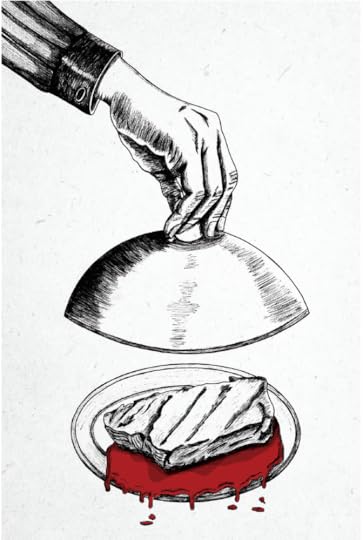
Poison Apple Pie
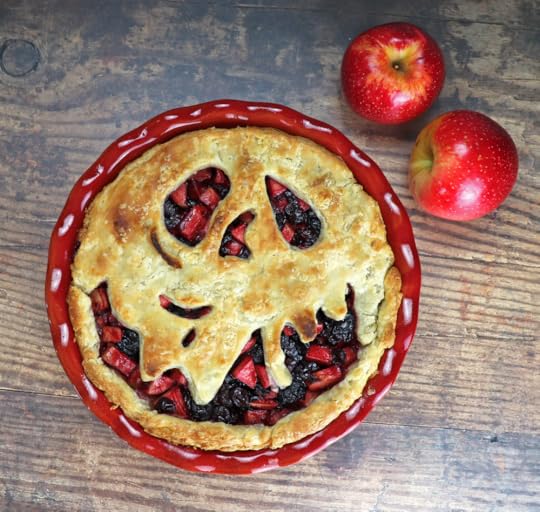
Come closer, dearie. Just one bite . . .
Freshly poisoned magic wishing apples straight from the Evil Queen’s orchard and baked into a delicious, life-changing pie.
Just one bite and all your dreams will come true.
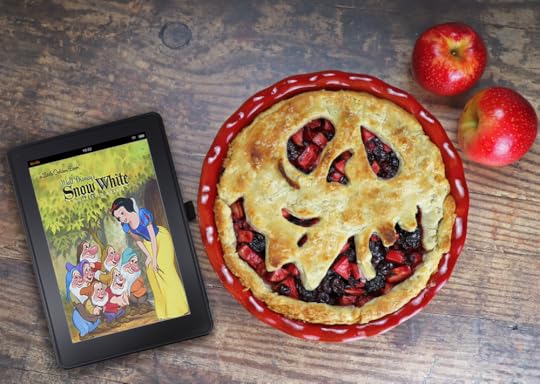 Poison Apple Pie
Inspired by Snow White and the Seven Dwarves
Servings: 8
Ingredients4 Granny Smith Apples, peeled and diced
12oz frozen cherries
Juice from one lemon
2 tsp pumpkin or apple pie spice
1 cup sugar
1/2 cup water
1/2 cup dried cranberries
2 tablespoons Clearjel
Two pie crusts
Egg wash
Directions
1. Preheat oven to 425°. Line pie plate with one pie crust and set aside. Pour lemon juice over diced apples and stir to prevent browning.
2. In a medium saucepan, bring cherries, one cup of apples, sugar, water, and pie spice to a boil over medium heat. Then lower heat and simmer until thickened and the cherries have popped, about 10–15 minutes.
3. Remove from heat, and add dried cranberries, remaining apples, and Clearjel. Let filling cool while preparing the crust.
4. Lay second pie crust on working area. Using a picture reference and a knife, free hand the Poison Apple face to the pie crust. It doesn’t have to be perfect! Paint the crust with egg wash.
5. Spoon pie filling into pastry lined pie plate, and then carefully place crust on top. Fold and pinch pie crusts together. Cover edges with aluminum foil or pie crust protector shield.
6. Bake for 30 minutes, remove crust shield and bake for additional 15 minutes.
7. Serve warm if desired.


October 4, 2021
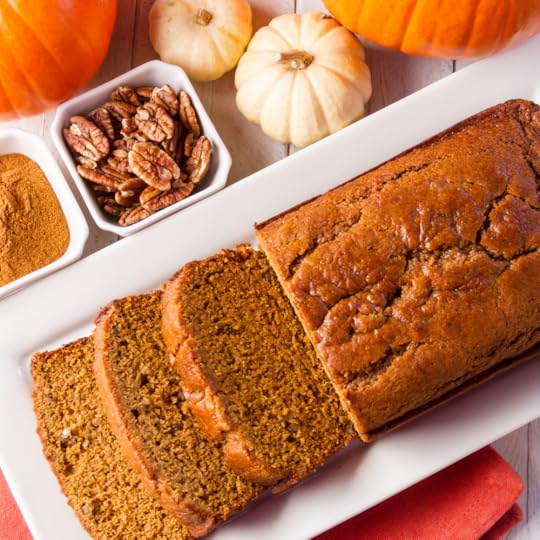
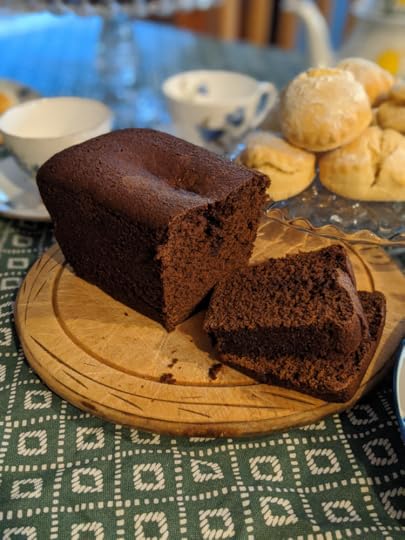
Delicious Pumpkin Bread

This delicious pumpkin bread is a favorite fall recipe packed with cinnamon, an autumn spice blend, and tons of pumpkin flavor.
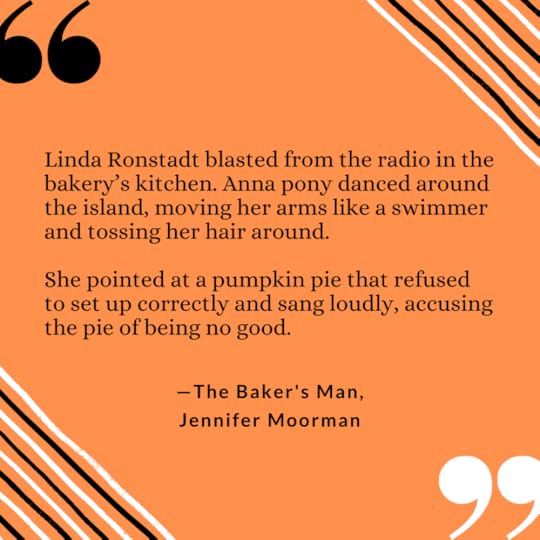
Inspired by The Baker's Man, this recipe is a perfect find for anyone strolling through Mystic Water's Fall Festival. Anna has a booth set up with treats that will change your life...literally.
Anna spends days prepping the bakery's goods for festivalgoers, choosing favorites like truffles, coconut cake, and Black and Blue Pie. In fact, there are a few late nights tucked in there when not all the desserts turn out as expected.
But you can rest assured that this Pumpkin Bread will turn out just as you hope. Bake this easy treat, and fill your house with cozy scents of fall and happiness.
 Pumpkin Bread
Ingredients
1 and 3/4 cups all-purpose flour
1 teaspoon baking soda
3 teaspoons ground cinnamon
1/4 teaspoon ground nutmeg
1/4 teaspoon ground cloves
1/2 teaspoon ground ginger
3/4 teaspoon salt
2 large eggs, at room temperature
1/2 cup granulated sugar
3/4 cup packed light or dark brown sugar
1 and 1/2 cups pumpkin puree (canned or fresh)
1/2 cup vegetable oil, canola oil, or melted coconut oil
1/4 cup orange juice
1 teaspoon orange zest
*Optional: 2/3 cup semi-sweet chocolate chips
Instructions
1. Preheat the oven to 350°F degrees. Adjust the oven rack to the lower third position to prevent the top of your bread from browning too much too soon. Spray with baking spray or line with parchment a 9×5 inch loaf pan. Set aside.
2. In a large bowl, whisk the flour, baking soda, cinnamon, nutmeg, cloves, ginger, orange zest, and salt together until combined. In a medium bowl, whisk the eggs, granulated sugar, and brown sugar together until combined. Whisk in the pumpkin, oil, and orange juice. Pour these wet ingredients into the dry ingredients and gently mix together. Do not overmix. If using, gently fold in the chocolate chips.
3. Pour the batter into the prepared loaf pan. Bake for 60–65 minutes, making sure to loosely cover the bread with aluminum foil halfway through to prevent the top from over-browning. The bread is done when a toothpick inserted in the center comes out clean with only a few small moist crumbs. Begin checking for doneness every 5 minutes at the 55 minute mark. Oven temps vary.
4. Allow bread to cool completely in the pan on a wire rack before removing and slicing. Cover and store leftover bread at room temperature for up to 3–4 days or in the refrigerator for up to about 10 days.
*Bonus Add In: If desired, add 2/3 cup semi-sweet, milk chocolate, white chocolate, dark chocolate chips, or even chopped pecans or walnuts.
September 22, 2021
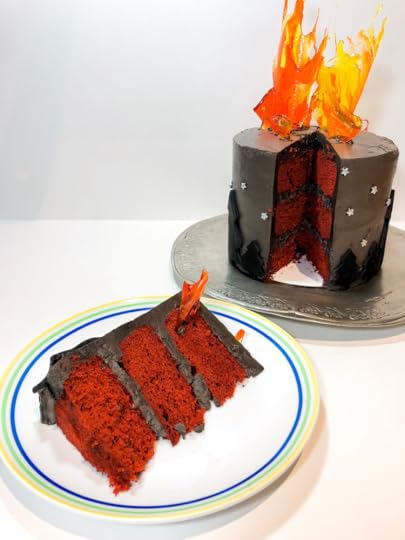
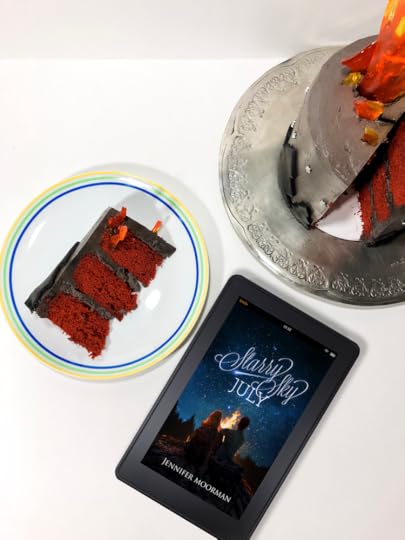
Starry Sky Cake
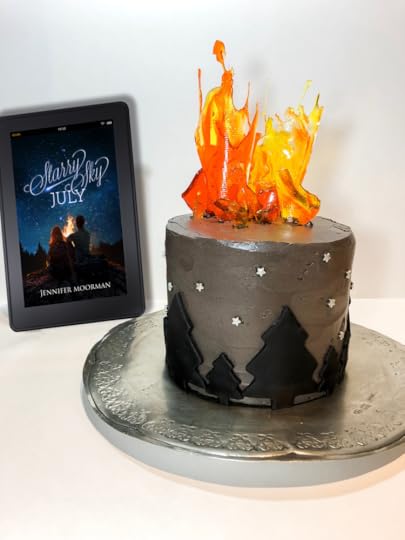
This stellar cake is inspired by my star-filled short story, ,,Starry Sky July. Does anyone ever say no to cake? Can these people be trusted? I'm kidding! Kinda.
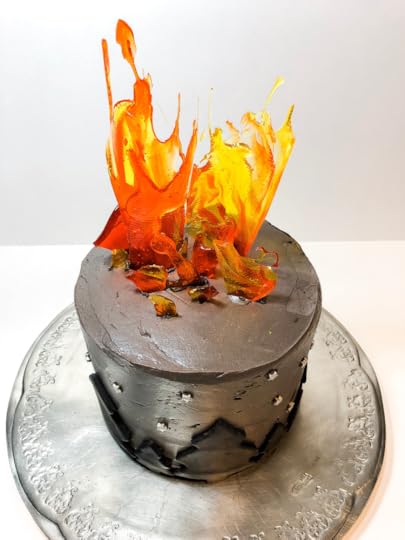
For this inspired cake, I wanted to try a few techniques that I'd never tried because... why not? Disaster or delicious? I like to live dangerously. Actually I don't. I mostly trusted this wouldn't explode the kitchen. But there are worse things than eating cake batter off the counter...right?
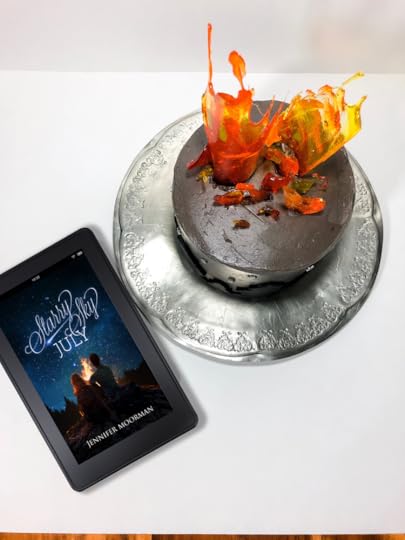
Fortunately, this didn't explode, and I created a vibrant red velvet cake interior covered with Swiss meringue buttercream dyed with black cocoa powder (not food dye!) and accented with isomalt flames on top!
I think Jude Jones and Maddie Mathis, the teenage best friends in ,,Starry Sky July, would settle in with a fat slice of this cake and enjoy it! What do you think? Want to try a slice? Don't say no...you want people to trust you, don't you?!
Normally, I would list the recipe below, with detailed directions, but if I'm honest with you, this cake is a doozy, not for first-timers in the kitchen, and well-suited for daring bakers who aren't afraid to melt isomalt to 330 degrees and try not to pour onto anything you don't want permanently glued together (like your fingers)!
So the next best thing is that I'll tell you where I found my inspiration for all the parts!
Red Velvet Cake Recipe Inspired By: ,Baking with Blondie
Black Cocoa Swiss Meringue Buttercream Inspired By: ,Gesine Bullock-Prado
Isomalt Flames Inspired By: ,Ashlee Marie
#newrelease #cookingthroughfiction #recipe #starryskyjuly
September 17, 2021
Virtual Baking Class with Jennifer Moorman
 Join Me!Free Virtual Cooking ClassLive baking experience with recipes inspired by fiction.
October 16 at 11 AM Eastern.
Join Me!Free Virtual Cooking ClassLive baking experience with recipes inspired by fiction.
October 16 at 11 AM Eastern.

Join me for a whimsical time of cooking through fiction where our baking experience happens live via Zoom from my kitchen and yours!
On October 16 we'll be baking Apple Crumble Muffins, which are inspired by The Baker's Man, and you don't want to miss these treats.
Once you've signed up, you’ll receive an email with all the class information, the recipe, and a detailed list of ingredients and the quantities you'll need to make this recipe at home.
Come enjoy a FREE and fun cooking class where you’ll not only smile and laugh but you’ll also have a delicious treat to share with loved ones!
Adults & children (with supervision) are welcome! No previous cooking experience required!
 Apple Crumble Muffins
A small-town Southern bakery in Mystic Water, situated between the seventy-five-year-old hardware store and the newly opened clothing boutique on Main Street, offers cure-alls in the form of baked goods, chocolates, and surprise treats. The bakery doors are always openno matter what time of day.The Baker's Man
 Let's Bake Together!
September 5, 2021
Chocolate Chip Quinoa Energy Bars

Are you ready for a treat your body will thank you for?
These Chocolate Chip Quinoa Energy Bars were featured in This Inspired Life Magazine and they are easy to make and the perfect on-the-go snack to keep on hand for those times you're craving something crunchy and a little bit sweet.
This Inspired Life Magazine highlights a community of creatives who share their art, writings, crafts, recipes, and hearts. You’ll find these pages offer a wonderland of imagination, heart, and soul. The magazine’s mission is to inspire readers with stories of hope and encouragement and to spark the creative spirit in all of us.
Grab a copy today and whip up these delicious bars!
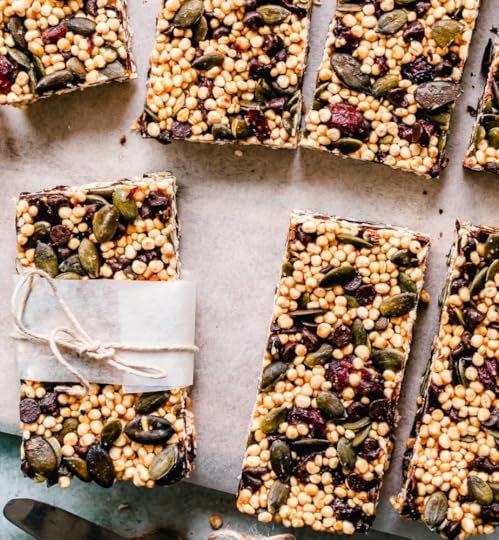 Chocolate Chip Quinoa Energy Bars
Ingredients
1 cup almonds chopped
1 cup quinoa flakes or rolled oats
1/4 cup sesame seeds
1/4 cup hemp seeds or sunflower seeds
1/4 cup chia seeds or ground flaxseeds
1/2 cup honey or maple syrup
1/2 cup coconut palm sugar or sugar of choice
1/2 cup craisins
1/4 cup coconut oil
1/2 teaspoon sea salt
2 teaspoons vanilla extract
2 cups millet puffs, quinoa puffs, or puffed rice cereal
1/2 cup chocolate chips
How to Make
Preheat oven to 350°F. Line an 8-inch square baking dish with parchment paper, allowing the paper to extent over the side. Set aside. Line a baking sheet with parchment paper. Spread almonds, quinoa flakes, sesame seeds, hemp seeds, and chia or flax seeds on the baking sheet and bake for 10 minutes. Transfer to a large bowl. Meanwhile, place honey or maple syrup, coconut palm sugar, coconut oil, and sea salt in a saucepan. Bring to a boil and reduce to a simmer. Cook for about 5 minutes, or until thickened. Remove from heat, and stir in vanilla. Allow to cool slightly. Pour sugar mixture over the quinoa flakes, and stir in millet puffs, craisins, and chocolate chips. Stir well, and pour into prepared baking dish in an even layer. Place a piece of parchment paper on top of the mixture and press down to flatten. Let stand at room temperature for 2 hours. Invert from pan and cut into 16 bars.August 23, 2021
A Gothic Cookbook
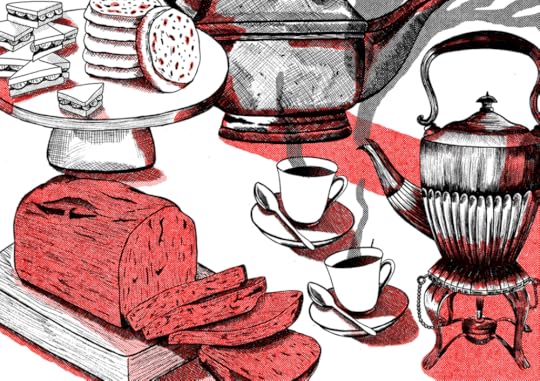
 Teatime at Manderley (and other Gothic delights)
A guest post by Ella Buchan, co-author of ,A Gothic Cookbook —a recipe tome that celebrates food in Gothic literature
Tea is a serious business at Manderley. It begins with an immaculate, snow-white tablecloth, followed by a “monstrous” silver teapot and matching spirit kettle, perched over a flickering flame. A veritable catwalk of cakes, crumpets, scones, and sandwiches totters out next, each item preened to perfection.
This “stately little performance” is enacted daily at the estate, as deliciously described by Daphne du Maurier in her Gothic masterpiece, Rebecca:
“Those dripping crumpets, I can see them now. Tiny crisp wedges of toast, and piping-hot, floury scones. Sandwiches of unknown nature, mysteriously flavoured and quite delectable, and that very special gingerbread. Angel cake, that melted in the mouth, and his rather stodgier cousin, bursting with peel and raisins.”
As readers, we can see (and almost taste) each of the components du Maurier describes. There’s a menace to the ritual, which belittles our narrator, the second Mrs. de Winter, and heightens the chilly formality of Manderley. There’s mystery: what’s in those sandwiches? What happens to all this food which, it seems, is barely nibbled at? There’s a sense that something is off-kilter, that this is a world to which the narrator doesn’t belong. It makes us think, it makes us feel—and it makes us hungry!
This is what we’re aiming for with A Gothic Cookbook—celebrating the food and drink in Gothic literature, discussing its importance and, ultimately, bringing it to readers’ kitchens/tables/mouths/bellies.

I’m (Ella) a food and travel journalist, while my co-author and friend Alessandra (Allie) Pino is a PhD candidate at Westminster University, London. Her studies focus on food in Gothic tales, which always intrigued me. On Allie’s birthday one year ago, I wanted to get her a present that combined her loves of food and Gothic books, but couldn’t find much that wasn’t gimmicky. I settled for a beautiful, illustrated edition of Poe’s short stories and joked, “I couldn’t find a Gothic cookbook.”

Her reply—“let’s write one!”—sparked this project, and now we’re signed with crowdfunding publishers, Unbound, and well on our way to reaching our target to make the cookbook a reality.
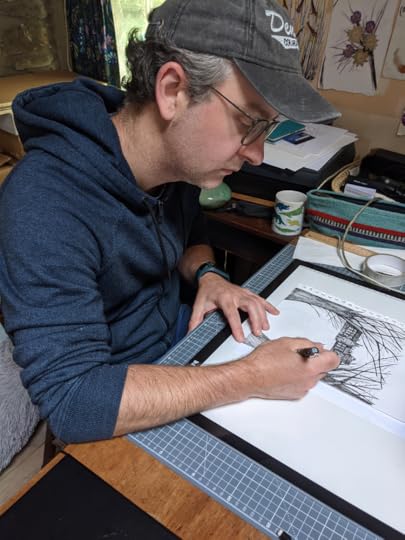
My partner, Lee Henry, is a graphic designer and artist, so we cooked up the idea of creating an illustrated cookbook by throwing our assembled talents into the pot: Allie’s academic knowledge and insights, my writing and recipe development skills, and Lee’s draughtsmanship. We wanted it to look and feel similar to a classic Gothic novel, with a cloth-bound cover and intricate illustrations.
Essentially, A Gothic Cookbook is a mix of lively discussion about food and drink in Gothic literature and recipes so people can throw their own Dracula dinner party, Frankenstein feast, or Manderley afternoon tea. Each chapter focuses on a different novel or short story, explores the edible themes, and provides tried-and-tested recipes inspired by the particular tale.
There’s Paprika Hendl as eaten by Jonathan Harker in Dracula and a savoury bread pudding made with the ingredients of the shepherd’s breakfast that Frankenstein’s creature devours (he likes everything but the wine—we quite like the wine, which is used in a layer of caramelised onions). Then we have seed cake, given as a gesture of kindness in Jane Eyre, and “Chalk and Chocolate” mousses inspired by the “chalky undertaste” in Rosemary’s Baby (our recipe has layers of dark and white chocolate, topped with walnuts).
Toni Morrison’s Beloved will focus on “sweet things,” as craved by the ghost, while The Haunting of Hill House has peach shortcakes, paranormal picnic spreads, and spatchcock chicken with radish-top pesto (based on “a bird, and radishes from the garden”).

And so we return to Manderley, where it’s teatime once more… We started with a recipe for the “very special gingerbread,” which escalated into the entire Manderley afternoon tea spread. Yes, even the sandwiches, with a range of fillings that would have been served at tea in 1930s Britain.
We’ve interpreted the gingerbread as a loaf/cake style, as was often served as a teatime treat, and made it “very special” by adding a dash of rum and drizzling over a lemony icing, too.
We’ve tested this recipe over and over (not our toughest job), and it’s turned out beautifully every time: rich, moist, and bright with lemon and ginger. Hopefully it has you dreaming you went to Manderley… again.
 That Very Special Gingerbread
Makes 1 medium loaf (around 10 slices)
Ingredients
For the cake
400g (2.5 cups) plain flour
1 teaspoon bicarbonate of soda (baking soda)
1 tablespoon ground ginger
125g (4.5oz) unsalted butter
200g (1 cup) soft brown sugar
250g (9oz) black treacle or molasses
Zest 1/2 a lemon
2 medium eggs, beaten
50ml rum (or you can add 1 teaspoon rum flavouring or lemon extract)
For the lemon glaze
50g (1/3cup) icing sugar
Zest 1 lemon
Juice 1/2 lemon (plus a little more if needed)
Directions
Butter and line a medium loaf tin. Preheat the oven to 180C/160C fan/350F/gas mark 4. Add the butter, brown sugar and treacle to a small saucepan and melt over a low heat, stirring until the sugar has dissolved and the mixture is smooth and glossy (around 5 minutes). Tip: weigh the pan and re-set the scales to zero before measuring out the treacle. This will save you on mess/waste/washing up. Sift the flour, bicarbonate of soda and ground ginger into a large mixing bowl. Punch a well in the middle and pour in the buttery treacle mixture along with the rum (or extract) and lemon zest. Beat, using a wooden spoon, until combined. It’s hard work but it will look smooth and silky, like melted toffee, when it’s done. Beat in the eggs, working quickly to avoid them scrambling (as the batter will still be warm). Pour into the prepared tin and bake, testing after around 45 minutes with a wooden skewer. If it comes out almost clean (you still want a little stickiness), it’s done. If not, pop it back in for another 5–10 minutes, covering loosely with foil if it already looks brown enough (it should be the colour of toasted pecans). Leave in the tin until cooled enough to touch, then tip onto a wire rack to cool completely. To make the icing, mix together icing sugar and lemon zest, then gradually add lemon juice until you have a smooth, slightly runny icing, adding more juice, if needed. (It gets runny quickly, so go slow!) Once the loaf has cooled completely, drizzle over the icing. (If it pools around the loaf, don’t worry too much—it will thicken as it cools so you can scoop it up and smooth over the top.) Allow to set before slicing, to serve.
Read more about A Gothic Cookbook, the recipes within, and how you can help make it a cloth-bound reality HERE.
Rewards range from signed copies of the book to bespoke pet portraits and a beautiful, vintage-style cocktail booklet to accompany the main cookbook. Everyone who pledges gets their name printed in the first edition as a supporter, too.
And you can use the code REBECCA10 for 10% off crowdfunding pledges, up to £100, until midnight on August 30.
August 17, 2021
Basil Buttermilk Scones with Strawberries
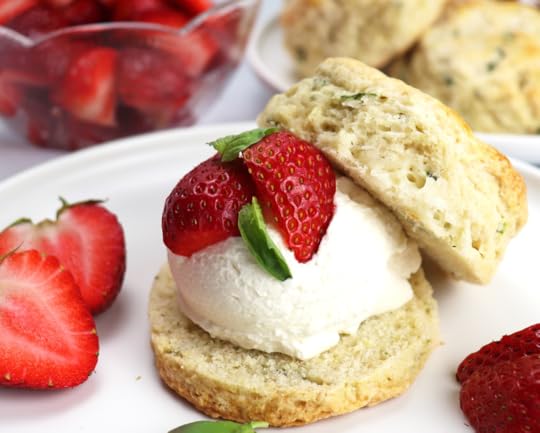
These basil buttermilk scones are a delicious summer treat! They were recently featured in the summer edition of This Inspired Life Magazine!
This Inspired Life Magazine highlights a community of creatives who share their art, writings, crafts, recipes, and hearts. The pages offer a wonderland of imagination, heart, and soul.
The magazine’s mission is to inspire readers with stories of hope and encouragement and to spark the creative spirit in all of us. If you haven't flipped through these beautiful pages, you should, especially if you enjoy:
Interviews with well-known authors and influencers Inspiration and motivation Fashion and entertainment articles Home and community interests Health and beauty Spotlighted books, art, and podcasts Seasonal recipes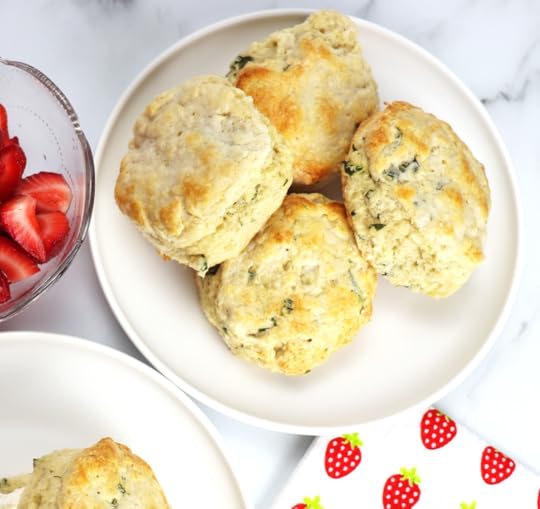
It's best to serve your basil buttermilk scones with macerated ripe strawberries and dollops of lightly whipped cream, which creates the perfect summer treat for high tea or an afternoon snack with your best friend. They're travel-friendly, so take them on your next picnic or road trip.
With their soft, light, and crumbly texture, the scones are elevated by the herbaceous hint of basil and the sweet taste of summer-ripe strawberries
 Basil Buttermilk Scones with Macerated Strawberries
Serves 9–10
Ingredients
2 ⅓ cups self-rising flour
2 teaspoons baking powder
¼ teaspoon baking soda
¼ cup plus 2 tablespoons granulated sugar, divided
½ cup cold unsalted butter, cubed
½ cup cold buttermilk
1 large egg, beaten
1 ½ teaspoons vanilla extract, divided
4 tablespoons large fresh basil, sliced into thin strips
Dash of salt
¾ pound fresh strawberries, hulled, quartered
1 teaspoon vanilla bean paste
1 cup plus 1 tablespoon heavy cream, divided
2 tablespoons confectioners’ sugar
Garnish: fresh baby basil leaves
Directions
1. Line a baking sheet with parchment paper. In a large bowl, sift together flour, baking powder, and baking soda. Add ¼ cup sugar, stirring until combined.
2. Add cold butter, tossing to coat. Using your fingertips, rub butter into flour mixture until mixture resembles coarse sand but there are still larger bits of butter.
3. Make a well in center, and add cold buttermilk, egg, 1 teaspoon vanilla extract, and sliced basil. Using a spoon, folk mixture until just combined.
4. Turn dough out onto a lightly floured surface. Using lightly floured hands, knead dough until it just comes together, 2 or 3 times. Pat dough into ¼-inch thickness, and using a 2 2 ½-inch round cutter, cut into circles, and place on prepared pan with dough touching. Freeze for 20 minutes. Preheat oven to 375°F.
5. In a medium bowl, toss together cut strawberries, vanilla bean paste, and remaining 2 tablespoons of sugar until combined. Let stand for 30 minutes.
6. Brush tops of scones with heavy cream. Bake until set and tops are golden brown, 15–18 minutes. Let cool completely.
7. In a stand mixer using the whisk attachment, whisk heavy cream until just combined and soft. Add confectioners’ sugar and vanilla, and whip until soft peaks form. Refrigerate until ready to use.
8. Slice scones in half. Spoon whipped cream and bottom halves, and distribute macerate strawberries over top. Garnish with fresh basil leaves.

Don't miss this edition of This Inspired Life Magazine! Find this recipe for basil buttermilk scones as well as other delicious and decadent summer treats.

August 1, 2021
Delicious Summer Treat
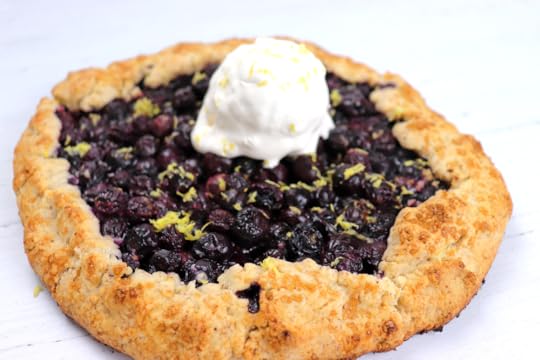 My classic ,Blueberry Almond Galette is currently highlighted on ,Hope Magazine as a much-try summer dessert. Anybody else love summer-ripe blueberries? This galette is sure to become a favorite treat. It's easy to make, bursting with flavor, and so easily customizable!The best part about a galette? The more rustic it looks, the better. Are you a novice baker? This is a great dessert to start with.Here's a sneak peak at the recipe. For the
full recipe
with direction, pop over to Hope and get baking!For the dough:⅓ cup sliced almonds1 ½ cups all-purpose flour1 tablespoon sugar½ teaspoon salt½ cup cold unsalted butter, cut into pieces⅓ cup cold water1 egg yolk
My classic ,Blueberry Almond Galette is currently highlighted on ,Hope Magazine as a much-try summer dessert. Anybody else love summer-ripe blueberries? This galette is sure to become a favorite treat. It's easy to make, bursting with flavor, and so easily customizable!The best part about a galette? The more rustic it looks, the better. Are you a novice baker? This is a great dessert to start with.Here's a sneak peak at the recipe. For the
full recipe
with direction, pop over to Hope and get baking!For the dough:⅓ cup sliced almonds1 ½ cups all-purpose flour1 tablespoon sugar½ teaspoon salt½ cup cold unsalted butter, cut into pieces⅓ cup cold water1 egg yolk
June 17, 2021
Cooking Through Fiction: Miss Trunchbull's Chocolate Cake
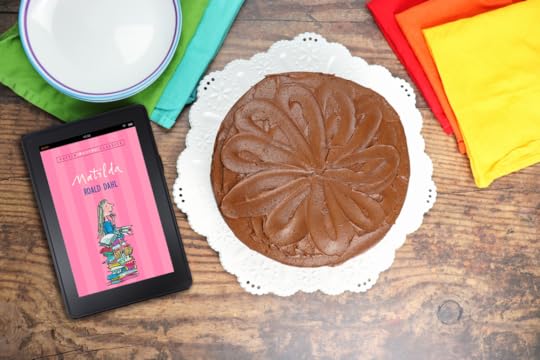
Roald Dahl is one of my favorite writers, and Matilda is one of my favorite children's books. Matilda is a sweet exceptional girl, but her parents think she's just a nuisance. She expects school to be different, but that's not possible when Miss Trunchbull is the headmistress.
My sister loved the movie, and we used to watch it over and over again. One of my favorite scenes in the movie is of the chocolate cake. When Bruce is accused of sneaking into the kitchen and eating Miss Truncuhbull's "most scrumptious cake in the entire world," he is forced to eat the most gigantic version of the cake ever!

I'm not sure this is punishment, but that cake probably weighed 100 pounds. I rooted for Bruce to eat it all, though! Just to show Miss Trunchbull that bullies don't win!
I kinda wanted this cake to be real, so I finally decided to make it. Even though Miss Trunchbull is a meanie, her chocolate cake is the most scrumptious cake in the entire world. Once piece of this will never be enough!
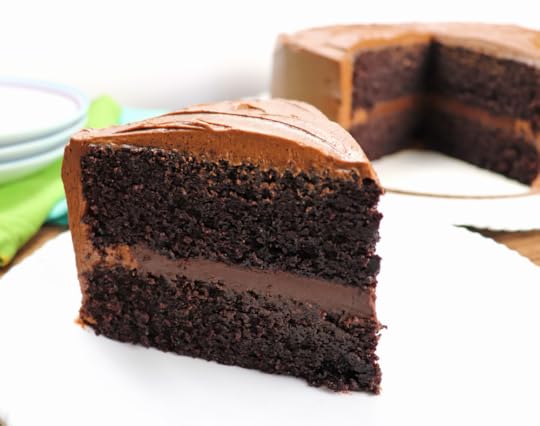 Miss Truncuhbull's Chocolate Cake
Difficulty: Average
Yields: 10–12 slices
Prep time: 1 hour
Baking & Finishing time: ~2 hours
Ingredients
For the Cake
2 cups sugar
1 ¾ cups all-purpose flour
¾ cup dark cocoa powder
2 teaspoons baking soda
1 teaspoon baking powder
1 teaspoon salt
2 eggs
1 cup buttermilk
2 teaspoon espresso powder in 1 cup hot water
or 1 cup dark hot coffee
½ cup vegetable oil
1 teaspoon vanilla extract
For Dark Chocolate Ganache
2 cups heavy cream
16 ounces dark chocolate chips
For the Chocolate Frosting
6 ounces good semisweet chocolate
½ pound (2 sticks) unsalted butter,
at room temperature
1 large egg yolk, at room temperature
1 teaspoon pure vanilla extract
1 ¼ cups sifted confectioners' sugar
1 tablespoon instant coffee powder
Directions
1. For the Cake: Preheat the oven to 350 degrees F. Butter two 8-inch x 2-inch round cake pans. Line with parchment paper, then butter and flour the pans.
2. Sift the flour, sugar, cocoa, baking soda, baking powder, and salt into the bowl of an electric mixer fitted with a paddle attachment and mix on low speed until combined. In another bowl, combine the buttermilk, oil, eggs, and vanilla. With the mixer on low speed, slowly add the wet ingredients to the dry. With mixer still on low, add the coffee and stir just to combine, scraping the bottom of the bowl with a rubber spatula.
3. Pour the batter into the prepared pans and bake for 30–35 minutes, until a cake tester comes out clean. Cool in the pans for 30 minutes, then turn them out onto a cooling rack and cool completely. Remove from pans and cool on wire rack.
4. For the Ganache: Heat cream in microwave safe bowl for 3 minutes. Pour hot cream over bowl of chocolate chips. Let sit for 2 minutes.
5. Stir until completely combined. Let cool for 10 minutes.
6. For the Chocolate Frosting: Chop the chocolate and place it in a heat-proof bowl set over a pan of simmering water. Stir until just melted and set aside until cooled to room temperature.
7. In the bowl of an electric mixer fitted with a paddle attachment, beat the butter on medium-high speed until light yellow and fluffy, about 3 minutes.
8. Add the egg yolk and vanilla and continue beating for 3 minutes. Turn the mixer to low, gradually add the confectioners' sugar, then beat at medium speed, scraping down the bowl as necessary, until smooth and creamy.
9. Dissolve the coffee powder in 2 teaspoons of the hottest tap water. On low speed, add the chocolate and coffee to the butter mixture and mix until blended. Don't whip!
10. Create a "dam" or line of frosting around the inside of the bottom cake round. Fill the center with the ganache. Place on top cake round, and cover the top and sides of cake with frosting. Best eaten immediately.
May 12, 2021
Gingerbread Caramel Apple Pie
This delicious, spice-filled pie is the perfect pairing to Alisa Weis's novel The Emblem. Apple pie is already a classic, but when you add the addition of warm gingerbread spices to a salted caramel and drizzle this all throughout the apple pie filling, the classic is elevated to the next level.
Alisa's novel is inspired by the Black pioneers who arrived in Roslyn, Washington, in the 1800s to make a new life. The Emblem explores heartbreaking class divisions, persevering love, and the hope for reconciliation.
Short summary: Because of local prejudices, when Callie falls for her employer’s right-hand-man, Gabe, not everyone in the small, coal mining town of Roslyn accepts them. Knowing there’s a price to pay for a biracial union, Callie and Gabe must decide whether breaking social constraints and expectations for love against the odds is worth the cost of ridicule and oppression.
[image error]With a heartfelt storyline, real-life struggles, and compassionate characters, Alisa's writing will keep you reading until the very last page.
I've known Alisa for years, and I had the privilege of reading The Emblem during its early stages and have watched it evolve into this brilliant story. I'm so thrilled to share her novel with you!
[image error]Alisa is a lifelong resident of the evergreen state (WA), likes coffee as much as any Seattle resident, and enjoys running and dancing. Her favorite color is purple, but she's never seen a more beautiful lily than the orange one that ended up on her cover. Connect with Alisa on Instagram at @alisaweisauthor, on her website at www.alisaweis.com, and email her at alisa@weisbooks.com. She also offers a 20% discounts to book clubs, but readers need to contact her directly for this rate!
[image error]Gingerbread Caramel Apple PiePrep Time: 3 hours
Cook Time: 1 hour
Total Time: 7 hours
Yield: 8-10 servings
Ingredients
Homemade pie crust for 2 crusts (1 for bottom and 1 for lattice top)
Gingerbread Caramel
6–7 large apples, cored, peeled, and thinly sliced (approximately 10–12 cups total; I use Honeycrisp and Granny Smith.)
1 cup (198g) sugar
1/4 cup (28g) King Arthur Unbleached All-Purpose Flour (or 1 tbsp + 1 tsp instant ClearJel*)
1 teaspoon cinnamon
2 tablespoons (30ml) fresh lemon juice
Dash of salt
egg wash: 1 large egg beaten with 1 tablespoon (15ml) milk
optional: coarse sugar for sprinkling on crust
Ingredients for Gingerbread Caramel
1 cup (200g) granulated sugar
6 Tablespoons (90g) salted butter, room temperature cut up into 6 pieces
1/2 cup (120ml) heavy cream, at room temperature
1 teaspoon salt
2 tablespoons unsulphured molasses
1 teaspoon ground ginger
¾ teaspoon ground cinnamon
¼ teaspoon ground allspice
¼ ground cloves
¼ teaspoon freshly ground pepper
How to Make
1. The crust: Prepare your homemade pie crust and place in refrigerator to chill (at least 30 minutes).
2. Make the gingerbread caramel while you wait for pie dough to chill. Heat granulated sugar in a medium heavy-duty saucepan over medium heat, stirring constantly with a high-heat resistant rubber spatula or wooden spoon. Sugar will form clumps and eventually melt into a thick brown, amber-colored liquid as you continue to stir. Be careful not to burn.
3. In a small bowl mix together salt, molasses, ginger, cinnamon, allspice, cloves, and pepper. Set aside.
4. Once sugar is completely melted, immediately stir in the butter until melted and combined. Be careful in this step because the caramel will bubble rapidly when the butter is added. If you notice the butter separating or if the sugar clumps up, remove from heat, and vigorously whisk to combine it again. Keep whisking until it comes back together, even if it takes 3–4 minutes. Be very careful; this mixture is hot. Wear rubber gloves if it gives you more comfort. The mixture will eventually come back together—just keep whisking. Return to heat when it’s combined again.
5. After the butter has melted and combined with the caramelized sugar, cook for 1 minute without stirring.
6. Very slowly stir in 1/2 cup of heavy cream. Since the heavy cream is colder than the hot caramel, the mixture will rapidly bubble when added. After all the heavy cream has been added, stop stirring and allow to boil for 1 minute. It will rise in the pan as it boils.
7. Remove from heat and stir in the gingerbread spice mixture. Allow to slightly cool down before using. Caramel thickens as it cools.
8. Make the filling. Place apple slices into a very large bowl. Add sugar, lemon juice, flour, and salt. Gently toss to combine. Set aside.
9. Roll out the chilled pie dough: On a floured work surface, roll out one of the discs of chilled dough (keep the other one in the refrigerator). Turn the dough about a quarter turn after every few rolls until you have a circle 12 inches in diameter. Carefully place the dough into a 9-inch pie pan. Trim the extra overhang of crust and discard.
10. Fill the pie crust with the apples, stopping at 1/3 full and drizzling with approximately 3 tablespoons of gingerbread caramel. Fill with more apples until 2/3 full and drizzle with 3 more tablespoons of caramel. Finally, use the remaining apples, and drizzle with a final 3 tablespoons of caramel. There are a lot of apples, so pile them tightly and very high. Reserve the rest of the gingerbread caramel for topping.
11. Preheat oven to 400°F (204°C).
12. Make the lattice crust: Remove the other disc of chilled pie dough from the refrigerator. Roll the dough out, 12 inches diameter. Using a pastry wheel, sharp knife, or pizza cutter, cut 16 strips 1/2 inch wide. We always use a clean measuring tape or ruler as a guide to assure the lines are straight. Carefully thread the strips over and under one another, pulling back strips as necessary to weave. Using a small and sharp knife, trim the extra overhang. Crimp the edges of the dough with a fork or your fingers.
13. Lightly brush the lattice top with the egg wash. Sprinkle with coarse sugar.
14. Place the pie onto a large baking sheet and bake for 20 minutes. Keeping the pie in the oven, turn the temperature down to 375°F (190°C), and bake for an additional 40–50 minutes. If the top of your pie is getting too brown, cover loosely with aluminum foil. The pie will be done when the caramel begins to bubble up. A small knife inserted inside should come out relatively clean.
15. Cool pie for 4 hours before serving. Drizzle the pie with the extra caramel sauce to serve. This apple pie is best served on the same day, but it can be covered tightly and stored in the refrigerator for up to 3 days.
* There are a few ways to help thicken pie filling (so you don't end up with a runny mess), and King Arthur Flour has great options and the substitution amounts HERE.


